-
Member Statistics
32438
Total Members2093
Most Online
All Activity
- Today
-
 JLuis - I'd like a set please. How many sets do you have left?
 - Yesterday
-

Yet another LS 260z swap :)
christianmoller replied to christianmoller's topic in Gen III & IV Chevy V8Z Tech Board
I had some time in the laser today so i decided to make new mounts for my seats😀. More on this later as they have no priority and are" a bit " of neerd warning. As the engine is 6.2 litre why not make it a 620Z😎
-
Wahane joined the community
-
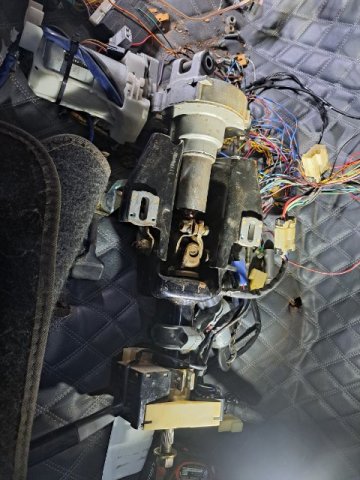
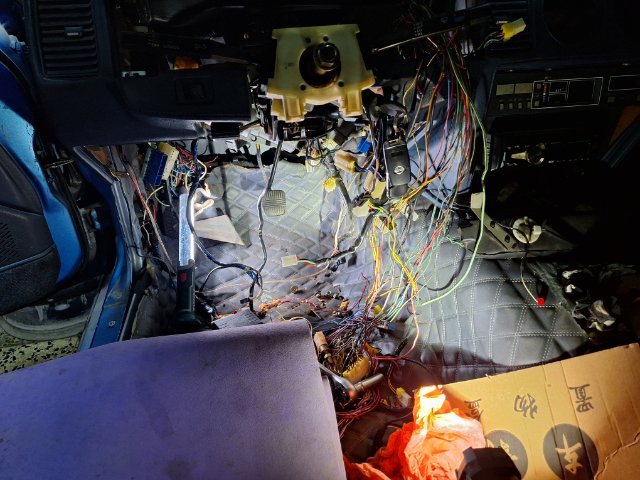
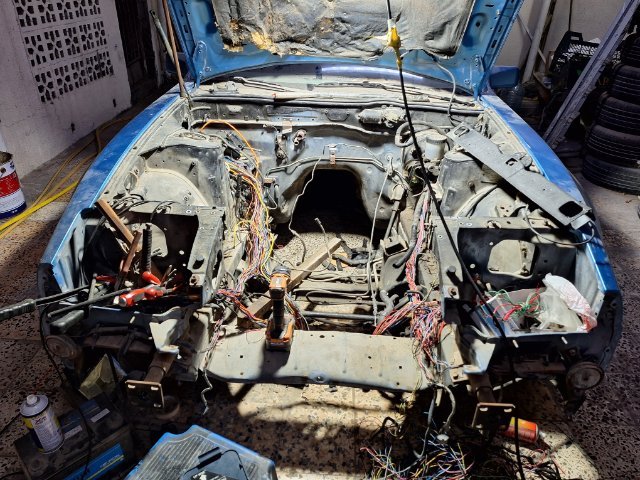
converting to electrical power steering for Prius
-
I have already started and pulled the motor and trans out.
-
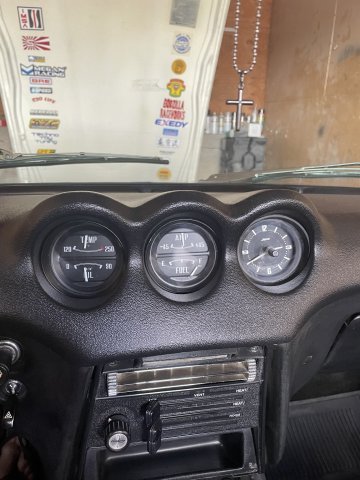
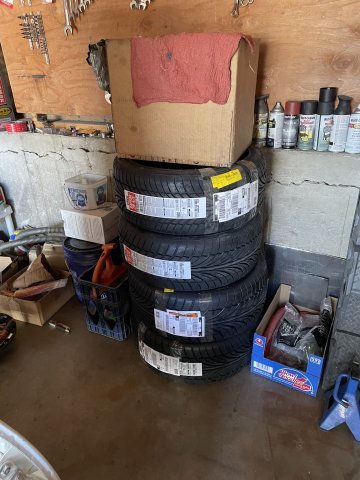
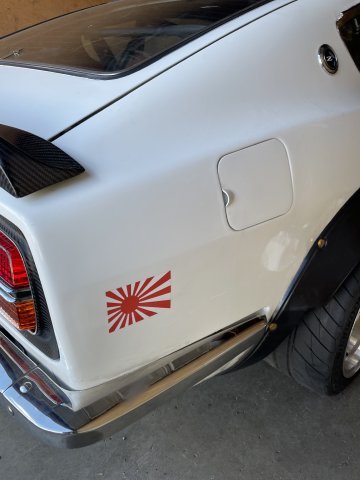
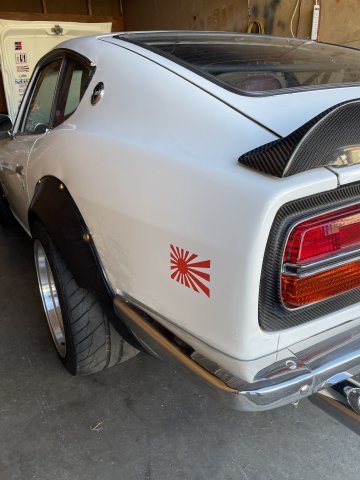
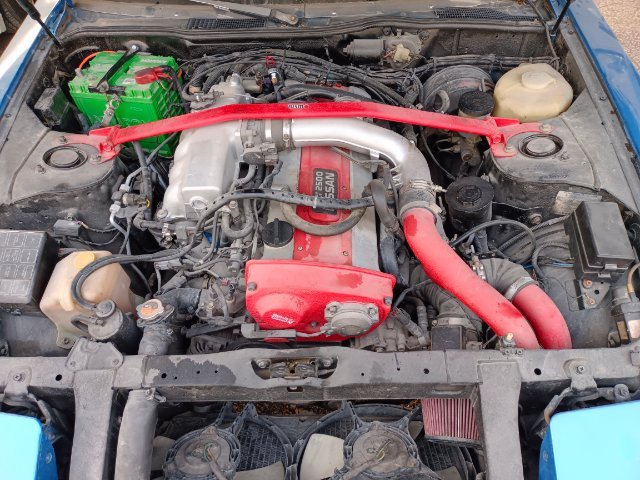
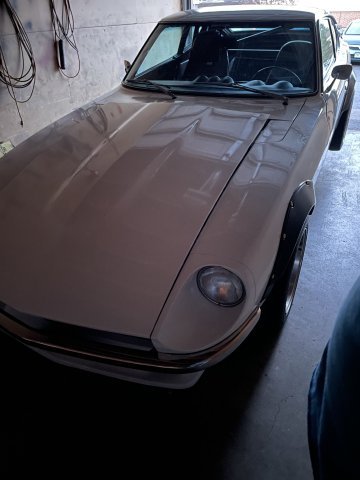
04-16-2024 UPDATE: Took the day and started with getting the Water Temp gauge working.......great feeling, had to dig back though the wiring to find the right wire and test it....really glad it's fixed.....I am noticing since I fixed my gas tank, that it is reading full when I poured 1/2 tank back in it.....and when I turn it off, the gauge doesn't fall completely back to E. I hope it will striaghten itself out once I get it out driving it around and fill it up for another leak test. I repalced the in tank sensor and it was worrking great....hmmmm. I ordered a repalcement clock from Ron at ZClocks. Upgraded to the Quartz and I am having him remove the green light filter, as I am using white LED bulbs. I also received the tires for my new 17" rims that are coming. I went with the Riken Raptor tires 225/245 45ZR17 size. They were on sale at Tire Rack, and they are a ZR rated all season.....I only drive on nice sunny days, but they will work. Less than $100/tire! Free shipping too! I jumped on my rear drum brakes, adjusted them to where the tire spins 1/2 turn or a bit less.....so they're right on, and so far, parking brake looks to be good as well. STRONG pedal feel. I rebuilt them completely a while back, but never did the adjustment...no wonder they didn't work! Torqued the wheels back on and then I noticed all of a sudden a really loud clacking sound while idling. Turns out 2 valves worked loose! All better now. Added some of my Walmart oil.....this is really good oil! Also finally got my Rising Sun stickers, put them right where I want them. Here are some pics. To view Video, click on "Facebook" below and scroll to the end of the pictures. (4) Facebook V1.MOV
-
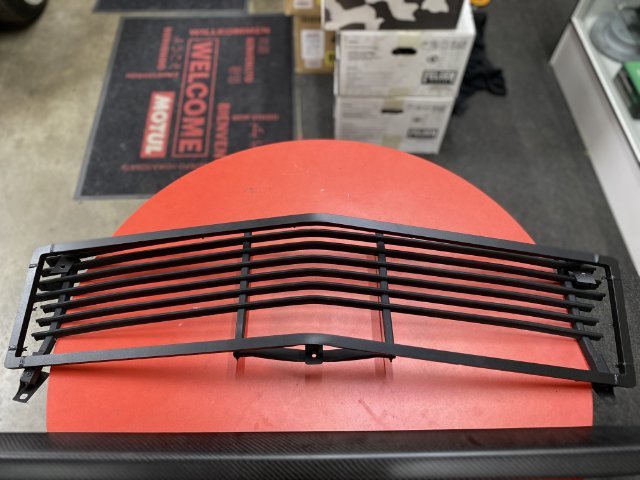
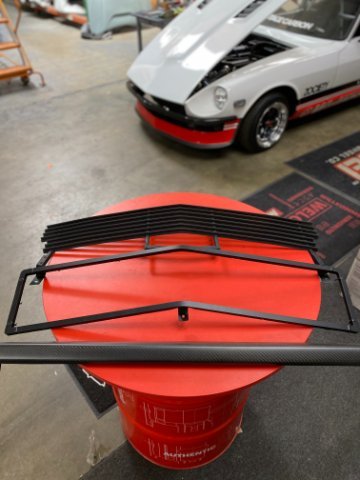
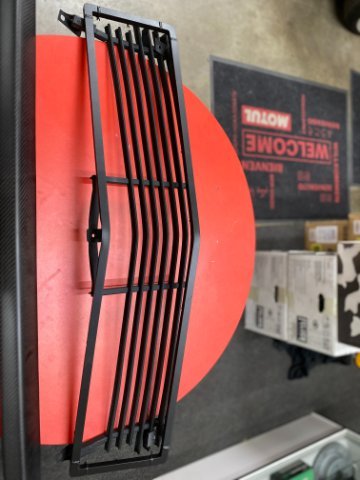
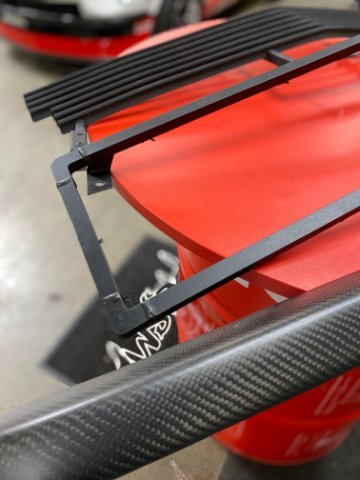
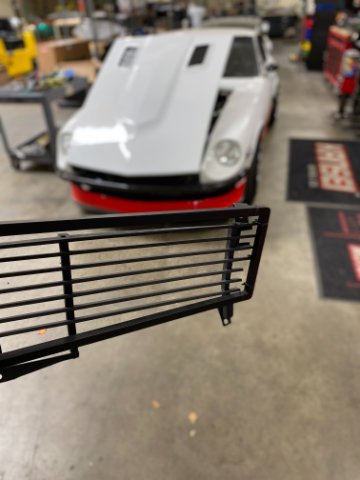
 VINTAGE CARBON Pre-order Opportunity - NEW S30 CARBON FIBER FRONT GRILL! We have been cooking here at Vintage Carbon! We are going to be coming out with an ALL NEW Carbon Fiber S30 Grill! To our knowledge, this will be the First Ever Carbon Fiber Grill made for the Datsun S30 Platform! We are going to incorporate the Thick Outer Border similar to the Fairlady 432 Style Grille, while keeping the OEM "V" shape and OEM style straight across Slats all made completely of Carbon Fiber!! The slats will be thicker so you can really see the Carbon Weave from the front. We are also going to extend the overall height about 3 inches to make sure it covers as much as possible with a front air dam installed. We are going to ensure the vents are spaced equal to OEM so air flow will not be affected. It will be different from anything out there, more aggressive yet reminiscent of OEM but made of Carbon Fiber right here in So Cal, USA!! These will really add style to any S30 Z Front End!! What do you guys think? We will be accepting pre-orders for a heavy discount off Retail cost for the first 10 people. Contact me if interested! Message me or Email me at andrew@zociety.org ! We are currently working on a high quality render as we speak! Hoping to have that ready by the end of this week.
- Last week
-
 Nice-looking piece. Can I suggest you move your post to the Vendors' Forum? https://forums.hybridz.org/forum/27-vendors-forum/ Thank you.
- 1 reply
-
- 1
-

-
VINTAGE CARBON Pre-order Opportunity - NEW S30 CARBON FIBER FRONT GRILL! We have been cooking here at Vintage Carbon! We are going to be coming out with an ALL NEW Carbon Fiber S30 Grill! To our knowledge, this will be the First Ever Carbon Fiber Grill made for the Datsun S30 Platform! We are going to incorporate the Thick Outer Border similar to the Fairlady 432 Style Grille, while keeping the OEM "V" shape and OEM style straight across Slats all made completely of Carbon Fiber!! The slats will be thicker so you can really see the Carbon Weave from the front. We are also going to extend the overall height about 3 inches to make sure it covers as much as possible with a front air dam installed. We are going to ensure the vents are spaced equal to OEM so air flow will not be affected. It will be different from anything out there, more aggressive yet reminiscent of OEM but made of Carbon Fiber right here in So Cal, USA!! These will really add style to any S30 Z Front End!! What do you guys think? We will be accepting pre-orders for a heavy discount off Retail cost for the first 10 people. Contact me if interested! Message me or Email me at andrew@zociety.org ! We are currently working on a high quality render as we speak! Hoping to have that ready by the end of this week.
-
 jay1983260z joined the community
 -
 BombshellCW joined the community
 -
Yet another LS 260z swap :)
christianmoller replied to christianmoller's topic in Gen III & IV Chevy V8Z Tech Board
Found this on my phone 😀. It is a start up video to check that everything works before i drop it in the car. -
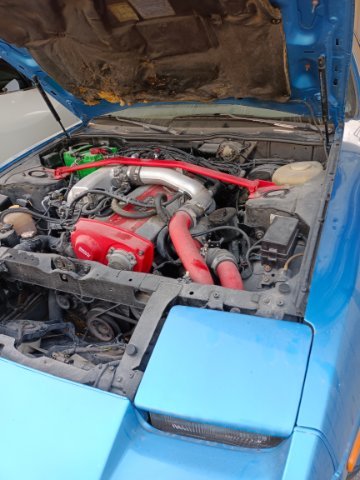
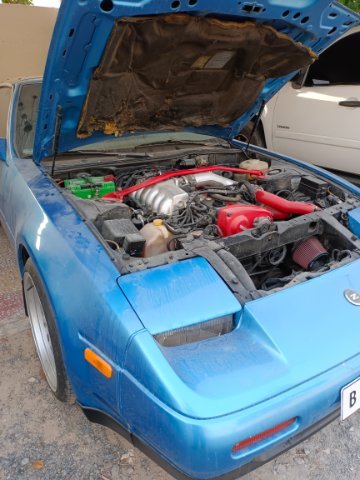
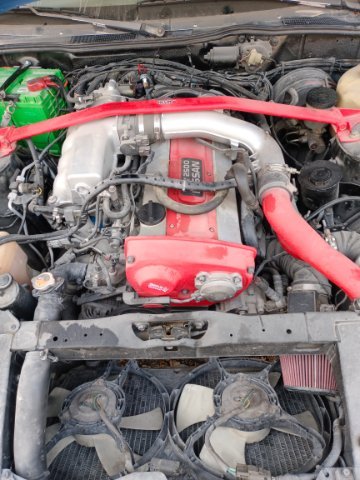
Hi forum, I have z300 1989 with rb25det,I decided to swap 2jz. Found 2jzGE full built.
- 2 replies
-
- 1
-
-
- electrical power steering
- electrical brake booster
- (and 2 more)
-
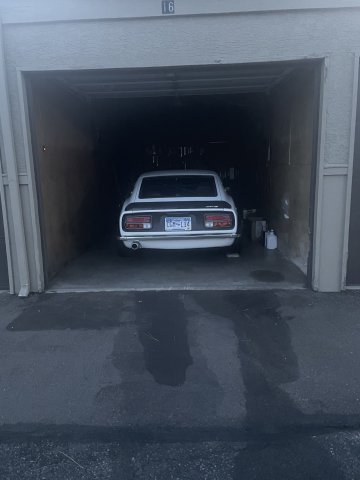
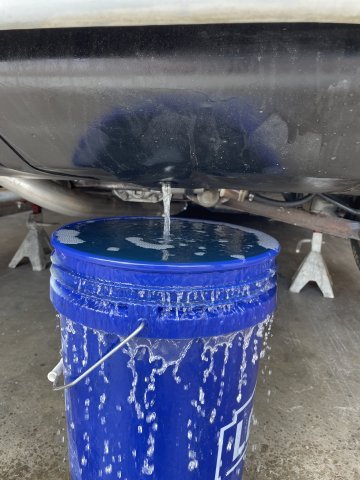
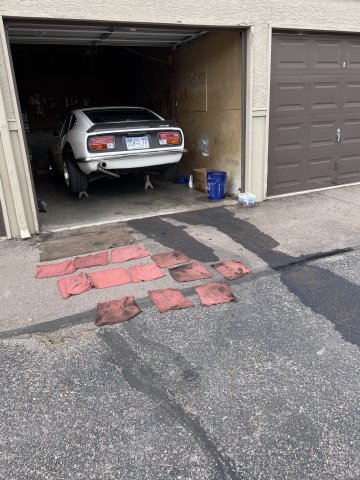
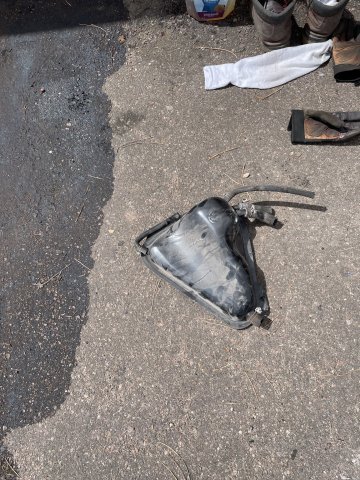
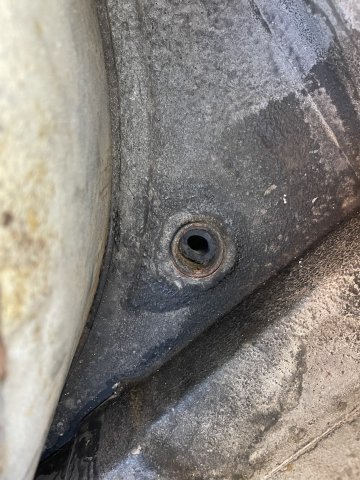
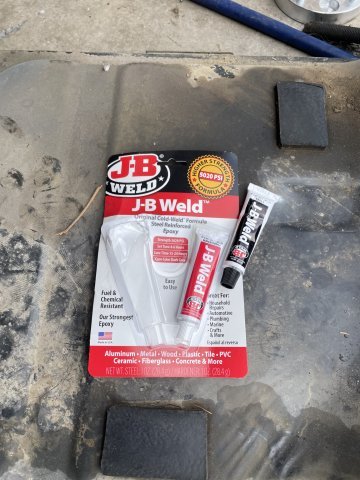
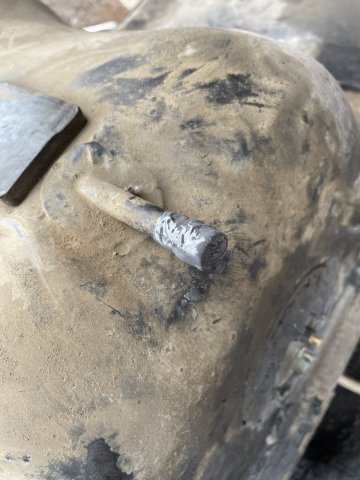
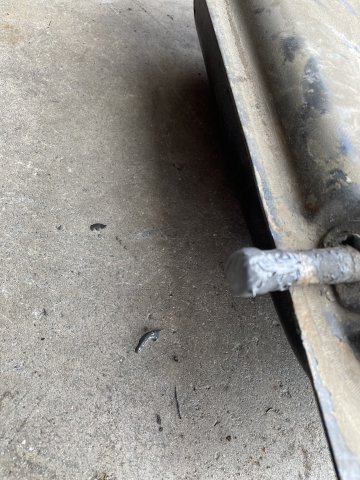
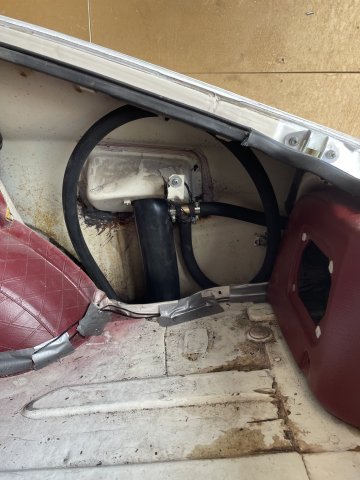
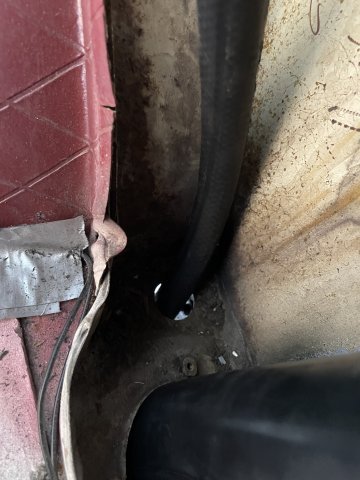
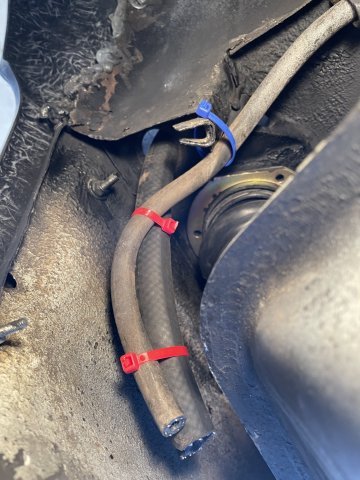
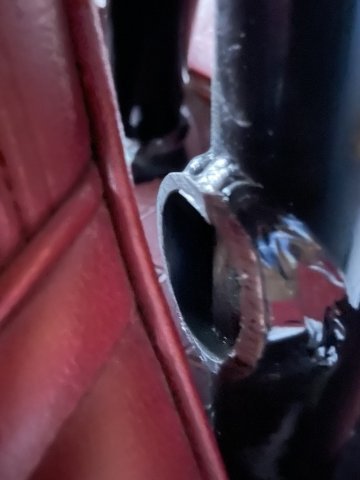
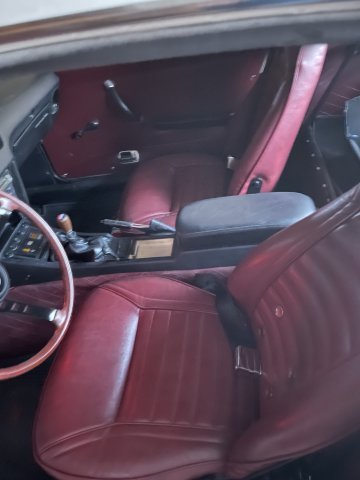
04-13-2024 UPDATE: So ordered the parts I needed to redo the hoses on the gas tank as well as a new filler neck, and decided to just get it over with and do it today. Very straight forward, but yes it is messy, and when I was letting the fuel drain, I walked away for a bit and came back to my 5 gal bucket overflowing! I blocked off the small port above the lines that feed and return from the carbs, and the driver's side port with copper plumbing caps....3/8 and 1/4. They did NOT fit right on, I had to use the dremel and open them up and then hammer them on. I then used the JB Weld to totally encapsulate them so I will NEVER have to do this again! I removed the carbon canister EPA "bag" and then removed all the hoses attached to it. I referred myself to the Z car Page that explained how to do that and used that as a guide (https://l.facebook.com/l.php?u=https%3A%2F%2Fzhome.com%2FRacing%2FFuelTankVaporLineMod%2FFuelTankVaporMod.htm%3Ffbclid%3DIwAR1CRB-K9MEA7BV-iDKRUhF4DIav92s3URvoLfdtm9JEXMoIZa1B12t_VUQ_aem_AYERpFuuWLmDxBWQcg6kDWB5XCyqV31fHhOPXT6lckUUhZyFHzoDsib2tLU11S3eWpEyR8tA5bH2sI_tP6vtGH7N&h=AT1WDx-JsAgk_WyvqIG7dCggOKAEPMcOvU_rP9QO-rEmKJK2ttY50DvJ6-PCI_GWdrjapjaidJhw8LLWxfHl0wpTPLTBeSv8v9P16mBjFCk_W4FHKLVVYJ9ZWtcunQHfdAsA&__tn__=-UK-R&c[0]=AT3tY1wiGHPTWcClhUVohf1JdT9khcNxdIdrsxpRoIL3t22WbWZubTvra0juI7yEygG6OuLpD2kD9_E58MH_ZoetYU0UwBJvIya4nNlS8FwJWwdzxBT8iXdGx4suCF0u1kPcBtxCaurzIpo_D2feerY8kllMHgmoV9WhYbKD6GQMLnrAhny1OPM_UQ24ffyXHQZUxL-GAzQkhUn1euANohA ). I got everything hooked up as instructed and closed it all up. I then poured the gas back in and no problems. Started the Z and let it run for a bit, and again, no leaks. It will now sit and let the fittings, or rather the BJ weld on the fittings dry up. After this, I decided to fix my seating situation in the car once and for all. I have thought of all the different things I could do to give me more room, and finally decided to cut out the lower cross bar on the rollbar. It is for looks anyway, and although I didn't want to do it, I decided that it IS my car after all, and I mod everything anyway, so I modded the rollbar. Cut and vacuumed it up and now the seat position is GREAT, but I need some foam on the rollbar angled bar as my head is against it. I have provided some pics and 2 video's at the end of the pictures. Click on Facebook below "videos" below and go to the end of those pics to see the videos. Cheers! For videos click on "facebook" below and go to the end of the pics, 2 videos in all. Facebook Facebook
-
The board looks to be in great condition, and no visible issues or smells are apparent. Also, because the fuel circuit and everything else works, I would like to assume the board is ok, but I know I cannot rule it out. I tested the chip, and get a reading of 1352 from the emitter side (I think), and 0.02 from the collector side. I would assume this drop would indicate and issue with the chip. Thank you for teaching me NewZed and following along. I really appreciate the help. Hoping the new chip coming in the next day or two will solve this weird issue. Wish something would just drop in and work from time to time. I guess that's the pleasure of working on these rust buckets.
-
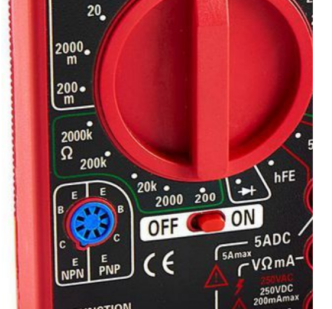
The power to the chip would come through the trace on the board. It's hard on the eyes but you can follow the trace back to its source. You might find a burn mark or a cut. The board might not be ruined if you find something. People repair circuit boards. If you put the board together yourself then the odds of a wrong/bad solder are higher, I'd guess. I'd go back and check my work. By the way, you can buy inexpensive transistor testers. No idea which are good or not. Even Harbor Freight's cheapo multimeter has one. Really though, if there's no power on the board trace even a good transistor won't work right. Not an expert... Just for fun - https://www.harborfreight.com/electrical/electrician-s-tools/multimeters-testers/7-function-digital-multimeter-59434.html
-
I was just using a multimeter. Yes, I used the left leg, which is circuited to the IGNIN, which is jumped to the JS10 port. I could very well be completely wrong in measuring it that way. I've been trying to do reading, but cannot really find any forums posts across here, DIYauto, and MS forums pertaining to measuring or testing BIP chips. I know it's probably not a great way to find info on specific board upgrades, but I just threw my problems into chatGPT and according to that, it should get voltage, maybe not during key on, but definitely when cranking, as that is when it signals the coil to fire. I think I might have short circuited the chip when trying to start it over the past few days, but it could have come from GRW defective, not sure. The fuel circuit works fine, and the injectors all trigger when using the tester in TunerStudio. That's why I'm leaning towards a chip issue rather than the board being fried. Maybe buying the DIY and saving $600 over the PnP kit from GRW wasn't worth it. Side rant on Godzilla RW, I'm not very happy with them or their products. I wouldn't buy the relay board from them, they upcharge quiet a bit. You can buy the same TunerMods relay box WITH the wiring harness premade for $60 vs their $100 box with NO harness and crappy tab style connectors. Also, they pointed me to DIYAuto's tech support when I reached out about the BIP chip not firing off. It could very well have come from them bad. DIYAuto responded to me and said because GRW does the modding for the single coil when you buy it from them, DIY cannot help with tech support. I have also had emails go unanswered, and it took over 3 weeks for them to ship my harness in the first place because somehow it got "lost in translation" with their shipping manager.
-
How are you measuring power at the transistor? Are you probing the board? Did you pick the correct pin? You're in to electronics world now. Here's a couple of links that might help. I've never been in to a Megasquirt board I'm just commenting based on the basics. Maybe you'll see something in the diagram. There's a fuse or two but it seems like the whole unit would be down if it blew. Maybe the BIP373 is damaged, although they say it's very durable in the link I gave above. But in their chip upgrade, linked below, they call it "infamous". Who knows, their description above and the link below are kind of contradictory. Good luck. https://www.diyautotune.com/support/tech/other/grounds/ https://www.diyautotune.com/product/coil-driver-kit/
-
BIP chip is not getting power at key on, and therefore, not triggering the spark signal. What gives the chip power before JS10? I want to trace the circuit back to find the voltage break.
-
Yet another LS 260z swap :)
christianmoller replied to christianmoller's topic in Gen III & IV Chevy V8Z Tech Board
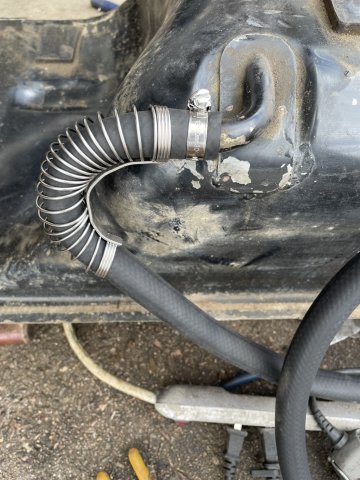
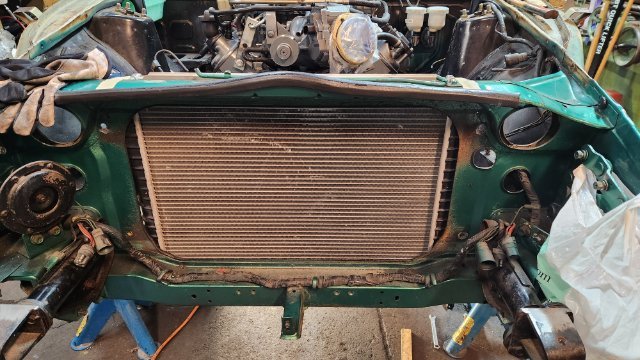
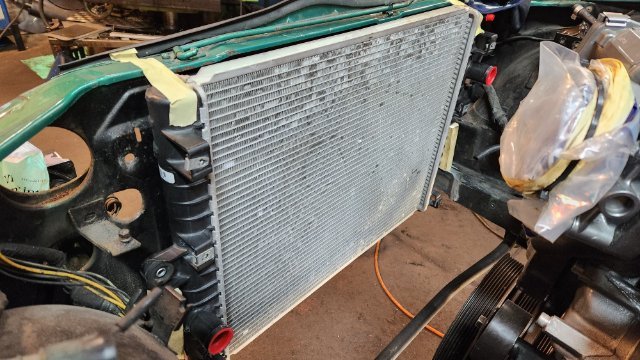
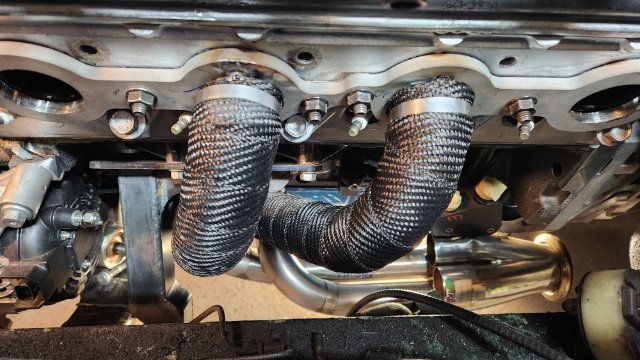
Hello, Slow progress this week............ Got the Corvette radiator and fan and ordered som sheet metal to make some brackets. Also started to wrap the primary tubes on the headers, not fun the stainless zip ties are hard to get tight enough even with a proper tool.
-
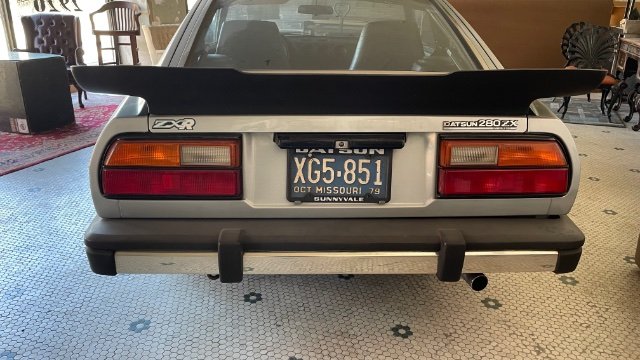
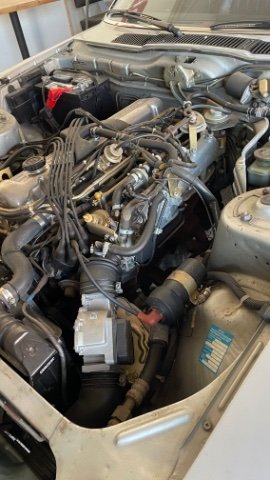
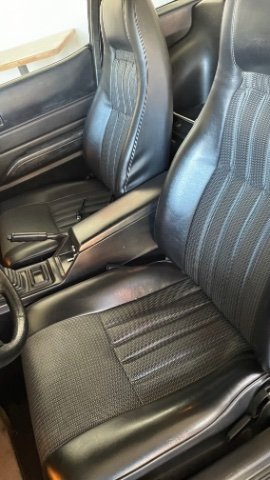
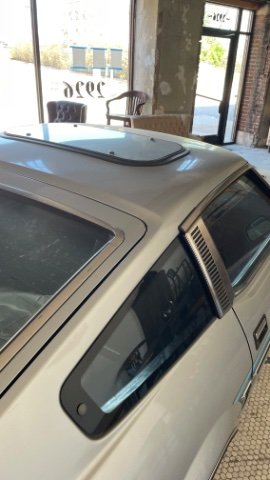
Progress has been slow as I’ve been working on a 76 Cutlass for a client to pick up some extra cash because buying a house with a 2 car garage ain’t cheap. Though at the moment we have a pretty cool piece of Z collector history come into the garage for some work before it goes to auction. A 280ZX-R. It’s got surprisingly good interior and mechanical wise, but the sunroof was unfortunate to see. Odometer says 930 miles but it has likely rolled over, been replaced, or is broken. We should have it up on BaT soon for those interested.
-
Just tested that, it read at 0 ohm from multiple test spots. Tomorrow I guess I have to trace to where it's grounding out. Thanks for bearing with my wiring novice-ness. edit: pulled the signal wire out of the conduit all the way up to the connector and found no breaks or issues. I took apart my ecu and the BIP looks perfect, no burns or damage. No weird smells either. Is there a way I can test the BIP with a multimeter? How should I proceed?
-
It's not the votage drop that matters it's what the voltage drop indicates. No spark will be created if the current through the coil is not stopped. You could also disconnect the coil negative at the coil and check the wire for continuity to ground, key off. Disconnect the wire, put one meter probe on the end and the other probe on a good bare piece of metal or the engine block. You should get OL or infinite/huge ohms on your meter.
-
I think I can use the tooth trigger thing to view coil signal, but I have to read up on how to use that to provide good info to you guys. I traced the circuit from the battery, relays, fuse box, ignition, and it drops a few volts, but I think it's because I went from 10g to 16g wire. I'll see using a higher gauge fixes the drop issue, if not I''ll look for grounding. Removing tachometer wire had no effect. Tomorrow, I will also try manually sparking the coil, to make sure the coil is working outside of megasquirt. If that works, I think I might have to contact Godzilla RW, maybe I got a defective BIP
-
Here's some BIP373 stuff in case you haven't seen it. It will shut down automatically if settings are wrong. They give some quick and dirty settings also. https://www.diyautotune.com/support/tech/other/bosch-bip373-ignition/
-
I don't know much about TunerStudio but can you see the coil control signals? In other words does it show that the current is being turned on and turned off? That's what causes spark, the turning off of the current. 11.9 volts is low, implying that the negative side of the coil is grounded. But it should only be grounded through the Megasquirt circuit, no other circuits. You might try disconnecting the connection to Megasquirt and seeing if the coil still has a voltage drop. You might have a short to ground on the negative side of the coil. With Megasquirt disconnected from the coil the voltage should match battery voltage exactly since no currrent is flowing. The other thing connected to the coil negative is the tachometer trigger. A shorted tachometer could cause the problem, for example, although that is unusual. You didn't confirm that the old igntion module is completely disconnected. If the blue wire from the coil is accidentally grounded it will cause a problem like yours.
- Earlier
-
I got the tach input signal to work somehow in tunerstudio. I get a solid 200 rpm crank. Spark output test shows nothing. I am getting 11.9v to the coil. I have tested and tried 2 coils to no avail. One of them being a flamethrower, both have good ohm readings. I'm thinking it may be a Megasquirt internal issue? I have the BIP373. Attached is my ignition stuff, let me know if I have something wrong. I tried D14 for output and it is currently set to going low because my coil was getting hot in going high.
-
 chaser joined the community
 -
Welp, I’m not getting spark to the plugs. I have fuel, and 12v to the coil, but no spark. Tested with an inline spark tester and timing light, nothing. In tunerstudio, the rpm gauge does not move when cranking. Got this DIY kit from GRW, so it already has the BIP373 on it. Would this point to the trigger wheel? I’m going to order the one you mentioned Newzed, do I need the cas too? Any spark help would be appreciated.


-
Who's Online 3 Members, 0 Anonymous, 212 Guests (See full list)