
mtnickel
-
Posts
335 -
Joined
-
Last visited
-
Days Won
5
Content Type
Profiles
Forums
Blogs
Events
Gallery
Downloads
Store
Everything posted by mtnickel
-
Sorry to hear you got bad parts I never did actually source one myself, but only knew the guy said he had at least 2-3 of them. It was a while back, but I believe this was the place: http://houston.craigslist.org/ptd/5737136963.html Are they going to warranty/replace it? usually wrecker parts are sold with at least a 14-30day warranty.
-
If you read up on this site, you'll see that the Datsun R200 doesn't use a "Crush" style pinion nut and it is in fact torqued to the somewhat heafty 137-159 ft lbs. It's got a spacer type sleeve to set the pinion depth and so changing the flanges or pinion seal is only as much trouble as it is to get the nut on and off. Putting 150ft lbs of torque on it is tricky with the differential so I (as is also recommended on the site) just let me impact hammer away on it's medium setting (which i know to be mid 100's of torque). on some impacts may be more or less, but the lesson is to not worry about changing your pinion depth. Did you look down near Houston like I recommended?
-
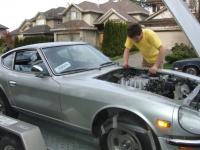
After pulling some weekend favors at my machinist friends shop, and a solid friday-saturday with the help of 2 other friends, I've finally got the Z back on the road! Some updates coming: Budget, but fun brake upgrade. mostly new brake hard lines (will explain) Sectioned struts, adjustable sleeves, and springs. Also finally got my LSD setup properly in a new r200 3.90. On vacation this week, so will get the photos up with some explanations. Happy Summer Cruising!
-
And I thought the 4-5 years i took was a long time! Well done! I've just been driving my rb'd Z for only about a month now and loving it! (other than the occational exhaust smell in the cab ).
-
My brother lives in Houston and I contemplated getting one there and shipping it while I was visiting. There is a Datsun wrecker type place and they said they had a handful of 280zx manuals (with the 3.90). If you don't mind the drive, I could put you in touch.
-
As another note. The sliding axles likely is not a problem. Once they centre or get bumped away from the adapter, the friction from torque applied will likely keep them in a position away from the adapter. The inner face of the adapter is also chamfered and would cause minimal wear if it were to rub. Grease it up and worry not.
-
There are no c clips on the axle. I was told by WCR hat it's designed to slide in and out to allow for length changes. It's a trick the off road guys use to gain a ton of suspension travel. As a downside, the splines are made to fit loose to allow the sliding movement. But this in turn adds a fair bit of slop/play. Certainly more than my stock u joints had. I'm going to investigate into doing a true 930 axle swap (WCR are technically VW type 2? 4? Axles, but labeled "Porsche style"). I also may be at the limit of what they rate the axles to (400hp). The used German made 930 axles are VERY tight with no rotational play at all. Hopefully the shorter custom axles I get turn out the same way. I was hoping for less driveline clunk, not more when I decided to go CV
-
Found the 280z shop manual to check plug. I dont' have the combination switch wire colors, but hopefully you can track them down from the shape of the plug. This should work:
-
Not sure if OP has found these, but I too am after the vinyl pieces. I would even be interested to borrow a pair to see where original cut lines were and I could just make a template. (would make template out of spare material or heavy paper...could keep around to mail out to anyone that wants to make their own. I haven't sown since high school, but i remember being pretty good at it. lol.
-
BAH! Nothing makes my ears ring more than imperial fasteners on a Jap/metric car. "is it a 14mm? 15mm? Bah, nothing fits!" (though i guess I could look at the head for markings). Yes, I put a 5/8" bolt in, but that's only because spindle are worse!
-
What wire outputs do you have at your disposal. What switch are you utilizing, how many outputs does it have. etc. Need to know what switch you're using before I can go into how you'd incorporate it with a relay system that parks. Also need to make sure your low speed switch goes high impedance (open) when you switch to high).
-
Camber change after 1.5" drop?
mtnickel replied to mtnickel's topic in Brakes, Wheels, Suspension and Chassis
I haven't measured the inner washer yet, but i'd think it'd still have a bit of meat left. Rather than deal with drilling out the spot welds, i'd be more inclined to just put an additional support washer (with the vertical slot in it) welded on the outside of the crossmember. It could be a 1.5-2" washer of thicker gauge. I'll take some measurements later and see what we're working with. -
Camber change after 1.5" drop?
mtnickel replied to mtnickel's topic in Brakes, Wheels, Suspension and Chassis
Great thoughts and discussion guys. I'll add 'slotted Inner pivot' to my growing list of fabrication mods (LCA, and poor man rear toe adjuster). For repeatable placement, I'll likely also tack a eccentric washer onto the Inner LCA nut and weld a peg to the crossmember...then Adjusting Bumpsteer is as easy as loosening the bolt and rotating the nut (similar to many camber adjusters). Pics to come sometime (though if you check out when i started this thread, it could be years down the road). -
Camber change after 1.5" drop?
mtnickel replied to mtnickel's topic in Brakes, Wheels, Suspension and Chassis
I'm glad this thread could be such a catalyst for suspension discussion! So I'll likely go the way of an adjustable lower arm. May relocate the inner pivot while I'm at it to get a little more arm angle. Don't really want to mess with the engine though, so if it looks like too much trouble to do on the car, i'll leave it for now. Regarding adjustable arms, Where did everyone settle on what quality of Rod end to get. I'll likely go 3/4" and then get reducer bushings. The purist in me wants to just make the bushings custom for the 14mm bolt instead of 5/8". Something about putting an imperial fastener on a Jap car just ERks me. Important to get chromoly, teflon lined, etc? or would an economy rod do since I'm already up to the 3/4" size. Aurora 3/4" CW are like 14,000 lb static load I believe. As a final note, It's be an absolute blast to get the Z on the road. I had it on the road for just a couple weeks last year for the first time before I blew a rear hardline brake line. Now I'm dailying it for the summer and loving it. Upgraded to vented fronts w/S12W's. Contrary to JohnM, I feel I have enough balance with the 43mm early 280zx rears. The Piston area calculations all seemed to work out and on my first brake check with full rear bias, the rear stepped out first. I must say, the 175/200 spring rates seem MORE than stiff enough for a street/AutoX ride. It's one of the stiffest I've been in, but the level handling (with next to no sway bars) and cornering is sure worth the occational rough road and chassis squeaks. I'll be updating my RB25 thread shortly with all my fun brake pics, sectioning, LSD swap, etc. Thanks guys for the fun discussion and community. -
Camber change after 1.5" drop?
mtnickel replied to mtnickel's topic in Brakes, Wheels, Suspension and Chassis
So since I couldn't find it, Here is how much camber was on a stock 260z (that's been hit in a couple places). This was about a 2" drop, or a 2 finger tire gap on 205/55r16 Rear 1.5* of camber Front 0, +.2* By slotting the fronts I was only able to get about .3-.4 negative camber. The stock isolator bottoms out in the tower. So if you're going to slot there, you can only get about .4-.5* in the negative direction. The rears I slotted both ways (probably didn't need to slot so far in the negative direction). I dialled it back to about 1.25* negative. Fronts will need adjustable lower arms. The slotted stock uppers could still be useful as with the positive and negative range I'll have about 1* total to play with. Can then set the lower to a give most of change and upper to fine tune. Maybe move between street and autocross setup. -
So i take it the stock intermittent relay box has been deleted? I can help, but need to know what Wires you have coming from your harness? You will likely need a Ground activated High speed, Ground activated low speed, 12v Ign source, and Ground. That will get you the wipers working. To get park to work, you'll need so relay trickery. Are you attaching wires directly to the wiper switch, or the intermittent box?
-
window frame water leak, early 260z, sash seal?
mtnickel replied to evoog's topic in Body Kits & Paint
any update on this? i have a gap in the same area (chrome window frame to body is much larger than lower gap). -
I wasn't the OP, but I refreshed the thread because my nub fell off. I glued it back on, and am using it anyways, but wondered what people thought it was for.
-
Even still, the deflection rationality doesn't compute with me. I think it's just there to keep the orientation correct and to stop the bar from being clamped at the wrong angle during assembly. The poly setup is probably sufficiently tight that it won't rotate, but I glued it back on with a rubber type silicone (shoe goo/automotive 'goo') anyways. Then I at least was able to clamp the rack at the proper angle.
-
Was that even with poly bushings? In the process of replacing to poly bushings, the rubber snub brushed off with minimal force. I suppose I could try and glue it back on. I'd wonder how it would cause the car to hunt. looks to only stop the rack from rotational forces. But I can't imagine how those forces would arise; perhaps from torque from the steering shaft combined with the geometry of the u-joints. Otherwise, perhaps it was a factory/assembly piece put in place to put the rack input shaft at the correct angle during installation. Thoughts? Automotive "Goo" best product to stick the rubber to the metal? or maybe contact cement? RTV?
-
Camber change after 1.5" drop?
mtnickel replied to mtnickel's topic in Brakes, Wheels, Suspension and Chassis
many thanks. I would think the solid top hat on the strut would contribute a lot more than the control arm bushing. As always many thanks Jon. Hope to meet you someday soon being in the Northwest (Vancouver, BC). -
Camber change after 1.5" drop?
mtnickel replied to mtnickel's topic in Brakes, Wheels, Suspension and Chassis
Your way certainly would be stronger but more work. I figured perhaps most of the force is Tension/compression with minimal torqueing/bending. I would to the same as BJhines and do maybe an 1/8" notch along the top and tig weld. along with tig welding the end and 2 plug welds on each side. How much NVH is added from these solid mounts? Really not many options for maintaining quiet but having adjustibility (especially if I want to add caster down the road). Best I could think of would be to taper the ends of the poly bushings a little, and then slot the rearward inner pivot point. Could then loosen the pivot bolt while adjusting caster to change it's rotational axis, and tighten back up. Then Control arm fab would have to be double sided with a type of turnbuckle. -
Camber change after 1.5" drop?
mtnickel replied to mtnickel's topic in Brakes, Wheels, Suspension and Chassis
What's wrong with welding the threaded insert directly in without a tube? -
while I can agree the L28ET is a nice period correct engine that's easy to swap and can make good power, it isn't NA. NA power provides a much different experience than a turbo car.
-
Camber change after 1.5" drop?
mtnickel replied to mtnickel's topic in Brakes, Wheels, Suspension and Chassis
John, Do you have a link to where this hardware can still be purchased? I think I even have a spare set of arms that can be used while I'm doing the fab work. Sadly, I'm just now finally getting to my suspension work. Sectioned struts, 175/200 springs on adjustable sleeves. Front RCA. I did slot the stock strut holes for fun. Using the stock insulators, the front can only go in about 1/4" which is maybe 1/2-3/4* of camber. Every bit helps, but will make the rest of the change in the lower arm. The rear however can move a solid 5/8" inward leaving plenty of camber adjustment there. I will get some pics up. Though mainly street, I'm really looking at getting into some auto crossing. After some pro karting sessions and lots of seat time on my pseudo racing simulator (assetto corsa), I need to get out in the Z as well. Now just need to decide on sway bars. Will start with stock front/no rear and see how the roll balance is.
