Derek
-
Posts
1317 -
Joined
-
Last visited
-
Days Won
40
Content Type
Profiles
Forums
Blogs
Events
Gallery
Downloads
Store
Everything posted by Derek
-
From the album: intake casting
-
From the album: intake casting
-
I saw this in craigs list a while back. http://orlando.craigslist.org/car/545820452.html Derek
-
I also have the Spal kit in my 73 and I'm very impressed with the quality. The parts are made in Italy and that's a very refreshing change from the crap from China that I'm used to. I also have the spal central locking/alarm kit and it's equally impressive. Derek
-
I'll second that about rick at RAAMmat. He's a great guy and his product gets great reviews on the boards. I have a roll of RAAMmat that I'm going to put over my home brew spray on and then ensolite foam over that. I did a test piece of RAAMmat on the floor board and it stuck to spray on really well. The thing I liked about the liquid deadener is I was able to flow it into all of the crevices. I really hope to stop the exhaust from entering the car.
-
Hi I need a new set of seatbelts. I'm looking at these http://www.thezstore.com/page/TZS/PROD/SIC03D/40-7491 Has anyone purchased these yet? Thanks Derek
-
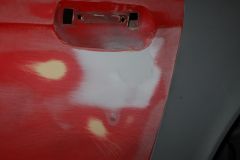
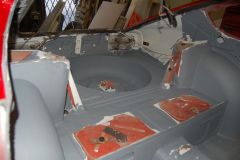
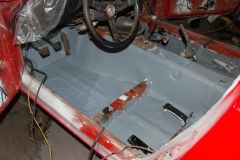
Here's what I'm using. I got this info from this post http://www.hotrodders.com/forum/alternative-lizard-skin-103610.html I'll condense it a bit. The idea is to get the glass micro spheres and add them to your paint of choice. I went with a water based elastomeric roof paint. I bought the micro spheres from here. http://www.hytechsales.com/insulating_paint_additives.html I bought the 5 gallon kit and mixed it a little heavier than they recommended. They said I could double the amount but I would get better results by using more coats. I spent $100.00 and ended up with 3 gallons of roof paint and the 5 gallon kit of micro balloons. I'm really satisfied with the adhesion I'm getting and it seems to work well as a sound deadener. I used an undercoating gun for the doors and 1/4 panels and a 3 inch roller for everything else. I tinted half the paint grey so I could control the coverage better. I'm on my third coat. Derek
-
-
-
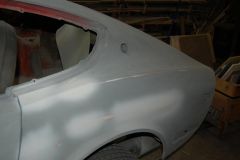
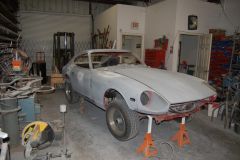
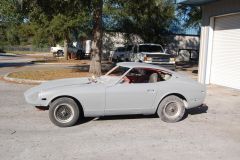
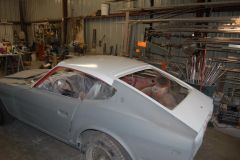
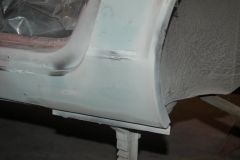
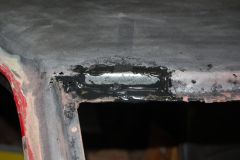
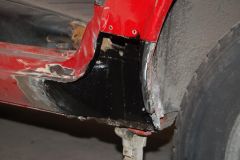
From the album: Refurbish #2
-
From the album: Refurbish #2
-
Thanks Titus. great link. Derek
-
What a great idea. Especially since I have a bunch of reed switches laying around and a pile of neodymium magnets that I use in my slot cars. And as an added plus I get to use more relays! I LOVE relays. Thanks for the link. One more problem solved on HydridZ !!!!
-
Not a bad idea. Unfortunately I don't have any switches at the moment so I have to buy something. They must not be as bad as I remember as there isn't a lot of "door pin switch" discussions on HybridZ! Thanks Derek
-
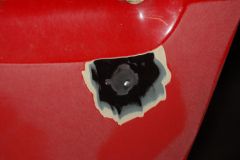
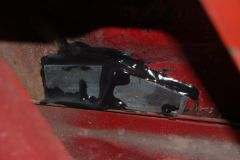
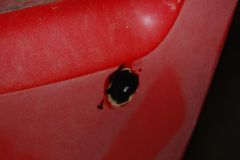
Has anyone used anything other than stock door pin switches? Mine are both shot and they never were the pinnacle of dependability. I'm hoping for something thats a little more water tight. thanks Derek
-
It looks really lonely! Derek
-
I live in Ocala which is about an hour north of Orlando. and yes it does get hot in Florida. I hope your interviewing for an indoor air conditioned job! I'm not super familiar with Orlando but they have their fair share of crime. At least according to the morning news. It is centrally located and you can get to quite a few nice destinations fairly quickly. I would think that it will be quite an adjustment moving from the bay area to Orlando. Derek
-
Thanks Guys I started the paint work on the patterns so I should be on target for casting on Wednesday. I'm still pretty far from having all the parts to complete the thing but I figure having half a manifold kicking around the shop will motivate me to complete the rest. Derek
-
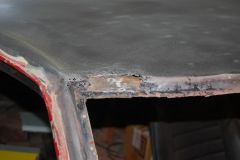
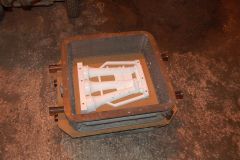
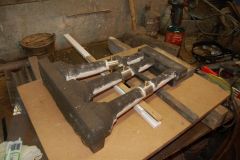
I managed to get a little free time and got the stainless throttle tubes made. Originally I was just going to cast around the stainless then drill through the entire casting and tube for the throttle shaft. I was never really crazy about this and finally came up with a better plan. Here's a shot of the bottom core mold with the throttle tubes in position. Keep in mind your looking at the inside of the manifold. The silver paint is release. I pre-drilled the tube and drilled a 1/4" locating hole in the core box. The plastic tube serves two functions. First it locates the throttle shaft hole in the correct position. Second it will hold the bronze bushings that I'm going to cast in place as well. Now after it's cast all I have to do is ream out the bronze busings and the trottle shafts are good to go. If I want to counter bore the manifold for bearings I can do that as well because the boss for the bearing will still be there. Here's a closeup of what I'm talking about Notice how the throttle tube is flush with the runner. This means there wont be a step or ledge (I hope) between the aluminum and the stainless. This is the top section of the core. After this core is made I will saw out the section where the stainless tube would go and glue the cores together. Here's the bottom core filled with the catalyzed core sand When the sand is cured and I glue the two parts together I'll hand finish the seams so that everything is nice and smooth. Unfortunately I had to leave before the sand kicked so i don't have any shots of the cores out of the boxes. Hopefully I'll be heading over to the foundry next week to cast the manifold. Derek
-

Is there an affordable compressor for HVLP paint guns?
Derek replied to zigzag240's topic in Body Kits & Paint
I just shot my car with this astro LVLP gun an was very happy with the results. It only uses 9.6 CFM so it would help reduce your compressor requirements. http://www.spraygunworld.com/Information2/Sales/Astro%20Pneumatic%20-%20EVO4014%20Combo.htm Derek -
Door glass squeegees from Black Dragon
Derek replied to Derek's topic in S30 Series - 240z, 260z, 280z
The stuff from metro looks promising. I should have thought of them as i bought stuff for my rambler from metro Thanks Derek -
Blue foam for fiberglass mold ? what is it
Derek replied to gretchen/jason's topic in Fabrication / Welding
It's in the insulation department in 4' x 8' sheets. It comes in 1/2" thick and 3/4" thick. You can also get it in thicker sections but you usually have to order a whole pallet. My local construction materials supplier stocked it in 1" thick pieces which was nice. When you use the foam there is a thin plastic sheet that you need to remove first. It just peals off. Also if you use a hot wire to do any cutting make sure your protected from the fumes. Polyurethane foams emit some really nasty gases when burnt. 3m supper 77 spray adhesive works really well for laminating. The blue and pink foams are superior to EPS white foam every way for this type of application. It sands and carves really well. Derek -
Door glass squeegees from Black Dragon
Derek replied to Derek's topic in S30 Series - 240z, 260z, 280z
That may be so but I can't make heads or tails of his web site! Have you been there lately? Derek -
Door glass squeegees from Black Dragon
Derek replied to Derek's topic in S30 Series - 240z, 260z, 280z
The squeegees are stapled to the moldings so you would have to cut the staples to remove the old squeegee and glue the new one on. Too Intense Restoration http://www.datsunrestore.com/catalog.html Has them for 47.00 for the pair. This is the direction I plan on going. Derek -
http://orlando.craigslist.org/car/522919429.html Derek
-
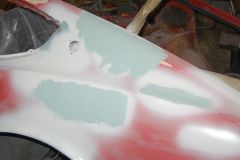
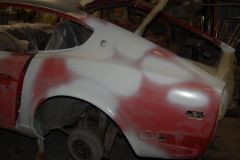
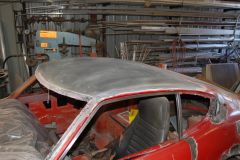
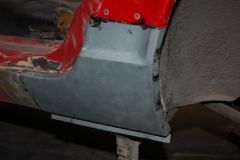
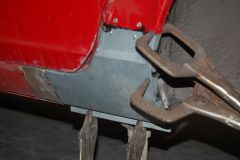
I set up a gallery page here http://album.hybridz.org/showgallery.php?cat=836&ppuser=0 if anyone wants to follow my progress. I'm also going to pass on a few pearls of wisdom that I've gleaned so far. #1 Approximately two to three months before you start your project go out and get into a minimum of three or four bar fights. And if your over 35 make one of them a Country Western bar. This will give you an pretty good idea of what your muscles will feel like when your done sanding! #2 Buy good bondo. I used Rage Extreme and it was awesome. It spreads easily and sands easily. I've used cheap bondo's before and there is a difference. Only do small areas at a time and do complete sections. Don't shove a wad of hardening bondo into a dent thinking you'll fix it by sanding. A nice smooth application makes the blocking so much easier. #3 When you start doing the bondo work give your DA to a friend to hold. Unless you do a lot of bodywork all your going to do is turn the area into a giant wave. I hand blocked all of my bondo work and managed to nail everything in two applications of filler. #4 Use a guide coat. I used a rattle can spray lacquer. A guide coat really shows where your at as far as high and low spots when your sanding. #5 Always use sanding blocks. If you can't remove a low spot with a block then it will need more filler. That's it for now. I'm sure I'll have more to add as I get into the paint work. Derek