rossman
-
Posts
1382 -
Joined
-
Last visited
-
Days Won
12
Content Type
Profiles
Forums
Blogs
Events
Gallery
Downloads
Store
Everything posted by rossman
-
If I had to guess, the copper nuts probably turned soft during high temps, lowering bolt preload leading to back-out. You might want to consider high temp stainless locknuts - the type that are deformed. Also, torque them to at 60 - 80% of the stud yield strength as a primary means of back-out prevention. Recommend lubricating them prior to installation to prevent galling, especially if you have stainless-on-stainless.
-
Gotcha...I didn't realize these even existed now. Upon a recommendation by TonyD I bonded a MSA performance gasket (I think - its light gray in color, not sure what it's made of) to my valve cover with weather strip adhesive and apply anti-seize to the head size to keep it from sticking. It's been working well for ~10 years.
-
I am curious why you don't like this setup. It should make removing/re-installing the valve cover easier, assuming you don't have to rtv the head side of the gasket.
-
Hi Mark! You will need a fuel pump suitable for fuel injection like a Bosh 044 and an adjustable fuel pressure regulator like ones made by Aeromotive, AEM, etc.
-
240z SCCA vintage race car, restoration
rossman replied to AydinZ71's topic in S30 Series - 240z, 260z, 280z
I agree. I'm also using an ACT heavy duty PP and street disk. It's holding up to 300+ HP with no issues, but I'm also not dumping it on slicks either. So YMMV depending on your setup and how you dive it. -
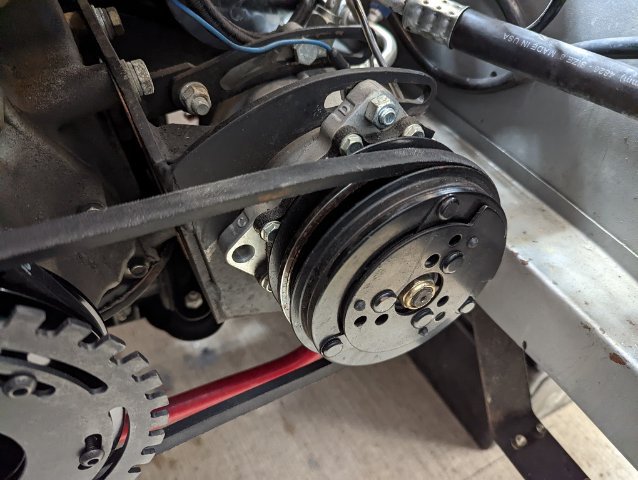
Oh, wow that's scary. Thank gawd it didn't come off while driving! Are you positive that you didn't bottom the bolt in the crank instead of clamping the pulley? Also, the pulley seems like a loose fit on the crank snout. It should be a very snug push/tap fit with very little to no slop.
-
I've also seen folks with modified fan shrouds. In my mind adding cutouts/flaps and especially louvers should be avoided unless you know you need them. You want all the air that the fans are moving to go through the radiator. Adding louvers shortcuts the flow path by allowing air from the hot engine bay to recirculate through the backside of the shroud then again out thru the fan housing, bypassing the radiator and reducing the cooling system efficiency. Adding flaps seems better but only if they actually seal, otherwise they just add another potential leak path. Anyway, thats my $0.02 on the subject.
-
@Dat73zI believe so. The few times I've driven it since adding the fans, the ECU shut off the fans while moving because the coolant temp dropped below the 167f set temp. The ECU turns on the fans at 170f and turns off when the temp drops below 167f. I'm running a 160f thermostat.
-
She is up and running again. I finally finished installing dual 10" Spal fans, shroud, and BHJ front damper. All of that stuff was sitting around for a while waiting on my lazy a$$ to install them. The below link should take you to a video of the car and fans running. Note my classy radiator expansion can! Probably should get a legit one at some point... Dual 10" Spal Fans The fans are a bit loud but so is my exhaust so it's not bad. It's difficult to tell how effective they really are because fall weather but my gut tells me that these fans are much better, especially while idling. I can see the temp gauge slowly drop, which is not something that happened with the clutch fan. I can also feel significant air flow in front of the condenser at idle and there is cool air coming out of the interior ducts. Previously interior cooling was marginal sitting idle...but again it's not nearly as hot outside. I guess I'll have to wait for a hot day, or summer weather to know for sure.
-
How so? My car definitely runs significantly better in cooler temps, as do all turbo'd cars I've driven. I think it mostly due to the colder and more dense air. It may be more noticeable here in Houston where the summer air is super humid and hot.
-
Requesting some L-24 rebuild advice and opinion
rossman replied to Daniel Fox's topic in Nissan L6 Forum
Welcome to the forums, and enjoy the ride! It sound like you got a pretty decent one there, at least mechanically. I don't know if larger valves will be much of an improvement on their own, maybe someone else here can answer. Regarding the cam and followers, I wouldn't recommend re-grinding the rockers, buy new OEM and have the cam reground (if it's a Nissan cam - if not get a Nissan cam that has been reground). There is a guy named "bonk" on fakebook "Church of the L" forum who makes custom cams and is supposed to be good. Talk to him before you do anything with your current cam. -
Turbocharged Rebello built 3.0L P90 8.5:1 static compression. The 7s don't get as black probably because the run hot. I was running 15lbs of boost at the time. I've since backed it down to 10 to be safe and the car is plenty fast for me.
-
I went from BR8 to BPR8 back to BR8. With the projected tips had to dial boost back quite a bit to keep knock under control.
-
I've found the BR8ES (non-projecting and colder) plugs to work the best on my car, at least from a detonation resistance perspective.
-
Seeing that old school manual valve boost controller reminds me of the old days! I used to have an 88 z31t with an MBC just like that, may have even been a TurboXS (early 2000s). Stock boost was 5-6 psi and I had it bypassed to 10 psi with a boost referenced fuel pressure switch "regulating" fuel. It was either full-on or full-off, no in between and boost spikes were part of the game!
-
A musician's therapist (The $300 Z)
rossman replied to Zetsaz's topic in S30 Series - 240z, 260z, 280z
Nice! It's really cool that T3 is producing reproduction steering racks. Now you have something to do when you come home for Christmas break ;). Good to hear that you're OK after the earthquake. I've never experienced one and never want to. Here in Houston we have hurricanes but at least you know they're coming! Cheers, Ross -
Yah, I'm sure it's impossible to make money doing custom work at what an average guy considers a reasonable price. @Zetsazare you referring to the slotted part of the bracket? Having a screw type adjustment would be nice instead of the old-school crowbar method that's required with this setup.
-
Assuming you are installing all the stock components then the FSM should do the trick: http://www.xenonzcar.com/s30/fsm.html
-
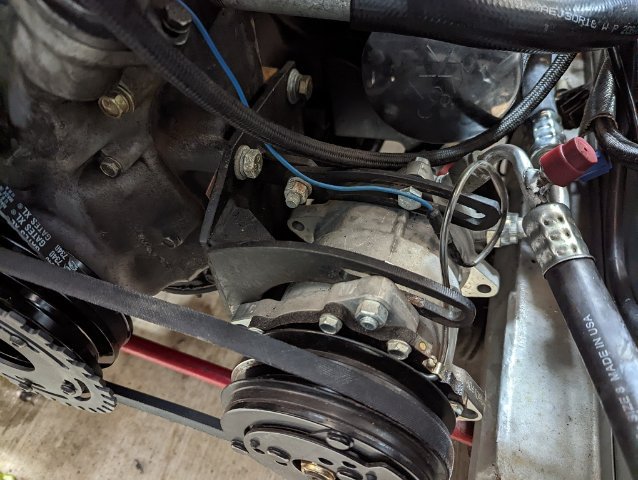
@Dat73zhere are a few pictures of my ac installation. I wouldn't call it clean...but it works.

-
Nice!
-
FYI, I "fixed" this issue by simply bleeding the slave and adjusting the slop out of the pedal. I'm not sure which one actually fixed it but I've put a couple hundred miles on the car with no issues.
-
Most folks get the VA Gen II mini although I've read the next size up will fit too but it may be more challenging.
-
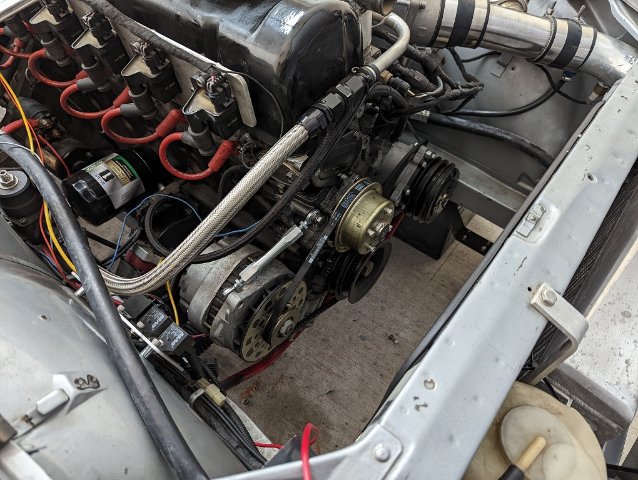
Thanks! I can get pictures of the setup. Are you looking for something specific? The heim joint should be in the front. It's just sitting there in that picture because I didn't have the correct size bolt for it. It's now attached and on the front side of the alternator.
-
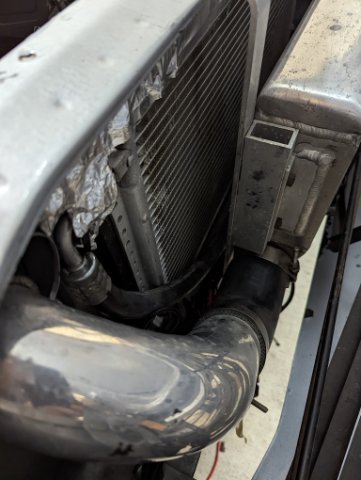
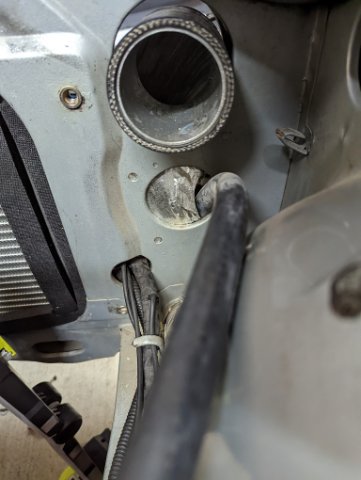
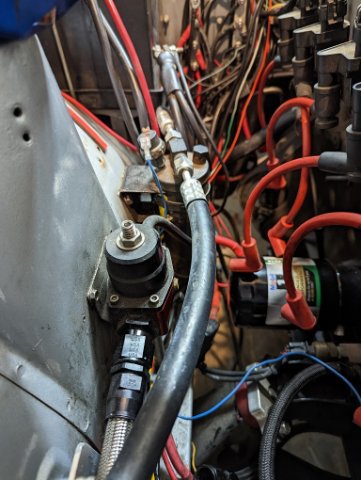
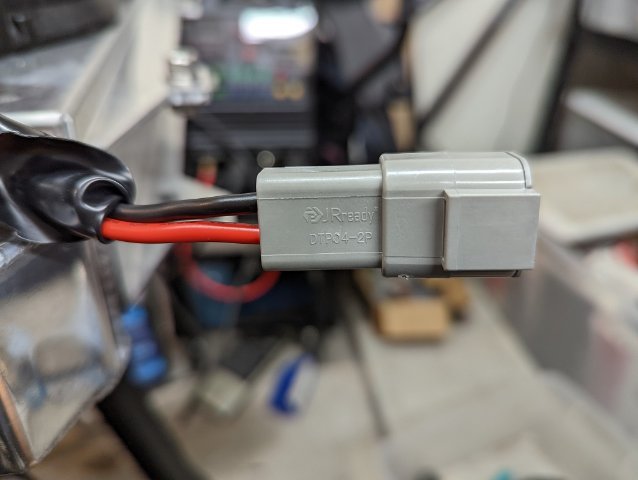
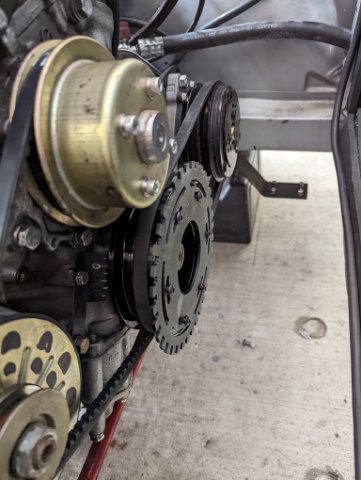
I've had some time off from work so I decided to make a few upgrades that I've been planning for quite some time. This champion radiator has been sitting on my shelf for years. The workmanship is pretty poor so I initially lost interest but recently decided to give it a shot after having some temperature creep while sitting in traffic. I think the main issue with the clutch fan setup was that it wasn't sealed up enough to pull enough air thru the radiator, but honestly the hacked up 280z plastic shroud I had in there was just plain ugly. So here is the shiny Champion radiator and shroud with twin 11" SPAL fans. I'm fairly confident this will do the trick. Also note that I've upped my wiring game with a JRready Deutsch DTP connector. I purchased a full set of JRready Deutsch DT and DTP connectors for when I eventually install a Haltech 750 (that has been sitting on the my for 1.5 years!) and rewire all the car. That's all future stuff... Here is the radiator, fans/shroud, connector, and sub-harness. Added a simple mount for the fan relay that also accommodates the headlight relays too. Here you can see the radiator removed and an upgraded alternator tensioning turnbuckle. It's much nicer than the crappy hardware store version that was previously installed. Unfortunately, the GM alternator bolt is an M10 and the turnbuckle is made for M8 on both ends. I'm still waiting on an M8 to M10 insert to make the conversion. It should be here Thursday. Oh, and some time ago I upgraded all the engine hoses to braided teflon line hoses to reduce fuel vapors. It was a noticeable improvement. Still need to do the tank side hoses. And while the radiator is out, might as well install the BHJ damper and trigger wheel. After reading some horror stories of ill fitting aftermarket dampers, I was pleased when this on fit it should - a light press fit. That's it for now. Next up will be finishing the radiator and fan install then making a trigger sensor mount. Cheers, Ross
-
If you're still having heat soak issues you might consider venting your hood or access panels. I temporarily removed the access panels on mine and the heat soak problems were minimized. I'll probably end up cutting vents in the hood even though I'm not crazy about the look.