Fauxre
-
Posts
315 -
Joined
-
Last visited
-
Days Won
5
Content Type
Profiles
Forums
Blogs
Events
Gallery
Downloads
Store
Everything posted by Fauxre
-
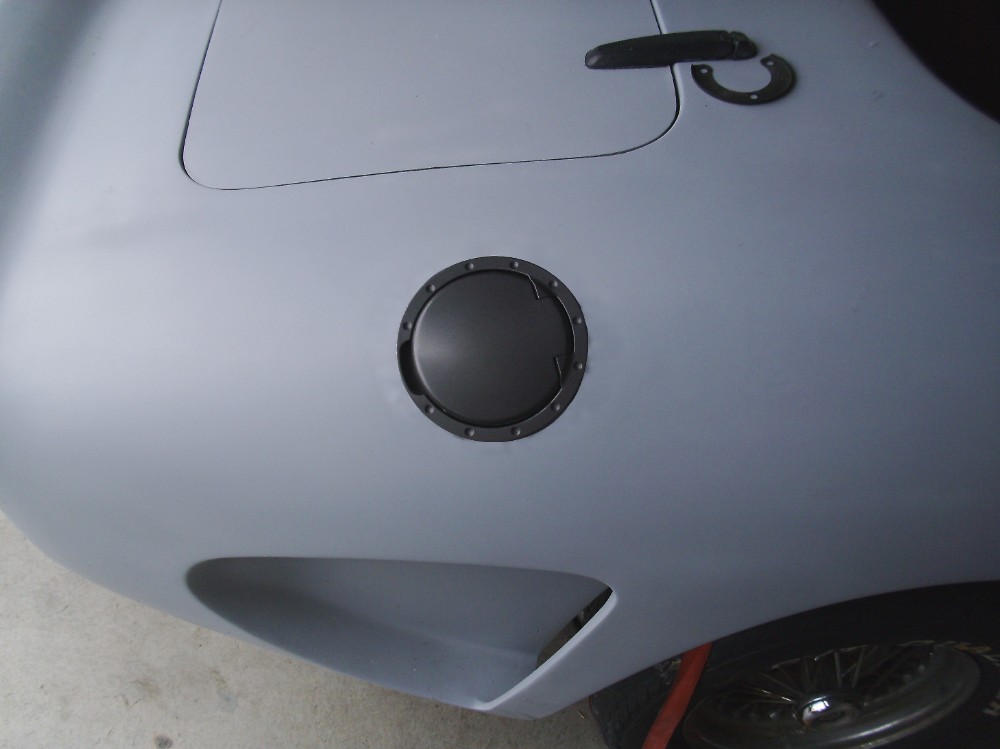
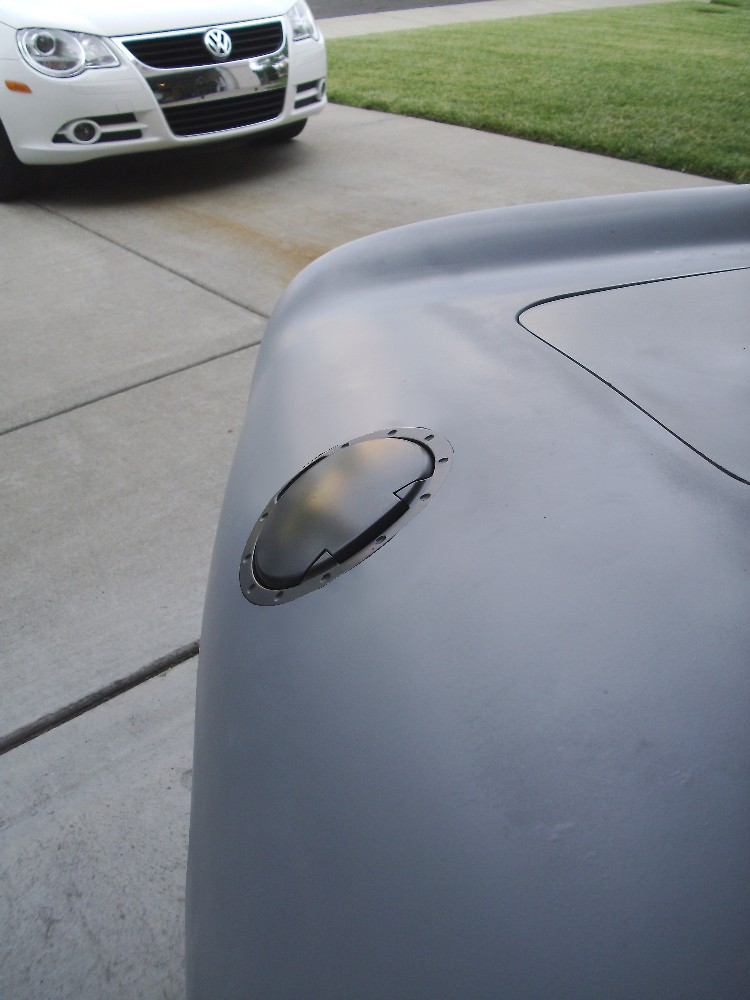
Hey Michael, here's my current plan for the fuel door. It's from a 2004 Mitzubishi Eclipse. The contour is very close to the that of the VR at the precut hole. $35 including shipping on ebay. It'll probably get a chrome finish to match the RX7 hinges. Did you bond the rear tub yet? How did it go? Wes

-
Thanks for the help.:burnout:
-
Specifically, does the Green-Red wire from the transistor ignition box connect to anything in the engine compartment with the V8 swap?
-
Yes. I have accounted for all the engine related wires and I want to remove the belt interlock system as well. The manual is vague as to some of the specific wire colors that need to be removed.
-
I've been searching threads, but can't find an answer. Has anyone here done the JTR V8 swap on a 260Z? I've removed the engine compartment wiring per the manual, as far as I can tell. When I backtracked the unused wires into the passenger compartment to remove them, I found one was connected to the transistor ignition module. Is this correct?
-
JTR's V-8 Conversion Manual should help with the LT1 crate engine install. http://www.jagsthatrun.com/Pages/Chevrolet_TPI_TBI_V-8.html
-
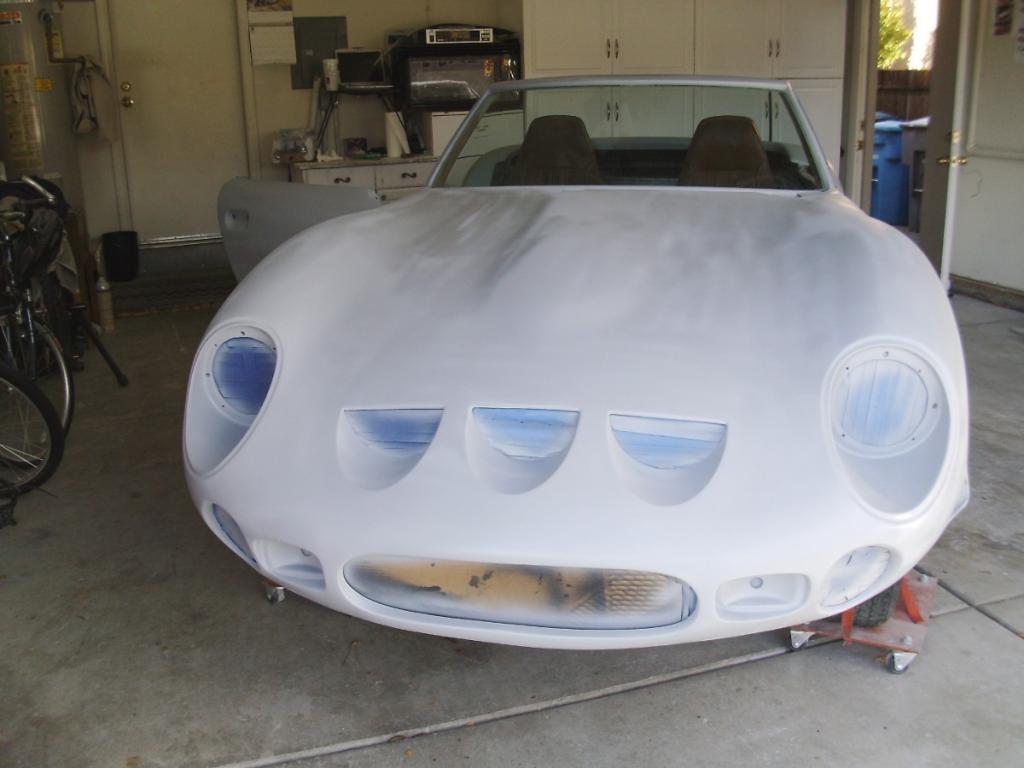
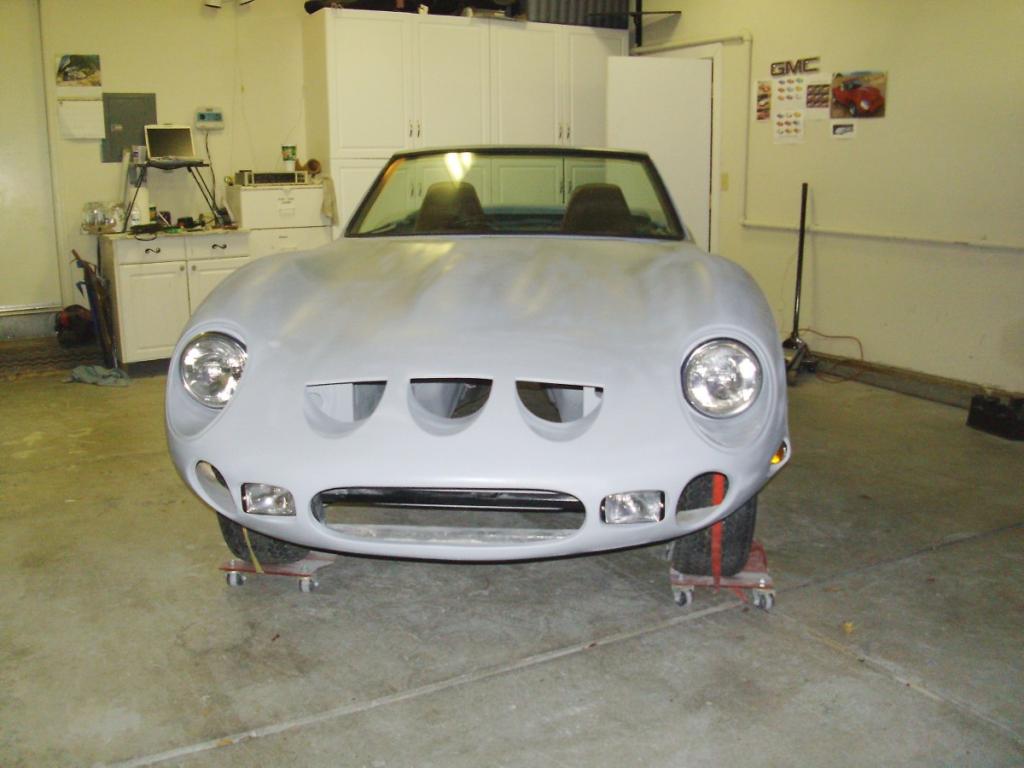
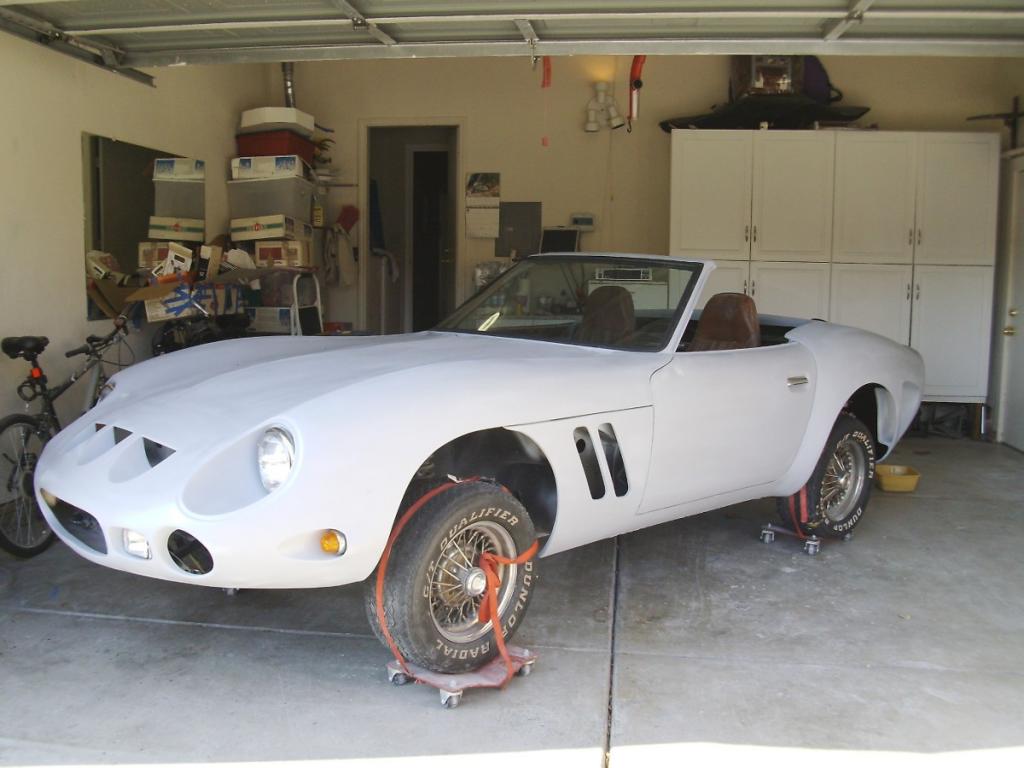
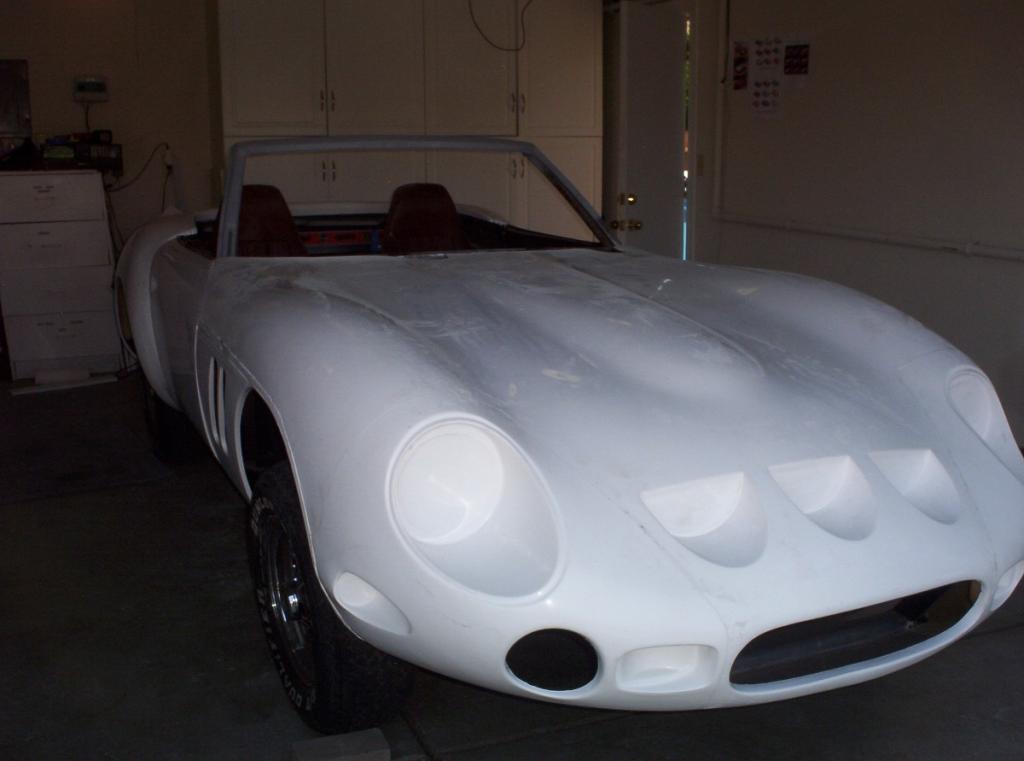
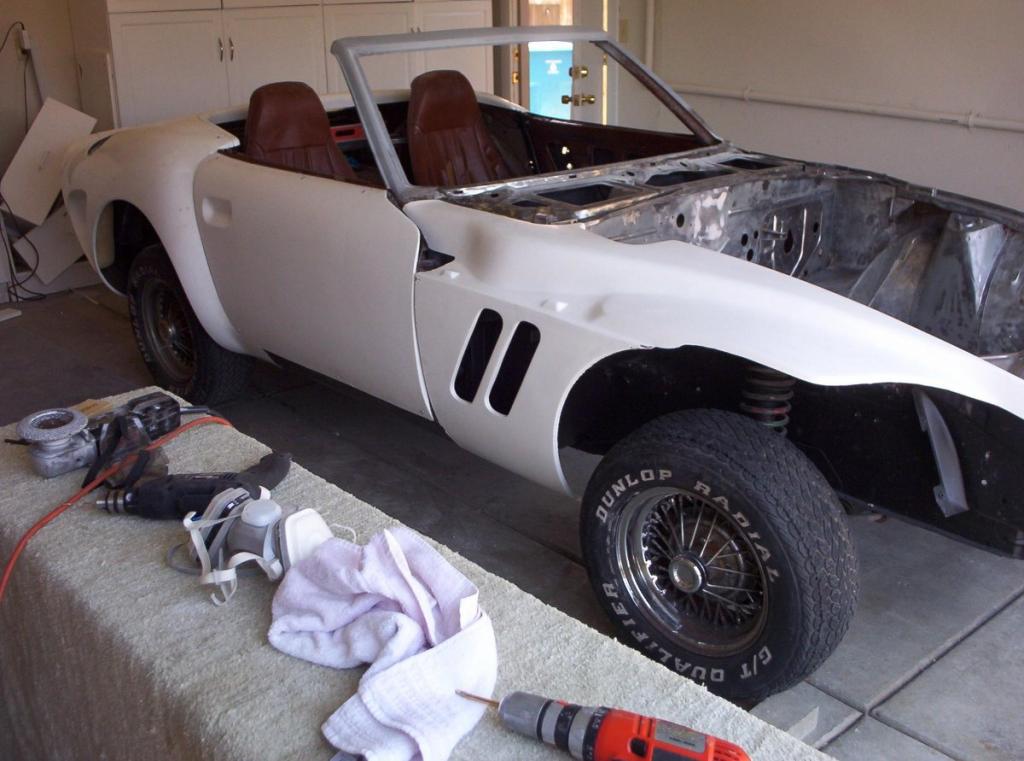
I finally finished the major body work and covered the car in a couple coats of primer surfacer to make it all one color. I little Photo Studio work and now I can actually see what's been in my head from the start.
-
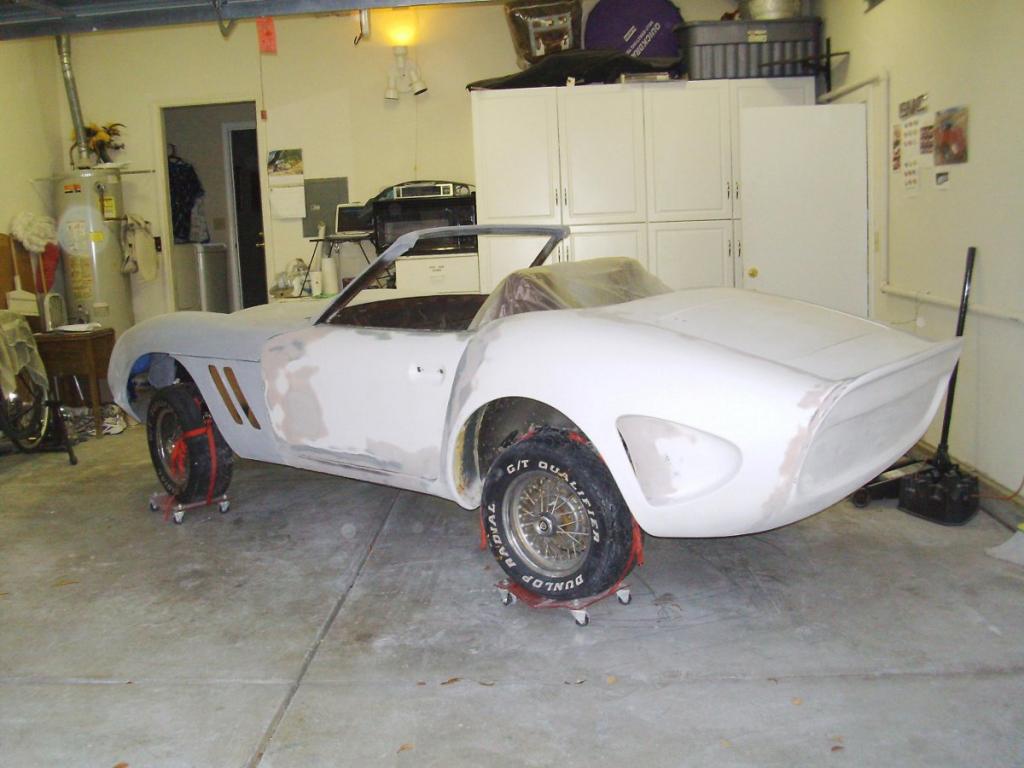
Well that pretty much brings things up to date. I intend to start working on the mechanical systems next. However, before moving on, I needed a little assurance that my bodywork, rough as it is, was at least "not horrible". With the body sporting so many different colors, my eye couldn't focus on shape. So I applied two coats of grey primer surfacer to the entire car. The result? Pleasing. Not perfect, but good enough to allow me to feel good about moving on. Ill leave the final prep and paint to the pros. I've re-installed the lights up front, the door latches and handles, and the windshield. The last three pics in this series are photoshopped concepts of this project... before final paint. Any and all comments are welcome...
-
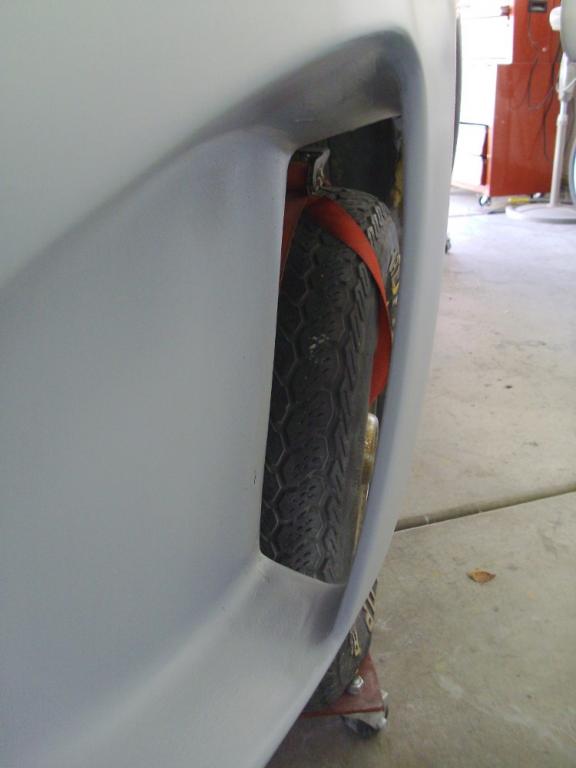
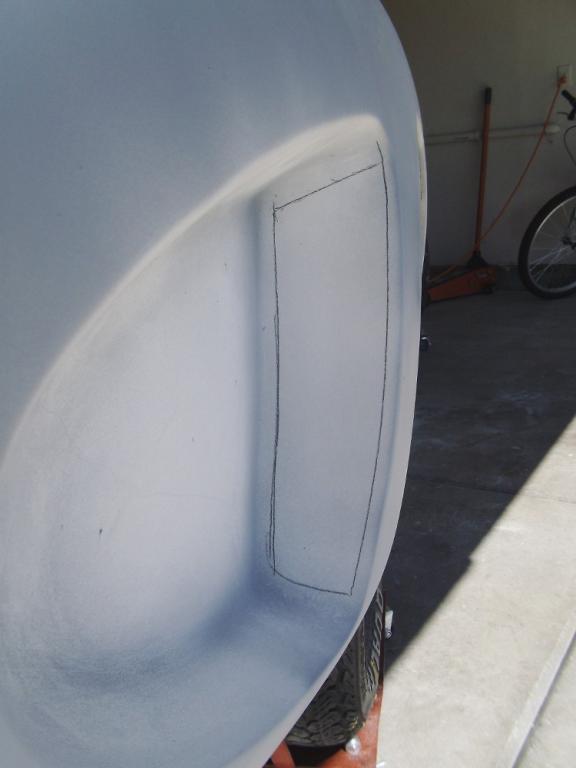
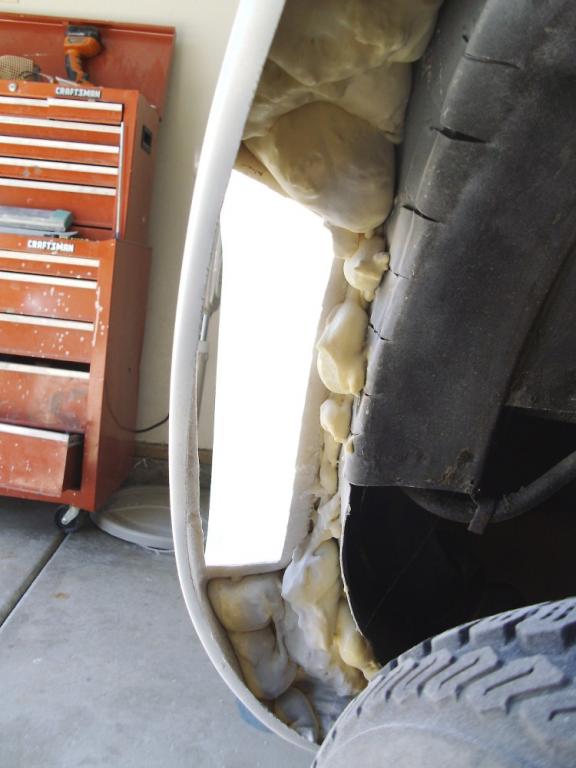
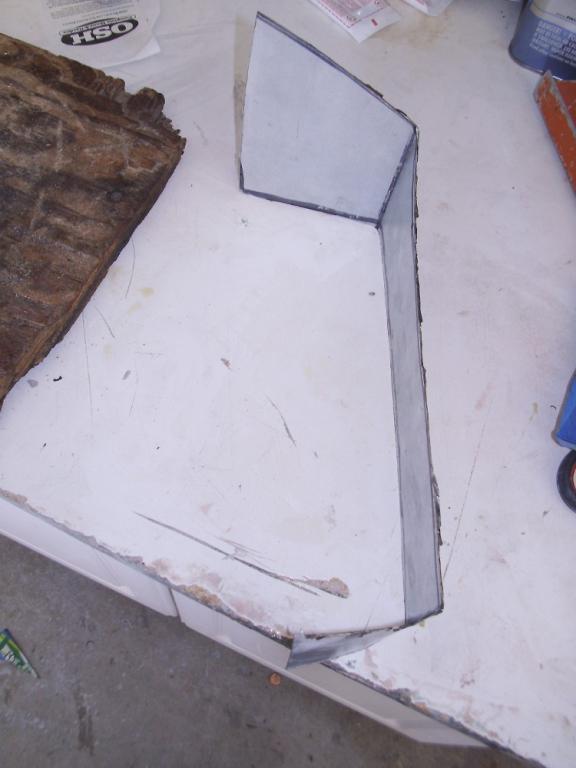
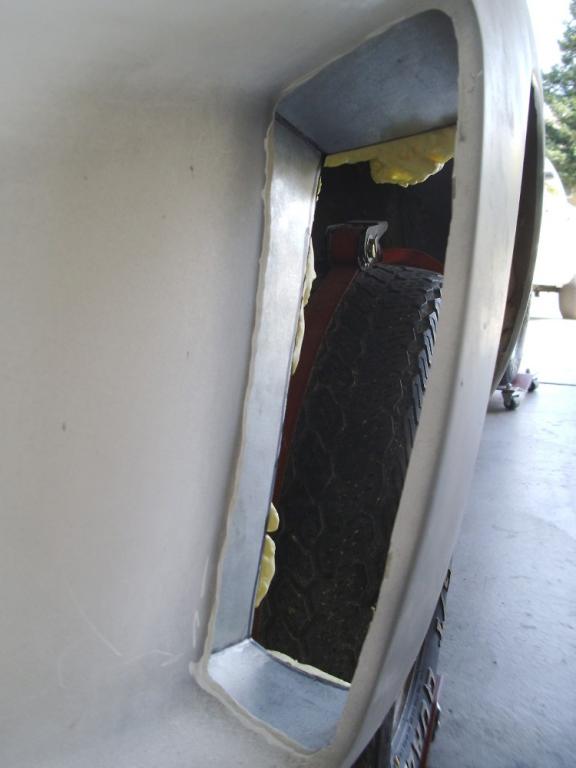
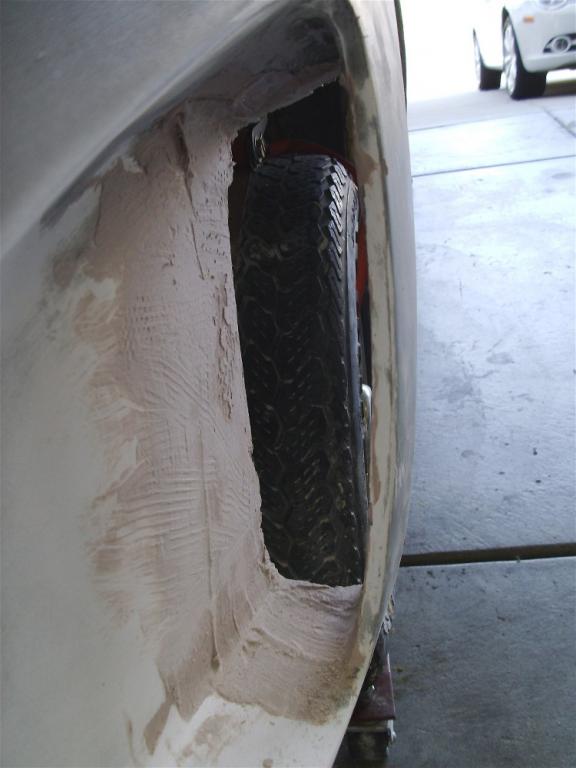
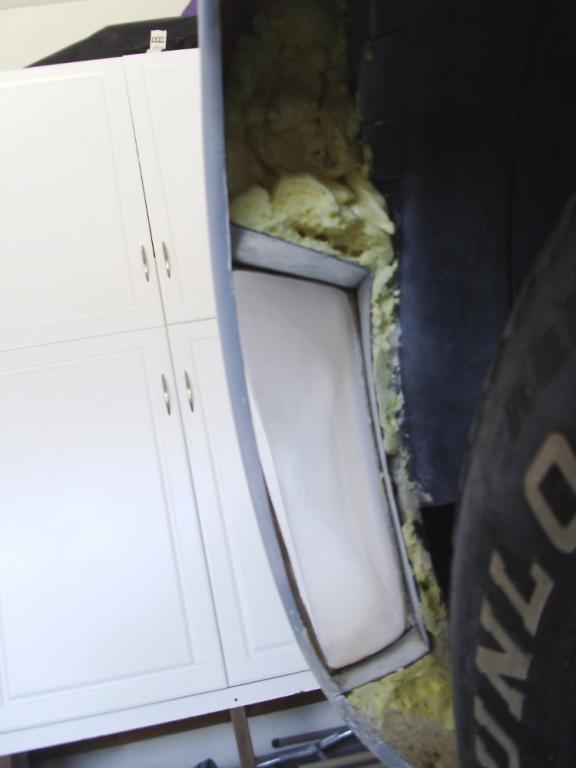
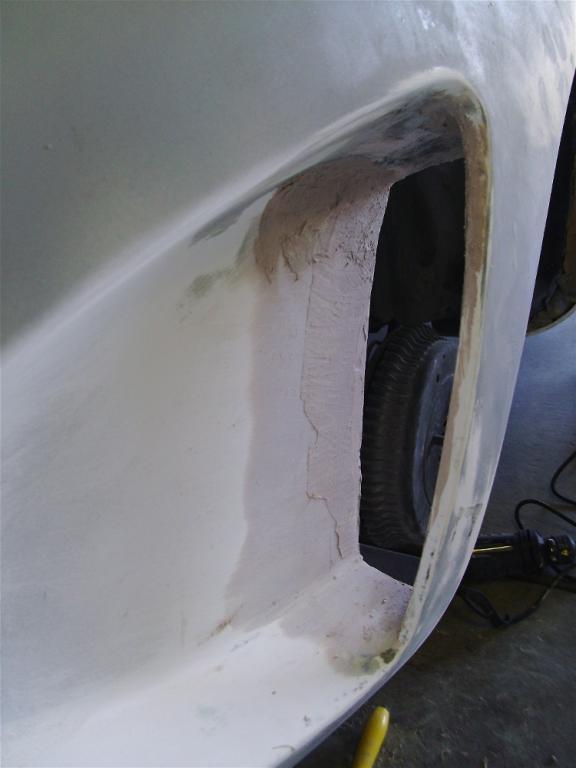
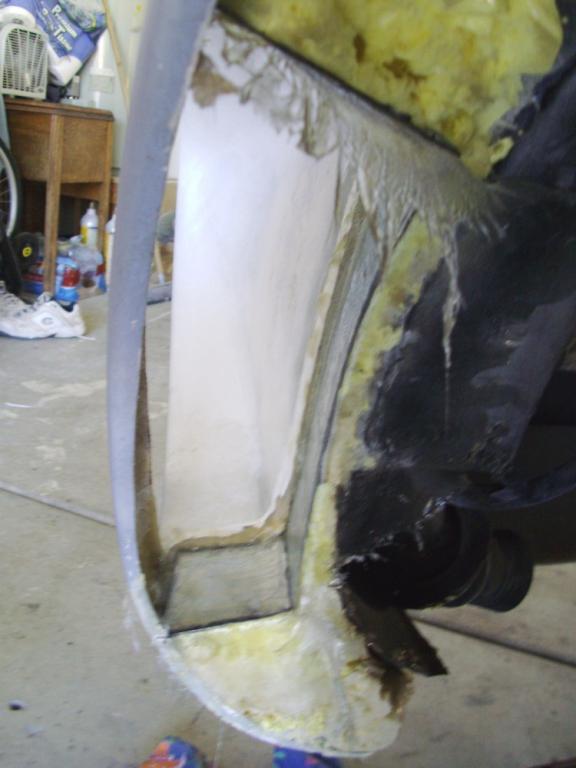
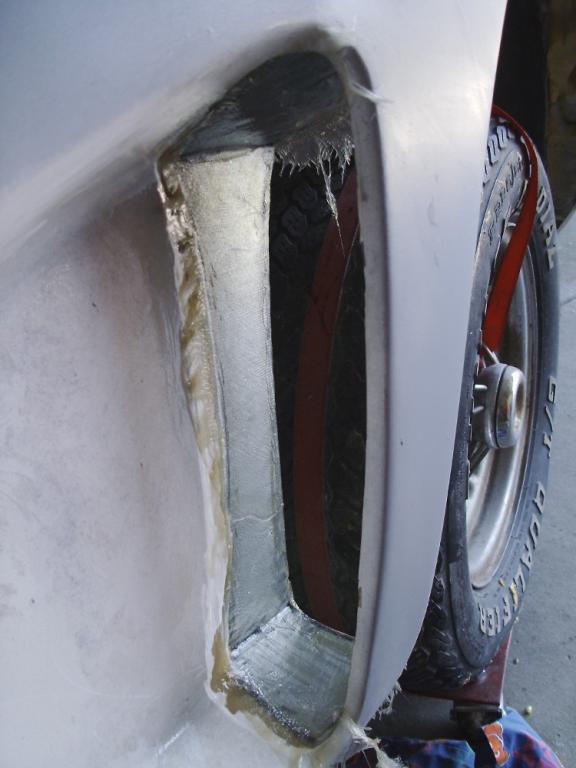
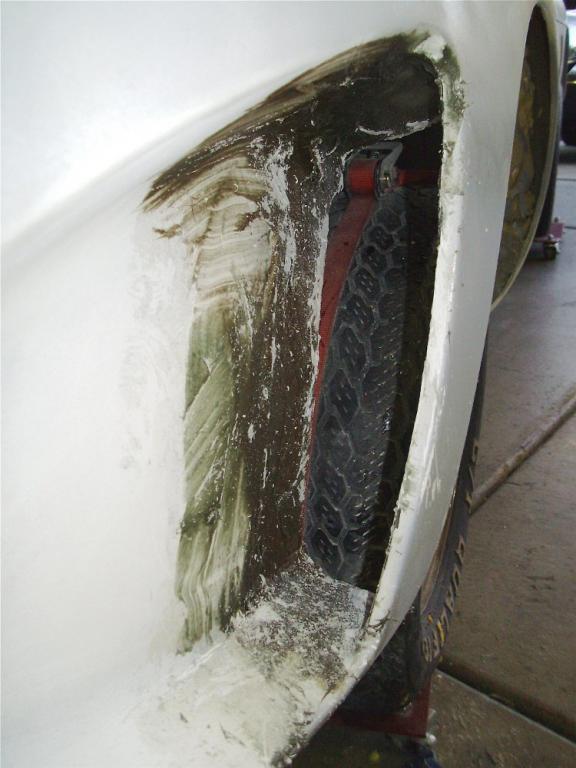
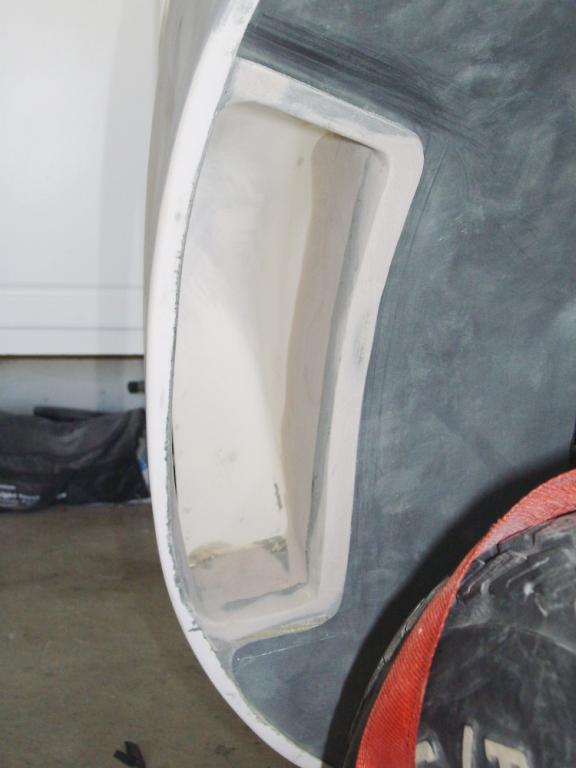
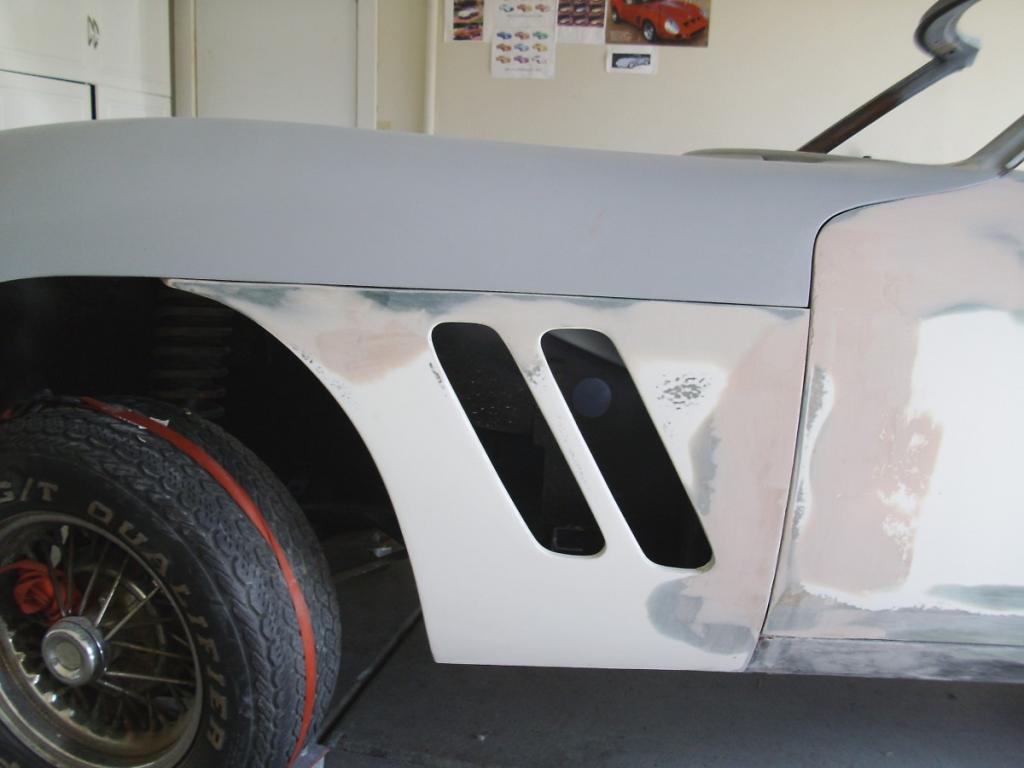
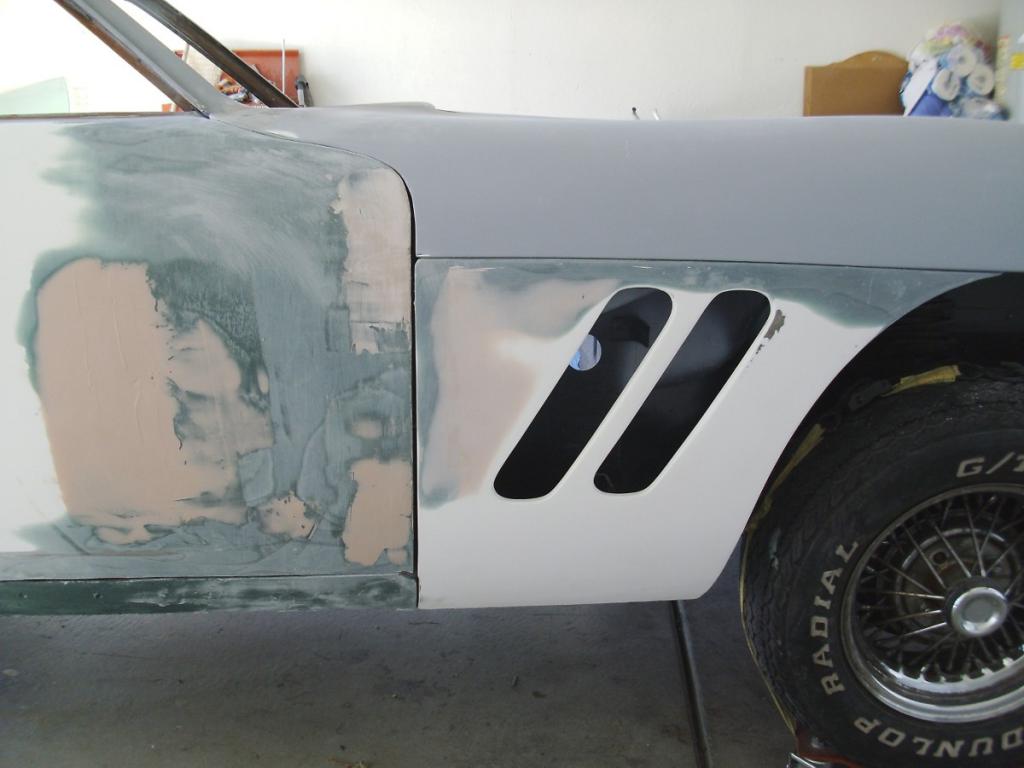
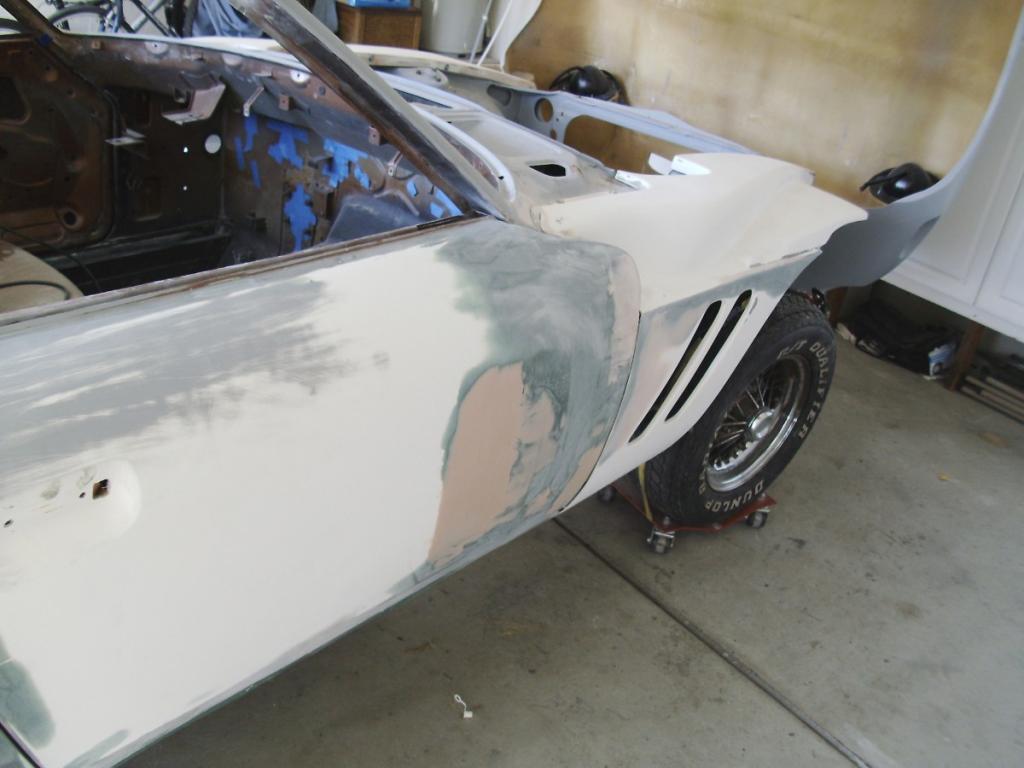
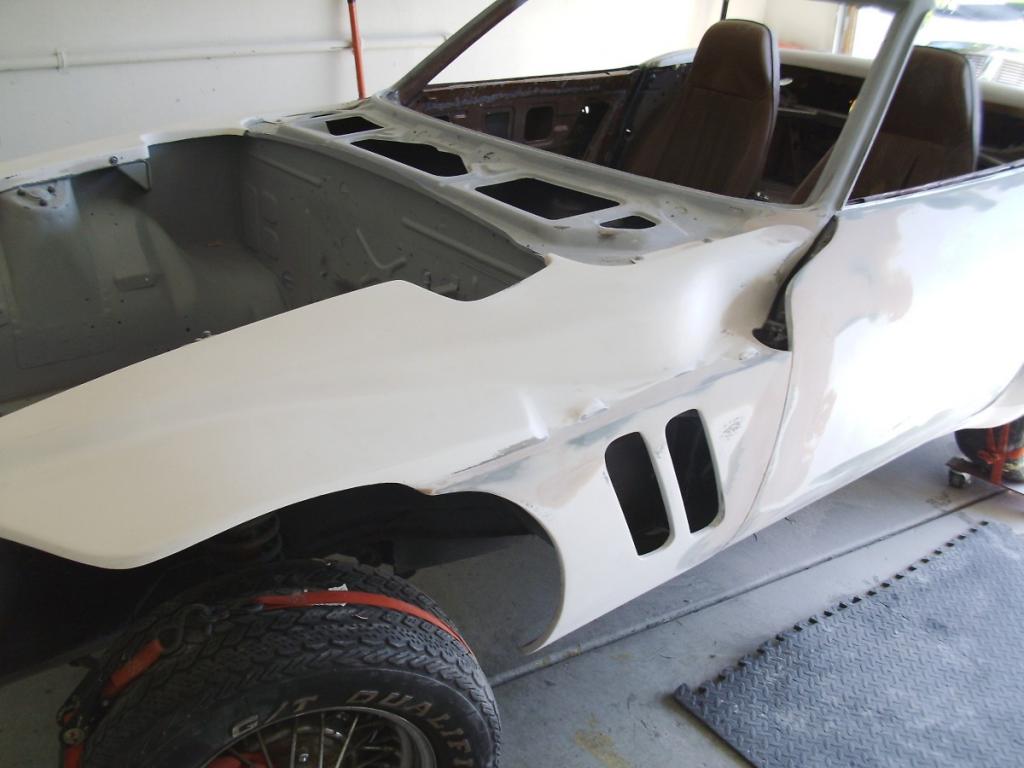
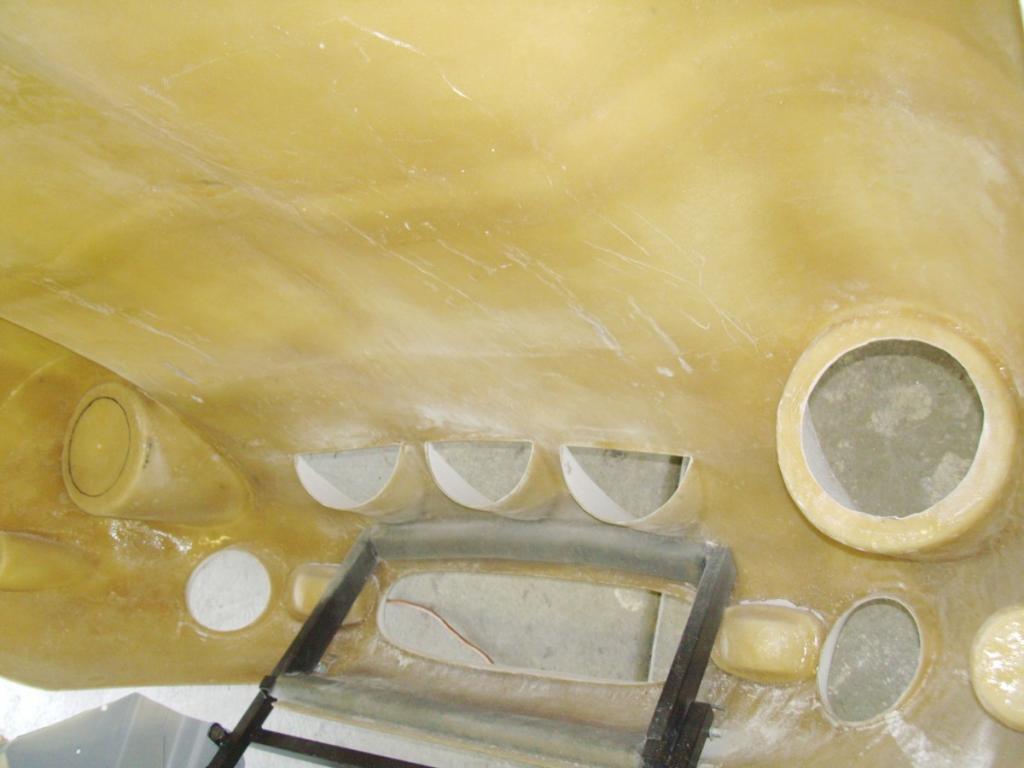
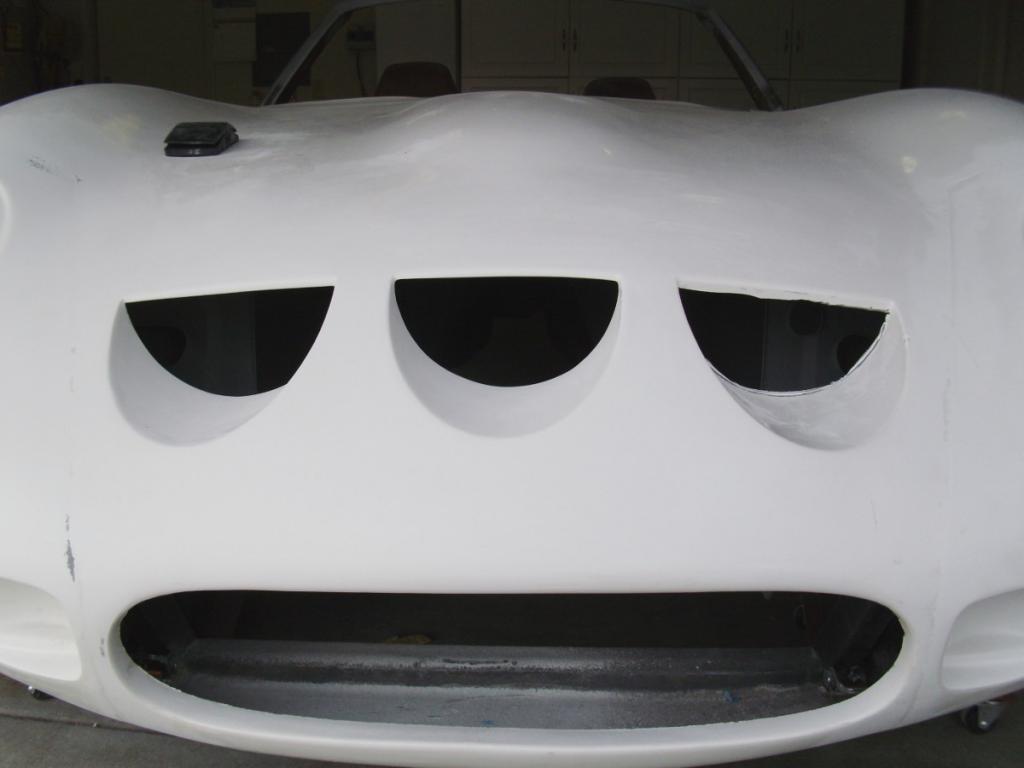
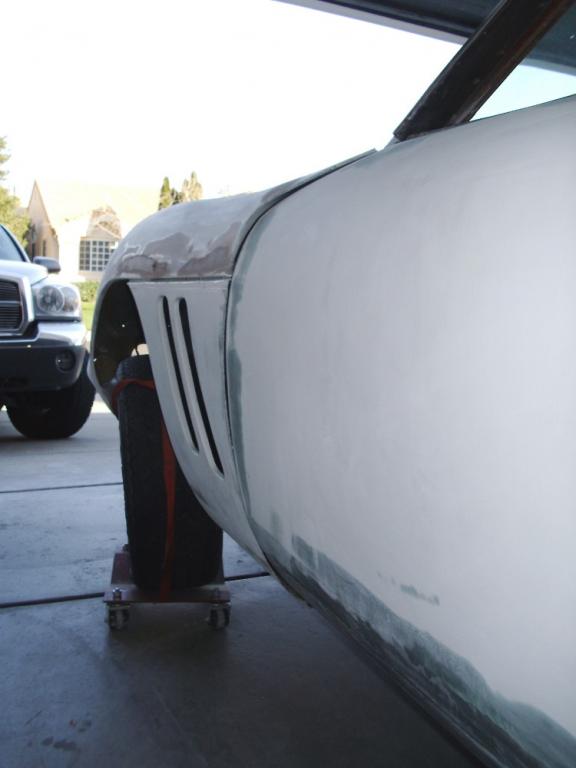
It was now time to take on my most ambitious modification yet... cutting and sculpting the rear wheel well vents. Many builders skip this mod, preferring to simply paint this area black to look like a vent opening. I think it's the most unique feature of this body style and never considered any option except functional vents. What that function is, is ambiguous to me. I guess it was to cool the rear brakes by allowing more air flow. Whatever the case they look COOL!!! After cutting the initial hole, I fabricated a cardboard template to form the extended inner wall. Using the template I cut a sheet metal version and attached it to the back of the fiberglass with resin and matting. I lined the inside with fiberglass cloth and built up thickness with more matting. To get level with the existing fiberglass, I spread a layer of the short strand fill, and sanded. A little light weight filler and more sanding. I fashioned a fender well extension from sheet metal to finish the look. The series of pics below chronicles this process.
-
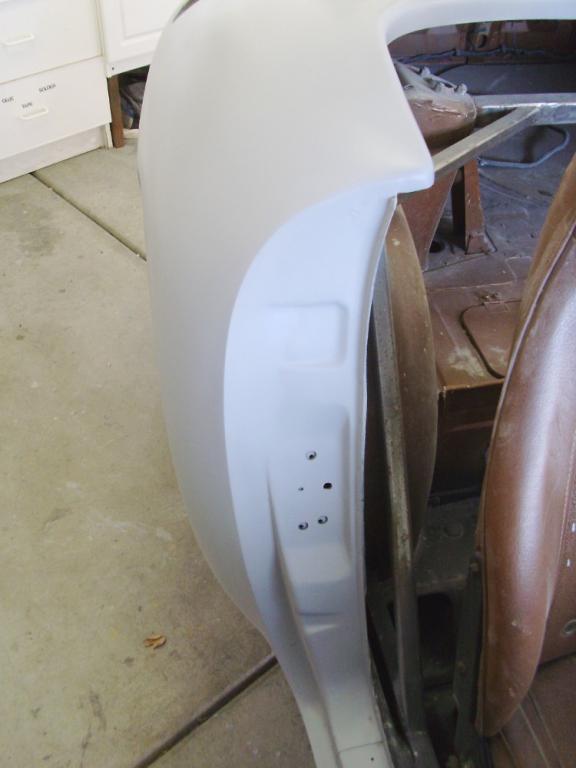
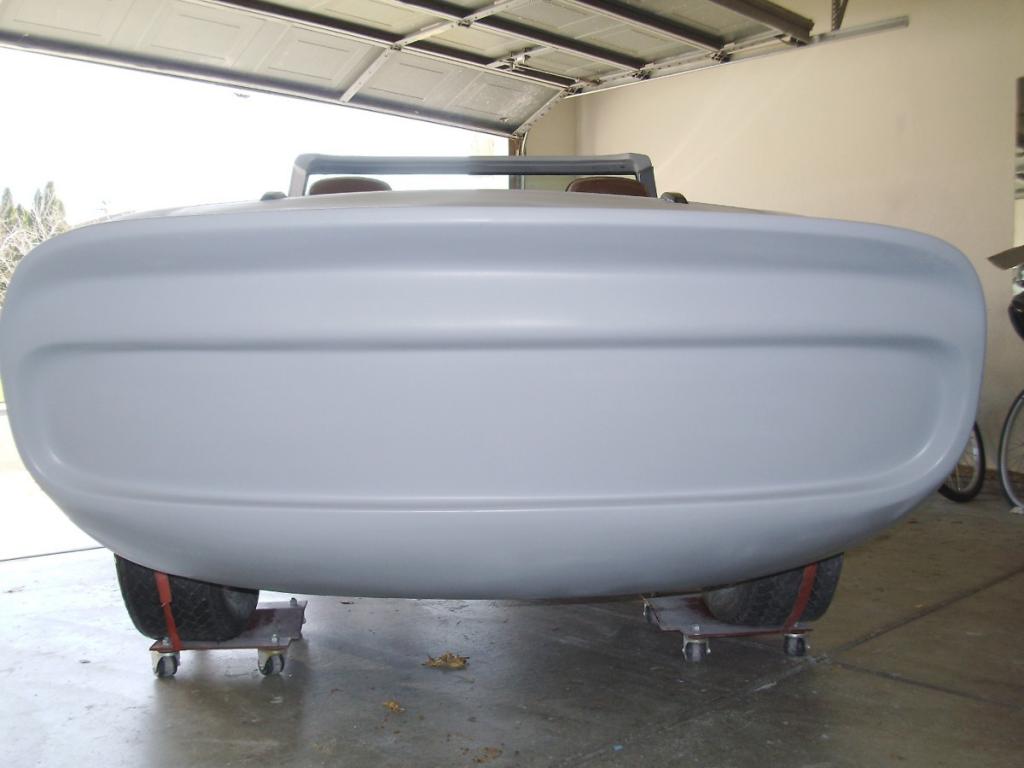
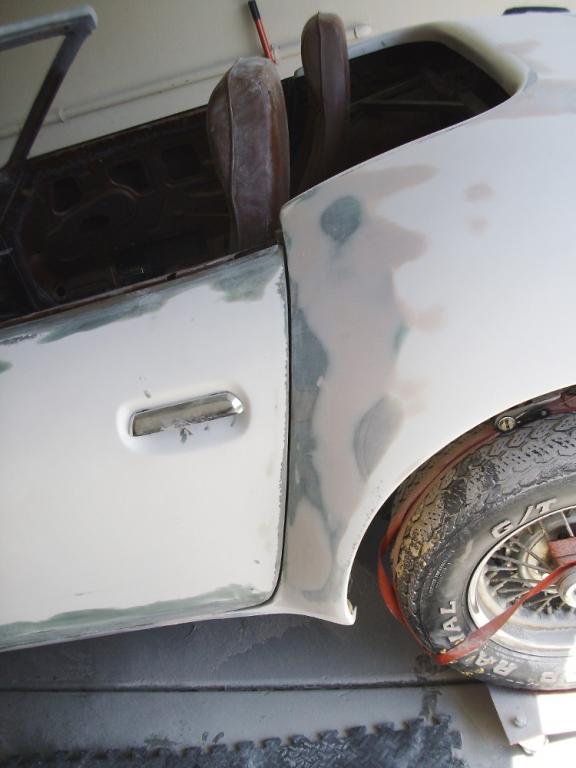
I was feeling so good about the results on my quarter panels, that I started to refine the gaps and blend the new fiberglass panels into the existing body. Starting at the front, I sanded the seams left by the molds, filled low areas with light weight body filler and cleaned up the edges of the panels. I worked my way around the car, feathering the bottom edge of the rear tub to the rocker panel and refining the shape of the tub to match the outer edge of the new door skins. I spread many thin layers of filler and spent many hours sanding.
-
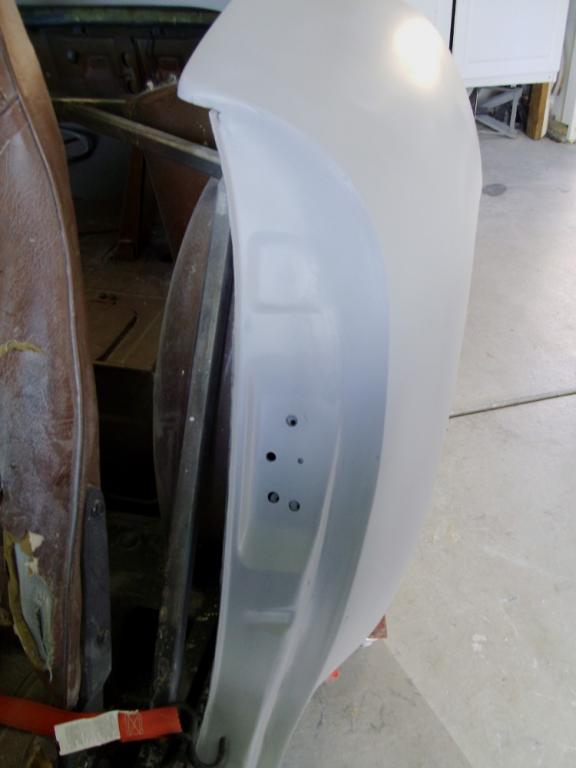
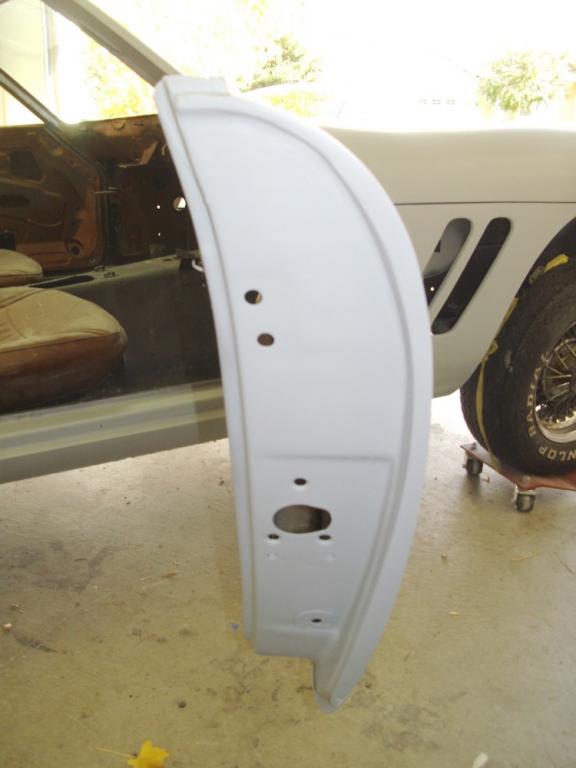
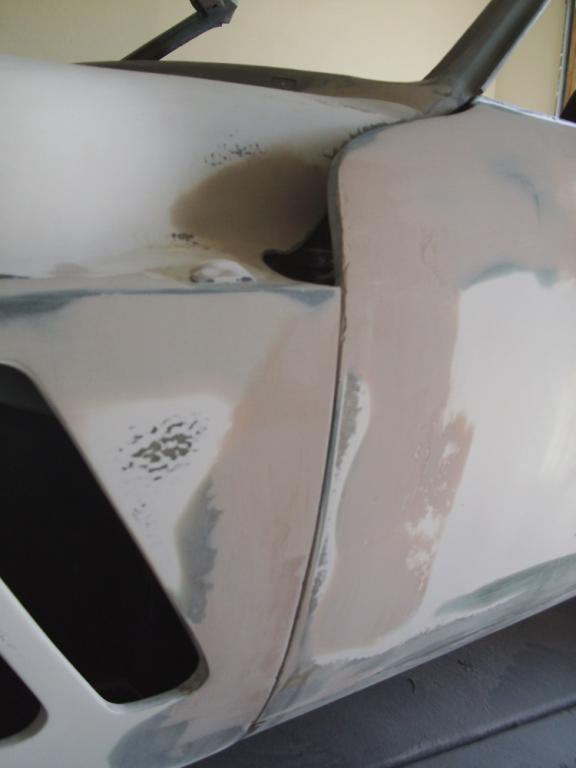
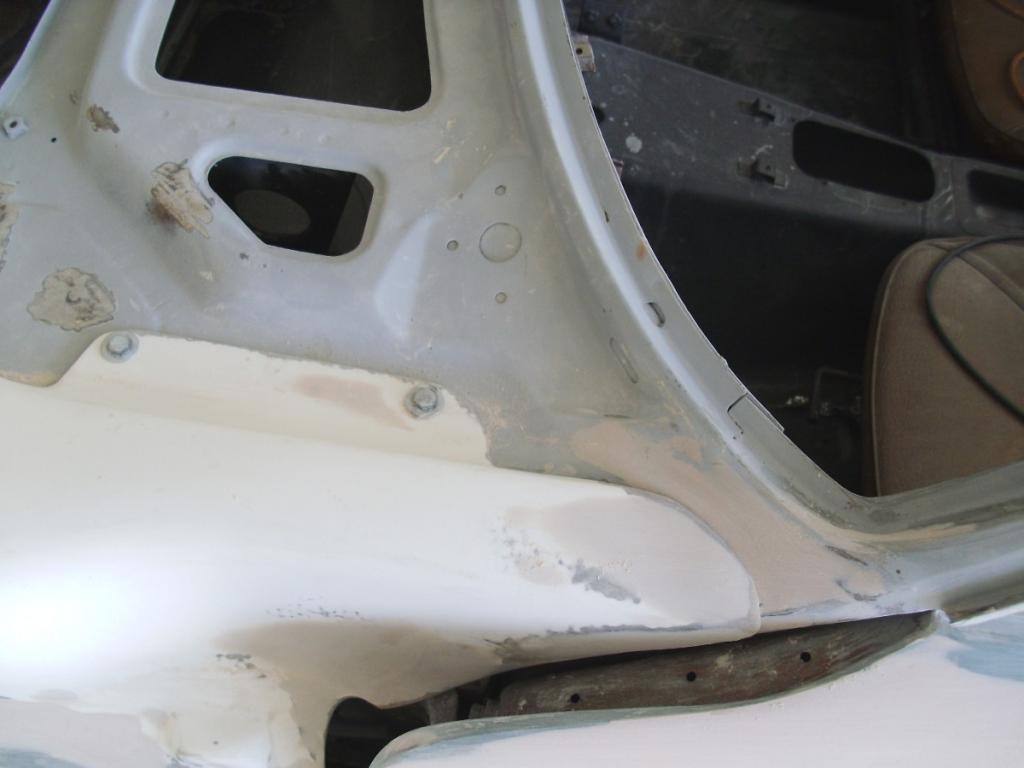
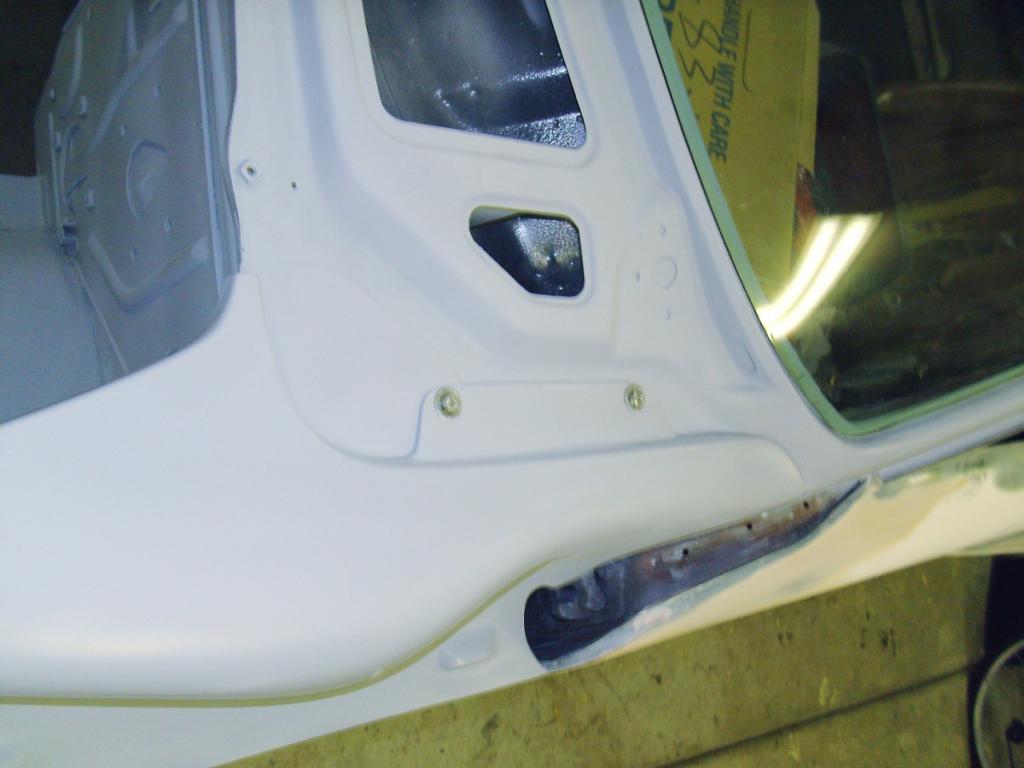
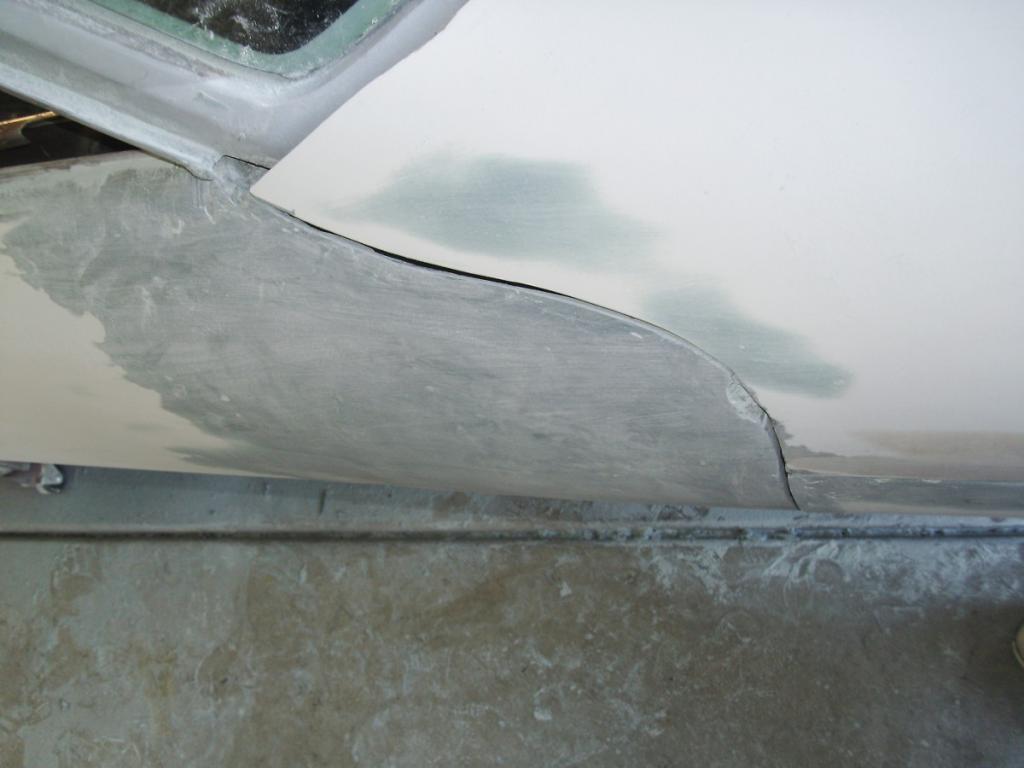
The upper portion of my quarter panels (near the windshield) didn't fit to my liking. They were too long, causing the entire piece to ride up off the sheet metal where it was supposed to bolt down. That piece also flared away from the body, keeping the rubber door seal from laying down flat. I also didn't like the triangular gap that the front edge of the door swings through when opened. It seemed awkward and exposed too much of the hinges below for my taste. After trimming the ends and sides of the upper section of the quarter panels, I laid down fiberglass matting to make a form fitting bottom and attached the panel with more resin, filling in the gaps with the short strand fiberglass filler. With more matting I created a web in the triangular door gap. After sanding and shaping, the piece now fits snug to the body and has a more eye pleasing curved door gap.
-
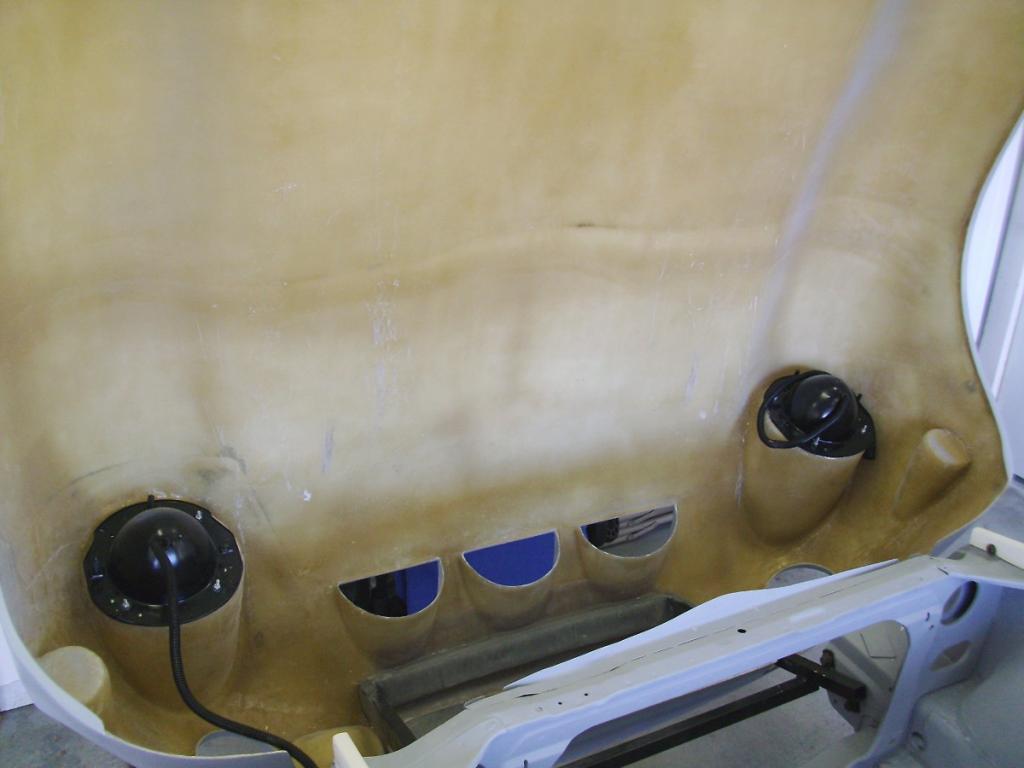
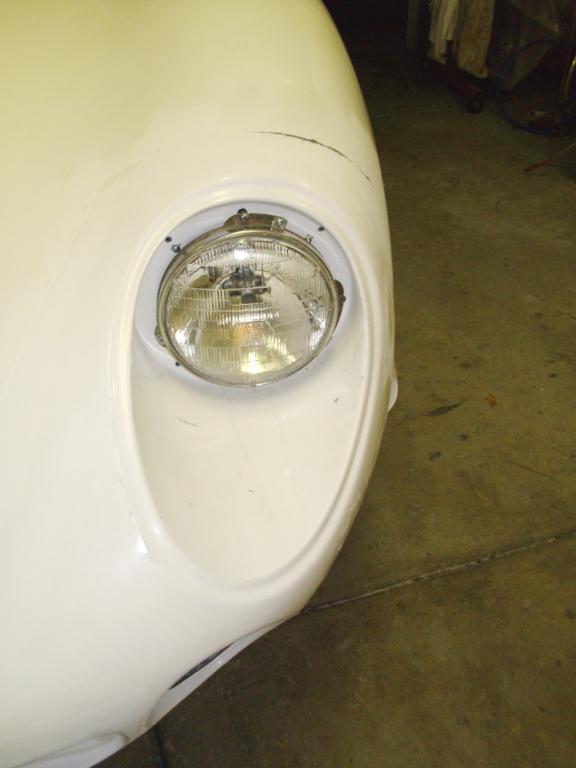
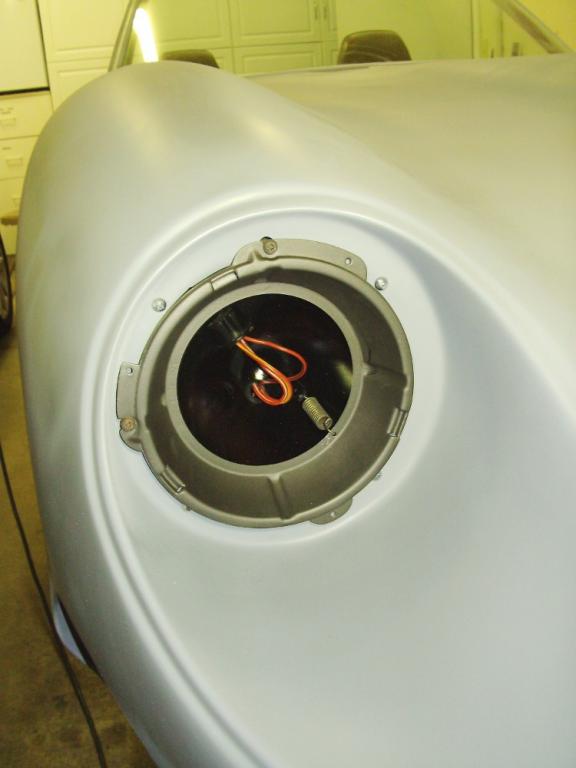
After fixing the door skin error, I turned my attention to the tilt bonnet. The bonnet must be trimmed to fit under the windshield. Once again I trimmed too much and had to recreate the proper curve with a little fiberglass work. I then cut the headlight holes and hood vents using a spiral saw. It makes quick and accurate cuts. I could then mount the original headlight buckets (cleaned and painted) from the Z. A couple chrome trim rings from a MGB finish off the lights nicely. The rings just rest on the lamps right now. If anyone knows how to make some clips to keep them in place, let me know.
-
I then test fit the door skins and front quarters. The door skins are attached with adhesive and the quarters bolt on using the same holes as the original Z fenders. I could then bolt on the tilt bonnet and check for fit. At this point I should have rough trimmed the bonnet to the curved door gap. If I had I would have noticed the door skin needed to be right where it was in order to match up with the bonnet. Instead I thought that the door skin was warped, pulling away from the sheet metal of the original door. So, when I attached the skin, I pulled it up tight using sheet metal screws to hold it down while the adhesive dried. When I remounted the quarter panels all seemed well. But when I lowered the bonnet I discovered my mistake. Many hours of glassing, sanding and cursing my stupidity later, every thing lined up.
-
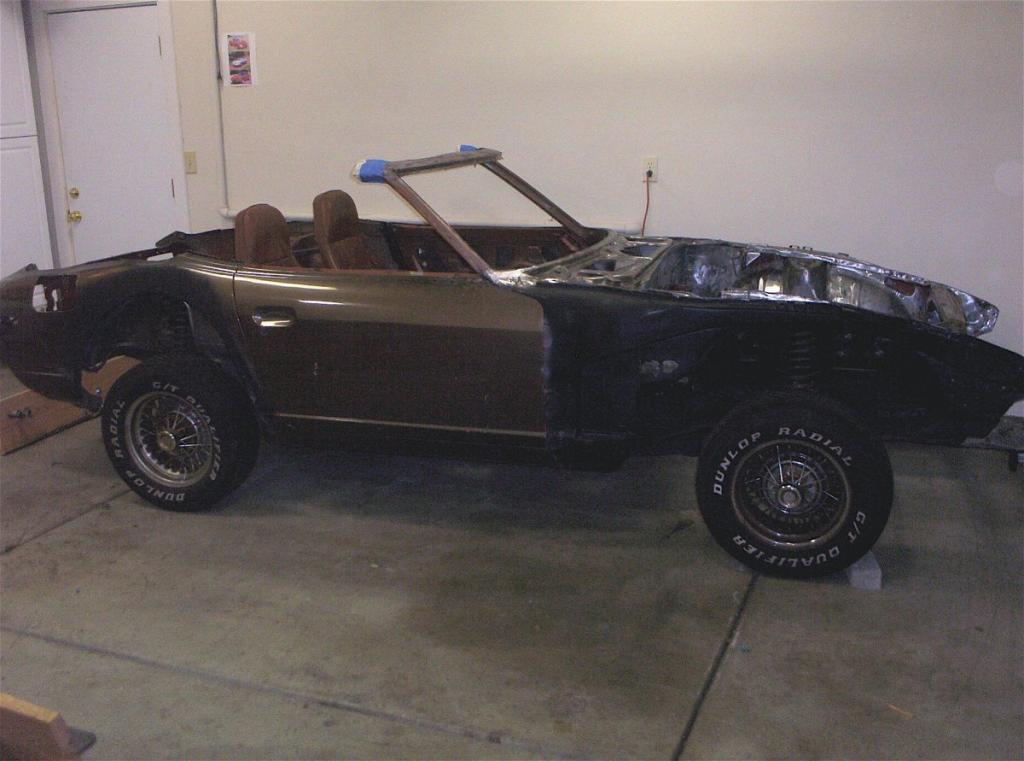
My VR body kit came as nine separate fiberglass pieces: 1 Rear Tub 1 Tilt Front End 2 Front Quarter Panels 2 Door skins 1 Trunk Lid 1 Windshield Cap 1 Le Mans gas Cap pocket I decided to start with the rear tub. I attached the tub with a combination of short strand fiberglass adhesive and expanding foam. The fiberglass is used to attach the tub to the door jams. The expanding foam fills the gap between the old Z sheet metal and the new fiberglass body making it impossible for the tub to shift.
-
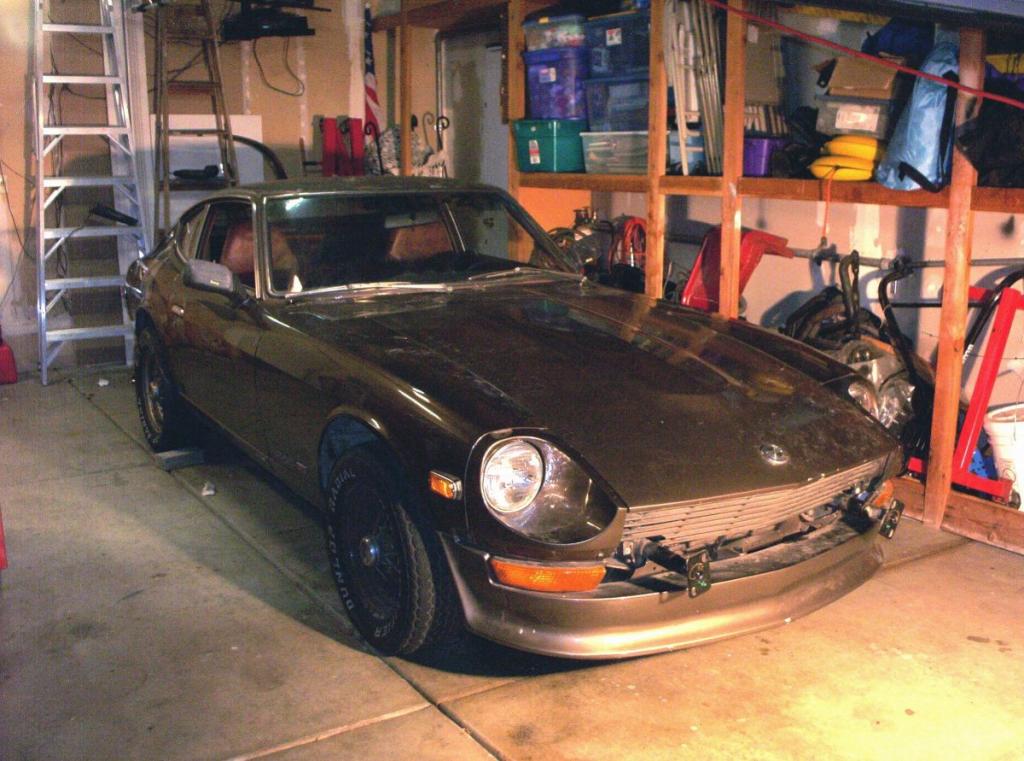
Let me start by saying I'm not a car guy by trade or a Ferrari devotee by any means. I was just looking for cool project car to putter around with. I had wanted a Cobra ever since seeing the movie 'Gumball Rally' when I was 18. But the needs of my young family, and the cost of a kit thwarted me until a couple years ago. I settled on the Velo Rossa kit from John Washington at Reaction Research because of the low initial cost. I have found John to be nothing but helpful since the day I first inquired about this project. I purchased the install manual three years ago, but didn't purchase my kit until April 2008. I purchased a non-running 260z donor for $350, and spent a year getting it ready for the kit. I sold off all the parts I don't need. I actually made a profit of $25. If I hadn't had to replace the rusted floorpans ($270) I would have started way ahead. I picked up my body kit from John at the Knotts Berry Farm Kit Car show last year. No crating cost, no delivery fee, just gas for my pickup truck, from Northern Cal and back. $4500 total. I've spent the last year fitting panels, cutting and sanding... fixing my mistakes... and then redoing it the correct way. My plan is to do the basic bodywork myself and get the car into primer. Then install all the exterior lights. Then I'll move on to drive train (SB Chevy using JTR conversion), suspension and interior. Once it's a driver, I'll strip it down and send it out for paint. To date I have around $5700 invested in the project. I'm estimating at least another $5000 before wheels and paint, but that will be spread out over the next couple years at my current rate, so it won't hurt too much. Here are a couple pics of the donor 260Z.
-

Wheel Show! Post your pics of you wheels
Fauxre replied to k3werra's topic in Brakes, Wheels, Suspension and Chassis
What are the specs? -
Hi Guys. I too have been following this thread for the last year or so. Lots of good stuff here. I see the topic of price has come up so I thought I'd throw in my two cents' for what it's worth. Let me start by saying I'm not a car guy by trade or a Ferrari devotee by any means. I was just looking for cool project car to putter around with. I had wanted a Cobra ever since seeing the movie 'Gumball Rally' when I was 18. But the needs of my young family, and the cost of a kit thwarted me until a couple years ago. I settled on the Velo Rossa kit from John Washington at Reaction Research because of the low initial cost. I have found John to be nothing but helpful since the day I first inquired about this project. I purchased the install manual three years ago, but didn't purchase my kit until April 2008. I purchased a non-running 260z donor for $350, and spent a year getting it ready for the kit. I sold off all the parts I don't need. I actually made a profit of $25. If I hadn't had to replace the rusted floorpans ($270) I would have started way ahead. I picked up my body kit from John at the Knotts show last year. No crating cost, no delivery fee, just gas for my pickup truck, from Northern Cal and back. $4500 total. I've spent the last year fitting panels, cutting and sanding... fixing my mistakes... and then redoing it the correct way. My plan is to do the basic bodywork myself and get the car into primer. Then install all the exterior lights. Then I'll move on to drive train (SB Chevy using JTR conversion), suspension and interior. Once it's a driver, I'll strip it down and send it out for paint. To date I have around $5700 invested in the project. I'm estimating at least another $5000 before wheels and paint, but that will be spread out over the next couple years at my current rate, so it won't hurt too much. Well, that's my story and I'm sticking to it!
-
Hey Tensorworld This one just showed up on e-bay. http://cgi.ebay.com/ebaymotors/ws/eBayISAPI.dll?ViewItem&item=370186630753&ssPageName=ADME:B:SS:MOTORS:1123
-
Classic Cars by Renucci makes Cal Spyder kits in Phoenix Az. It isn't based on a Z, so here aren't any threads specifically for the Cal Spyder here. http://www.calspyderii.com/Welcome.html
-
Anyone looking for a Velo Rossa body kit? This ones going for half price on Craigslist. http://portland.craigslist.org/clk/pts/1051875250.html