Gmagno
-
Posts
71 -
Joined
-
Last visited
-
Days Won
4
Content Type
Profiles
Forums
Blogs
Events
Gallery
Downloads
Store
Everything posted by Gmagno
-

BC Racing DR Series Coilover Opinions???
Gmagno replied to Gmagno's topic in Brakes, Wheels, Suspension and Chassis
DR Series Low Option. Build thread link. -
BC Racing DR Series Coilover Opinions???
Gmagno replied to Gmagno's topic in Brakes, Wheels, Suspension and Chassis
Car is still in the mock up stage, slow going. I read enough to choose these. Pull the trigger and don't look back. -
Z-Envy Race Car - Champ Car Series
Gmagno replied to Gmagno's topic in S30 Series - 240z, 260z, 280z
Moving along on the suspension and engine mock up. Slow going.......
-
1970 240Z Race Car Front Suspension Issue
Gmagno replied to Gmagno's topic in Brakes, Wheels, Suspension and Chassis
From Edan at Silvermine. I will flip them whi week and post the outcome. "Looking at the pic, I think you need to flip the LCA. the flat side should be facing up. But I don't know why the sway bar is so narrow. weird." -
1970 240Z Race Car Front Suspension Issue
Gmagno replied to Gmagno's topic in Brakes, Wheels, Suspension and Chassis
Thanks @silverado22c, I will post once I get it and attempt the changes. Thanks to everyone for the replies. -
1970 240Z Race Car Front Suspension Issue
Gmagno replied to Gmagno's topic in Brakes, Wheels, Suspension and Chassis
Is this what you are suggesting? https://www.amazon.com/dp/B075FM9GMH/ref=cm_sw_em_r_mt_dp_U_MfBtDbMR9QH39 Sometimes the obvious is overlooked. Thanks for this, it jump started my brain cells again. -
1970 240Z Race Car Front Suspension Issue
Gmagno replied to Gmagno's topic in Brakes, Wheels, Suspension and Chassis
Wondering if after I stretch the sway bar to fit if I can still get more stretch by adjusting the LCA the way it's currently mounted? -
1970 240Z Race Car Front Suspension Issue
Gmagno replied to Gmagno's topic in Brakes, Wheels, Suspension and Chassis
Thanks for the diagram, thought about this. -
1970 240Z Race Car Front Suspension Issue
Gmagno replied to Gmagno's topic in Brakes, Wheels, Suspension and Chassis
Nothing is original and everything modded from 1970. Some things replaced the same due to deterioration. We kept the same specs on width. -
1970 240Z Race Car Front Suspension Issue
Gmagno replied to Gmagno's topic in Brakes, Wheels, Suspension and Chassis
Found out the LCA's are from Silvermine. Checking with Edan now. -
1970 240Z Race Car Front Suspension Issue
Gmagno replied to Gmagno's topic in Brakes, Wheels, Suspension and Chassis
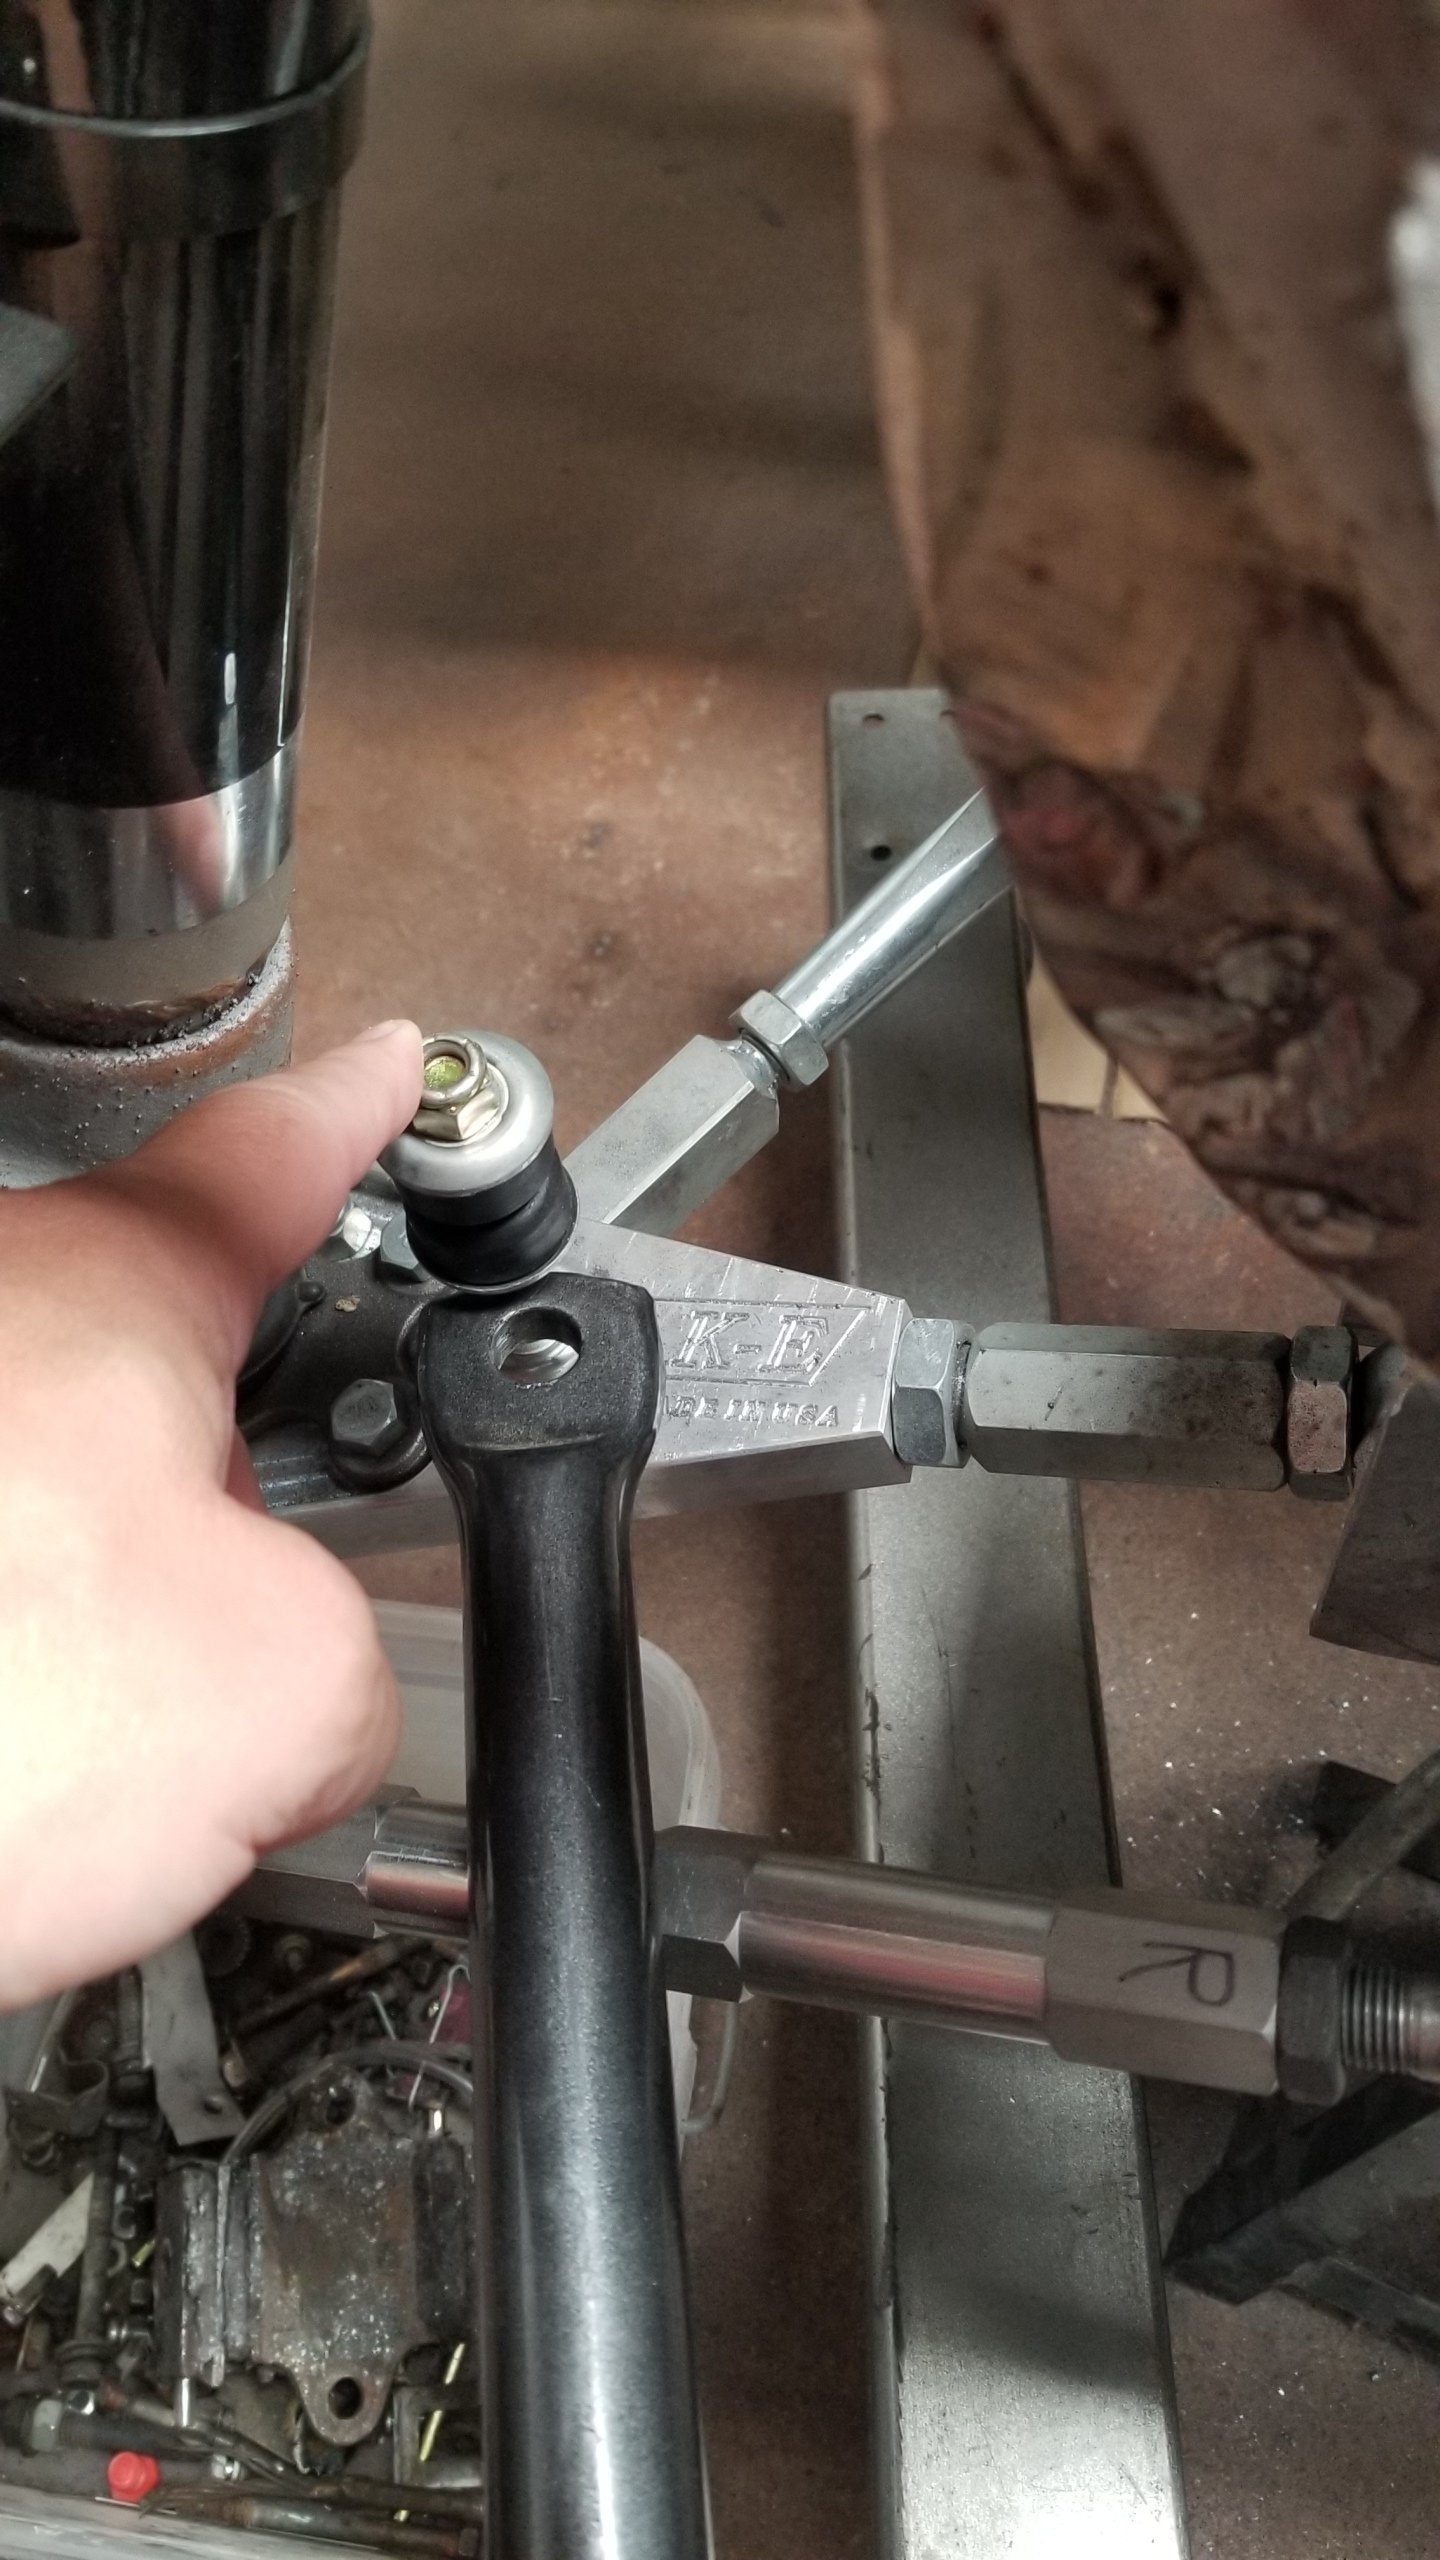
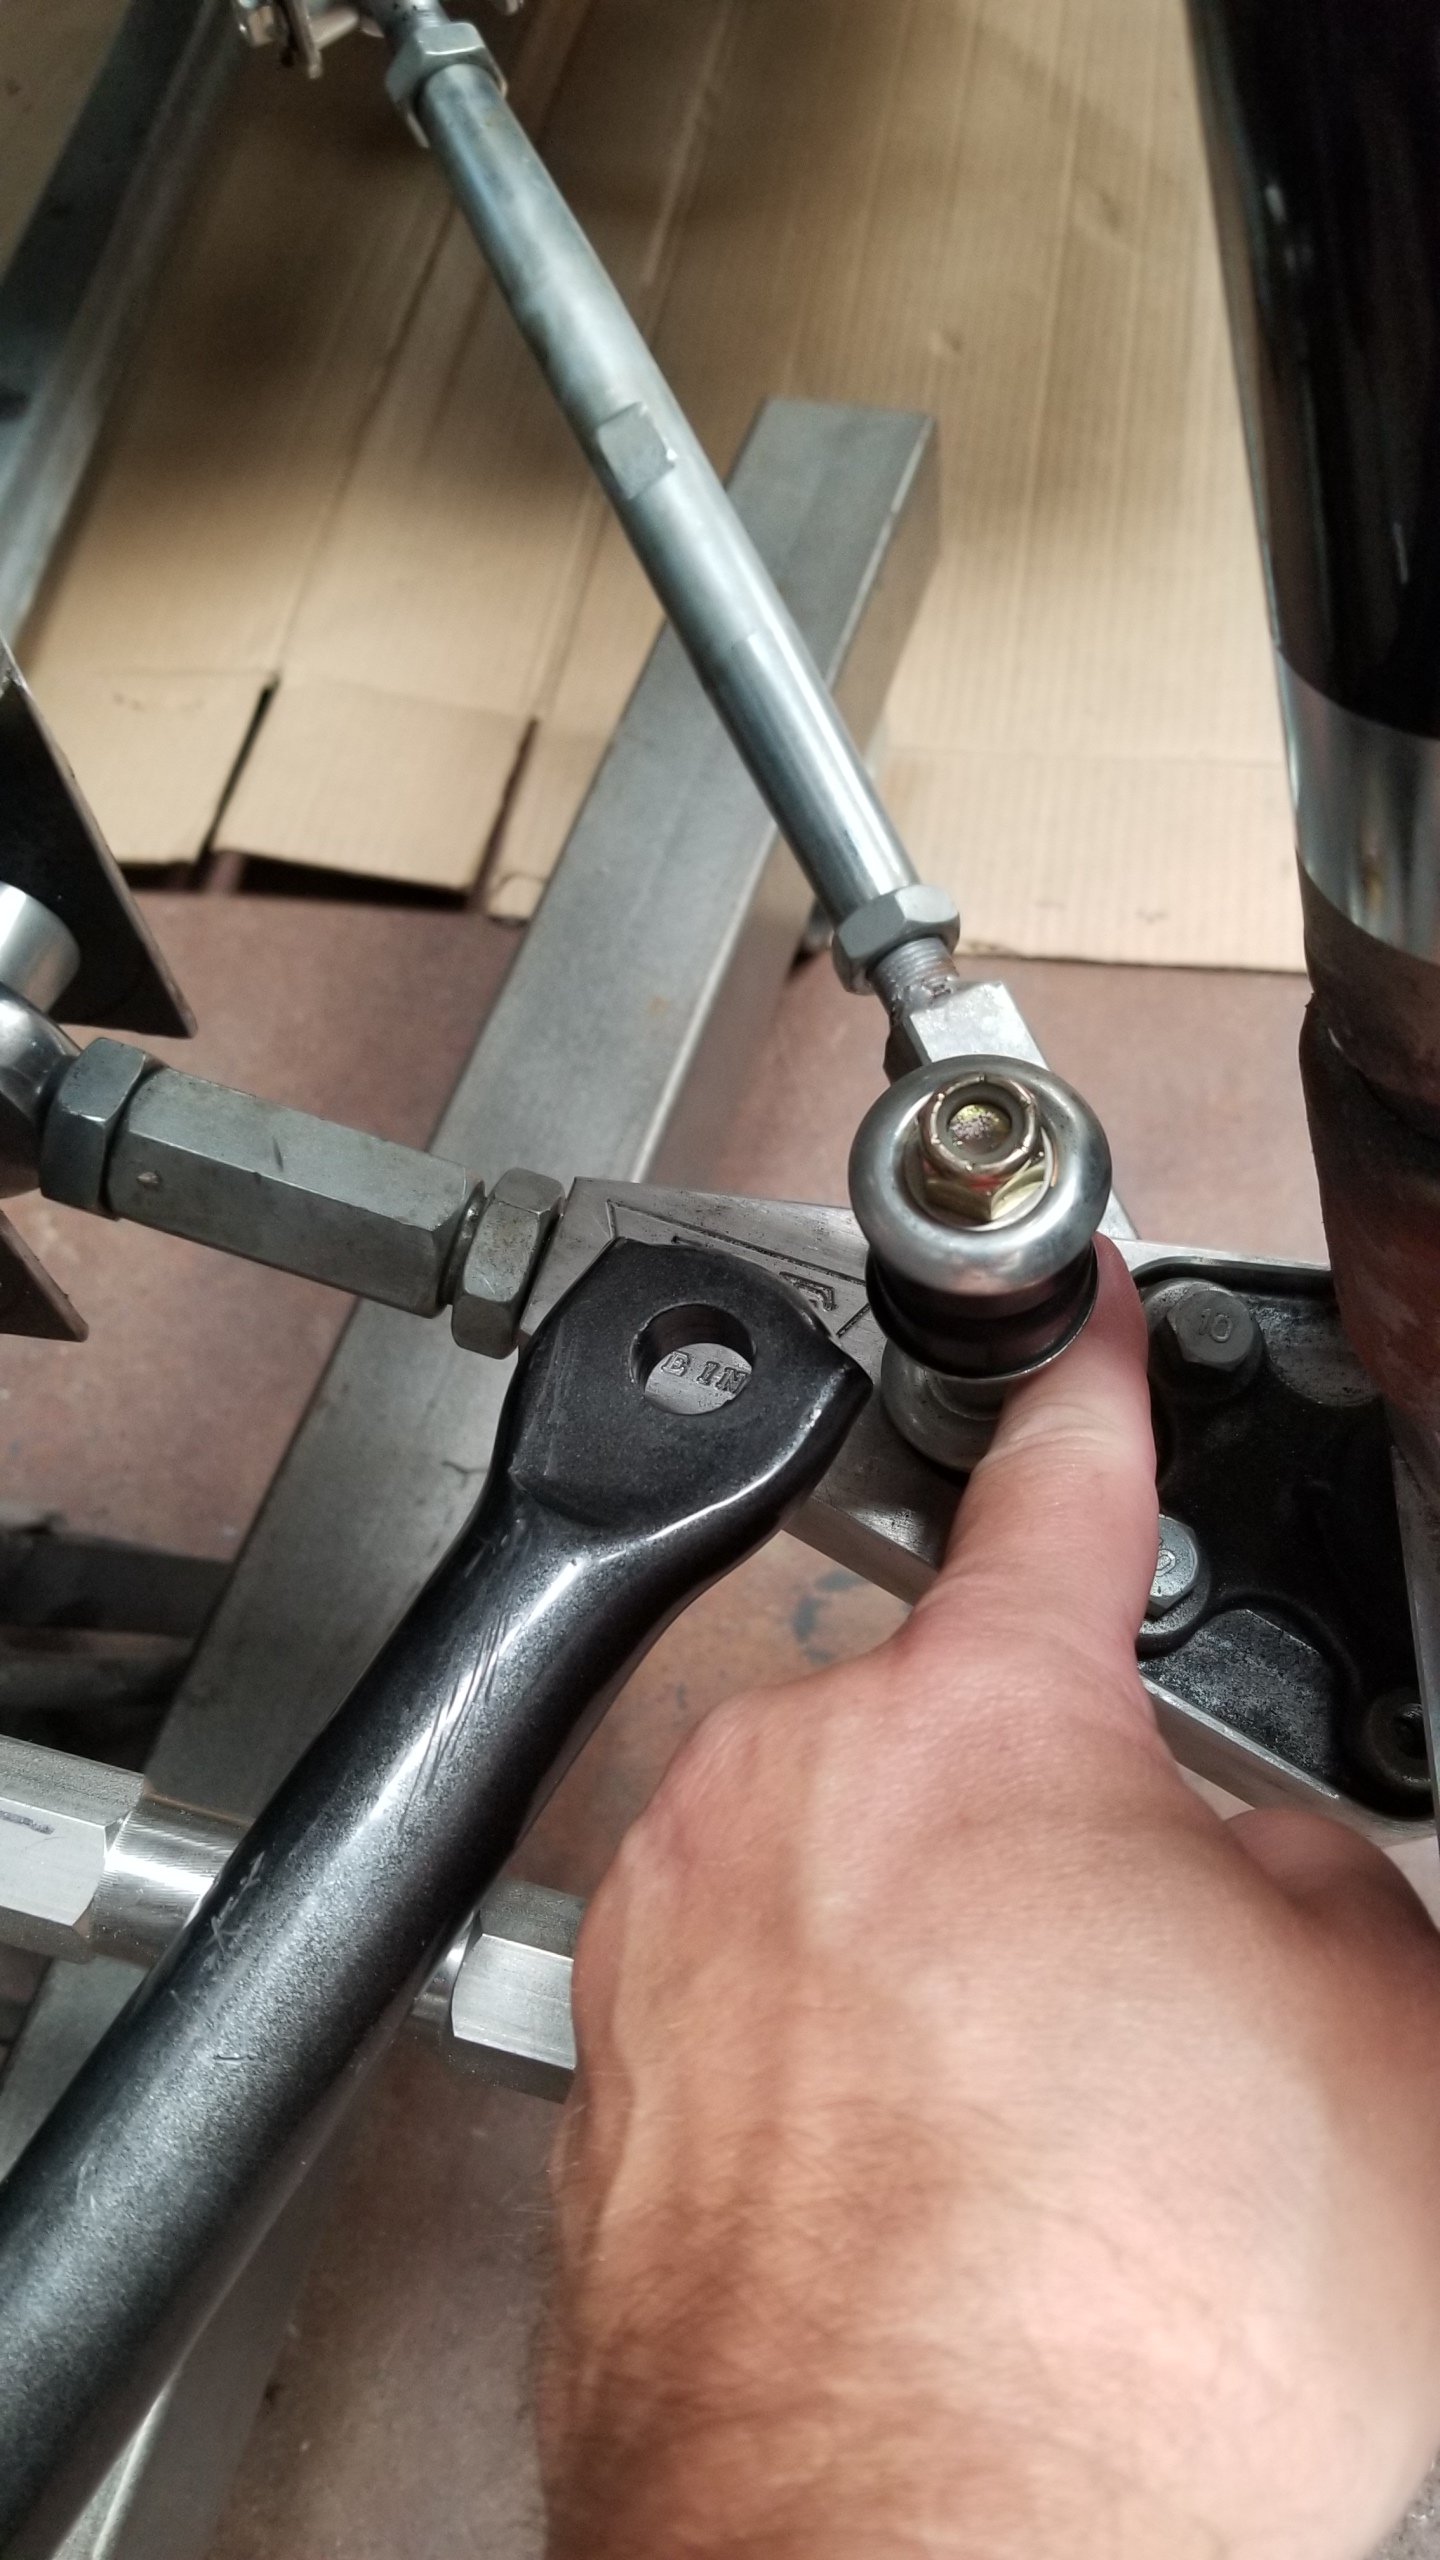
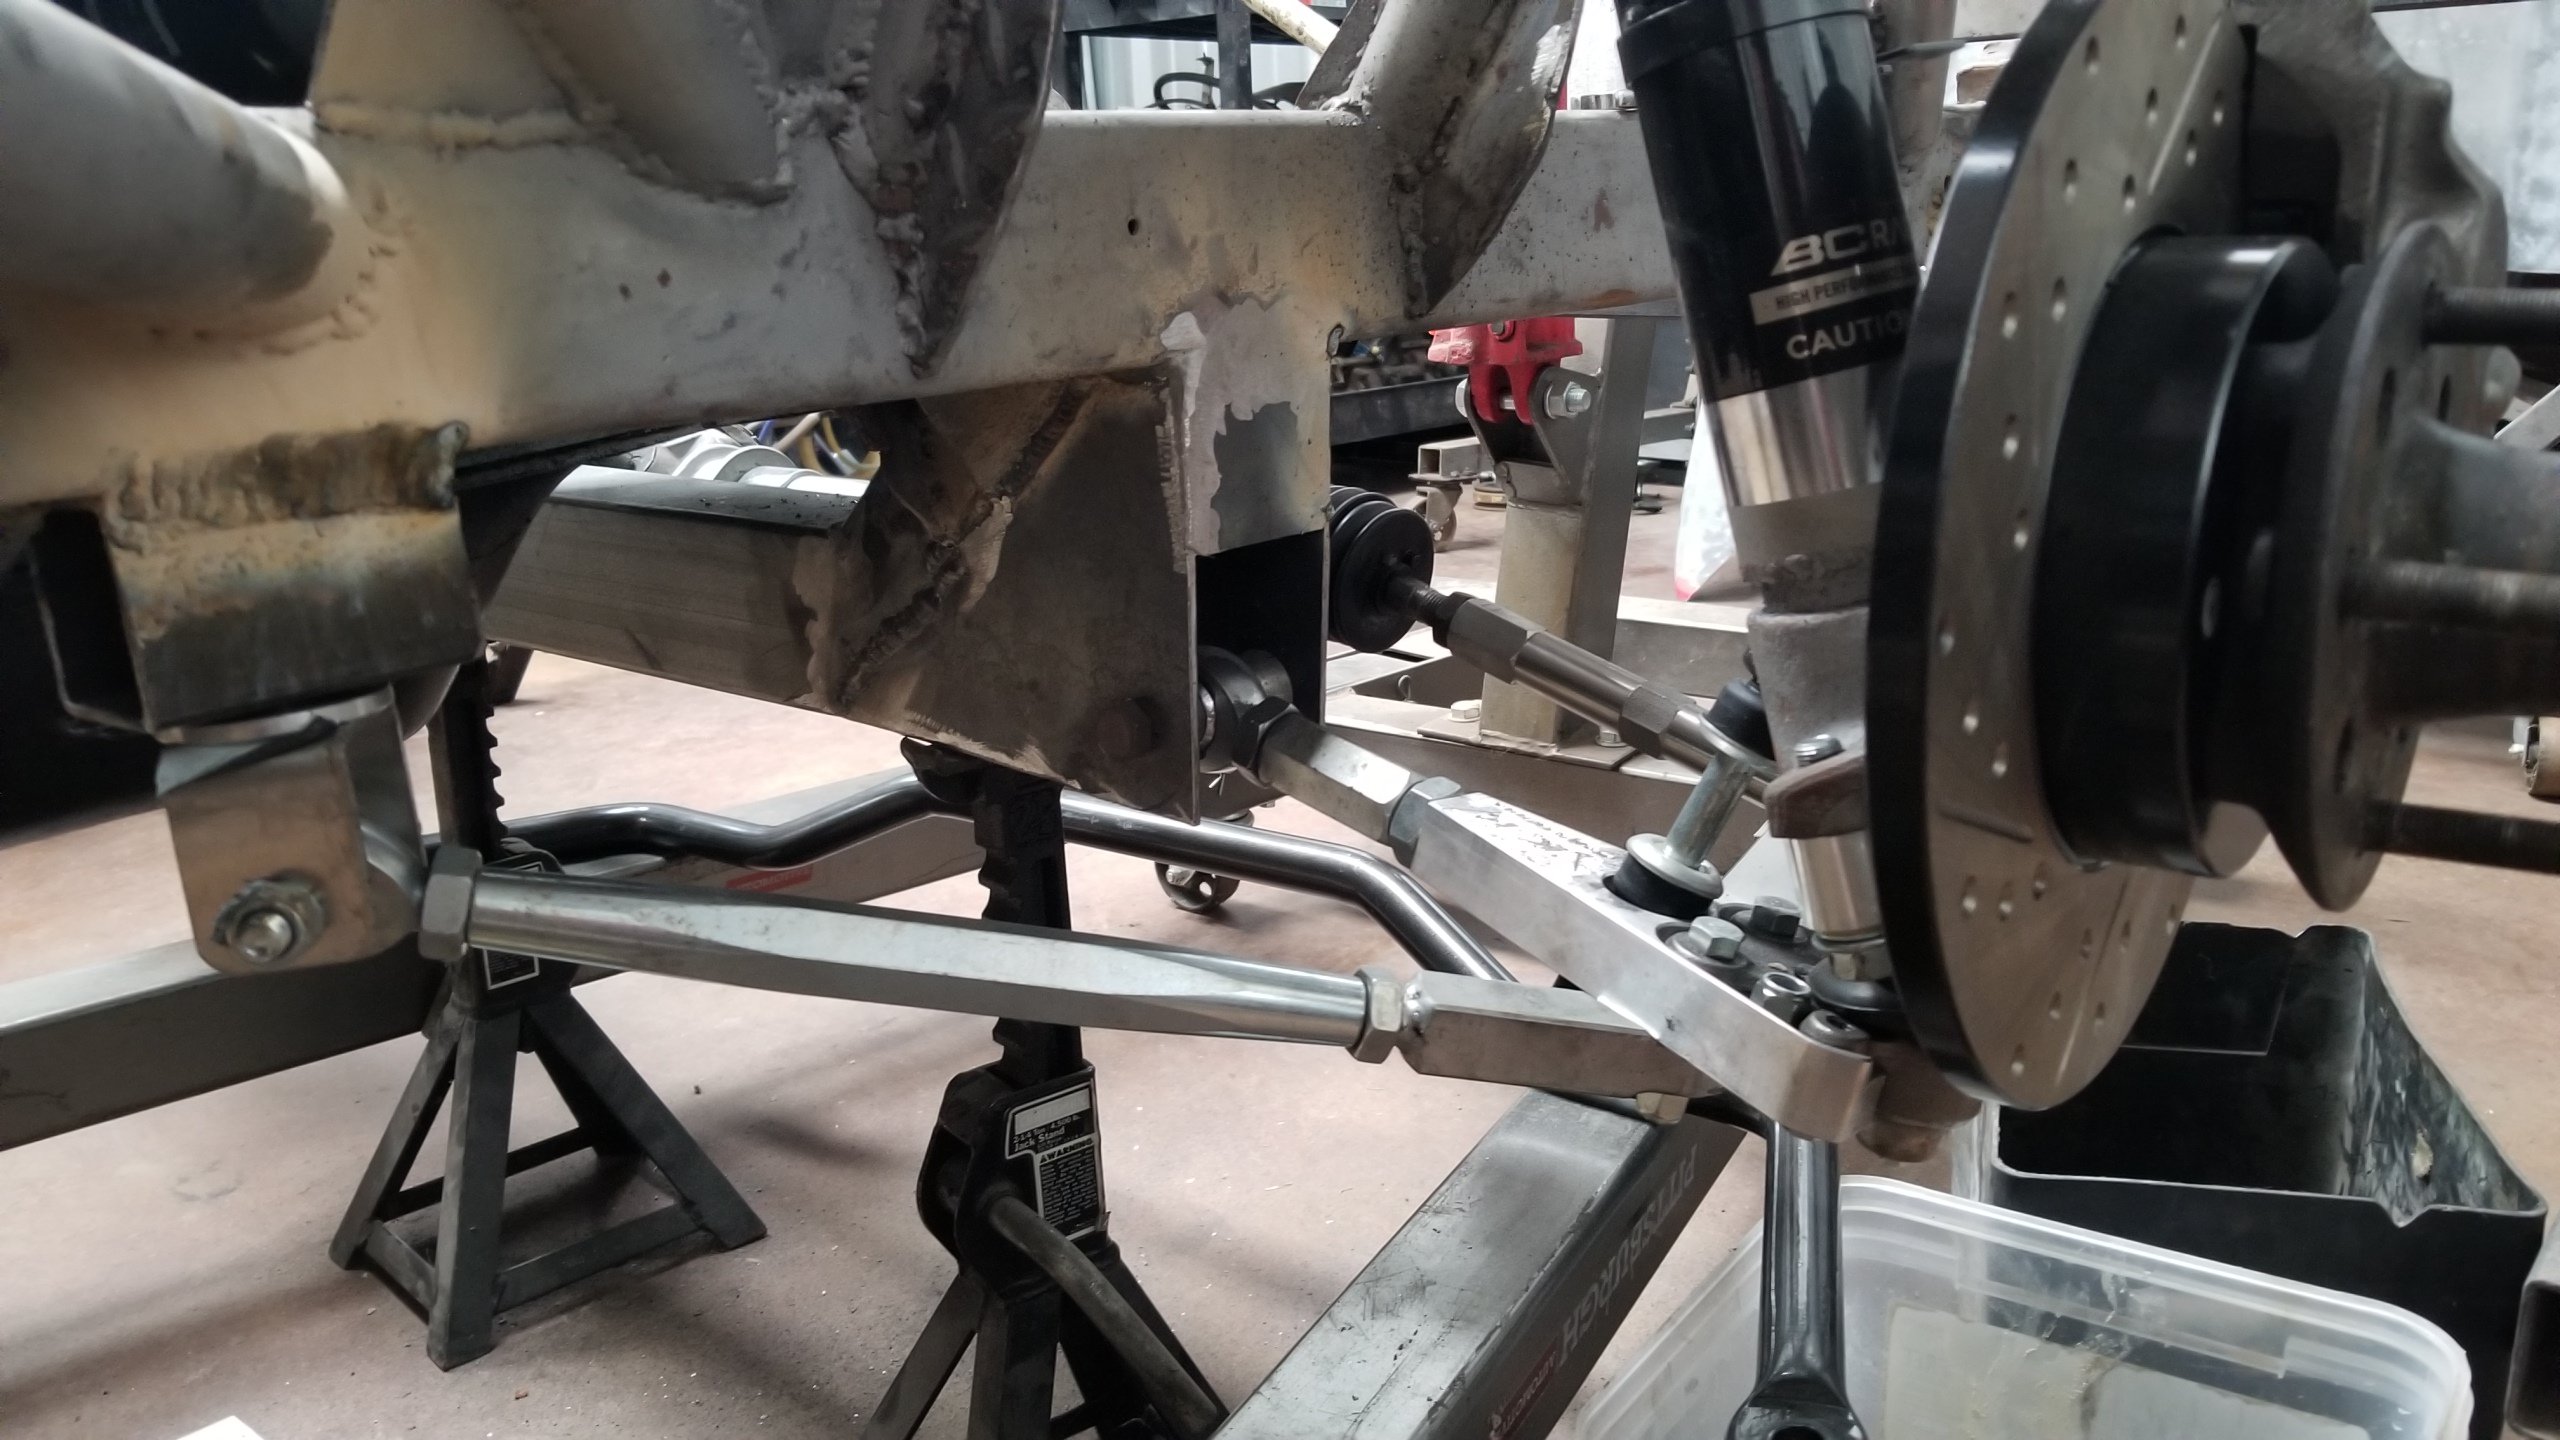
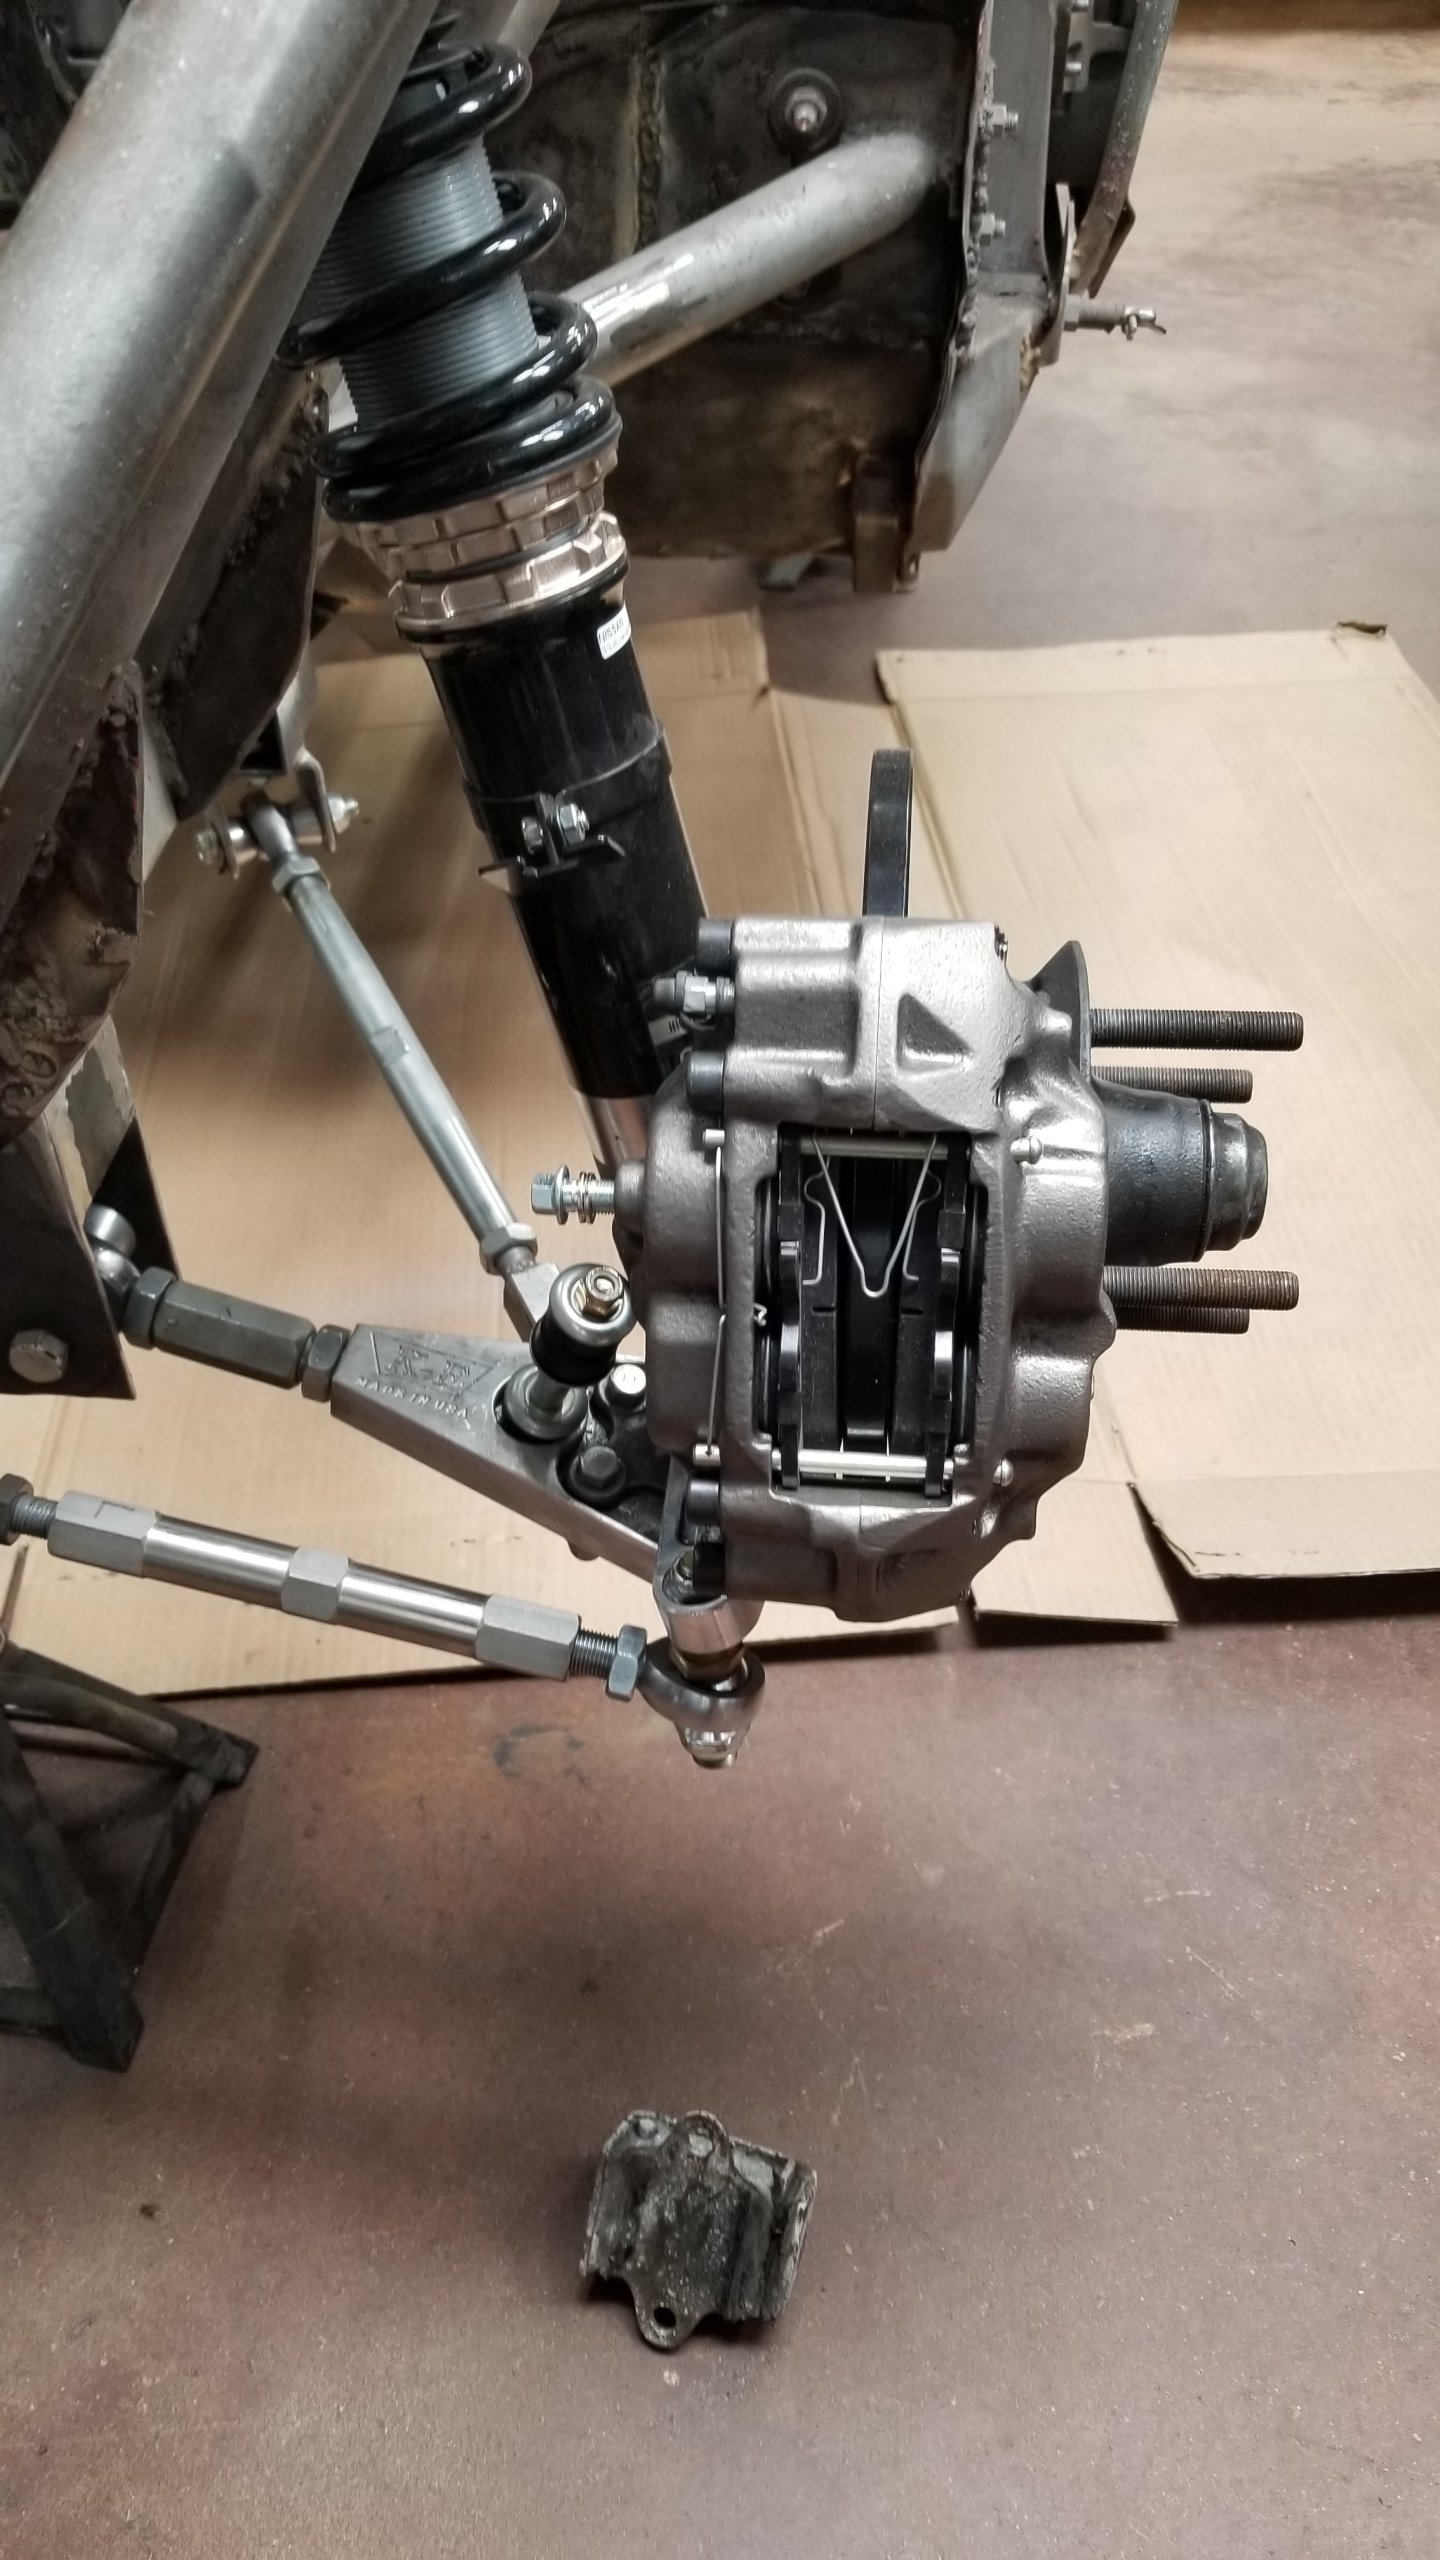
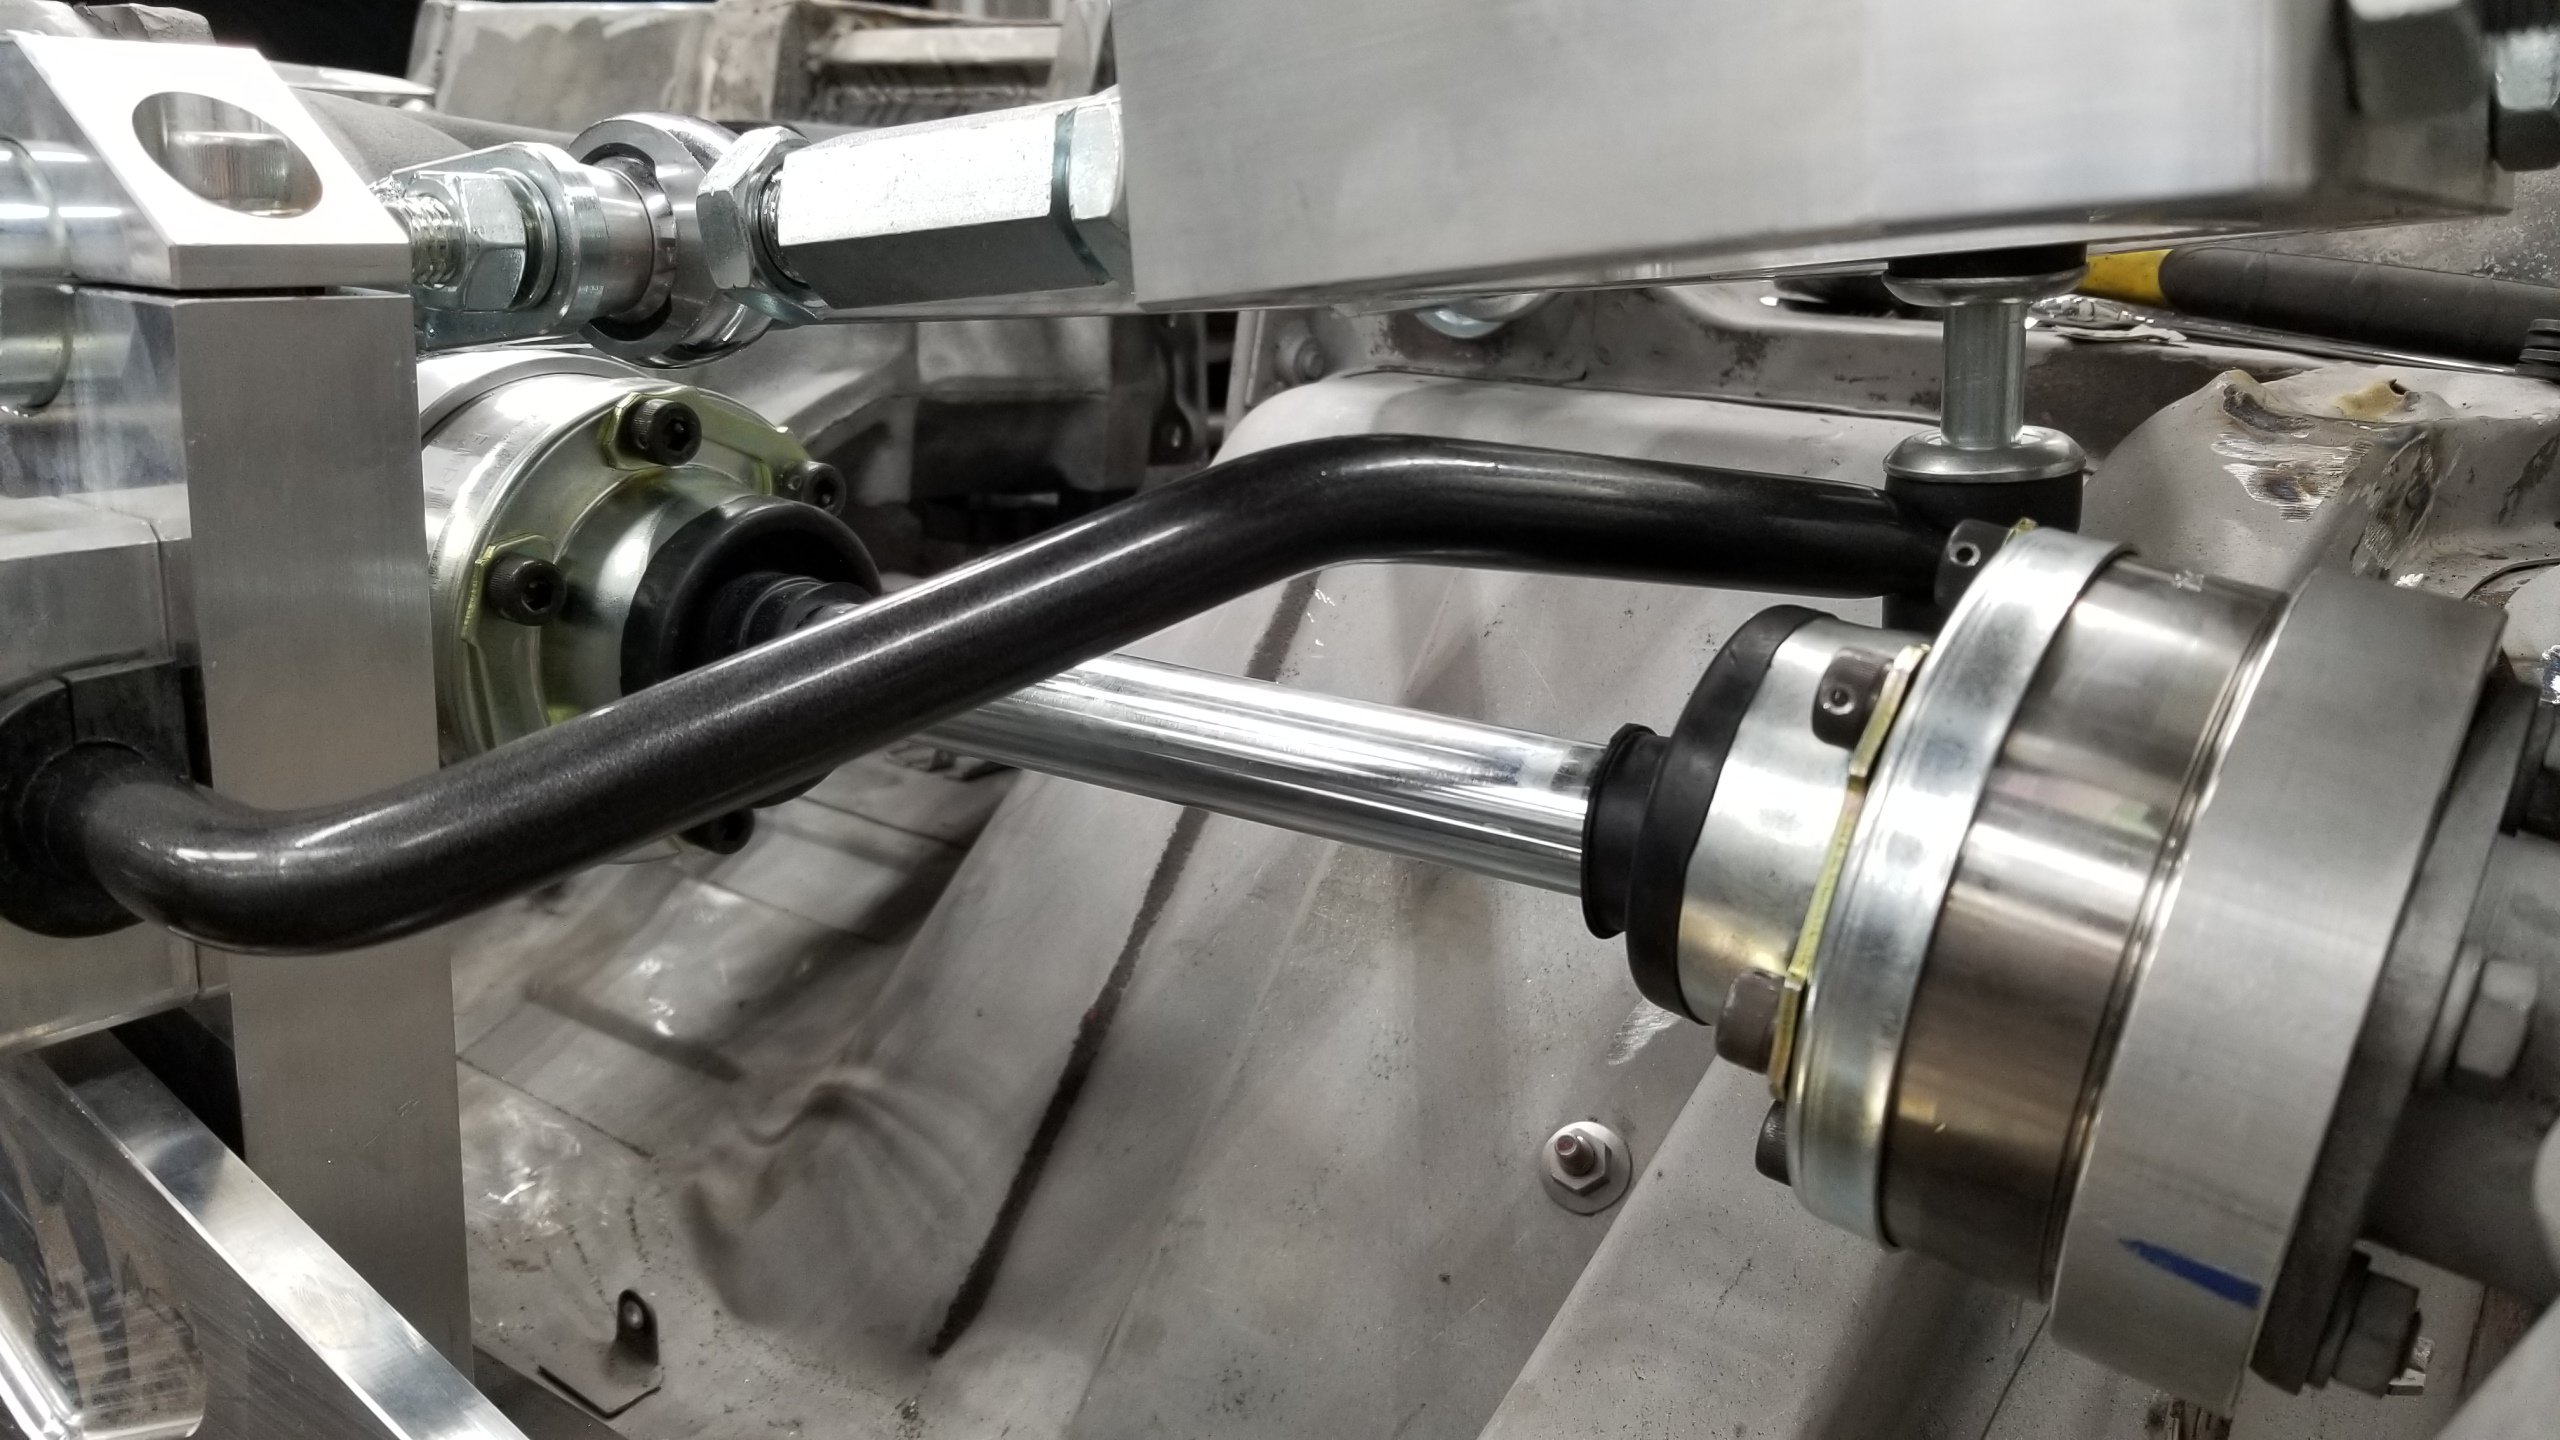
I appreciate all the replies and in hindsight should have posted these pics earlier. Let me know your thoughts. Biggest question again is, can I adjust the lower control arm out on each side if the sway bar is already stretched to the max width? Maybe the end links @silverado22c mentioned is my total solution?
-
1970 240Z Race Car Front Suspension Issue
Gmagno replied to Gmagno's topic in Brakes, Wheels, Suspension and Chassis
I am, but haven't yet. just don't know how the lower control arm can be adjusted out any with sway bar installed, being as tight as it will be once I get it to fit. Didn't call Dave yet. Looking for feedback and planned on sending him a link to this thread. -
1970 240Z Race Car Front Suspension Issue
Gmagno replied to Gmagno's topic in Brakes, Wheels, Suspension and Chassis
I will upload more pics tomorrow. Sway Bar info here. https://www.summitracing.com/parts/stq-50100/applications -
1970 240Z Race Car Front Suspension Issue
Gmagno replied to Gmagno's topic in Brakes, Wheels, Suspension and Chassis
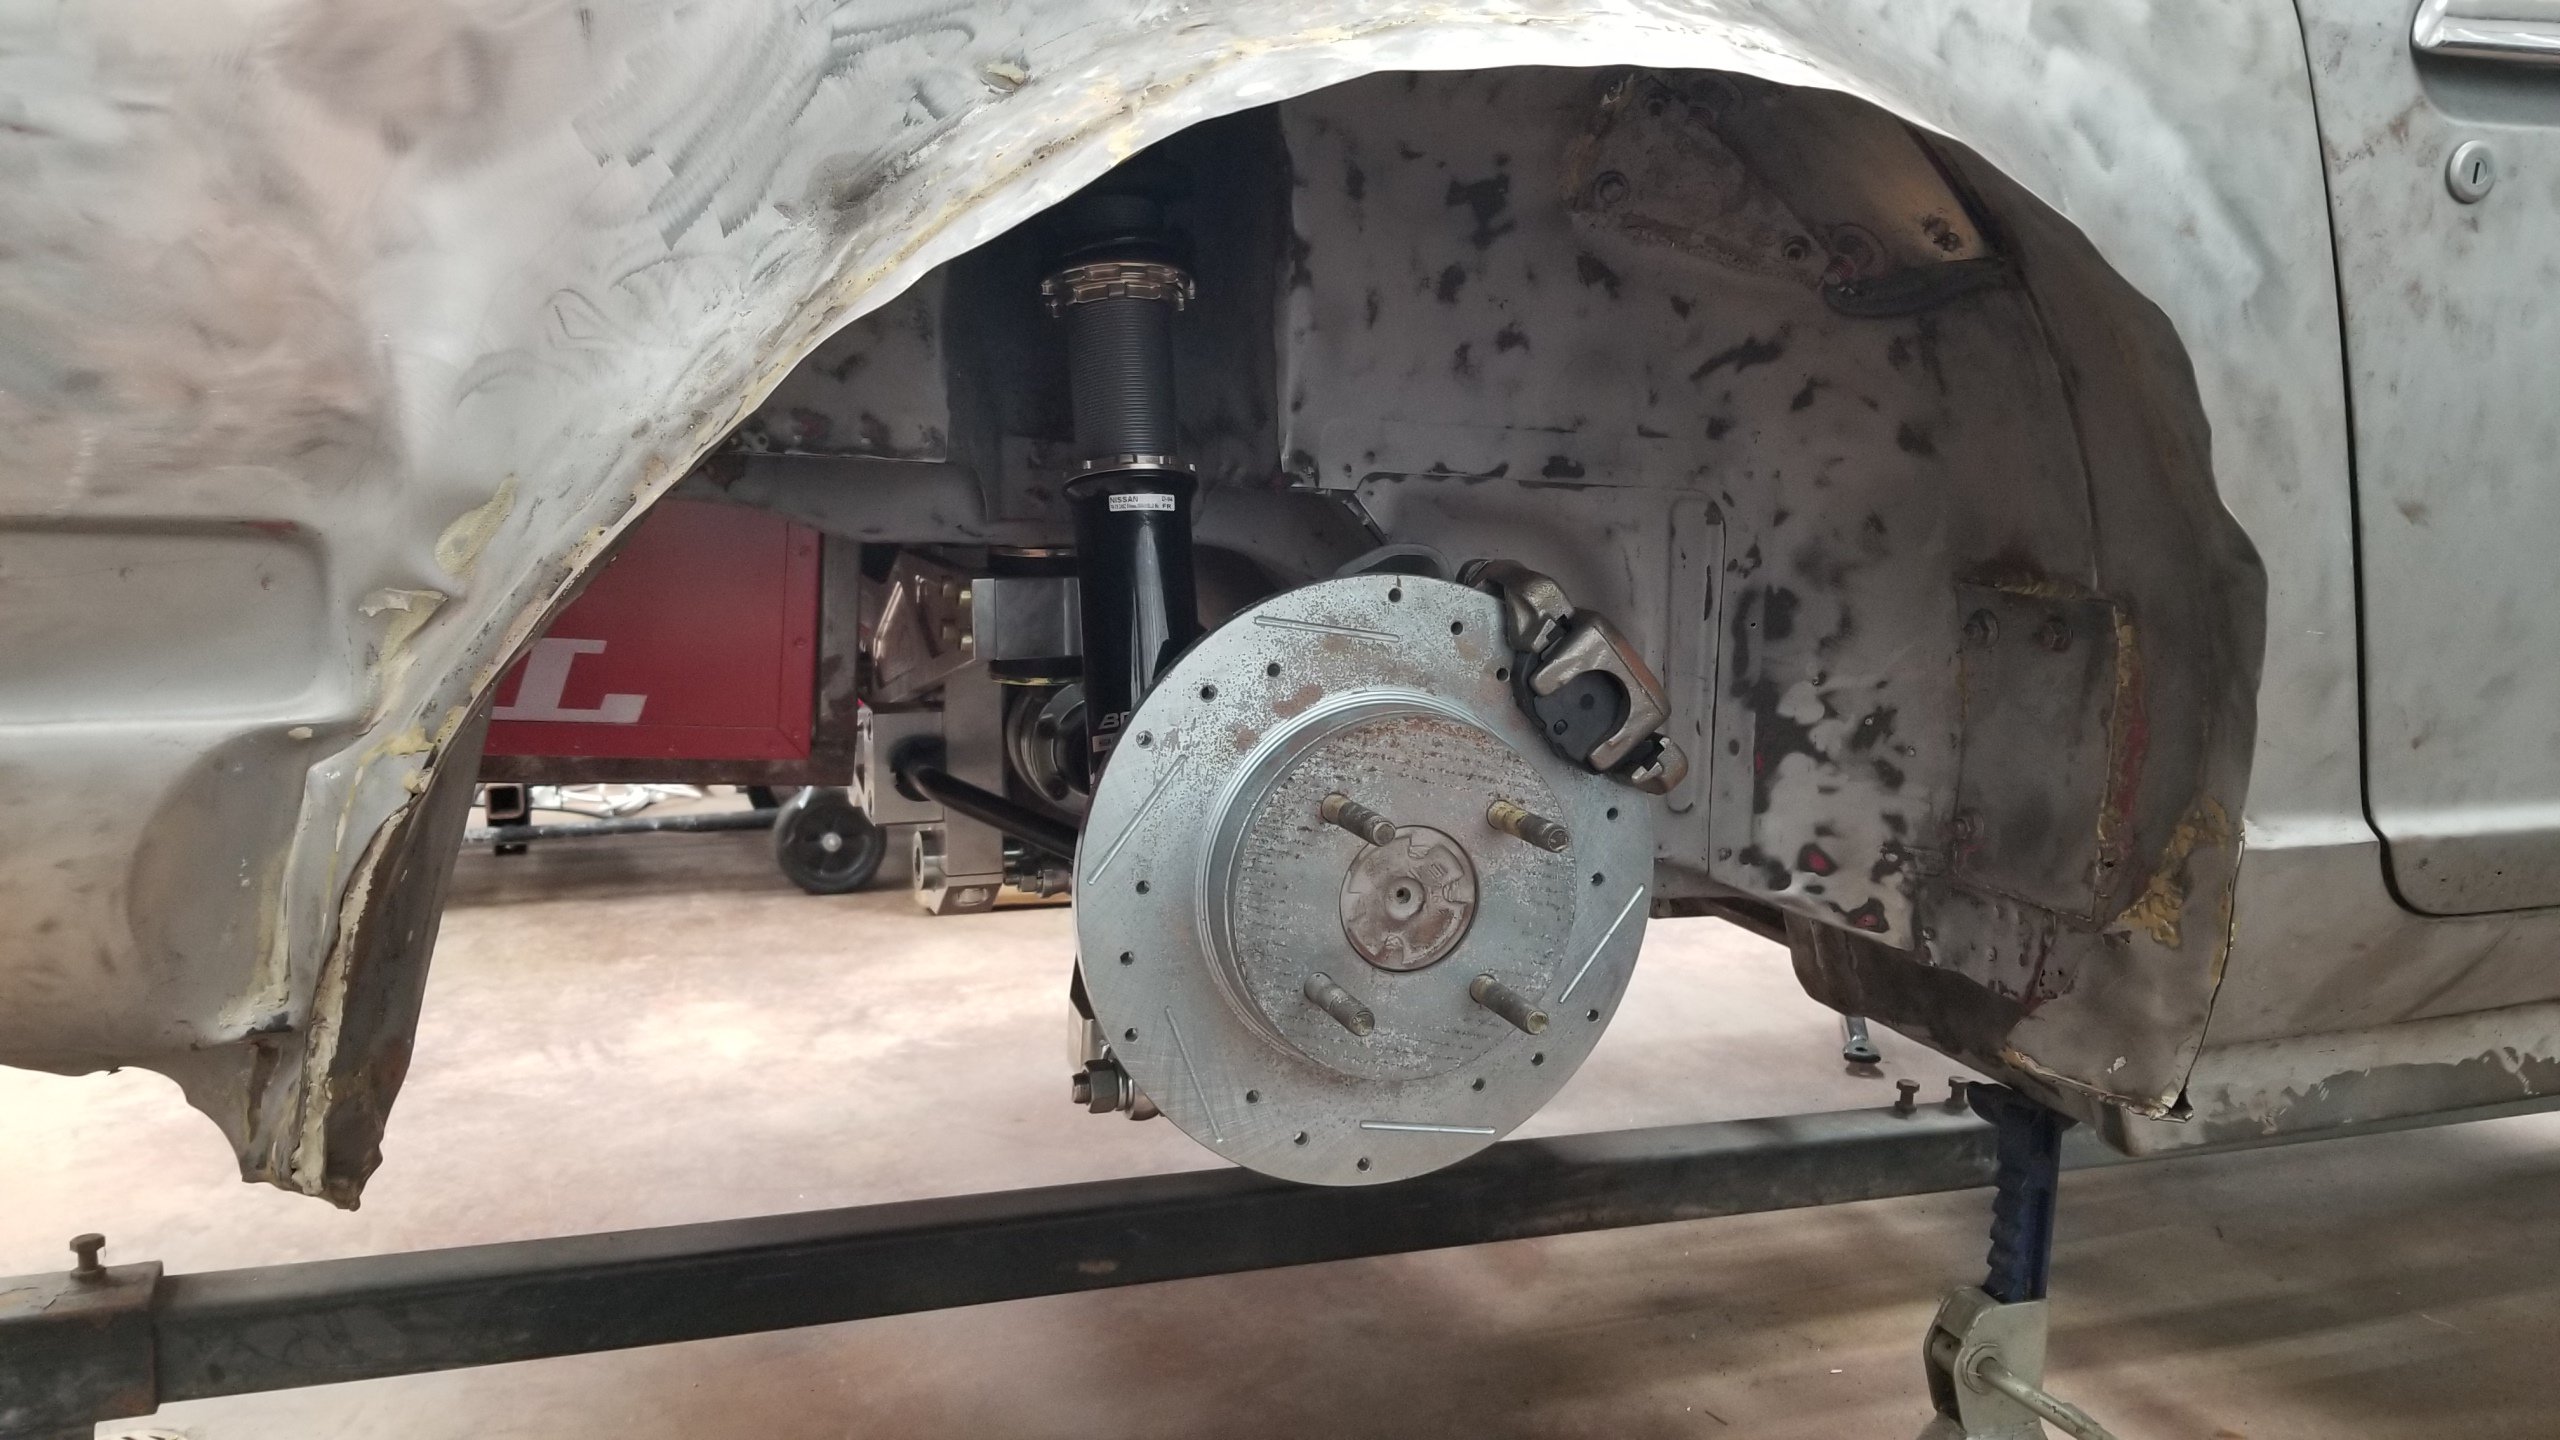
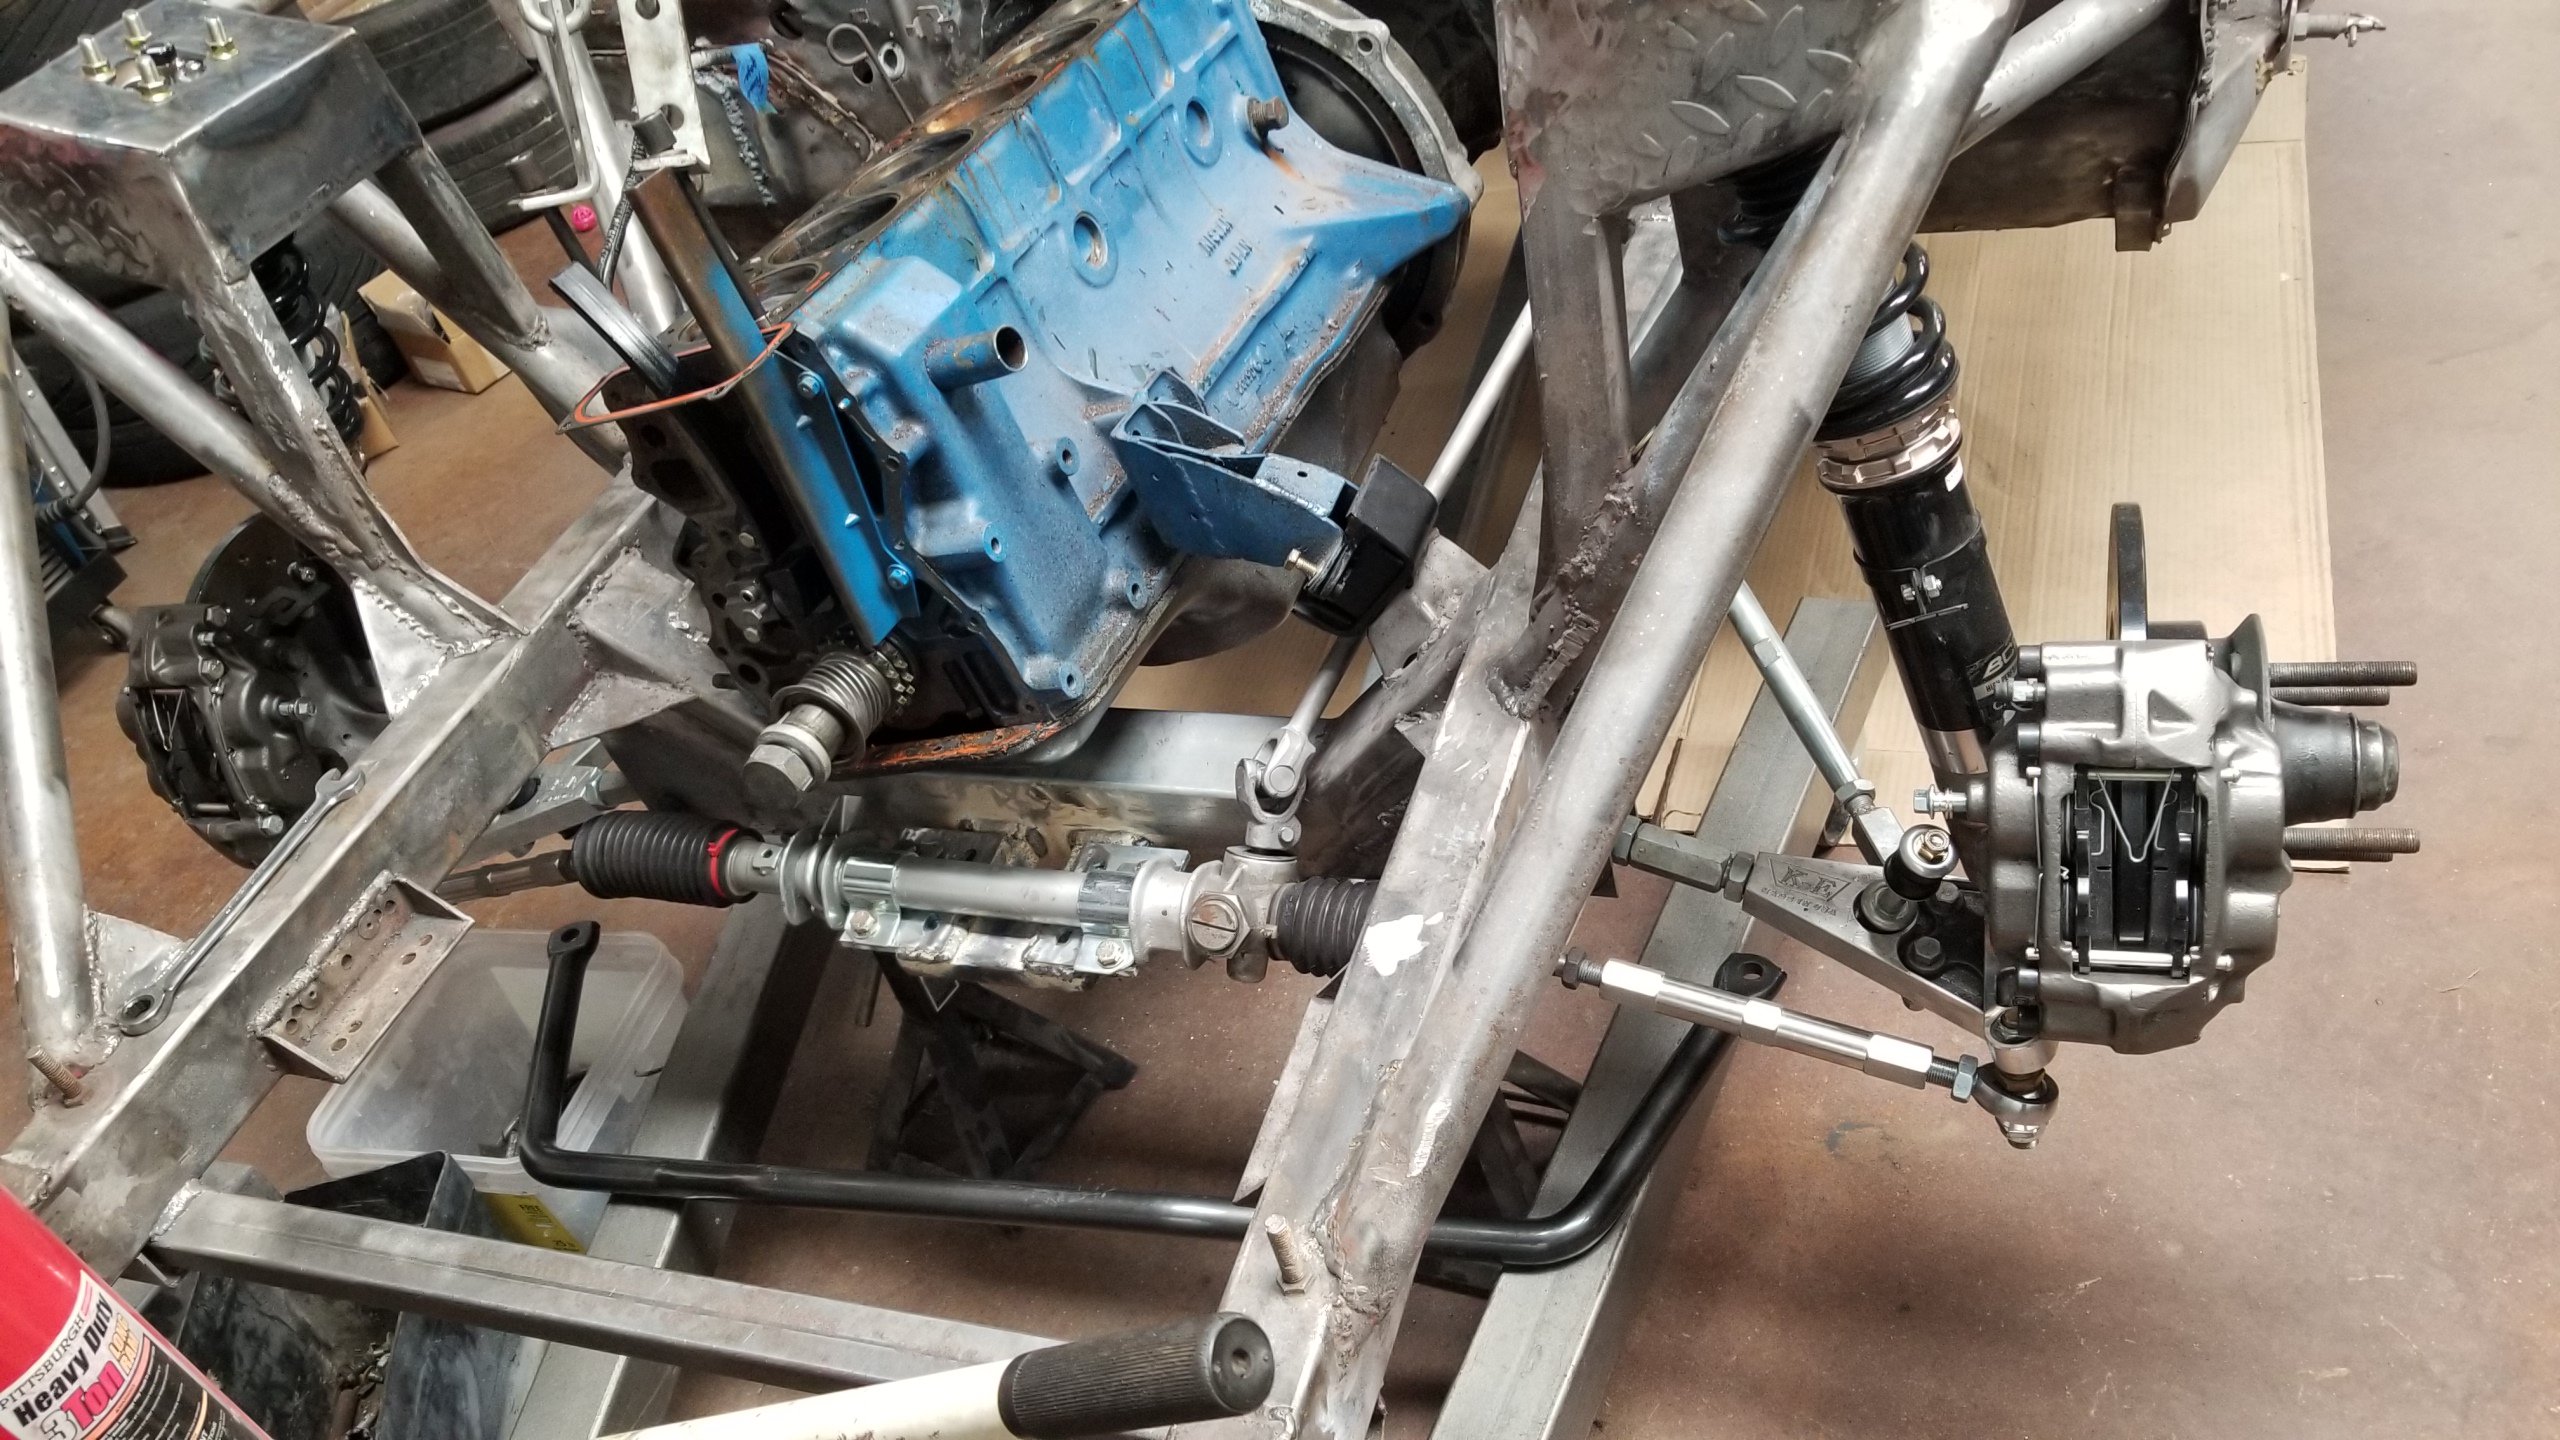
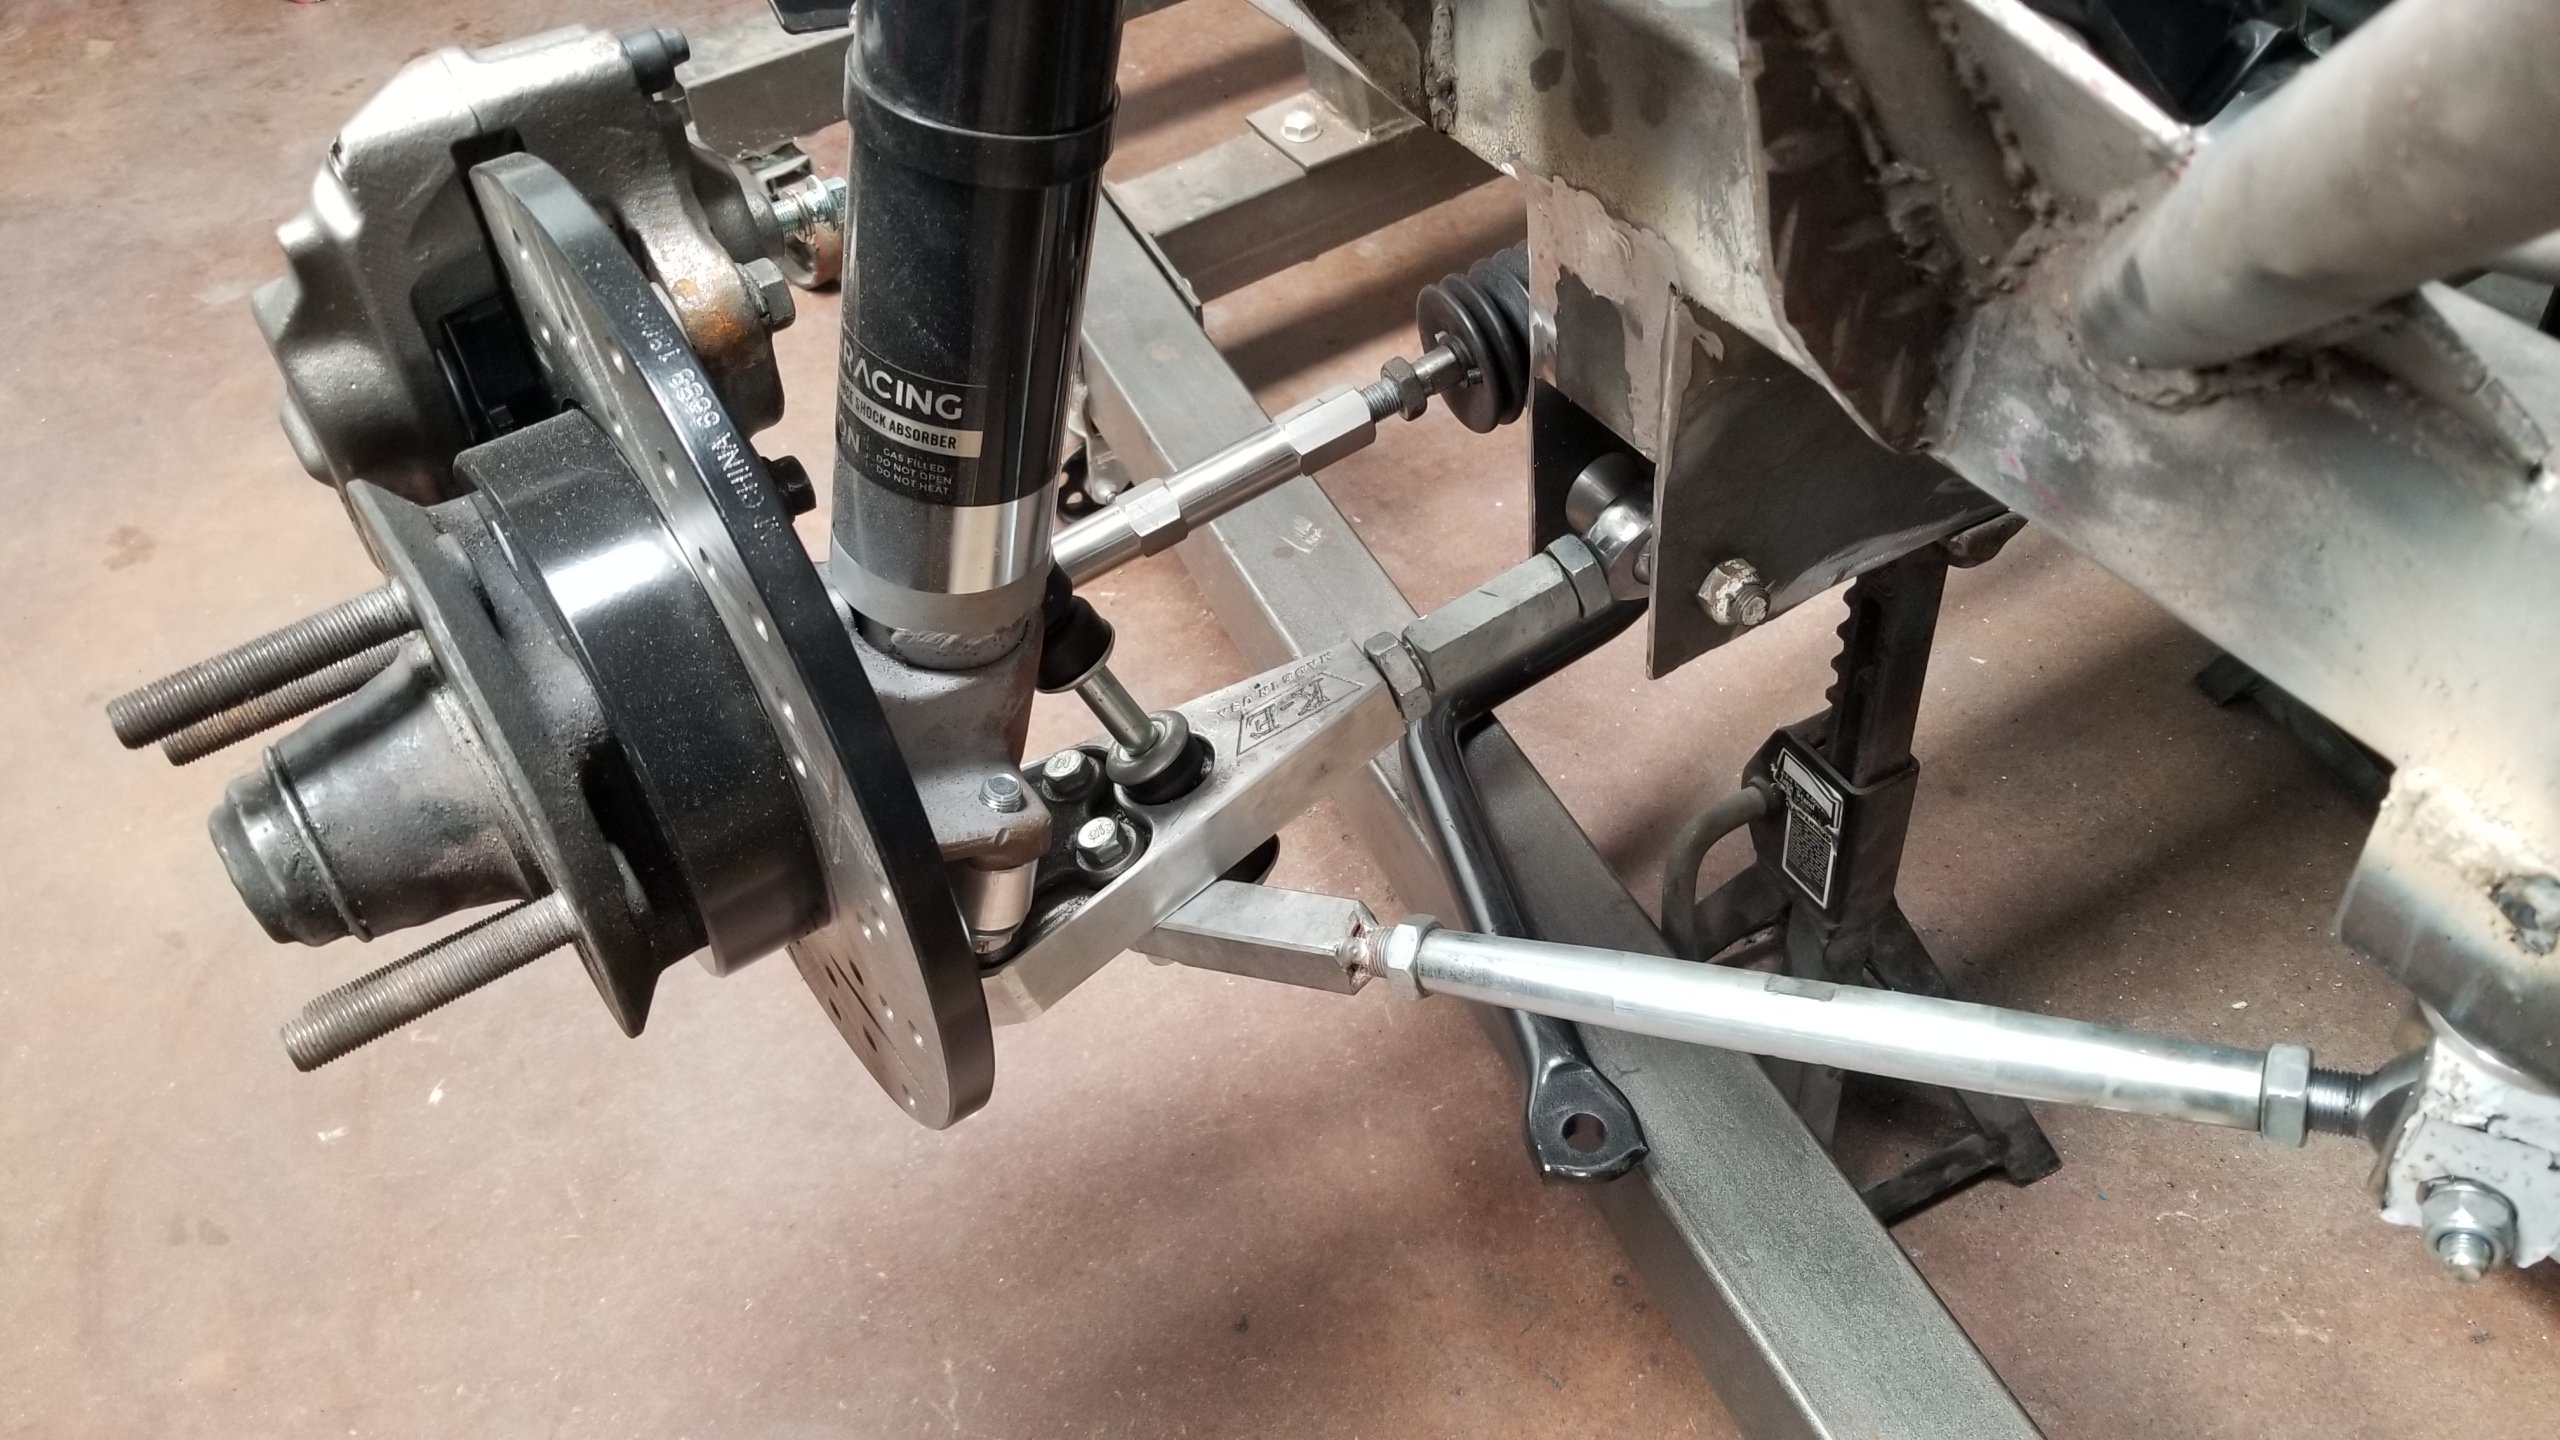
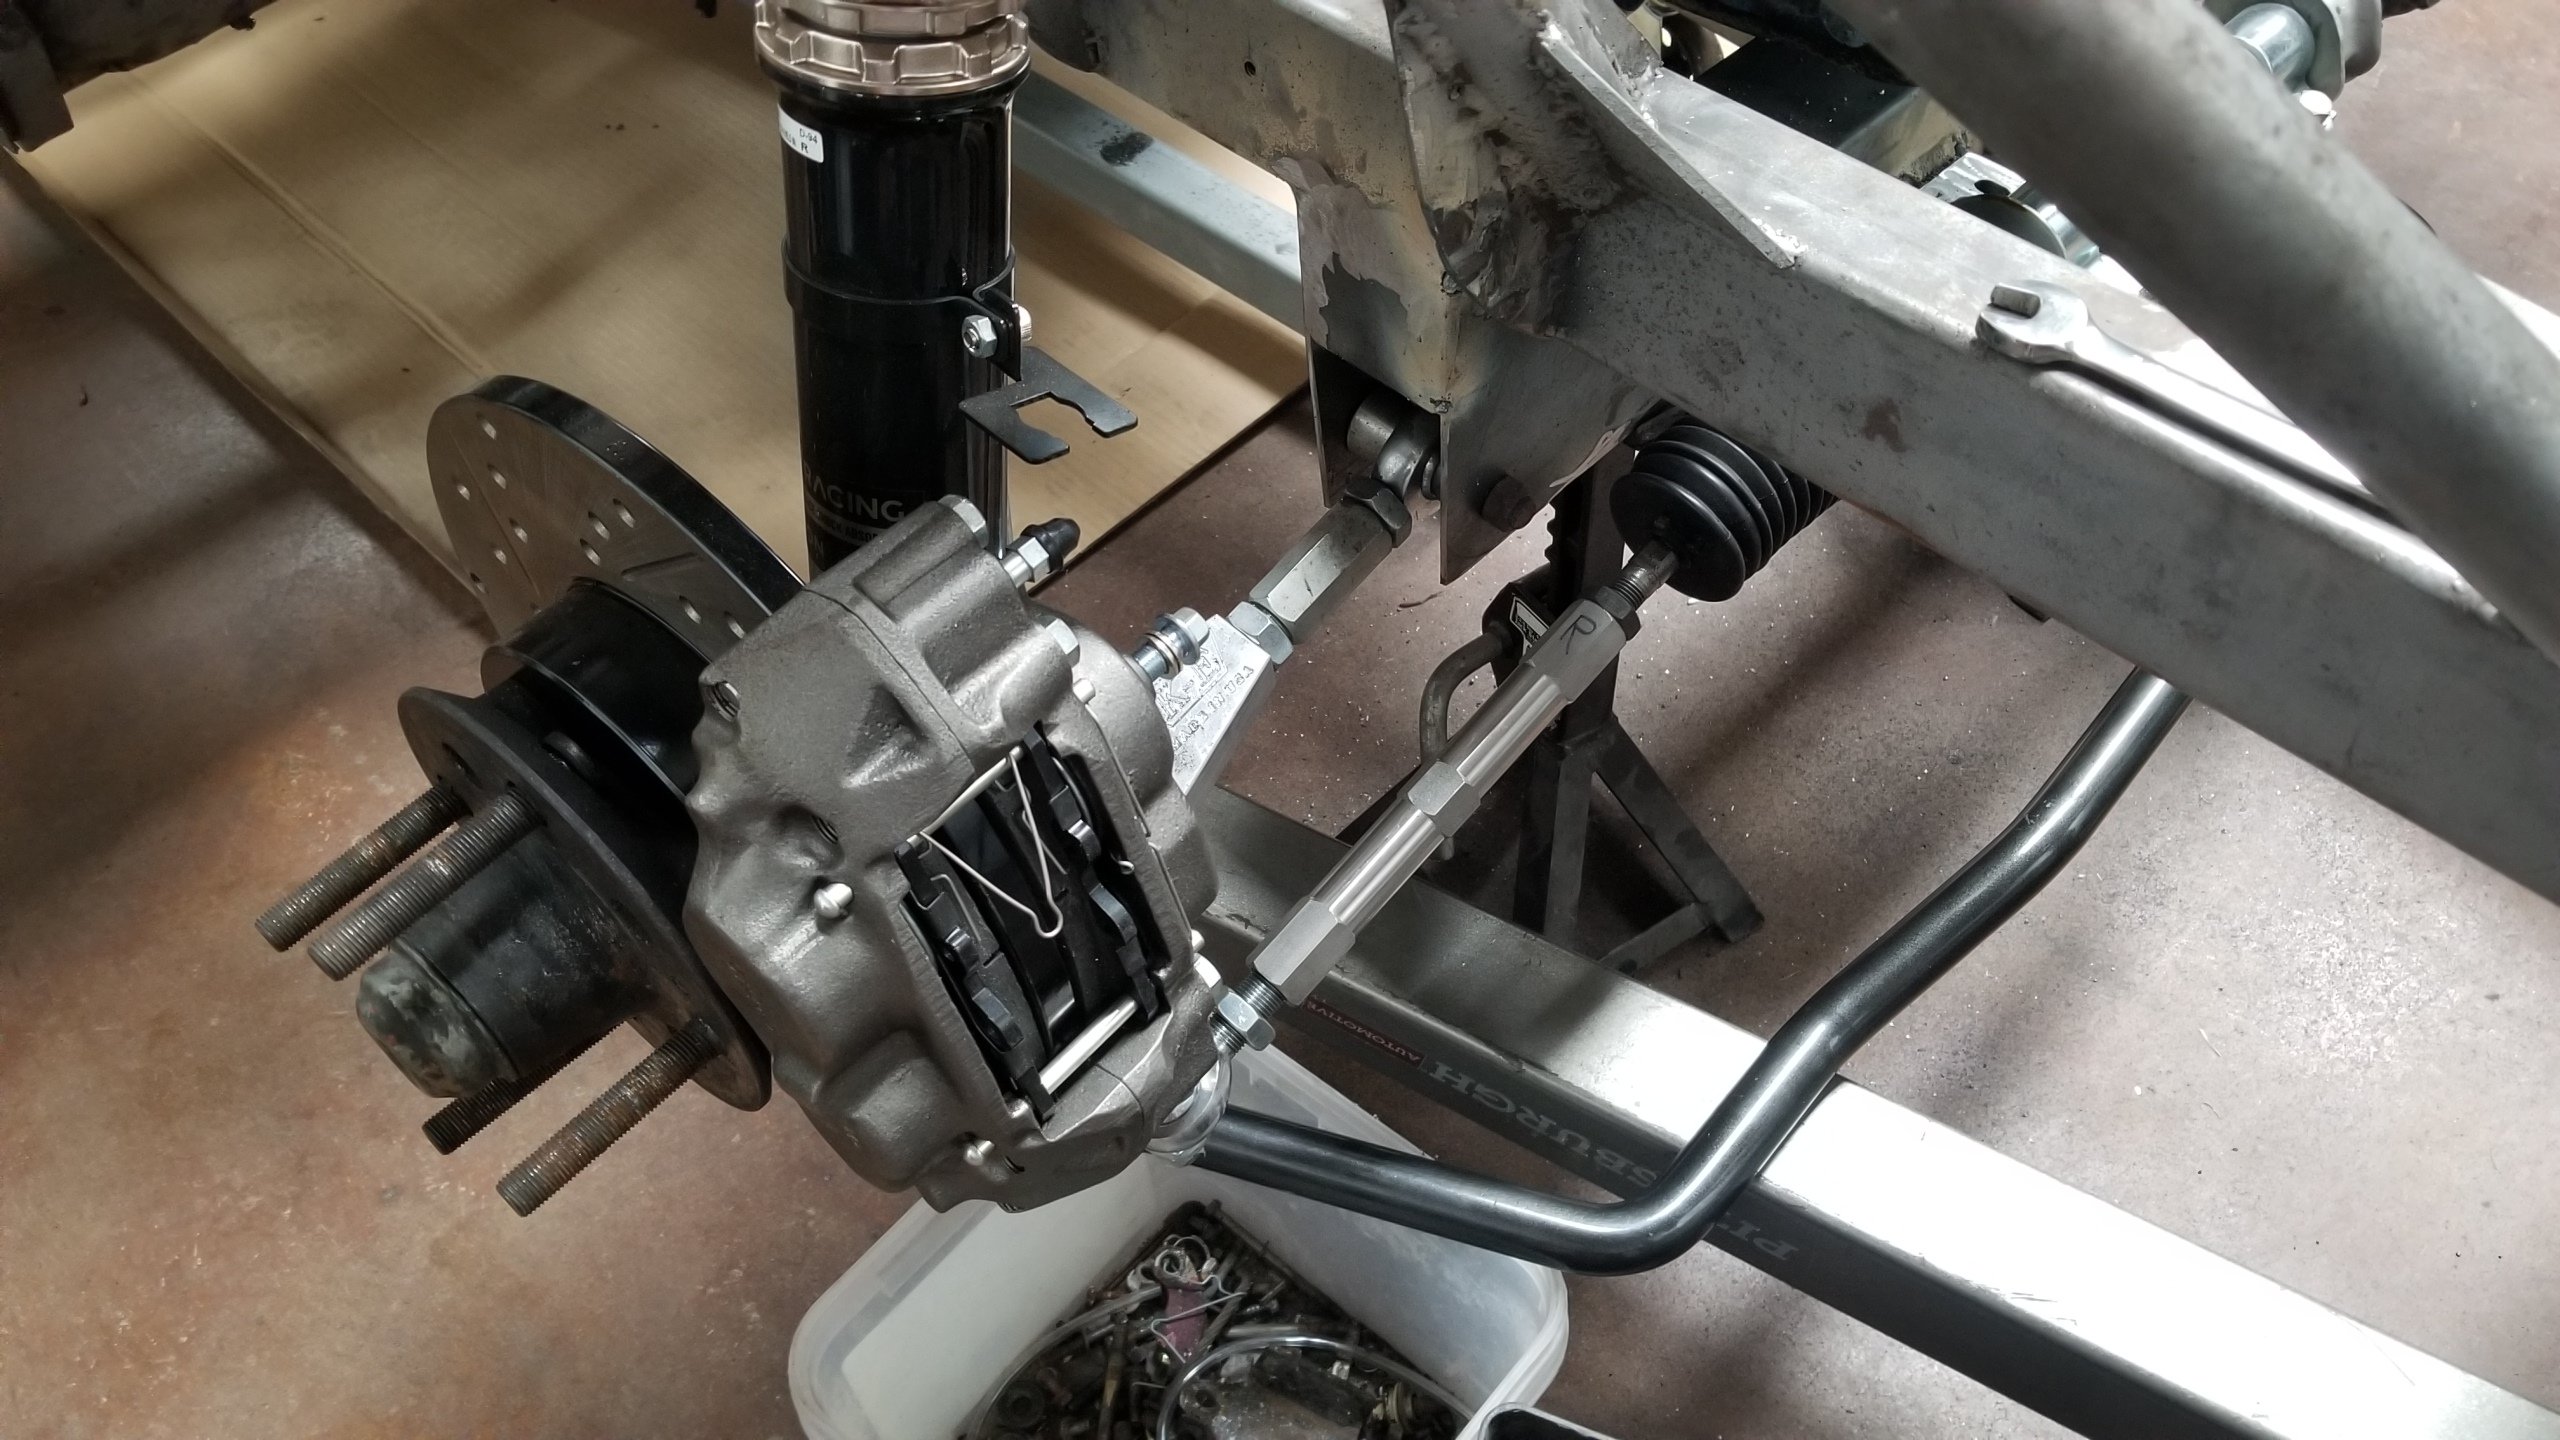
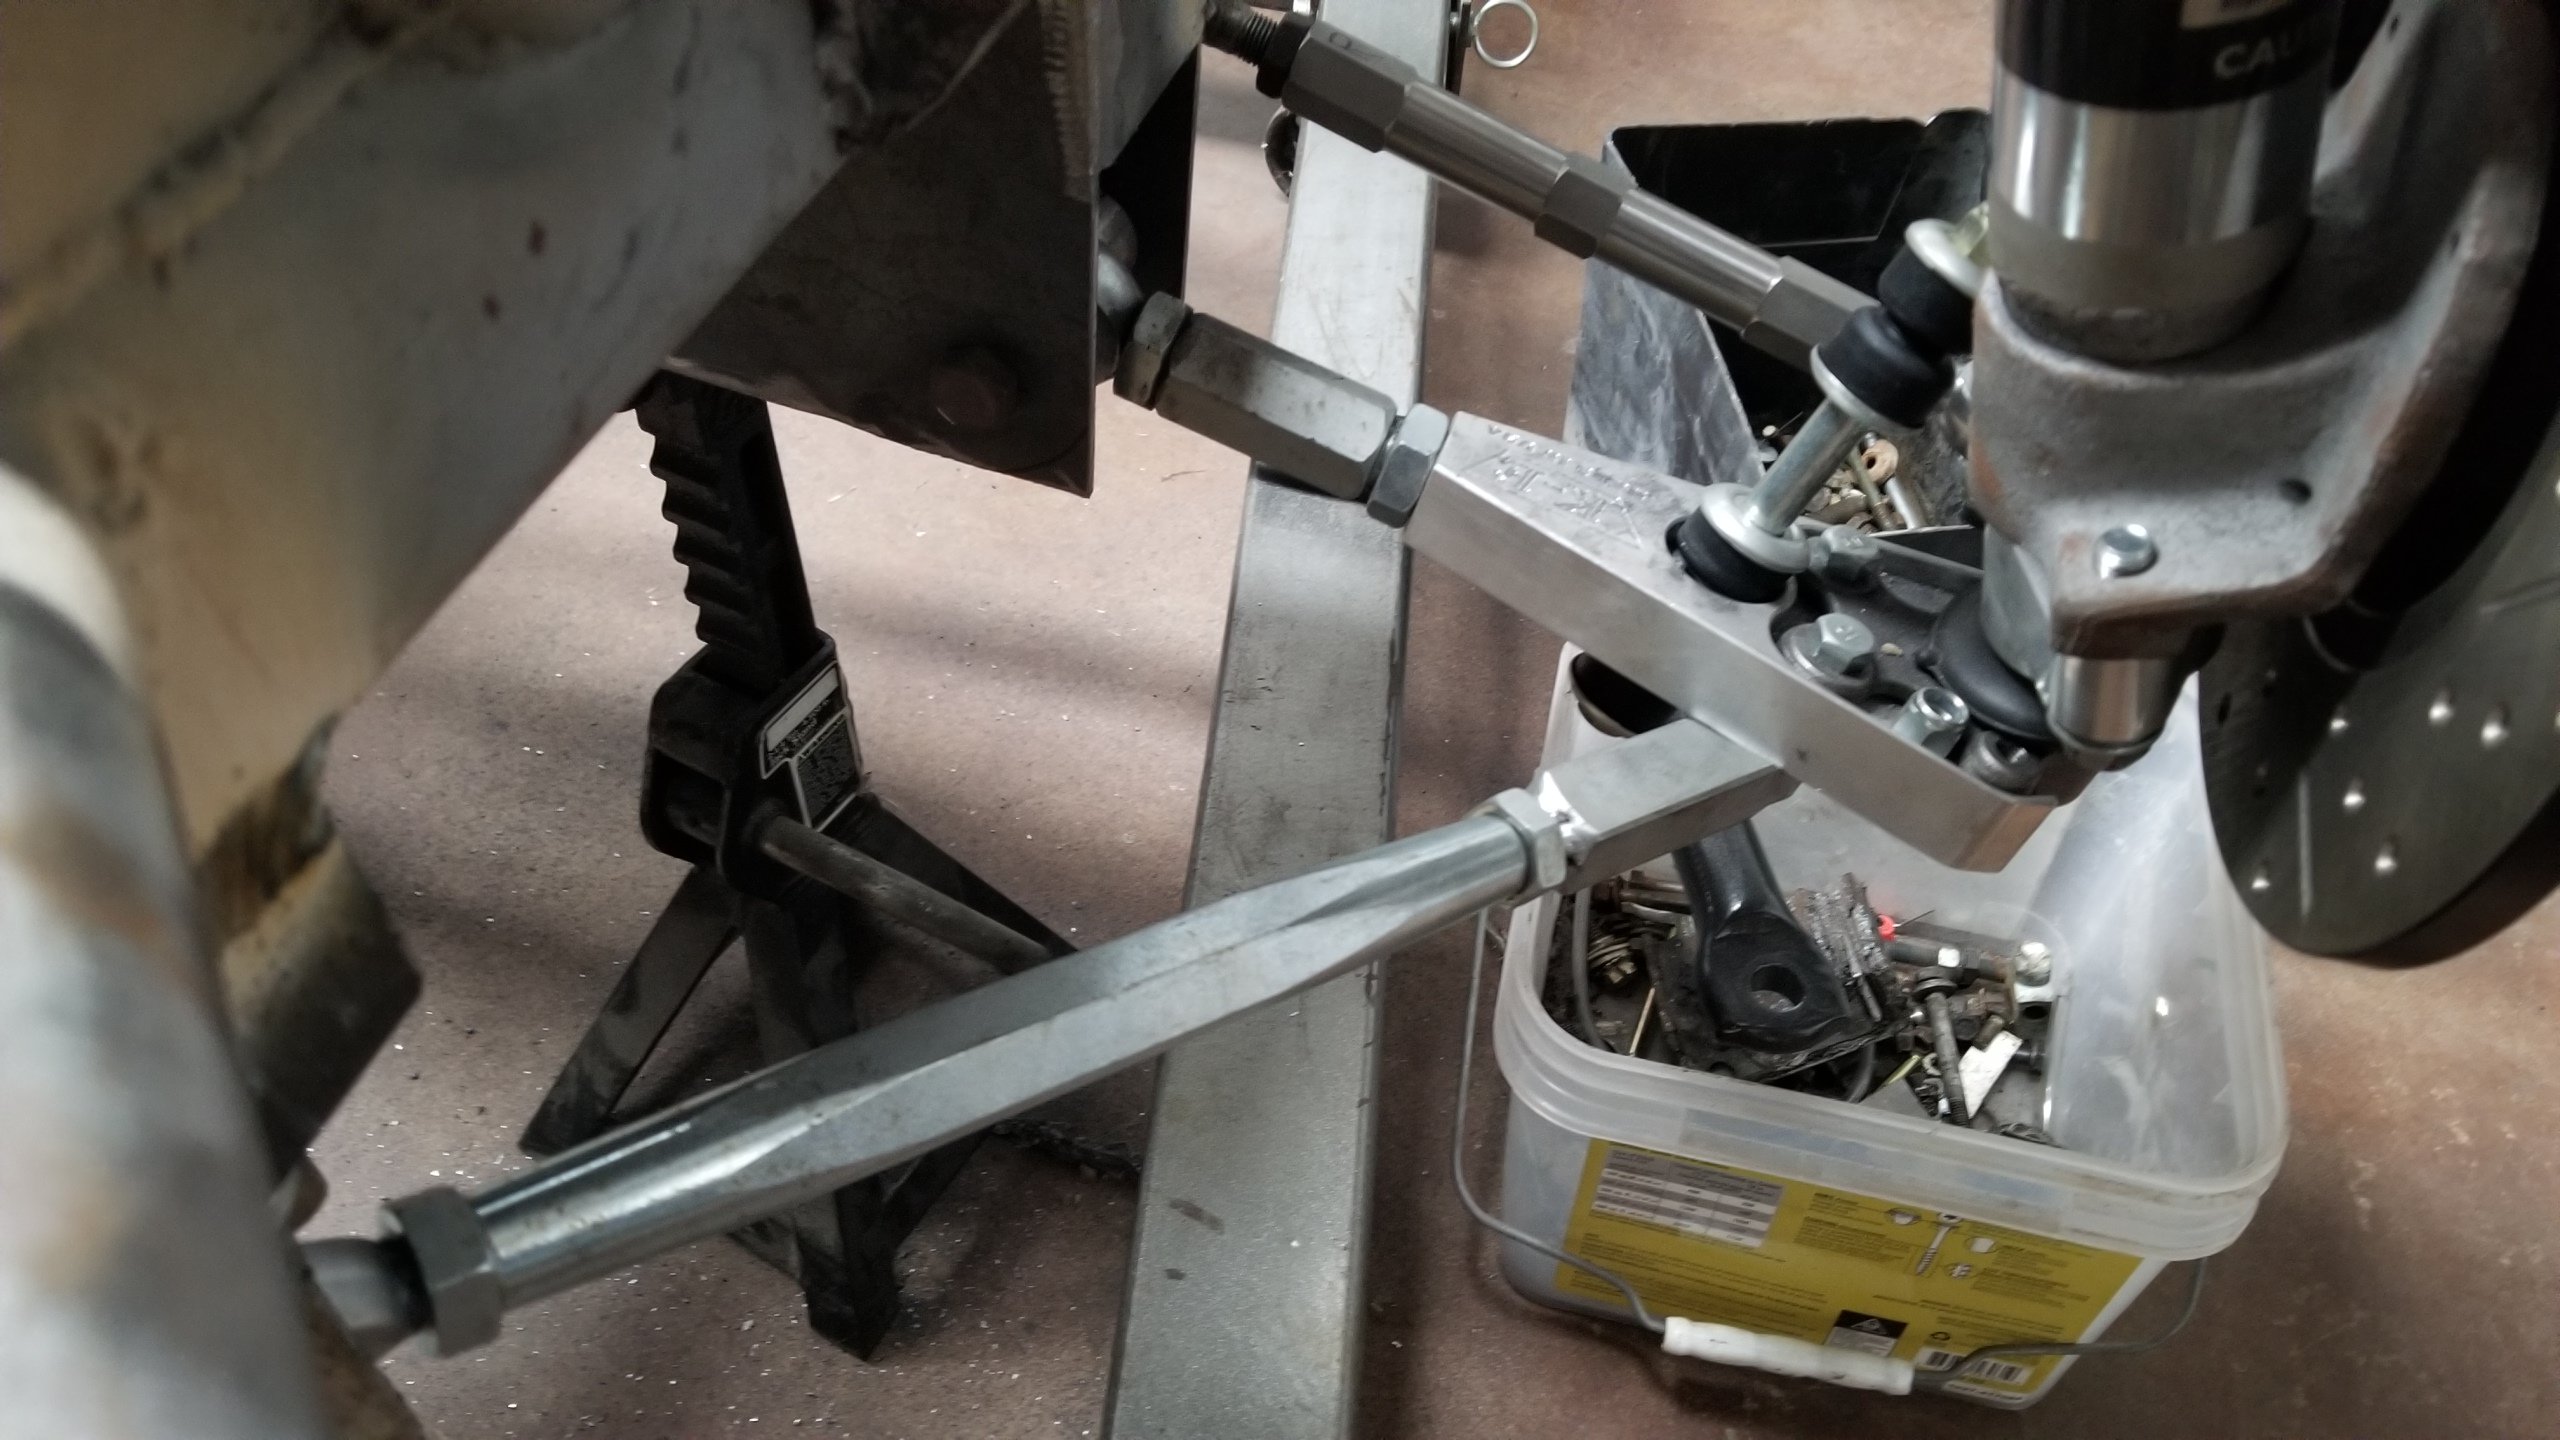
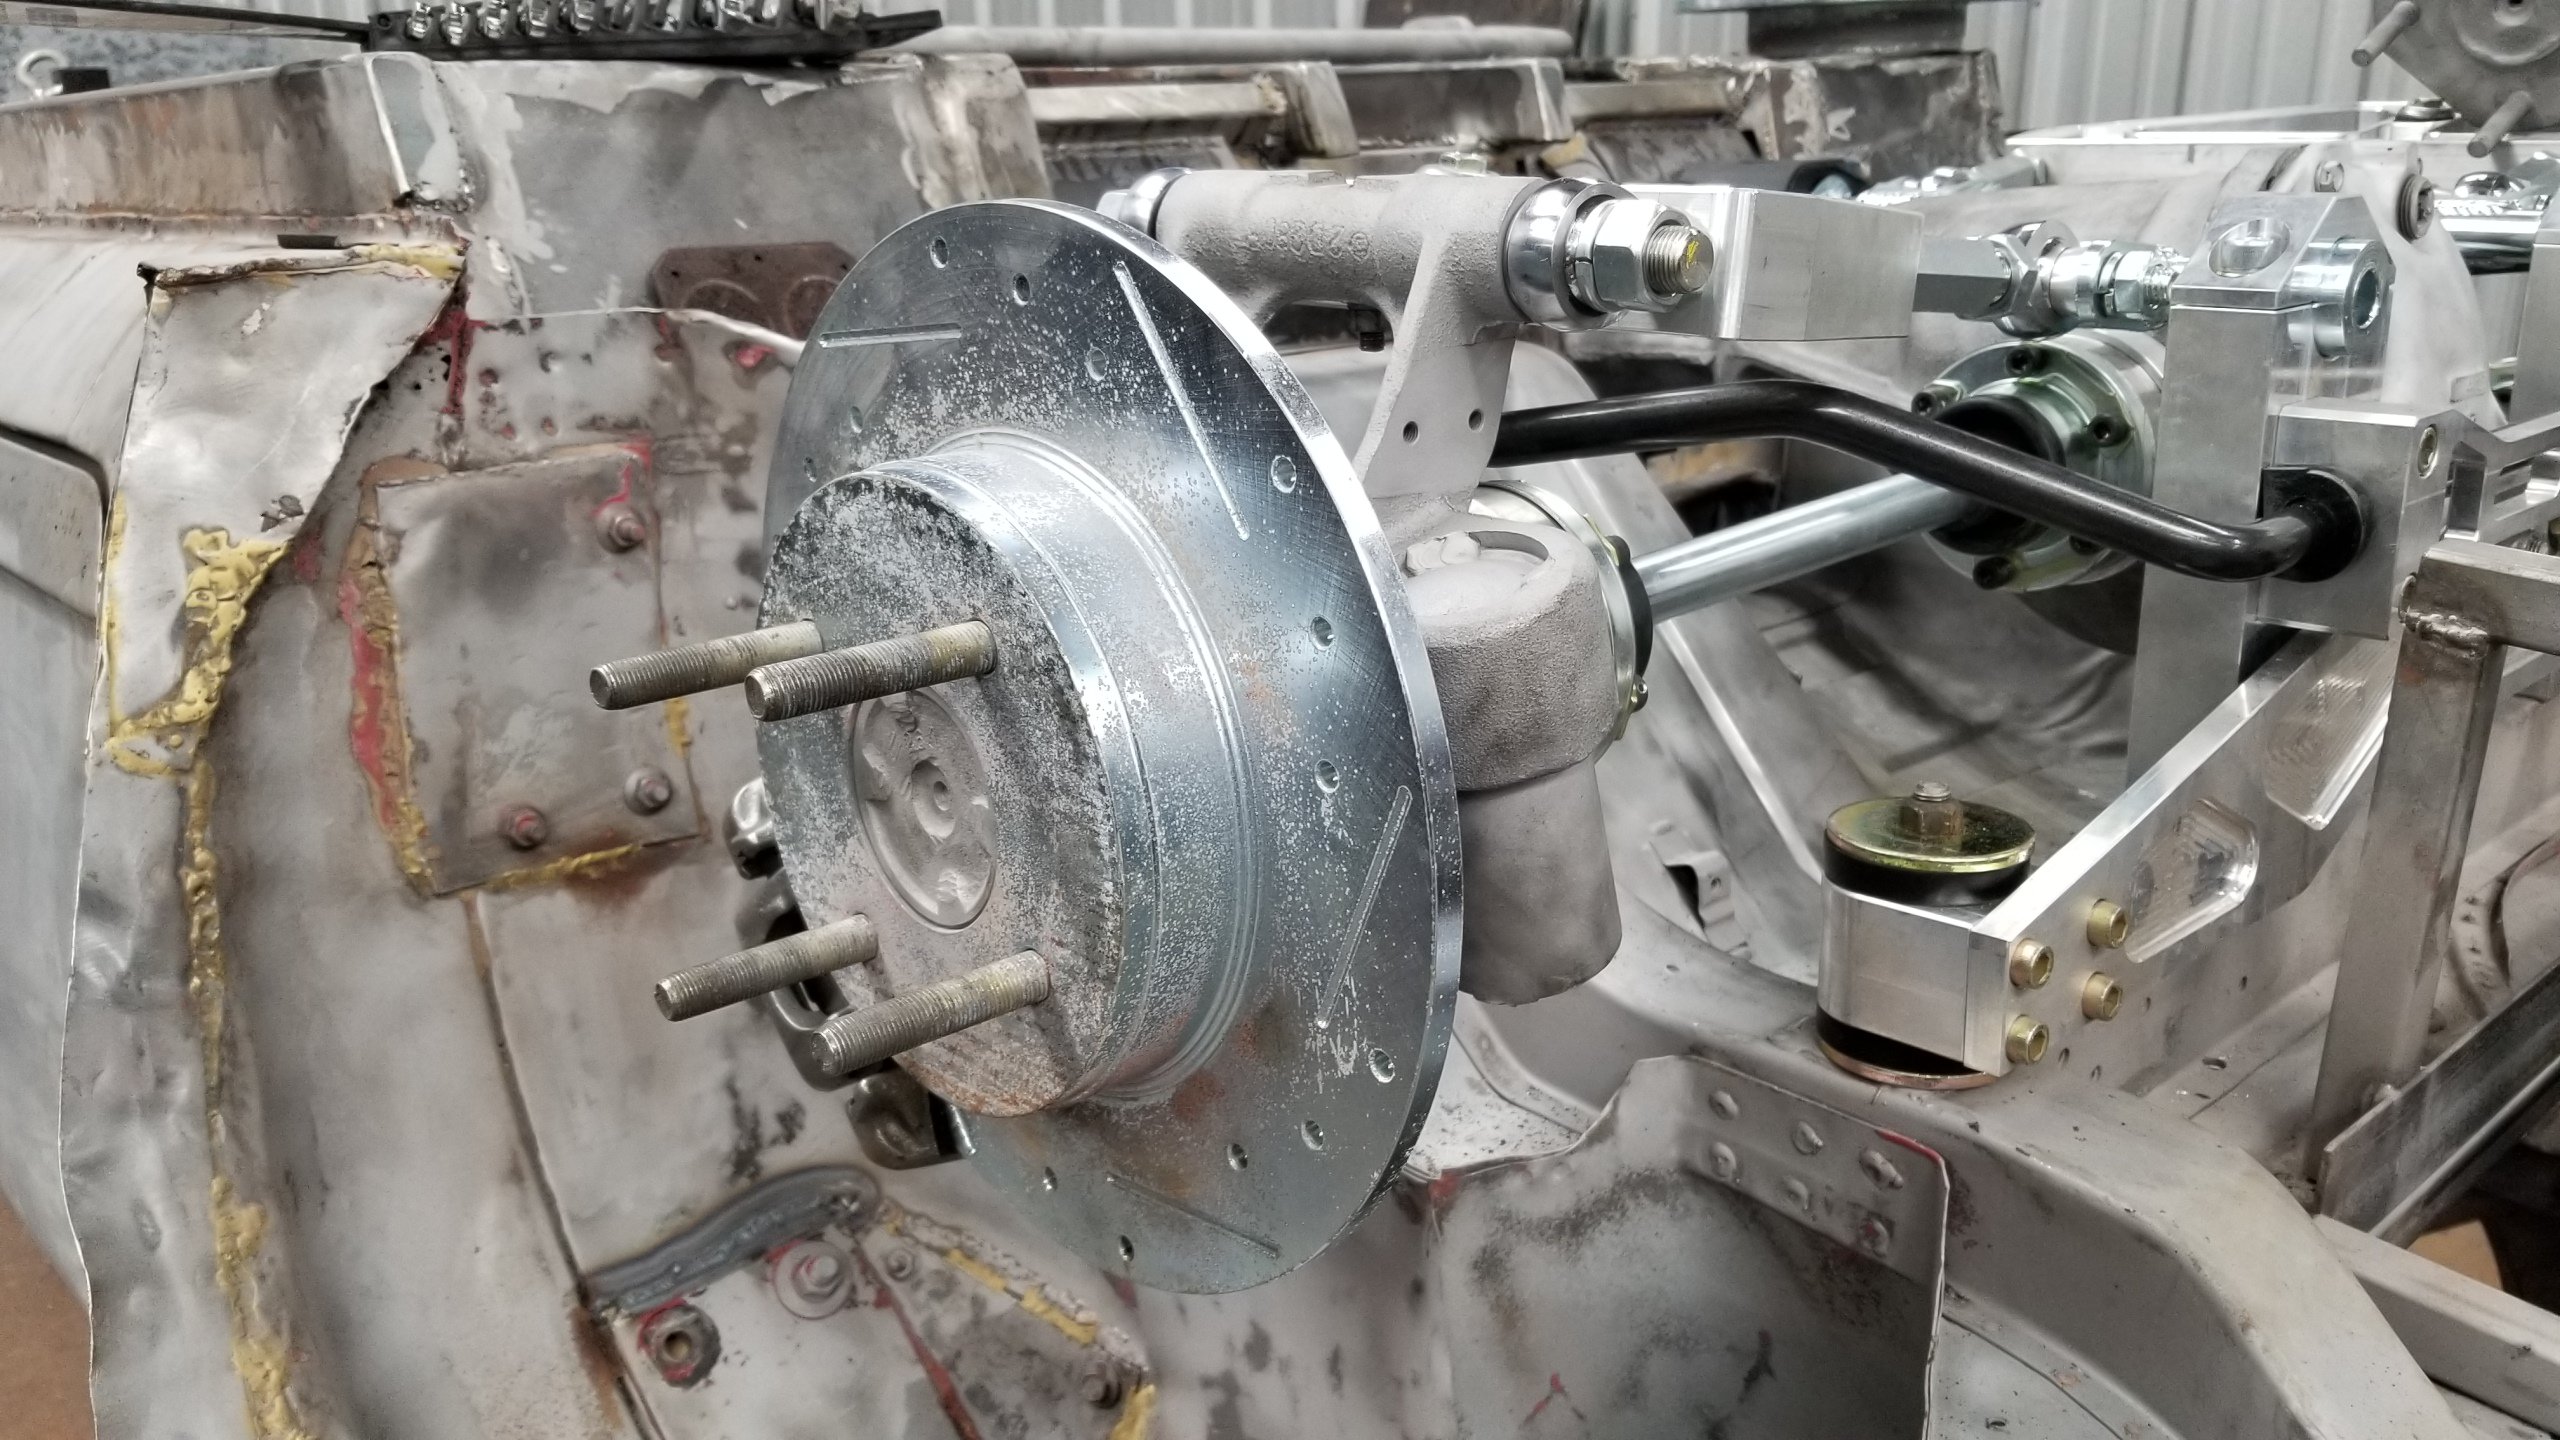
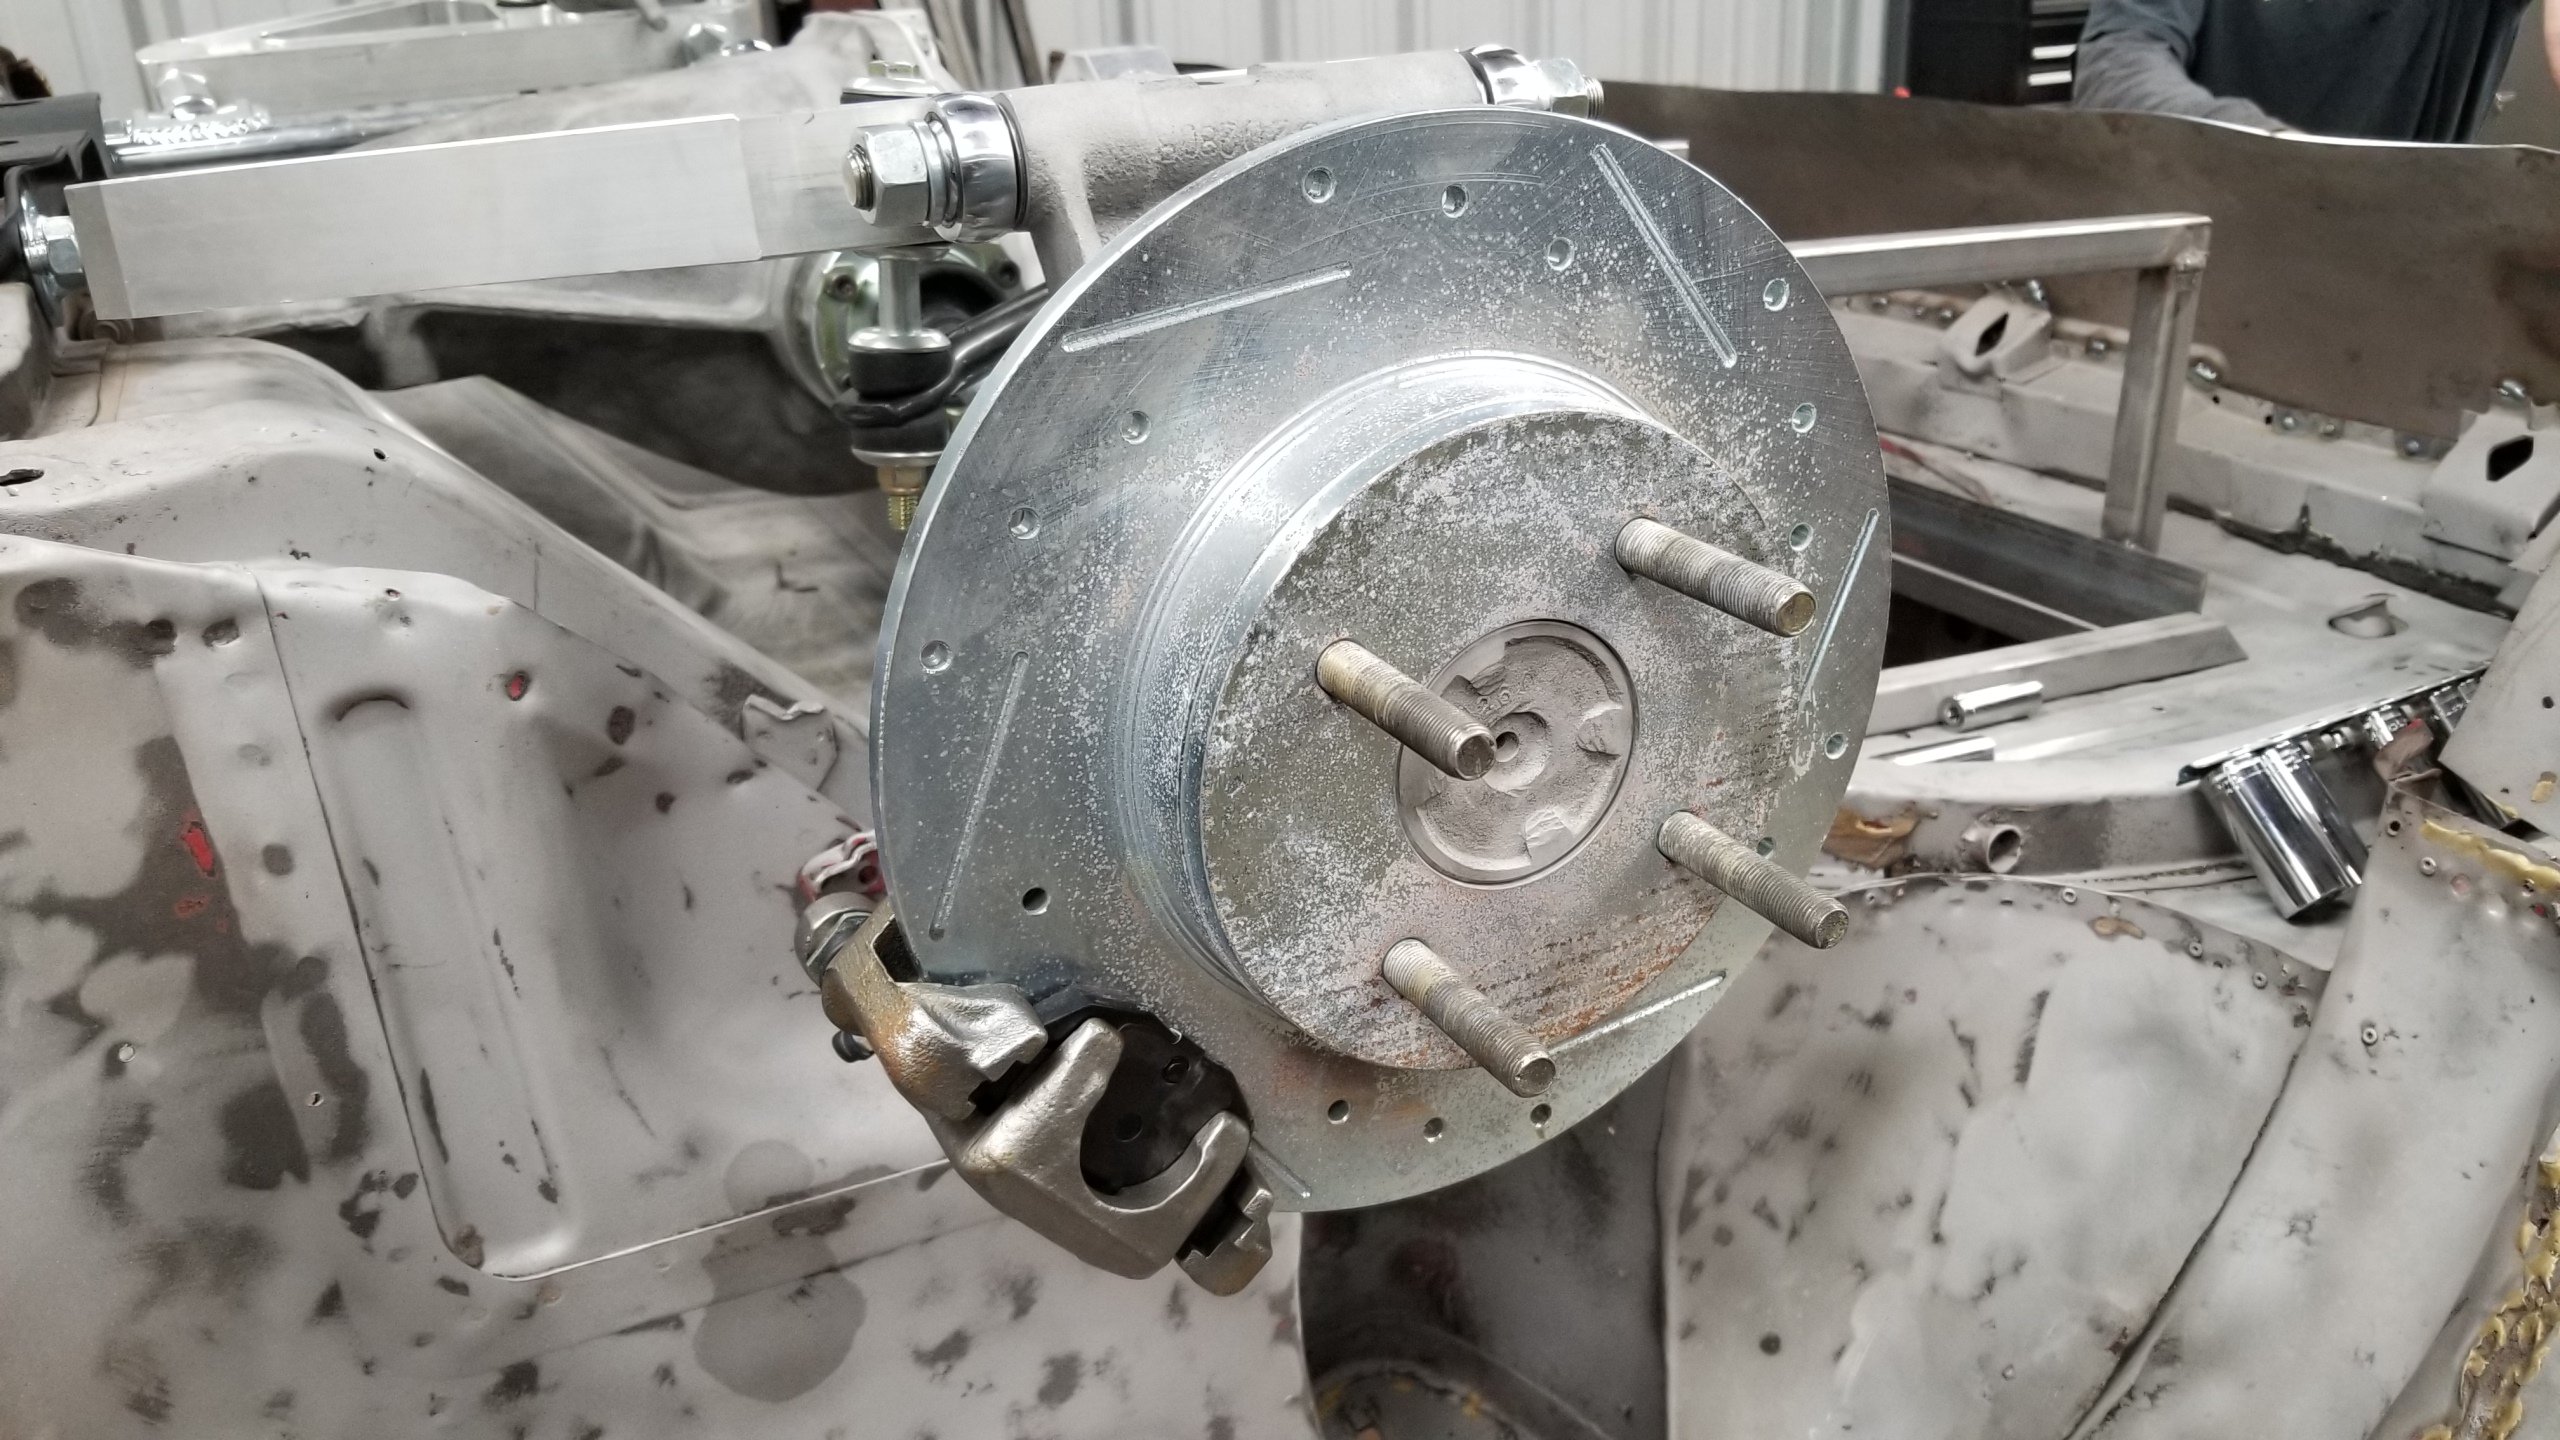
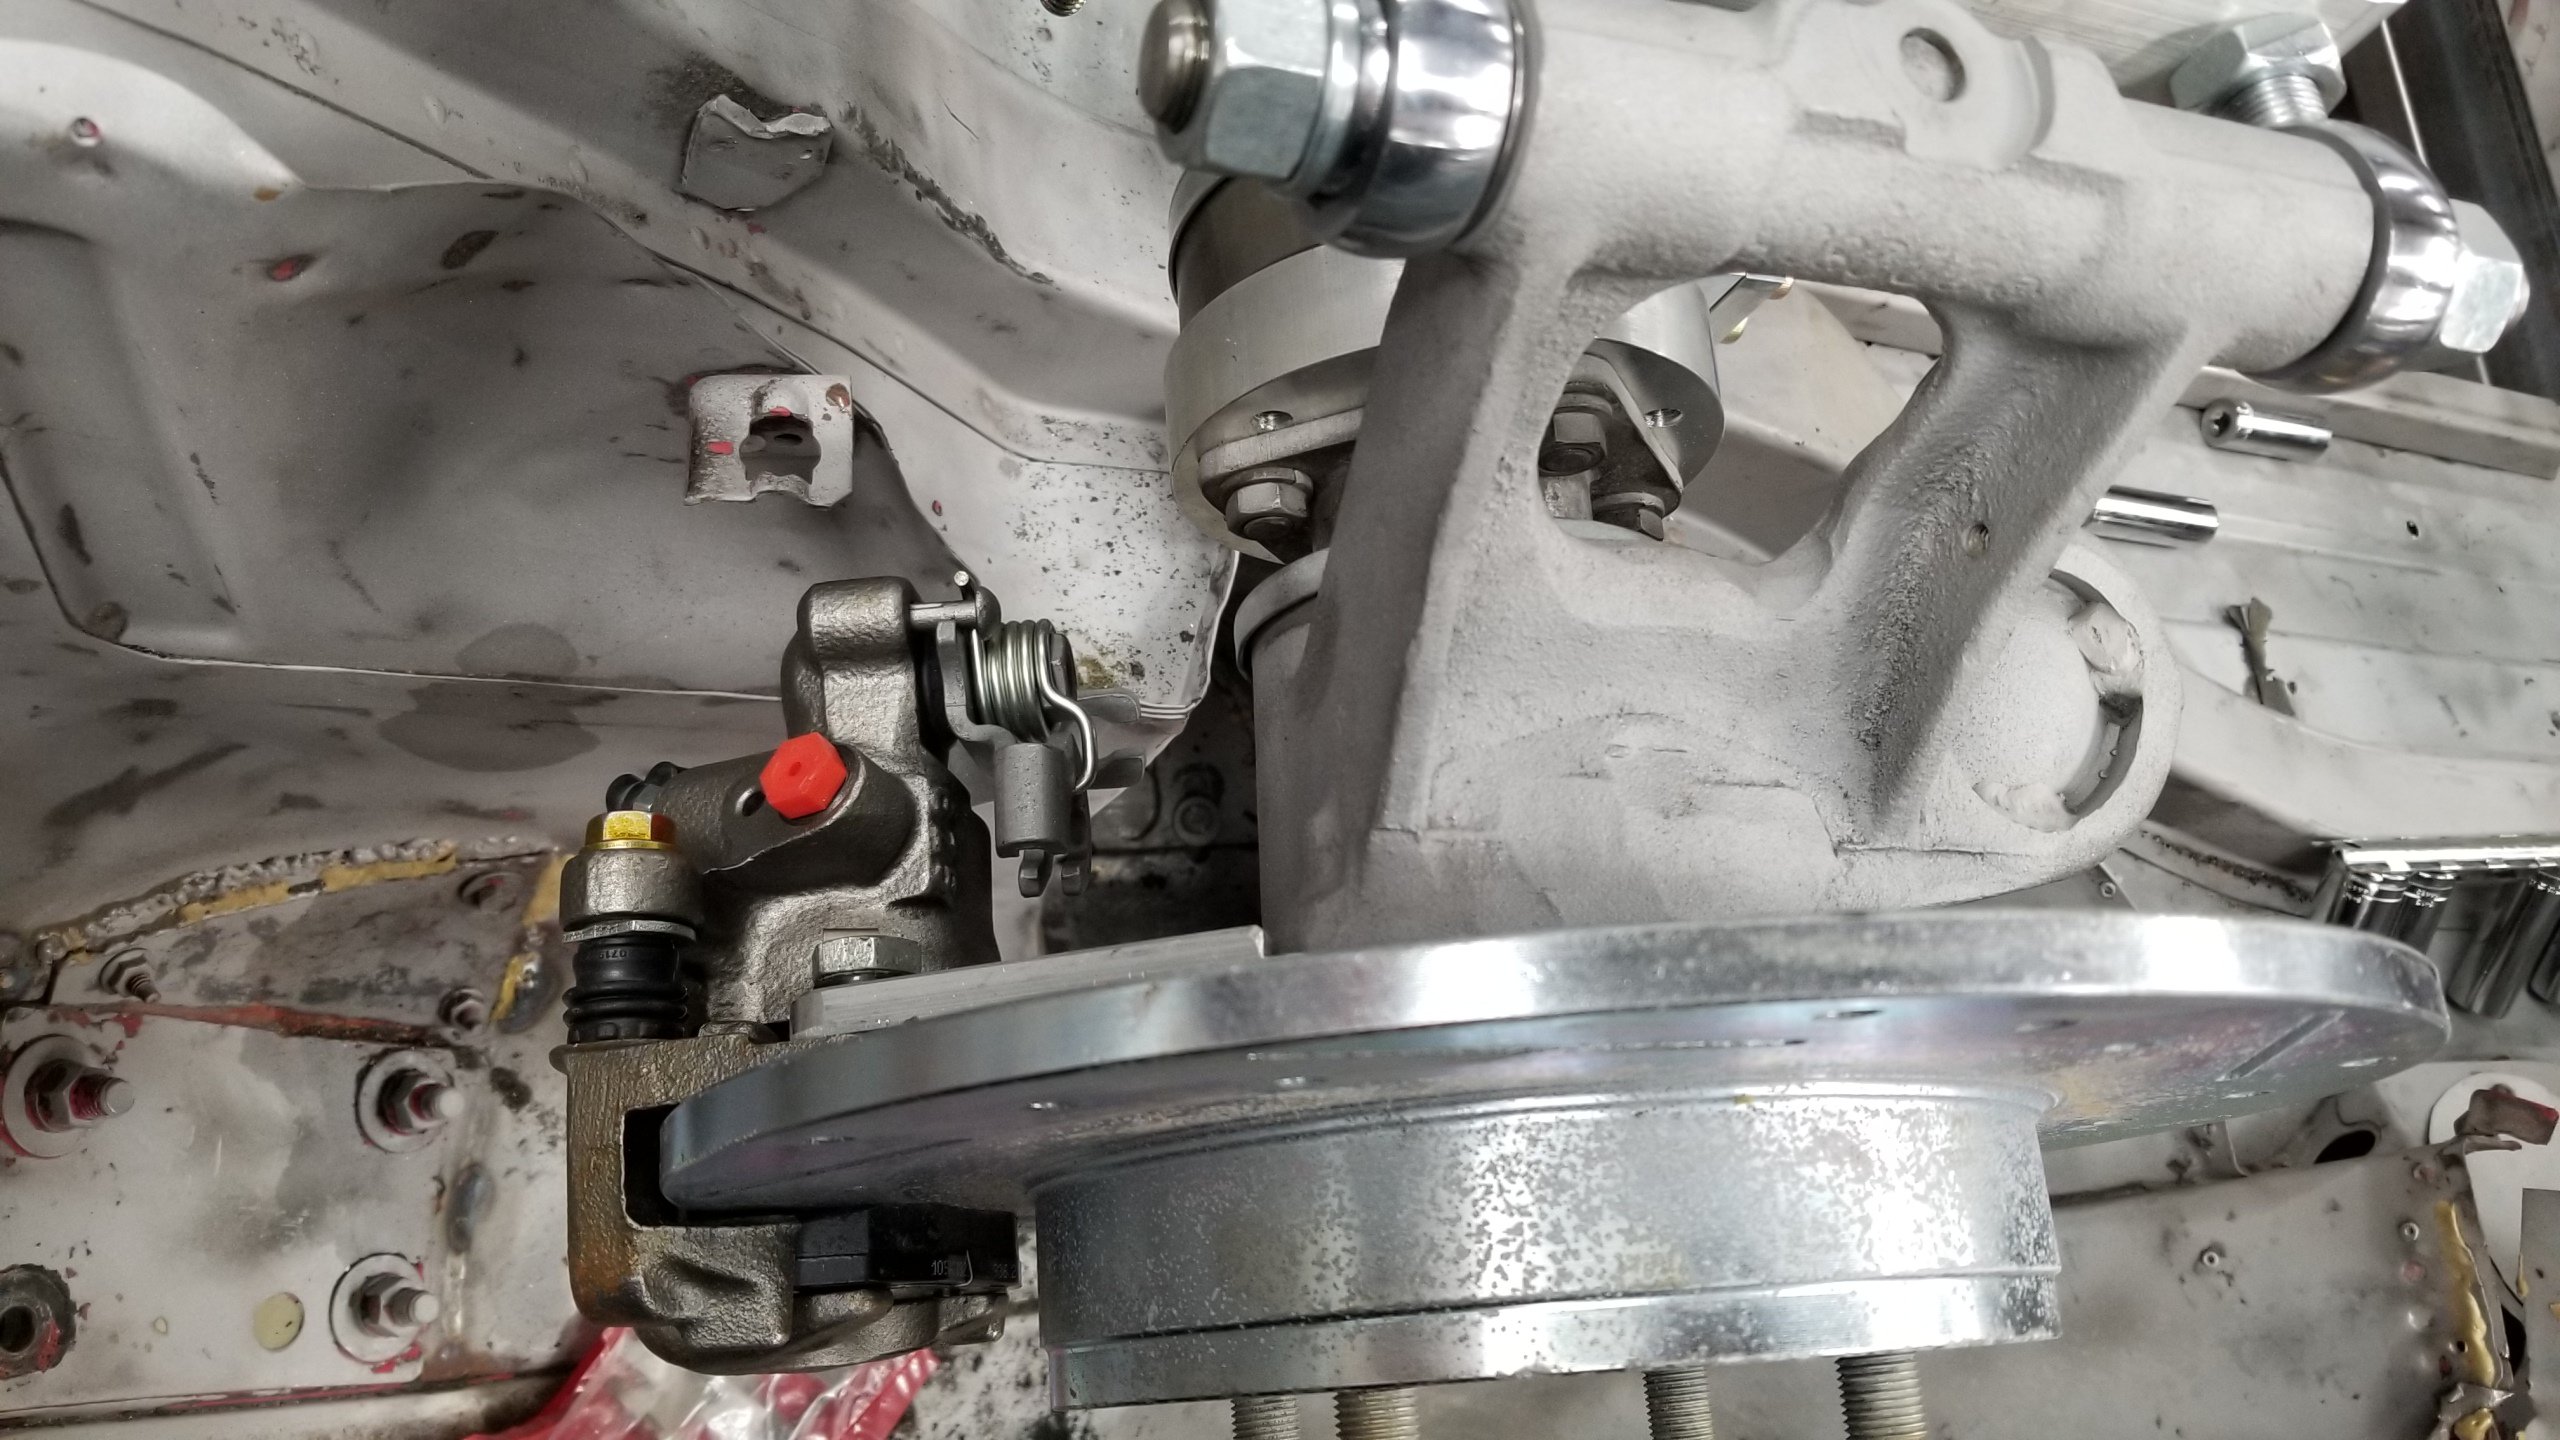
No, pic is deceiving, sway bar end link is leaning against caliper. -
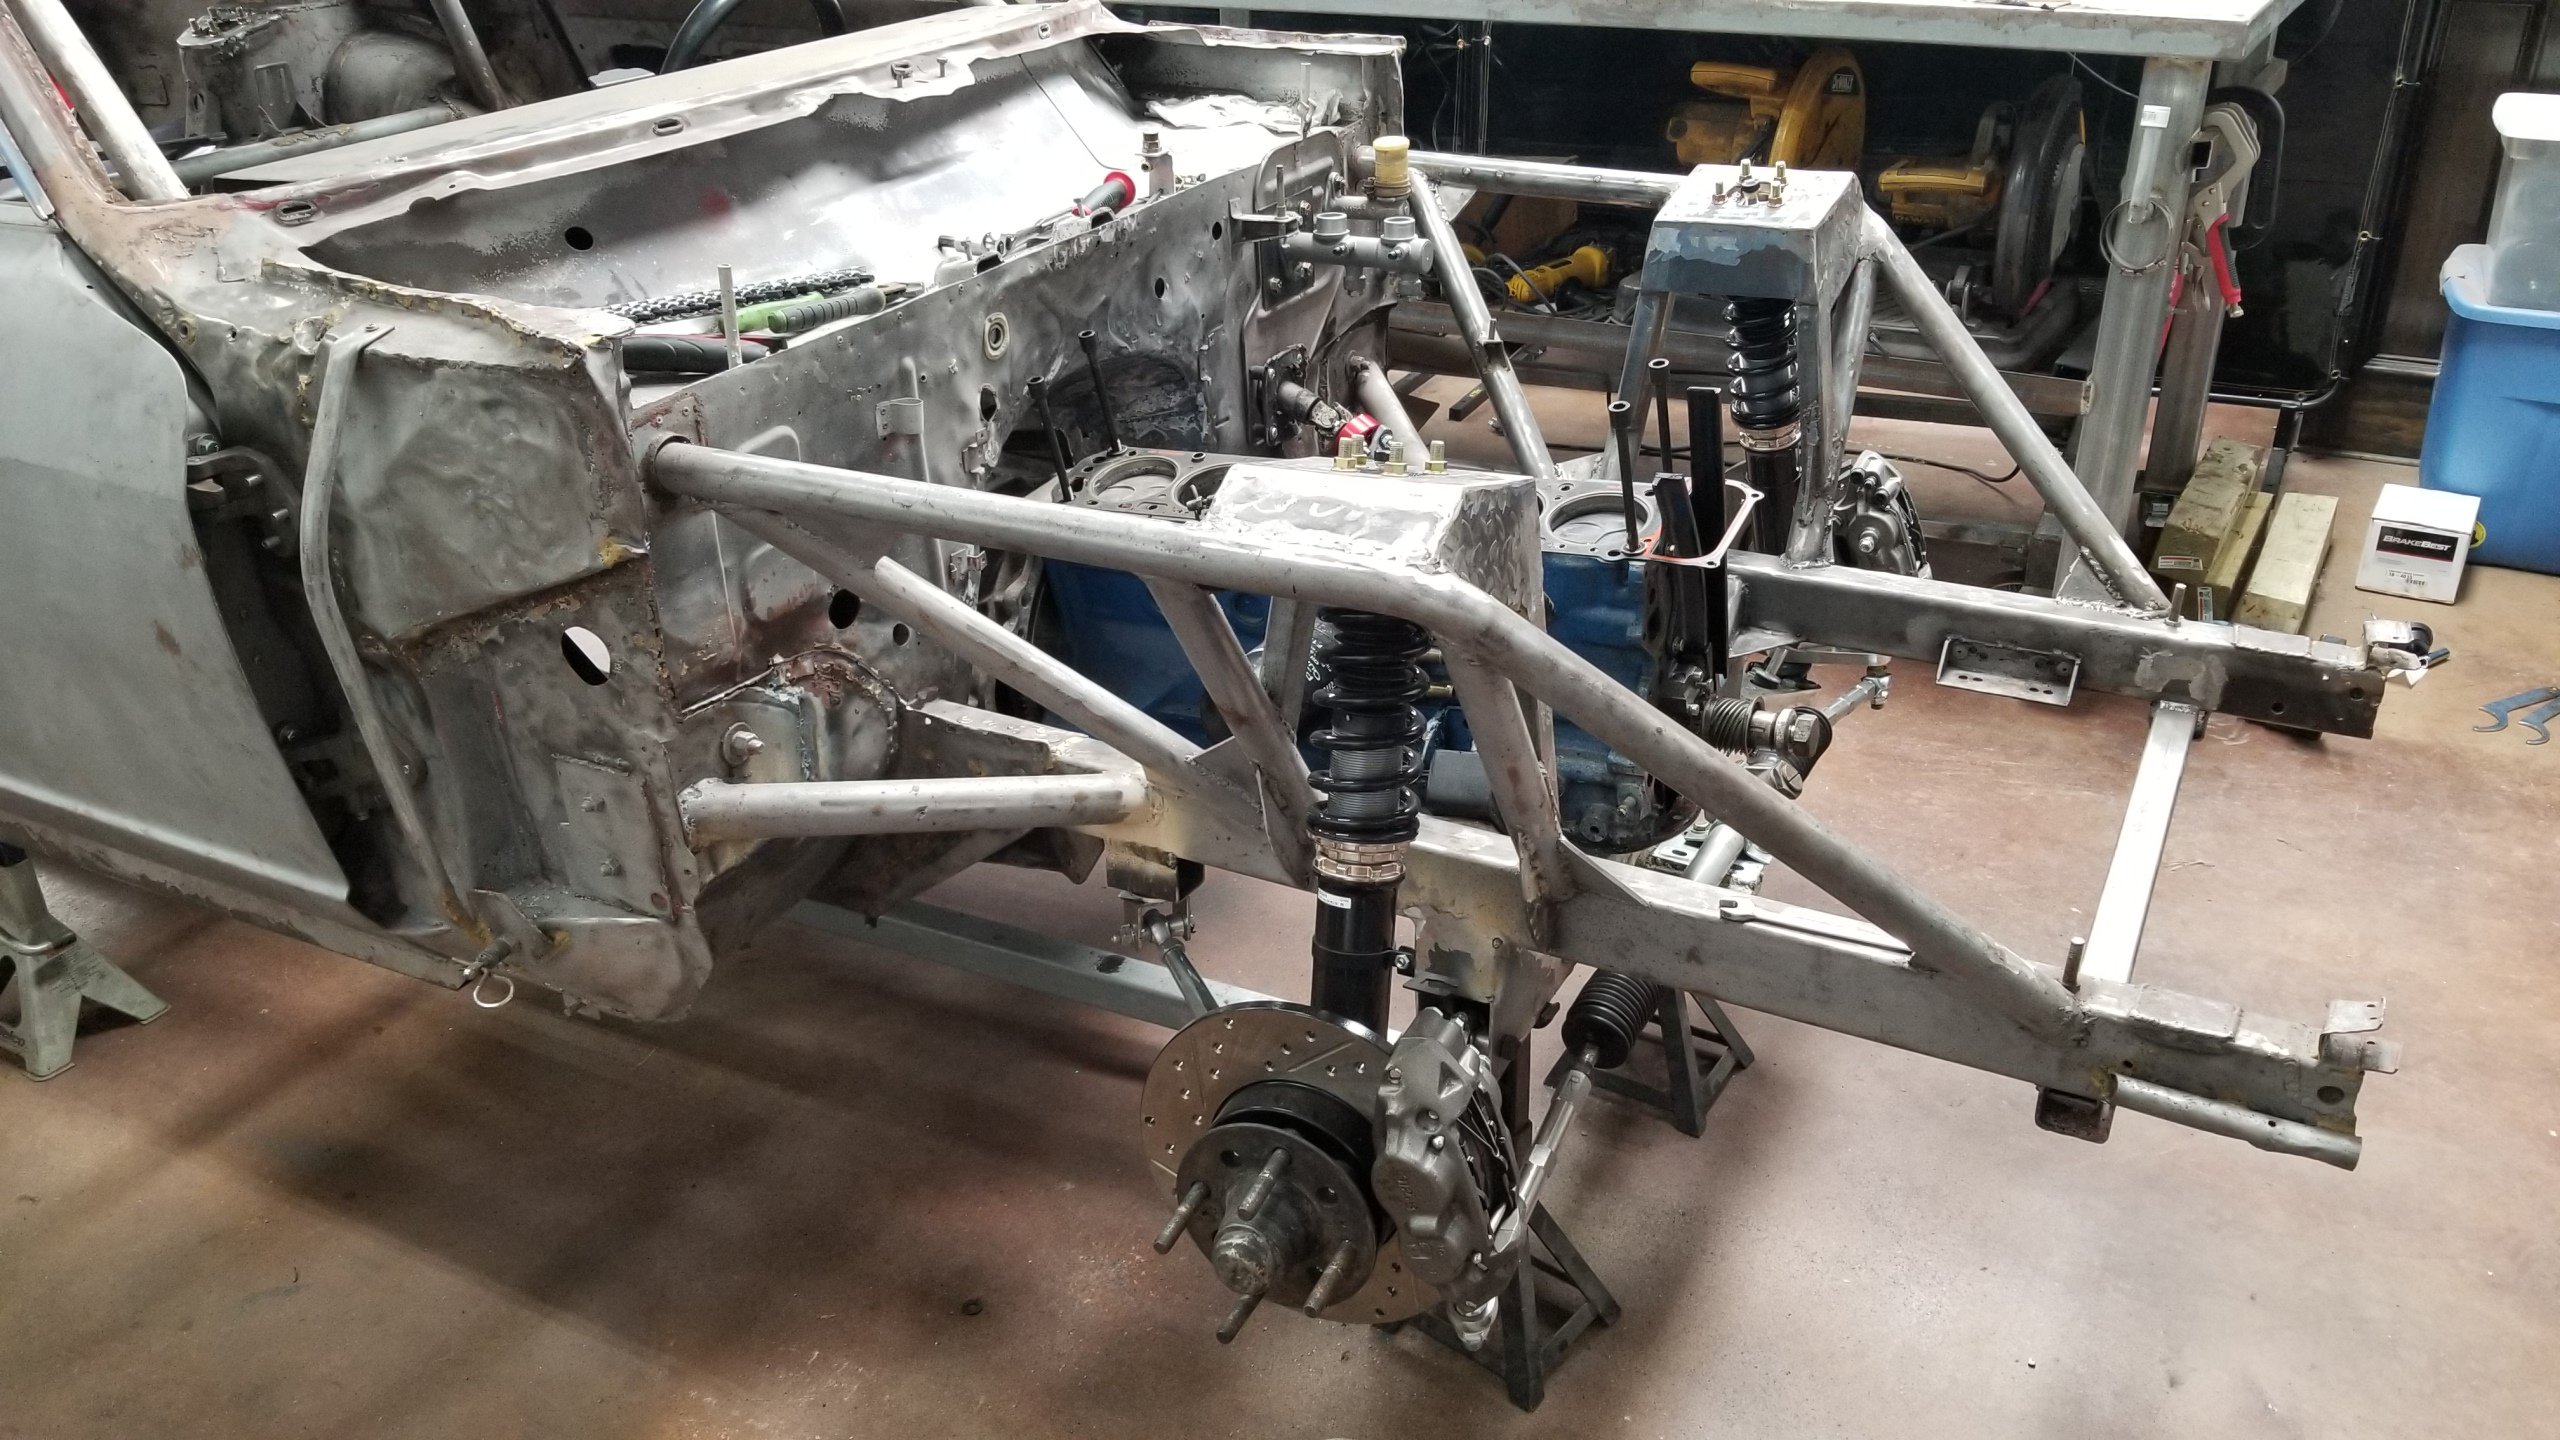
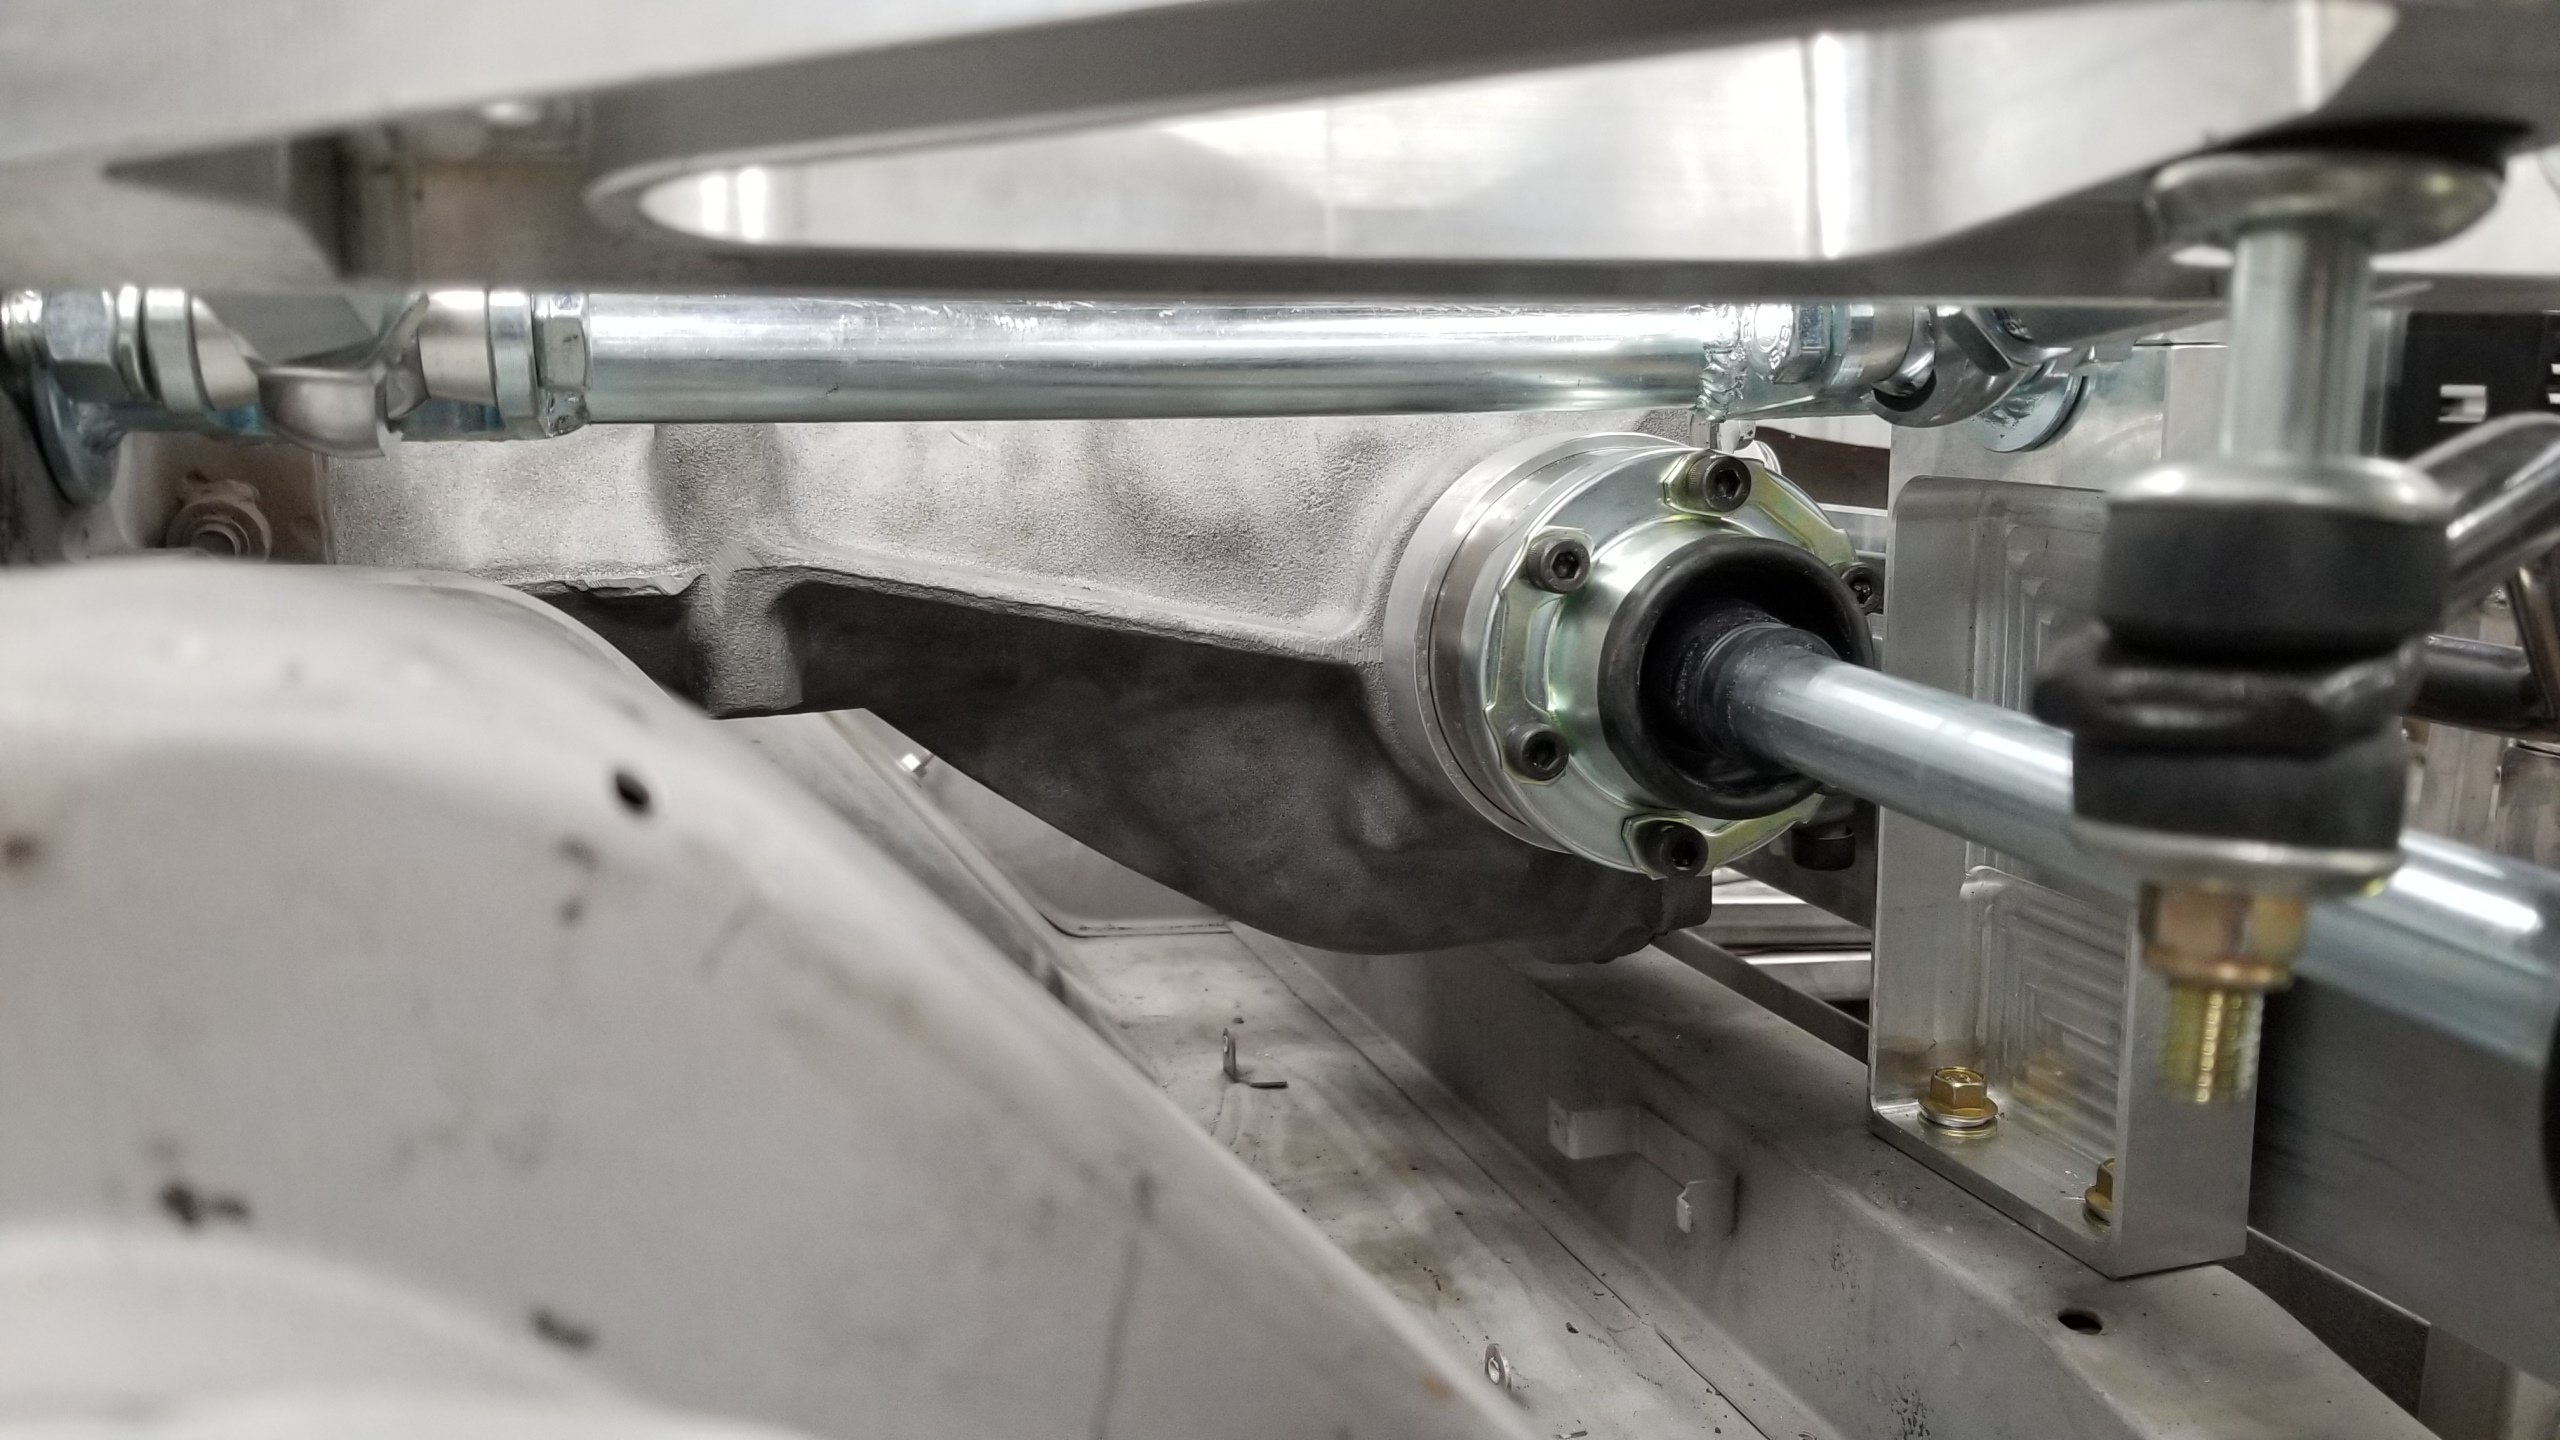
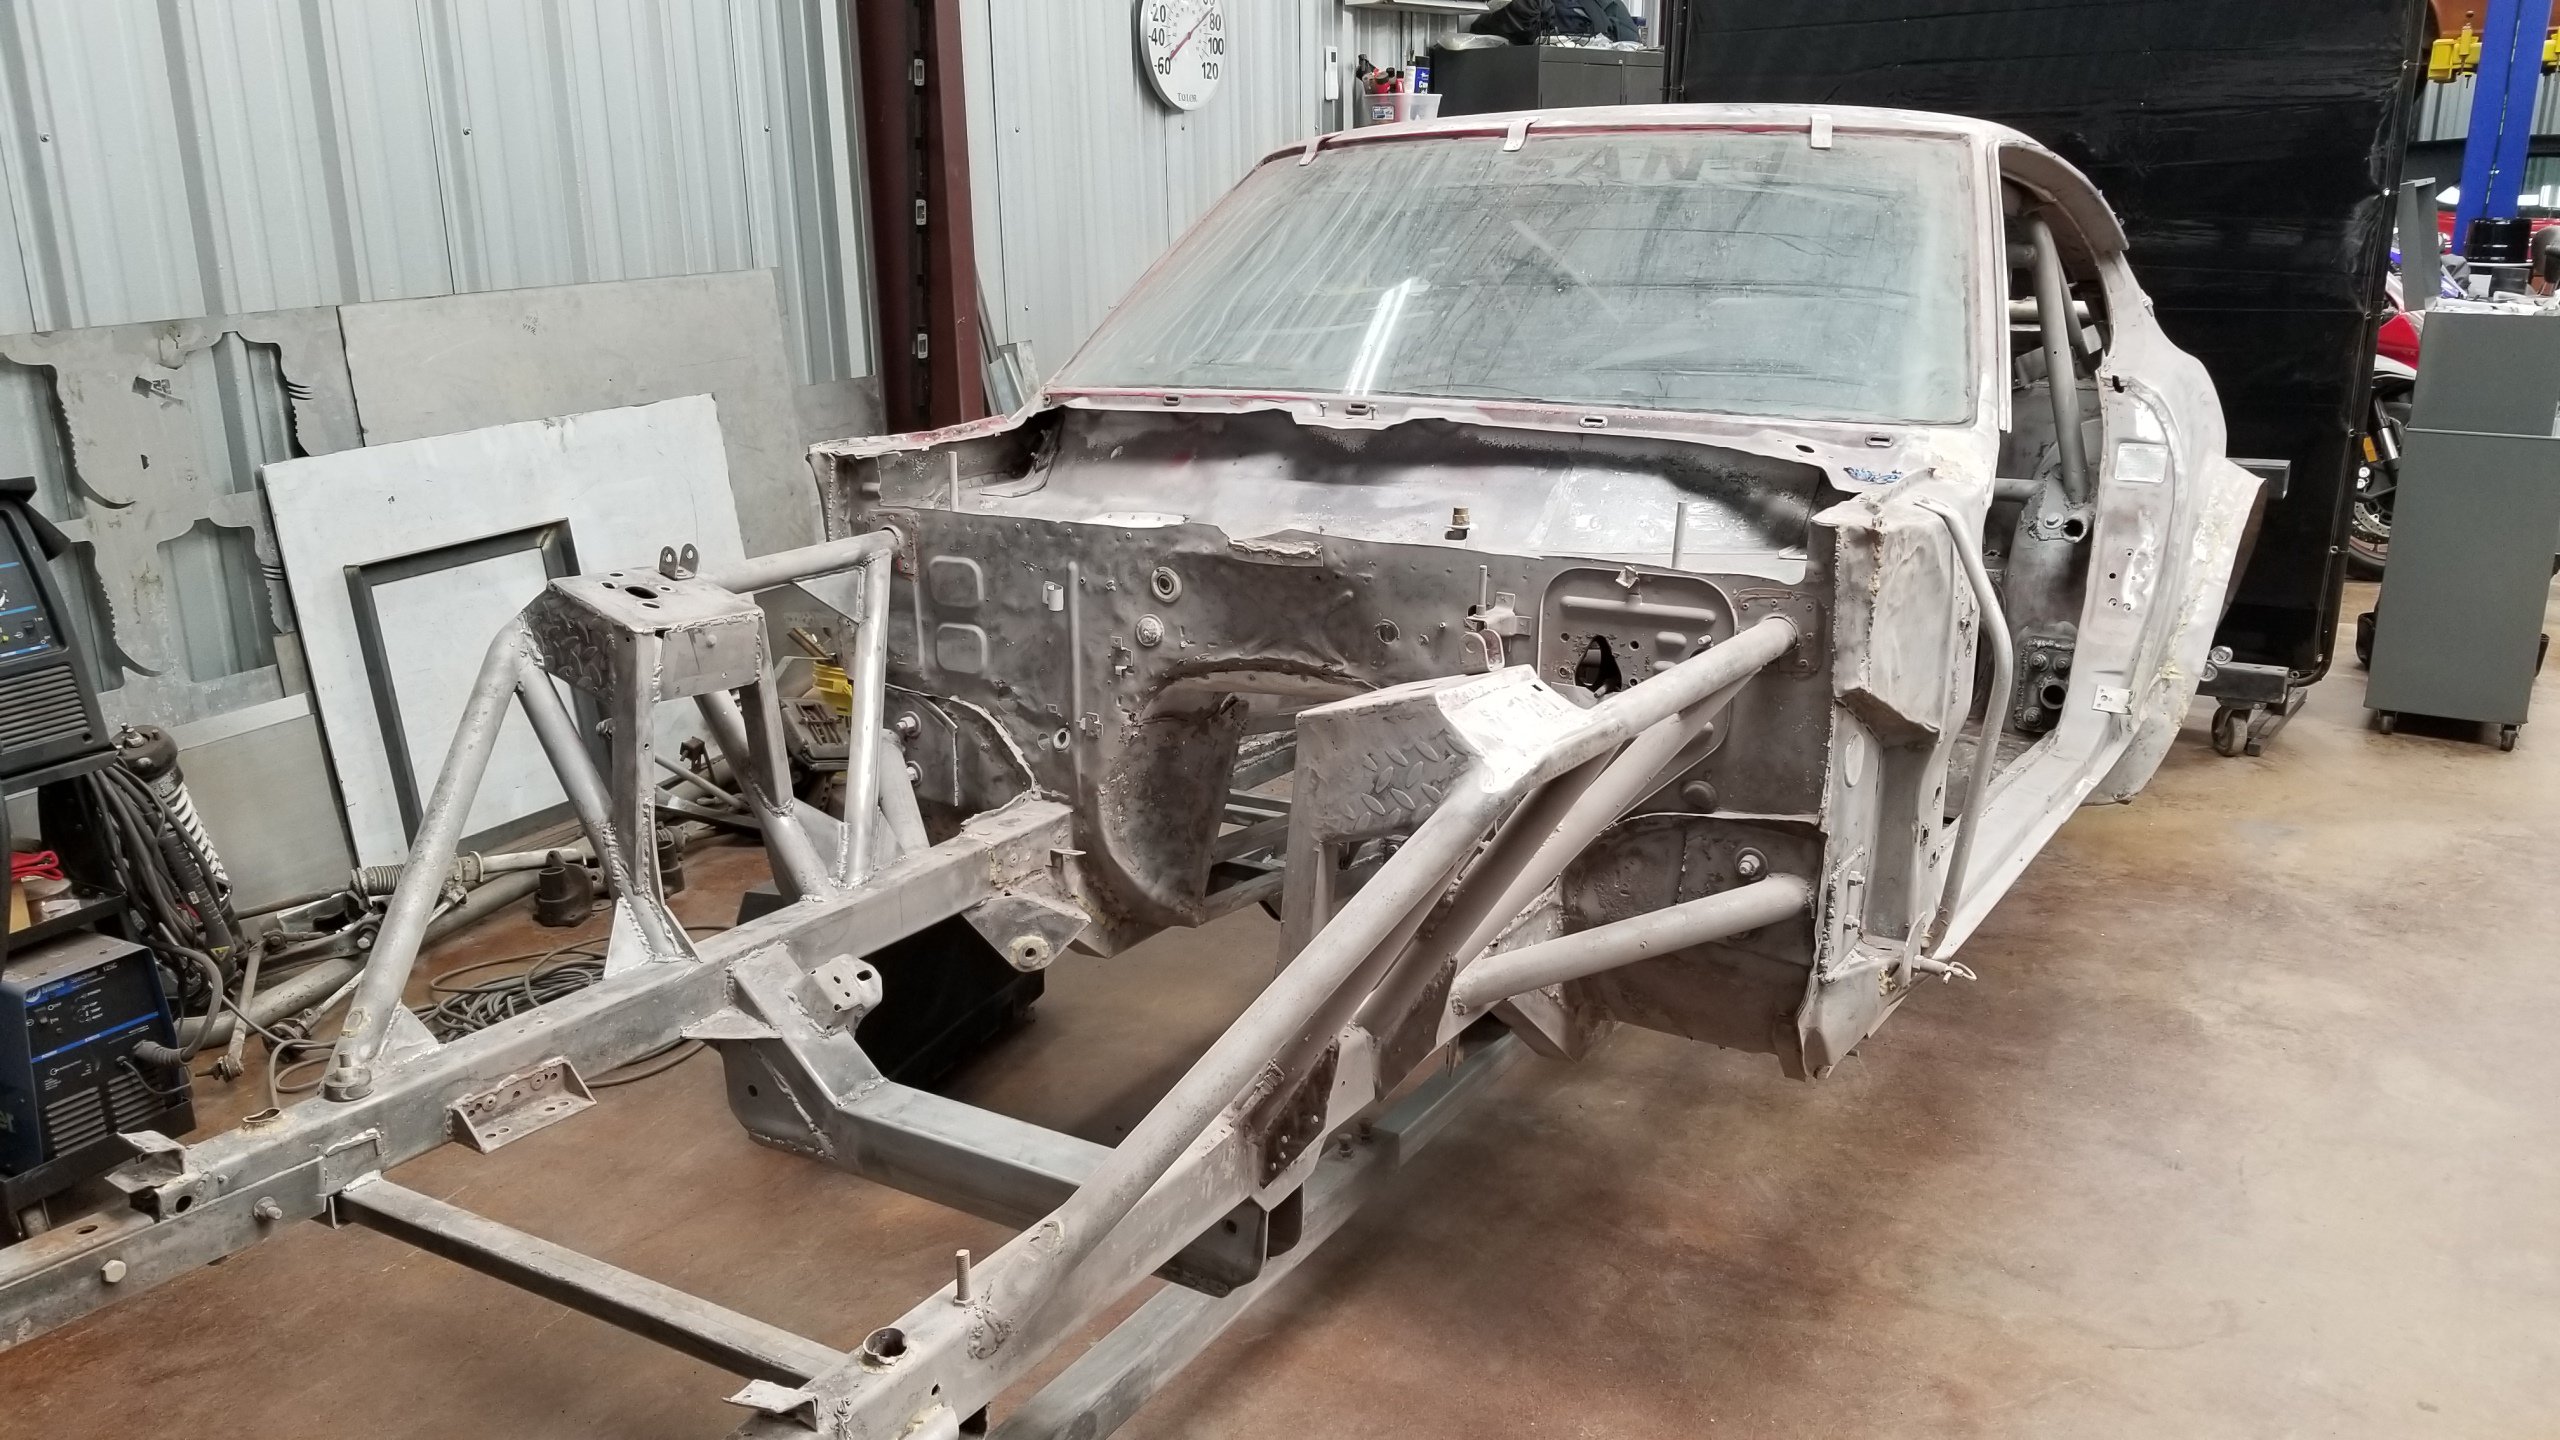
Mocking up the front suspension on the race car and ran into an issue. Sway bar is too short to match up with Arizona Z lower control arm mounts. Logic tells me i can narrow the distance by drilling another hole and move the lower control arm in an inch on each side. Dimensions of another 1973 240Z I have below along with current 1970 240Z race car. My question is, if I narrow the distance to fit the sway bar, how narrow to allow lower control arm adjustments and will the sway bar stretch? Thanks in advance for the help. 1973 240 Z Stock 1970 240Z Race car 51" font rotor to rotor W. 51 1/4" 39" sway bar pin to pin. 40 1/2" 52" rear rotor to rotor W. 52"
-
Z-Envy Race Car - Champ Car Series
Gmagno replied to Gmagno's topic in S30 Series - 240z, 260z, 280z
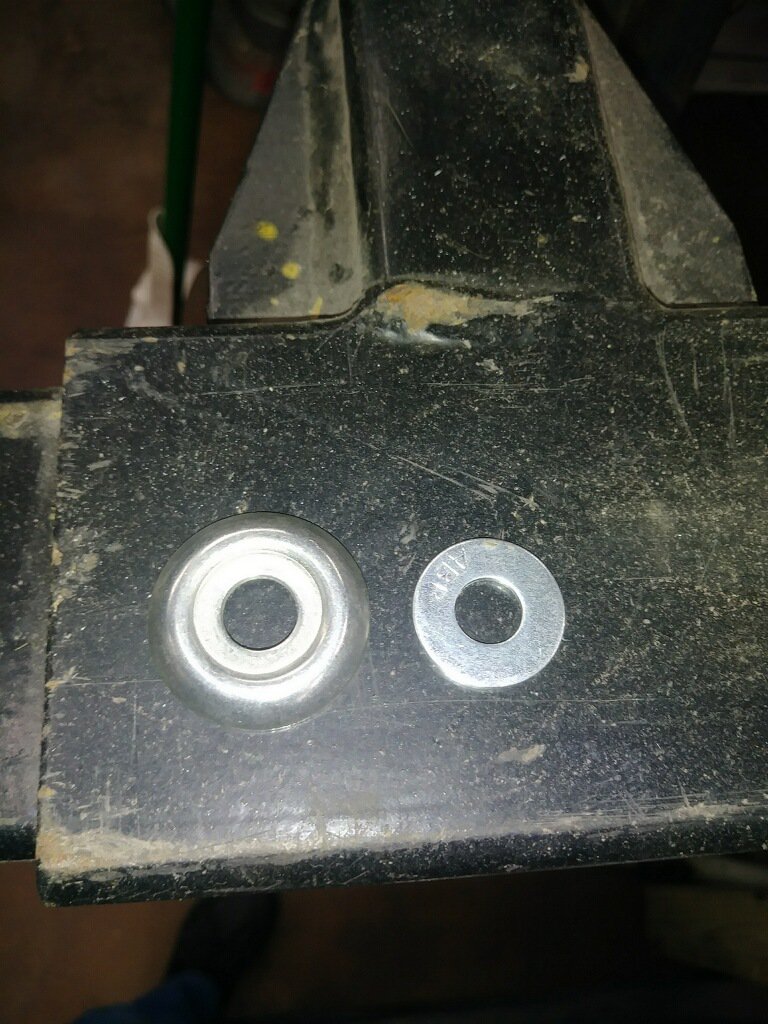
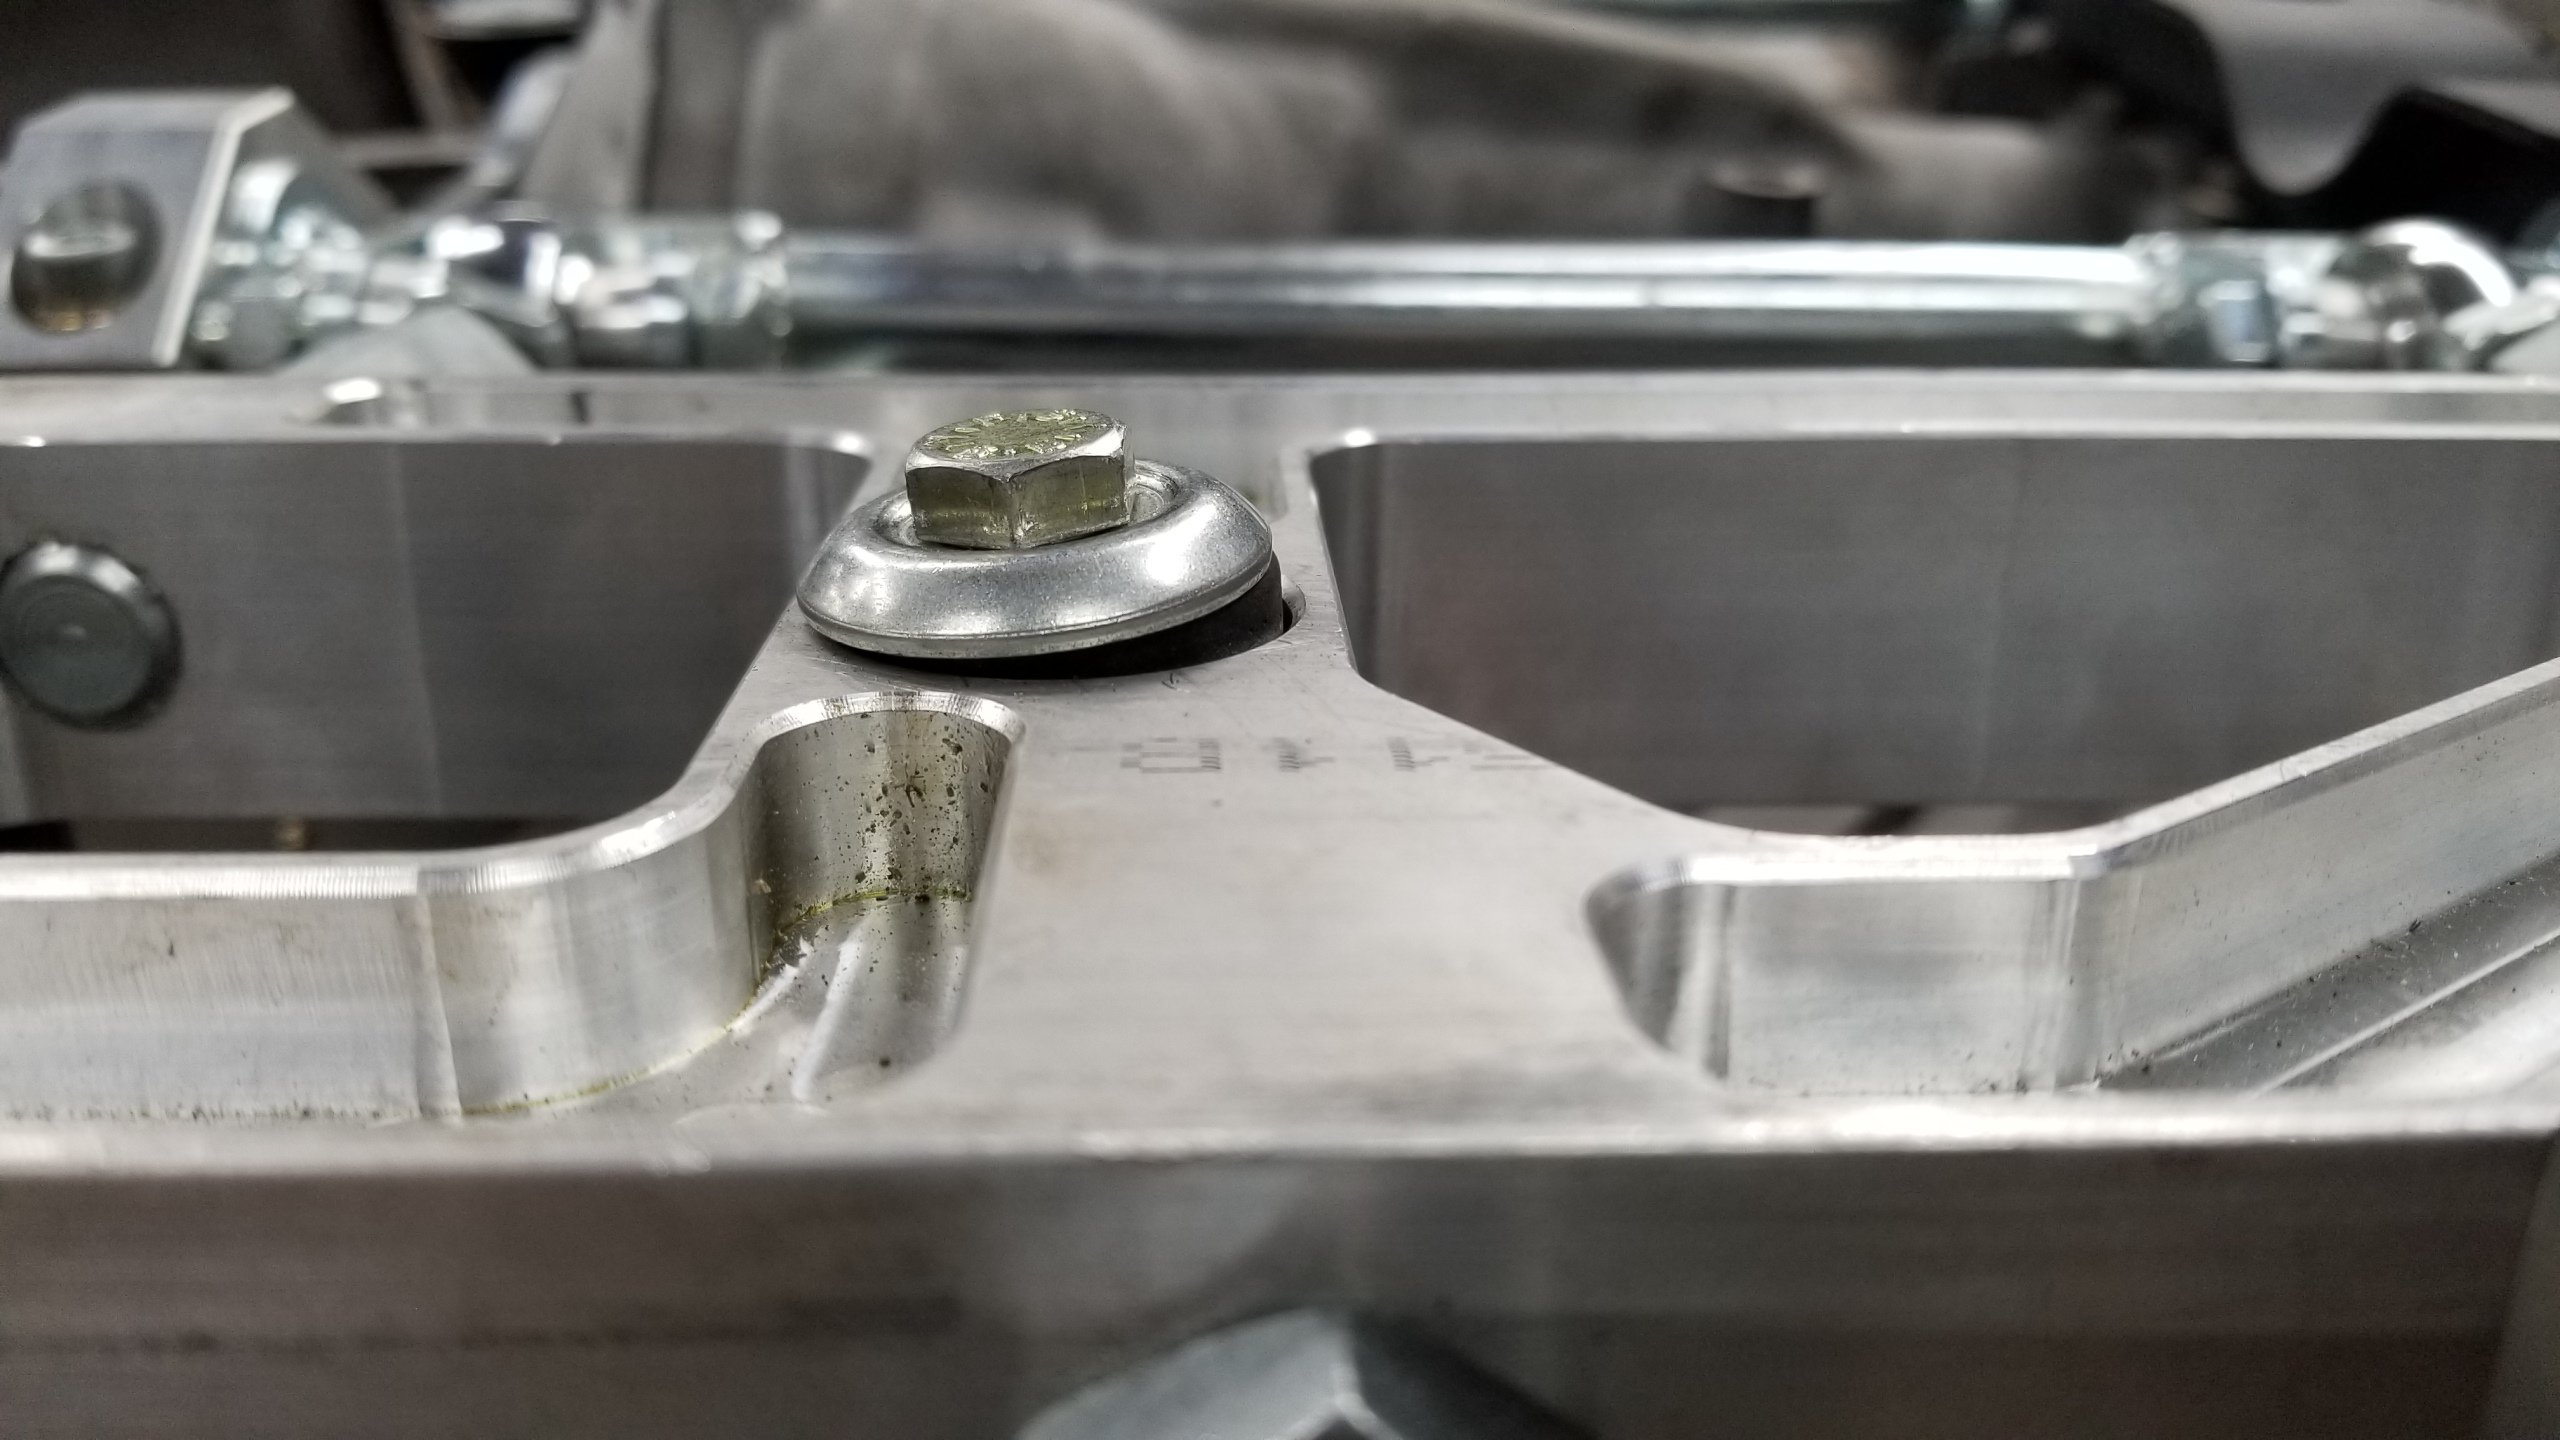
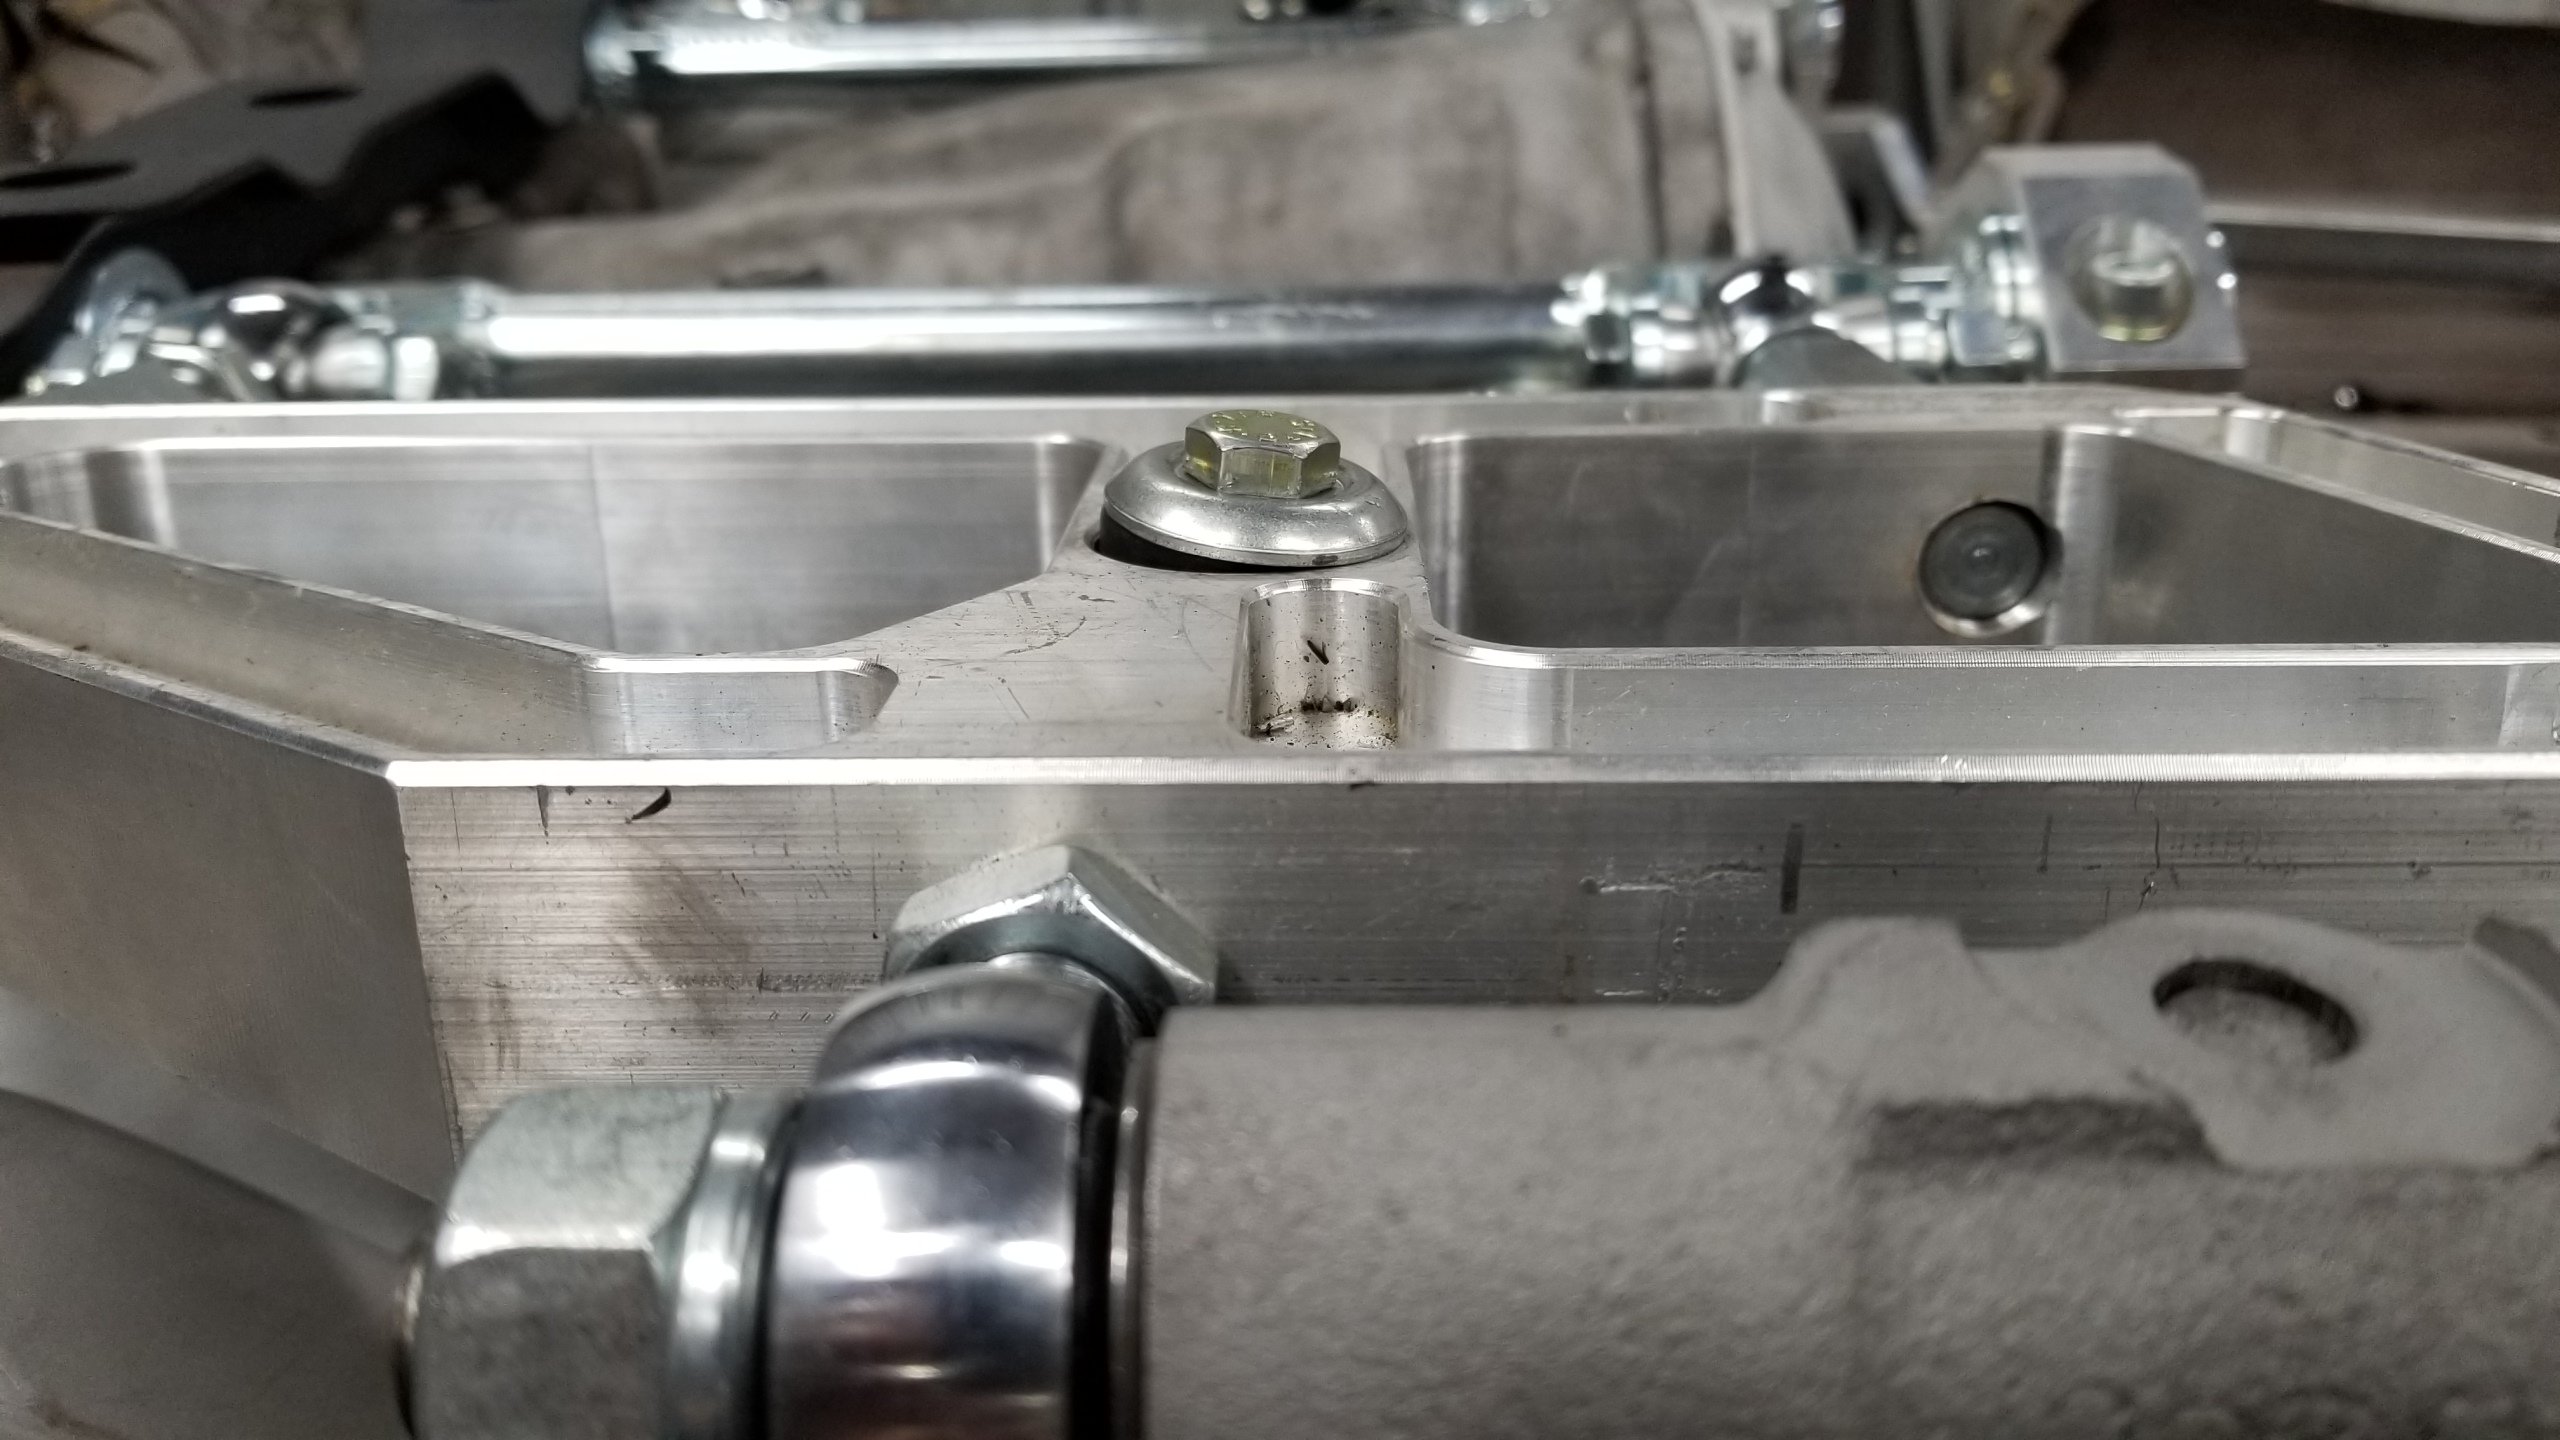
Found smaller washers laying around. Sourcing larger flat washers that match bushing diameter.
-
Z-Envy Race Car - Champ Car Series
Gmagno replied to Gmagno's topic in S30 Series - 240z, 260z, 280z
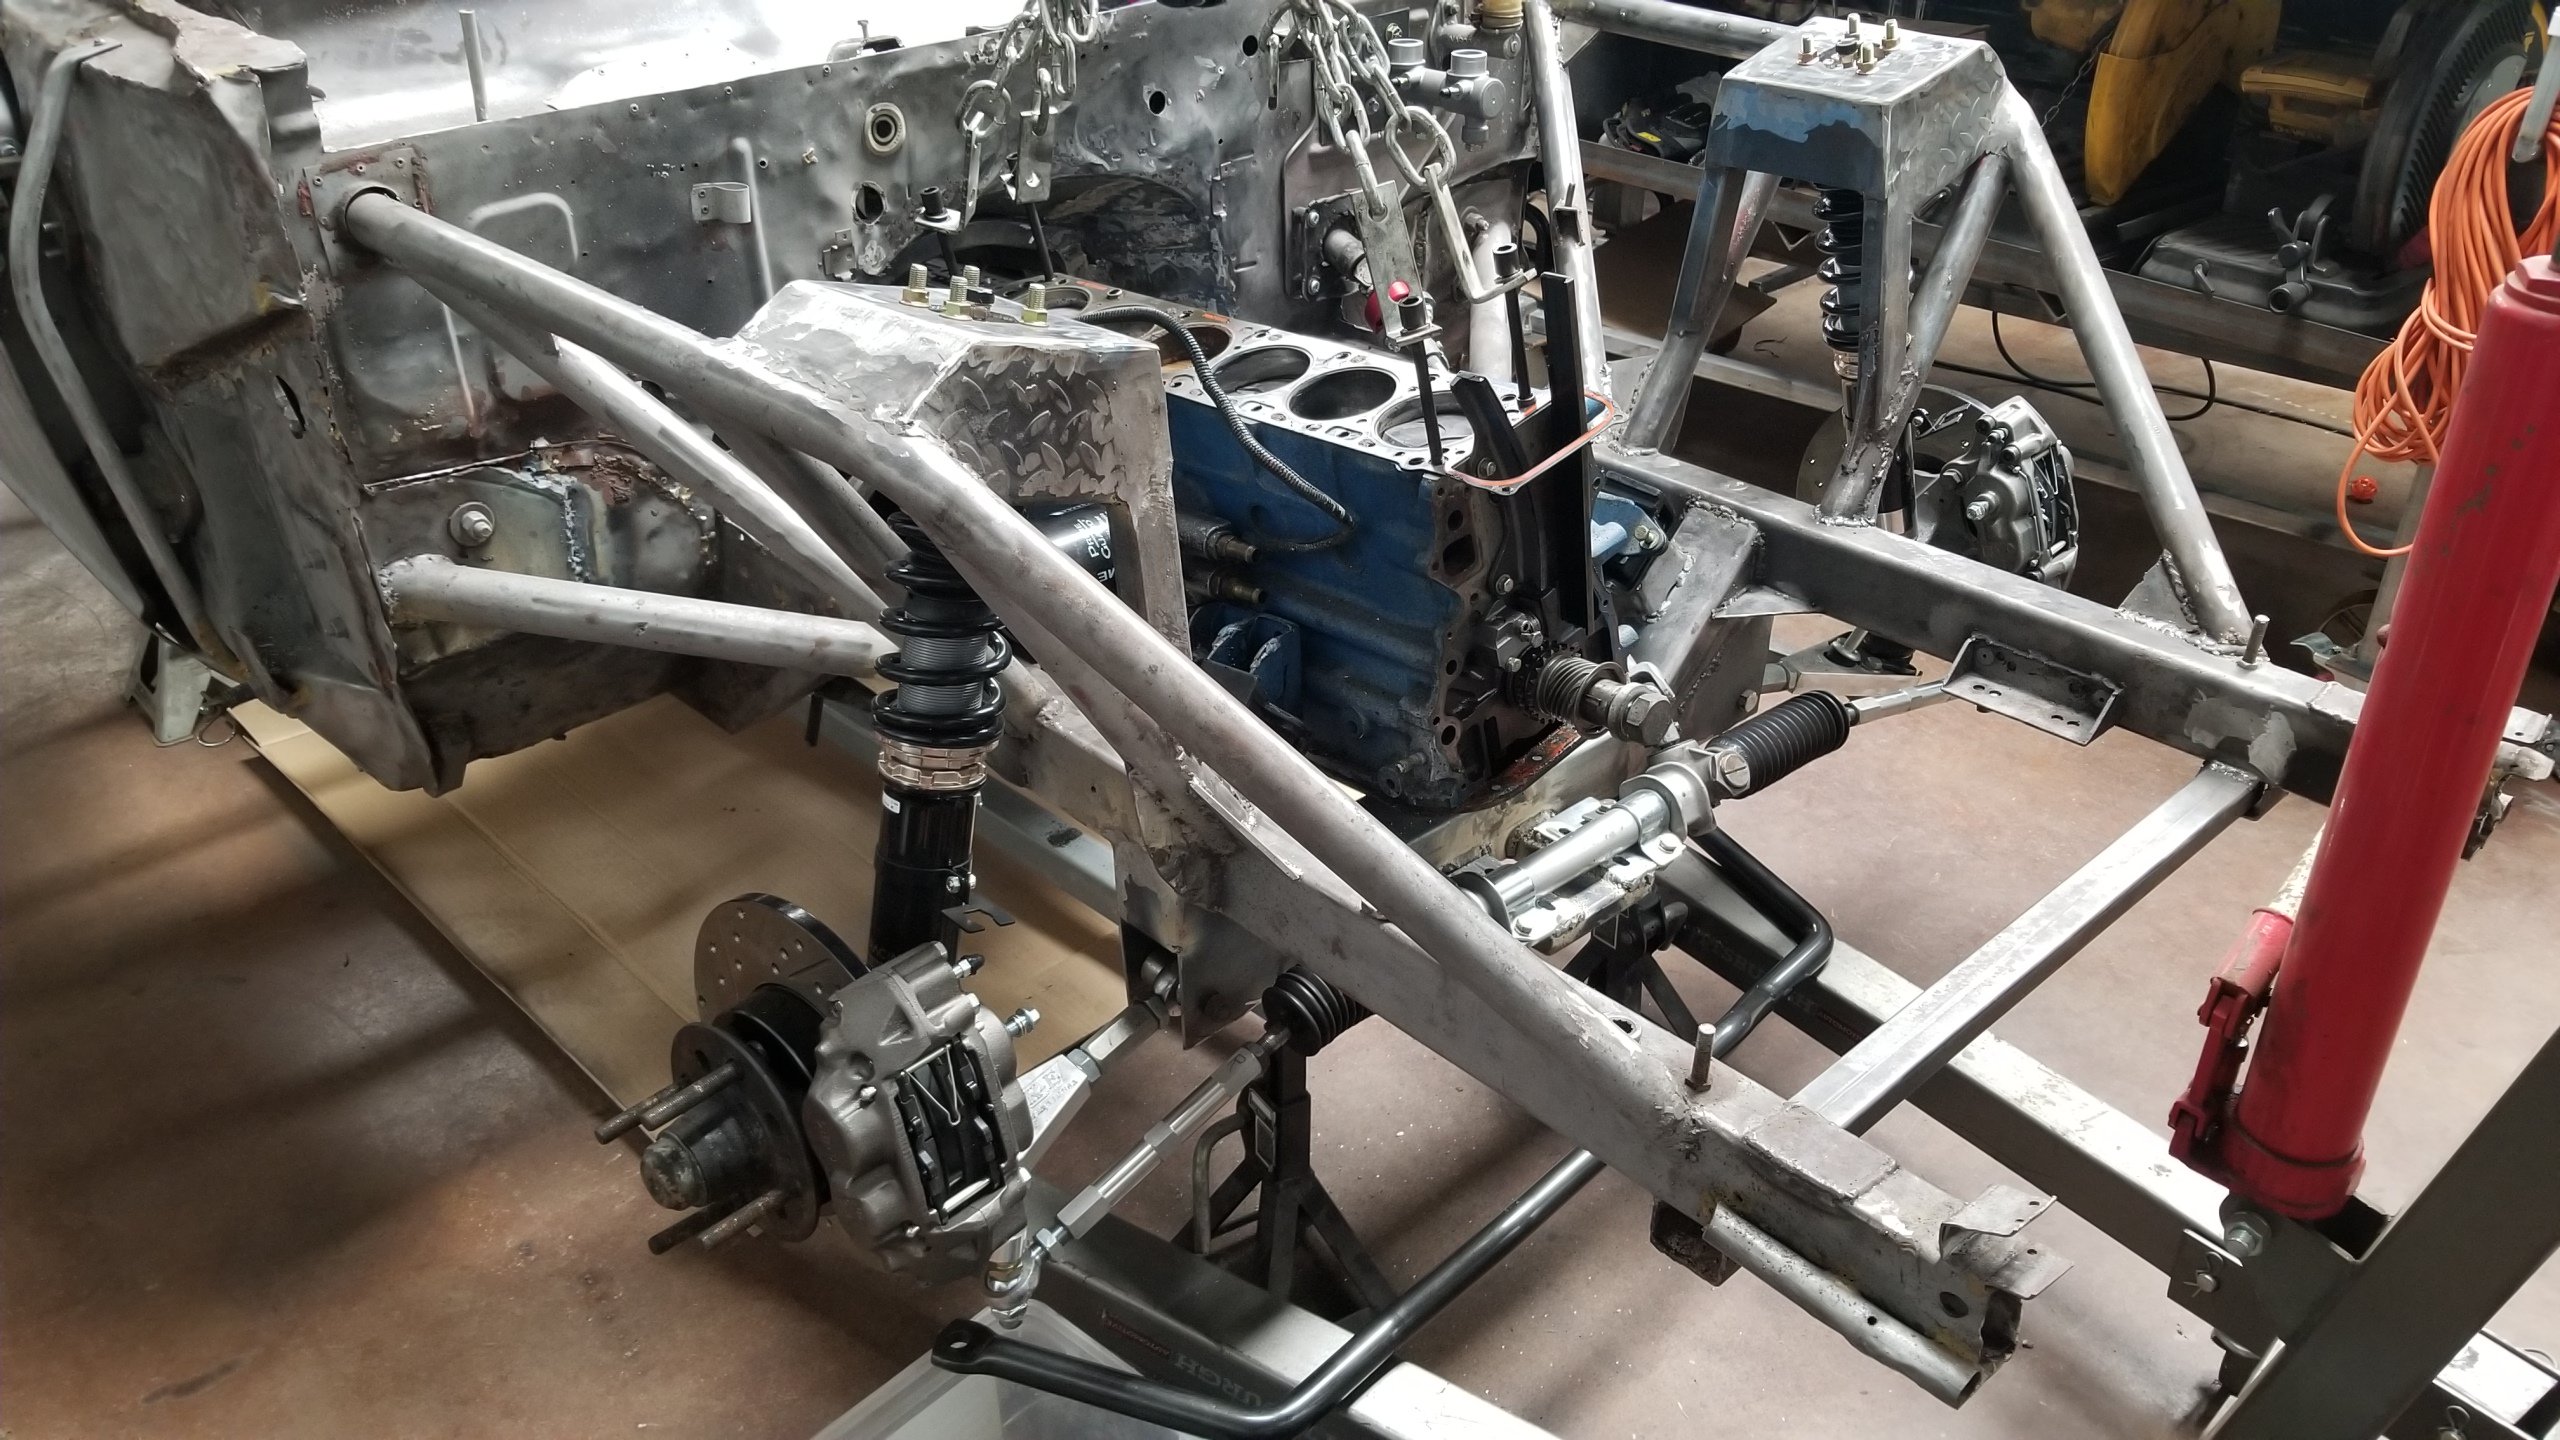
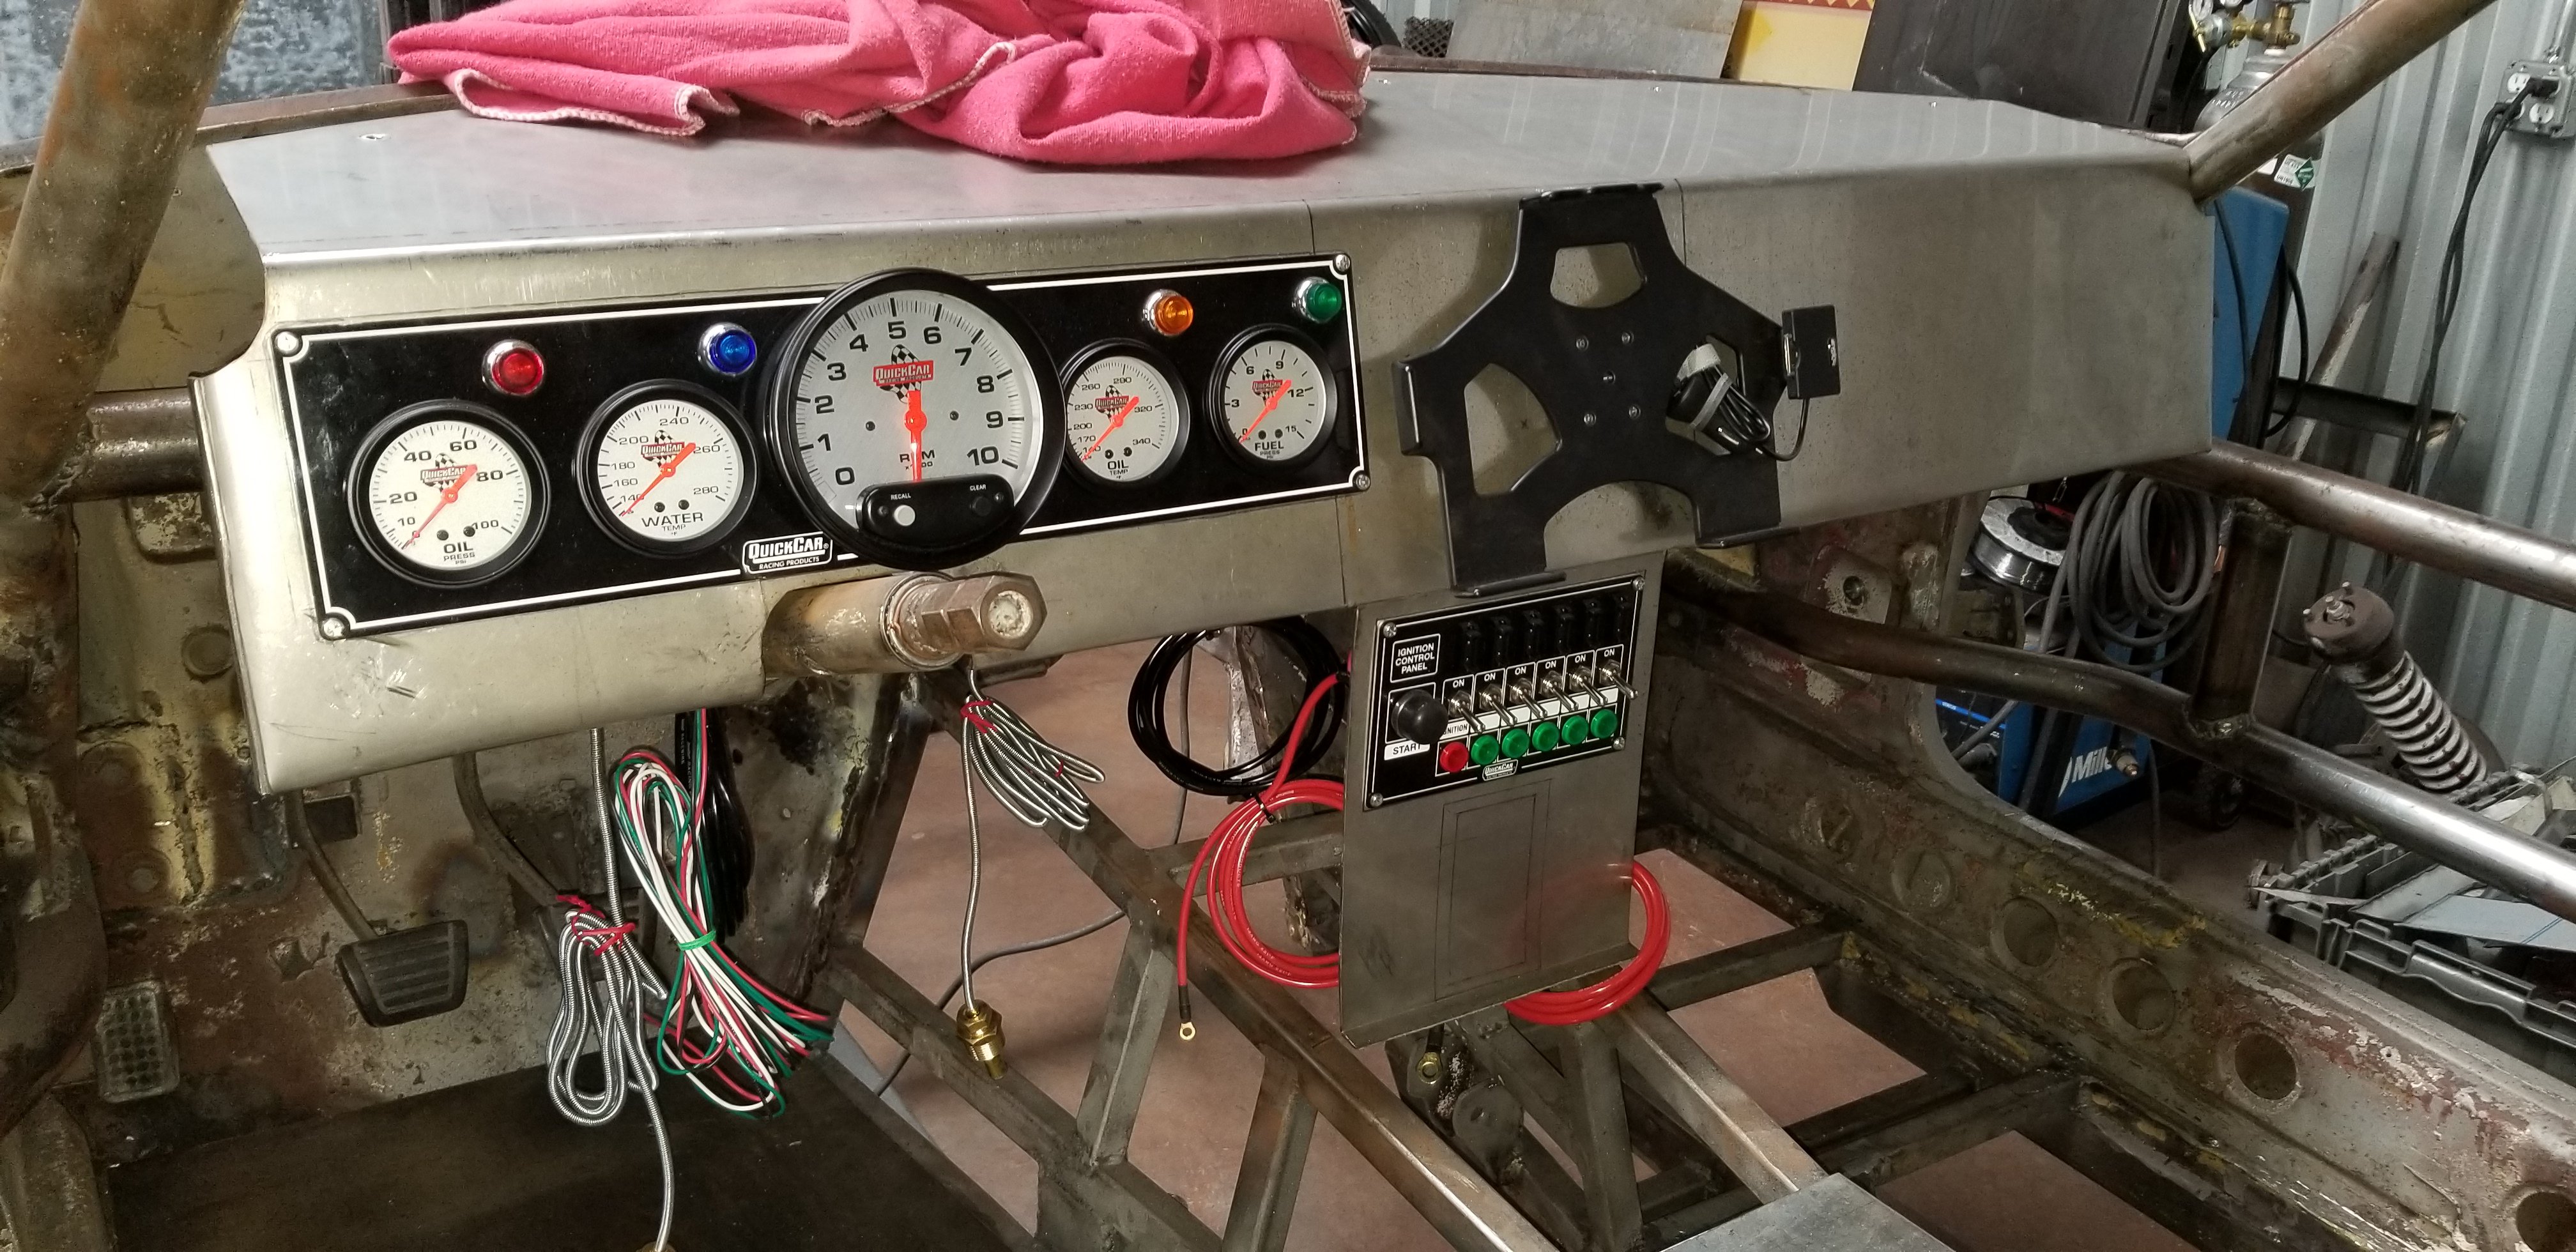
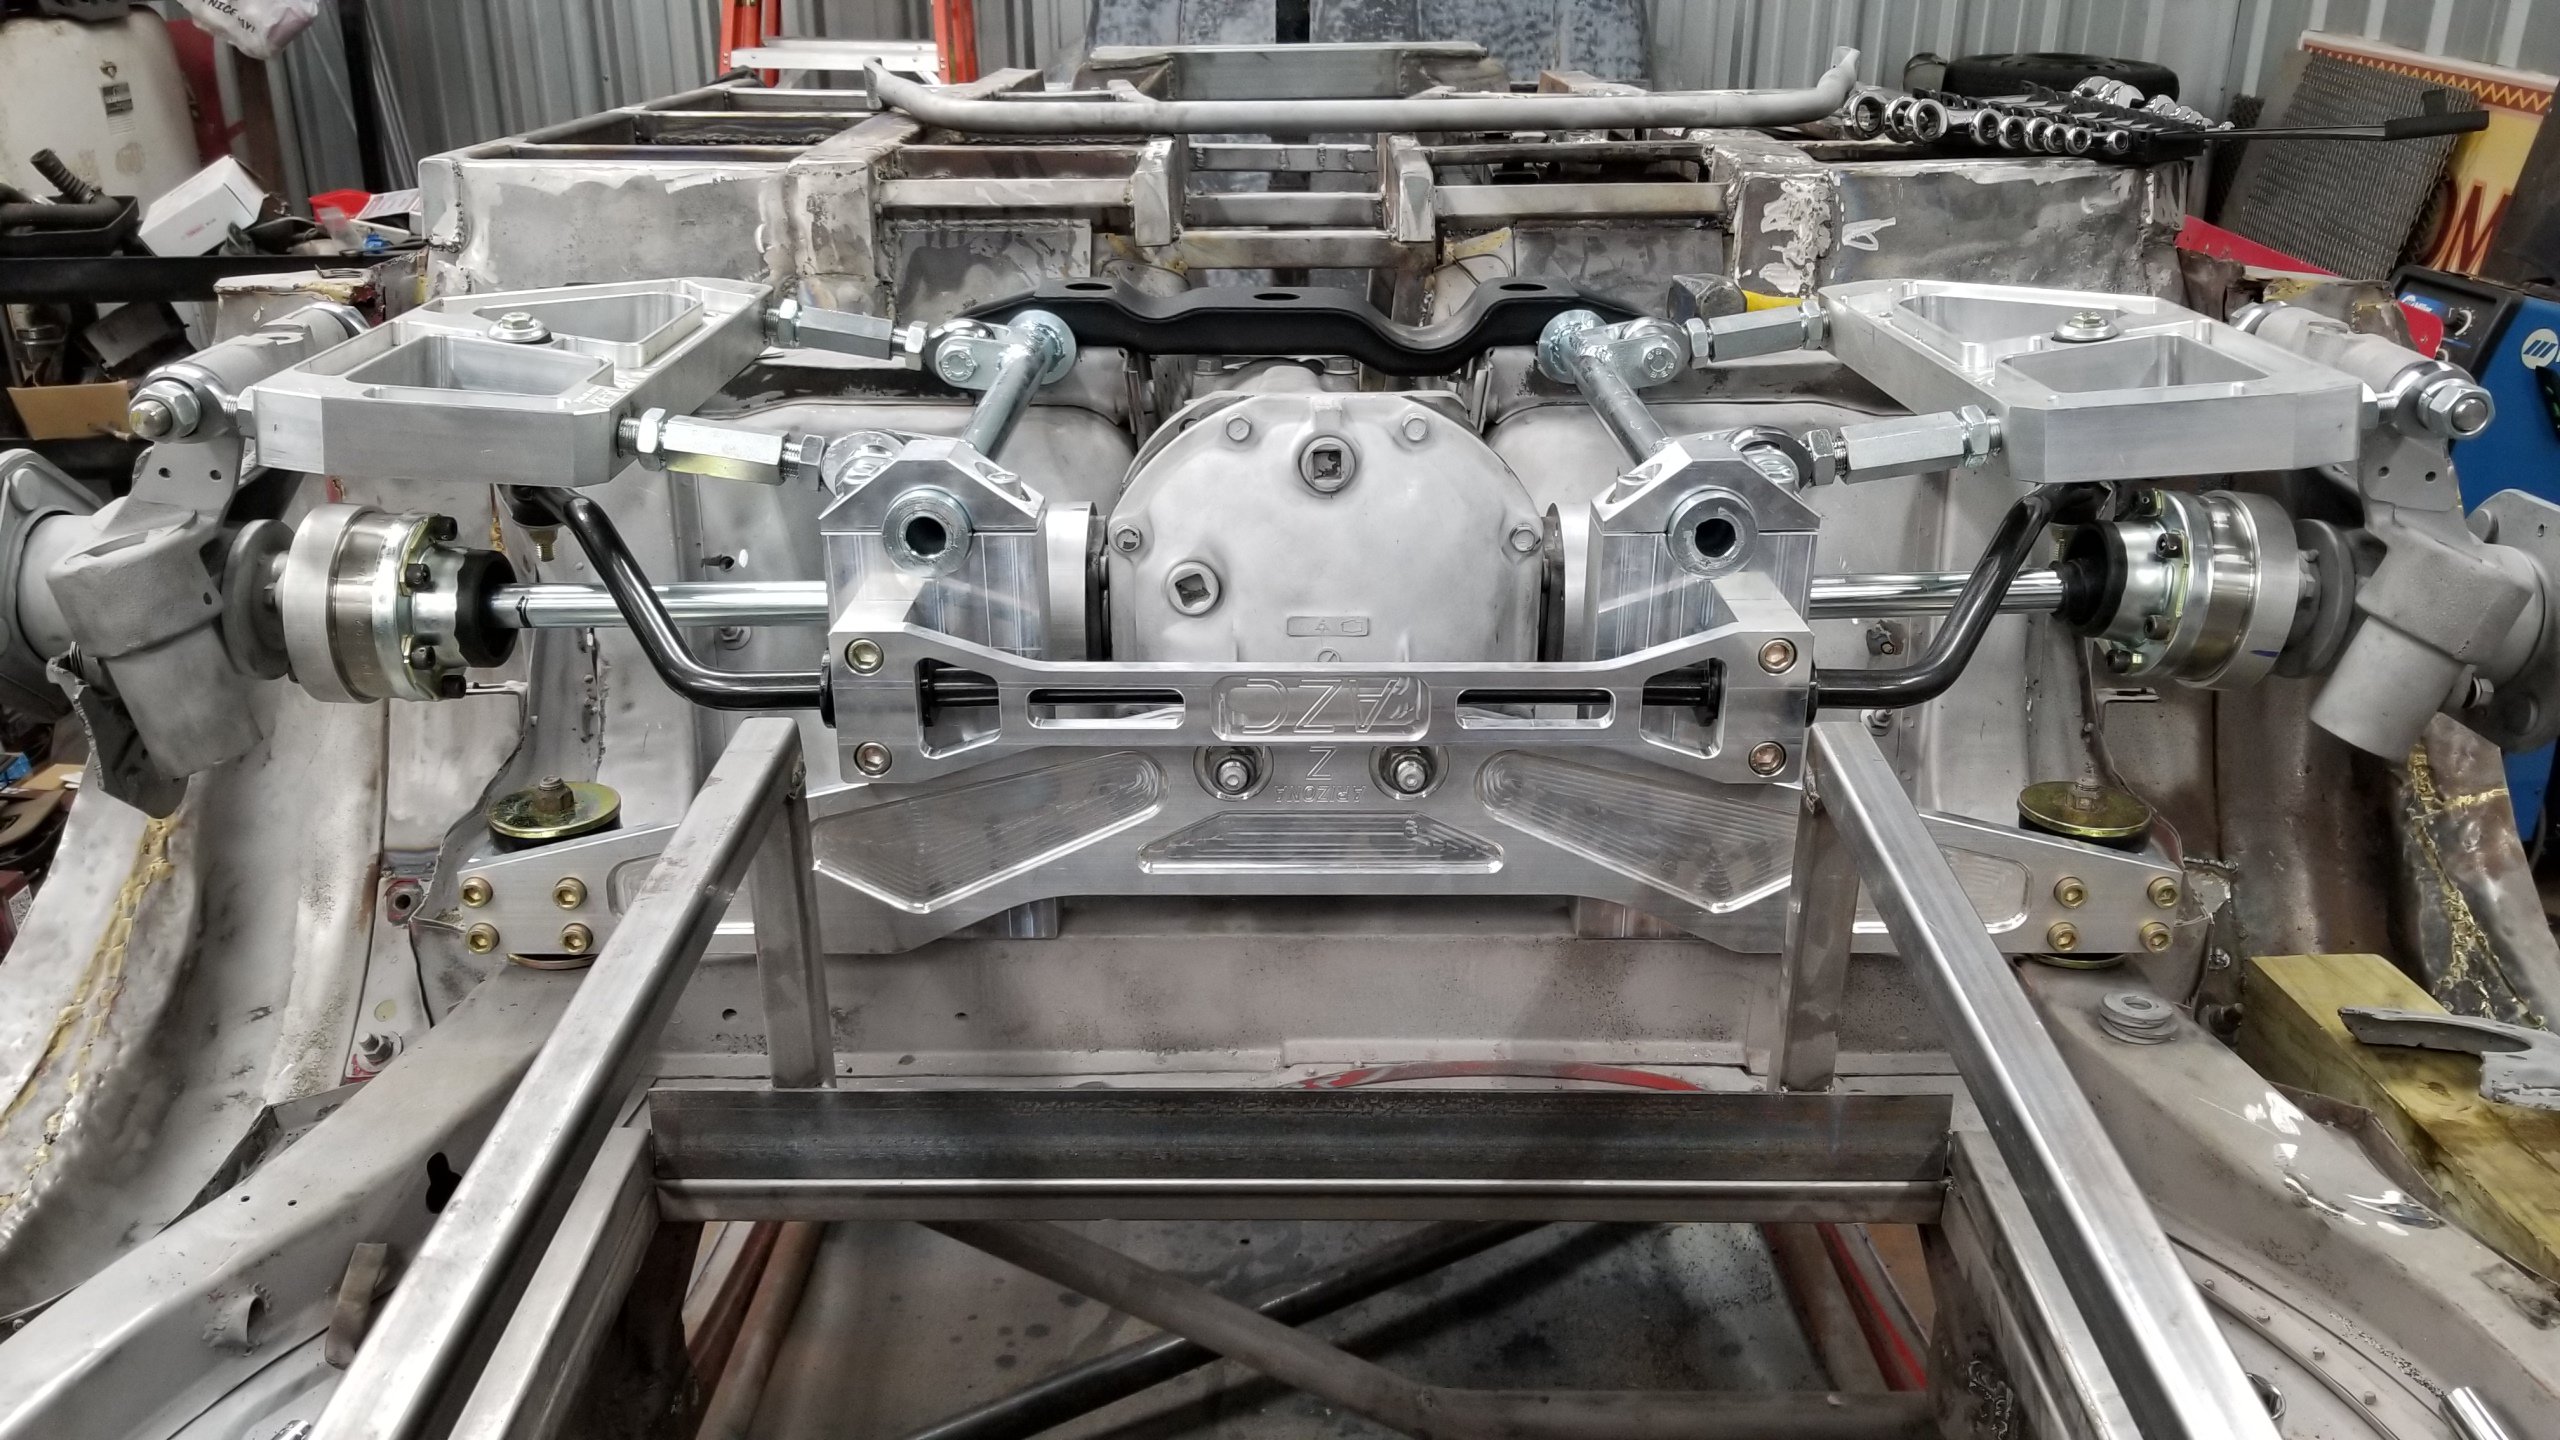
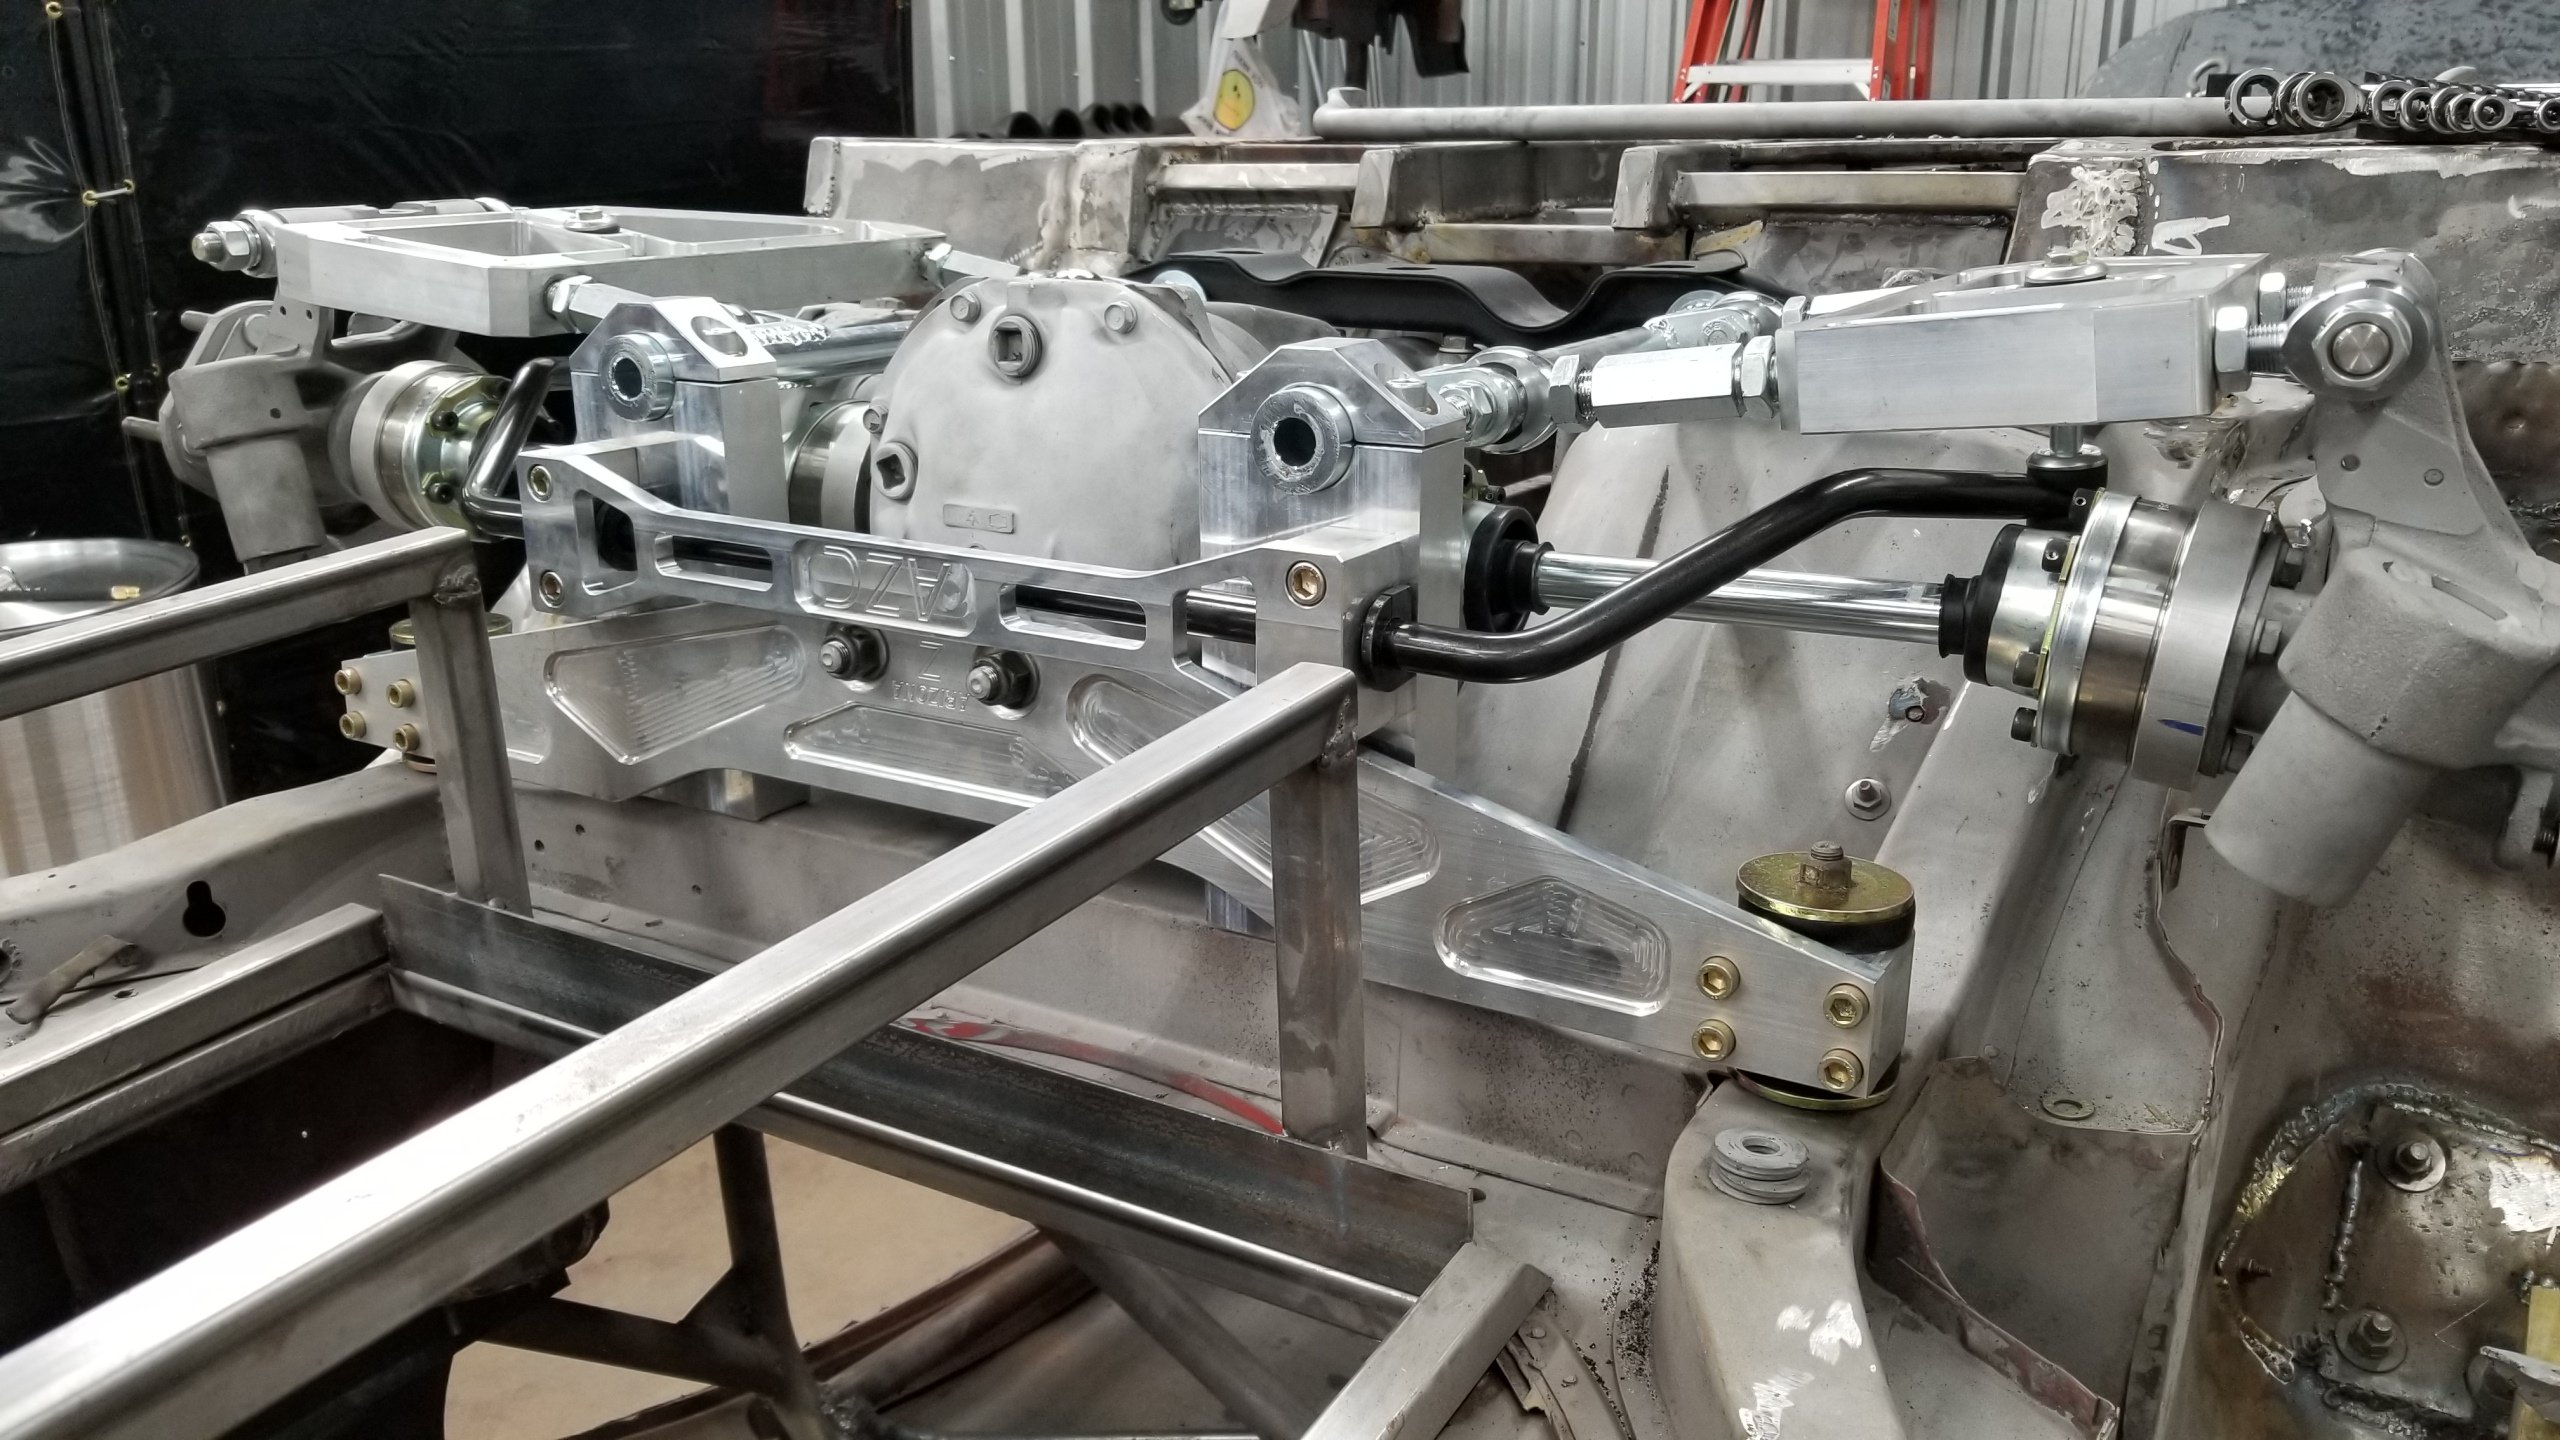
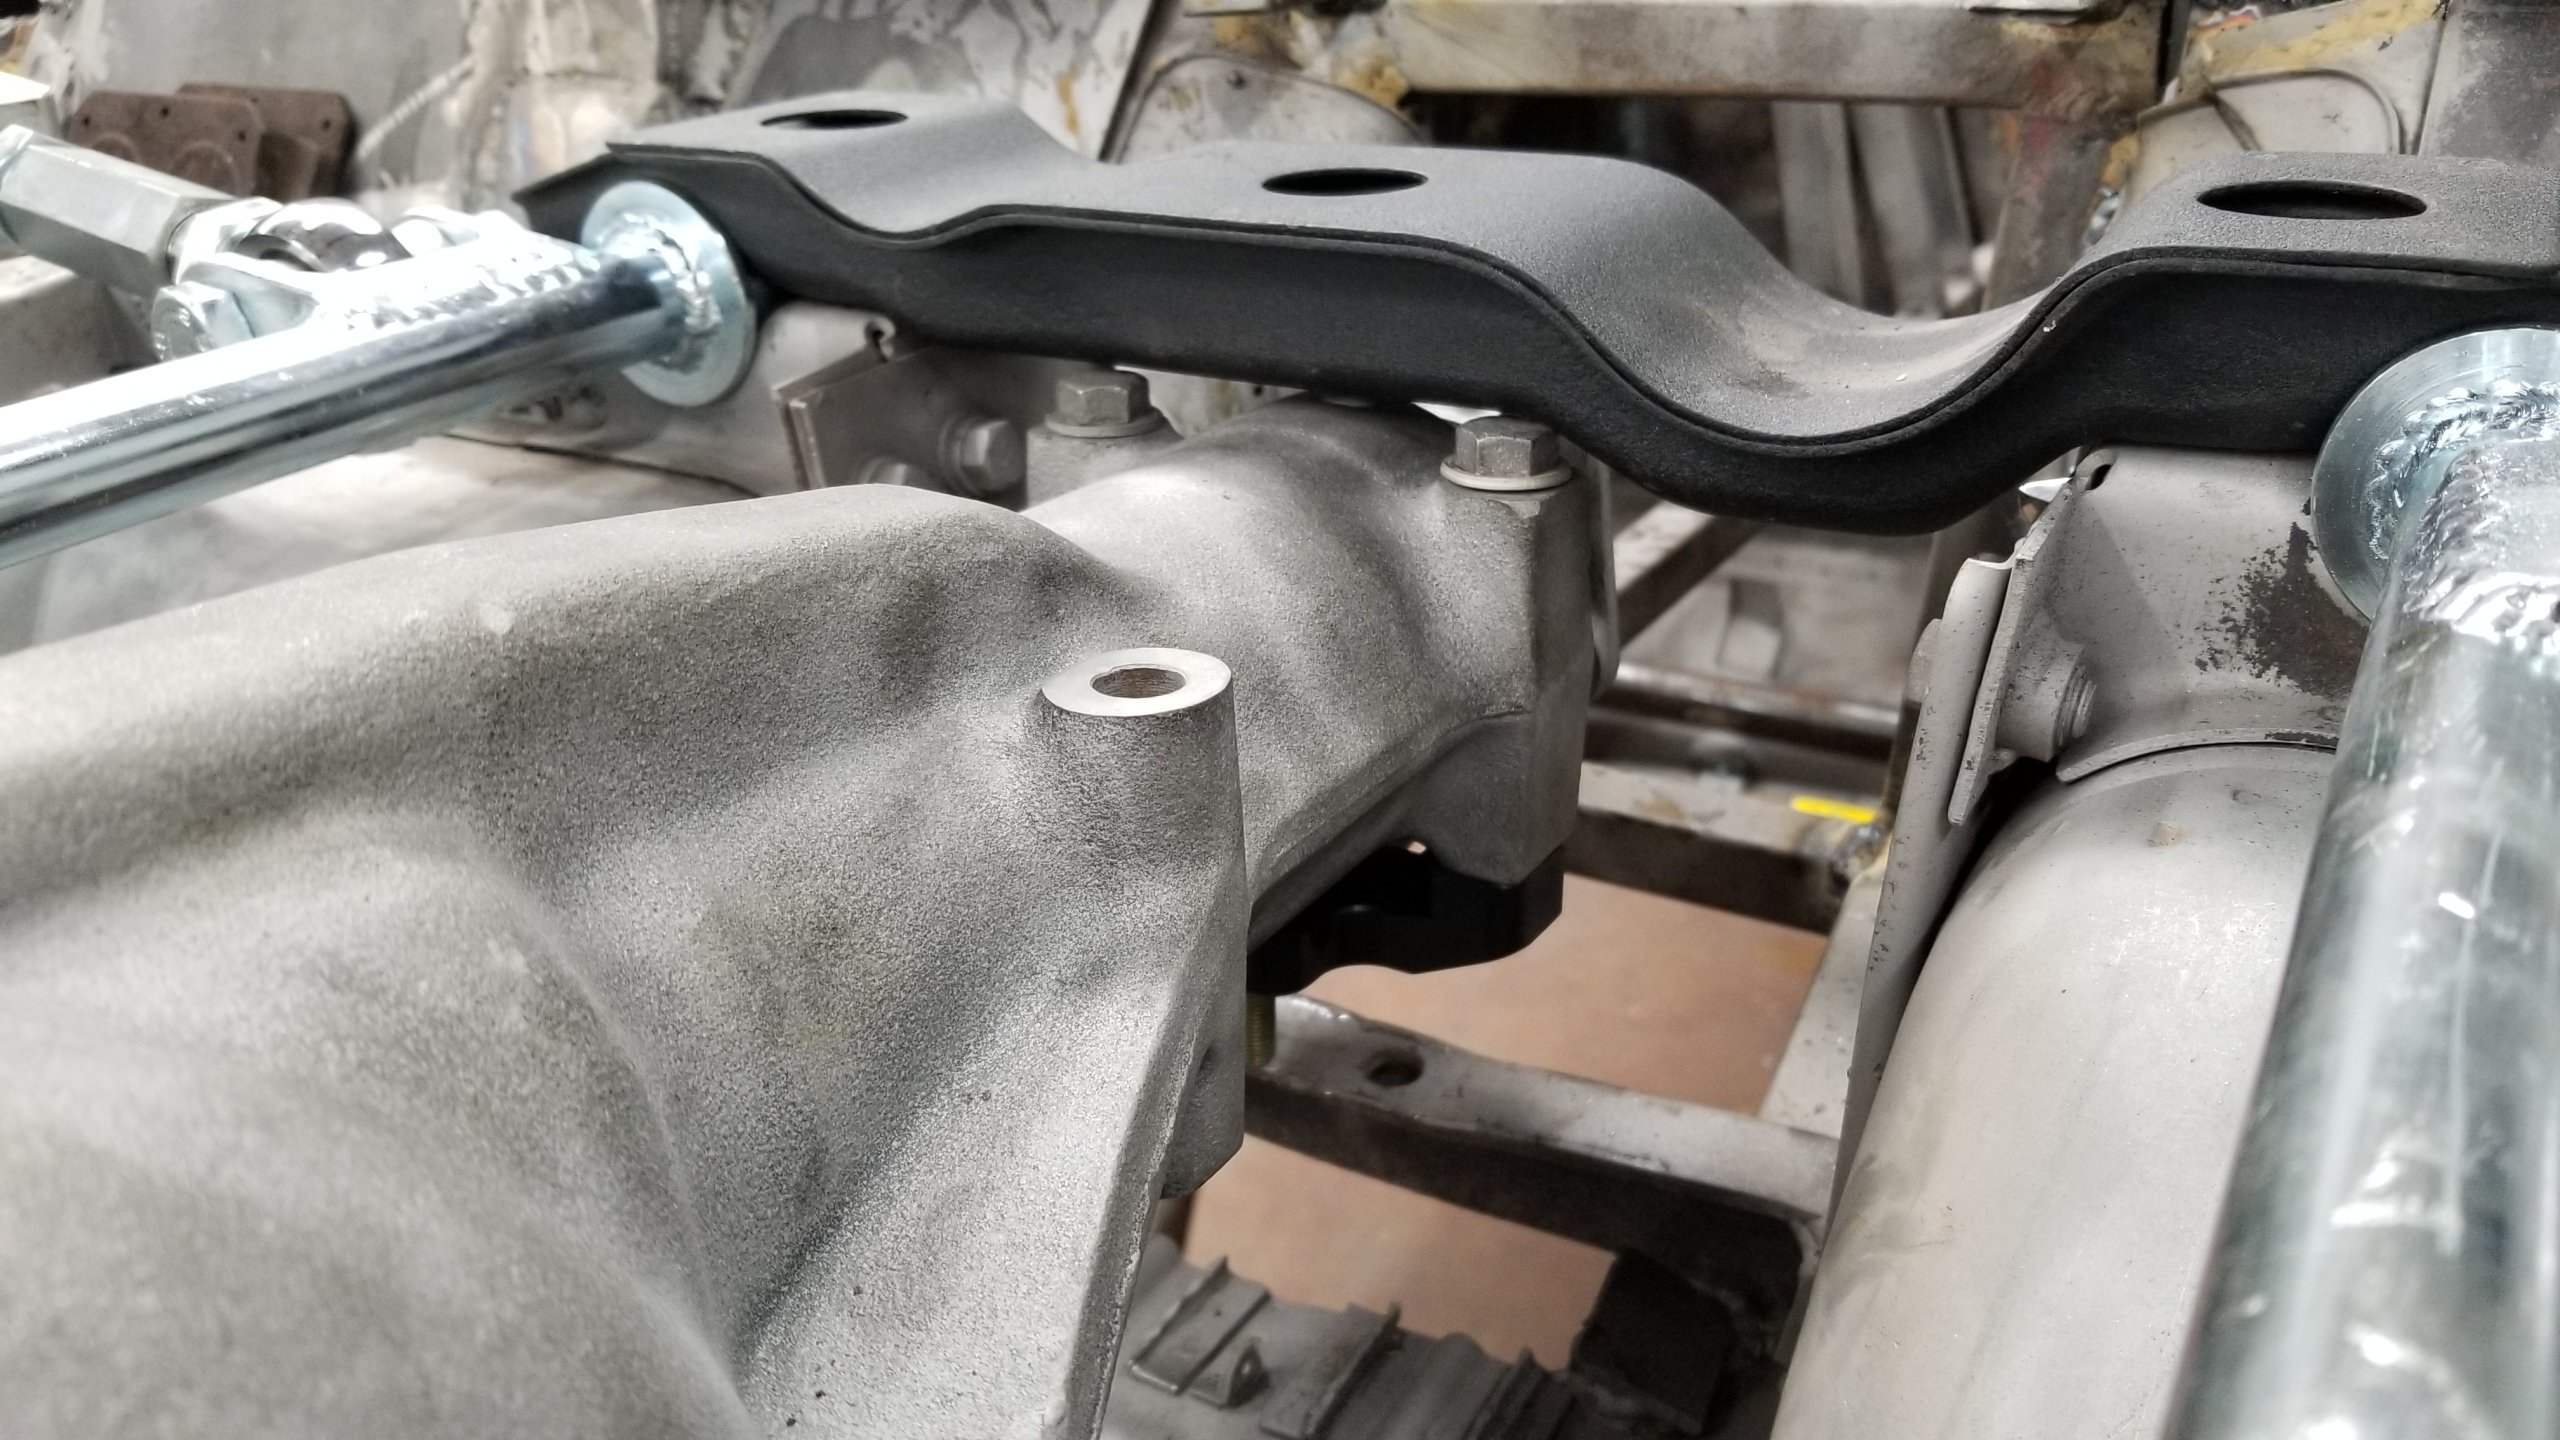
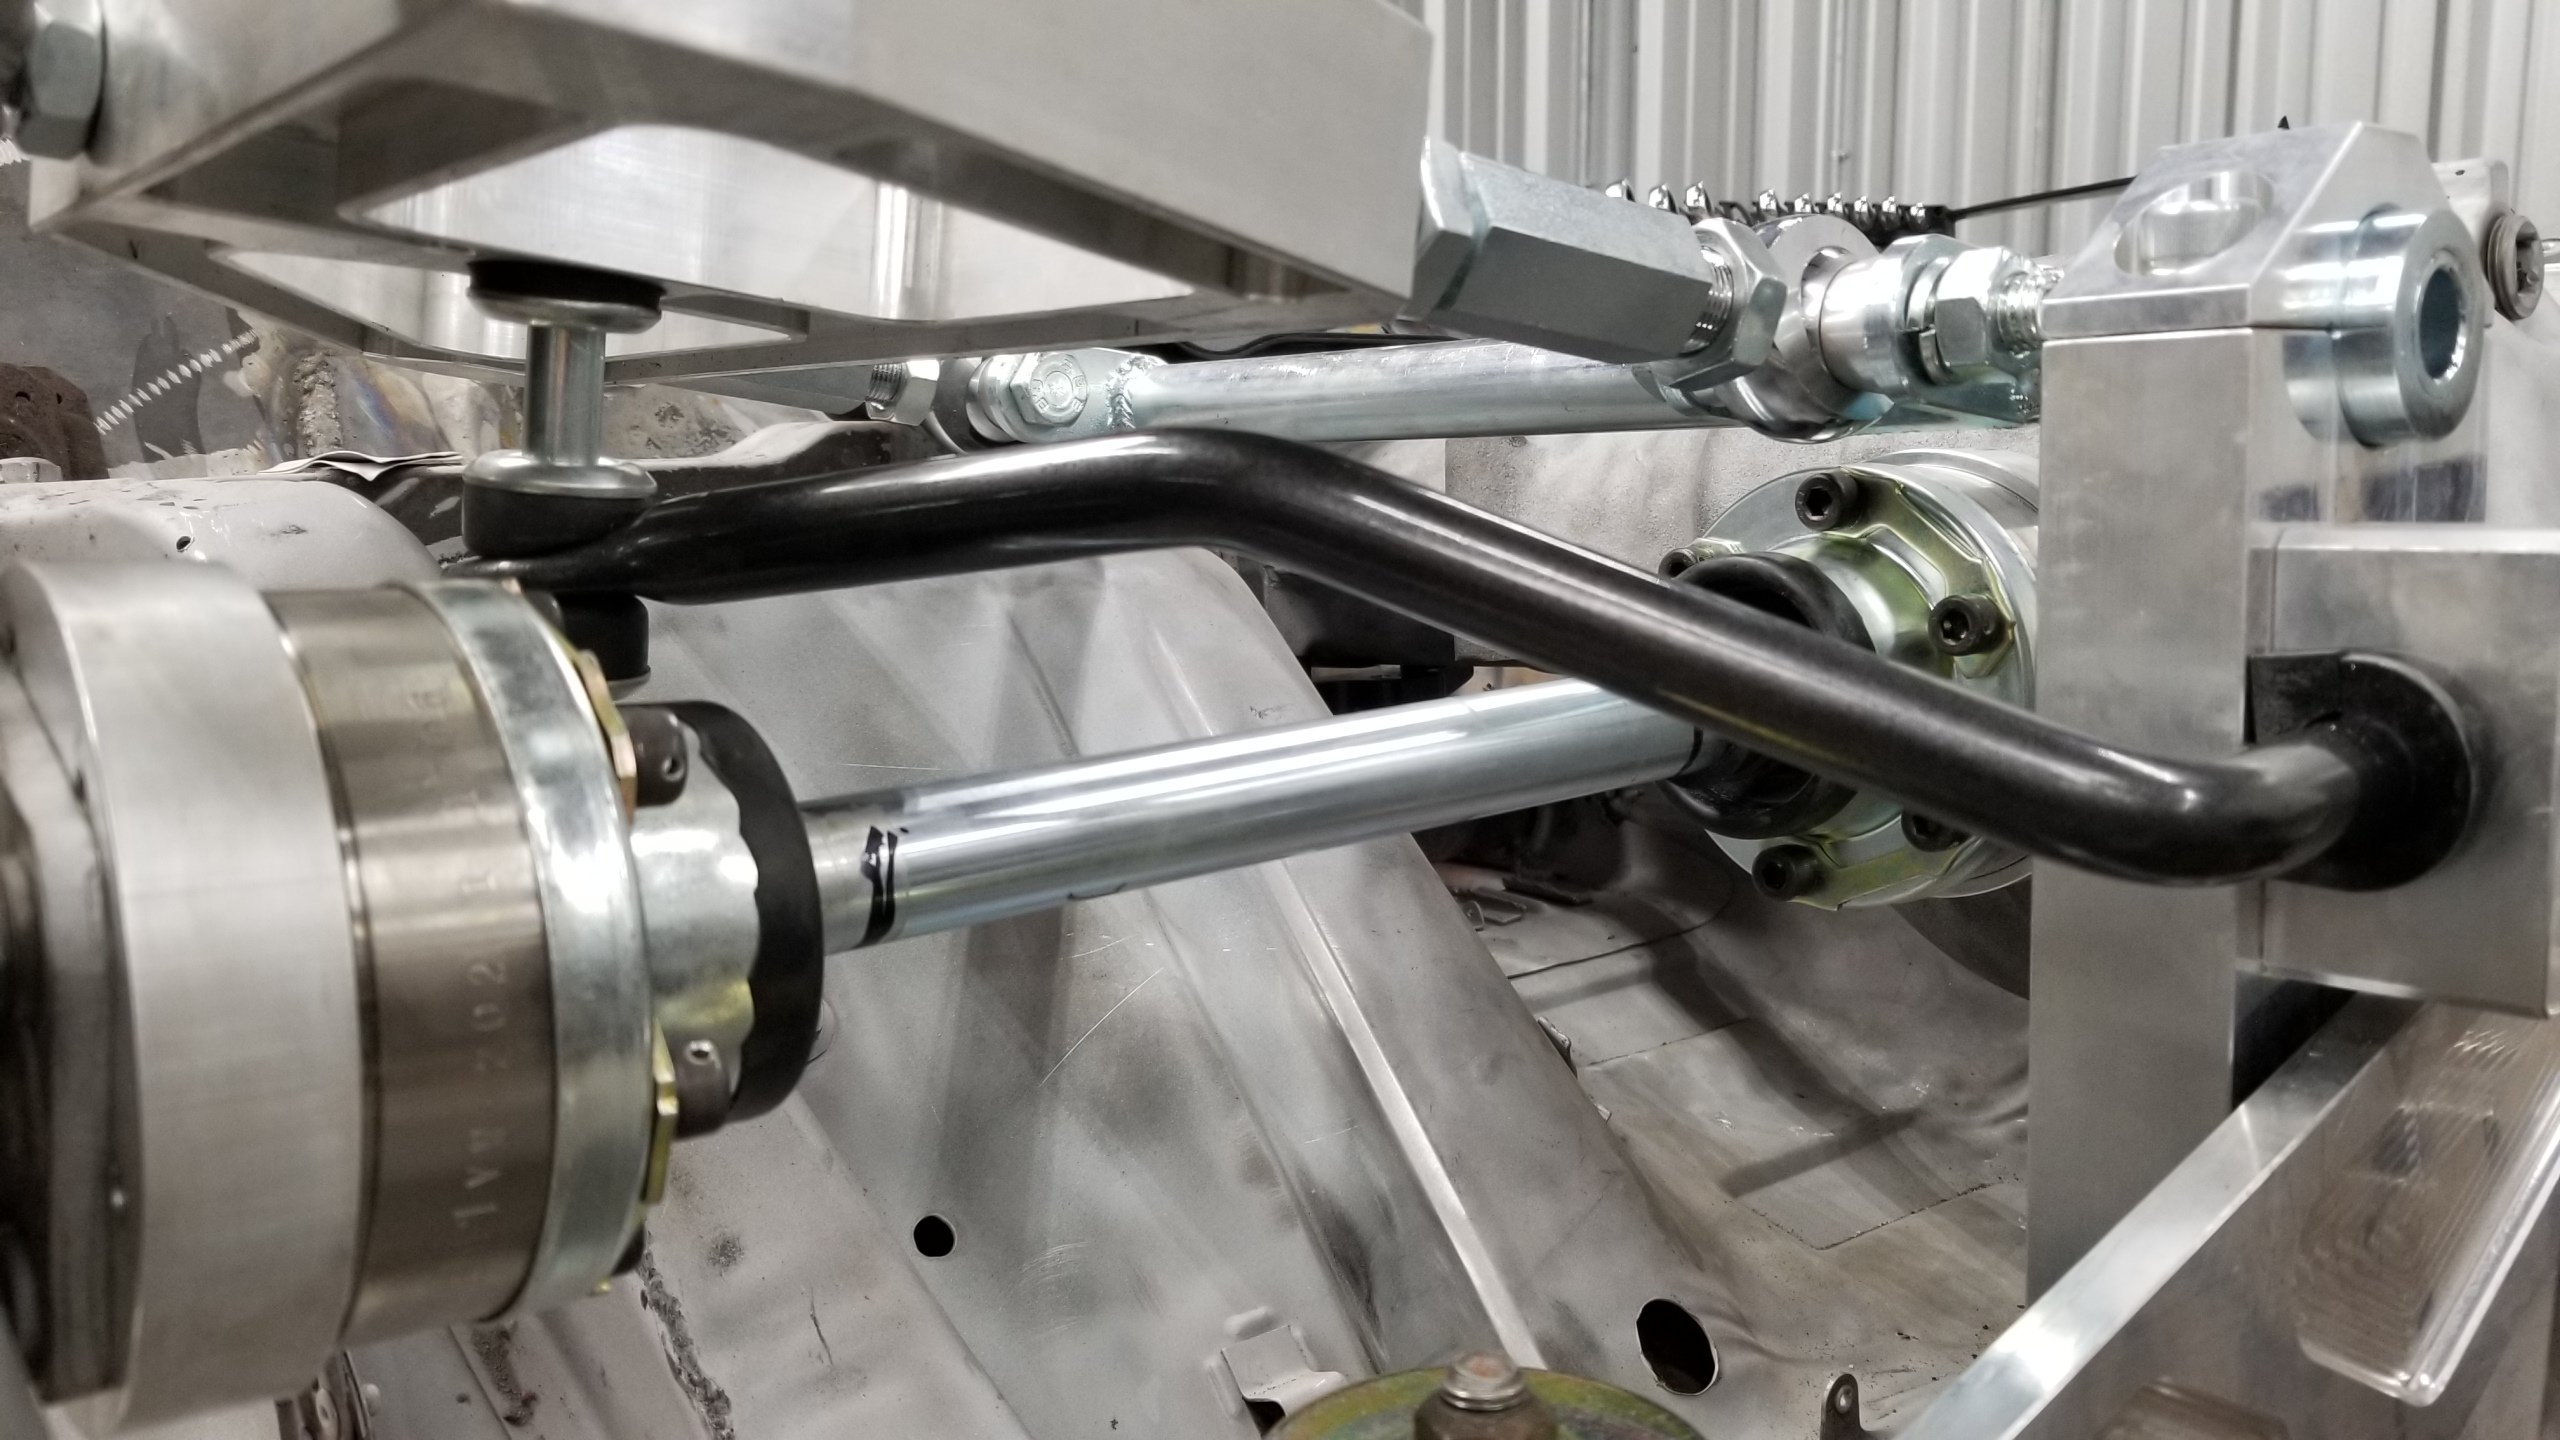
Made the dash out of 1/8 stainless, still need to finish, and mocked up the rear suspension. The bolt heads on the diff are putting pressure on the front factory mount. I will check on shorter head bolts or possibly purchase this from TTT https://technotoytuning.com/nissan/240z/r180r200-long-nose-front-differential-mount . After installing the Silvermine rear control arms, sway bar bushings are too short and the retaining cap sits on the control arms. Checking with Edan for a longer set of bushings available that eliminate this issue or will need to source. Decided to abandon the Wilwood brakes given the age and need for rebuild since i already had the new parts below sitting around. Working on welding up the BC Racing coilovers and mocking up the front suspension next. SILVERMINE BRAKES:1 - 15/16 master cylinder $185.001 - 240z, 260z, 280z Rear Brake Upgrade Disk Conversion Kit Front Big Brake Kit (stage 3) $395.001 - S30 Rear Disk Conversion $599.00 SUMMIT RACING: 1 - STQ-50100 FRONT ANTI-SWAYBAR $162.501 - STQ-51075 REAR ANTI-SWAYBAR $146.50 AMAZON: Quickcar Racing Products 61-6751 4-1 Gauge Panel w/5in Tach $364.95 Quickcar Racing Products 50-864 Ignition Panel $112.85
-
Z-Envy Race Car - Champ Car Series
Gmagno replied to Gmagno's topic in S30 Series - 240z, 260z, 280z
Thanks. Working on the interior dash, etc. at the moment. I found more metal work needed as I went along which has taken much longer than expected. In reality it may be another 6 months to complete. I will post more in a couple of weeks. -
I apologize and have moved the thread.
-
Cut & Shorten 240Z Steering Column in Race Car
Gmagno replied to Gmagno's topic in Brakes, Wheels, Suspension and Chassis
Please share the details. -
Cut & Shorten 240Z Steering Column in Race Car
Gmagno replied to Gmagno's topic in Brakes, Wheels, Suspension and Chassis
Seat is all the way back, even modified/removed metal to extend further back that stock. -
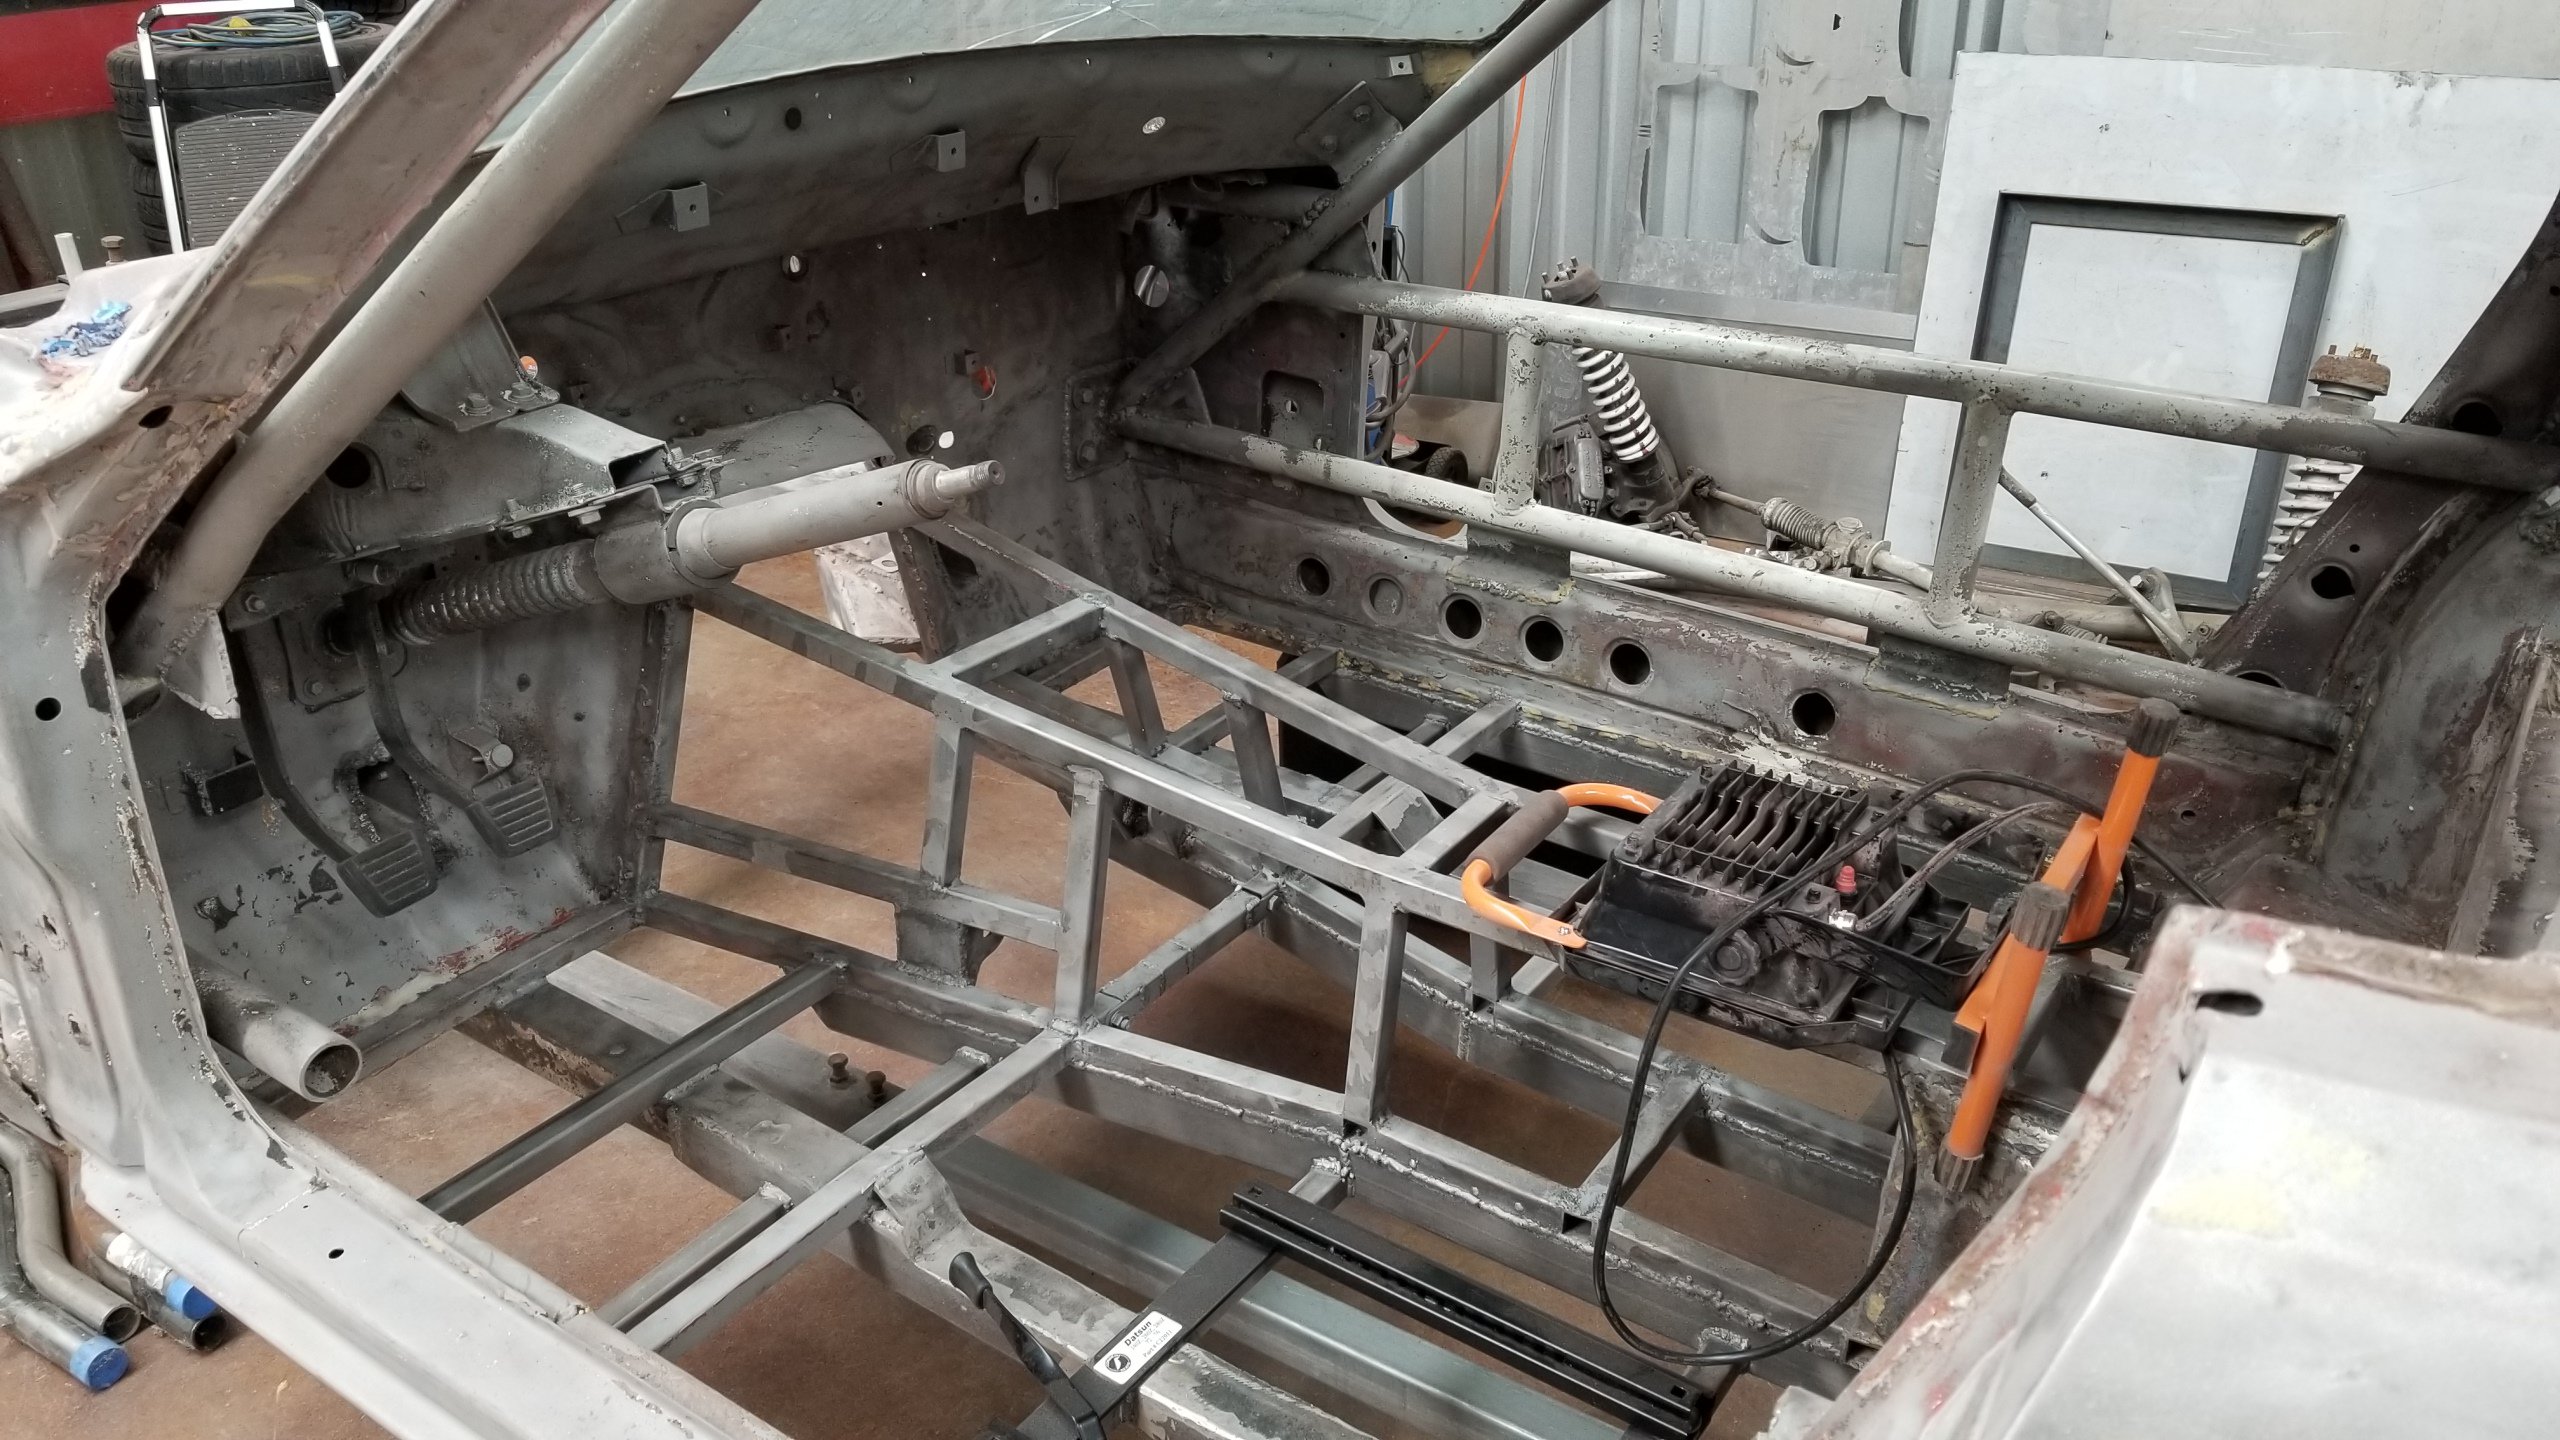
Help and advice needed please. I have searched everywhere and cannot find any info on this process. I want to shorten the steering column/shaft 3 inches for taller drivers. I have seperated the column, the top half is spring loaded, the inner shaft is male spline and connects to the bottom female shaft, 2 piece setup. Common sense tells me I need to cut the space between the dash mount and steering wheel. Worried about not getting the spring back in place properly after the cut/weld. I really don't want to screw this up since these columns are not off the shelf and not cheap. I just need someone to tell me its possible, or not. Thanks in advance for the help.
-
Z-Envy Race Car - Champ Car Series
Gmagno replied to Gmagno's topic in S30 Series - 240z, 260z, 280z
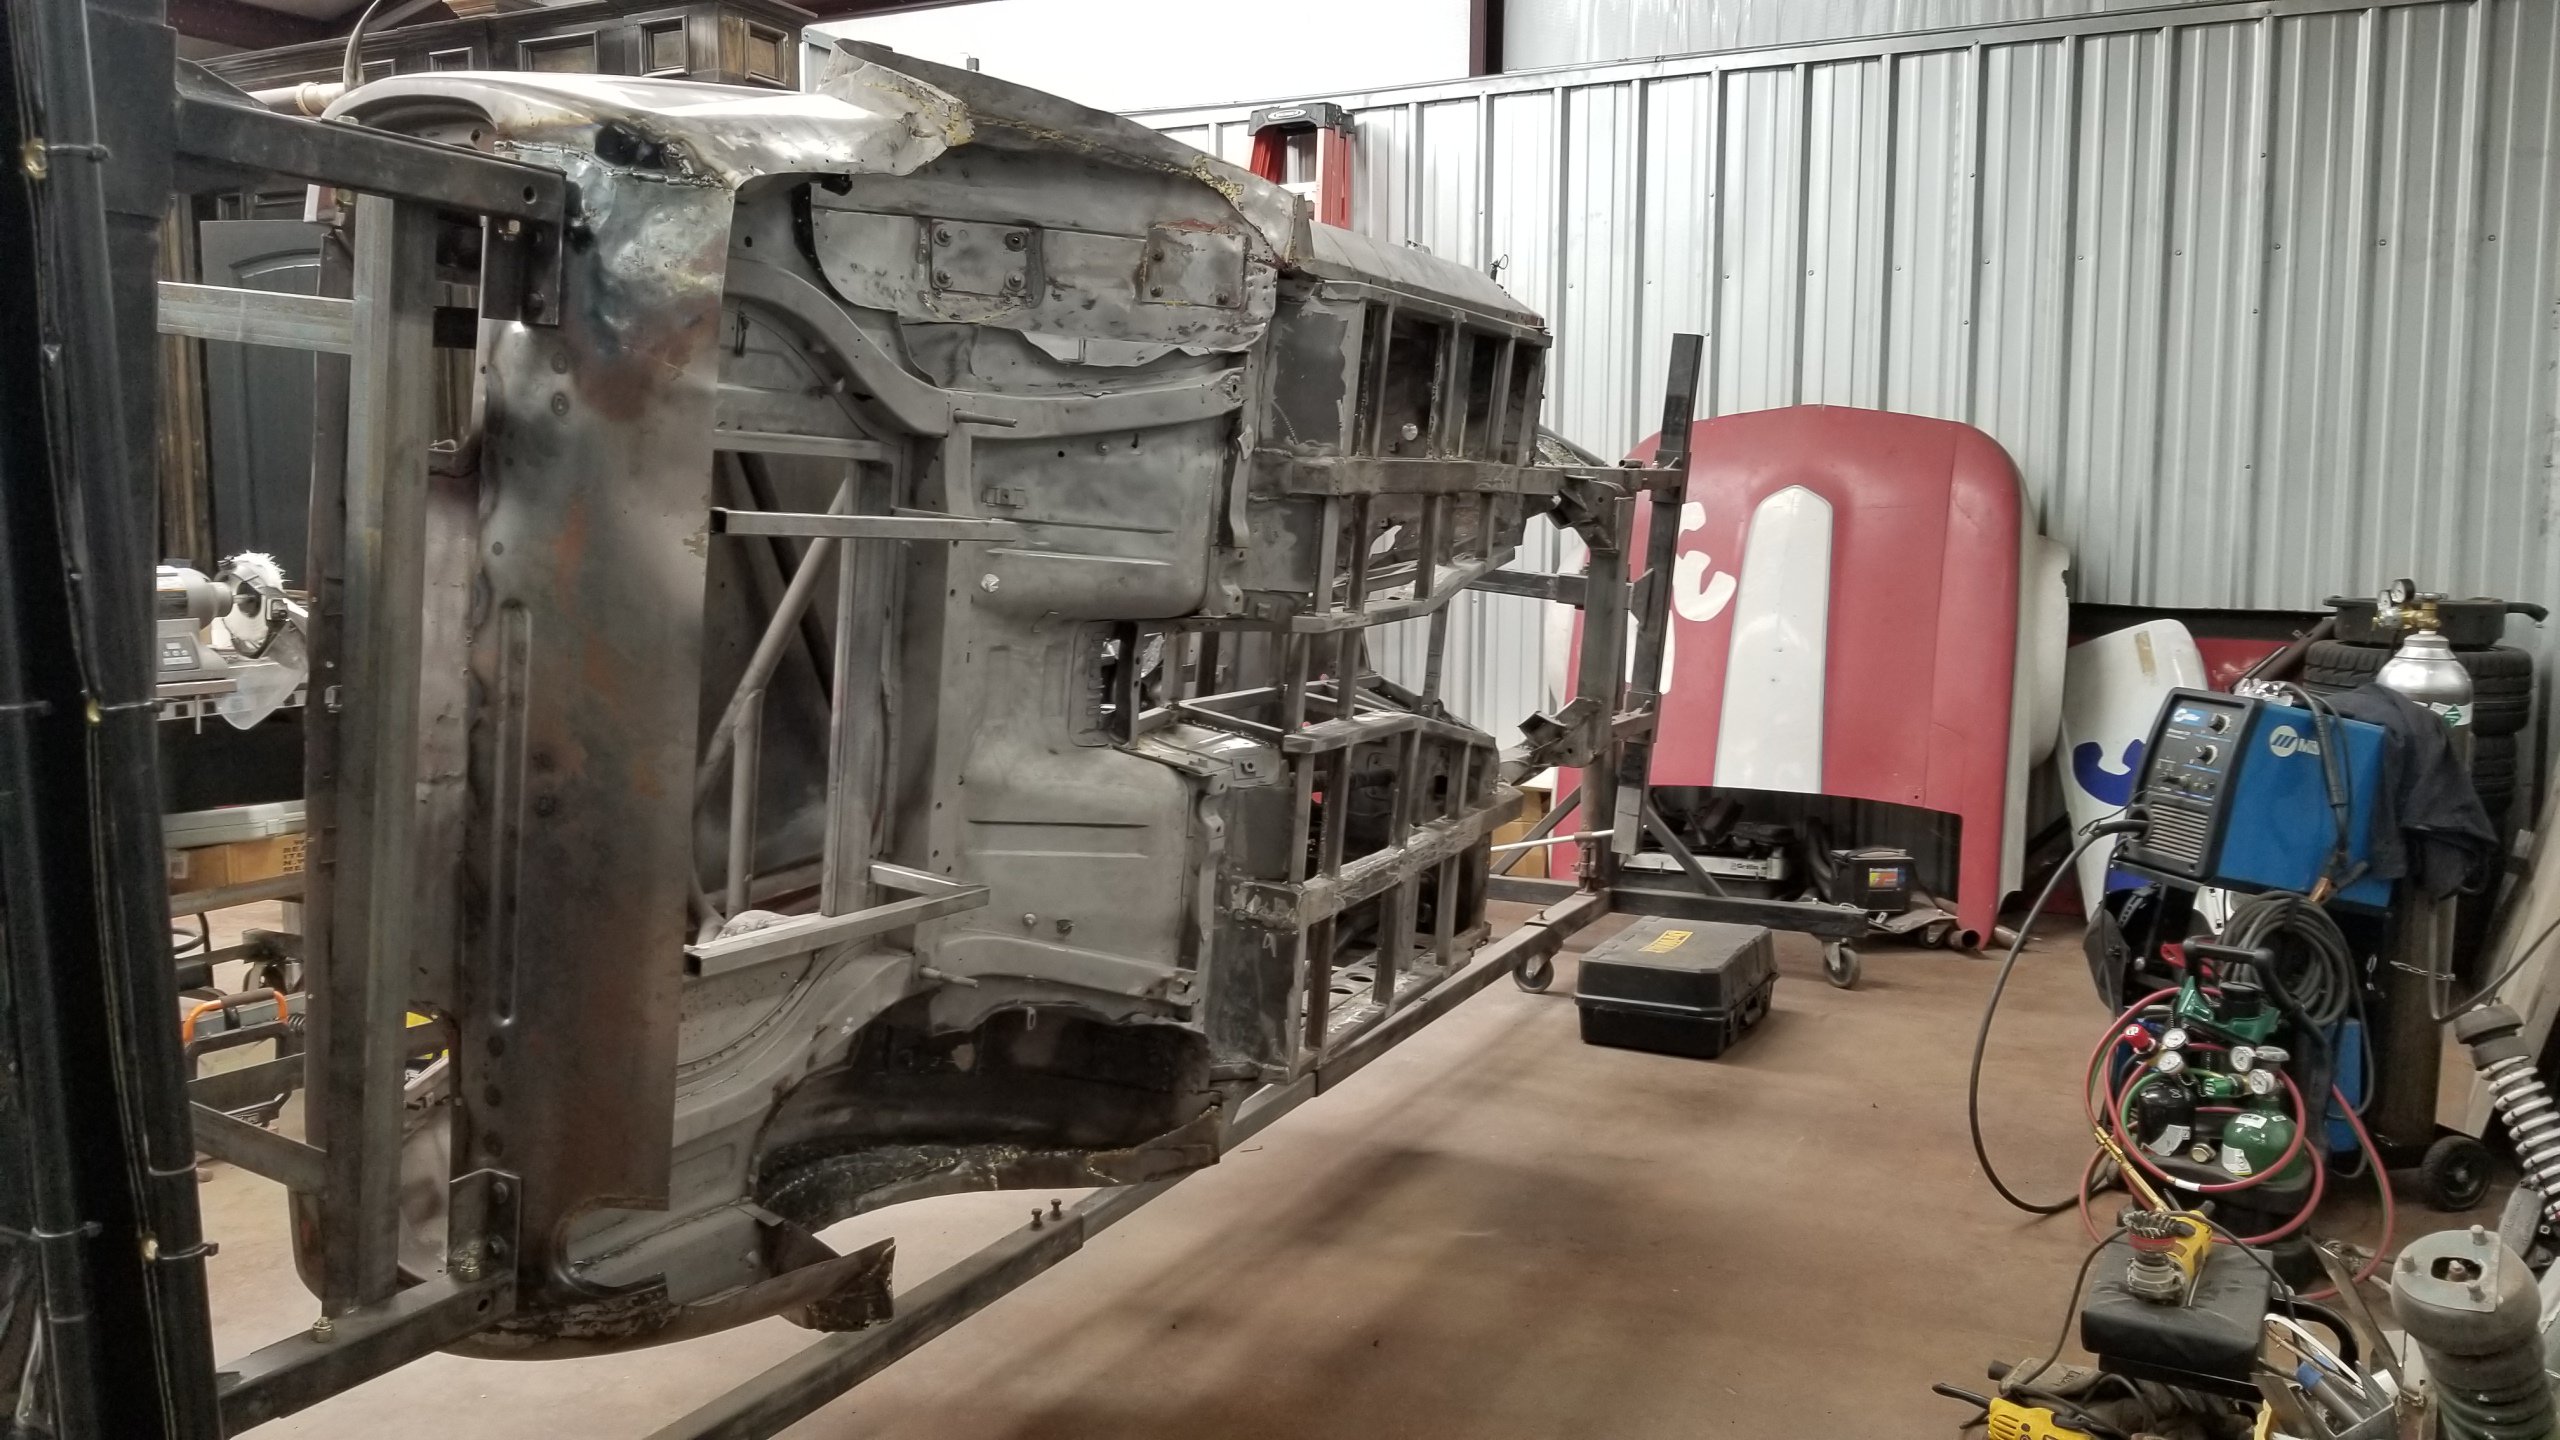
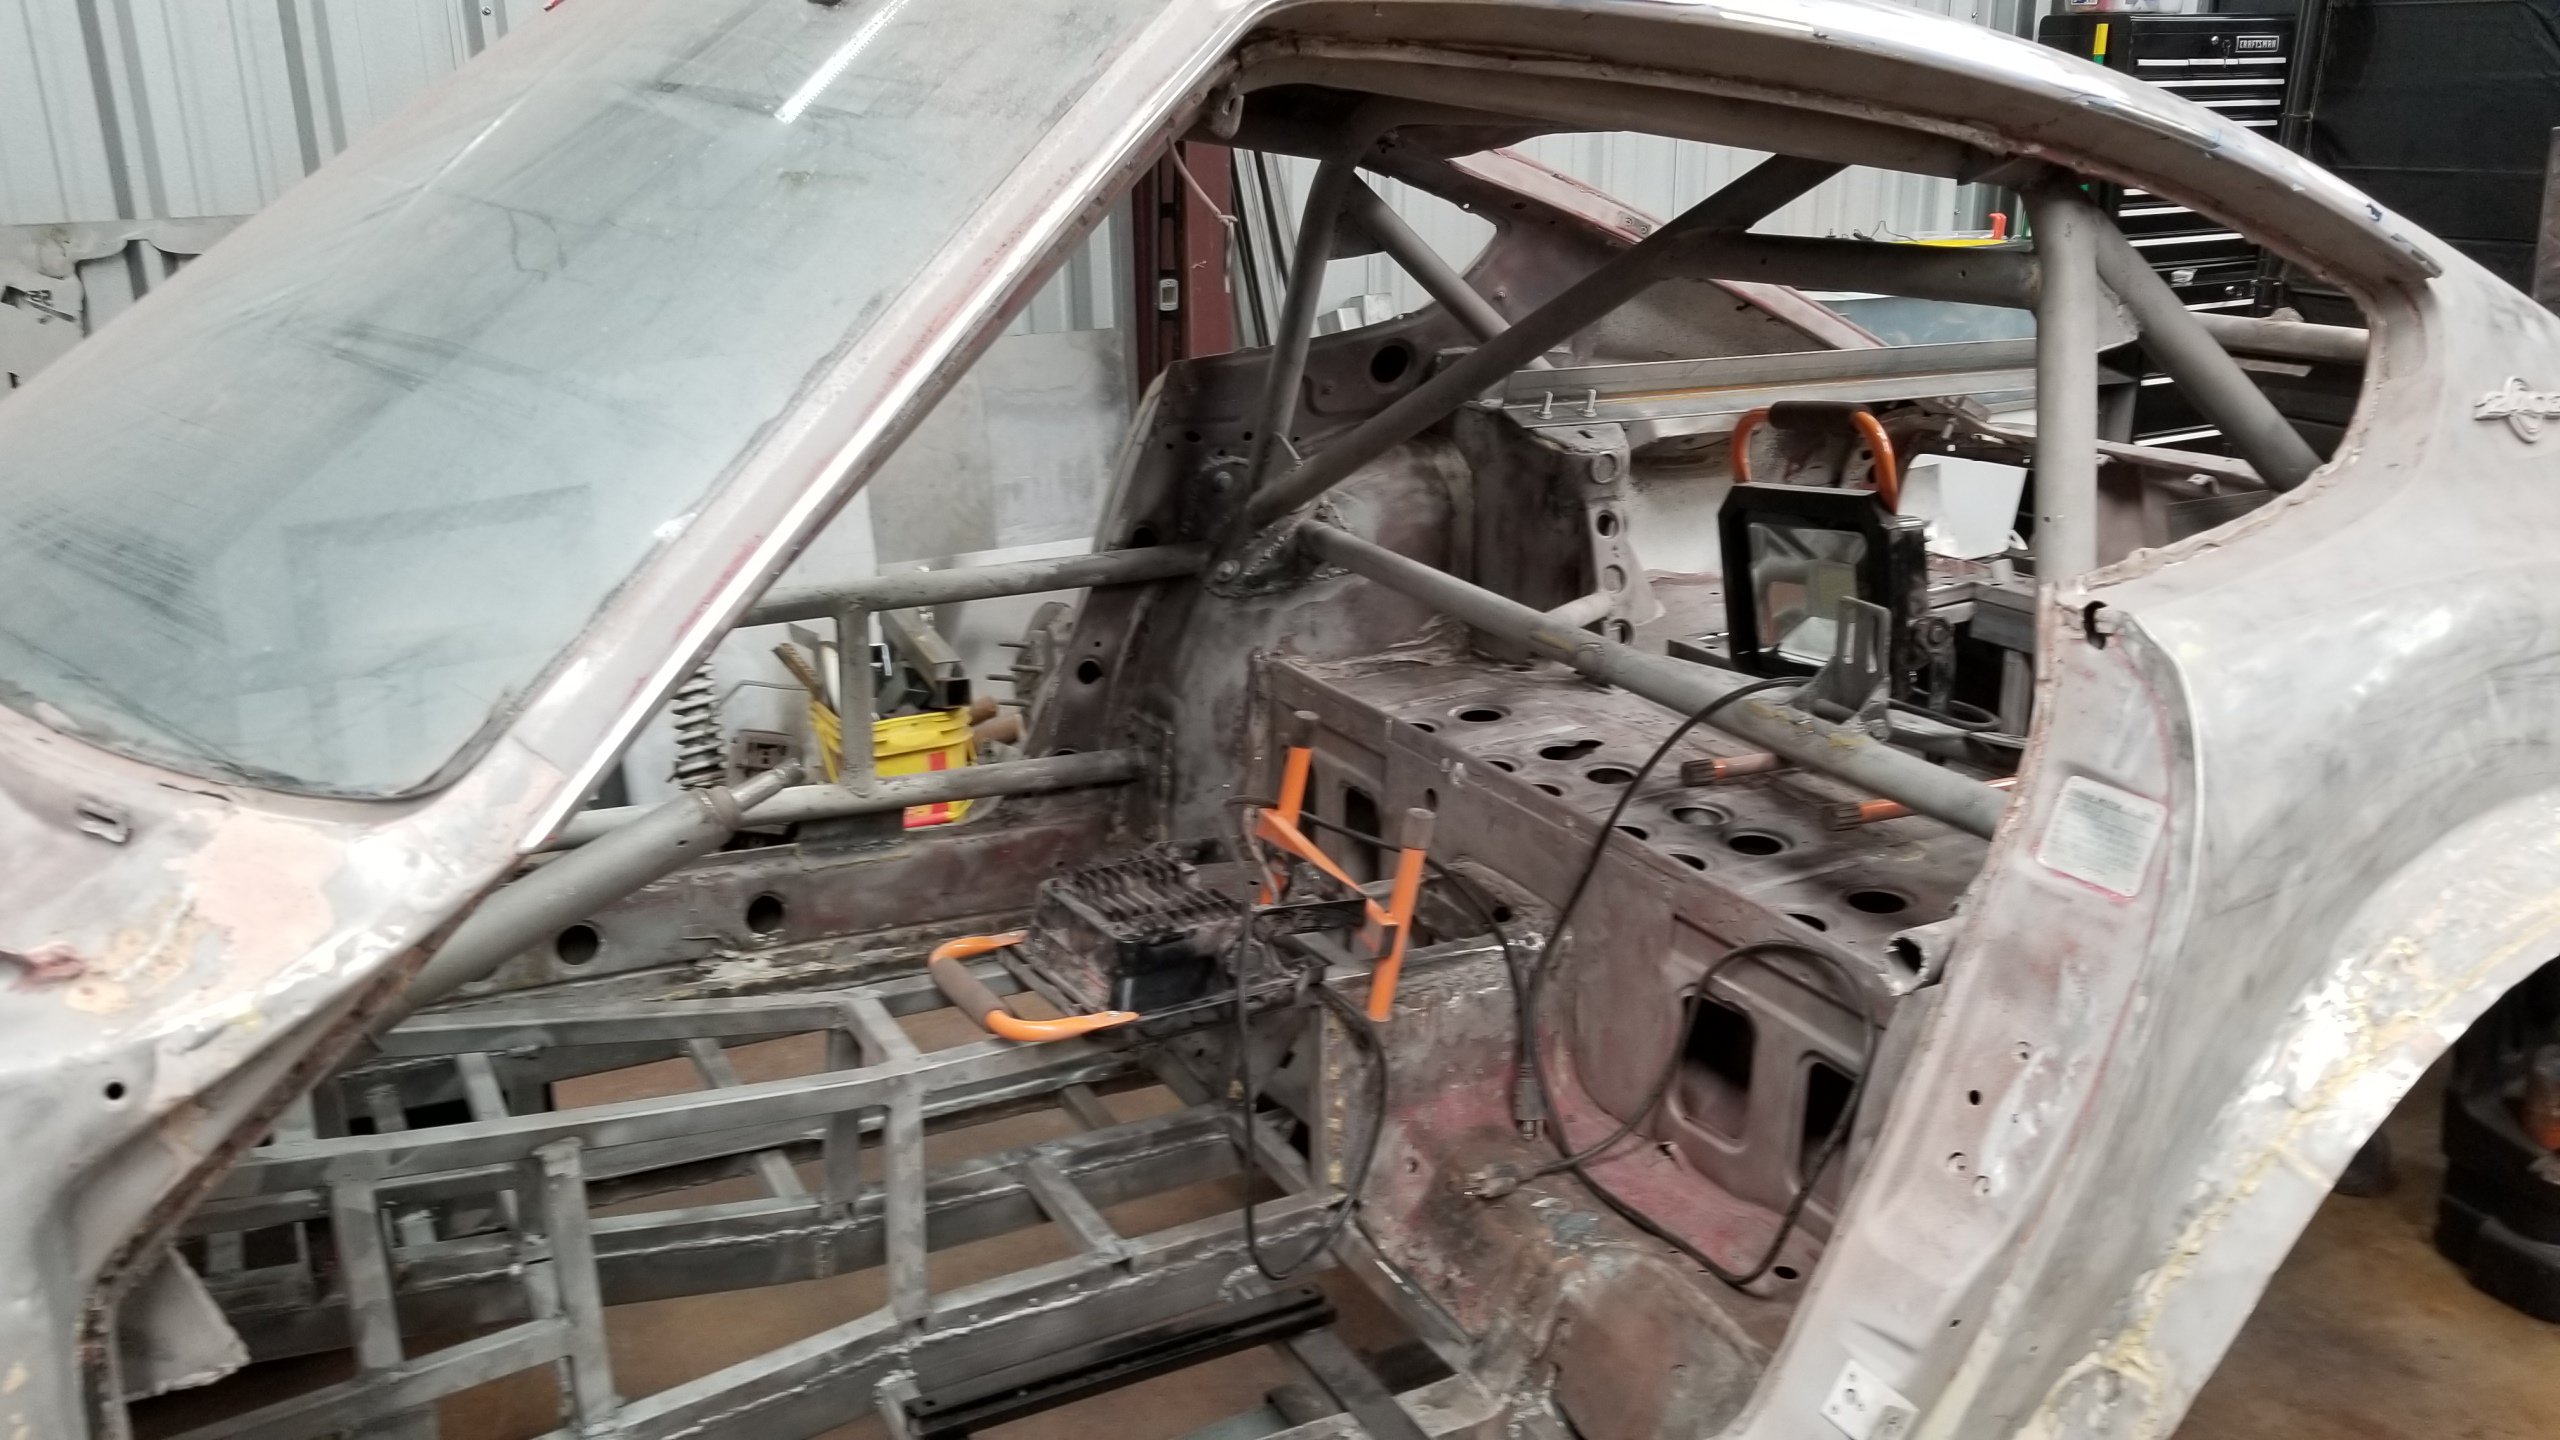
Moving along now. Welded the bung for the removable steering wheel. Finished up the Nascar bars and lower rear valance replacement. Cleaning up older welds, sandblasting doors and hood. The next step is mocking up the doors. I bought used factory hinges so the doors can open rather than be removed, faster in the pits this way. After doors, hatch and hood are mocked up and working well its on to the suspension so we know what to do with the fender flares.
-
Z-Envy Race Car - Champ Car Series
Gmagno replied to Gmagno's topic in S30 Series - 240z, 260z, 280z
Thanks. I am hoping for the same but doubt it. My old blue Z was stock except the inside cage and weighed 2200. I am guessing this will be 2500. -
Z-Envy Race Car - Champ Car Series
Gmagno replied to Gmagno's topic in S30 Series - 240z, 260z, 280z
Sandblasting complete. Welding, welding, more welding, then nascar bar install before suspension mock up.