beermanpete
-
Posts
629 -
Joined
-
Last visited
-
Days Won
2
Content Type
Profiles
Forums
Blogs
Events
Gallery
Downloads
Store
Everything posted by beermanpete
-

are the bump stops need it?
beermanpete replied to J240ZTurbo's topic in S30 Series - 240z, 260z, 280z
These go on the strut shaft. To install them you need to remove the springs. If you are replacing the springs or strut cartridges(shocks) it is eay to put them in during the process. You should not drive the car without any bump stops. It can damage the strut tubes or the upper spring seats. It is very harsh when it bottoms out as well. -
New bushings now arms wont fit?
beermanpete replied to J240ZTurbo's topic in S30 Series - 240z, 260z, 280z
We had the same problem with ours. We managed to shoehorn them in with a lever. Believe it or not, the bushings will compress enough to go on. It take some force though. We had the arms and the struts in the car so they were not moving around too much. Get one end in and start the spindle into the strut. Next, use a lever to guide the other end in and compress the bushings. I don't remember what we used. Anything long and thin should work. -
240z rear spindle removal
beermanpete replied to J240ZTurbo's topic in S30 Series - 240z, 260z, 280z
We had the same problem with ours. We managed to shoehorn them in with a lever. Believe it or not, the bushings will compress enough to go on. It take some force though. We had the arms and the struts in the car so they were not moving around too much. Get one end in and start the spindle into the strut. Next, use a lever to guide the other end in and compress the bushings. I don't remember what we used. Any thing long and thin should work. -
A few more items for the list: Headers,6 into 2, 1 5/8" primaries, unknown brand: 14 lbs Flywheel (stock, 1973): 22.75 lbs Pressure plate (stock, 1973): 12.75 lbs Clucth disk (oem type, 1973): 2 lbs Autopower 4-point roll bar: 35 lbs R180 Differential 3.364 gear: 59.25 lbs Wink mirror 5 panels: 1.75 lbs ATL SP112 12 gallon fuel cell: 30.75 lbs
-
The side with the spring (left one in your pic) goes toward the bearing.
-
240z rear spindle removal
beermanpete replied to J240ZTurbo's topic in S30 Series - 240z, 260z, 280z
I had a hard time getting those out as well. I ended up taking the whole strut and lower control arm out together. Once out of the car I was able to use a hammer to drive it out. The spindle was ruined beyond use as a result however. Be sure to take the cotter pin out first. Those are stubborn as well. Same deal. BFH. Damaged beyond re-use. -
Front arms bushing removal
beermanpete replied to J240ZTurbo's topic in S30 Series - 240z, 260z, 280z
I did the same thing. It works great. -
Speedo accuracy can be wrong due to changing drivetrain parts such as your rear tire size, differntial gear ratio, transmission, or the speedo itself could be bad. Here is a method to determine which it is: 1) Disconnect the speedo cable from the speedo and route the free end so you can see it while moving the car. 2) Make a pointer out of tape on the end of the cable to count the turns as you move the car. 3) Measure out and mark a distance of 44 feet on a flat and level area in a driveway or parking lot. 4) Roll the car 44 feet and count the turns of the speedo cable as the car move through this distance. The cable should turn 10 times if the drive ratio is correct. This is becasue the speedometer needs to spin at 1200 RPM to indicate 60 MPH. This works out to 10 turns every 44 feet. If the cable turns more than 10 turns the sppedo will read too fast. This is a percentage error, meaning if the cable turns 11 times the speedo will read 33 at 30, 55 at 50, 77 at 70 and so on. Less than 10 turns will have the opposite effect and result in a slow reading. If the speedo reading is not in agreement with the cable speed error as described above your speedo needs to be serviced. To correct the cable drive ratio you can get different speedo drive gears from the dealer This may require removing the transmisson for installation as one gear goes on the output shaft (inside the trans). Another method is to buy a little gearbox devices to install in-line with the speedo cable to correct the drive ratio. Meter companies such as Stewart-Warner sell these. You tell them the number of turns your cable turns in 44 feet and they set the internal gearing for the necessary correction factor.
-
Can i see some Zs painted BLACK... post some up!
beermanpete replied to VenomousType's topic in S30 Series - 240z, 260z, 280z

-
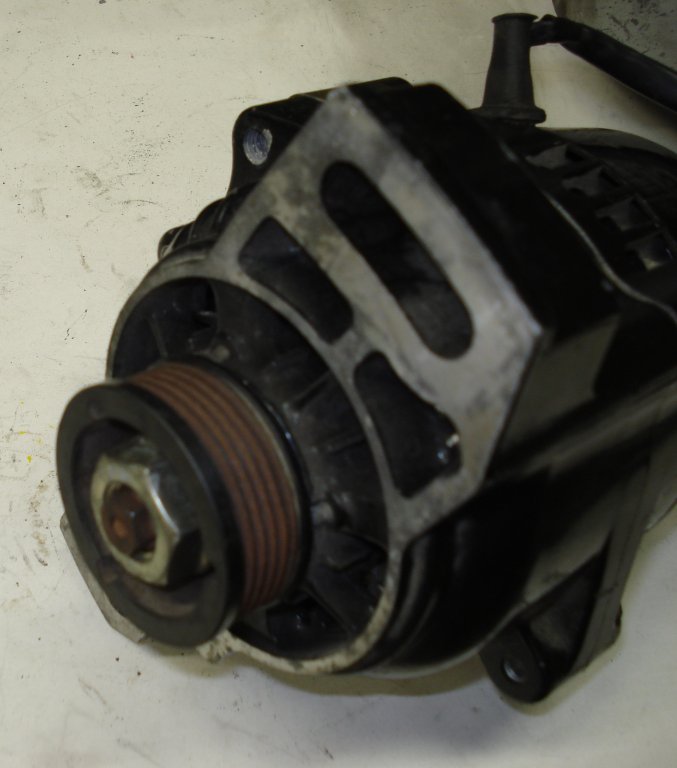
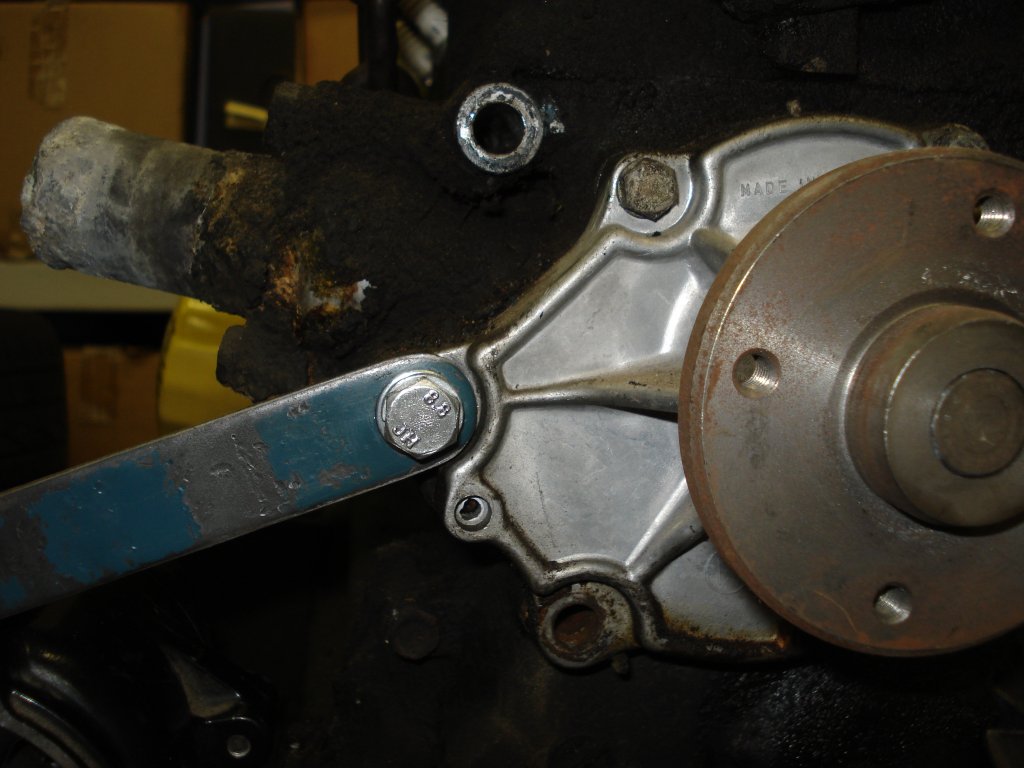
The original pulley is about 1.75" in diameter. The engine this alternator came from redlines at 11K RPM as I recall. What I don't know is the drive ratio. The info I have found indicates most car alternators run at about twice engine speed and output rated current at about 2500 engine RPM. The Ninja alternator is essentially the same, just smaller. The new pulley is the same diameter as the water pump pulley which should run the alternator about 20% faster than the engine. This means at race speeds the new alternator will be running between 4800 and 7200 RPM. If the output is low due to running too slow I will reduce the diameter of the pulley. I left the center section full thickness for this purpose. After I get this sorted out I will thin the center section of the pulley to lighten it and make it look nicer. The only electrical loads remaing in the car are the ignition, fuel pump, electric cooling fan, brake lights, and head lights. The car is really not driven around town. we left the lights on so we could get away with short test drives around the block if needed. On the track the ignition and fuel pump are the only steady loads and are about 10 amps combined.
-
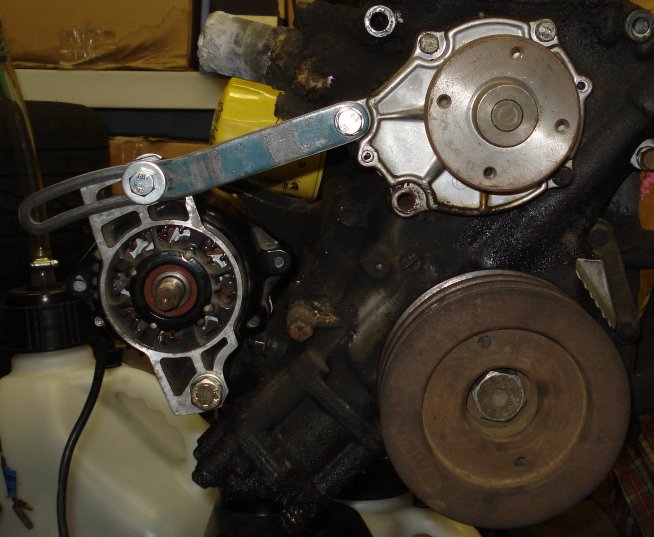
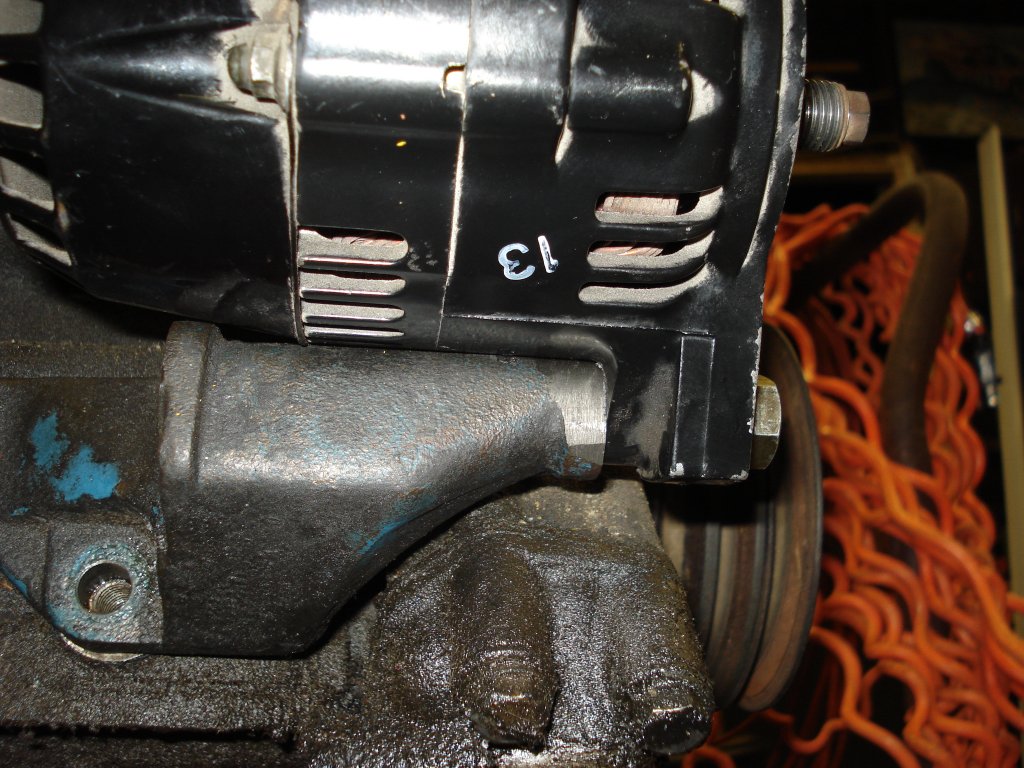
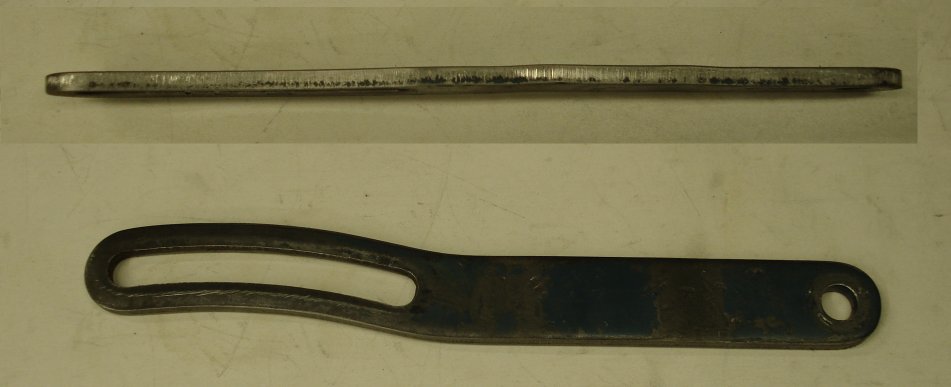
I have been wanting to install a smaller alternator in my 240Z for a while now. After reaserching the subject all I came up with was articles on swapping in higher output alternators. I am using my car for time trial events and hope to get into racing as well. I rarely drive the car on the street and have removed the heater, wipers, horn, and such to reduce the weight of the car. Since I do not need to run lights, fans, and the like I decided I might be able to save a few pounds by using a smaller alternator. After some thought I remembered that one of the motorcycles I use to own had a belt drive alternator, so I bought a used alternator and managed to fit it to the Z engine. The donor motorcycle is a 1987 Kawasaki Ninka 750. The alternator is rated for about 25 amps output which should be plenty to run the breaker point ingition and Holley fuel pump. The Ninja alternator in an internal regulalator type and weights in at about 6 pounds. The stock alternator and regulator weight in at 11.5 pounds yeilding a weight reduction of 5.5 pounds. The Ninja alternator used a micro-V belt so I will have to make a new pulley which is ok since I am not sure about the gear ratio needed for the new alternator. To get the new pulley aligned with the crank pulley I started by mounting the new alternator to a spare engine. The stock 240Z alternator mounts worked well with minimal mods. I had to grind a small ridge off of the front of the lower mount to clear the new alternator because the mounting ear is shorter that the stock alternator. I also increased the thread size for the pivot bolt from M8 to M10 because the Ninja alternator uses the M10 screw. The stock upper mounting/adjusting bracket needed to be flatened and shortend. I used one of the water pump mounting bolts to attach the engine end of the bracket which helped align the radius of the alternator end of the bracket to the smaller alternator. A few pieces of new hardware were requied. A M8 x 100 mm screw is need to attach the upper bracket to the engine. I had to shorten it a little bit so a 95 mm screw should work if it is available. The lower mounting (pivot) bolt is M10 x 40 mm. A M8 x 45 mm is used to attach the upper bracket to the alternator. The new alternator has an adjusting slot in it and so does the adjusting bracket, so I will use fender washers on both sides. An M8 x 45 mm bolt and nut hold it together. I had to make a small flat spot on one side of the rear washer due to the short mounting ear. The end result looks good. It is very rigid and should work out well. Now I need to make the pulley and figure out what length the belt needs to be.
-
R180 differential from 73 240Z - 68 lbs. 3.364 Gears No oil
-
Alternator - 12 pounds
-
240Z Engine Weight - 320 pounds No intake No exhaust No flywheel or clutch No cooling fan All covers in place (rocker, oil pan, etc.) Water pump, alternator in place Oil pump in place 4-speed gearbox - 75 pounds
-
The tach in 73 240 occasionally goes crazy when the interior of the car is very hot, like when the car has been parked in direct sunlight for a while. The needle floats mid-scale regardless of engine speed or pins at 8K. when the car cools down it works fine and compares well to my service tach/dwell meter. I suppose the electronics have become temperature sensitive with age. Any of you guys have a schematic for the internal circuitry of the tach? Perhaps I can fix it.
-
If only...LOL
-
I received the parts finally. It turns out I made a mistake looking up the part numbers for the inboard bolts. The part number listed above (38226-21000) is the long bolt that holds the output shaft into the differential. Sorry about that. The correct part number for the bolts needed for the drive axle flange is 38228-21000, which John posted several weeks ago. I have requested this part from factorynissanparts.com. Maybe I will get lucky and get some. As it happens, factorynissanparts.com is run by Nissan of McKinney in McKinney, Texas. I have received good service so far. I will let you know if the Nissan seals fit in the Subaru LSD, but it will be a while before I can get to work on that part of the project. Peter
-
I looked up the bolts in the 240Z parts list and found the following: 38226-21000 Bolt, fix side flange 1.45 Inboard end of drive axle 39628-E4100 Bolt-Box, Driveshaft 3.46 Outboard end of drive axle 39627-E4100 Nut-Hex M10x1.25 Supercedes to 39627-N3000 39627-N3000 Nut-Hex M10x1.25 0.77 08915-14010 Washer-Spring Supercedes to 08915-2401A 08915-2401A Washer 0.09 The 510 parts are: 39628-21000 Bolt-Driver Outboard end of drive axle Supercedes to 39628-E4100 The inboard bolt is shown in the diagram but is not marked with a legend, so it cannot be selected to get a part number. The prices are from http://www.factorynissanparts.com. I know the discussion is about the bolts that hold the inboard axle flange to the output shaft on the differential, but the part numbers in the discussion are for the wheel end and have different part numbers. If I recall correctly, the bolts are each end are different. Also, from what I can tell the oil seals and cover gasket are the same on the original Datsun R180 differntial and the Subaru LSD R180. I ordered the oil seals from factorynissan.com. I ordered all these parts from factorynissanparts.com today. I will post when I receive the parts and let you knwo if they work. Peter
-
I know this thread is getting old, but I thought I would share my experience of Tokico products. I have a '73 240Z with the Tokico Blue shocks and Tokico "lowering" springs. It handles well and does not wander or squirm. I have had a good experience of the Tokico products so far. I bough the shocks and springs about 9 months ago. I did not speak with anyone from Tokico directly, but I did e-mail them to ask the spring rate and they replied promptly and answered my questions directly. A few things come to mind after reading this thread. Nobody has mentioned the spring rates, free length, or any other critical spec of the springs or what bump stop is being used. It seems that these are important facts when talking about the ride height, remaining travel and so on. The Tokico "lowering" springs are 140 lbs/inch (front) and 170 lbs/inch (rear). I do not know the free length. I used the bump stops that came with the Tokico dampers. My car started out as a stock, high milage daily driver. No mods (except the typical slot mag wheels). Stock springs, dead shocks, and so on. I bought the car for time trial use at the local club tracks. After the first track event(dragging the door handles in each turn) I replace the shocks and springs with Tokico springs and shocks. It drives very well with the Tokico parts. Admittedly, my base of comparison is limited, but I have no complaints. The Tokico springs are a bit short and have no pre-load at full droop. They actually move freely in the spring seats, front and rear (at full droop). With a static load the first few coils touch, as described in prior posts. The apparent travel (as viewed on the damper rod) is about 1", not including any compression of the bump stop. The coils are closely spaced, but there is about 1 wire diameter (1/4"?) between each later and about 8 layers. This should add up to well over the 1" of obvious remaining travel and still leave room for bump stop compression. When driving I have never felt any thing that indicates the hard impact of metal-on-metal. The paint is still clean and intact at the surfaces that would touch it it coil bound. For what it is worth, the car had no bump stops when I bought it and the stock springs would coil bind at full compression. There were clean spots in the facing surfaces of the springs to prove it. The dampers fit well and work well. No fuss, no muss. The car drives well. Around town it is on the firm side, but not unbearable for an enthusiast. The suspension does bottom on large bumps here and there. On the track it is a bit soft but handles well. I do not notice any banging or obvious harsh bottoming out on the track. I am using 225/50-15 Falken ZE912 tires and the suspension is clearly better than the tires. Just my two cents worth. Peter
-
I have a 1973 240Z. A used L24 engine I bought came with a distributor that turn out to have the incorrect points cam. Ran fine to about 5000 and then started missing and popping. I put the points cam from the old engine in and it runs great. I know (assume) your car has electronic triggering. The point is that with cars of this age, unless you know the history it could have incorrect parts in it. Rebuilders don't necessarily respect the subtle differences between the hot-rod version, the regular version, and the truck version of part. A L28 is an L28 is an L28. Detonation is not the only determining factor of timing limits. As always, a compromise needs to be found between two or more parameters. If you want good fuel mileage, set the time for that. If you want good power set the timing for that. You might not get both at the same time. Peter
-
Oil or soot from exhaust?
beermanpete replied to PSL_240z's topic in Trouble Shooting / General Engine
Despite the poll results (and my own vote for soot), it could be either. Half-burnt fuel and half-burnt oil will both result in black particles. Is there smoke associated with the problem? What color is the smoke? What color are the spark plugs? Does your engine consume oil? Was the choke on fully? To determine the source of the black particles requires diagnostic work on your part. All we can do is hypothesize, guess, and ask a lot of semi-pertinent questions. Cars, especially older cars (due to design or wear) produce pollution. Your car might be perfectly fine. Perhaps you should not start it when the exhaust is pointing at the Mona Lisa. Peter -
I had the opportunity to weight two engines a few weeks ago. 1) Datsun / Nissan L24 from Datsun 240Z. Weight - 320 pounds No intake No exhaust No flywheel or clutch No cooling fan All covers in place (rocker, oil pan, etc.) Water pump, alternator in place Oil pump in place 2) Ford FE block 390 for F250 pick-up Weight - 425 pounds Newly purchased long block from re-builder. No covers of any kind No flywheel No oil pump No nothing
-
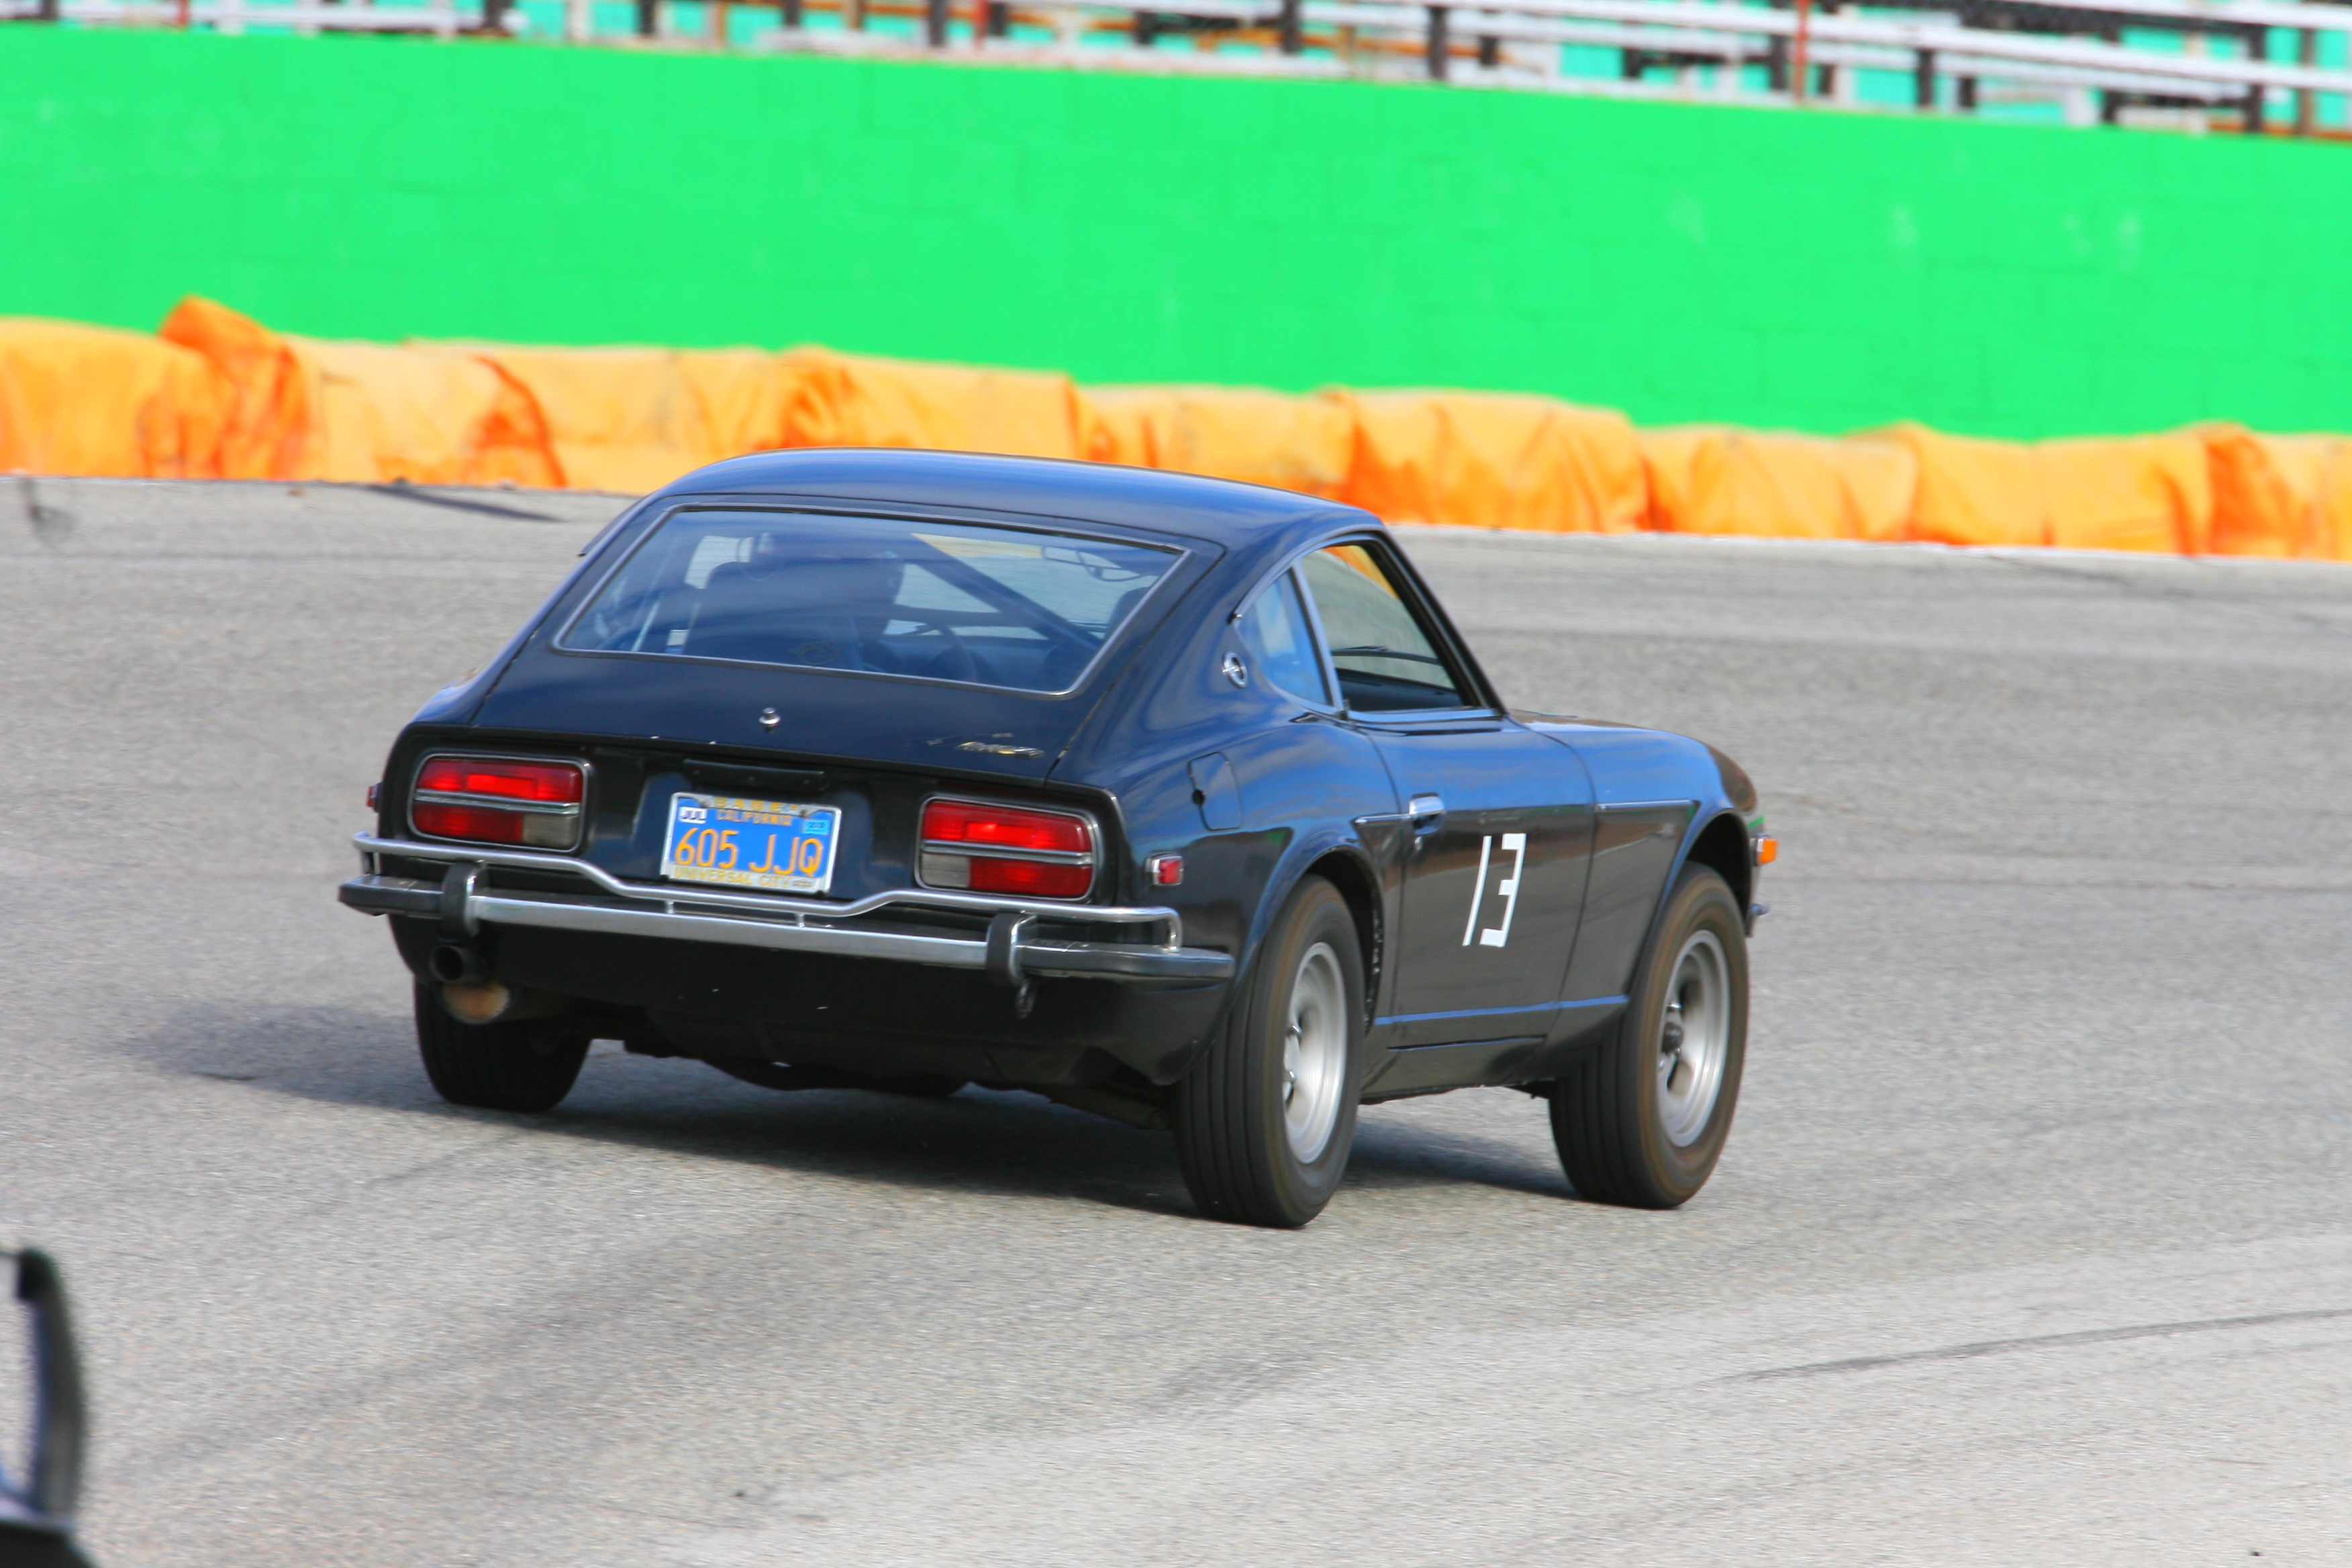
Willow Springs - January 2009