walkerbk
-
Posts
226 -
Joined
-
Last visited
-
Days Won
7
Content Type
Profiles
Forums
Blogs
Events
Gallery
Downloads
Store
Everything posted by walkerbk
-
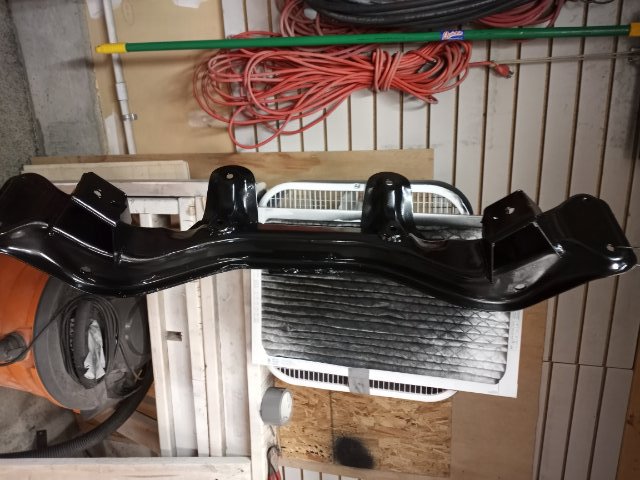
Slowly but surely getting her done. I have the rear entirely welded in, just have to make some minor adjustments and trim the bottom. Everything is done being Powdercoated and the rear suspension will be going on so I can get the rims on (when they come in). Once everything is mounted I should be getting the fender flares mounted.

-
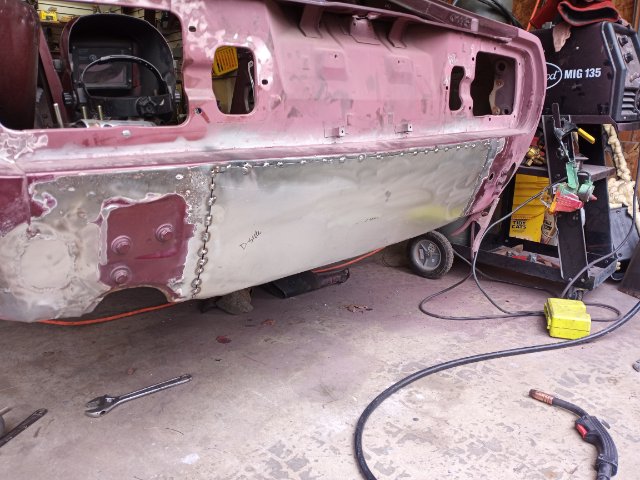
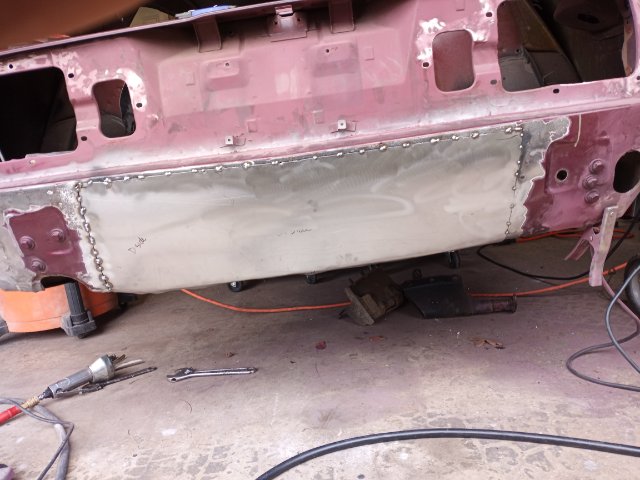
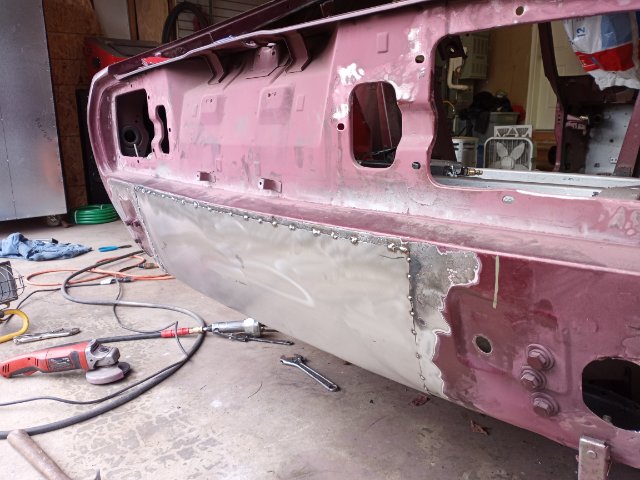
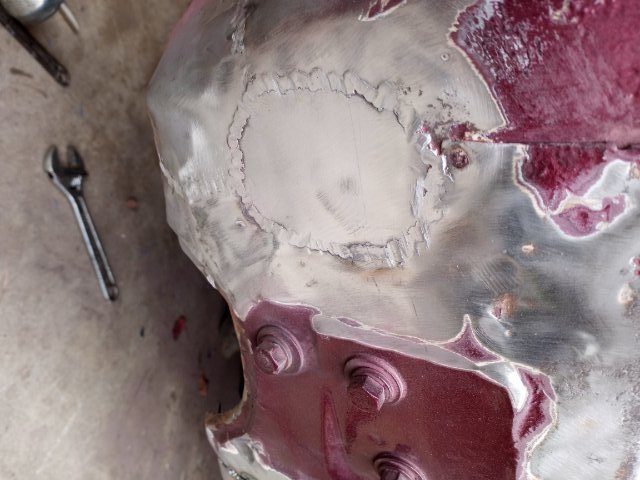
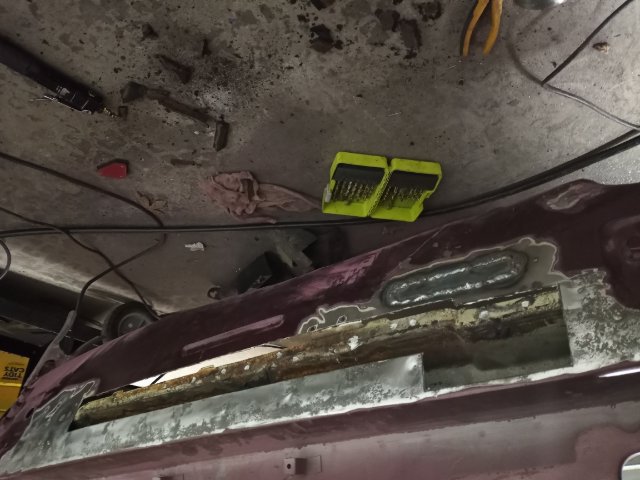
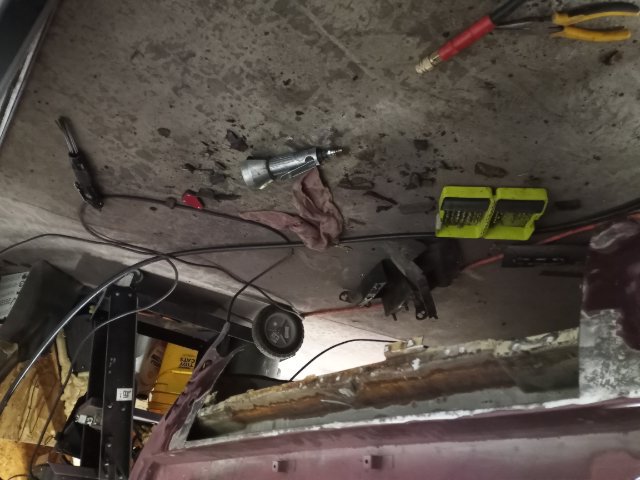
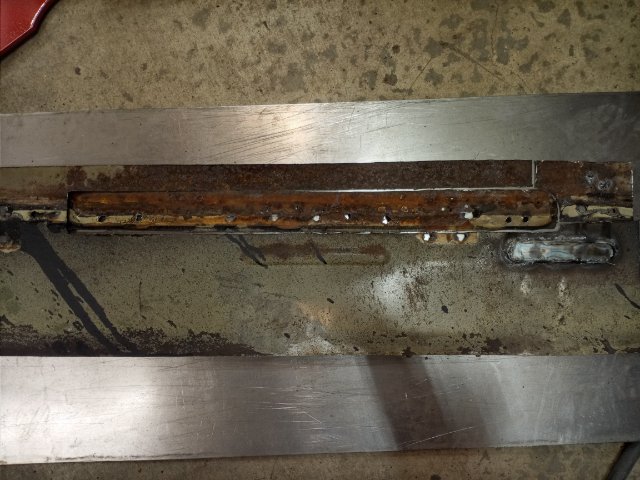
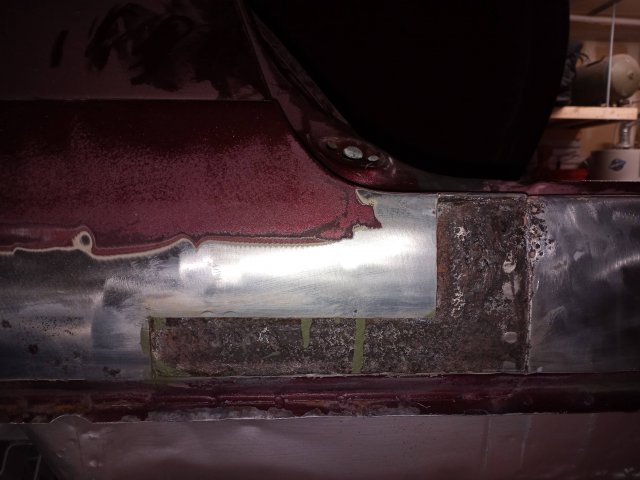
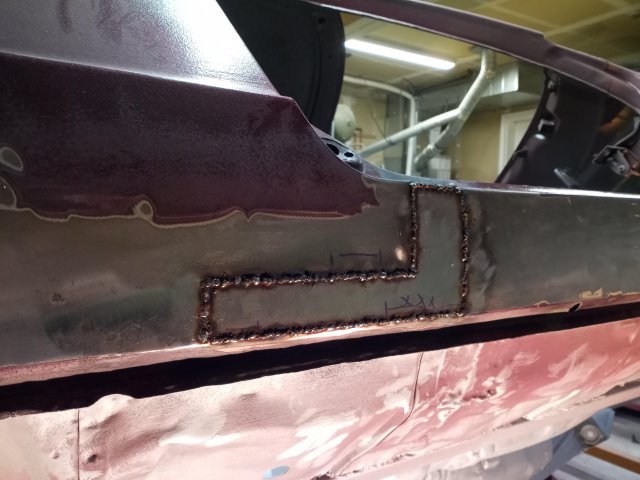
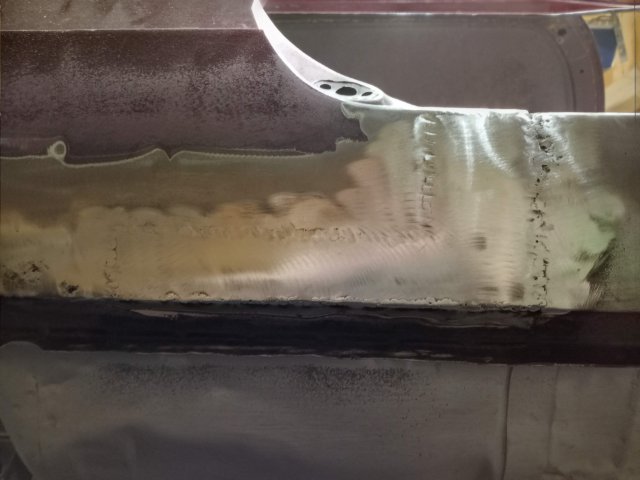
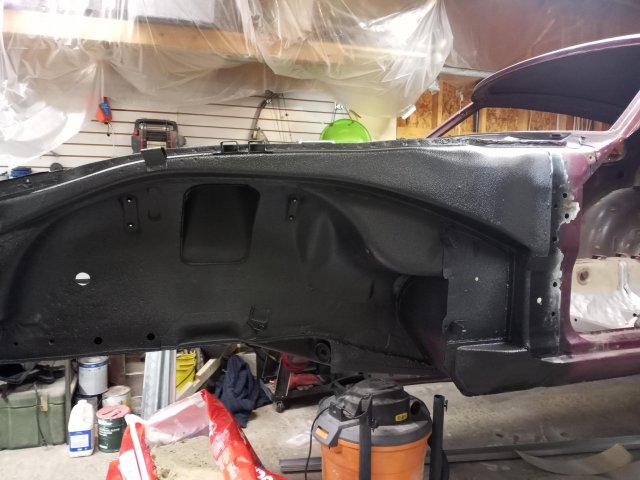
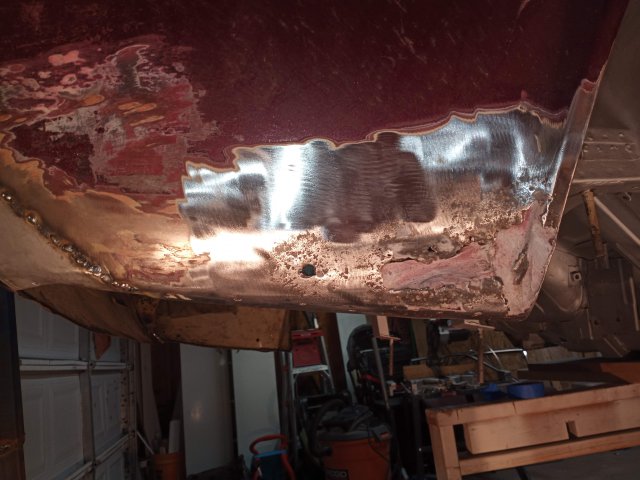
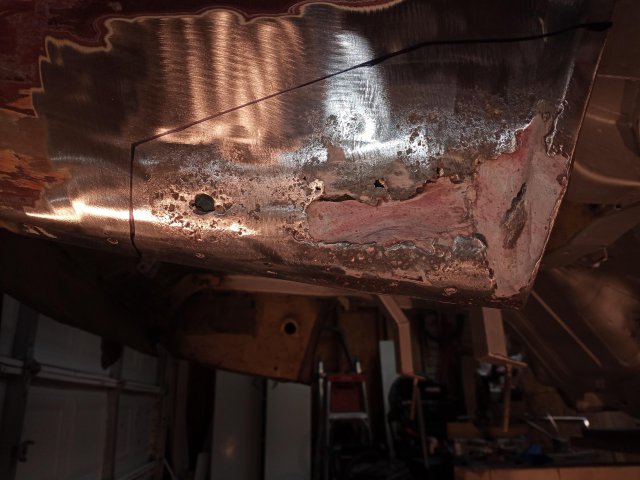
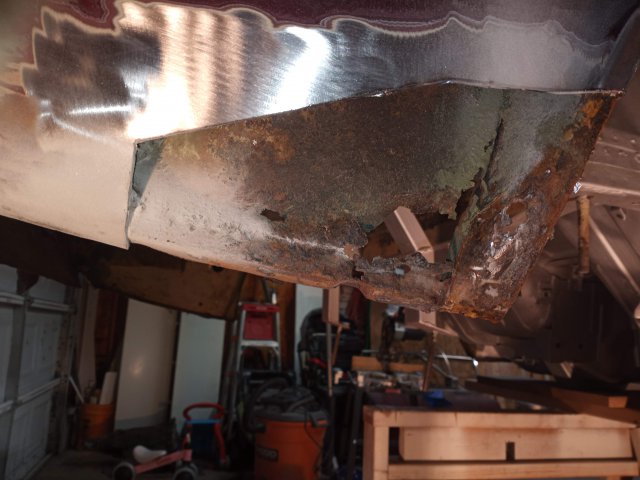
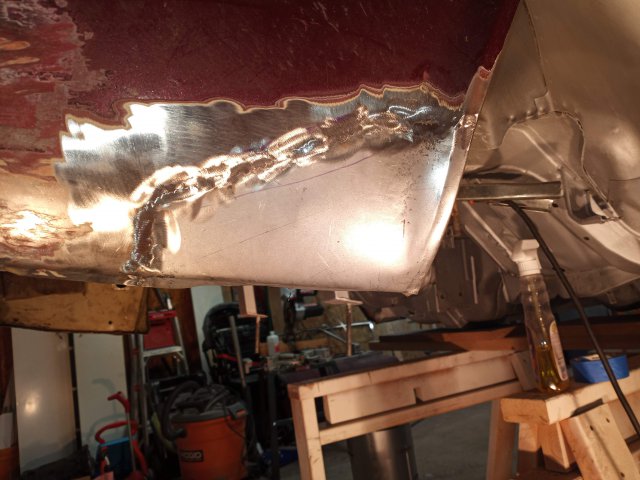
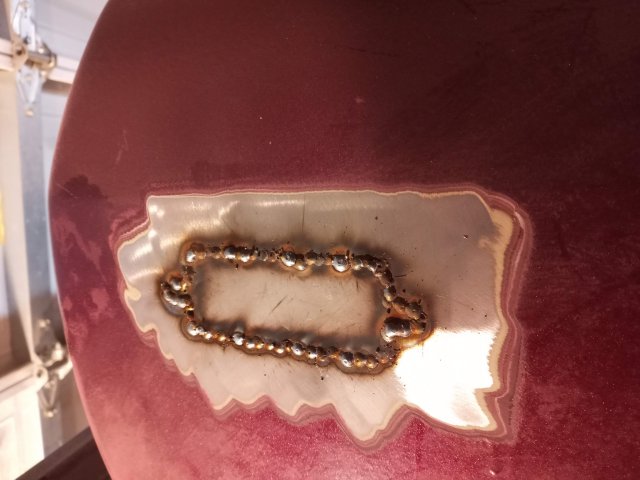
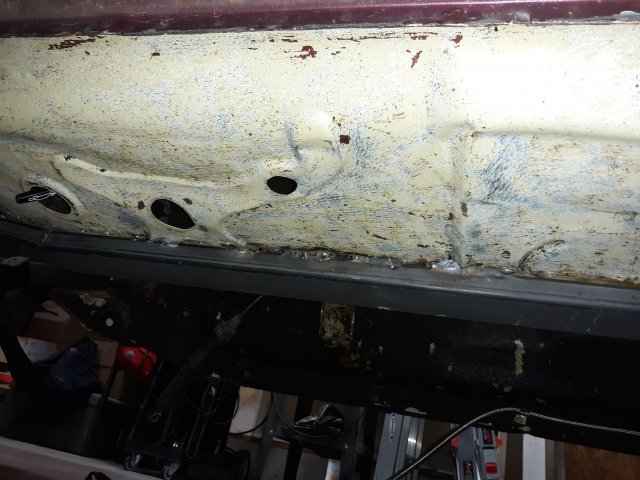
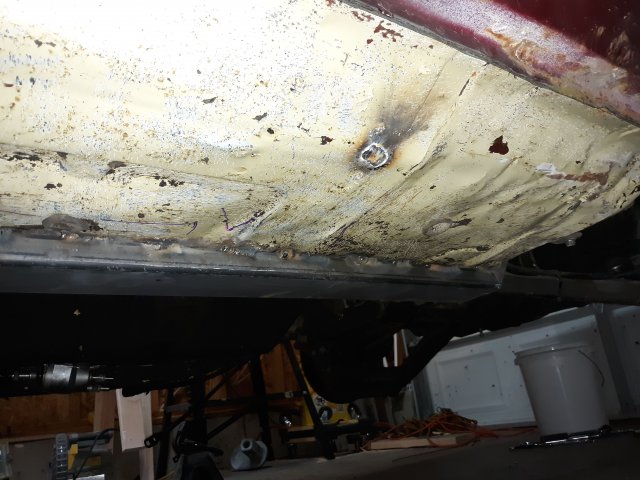
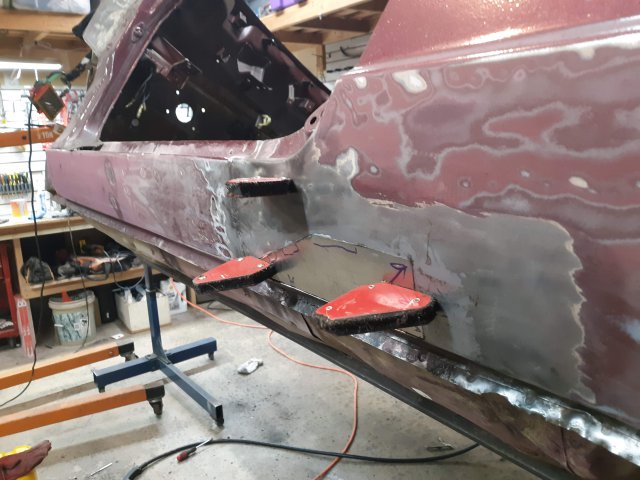
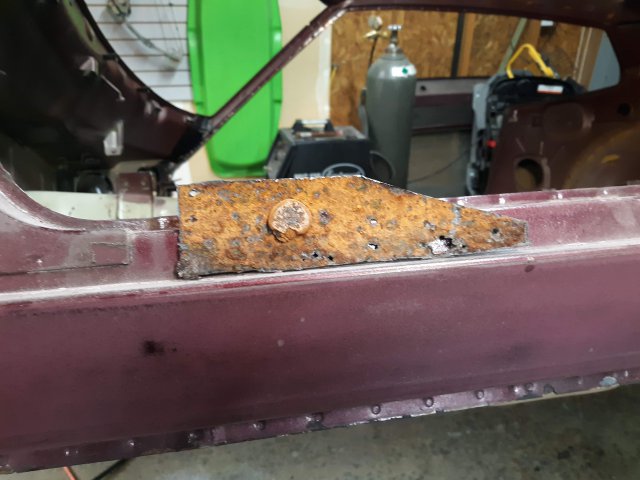
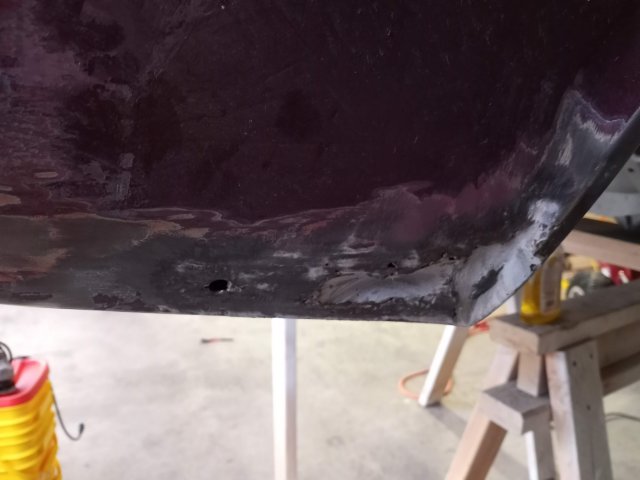
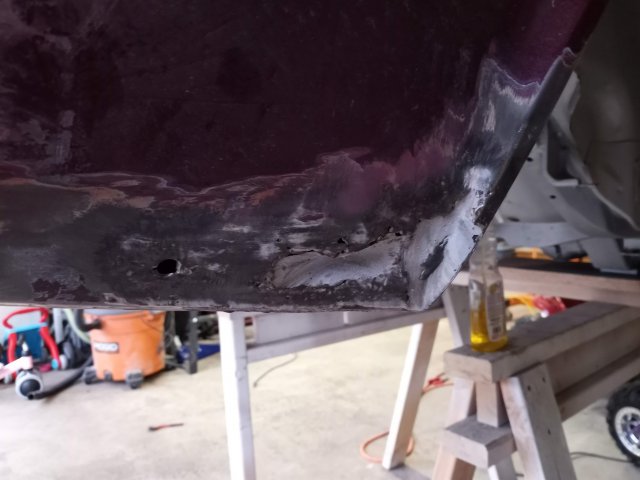
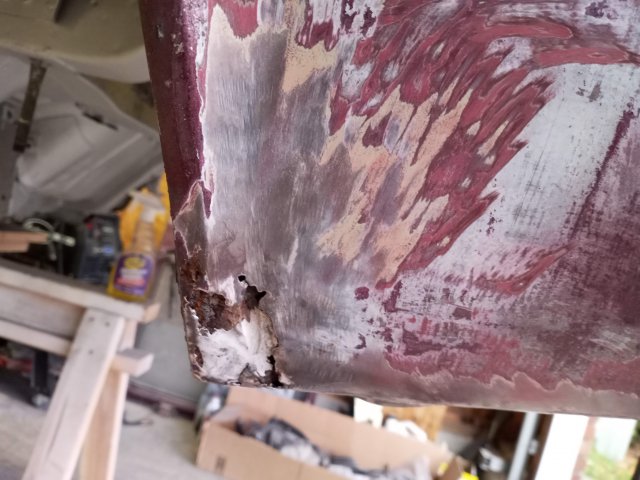
And just when you think you are done with the rust and the welding... she rears her head and strikes. I was only planning on patching the holes in the rear valence in hopes of going for the smother back end but after taking off the paint I found some pitting and rust pin holes. after debating what to do I went ahead and cut a small hole out covering the larger of the pin holes in hopes to seal from the inside out and then through some tiger hair (fiberglass body filler) on the outside. As I cut away I found that it was unlikely the small hole would work and I would need to take all the rust out so I cut a long 2" strip out of the rear... Once done I looked back at the rear valence and could not resist just cutting the rest out. Since my car had been in a wreck, the rear valence was bent up badly. no mater how hard I had tried, it still was not straight so I figured I would just go ahead and replace it all. I dont know what everyone elses rear valence looks like, but based off the design of the 280z rear I do not know how it didn't rust out sooner. The boxed in area behind the valence dips in the middle and it is sealed all the way across preventing any moister from escaping. They should have left a little opening for moister to drain. BTW, what does everyone else do for rear valence replacements? it bends both around the rear (sideways) and top to bottom (vertically) making it a tricky part to get just right. Well I should have the rear bearing seals in today and I'm going to finish rebuilding the steering rack and put it back so everything is coming along nicely in preparation for epoxy coating as soon as the weather permits.
-
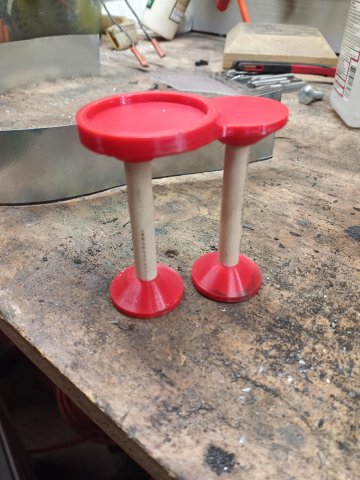
I finally got all four strut towers powder coated and most of the big parts are sand blasted and ready to be coated. I got tired of swapping powders back and forth so I decided to focus on just sandblasting the parts over this past weekend and will coat all the parts next weekend. I was having problems figuring out the best way to seal the larger holes (rear bearing area, steering rack) while sandblasting and powder coating. I figured out the best way was to 3d print some plugs about .002 undersize and then wrap them with some high temp tape. Since they do not have to stand the heat for that long (only while coating) they hold up just fine. As I am in Washington, it is still cold up here but current body metal temp is 62* in the day. I plan on ordering some SPI epoxy primer and here in the next month strip the body and get her in epoxy.
-
Please tell me that is 3d printed... looks awesome
-
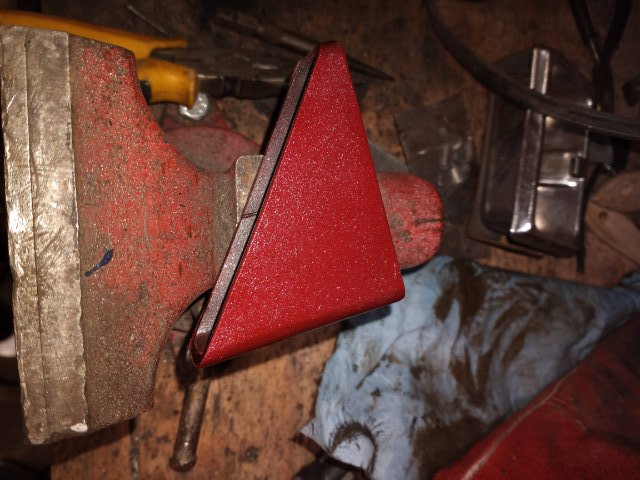
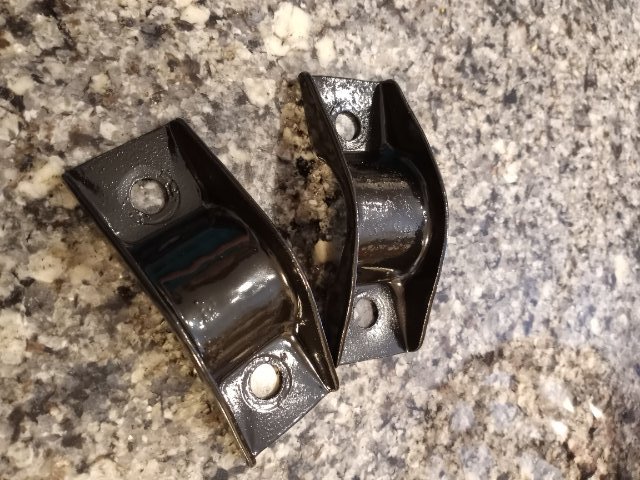
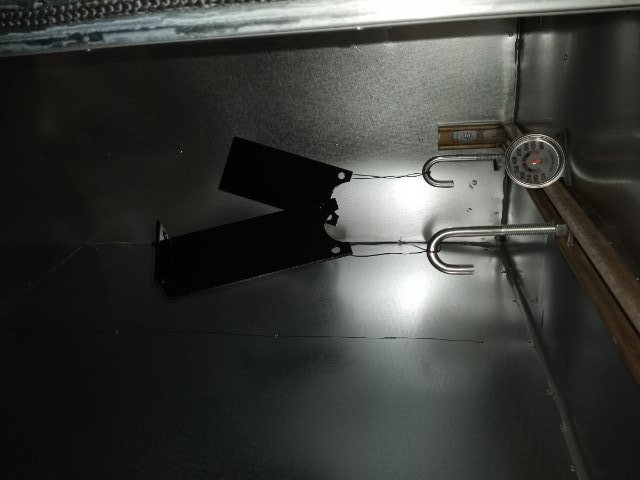
It cost about $450 for the entire set up. I did this because I asked a local shop how much they would charge for just the 4x control arms (After I cleaned and sand blasted them) and they were going to charge me $300 for black. I got a broken food warmer for free off Market place. This was the best way to go as it came with extra wiring (high temp), blower motor and some extras The metal studs and rockwool came from lowes for about $100 internal metal is 26 gauge from a local AC company for $100 The heating element (1800w) and PID cost $100 And the most expensive part of the set up was the duel volt powder coating gun from Eastwood for $120. Overall very happy with the setup as it takes 20 minutes to get to 400* and I have gotten it up to 550* in 30 min. I am currently planning on going on a powder coating spree as I plan on chrome powder coating a lot of the small parts and red metal flake powder coat the control arms this weekend.
-
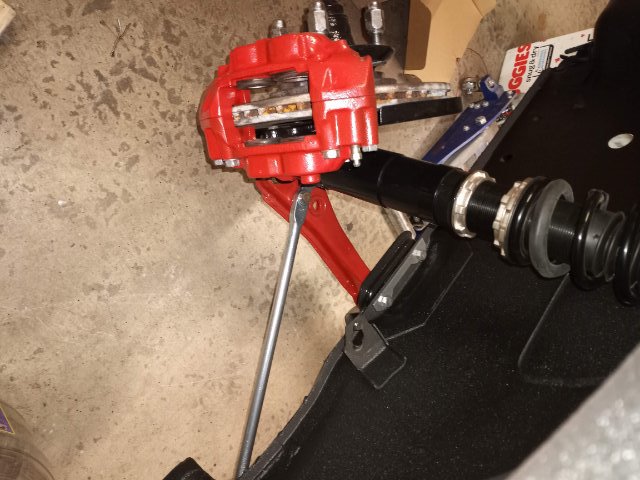
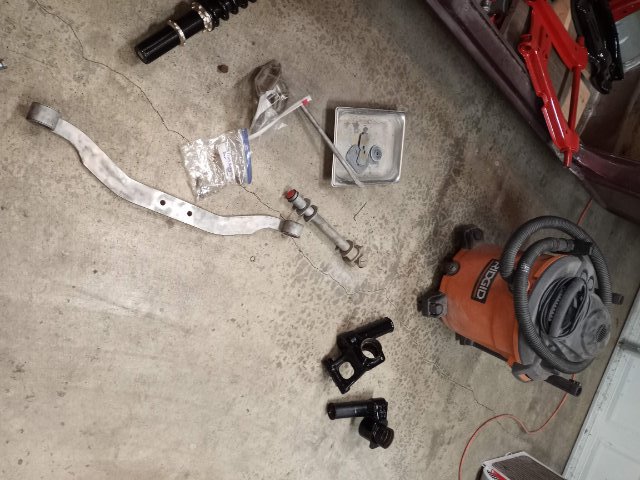
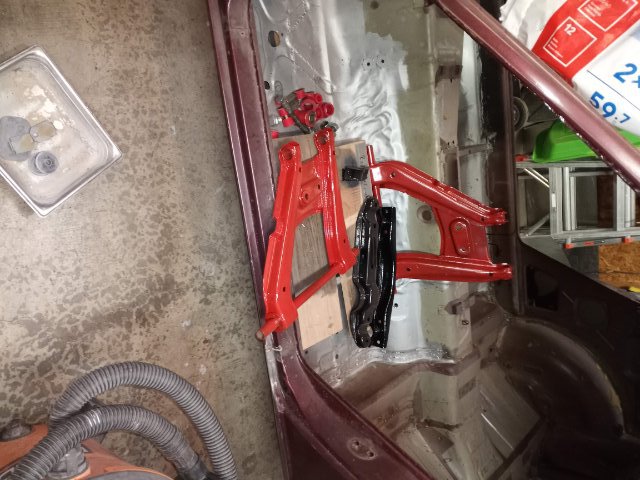
Well since I got the powder coating oven done I have started coating stuff. My plan is use black, chrome, and red metallic powder. Going to hide stuff with the black like the cross member, drop mounts differential. Planning on coating the control arms, brakes, mustache bar, and some other parts with the red metallic to make them pop. Then coat some of the smaller parts with the chrome/ clear.
-
SPDRCR LS1 and 4l60e Build Thread
walkerbk replied to Spdrcr's topic in Gen III & IV Chevy V8Z Tech Board
I have purchased these rims for my rocket bunny build and should be getting them in soon. https://www.felgenwerks.com/fw-001-satin-black-15x105 -
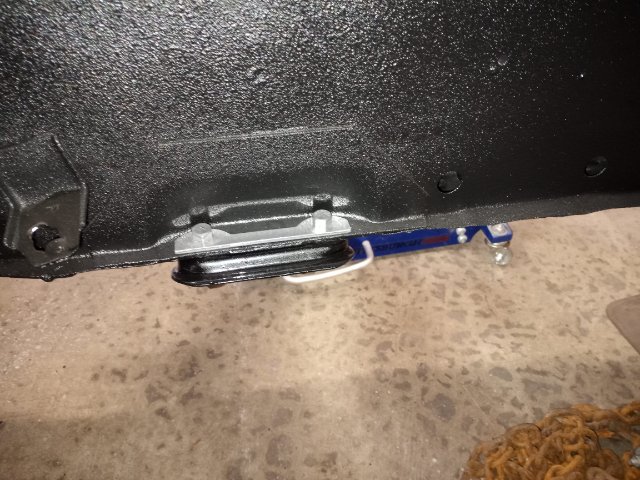
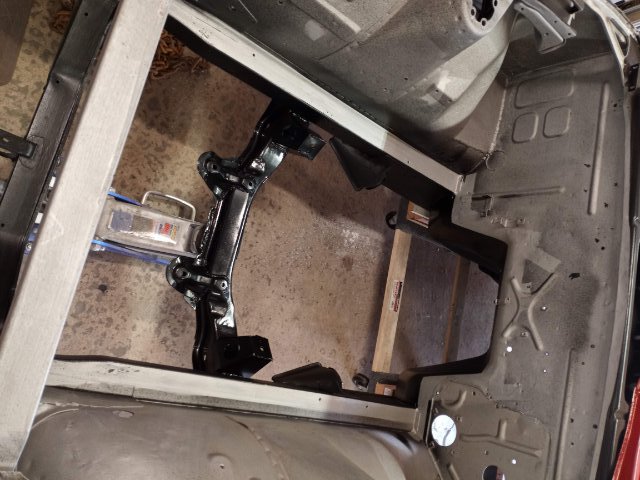
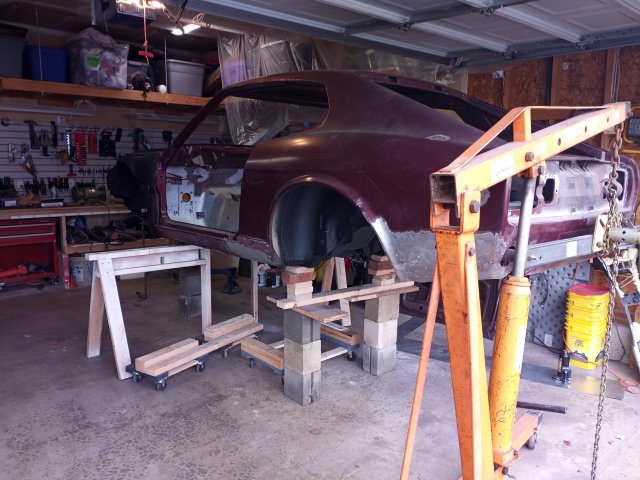
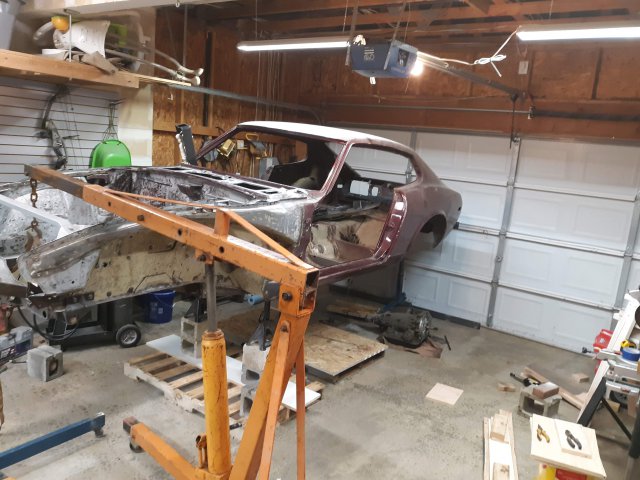
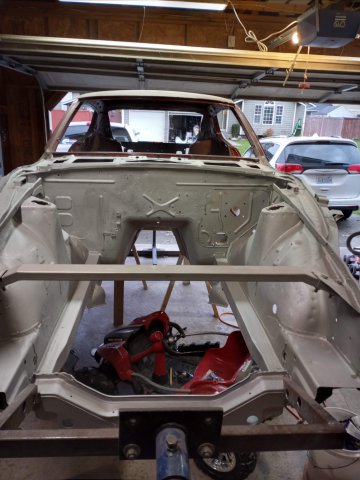
My main goal for this weekend was to get the car back on the ground and the powder coating oven close enough to finished to push it into its location. Based on everything I have read on powder coating ovens, I needed 100-150 watts per c.f. My oven is 17" x 24" x 54" which results in 12.2 c.f.. meaning I needed between 1300w - 1800w heating element. I could have used a 1500w smoker element but was able to find a 1800 watt element which should allow me to get to temp quicker. After a quick test, I went from 45* to 400* in about 18 min and hit 550* in 30 min (longest I ran it). Now that I know it will work, I ordered a PID controller and will be building the control box. PID should be here tomorrow so I should be able to start coating soon. Based on the size of my oven, it should allow me to coat all suspension parts, along with all those small parts through out the car. The only thing I might not be able to coat is going to be the torsion control arm. Getting the car off the rotisserie and back on the ground was the 2nd scariest thing i have ever done (putting it up there was number 1). As every safe and responsible adult should, I used a series of cinder blocks, scrap wood, jack stands and whatever else I had laying around the garage. With the help of my engine hoist I was able to safely set her back on a set of movers dollies. If anyone wants a rotisserie in central Washington area, I will trade for a regular engine stand.
-
A musician's therapist (The $300 Z)
walkerbk replied to Zetsaz's topic in S30 Series - 240z, 260z, 280z
If your trying to use the 300z turbo set up, those axles won't work. They have to be the actual oem ones... if those are the 280zx ones looks fun. -
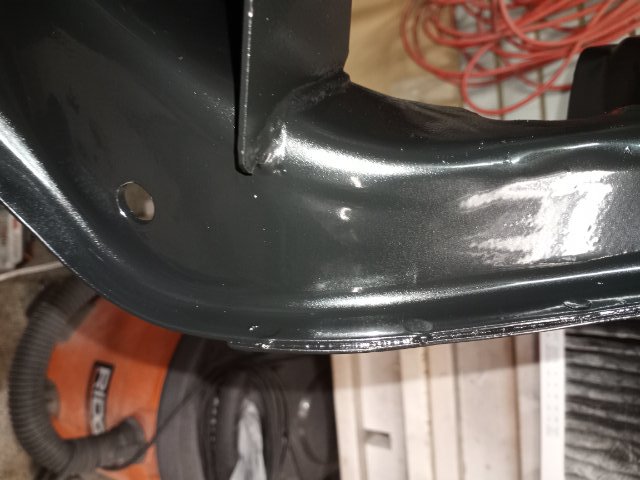
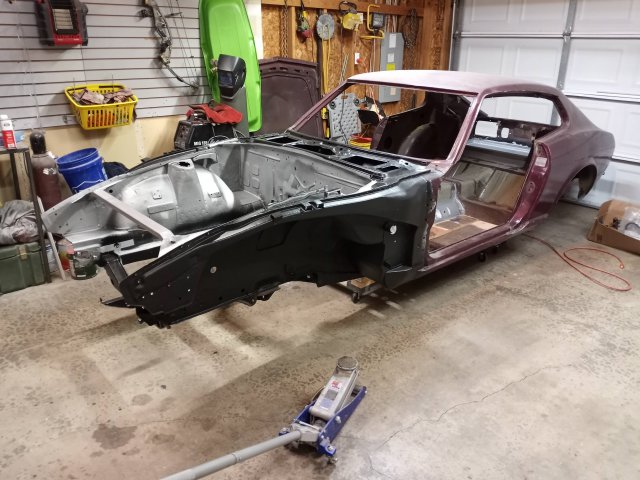
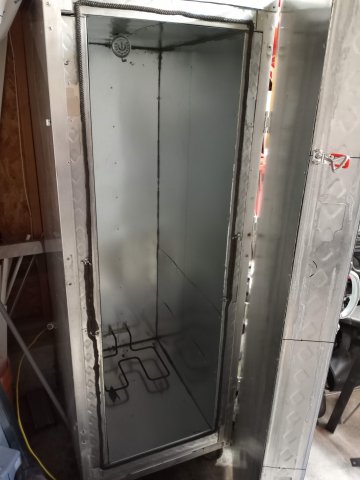
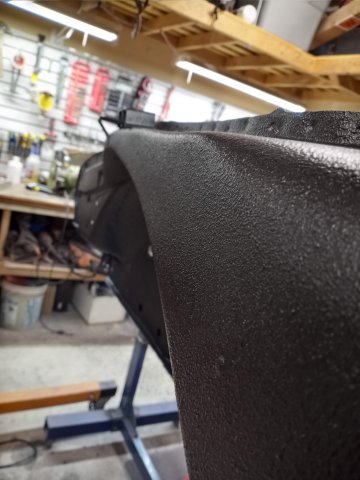
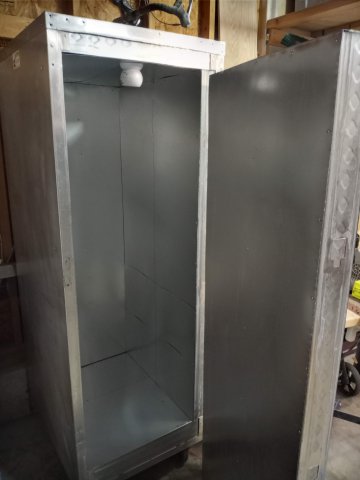
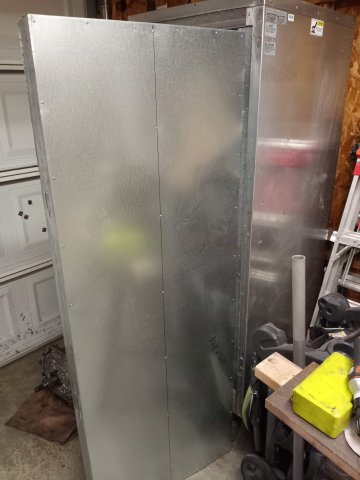
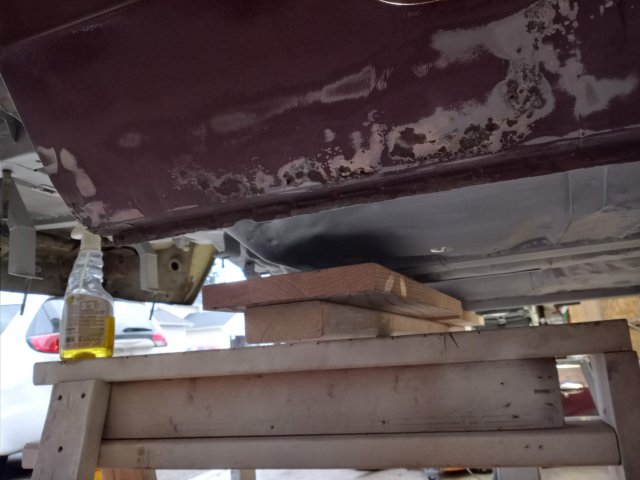
Well I completed the welding on the car for the most part. I finished welding all the rust on the main body along with patching the rear side markers and the antenna hole. there might be some minor welding on the front but I dont expect it to be much as most of it will be cut off for the fender flairs. Since I was complete with the welding, I sealed the seams up on the outside with my make shift 3d printed duel tube extruder and some 3/8in dowels. It is a simple model that allowed me to use a cheap caulk gun with the duel tube 3m seam sealer. If anyone wants the STL file I attached it below. I set up my make shift spray booth out of painters tarps and sprayed the underbody with Raptor Liner. I bought the 6 qt set as I figured I would rather have more than not enough and I figured I could use it on the interior if there was left overs. I am very pleased with the results. I used 4 qts covering the underbody with 2 coats and it is rock solid. I figured I would use the other 2 qts to cover the inner front fenders once they were complete and to finish the rear fenders once I cut and welded for the rear fenders. I am waiting on my rims to drop the car back on the ground so I can install the rear fender flares. I have purchased a set of rims from Felgen Werks 10.5x15 in the rear and 9x15 in the front. I went with them because of the price along with the ability to get wide rims that were not custom. I ordered them however almost a year ago and am still waiting. Every time I call and talk to the owner he tells me that its set backs due to covid... I am almost at the point where I can no longer wait. Below is the link to the rims. https://www.felgenwerks.com/fw-001-satin-black-15x105 While I am waiting on the rims, since I have to have the suspension to put the rims on, I have been working on another project (my wife hates it)... A Powder coating oven. I bought a powder coating gun a while ago with the intent on using it but have not wired my garage for 220v yet so I have not got a oven or anything to cure the parts. I found a food warmer near by that was free and I have been converting it to a 120v powder coating oven. I have been using steel studs, rockwool insulation and 26g galvanized sheet metal (lining) in the construction. I was just able to finish off the door to night and still have one side left before its completed. the inside is 24"x17"x55" which should allow me to coat the majority of everything I need while keeping the inside around 11c.f. which should allow me to heat it with a 1500w heating element from a smoker (again 120v). I will be working on the suspension and other small projects for now as the weather up here in Washington is far to cold to spray epoxy. When I sprayed the Raptor Liner I had my propane heater on for almost two days just to make sure it cured. duel caulk base v1.stl duel caulk plunger v1.stl
-
A musician's therapist (The $300 Z)
walkerbk replied to Zetsaz's topic in S30 Series - 240z, 260z, 280z
Make sure the auto adjustment screw is facing the right way. When I rebuilt my rear drums I put the screw in the wrong way and they auto adjusted backwards loosening up whenever you pumped the brake. If your brake issue returns this might be the issue. -
Using 5/8 bolt in place of spindle pin
walkerbk replied to fusion's topic in Brakes, Wheels, Suspension and Chassis
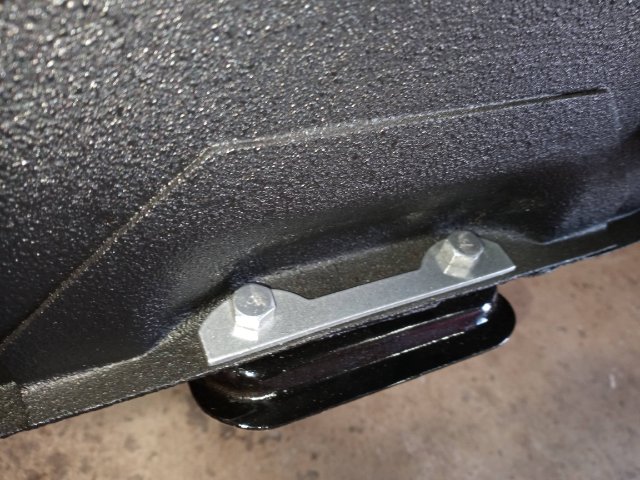
I used the 5/8 in bolt without cutting any notches or anything. I torqued it to 65ft lbs and never had any issues with it. I used the nylon lock nut and regular washers. -
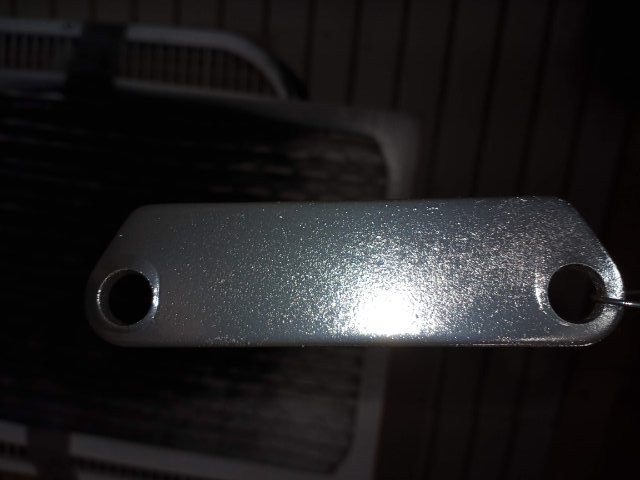
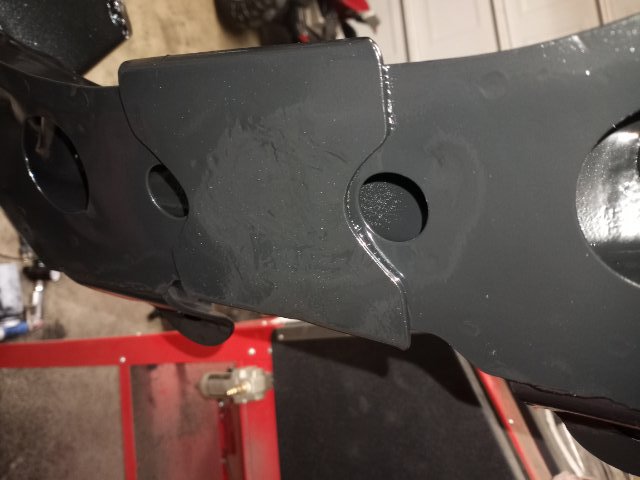
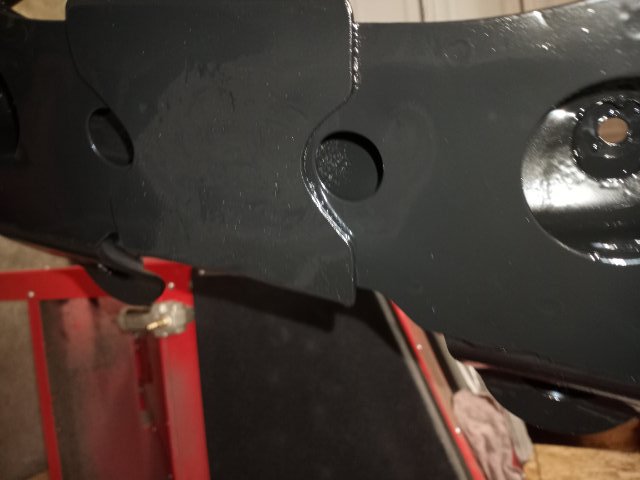
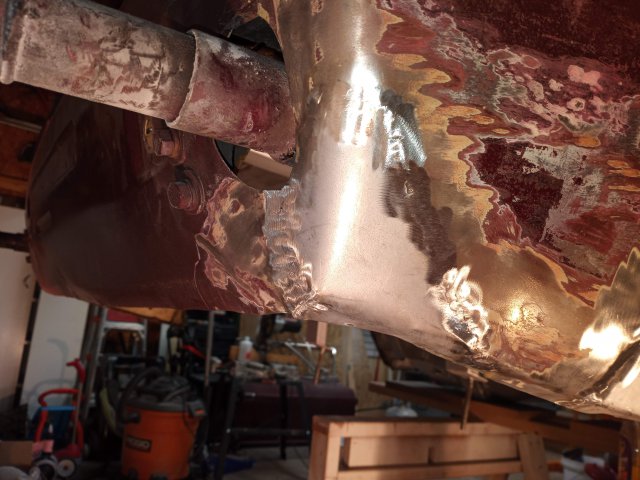
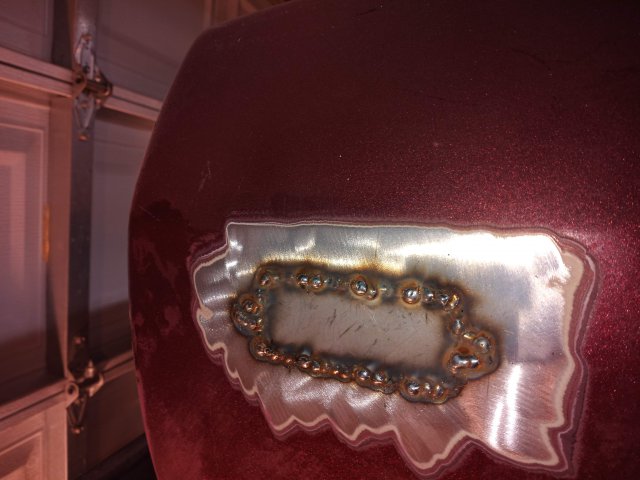
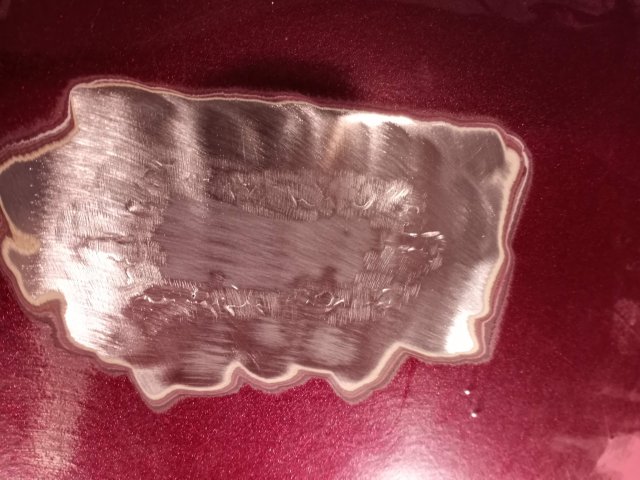
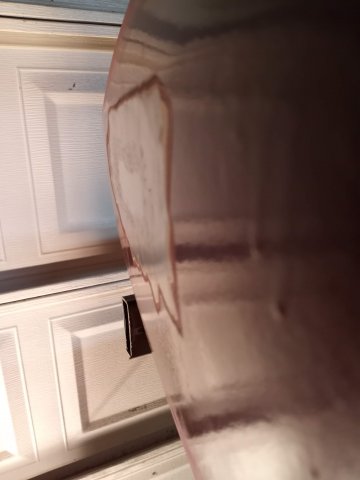
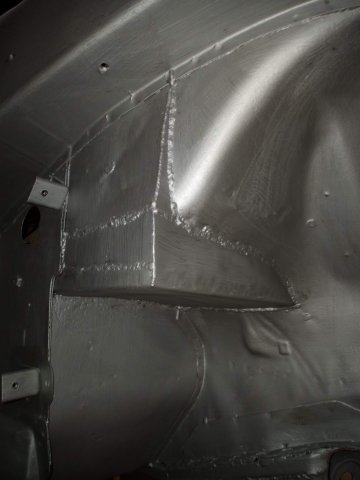
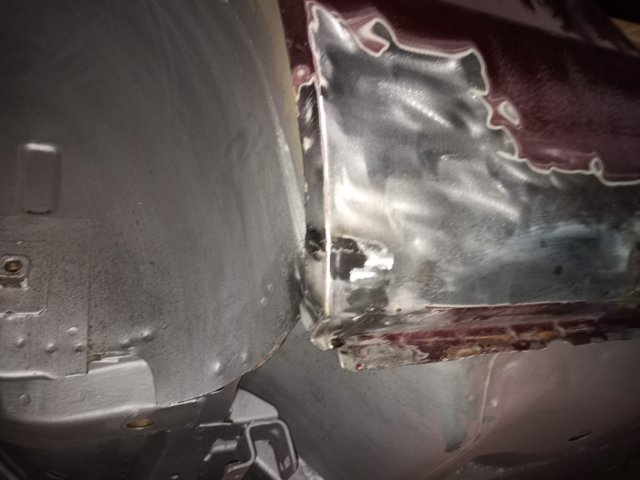
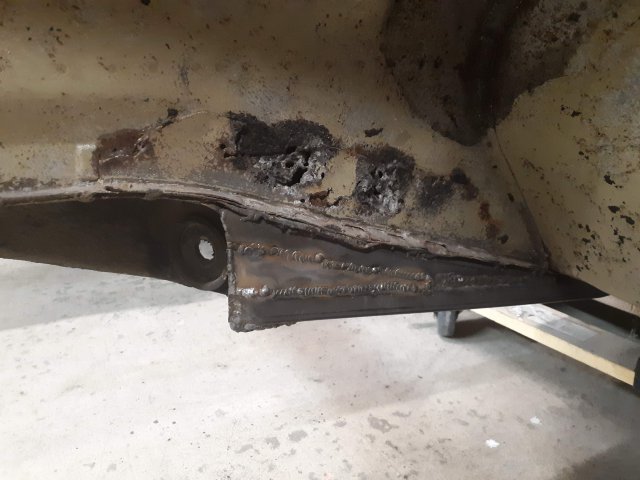
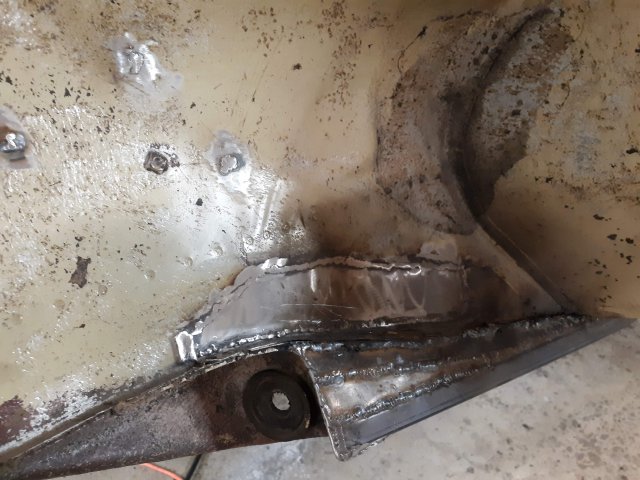
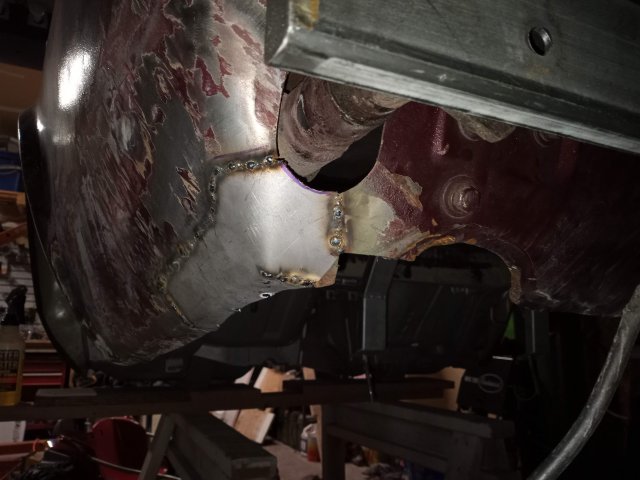
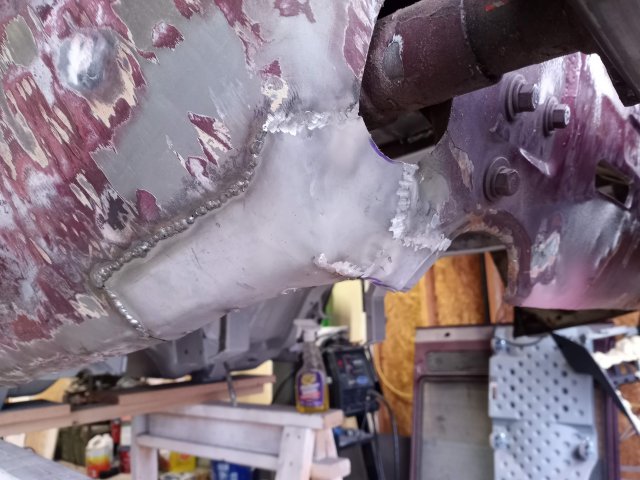
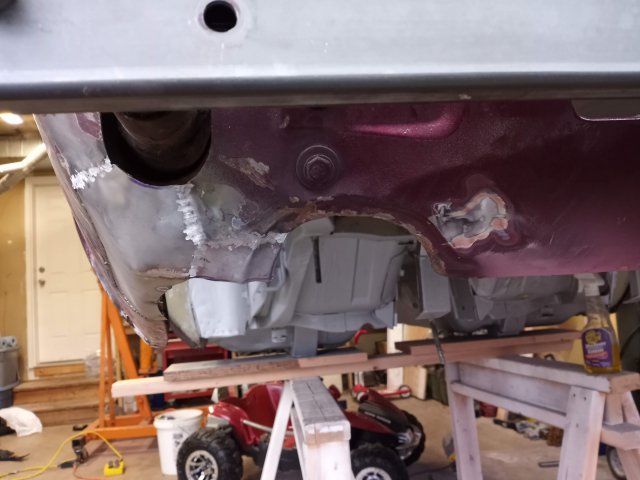
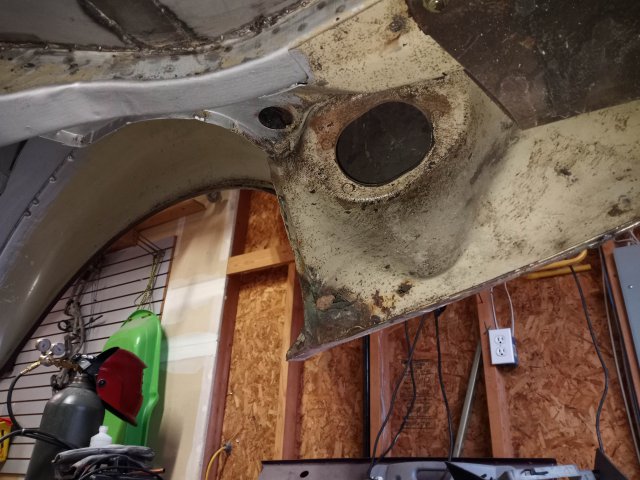
Battery Tray I don’t think I ever uploaded the photos of the battery tray. I squared up the tray to fit the stock battery about 5in lower than stock. The battery will be secured front to back by the firewall and the new metal and I will just have to secure it from sliding into the engine compartment. They are not the prettiest welds but the outside will be covered up and the inside will be covered up by a battery. Patch Panels I had to weld a patch on the rear passenger side right behind the tire. The metal had rusted about a 6x10 patch in the outer skin and a 3x5 hole in the inner skin. I used the Tebco patch panel for this as well and again had problems with the fitment. It was about a 70% solution and took a lot of forming at the top to get it to match up. I am still not happy with the fitment but it can be covered with about 1/8” of bondo. I also while on the rear passenger side filled in the side marker light. I currently plan on utilizing some ¾” lights from Amazon to replace them while keeping a low-profile hidden look. I have two patches that had to be made for the dog leg. One very small one towards the very back by the rear tire and one larger one forward that goes forward to the union. I thought about cutting out this entire section to gain access to the metal behind for better prep but ended up not needing to as I used the Eastwood internal frame coating which allowed me to get very good penetration into the area along with the use of the rotisserie and compressed air to help direct the paint. I was able to complete the small patch and still have the larger patch to finish either later tonight or tomorrow. I still have to finish the other side marker and am going to weld up the antenna hole which should conclude my welding on the main body. I still have to repair the hood (large dent in the nose) and the hatch (small dent in the rear) plus some other things I find along the way. I plan on using Southern Polyurethane Coatings epoxy primer.
-
SPDRCR LS1 and 4l60e Build Thread
walkerbk replied to Spdrcr's topic in Gen III & IV Chevy V8Z Tech Board
Having done this before... do your self a favor and put the harness on the engine and get the general layout for how it will fit in the engine bay. -
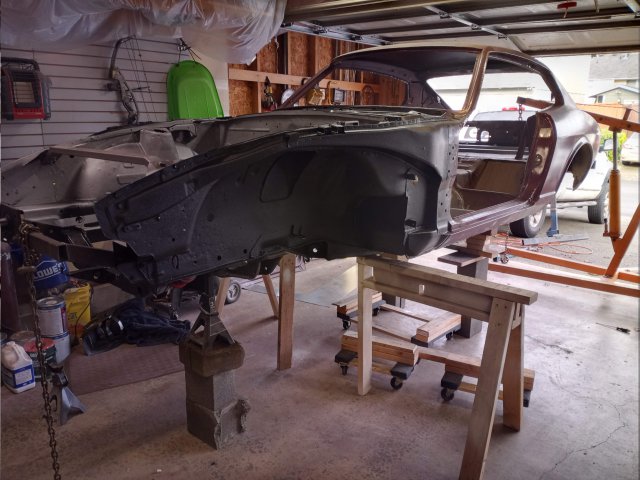
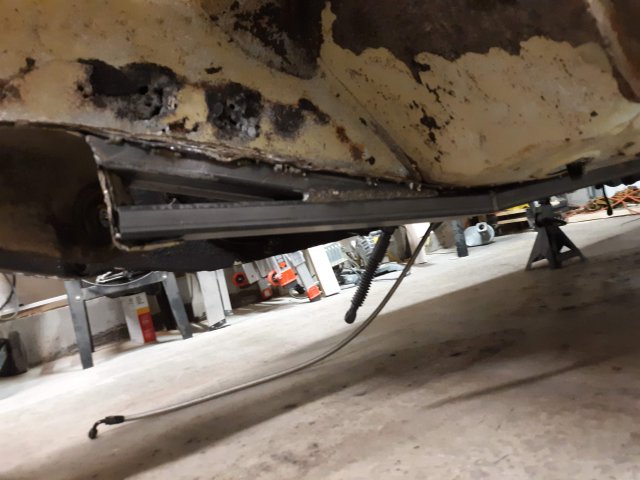
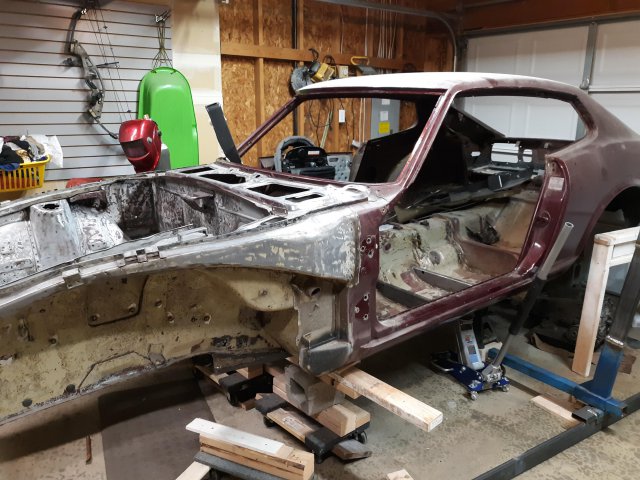
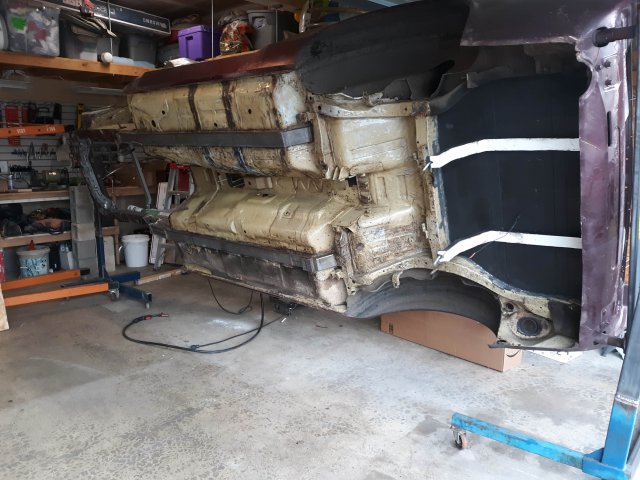
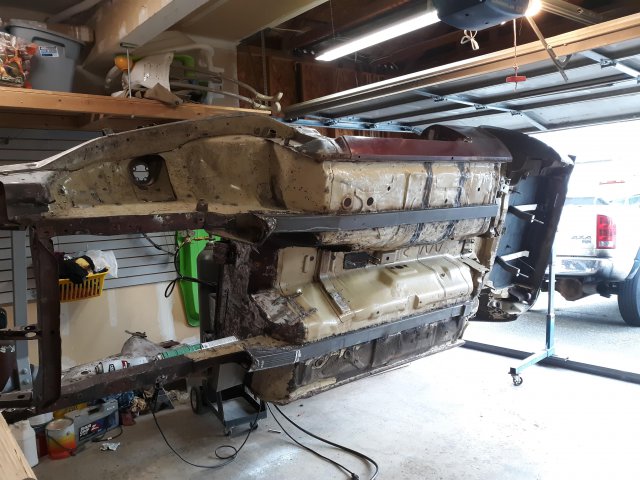
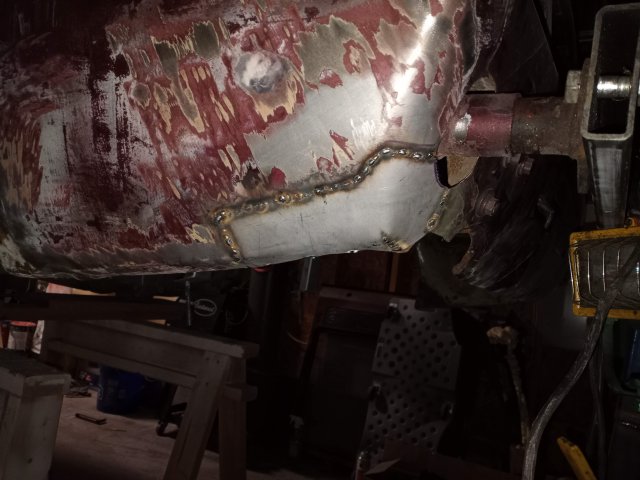
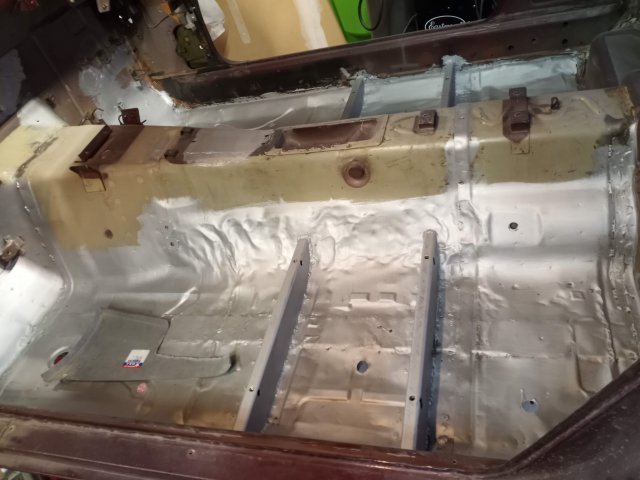
Wow, it has been a long time. I got back from deployment to a new kid crawling while COVID was all just getting started. Even with everything being shut down across the country we Army folks are still hard at work leaving little time for play. I decided to build a rotisserie and put the car up in the air in order to remove the underbody coating, weld and paint. I had contemplated on building a rotisserie or making a roll over jig for a while and eventually decided that it was best to put it in a rotisserie as I could quickly turn the car both ways. I had 2x engine stands and was able to heighten then to mount the Datsun on them. I will say… getting the car up on the rotisserie was the scariest thing I have done in a while. I was using cinder blocks, pallets, jack stands and other material to get the car high enough to mount on the rotisserie and the car even fell one time from about 3ft up. The reinforced steel frame rails just bounced on the floor and then I started lifting it back up (luckily no damage) I was able to complete the underbody for the most part in primer and still have to do the paint. The best way I found to remove the old underbody coating was with an air needler for the majority and then a heat gun and scrapper for some of the harder to clean areas. Once scrapped clean, the remaining was wiped clean with mineral spirits to get clean paint in most areas. The hidden areas were coated with the Eastwood internal frame coating (green for first coat, black for second coat), and then the visible areas were coated with the water cure Mastercoat. I have never used POR-15 or rust bullet but I really like the Mastercoat paint. It is a little more costly but if it stays and does its job, its money well spent. I then turned my attention to the rust on the body. I repainted the car about 7 years ago an found the rear corners by the bumpers, lower rear quarter panels, and the lower dog legs to be rusted out. Being the great paint and body guy that I am, I shoved fiberglass bondo in the rust and painted over it all. Well, this time around I am doing it right (or at least better). I have been able to patch the fresh air vent along with repairing one of the lower dog legs, the battery tray (I did end up lowering it) and the rear corners. While welding, I utilized the Eastwood inner fender coating system to coat behind the welds as it is high in zinc. The dog leg was simple being an almost flat piece of metal with a slight bend but the rear corners were a pain. The rear passenger corner had rusted through both layers of steel which took a little extra time to repair. I utilized the tabco repair panels which at times I felt were made for a different car. They took a lot of beating and work to get them to fit. On top of the rear corners being a pain, the lower valance (below the tail lights) was bent up pretty bad as my brother-in-law wrecked the car and the rear end hit the ground hard. It took a lot of bending and hammering but I think I got it close enough to work with. I do feel like the lower valance is made of super thin metal and is flimsy as tin foil but I don’t know how to reinforce it. I still have a few rust spots to repair at which time I am going to finish the underbody paint and then move to sanding the body for primer.
-
The problem i ran into witha stock shifter was the stock cable was to short. I had to mount the shifter in the trans tunnel to make it reach and it never felt right. I have a c5 shifter.
-
I use a product called master coat. I cant speak to how well their paints work (same kind as por15) but their metel prep has zinc phosphate in it which is embedded in the metal as the rust is converted (or so they say) I wiped my engine bay down and left it for a year in Washington state (very moist) and didn't have any issues. I believe they also say to wipe it off with water prior to paint but the extra protection from the zinc prevents flash rust. The reason you need to wipe it down with water is to rinse the acid out and to neutralize it. Water is ph neutral, dont know about acetone.
-
looks good but it sounded like your differential was bouncing all over the place. every time you acc/brake you can hear it bang.
-
silvermine coil over kit
walkerbk replied to nzarano's topic in Brakes, Wheels, Suspension and Chassis
Its the same as the CX Racing ones. I bought some BC coilovers because I know they can be rebuilt in the future and they arent that much more. Who knows what kind of support your going to get for the CX racing ones down the road. -
looks good. simple but probably much better than what was there. I hate how the stock battery tray sits 3in higher than it ever should have.
-
Rear caliper pistons won't engage
walkerbk replied to YupI'mFrustrated's topic in S30 Series - 240z, 260z, 280z
Sounds like your master cylinder lost its prime. If one of your reservoirs went dry, you got some air in the master and you cant get that out by bleeding it at the brakes. You probably need to pull it off and bleed the master cylinder. After the master cylinder is bled, bleed the 4 corners. -
2+2 Chassis Reinforcement
walkerbk replied to Twisted46's topic in Brakes, Wheels, Suspension and Chassis
The Bad Dog Subframe Connectors will be to short since it is a 2+2. I changed my frame rails out with 1x3 steel tube. The 1x3 is actually shallower than the original frame rails so depending on your power levels, 2x3 might even be a good idea. -
I have my LS swap with 3in exhaust ran under/beside the diff and it does cut down on the ground clearance but it works. you might try oval tubing or flattening the tubing right where it runs under the diff.
-
A musician's therapist (The $300 Z)
walkerbk replied to Zetsaz's topic in S30 Series - 240z, 260z, 280z
I never understood why people complain about the old Datsun wiring that doesnt have relays and then when people replace the wiring, they use a harness without relays. That is a very nice relay board. I am planning on linking a relay board into the speedway motor wiring harness (very similar to all the other universal ones but good reviews).