Dingo
-
Posts
64 -
Joined
-
Last visited
-
Days Won
1
Recent Profile Visitors
3430 profile views

Dingo's Achievements
")


-
A big thank you - 240 LS Conversion
Dingo replied to Mikey303LSZ's topic in Gen III & IV Chevy V8Z Tech Board
I know i'm bumping an old thread, but I just purchased the Tanks Inc. setup to copy what you did. Thanks for the pics and info about the setup! -
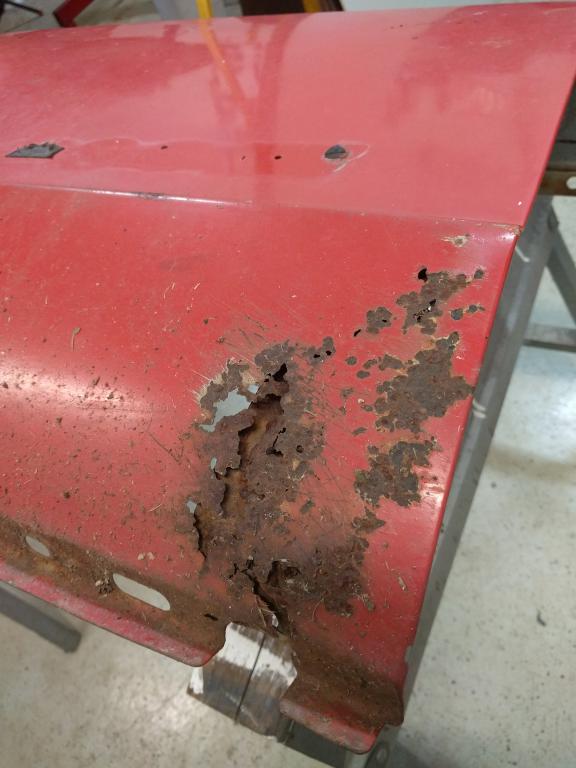
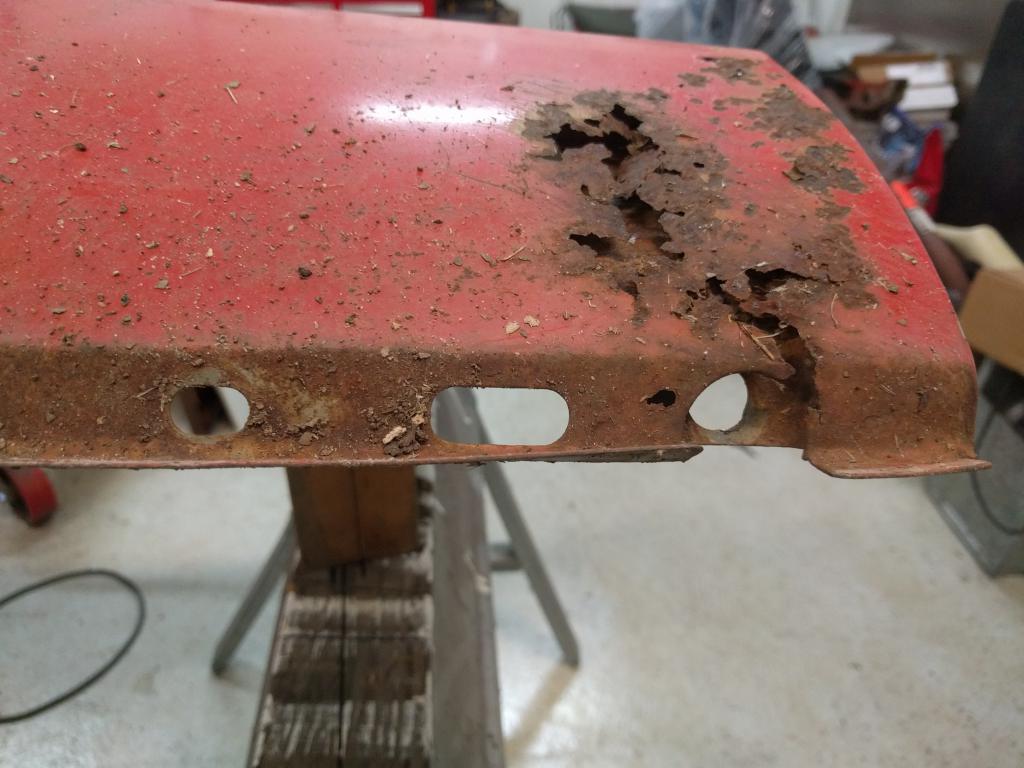
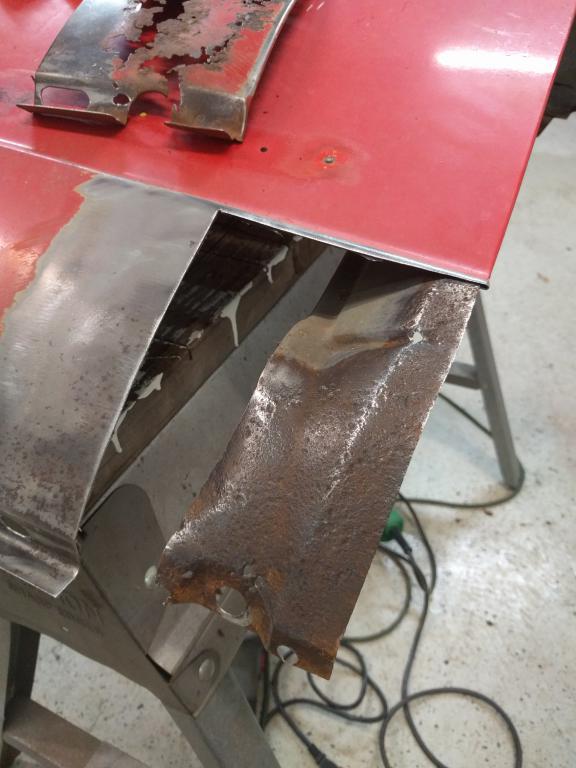
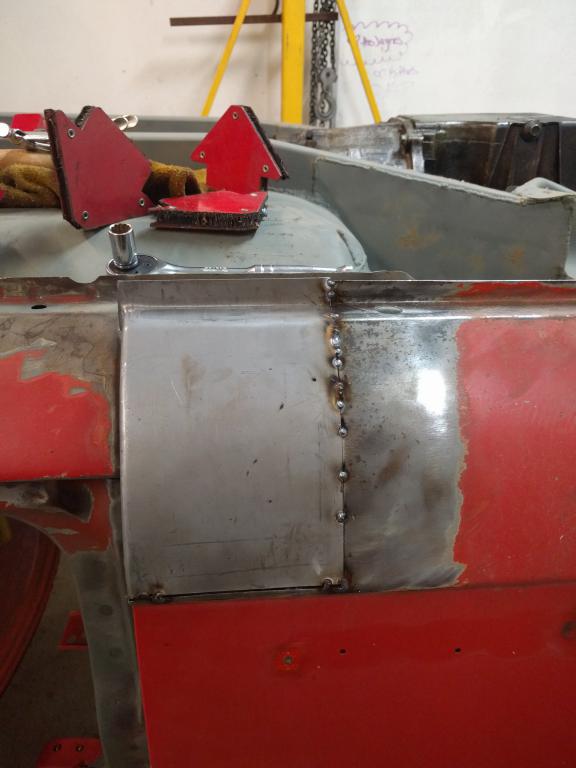
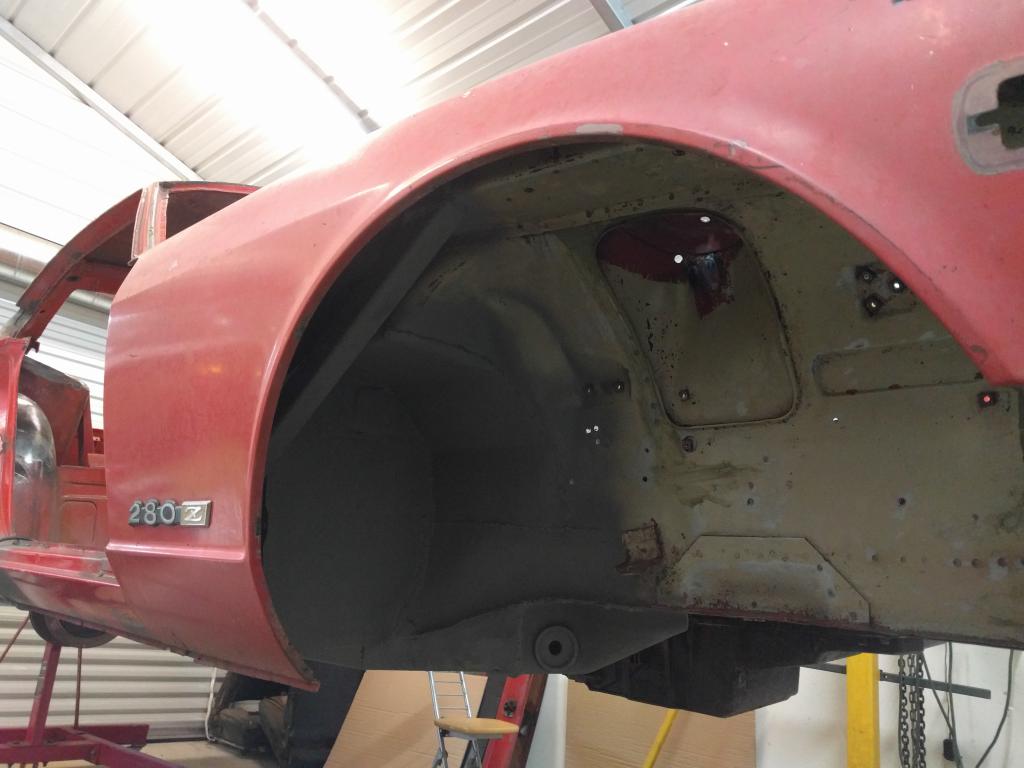
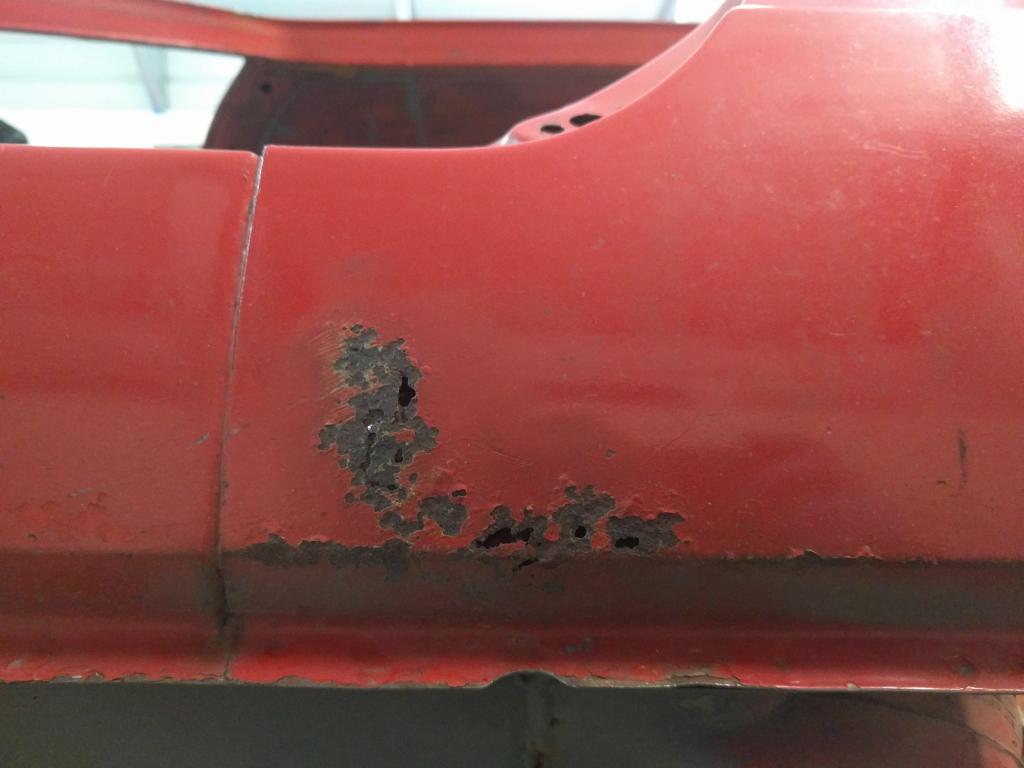
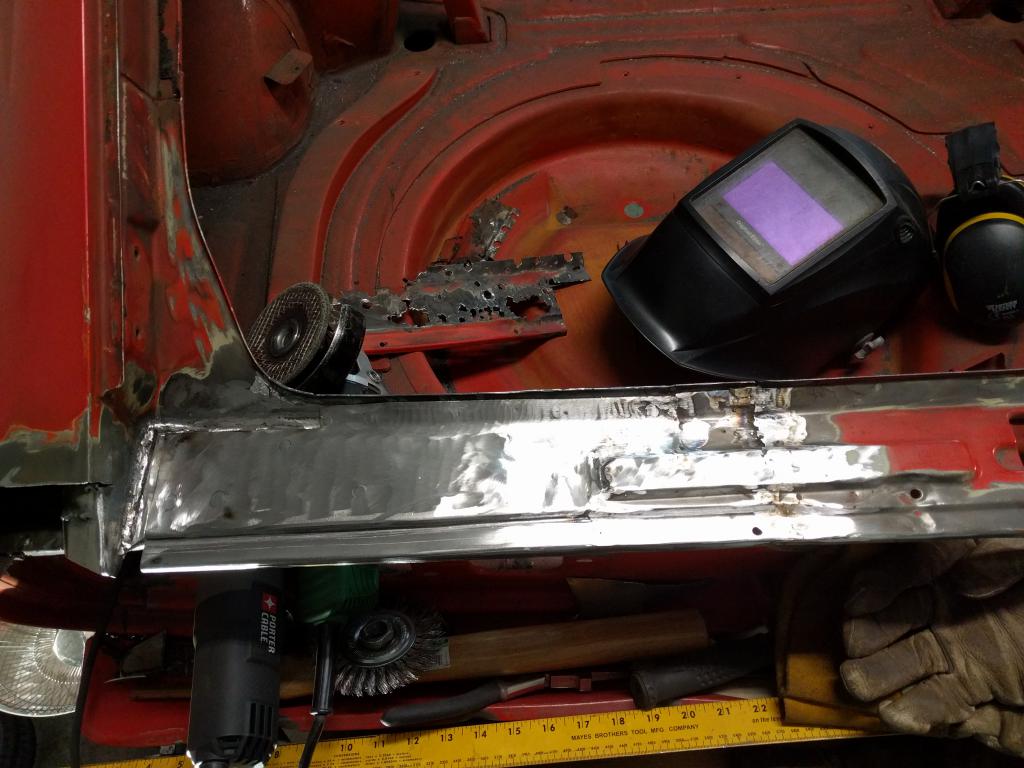
So i'm jumping back in the saddle again. Nothing too major this time around, but started patching rust on the driver side front fender. I bought a panel from Tabco for this section. I'm not going to fix the minor rust on the inner fender by the tire, since that will be cut away for fender flares eventually. The last two pics is the fender back on the car and flipped upside down. It's a little easier to work on at that height. After it's welded in a little more solid I'm going to have to hammer the excess over the lip to match the factory seam. I've never done that before, so we'll see how it goes...

-
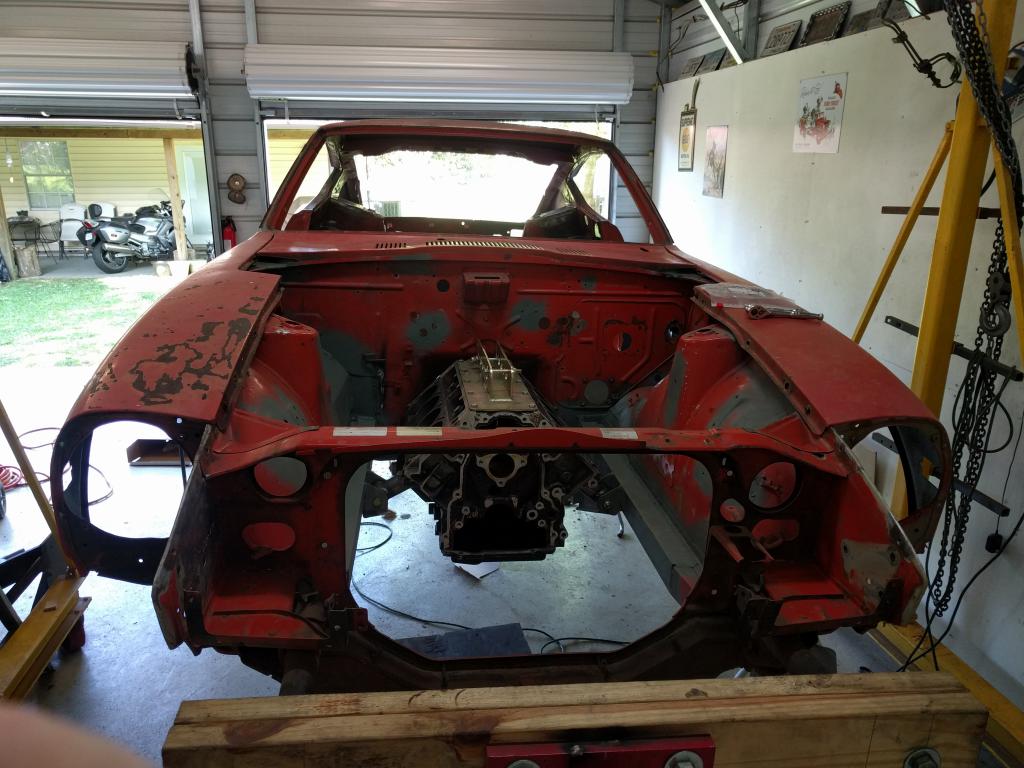
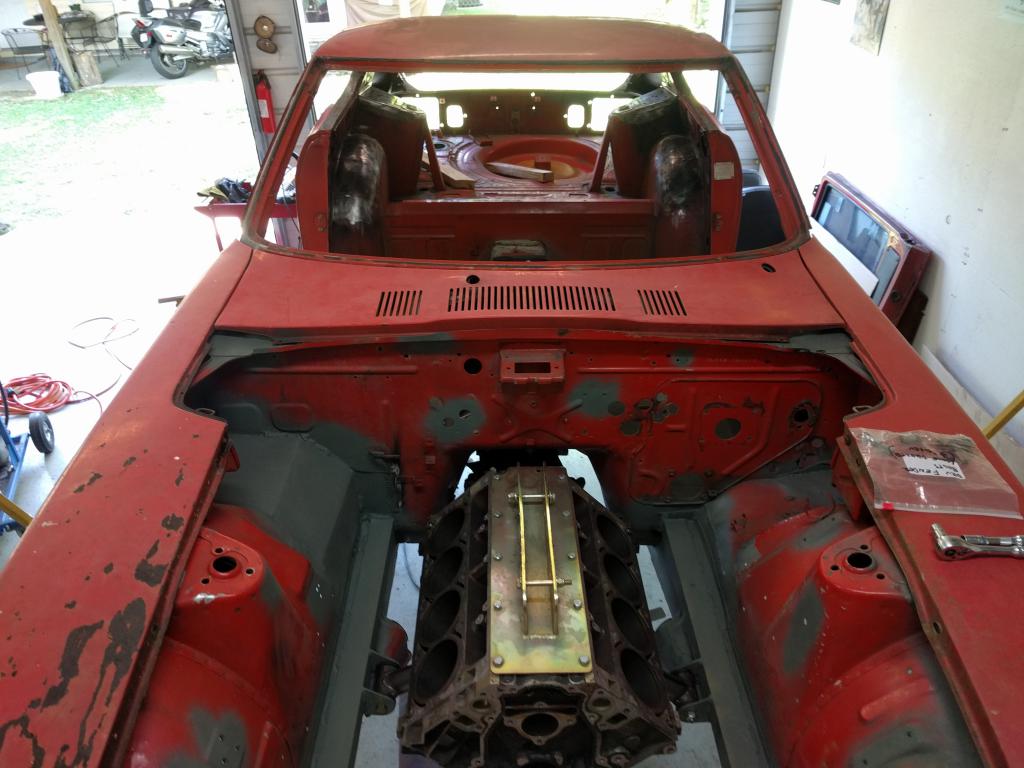
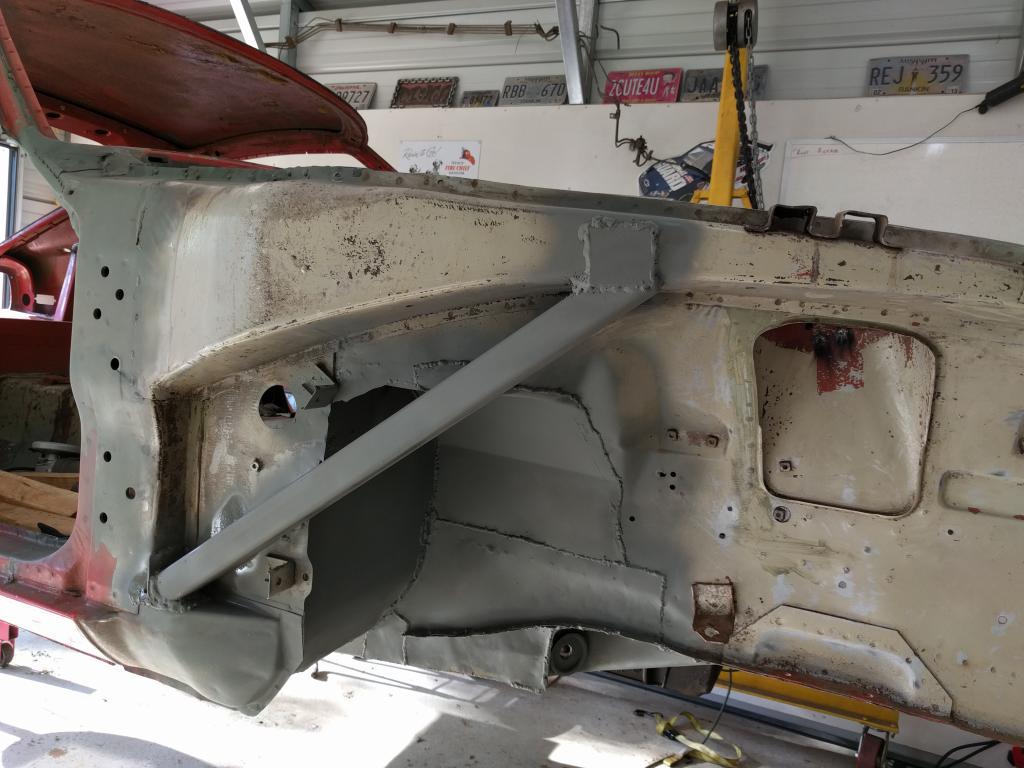
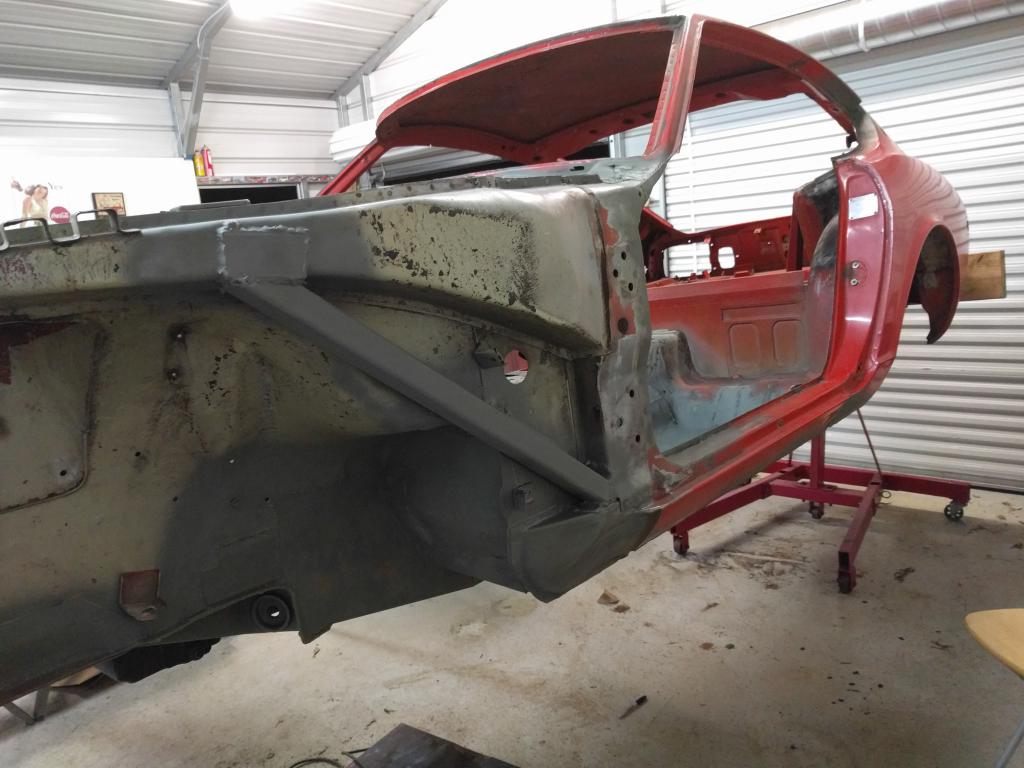
Some work and some fun pics. I haven't had the fenders on the car in maybe a year and a half? I put them back on to mark bolt holes that were removed during rust replacement and to just check out the ongoing work and make sure it all lines up. I also had to reweld the tabs that hold the inspection plates, so the fenders, inspection plates, and cowling had to be in place and lined up. Next I added support bars under the fenders. Each end of the bars are welded to angle iron, and then the angle is welded to the body (like you would do a roll bar/cage). I've seen a couple build threads with those bars added, and I had the scrap that fit perfectly, so why not?
-
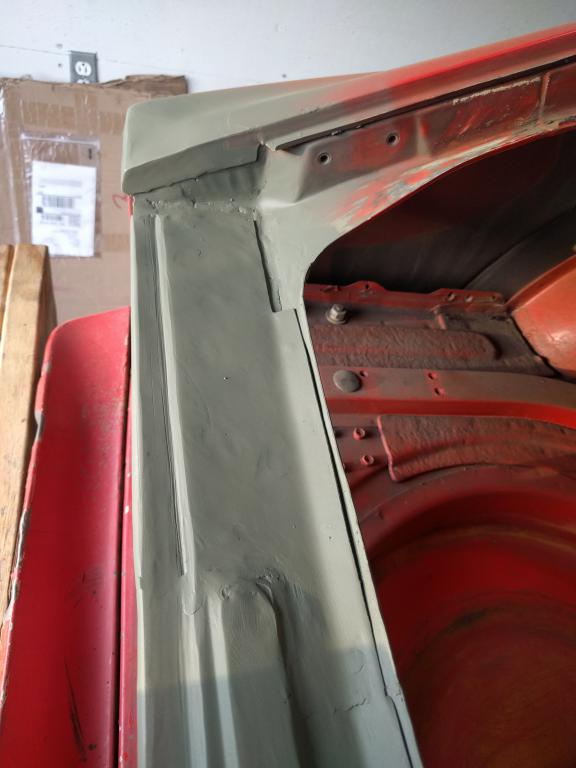
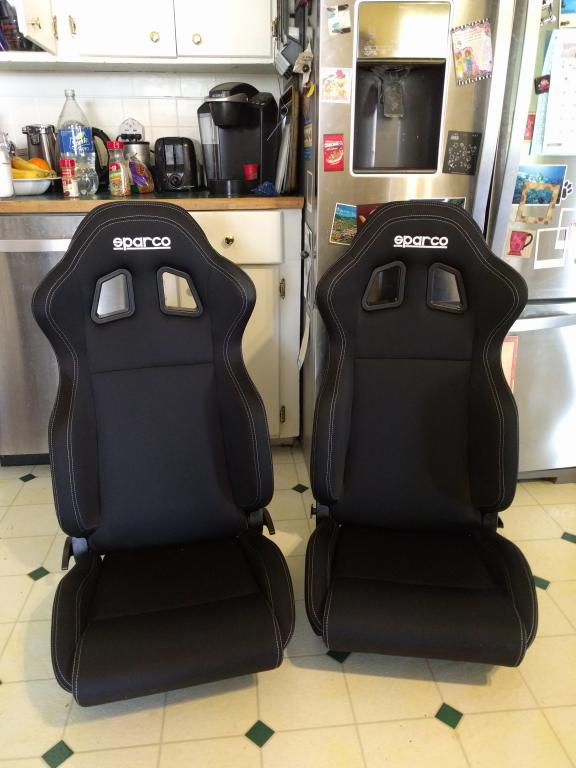
These are just some follow up pics. I've sprayed primer on everything so far. I'm pretty happy with the way the rear hatch corners came out. Too bad they are probably going to get covered up by a BRE type spoiler Also, two bonus pictures! The autopower roll bar kit came in today. I'll get that mocked up soon, welded in, and then hopefully start working on the new seat mounts. I went with Sparco R100's for both the look and the price. I've read about some possible fitment issues with those seats in the 280 chassis, so I put the LS1 and T56 back in the car for now so there's no questions about cutting into the transmission tunnel.
-
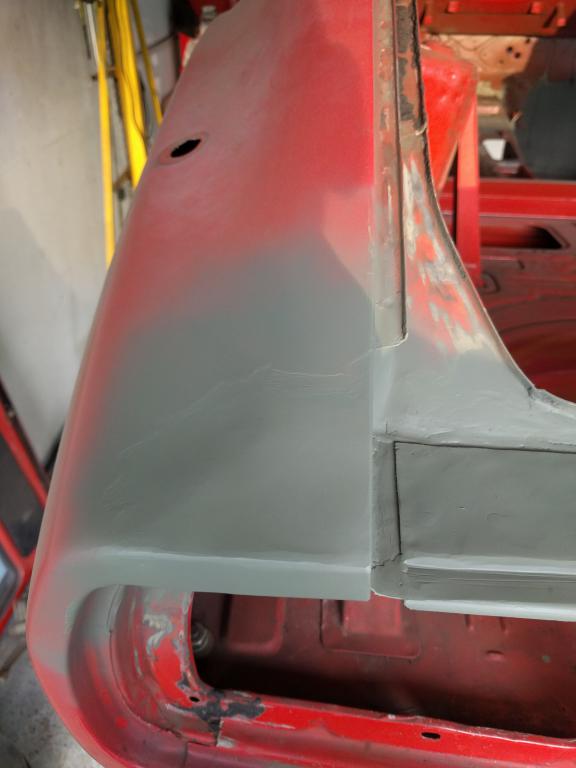
I've done stuff, but haven't posted in a while. This is the finished driver side dogleg. I was able to get the contour fairly close by eyeballing it. Considering this will be sorta kinda on the bottom, I'm thinking it's "good enough" for my amateur attempt Spraying primer on it helped give me a better idea of how close it seems to be.
-
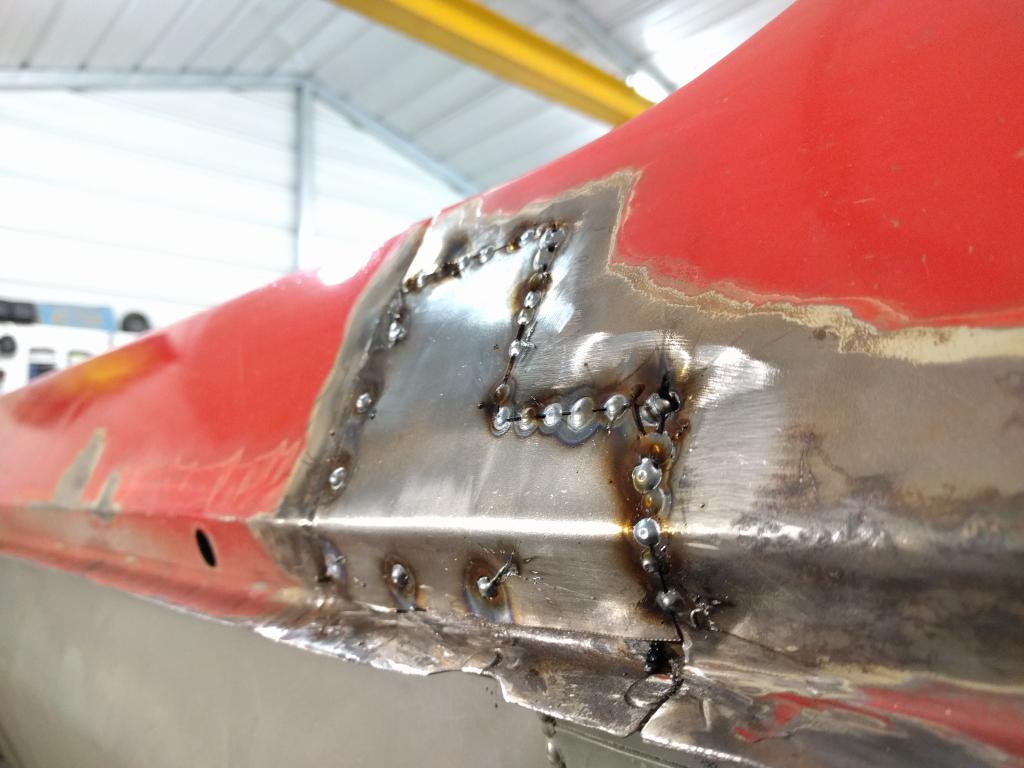
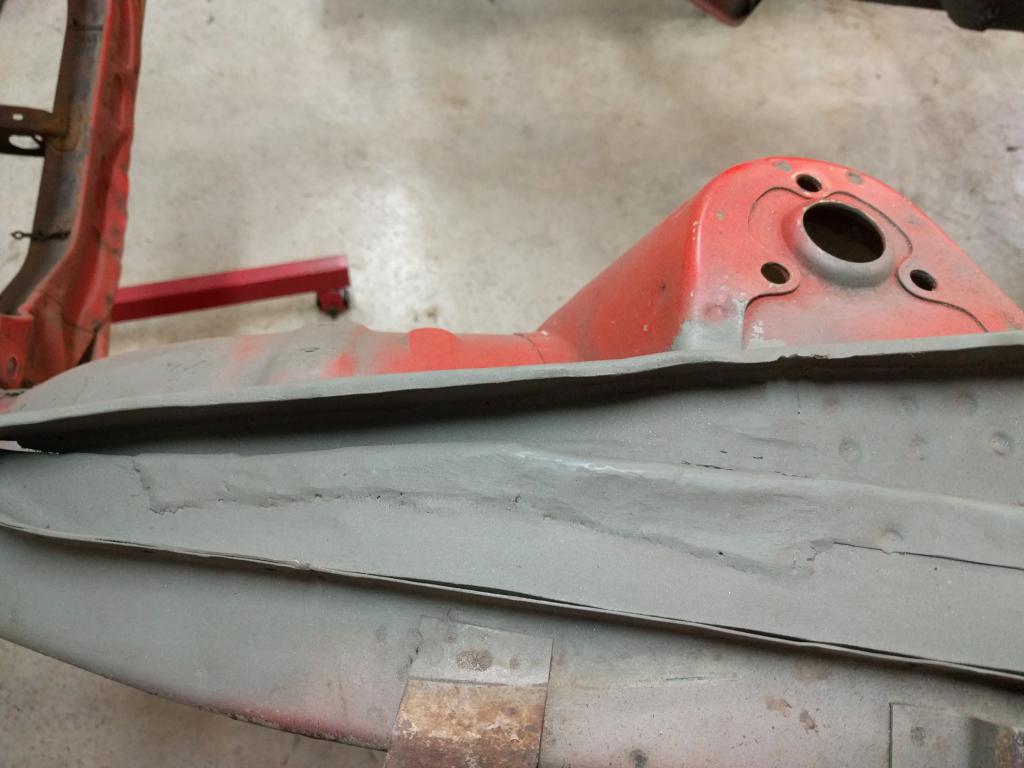
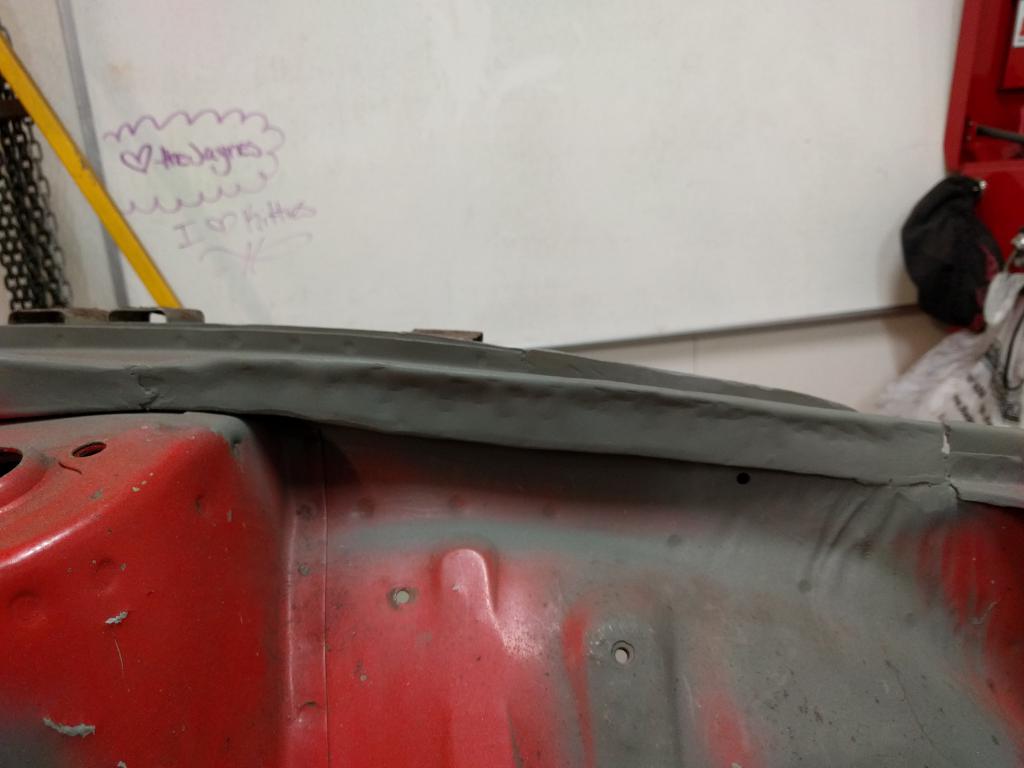
That piece was complicated. It has two curves, a slope, and 3-4 angles. I tried to make that as a single bent piece, but ended up making this long rectangle that became too strong to manipulate . I ended up making that piece as 2-3 individual parts and welding them a piece at a time onto the car. The pictures are: 1) Top most piece cut out 2) Bottom piece cut out 3) Bottom piece replaced with slope running down (I assume for water run off) 4) Top piece remade with several bends, and cutouts near the fender side so I could bend it to the S shape. After looking at the pictures again, I think I made the top piece as two separate pieces, and welded the S shaped piece onto the multi-bend/flat piece. I hope that makes sense. I don't have stretcher/shrinkers or an english wheel, so I worked within my limits. 5) Everything welded in place. I also left a small opening at the bottom of the sloped piece, because the factory had that too (Again, I assume for water runoff). EDIT - I added two more pictures. Both after I had smoothed the welds and sprayed self etching primer on it. It's not the prettiest piece, but it will be entirely covered by the fender so I wasn't too worried about it. I still have to drill holes and weld nuts in two spots to mount the fender.
-
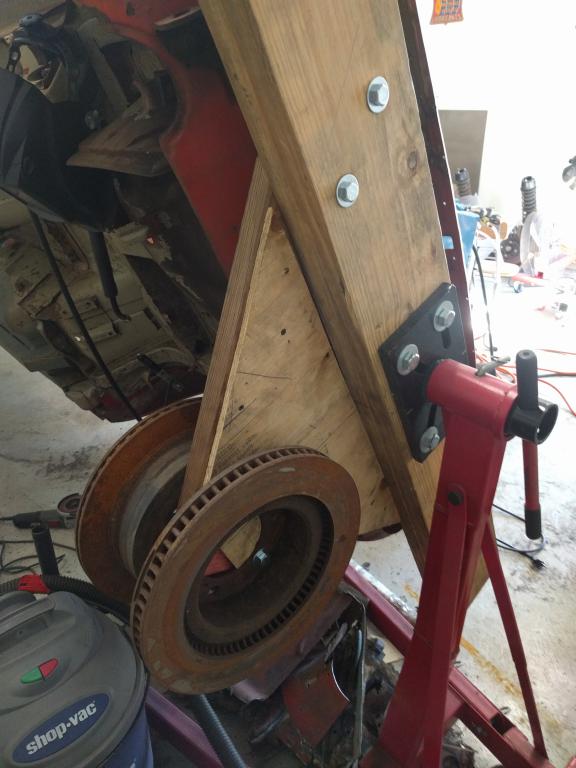
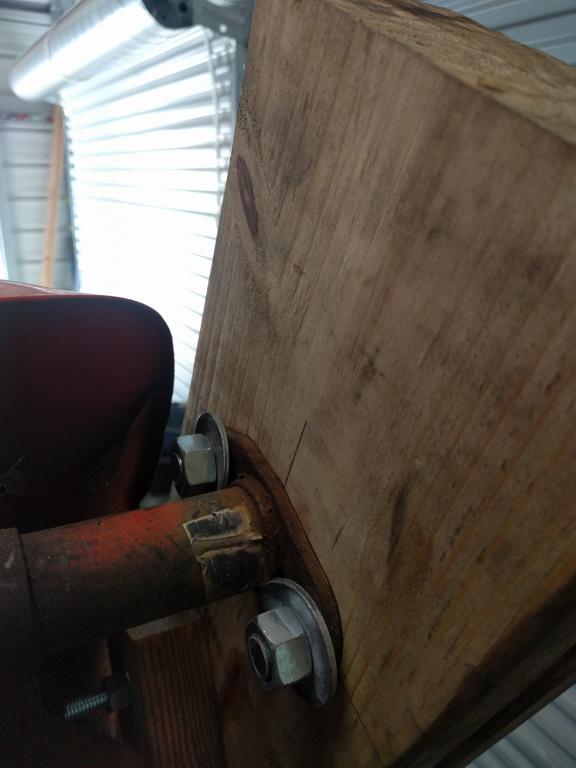
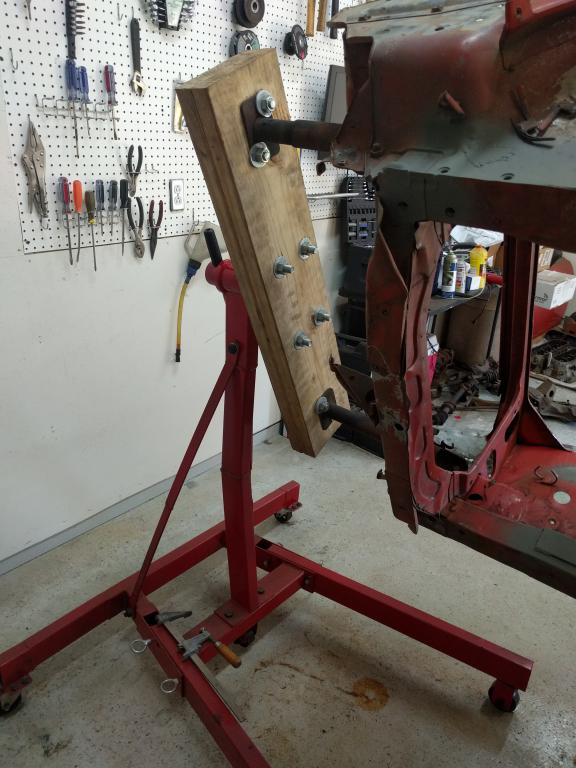
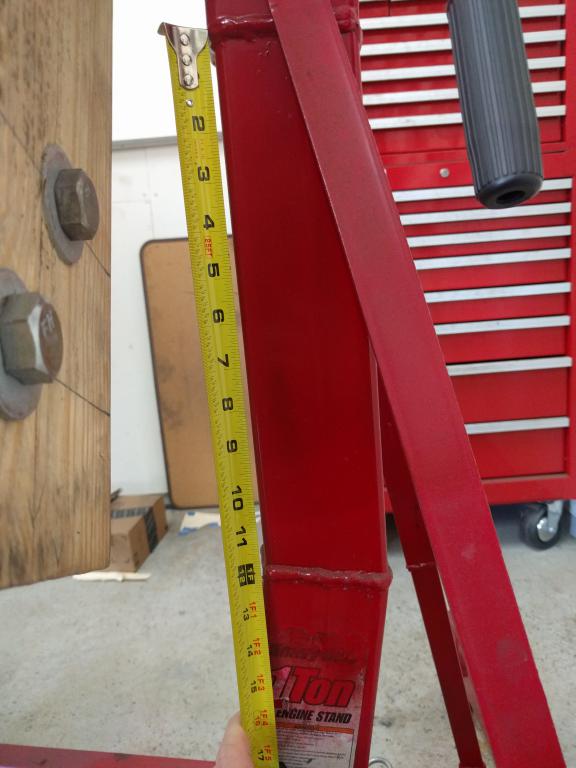
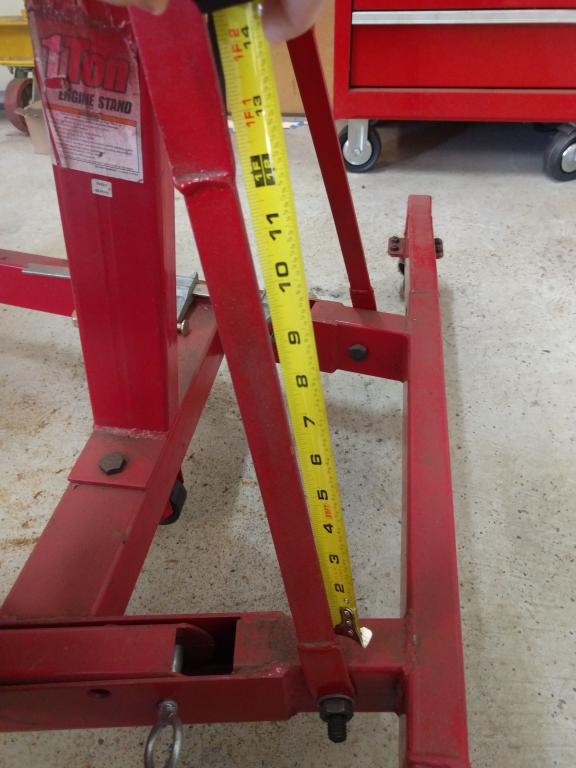
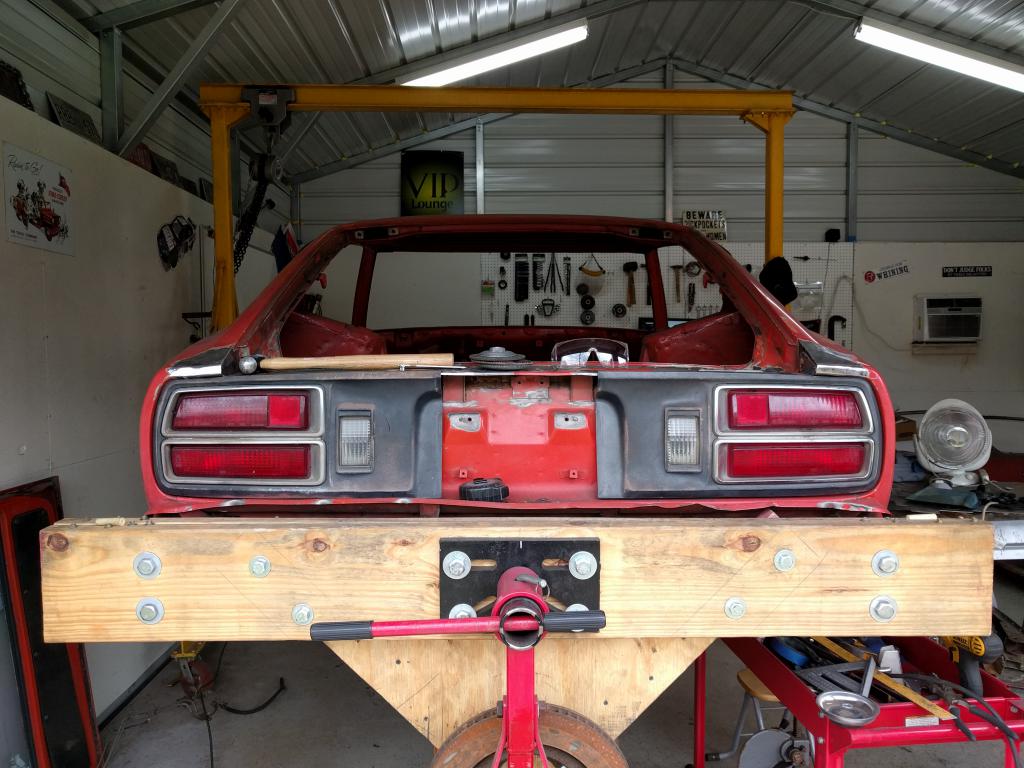
Absolutely! I followed the directions I found here: http://imgur.com/a/2X4n2. Instead of adding 11" of new material I went with 12". It was a pretty easy modification, you just have to be sure that both stands are level to each other once it's done. I added the brake rotors for counter-weight later on, because the bumper mounting points on the stand make it top heavy since it's not vertically mounted 50/50%. I could always rotate the car by myself, but with the counter weight added I can do it much easier/safer now. As you can see in the pics, i'm using the factory bumper shock mounts. So far I've not had any trouble with this setup and personally feel that it is safe.
-
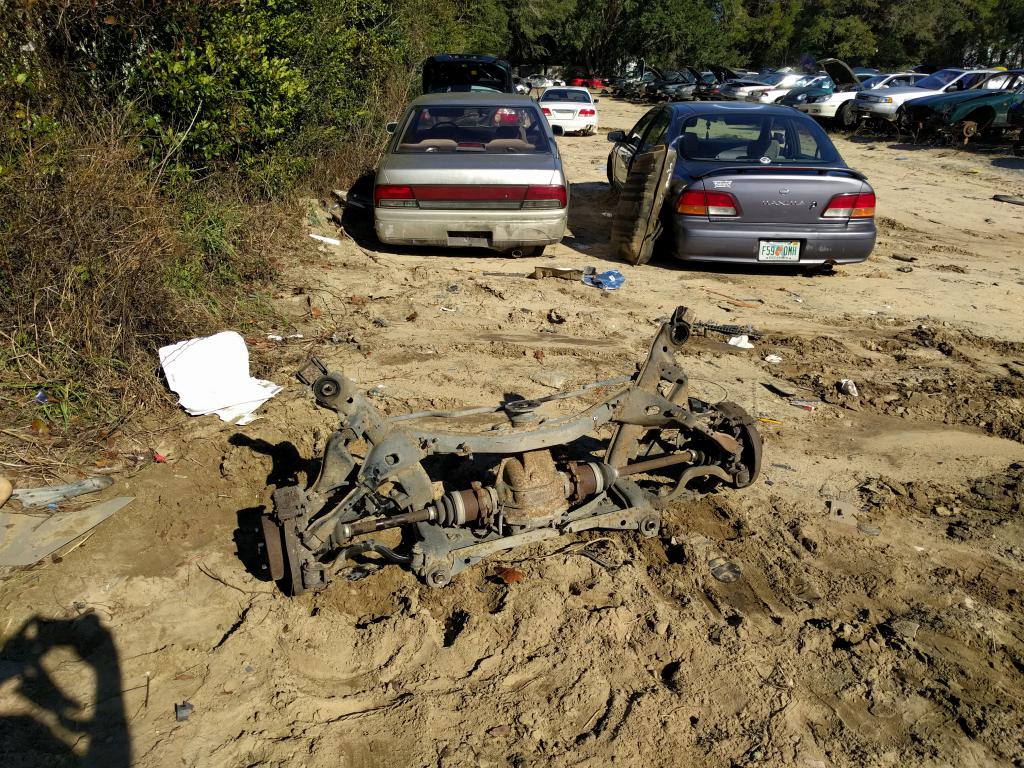
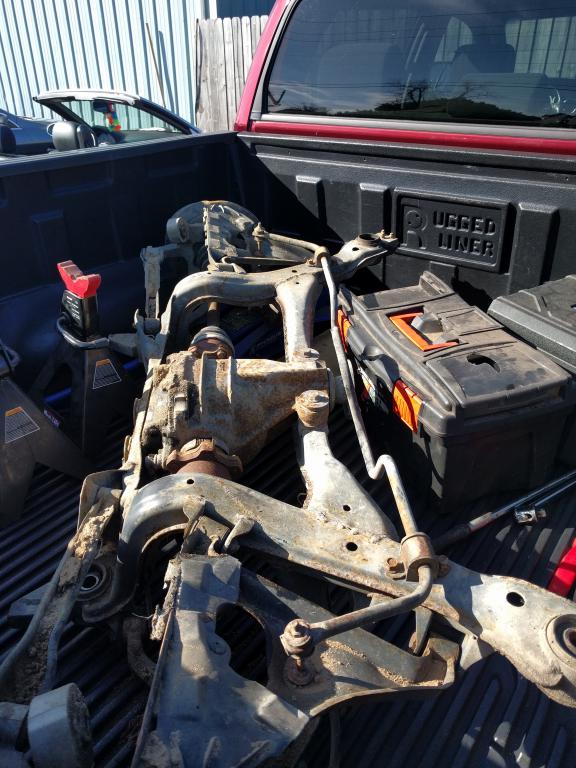
I'm eventually going to buy this kit, https://technotoytuning.com/nissan/280z/complete-r200-r230-rear-end-conversion-z-car, and I can bolt in the Q45 diff and brakes. As part of the kit I send the Q45 axles to T3 for reworking/rebuilding them. The Q45 R200 is a VLSD and uses the same size axles from a Z32TT, so pretty stout.
-
Oh, and I almost forgot! I pulled the rear subframe out of a 1996 Q45 for the brakes, axles, and differential. A couple hours of work and $150 later, I'd say this was a great success.
-
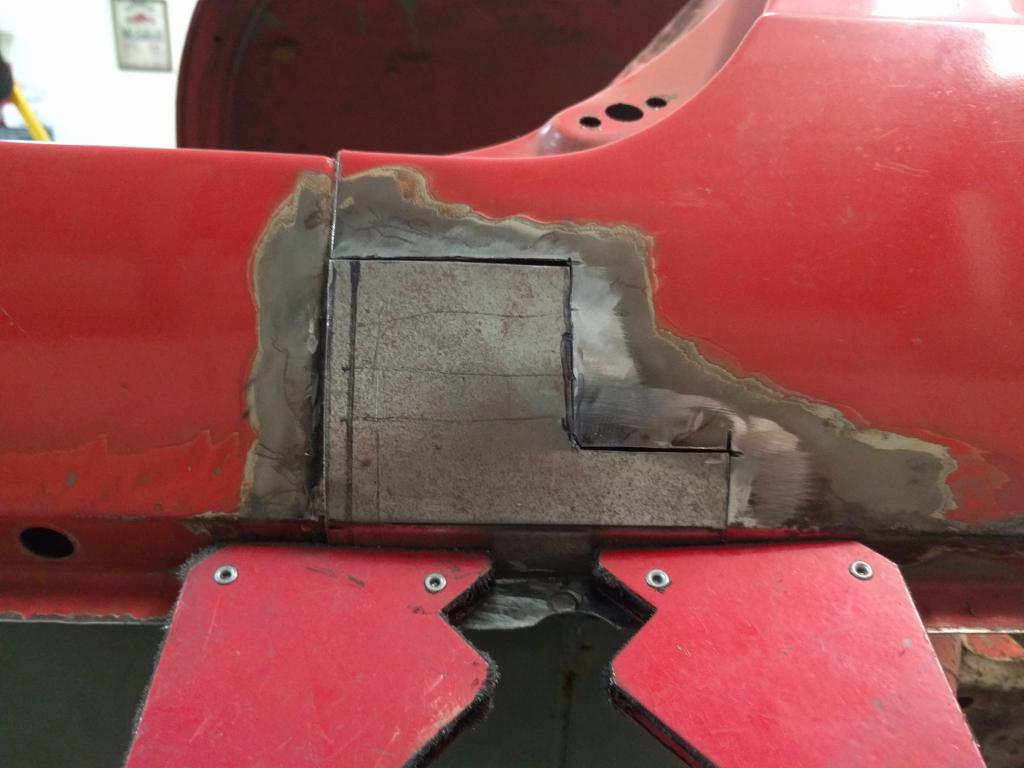
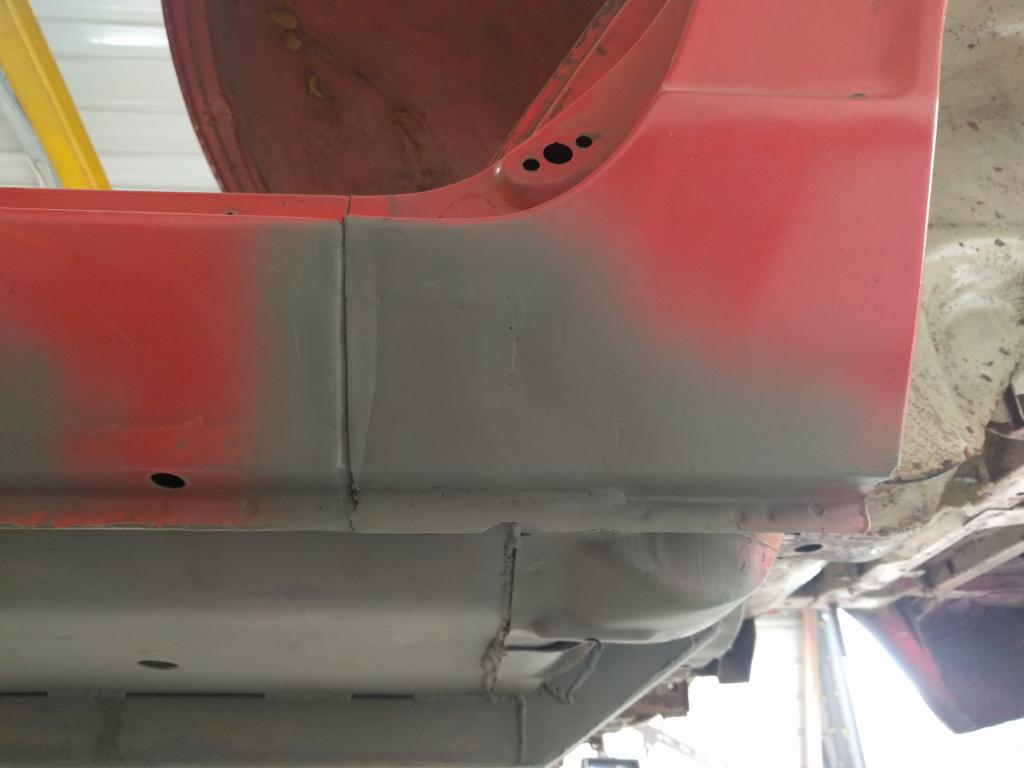
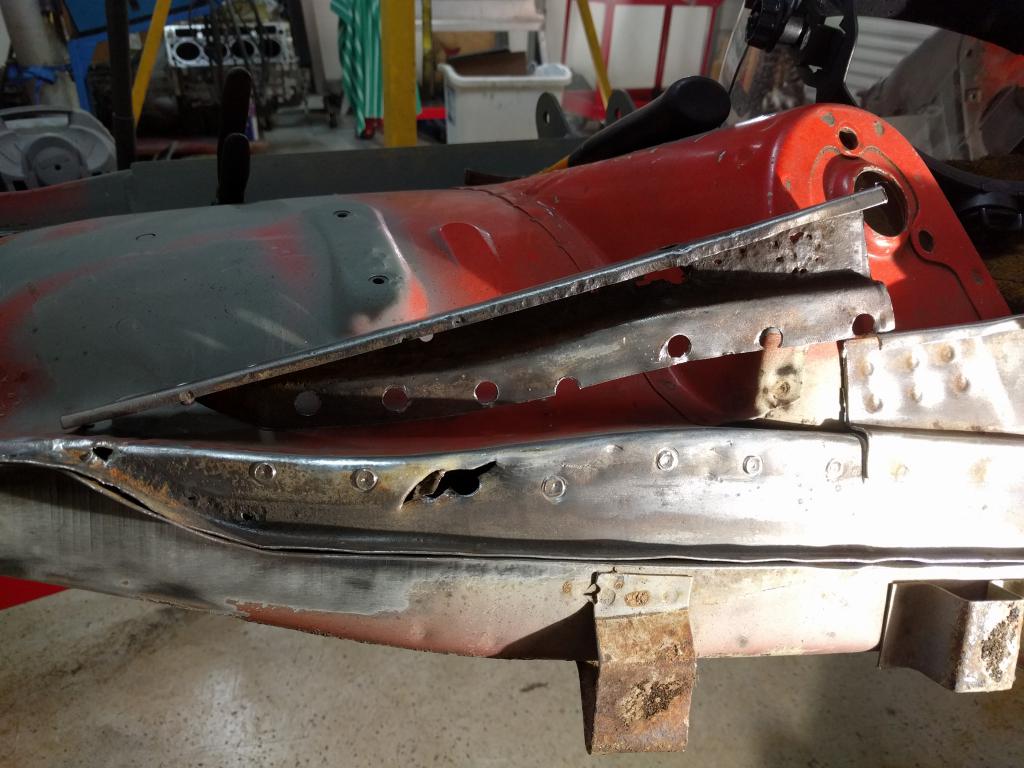
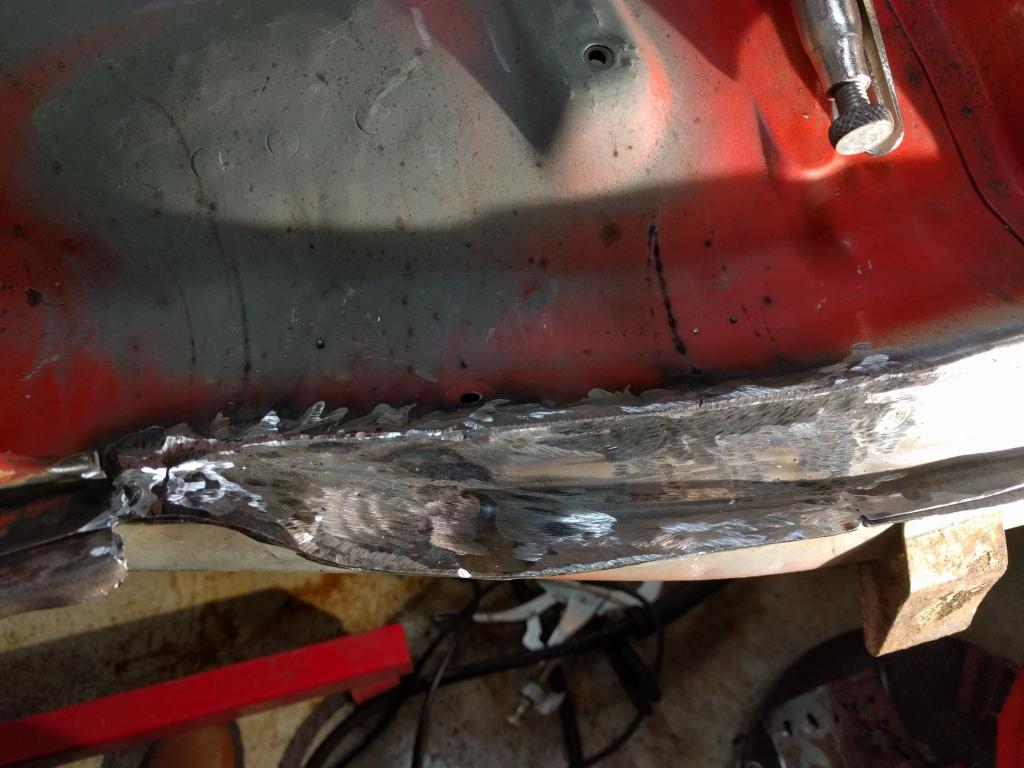
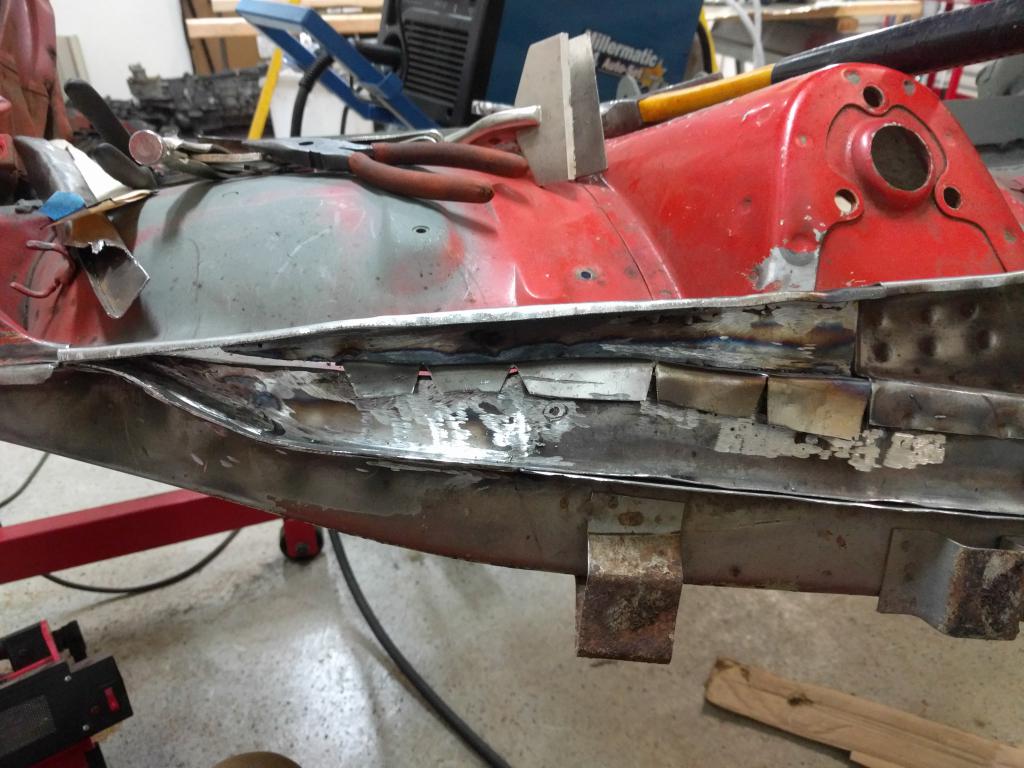
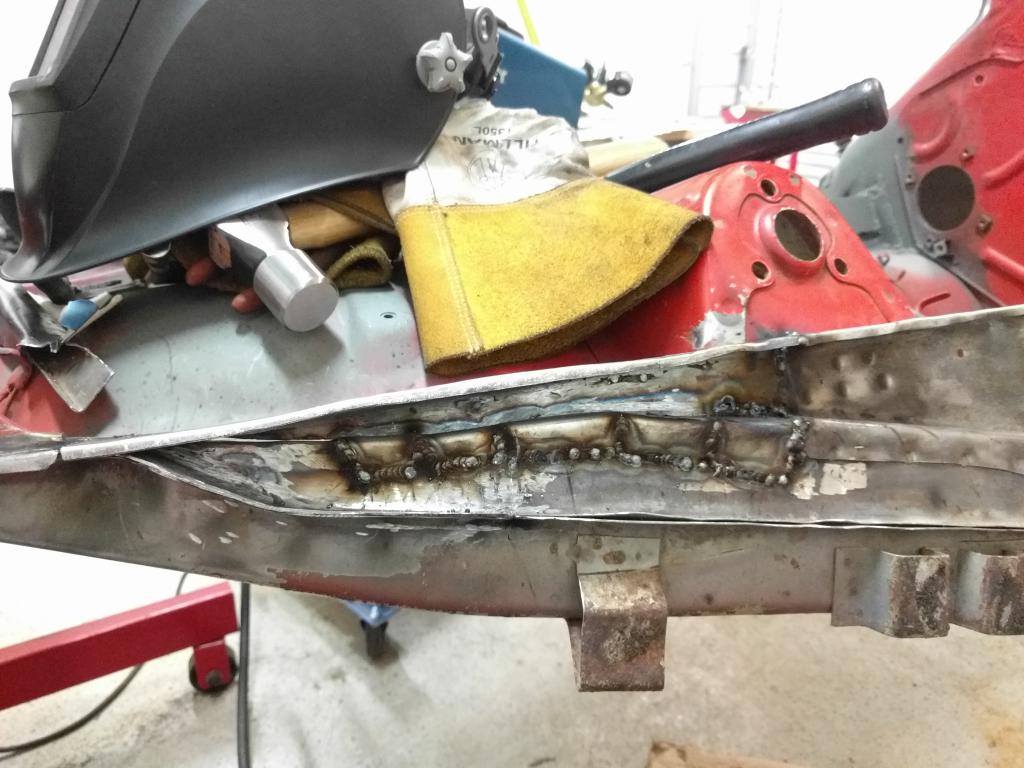
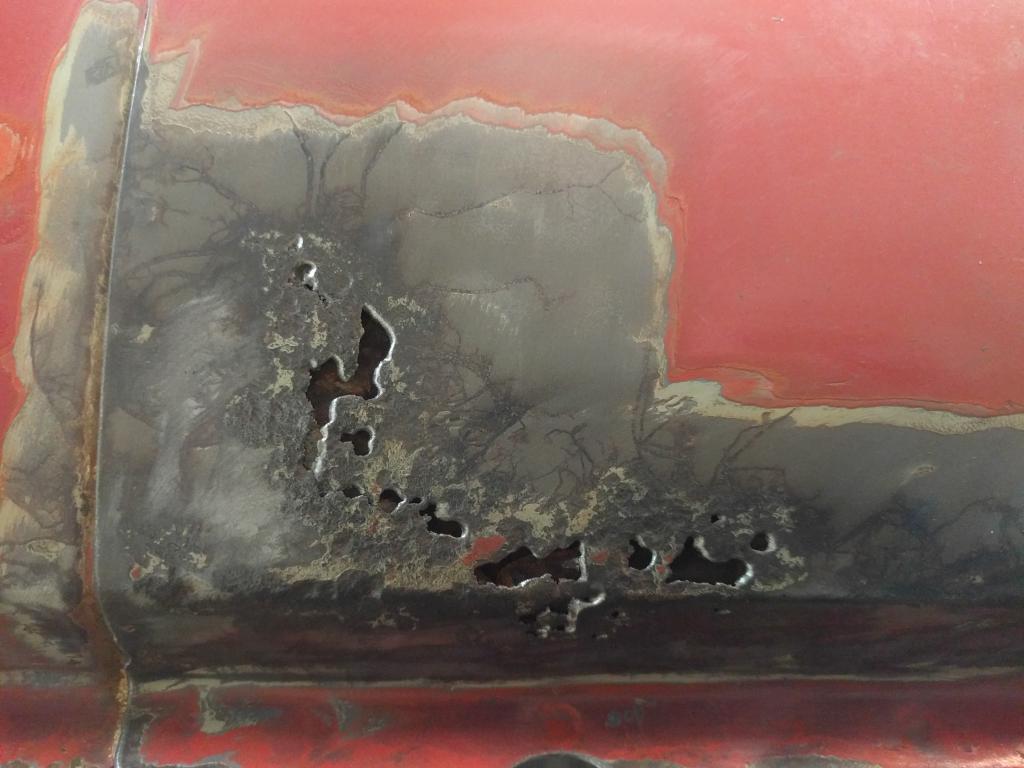
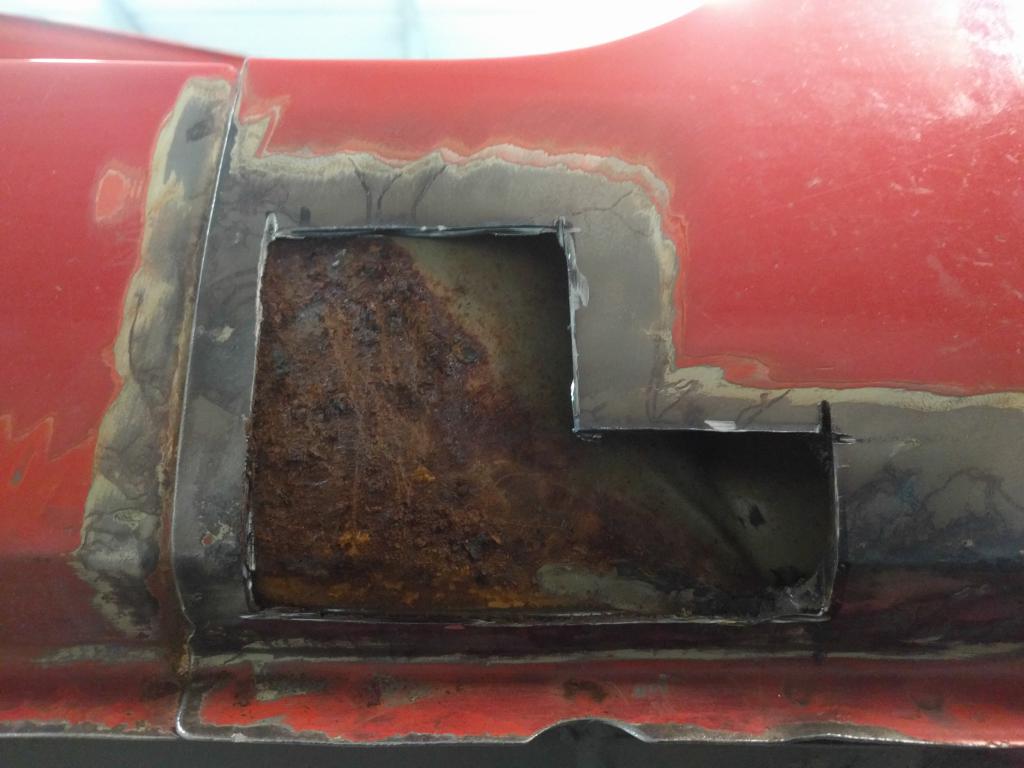
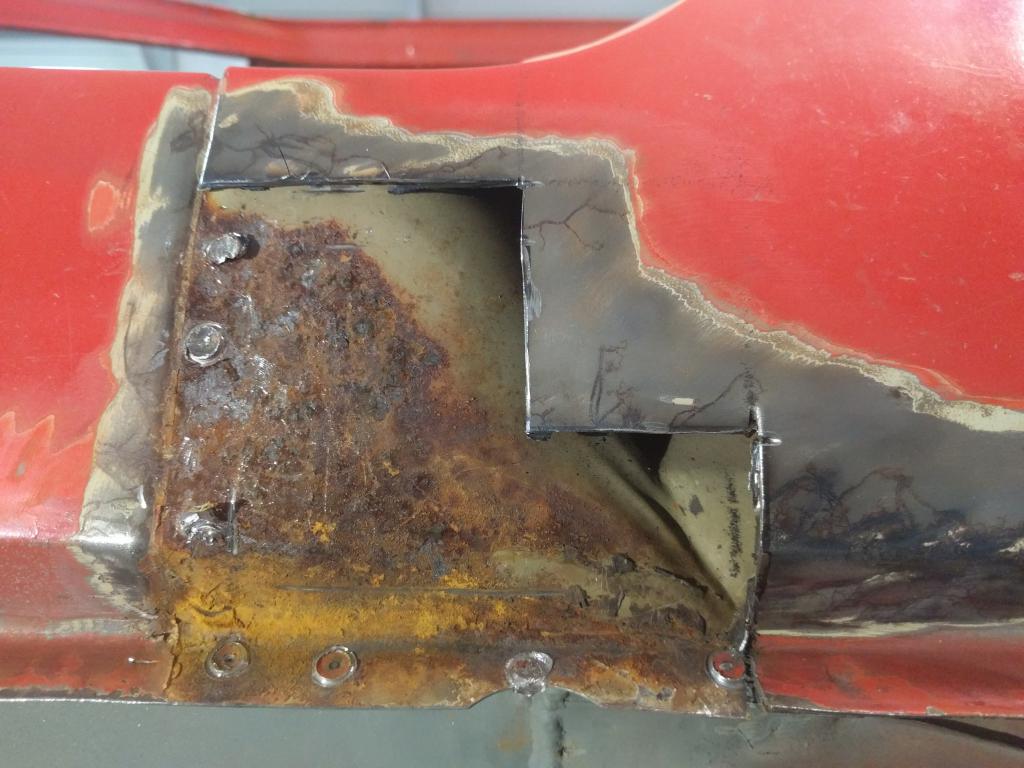
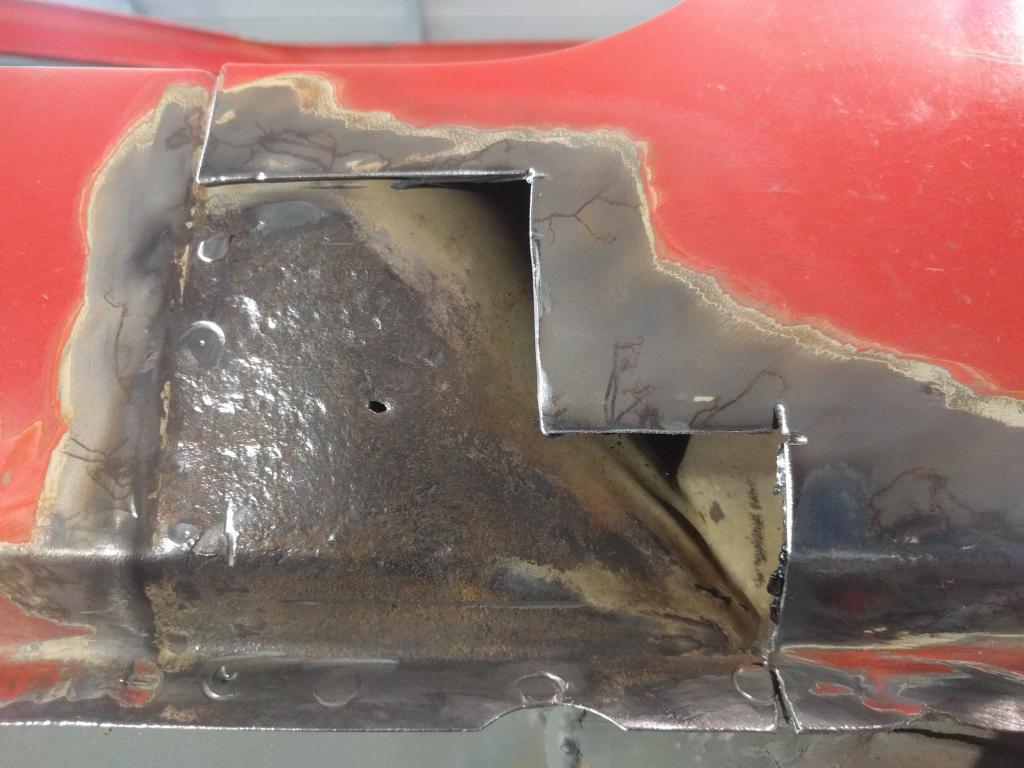
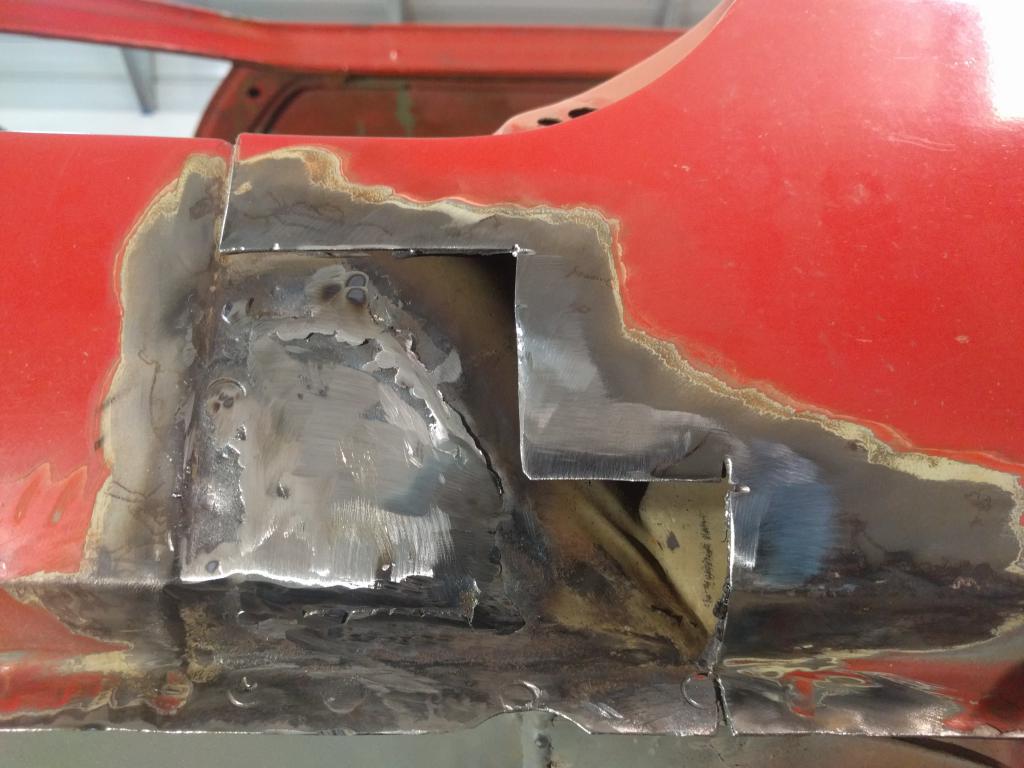
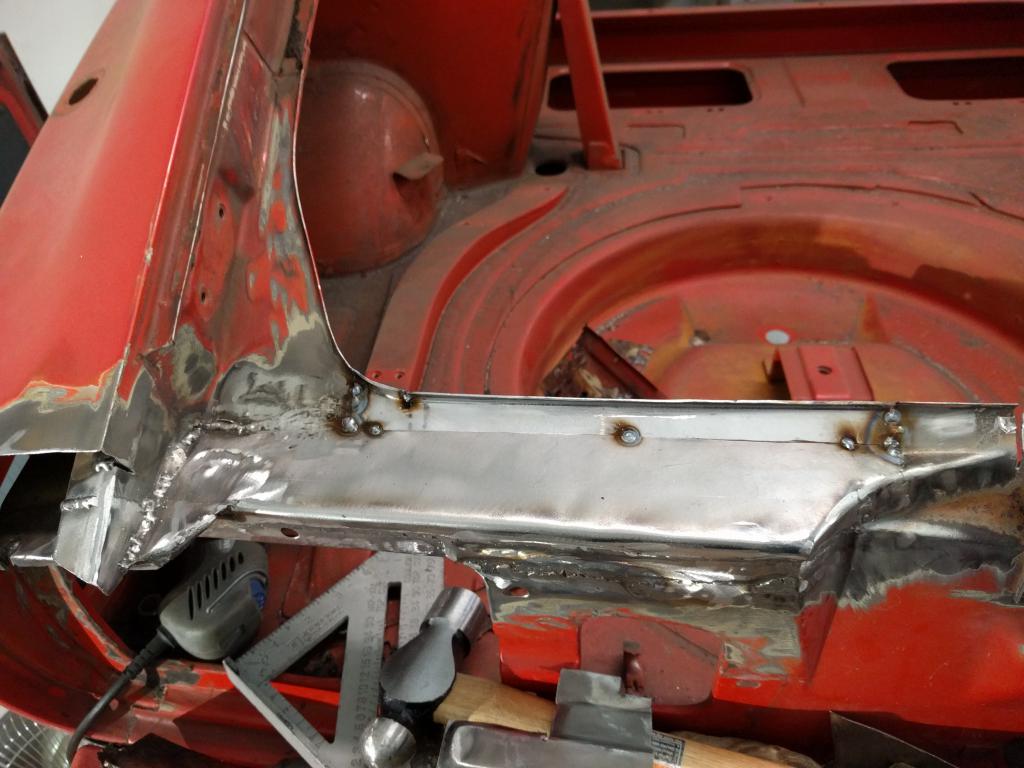
This is the driver's side rear quarter panel/dog leg. It was in much worse shape than the other side. I took a step-by-step picture of this along the way. I had to keep cutting as the rust went all the way to the internal rocker panel. I haven't finished this piece yet, the last picture is how it sits right now.
-
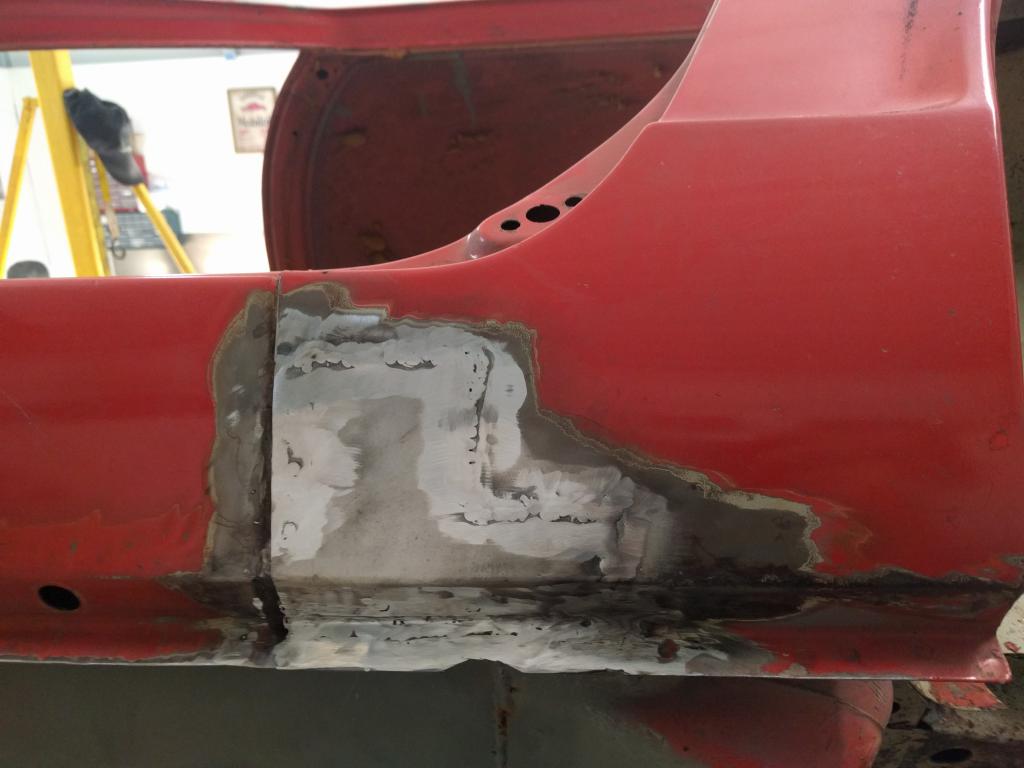
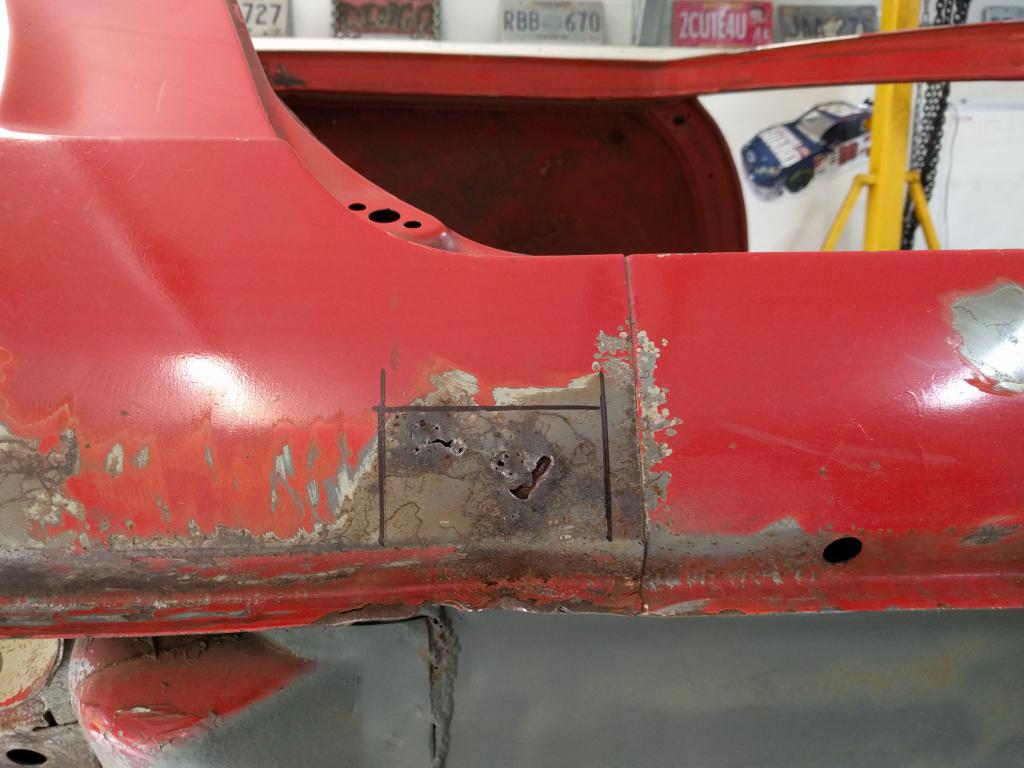
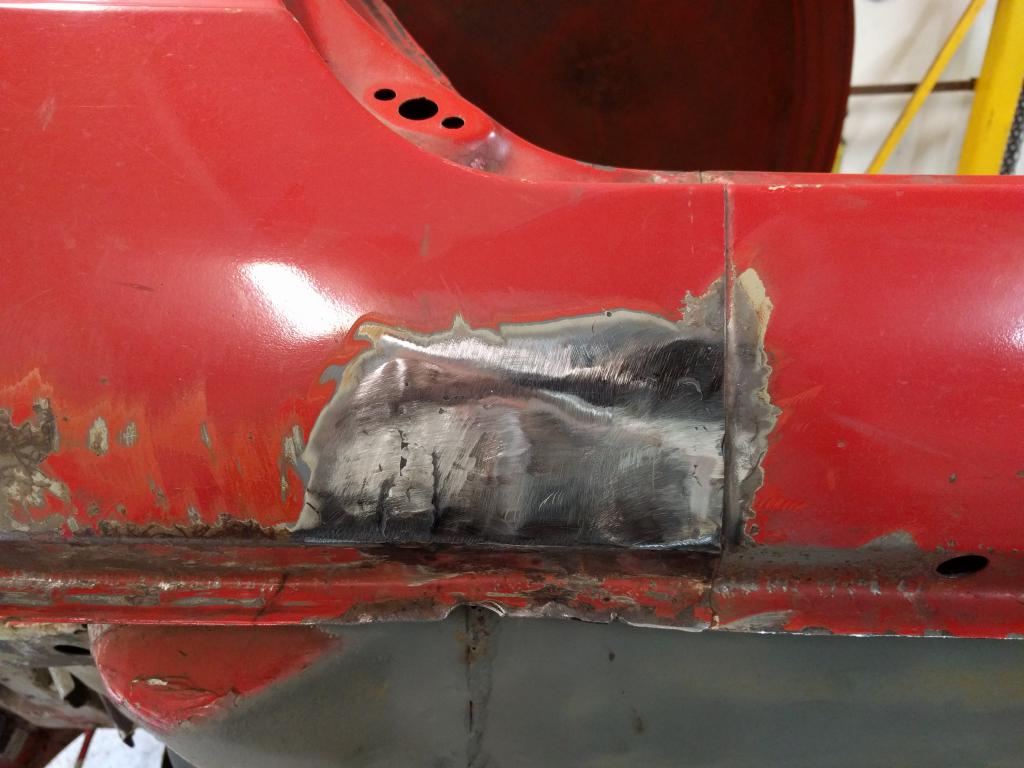
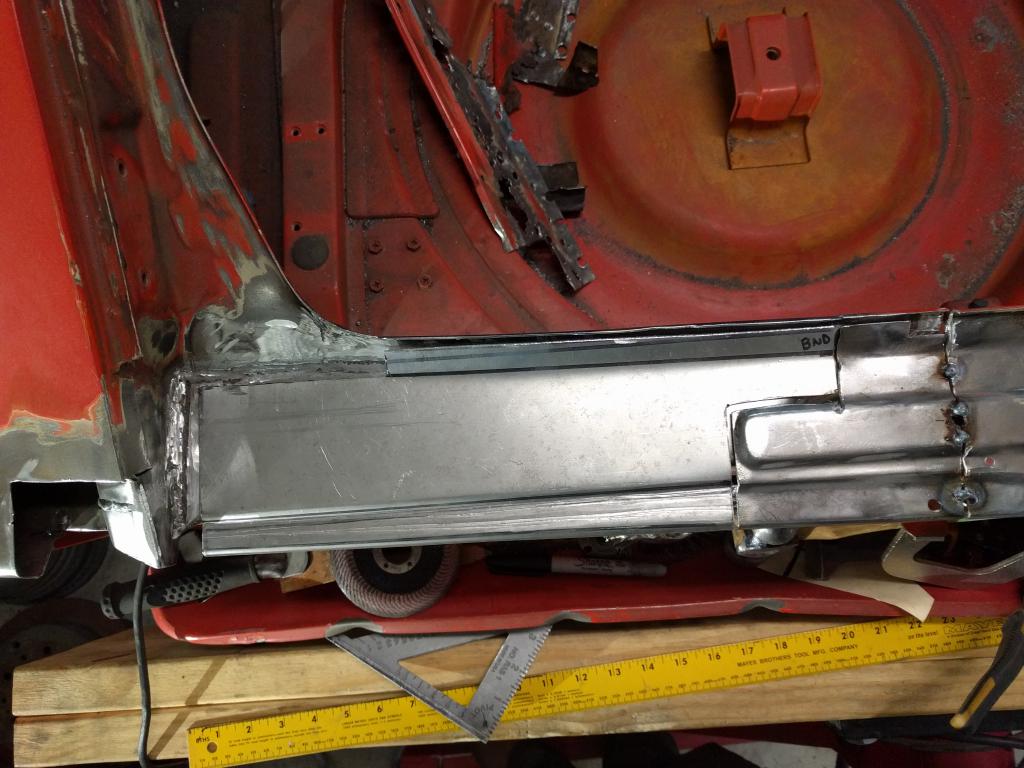
This is the passenger side rear quarter panel/dog leg. After cutting out the outer body panel, the underside wasn't bad at all. I patched the body panel then sprayed Eastwood Internal Frame paint liberally down inside that area. This patch will need surface filler added and smoothed out to match the contour. I don't really have any tools to make contoured pieces, and I figured something this small would probably be fine smoothed out.
-
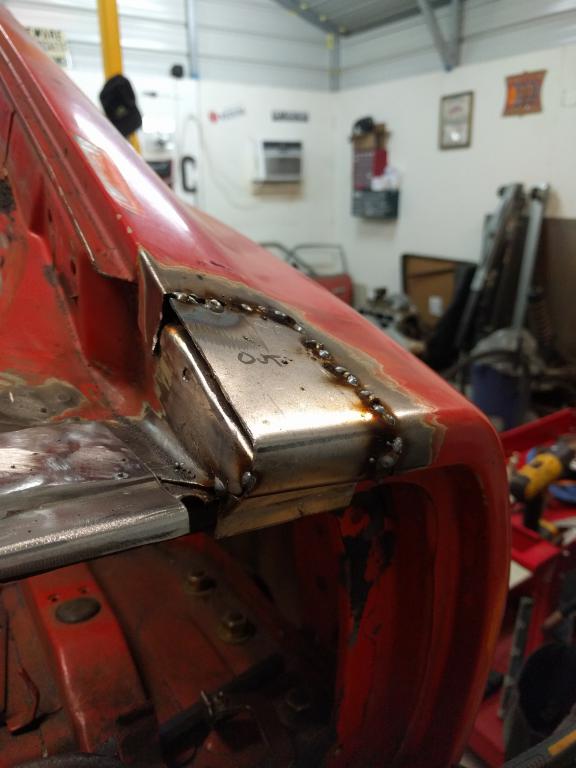
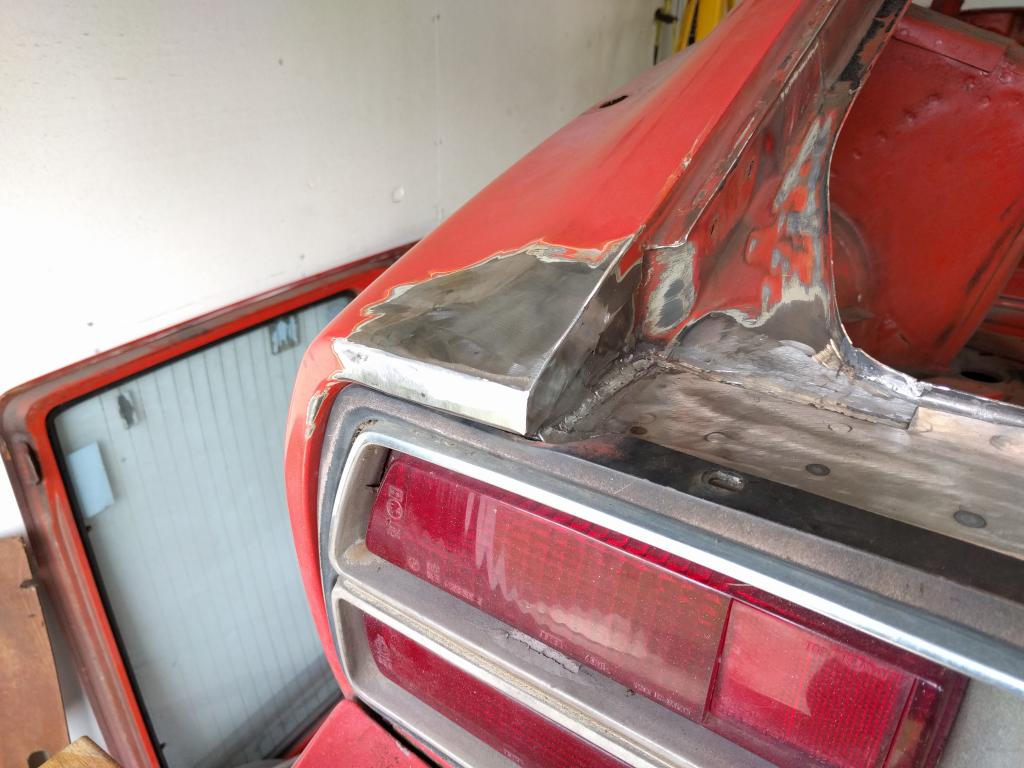
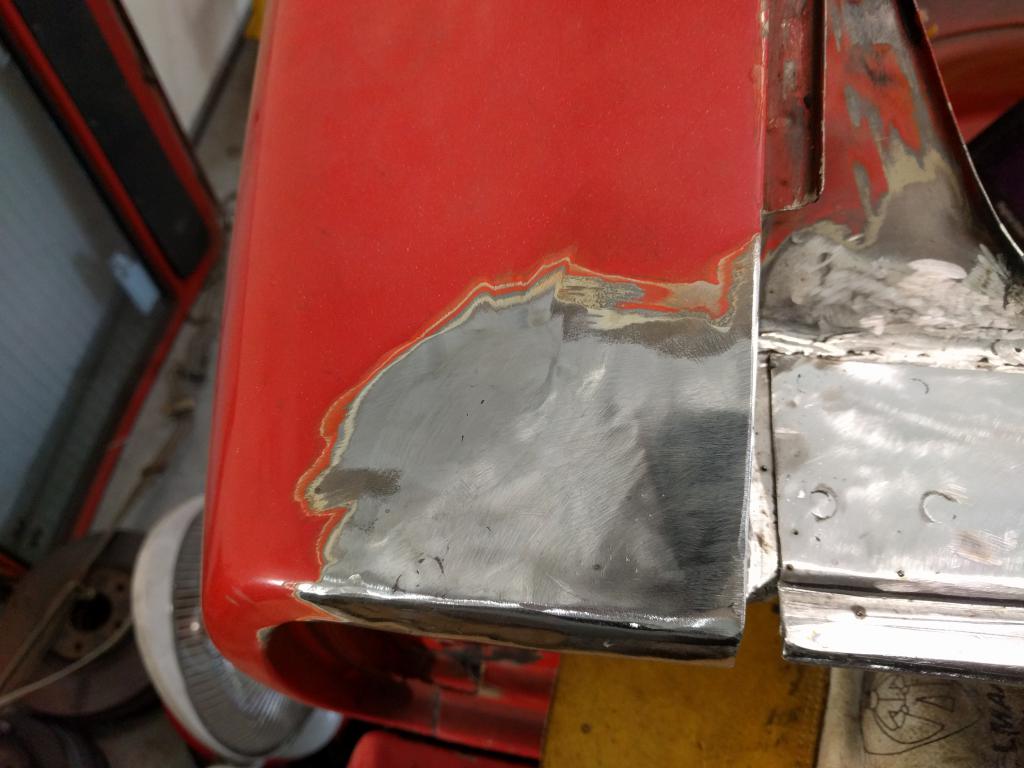
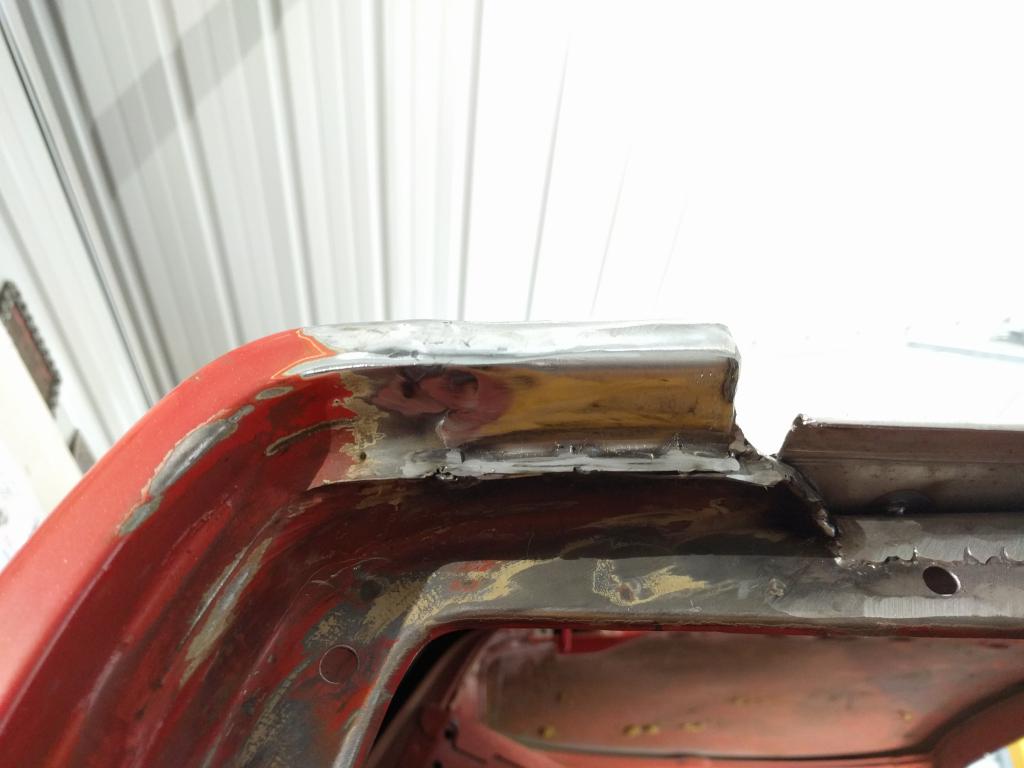
I think the hatch corners and tail light area is tentatively "done". I test fitted the brake lights to see how everything lines up, and I forgot just how much those lights cover up. It looks like everything fits just fine. I still have to drill the holes where the lights attach on the top lip. I also didn't take a final picture of the passenger side hatch corner for some reason, but it's all done too.
-
Thanks for the compliments, but let me fill you in on a little secret.... Youtube! Almost everything you see is the first time I've ever done that particular thing. I have been buying tools along the way, and just researching whatever comes up. I also like to look at other rust pictures to get an idea of what i'm getting into before I start cutting.
-
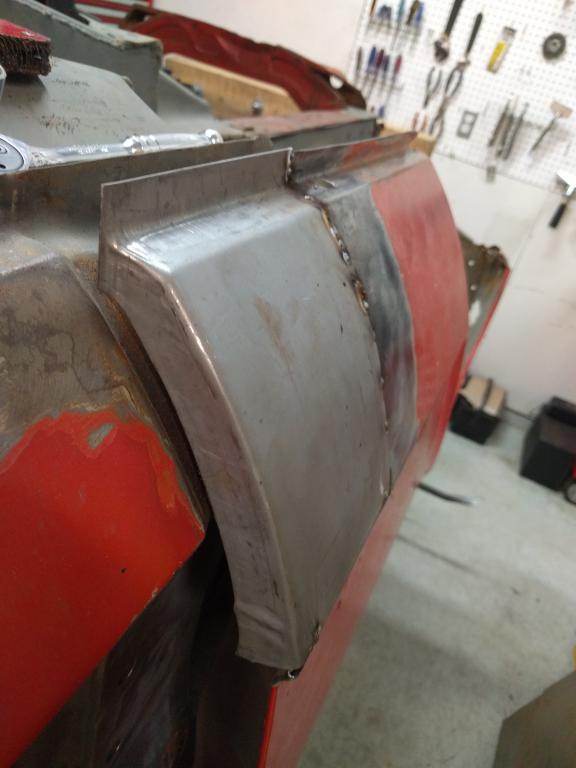
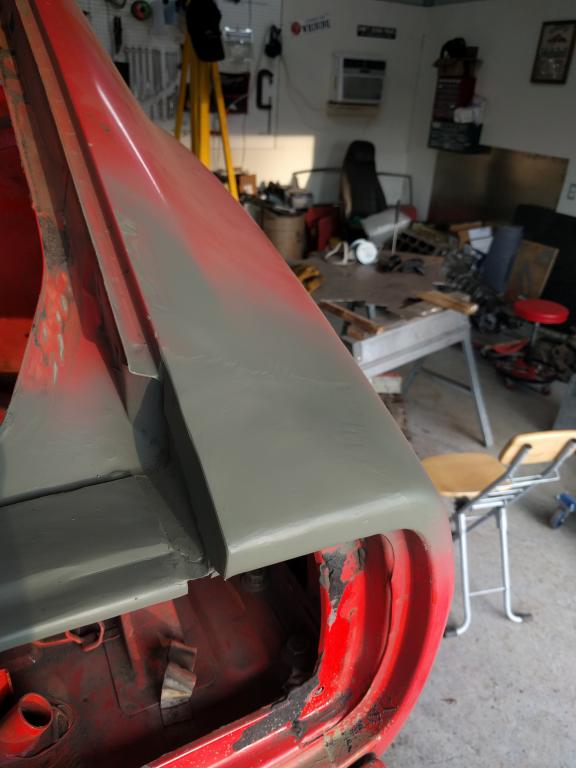
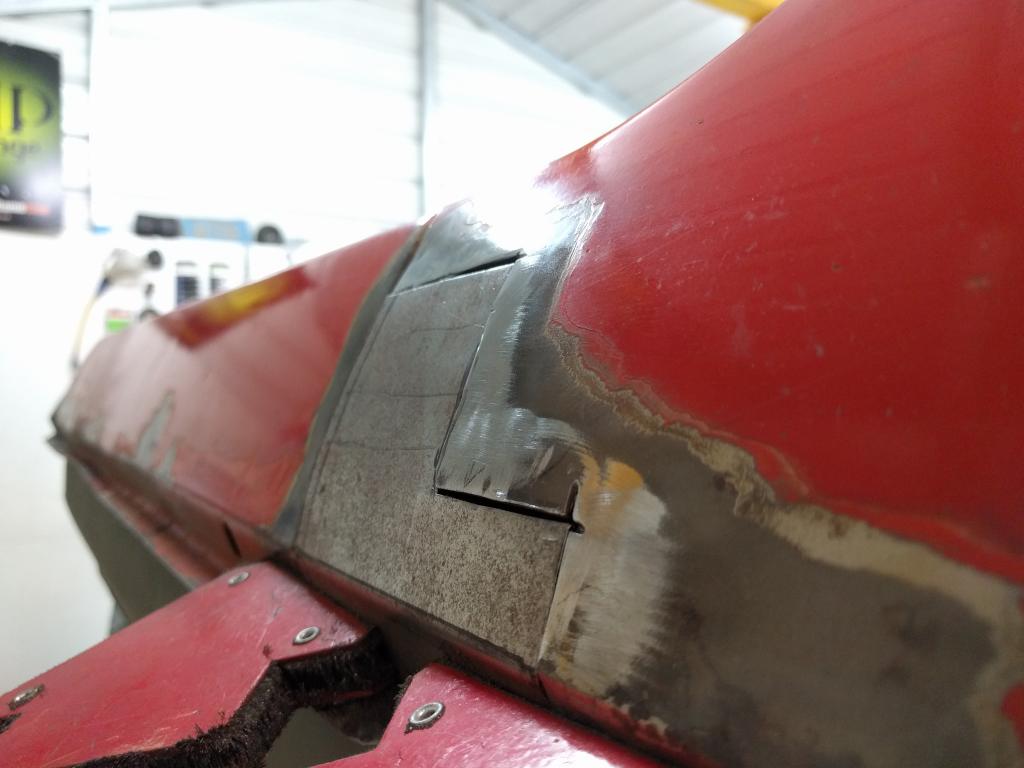
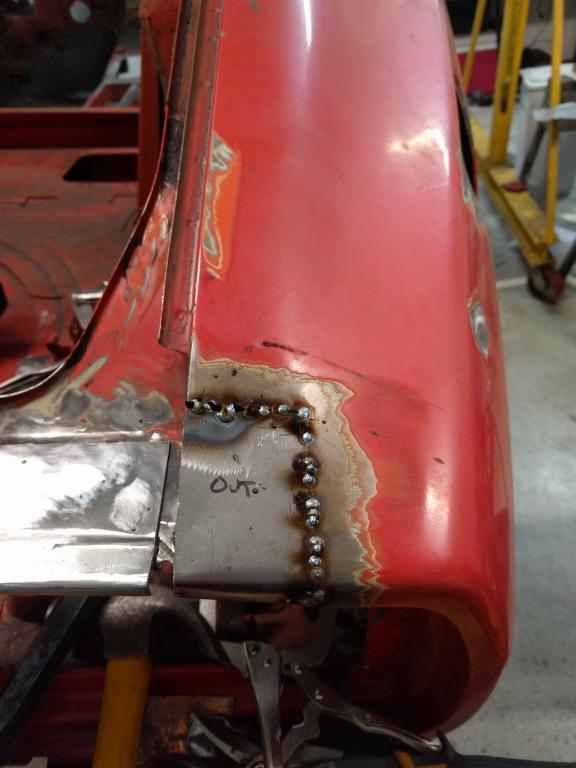
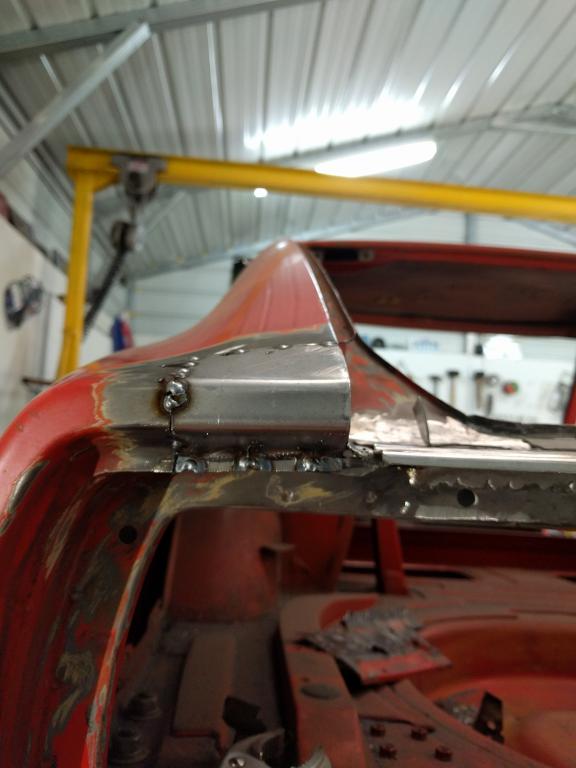
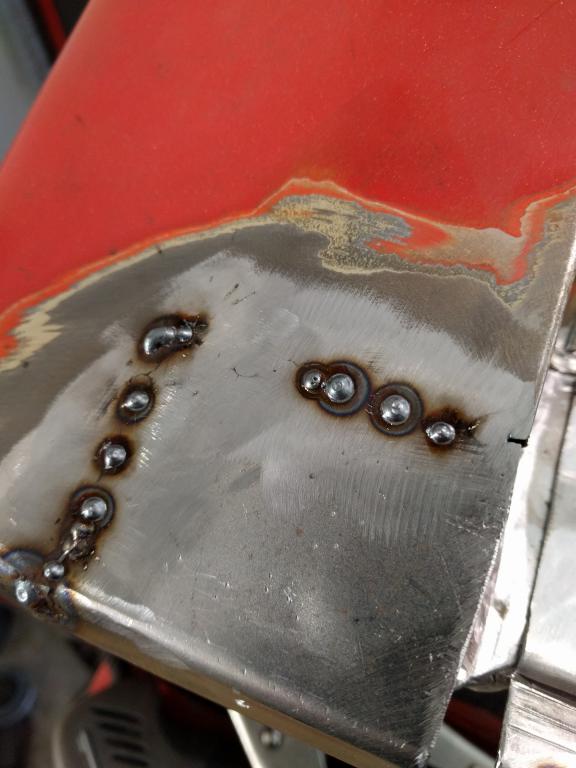
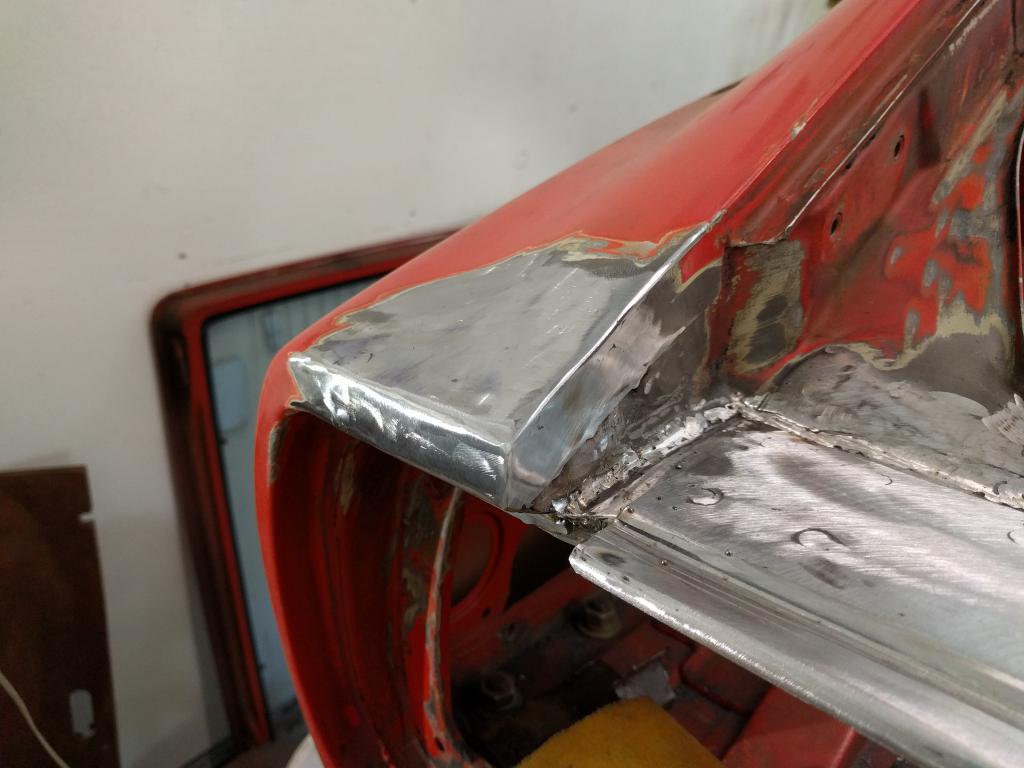
Driver side hatch corner done. This is my first "visible" exterior body panel repair. I did some research on how to do this, and I think it came out pretty good considering it's my first attempt. I tacked the piece in place, then planished it with a flapper disc, more stitch welds, more planishing, rinse, repeat. I sanded it in small batches, making sure to not heat the metal up with the grinder, and tried to take off the minimal amount. There's also a contour that slopes down from the hatch to the corner I had to take into account. When I made the top piece, I ended up cutting off the side since the compound bends would be hard to manage. I welded the inside/side piece corner on after and smoothed it down.
-
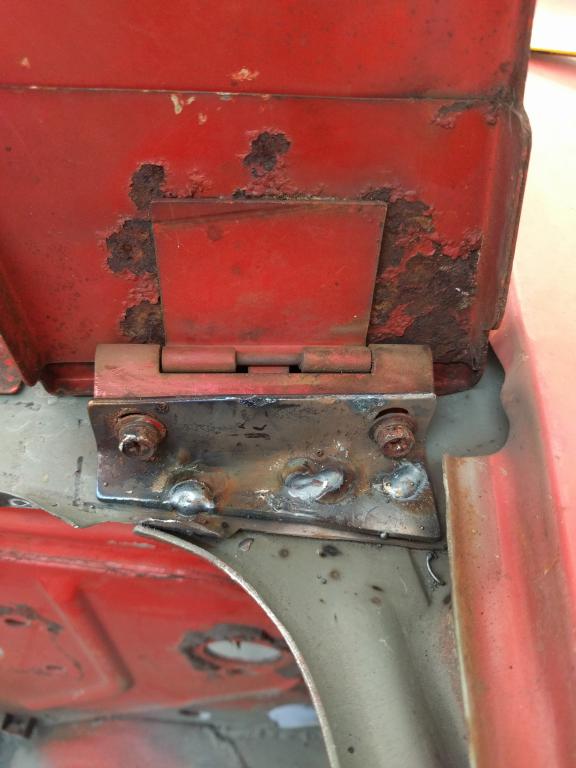
Final pics for the driver side hatch lid/plate. It came out pretty good overall. There are a couple of pinholes to fix, and I'm not entirely pleased with how some of the smoothing of the welds came out. I may be too critical though, since a good bit of the upper portion is going to be covered with weather stripping and seam sealer. I am really happy about how the weather stripping lip came out though. That one was an interesting lesson in finding creative ways to hammer the shape into place.