Jeff
-
Posts
421 -
Joined
-
Last visited
-
Days Won
1
Content Type
Profiles
Forums
Blogs
Events
Gallery
Downloads
Store
Everything posted by Jeff
-
280ZX doesn't run if battery disconnect switch is installed
Jeff replied to nbesheer's topic in S130 Series - 280ZX
If you're switching the ground side why are you running anything to the starter? I agree with 260DET, my race car is switched on the positive side and that's what I'm used to seeing. -
I don't know about being competitive, but it can run in the NASA Super Touring classes. It's all about power to weight with brakes and suspension pretty much wide open. I imagine it would compete in ST2 or possibly ST1 depending how much wheel horsepower it's putting down. Time Trials run the same rules and I currently run TT3 in my 2014 SS Camaro, mostly at Sebring but I was just at Daytona a little over a week ago. It's a fun group and they are nation wide. Here is the form, it's stupid simple. Classification Form
-
That looks like a very fun project Clark. I can't remember if we ever met but I was around when Scottie and Mike (Zgad) were drag racing their Z cars. I work in the SODO area and don't live far from there so I would love to see the project sometime. I'm heading out this afternoon to go instruct and run TIme Trials with NASA at Sebring this weekend. I'm currently running my 5th gen Camaro street car but building my 94 Trans Am track car up to be a little more competitive. My poor 260Z is sitting in a storage unit over in Melbourne wondering if I'm ever going to get back to it again. Just that time & money thing of course! Looking forward to updates on this.
-
ANOTHER Datsun Z/LS3/T56 Swap Thread
Jeff replied to Ironhead's topic in S30 Series - 240z, 260z, 280z
My best friend is a car guy of course but he paints corporate jets for a living. For his single stage automotive paint jobs he swears Acry Glow by Sherwin WIlliams is the best. It's what they use at his work and is a very tough paint able to hold up in the areas you've indicated. It can be cut & buffed to a high gloss but you're never going to get the depth of a base / clear so in various lighting there will likely be some color variations. They should be able to match your color code though so it might be worth a try. Here is the Sherwin Williams page: Acry Glo -
My 260Z is in storage with an LT1 ready to go in it so I had researched this quite a bit but its been a while. Choices are limited but there are some options out there. When this was a popular swap people were using the F-body bracket for the alternator with an AC delete pulley and leaving the power steering pump in place gutted and capped off. Hawks has the AC delete and Dorman makes one as well. https://www.hawksmotorsports.com/93-97-f-body/firebird/engine-components/pumps-pulleys/ March makes a very nice kit but it comes at a price because its machined aluminum brackets, they provide new accessories and all of the decorative covers for everything. I was going to call them because all I wanted was the brackets in black without all the fancy stuff. Give them a call and see what they can do. https://marchperformance.com/chevy/chevy-lt/all-inclusive-kits.html
-
Yes, the mounting area has been reinforced some and a tab added that through bolts to the removable support. I don't seem to have any good pictures of that area but the one below shows the bottom of the upper support. My body guy changed it up so that it only has one bolt on each side now and that is going to be corrected before it's all said and done. He was trying to conceal the fastener(s) but sacrificed stability to do it, which pissed me off to no end since it was set up with four bolts before he did his mod.
-
I wound up replacing my frame rails with 2 1/2" x 2 1/2" tube steel to fix damage from a previous collision and while we were at it I picked up a bolt in core support one of our members had used previously with success. The car is still sitting like this so no real world experience yet but it sure makes test fitting a breeze. I will eventual fabricate some sheet metal panels on both sides of the radiator.
-
My 260Z has lead there as well but mine was in good shape after media blasting so we just went over it with DP epoxy primer. My understanding is that once the lead starts to fail you need to remove it, melt it out, and either replace it with new lead or filler.
-
Nothing really anything to add but here is video of the first one that went into a customers car. Hellcat Z
-
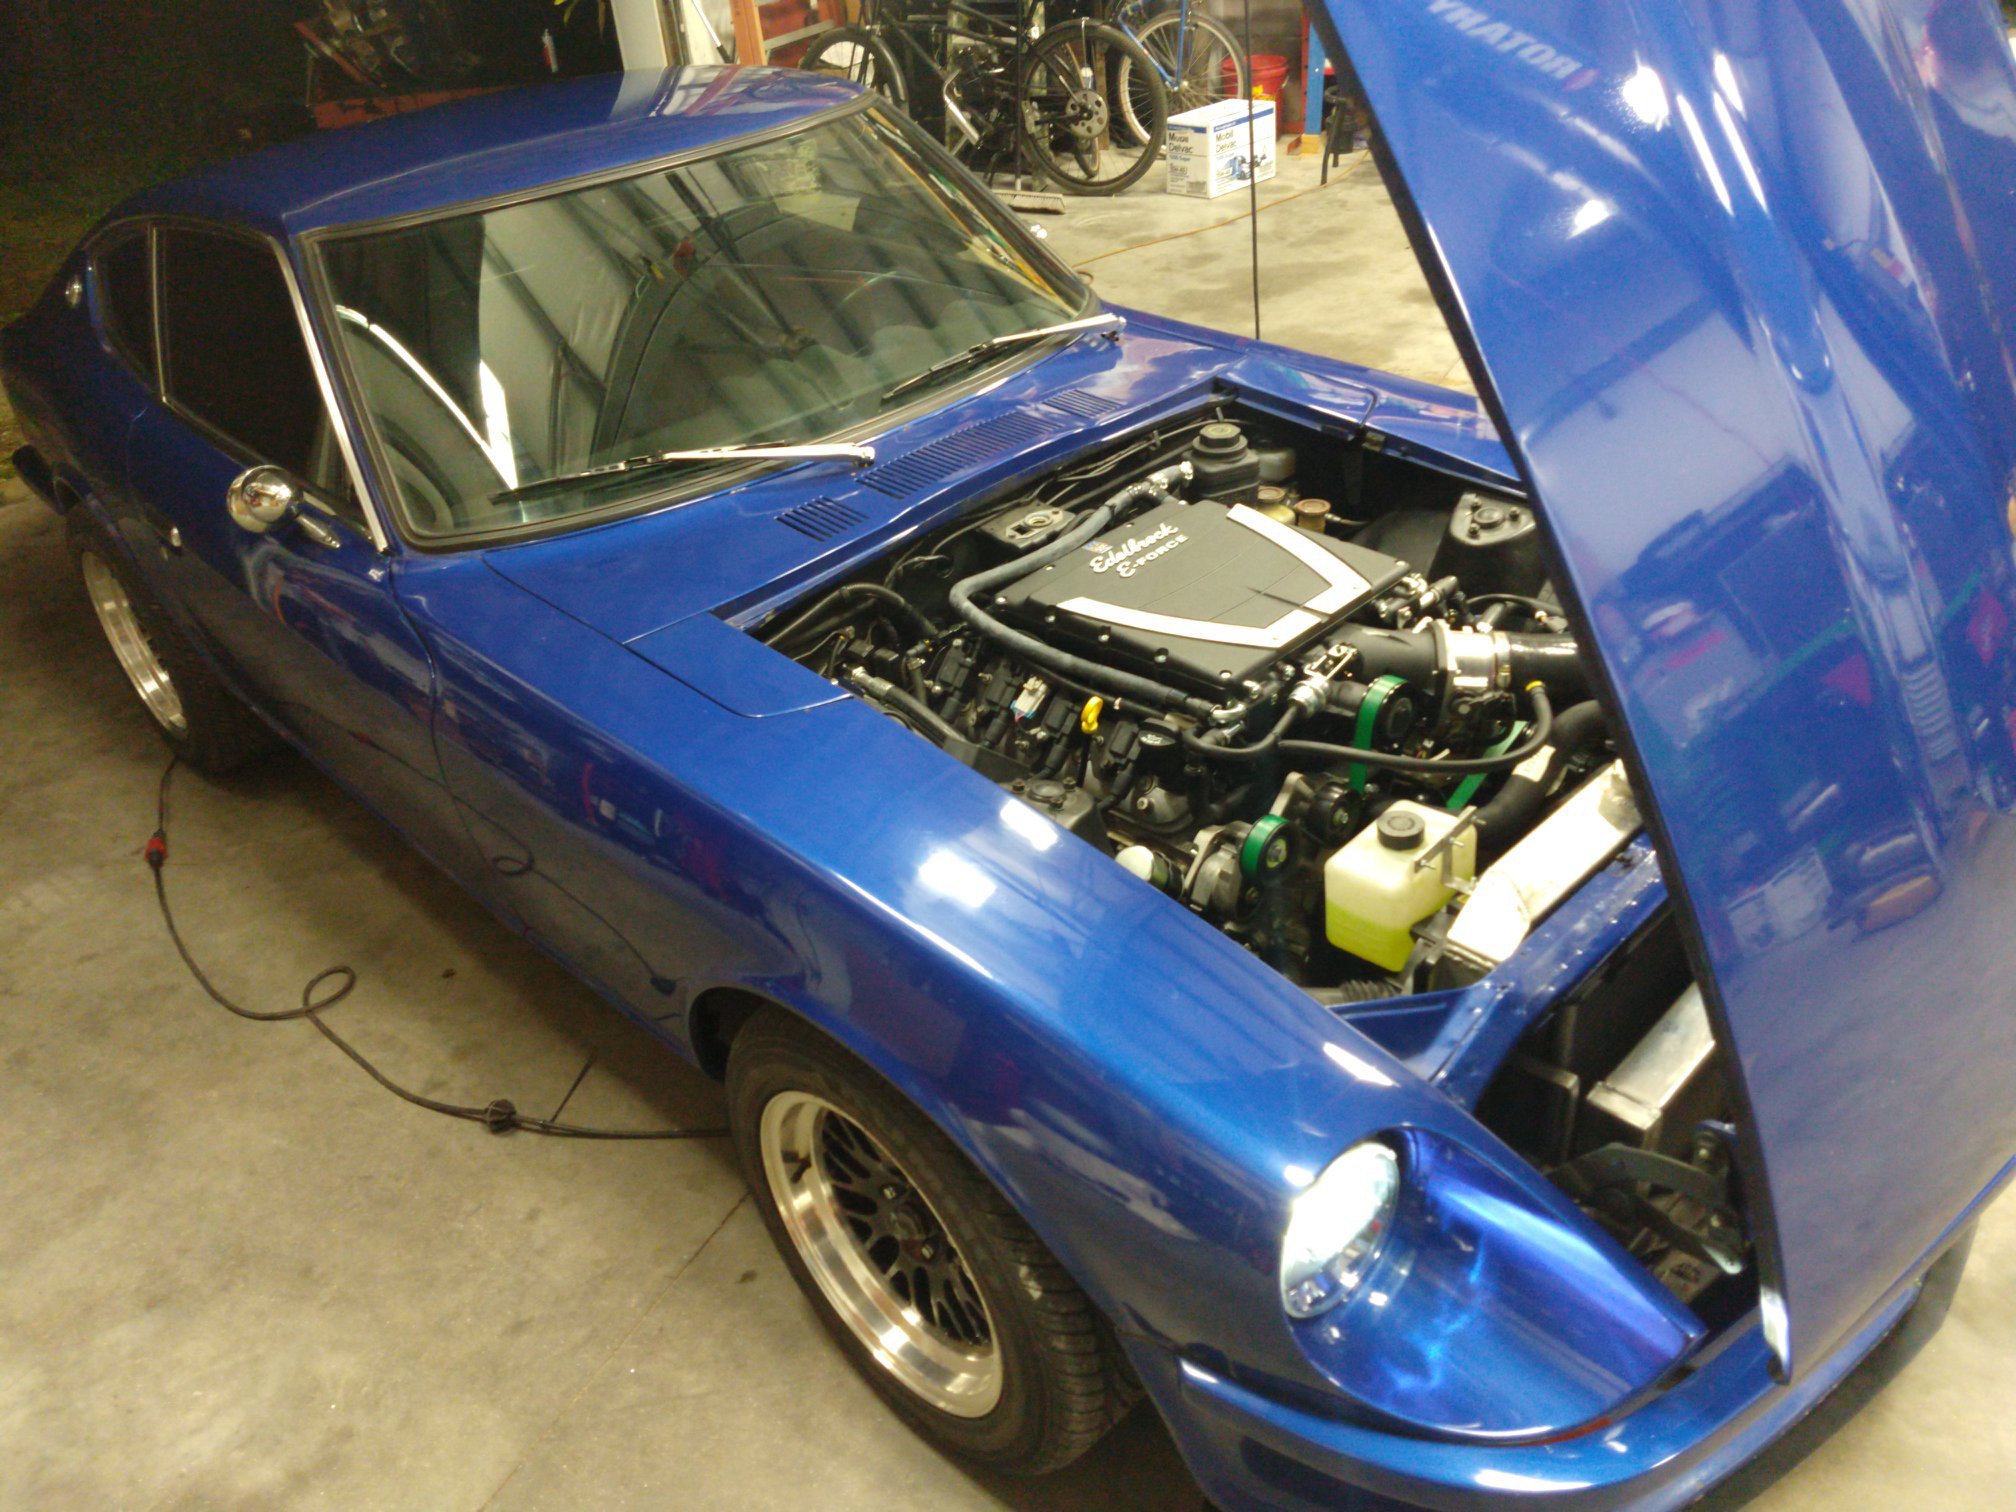
Not a lot of information on Facebook but it's an LS3 with an Edelbrock E-Force TVS2300 blower. Put down 522 HP with stock heads & cam.

-
Do a search for Will Leet in the Facebook Swapped S30 Owners Group. He has an LS3 with an Edelbrock E-force blower under a stock hood.
-
I would say that is right on the mark. I'm the guy that weighed his bare body shell, early 260Z, on 4 bathroom scales and my result was 520 lbs. I found the old files on a hosting site I haven't paid for in years but unbelievably they're still there. Fifth picture down shows it being weighed. My 260Z beign weighed
-
RWB Jeff - 1970 Datsun 240z - Build
Jeff replied to 240zJJR's topic in S30 Series - 240z, 260z, 280z
I did the front frame rails first with it on the ground and no bracing. We hung doors, fenders and hood back on it and everything lined up great, no worries. I then put it on the rotisserie, put the 1x3 frame rails in, cut out the floors & replaced one side at the time. Did all of that without any bracing and I paid a big price. The body shop was pretty far into it before they hung the fenders and hood again only to discover that the front of the drivers frame rail was 1 1/2" higher than the passenger side. It had to be put on a frame table and pulled back into shape but the good news is I now know it's square and straight. That was a costly lesson, so yes make sure you brace yours well. I would cross brace the interior from the front edge of the inner rocker to the opposite strut tower but hopefully someone that has actually done it will chime in. -
RWB Jeff - 1970 Datsun 240z - Build
Jeff replied to 240zJJR's topic in S30 Series - 240z, 260z, 280z
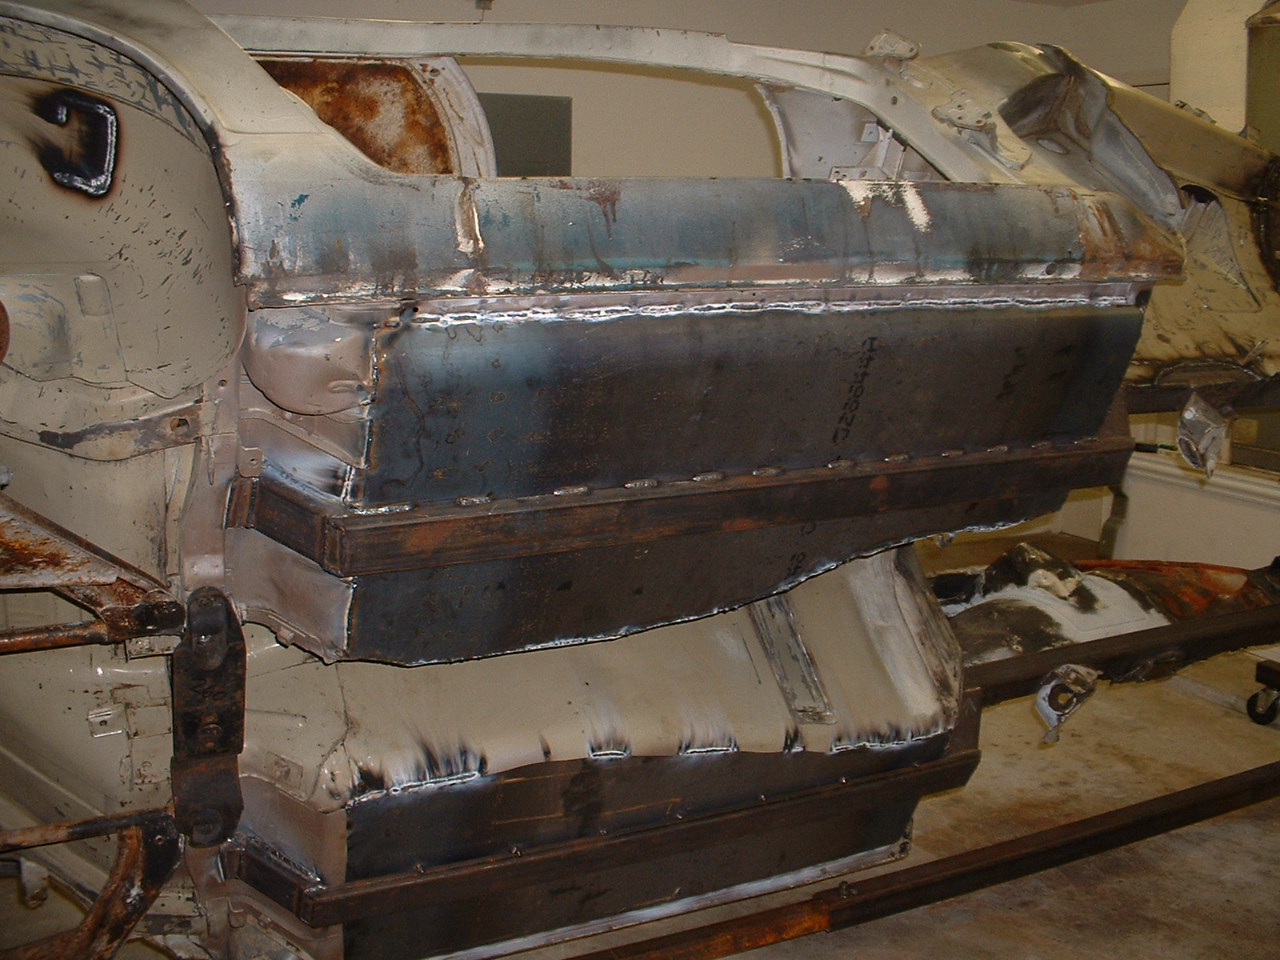
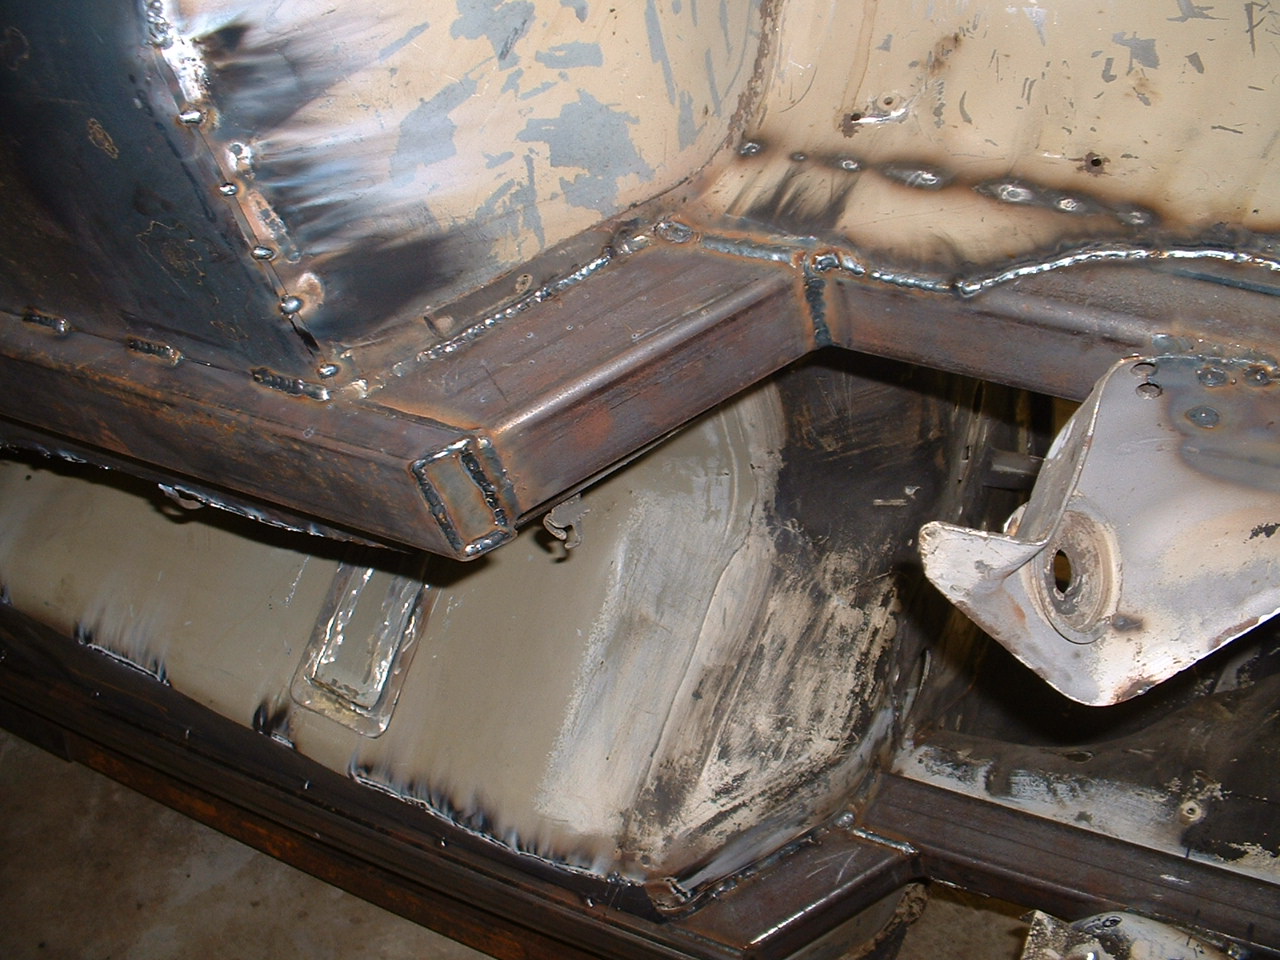
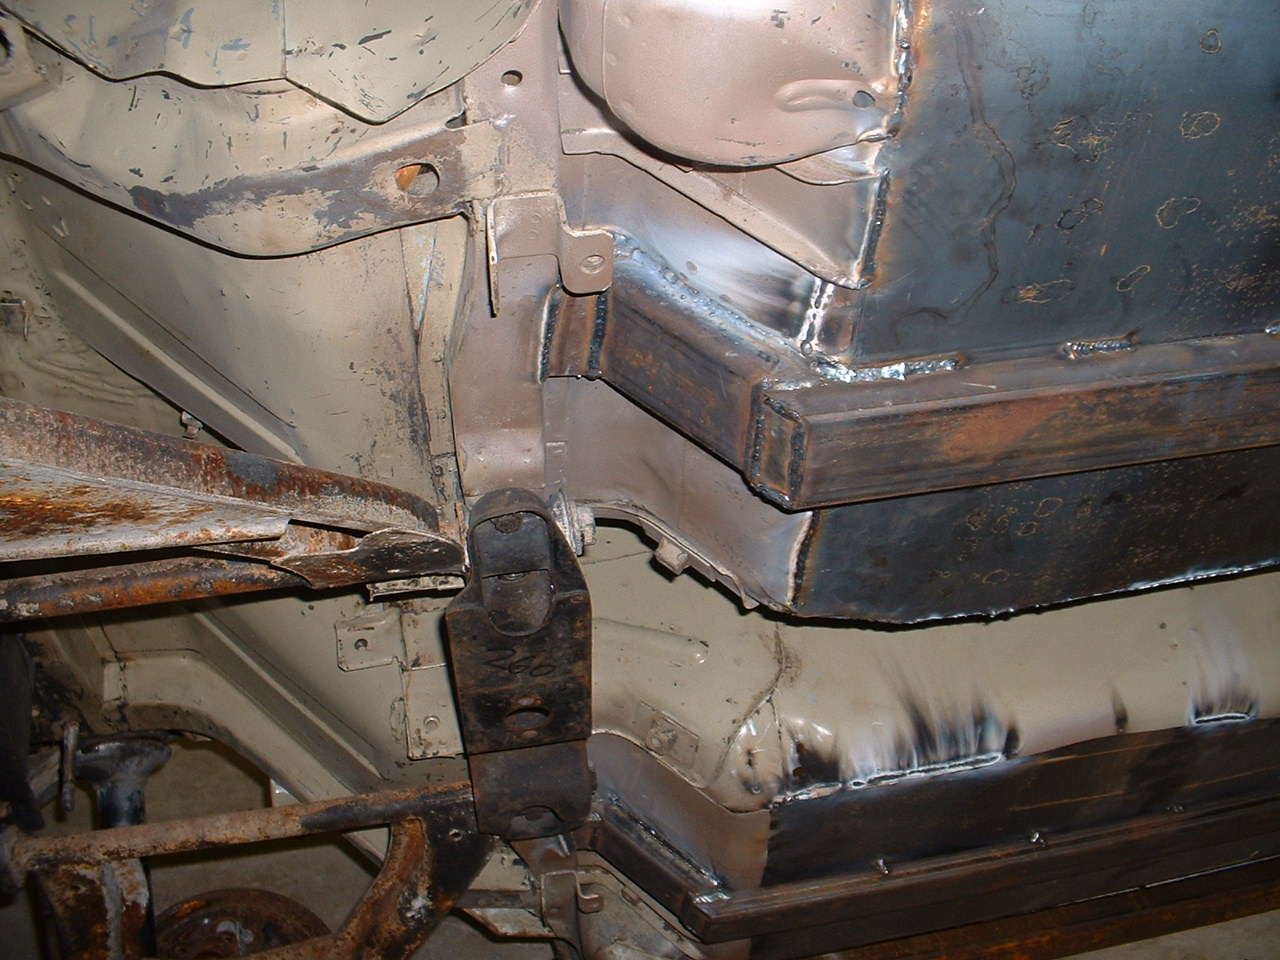
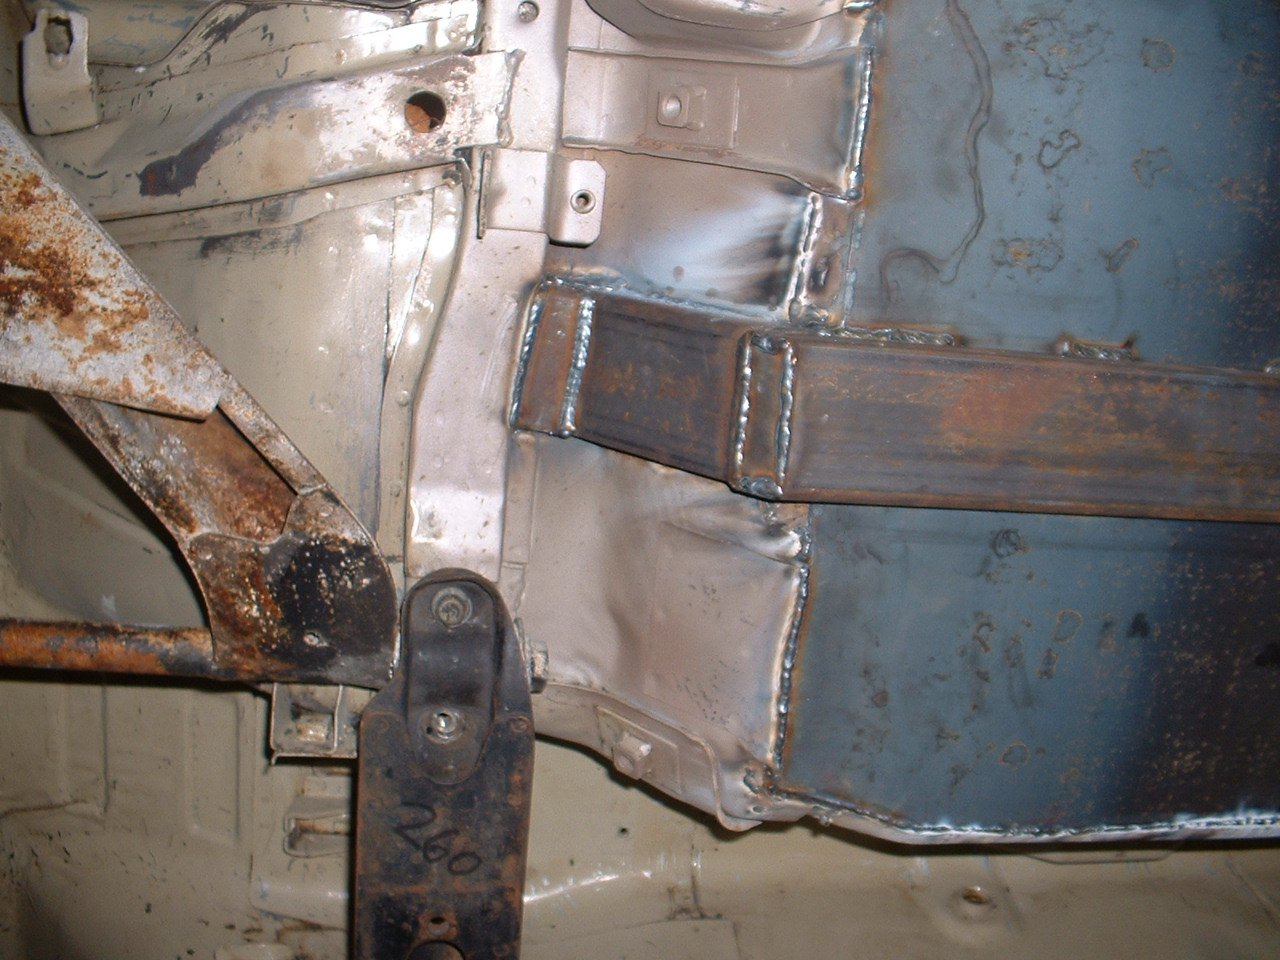
My car had to be clipped in front of the strut towers due to a previous hack repair job. We discovered that the frame rails had been covered with body filler to hide the wrinkles so new frame rails were in order too. We removed the frame rails and replaced them with 2 1/2" x 2 1/2" square tube which was close in size to the factory ones and then took 1x3 tube steel under the floors and tied them to the rear factory subframe. The 1x3's add a fair amount of strength and give you some much needed jack points instead of the factory ones that are always crushed. The challenge was mating the 1x3 & 2 1/2" tube together at the base of the firewall. I believe that structurally it's sound but not the prettiest joint. You have to be under the car to see it. We removed the factory core support and put in a simple bolted one but I know it's weaker torsionally than the factory unit. I never finished the car and it's tucked away in storage right now but when I get back to it I'm probably going to go with a braced welded in unit. Here are some pics to see what was done and just food for thought. Added a plate as a gusset and TC bucket tie in. I did media blast every square inch and apply some good epoxy primer before the body work started. Should have done that before the metal work. Engine compartment all smoothed out and ready for color. -
RWB Jeff - 1970 Datsun 240z - Build
Jeff replied to 240zJJR's topic in S30 Series - 240z, 260z, 280z
I love the fact that you've left the front bumper on it as a visual break point for the grill. When the grill is fully exposed it just feels out of proportion to me. I also like how you've pulled the lower lip of the front spoiler under instead of forward. Following the wheel arch line just makes the whole thing flow very nicely. I would actually prefer it without the splitter, but that's just my taste and I realize that it's probably quite functional. Looking forward to seeing the side view(s). -
No, it's just an opinion and I should have stated it that way. I just assumed that anything that smelled that way would be damaging to the foam but I've been wrong before.
-
Yes, brake clean on upholstery is a very bad idea. I would use SImple Green concentrate, not mixed with water yet, and spray a small amount on the oil stain. Take a clean dry towel and blot the spot, do not rub! I'll repeat it, do not rub! Repeat this until no more oil is transferring to the rag and then take a clean wet cloth and rub the spot to start getting the Simple Green out. Once the area is wet you can blot it with a dry cloth to help get the Simple Green out and repeat. It's worked on some greasy stains for me in the past. Good luck with whatever method you choose. I've also had great luck with a foaming cleaner called Tuff Stuff but it's probably too weak for this. It does clean up an interior really well though!
-
I did 1x3 subframes on mine but also replaced the floor pans with custom built ones that are flat on the bottom. I replaced the front frame rails with 2x2 as well so the front tie in is different from stock rails. Here's what mine looks like and we capped the open ends of the 1x3 with a piece of sheet metal welded solid.
-
I don't have any of the measurements you're looking for but I do have the plans that I followed to build my rotisserie and photo references of the completed build. I believe that the rotation point was around 27" down from the top of the 60" upright. The car would rotate 360 degrees but I never quite got the balance right so I could still rotate it alone but it was a bit of a challenge. Plans I followed are here. Photo references are here.
-
Approx weight of 280z rolling chassis?
Jeff replied to equalme's topic in S30 Series - 240z, 260z, 280z
My completely bare 260Z body shell weighed 520 lbs. if that helps any. -
I replaced the front frame rails and installed subframe connectors so yes I tied it together while I was doing that much work. That top brace was originally on a friends 240Z with a V8 swap and it held up just fine with factory frame rails. I know I have pictures of his car somewhere but they're either on a disk or an old removable hard drive.
-
I had to replace the frame rails on mine because of a botched repair from a previous collision so I did a removable core support while I was in there. Welded tabs to the inner fenders and the new core support bolts to the tabs. I haven't mounted the radiator yet so this is as far as I've gotten in the process and I haven't touched it in a while at this point.
-
Jon, racers are an amazing group and it always does my heart good to help someone else because I believe in karma so what goes around comes around. I was at Daytona a few weeks ago running a PDX with the local SCCA and one of the students boiled his brake fluid. His instructor was a friend of mine and with my jack, tools and brake fluid we had him going again. He tried to pay me for the brake fluid and all I told him was to pay it forward some day. So next time someone needs help now it's your obligation to be there. I know you know this already though.
-
Track brake pad recommendations
Jeff replied to Zmanco's topic in Brakes, Wheels, Suspension and Chassis
I've run the HT-10's and DTC-70's on the front of my Trans Am and the 70's are a wonderful pad but probably too aggressive. I'm probably going to step back to the 10"s for the next set and would imagine that on the rear of a lighter Z-car they would be the way to go. I've never played with the Porterfield's so no help there. -
Scottie, I'm so sorry to hear about your father and unfortunately can relate. I lost my dad two years ago on September 7th. Cars can be replaced, I'm just glad that you are OK and the safety equipment paid off. I've been running time trials with NASA lately and watched a friend crash in turn one at Sebring in front of me and my next investment was an SFI rated one piece fire suit, gloves, shoes and balkava. I'm so happy to hear that you are OK and I know you love the build process so I can't wait to see what you put together next.