Search the Community
Showing results for tags '240Z'.
-
Does anyone have a diagram or a list of all the grommets and seals that at 240Z needs or where I could obtain that information ? I am needing every bit of rubber on my car but I want to make sure that I get every one that I need
-
I'm trying to get my new Series 1 240Z project car started, and it looks like the original fuel pump isn't working. I bought a replacement, but the bottom bolt snapped in half while I was removing the original. Now I have half of that bolt stuck in my block with no good way to pull it out. Does anyone out there have any good ideas? I've heard of people welding on nuts, but I've never welded in my life so I'm a little worried about trying it. Also, I'd like to get a replacement bolt for when I eventually pull that sucker out. Does anyone know what size bolt this is?

-
Hey y'all, I need some clarification. From what I've read in various forums and conversations & a few google searches. Datsun utilized 2 or 3 versions of the 5 speed for the 280z. Again, from what I've read. It seems as though the later 80-83 version is the more desirable due to it being a close ratio gearbox compared to the earlier versions. And from what I can tell, it doesn't seem as though there is any identification numbers stamped on the transmission. I did read that if the 5 speed has one hanger at the tail end then it's the more desirable version compared to the earlier version which would have two hangers/forks? There was a 4204C label stamped on it, not that this probably helps. If anyone can tell me which version of the 5 Speed I bought, I'd appreciate it. Did anything that I mentioned above seem to be completely wrong? Thank you in advance!
-
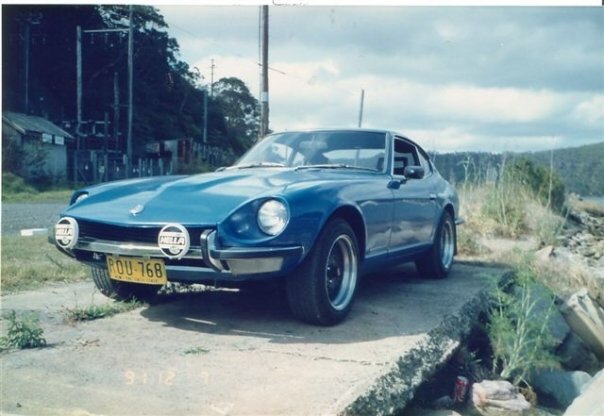
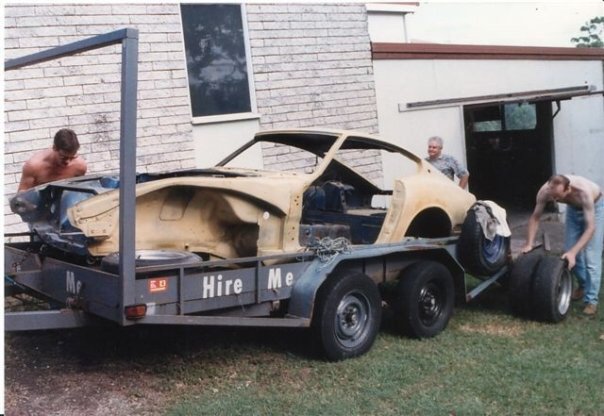
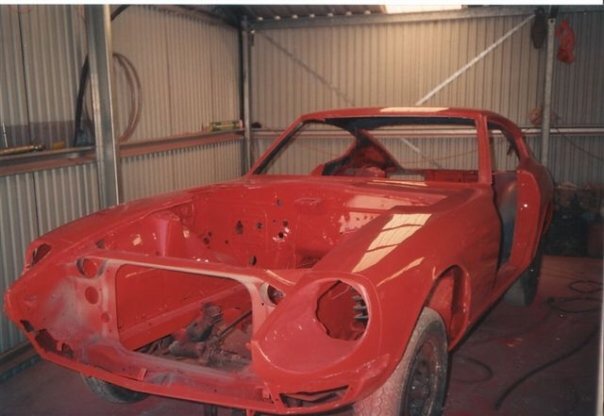
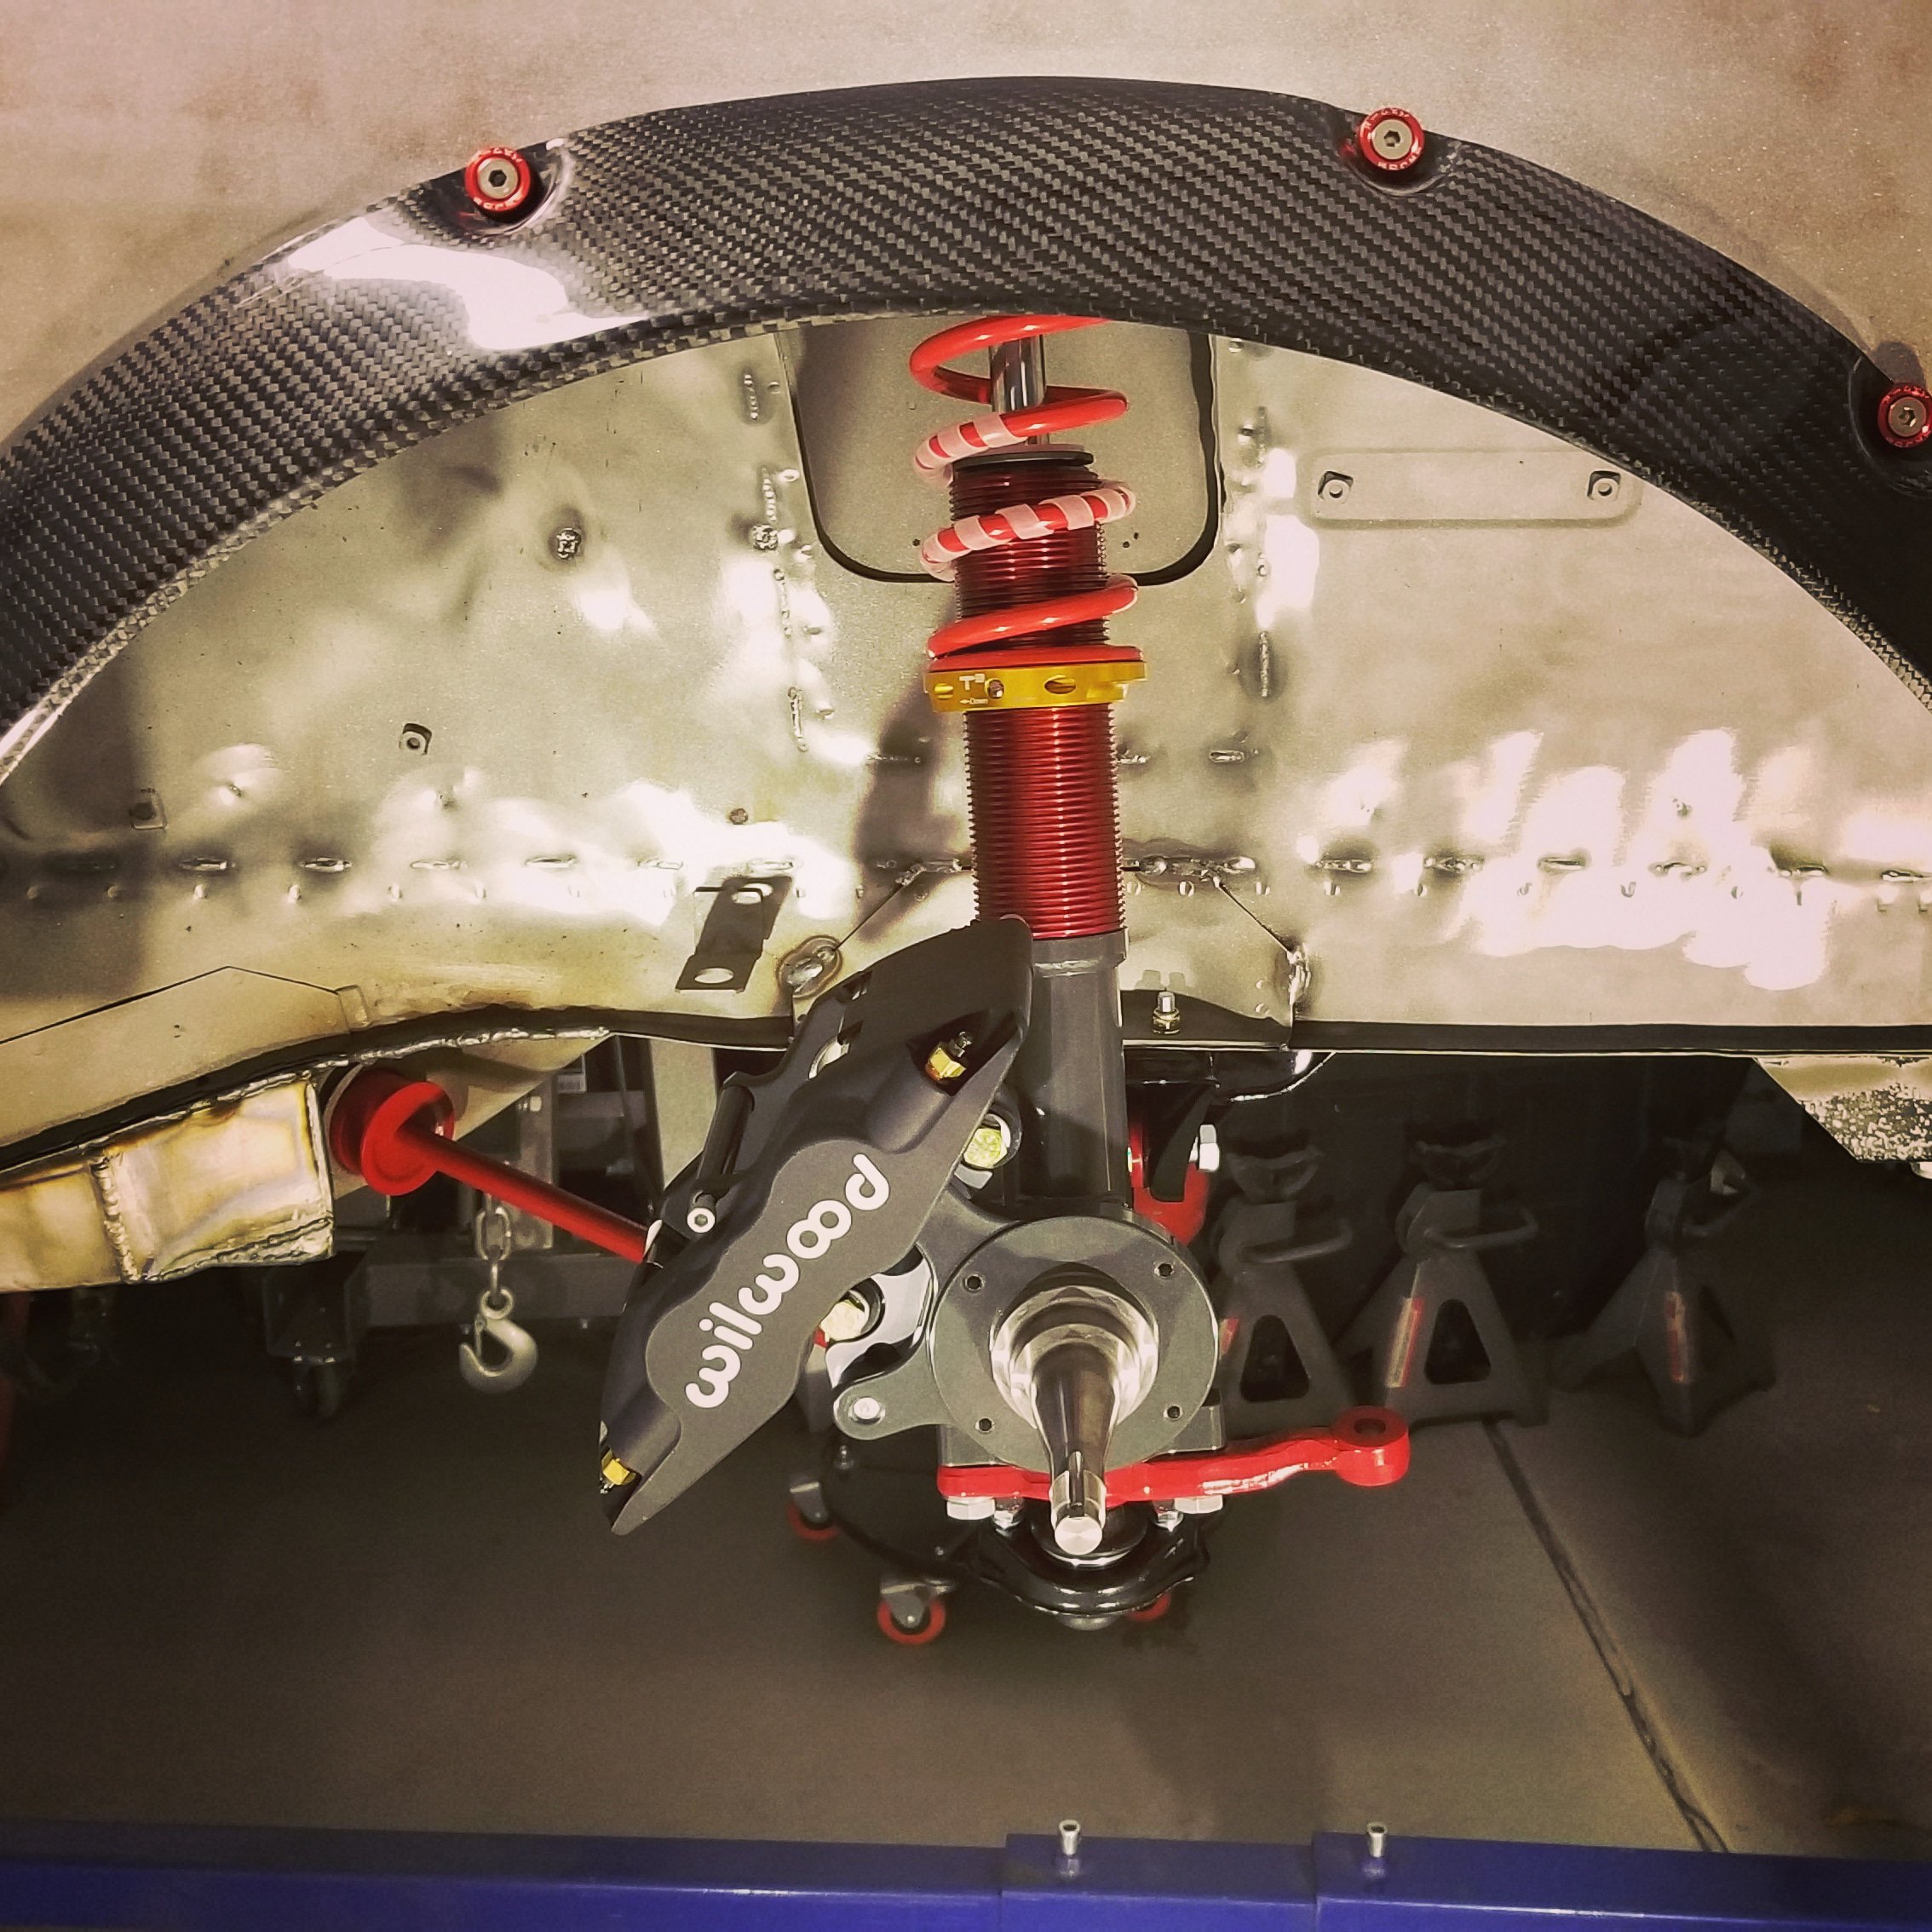
I think I better start firstly with a quick intro. Hello from the Wide Bay area of sunny Queensland in Australia. I’m a long time ‘guest’ lurker to the HybridZ forums mainly for research and ideas particularly when it comes to round top Hitachi SUs. I’ve loved Z cars since I first laid eyes on one in my early teens when I went to a historic race meeting at a local track with a friend’s family (who also have an affiliation with Datsun 1600/510). There was no escaping the ensuing obsession. This was only made worse by the inception of the Fast and Furious franchise coincidently at the same time I acquired my learners driver licence. I am shamed to say I have had at least one car with “cool” under body neons…. On to the car! This particular car is a 1971 chassis number #629 purchased in 2009. The car was a daily driver retaining the L24 and had a 280ZX gearbox and ignition. I believe it was Victorian sold in a blue colour and was repainted to red in the late 80s or early 90s (judging by the Australian fashion sense in the photos). I have maintained continuous registration of the car as well. The car has had various levels of priority around my life choices and events. I think I put less than 1000 miles on it between 2010 and 2017, is this considered Datsun abuse? I am now at a stage where I can tinker with it more and crack on with a long time goal to leave a legacy of my experiences and information on YouTube and lessor so on Instagram. One immediate goal is to try for 200WHP with only optimisations to fuel, ignition and exhaust. There are gaps to the story thus far which I intend to fill in with further posts. I want to keep this post short and sweet. Cheers, Neubs PS. The current specs are: ENGINE (currently making 170WHP) - Overbored and stroked to 2996cc - Approx. 10-10.5:1 compression ratio - L28 F54 block - L28 N42 head, 1.0mm O/S Ferrea Super Flo valves and match ported - ‘V07’ LD28 crank, balanced, knife edge and nitrided surface - L24 connecting rods - Modified Mistubishi pistons - Crow Cam camshaft; - 292° duration 0.495” valve lift intake - 296° duration 0.510” valve lift exhaust - Innovate Motorsports LM-2 datalogger and wide band O2 sensor COOLING - Ebay 75mm alloy radiator - 2 thermo fans - 280ZX thermostat with Tridon temp switch IGNITION - Pertronix Ignitor I module - MSD 6A ignition - L24 distributor with ‘7.5 plate’ and vac advance FUEL DELIVERY - Rebuilt round top 240Z Hitachi SU carbs with ZTherapy rebuild kit - SM needles with higher set fuel float level - Holly Red fuel pump EXHAUST - ZStory stainless steel Race/Sport headers - ZStory stainless steel Z432 style JDM muffler - Recycled mild steel centre pipe and generic hotdog muffler TRANSMISSION - 71C RB20DET gearbox - Exedy ceramic clutch and pressure plate DIFFERENTIAL - Standard rebuilt open centre 3.9:1 R180 - Standard uni joint drive shafts BODY - Restored Japan polyurethane front bar INTERIOR - Stock (and very worn out) - 280ZX modified tacho SUSPENSION - Stock springs - Stock brakes - Stock geometry components - Koni adjustable shock absorbers ROLLING STOCK - Rota RB-R
-
Hello I have never welded before and was hoping that you all can tell me if I should buy a "mig welder" and attempt to spot weld my entire car myself? If so any ideas of the most inexpensive machine and possible advice on how to learn to do myself?
-
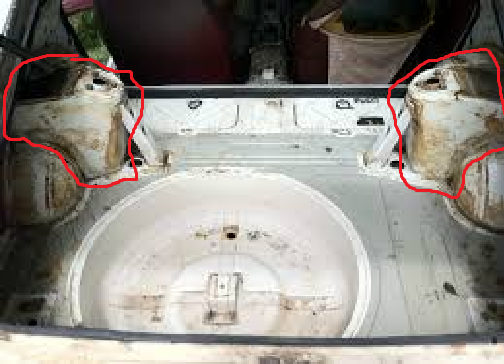
Hi, I'm looking for a set of rear turrets from a 240z. Perhaps you have a rusted out or crash damaged car? If so I'm looking for the turrets to be cut out out. I've attached an image highlighting the panels I'm after. Thanks.
-
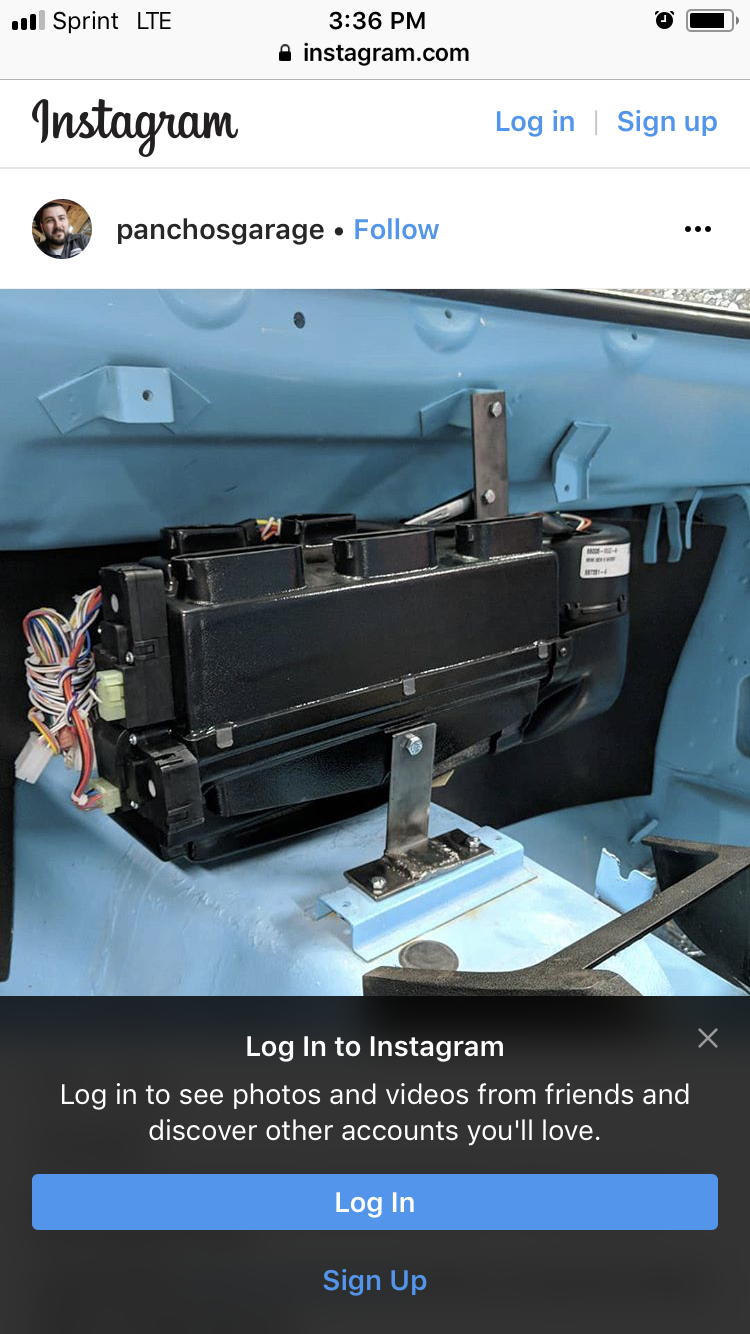
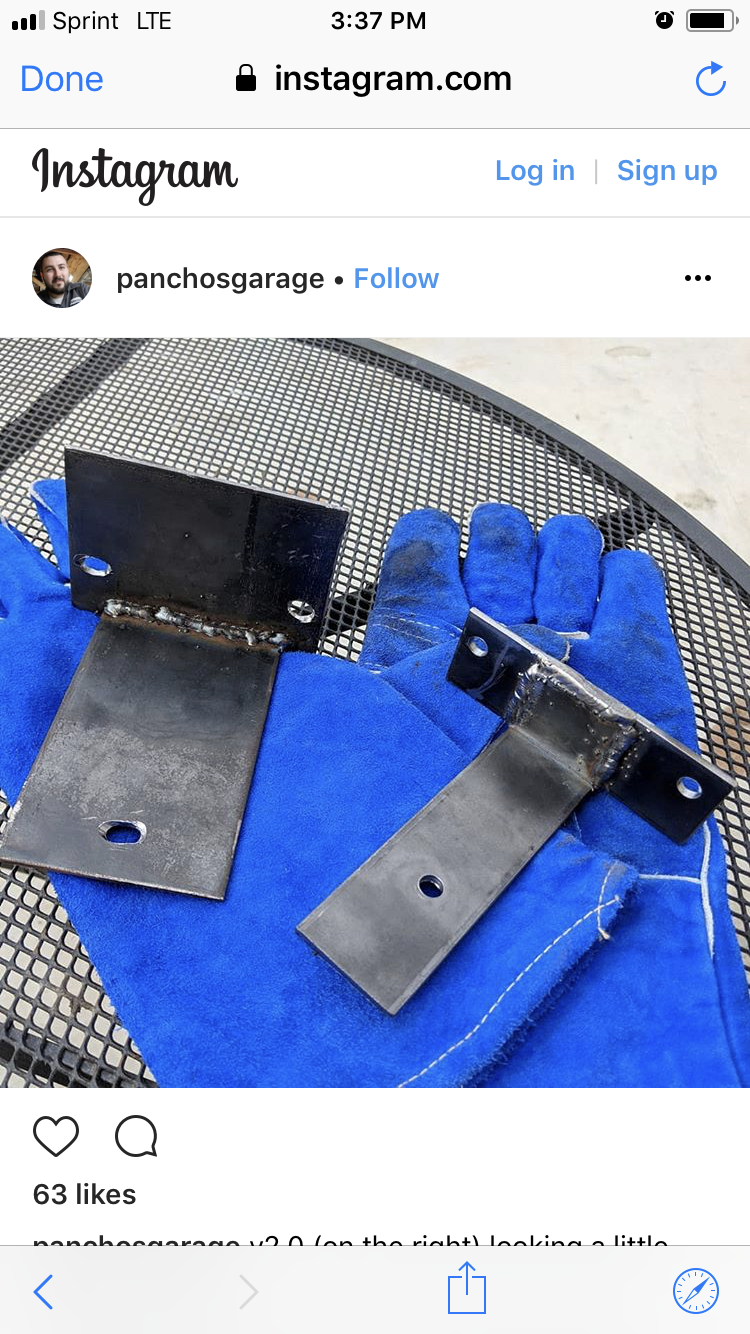
I have purchased the vintage air 2 for my 70 to 240 Z I was hoping someone knows the specs/measurements for the brackets to install the unit under the dashboard I cannot weld so I’m trying to just put together steel brackets and put them together to fit but I could use some help with how far up and down place it in side to side so I’m not spending an arm and a leg on the brackets. Or if anyone has got extra ones welded I’m willing to purchase them ?😀
-
I purchased this dash over 5 years ago but never used it. I believe it was an alternative dash for use with Vela Rosa or Thunder Ranch GTO kits. Anyone have an idea of worth, or have a need? I'll probably ebay it. PM me with any thoughts
-
Hi peeps I have an 72 240z and I have purchased an Vintage air Gen 2 air conditioning system, but I do no have the bracket that will hold the condenser in place that will also give it tension! So I am hoping someone can give me a path on where I can purchase a reasonably priced bracket for this system?
-
 Hello Everyone, I bought a 1971 Datsun 240z, about 2 years ago as my first project car. The more I started to dig into the car, the more I wanted to repair and improve it. Initially I was just planning on getting it running and using it while slowly upgrading and repairing it. I ended up tearing it down to the bare chassis, mounting it on a rotisserie and media blasting it. After I media blasted it, I decided to replace the floors and upgrade the frame rails with baddog frame rails. I sat down and thought about what I wanted the car to be and I came up with a ton of ideas, but ended up narrowing it down into one vision. The vision is this(nicknamed ProjectWhiteNoiseZ): My vision is inspired by modern Nissan Nismo styling, but it will be powered by a 2JZ-GTE with a cd009 transmission. I have gone through every part and media blasted and powder coated it or upgraded it with something better. Doing all of this, inspired my brother to buy a crashed 2008 Mustang GT and the current plan is to complete our cars by August/September '18. I live in Colorado and he lives in Pennsylvania, so I'll be road tripping the 240z 1700miles each way when complete to meet him at a track in Pennsylvania and race. If you're interested to see the work and follow our journey to complete our cars over the next few months, we have a YouTube channel, Facebook, and Instagram where we're documenting our builds. Any comments on suggestions for YouTube video improvements are appreciated. We will answer any questions you have. YouTube: https://www.youtube.com/channel/UCJt7v6VEHBqNPweO_cZ1guw PBB Instagram: https://www.instagram.com/projectbuildbrothers/ PWNZ Instagram: https://www.instagram.com/projectwhitenoisez/ Facebook: https://www.facebook.com/ProjectBuildBrothers/
-
 This came in a 240z I got a few years ago, I parted the car out as a friend of a friend wanted something for an lsx swap and my uncle has been trying to sell me his 240z for ages. The z I bought from my uncle has a rebuilt numbers matching original motor so I’m not changing it. This L28 came from a 280z and is supposedly built. Unsure what it has, could be just a cam, I wasn’t the one who put it together. N42 block, N47 head. Turns by hand. Remanufactured starter. Intake and exhaust manifolds were on until I just removed them, it wasn’t sitting exposed. L28’s originally came in 280z’s but they can be used in 240z’s with carbs, an electric fuel pump, and ignition control (I have a Crane kit and a GM unit people often use available). $675 6-1 header available separately $195. Round top SU carb complete setup available extra with motor. Located in Buffalo, NY, I’d drive across the border in exchange for a bottle of vodka from the duty free heh Text or call 716-7two5-5366
 -
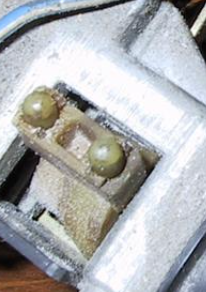
Need a 1973 headlight combo switch, im in nj so can drive or factor that for shipping Mine crapped out, i tried cleaning that little box with the tabs that controls the headlights and tail lights but the issues was with those little caps that cover the springs in the mechanism they were totally messed up and that whole box is kind of dead.... looking for either entire assembly or just the little headlight box with the rocker switches and those 2 springs with the little caps. Attached a pic of the box and the little caps over the springs, let me know what you have! car isnt really entirely drivable with out this! thank you!
-
Just Vinyl Wrapped my 240z... Here are my thoughts
supershanesta posted a topic in Body Kits & Paint
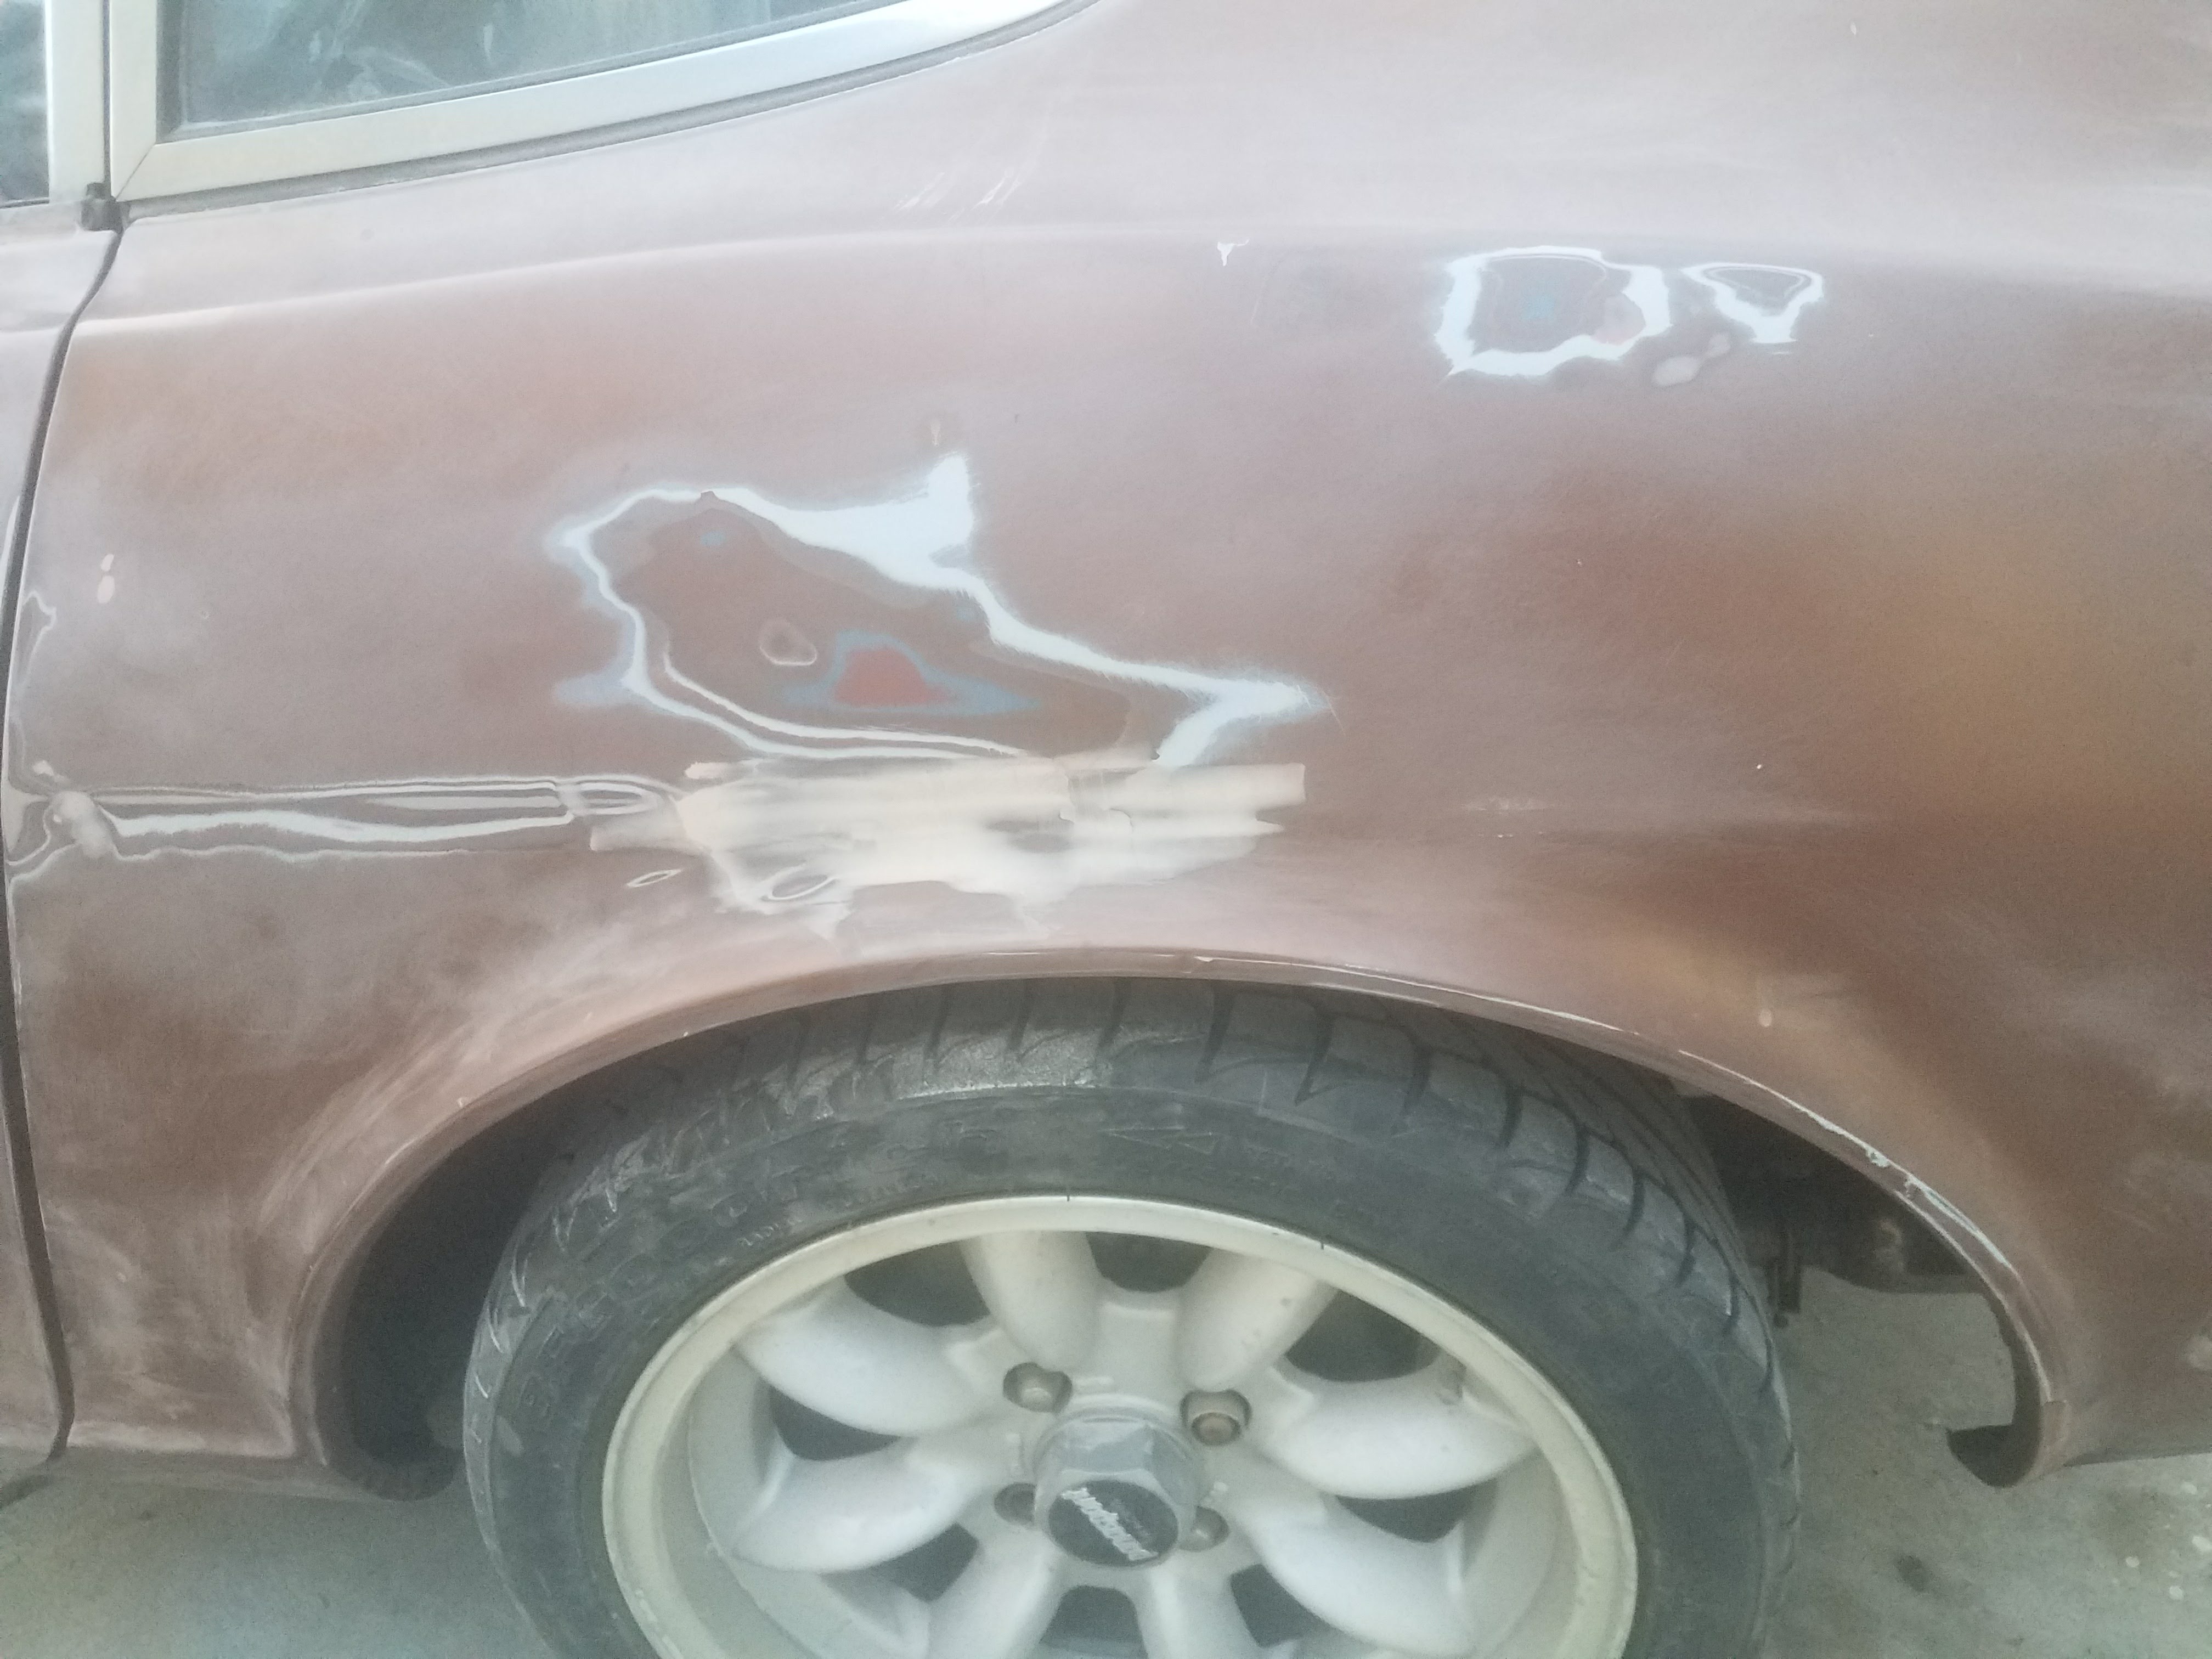
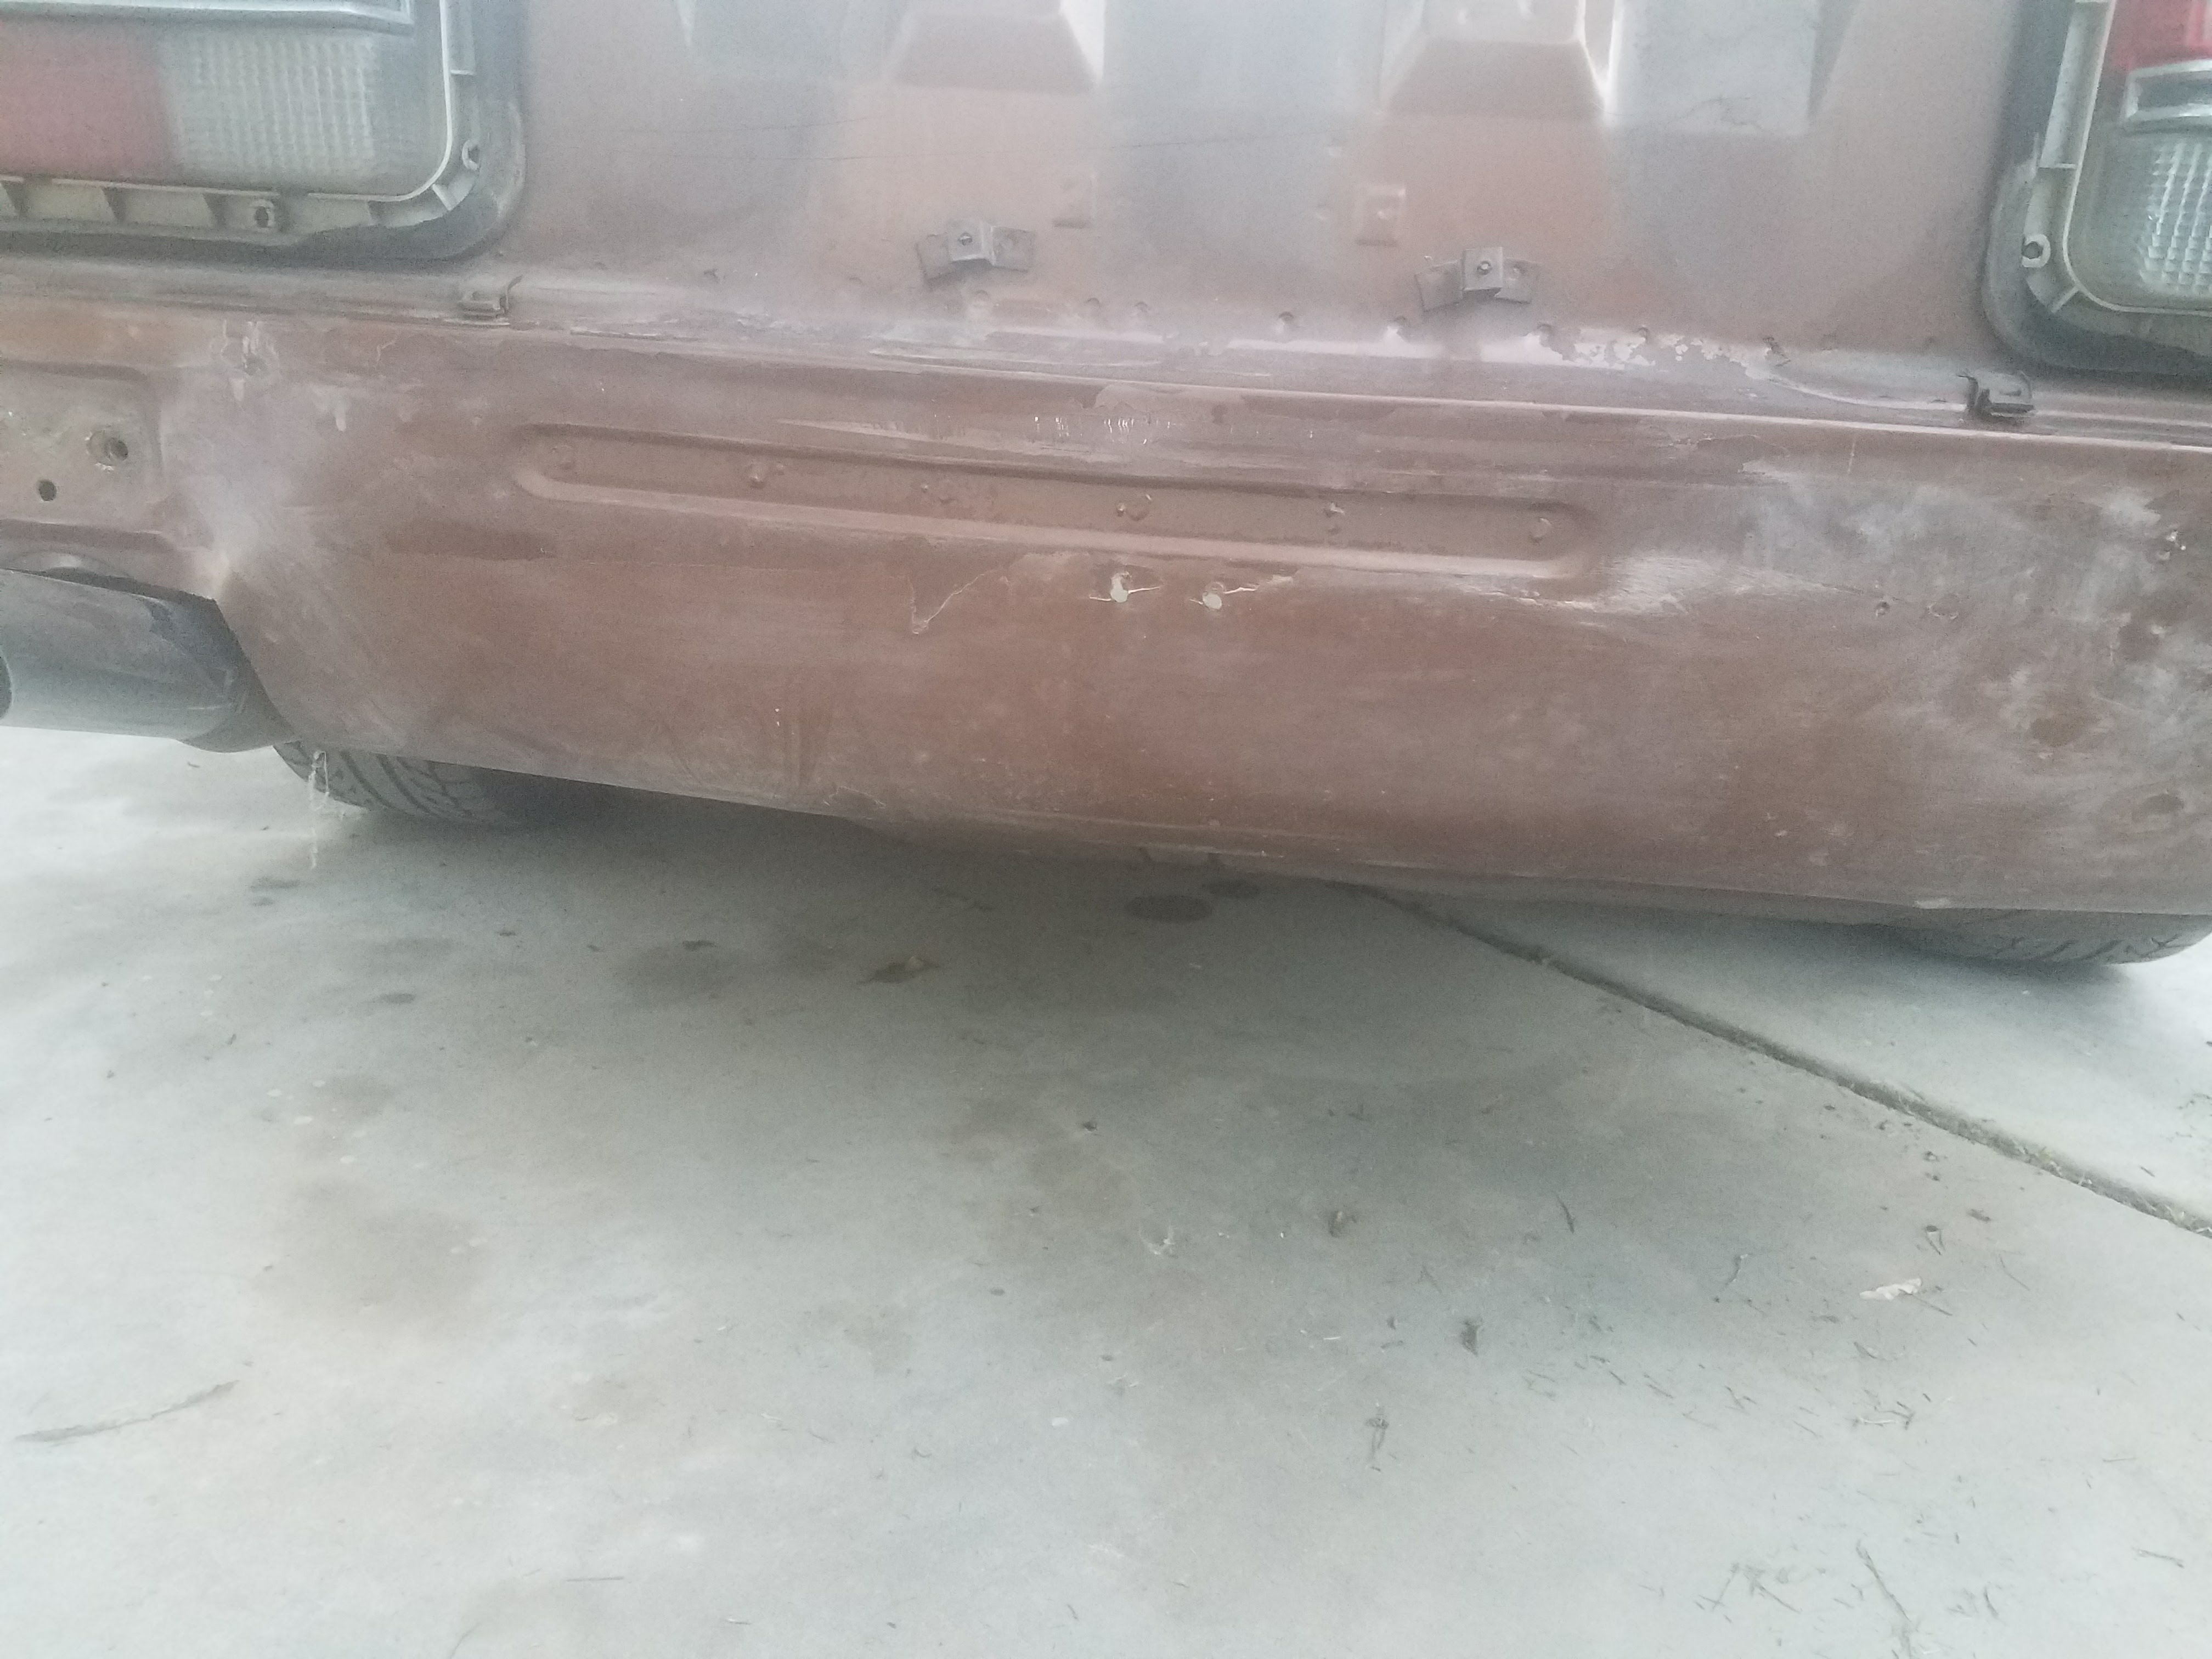
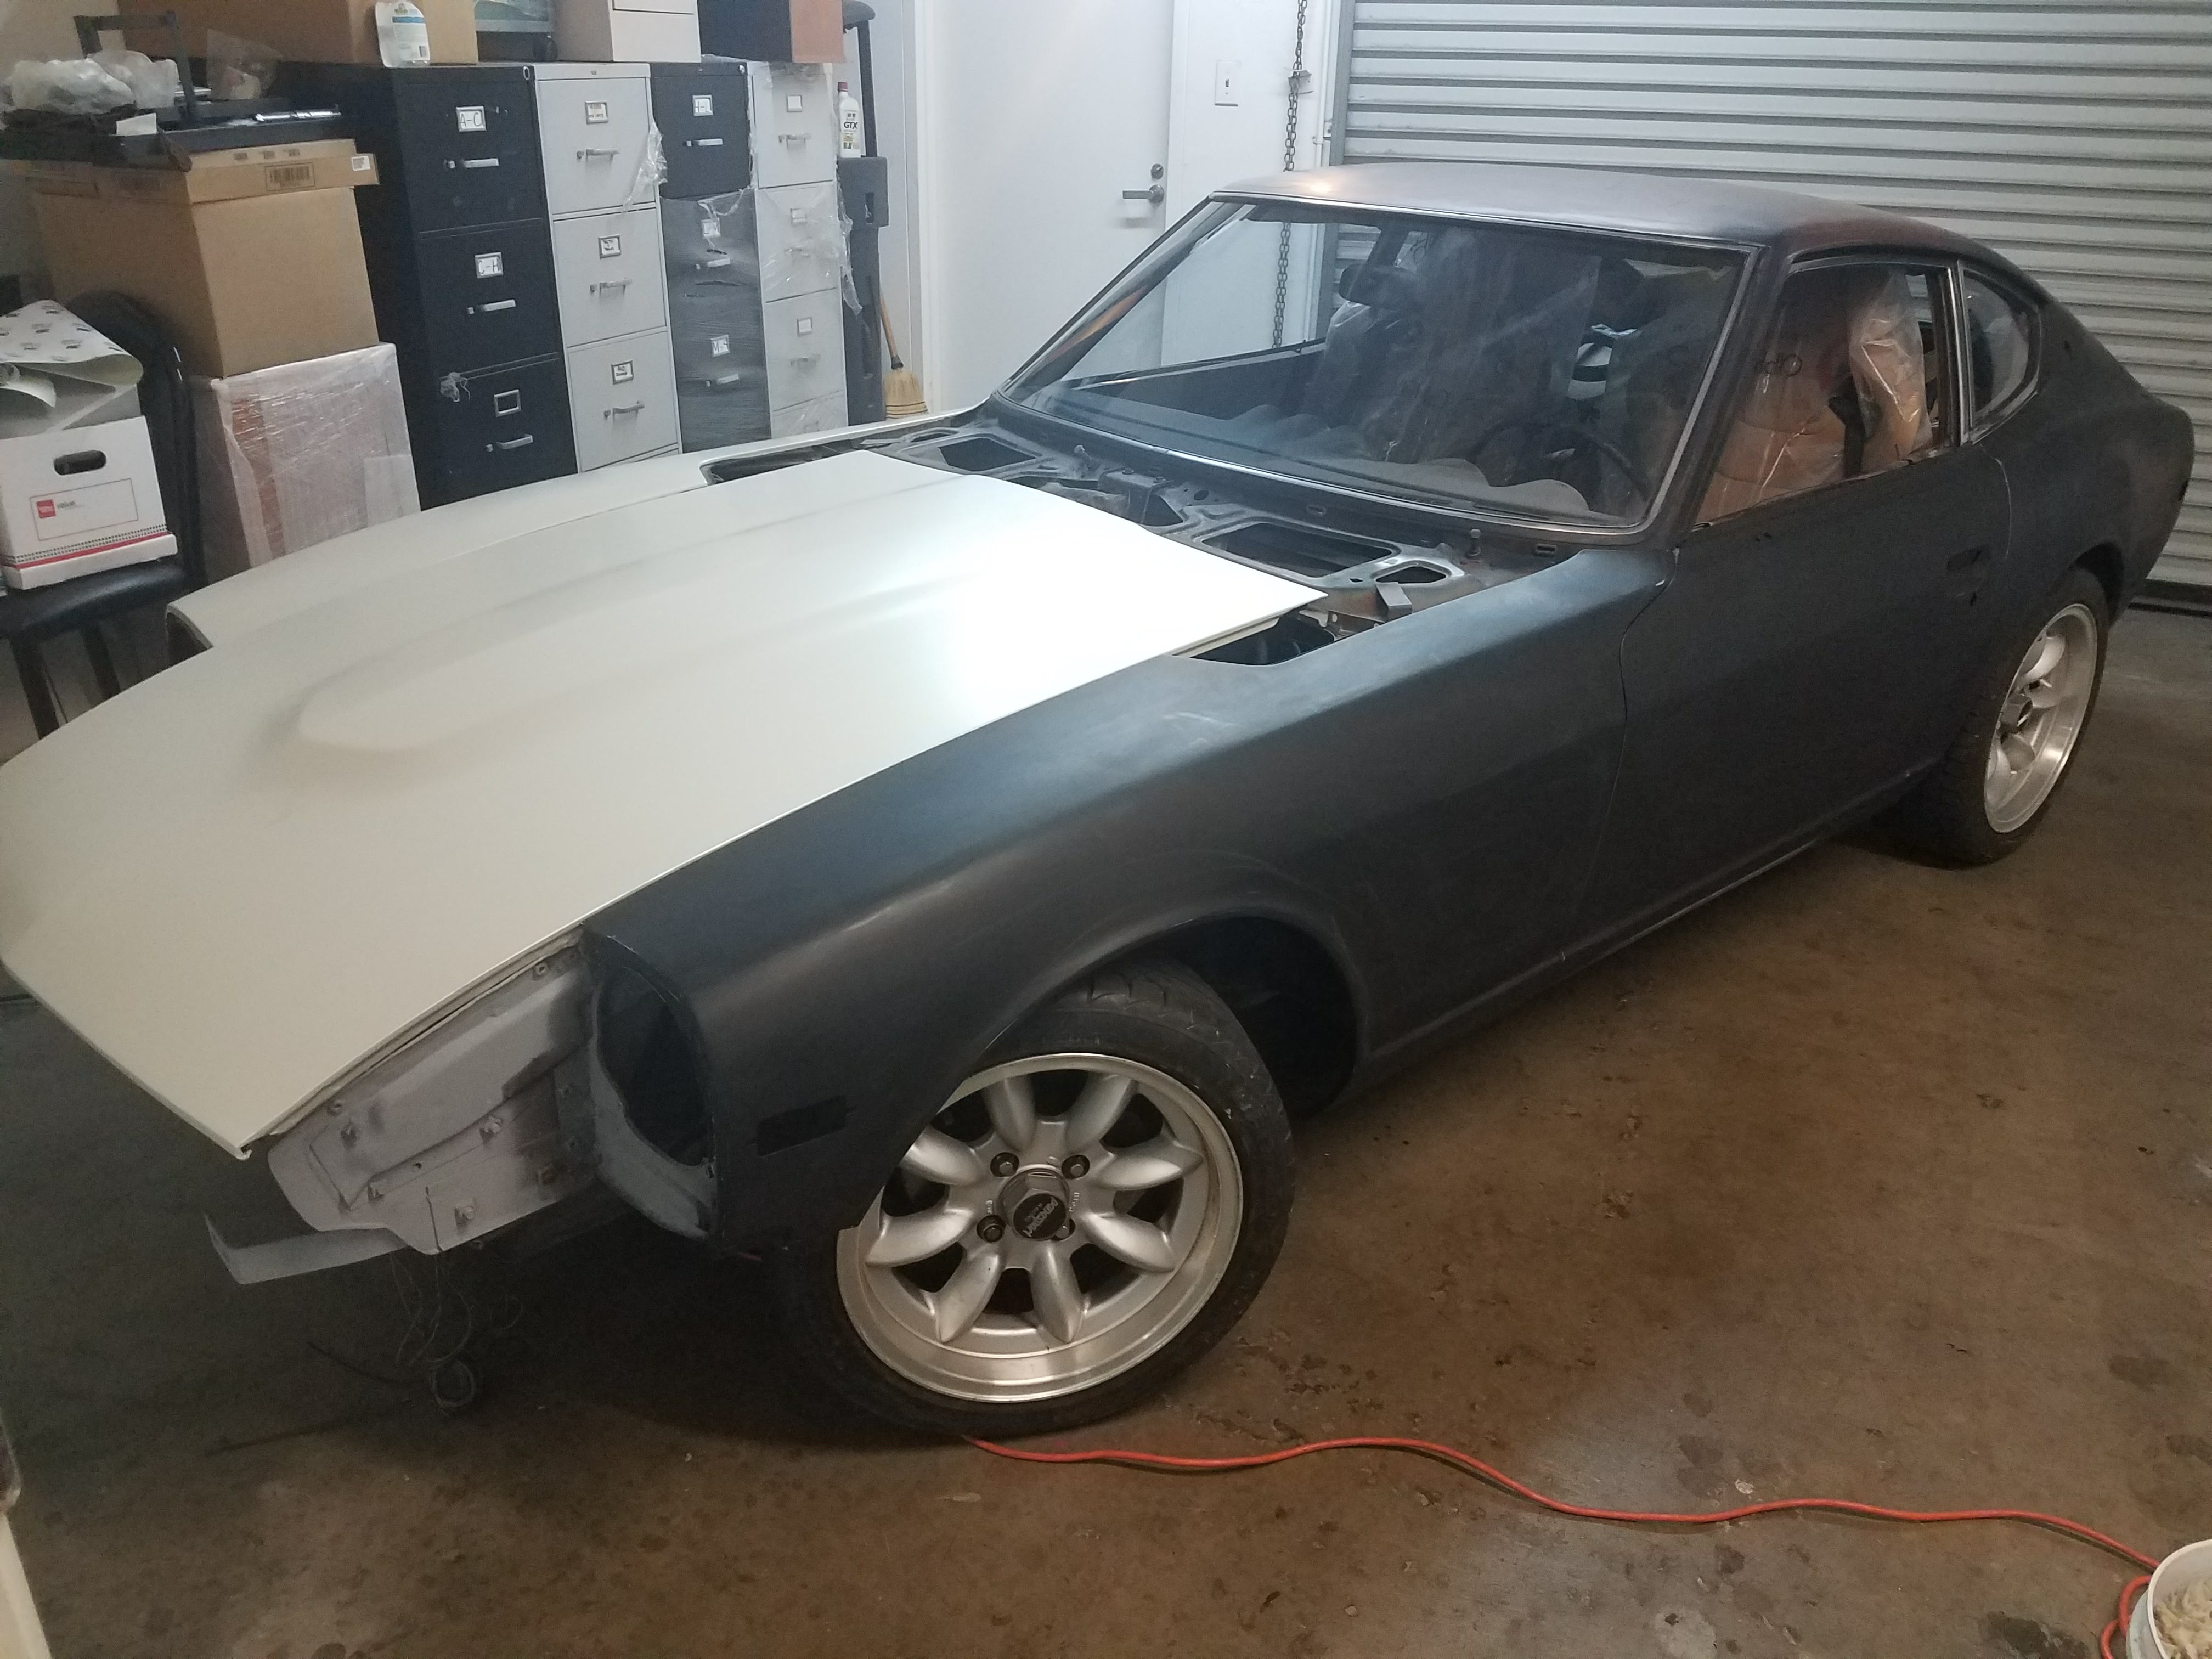
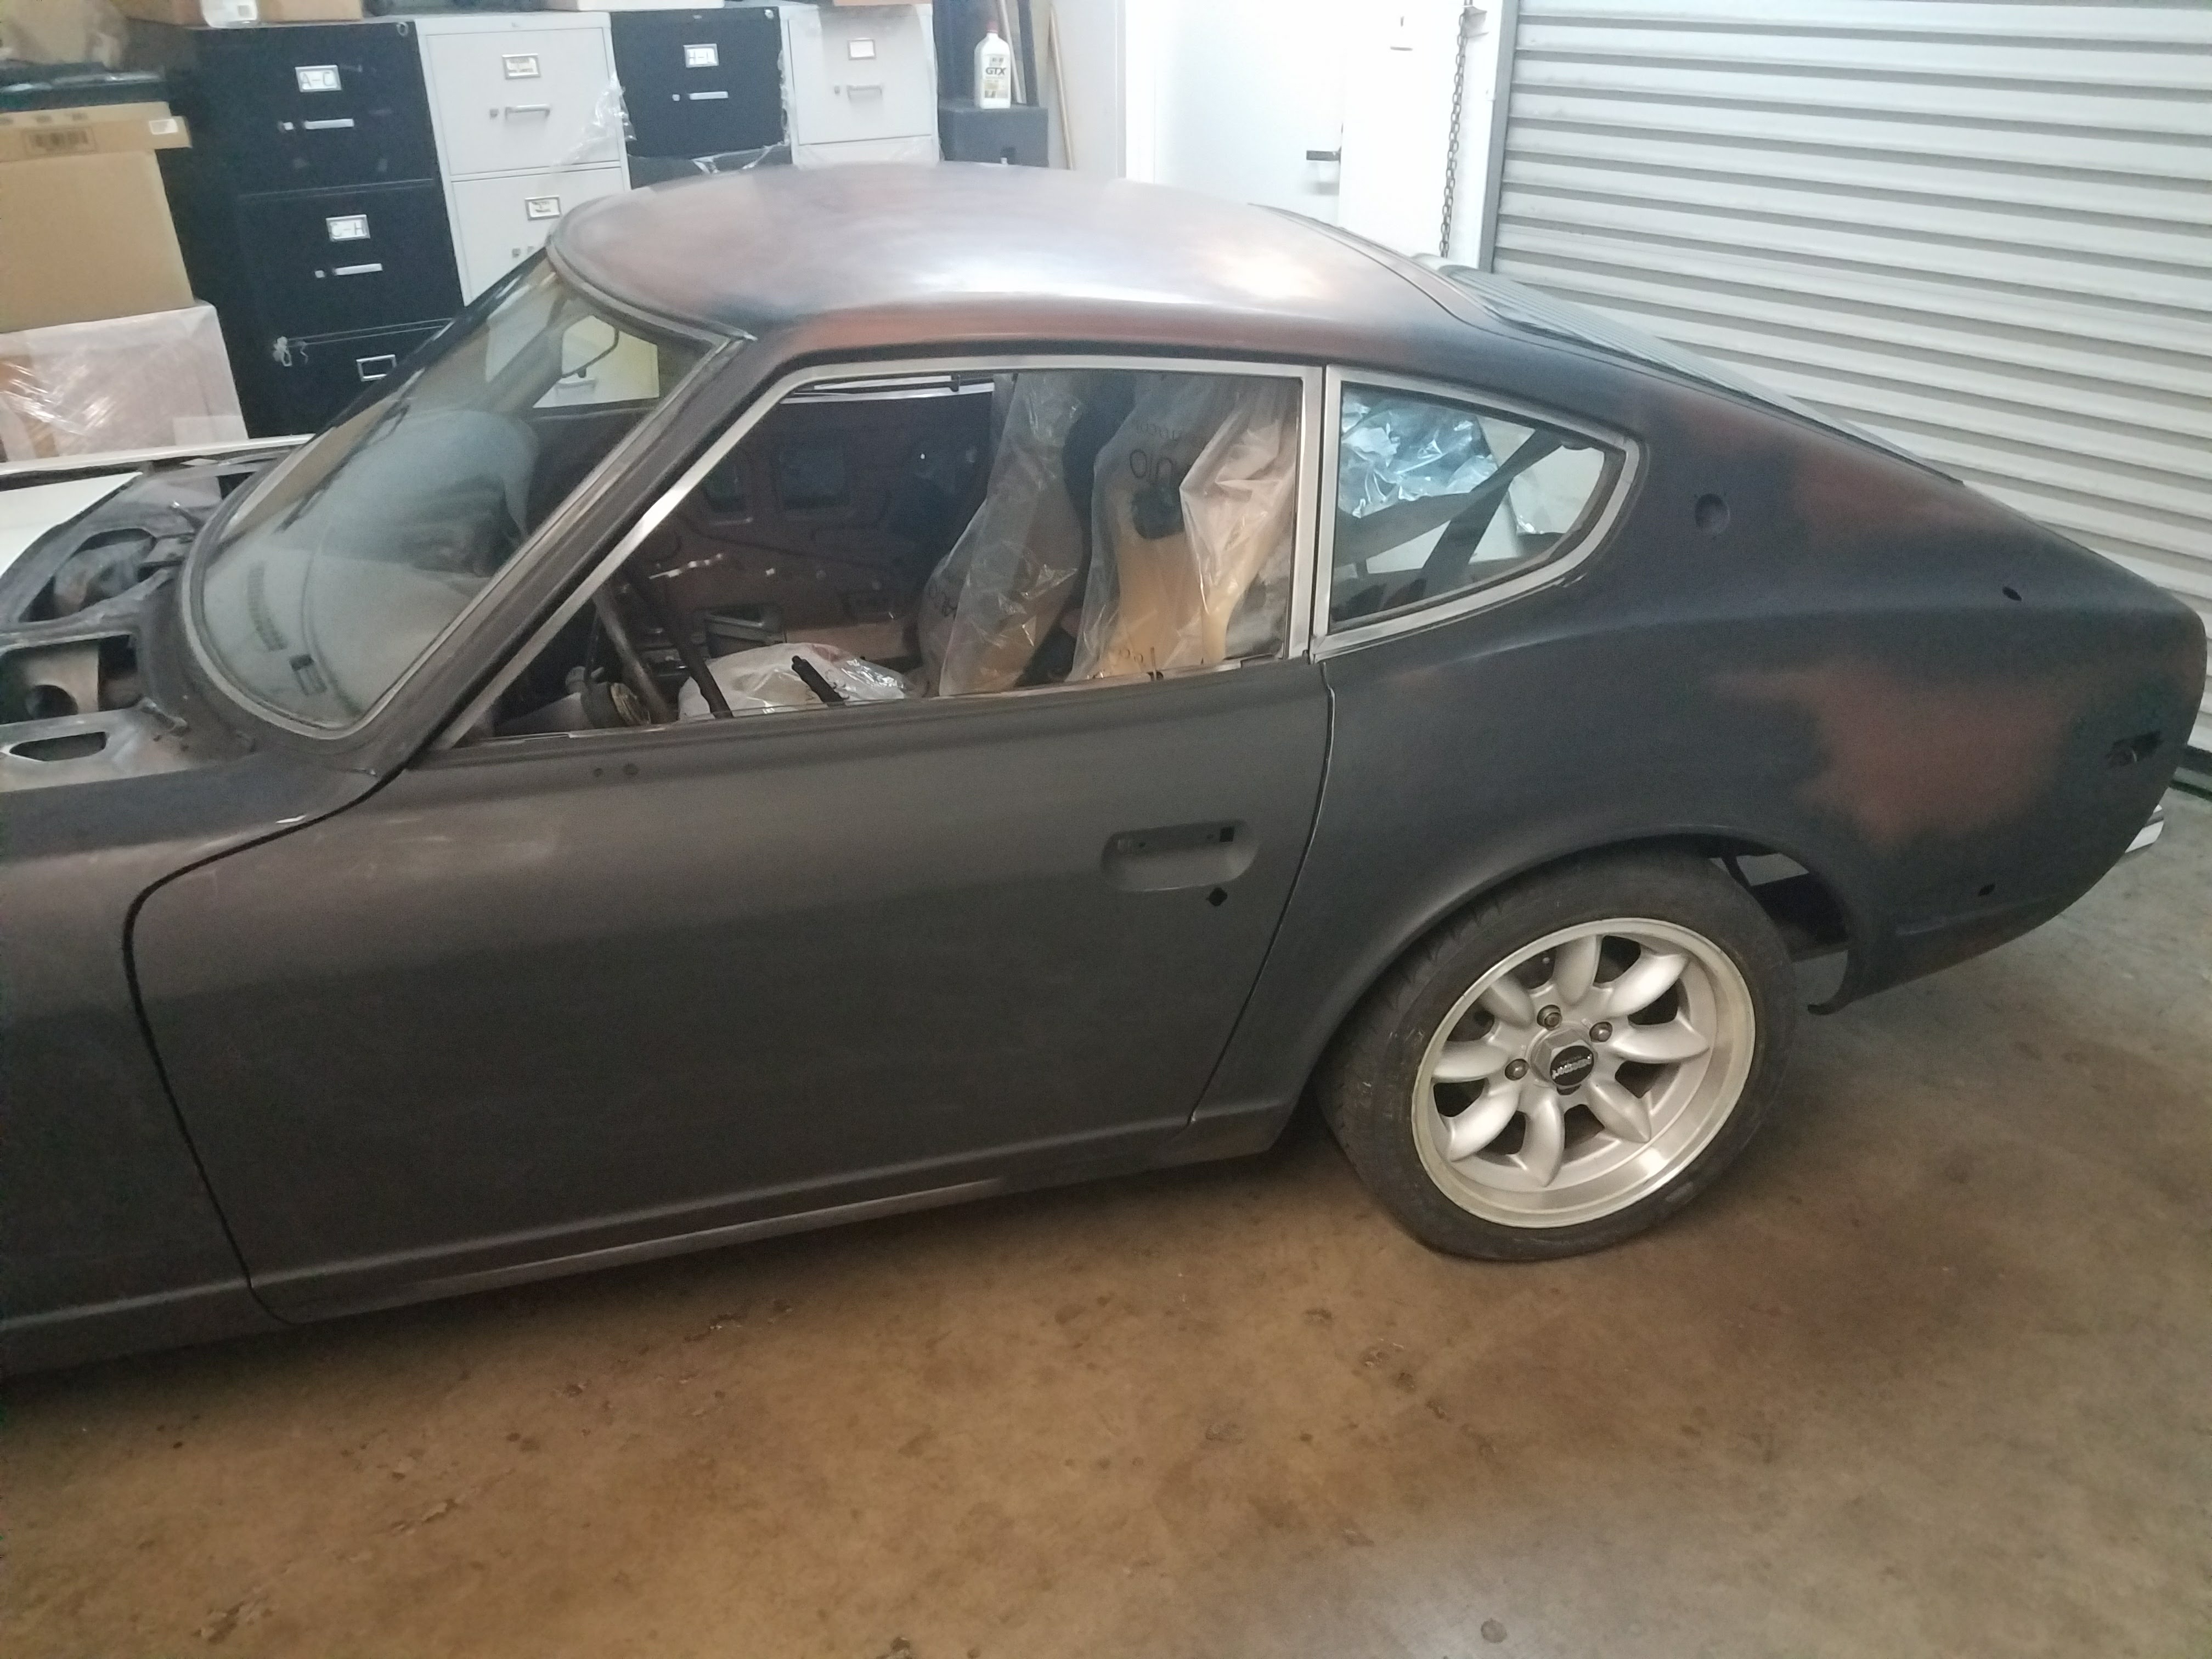
Hey Guys, I have been trying to figure out what I wanted to do for color uniformity on my datsun. I really wanted to get the car sand blasted and do a complete overhaul, but after swapping a l28et in the car, building and installing the megasquirt, and all the other tid bits... I was way over budget to say the least. To be cost effective I decided to do a vinyl wrap. 3m vinyl to do the whole car was only 500 bucks! The car itself was in no shape for vinyl. It had chips, dings, rust, you name it. I had to do all the body work to straighten it out. Here is some before pictures. The paint had to be sanded or removed to metal and bondo was applied. First time ever really doing body work and it looked OKAY. I did have a professional come and do the final things to the driver's side fender and door. Lots of chipping paint that needed to be sanded. After things were sanded and looked pretty good, spray can primer was sprayed on the trouble spots, then sanded, then black rustoleum, then sanded. Finally I wet sanded the car with 1000 grit and made sure all surfaces were smooth. Then the fun began. Vinyl took around 20 hours to finish in a weekend. This did not include the headlight buckets, turn signals, or cowling which I am still trying to figure out. The car being unibody caused issue. The rear bumper section is 1 piece which is then overlapped 1 inch by the quarter panel which is then overlapped by the roof. Knifeless tape was key to get smooth lines. The hood is harder then it looks because of the round center bubble. Really have to stretch and pull to get in on right. Also getting the vinyl to stick properly on the back required cleaning all edges and even applying loctite super glue.... I know not the right way, could use primer 94, but actually works! Just don't get that near any exterior surfaces or you will leave marks on the laid vinyl. Fenders are one of the easiest. Tucking around the wheel arch was a little tough. Make sure to clean these back areas so that no dirt is in between were you want the vinyl to stick on the inside. This is were I started to notice that my rusto paint would start to peel if we kept taking off and re-applying the vinyl. There are spots were you can see this for sure, but oh well.... it cost 500 dollars. Also you would get specs of shit for the same reason, small pieces of paint peeling up. Moral of the story. Only works on really good paint or paint that is strong against the body. Should have spent more time in that regard. Rear bumper area was pretty easy just a flat piece. The quarter panels were the most difficult. Trying to get around the rain gutter was a challenge. We accidentally cut the vinyl and had to pivot to a new plan regarding the roof. Paint was peeling up if we removed it so we went with what we got. If we were to peel it off... I would have to sand the whole quarter panel over again. Made it work, just needed to add an intermittent piece between the quarter panel and roof. Getting around the back taillight area was a little hard as you really need to stretch it. I assumed the inner edge would mostly be hidden by the taillight panel, but more is exposed then I thought. Might try to adjust this better. Roof and hatch were also pretty difficult. If you have old shitty gaskets around the glass. CHANGE THEM. Tucking underneath that shit would have been way harder than it already was. I got new rubber were needed and it was way worth it. If you mess up on a part like that... there goes 70 bucks in vinyl to redo it. Tucking worked best with knifeless tape in my opinion. Don't forget the sides of the windshield... I used a small inlay for that. Also the bottom area below the door is an inlay. Here is the vinyl result.... get it... vinyl result Might keep the windshield wiper area black... its scary when you see all the spots were it needs to be cut! Here is a picture of how we did the inlays from quarter panel to roof. It turned out pretty damn good if I say so myself. I have learned a lot about this process as I went because there is not too much info about unibody cars. I would say that this is a pretty difficult job and very tedious. Details are important, missing a cut or making a mistake can make it look bad. We had mistakes, bumps, paint chips you name it, but the point of this was to get the car looking good for a couple years for cheap until I am ready to get the car painted. What I would suggest if you want to do this... - Make everything really smooth. - If painting, take your time and get it to stick well. Paint peeling and sticking to the vinyl was the biggest issue I experienced. - Have a friend. My dad worked the whole time with me.... I can't thank him enough. I did a trial hood before all this on my own and it took 2 times as long and looked way worse. - Plan out all the cuts before you apply. Thought I would share my experience. If you have any questions about it let me know. I hope to reassemble the car in the next 2 weeks.
- 18 replies
-
- 2
-

-
- vinyl wrap
- wrap
- (and 2 more)
-
Hi I am wondering if anyone would be willing to do a purchase inspection, or know someone that does them in Bakersfield. Also I would like to know the average cost of a PPI. Thanks
-
Hey guys. So Ive previously done a L28et swap previously back in the day and car ran fine. Just did another 81 L28et swap into my series one 240z and got it all bolted up and cranking. Now, on the donor car the car started up and ran up and down the block before I took it apart( 2 years ago) so things seemed all functional at least back in the day. Issue I'm running into is the car won't come on. And when it does start briefly, it dies within 3 seconds. I Bought a new fpr and verified that there is fuel and pressure (36psi) while car is off and in the ON position. There is verified spark in all 6 sparkplug wires. I've got two separate grounds on the engine so engine and car is well grounded. I also took the fuel rail off and verified that while cranking the Injectors are indeed spraying and there isn't infection leaks. Below is a YouTube video link I uploaded for your viewing pleasure haha. The ECU light seems to come on then shut off after cranking and sometimes intermittently the Injectors will stay on buzzing even if I stopped cranking. Anyway, any idea what's going on? https://youtu.be/p-DhNG0mq7E Your help is Much appreciated!
-
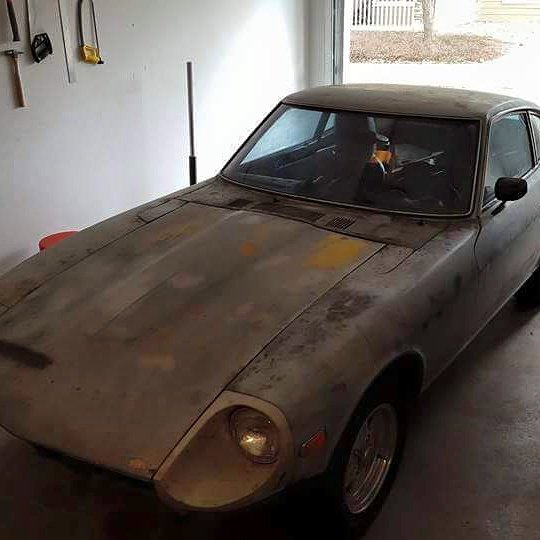
After finally taking delivery of my 1972 240z from America, it's now appropriate to start a build thread! After being contacted by a fellow forum member with an unfinished project on his hands, money was sent over the interwebs and a few months later, the car arrived in the UK ready for collection. The car was a half finished RB26 swapped top end track car. It stood with the long block sat in the car, and a full Arizona Z Car track package installed. The underside of the car had been shotblasted & a half cage welded in. Most Z parts were included, however would need restoring/replacnig and generally rebuilding. The car from the seller Unknowing what to expect, we turned up with a trailer and loaded her on. The car was pretty much as expected, other than the weather had taken its toll and unforunately most untreated surfaces had succumed to quite a bit of surface rust. It looked a bit sorry for itself, but a quick test with some scotchbright does indicate its very light surface rust only and should come off without too much effort. There was also no steering rack connected which made loading the interesting! The bonnet (hood), windscreen (windshield) and boot lid (trunk/tail gate?) were all strapped down with duct tape which we didn't trust to hold on the motorway. This was not your knock-off chinese crap, obviously soviet-spec adhesives were used in this stuff as it kindly ripped off a majority of the paint when removed! Tucked up in the garage after a long day The intent for this car will be a track/race orientated build whilst retaining road legal status. Wish me luck
-
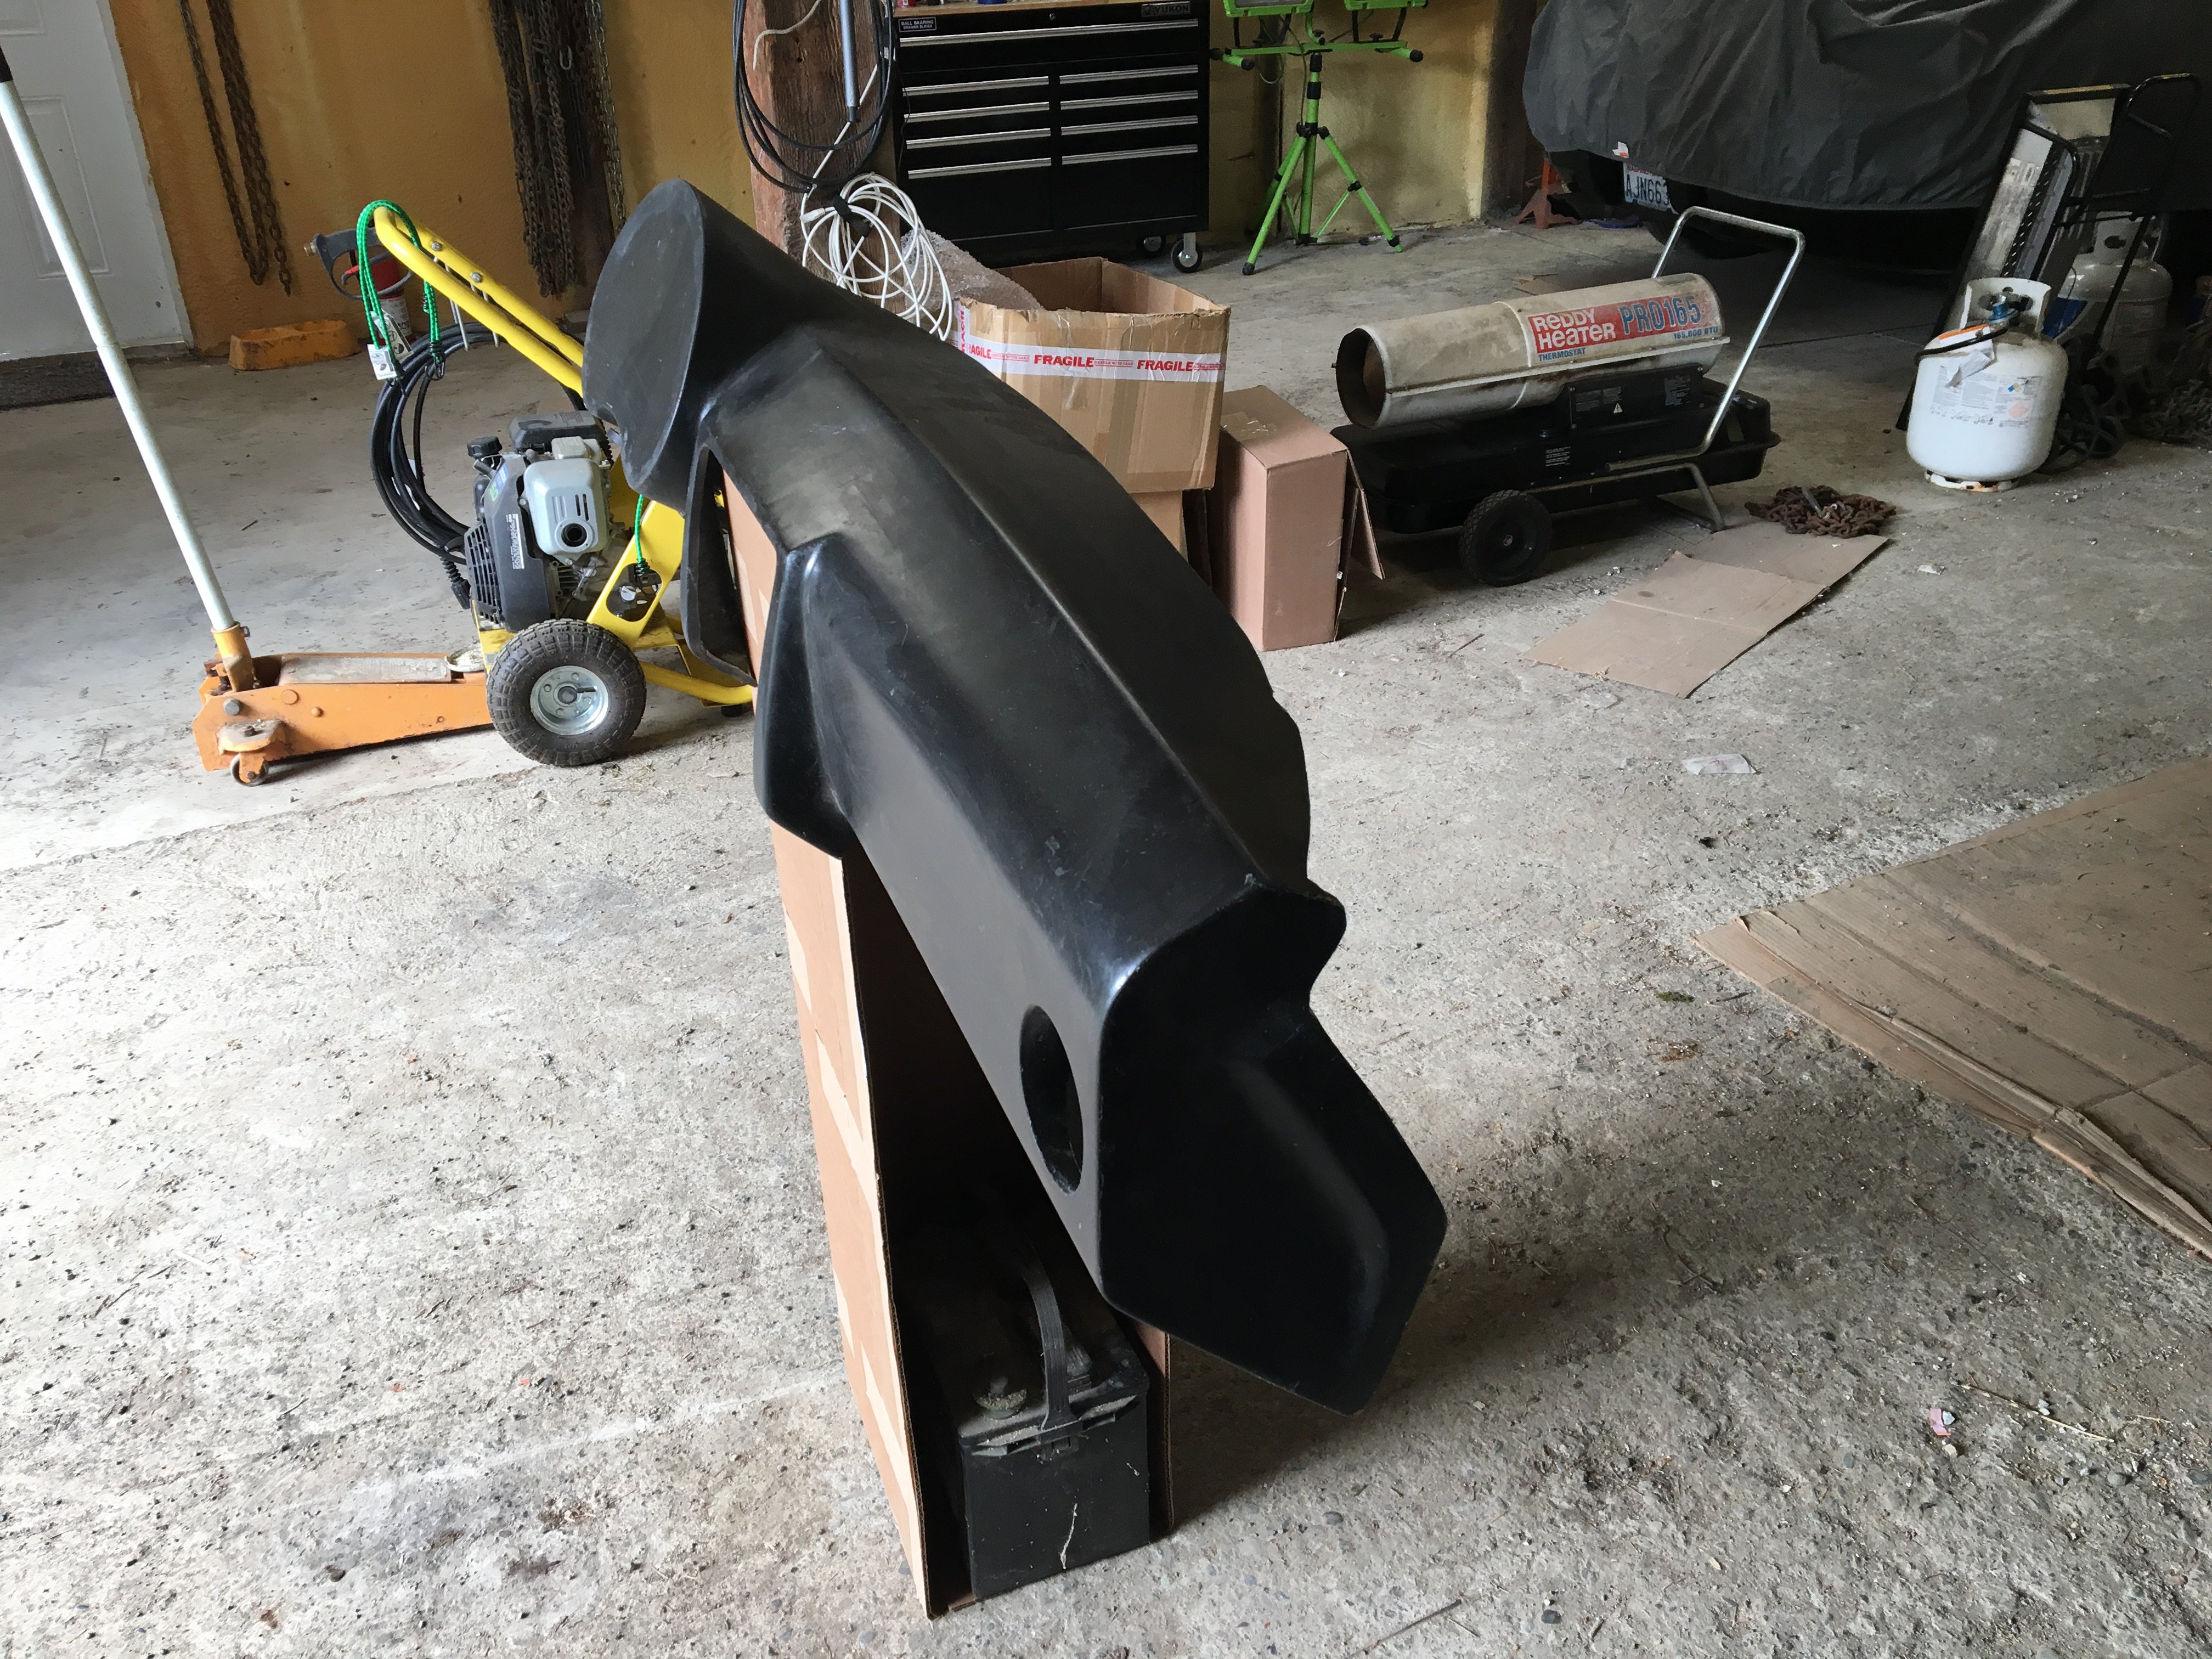
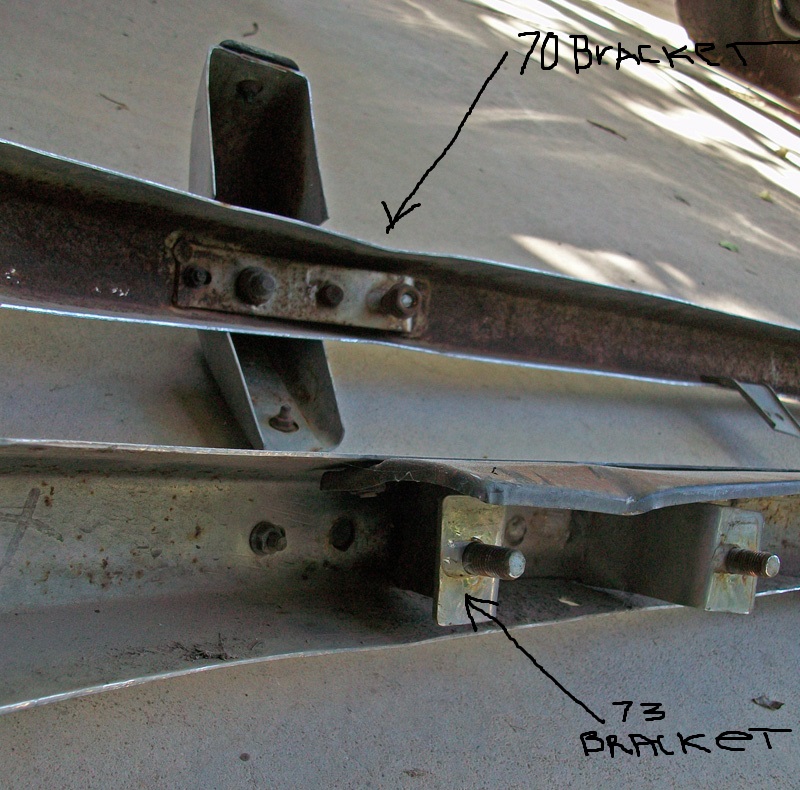
I have a 1970 240z. I aquired a 1973 240z front bumper that has a different setup/bracket. I do not have the arm/rod brackets for the 73 or the "L" brackets for the 70. What do i need to install it on the 70 z? If i buy the early L brackets will they work or do i need to remove the U shape bracket (that looks like the rear) that is bolted inside the bumper and utilize or drill a new hole on the bumper? If the L bracket will work, i am willing to buy them, but didnt want to until i consulted with someone who is more knowlegeable on the issue. Picture: Early on top, 73 on bottom. I have the bottom and the left bolt seems to line up and so does the hole on the bumper behind the bracket stud according to the picture but i have not done any measuring. NOTE: I will also move the guard to a more outer position since the early z's had the guard next to the light bucket and the 73's had them about 4 inches on each side closer to center. In addition, i will have to find an overider that belongs to the early z. the 73 is a shorter bar and will not work.
-
Wanted: 240z, 260z, or early model 280z. I need one with all glass and a body with no major damage. Rolling body with a dashboard is a big plus. Im located near sumter sc, and can have family look at cars near louisville ky.my max price range is 8k.
-
Hey everyone, Any chance of finding a RHD padel box (actually i need 5!) For a 1973 240Z ?
-
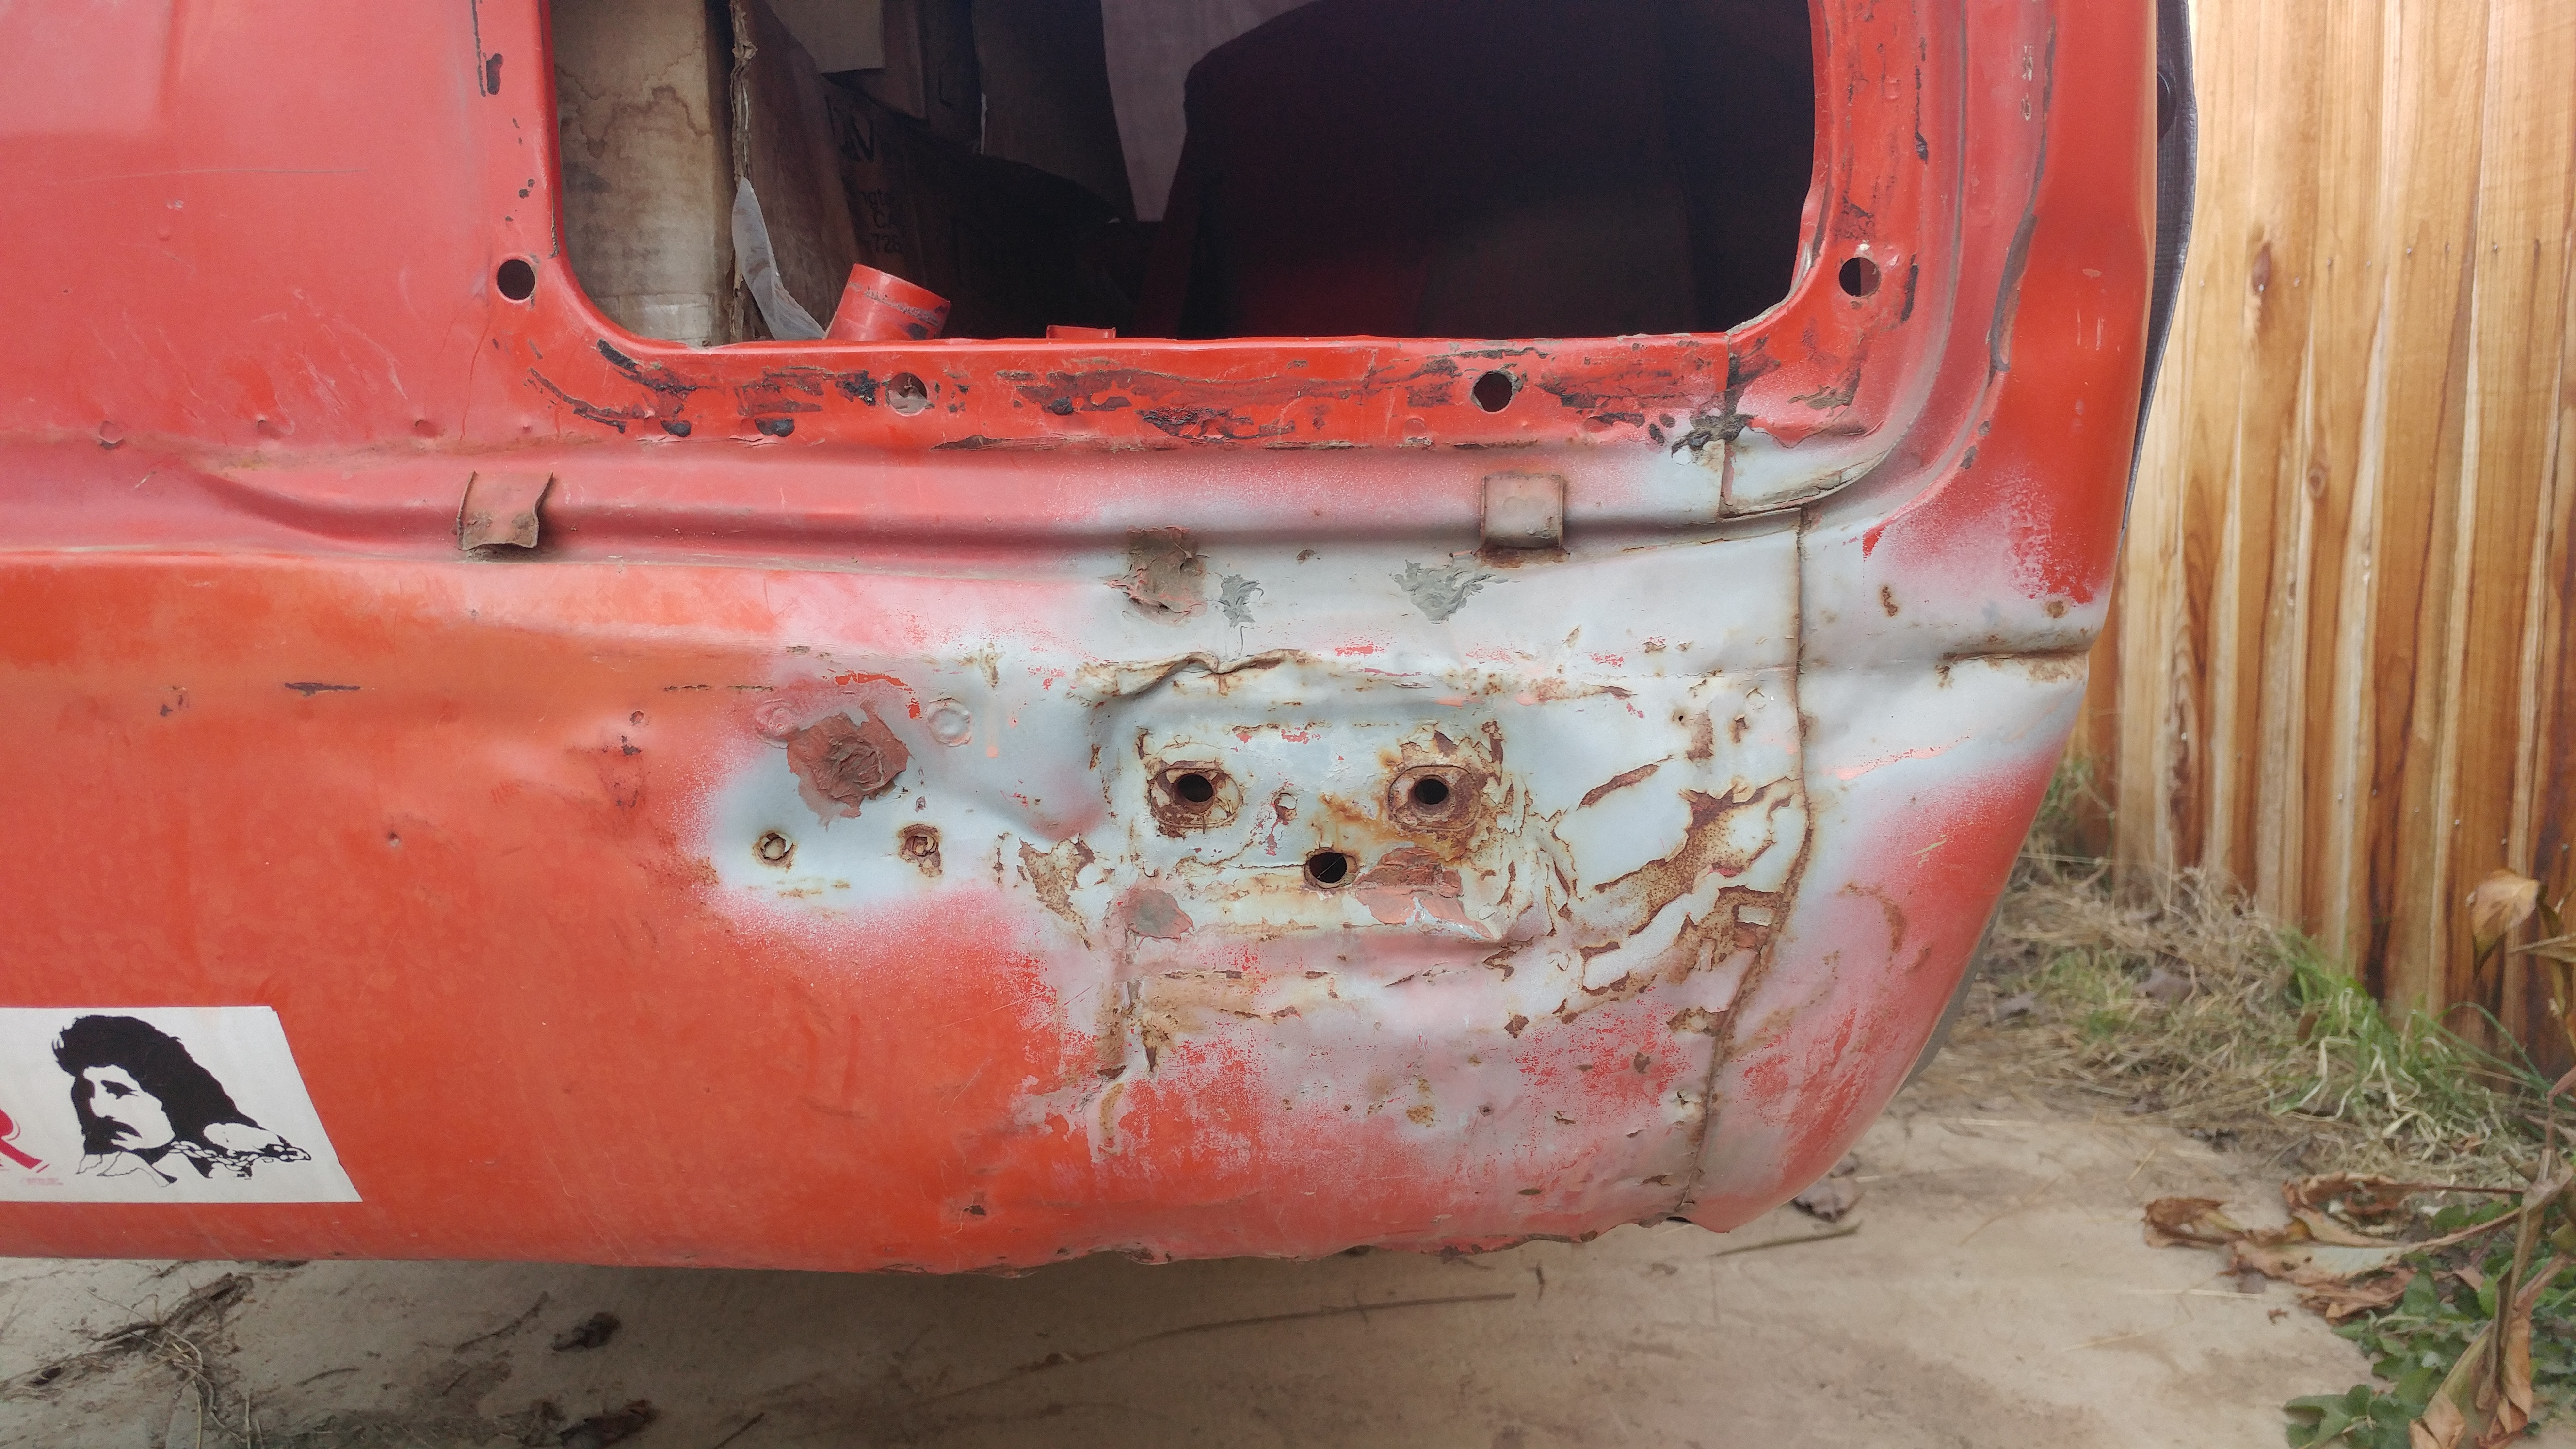
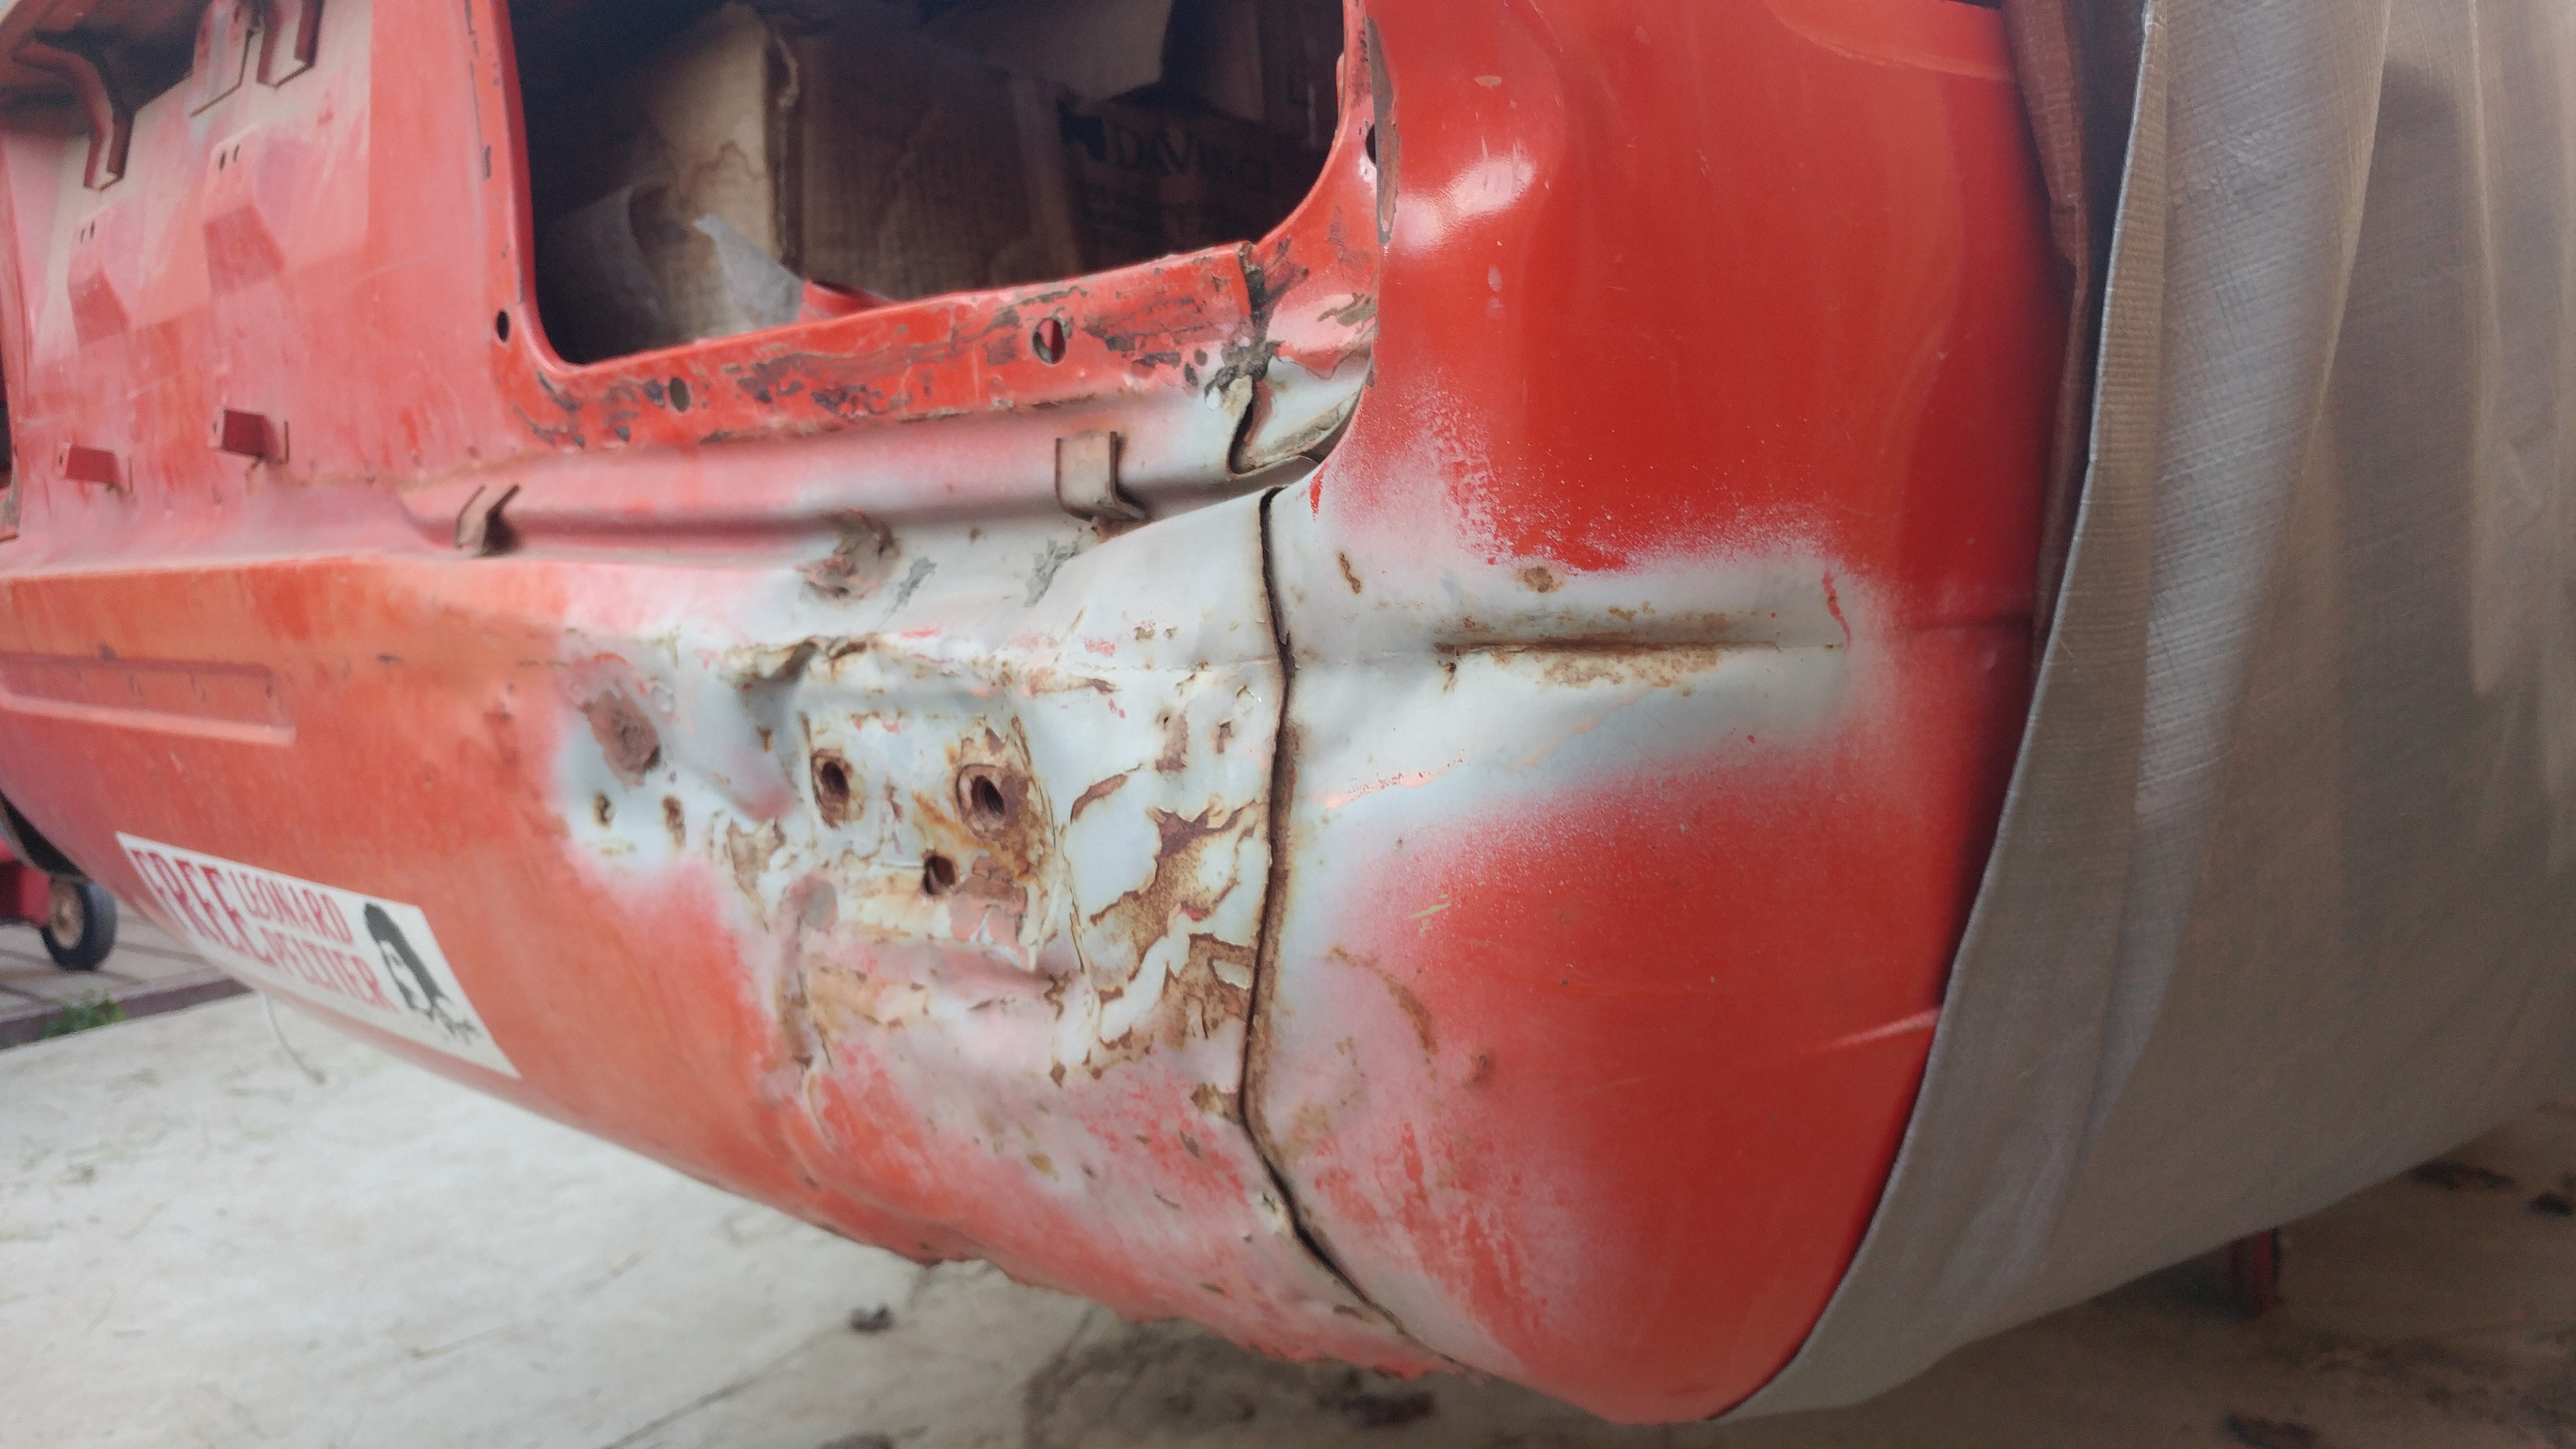
Anybody out there have this piece or a parts car they are willing to hack up? I need the lower right corner of the bumper/rear valance area from just under the right taillight with a bit of the rear right quarter panel. My car is a '73 but anything '70-'78 would probably work just fine. See pics for damaged area and what I would like to replace. I'm located in central California near Fresno. Hit me up with a price + shipping. Thanks and happy Z-ing.
-
 I've embarked on the installation of a Vintage Air evaporator, using John's Cars compressor and mounting, and a stock copper condenser out of a 280Z. I like the condenser because it is a perfect fit.. bolts in with existing bolt holes and the high and low pressure line align with the radiator mount. This unit has been stored for a number of years with duct tape covering the orifices of both lines. The lines appear to be 37 degree cone and very similar to either jic or an fittings. Does any know what standard fitting was used on 280z condensers? I need to match my condenser (37 degree or so cone) to the"O" ring fittings of the compressor and evaporator unit. Does anyone know of any adapter that might make the transference. Finally, local a/c guys advise me to ditch the 280Z condenser in favor of a newer after market AL unit with "O" ringed fittings. The reasons they give are: 1. the high and low pressure fitting, being a flare of some degree, are inadequate and will leak refrigerant; that the copper construction does not transfer heat as well as AL, and that my 280Z condenser is contaminated by the oil that was used in the '70s and can not be adequately cleaned or used with the current refrigerants. So can anyone tell me: 1. What standard are my condenser's fittings? Are they JIC? 2. Are the newer refrigerants (134a ?) incompatible with flare fittings? 3. Is oil contamination a real problem or is it something that can be cleaned up by any radiator shop? I've read Tony's discussion of CU versus AL and condenser sizing, so I don't see the construction or size to be a problem. thanks,
 -
Looking for a clutch pedal for an s30. I think they are all the same. Thank you!
-
Anyone in DFW know where I can find a driver side door for a 71 240z? I'm not finding any luck on craigslist and the original Z junk yard seems to no longer have Z's?
-
Hello fellow HybridZers, I'm looking for a whale tail for the S30s, hopefully in better condition than not. Willing to pay shipping from anywhere in the US, I am located in 92691. My phone is the best way to reach me, text or call. 949-939-7573. Thank you for your help in advance!
-
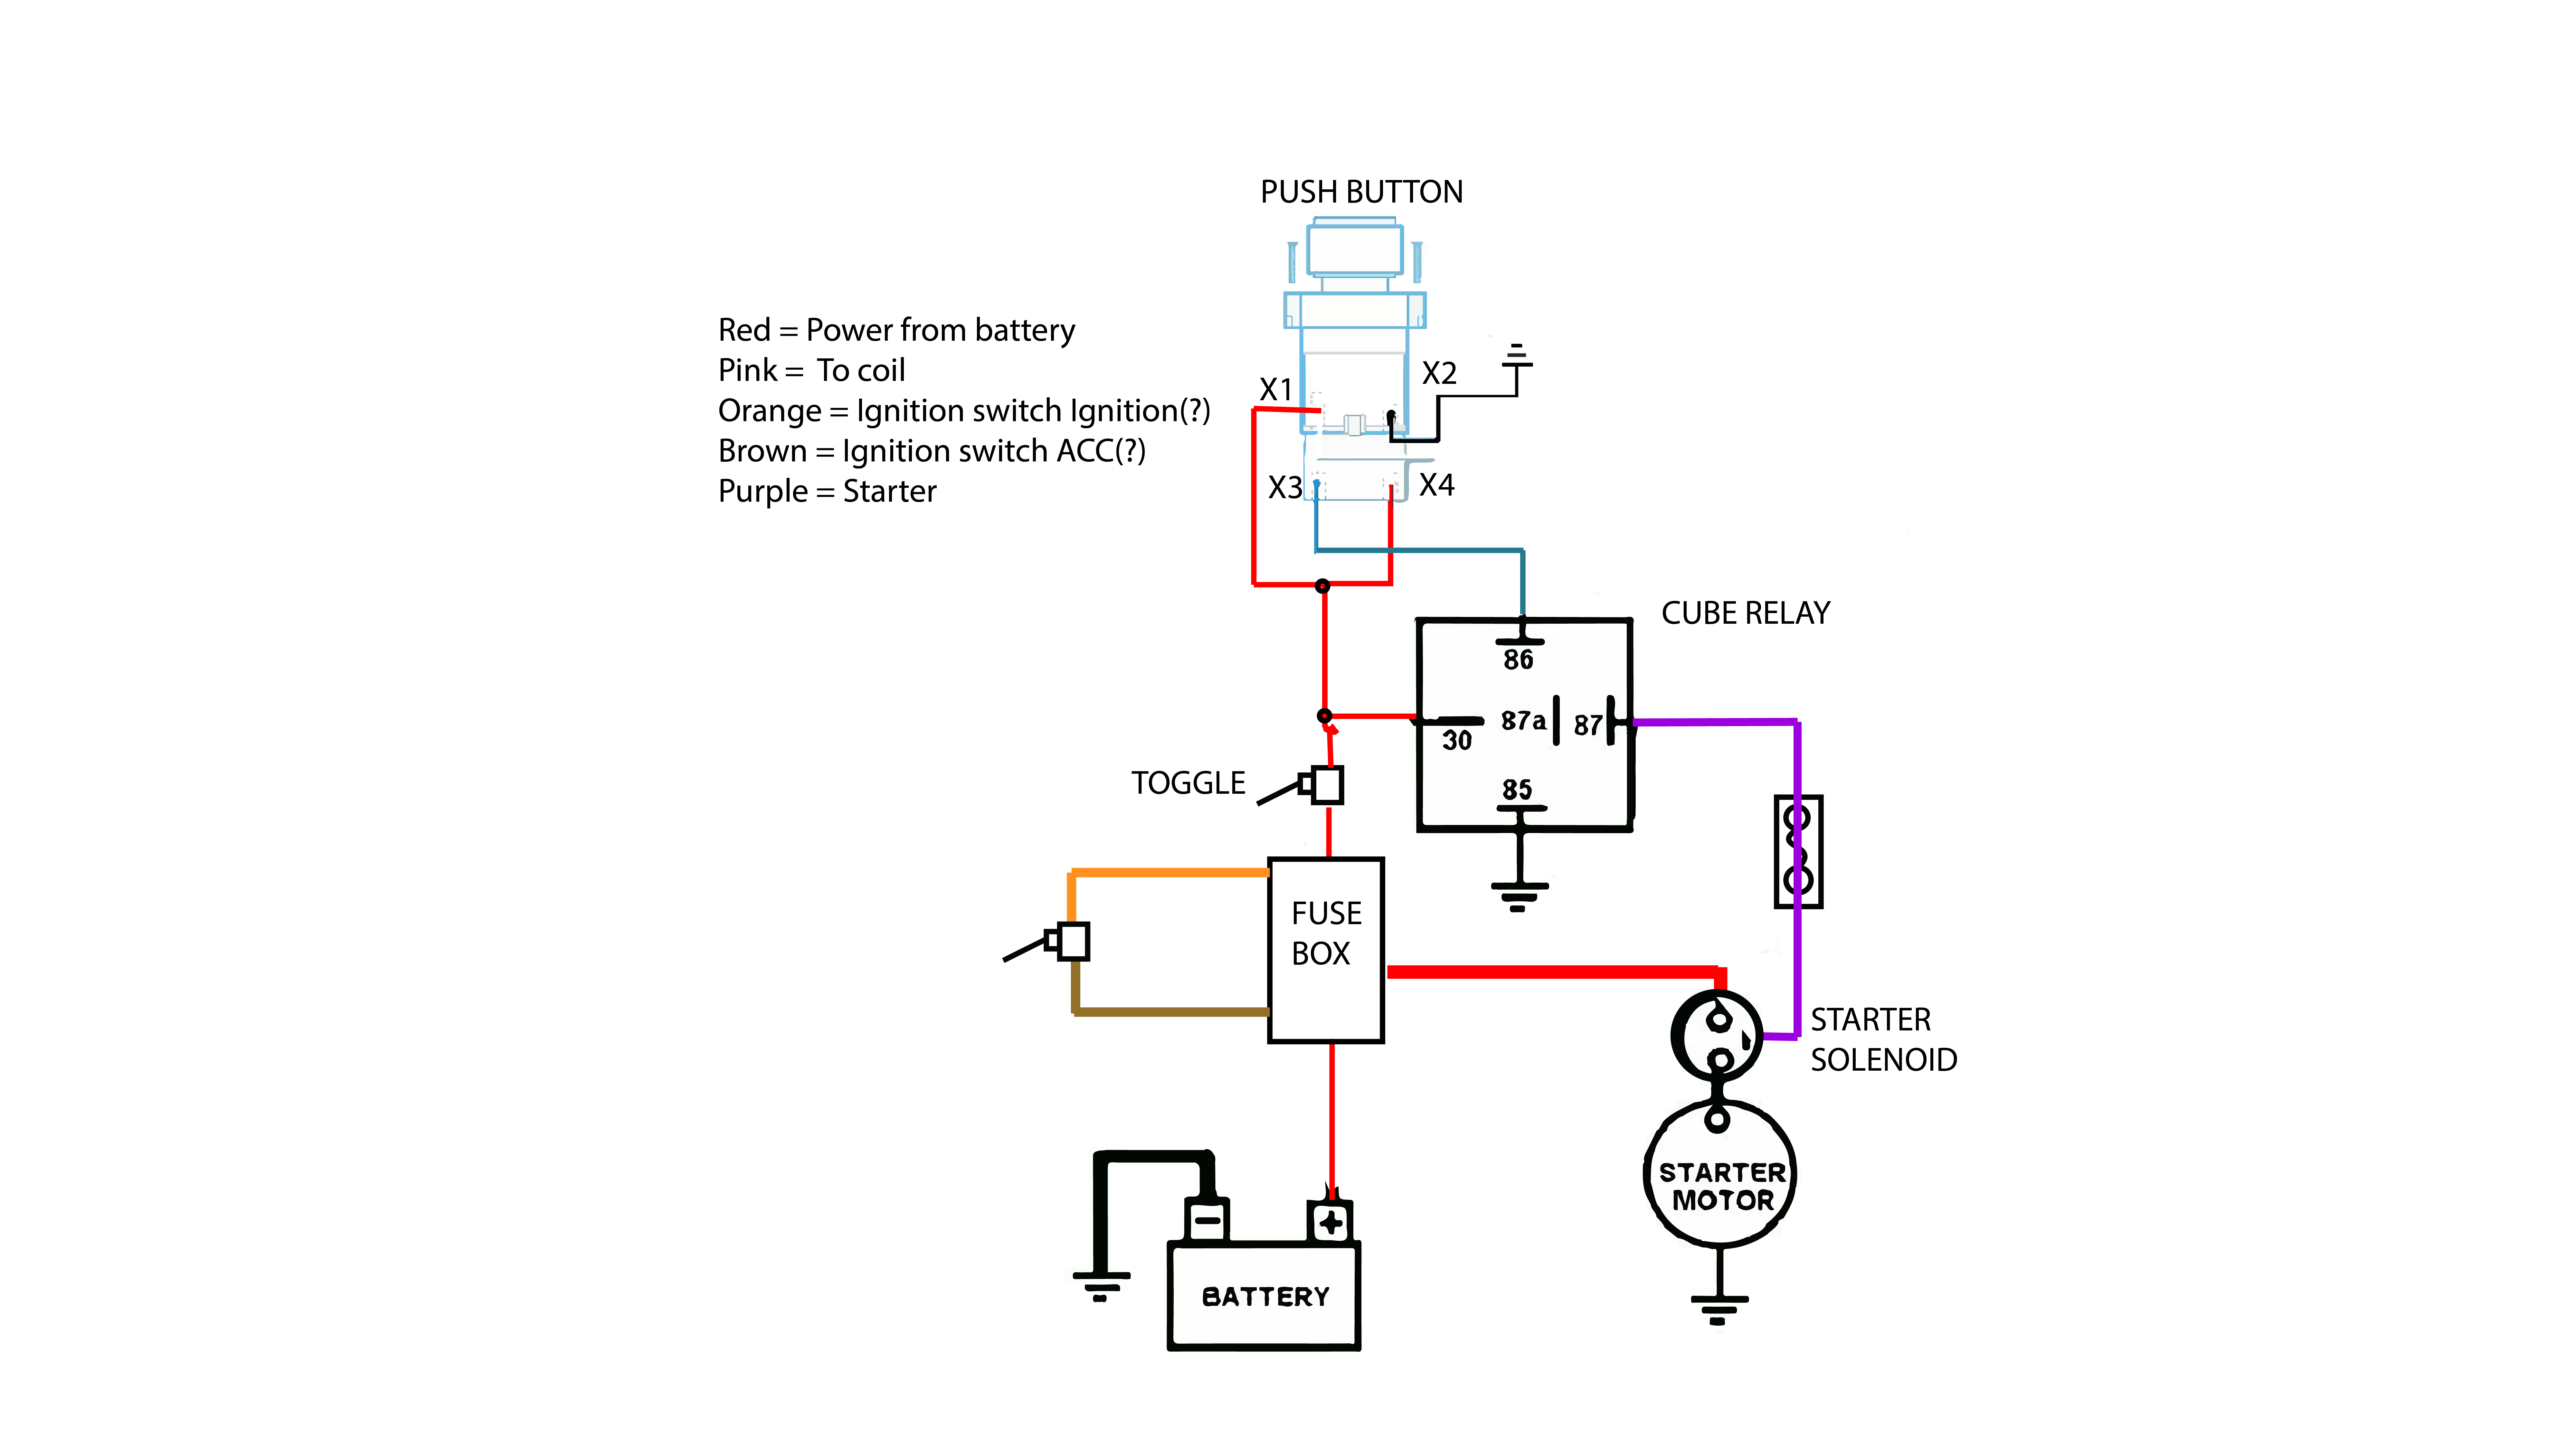
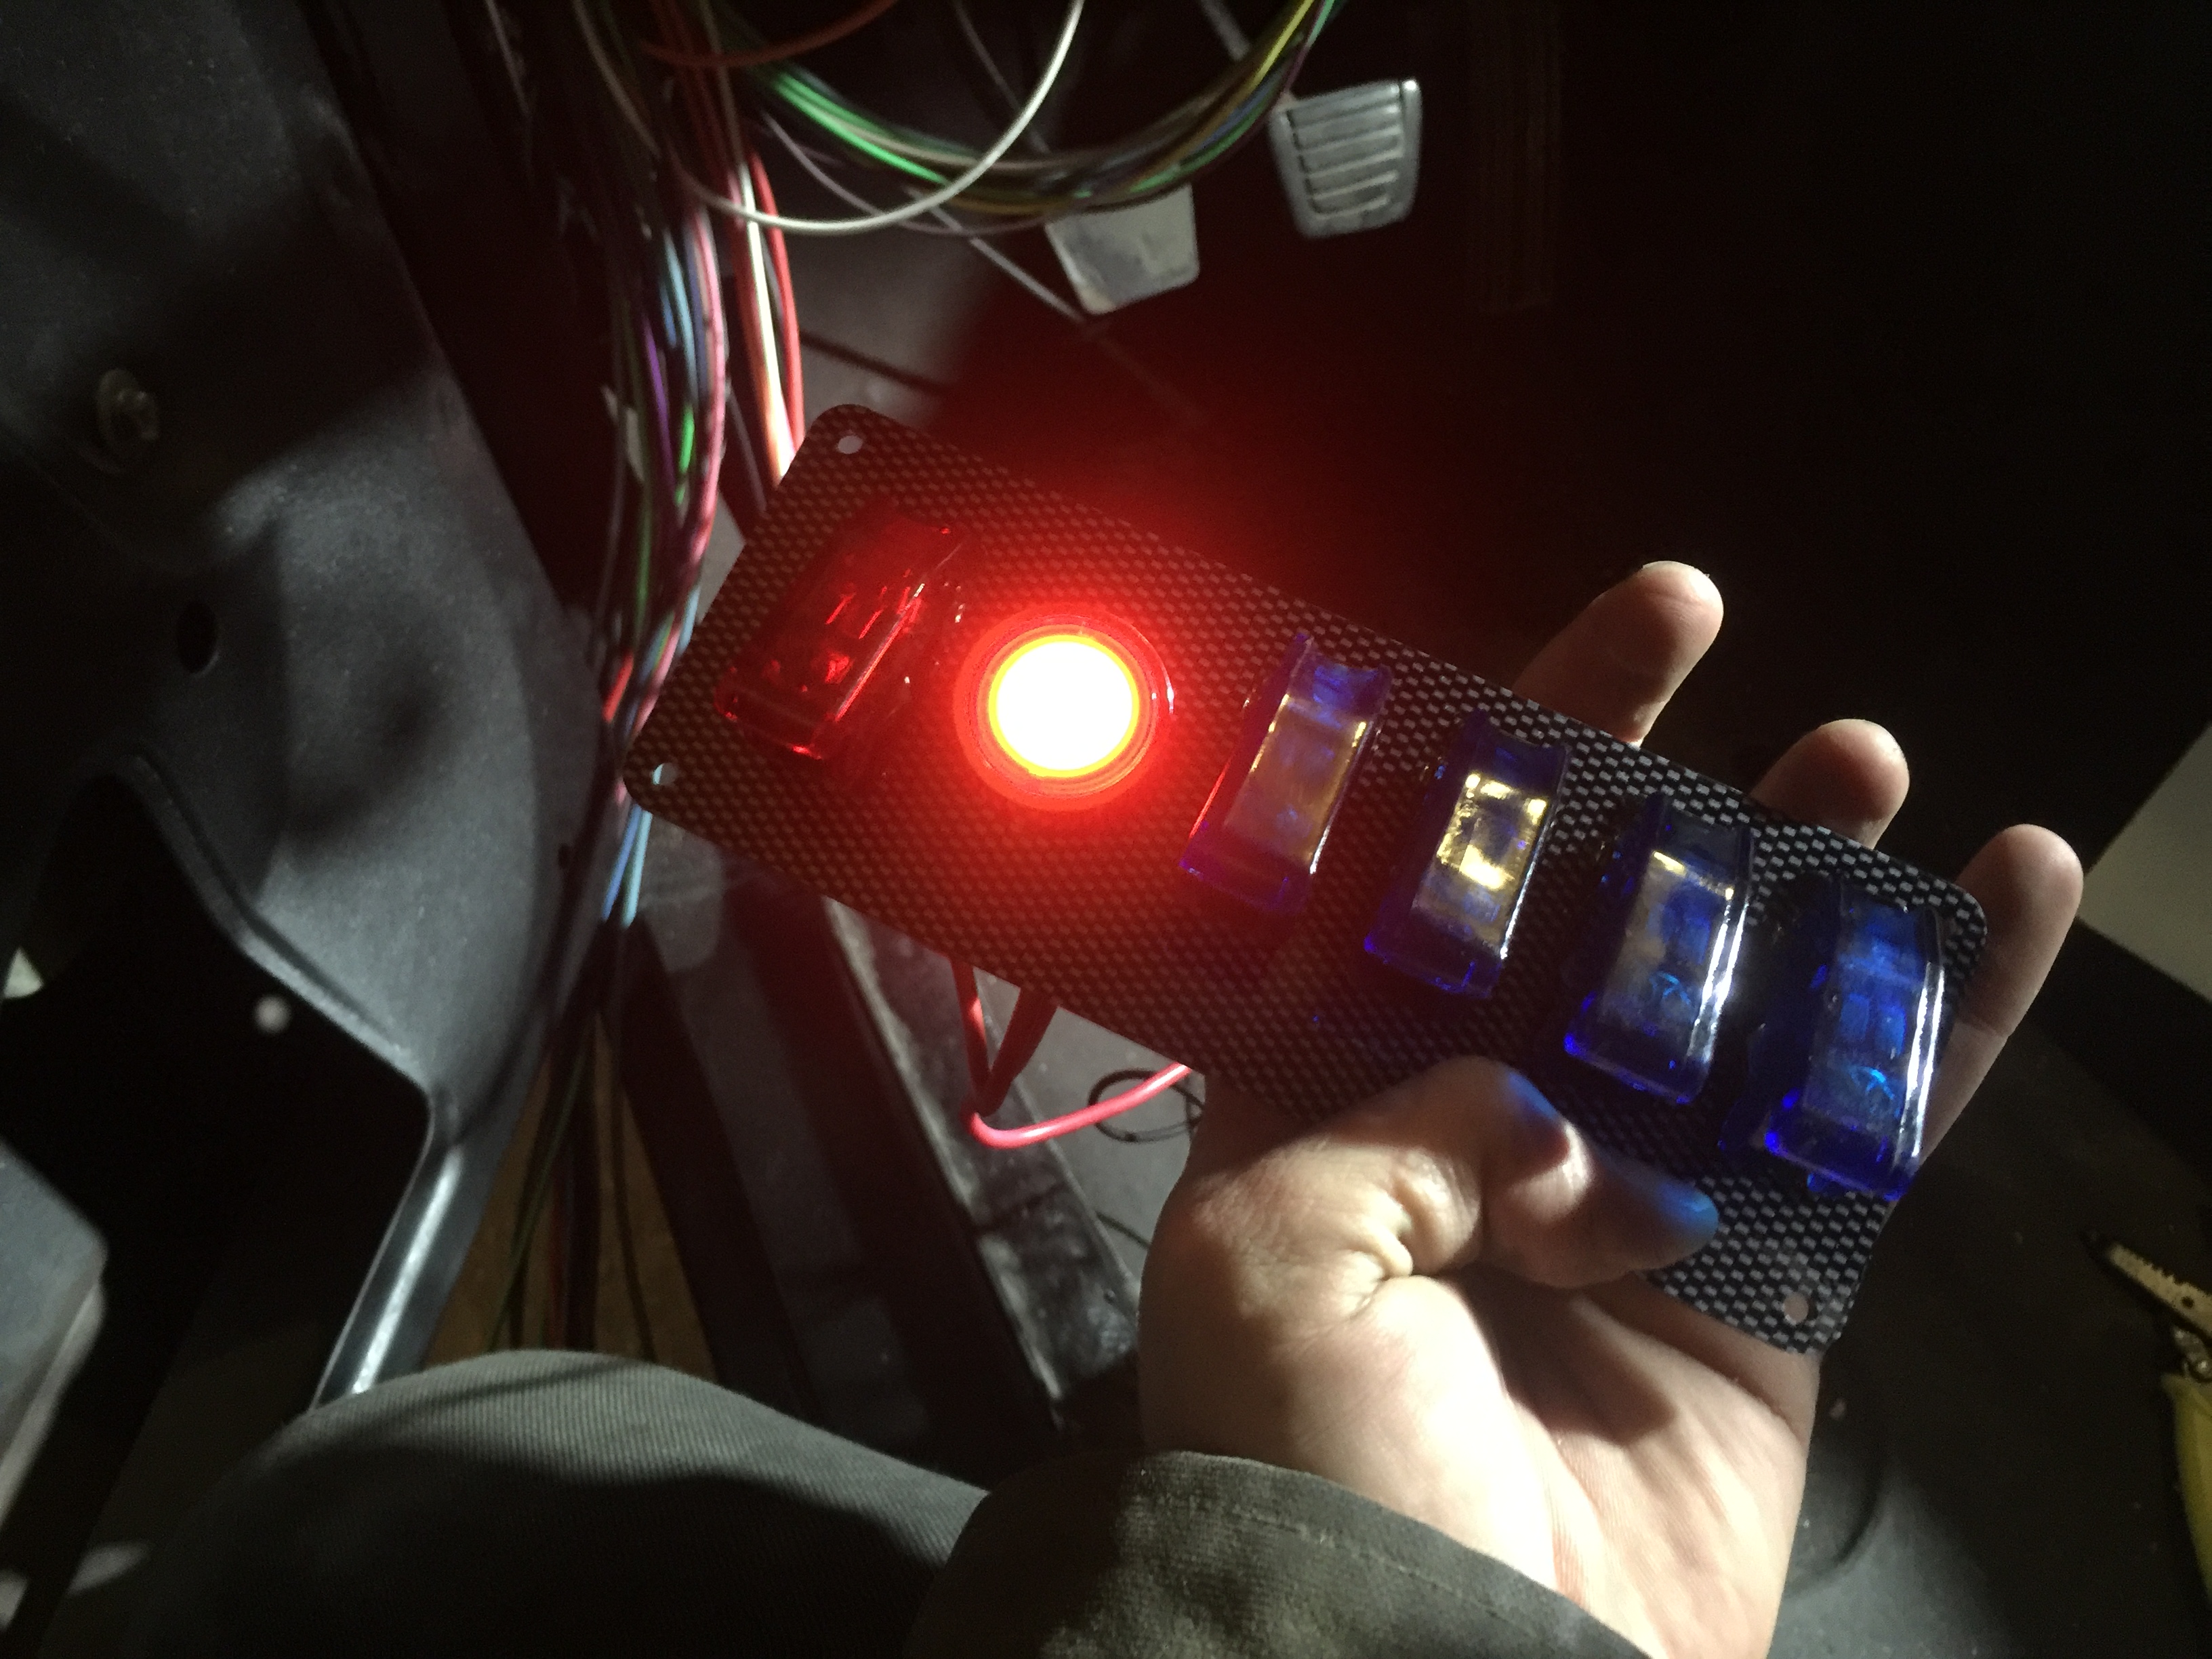
 Hi all, So I recently bought a toggle panel/push button start combo (here's the link: https://www.amazon.com/gp/product/B01JYRFLHG/ref=oh_aui_detailpage_o00_s00?ie=UTF8&psc=1). Pretty good build quality for the price, but I am rather uneducated when it comes to wiring. My goal is to be able to flip the first red switch and have that be my ACC power switch, then push the start button and off I go. I ripped out the old harness entirely and have rewired the car with an EZ wiring 21 circuit kit. Currently, It's getting power to the button but it's not cranking over anything. Also, when I turn the ACC switch the power goes through to the button, but even when I turn off the switch the current continues to flow through, I'm assuming the relay is set up incorrectly. After having that problem I did some research and drew up this diagram of what I think would be what I want, but in the diagram, I have the ACC toggle on its own, whereas I want it to be in line with the power to the button if possible. The Toggles are 3 prong units, so I think it's possible? I am hoping somebody can look this over and give me some practical advice and tell me if I'm close, and if not, what I need to change up! Thanks in advance. Here are the photos/