Search the Community
Showing results for tags 'ls1'.
-
What's up everyone, I am going to be swapping a LS1 engine along with a tr6060 transmission into my 1975 280Z. This is my first time doing a full engine swap, so it should be a fun time (hopefully). I'll be posting progress pics as I go along with the project. My plan is to have the car running by this summer of 2023. It's currently April 26 soo no pressure lol. I hope this thread can be another resource to anyone doing a similar swap. I plan on being as thorough as I possibly can!

-
Hello everybody I am currently swapping a 5.3 with a t56 into my ‘78 280z. This is my first engine swap I’ve ever done which means I’m learning as I go. I will be running a Holley terminator computer but I am now wondering how much of the old harness I can take out of the car. I plan on running speed hut gauges later down the line but my main focus is making sure my headlights, turn signals, and brake lights are working properly. I still want everything to work with the steering column but if there’s anything I’m missing please let me know.
-
Was able to attend a local roll race event. Here are a couple of passes of my ls7 280z!!! Enjoy!!! https://www.youtube.com/watch?v=IkqF5j8-Kjs https://www.youtube.com/watch?v=xMkUFN4t0ms
-
Hi all, I am almost ready to start up the LS1 in my 280z for the first time but I need exhaust headers first. I used the mounting kit from JCI but they are out of headers right now and it could be a month until they build some more. I know this is a long shot but does anyone have a pair of JCI exhaust headers they would like to sell? Thanks!
-
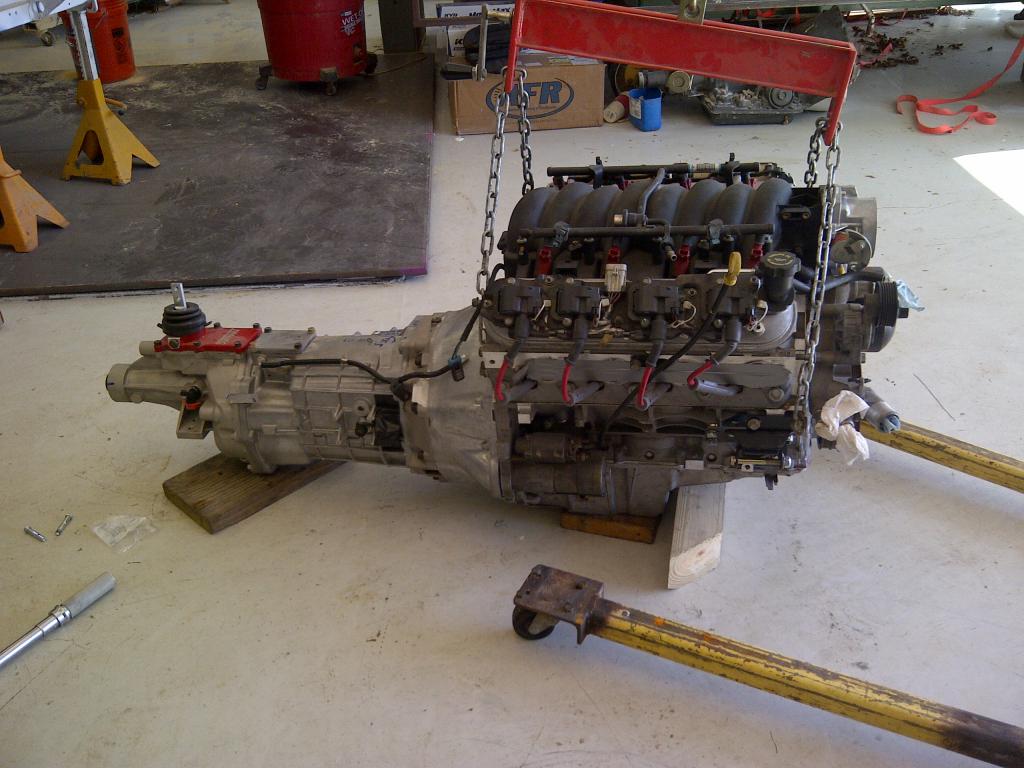
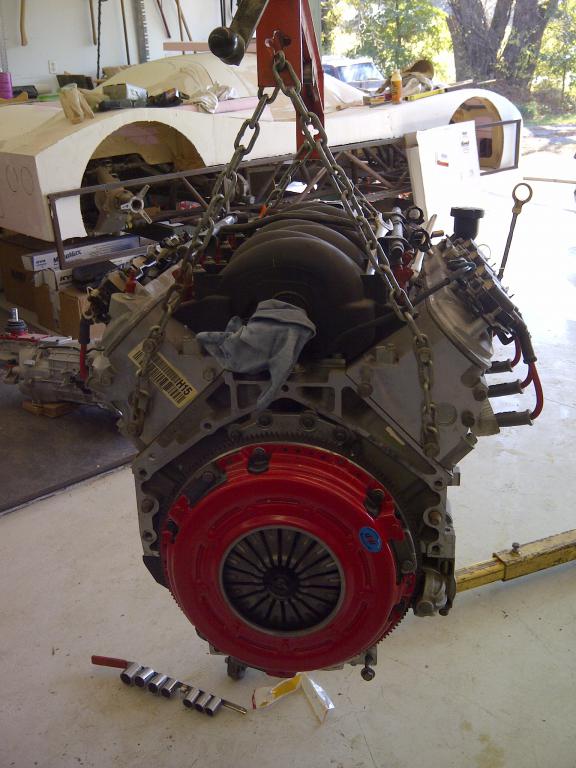
Hi all I've been working on this build for about a year now. This is my first build and I'm tackling it in my apartment one car garage. I figure it's about time I start documenting my build on here but there is quite a bit to catch up on so I'll just dive right in! 1974 Datsun 260z Running a 5.7 Alum Block Ls1 out of an 02 Camaro Fast Wilson intake Clevite rod bearings Total Seal piston rings Ls9 Cam Arp head studs Mcleod clutch (ARP hardware) T56 out of a 99 Camaro These are the upgrades I currently have. Much more to come and I'll do my best to update in real time. Here are some photos of the condition I purchased the car in.
-
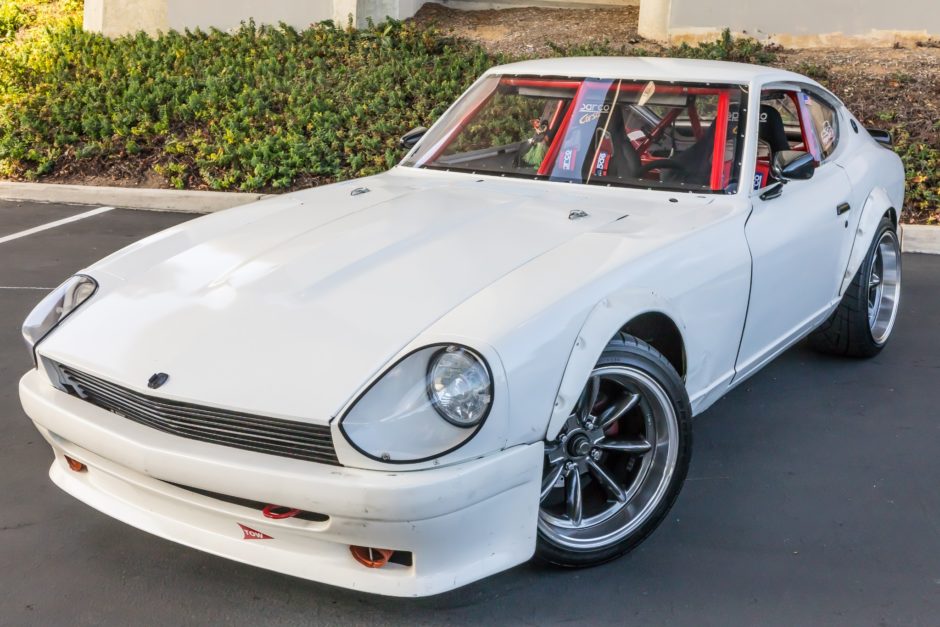
Selling my 1973 Datsun 240z on Bring A Trailer. https://bringatrailer.com/listing/1973-datsun-240z-43/ LS1 engine, T-56 transmission Exterior: White 2,400 miles since rebuild Located in San Diego, CA More details on bring a trailer in link above. Contact: John DM for contact info and questions.
-
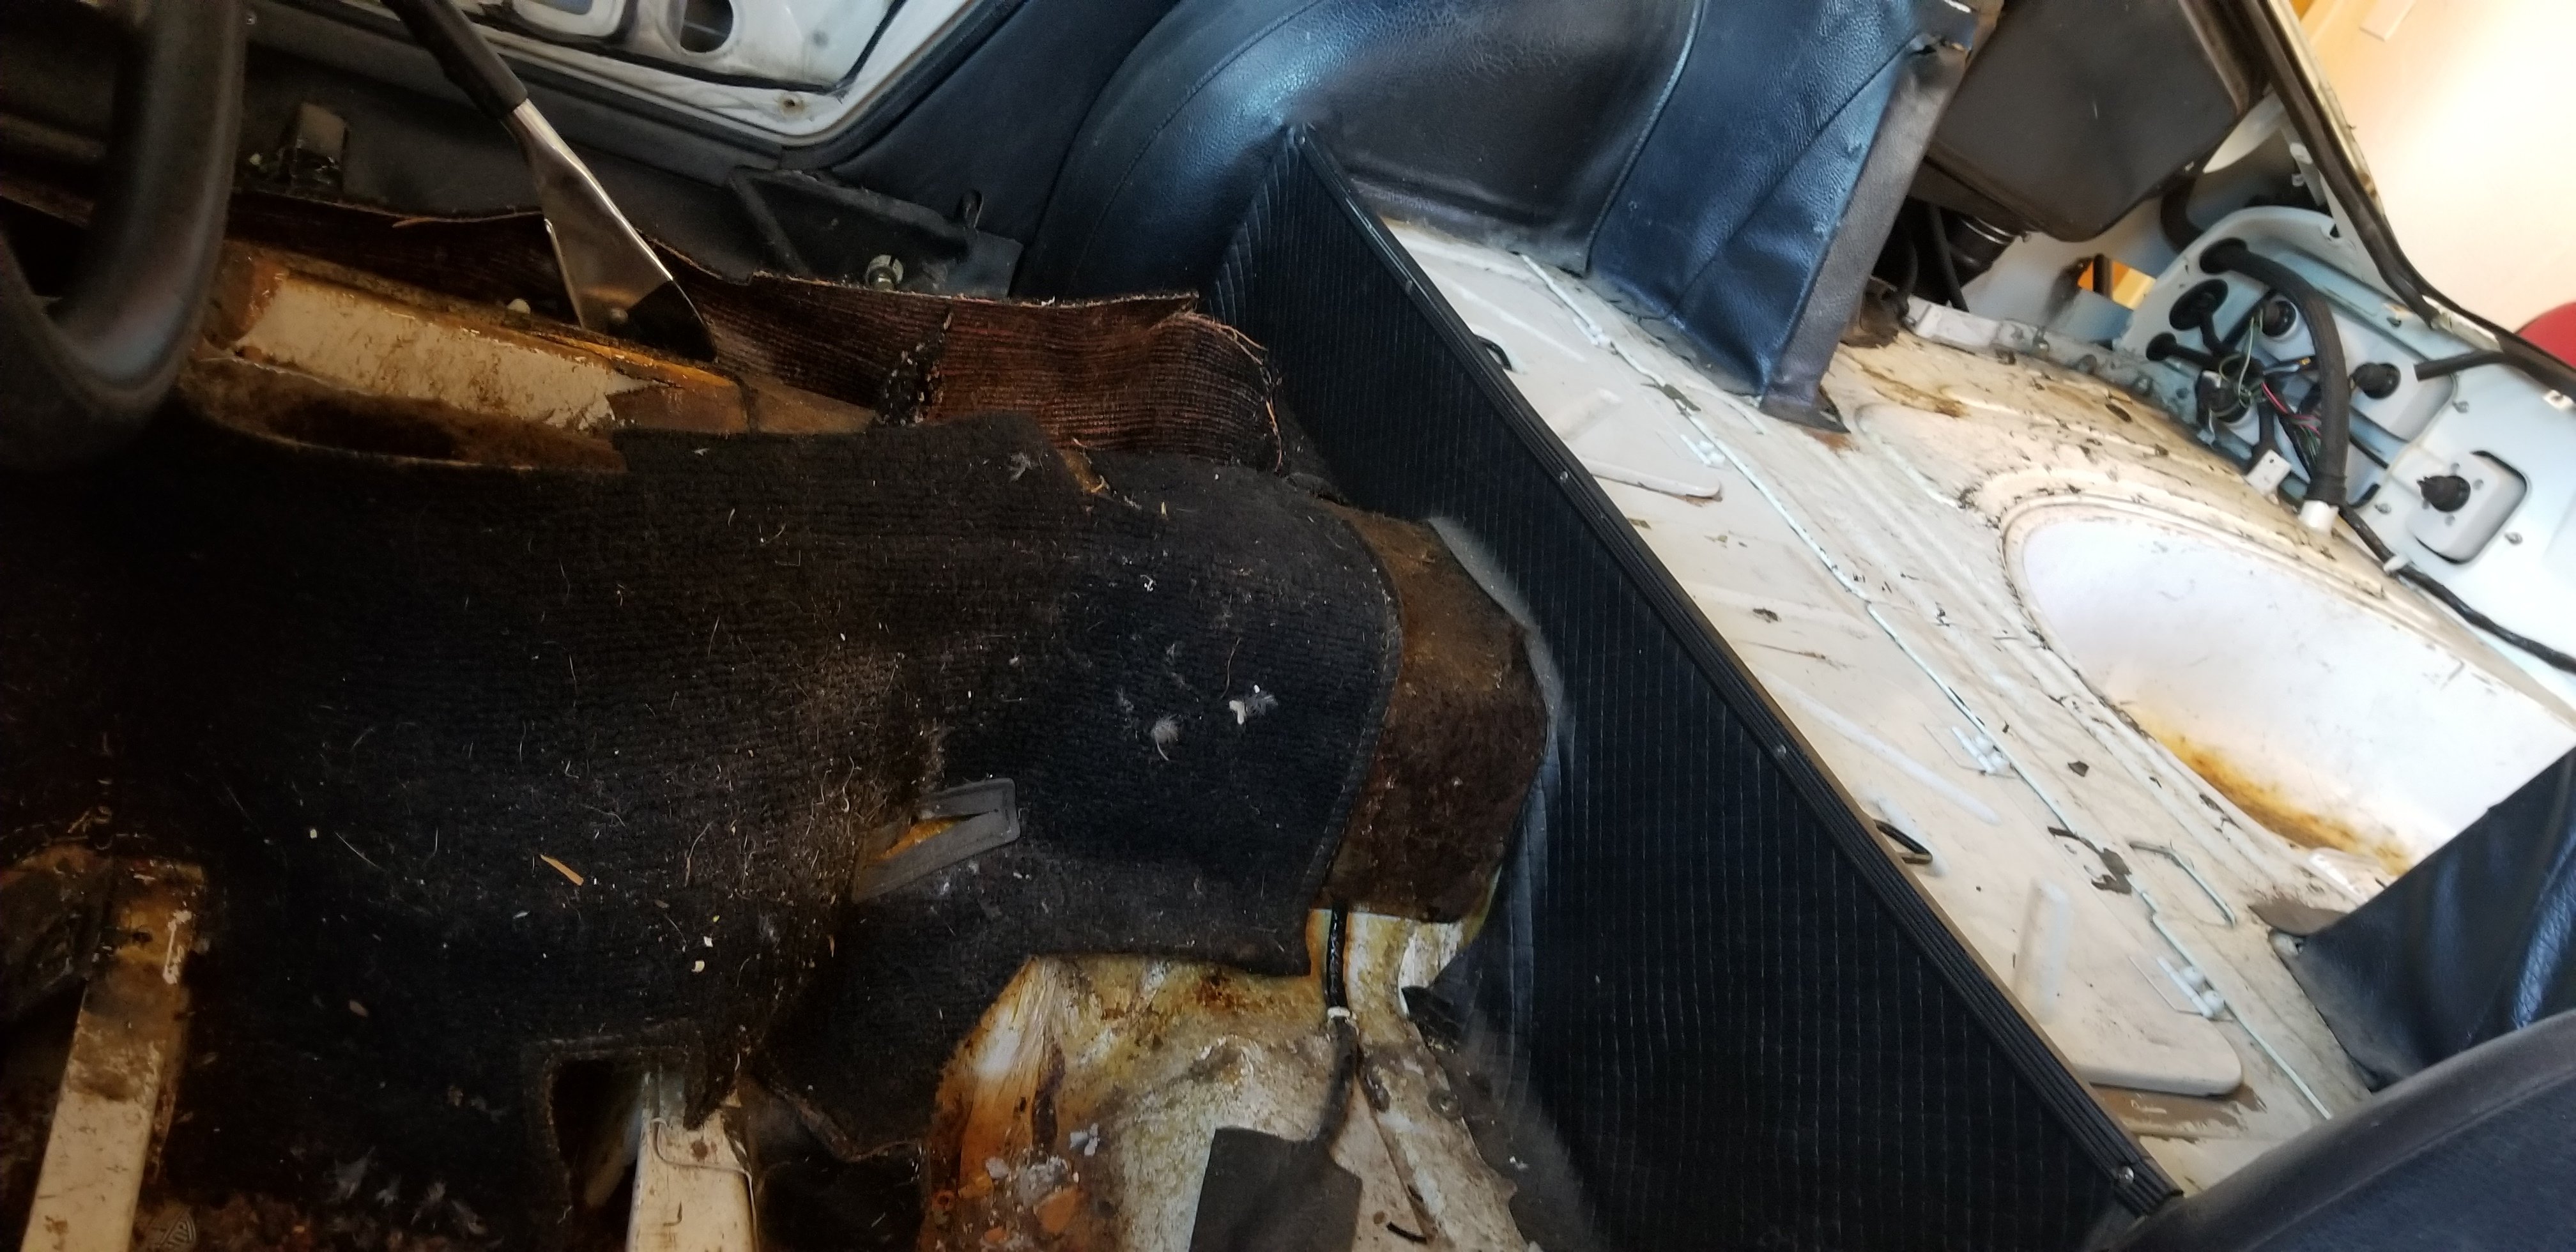
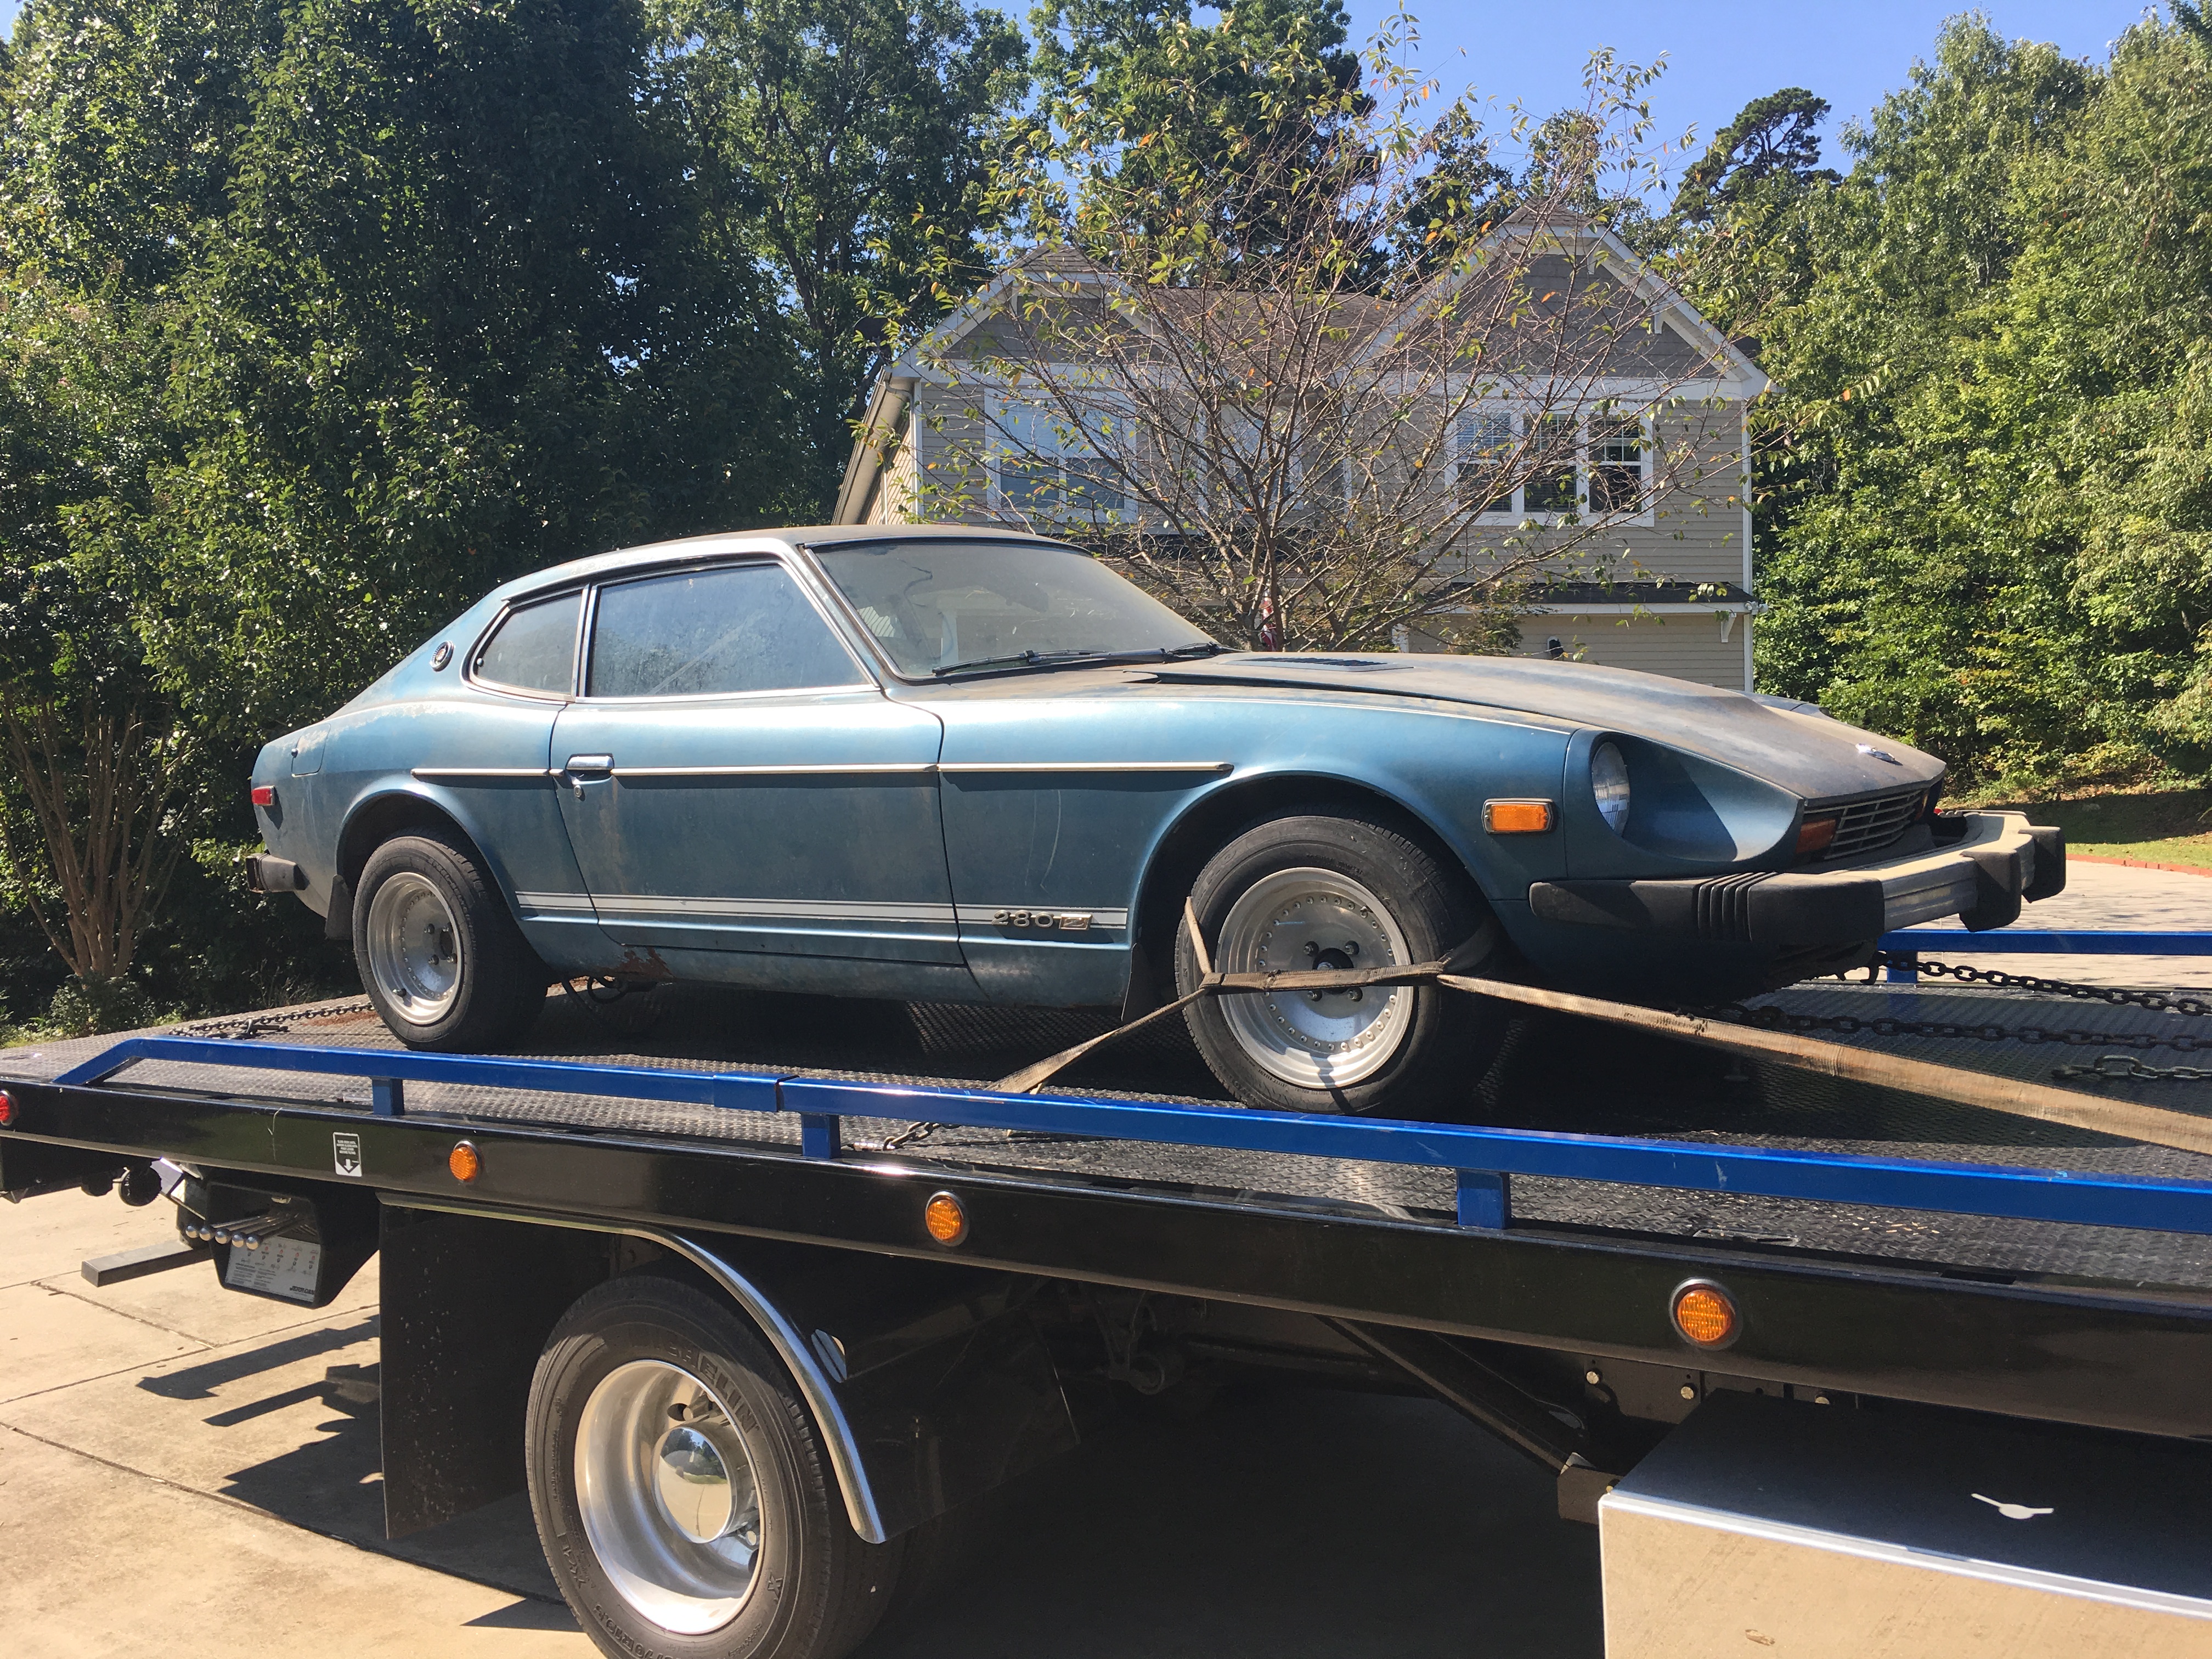
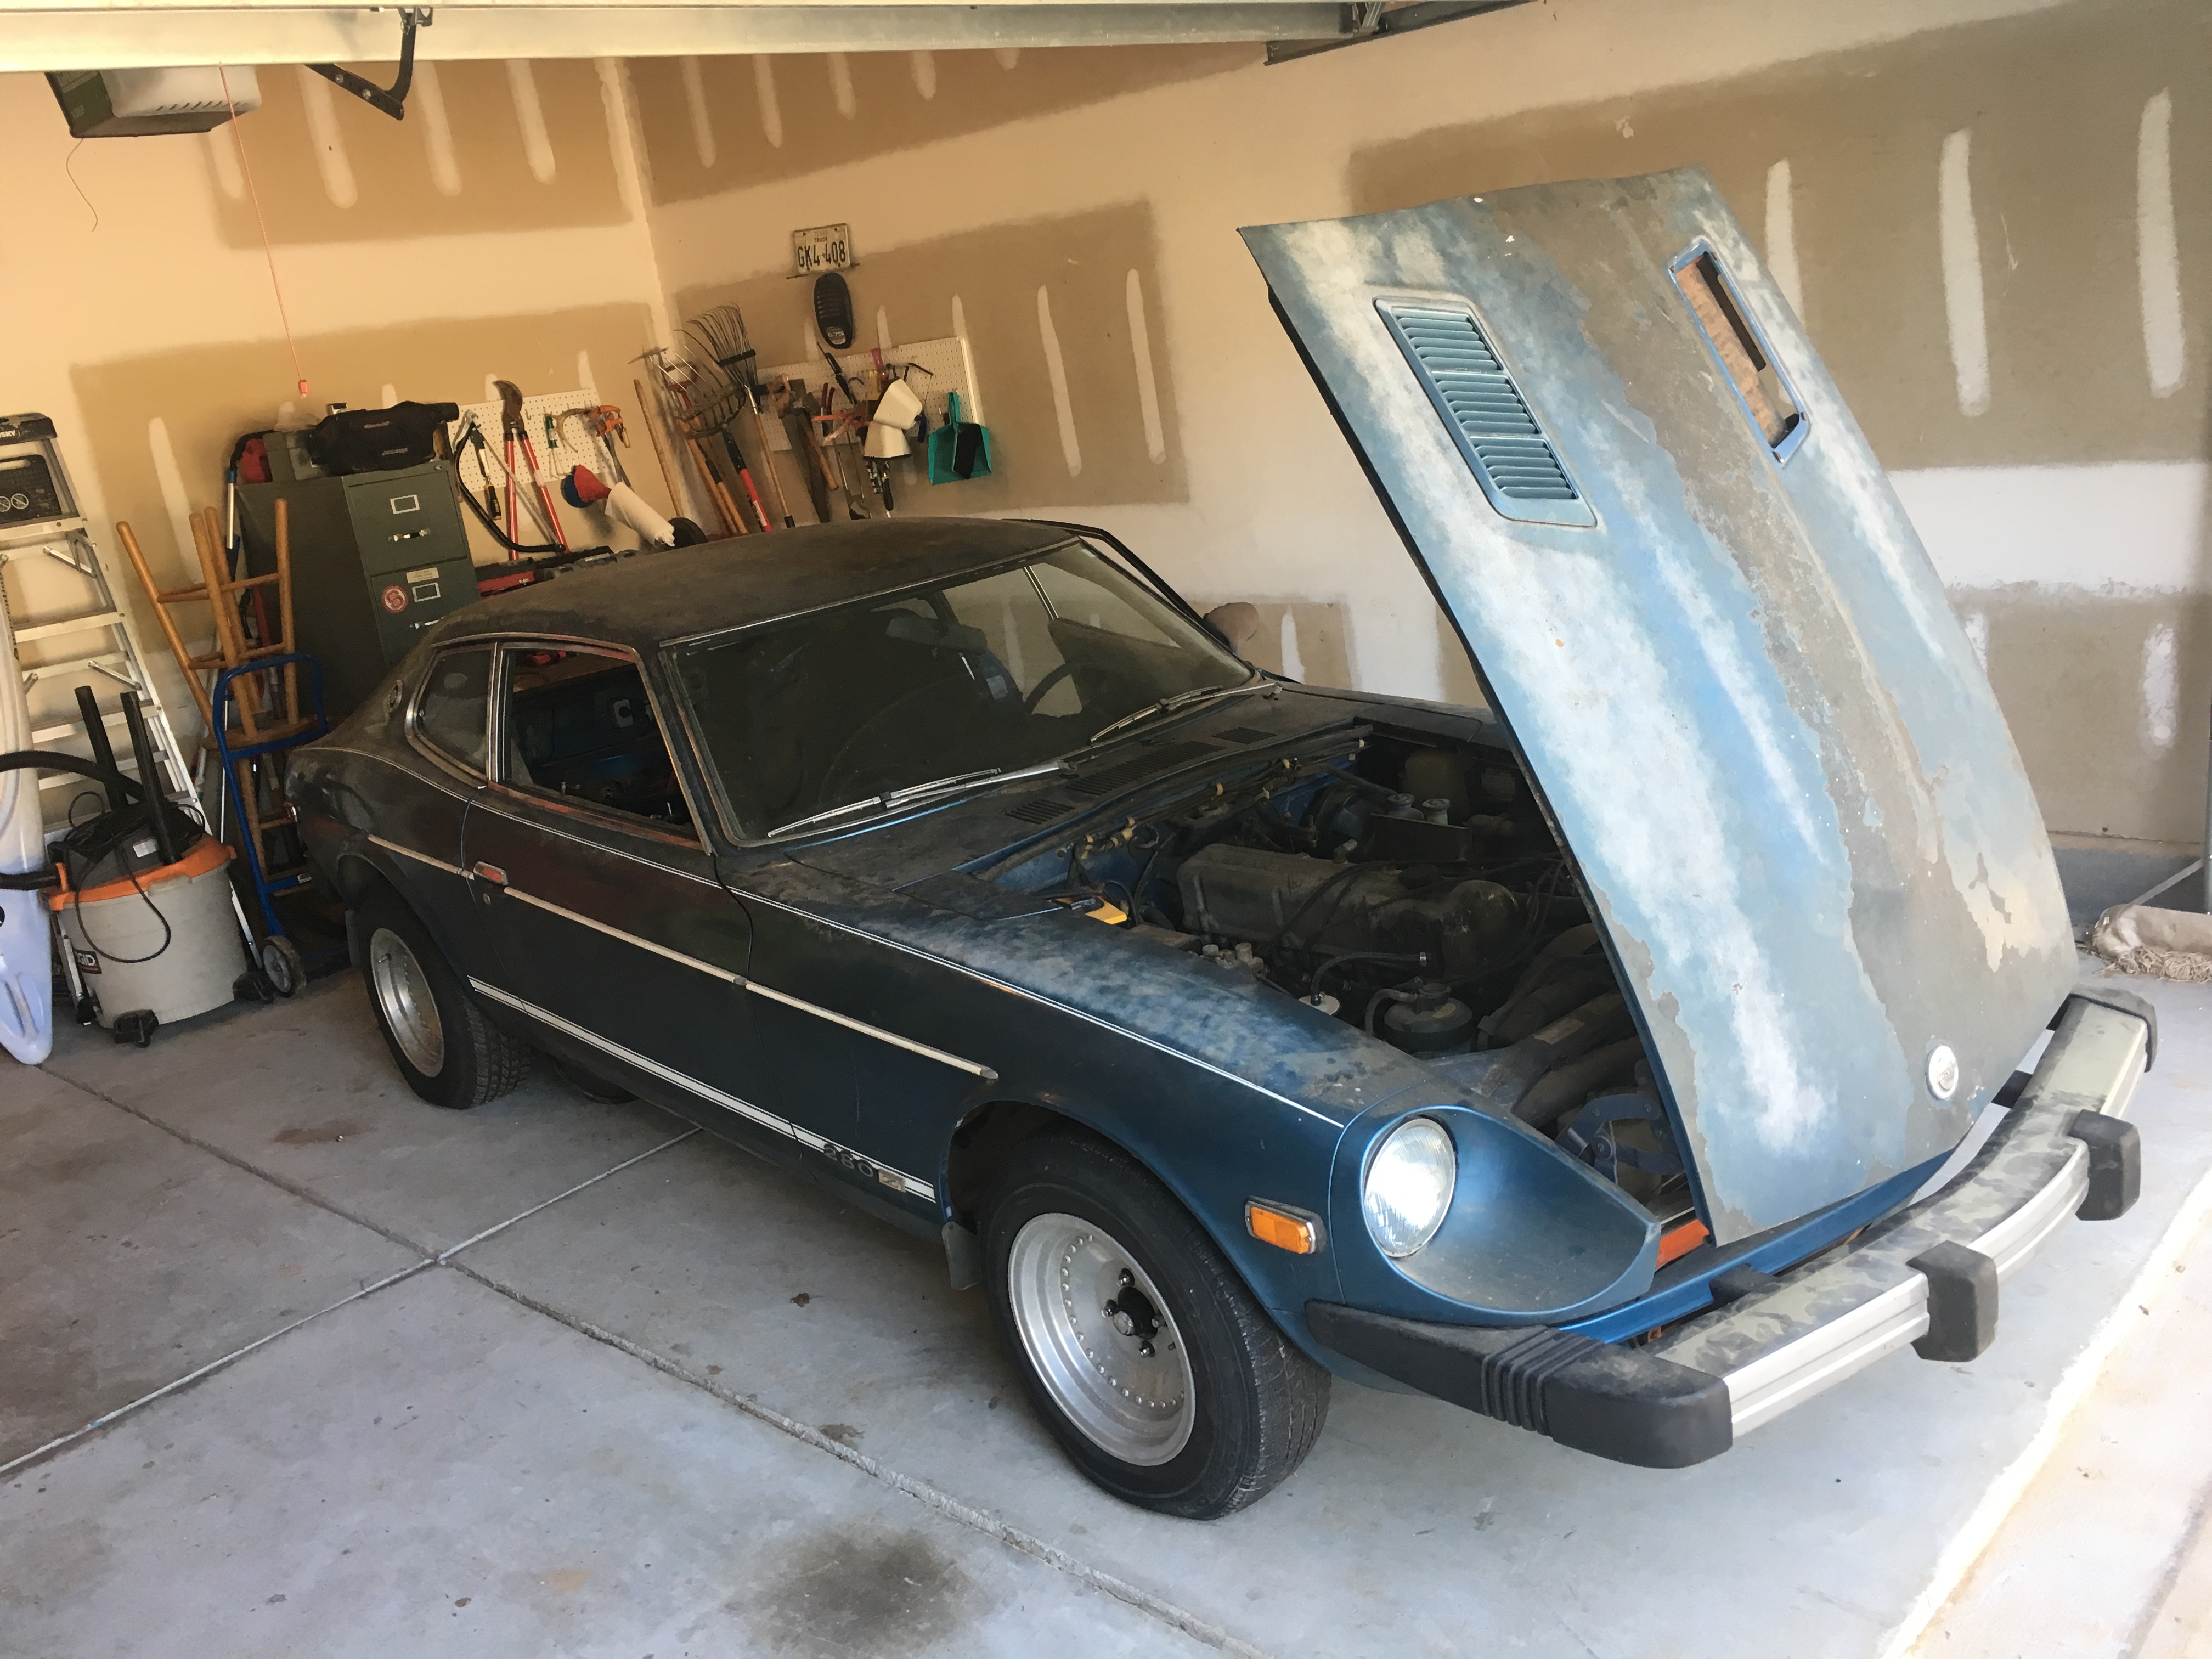
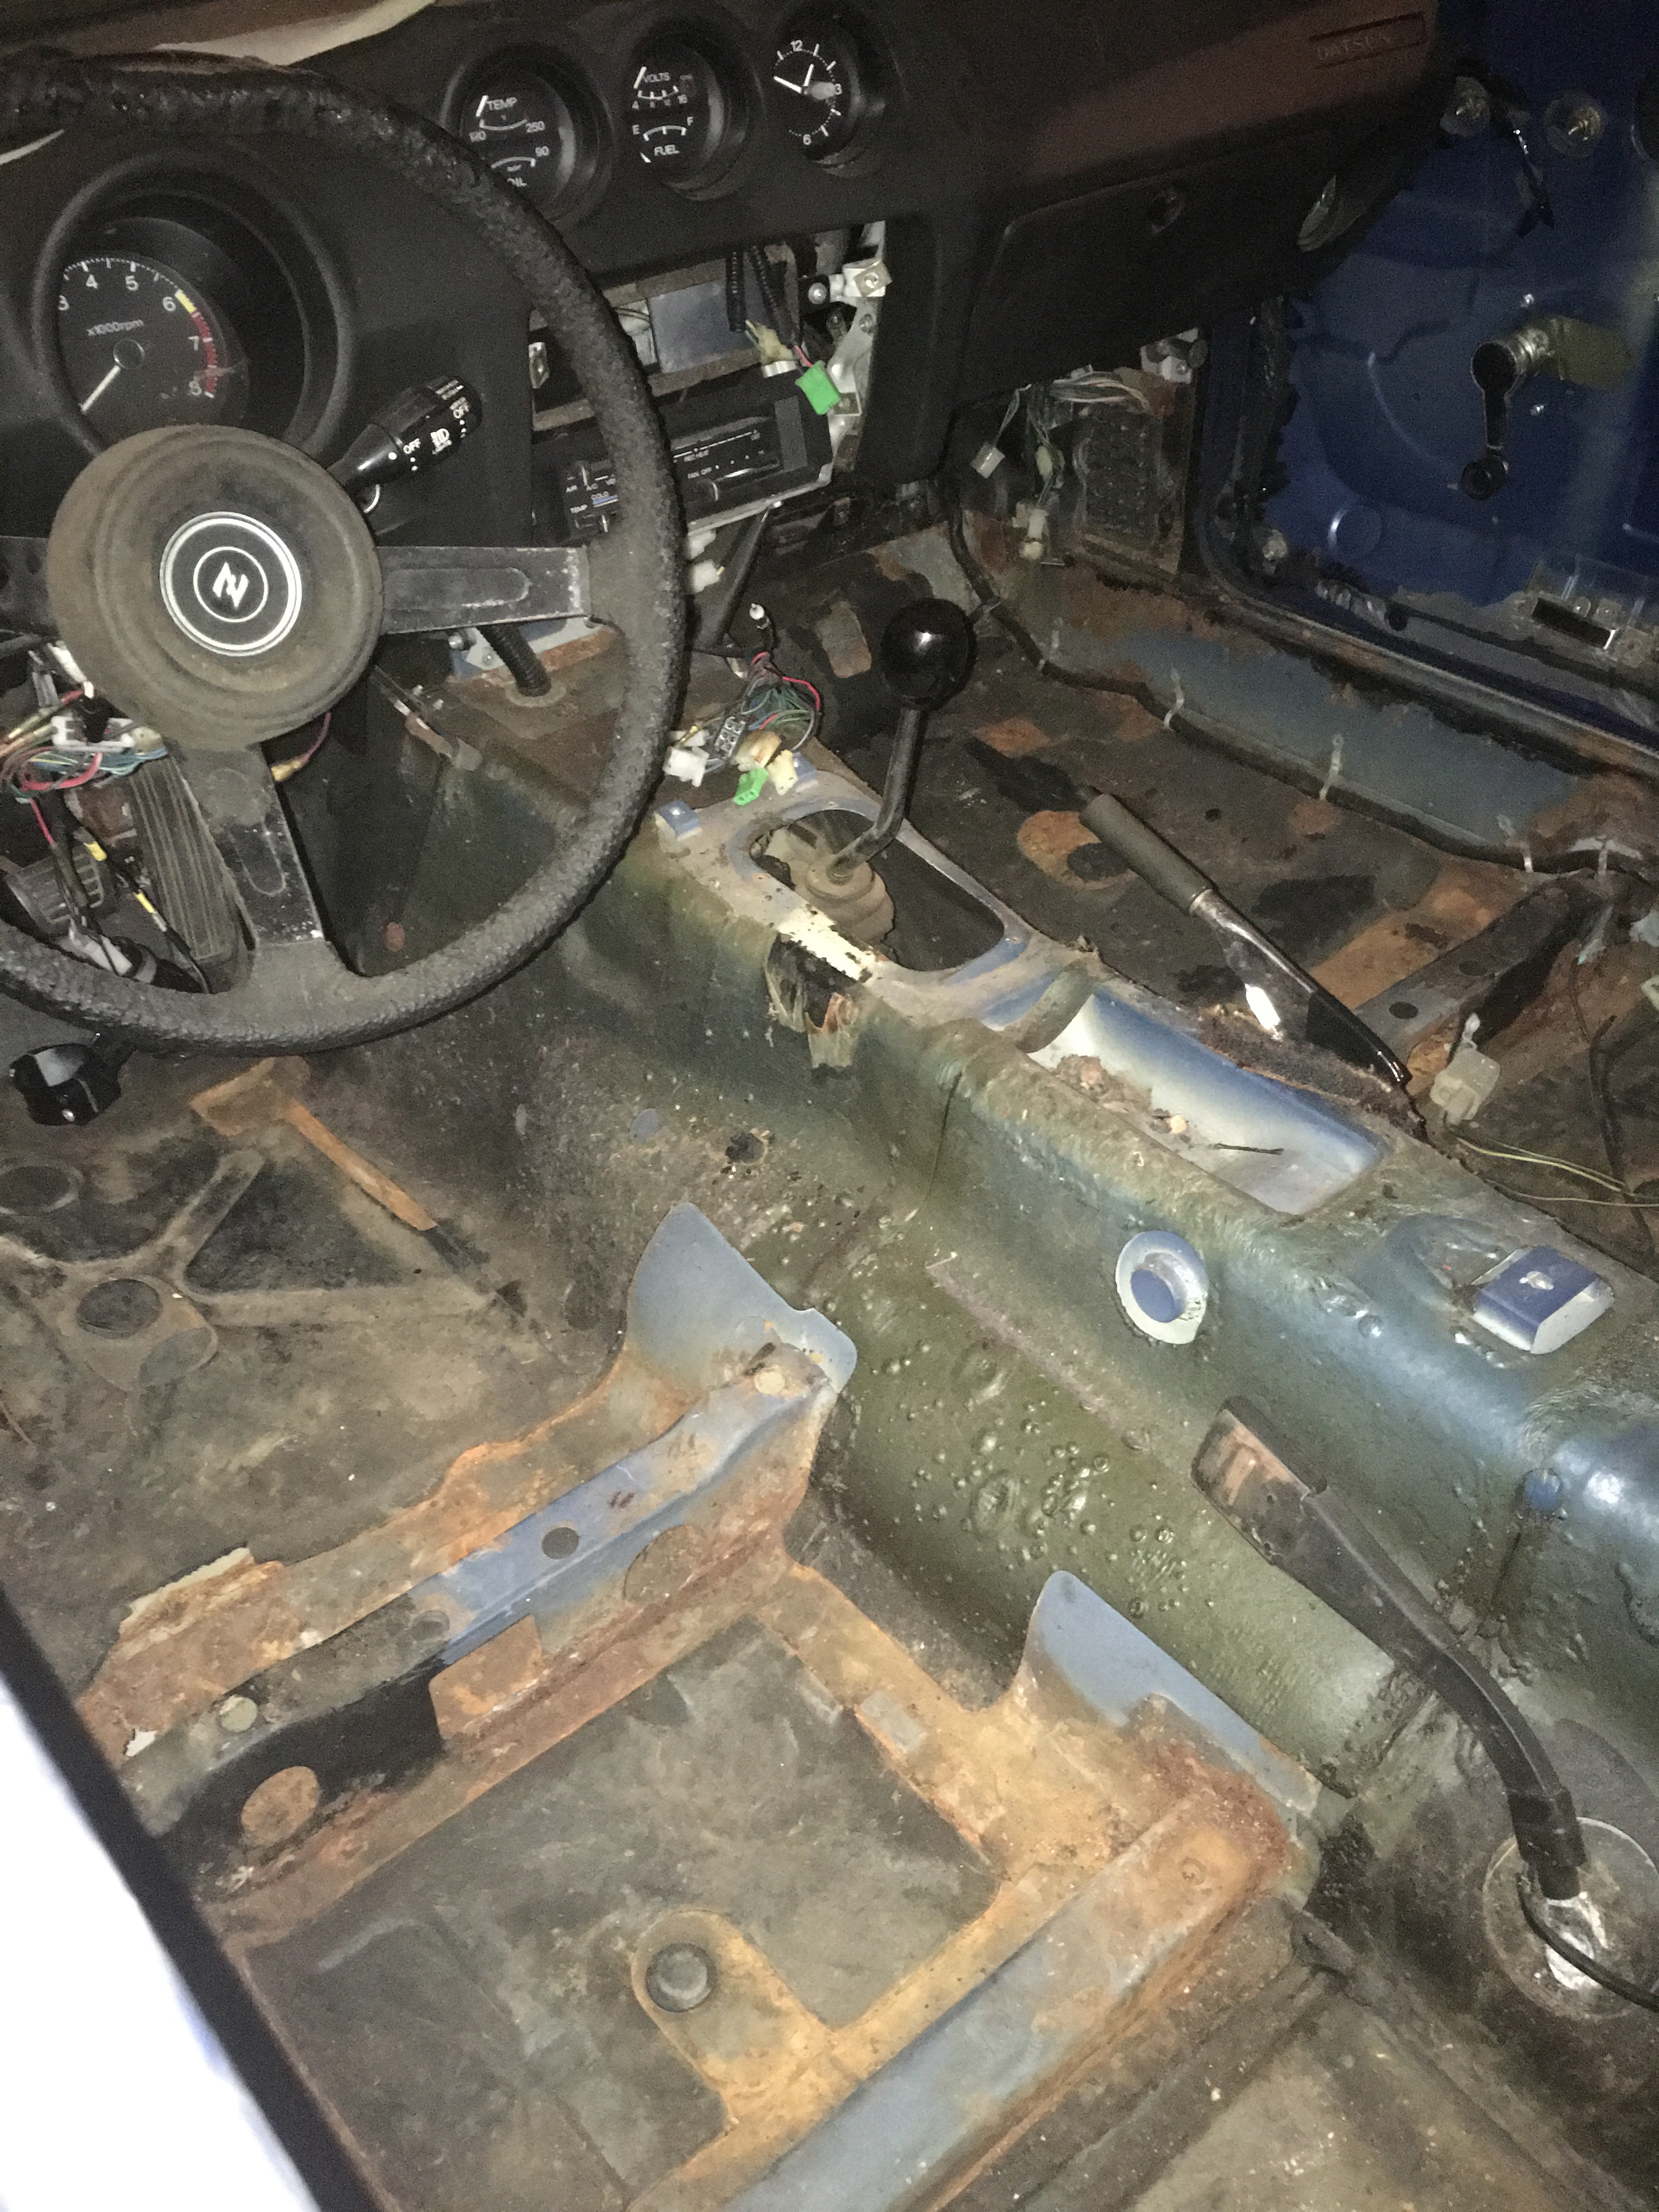
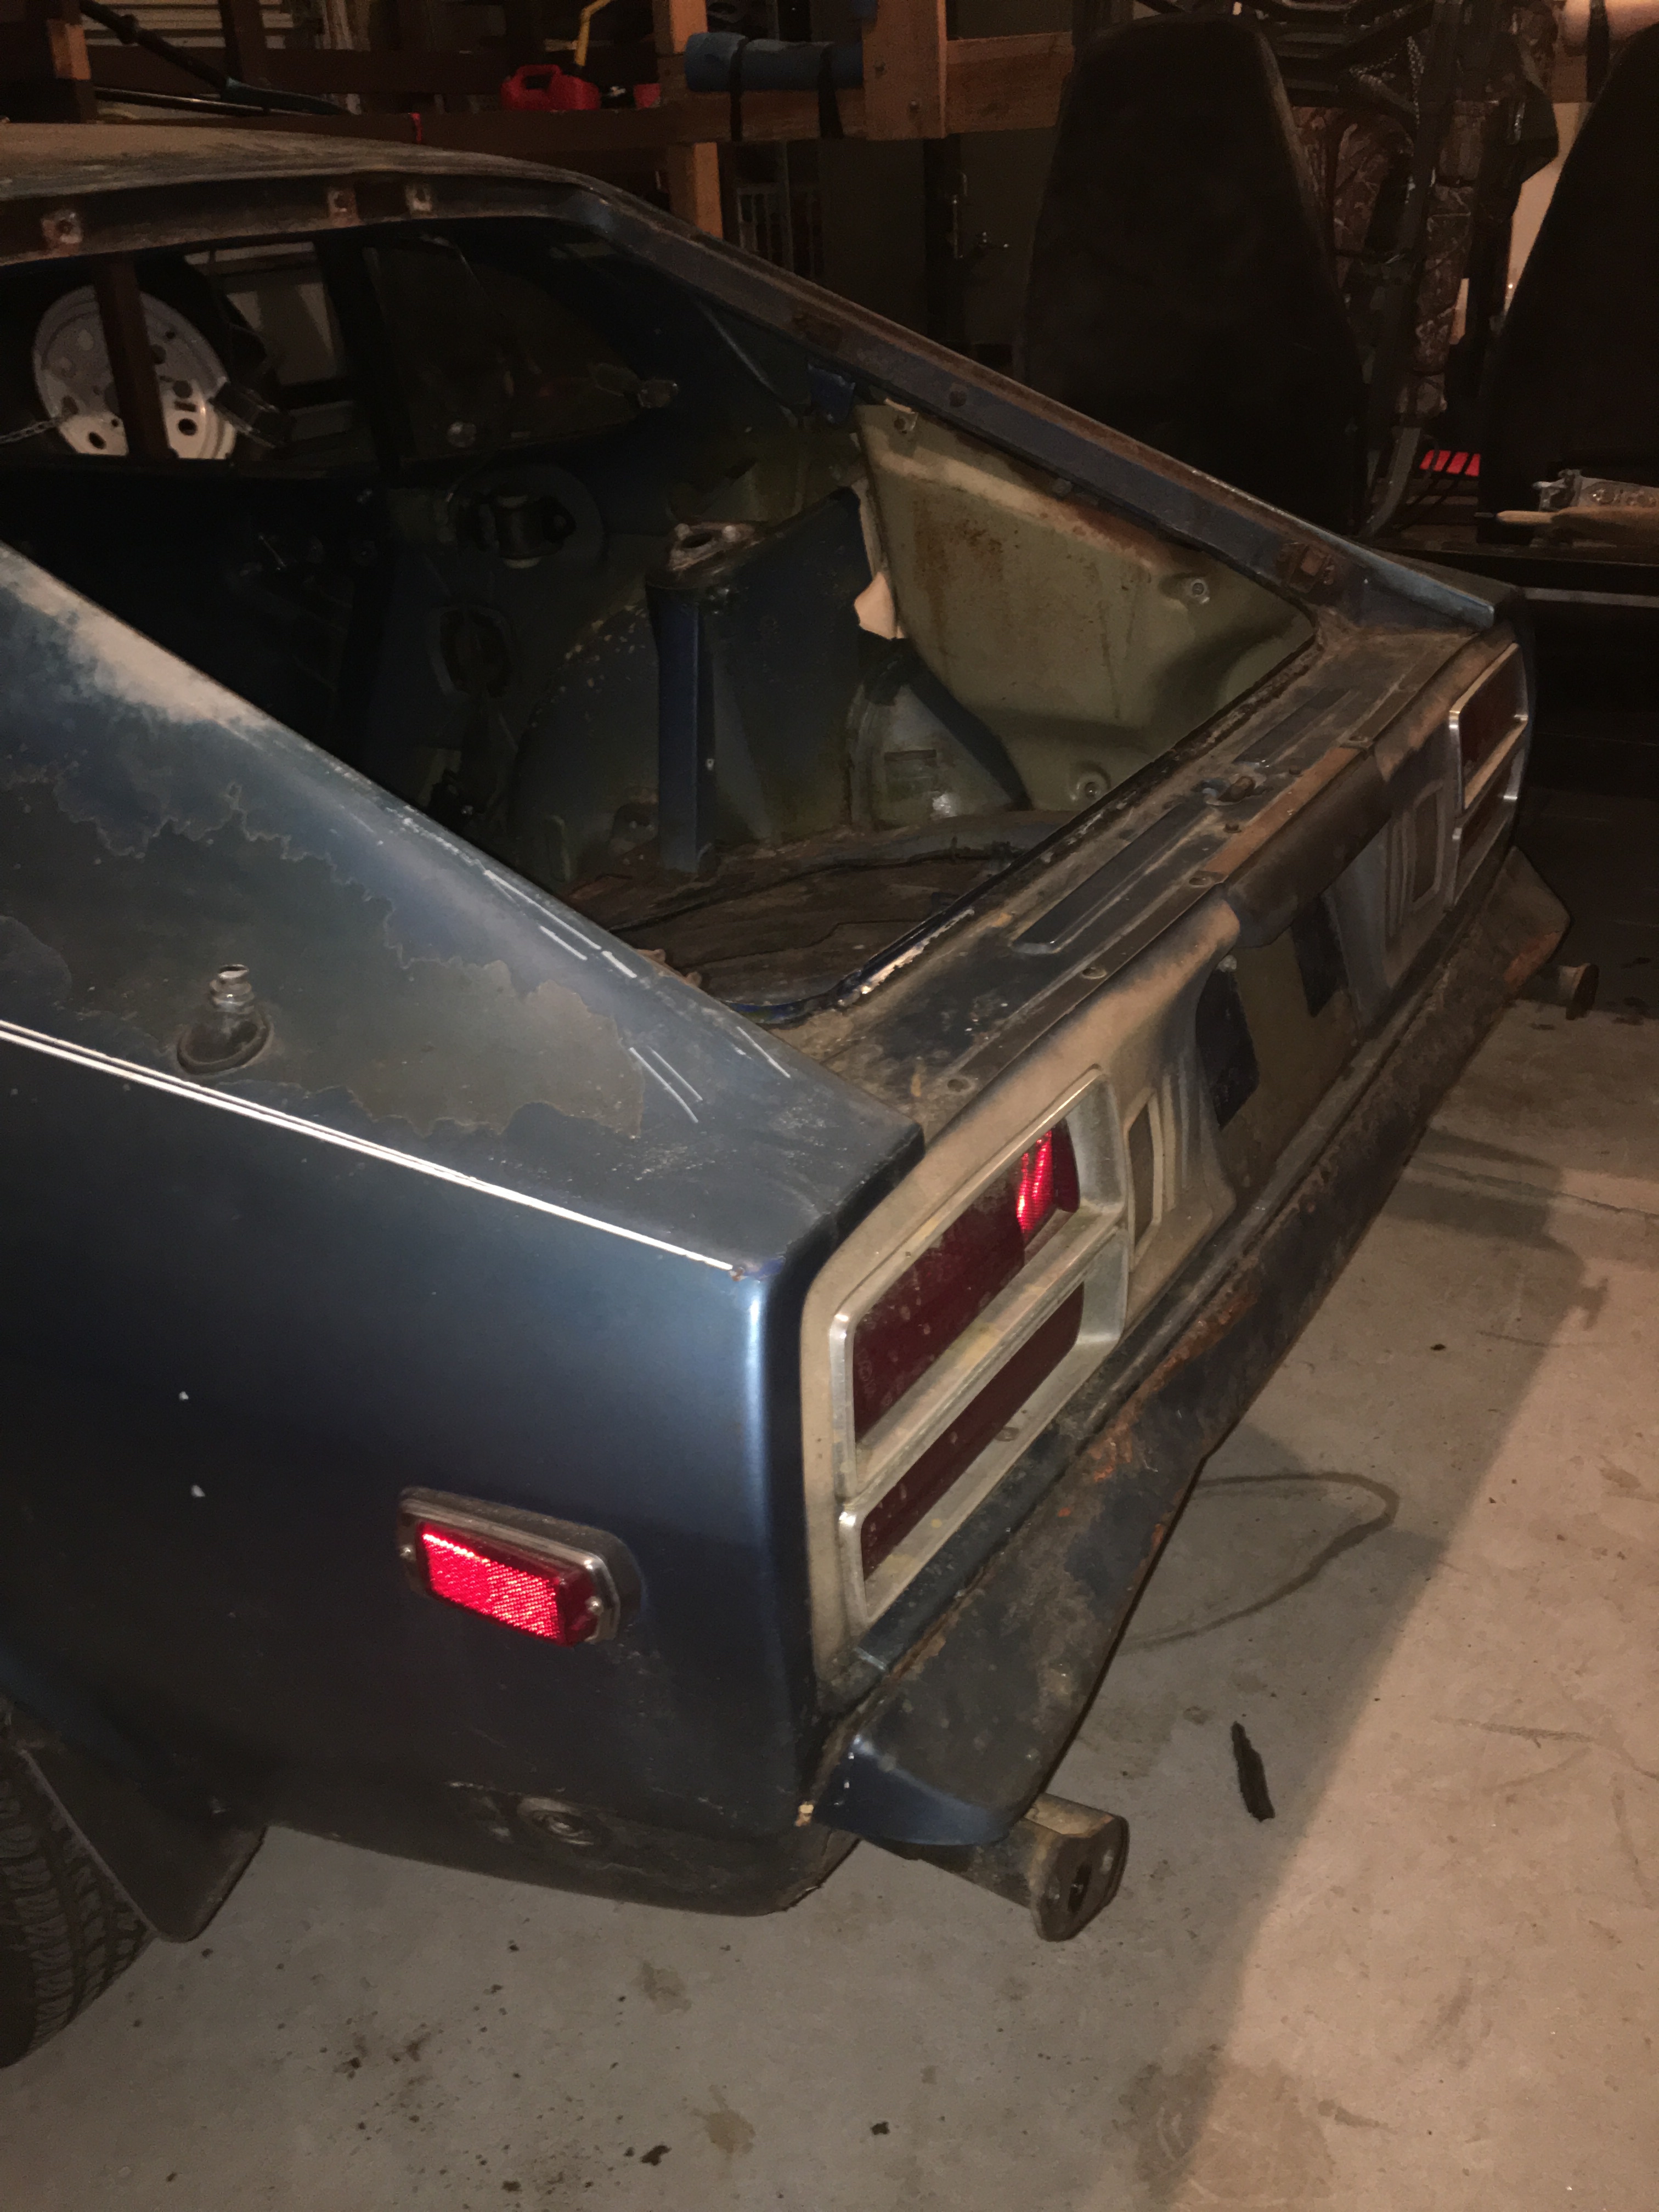
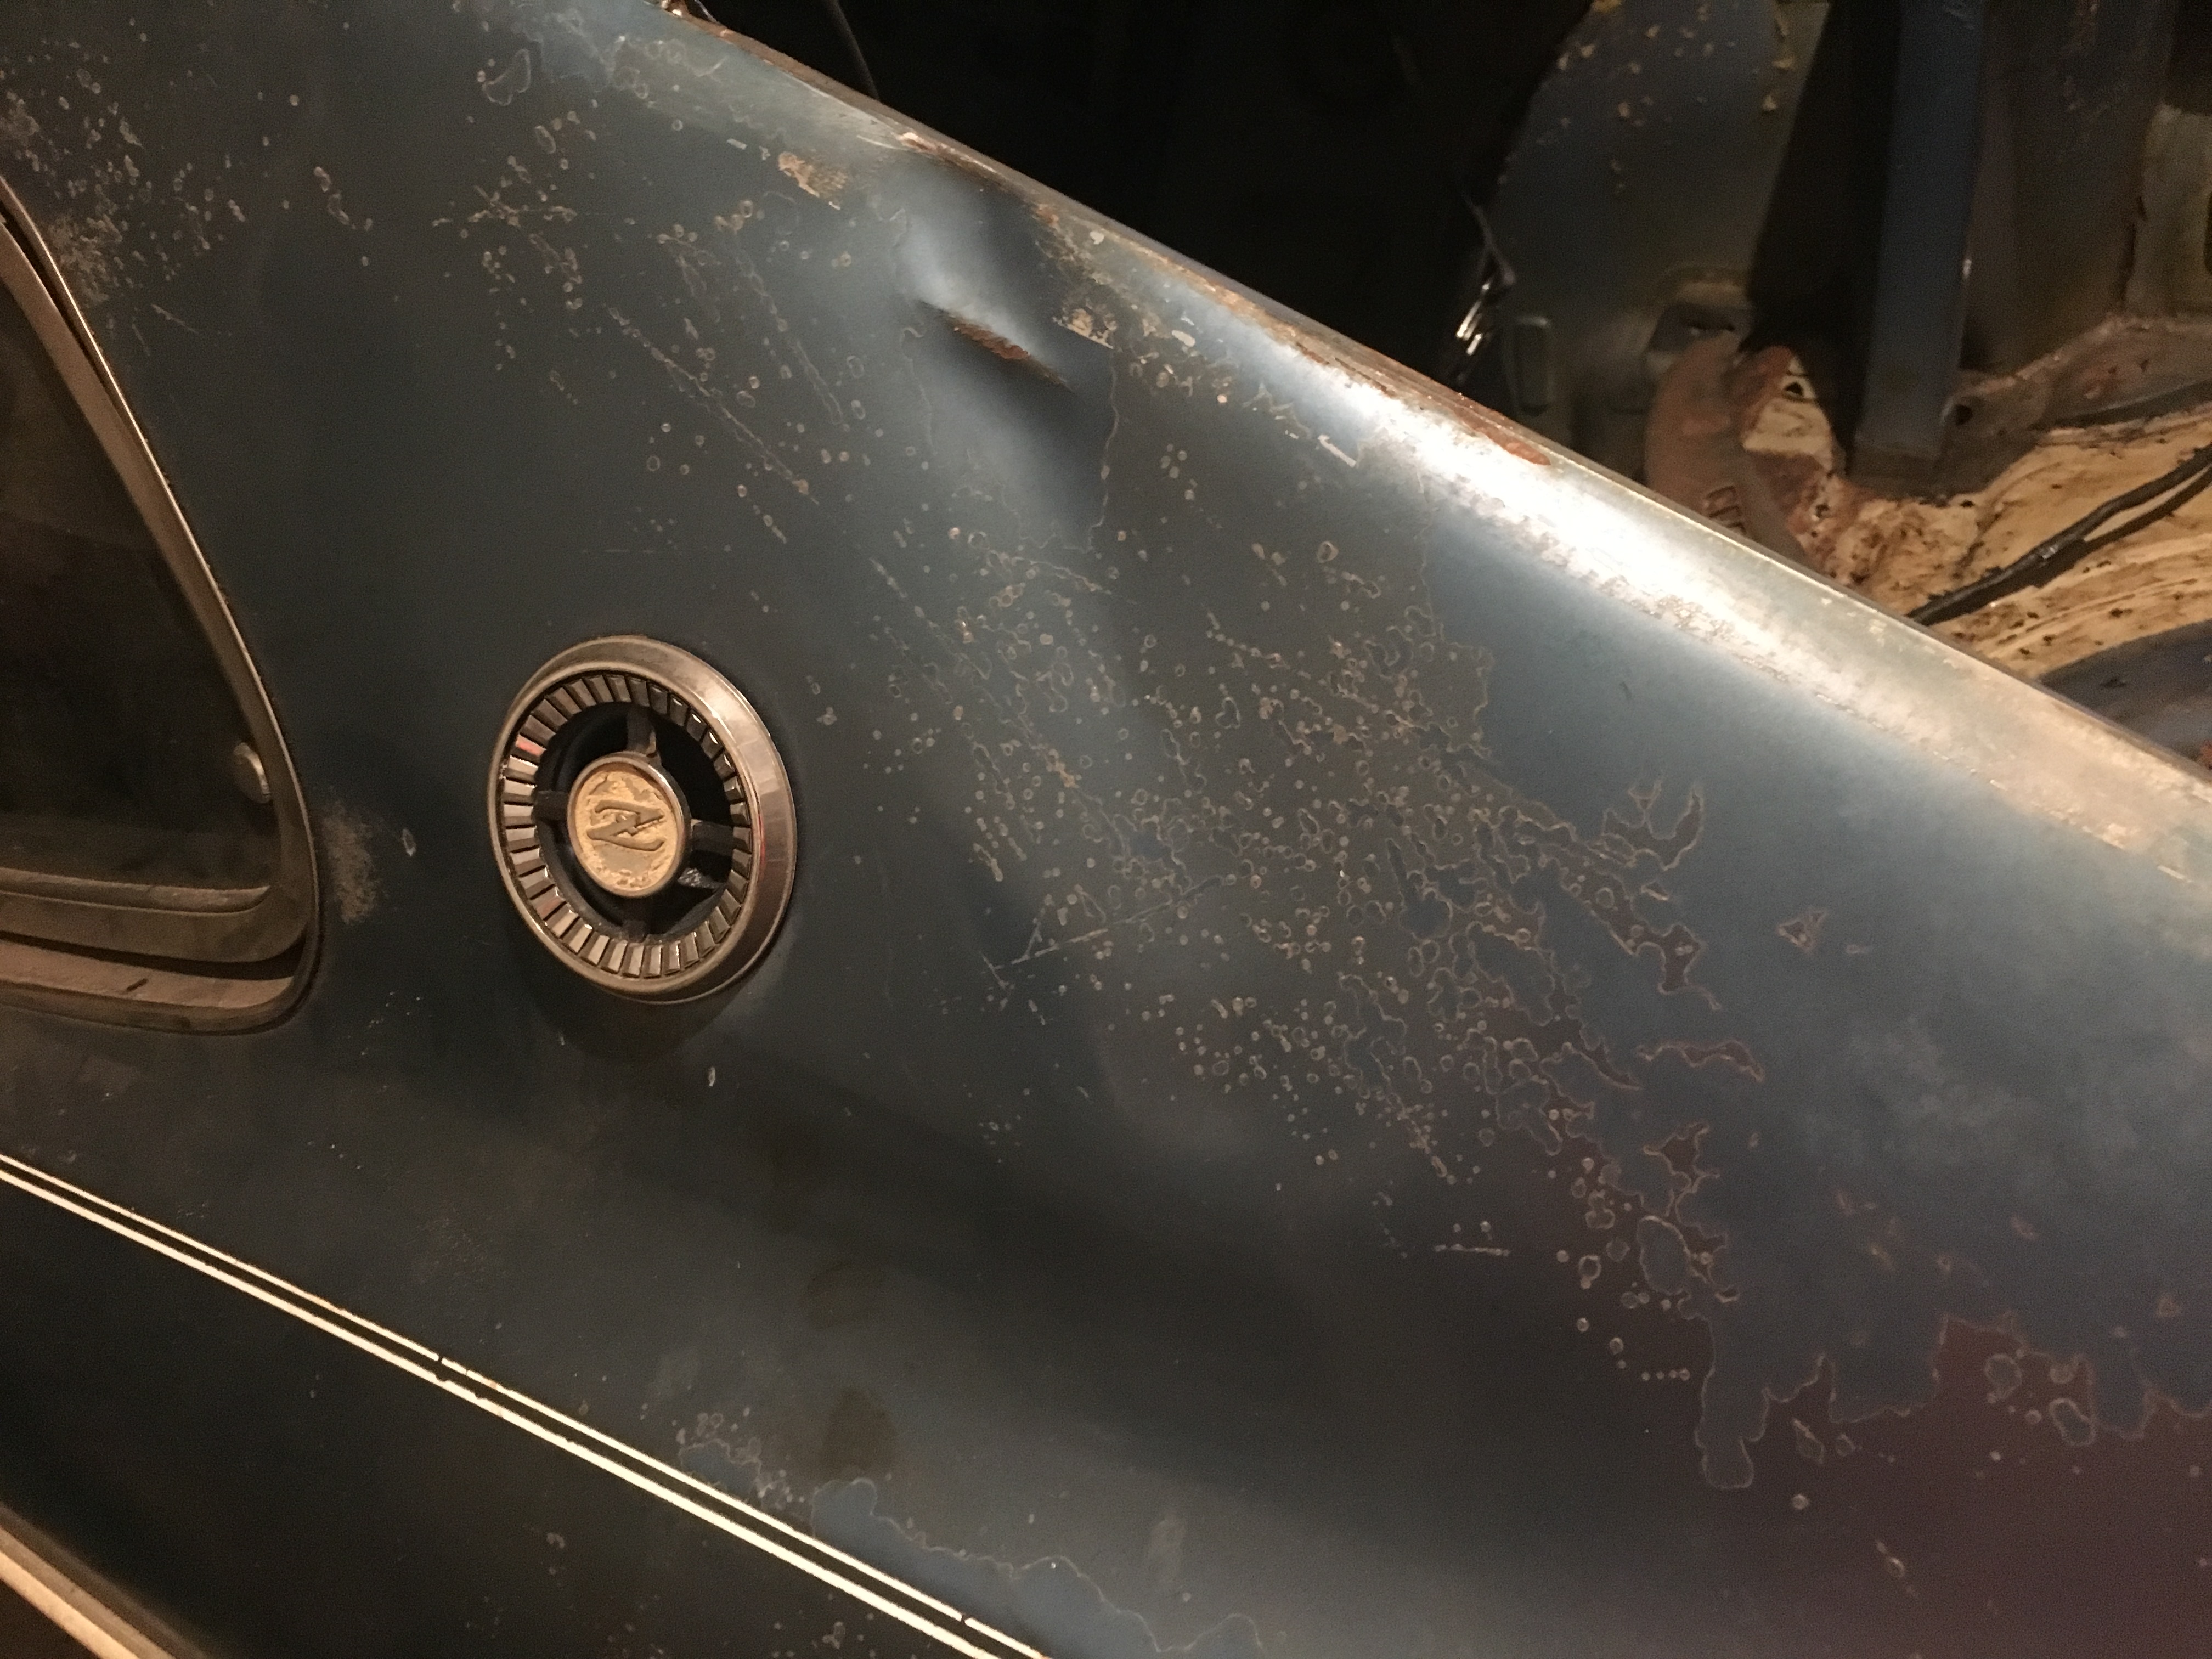
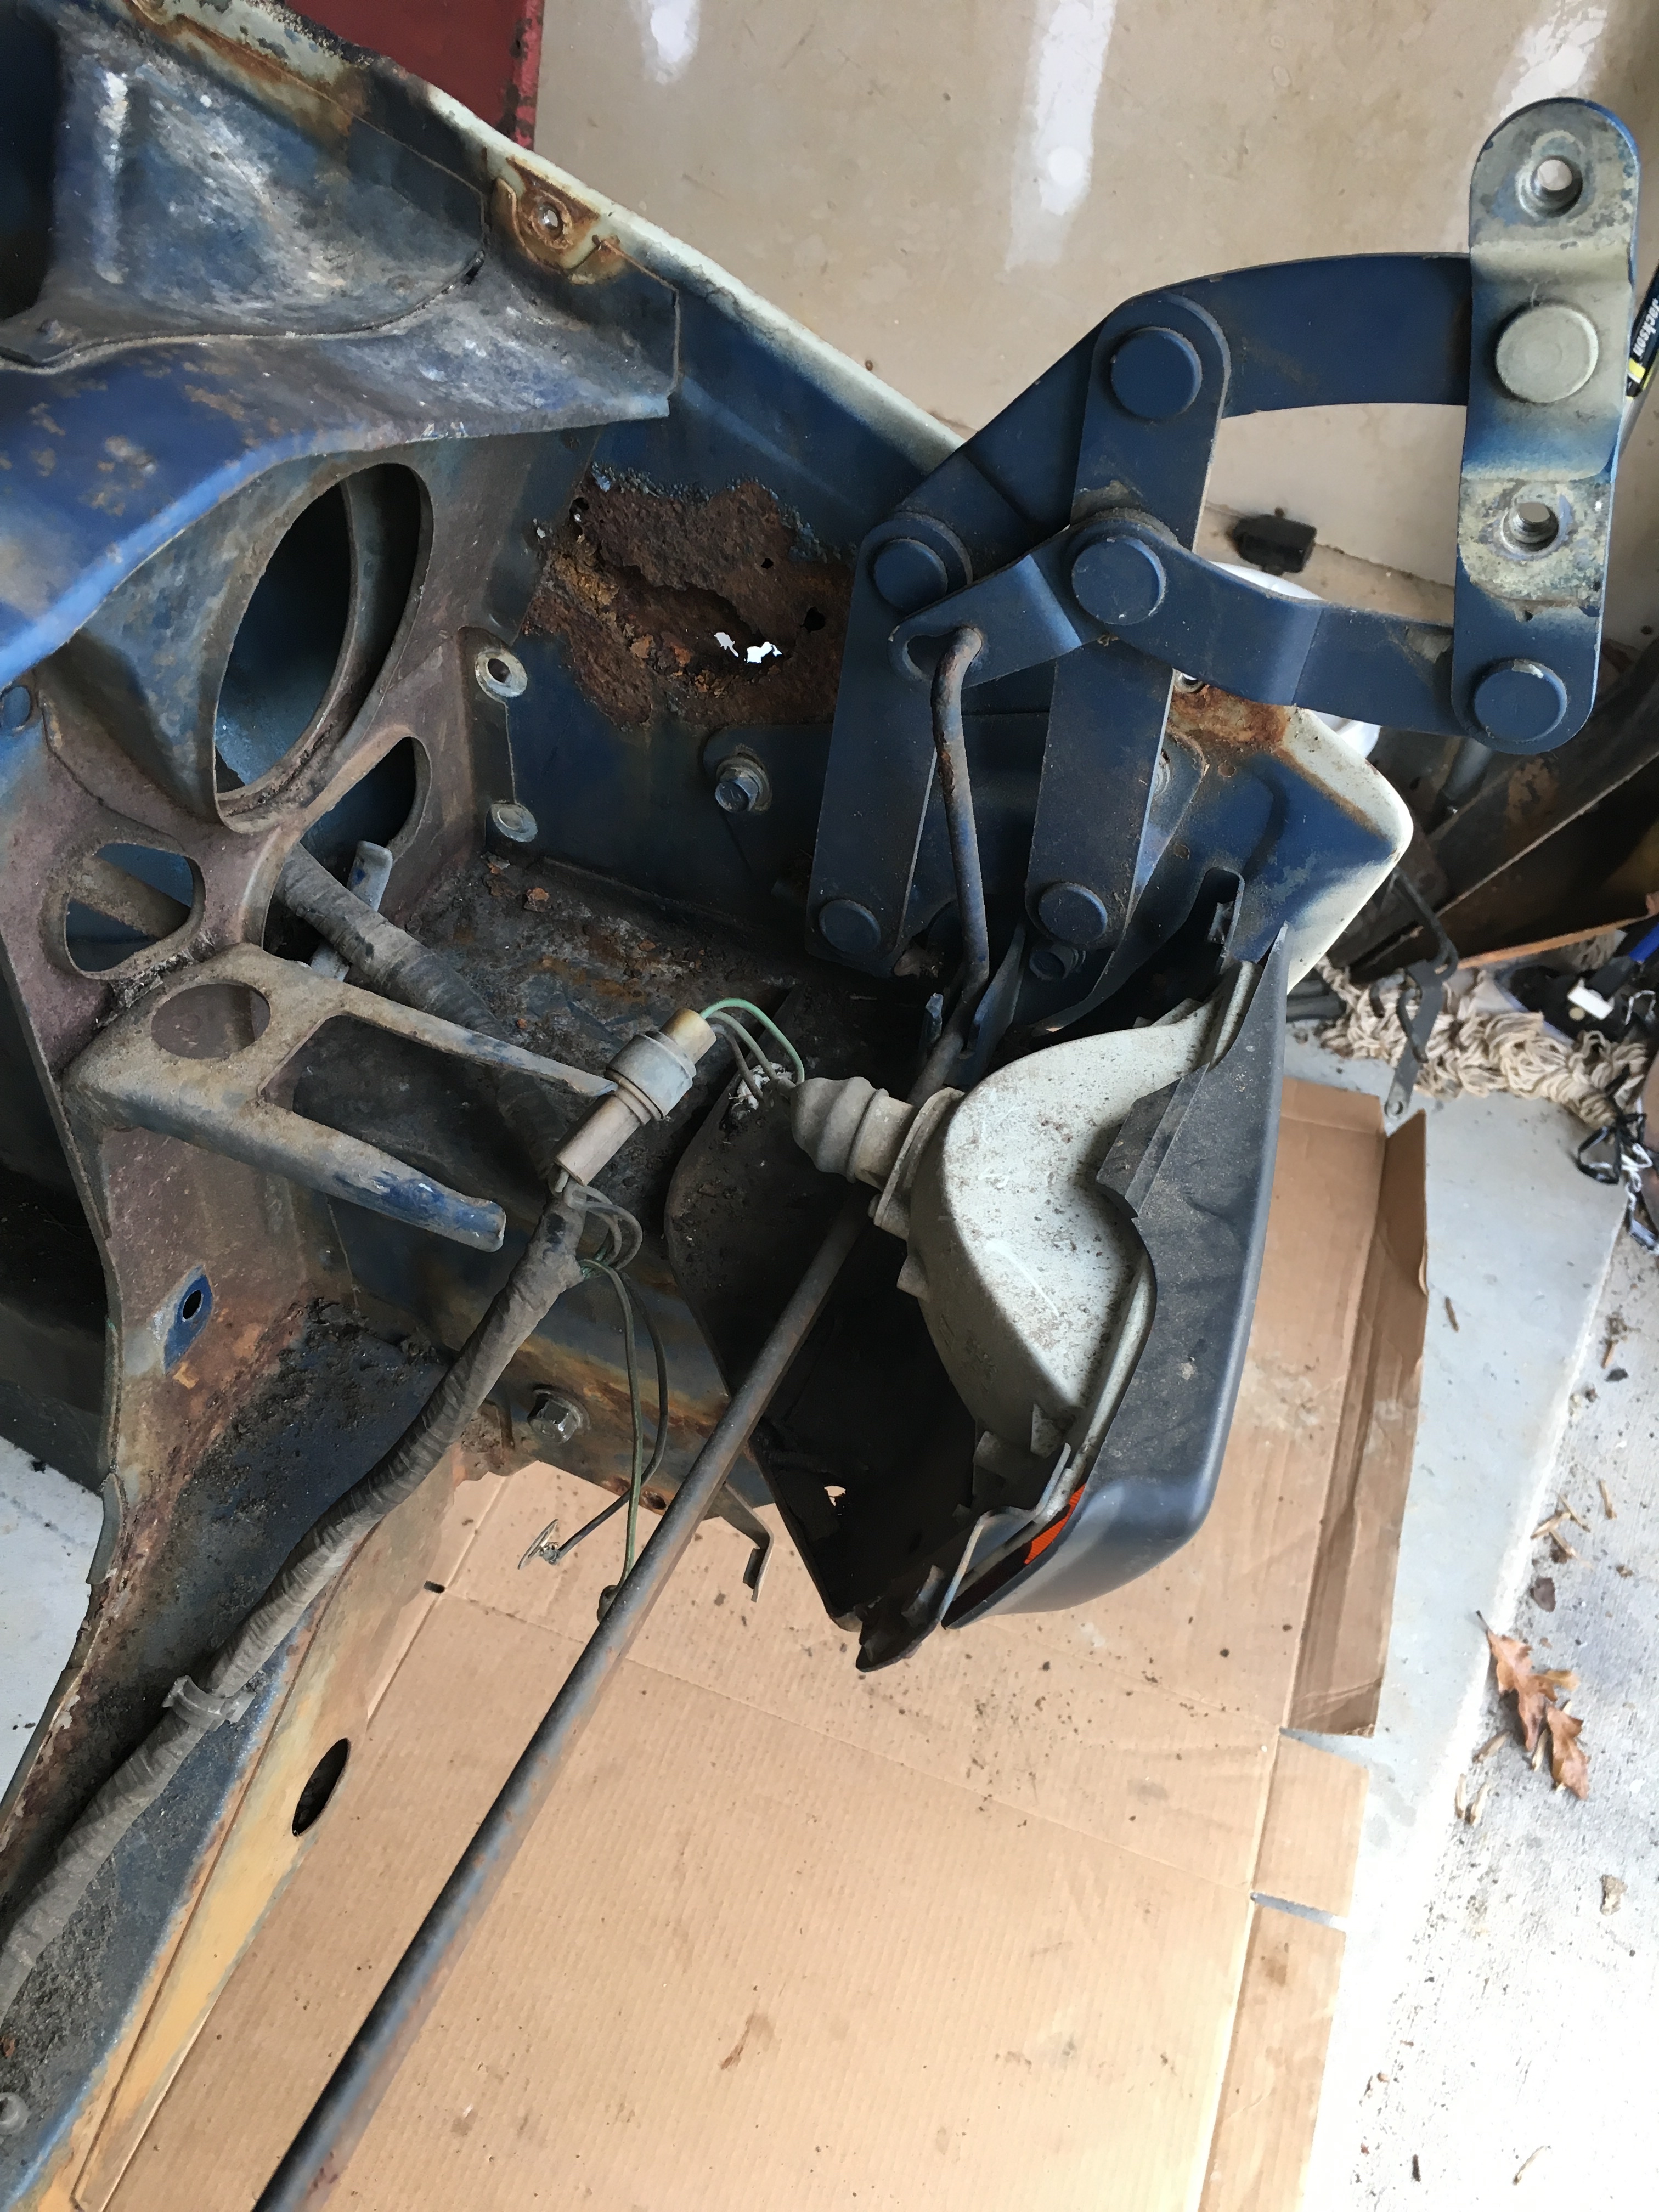
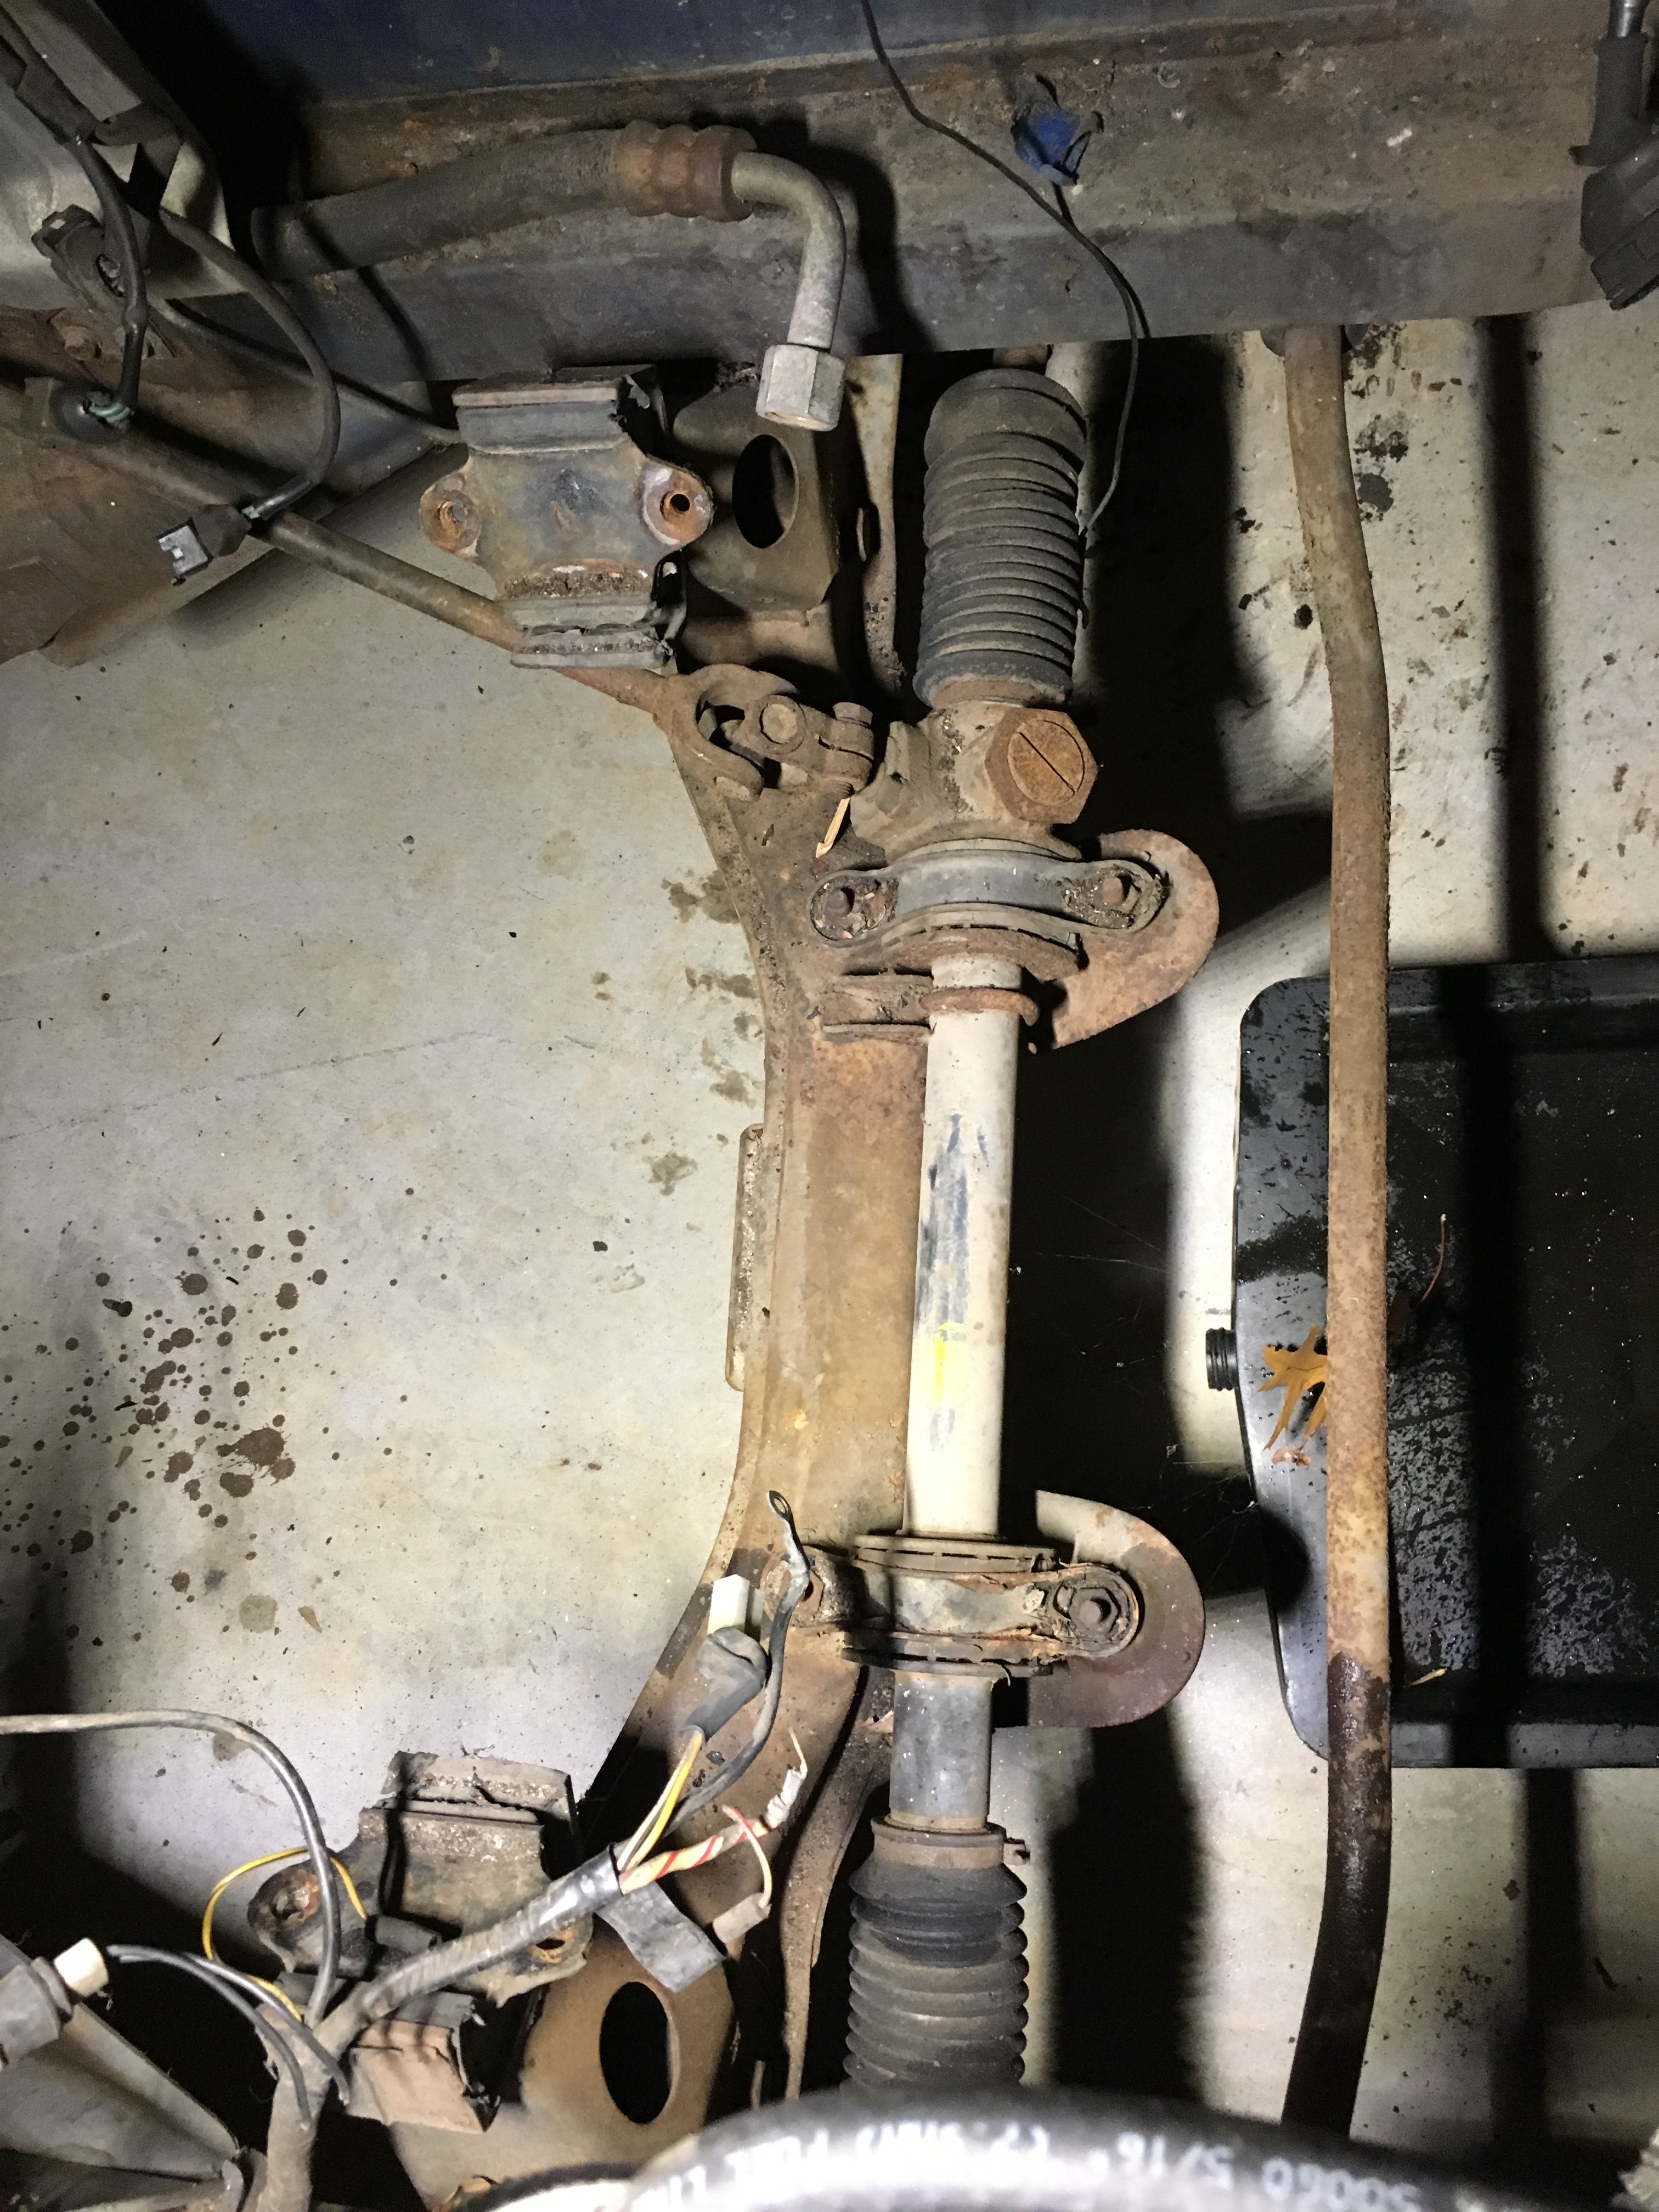
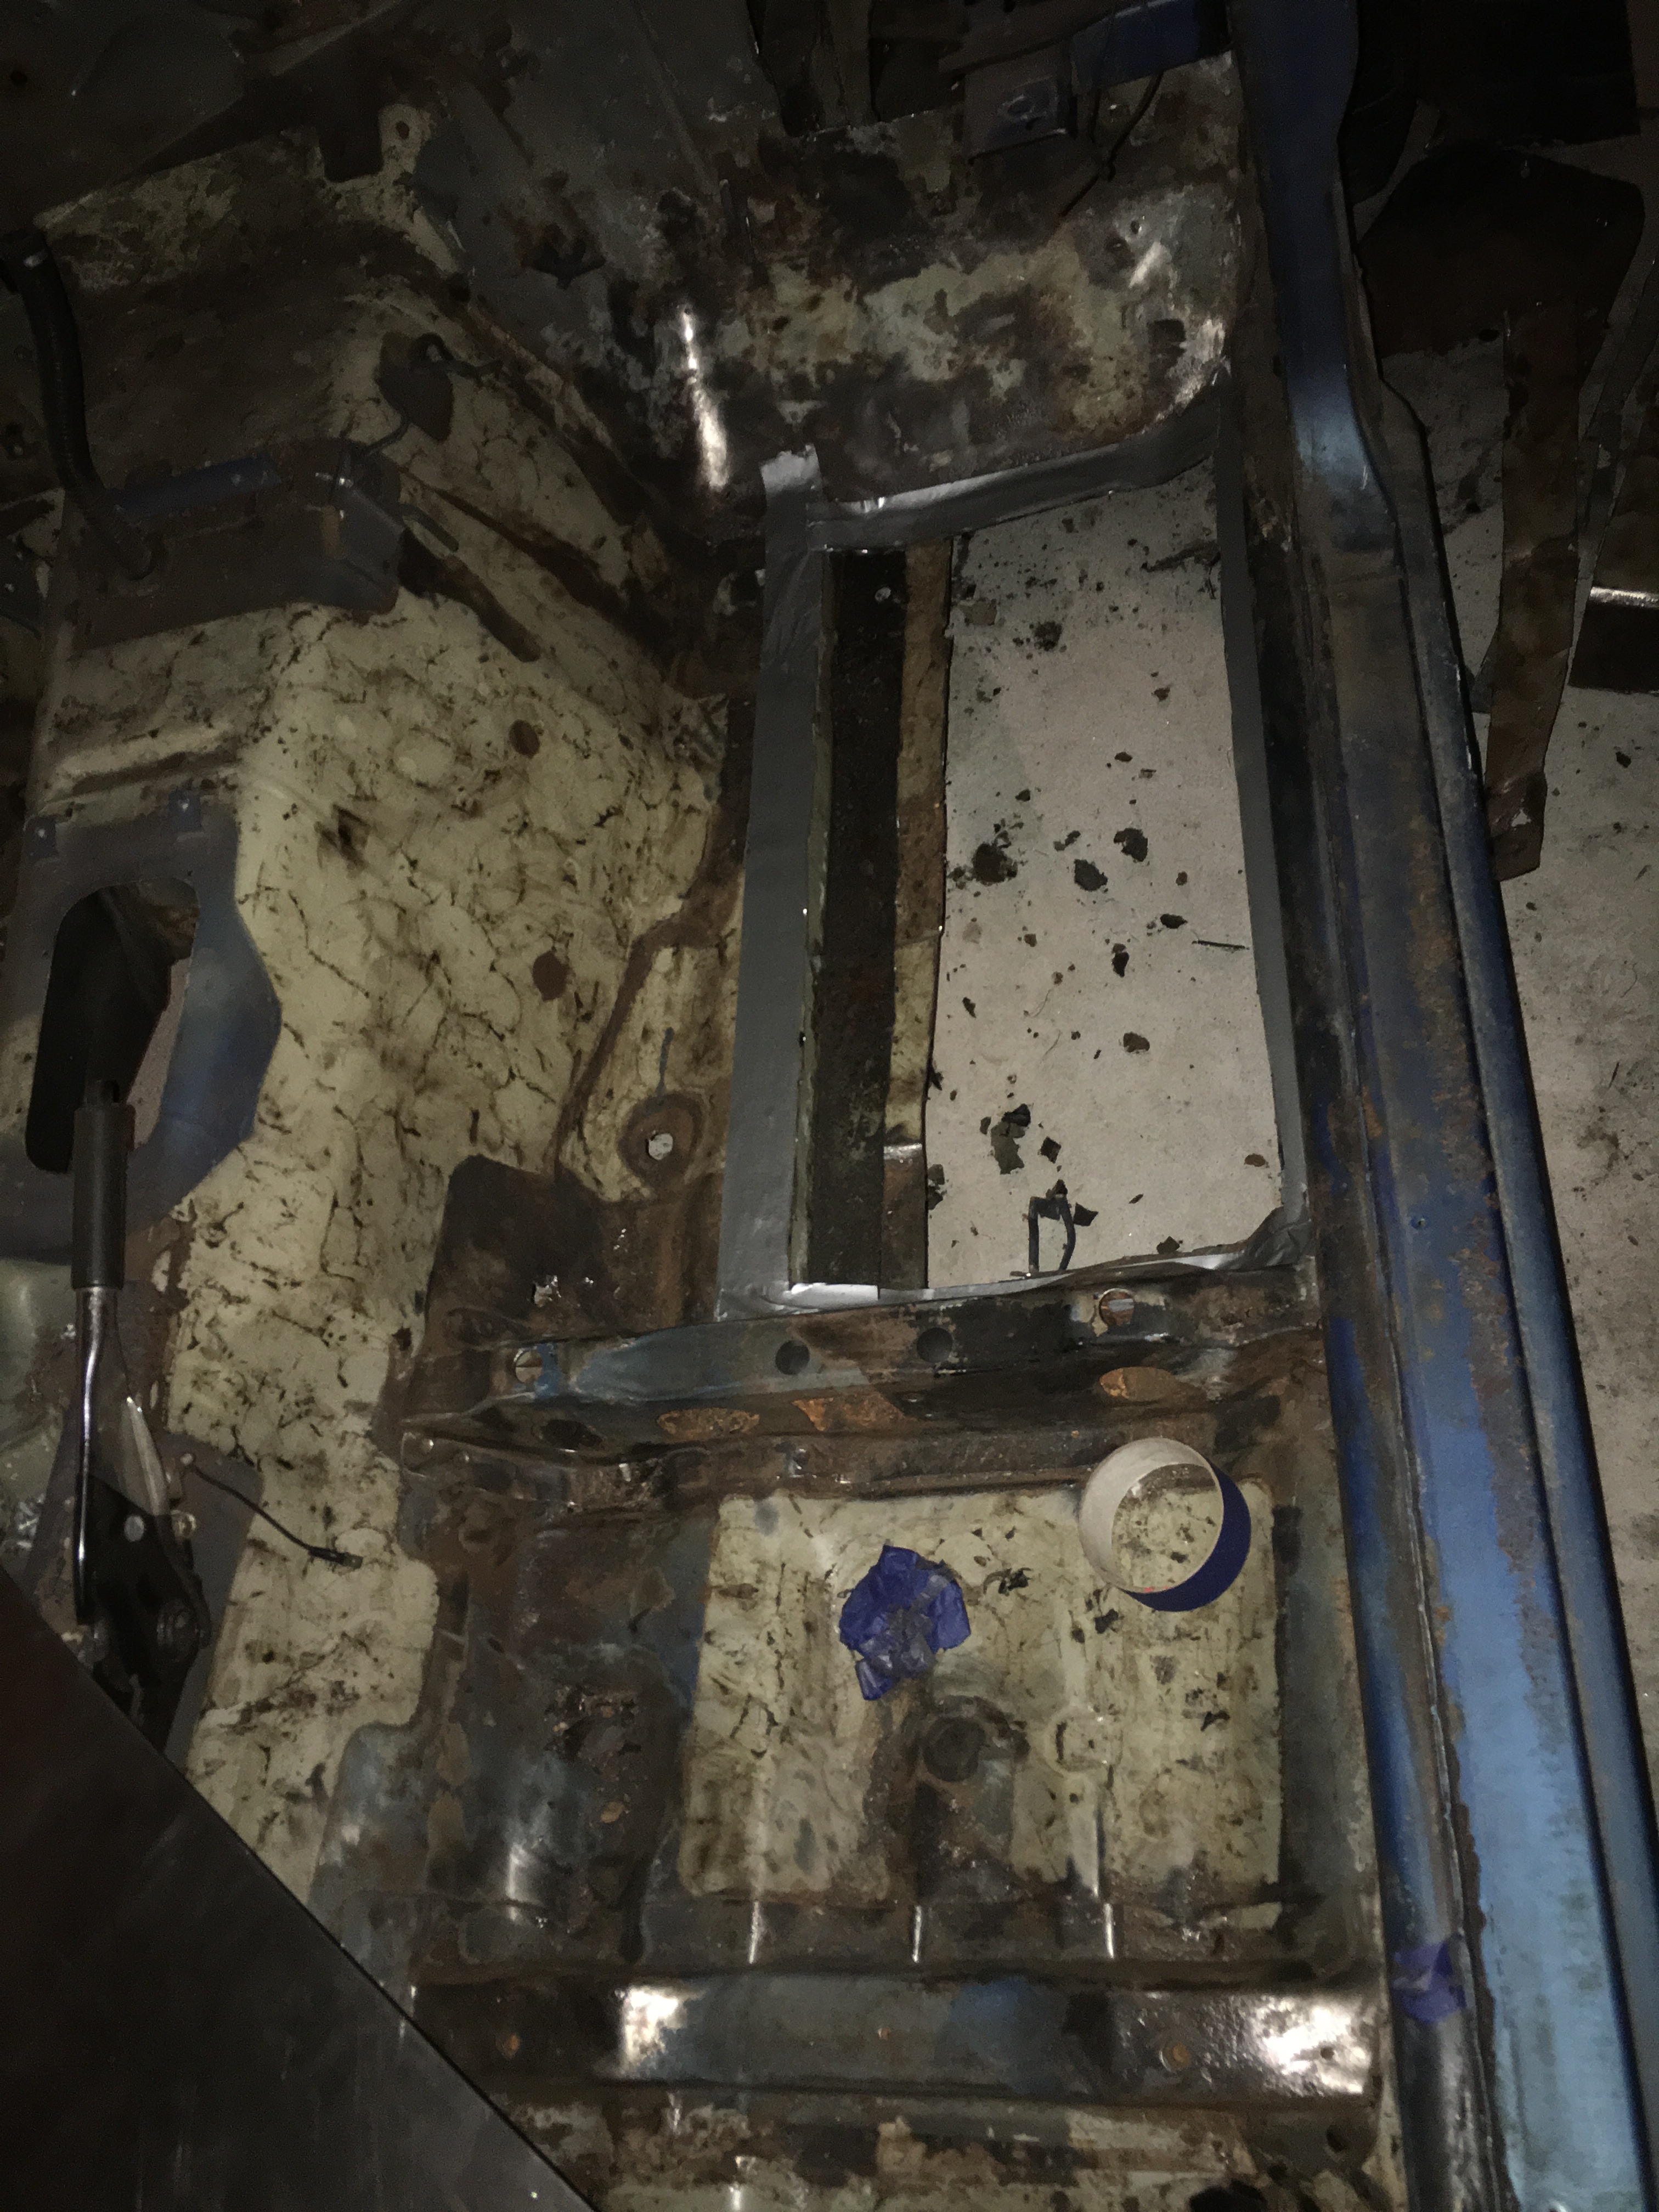
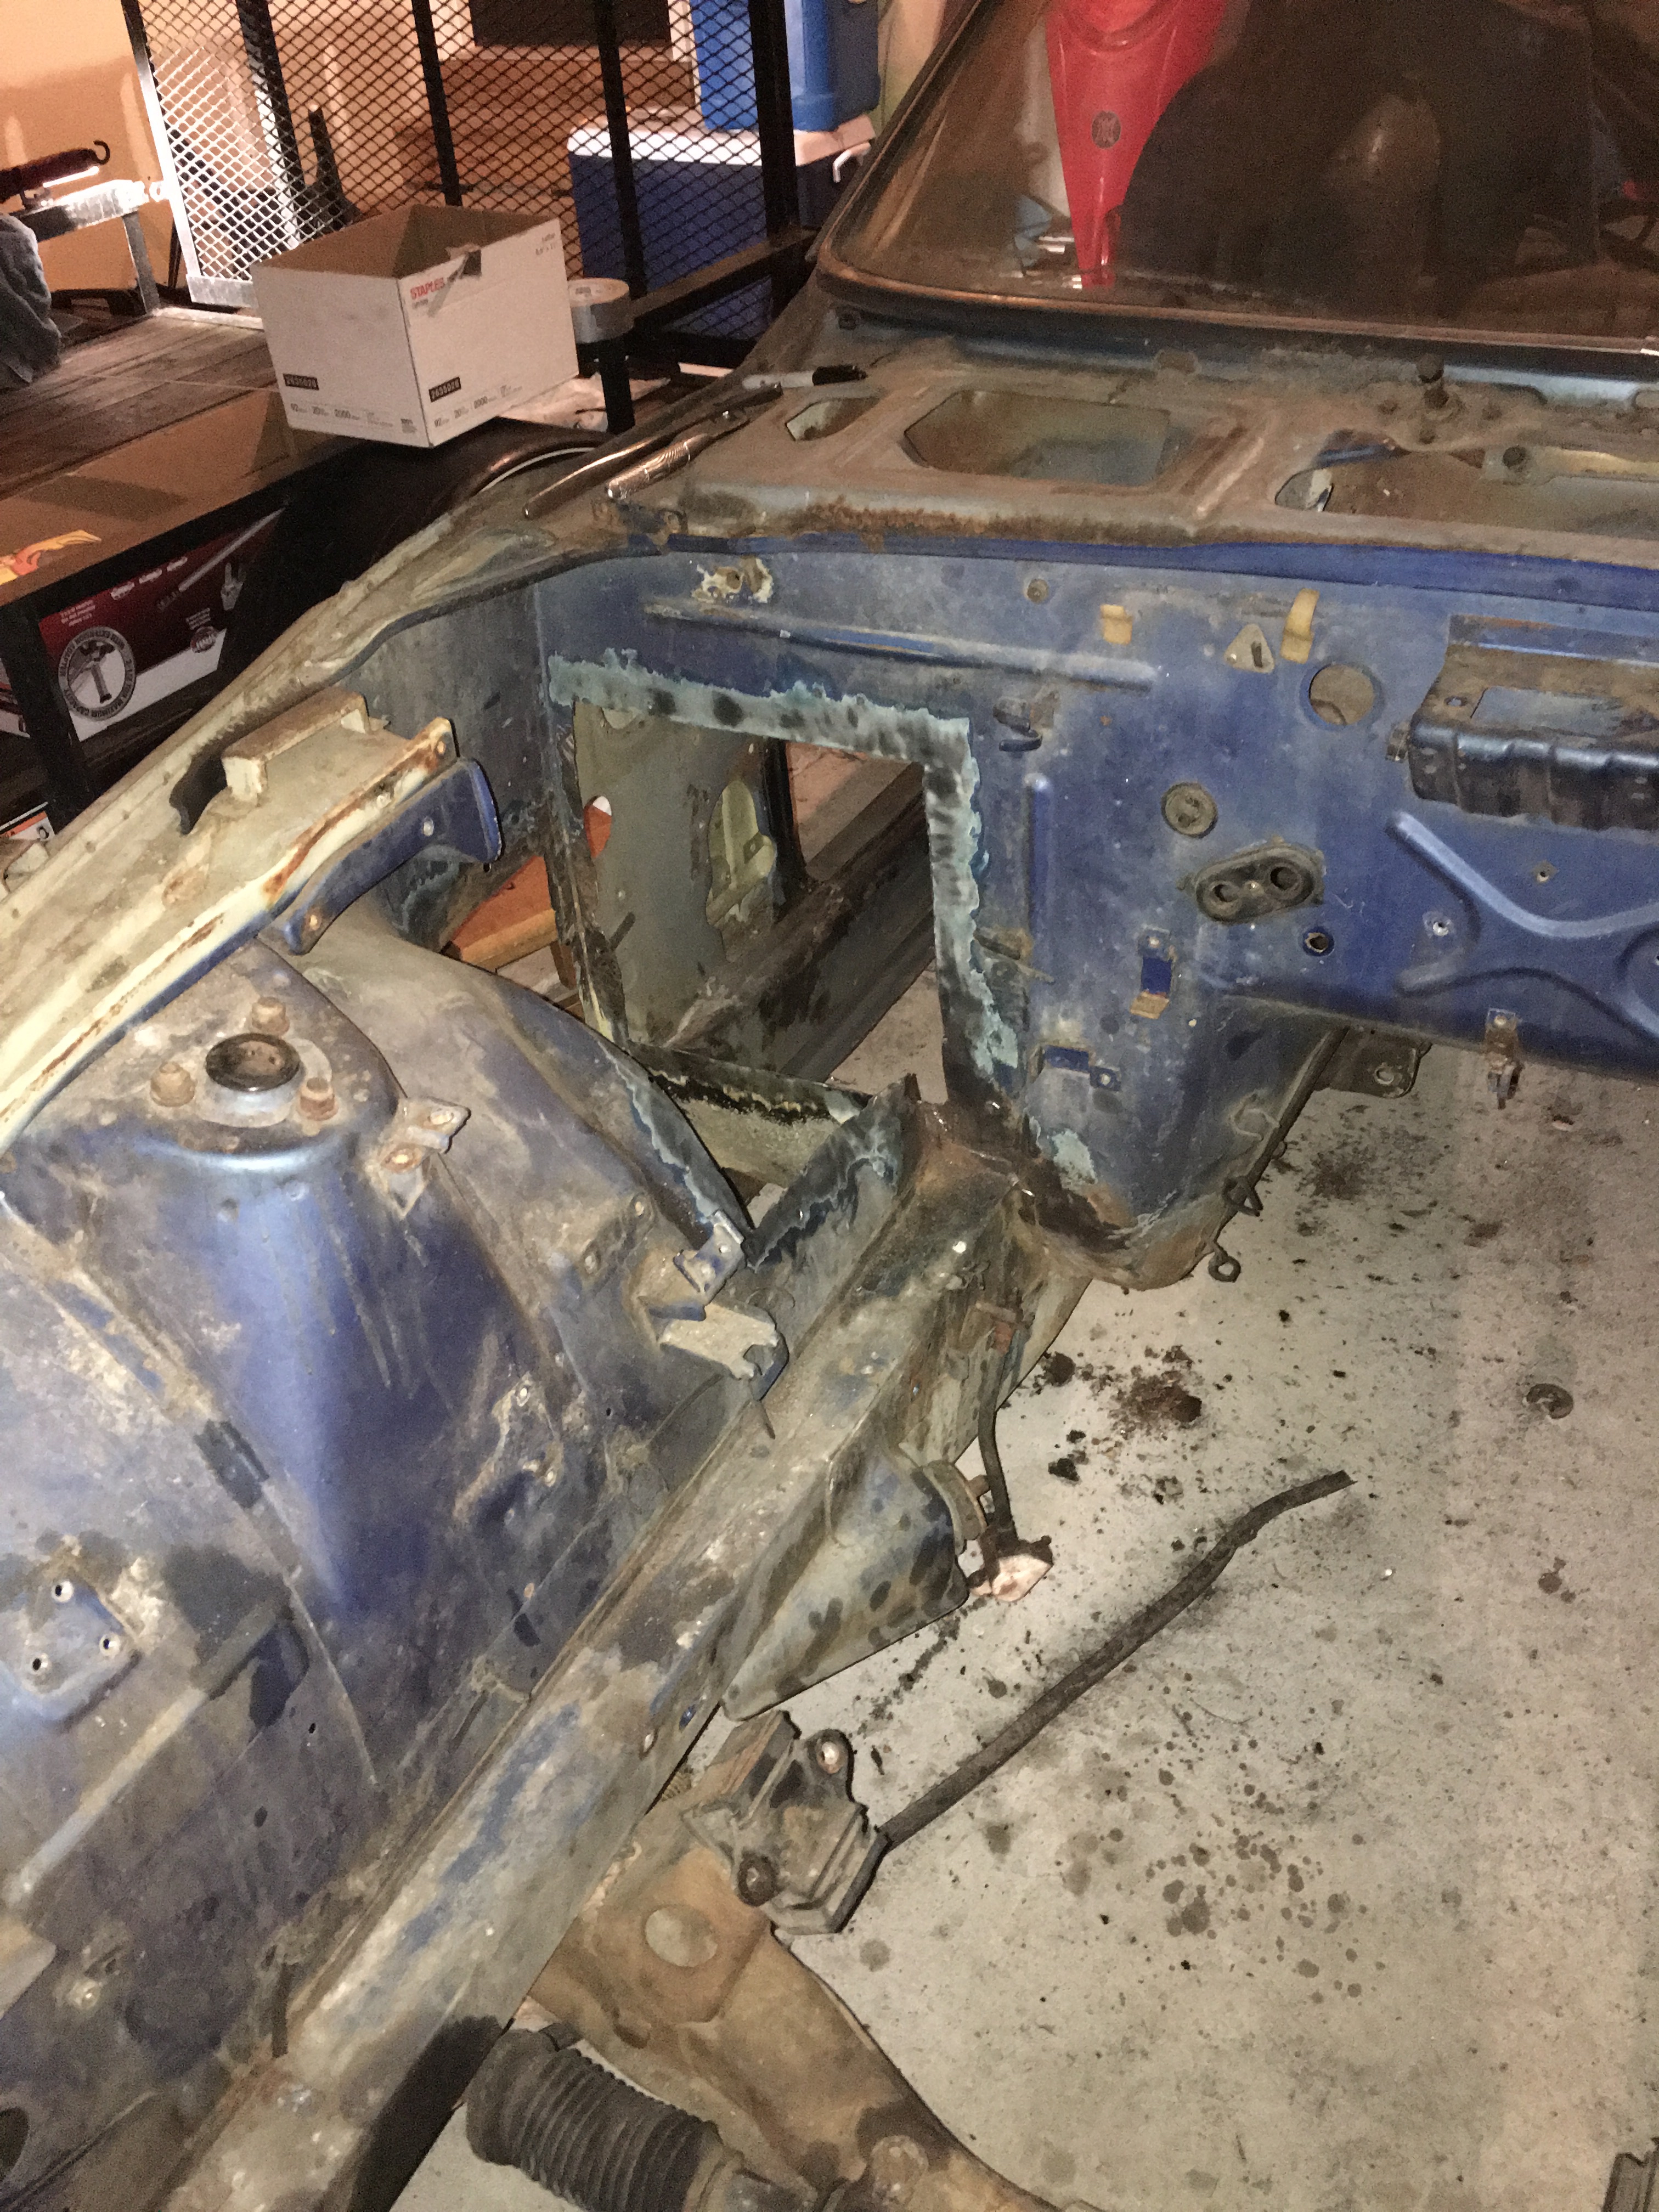
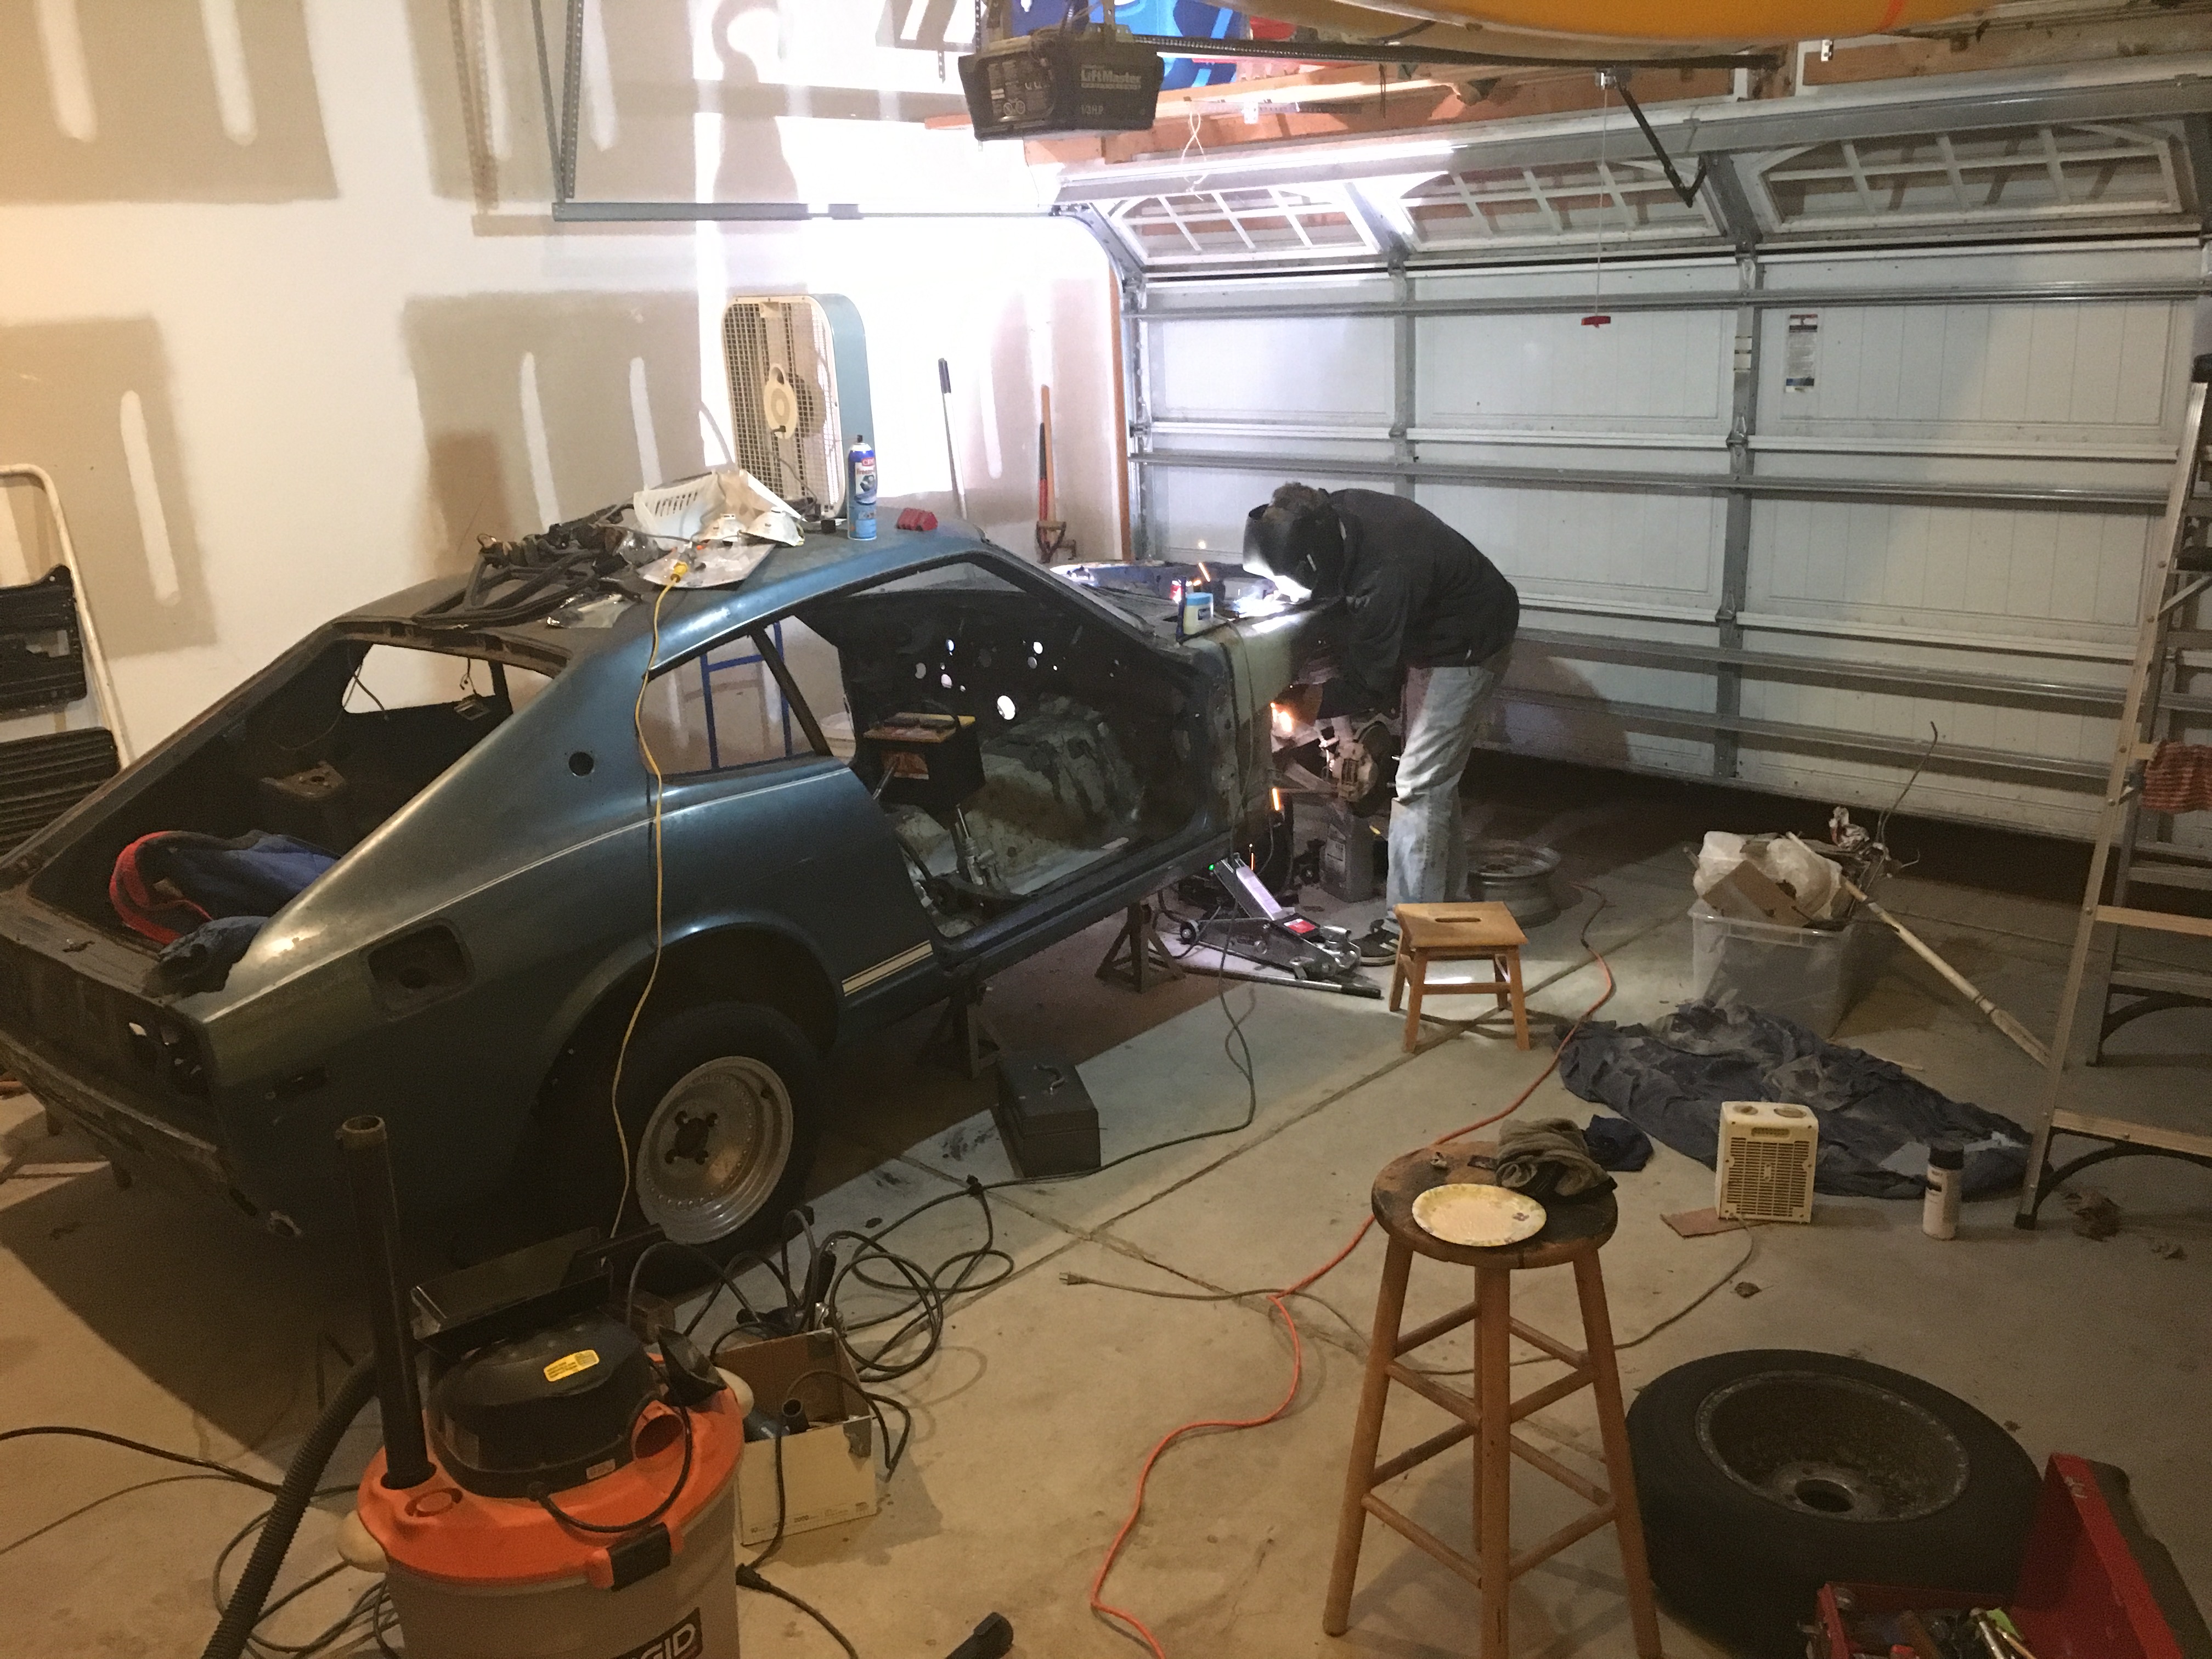
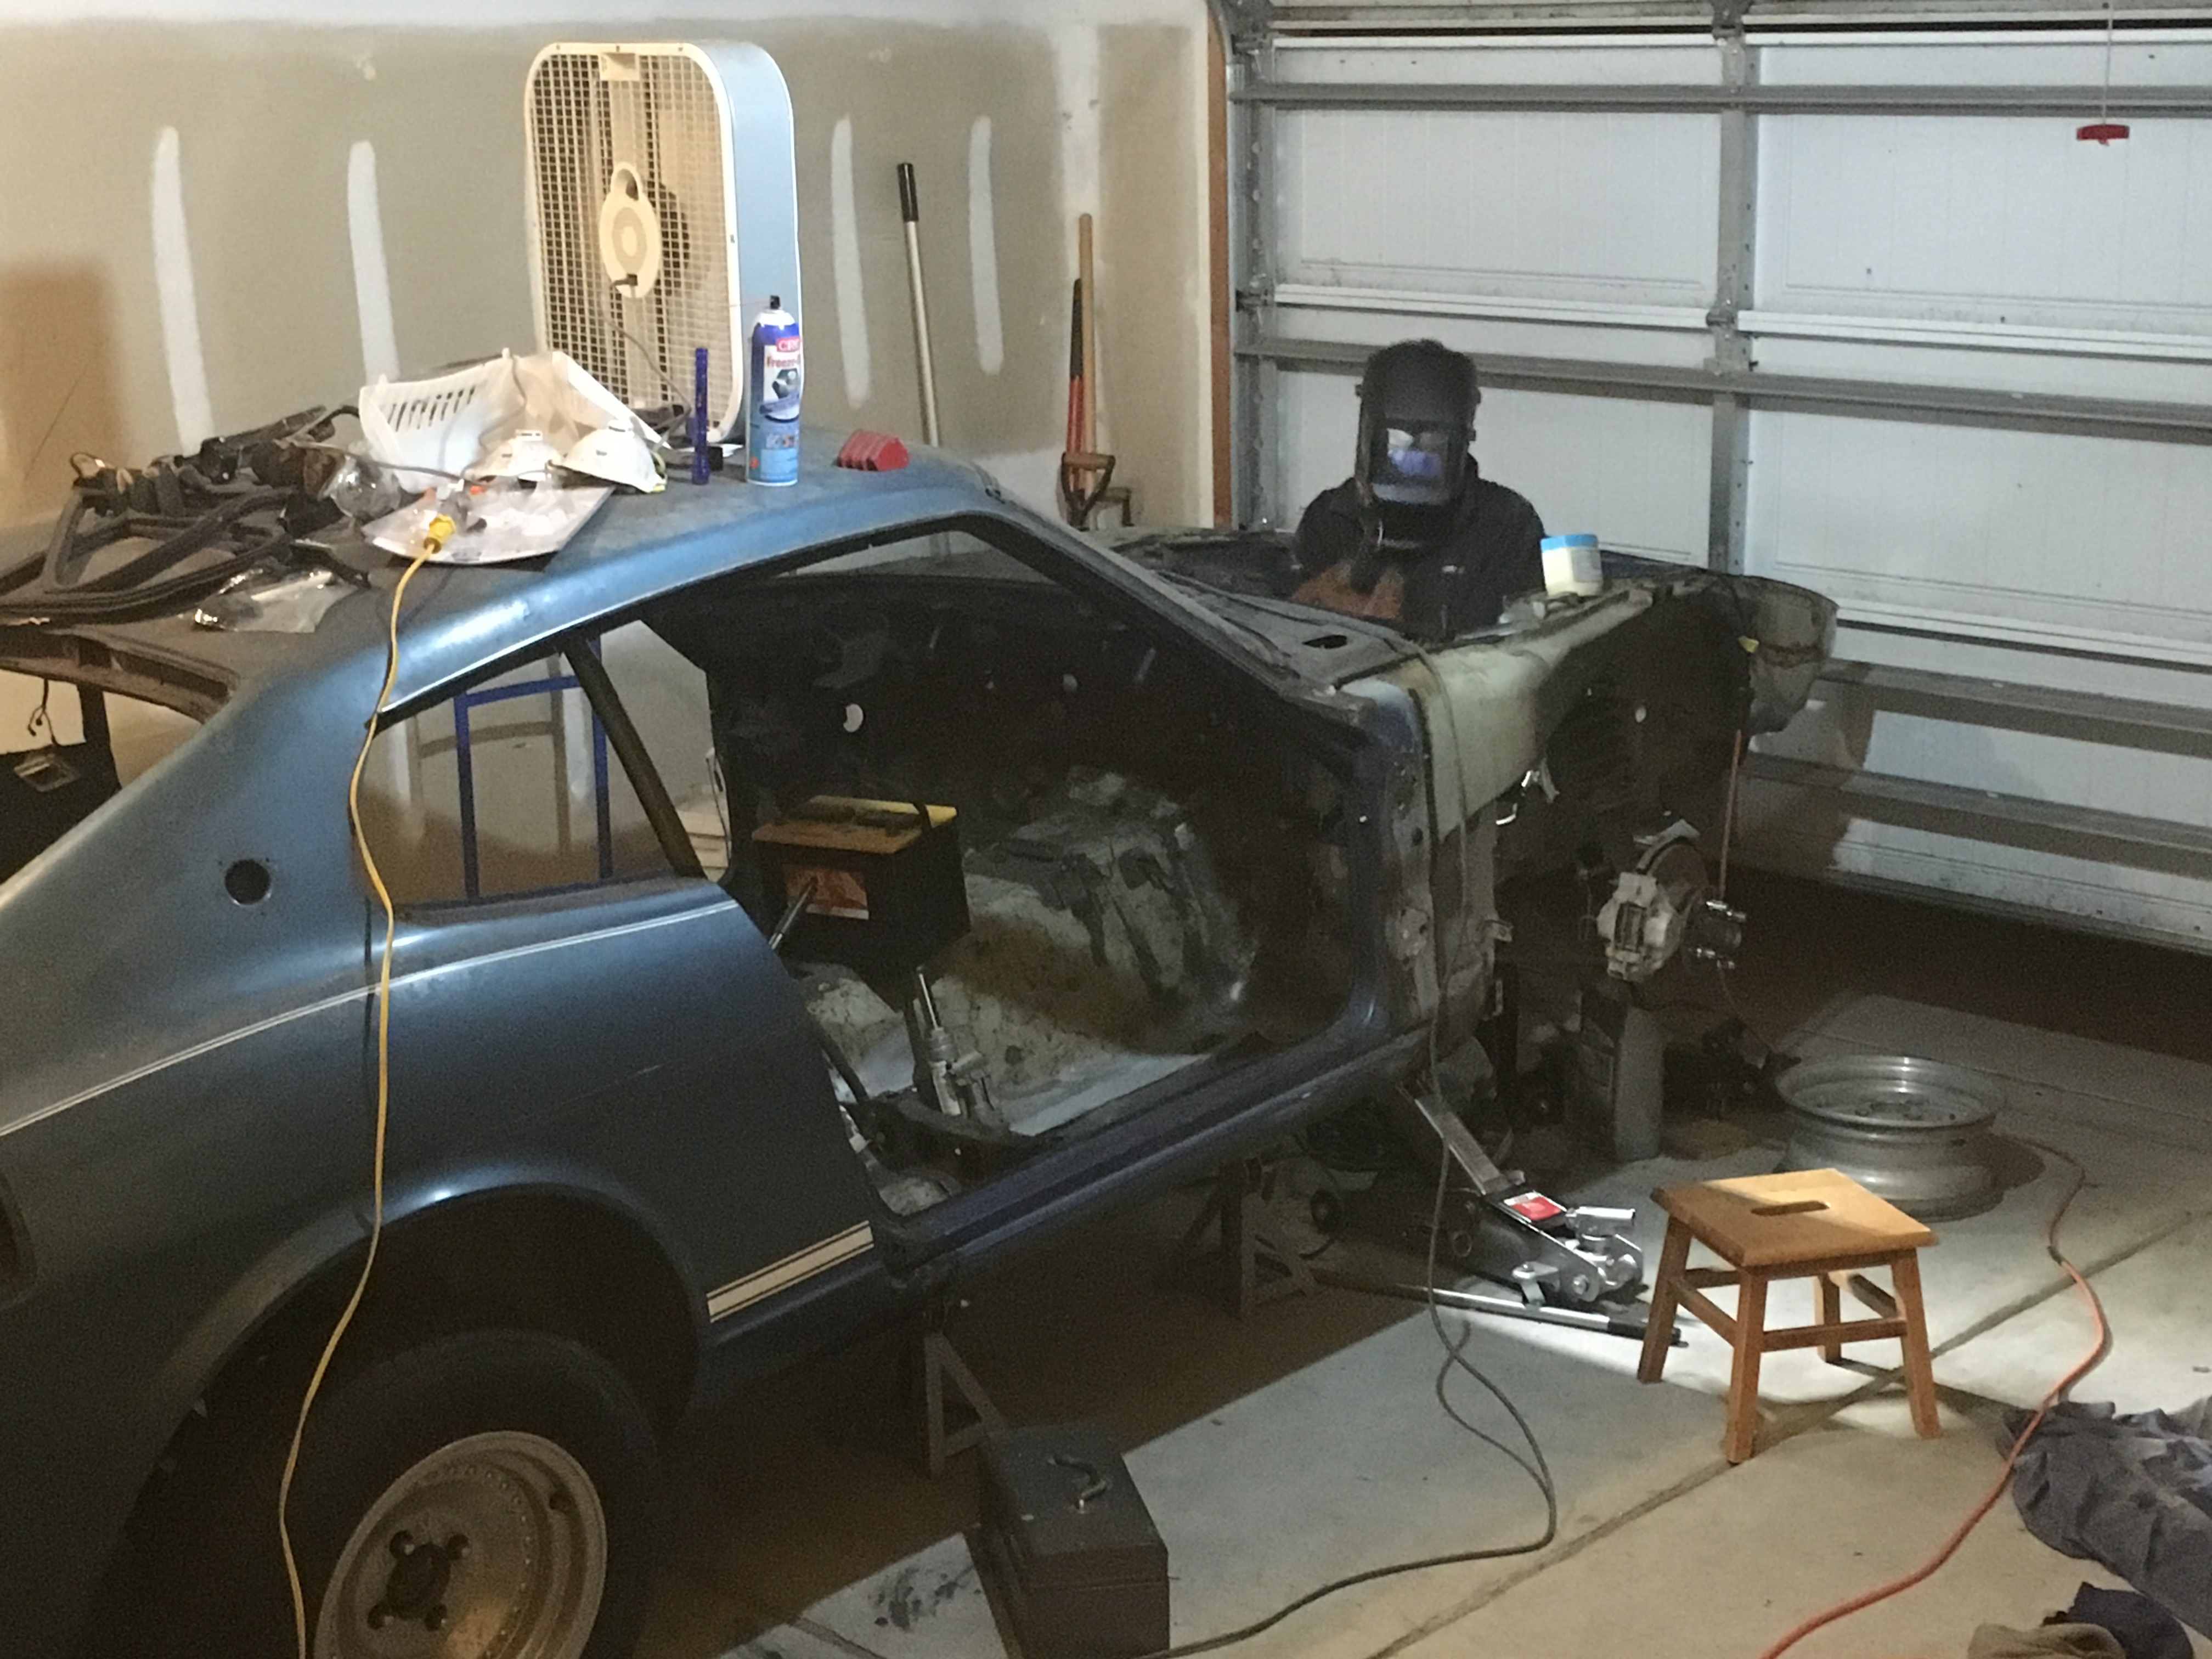
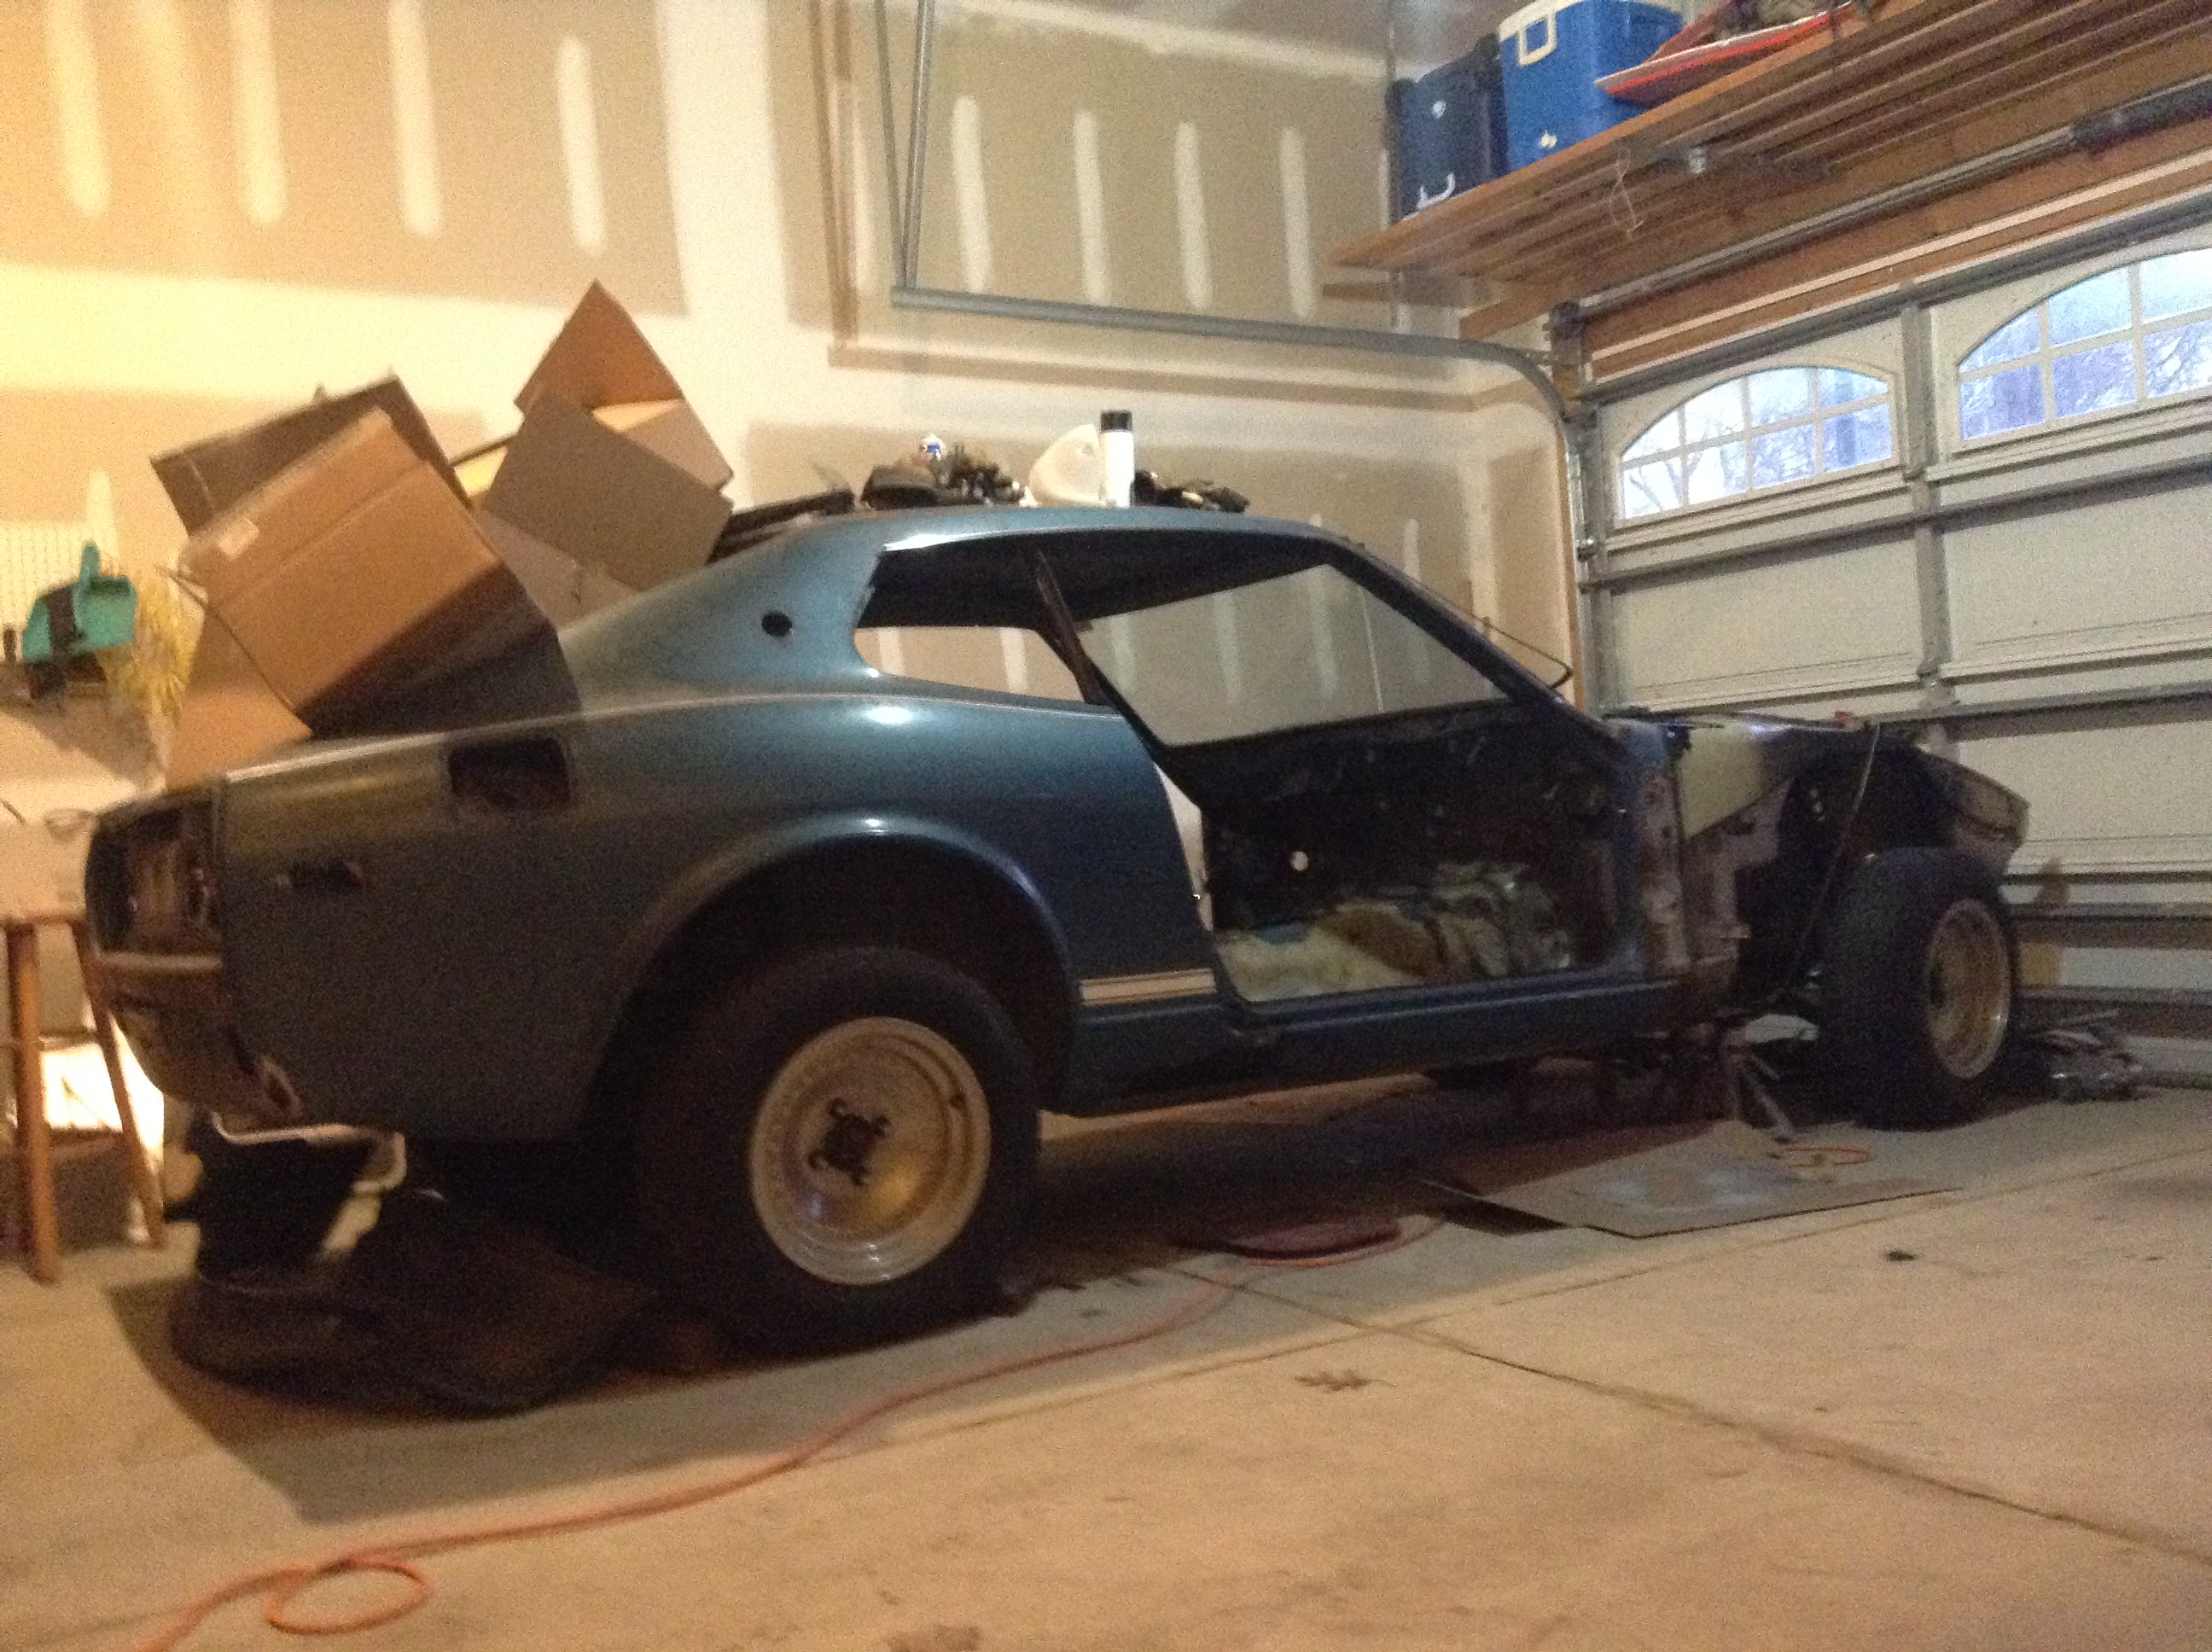
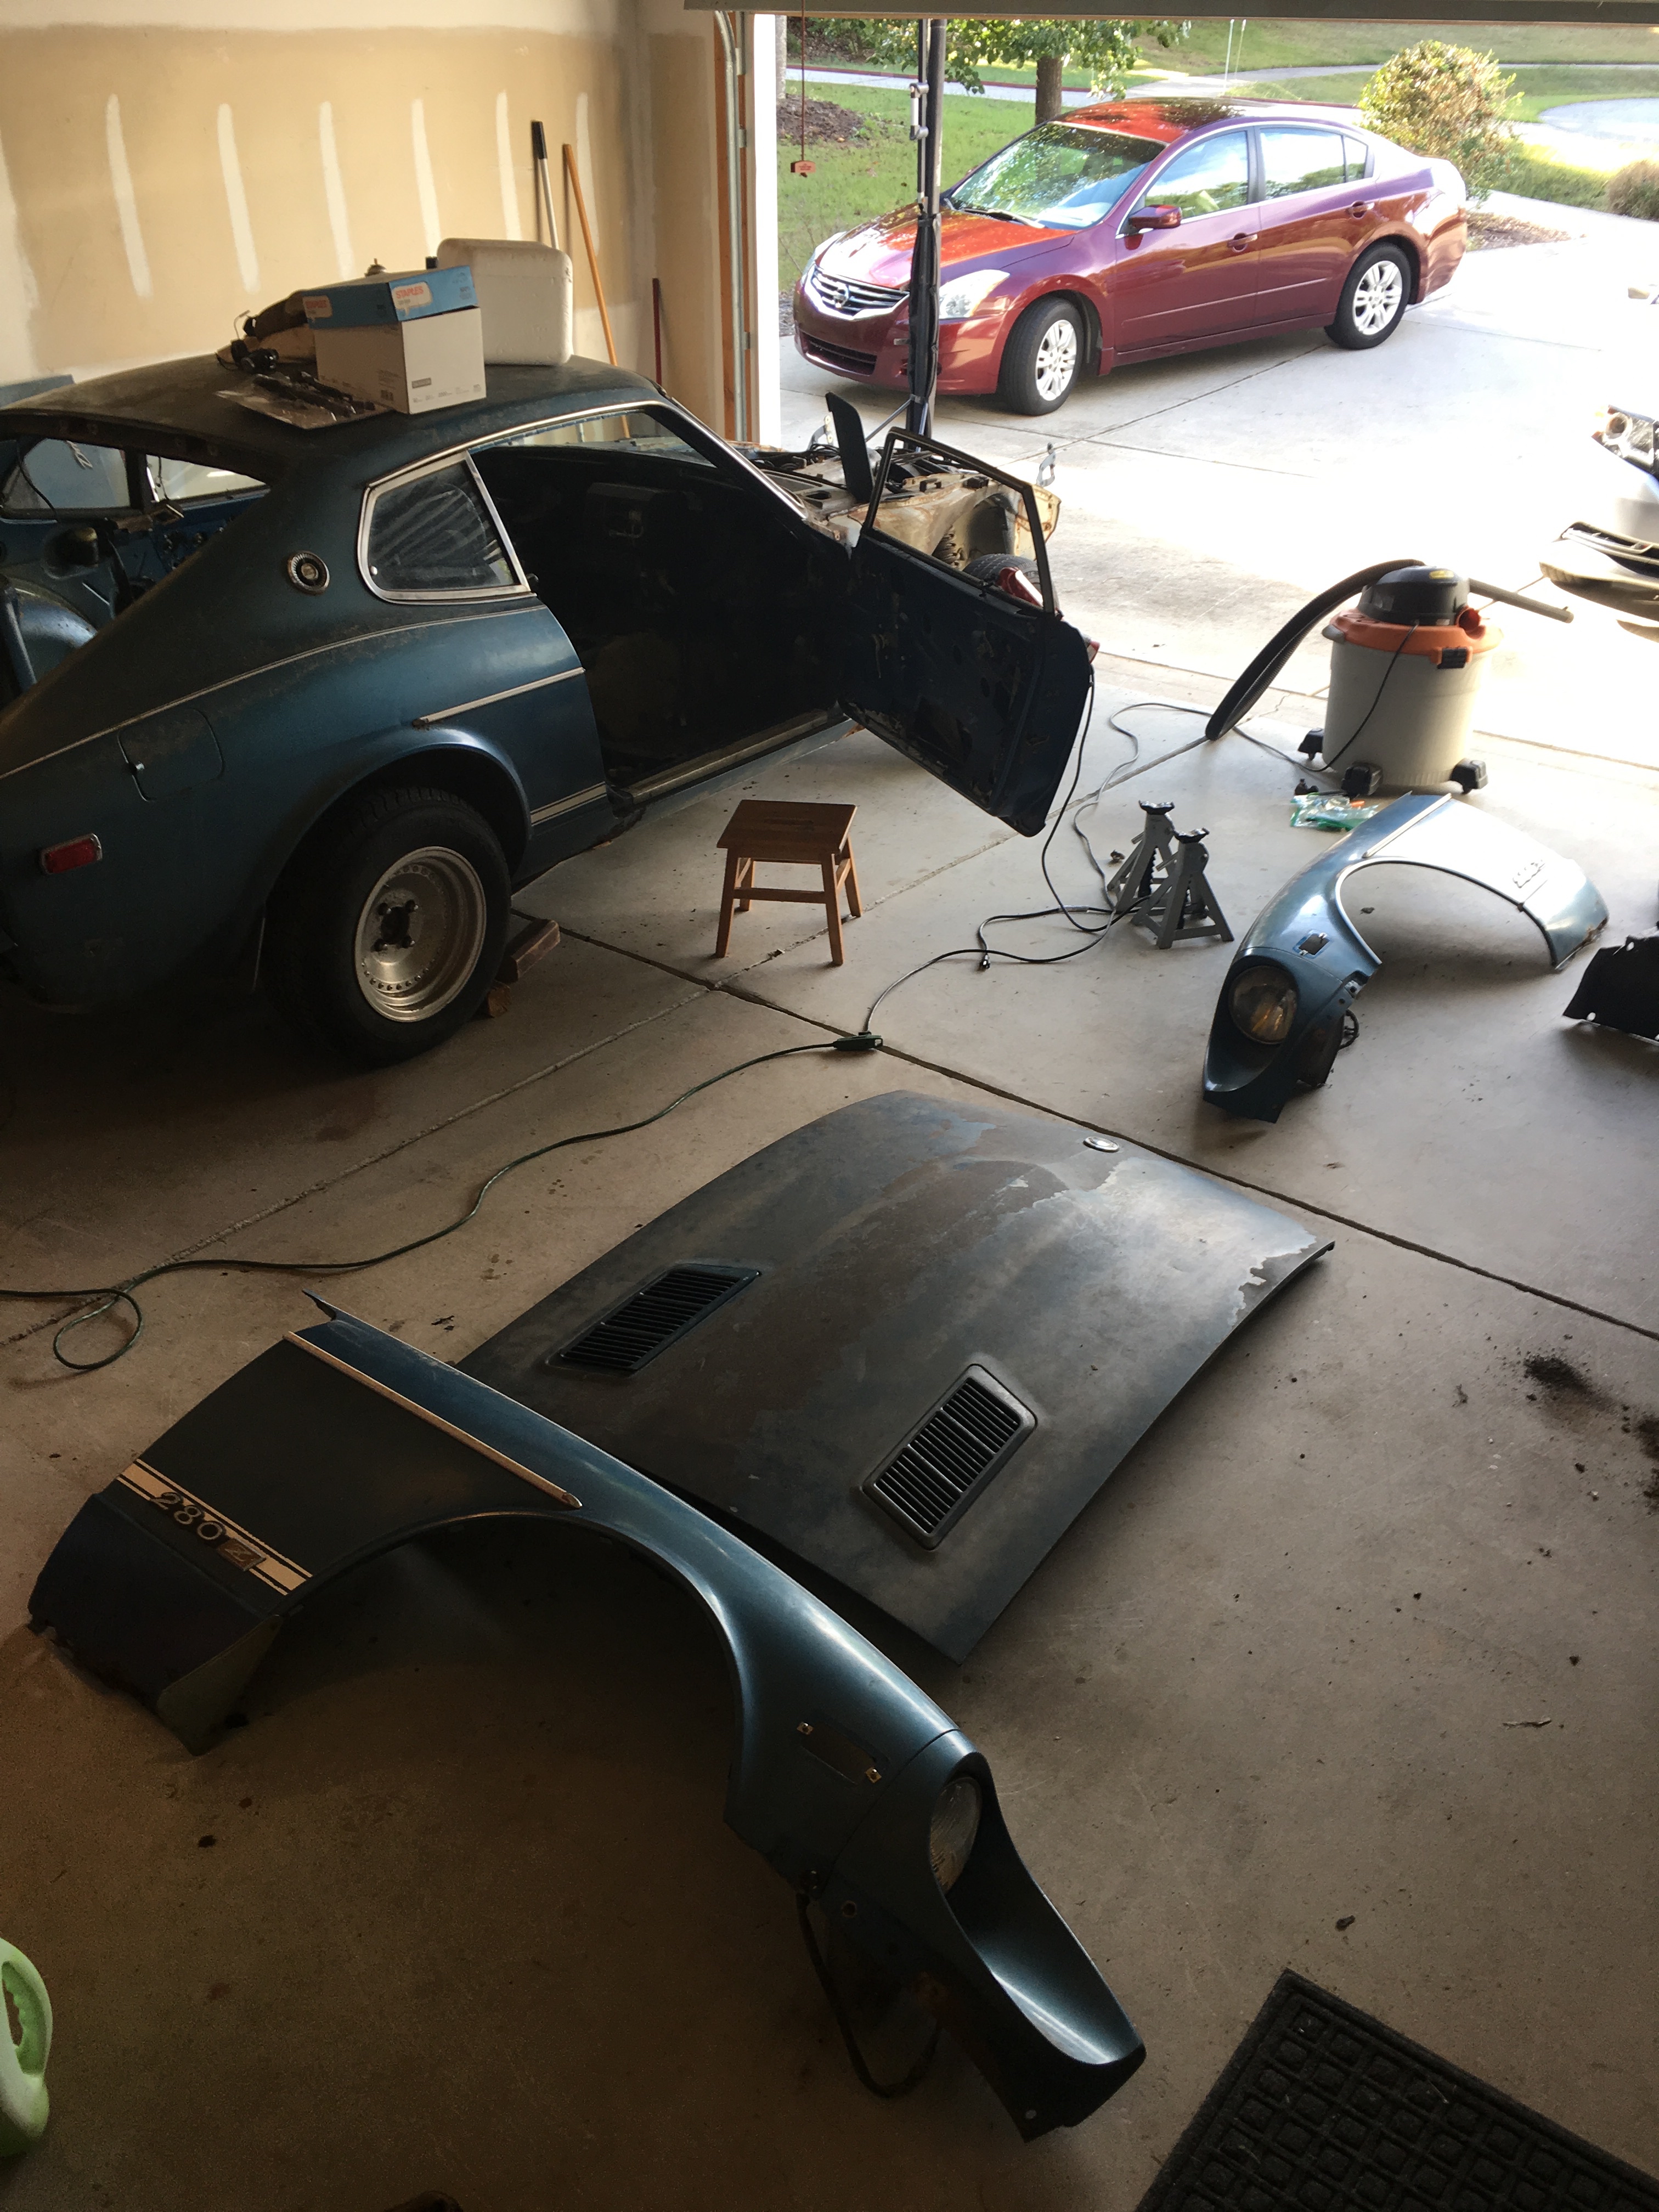
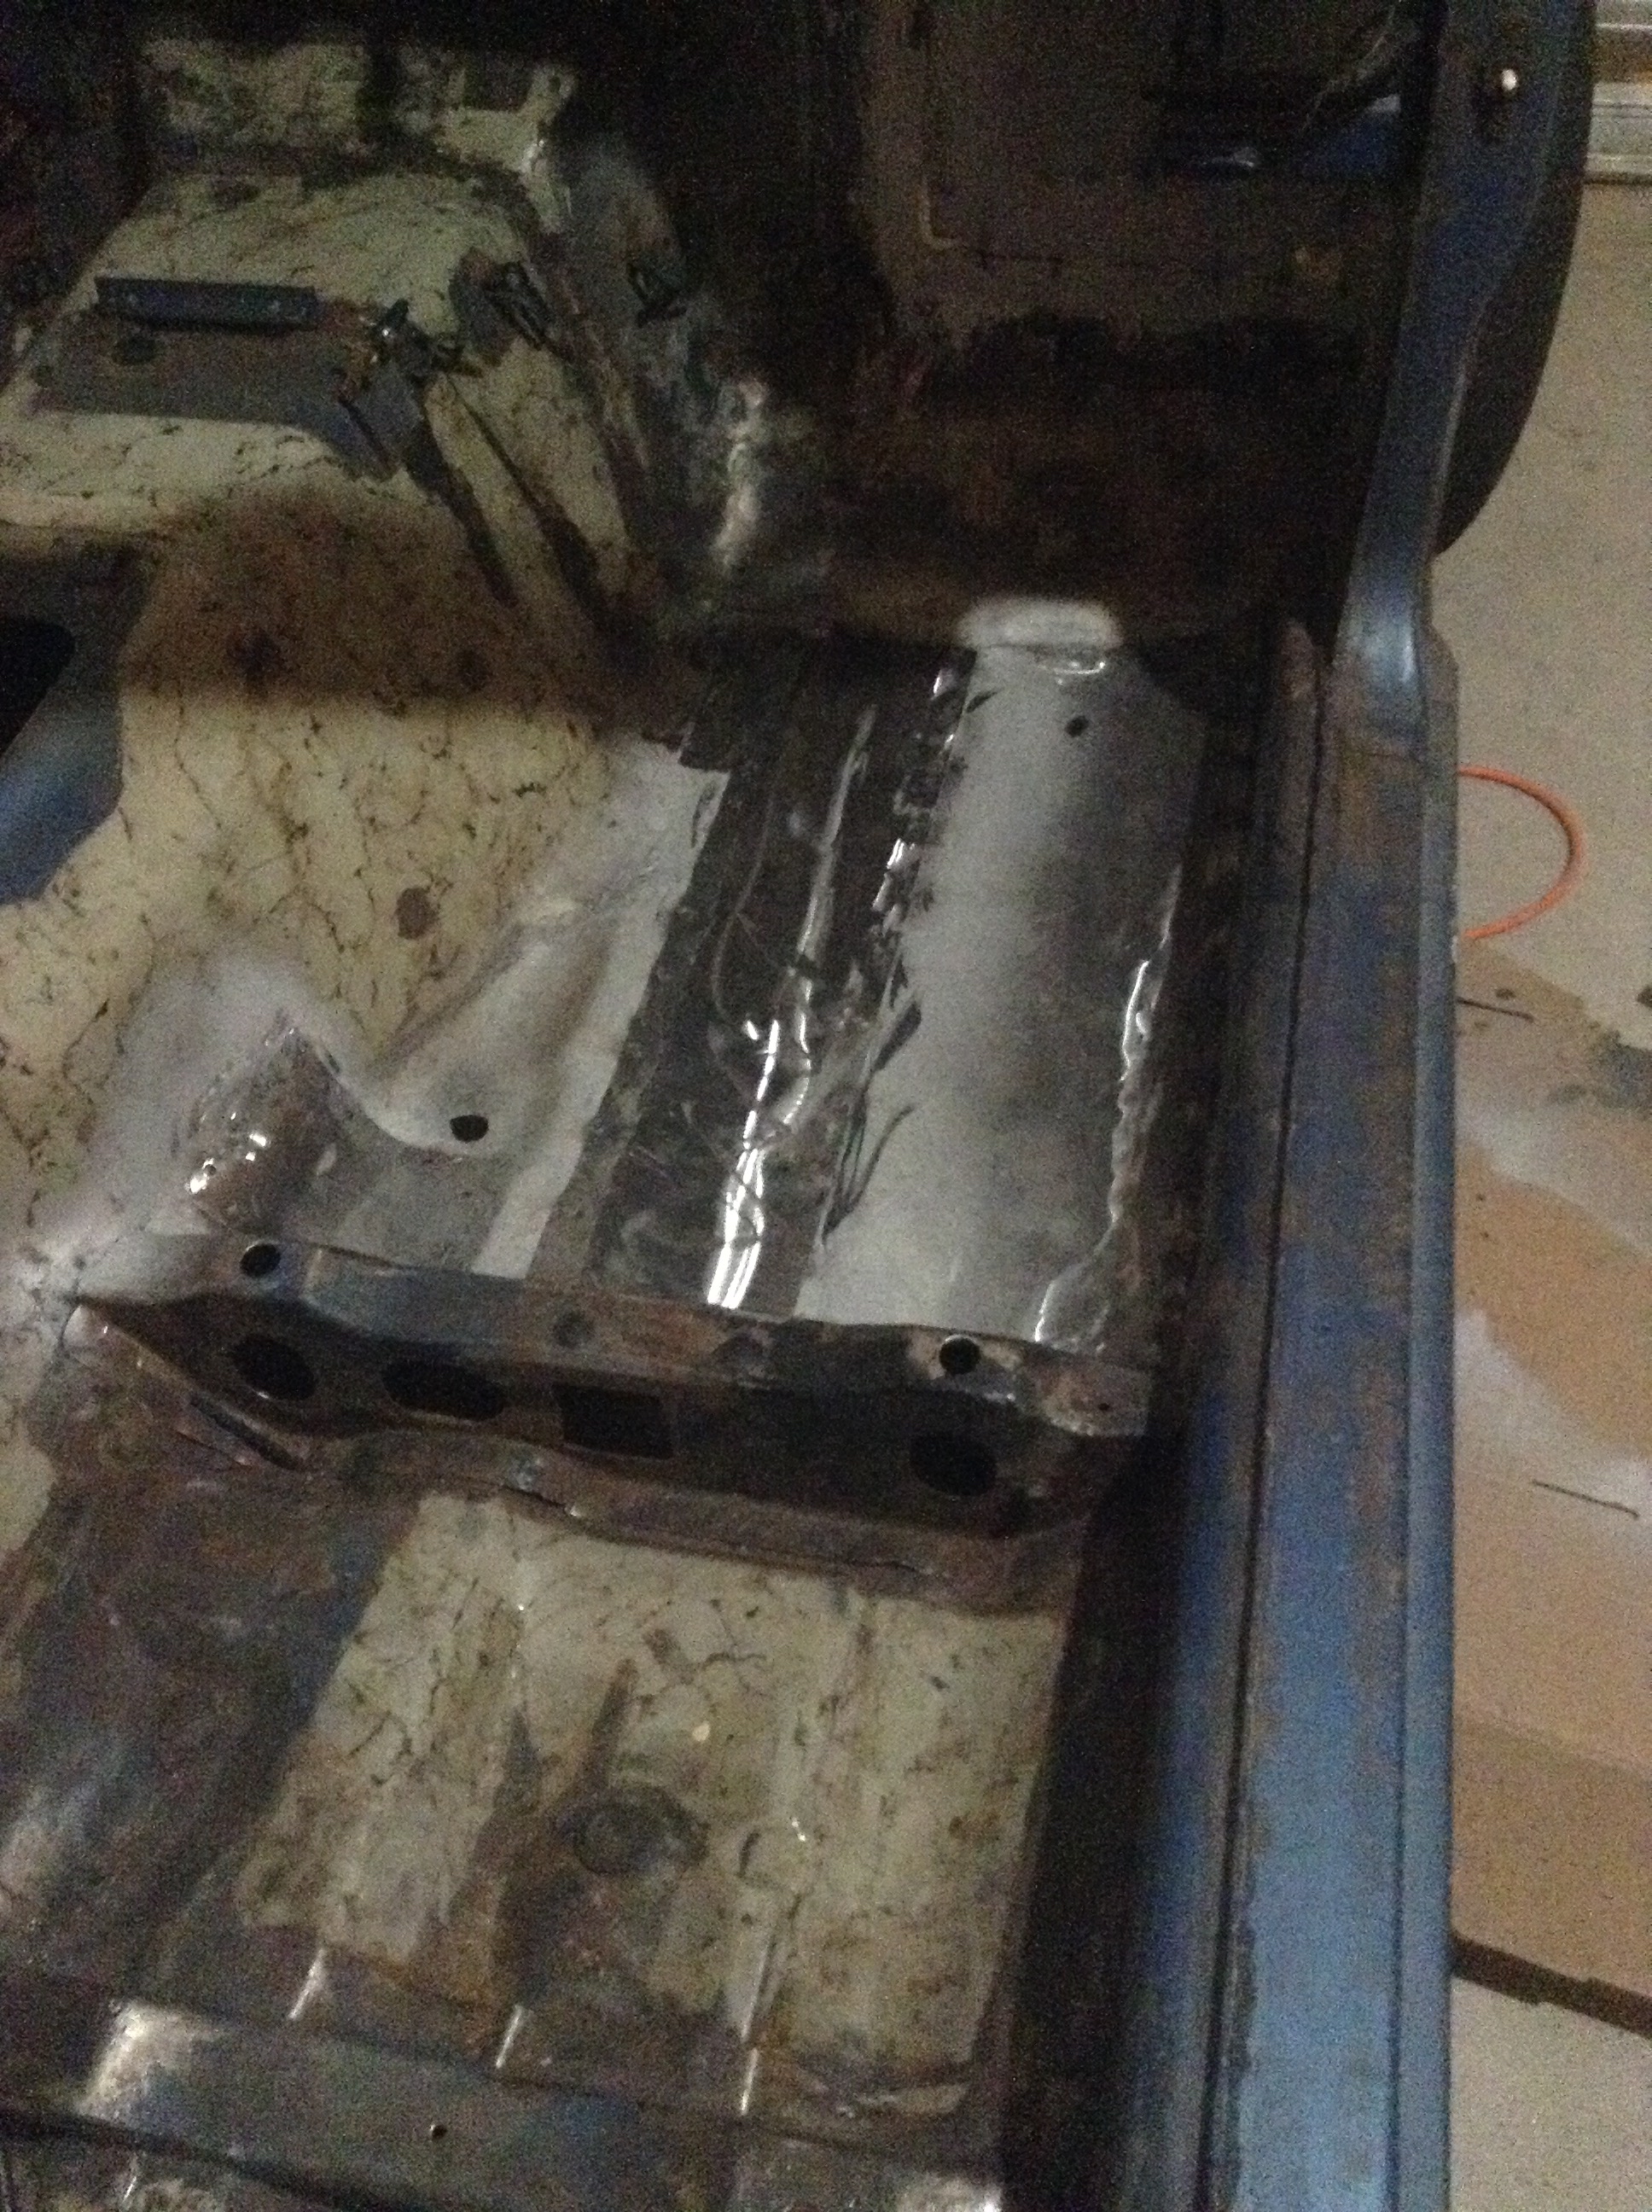
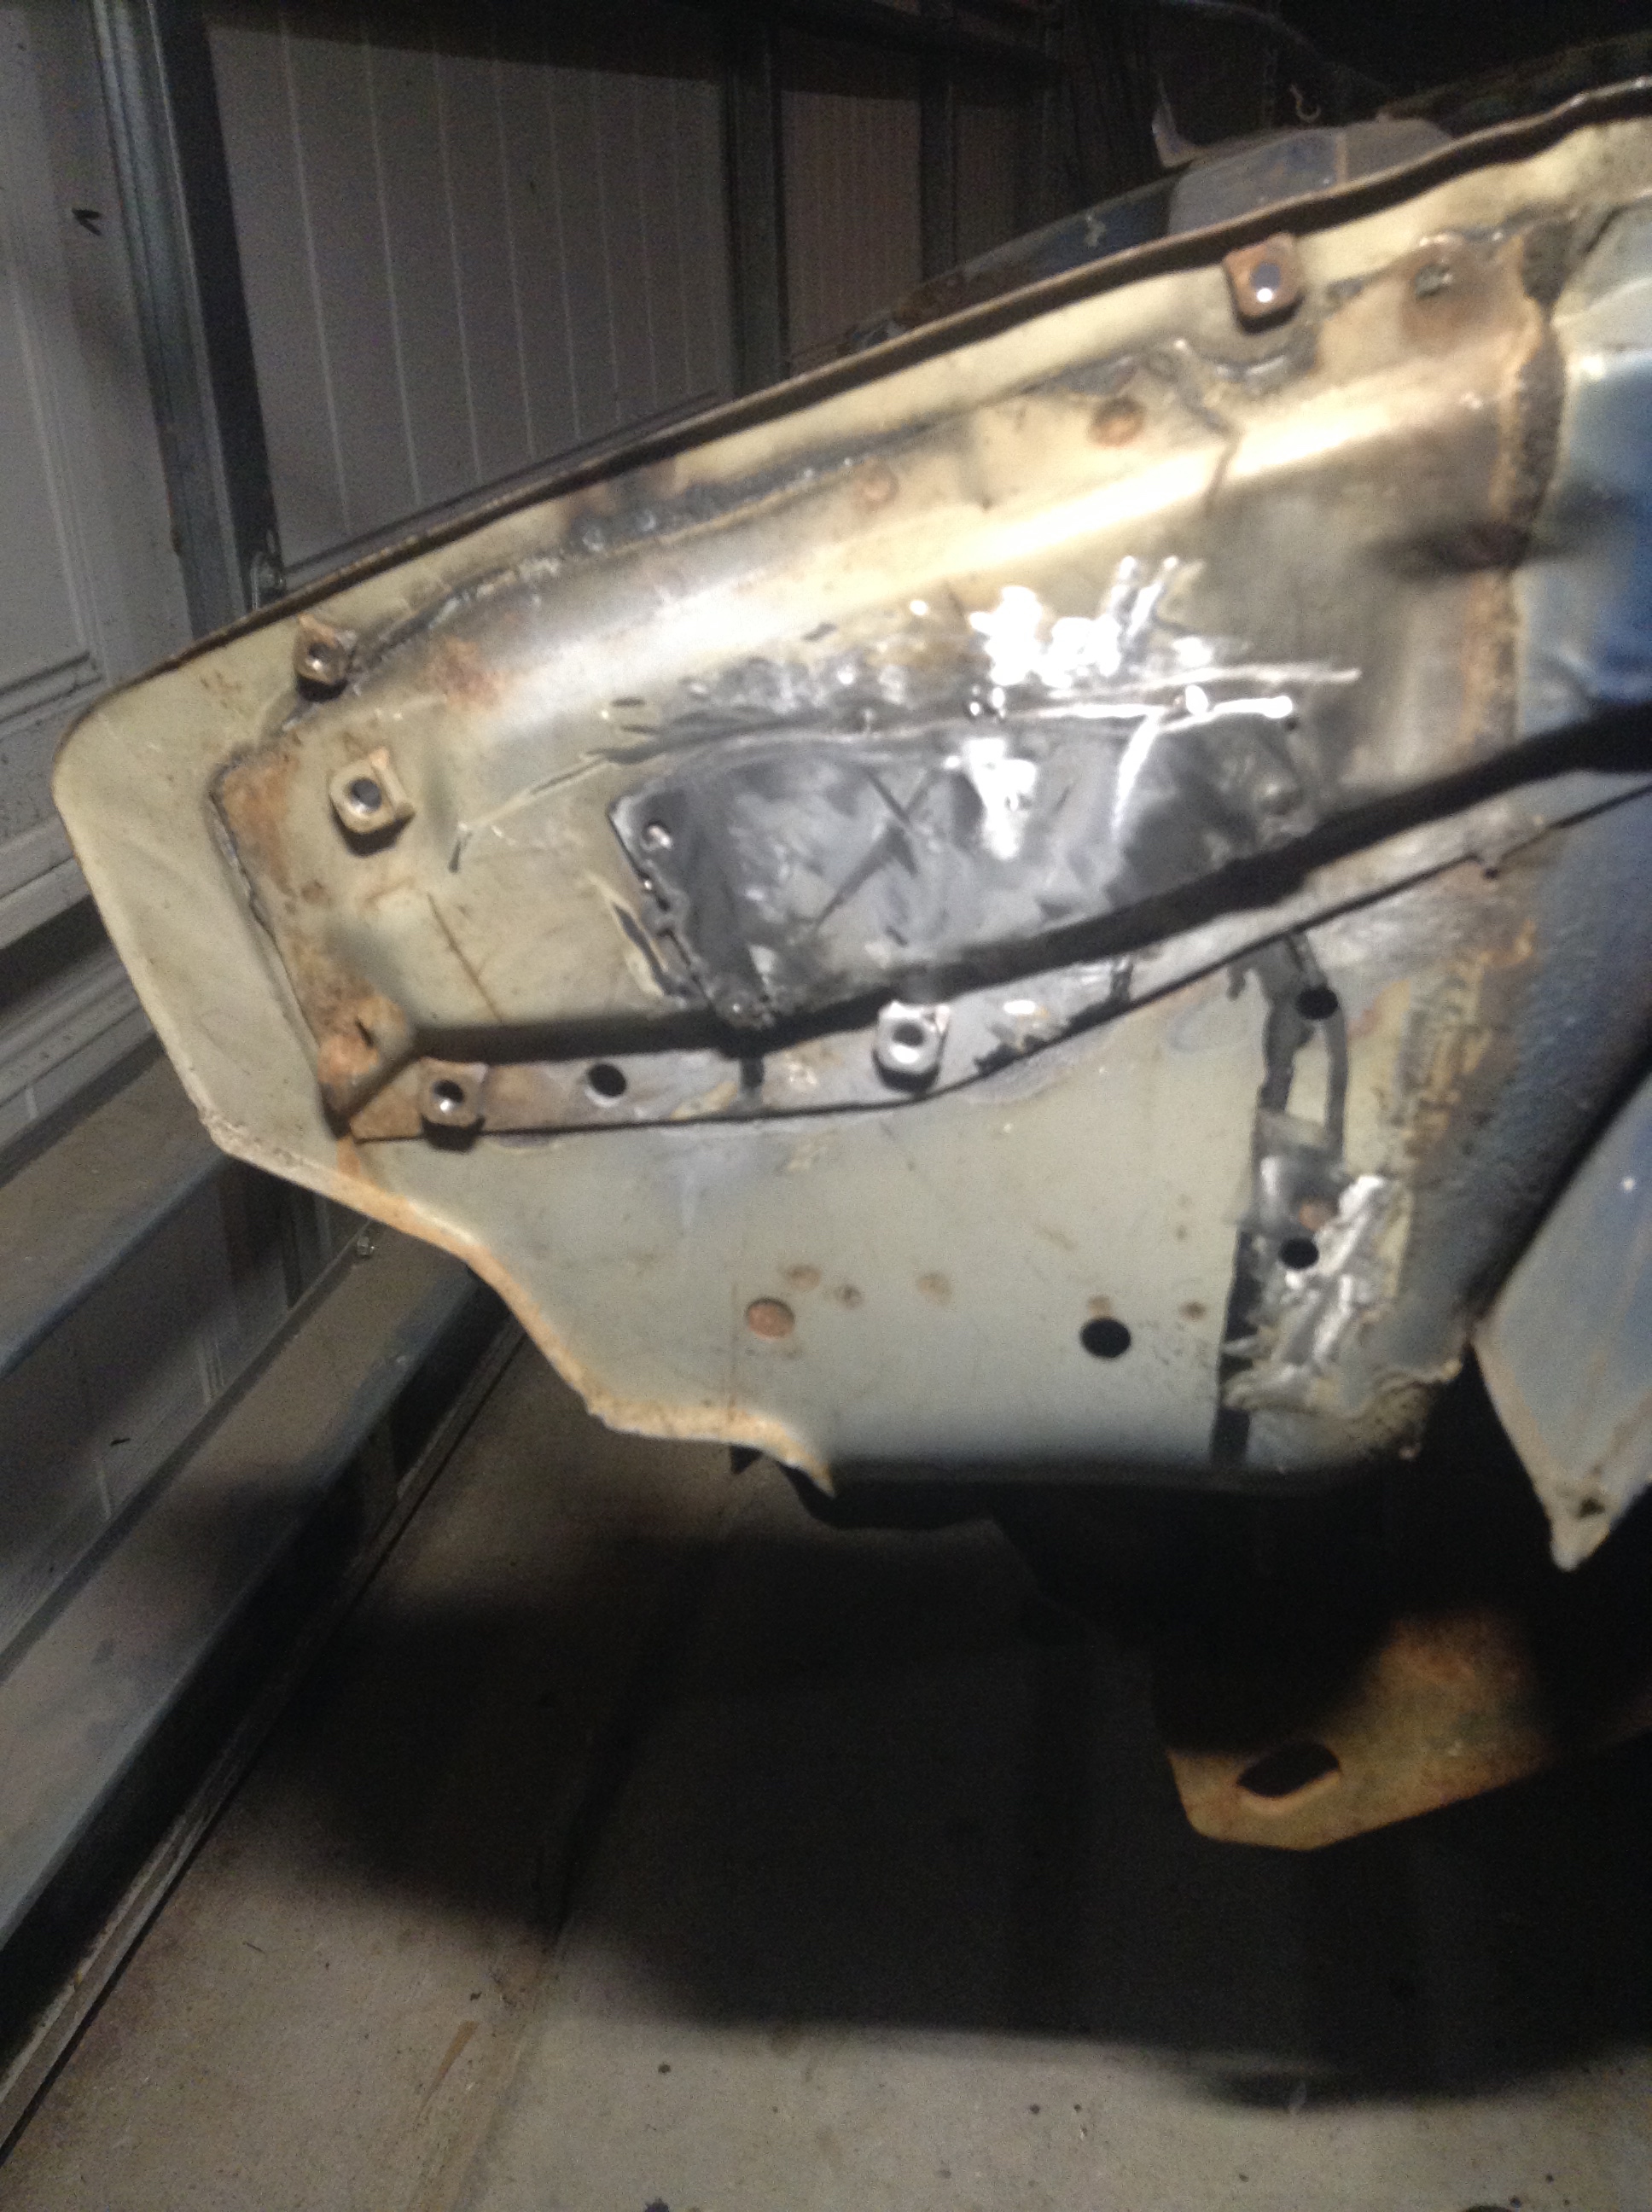
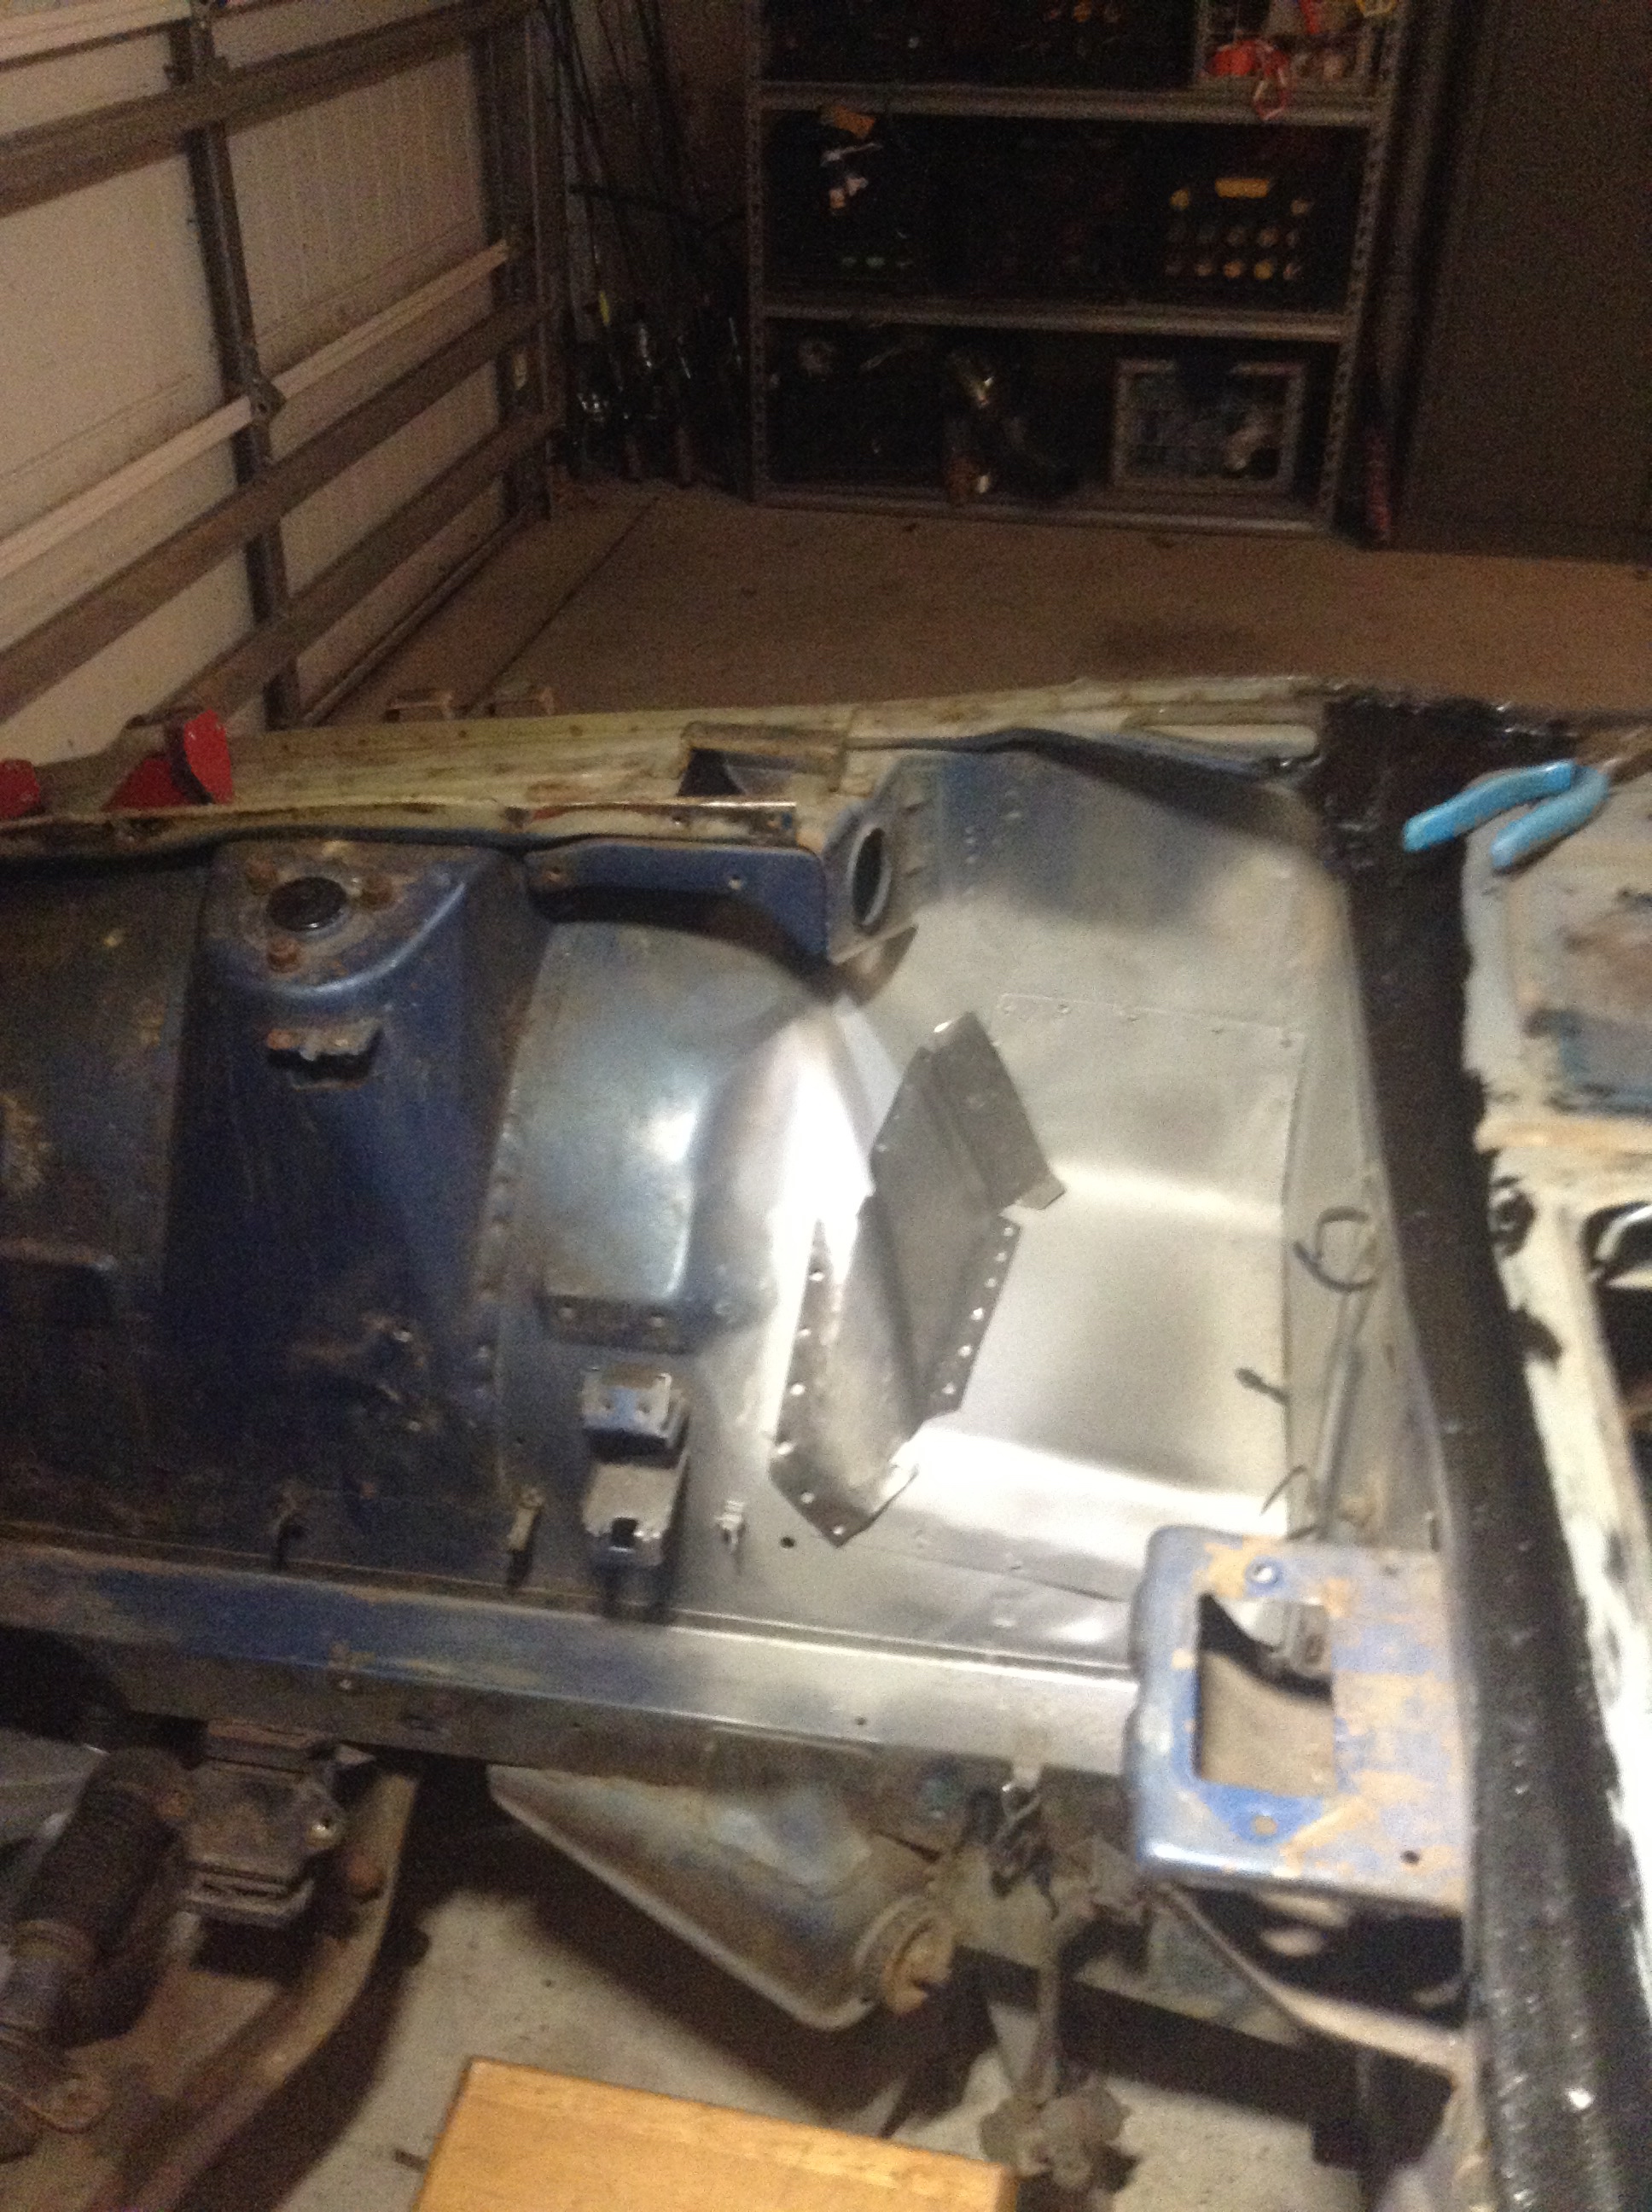
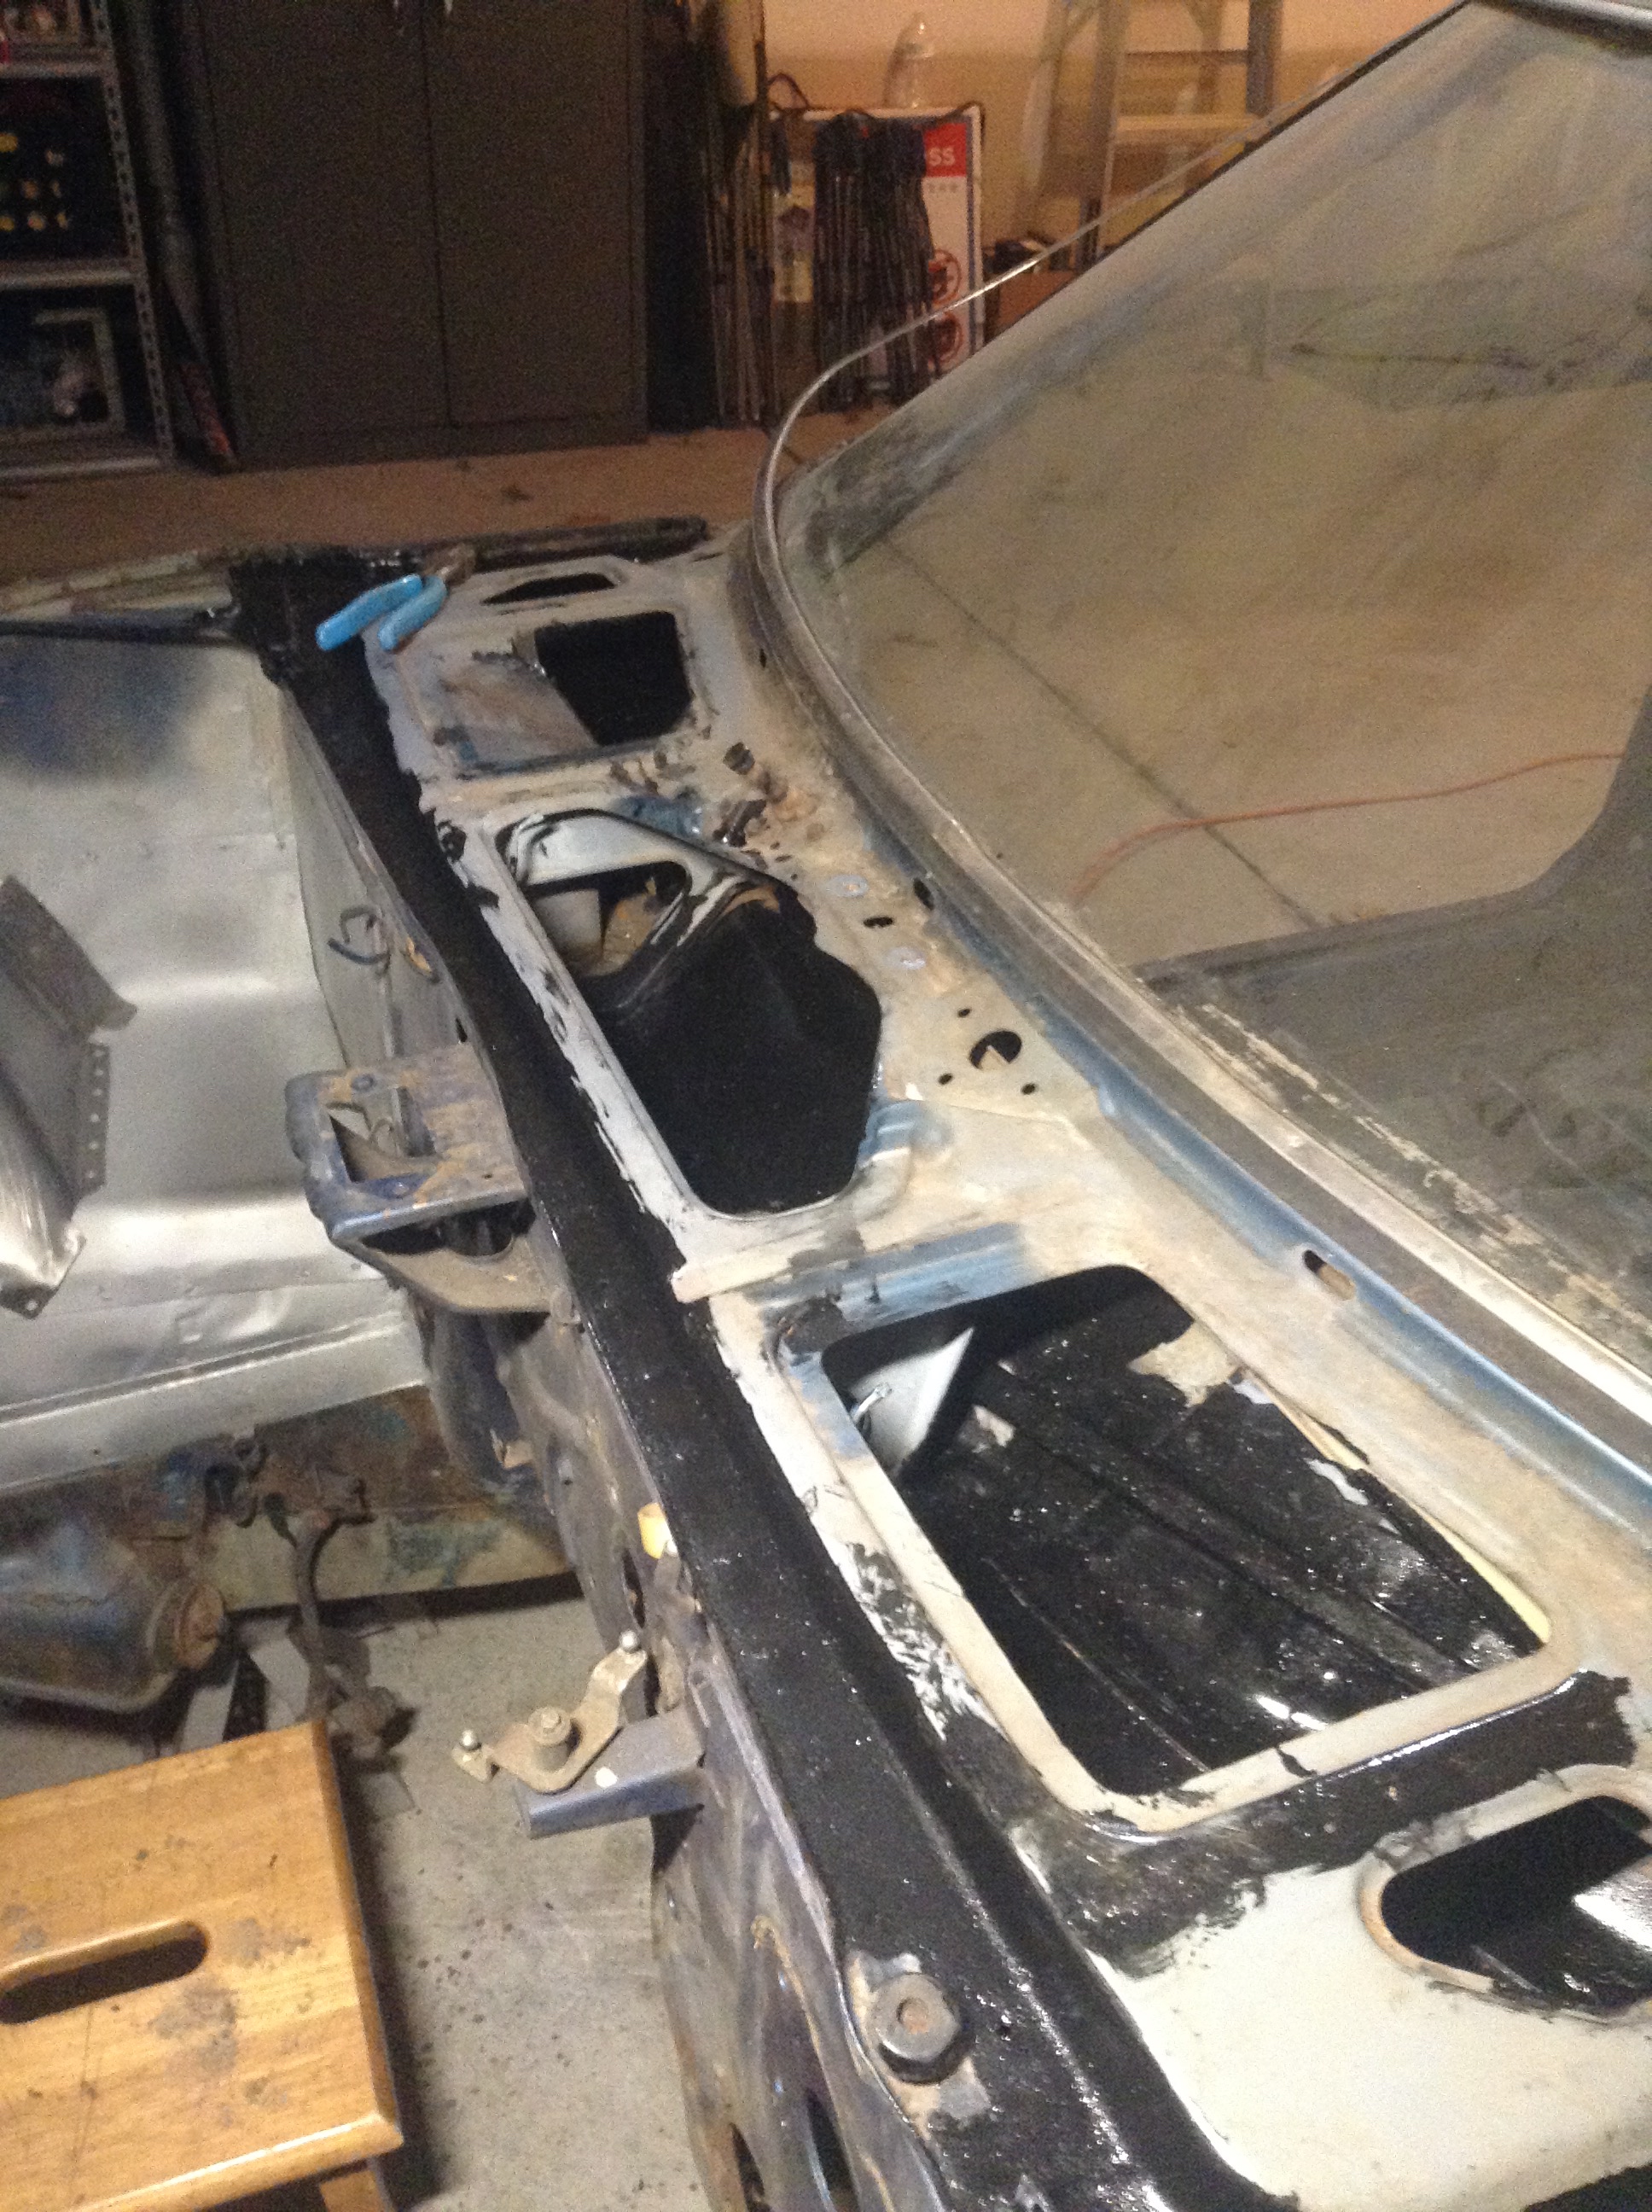
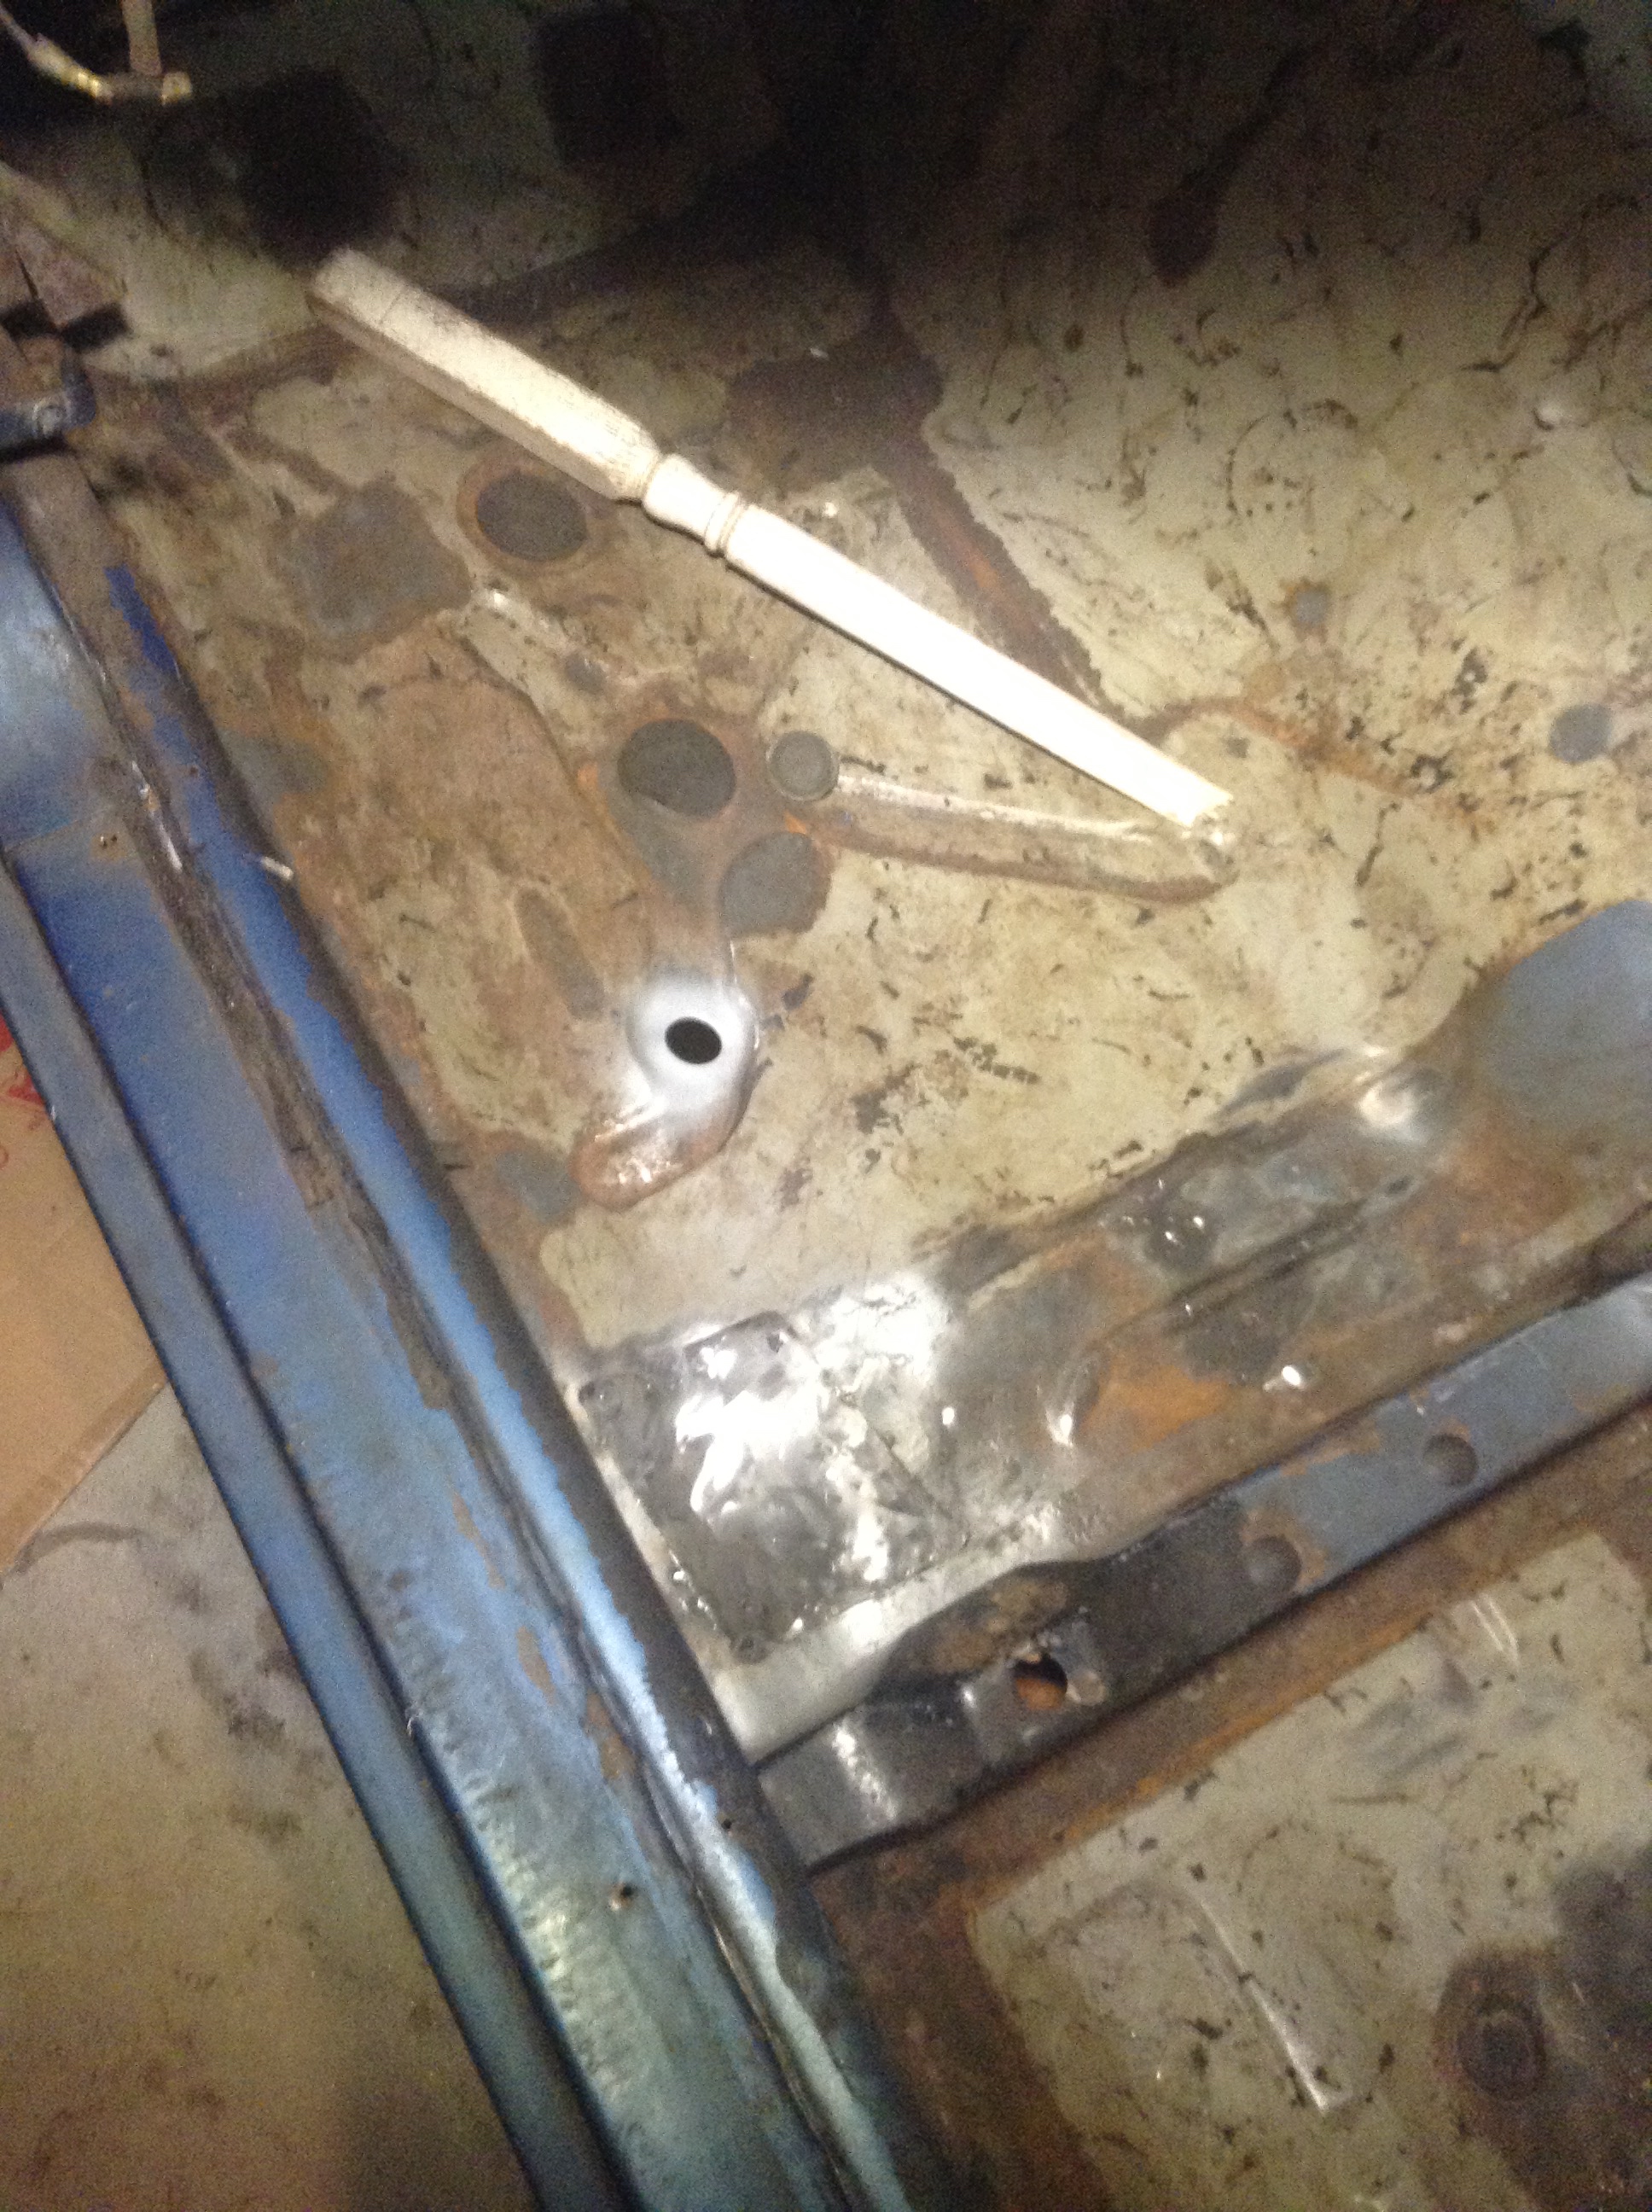
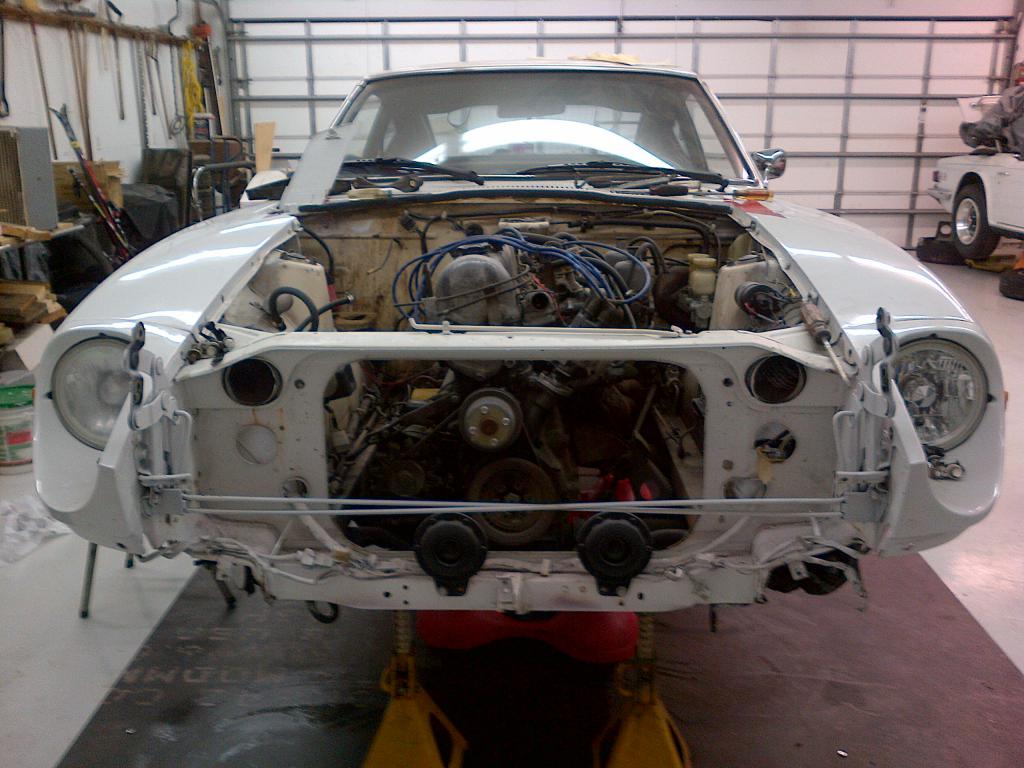
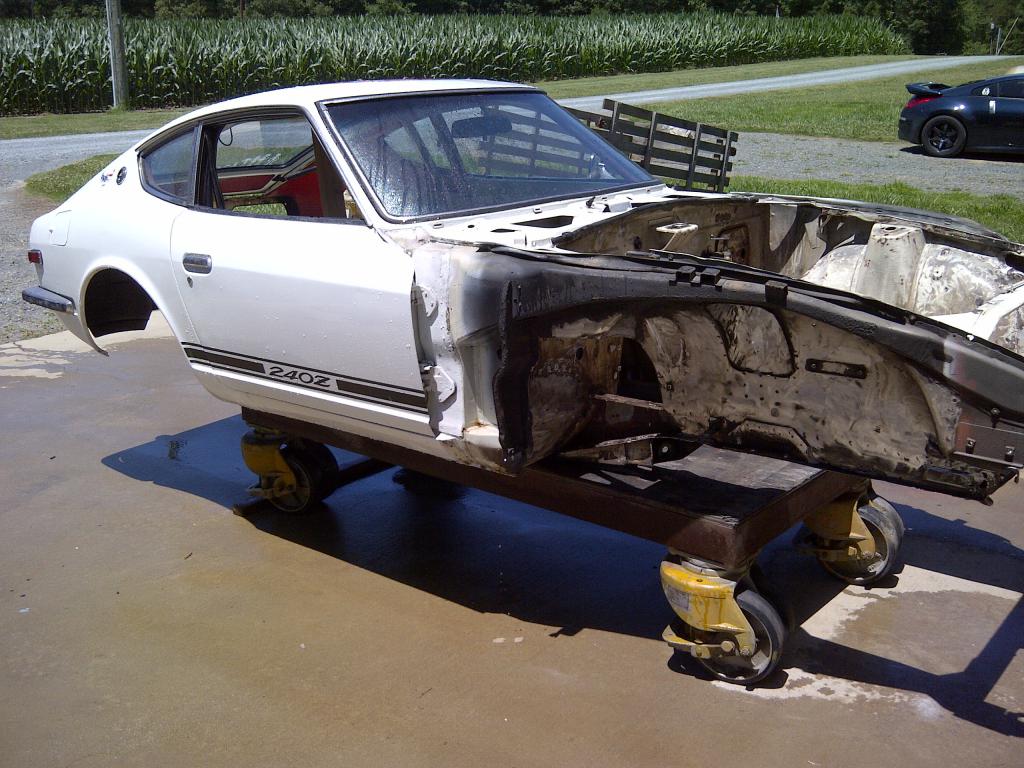
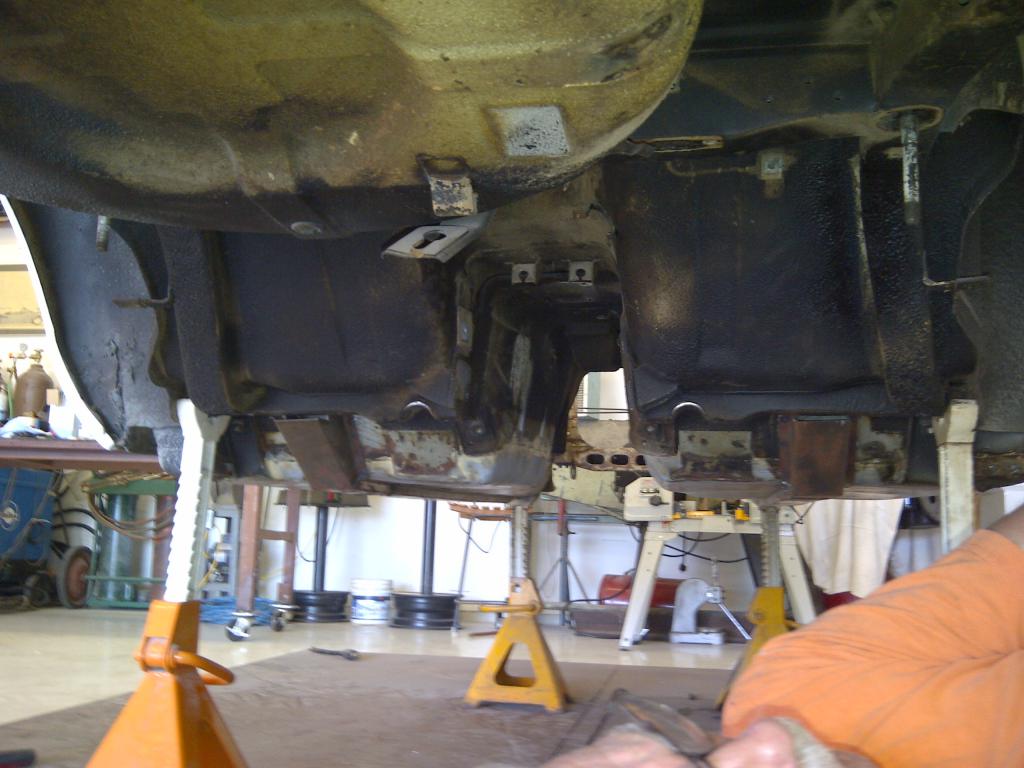
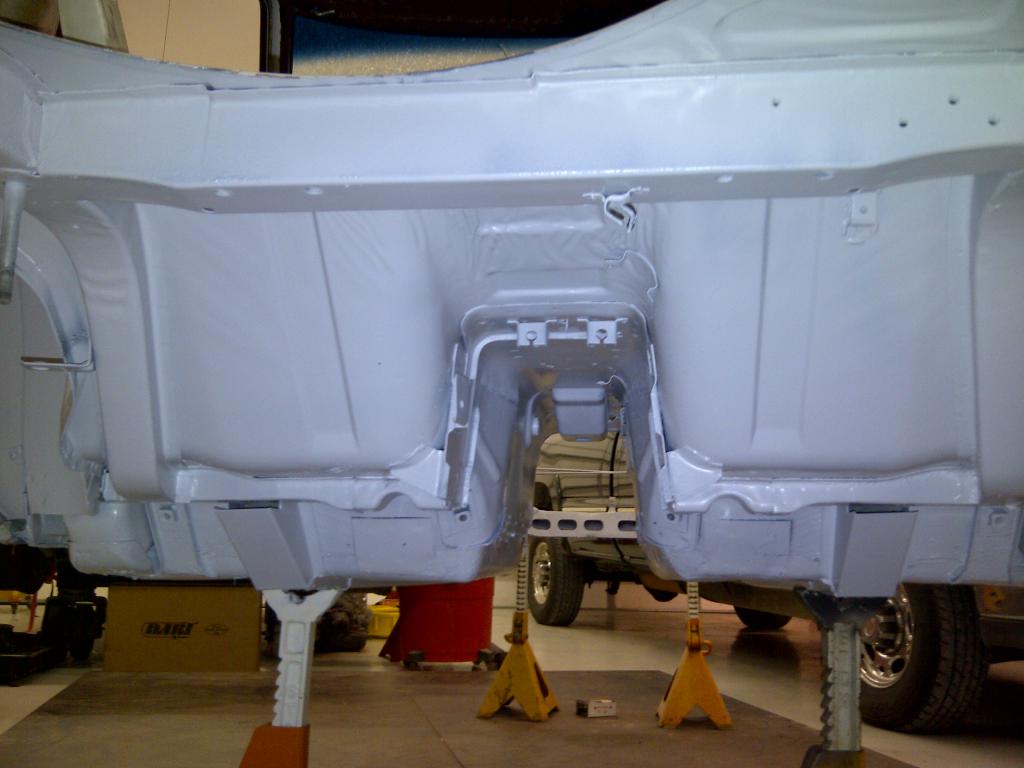
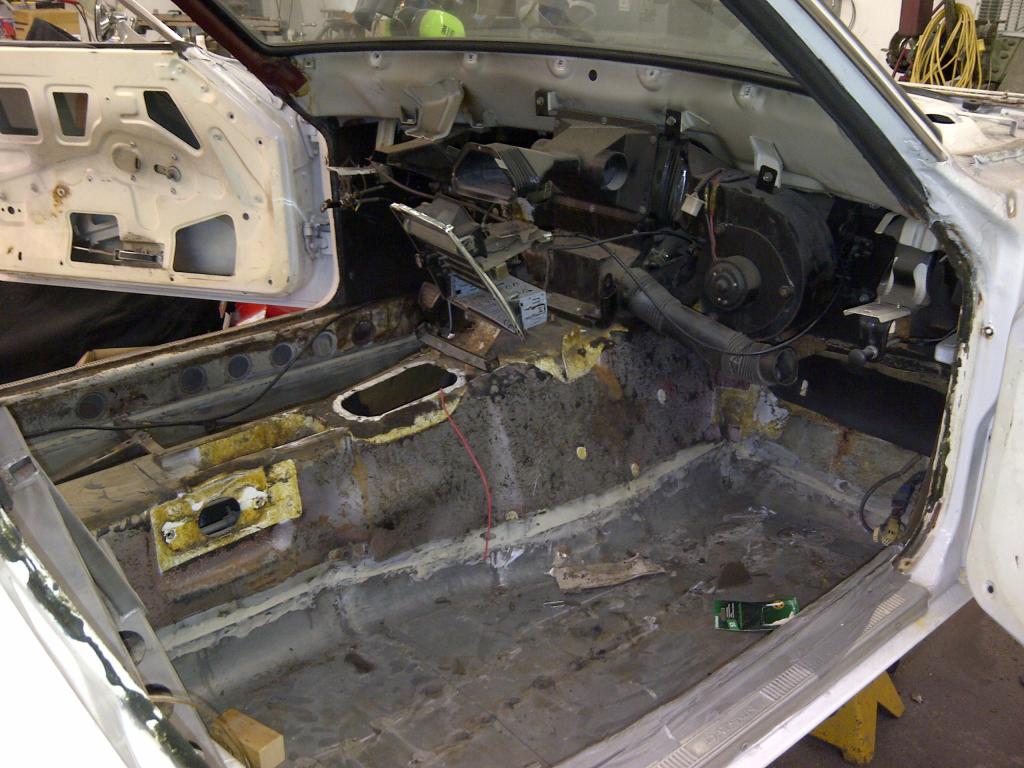
This is a build thread to document the progress on a 1977 Datsun 280z 2+2. The previous owner had started stripping the car with intentions of restoring it but it ended up just sitting in a storage container. Before that, the car sat in someone's yard because of a lien against it and eventually a tree fell on the back portion busting out the rear glass and leaving a nice dent. Because the car has been sitting for so long, it has a bit of rust but nothing structural, like the frame rails, is damaged. We've never done any car restoration work before so any pointers would be appreciated. The long term goal is to swap a LS v8 engine (probably a 5.3L or 4.8L), upgrade the suspension and brakes, and have a solid daily drivable Datsun. Below is a list of what we have done to the car already: -Stripped the interior and exterior -removed the sound dampening material with some freeze spray and an air chisel -removed the engine, transmission, and engine bay wiring -misc metal work (cutting out the usual Z rust and welding in patch panels) -coated all internal frame rails and cavities with east-woods internal frame rail coating or POR-15 Here is what we started with. Inspiration / Goals Pulling the engine - relatively easy. When you don't have a load leveler, you just use screw drivers to make sure the chain doesn't slide! Hopefully, the steering rack will be salvageable. Cutting out the rust (floor pans, battery tray, and a big spot in the bumper area) Here's some of the welding / patch panels. We used weld through primer so the the welds won't rust through. Battery Compartment The front nose area - patched on both sides driver's side floorpan (not nearly as bad as passenger side just one patch panel near the seat mount). Passenger floorpan - we fabricated a floorpan that was mainly plug welded in place and also replaced a rusty spot in the trans tunnel. a shot of some POR-15 rust convertor work underneath the cowl panel. That brings the project up to present time, lots of work to do still.
-
Time to give up my Datsun to someone else. I just don't drive it much anymore and I'm now just too old for such an impractical vehicle . Owned it for almost 20 years and put 30K miles on it in various iterations. Lots of info on this particular car can be found in these forums. I have a little web page write up slash ad here: http://240z.jeromio.com. I have a punch list of what I would consider minor things to take care of - all relating to the interior. I've been chipping away at these over the past few weeks so there may be no todos left in the next month or 2. It does have fully functioning A/C. Seats are a bit worn. Wheels are kind of dated. If I were to keep it I would buy some 17x9 Rotas and install ZG flares. But probably better to leave these choices to the next owner of the car. As it is, it is fully functional and enjoyable. I would drive it across the country. I would arrive pretty worn out tho bc it rides like a skateboard and it's loud as f**k . Gets great fuel mileage tho. What is it: 1971 Datsun 240Z (well, that's what it started out as) What's in it: 1999 LS1, stock tune, stock manifolds, no cats, 2.25 into 3" w/ single stainless 3" muffler. T56 w/ McLeod clutch. 3.54 R200 diff. 83 ZXt CV Half Shafts (rebuilt). Chassis: Fully de-rustified, full subframe connectors. GC Coil-overs, 250lb springs, all poly bushings. Custom double poly front diff mount. Relocated front lower pivots. Sectioned struts, Tokico blue carts. Brakes: Front 84 Z31 vented discs. Rear 83 ZXt solid discs. 83ZXt master + booster. Cosmetic: Fancy Ford SVT Grabber Blue paint. Front poly airdam. Aluminum re-enforced fiberglass front bumper (which makes it functional). Location: Philadelphia, PA Price: $16,500 (or trades considered for more practical, manual transmission car such as Focus ST, Volvo C30, MazdaSpeed 3, etc.) (Also - I'll transfer ownership of http://facebook.com/datsunz to whomever buys the car. Has over 31K followers)
-
Hope everyone is well. I've learned a bit since my last post about my issues but I'll explain where I'm at. My car 280z with a 99' firebird LS1 and a 4L60E trans is constantly getting getting a P1054 error code (checked with a diablosport intune, i only use it to check for codes, I need a more comprehensive scanner). When the code/check engine light comes on the car seems to lose power/struggle and miss when I hit the gas, just makes a bunch of racket, it gets around ok if I don't hit the throttle too hard. I made it to the gas station about 2 miles from my house today and the symptoms popped up, I've made it 20 miles to a car meet 100% and then on the way home from the meet the symptoms return. I'm open to suggestions of what to do. Now if you feel like reading, here's what I've done... 1. When I bought the car it didn't want to start but when it did, it got around. After scanning it a Cam sensor code came up. Turns out the Cam and MAP sensors were UNPLUGGED. Plugged them in and the check engine light went off for about two days and now I'm basically having the same symptoms I am now. (i drove the car 150 miles to OCMD like that btw before I knew those sensors were uplugged) 2. Talked to a friend who's done a few LS Swaps and gave me some things to trouble shoot. First I relocated the 02 sensors directly under the header collectors, they were about a foot down the pipe in what he described as a lazy installation. 3. My symptoms made him think the car might be starved for fuel (hesitating and struggling under load on the road) so I inspected my fuel system. The main fuel line on the car appeared to be a braided 5/16 line and it was kind of a mix of sizes to get it plumbed between the fuel tank and the pump. The car also had an MSD fuel pump rated up to 40psi... I thought I hit the jackpot... I ordered the complete PSI Conversions LS Fuel kit (25' of line, proper fuel pump *Much quieter than the MSD piece of crap*, fuel filter/regulater and all the 6AN fittings your heart could desire. Finished the install this week and fuel pressure at idle improved from 58 to 61psi. But after all that, here I am, still chasing this stupid issue. Here is where I'm at... I currently have the spark plugs out of the car to inspect them and the wires. They are all an MSD wire/boot (gray/black) set specifically for an LS but one has brown boots and is visibly torn at the plug connection so I'll definitely replace that. The plugs look ok and are NGK TR55 gapped between 55 & 60. I don't see any obvious problems other than that boot. Was googling for the correct spark gap and found this update for the Spark Plug Wire Gaps https://www.acdelcotechconnect.com/pdf/tsb/tsb_03D-J-171.pdf Well I just looked up my plugs and TR55 (gap at 60) plugs ARE NOT listed as being specifically for my year motor however some old ass LS1.com thread had guys in 2008 running the TR55 on their 99-02 firebirds. The 3 plugs on NGK's website THAT ARE what they sell for the 99' V8 all say to gap them at 40. Perhaps NGK made the adjustment to their website a long time ago when the service update was released. Is it possible I'm over gap and having misses and that's throwing the o2 code because of improperly burnt fuel on the 02 sensor? or would the the computer throw a different code? I'm not sure how specific or complicated ECU's will throw codes. I literally might just have the wrong plugs in my car... Any thoughts would be appreciated.
-
Hi guys, This fuel injection stuff is new to me... I'm trying to get my car's fuel injection/computer checked out before Ocean City Maryland cruise weekend this weekend but I'm about out of time. The car runs ok but it's not 100% and I want to at least have it checked out. The motor is a stock 99' firebird LS1 and the previous owner gave me his Diablosport Intune. I tried to mess with it a weekend ago but didn't really get into it. I spoke to a local shop Friday and apparently a newer guy answered the phone and said they could plug it in and check out it. I get there today and he's not there and the owner tells me it's not that simple, says they sell diablosport but they don't really tune them, more into HP and SCT (Brands I guess). He says if I know the computer's serial number that helps and they'd need three days to get a new map built. I don't know if I need all that right now but just wanted it to get checked out. I couldn't find my Intune tuner before I went there which didn't friggin help but then of course I found it immediately when I got home. I think I'm going to try and mess with the tuner myself again. It looks like you can do a ton of stuff with it but it was a little hard with the small screen. I immediately hit an acronym I didn't understand last time i messed with it and I only have a quick start guide, I'm going to get in touch with Diablosport soon and see if there is a glossary or more detailed instruction manual and ask them if they know any shops that actually tune rather than just sell their product. Does anyone have any Diablosport experience or know any shops in Maryland that might be able to help me out? Either way I'll post any progress I make. Take care fellas. P.S additional reading if you want. My fuel injection experience is limited to my 2010 Ducati Hypermotard 796. Years ago I installed a full exhaust on it and purchased a Bazazz piggy style back ecu for it (like a power commander). Well that turned into a crapshoot. The Bazazz units apparently don't talk well with the stock Siemens computers on those bike's, I needed to get my ECU reflashed for it to work together which is what I thought I was avoiding. A new fully tunable dedicated ECU is twice the price which is why the piggy-backs are attractive but after reflashing the ecu and you're spending the same money anyways so I screwed myself. I went back and forth with my shop and Bazazz and got annoyed with Bazazz and ended up telling the shop (Ducpond) to pull off my tuner and send the stock ECU to Redline in Virginia to get a flash and dedicated map installed on it for a similar exhaust, the bike has run pretty well ever since. Anyways I don't think or don't know if I'm in a similar situation to my Datsun's ls1 right now. Why does it matter if I go somewhere who can or can tune Diablsosport stuff. Is it something with the car's OBD port that's now proprietary to the Diablosport tuner? I thought any shop would be able to plug into my car and check out the fuel injection. I'm a bit confused obviously but I'll learn this stuff soon here.
-
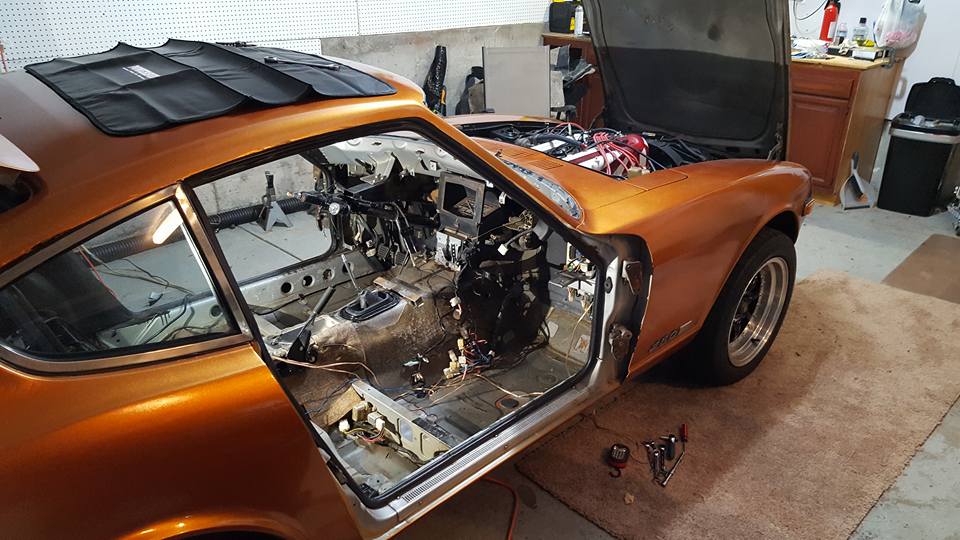
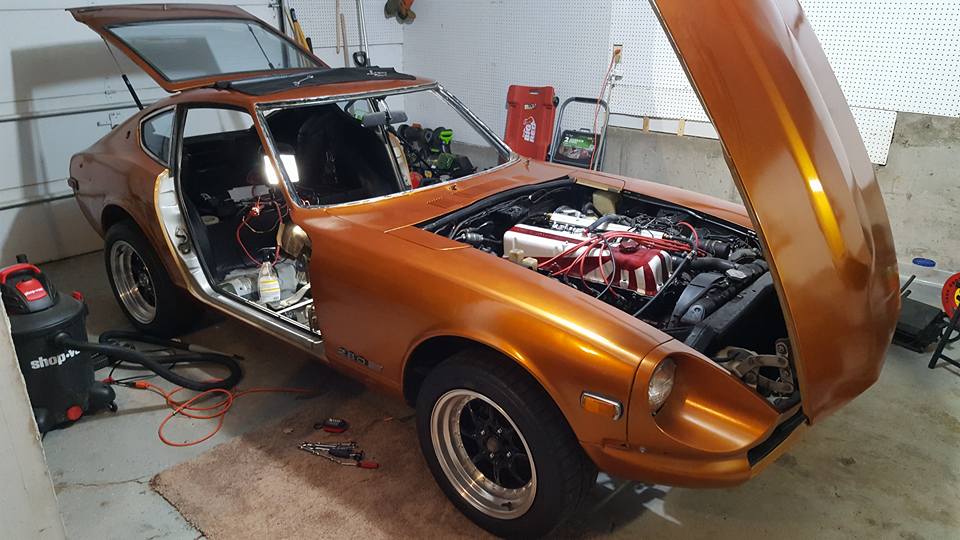
Hey Everyone, After months and months of consideration, my 1976 280z is getting a new life. I've had this car for 2 or 3 years and have had it mostly running, but keeping finding small anomalies that turn into more and more fixes, and more questions about what the POs were trying to do with it. Well, my OCD has had enough and it's time for me to know every square inch of this car and have it the way I want it. I'd like to share this project no matter how it turns out, whether it helps someone else, or any of you all want to throw in your 2 cents - I would appreciate some veteran knowledge. Wants: 300+bhp, decent handling, decent brakes, keep it classy looking with exception to wide-body mostly for grip, mostly stock looking interior with sound deadening and added comfort, a much cleaner wiring layout that's color-blind friendly. To achieve all this, I was initially trying to decide between an S54(M3) or LS swap. After some research I'm definitely leaning towards LS with my skill level and budget. I know there's nothing original about it, but I have enough battles to fight - I'm going to keep this part easy. I'm still debating between the 280yz or Subtlez kit, and may likely do YZ rear and Subtlez front - I'm not sure I really want to be running 10-12" wheels square. Budget? I don't have a solid number, mainly because I will take my time to do this right. IF this were to creep over $20k, I'm doing something wrong basically. I know there will be "while you're in there" costs, like bushing kits etc. At the moment I'm just tearing it all down and organizing everything in a separate room with bags and labels. I have some unknowns at this point to digest until I get to them - how I want to remove the paint (grind, sandblast, etc), sound deadening (dry ice chisel, sandblast?), and any remaining adhesives/insulation (sandblast?, chemical?). I read sandblasting the exterior could cause some warping issues, but I haven't dug that deep on that specific subject yet. Anyway, I'll keep this updated, and hope to learn a lot and help anyone else doing this as well. Thanks
-
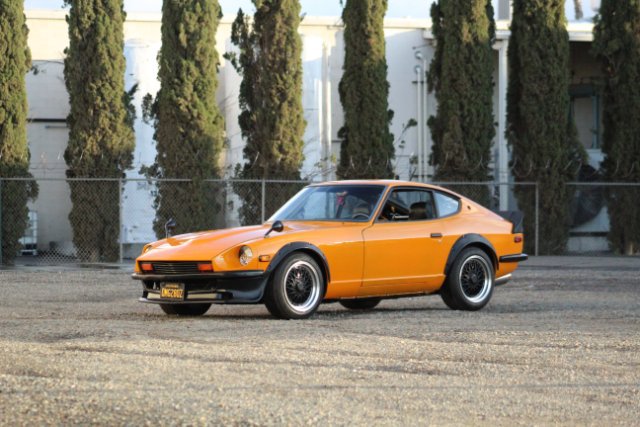
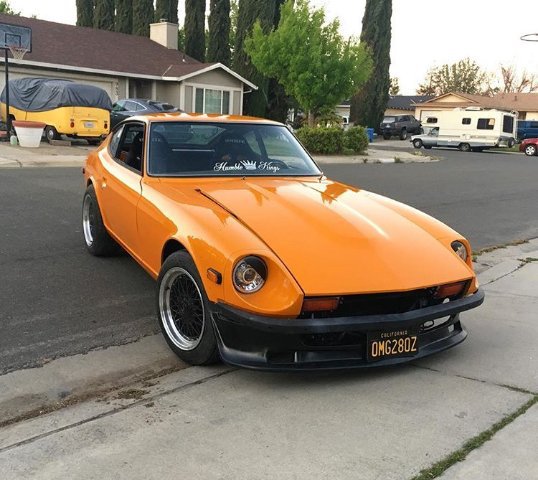
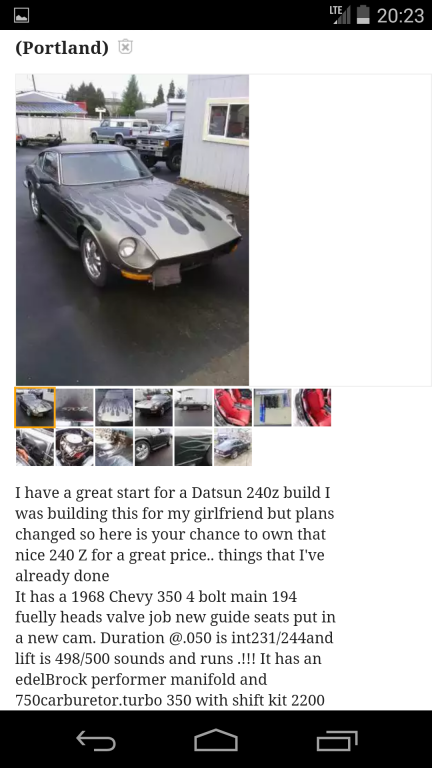
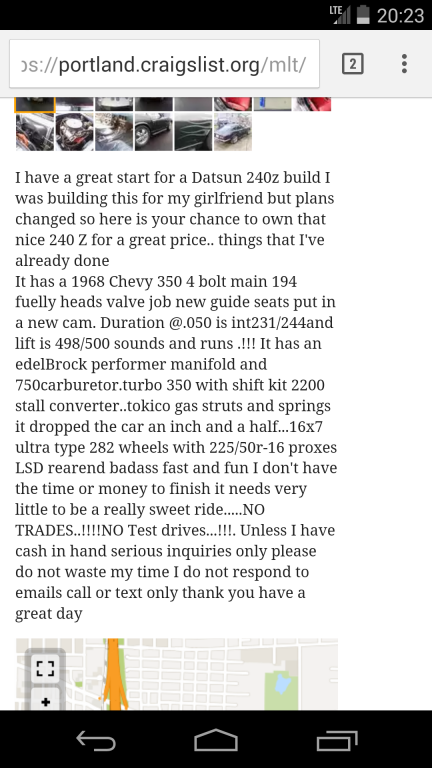
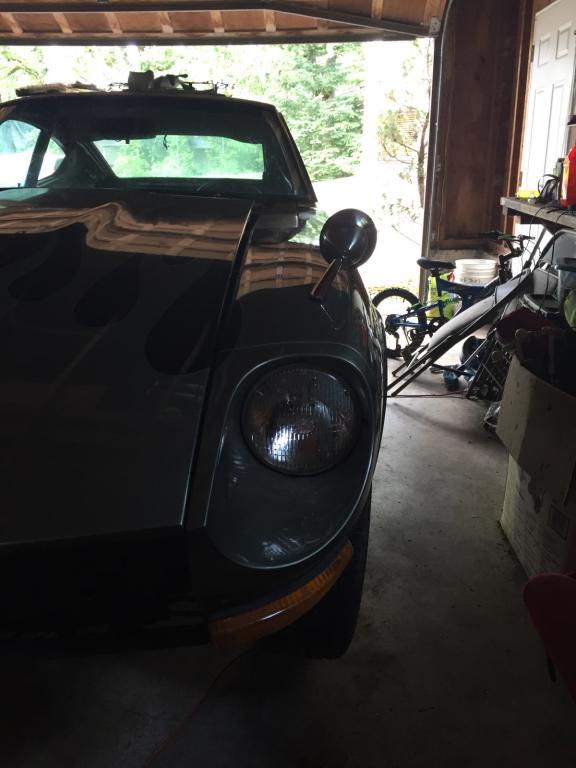
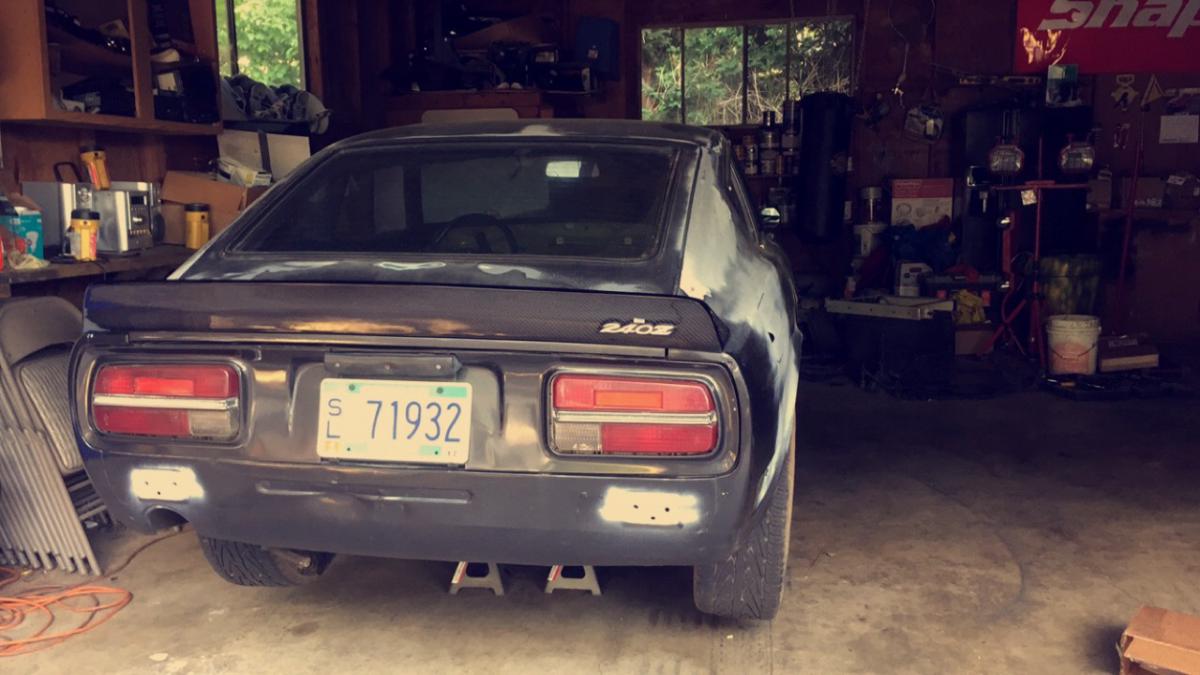
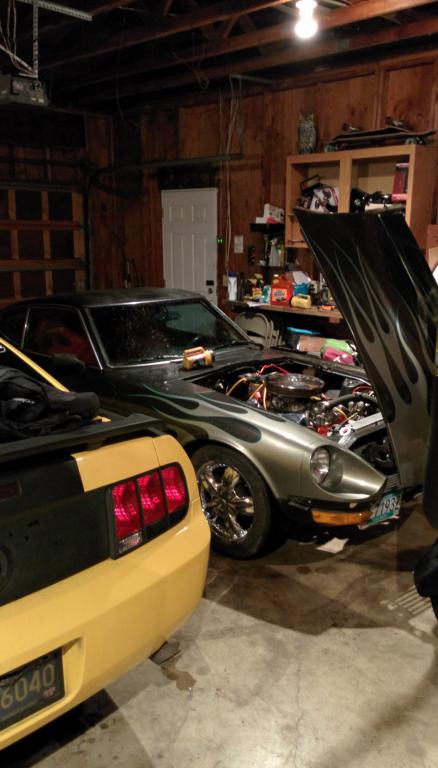
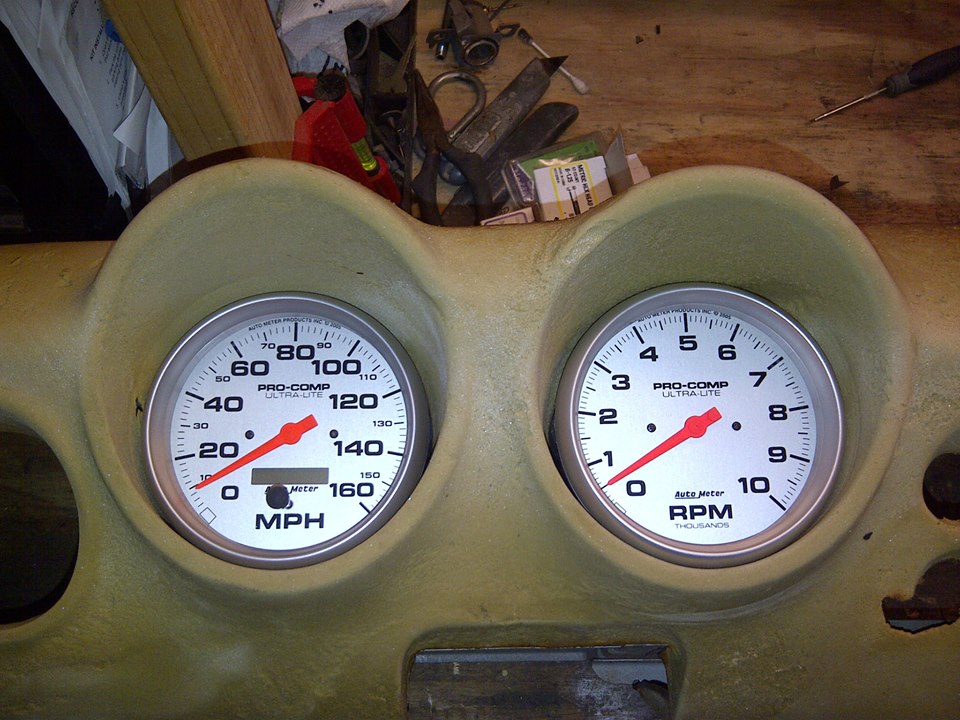
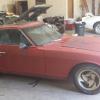
About me I don't want to go too in depth and bore anyone, so feel free to skip. lol My name is Kyle. I'm from Oregon City, Oregon. I'm in the USAF so that's why I am in CA. My current car is a 2008 Honda Accord V6 Manual 6 speed. It's a fantastic and very reliable car. Nice interior and sleek looking exterior. Just a good all around daily. And its the first car I have driven with a stick, and boy did I love it! I have spent a couple years with it, but after increasing its power steadily, I realized the limits and problems with a forward driven car. Not to mention the absolute BS that is California smog. I was at the point of either spend the money on a power adder, or a new car. I decided it wasn't worth pouring more money into a car that had such limitations. Especially in size and weight, she just wasn't very good in the twisties and back roads, so I decided I wanted a Rear driven pre- 1975 car. After a length of time searching, I couldn't believe what an awesome find a 240z was! A small, lightweight, Japanese car, pre- 75, endless parts, huge forum support, the list goes on! I was sold! The Car While on leave back in Oregon for a week, after 3 months of searching for a good deal on a 240z, one popped up for sale for $3,500. Super cheap! It was a 1972 240z with a Chevy small block V8, with a 3 speed automatic. A lot of people had interest, so decided I was done searching, and ready to start building; I bought her outright. Here is the AD: The Good -V8 Swap -The Trunk area, engine bay, and I (hope) under fenders were sprayed with bedliner -Body panels are straight -Badge and side marker light delete -Its a 240z The Bad (As I have quickly, or slowly discovered) -The paint is awful, and needs to be redone (Huge amount peeling) -The windshield wiper doesn't work -The heater doesn't work -The Air Blower doesn't work -The dash was cracked in multiple places -The passenger door was missing the interior panel -The engine, differential, and transmission were pissing oil -The hatch strut was blown -The lights were all extremely dim -The car got less than 8 MPG -Seats are cheap aftermarket ones. Fit nice though actually -You have to SLAM. And I mean SLAM the doors to get them to shut. I'm scared I'll shatter the glass! -The passenger window won't roll down -Probably a lot more I'm forgetting So yes, the car needed work. A lot of it. Was it awesome to drive and own a V8 car? Yes. Yes it was. I only had a few days of leave left, and I sadly realized I couldn't take her with me. Especially with the gas mileage at aircraft carrier fuel consumption rates. On the last night, I took my friend out for a spin, and very soon after leaving the driveway we could smell something burning. It was too foggy to drive fast, so we turned around and went home. I ended up leaving the car at my friends garage, which happens to live only a couple houses down from my dads. Here is the car next to his yellow V6 Mustang: We pulled the windshield wiper motor, the dashboard, the heater blower assembly, cut out random disconnected (and unsafe) wires and taped them up, and cleaned and vacuumed any debris. I loaded the dashboard and wire harness into my car to take back to Cali so I could be somewhat productive for the next 6+ months. Later my friend discovered that the wire harness caught fire in the engine bay! And the harness I had, was melted in multiple places. I decided to scrap it. I will need an entirely new wire harness. What I have been doing Research. Researching like a crazy person. I have also been buying parts like crazy and shipping them to Oregon. Since I'm stuck here, I: -Fixed the Dash Cracks / Sanded / Painted -New Vents -New glove box setup and badge -Autometer gauges -Realized the wire harness I had was hopeless after attempting repair My Friend has been inspecting parts that I send him, and tinkering on the car. -Sold Engine / Tranny / Radiator / exhaust for 750.00 -Sold Bumper -Sold Fuel tank Has a total of 1k. So the car as a roller was 2,500. Even cheaper! What Happens Now I am taking 30 days of leave starting on 20July2016. I plan to: -Sell the Honda -Engine Swap the Z to an LS motor. -Make the 240z my new DD. Here is the car as it is today. My friend installed the $420.00 Fender Mirrors, and there is the photo of the horrible quality Retro-Spec spoiler sitting on the hatch just to see what it looks like: That's it for now. Later I will post shots of my excel sheet of costs, future plans, ect.
-
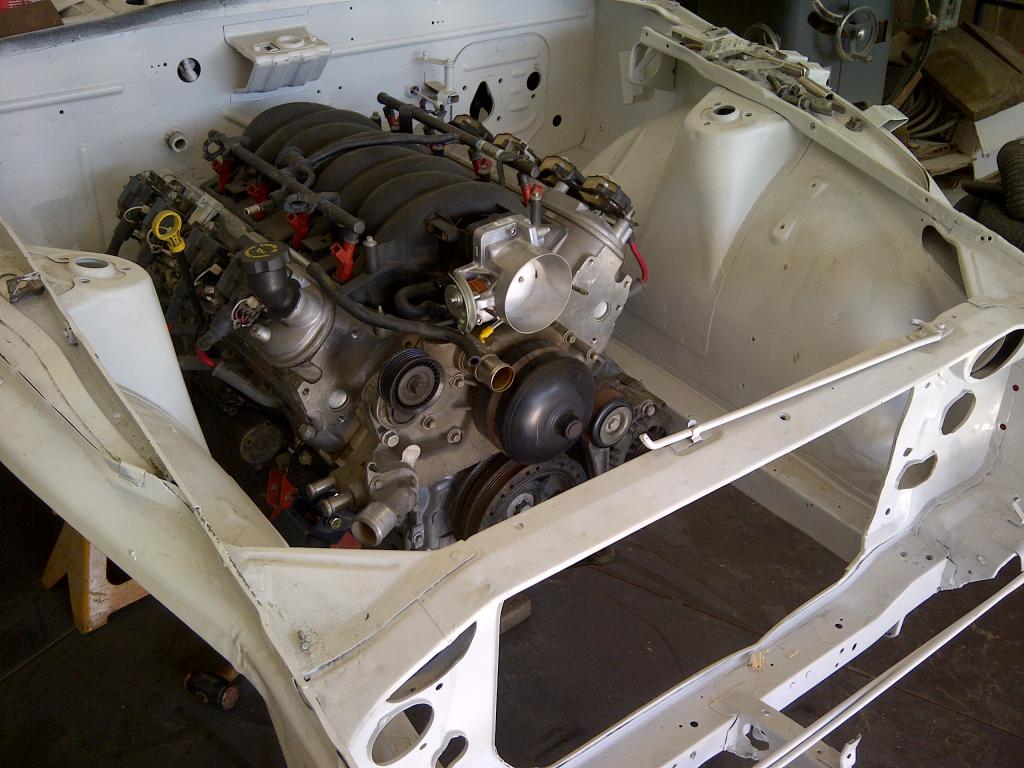
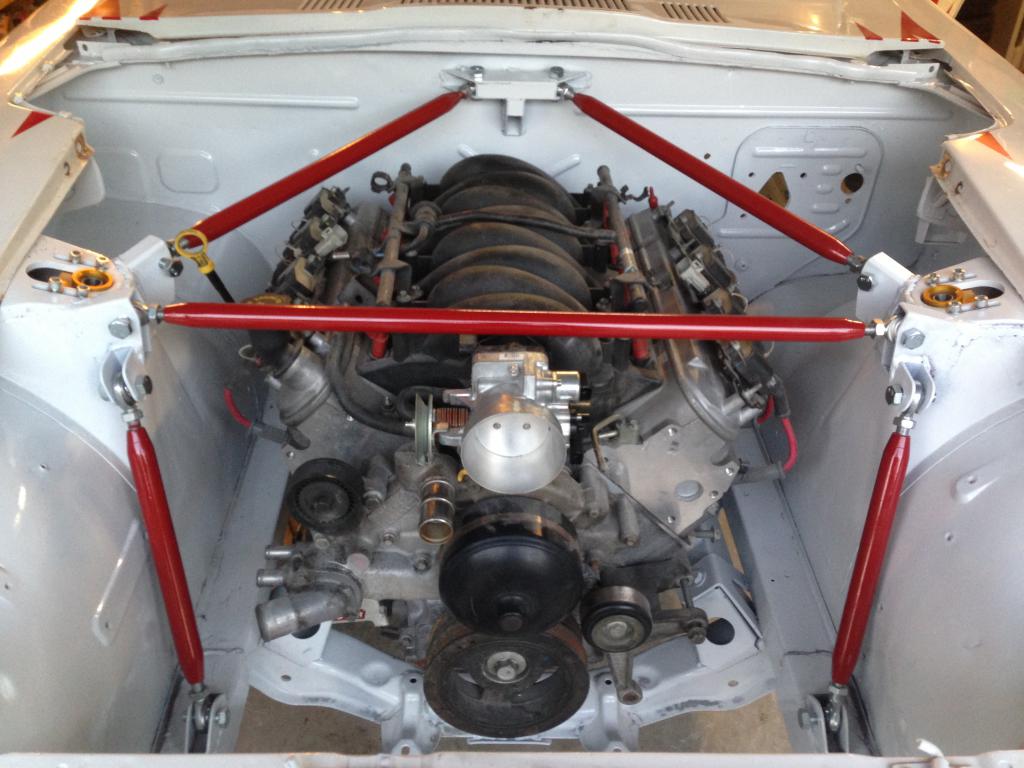
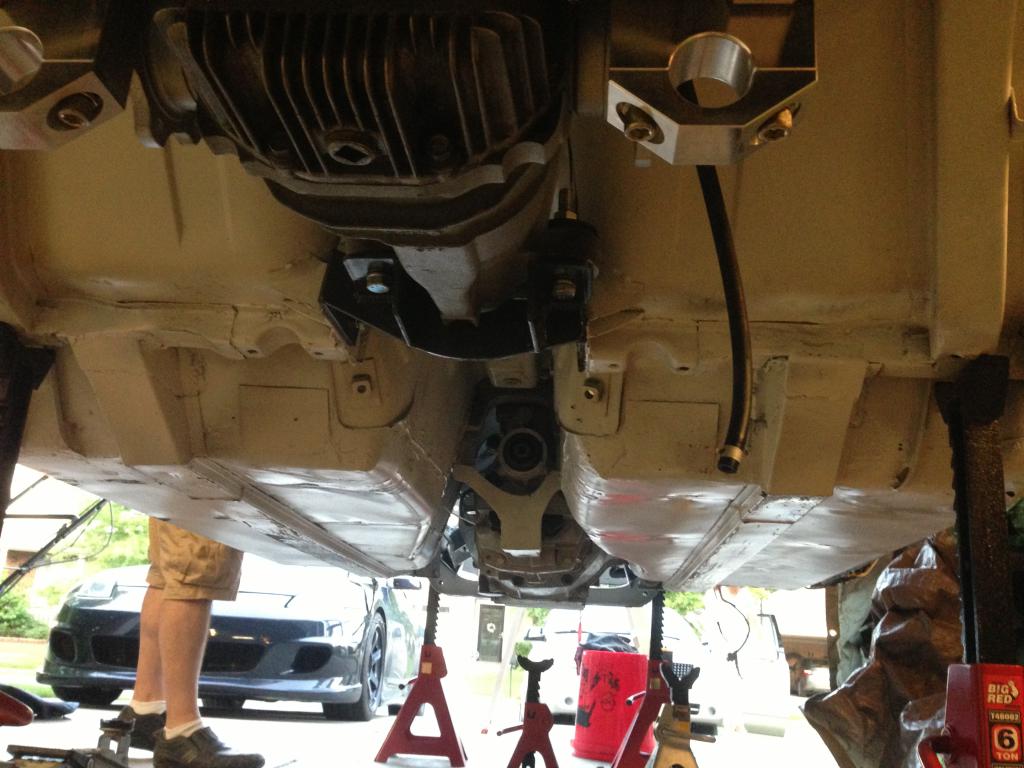
 I've never seen a thread where someone documented how hawks mounts actually mount up and are installed. So I took a bunch of pics when I did mine for all to enjoy. Chassis Mounts Here's how the mounts look in your hand. I'll explain what each location really does as we move along. And here is the back of the plate that you must weld onto the frame. As you can see, you must clearance the frame in order for the plate to site flush again your frame rails. But before we get into that, lets see how we locate the bracket (front to back). So here is the mount just resting on the frame rail, without the backing plate, You can see now that the lower location of the bracket lines up perfectly with the lower control arm bolt. Now all you have to do is loosen the LCA bolt, remove the nut, and thread the bolt into the bracket (yeah its threaded down there). Once you have it threaded in and snugged (not tight), you've got it located front to back. So then I attached the backing plate to the bracket and swung it back into place on the frame rail. Obviously the backing plate wont sit flush until you clearance the frame. So now, mark the front and back of the backing plate on the frame like so. Now remove the backing plate from the main bracket, also remove the main bracket from the LCA bolt. Place the backing plate on the frame and mark the hole locations. Note that they will be off because you still cant set the bracket flush. So here are my marks. Let me save you some time and suggest that you cut the frame like the pic below. I tried counterboring the holes to make room for the tacked on nuts, but its harder to get the position correct. Notching the frame is easier and much faster. Now you can check to see if the bracket will sit flush. It might not sit perfectly flush, but pretty close. Heres how mine looked. If its good enough for your taste, put the main bracket on the LCA bolt and bolt it back to the backing plate. This will ensure that when you weld it, it is in fact correctly positioned. You probably want to go ahead and grind off the paint on the frame as well, I dont have a pic of that but you get the idea. Now your ready to weld. Just for reference, the side of the frame rail is twice as thick as the top. So you can get a little more heat into that side. Here's my ugly flux core madness, but it will get the job done. The second one turned out much prettier after I found a rhythm. And here is the finished product. Engine Mounts The mounts on the motor are fairly straightforward but I figured I'd show them for documentation purposes. Here is where the original mount goes. And here is the backing plate for the new Hawks mount. Dont put that lower right bolt in though, that comes later with the actual mount. And here is it all bolted together. At this point, I dropped the motor in to position the trans mount. I'll write more on that in the Trans Mount section. Here, its just to show you how the motor sits in the bay.
 -
First post! I have a 240Z that I bought from a member here after searching for a few months. It definitely passes the 10ft test with ease, but it ended up not being as nice as I was expecting. We were able to work out a fair price with that in mind so it worked out for both of us. After the engine work is completed, I will be getting the body work and exterior repair completed so she'll be real nice. Car has a somewhat upgraded L24, with a S3 cam, AZC 4 bbl intake, header, etc. Had carb problems, didn't run very well. New carb made things a bit better, but still underwhelming. I can fix that. When I bought the car I had an iron 6.0L sitting in the garage with no plans but I decided an aluminum block LS would be a better fit for this car. I picked up a L33, and soon after picked up a TKO600. I wanted a lightweight trans but I know a T5 wouldn't last too long. This trans is more than strong enough and is still quite a bit lighter than a T56 (and cheaper) I haven't started the swap yet but I've been preparing everything for a few months. I have most everything I'm going to need, at least all the really expensive stuff. L33 aluminum block 5.3L LS2 intake 90mm cable TB F-body oil pan Dingo mounts CX longtubes Harness/ECM TKO600 5 speed transmission LS6 clutch/flywheel Lakewood bellhousing Aluminum driveshaft from F-body Speedhut gauges Currently I am modifying the harness removing all the unneeded crap from it, once that is completed I'll be starting the actual swap - should be shortly after the holidays. My feeble goals -More than 2x current HP -Same or better mileage -Lighter curb weight/better distribution -More reliable -AC Things I still need -Different injectors or injector spacers -Alternator and bracket -Compressor and lines -New fuel pump or steal fuel pump from the Corolla and hope it still works -Figure out differential situation (really want R200 + CLSD), fab skills aren't quite at the level where I would trust myself making custom diff mounts
-
Hi all, In progress of building out an LS1 for my 240z. Currently: LS9 Cam + LS2 front cover + holley carb + intake Using JCI mounts for the swap. (yet to arrive) Electric water pump and no other accessories. Has anyone mounted an alternator low passenger side? If not, anyone run a mini alternator as the only accessory on the driver side? What mount & alternator did you use? Here is my current setup - I fear the alternator sticks out too far: Threads I've already looked into: http://forums.hybridz.org/topic/72741-whats-wrong-with-this-bracket/ http://forums.hybridz.org/topic/49579-mini-alternator-with-6-rib-pulley/?hl=alternator
-
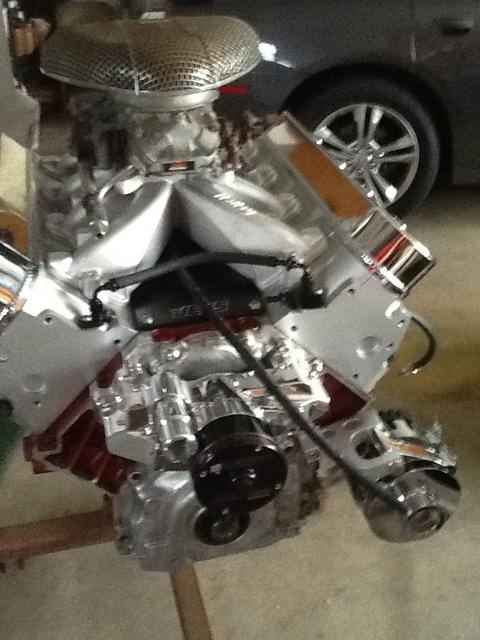
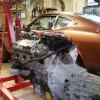
 After 25 years of loyal service my SBC 350 is coming out, and replacing it will be a beautiful 5.3LS out of a 04 Yukon with 95K on the clock. The plans are simple for this build cam,and intake springs and rockers if needed other than that just the stuff it will take to fit and get running right. Have not made a choice on a trans yet would love a 6 speed but the T56 is out of my price range for now but who know buy the thing I get it done. I will keep you guy updated with my progress even though it will be at a snails pace. I am so pumped. Old Sbc new 5.3
-
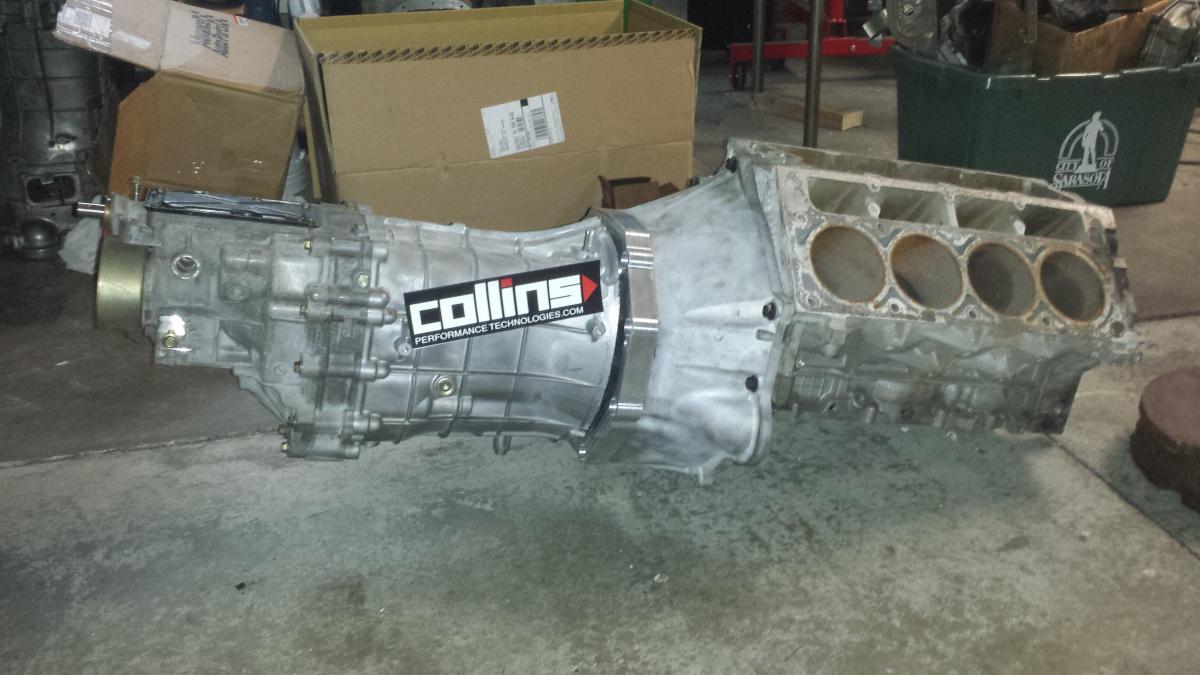
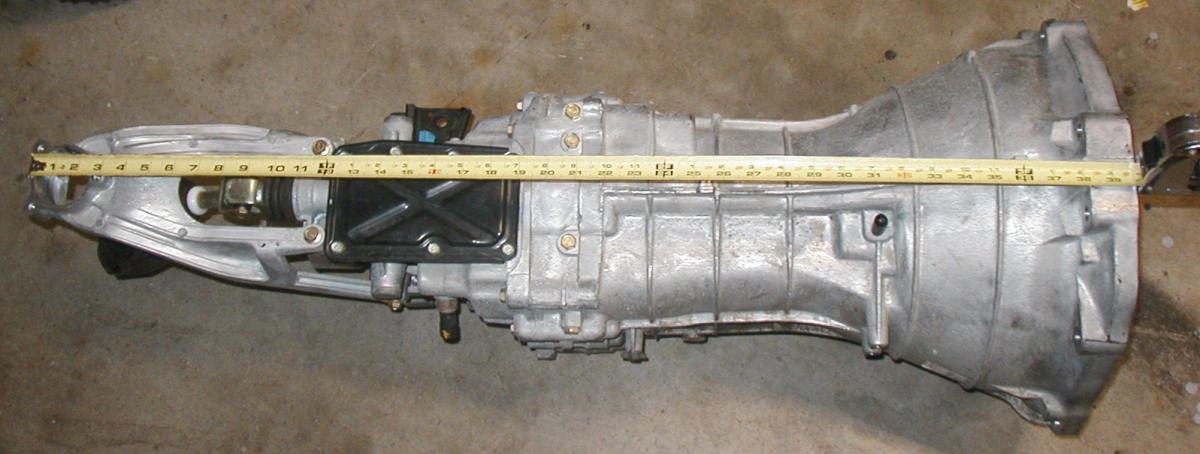
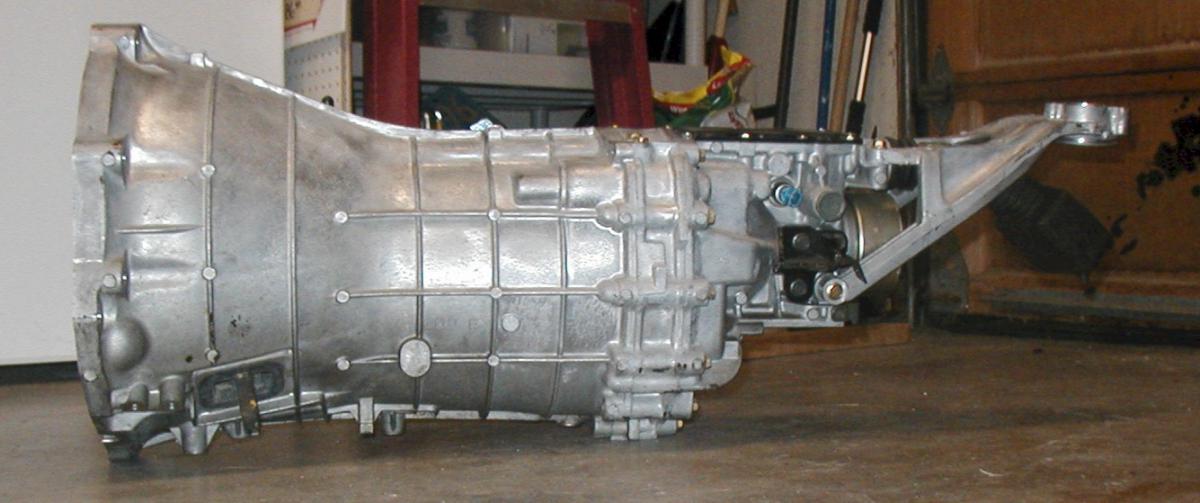
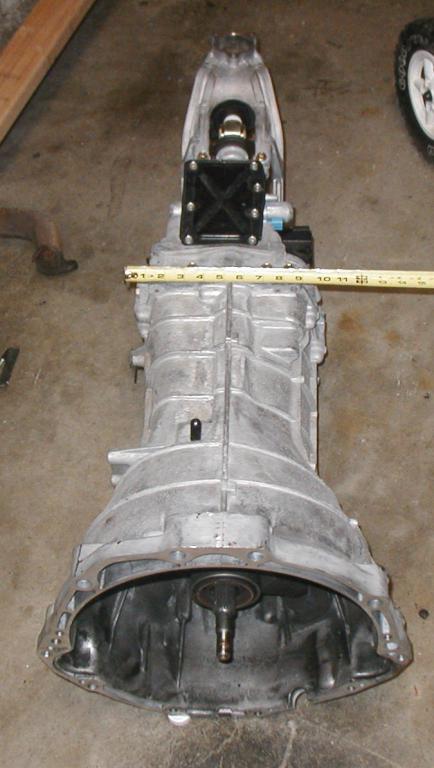
Its time for some changes in my Z due to a knock in the bottom end. I have made the decisions to go the LS route with a manual trans. and i am doing research and getting all my ducks in a row start spending money. I have see sights were people are putting a 350Z/370Z CD009 trans behind there LS. I did some digging and found that a adapter plat is made by Collins performance technologies . The 350z has a great shifting trans and is much cheaper then a T56 and can take abuse, but I have never seen this combo in a S30 if you have even seen this please let me know of if you can think of any pluses or minuses to this idea chime in please! Thanks Will S. cd009 with adapter CD009 CD009 CD009 T56
-
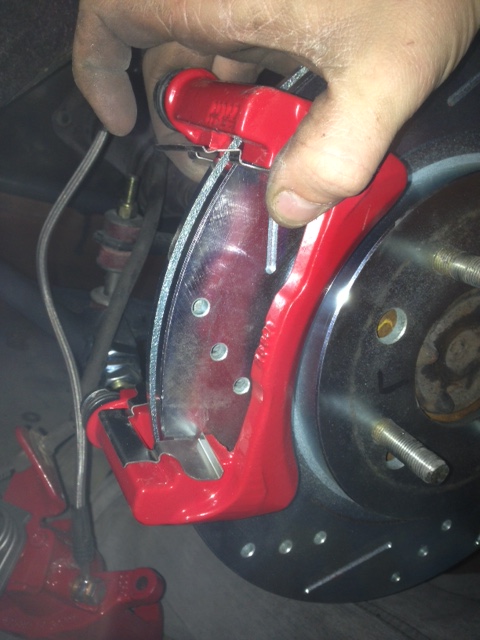
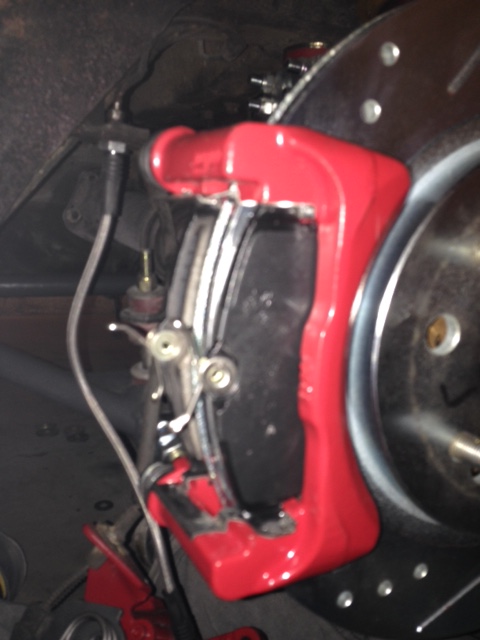
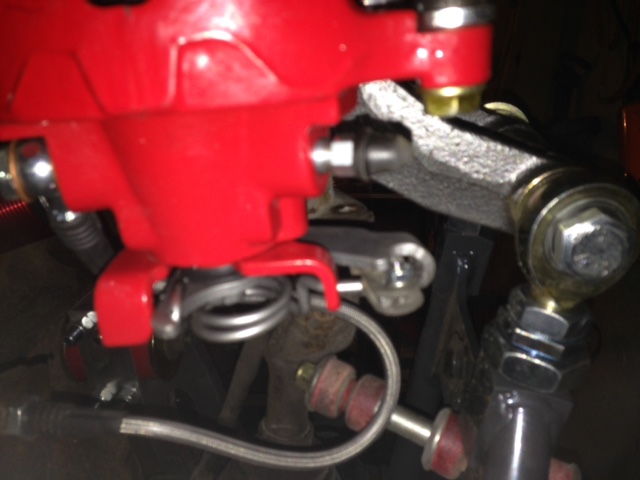
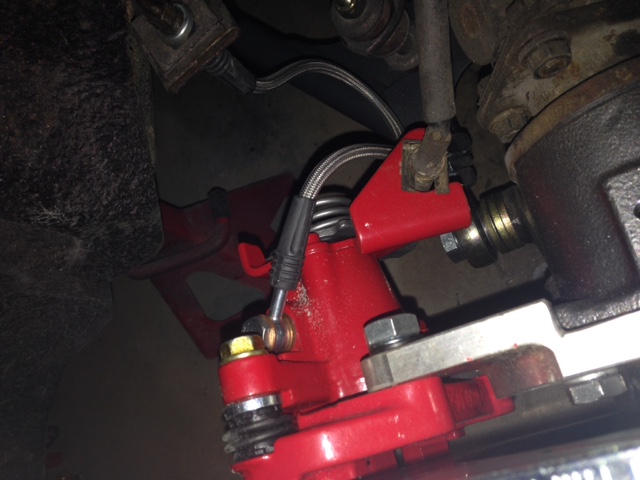
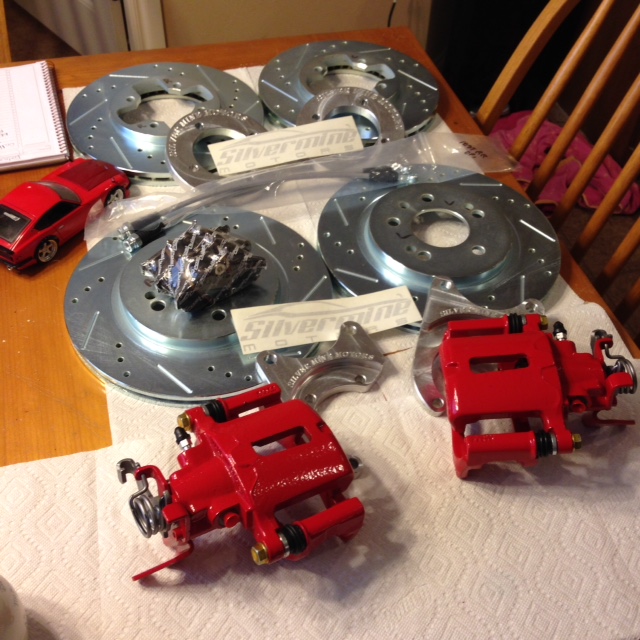
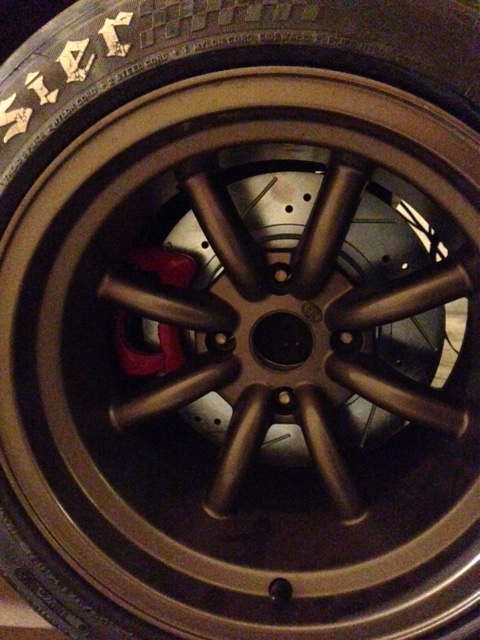
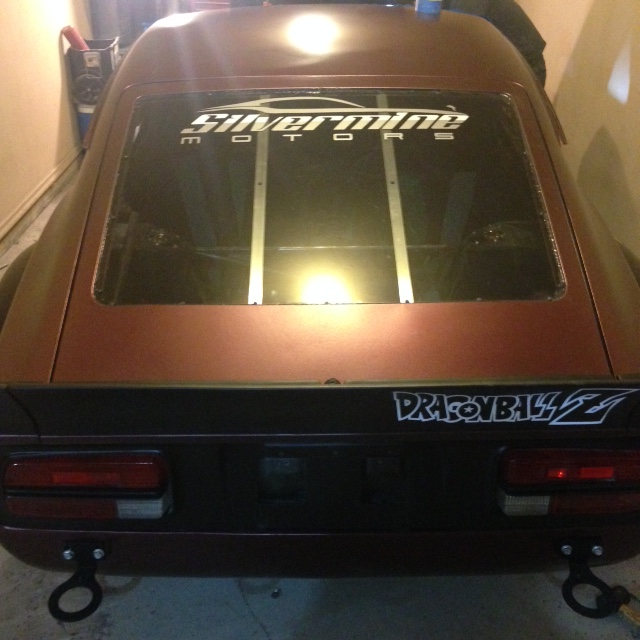
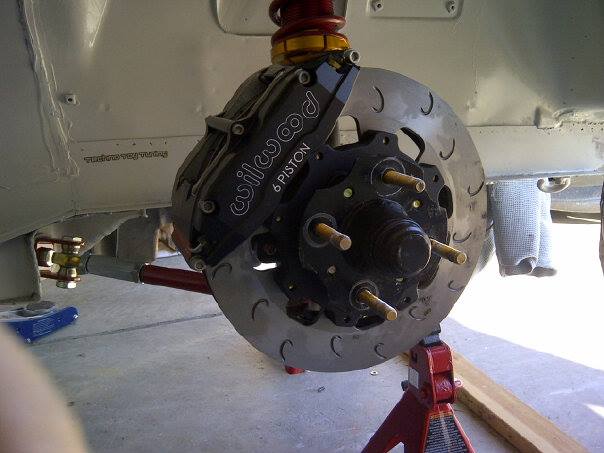
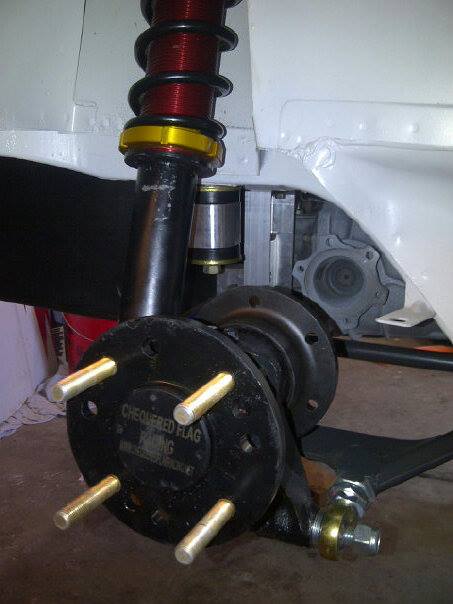
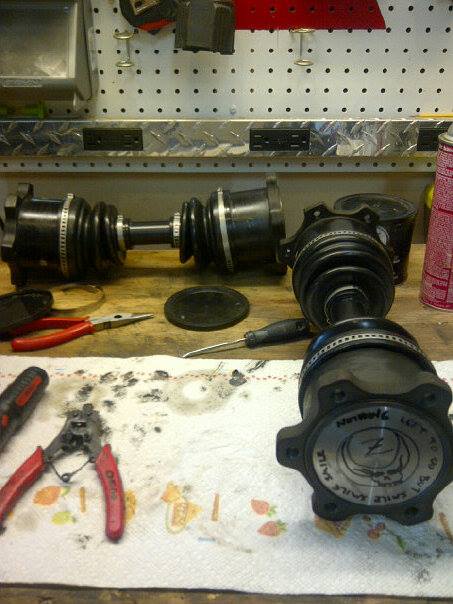
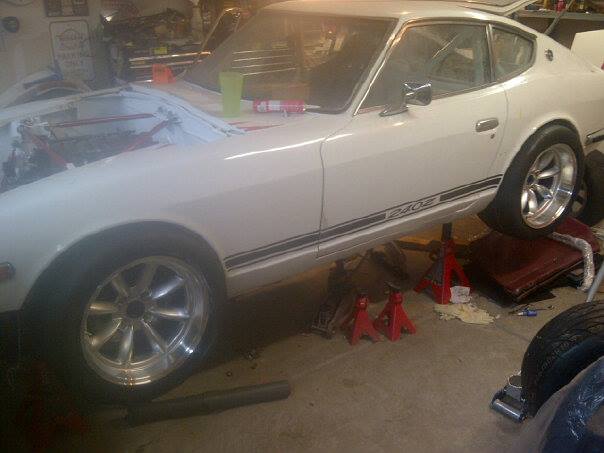
 First time doing a write-up so bare with me... I autocross my series-1 240z last season and needed to upgrade my rear brake, but did not wanted to go to Willwood because I am running a smaller wheel, so I contacted Edan at Silvermine Motors to get his Stage 4 Rear Brake Kit. I currently have one inch Willwood master cylinder and Toyota S12+W front brakes. Shipping was fast and prompt, customer service was great. Complete install 4 - 6 hours, depending on skill level. The kit comes with all necessary hardware and instructions. Stub axles needs to be removed for the install. Mounting brackets needs to face towards the front of the car. Caliber mount needs to be installed next, see picture below. Install brake pads guides; grease as necessary. Next, place caliber on where the bleed nipple faces down. It's designed that way to use stock e-brake. Bleeding caliber will have to be done unbolted from the mount, then placed back on the mount, then adjust e-brake accordingly. Edan states the kit won't fit 15" wheels, but my Atara Racing 15x10.5 - 32 offset clear by a quarter of an inch. I'm sure I missed a lot of details, but the instructions include in the kit are very clear. I am excited to test out the kit on my SCCA car. For anybody that wants to follow how the kit does, feel free to follow the link to the car's Facebook page: https://www.facebook.com/pages/The-DragonballZ/701471269934147 Here's the link to the brake kit : http://www.silverminemotors.com/datsun/datsun-240z/brake-upgrades/stage-4-rear-big-brake-kit Any questions, feel free to ask.
-
 So my build is coming to an end. Spare wheel well has been cut out for the f body fuel tank, gauges are ready to be installed. One last thing at the VERY VERY end, is the exhaust. I've heard a lot of people go 3 inch. I'm wanting to learn towards 3.5 single from 3inch collectors to a 3.5 inch y pipe through a resonator and a muffler. I really really want to avoid drone. And i REALLY want to avoid having to do a true dual out setup. Here's what I got so far. 4inch intake into stock ls1 from 2000 SS sanderson block huggers from JTR, ceramic coated 3 inch collectors. WANT TO GO TO 3.5 inch y pipe, to a resonator, and a muffler, then out. What do you guys think? How would it fit under the s30 body? Am I looking for too much with a 3.5? ANY sound clips are welcome. I've been coming through youtube to find a good 3.5 inch exhaust note, but i've been seeing a lot of STATESMAN machines from australia. PS, I want a smoother throaty sound than a cammed sound that seems to want to rip through the pipes. Maybe that has a lot to do with what tips? =T
 -

From the album: ls swap
-

From the album: ls swap
-

From the album: ls swap
-
I figured it was about time to start my thread on my 240Z that I've been building for a few years.... To start the background on the Z; I found it on ZCar.com in central Florida however it did live half it's life in Texas. Pictures looked pretty decent for a 72 and mostly unmolested. It had recent paint, classic hubcaps and upgraded 280Z block; 5spd and R200 diff transplant. After reviewing the pics and video, I made up my mind to commit to this one. The 175/70-14 donuts were so bad; they almost looked like original tires but what the hell, she was going to be a track car- right? I contacted the owner and found a flight on Jet Blue to Orlando for $99. I flew down on Saturday morning and my old boss picked me up at the Orlando airport and we drove over to check it out. Everything was as expected, nothing to make me fly back to Charlotte today. I did cut some of the fuel line and re-tighten some of the clamps just in case. Paid the guy and drove off to Charlotte. Car ran great up to Columbia where I stopped to see family and take a break from the drive. The biggest problem was the exhaust leak but with both windows down, wasn't too bad ~ Hit the house about midnight that night but she ran great and no issues. I drove her for about a year before the planning stages began. My last 240Z I built was 12:1 high compression L28 that I built back in 93 with forged pistons, floating pins; cam and all the fixins... L28's are pretty good but have limits and are still iron blocks. Looking at other alternatives; I started looking at RB swaps. The biggest issue I found was going to get parts for them, but wasn't a huge issue considering our global transportation system and JDM suppliers on the west coast. You can get a RB engine and wiring harness pretty decent price but then you want to get bigger turbo (s) and all the fixins...Some say the RB26 has too much power and RB25 is better...both can put out gobs of power and take your paycheck just as easy as making that power. There's some good suppliers of RB swaps these days too like McKinney. Then I started looking at VQ swaps like A Hoke. I like the idea of staying in the family but it wasn't that important- Weight and power were the main requirements. There were some VQ swaps out there that look pretty good but then I started looking at the power and decided no VQ35. Hmmm, what about VQ37? still pretty new and prices were still pretty high for a VQ37 with tranny and harness. I started to think about the old american love of sticking a V8 in a small foreign car like Carol Shelby. Why not? The SCARAB was our answer to this question. But the early generation small block engines were heavy and not what I was looking for in a car to track. After seeing Dave Palarmo's LS1 240Z at the 2008 ZCON @ mid-ohio I thought that was a nice setup. Doing some research on it; the LS engine is a few pounds different than the L28. Buying a LS1/T-56 combo was easy to come by but many of them have oil issues (lack of owner responsibilities in changing the oil) and ragged out / tranny issues with hard shifting over 80K+ miles on most of the combo's. Started looking at the various LS engines and options. The F-Body SS Camaro's and Firechickens were around and running car would cost about 4-6K depending on the condition. Better the condition the better the care I thought...THen started looking at wrecked GTO's for LS2 engines with lower miles. About the same in price. I put the word out and found an LS6 at the right price. A fellow track junkie and known around the circles; I was pleased to find this beast with about 4800 miles on it and already had a hot cam installed. So off to the rodeo I went. I started to strip down the Z and for the past three years- due to three crazy kids, wife and job...I'm "almost done!" kind of...at this point I'm just ready to get her started and shake out a few things- mainly what is left to do: Run brake lines (MC to wheels all aorund) Finish fuel lines (today?!?) Dash decision - Aluminum or stock (going twords aluminum to just do it...) wire it up Radiator Exhaust Battery wires THE LIST [Drivetrain] LS6 Engine - Fuel Injected with cable throttle body. T-56 Magnum- Enough to hold 600 HP. - Stock will not work (for long) Q45 / CV shafts. Driveshaft shop Aluminum driveshaft DXD dual friction clutch Interior Roll bar Auto-Meter guages Start switch Battery relocation / lighter battery Exterior ZG flares BRE spoiler [Chassis] Bad Dog Racing full frame rails New floor pans Stripped and painted underpan Stripped and painted front clip [Fuel] Fuel cell - 16 gal Summit circle track Russell Fittings Bosch 44 fuel pump Speedway LS conversion regulator For now- stock fuel rail [suspension] TTT rear lower control arms Coilovers - Koni Shocks Quick steering couplers / bump steer spacers TTT T/C rods TTT Lower Control Arms [brakes] AZC Wilwood on all 4 corners (6/4). Heavy Duty Rotors SS Lines all around Wilwood 1" MC 280Z Booster Pics attached... Thanks to Matt Isbel and Mike Kelly for inspiration as well as the countless hours on HYBRIDZ allowing me to second guess everything and upgrade upgrade upgrade... This is my first real track car so I'm sure I've screwed up somewhere- feel free to tell me -much of this has been a great learning experience from restoring cars since I was a kid helping my Dad to what I've built to date. So far I'm really happy and wish I could be ready for ZDAYZ but looks like that's out this year- Hope to get her to CMP this summer... Right now, I'd like feedback on the fuel setup - how much fuel starvation will I have and do I need to sump it? Any concerns with my setup like heat soak or fuel starvation issues I can avoid? Thanks in advance for the feedback
-
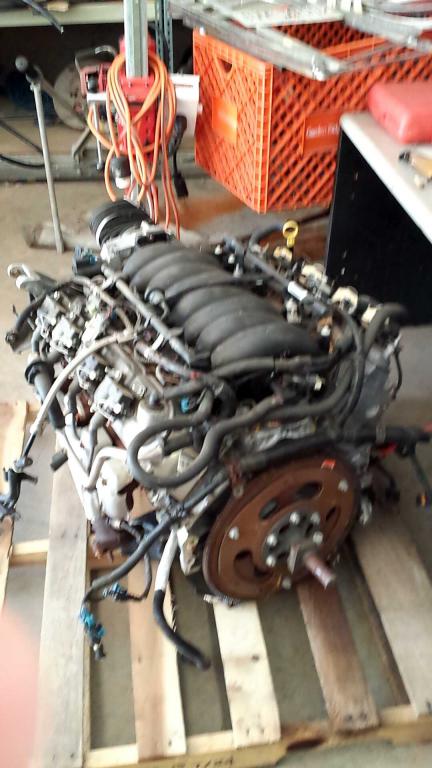
So I've had my eyes on a ls1 engine and a bunch of parts I couldn't identify at my cousins shop. I've just about got my dad sold on the idea of swapping a Chevy V8 into my 260Z and he actually seems really interested. (probably because it's GM) AAnyway I was wondering about your rear end setups on your V8 swapped Z's I know the common option is a R200 LSD or welding a R180 but I'm still kinda anxious about putting close to 350 hp to the wheels on a 40 year old car. Also I need help IDing the engine its self. It's an aluminum block LS1 so I know it's a car engine but I'm unsure about the displacement. I remember somebody at a family reunion saying something about a 5.3l at their shop but I thought the 5.3's were truck engines? My dad swears my cousin got the engine out of a Corvette a few years back but I'm not sure. Thank you guys! PS; I know many people will get the exhaust manifolds off of a Vortec truck to modify into a turbo manifold and I was wondering what the most common truck you can get the manifolds off of is?
-
My cousin has an aluminum black ls1 and what I assume to be T56 manual transmission sitting at his shop which I feel that if I showed enough interest in I could get for a decent price. Only problem with that is that I've already decided that I want this Datsun to be turbocharged and I feel like an ls that makes roughly 300 he (sorry if that's horribly incorrect) would already be a riot in a car that weighs like 2600 lbs. Then to add on to that a turbo would make the car generally Un-safe because I plan on daily driving this in most if not all conditions. I'd like some feed back on how you all like your ls swaps and if you would recommend it. Thanks guys! - Grayson. Ps; another reason I feel like this swap is more practical is because my dad is an absolute die hard GM fan and would prefer an American V8 compared to a foreign in line 6