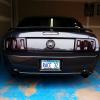
Stock Car Mafia Posted June 26, 2016 Author Share Posted June 26, 2016 What size tips are those? They are 4" Magnaflow tip with no rolled edge. I think they look great! Quote Link to comment Share on other sites More sharing options...
appleslicer Posted June 27, 2016 Share Posted June 27, 2016 (edited) I just read through your entire thread. Exhaust looks good....but one potential issue. I dont see that you are using any flex tubes? If you dont use them after the headers (right after your V bands) you have a strong / imminent risk of cracking the exhaust. Especially with the torquey V8. Also there might be drone with the resonator tubes having additional piping after them. Down the road you may want to invest in a couple Borla XS mufflers. They're really light and small, and what I am going to use when I fab my exhaust for the Z. I know I'm new here, please understand I am not saying anything bad about your choices. I'm sure you know what you're doing. EDIT: Wow...just read that you say there is no drone. Please ignore my statement regarding it. Edited June 27, 2016 by appleslicer Quote Link to comment Share on other sites More sharing options...
Stock Car Mafia Posted June 27, 2016 Author Share Posted June 27, 2016 Appleslicer, I do agree about the flex tubes. It was something I was contemplating doing but when I first was eyeballing the car for an exhaust kit, I wasn't sure there was room for them. Ideally now I do know I could add a small section of flex tube before the X. I could cut and weld these in at any time but I probably will down the road. I was doing some reading many months back and for some reason I recall that having as much piping after straight through mufflers was the best to cut down on drone and what not. Honestly my version of quiet exhaust might be quite different from everybody else. But in all reality I think it is fairly quiet and cruising in 6th gear you can barely hear the exhaust. Appleslicer, I'm not one of those internet guys that gets offended with constructive criticism. Shit if it wasn't for input from anybody I wouldn't be posting on here! I just read through your entire thread. Exhaust looks good....but one potential issue. I dont see that you are using any flex tubes? If you dont use them after the headers (right after your V bands) you have a strong / imminent risk of cracking the exhaust. Especially with the torquey V8. Also there might be drone with the resonator tubes having additional piping after them. Down the road you may want to invest in a couple Borla XS mufflers. They're really light and small, and what I am going to use when I fab my exhaust for the Z. I know I'm new here, please understand I am not saying anything bad about your choices. I'm sure you know what you're doing. EDIT: Wow...just read that you say there is no drone. Please ignore my statement regarding it. Quote Link to comment Share on other sites More sharing options...
Stock Car Mafia Posted June 27, 2016 Author Share Posted June 27, 2016 Exhaust videos will be done today with the help of the girlfriend. Then you guys can be the judge of if it's too loud! Yesterday was a success. We drove 2 hours to have lunch with my family and then drove another 45 to see a good high school friend. We put on another 3 hours or so of driving after this through some windy back roads down to Wabasha, MN and some other small towns. Here are some things I found out. I still have a damn tire rub on hard ass bumps in the RR. I had the shocks set on 5 but bumped them down to 4. It could be from the fenders not being tacked and seamsealed yet but we will see. I had a driveline vibration at about 97 mph. At that speed you can feel it, so I am not pushing it past that point at this time. I am wondering if it is due to the drivetrain geometry with the Hawk's mounts. I need to look in to measuring these and then figuring out a fix. The car handles GREAT on corner entry/deceleration but pushes like a plow on corner exit. I want to say this is due to no rear sway bar or a combination of the this and the independant rear. I am used to solid axle cars so maybe I'm just dreaming. But no matter what I am going to get that rear sway bar in. I don't know why people say they don't fee a difference with and without the rear sway bar.... After this weekend it is going back up on jacks and hopefully all of this gets addressed before the dyno session. The cam and other components will be going in as well. Quote Link to comment Share on other sites More sharing options...
Stock Car Mafia Posted June 27, 2016 Author Share Posted June 27, 2016 Here are the requested videos. I haven't done "exhaust" videos before so hopefully it helps. She said that the video is quite mellow compared to standing on the side of the road. So maybe it's a little louder than I envision https://www.youtube.com/watch?v=ZqkQBBBUodM https://www.youtube.com/watch?v=YiHkSWqCoac Quote Link to comment Share on other sites More sharing options...
appleslicer Posted June 28, 2016 Share Posted June 28, 2016 (edited) It sounds nice! Edited June 28, 2016 by appleslicer Quote Link to comment Share on other sites More sharing options...
~KnuckleDuster~ Posted June 28, 2016 Share Posted June 28, 2016 Sounds wicked! Quote Link to comment Share on other sites More sharing options...
Stock Car Mafia Posted June 28, 2016 Author Share Posted June 28, 2016 Thanks guys! Quote Link to comment Share on other sites More sharing options...
rossman Posted June 28, 2016 Share Posted June 28, 2016 It does sound mean! Make it robust and get some flex pipe in there! Quote Link to comment Share on other sites More sharing options...
Stock Car Mafia Posted June 28, 2016 Author Share Posted June 28, 2016 That's two votes for the flex tubing! I wrote this down to get some in. It should be an hour fix or so. It does sound mean! Make it robust and get some flex pipe in there! Quote Link to comment Share on other sites More sharing options...
Stock Car Mafia Posted June 28, 2016 Author Share Posted June 28, 2016 I just punched in my gas receipts for the car. Coming up on a month on the road and we've already booked 1,777 miles! I've been lazy and haven't calibrated my speedo yet and my calculations are adjusted accordingly. I forgot to mention I did pull the wheels off prior to the trip and cut out more wheel well for tire clearance. I also went up 2 rounds on the coilovers which brought the car up another 1/4". The ride height still seems to be good without having the 4x4 look. One thing I forgot to mention is the Jeg's fuel level sender has been acting goofy. Ever since I've really got on the car, the sender get stuck close to empty on sweeping left handers. After the corner I have to jerk the car to the right to get it to even out. I am quite bothered by this! I am going to contact their tech support guys at some point probably after the dyno tune. I don't care to drain and pull the tank at the moment. Quote Link to comment Share on other sites More sharing options...
Sirpent Posted June 28, 2016 Share Posted June 28, 2016 One regret I have is that my conversion will never have this rasp pitched appeal, that sound brilliant with no back popping................ Well configured and well done. Quote Link to comment Share on other sites More sharing options...
Stock Car Mafia Posted June 28, 2016 Author Share Posted June 28, 2016 In the end your's will be far more unique! If only we could do what we love to do everyday and not have to work... One regret I have is that my conversion will never have this rasp pitched appeal, that sound brilliant with no back popping................ Well configured and well done. Quote Link to comment Share on other sites More sharing options...
Stock Car Mafia Posted July 1, 2016 Author Share Posted July 1, 2016 Well I started in to the cam swap last night. I will have to put up a how to after I get this all done. Here are some sneak peeks as I hope to finish it tonight....Still a ways to go. Quote Link to comment Share on other sites More sharing options...
Stock Car Mafia Posted July 3, 2016 Author Share Posted July 3, 2016 I feel like getting out today so I will probably keep my post a little short. I decided to swap the cam and what not prior to Saturday. Thursday night I was able to strip the block down fairly fast to get it ready for Friday night. This stuff is pretty straight forward. This is where I got after unplugging the plugs, disconnecting the coil packs and unbolting them, and then pulling the valve covers off. The rockers were unbolted and the rocker guides and pushrods were pulled. When I got to this point, I knew the bottom two timing chain cover bolts were going to be a BITCH. I was thinking I was going to have to move the steering rack or drop the suspension...I removed the alternator and bracket as this was easy to remove. The crank bolt was really hard to break loose. Having the car in 6th gear and the parking brake on, the car still moved. I had to put blocks in from of the wheels to get it loose. The crank pulley can be pulled using a remover and the stock bolt but this is risky. The bolt is barely long enough to use. Just go buy the damper removal tool from the LS1TECH! It is worth the money to do things right... Here you can see how there is no room at all. I removed the other 8 bolts from the cover, and then loosened the bottom two and slowly moved the cover up to get them fully unbolted. I couldn't unthread them with the cover in place. The steering rack was just that close with the Hawk's kit... The LS2 has a timing chain guide that makes it a little difficult to see where the timing dots are. If you shine a light in from the side and look from the top you can spot it. These NEED to be lined up prior to unbolting the cam gear. I have a video posted in my photobucket for anyone that is interested. After the gear is removed there are some star head bolts that need to be removed. I think LS1's have metric bolts but luckily I had the bit for this. After that, throw some water pump bolt in and spin/flick the cam a couple rotations to get the lifters to stick up. For the most place they should hold in place. BEFORE MOVING THE CAM, make sure to get either the lifter holder tool or go pick up some 5/16" steel rod from Menards. I took mine and rounded the edges so if there were any finicky lifters it would be able to slide underneath it. These went in with EASE. Save yourself the tool money and just spend $4 for rods... Now is the time that you can slide the cam out. The first 25% is the toughest because you have to support the weight of the cam as you pull it out. Just go slow. In the end the removal and install of the cam is the easiest portion of this whole swap. I just used fresh motor oil to lube the cam, no assembly lube. After the cam is slide in, put the retainer plate back on and use Loctite on the bolts. Then put the cam gear back on with the dots lined up and getting the chain oriented right to bolt to the cam. This part is kind of tricky as you have to move it tooth by tooth if it doesn't line up, however I got it the first shot Use loctite on these bolts as well. Next up was the spring swap. I got the Crane cams tool and I personally would recommend it. I used antiseize on the bolts and this thing never locked up on me. I replaced the springs, seats, retainres, and the keepers. I was not going to change a valve dropping in the cylinder so I used the top dead center trick along with a compressed air fitting from a leakdown testing kit. Thanks to my sister-in-law Sophie for her sweet ass Snap-On tools! With the cam dots lined up, the motor is at top dead center for #1 and #6. These exhaust and intake valves can be worked on. Put the car in gear when you compress the cylinder. My car would roll forward as soon as I would hook up the air line at 80 psi. The best method I found to get the keepers out, was to compress the springs until you hear the valves open. I then cranked the ratchet about 6-8 more times. My air compressor is small so it turns on to try to keep up at this point. I then took a rubber mallet and tapped on the valves until they popped up and freed up the keepers. I used a pen magnet to get all 4 out. Use rags to plug any holes so they don't fall in the block!!! After #1 and #6 are done, it is rinse and repeat. Turn the crank 90 deg. clockwise and work on #5 and #8. Turn the crank another 90 deg. and work on #4 and #7. Turn it another 90 deg. and work on #2 and #3. After this, the motor is pretty much ready to go back together in the reverse order. Quote Link to comment Share on other sites More sharing options...
Stock Car Mafia Posted July 3, 2016 Author Share Posted July 3, 2016 I decided to rebuild my rockers with a trunion upgrade. I went with the new bushing trunion kit after reading about comp cam trunion kits have some nasty premature wear on the trunion. Those kits are really noisy to begin with as well. After seeing the needle bearings, I am glad I am getting rid of these... I used a 14mm and 13-16" sockets to press the center sections out. They do make a bench vice tool which I didn't know until someone on the LS1Tech site told me about it. I do have a press so I didn't need it. I used a 5/8" and 13/16" sockets for the install. I did grab 2 thick hardened washers (5/8" Grade 8) from Menards as well. These worked great at giving the trunion room so you can press the brass insert in flush. All of these parts were sitting in motor oil prior to pressing in. Now after my first rocker, I noticed that there was still some side to side play even with the fittings pressed in flush. I took the 5/8" socket and pressed each side in a little more to get then almost to the point of snug. I made sure each rocker spun absolutely free with no resistance. After that, the 32 snap rings were thrown on to retain the piece together. I like the way this kit looks! Let's hope these have a good lifespan. I pounded out the old crank seal with a punch and hammer. The new one was seated in with a block of wood. And I think this was the end of the pictures I took. The rest of the car went back together with ease. I did grab some green antifreeze and mixed it roughly to a 30% antifreeze/70% distilled water mix. I did throw a bottle of water wetter in too. After that I was going to wait for my neighbor to help spot but he didn't get back in time. I went to go start the car and she fired up on the first crank. https://www.youtube.com/watch?v=RqpbMvY1lSU The rocker upgrade is pretty damn quiet compared to the other sewing machines I've heard. I did 2 heat cycles on the motor and then dropped the oil Friday night. Quote Link to comment Share on other sites More sharing options...
Stock Car Mafia Posted July 3, 2016 Author Share Posted July 3, 2016 I took the car to CnC in Chanhassen yesterday. I took it easy getting there and saw some great cars. I did get on the gas a few times and the car went in to limp mode 2 times... I am getting codes for the MAF and TPS sensors. Typical of a bigger cam. So now it is taking it easy until the dyno tune! I did take the throttle body off yesterday after the show and shave down the two lips in front of the blades. I have yet to polish this. List of items to complete before July 11th: * Port and polish throttle body. * Port and polish intake * Route air filter in front of radiator * Install Mightymouse PCV can - Wire resistor in tach so it actually reads I think this is it for now! I'm off to find some good roads to hit today... Quote Link to comment Share on other sites More sharing options...
Stock Car Mafia Posted July 8, 2016 Author Share Posted July 8, 2016 Well the weekend, bachelor party fun, and the dyno are really sneaking up on me fast and I am shaking like a leaf to get this all done before Monday. I did end up pulling off the intake a couple nights ago. I was shocked at how much oil was blown up through the intake just after 2,000 miles. I had cleaned everything up really well when I installed the new fuel rails. This is probably due to me refusing to allow any crankcase ventilation. The Mightymouse catch can will be going on tonight to eliminate this. I will have to say the LS2 intake is a POS. The porting is really jagged and not uniform from port to port. Also that sonic welding they use doesn't "weld" very well as I could tell on some edges. What I did was take out the ports to about 1.050" from 0.950" I believe. The majority of the work was done to level out the ports for better flow and do my best job to port match each cylinder. There was a rough lip on the inside of the TB side that was cleaned up as well. Then there is a large bump on the intake runner #1 that restricts the flow past that opening lip. All of this was shaved down as well. I used 60 grit for the rough cuts. Then followed with 220 sandpaper and 360 grit red scotch brite. On top of all of this, I finished my port and polishing of the throttle body. I was only able to get everything bolted up last night before it got too late. The shipment from silicone intakes made it yesterday too so I should be able to reroute my air intake and filter. Quote Link to comment Share on other sites More sharing options...
Stock Car Mafia Posted July 10, 2016 Author Share Posted July 10, 2016 Friday night I was able to finish the intake routing and installing the catch can. My IAT's are down from 120-140 deg. to now around 80-90 deg. depending on the temperature for the day. I'll take this as a win. Car seems to be running fine exept for that drivetrain vibration at about 100 mph. We had the car on the jacks today and it seems to be one tire is out of round and the other wobbles in and out. I can see the rim moving a little bit probably proportional to the tire wobble so I am sure this is due to the paint that is on my brake drums. I'm swapping the tires for my stockers to see if the problem remains. Quote Link to comment Share on other sites More sharing options...
NewZed Posted July 10, 2016 Share Posted July 10, 2016 Soft plastic paint on a metal mating surface isn't really a good idea. It will creep and compress over time. Quote Link to comment Share on other sites More sharing options...
Recommended Posts
Join the conversation
You can post now and register later. If you have an account, sign in now to post with your account.