Kevin.pk Posted April 4, 2007 Share Posted April 4, 2007 (edited) Interior when i first saw the car.This is when i first really started work on it.... i tore out the interior to see exactly what rust i was going to find..... only to be pleasantly surprised that it really was just about a rust free as it first appeared. I immediately started work on the body. I had until May and only limited to being able to work on it for about 2 hours a day on weekdays in my high school auto body class.Me and my friends decided to paint the hood.We could do pretty much anything to it as i had ordered a fiberglass hood online. the only option was clear.... THE MACH 5. hahahaAt this point i had made a little more progress on the body and decided to go ahead and bolt the suspension bits up.I went ahead and installed my suspension which consists of:Tokico hp blues in frontTokico illuminas in rearTokico springs all around.Suspension techniques sway bars front and rear.Little did i know this would definitely not be the last time i took apart the suspension..... i took everything apart probably 3 or 4 more times. once for tie rods and ball joints.... then 5 lug swap.... brakes, etc.More body work pics.... i decided to shave the vents on the c pillar as well as the antennae, rear bumper, headlight extension seams, gas door, and side lights. I didnt really take any progress pictures on anything other than the c pillar vents though.This is my high school pipe dream here...... for no good reason i decide to rip out the perfectly good spare tire well and install some tubing and such for a fuel cell and relocate the battery to right behind the right rear tire.... lets just say that this was poorly planned and has given me headaches ever since..... notch this one up as a bad decision. This may have been a good idea if i were building a full on race car but i was not and probably in retrospect should have left the stock tank alone. At least for my current goals and budget.These two pictures show the car in primer, pretty much ready for paint.The slicks under the car aren't mine.... i had just mounted the tires on some wheels for a friend and stored them under the car until he came to pick them up..... all in good time though.Fresh out of the paint booth. Had to bring it outside for its first time as the color Chrome silver. I chose to use the 350z silver... maybe there is a little purist in me.here is where i first mocked up the mustang wheels after my brother gave them to me. He upgrade to deep dish 18" version of the same wheel but wiht black centers.Picture of the rear of the car.... but hmmm the license plate look a little funny........This is half the reason i decided to get a fuel cell... i wanted to conceal the gas filler behind the license plate. I used the stock gas filler and cut it down ... the welded an adapter to it so the hose size would match the cells fill hole. The flip down license plate is off a mid 70's monte carlo if i remember right.I don't know why but when you get the lights on in the car the car finally begins to come to life.... or at least i thought so..... here i am 2 and a half years after this picture was taken, with a car with lights that work but doesn't move cause i need to get the motor rebuilt. I have been away at college since august 2004 so im 4 hours away from the car and only get time to work on it during the summer.... therefore its a project that will never end.This is a grill that i fabricated out of two 280z grills. I simply welded them together with a small bracket on the back side. It needs a little reworking but it rest right on top of the air dam and sits near flush with it... a total coincidence.... it was accidental. I think i am going to try and fit some fog lights or something underneath the turn signal to fill in the void.The rest of these pictures are after i got the suspension and wheels finished once and for all. Unfortunately since the engine is toast and my drive way is too steep for me to move it into the sun.... i had to take pictures in the garage and the camera can't quite capture the whole car in one picture.I got the 300zx front hubs with modern motorsports spacers for the 300zx vented rotors. and bolted it all up...... the rear stub axles i had drilled by a local machine shop for like $100.Hopefully this up coming summer i will have the time and funds to finish it up... It is only 3 or 4 years in the making now.. and i just want to drive the damn thing.Kevin Edited April 13, 2015 by Kevin.pk Quote Link to comment Share on other sites More sharing options...
Kevin.pk Posted July 23, 2007 Author Share Posted July 23, 2007 well I've gotten a few new things done. i started working on the interior some. I installed the headliner and some random vinyl pieces. it was surprisingly easy to do th vinyl pieces.... i just bought a few yards of black vinyl and started cutting and gluing. the results aren't professional but not bad for my first venture in to the world of upholstery and interior. i also got bored and decided i needed to finally shave my n42 intake to help clean up the engine bay. i had been putting this off for a while but after a few hours of grinding,a swipe of jb weld to fill the holes, and a coat of paint, i think it came out pretty good. Quote Link to comment Share on other sites More sharing options...
Kevin.pk Posted August 3, 2007 Author Share Posted August 3, 2007 i finally got around to installing these door panel covers that believe got from Classic Datsun.... i don't fully remember but i think thats right.... i decided to not deal with the staples and the felt that goes between the panel and the window and just decided to paint the top metal part and just attach the vinyl to the lower cardboard half. i think it came out pretty decently..... I'm still deciding on if i want to use the stock pull handles or look for something different. passenger side.... driver's side.... i felt like doing something a little different with the rear hatch deck and cover it with vinyl too. i also covered the storage compartment lids..... then got some nice allen head bolts to hold them in place. the other little detail is that i got come aluminum C-channel and attached it the lip behind the seats. i still need to clean up the excess adhesive that got on some of the vinyl. I more or less just need to get some carpet to go over the shock/ tire wells and for the front floor and transmission tunnel. Quote Link to comment Share on other sites More sharing options...
Kevin.pk Posted May 25, 2008 Author Share Posted May 25, 2008 things just got a little more interesting..... and a little more expensive Well i ditched the whole l28et thing and decided i wanted two extra cylinders. Its a 350 bored .030 over super victor intake 750 holley carb cam -- don't remember specs off hand, but its pretty nasty. jtr position etc.... It's more or less your average swap, nothing too exciting, but it should scoot pretty good. Shifter is a B&M pro stick. I just welded a plate to the stock rubber shift boot retaining ring and bolted the shifter to it. Its connected to a 700r4 with a few upgrades. errr... carpet is just on its way. B&M transmission cooler theres alot more that has been done since these pics i need to take some more. Right now I'm hoping to start it up some time this week.... and then ill have to start thinking what I'm gonna do about the stock half shafts... it never ends does it? Kevin Quote Link to comment Share on other sites More sharing options...
Kevin.pk Posted May 27, 2008 Author Share Posted May 27, 2008 crappy cell phone pics but.... radiator and electric fan installed... upper radiator hose is just kind of mocked up into position. It still needs to be trimmed a little. another shot of the radiator from the front of the car with the trans cooler again. alternator installed and wired up as well as the belt and pulleys...... the alternator was installed with a mid mount kit from Alan grove components. I really liked how it tucked in and makes the motor a tight package. It only works with the long water pump though. Lokar transmission dipstick. There was no way the stock dipstick was going to fit with the way i ran the trans cooler lines. and it looks a lot nicer too. Coil, relays and fuses were mounted where the battery tray used to be. The battery is mounted in the rear. Its getting closer... I can't wait Kevin Quote Link to comment Share on other sites More sharing options...
Kevin.pk Posted June 6, 2008 Author Share Posted June 6, 2008 no pics for this update but I finally started the car and it sounds awesome. The only real hiccup up was when I was checking for fuel pressure and realized I had none. I looked under the car and realized the fuel pump inlet/outlet were reversed. After that mistake I pulled my head out of my ass and it started on the first crank. Open headers is a little loud for my taste... haha... exhaust should be installed on Tuesday. pictures and video will ensue. Kevin Quote Link to comment Share on other sites More sharing options...
Kevin.pk Posted June 13, 2008 Author Share Posted June 13, 2008 Exhaust is not yet installed yet but the mufflers came in yesterday. Hopefully i will be able to get the exhaust done sometime next week...we will see. My plan for the exhaust is to have a dual 2.5" inlet muffler installed just under the driveshaft with a single 3" outlet... a second muffler will be installed in the stock location. It has a 3" inlet and a 4" polished tip. Both mufflers are magnaflows. Pics below.... Dual 2.5"inlet/3"outlet Single 3" inlet/4" outlet Polished stainless steel 4"polished tip Quote Link to comment Share on other sites More sharing options...
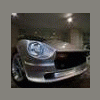
Kevin.pk Posted August 21, 2008 Author Share Posted August 21, 2008 Finally got some new pics of engine installed and finished as well as all the other goodies that i have installed. All the engine needs is an air cleaner and its essentially good to go. Sorry for the picture quality. I used my phone cause I forgot to bring my camera. Here is a pic of the front showing the coolant catch can, trans cooler and front of radiator. Electric fan installed. I am going to make a shroud for it eventually. Fuel cell installed and the rear muffler mocked up. JTR trans mount with 700r4 transmission. you can also see the battery cable being run along the frame rail. Suspension techniques front sway bar. 1 1/8" if i remember right. Battery mounted behind the right rear tire and next to the fuel cell. Also the fuel filter. Holley fuel pump mounted in stock position. I had some extra tread plate lying around so I blinged out the mounting plate. Shifter installed with center console mocked up. I still need carpet to finish out the interior Miata seat installed. First decent picture of the car in full.... minus fiberglass hood. I'm going to have to cut a hole in the hood for the air filter and still trying to decide whether I should put a scoop on this hood or go cowl induction. Rear shot Kevin Quote Link to comment Share on other sites More sharing options...
Kevin.pk Posted August 26, 2008 Author Share Posted August 26, 2008 Here are a couple more pics of things I'm working on. Painted gas tank straps to add a little contrast. Exhaust still just mocked up. Top of fuel tank and battery in the hatch. Fuel tank/ battery cover. I still need to make an access panel for filling the gas tank. I used Dzus fasteners to attach it. Quote Link to comment Share on other sites More sharing options...
Kevin.pk Posted August 28, 2008 Author Share Posted August 28, 2008 Took camera with me today and got some decent pictures...... Fuel cell padded and covered in black vinyl. New Autometer sport comp mechanical gauges installed. Still need to replace the analog clock with a fuel level gauge. Hood installed. I am still gonna have to cut it up for the air filter. Not very much space.I think I need to remount the air dam in the front too. It really should be angled down about 1" more. Shot of the rollbar and gauges from the hatch. The reason for needing the hood scoop..... Quote Link to comment Share on other sites More sharing options...
Kevin.pk Posted August 31, 2008 Author Share Posted August 31, 2008 Well I found an air filter that will fit under the stock hood but its.... uh... small. It's a Mr. Gasket part# 1486. A 6.5" diameter by 1.5" tall filter. It's temporary until I figure out if I am going to go with a different hood or add a scoop. I am still debating on what to do. If i choose to go with another hood I don't want to cut my current fiberglass one so i can sell it intact. My space under the hood is so limited because I am running a super victor intake. With this current filter I have probably ~3/16" clearance. The car is pretty much complete in terms of full drivability. It had a couple short drives in a parking lot with open headers so far, but nothing past that. Exhaust, registration, inspection, insurance are still to come before i really get to break it in. Things needed to make it road worthy: Exhaust Seat belts Hood latch or hood pins One Brake light just stopped working Change out throttle bracket http://www.jegs.com/images/photos/500/555/555-15152.jpg (The one on there works but is a cheap one from autozone that was cut and welded to work) Tires Less important things that can be sorted out later: Carpet fuel gauge/ sender upgrade tachometer and speedometer to match autometer oil pres. and water temp. gauges radio (for if I ever get tired of listening to the exhaust... hehe) upgrade the entire end (if i ever get traction, i foresee broken axles and stub axles in my future) Kevin Quote Link to comment Share on other sites More sharing options...
Kevin.pk Posted September 10, 2008 Author Share Posted September 10, 2008 Well the car is finally 100% street legal. It is registered. I got the exhaust installed. It has been inspected. It is good to go. Sorry for the bad pics. I didn't get around to taking any decent pics since it was raining all day. Here are a couple of pics showing the few things that have been done to finish up the mechanical and appearance of the car. New throttle bracket installed Exhaust installed. Front grill and turn signal surrounds installed. Kevin Quote Link to comment Share on other sites More sharing options...
Kevin.pk Posted January 4, 2009 Author Share Posted January 4, 2009 Well the weather was perfect today so I cleaned up the Z and took it for a little photoshoot. I am by no means a photographer but this is what I came up with. I will definitely bring a tripod next time. This is my favorite light in the car...... Finally got a tach for the damn car....... Quote Link to comment Share on other sites More sharing options...
Kevin.pk Posted March 28, 2009 Author Share Posted March 28, 2009 Painted the brake drums black. Trying to hide them a little bit until I put in some disk brakes.They just look out of place with the large wheels. I still need to get center caps for the wheels. New tires for the rear. 245/45/17 Sumitumo HTR Z III New tires in the front. 245/45/17 Kumho Ecsta ASX I covered the piece that the defrosters blow through with suede.I actually cut out the little dividers that used to make up the "grill" that the air came through. It was the only way to make the suede look right and stil have functionind defrosters. The pictures kind of suck; I'll have to get some better ones with it installed. Quote Link to comment Share on other sites More sharing options...
Kevin.pk Posted April 3, 2009 Author Share Posted April 3, 2009 More little cosmetic things.... Painted steering wheel white. I actually was just priming it with kilz and I liked the way it matched up with the white shift knob. I may still paint it. Found a center cap that'll work for the wheels. They are actually stock center caps off of the Iron cross wheels. I had to sand down the outer edge slightly to fit it inside of the wheel center hole but it fits in snugly now. Unfortuantely I only had one lying around so now I am on the hunt for three more for the other wheels. I also covered the panel where the dome light goes with the same material i used for the headliner. The color is a light grey.... bad lighting. and here are some random pics I took of the car.......... Quote Link to comment Share on other sites More sharing options...
Kevin.pk Posted May 10, 2009 Author Share Posted May 10, 2009 Had someone who actually knows what they are doing with a camera take a couple pics of the car..... Quote Link to comment Share on other sites More sharing options...
Kevin.pk Posted May 15, 2009 Author Share Posted May 15, 2009 I started trying to cover the plastic panels in the hatch. The quarter window piece has a little bit of exposed plastic but it was a first attempt and the underlying plastic is black so its less noticeable. I still need to work on the other side. It is black suede but the sunlight kind of throws the color off. It is the same material I used on the piece in front of the dash. Here's another pic of the overhead plastic piece where the dome light mounts.Its covered with headliner material.You can see it a little bit in the picture above as well where it meets the quarter window piece. I'm contemplating covering it in the same suede material. Quote Link to comment Share on other sites More sharing options...
Kevin.pk Posted May 16, 2009 Author Share Posted May 16, 2009 WIRING IS TIRING. After neglecting to properly clean up the wiring when I first put in the V8, I finally decided to clean it up a bit for two reason. 1. It looked like a rats nest. 2. The wiring touched my passenger header and melted the plastic cover and a couple wires. The wires that did melt weren't actually attached to anything. That's when I realized I still had a lot of "spare" wiring in my engine bay from the L28. About 2/3 of the excess wires: I don't have many pics showing the ugly wiring because I avoided that when taking pics. Thus the following picture is all I have as a before shot. This is basically what I started with (with the additon of a couple relays): And this is the end result: I sent all the wiring for the Headlights, turn signal, and horn through the fenderwell. I would have routed the wiring along the lip at the botom of the inner fender but the tire comes very close to the chassis at the front and I didn't want any chance of rubbing. Therfore it is further up. You can also so where my battery cable routes in from the battery mounted in the rear of the car. The end result is absolutely worth it. It looks better, it's better organized, and I gained a little bit more knowledge of the electrical system in my car. Quote Link to comment Share on other sites More sharing options...
Kevin.pk Posted September 17, 2009 Author Share Posted September 17, 2009 Small update. Decided to paint the front calipers. They were looking a little dull and what not so I shot them real quick with some silver high temp paint. Although now it is abundantly clear how much smaller the brake setup looks now that the calipers have been "highlighted." I may still change them to black. lol Here are some miscellaneous pics I took..... I raised the back end of the car up with the stock isolators. I scrape less and the car doesn't have the squatting dog look anymore. I'll wait to drop it more when I buy some coilovers and section the front struts Quote Link to comment Share on other sites More sharing options...
Kevin.pk Posted September 22, 2009 Author Share Posted September 22, 2009 Started tearing apart the HVAC stuff. Planning on installing A/C in the near future and figured I should clean everything out. Also, I need to figure out what I want to do about the heater control valve that leaked when I hooked it up last year. Took me a while to get around to it, but a heater isn't necessarily a necessity in Texas. Some much need wiring clean up is in the plans as well. Everything torn out for the most part. Clearly need to do a little bit of cleaning. The leaky culprit..... Wiring that needs a little cleaned up... Little bit of rust on the fresh air vent under the cowl. Looks like mostly just surface rust. I'll throw some POR-15 on it before I bolt everything back up. Heater Box needs will get a through cleaning and inspection as well. Quote Link to comment Share on other sites More sharing options...
Recommended Posts
Join the conversation
You can post now and register later. If you have an account, sign in now to post with your account.