Barrel_Ball
-
Posts
83 -
Joined
-
Last visited
-
Days Won
1
Barrel_Ball's Achievements
")
Newbie (1/14)
12
Reputation
-
Thanks for the advice. I did as you said, and redid my timing map from scratch. It idles pretty decent for the most part. Idles better than it did previously, even. I guess I'm beginning my learning curve from scratch, too.
-
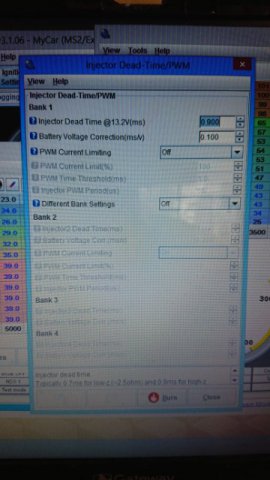
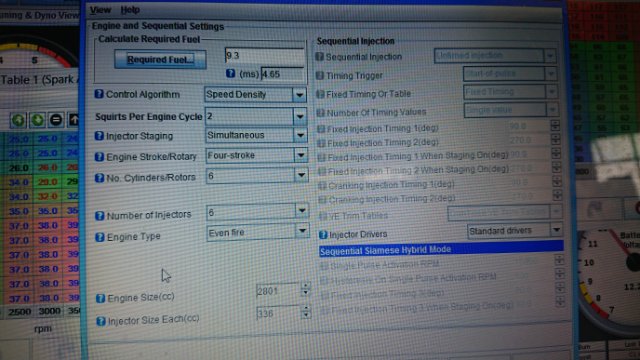
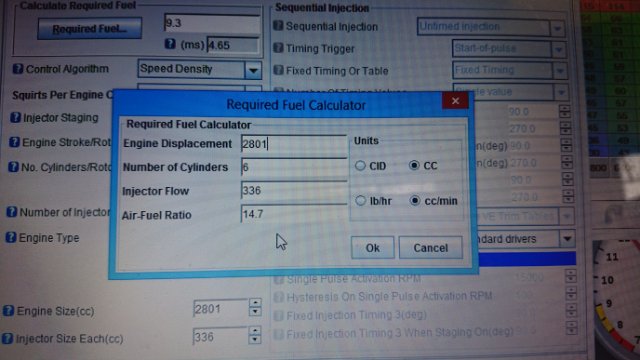
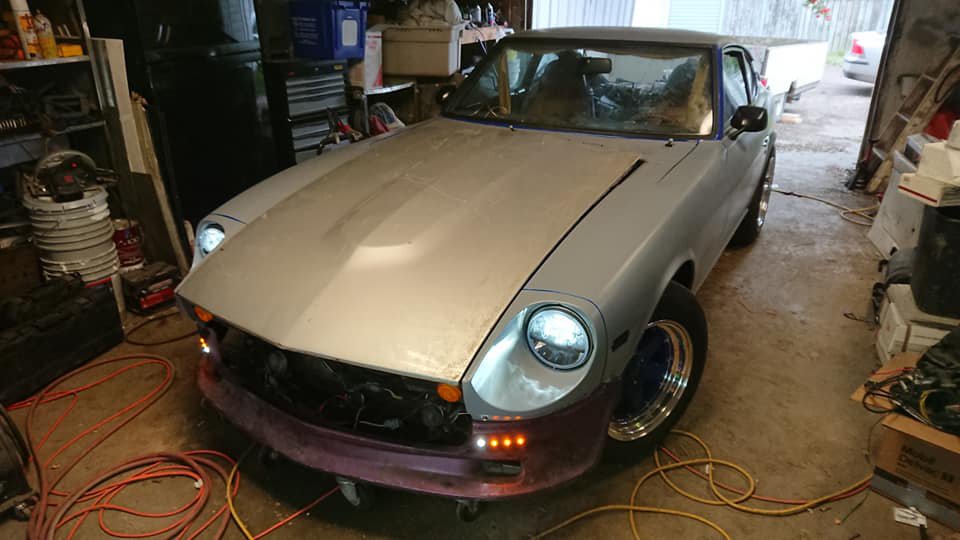
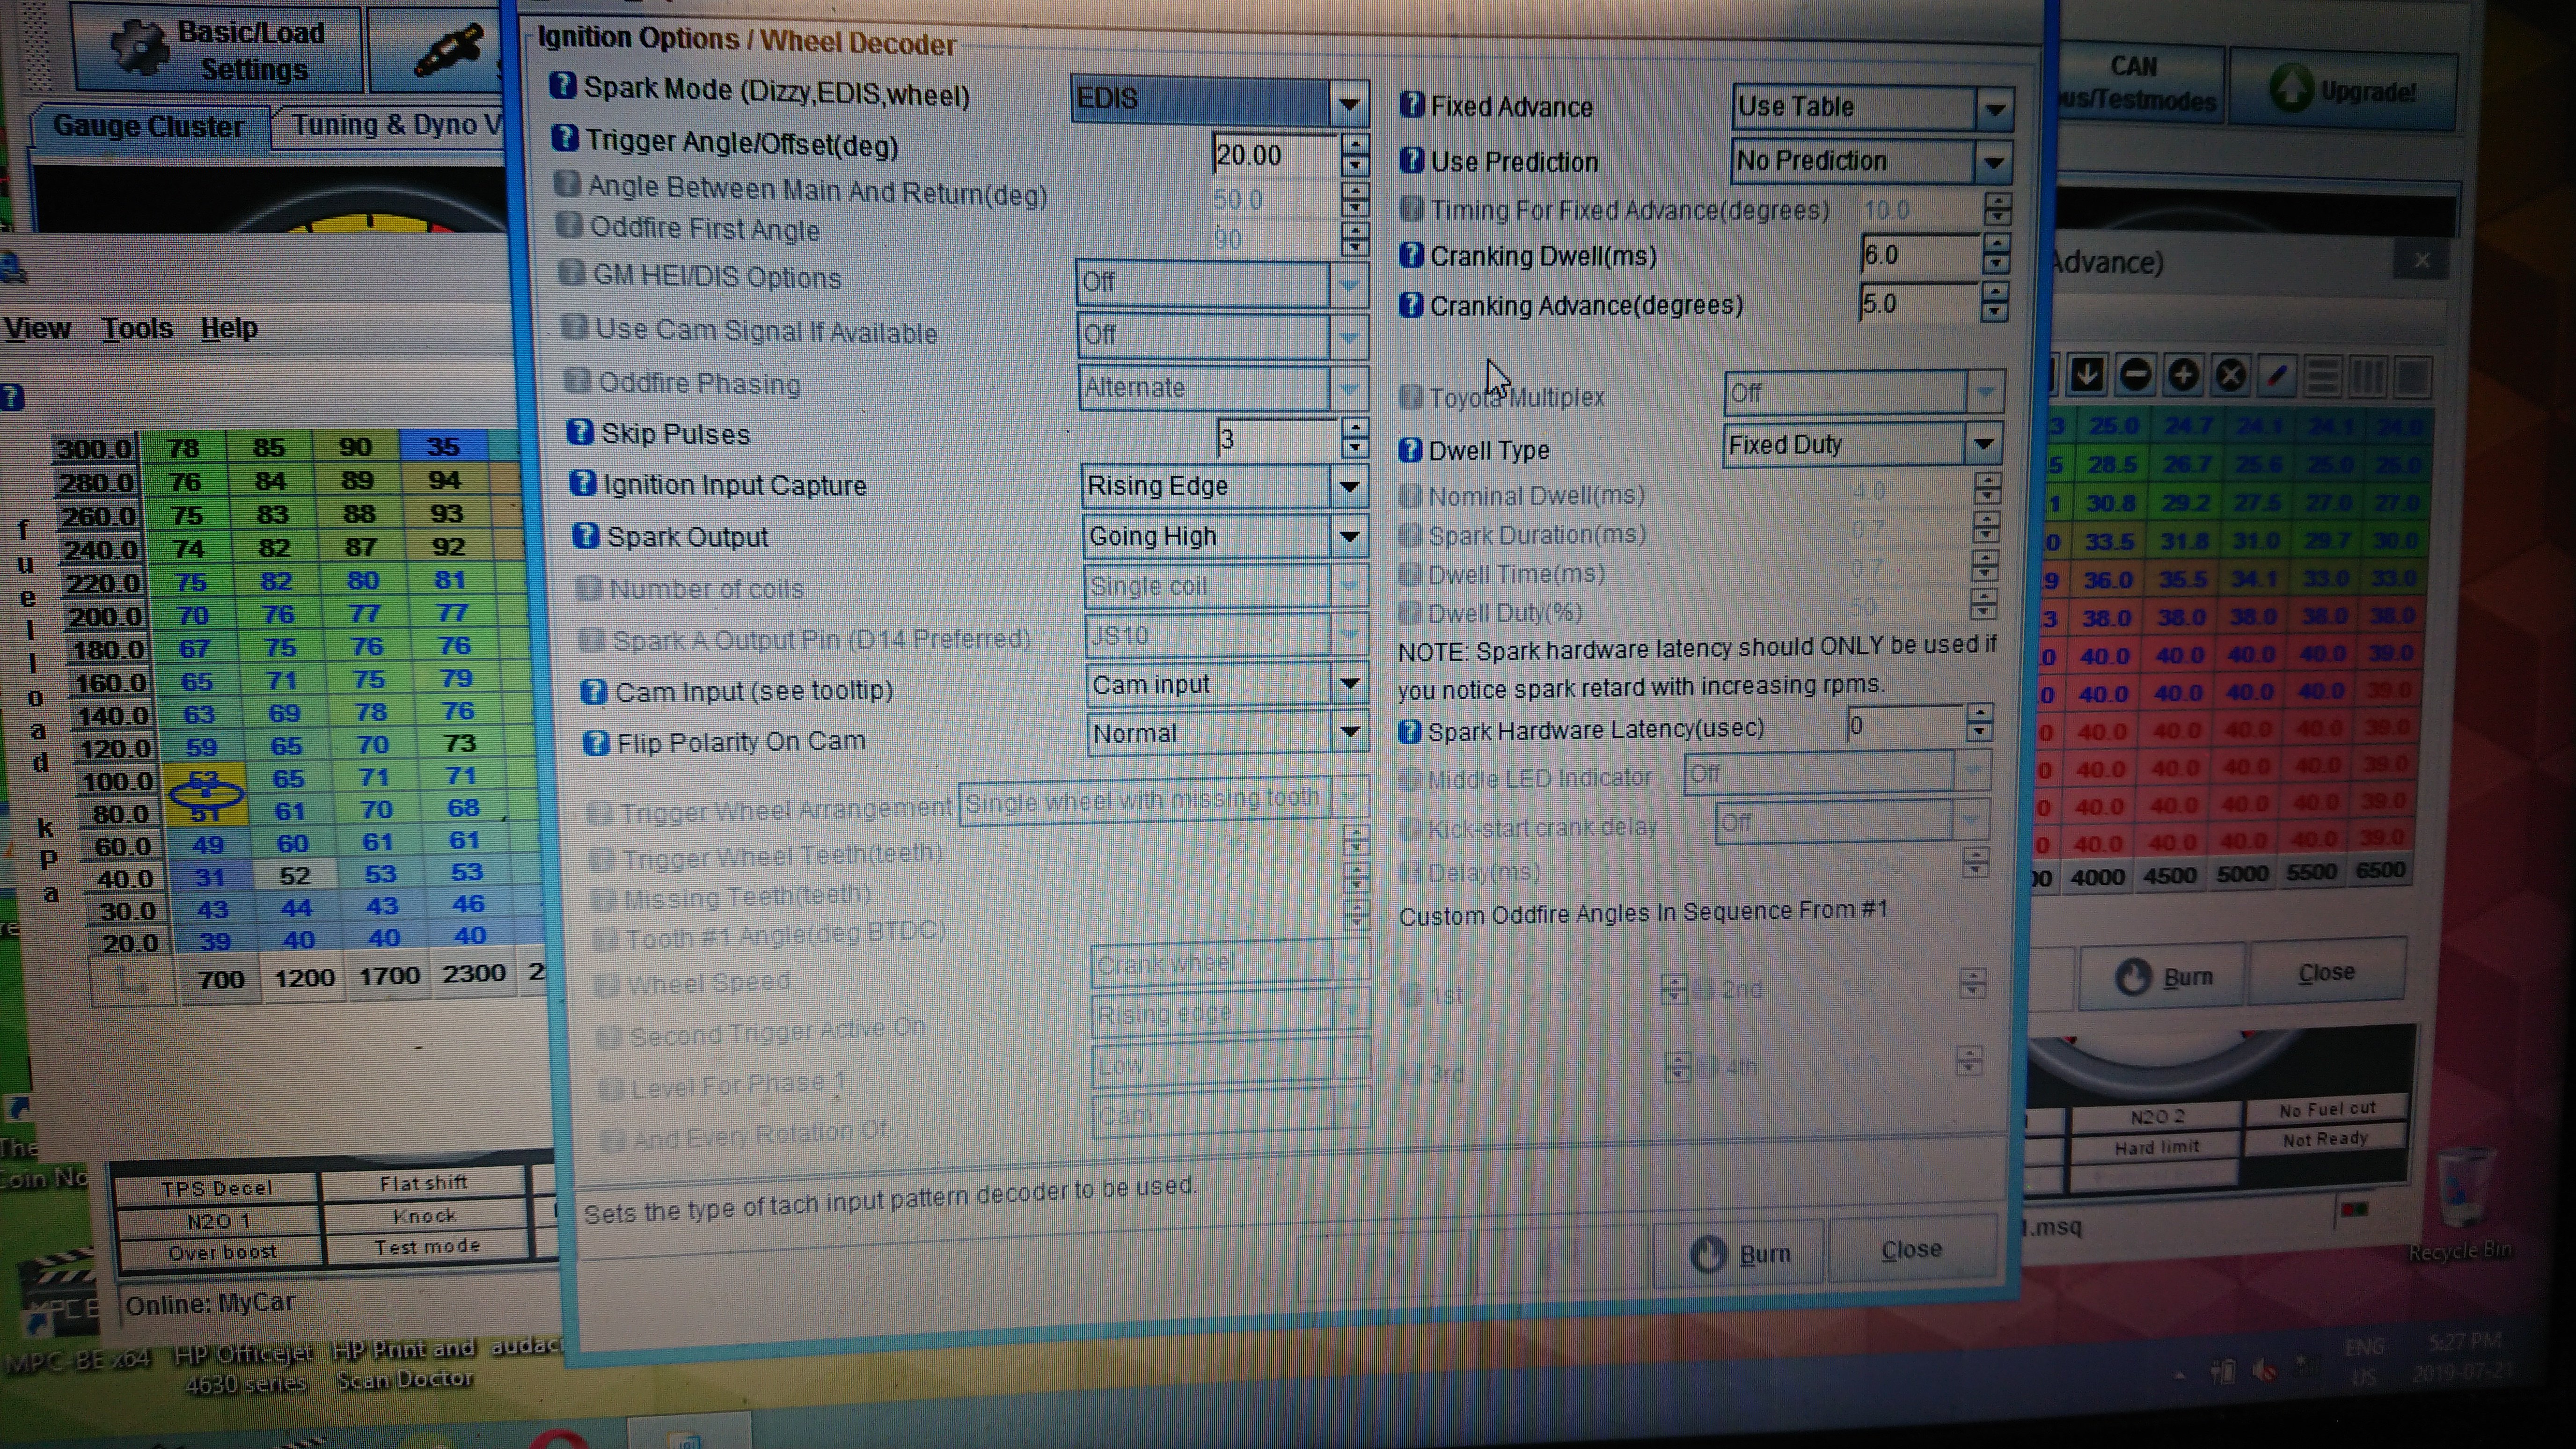
Hey everyone. I'll be the first to say in this topic that I have no idea what I'm doing anymore. Car's popping out the intake, running super rich, falls on its face, appears to have just killed an injector (which I'll be replacing this weekend)... Details (what I know): L28ET: 0.020" bore, fully balanced rotating assembly, 5-angle valve machining, self-oiled 'A' grind cam, minor port cleanup, fortified with ARP hardware. Nissan 45v1 turbo (R33 Gts-t, similar in flow characteristics to stock turbo) Equal length header Ford Coyote 32lb/hr (336cc/min) injectors (was running 50PSI, now at 40PSI), high impedance, binned the resistor. 2.5" exhaust from the turbo back. MS2 V3.0 (can't remember firmware ver. Last installed circa 2011?) Ford EDIS ignition (escort CPS, B4000 controller, '06 Mustang coil pack). I know I'm most likely doing a number of things wrong, but I'm not sure what anymore. I change one thing, it gets worse, so I rewind. I change another, it gets better, so I go down that path, and then it gets much worse, then I get lost. I just wanna get this thing to something resembling driveable, so I can take it to someone who actually knows what they're doing. You'll have to excuse any blurriness in the pics. Here's an msq... 2021-04-29_19.20.12.msq I've been building this car patiently for the past 8 years, and I'd like to start driving this summer if I can. Any help/insight would be greatly appreciated. *EDIT* I also live in Calgary, Canada, which I believe is roughly 3700 ft above sea-level, and my wideband is currently not operational due to the dash being out of the car.

-

1978 280Z (project name: Mothra)
Barrel_Ball replied to Barrel_Ball's topic in S30 Series - 240z, 260z, 280z
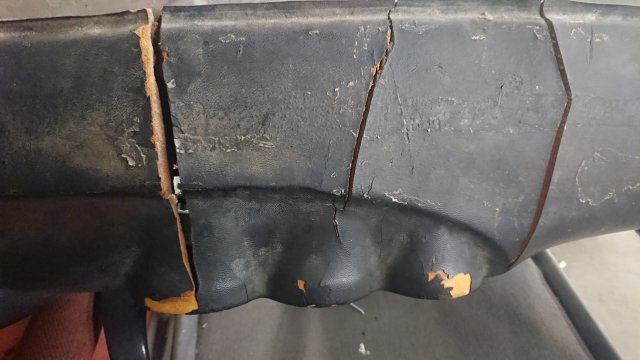
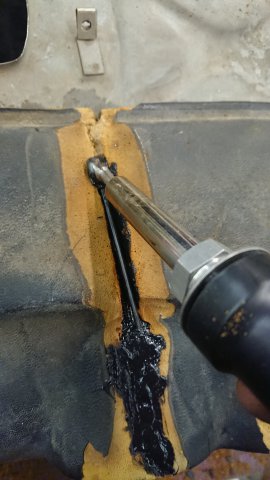
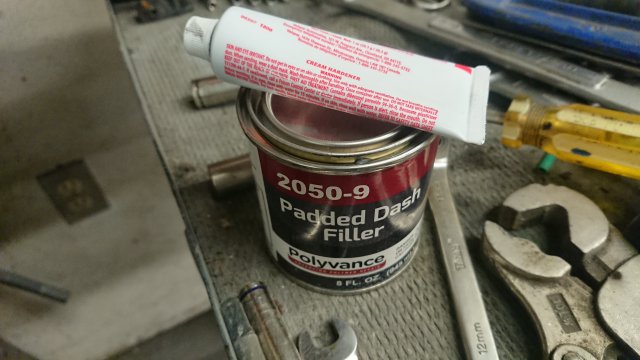
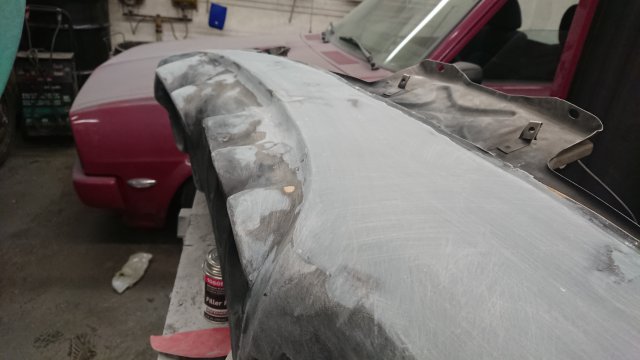
Progress time! I looked around for options on dash restoration/replacement, but the one option I was going for turned out to have shut down due to a fire that took out all their stuff. One source of new/refurbished dashes was way too rich for my blood, and while I did find a far less expensive source for reproductions, I figured "what's the point if I'm modifying it anyway?" I decided to rebuild it myself. Polyvance makes something called 'Fiberflex' which is a polymer brazing rod that's reinforced with glass and carbon. It cools hard, but somewhat pliable, and gave structure back to the areas I had to fill. The big crack here was also further reinforced with some steel mesh from behind. The stuff was tuff, but sandable. The heavier the grit, the better, but I had to be careful not to rip up too much vinyl and foam in the process. The next stage is this padded dash filler. The kit I bought came with one of these cans. You will need one or two more. Stuff mixes and goes down exactly like body filler. Sands very easily, too. There's an adhesion promoter that I also bought. It helps heaps. I had to build it up a bit to get the contours half-decent, but I'm happy with it, so far. More as progress unfolds...
-
Hey y'all. I just replied to your PM, but I'm going to say this here so others know so far: I haven't had a chance to drive the car yet 'cause it's in pieces, but I ran the engine a bunch of times. Cylinders 4 & 5 leaned out from injector failure and caused those runners to glow, but no cracks so far! That old video showed the car running using a performance world resonator and a yoshimura muffler from a bike. I used regular stainless mandrel bends for this header, but if you're going to use MIG, I found from experience that schedule-10 stainless is more forgiving, strength-wise.
-
1978 280Z (project name: Mothra)
Barrel_Ball replied to Barrel_Ball's topic in S30 Series - 240z, 260z, 280z
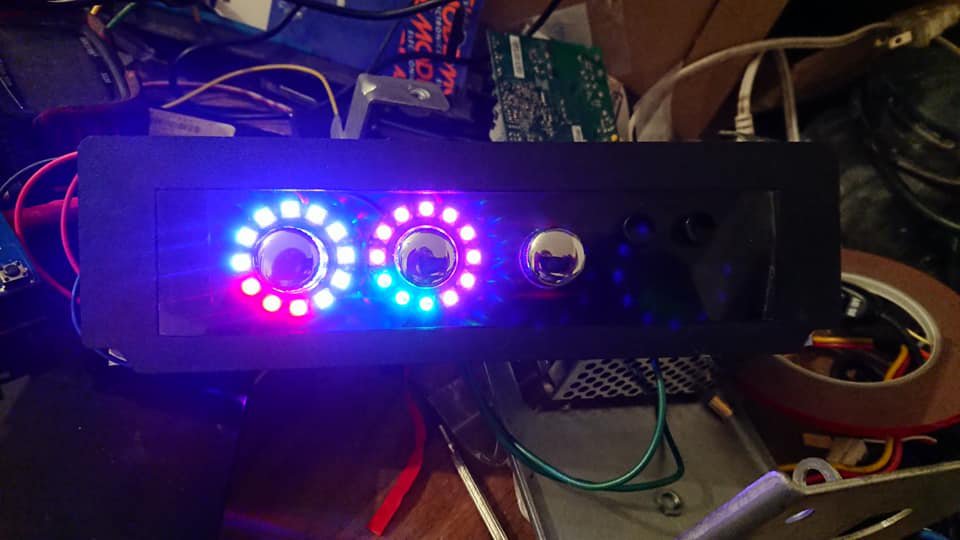
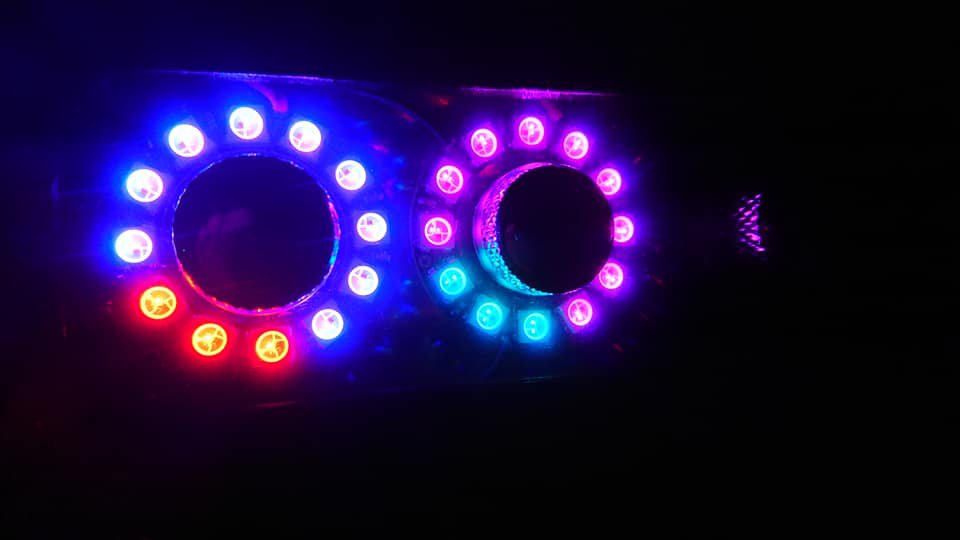
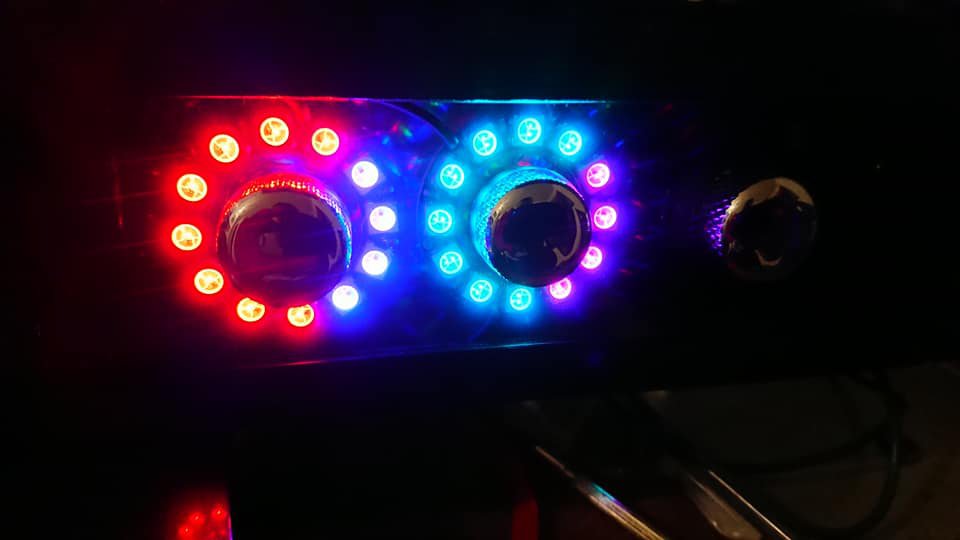
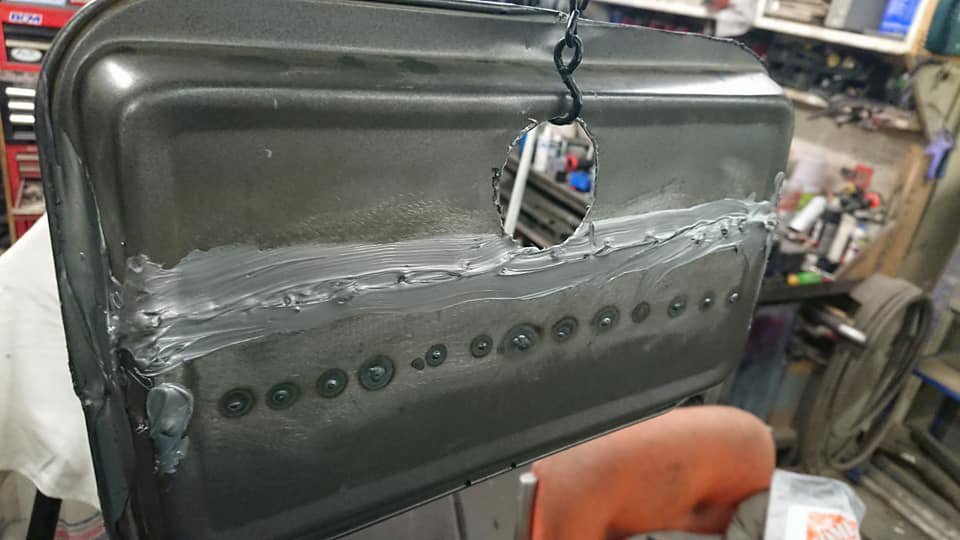
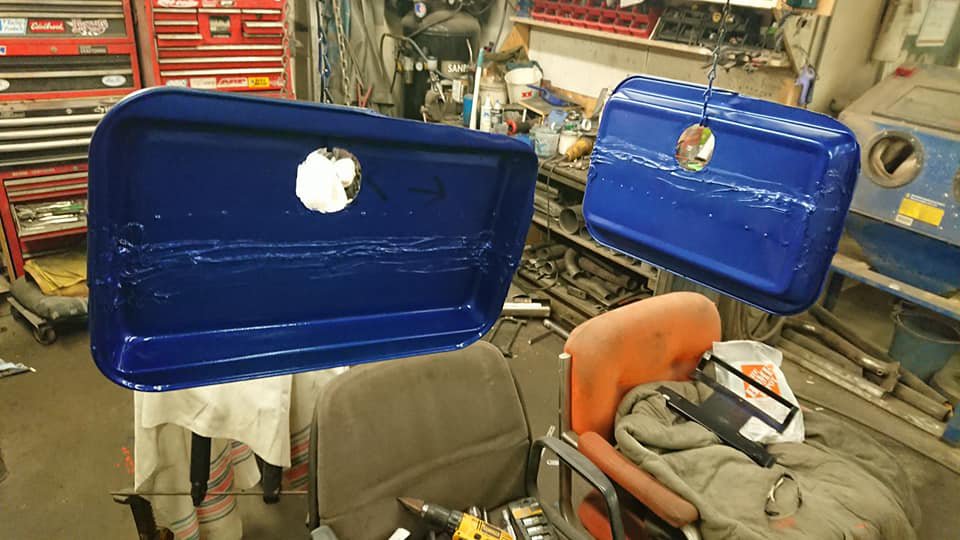
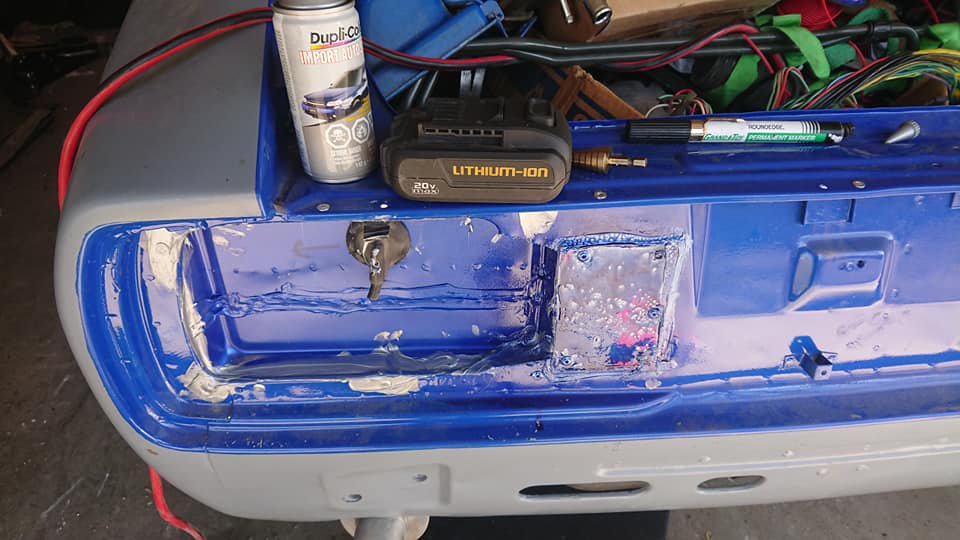
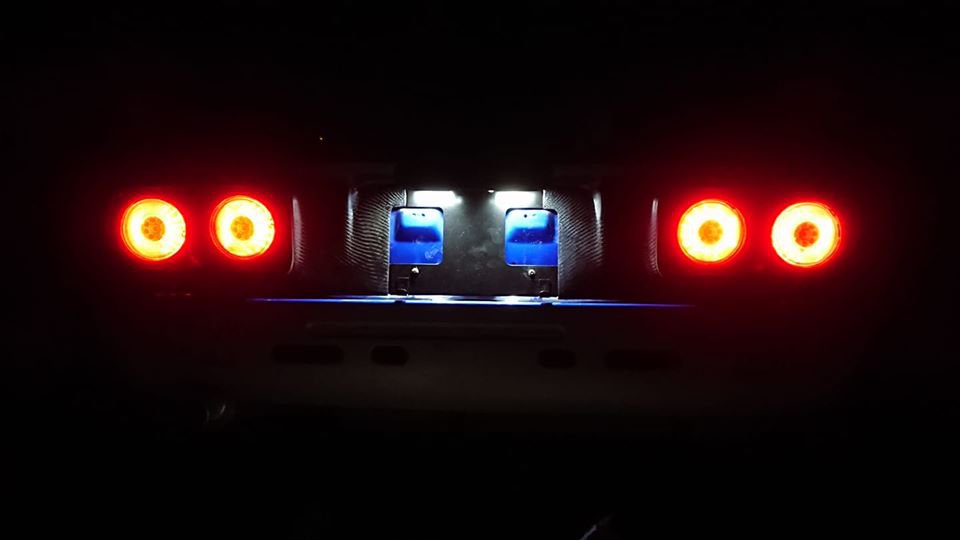
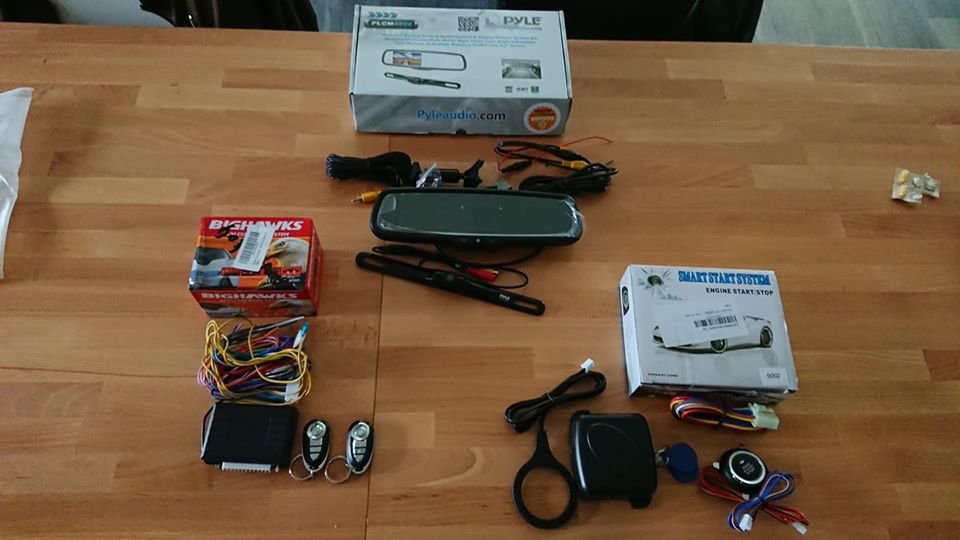
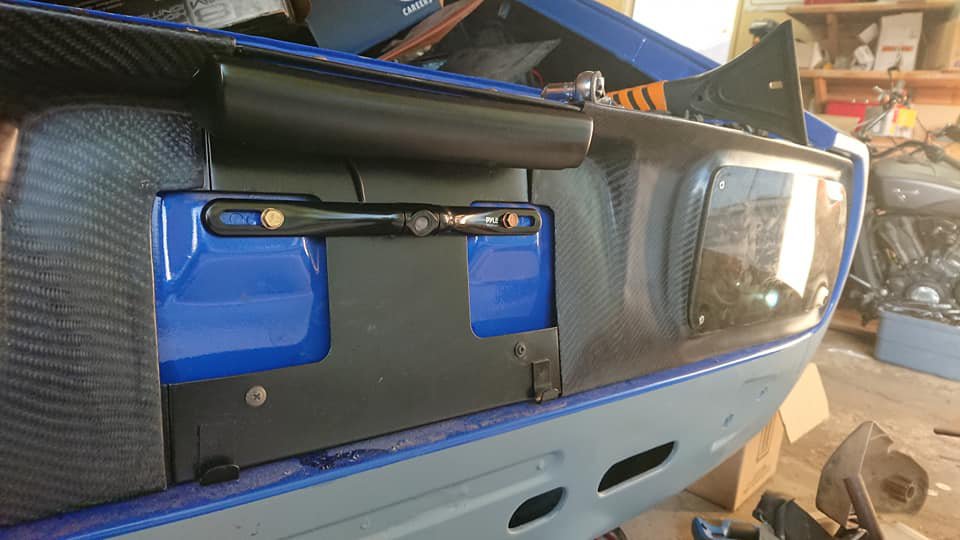
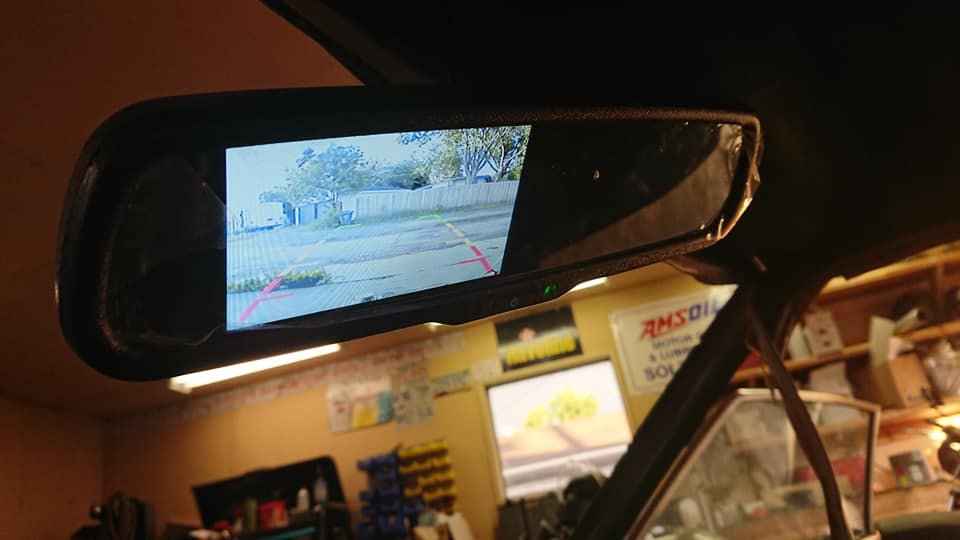
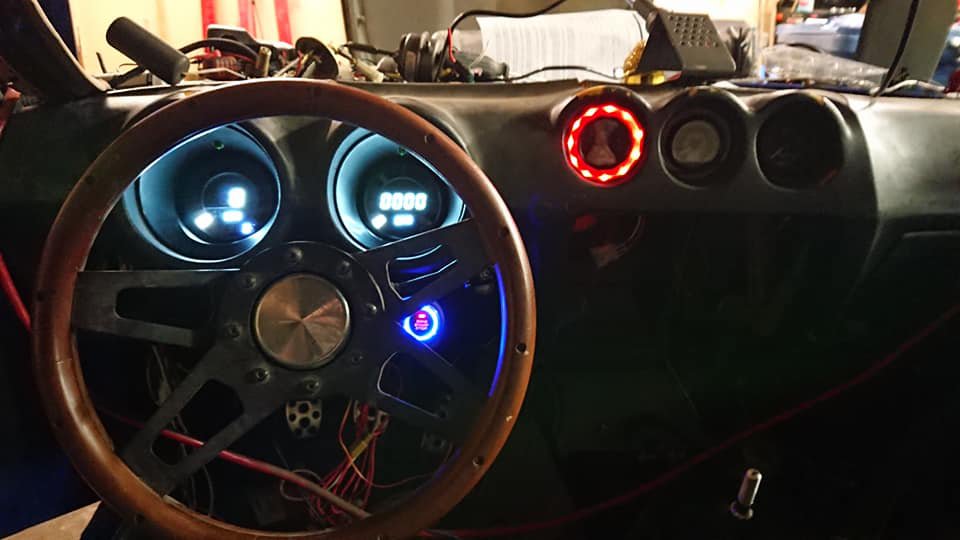
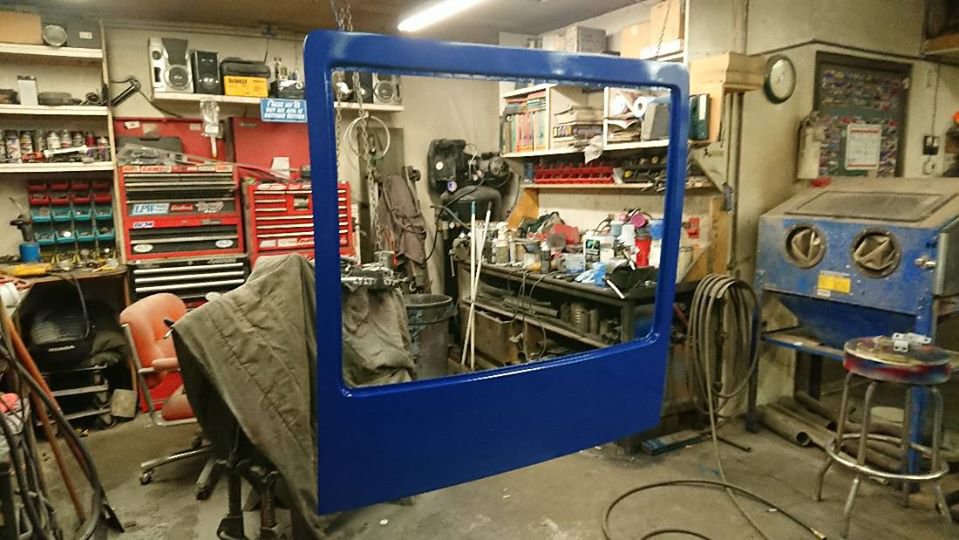
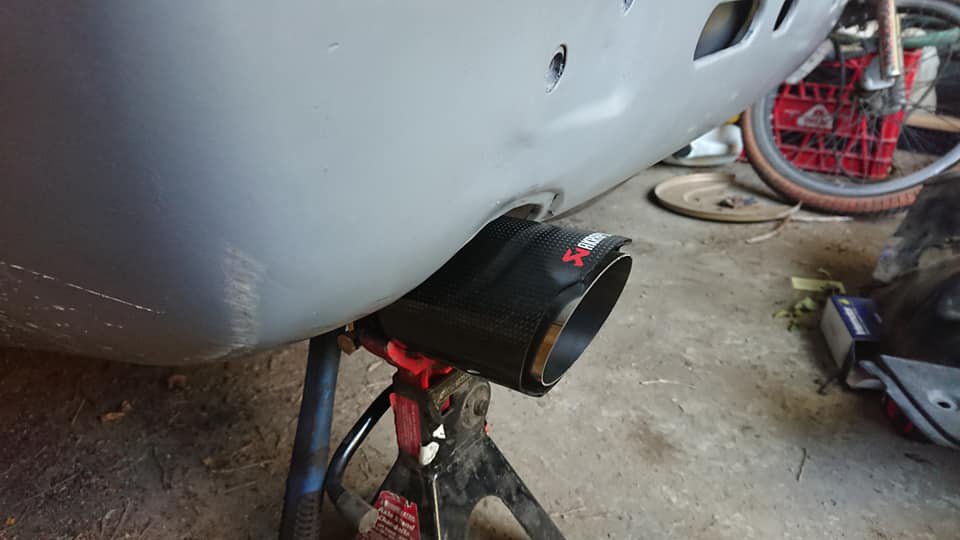
Hey, folks! Been a busy, long few months or so, but much has happened in life, and with the project, so here we go! That climate panel I was developing last time? It's pretty much finished, except I kinda got carried away with an arduino board and some neopixel rings for visual appeal and ergonomics: The heater control knob has a blue LED ring that sweeps red as you turn up the heat, while the Fan control knob has a purple ring that sweeps turquoise. Figured I'd use those colors for contrast. Also finished, is the tail light installation! Did you know that a well-known baking company not only makes decent bakeware, but also body panels? Neither did I until I chopped up a couple cookie sheets, and shortened them up a bunch to make some tail light mounting buckets that will not only give the light assemblies something to bolt to, but also seal the cabin a bit better, keeping fumes and weather out of the cabin. Overall, I'd say I did a fine job of the tail light installation... Moving to the interior for some creature comforts (does that kinda make this a ZX now?) I ordered up a bunch of goodies that caught my attention: - Remote central locking system (because why not?) -RFID push button start system (because MSA discontinued their kit some time ago...) -Auto-dimming rearview mirror with integrated backup camera (stupid me destroyed two spoilers and a hatch on the old car, and I don't wanna take any chances). Also, dash mounted with gauges fully operational (albeit the centers not lit in the picture as I was still figuring out the rest of the lighting circuit), with the oil pressure warning "ring-O-death) surrounding its companion gauge... Next up, is the rear hatch: An exciting feature of the remote central locking system is an electric trunk/hatch popper function, so my friend and I rationalized that using this feature was a no-brainer, as it not only allows me to pop the hatch without the use of the old, sticking mechanical button, but it lets me get rid of that thing altogether and seal up the hatch, preventing water and such from getting in and literally raining on my parade. Worry not, though, as there will not only be a button inside the car to open the hatch without the remote, but also a mechanical pull-handle, and in the worst-case scenario, just pull the panel and work the mechanism by hand. Never hurts to have fail-safes... Also Celica cargo light... Also final bodywork, prime and paint on the hatch. Still waiting for clearcoat... One last thing for the time being is a preview of an exhaust tip I found that will compliment the carbon fiber accents. Still needs a de-label and pearled clearcoat to match the rest of what's going on, and finally, some shots of how she sits currently. More to come...
-
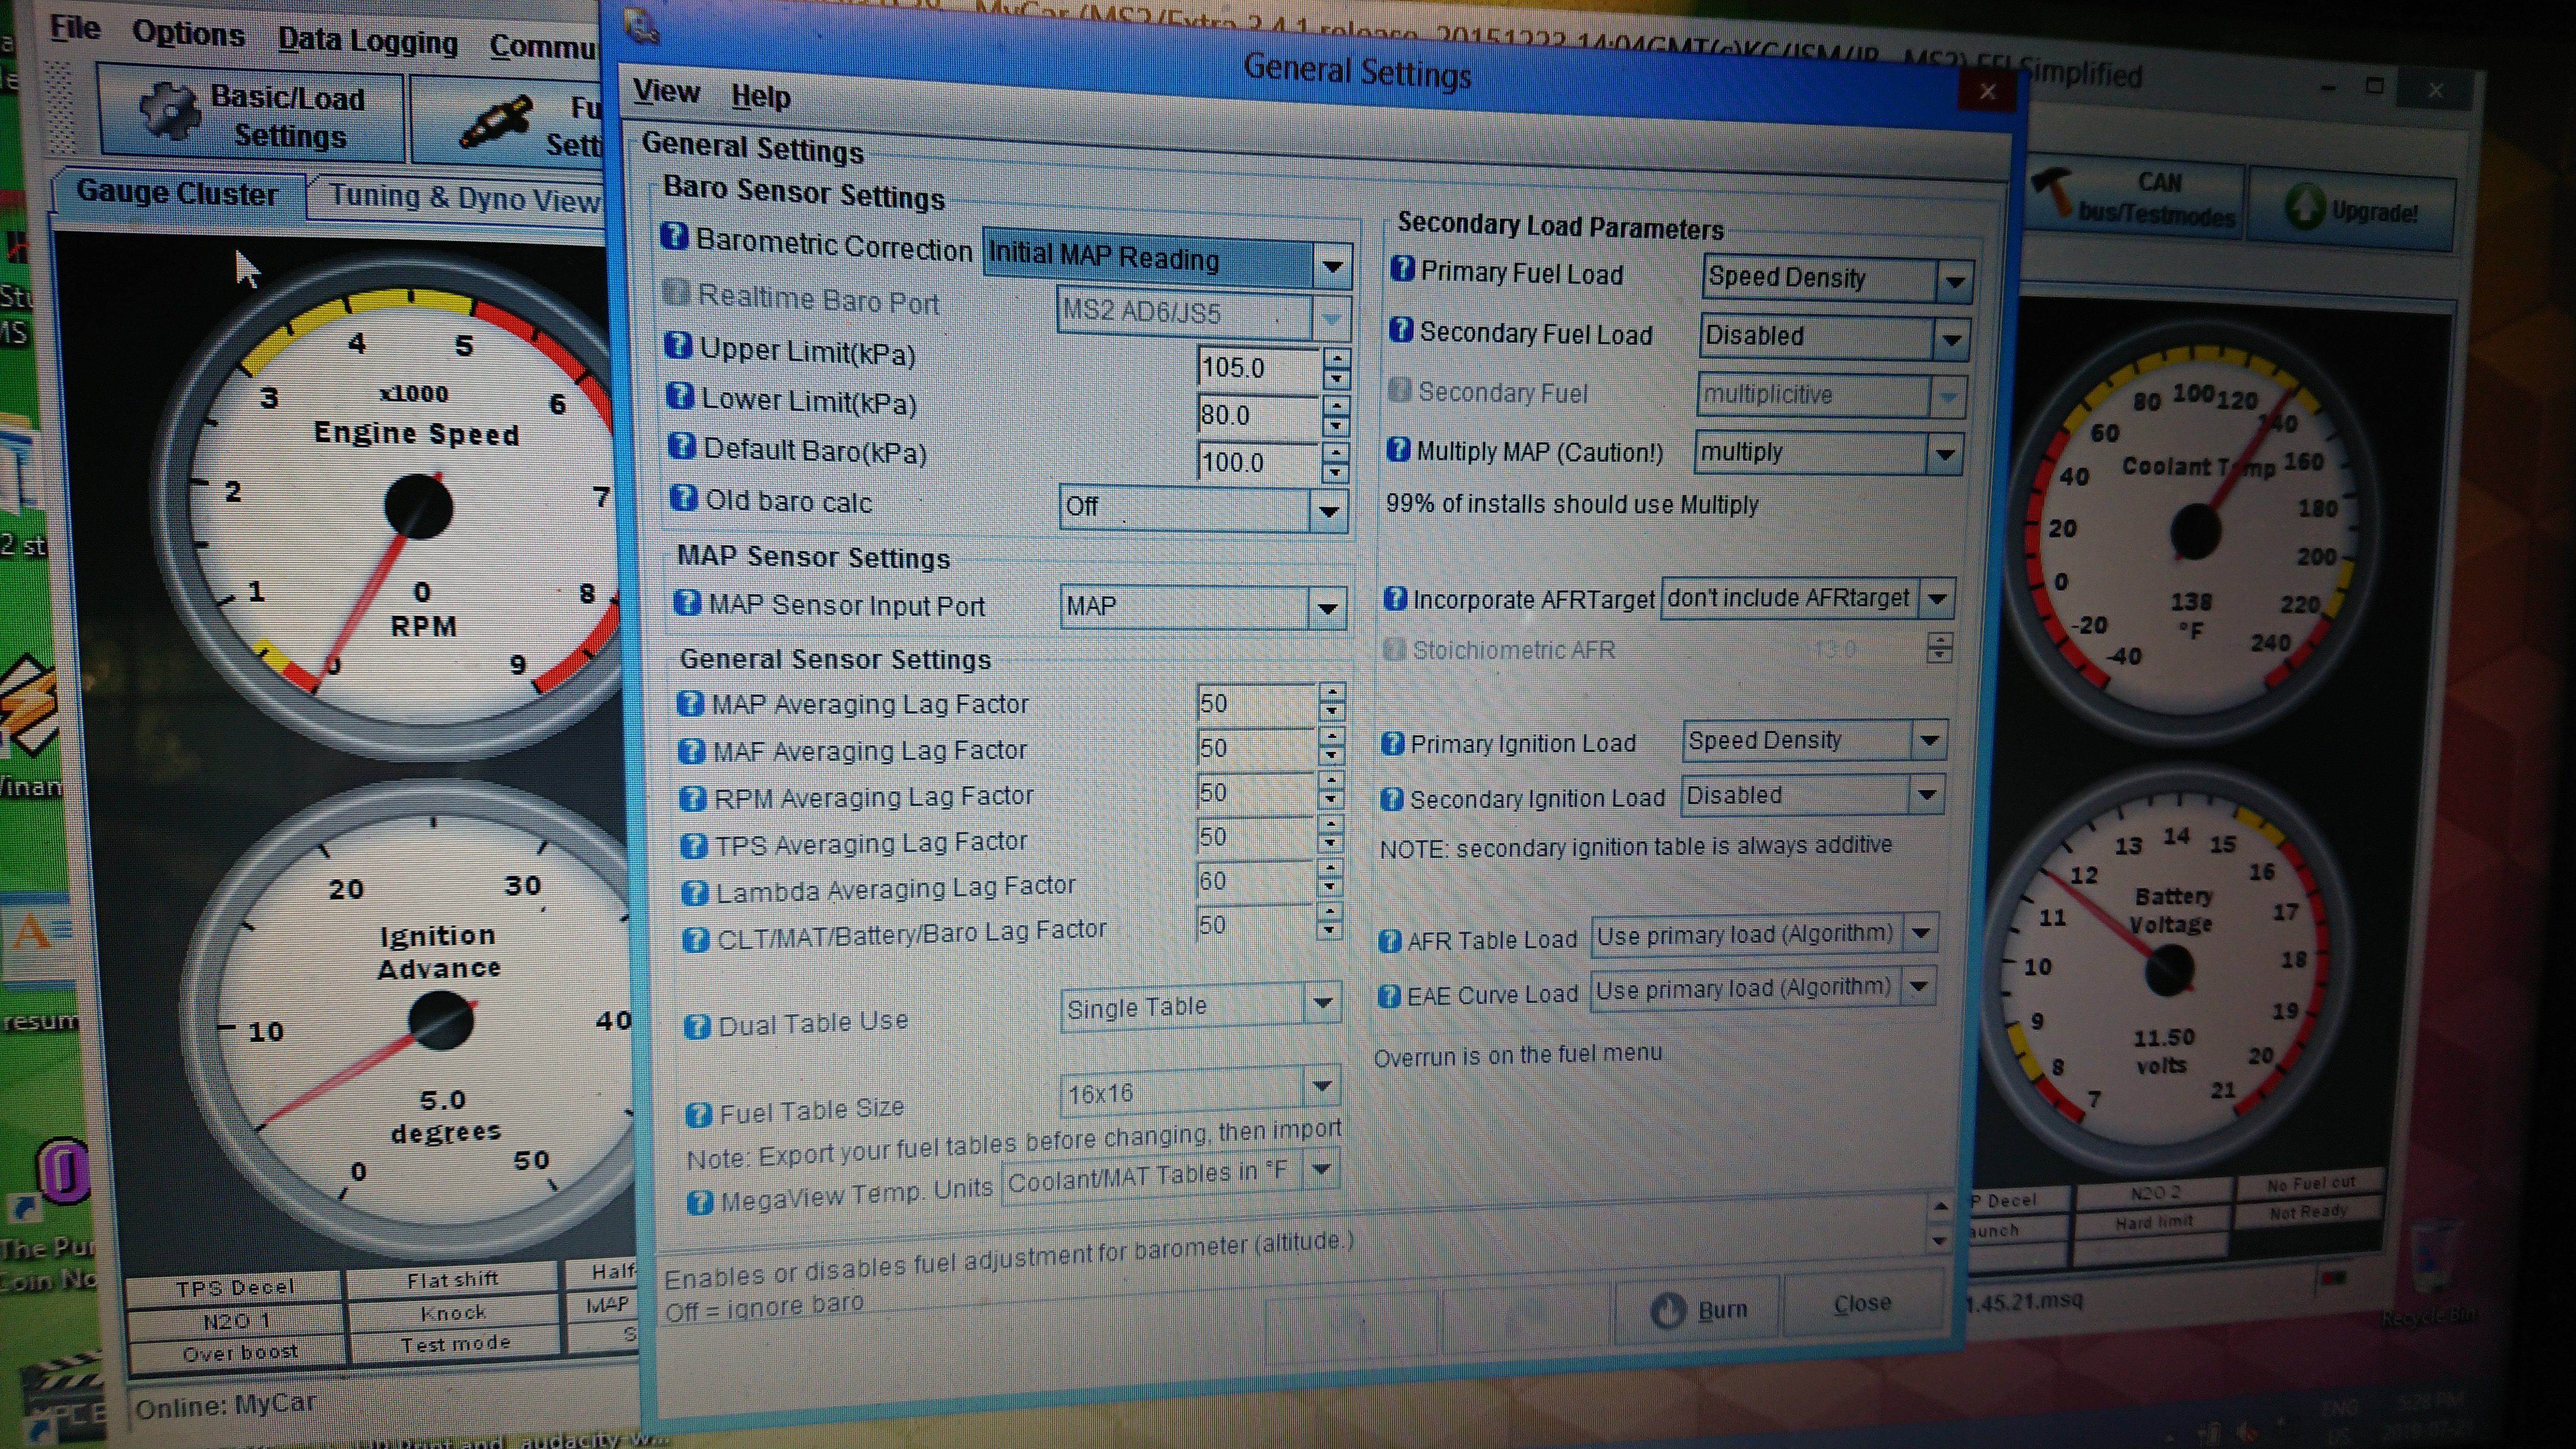
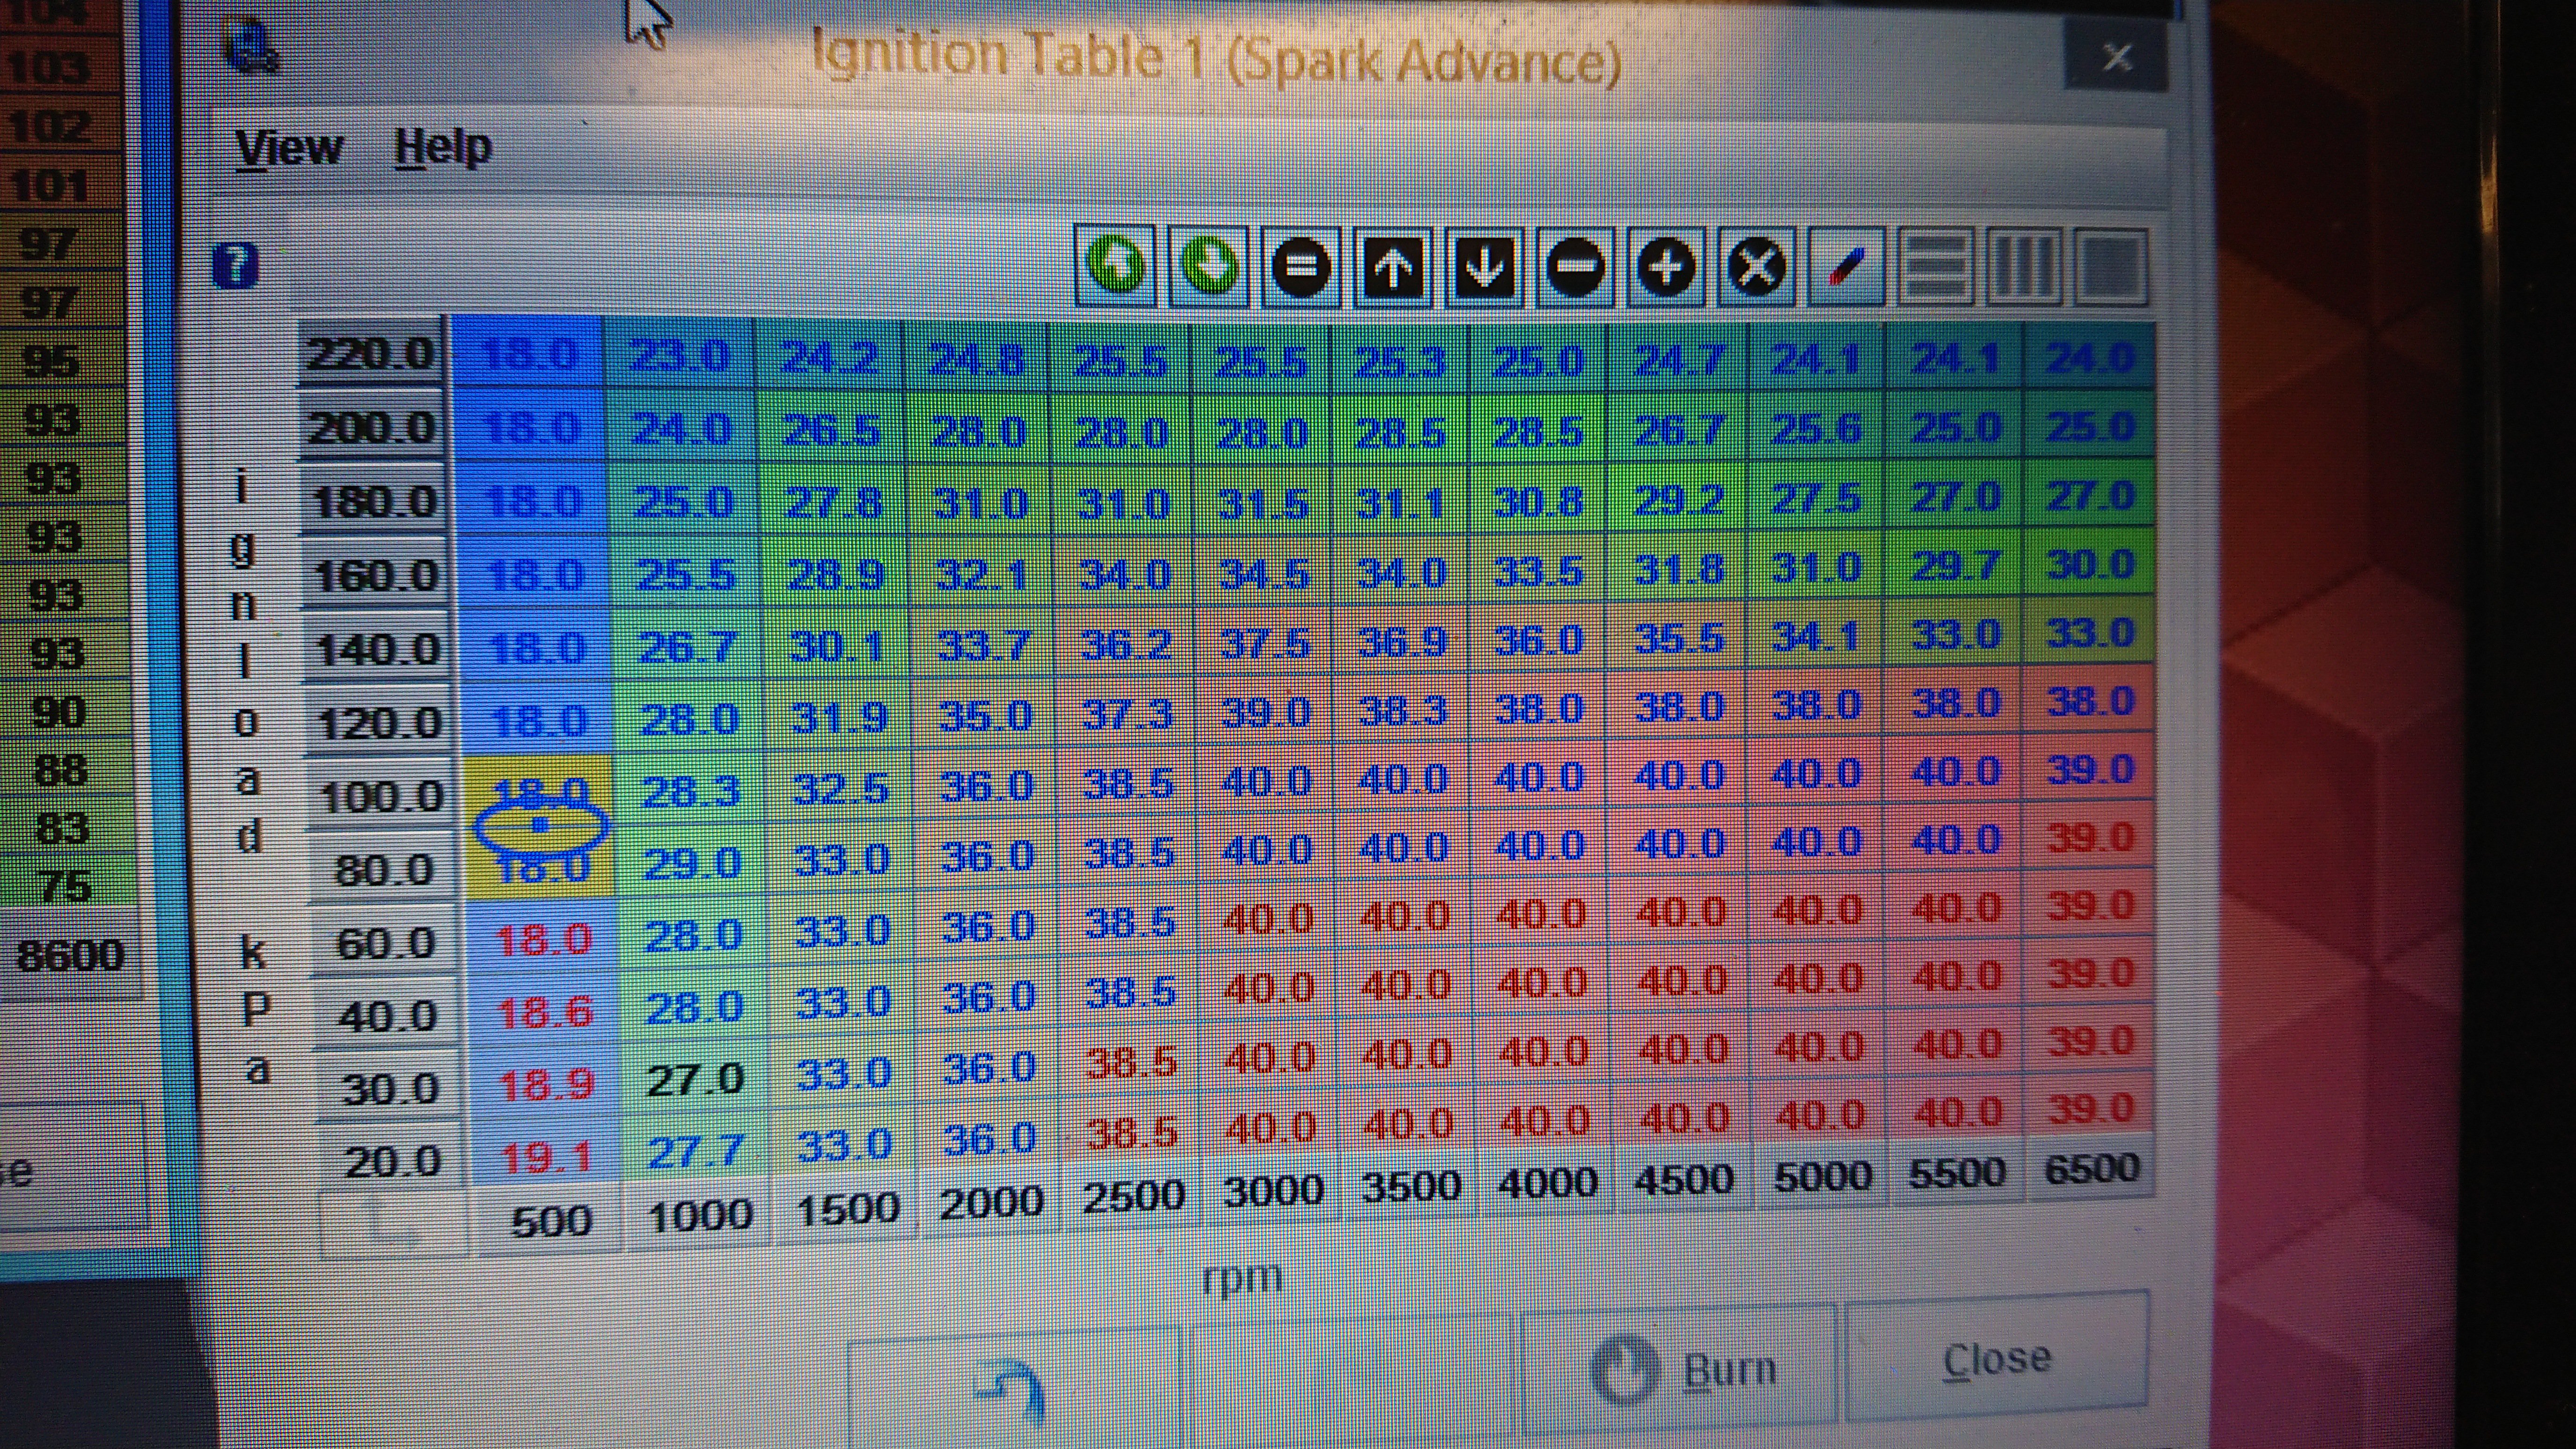
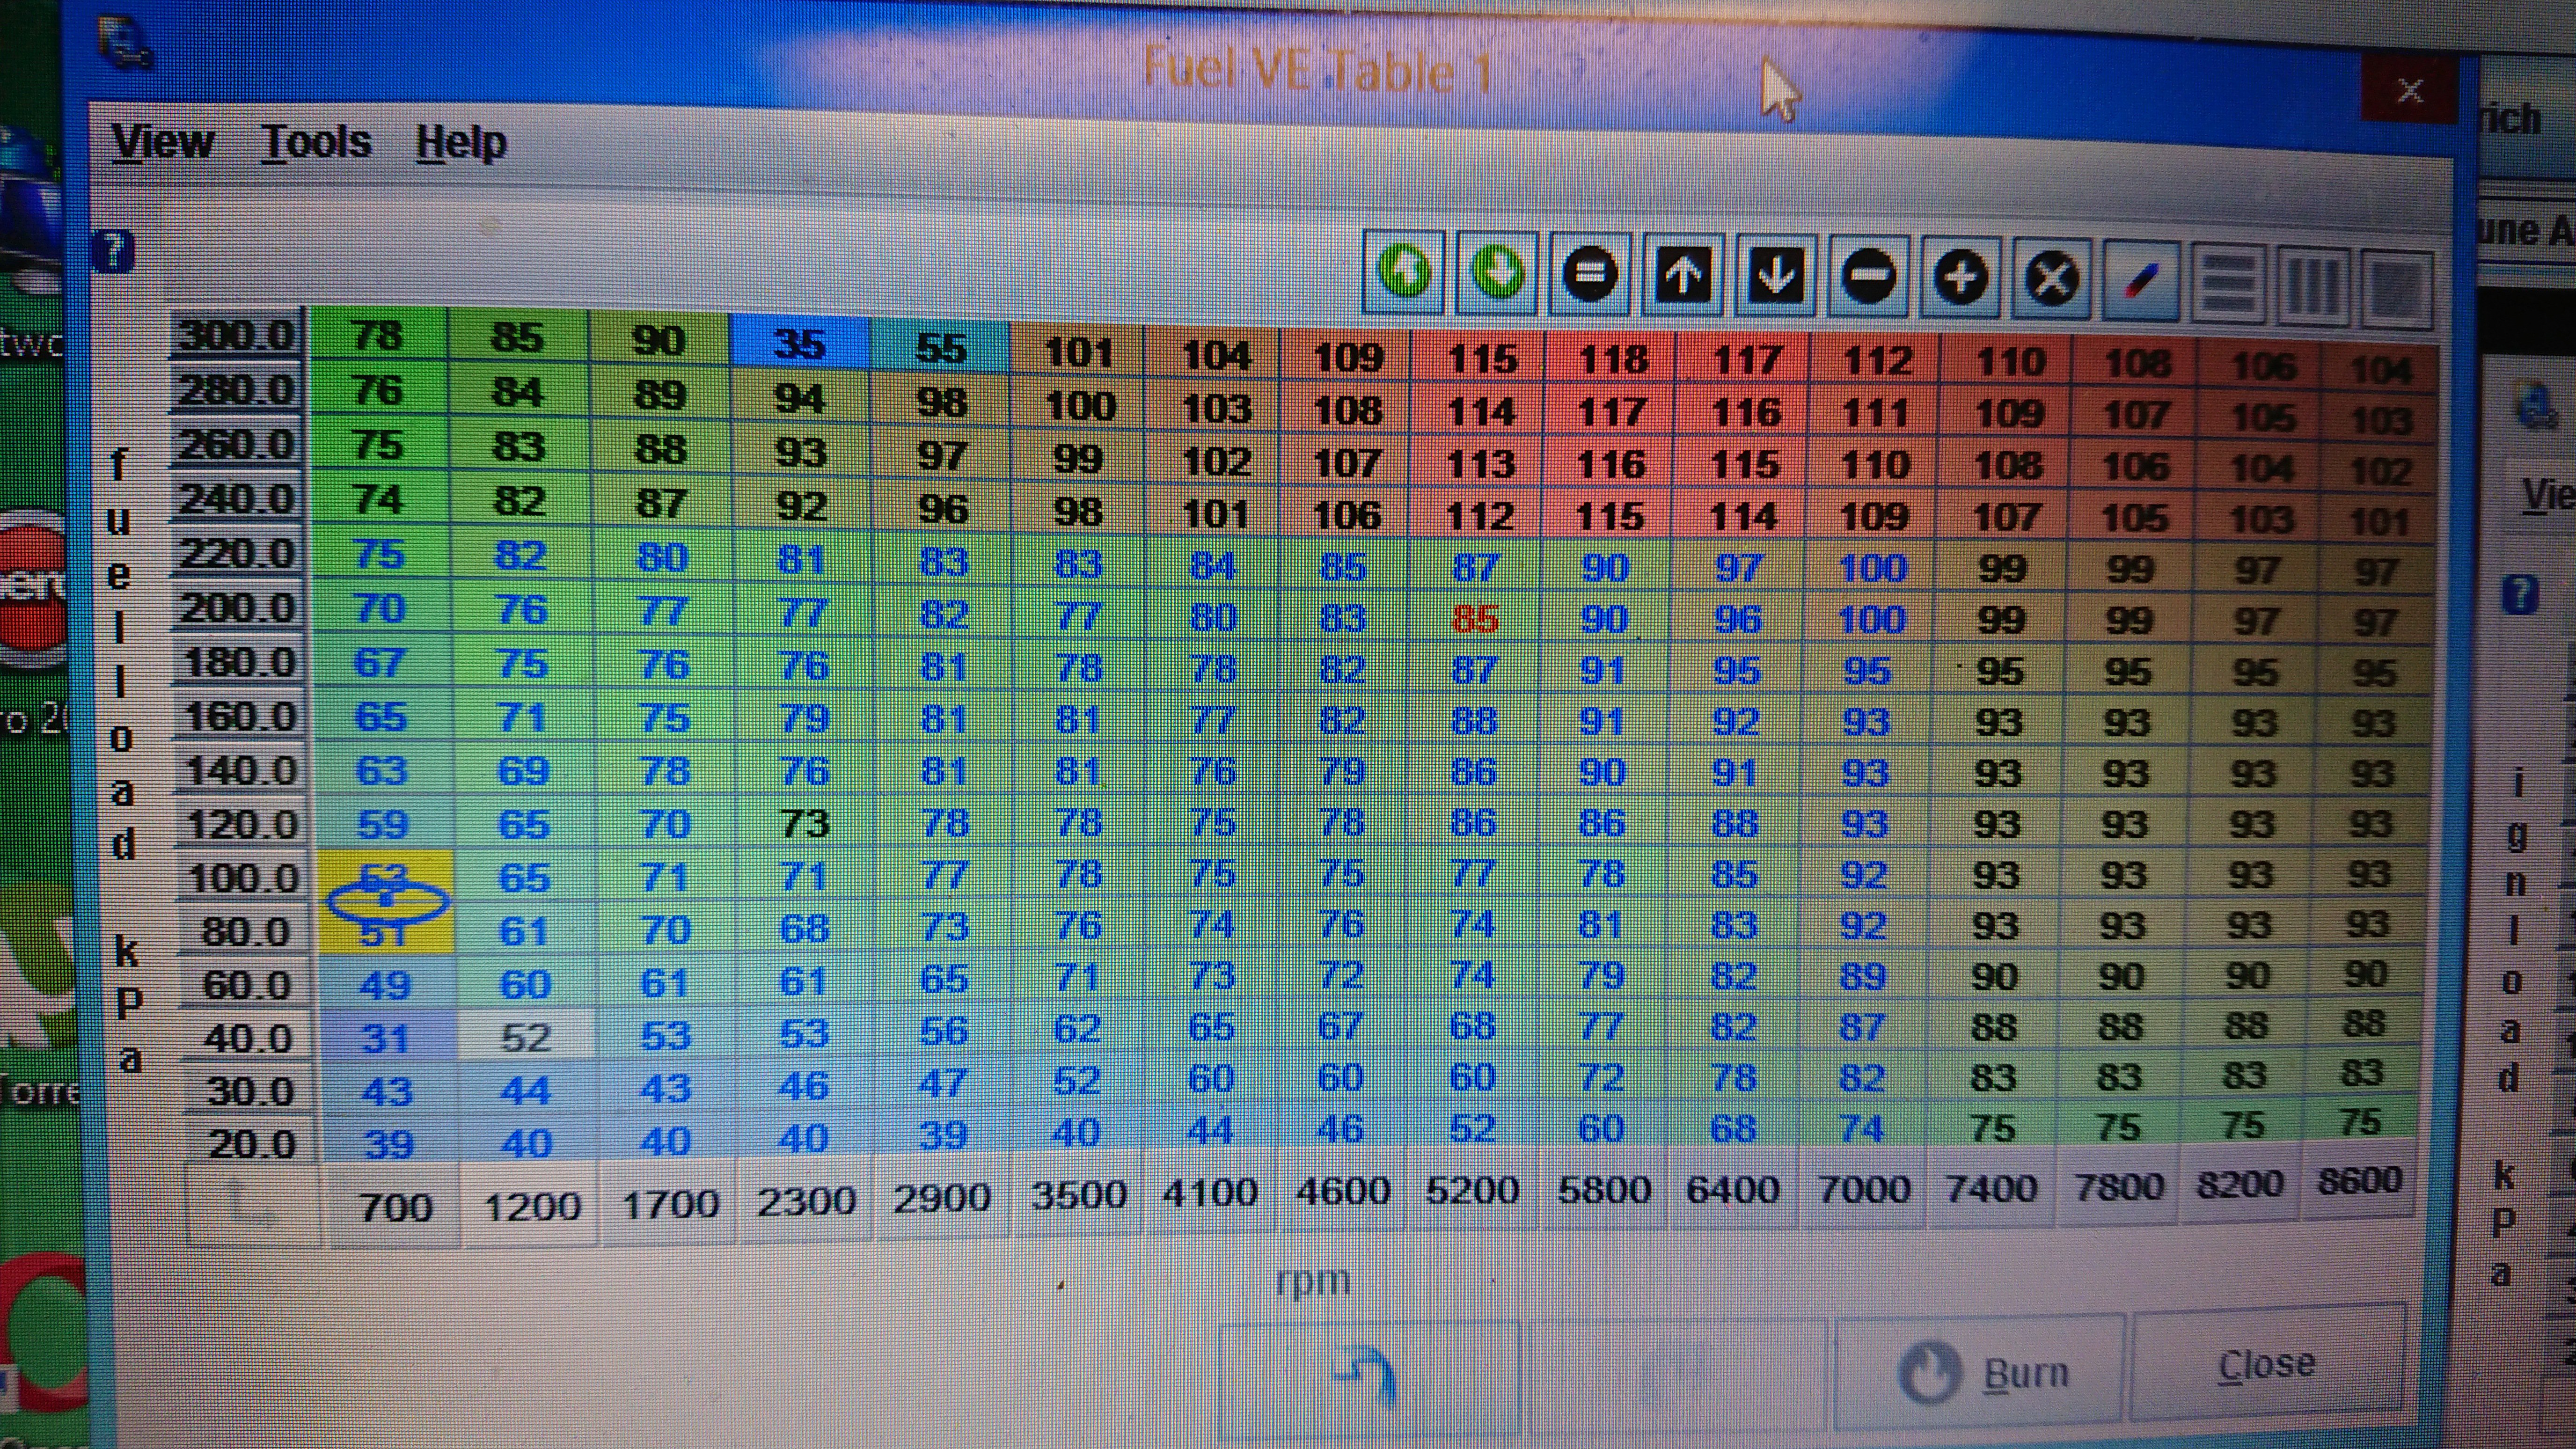
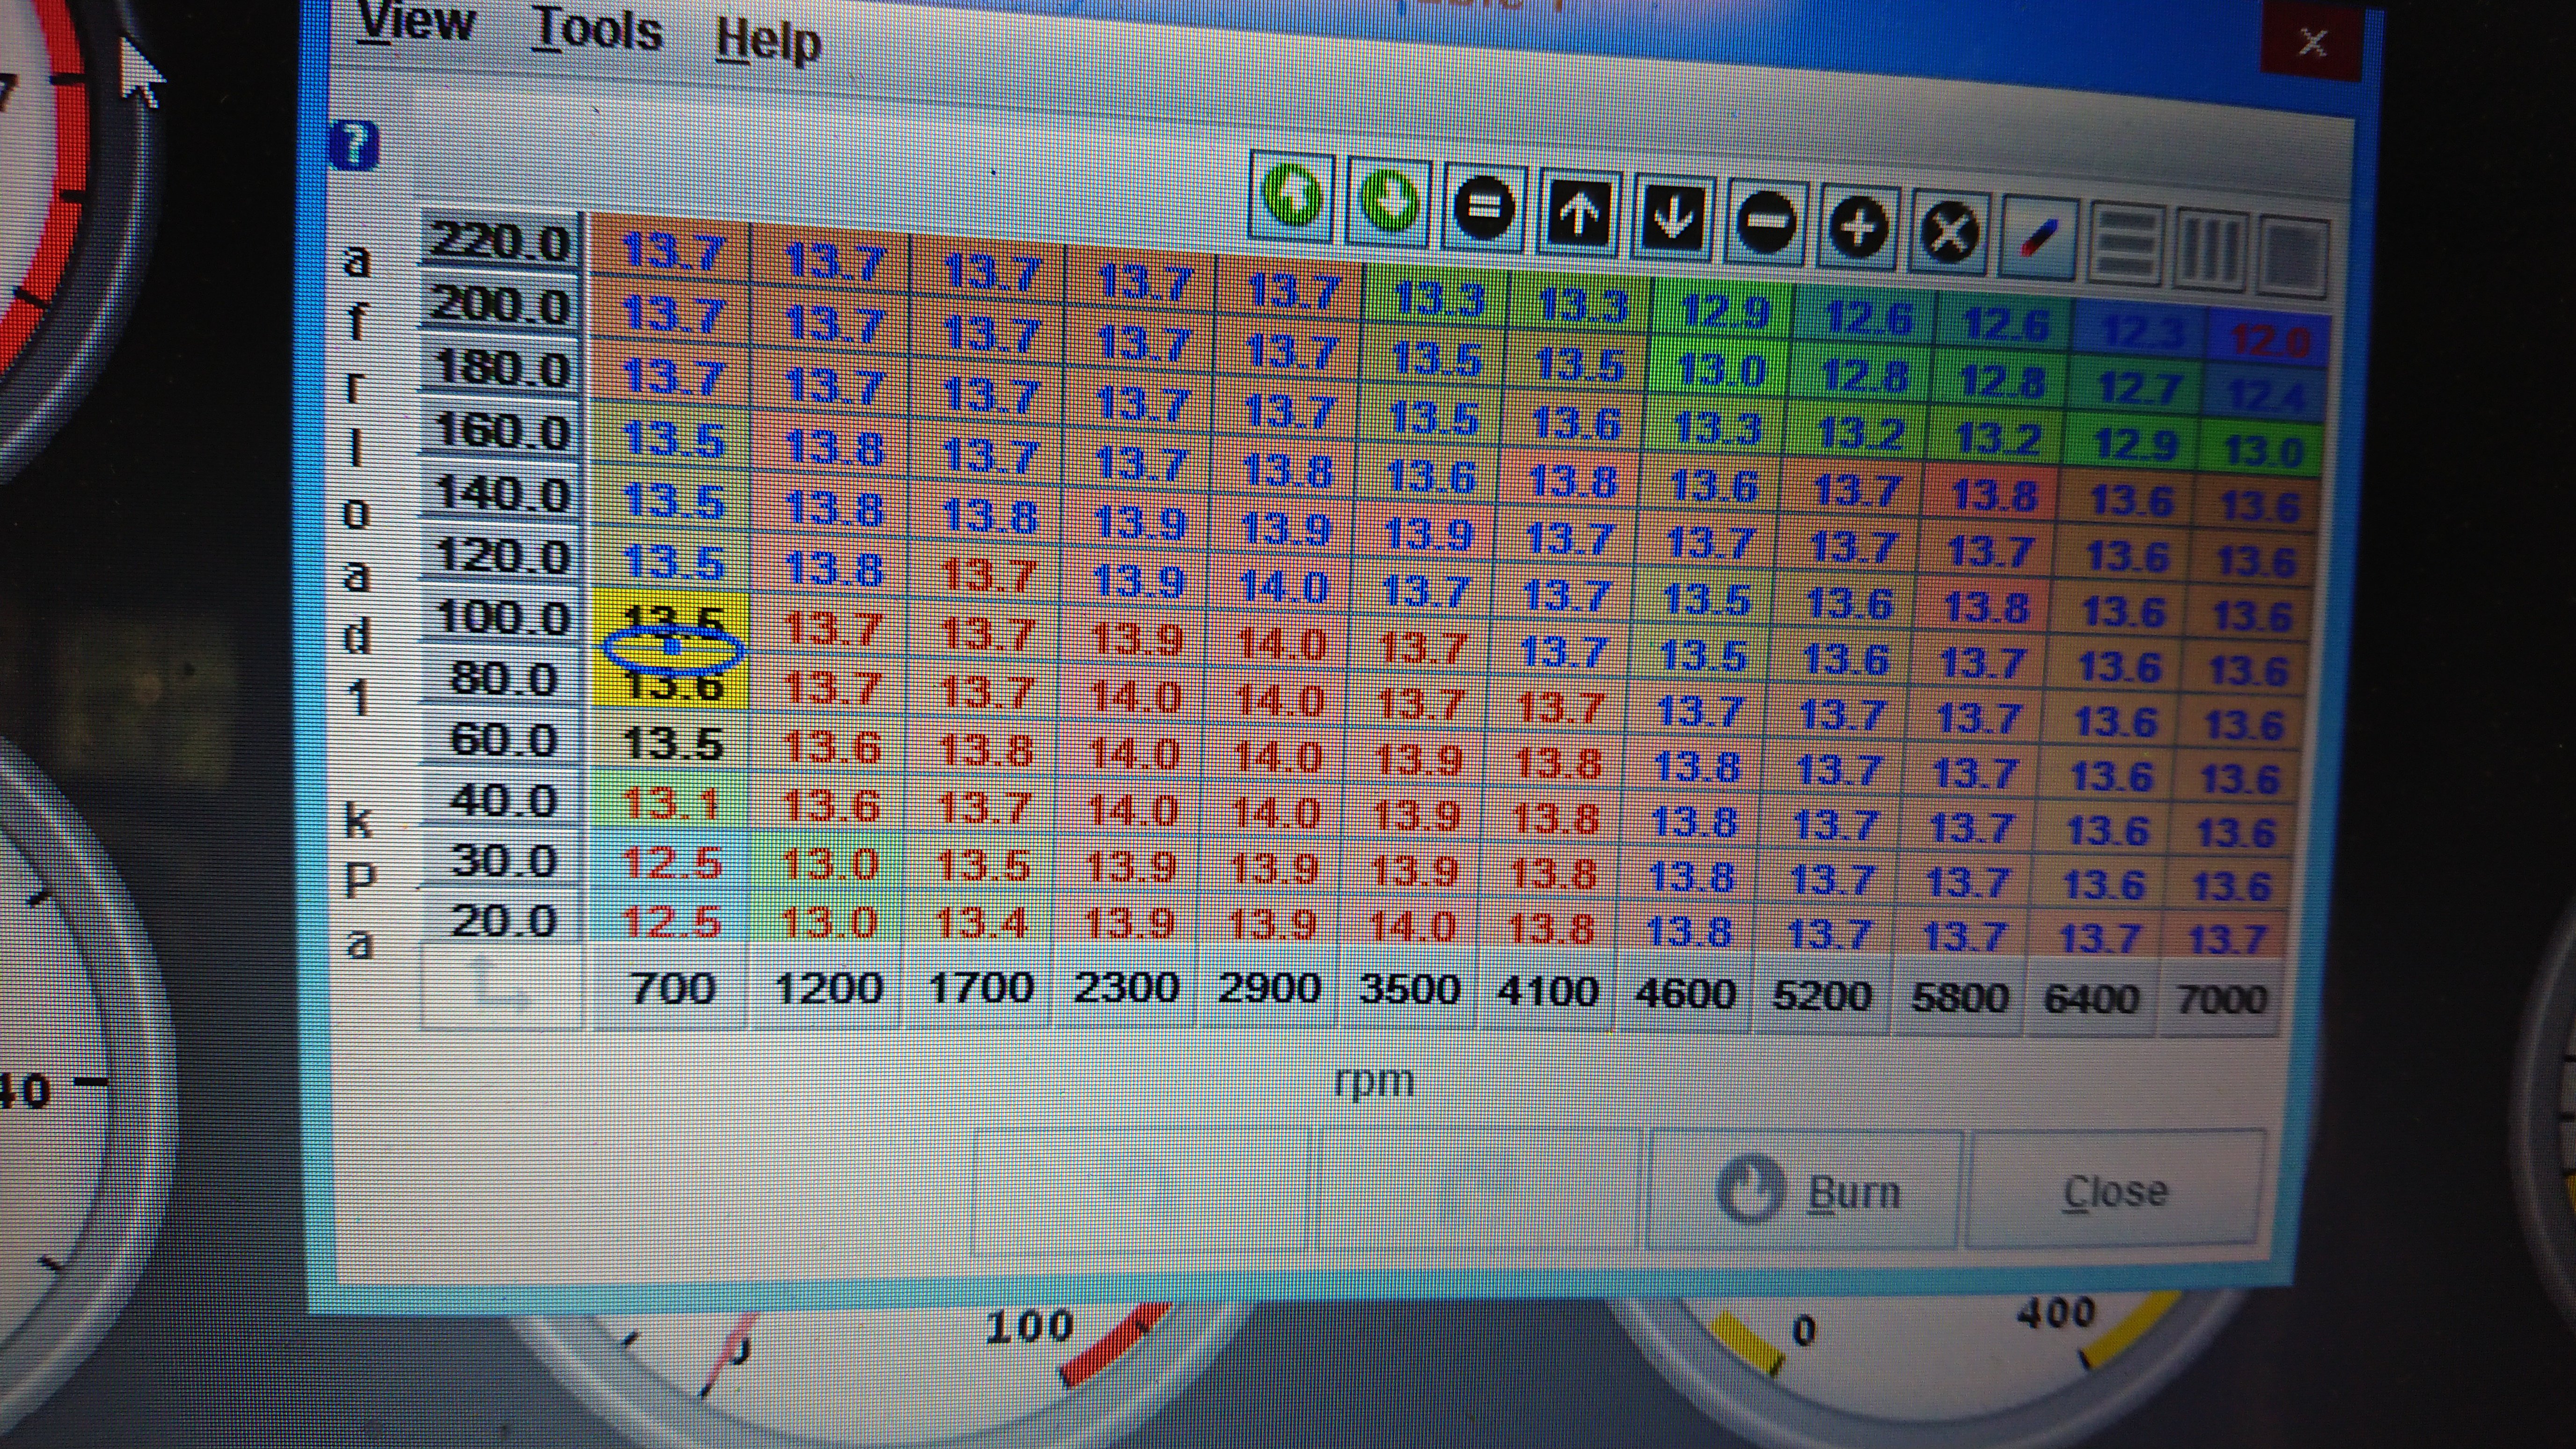
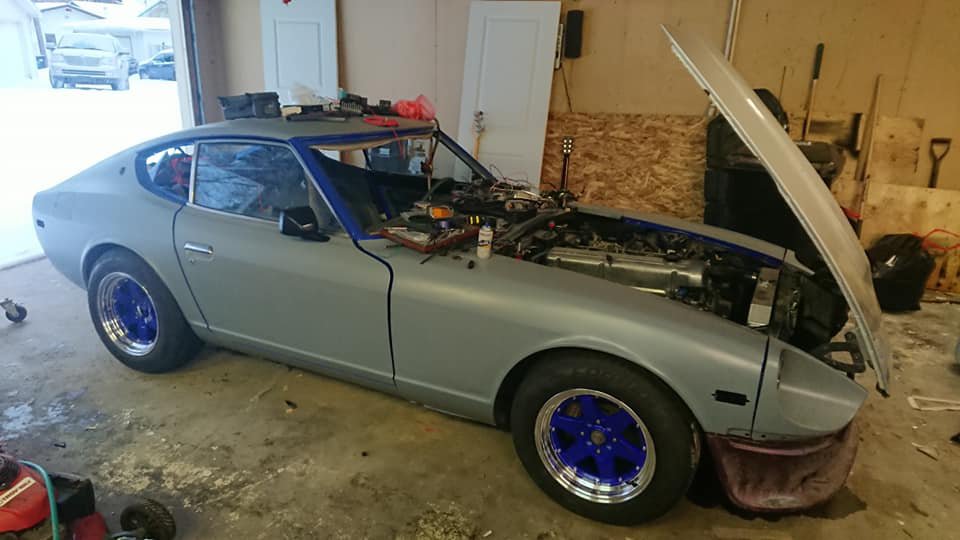
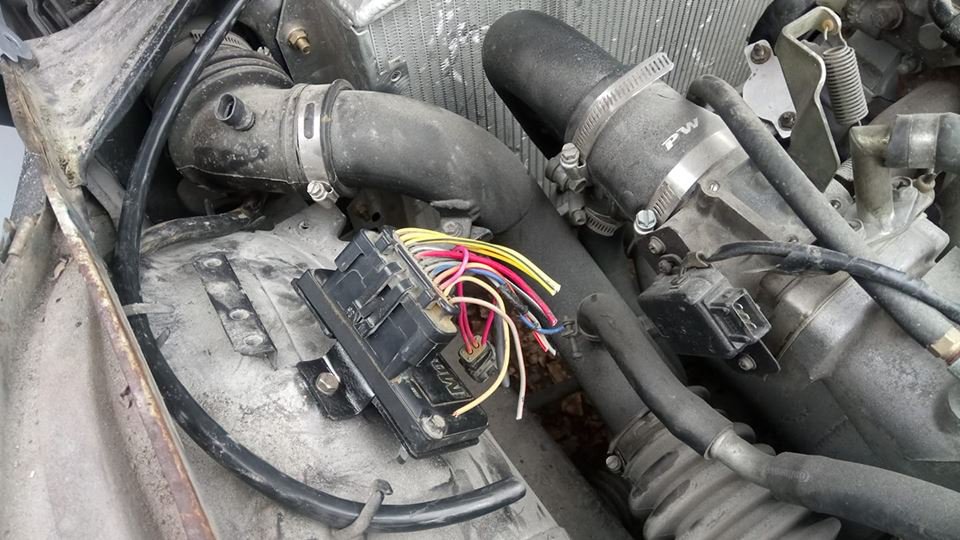
To start with, here's a rundown on the setup: '78 280z -L28ET, 0.5mm overbore, ITM pistons, full internal balance -Late 'A' grind cam from a late Z/early ZX -Rebuilt head: Minor port cleanup and 5 angle valve cut -'76 non-emmissions intake, stock turbo TB with 240SX TPS -Custom equal length header with Nissan 45v1 turbo (R33 GTS-25t), 8 psi wastegate actuator -Denso 440cc fuel injectors (Mk3 Supra) with stock Z resistor pack Aeromotive fuel pressure regulator set to 26 psi @idle, rises to 30 psi when throttled -Ford EDIS 6 ignition system: Explorer controller, '06 Mustang coil pack, Escort 1.9 CKP sensor, custom 36-1 trigger wheel and sensor bracket Running MS2 V3.0, firmware 3.4.1, ZXT chts, GM iat sensor, no idle air control, although I eventually plan to use the factory fast idle valve. Also using an Innovate SCG-1 wideband/boost controller. My problems are: it will barely start, especially when the engine is warm, and will not idle on its own, requiring constant blipping of the throttle. When attempting to rev the engine or even keep it running, it backfires out the tailpipe, which tells me it's running rich, and yet it will occasionally pop through the intake, which tells me "lean". The wideband's display is all over the place, reading pig rich when starting and running for the first bit, then it starts jumping randomly between 12:1 and around 16:1. Then if you either leave it to idle or press the gas, it just gives up and leans dead... The chts and tps are already calibrated, I've gone through various tunes, even changing cells, only for it to kind of work better, but have another aspect of it worse (eg. Better idle but worse intake popping). Currently trying one of Cygnus' older map sets since their engine setup is similar to mine. Here's some pics of what I have so far. I'm looking for some insight on this. Another important thing to note, is that I live in Alberta, Canada, which is roughly 3500 ft above sea level, which might skew timing and fuel a bunch. I appreciate any help.
-
1978 280Z (project name: Mothra)
Barrel_Ball replied to Barrel_Ball's topic in S30 Series - 240z, 260z, 280z
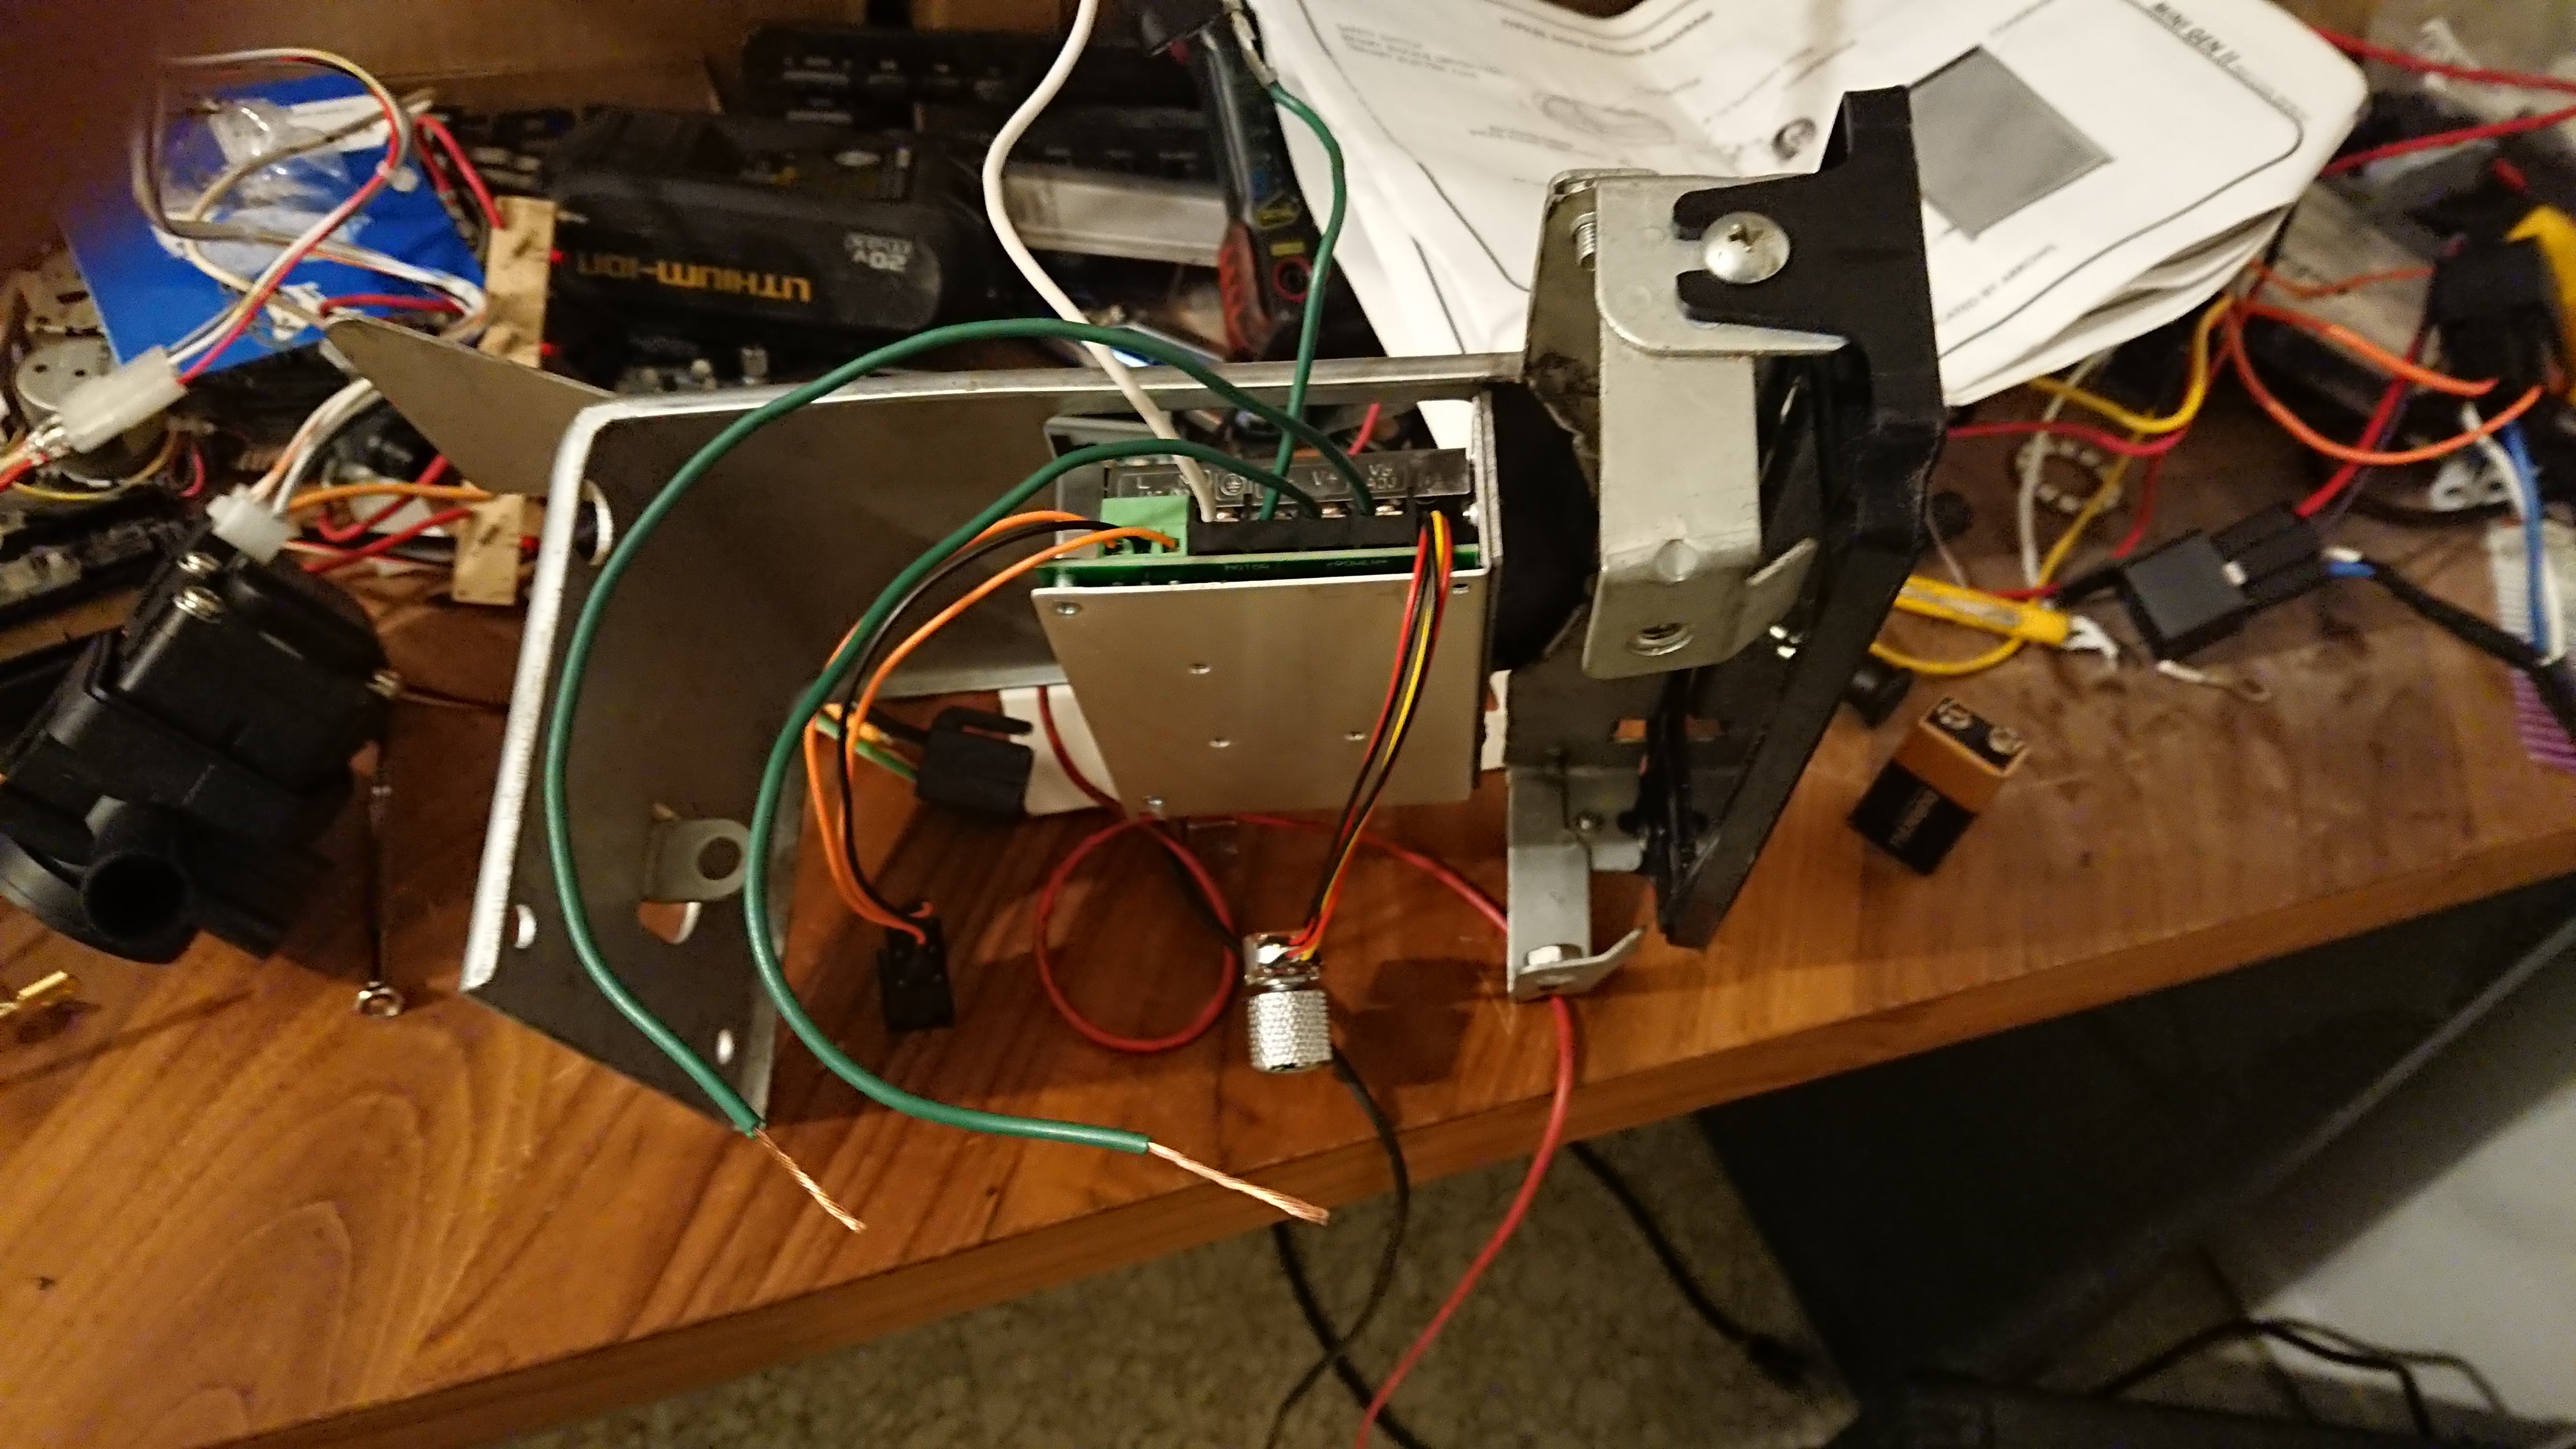
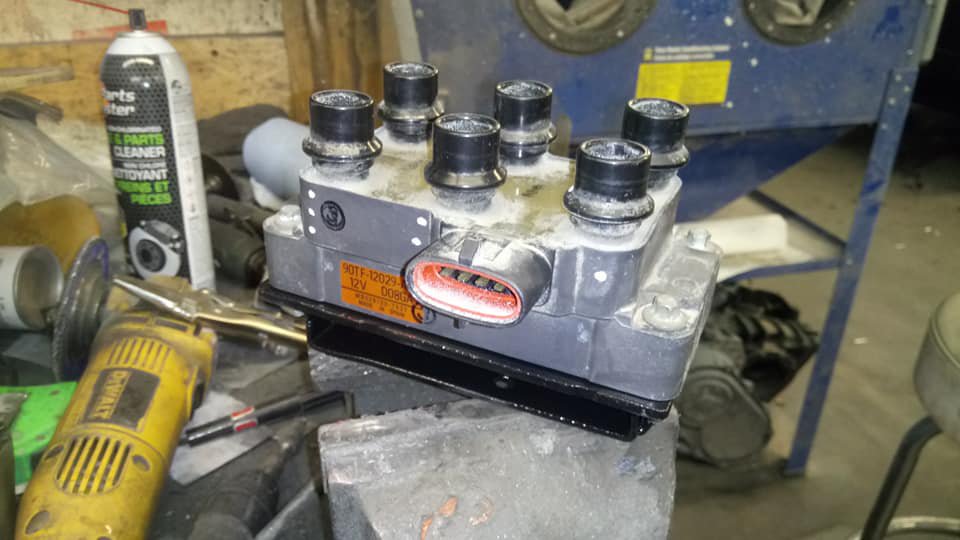
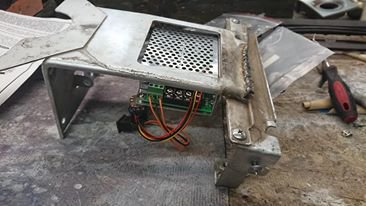
It's one of these controllers. 10-55v DC motor controller. You can get them on bangood for next to nothing, or your local electronics parts store might carry them. Comes with a 100k ohm switching pot, and a directional switch (which I eliminated). It's quite a nice piece, and fits inside the modified stock slide bracket like a glove.
-
1978 280Z (project name: Mothra)
Barrel_Ball replied to Barrel_Ball's topic in S30 Series - 240z, 260z, 280z
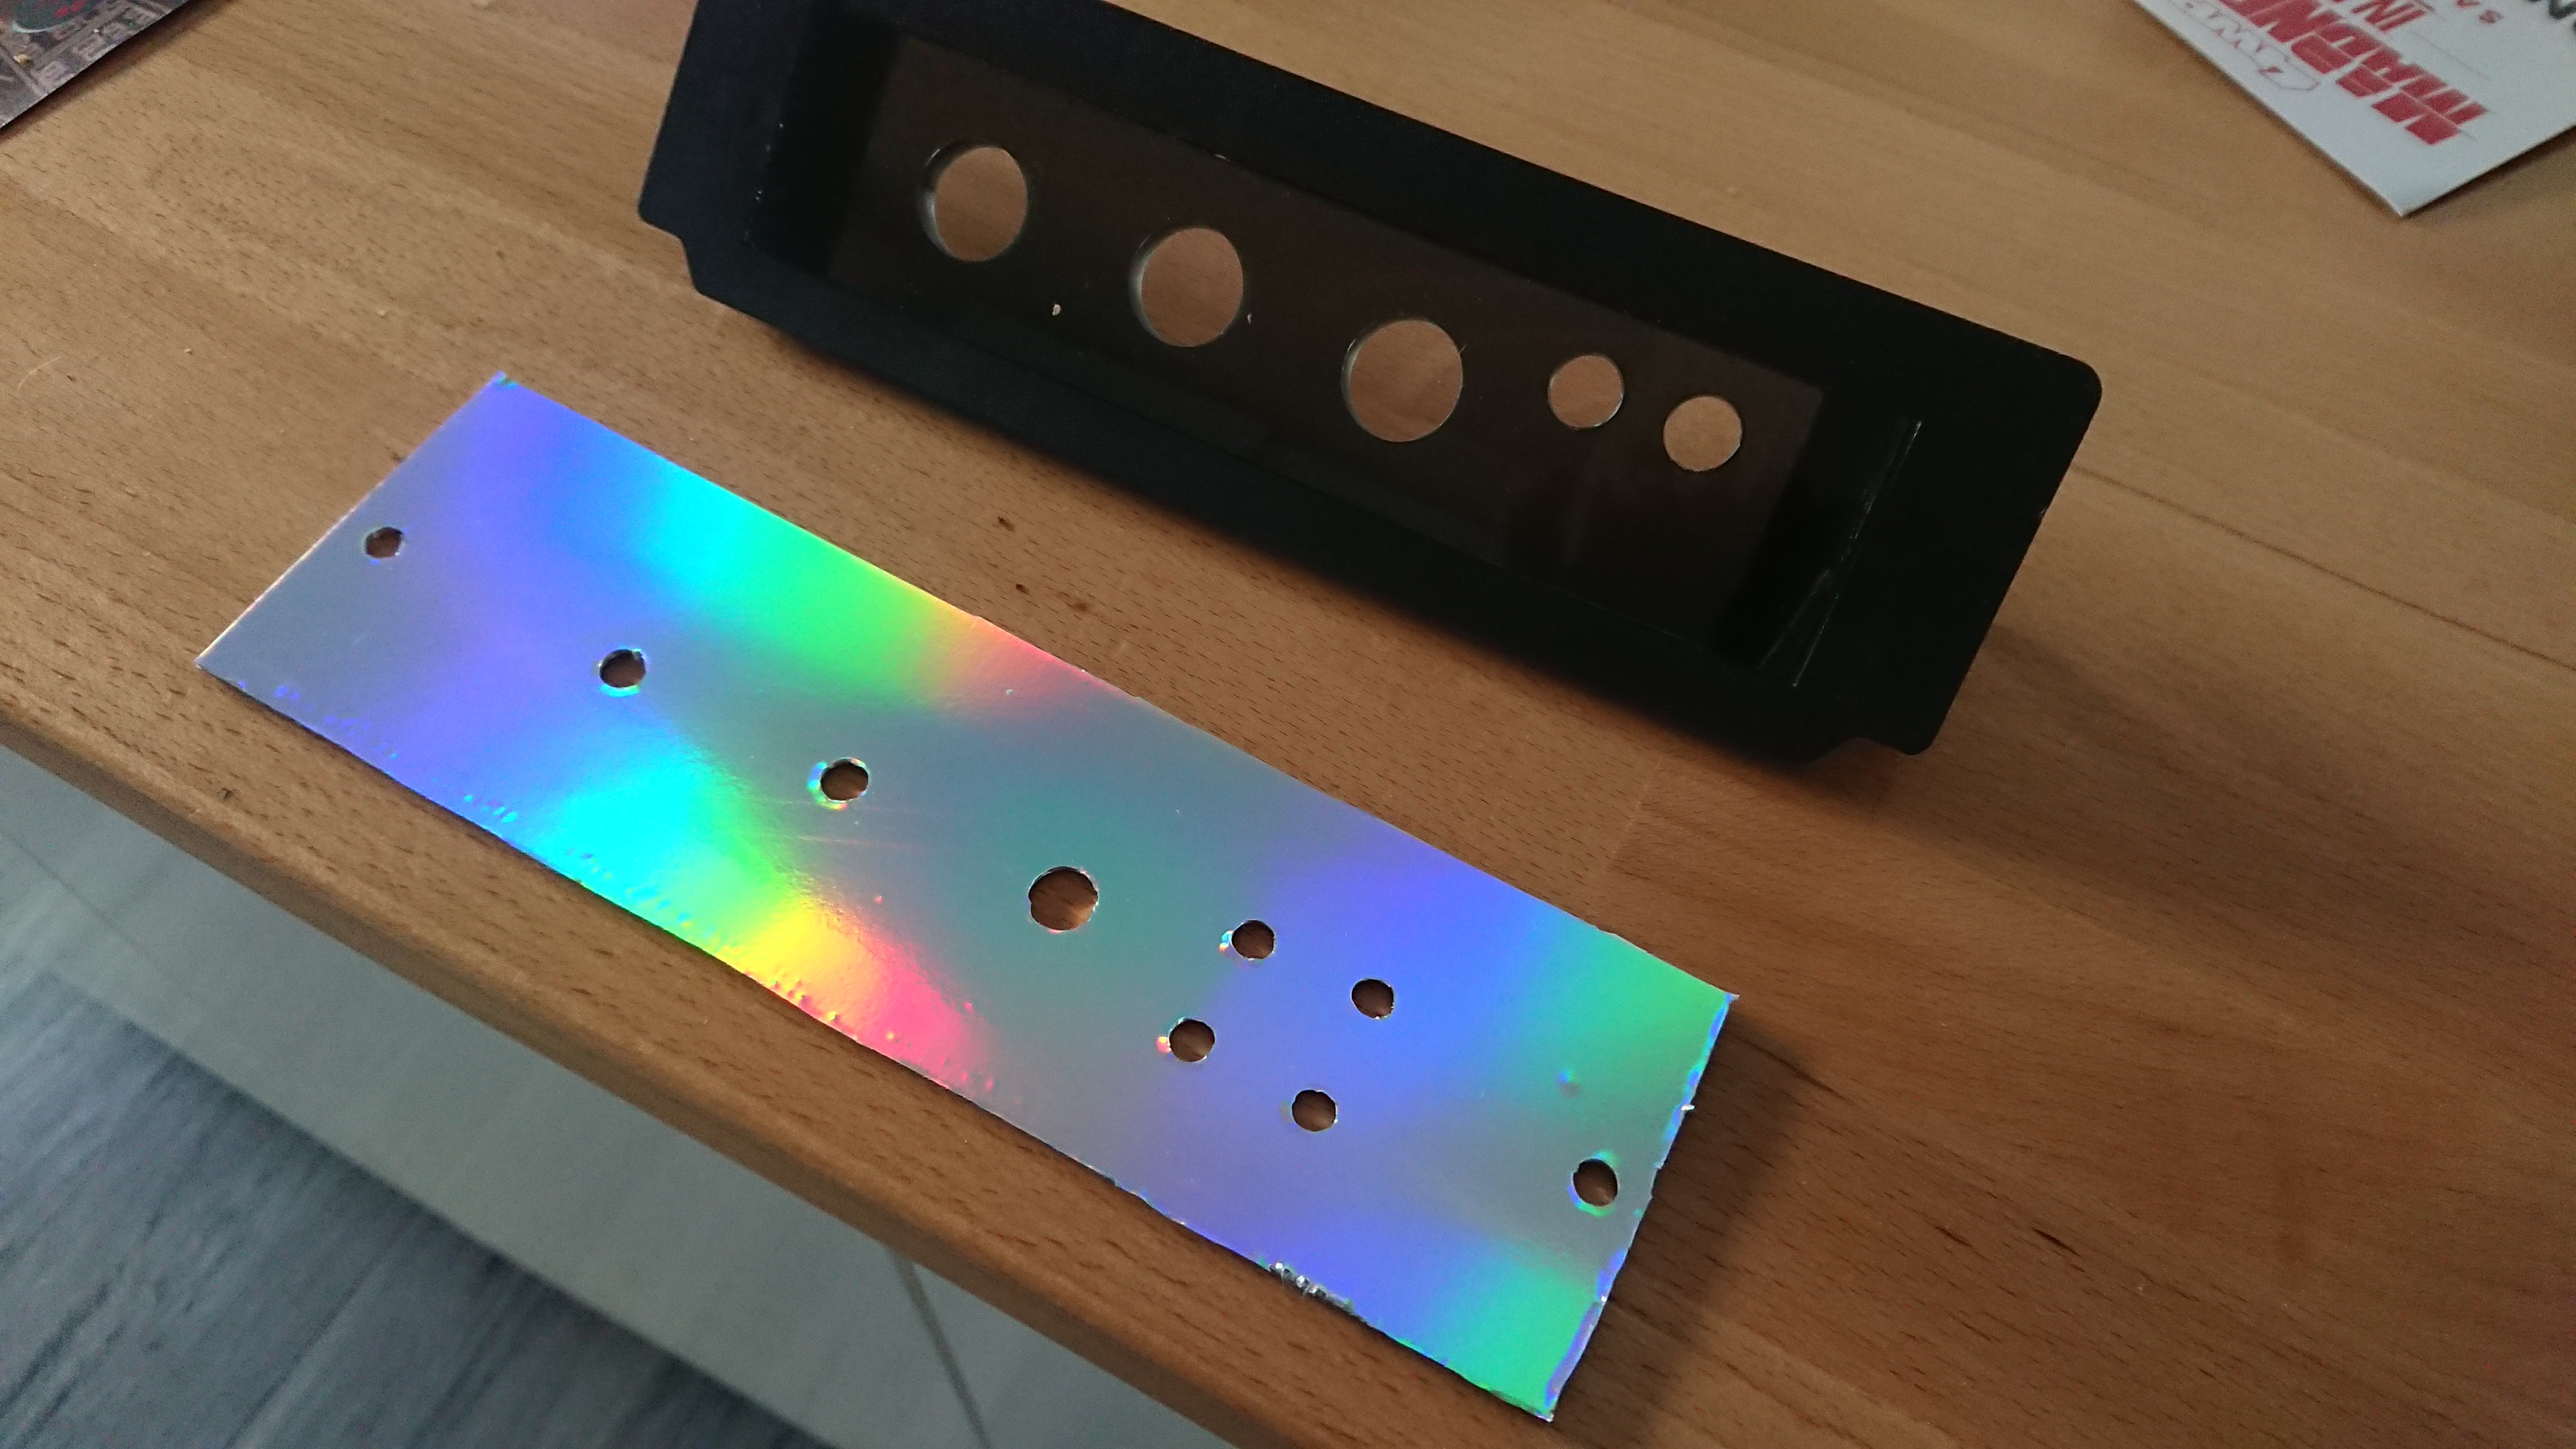
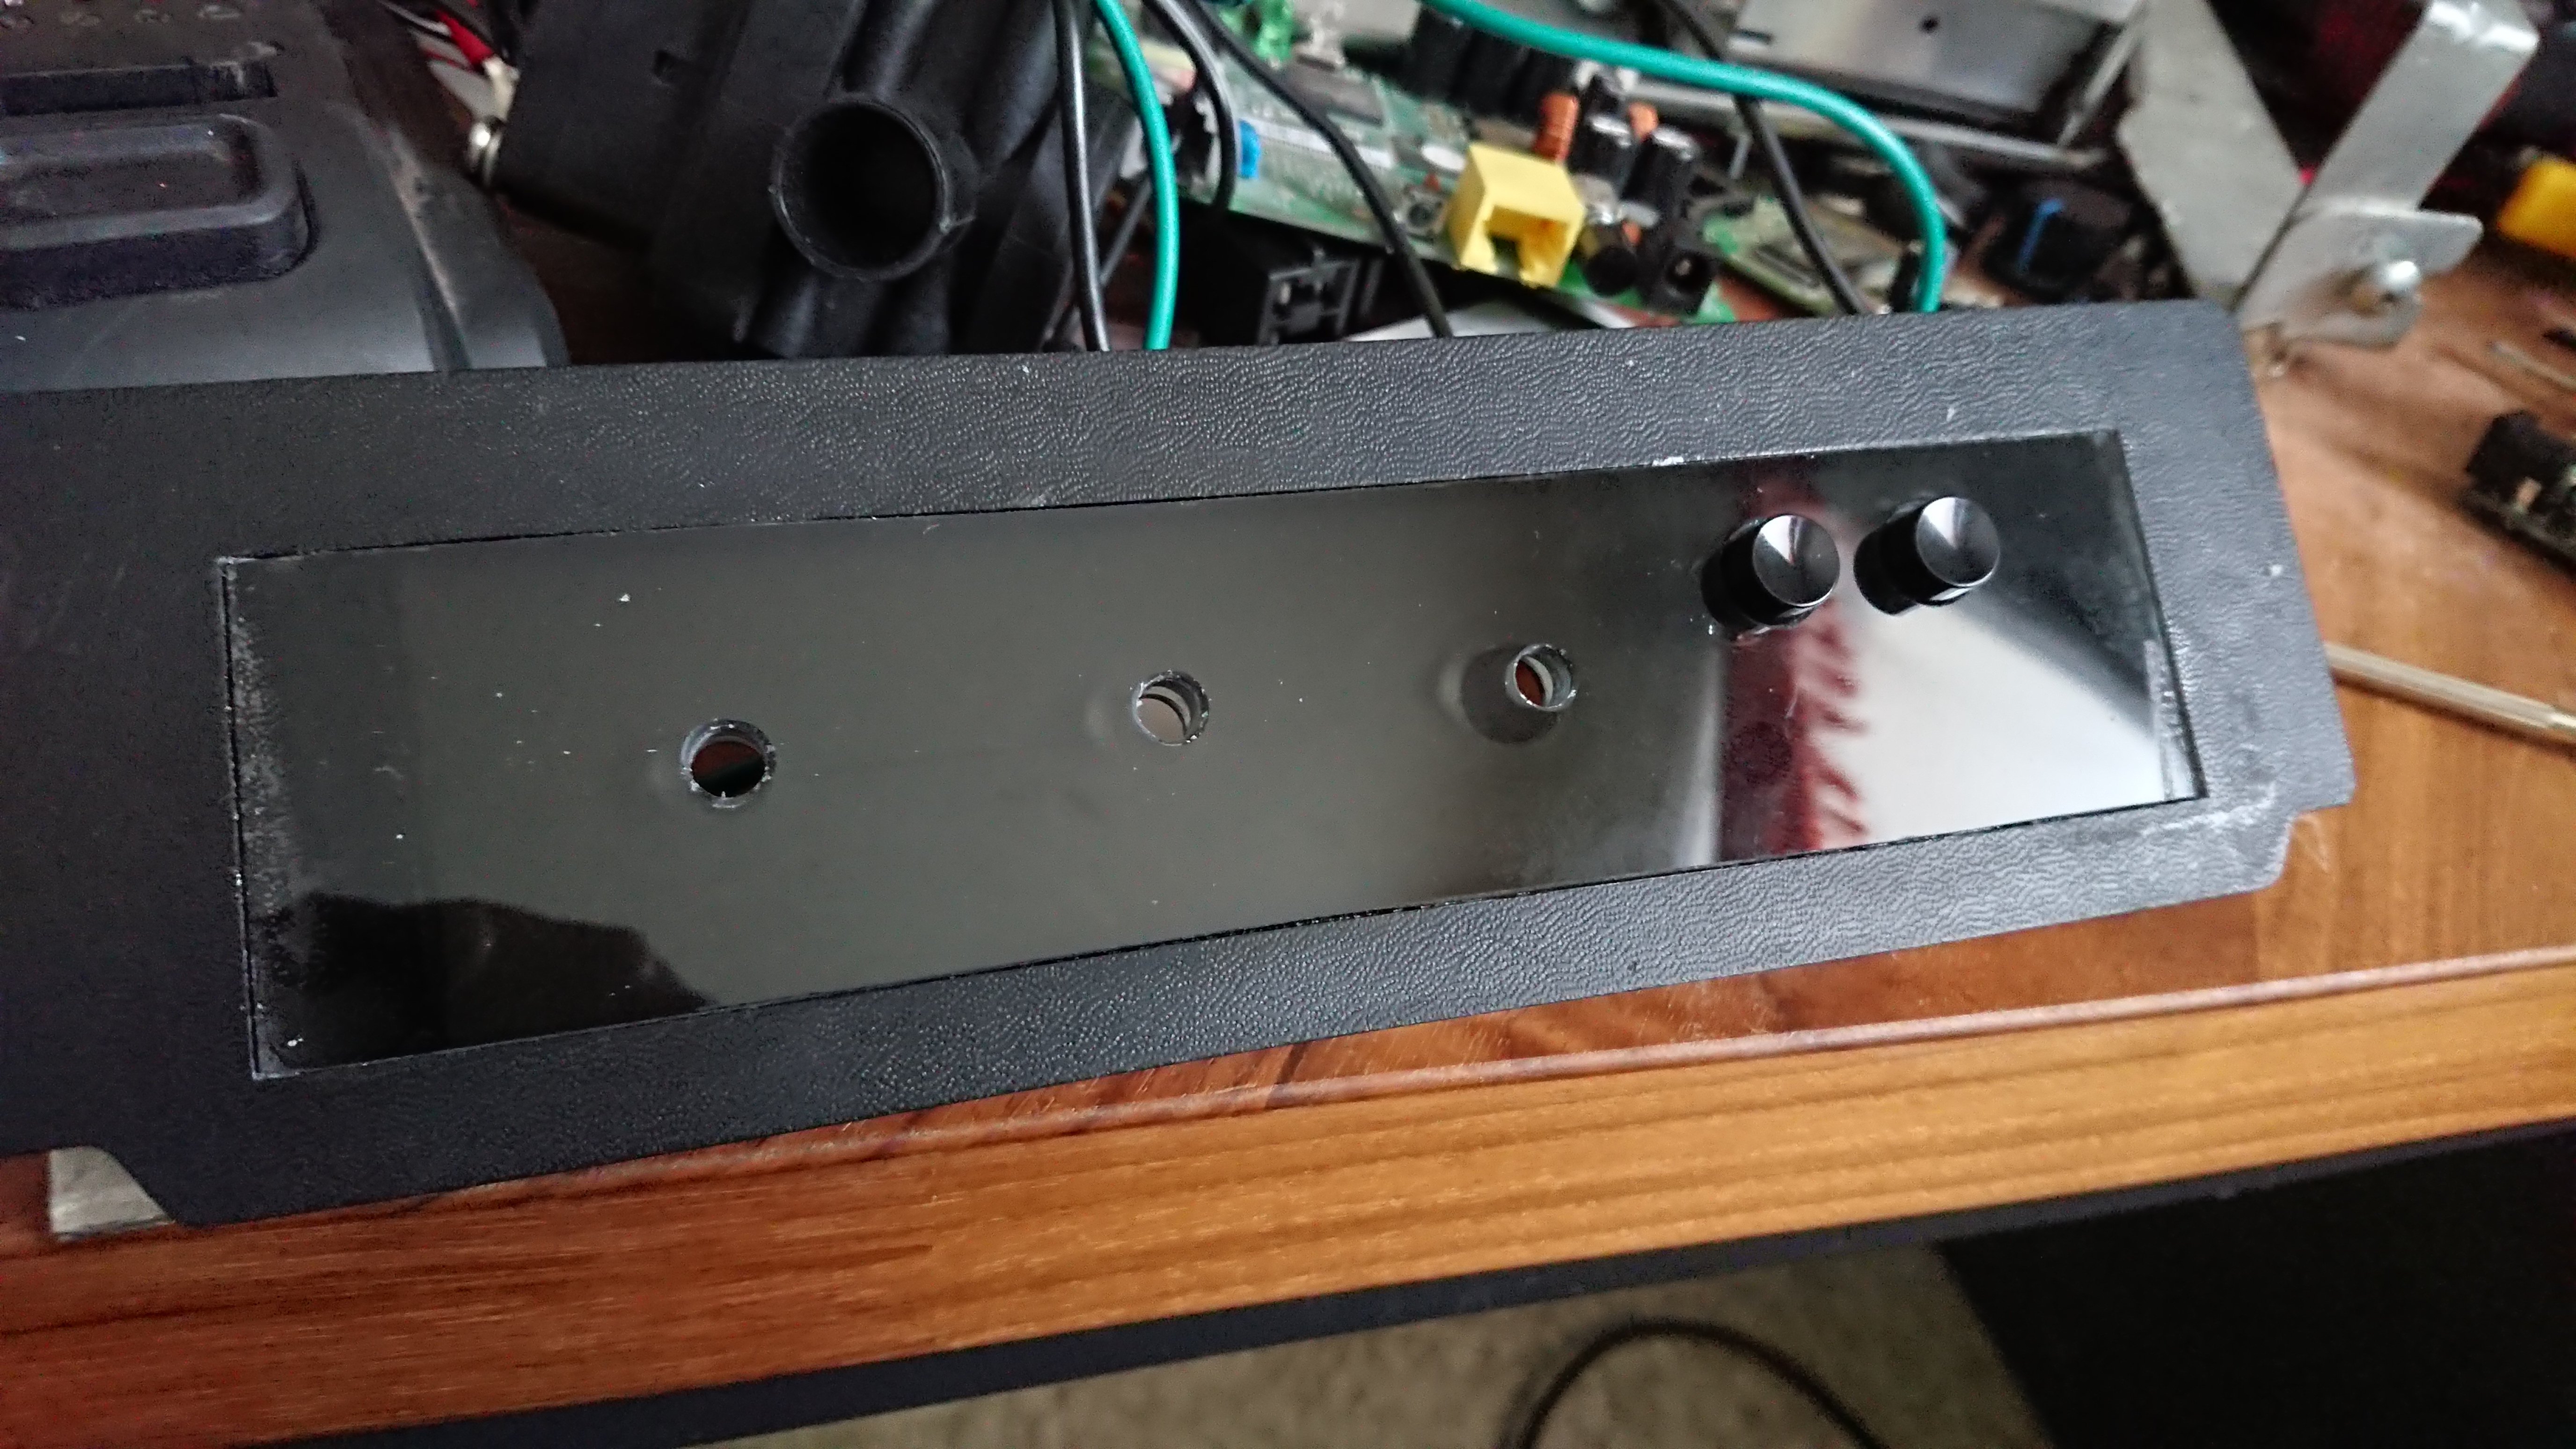
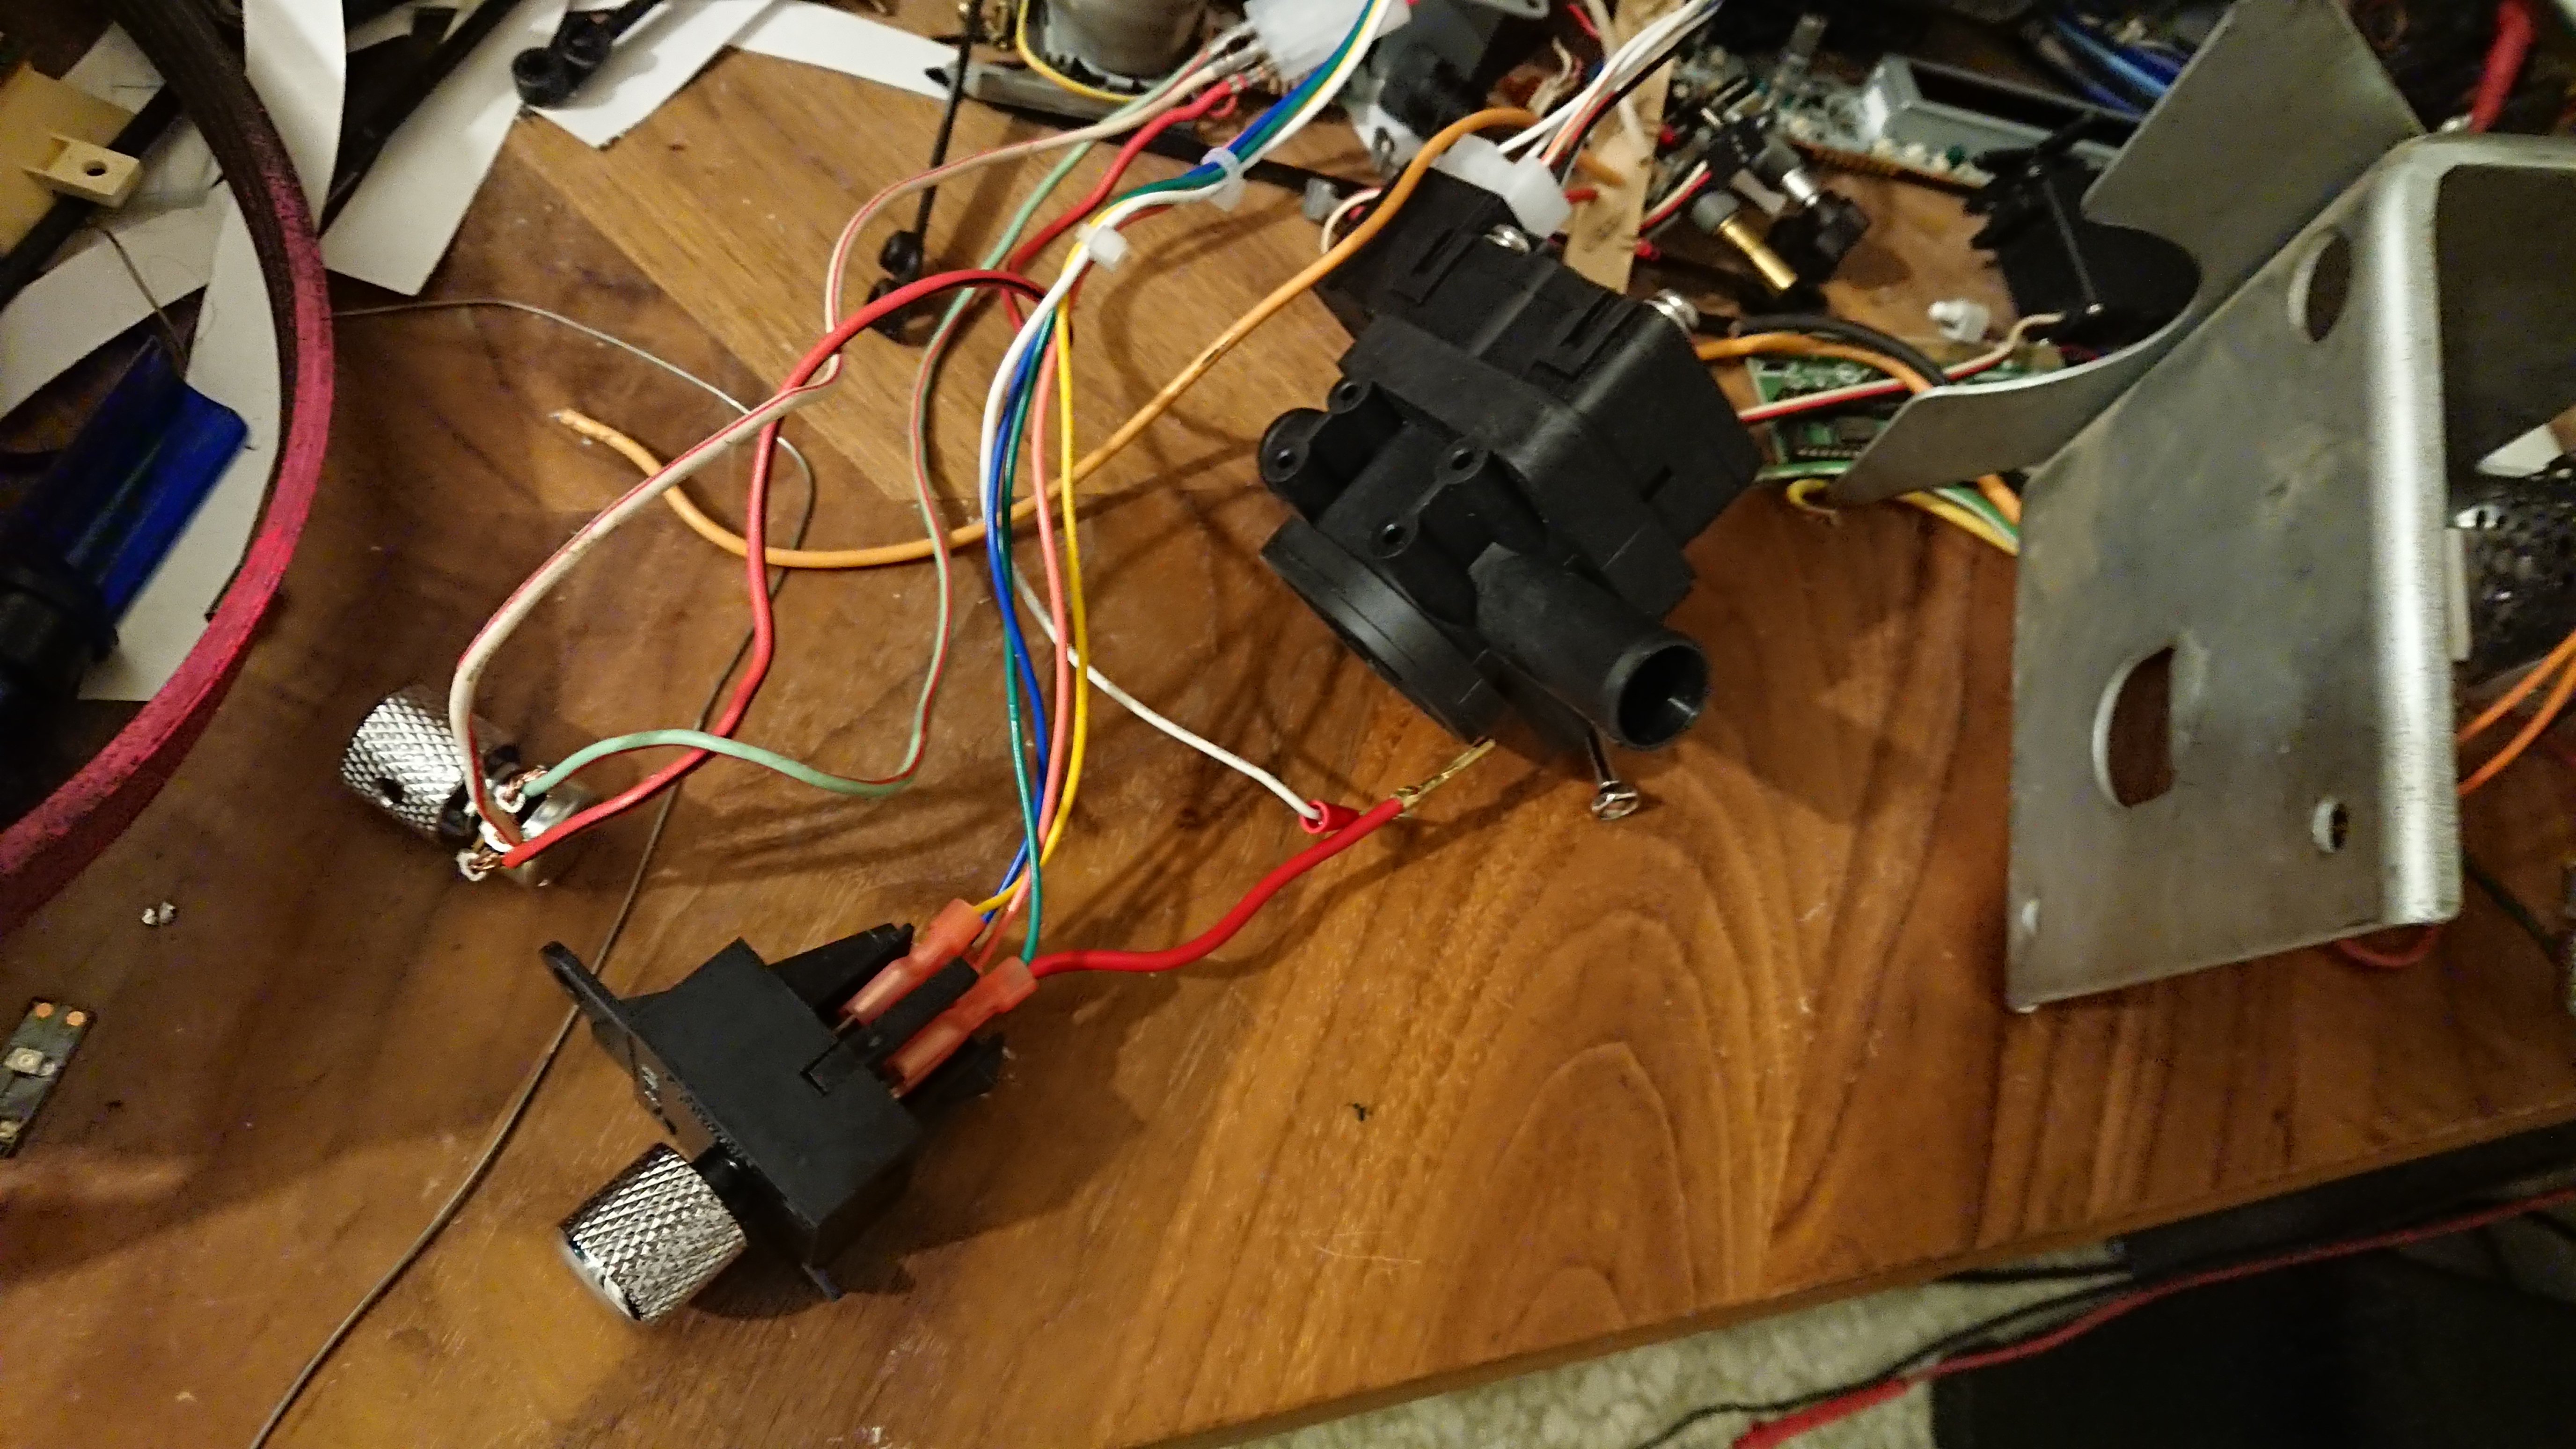
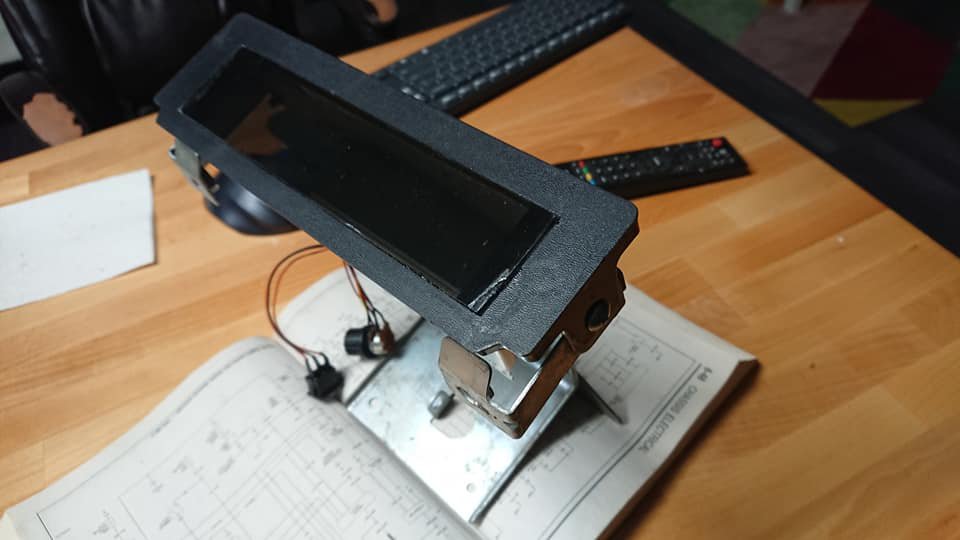
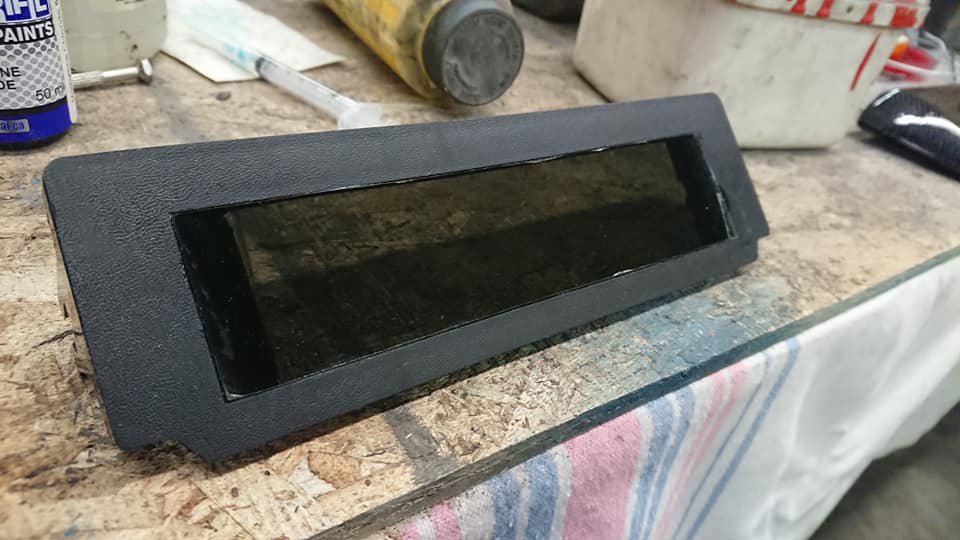
This past week, I got ahead with climate control. The HVAC unit is a vintage air gen 2 mini with defrost. Not content with using the available slide controls, I decided to make my own. Blower speed is now controlled by a variable PWM motor controller. It has a knob (100k ohm potentiometer) with a built-in on/off switch. Very slick. Mode switch is a fan switch from a late fox body mustang, 4 pin, 4 position (originally 0,1,2,3). The heater control valve is a 10k ohm potentiometer - 5k works, too. The panel is just the OEM panel with the center cut out, and a piece of tinted acrylic bonded in. The two buttons are for a/c, and recirc/fresh air door. They even have blue and green LED's to differentiate between them. The controls themselves are attached to a strip of aluminum, screwed to the back of the panel. I decided to cover it with the holo-foil vinyl from earlier. The end result is quite stunning. Might do more to this later, but for now, it's a good time to figure out mounting the whole thing to the car.
-
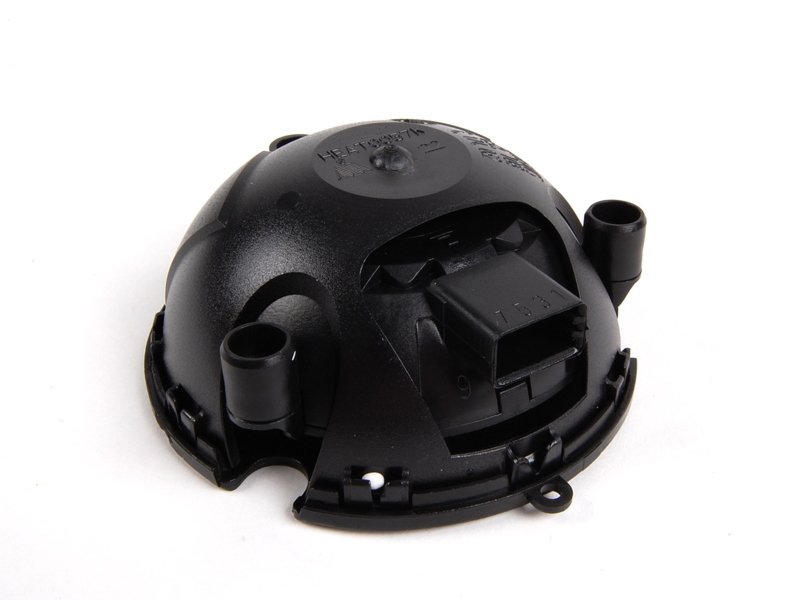
Ever considered making them powered? I had the idea of making powered fender mirrors, myself, before going a different direction (powered door-mounted units from a ZX). My idea was going to use a motor assembly from a late-model VW/Audi, since they're a really small, dome-shaped unit. Food for thought... Like this...
-
Wheel Show! Post your pics of you wheels
Barrel_Ball replied to k3werra's topic in Brakes, Wheels, Suspension and Chassis
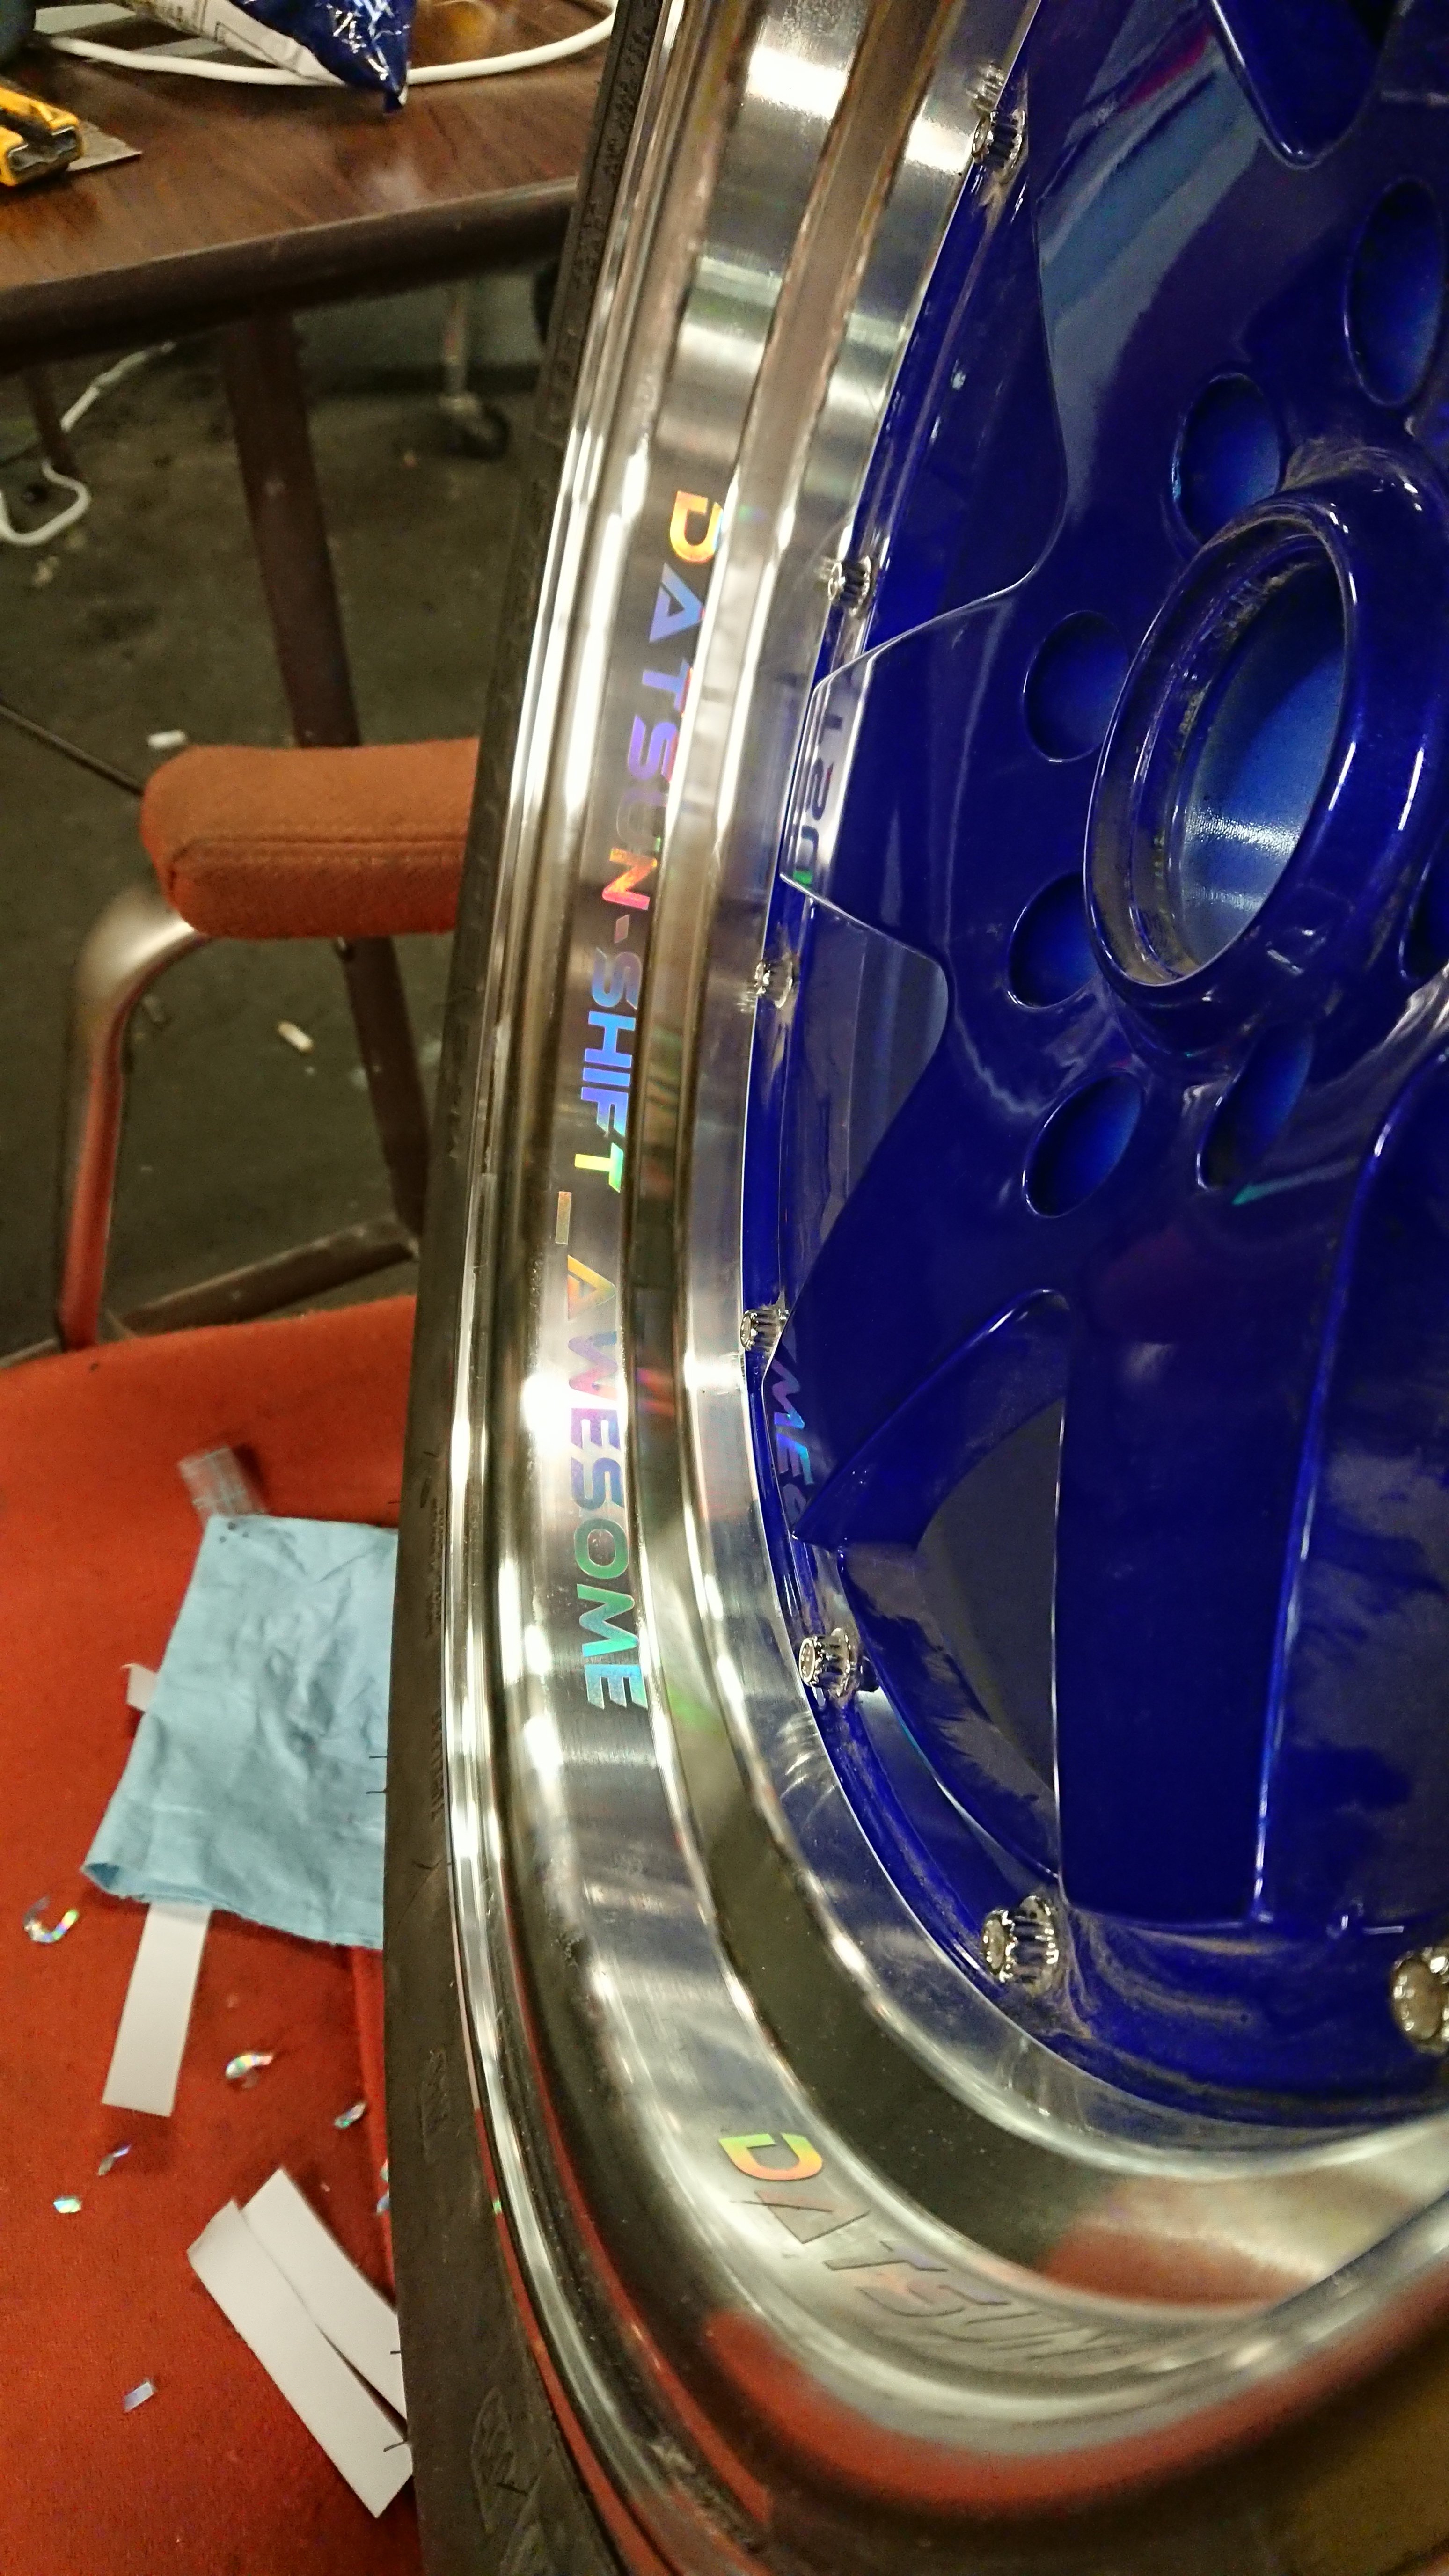
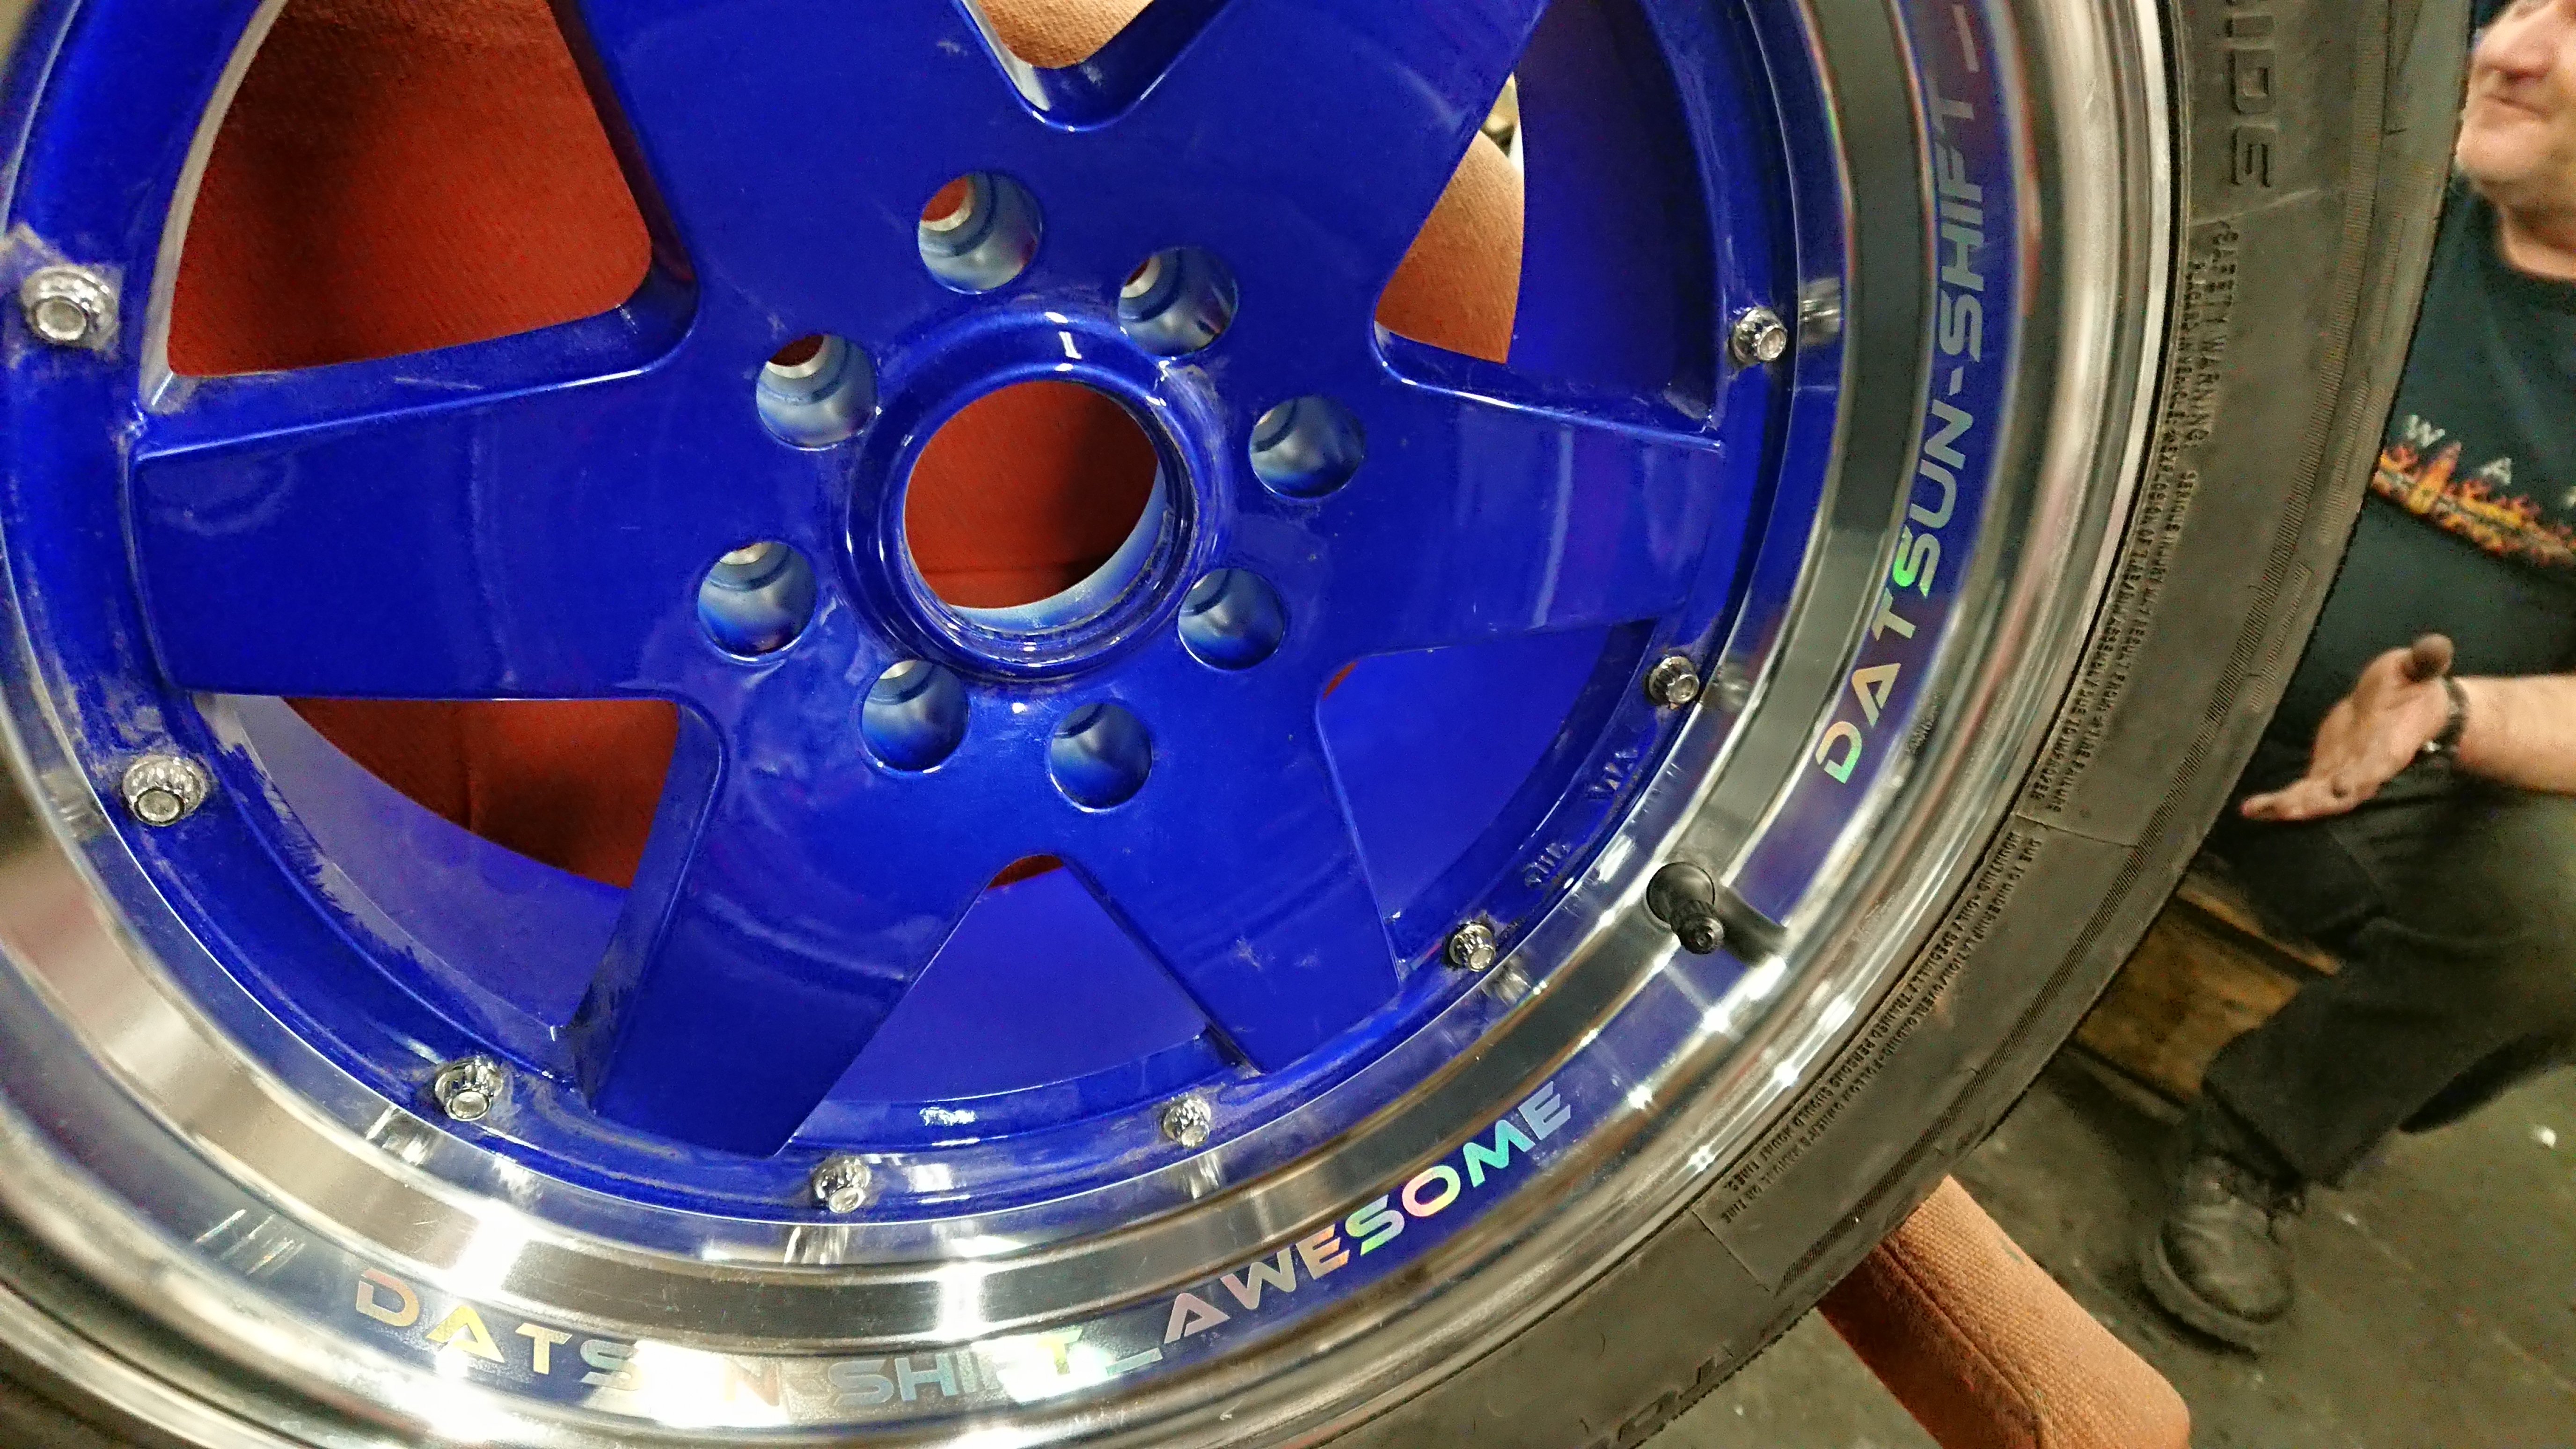
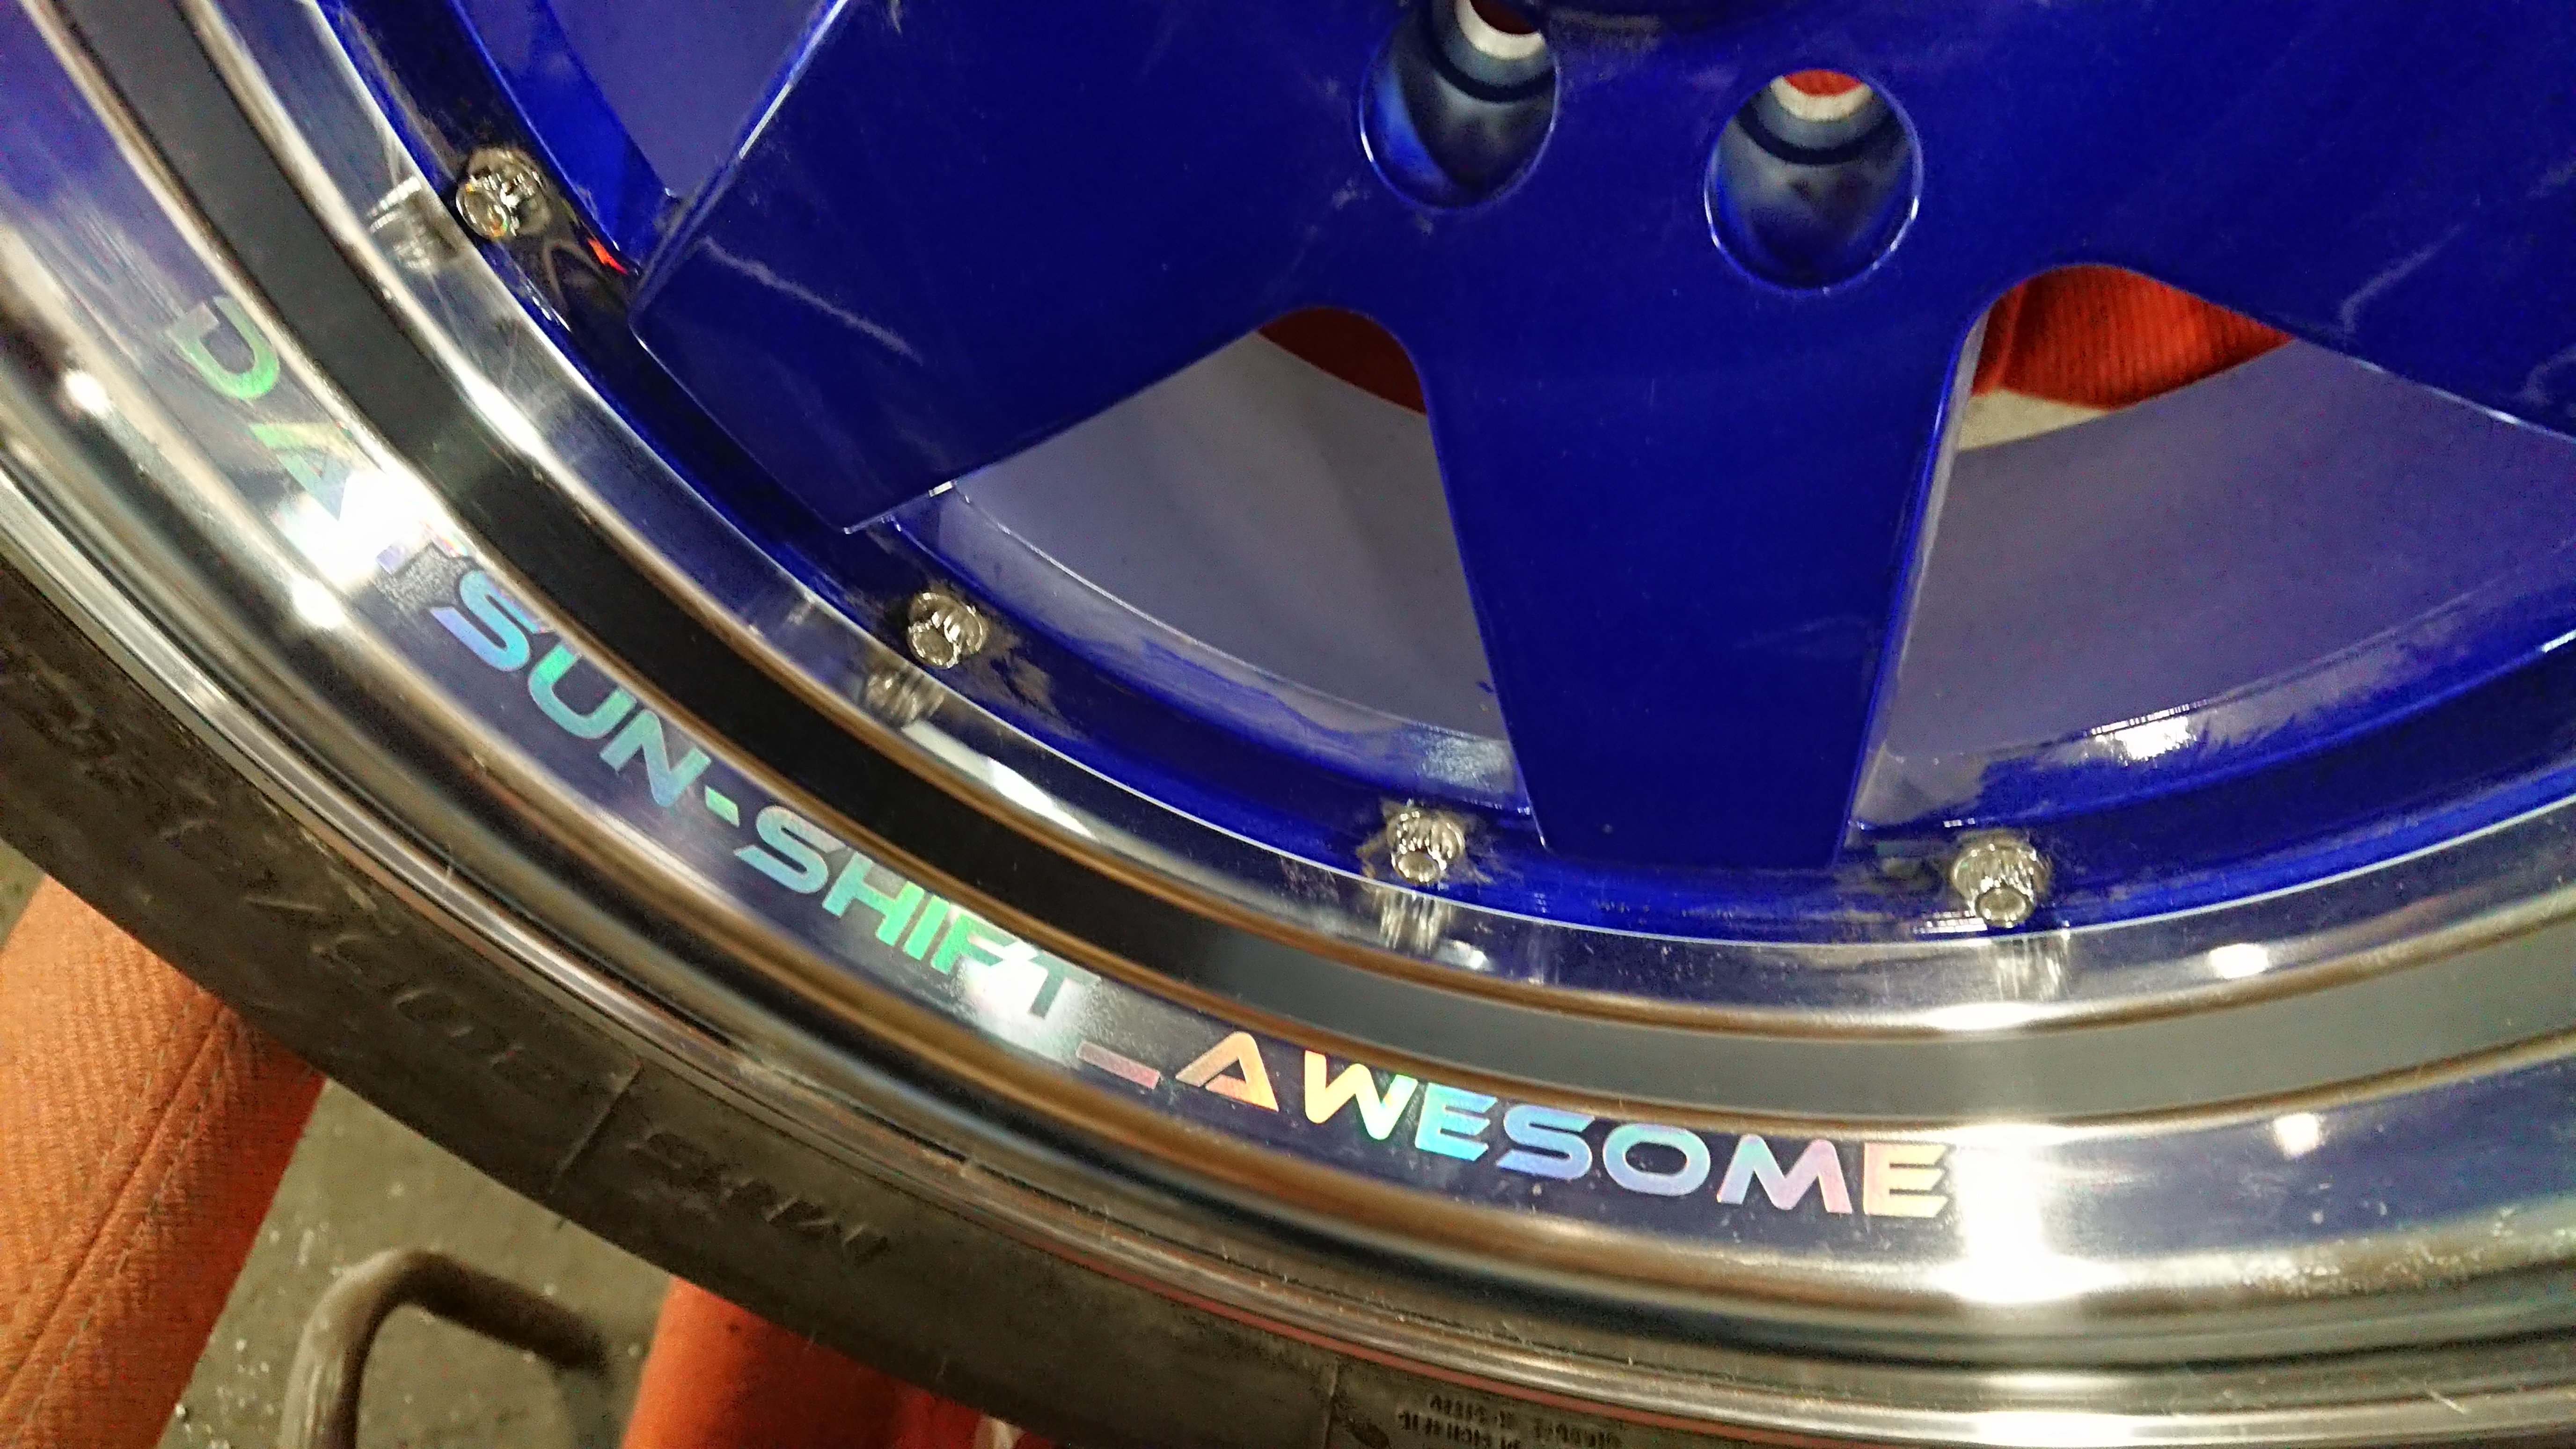
STR 523 in 15x8", 0 offset, wrapped in Cooper CS5 Ultra Touing 205/65R15 Also, custom graphics on the outer lip...
-
1978 280Z (project name: Mothra)
Barrel_Ball replied to Barrel_Ball's topic in S30 Series - 240z, 260z, 280z
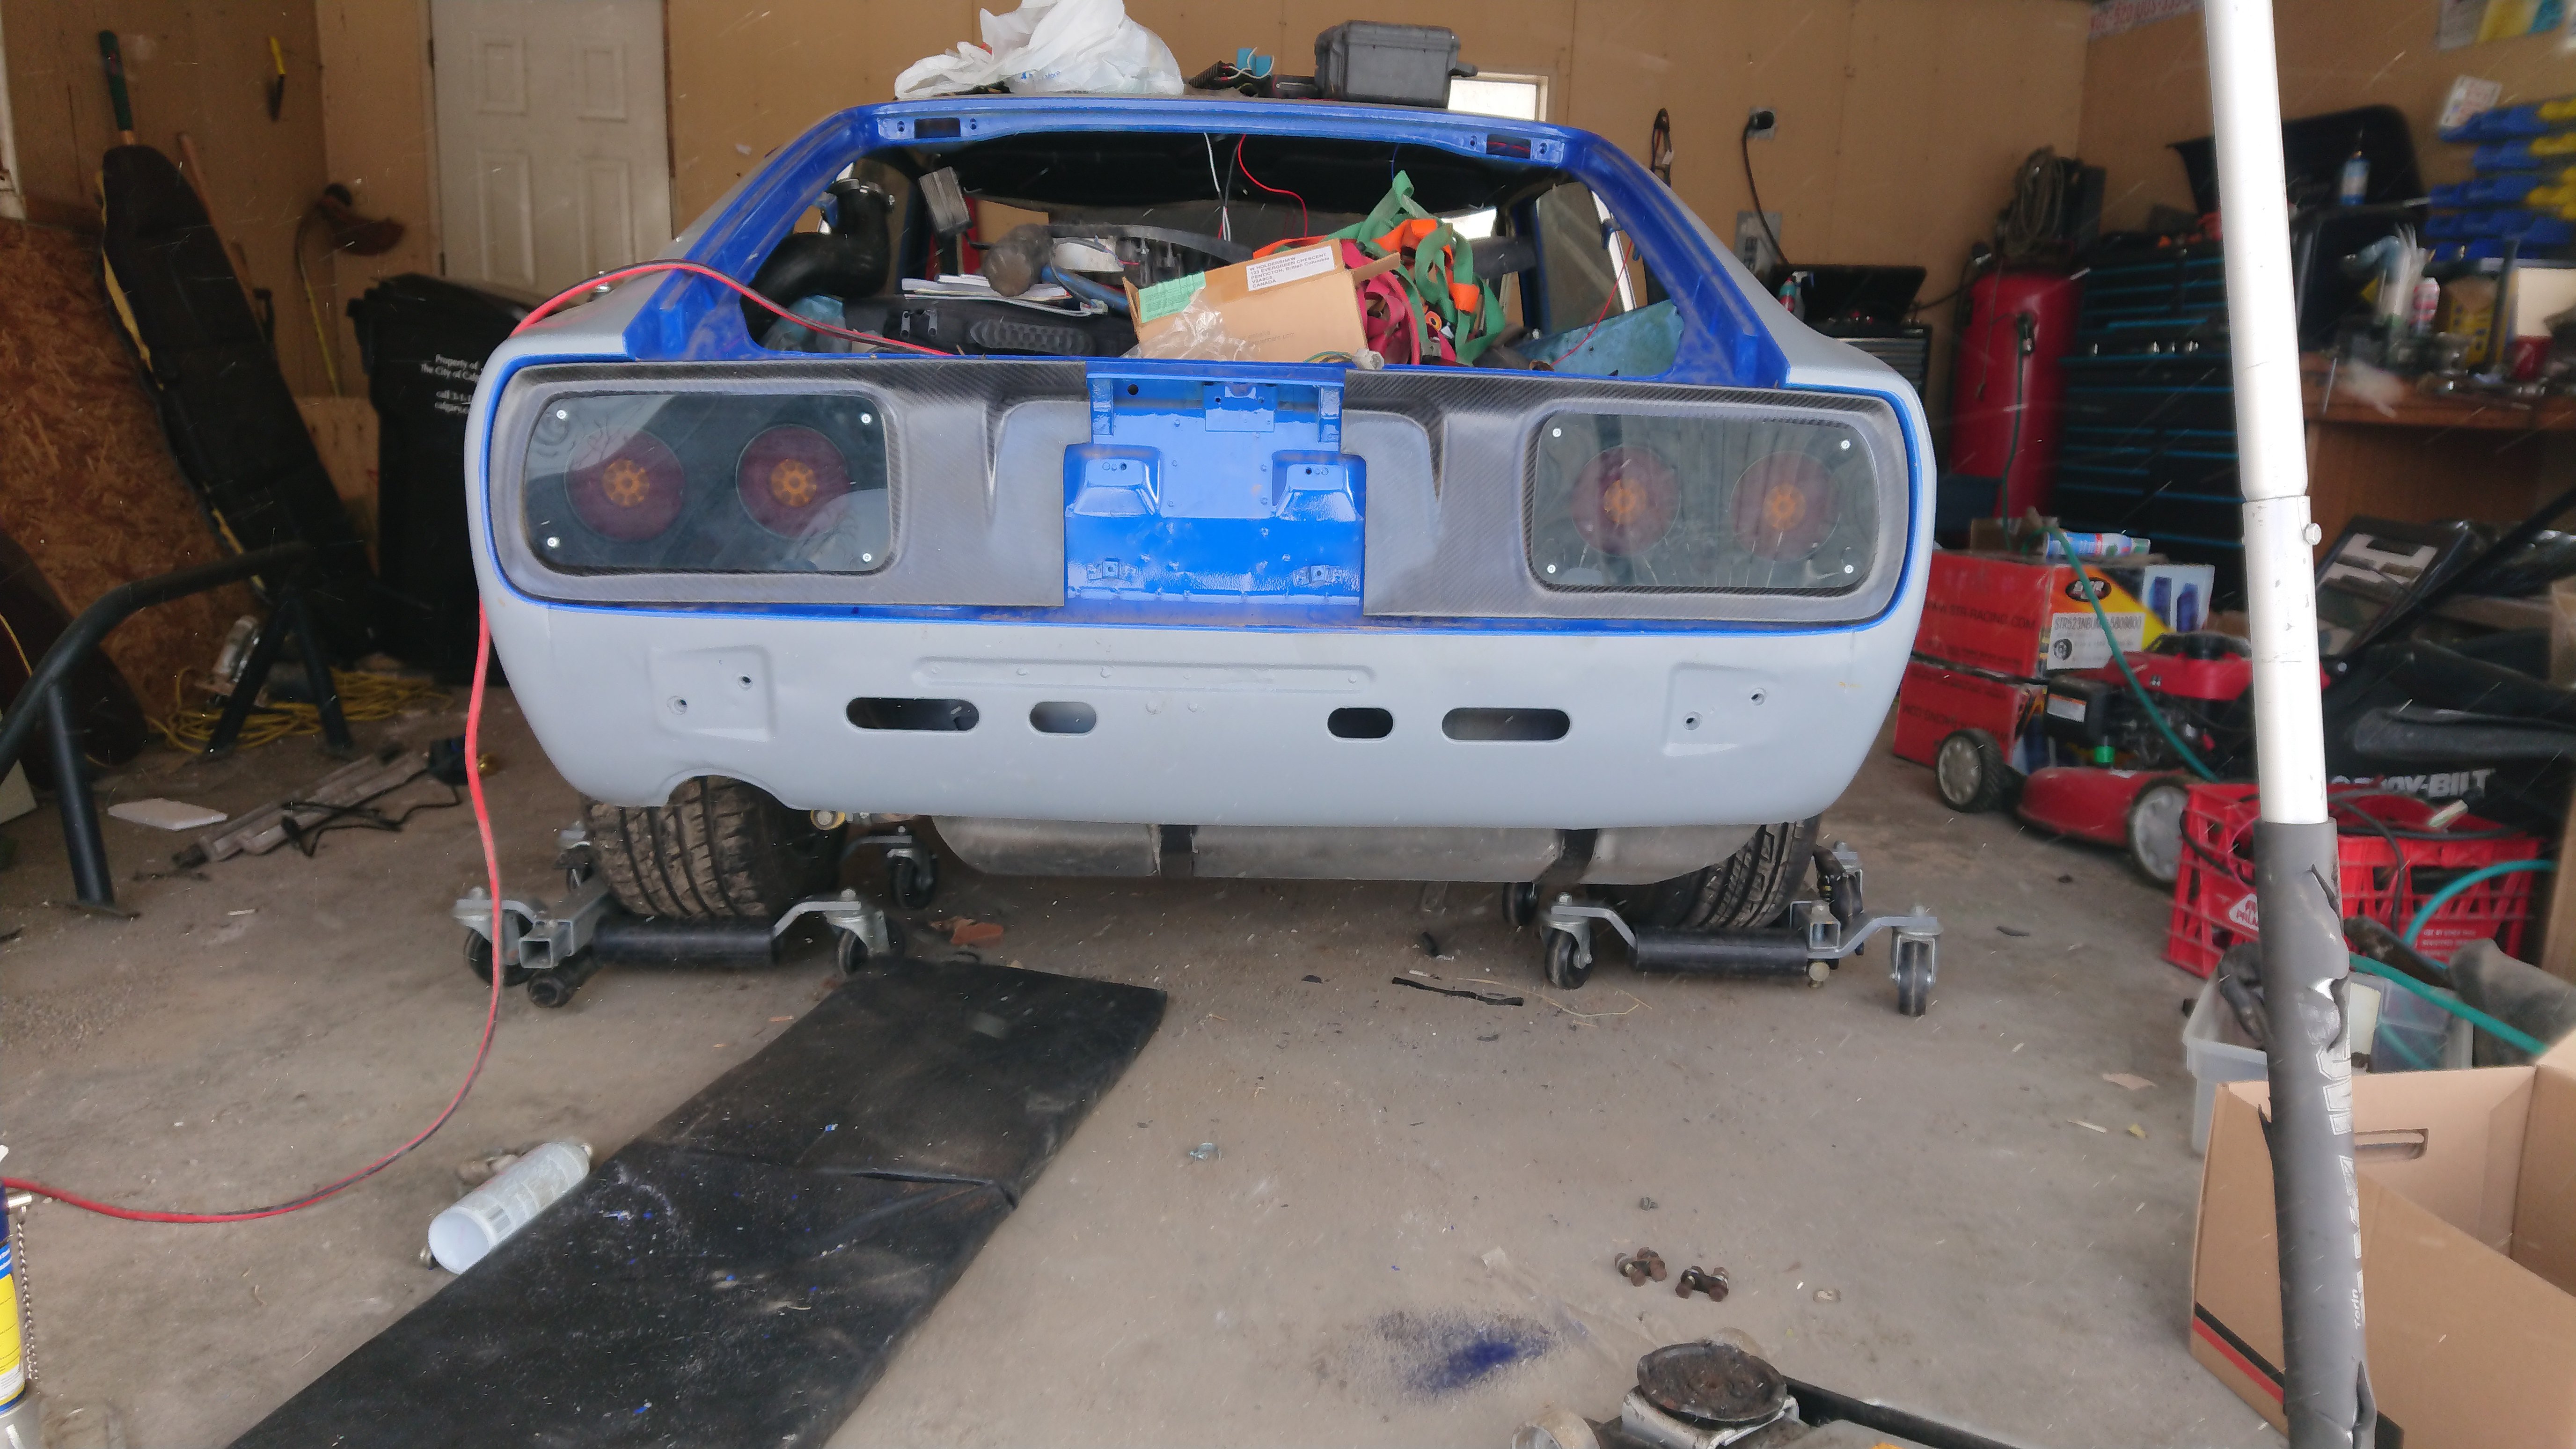
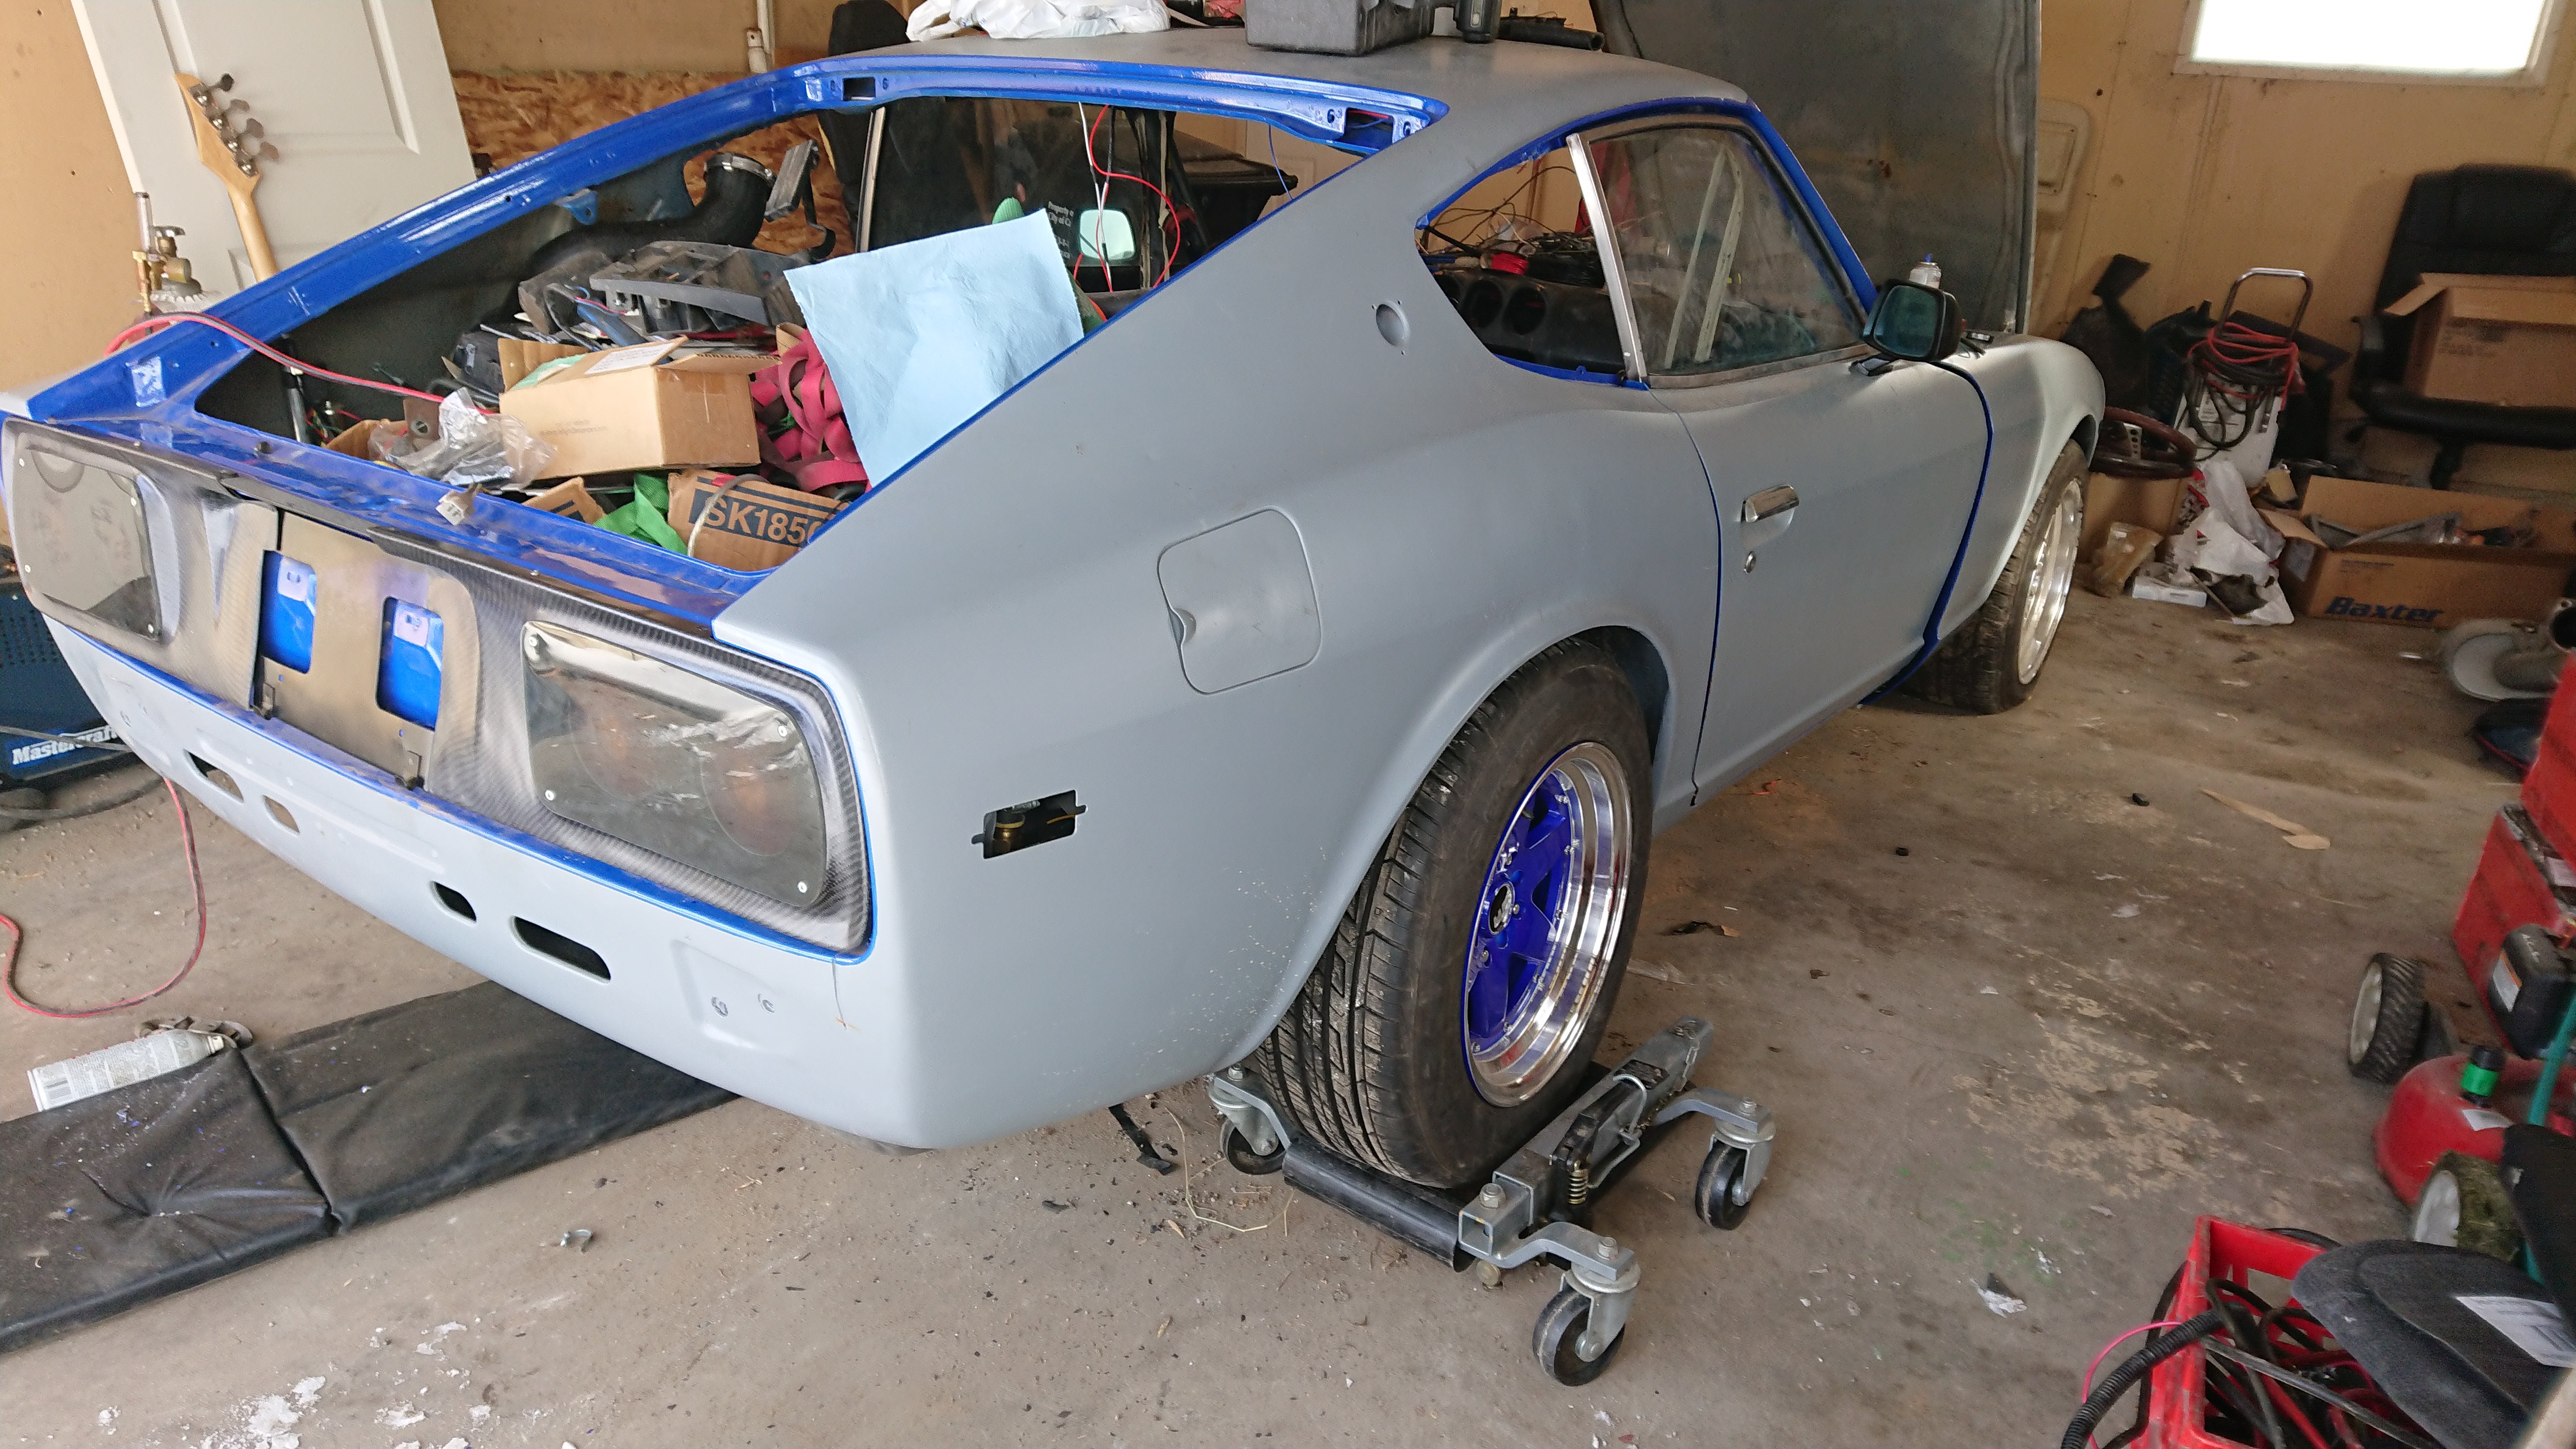
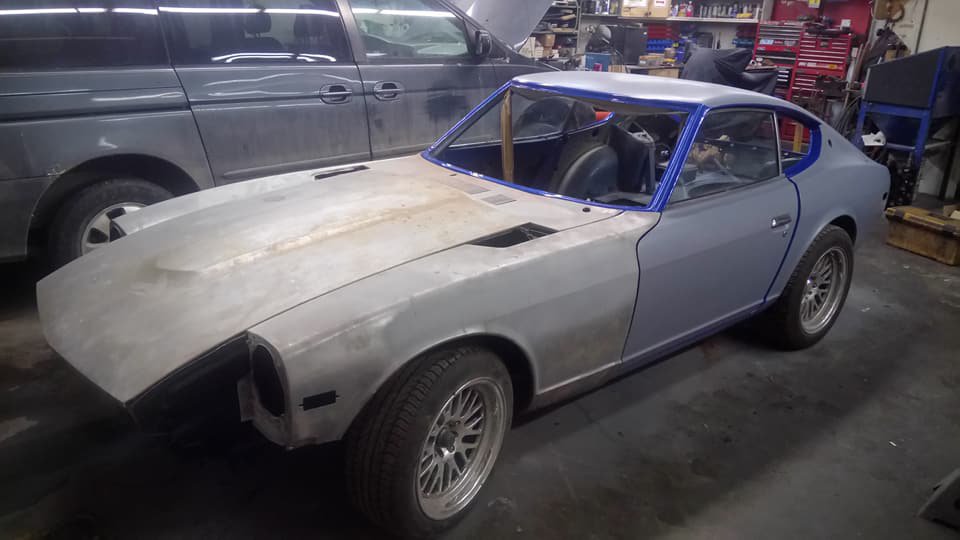
I managed to get a few minutes in the garage last week to test fit my tail lights before I started to freeze, and I'm very happy with how it's going to look. You may have also noticed a different set of wheels in earlier pictures, with one of them showing up in this update. These are STR 523 six spokes (15x8", 0 offset). These were the closest thing I could get to a 280zx wheel that was bigger than 14", but I like them. Anyway, I had a crazy idea, and called up my friend with his vinyl cutter... This is supposed to be a cross between Datsun's "Shift into awesome" ads for the 280zx turbo with the manual gearbox, and Nissan's "Shift_" ad campaign. Figured I'd bring two different eras together for this little thing, much like what I'm trying to do with the rest of the car.
-
1978 280Z (project name: Mothra)
Barrel_Ball replied to Barrel_Ball's topic in S30 Series - 240z, 260z, 280z
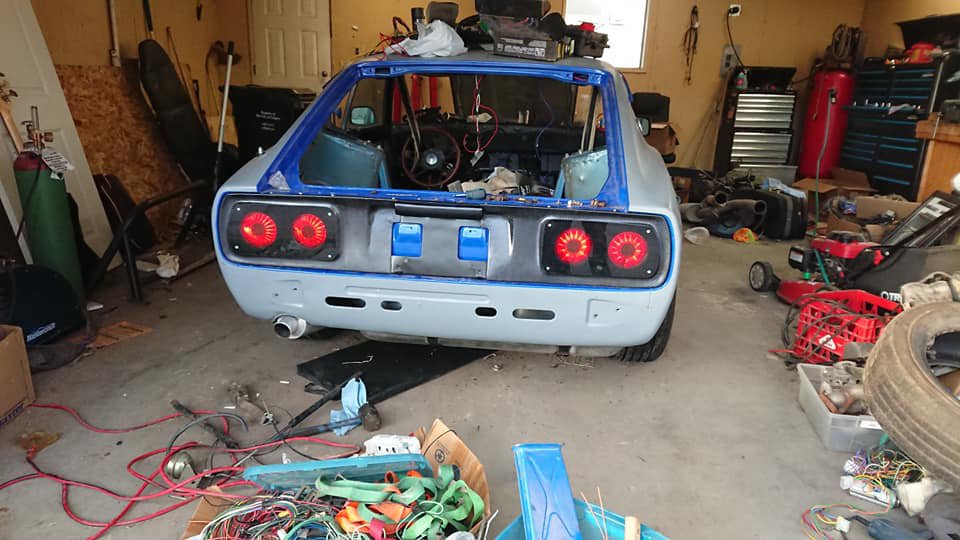
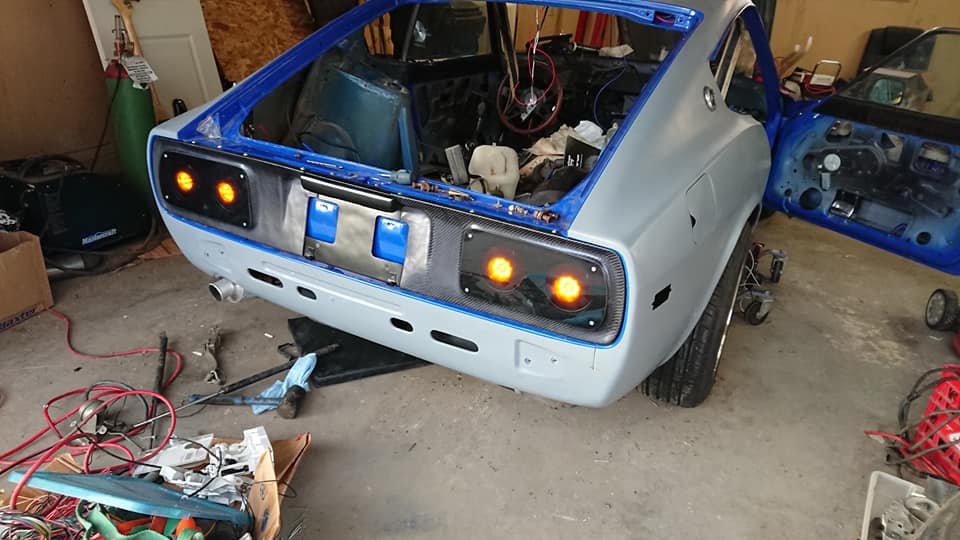
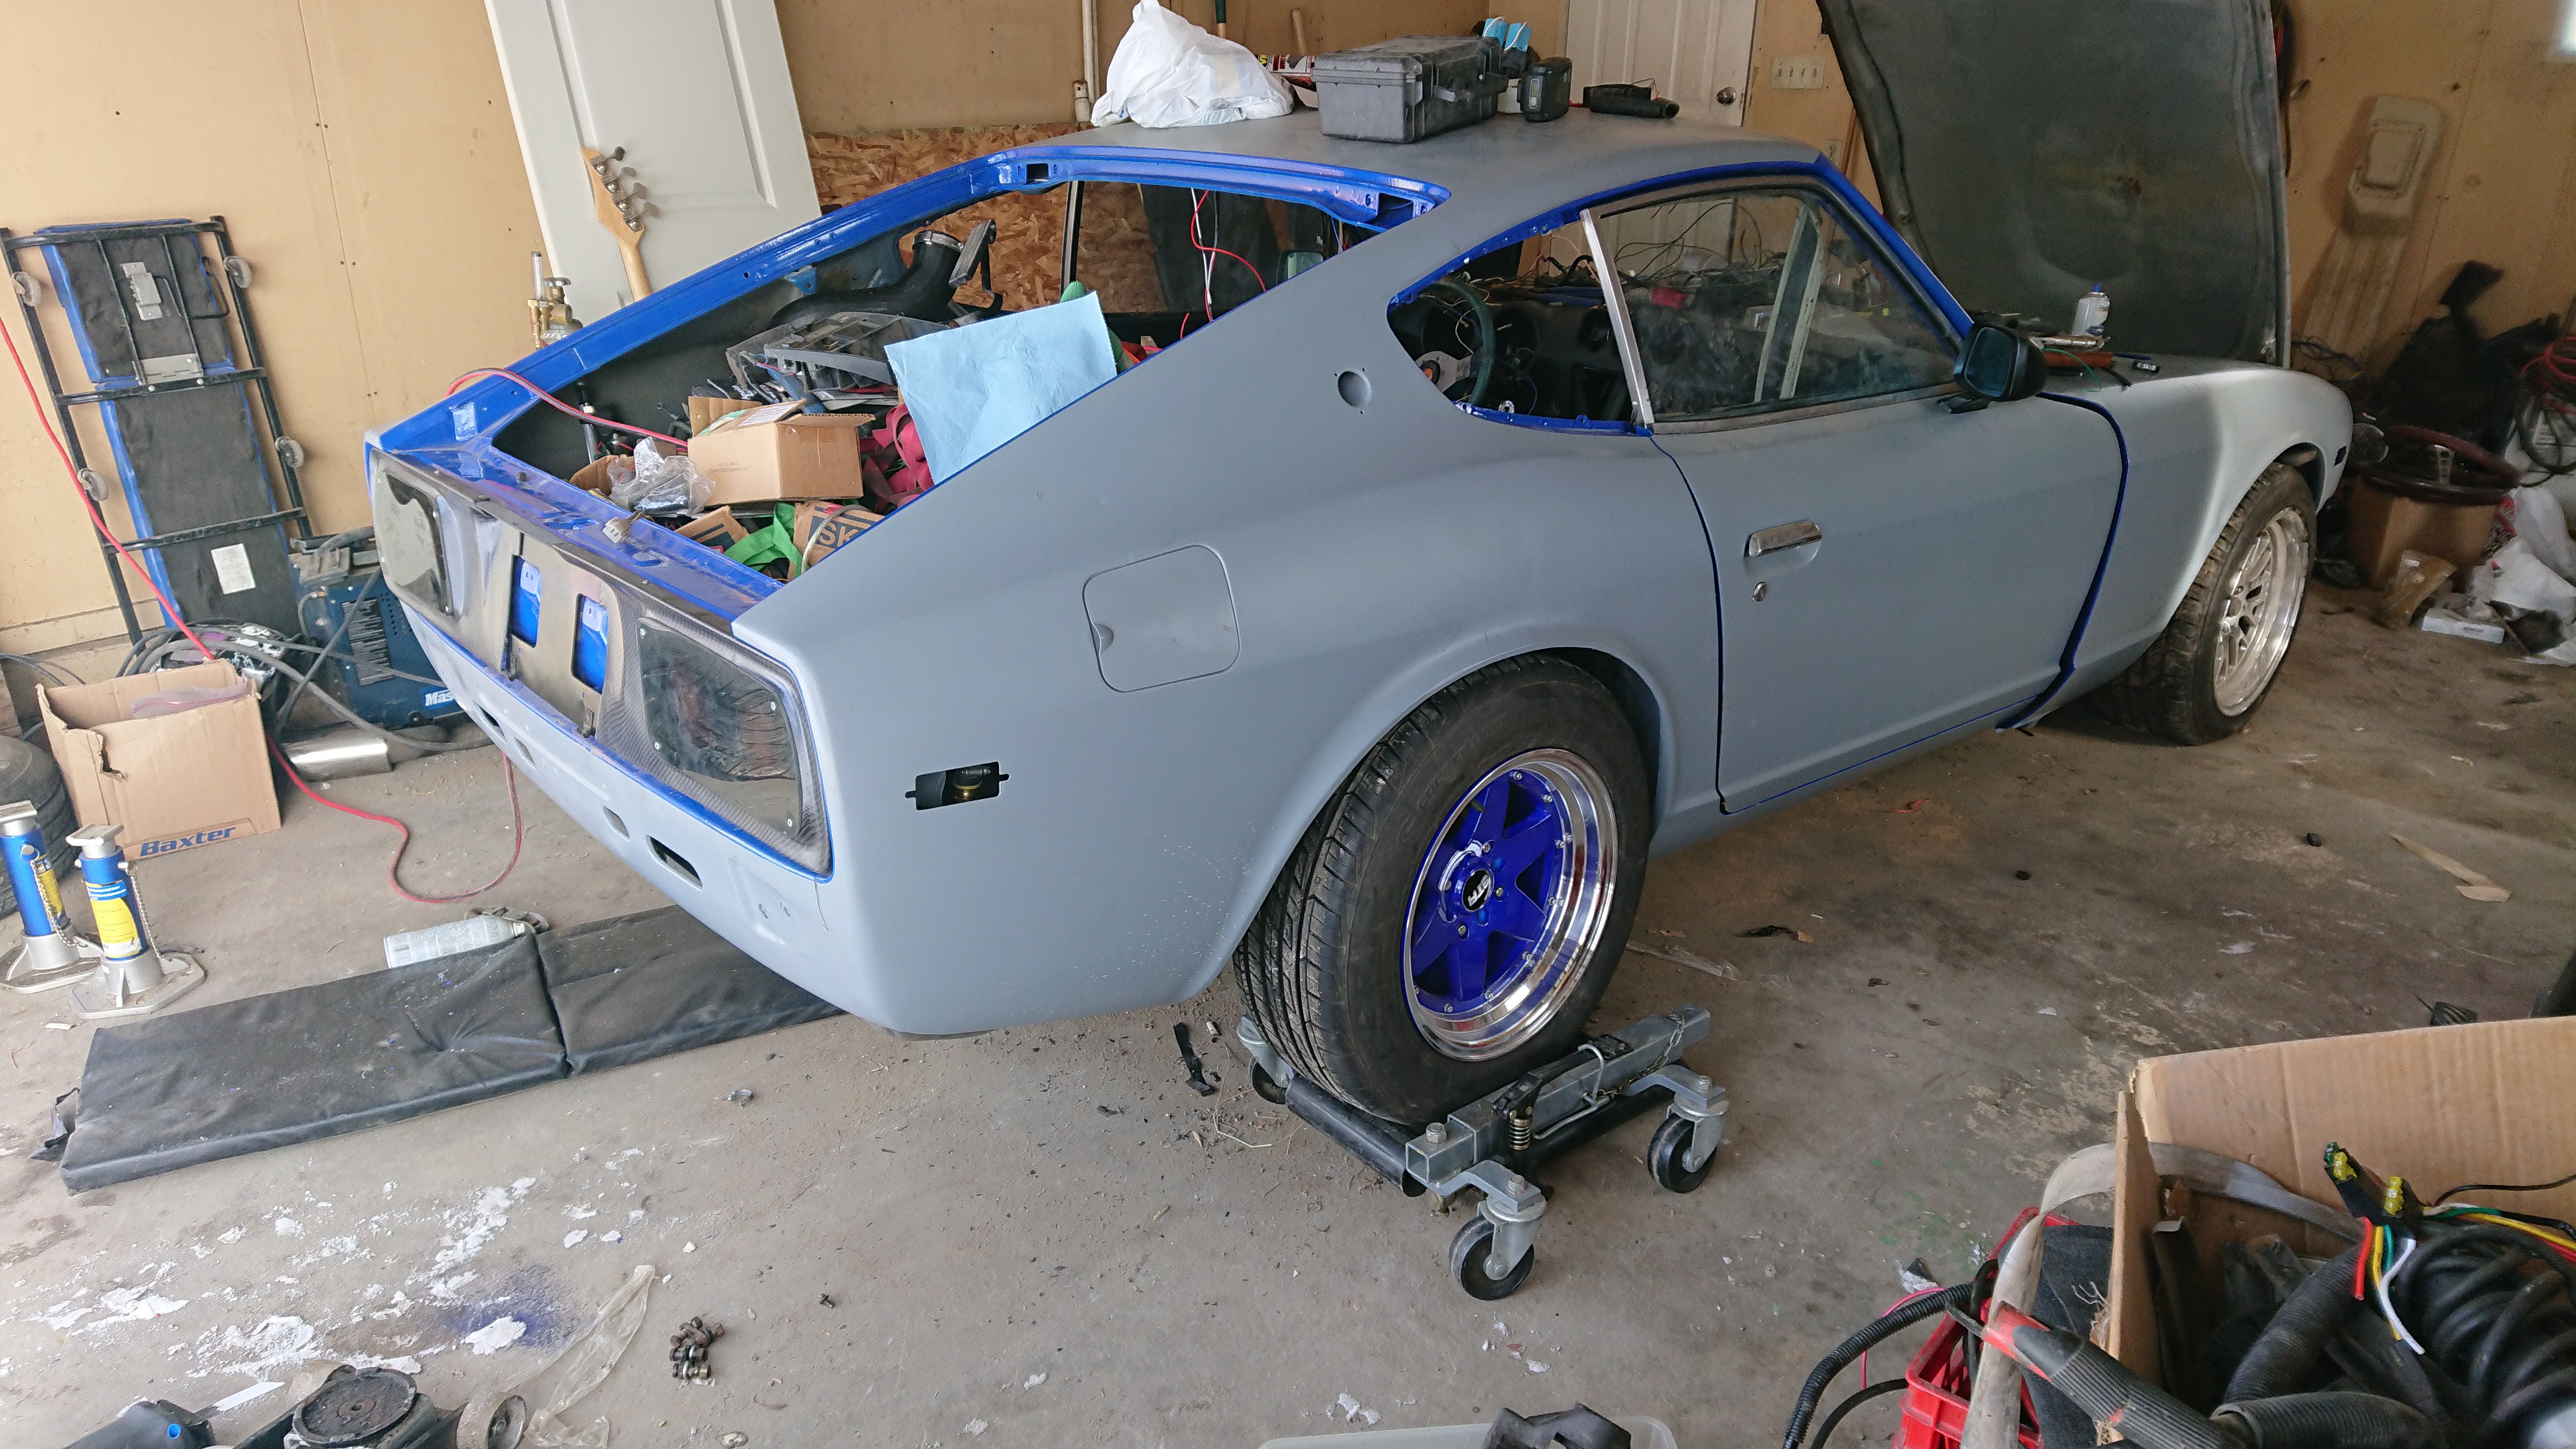
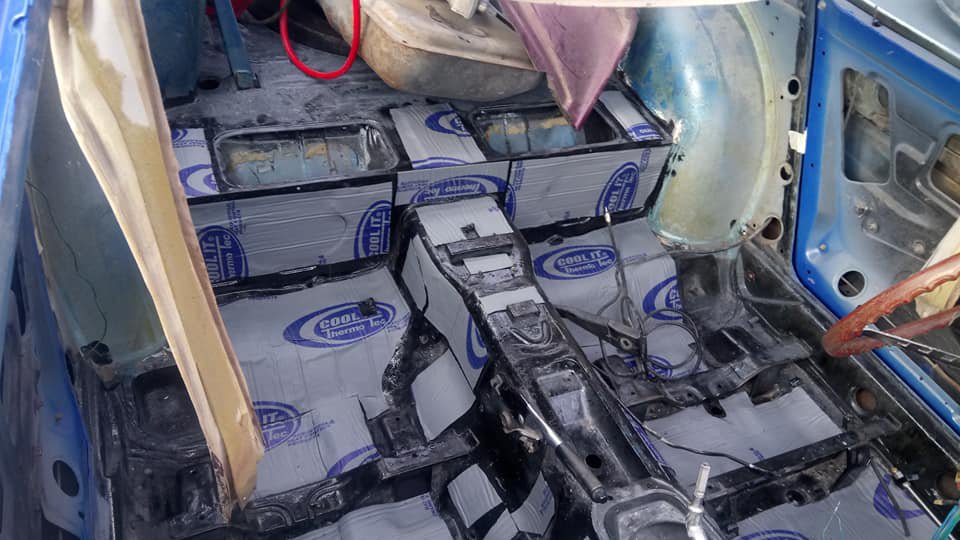
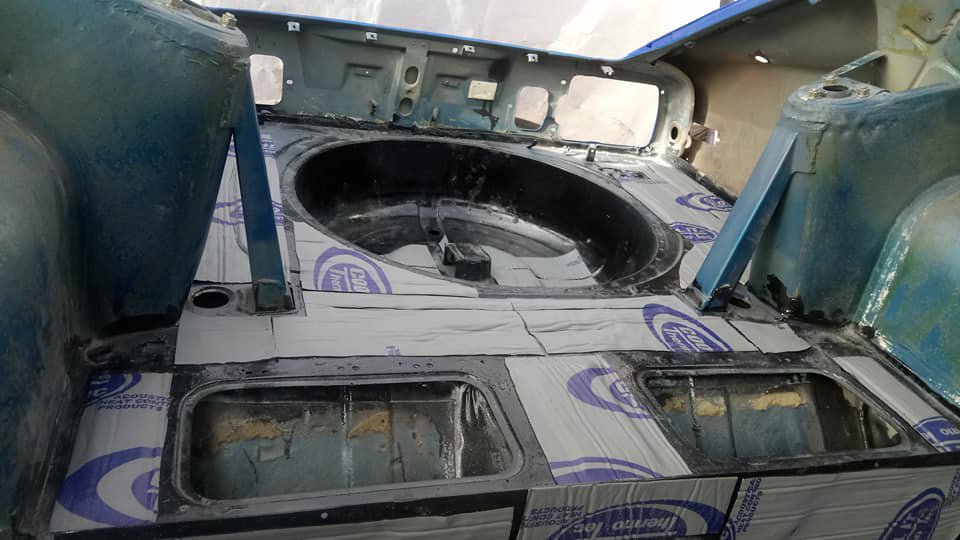
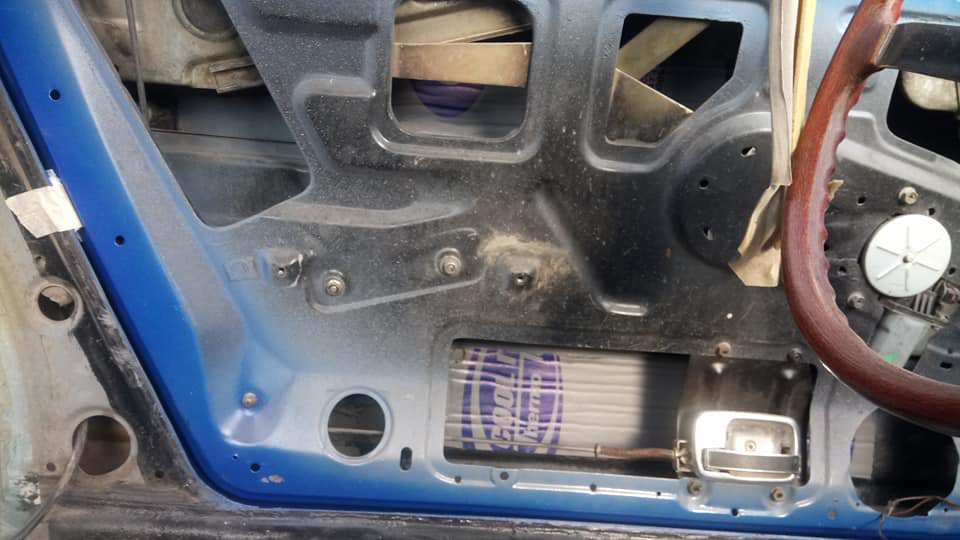
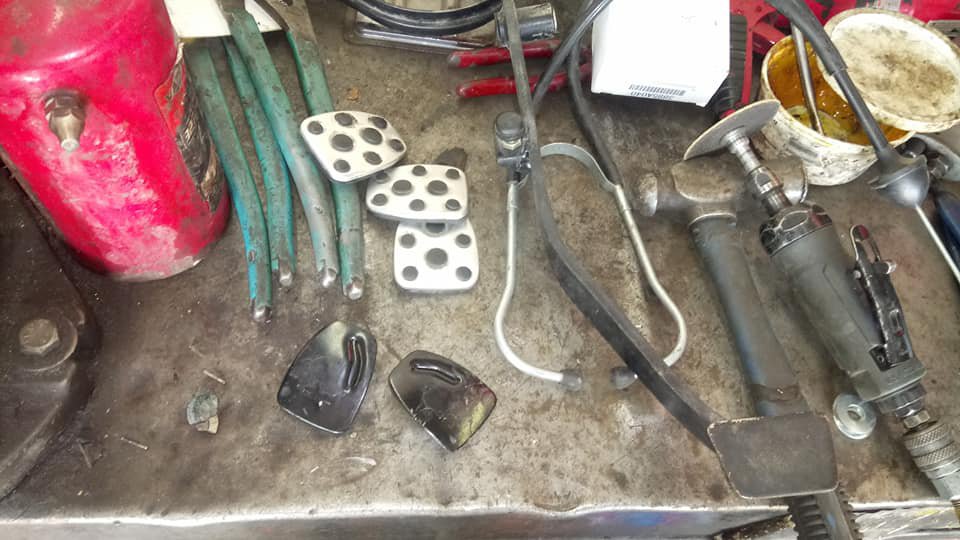
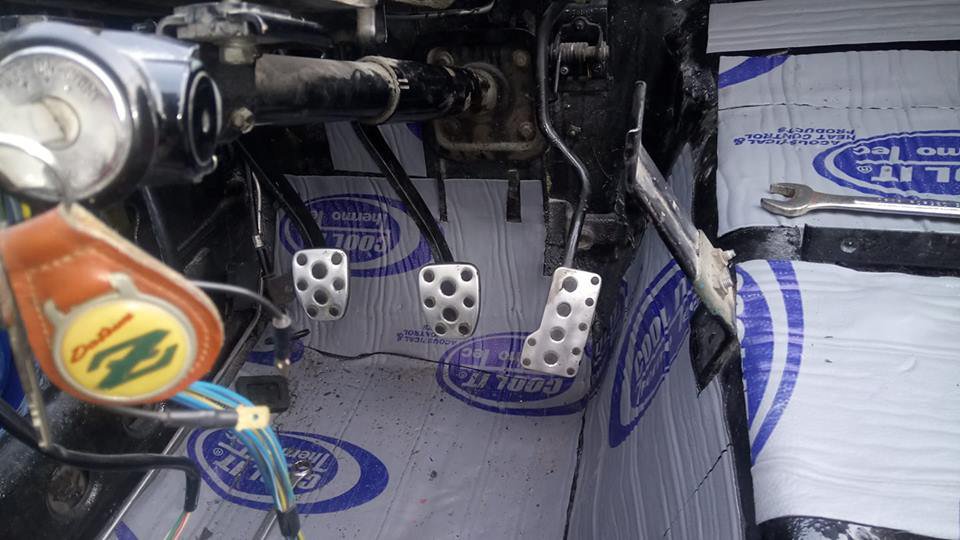
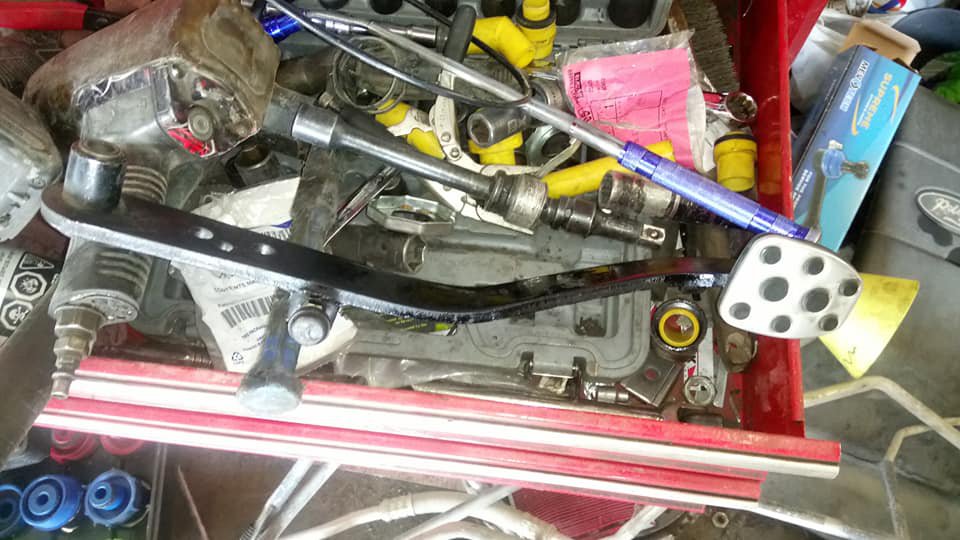
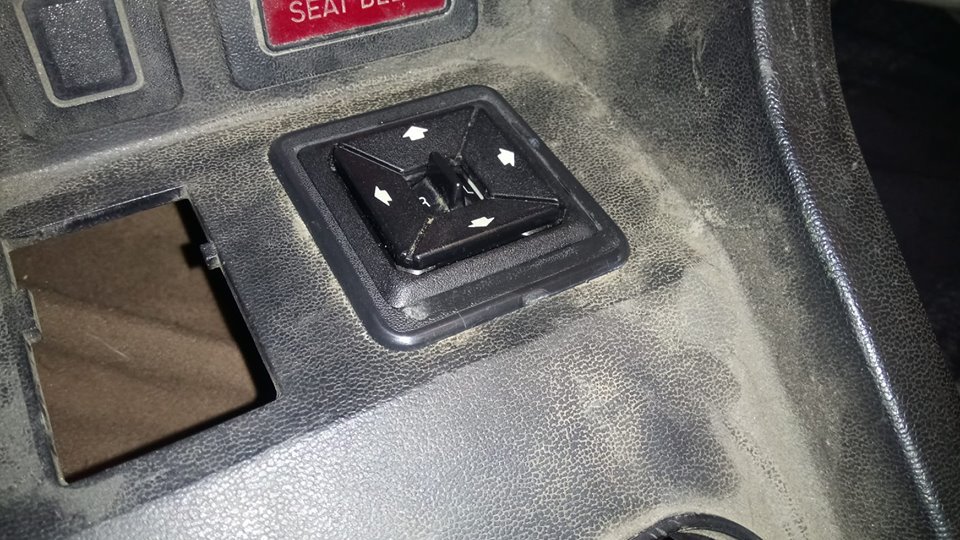
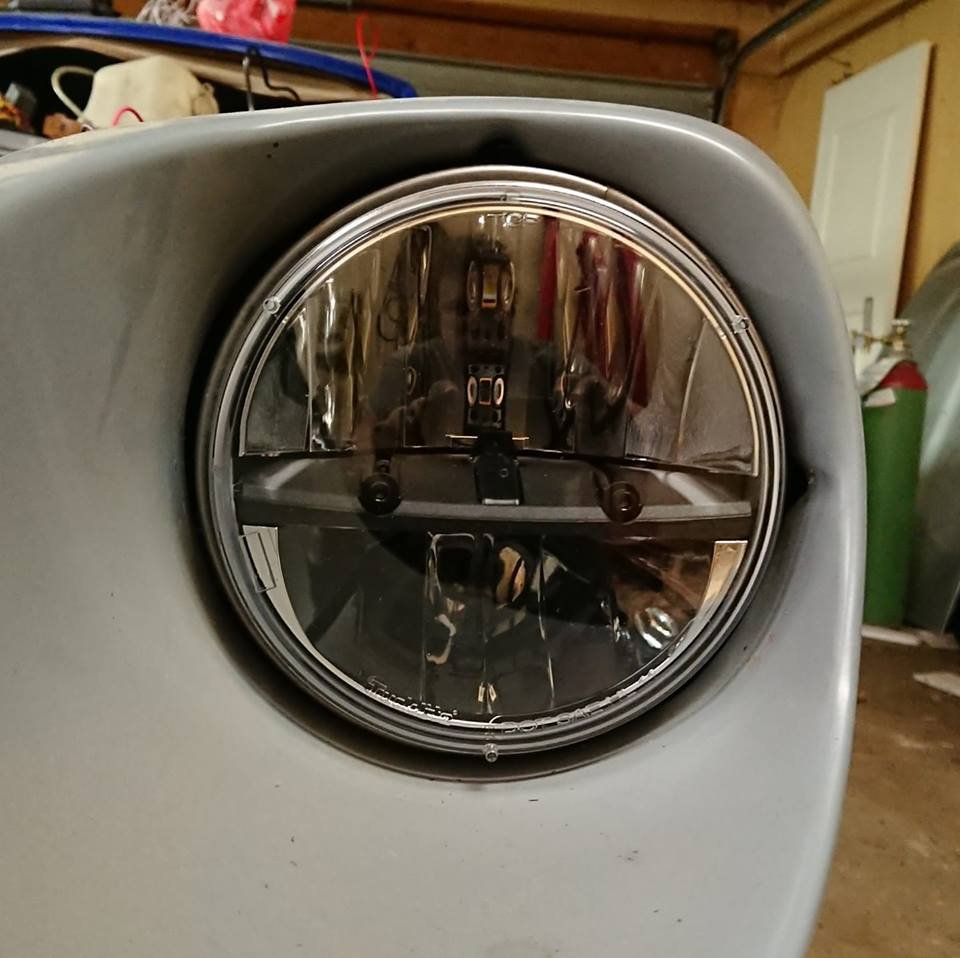
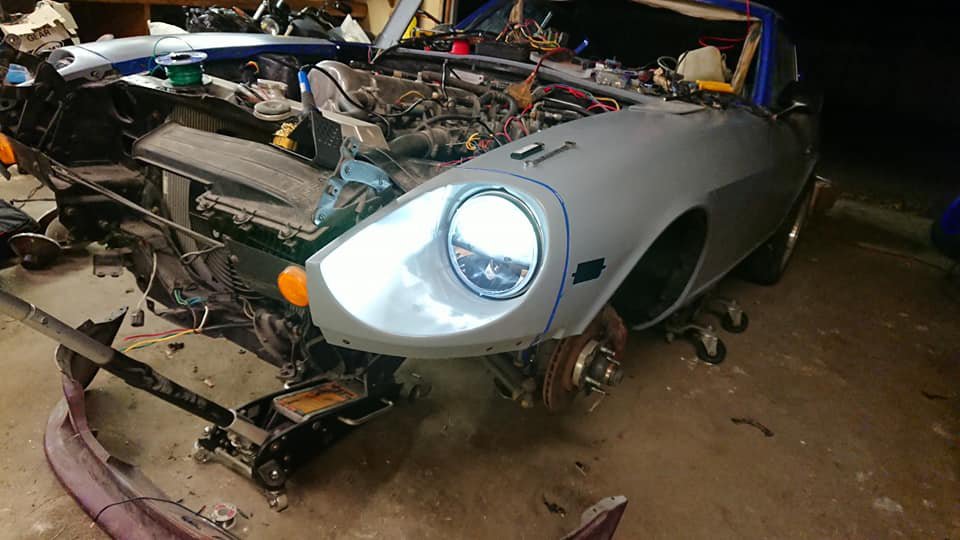
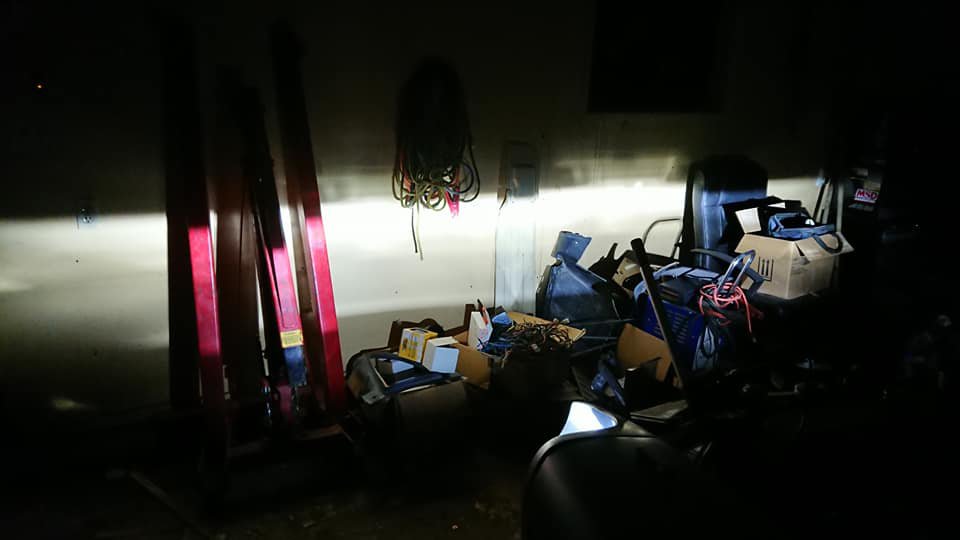
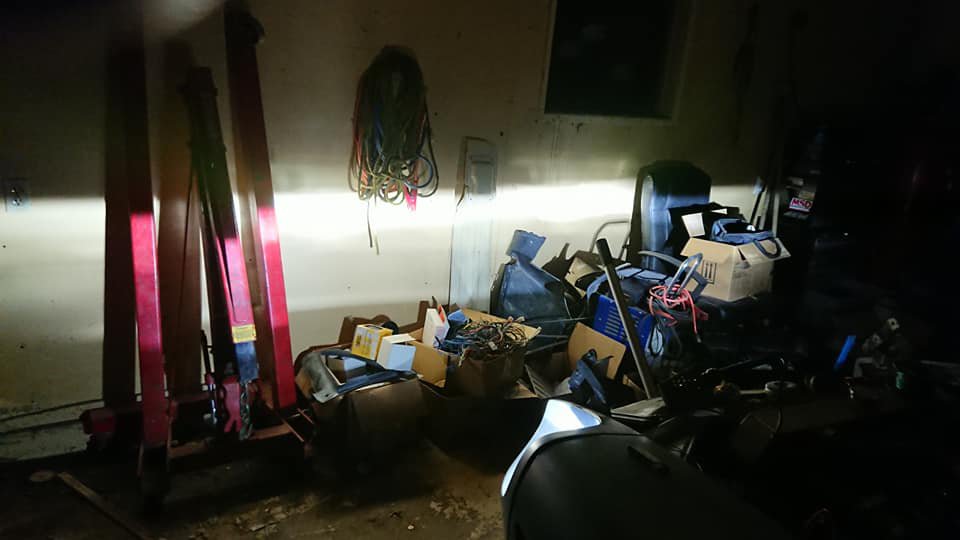
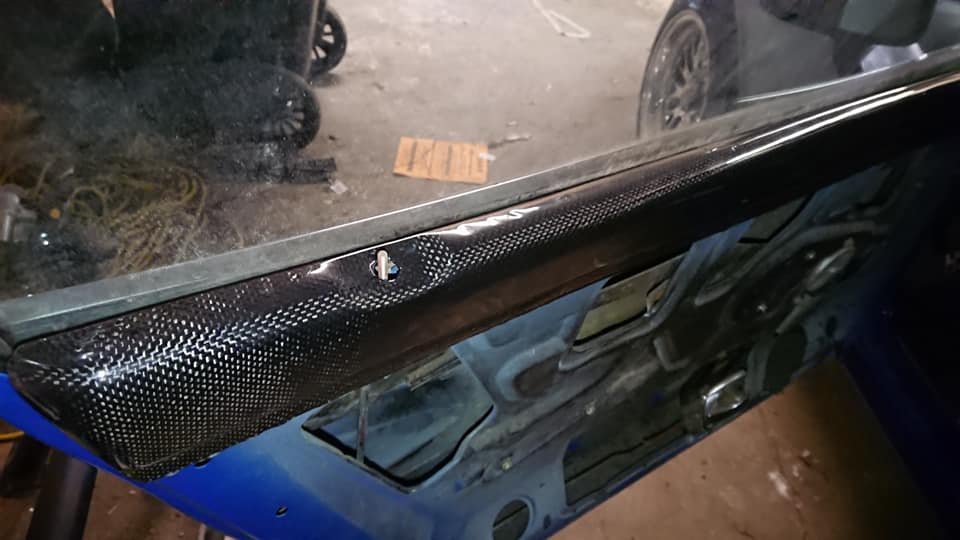
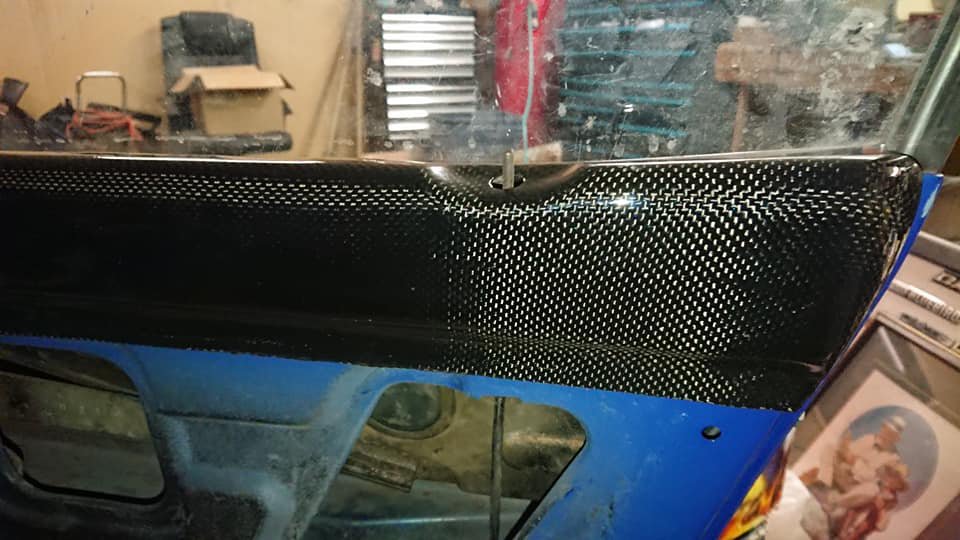
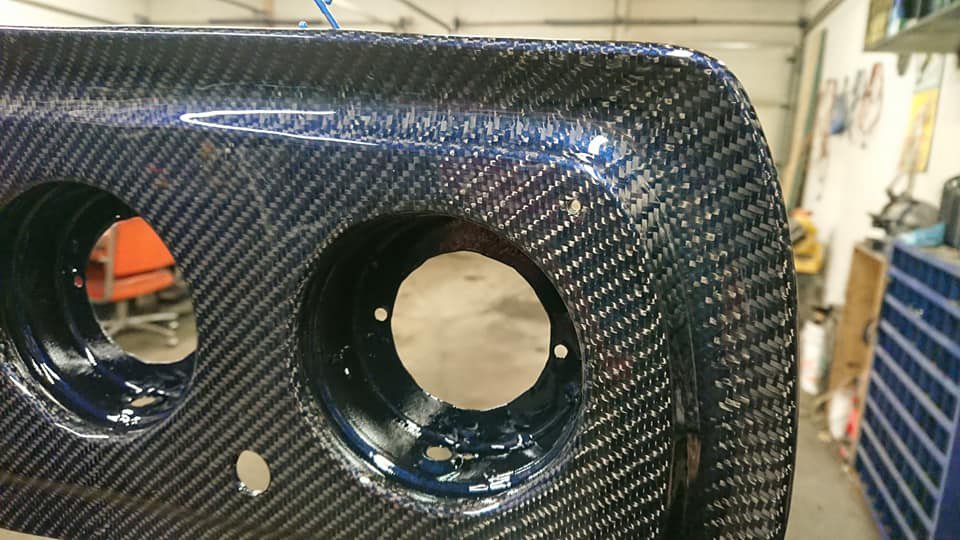
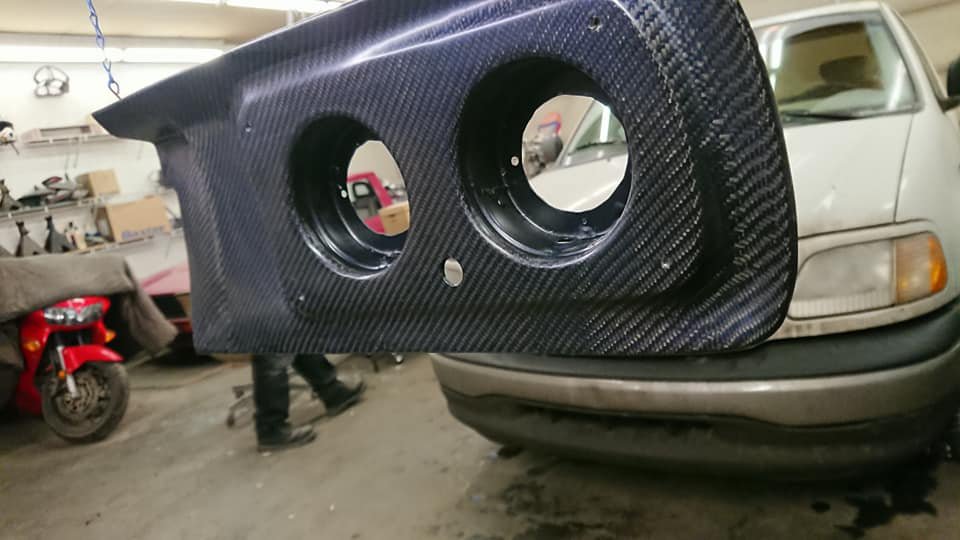
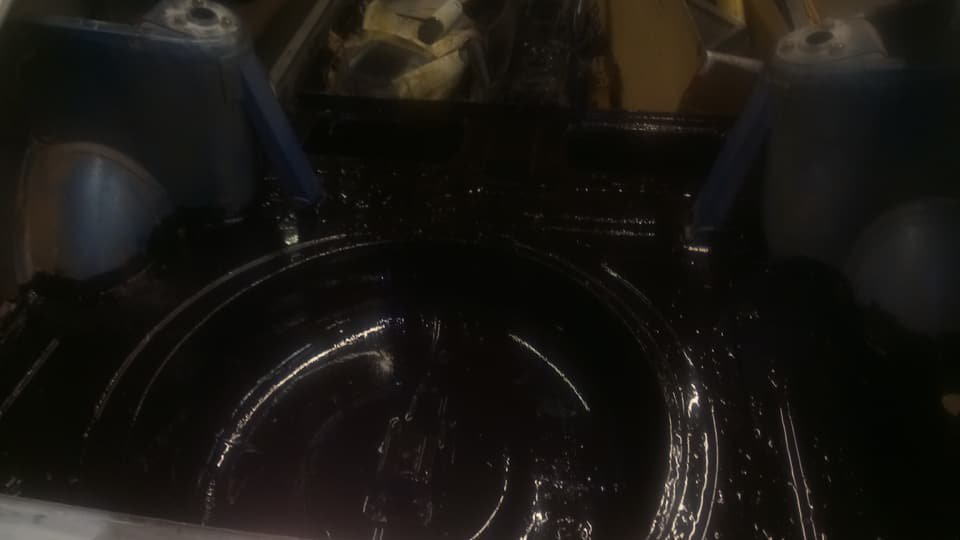
Now, onto the interior: First off, sound deadening has been replaced with a better, more modern substitute. Maybe this car's interior will be quieter than the last... Next, odds and ends: Throttle pedal from a Lexus IS300 with brake and clutch pedal pads from a Subaru WRX ('08-'14). Door switches from the back of an X-Trail (back doors) modified with a screw in the end to bring them out far enough for the door to meet. Also, Mustang mirror switch where the dual switch blank was (yes, power mirrors!) Also, those carbon wrapped upper door panel shells are done, too. Can't wait to get the rest of the panels done! And now, lighting! Starting off with the headlights, I finally have the Trucklite LED housings installed on the car and wired for testing purposes (not wired to any relays or switches yet). Looking pretty darn good, if you ask me. Bare in mind that the car was on jack stands and thus, does not represent proper headlight aiming. Finally, Tail lights: These bad boys were a doozy, since somebody (me) had the wise idea to carbon-wrap the tail light panels after everything got laid out and put together... Why do I do this to myself? Whatever, it was ultra-tedious, but worth it... There's blue pearls in the first three coats of clear much like the door panel tops, but we decided to finish these in a satin clear, since the gloss might poke out too much. We also tried the lightly smoked covers, and the overall combination looks stunning. So here's to another year of the build! Wish me luck!
-
1978 280Z (project name: Mothra)
Barrel_Ball replied to Barrel_Ball's topic in S30 Series - 240z, 260z, 280z
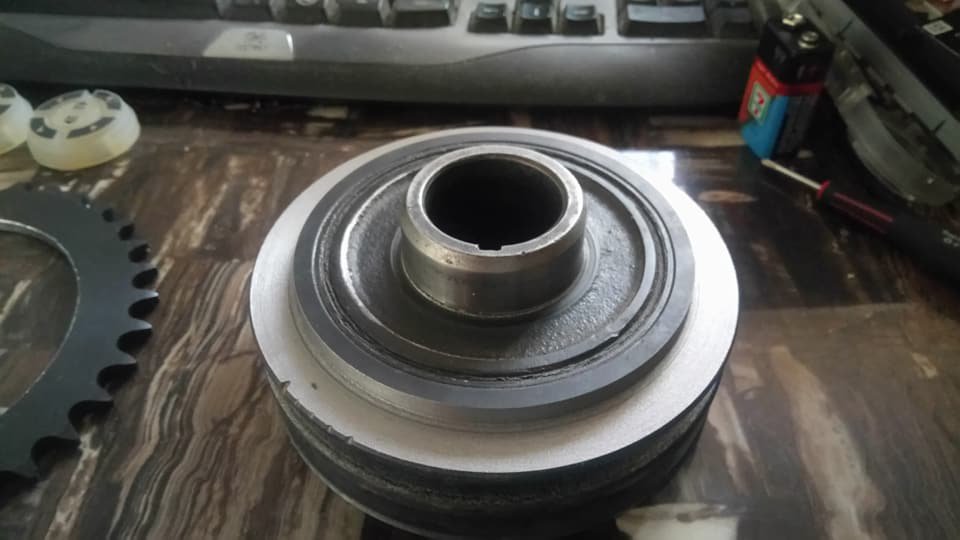
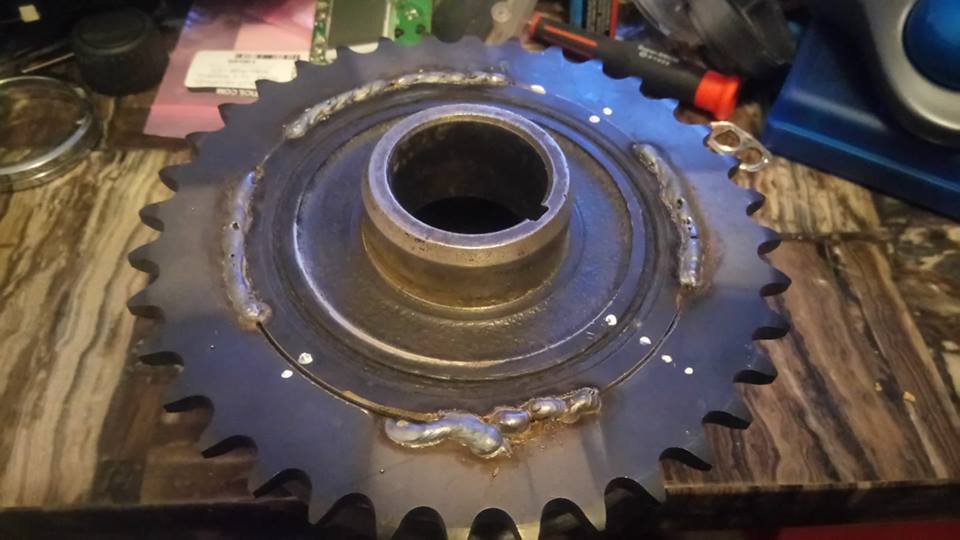
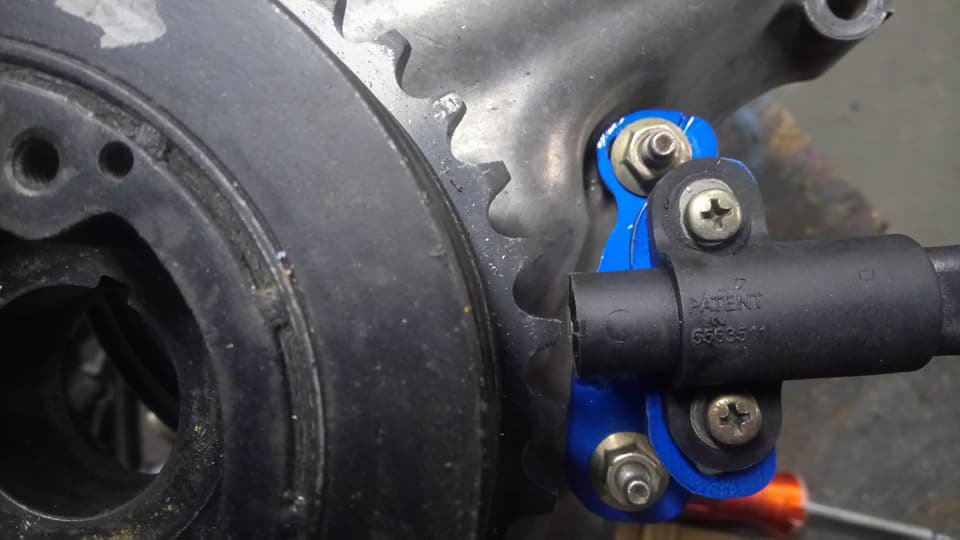
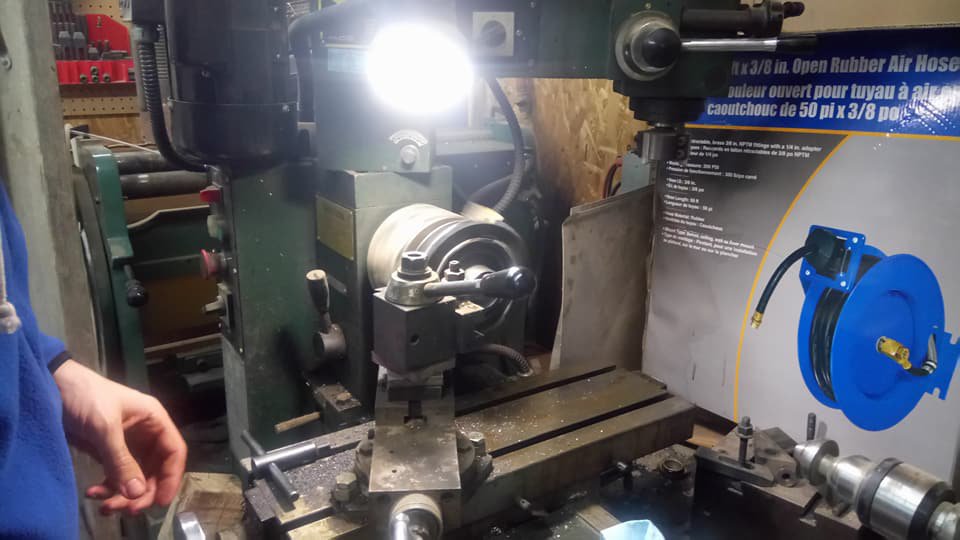
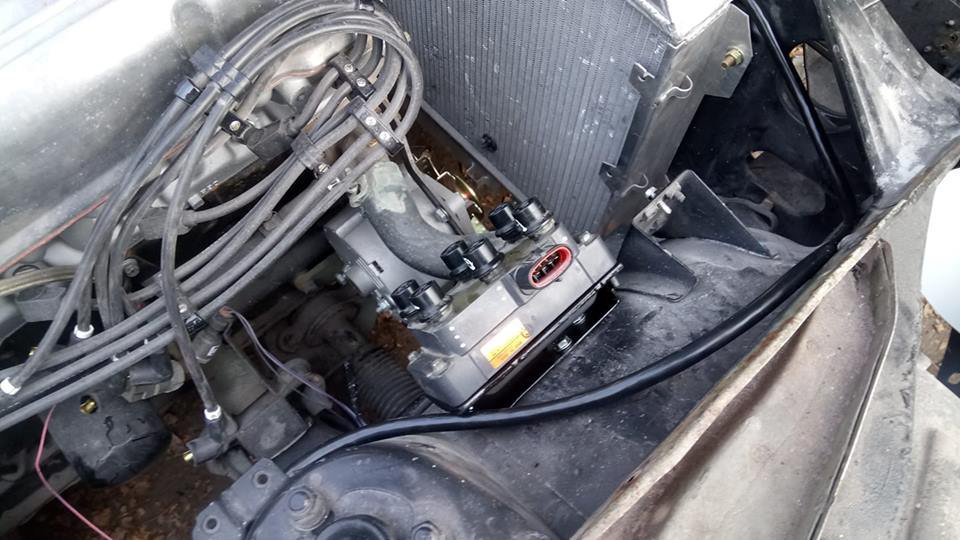
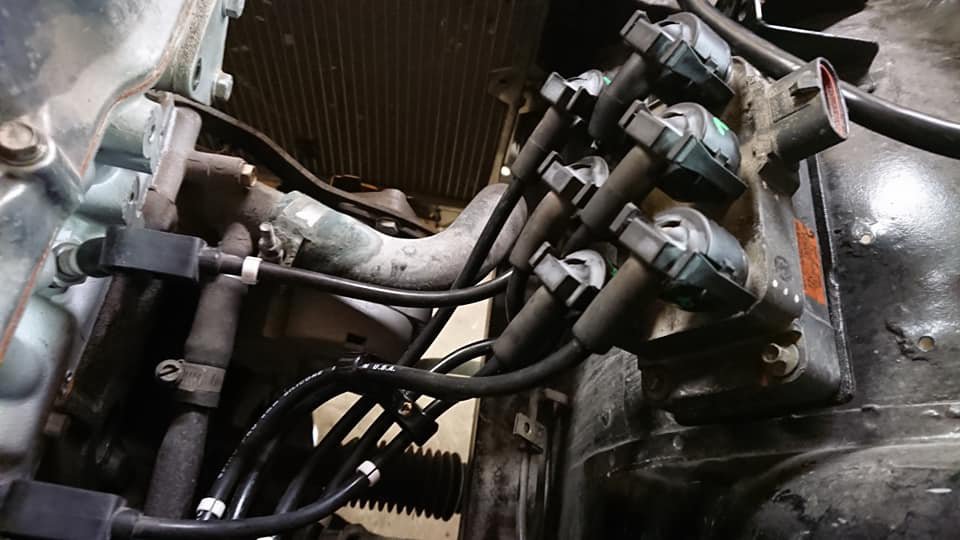
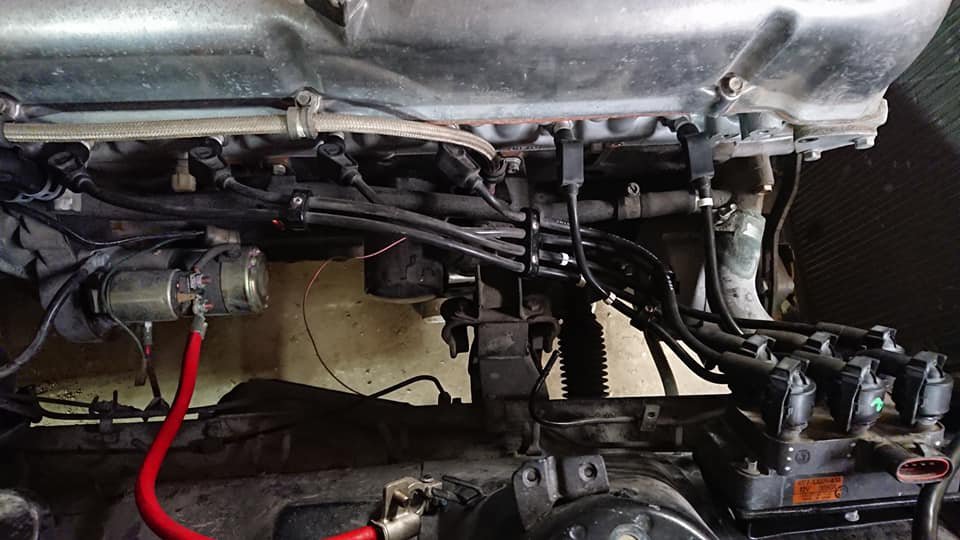
I'm putting this next part of the update in a separate post to avoid cluttered posts, so let's continue! First on this post: Ignition system! After having bad experiences in the past with failed 280ZX turbo optical distributors (and how hard they are to come by), I decided to upgrade away from a dizzy system altogether, and am going to an EDIS install. While there are trigger wheel kits out there, they're kind of a pain when you have to remove said trigger wheel or sensor just to change a belt, only to have to reset your timing and stuff afterwards, so I went a different direction: I went to Princess Auto (Canada's version of Harbor Freight, I hear) and picked up a 36 tooth #40 size (I think) sprocket (grabbed a second one in case I messed up the first attempt), cut the hole up to the correct size on my work's brake lathe, welded it to the back of my crank pulley (after turning it's back step a smidge to make sure it was true), then put the whole works up onto my friend's lathe, and cut the teeth flat. After making a bracket for my CKP sensor (Ford escort 1.9L), I ground out my missing tooth for cylinder ID. Then, to avoid any walking of the oil pump gear, I chopped up an old dizzy, and made it into an idler bearing! The coil pack ('06 Mustang V6) and EDIS controller (Mazda B4000) are mounted on opposite sides of the engine bay, connected by a section of 4-lead trailer cable, tucked in between the top rad tank and the upper rad support. Also, new plug wire layout!
-
1978 280Z (project name: Mothra)
Barrel_Ball replied to Barrel_Ball's topic in S30 Series - 240z, 260z, 280z
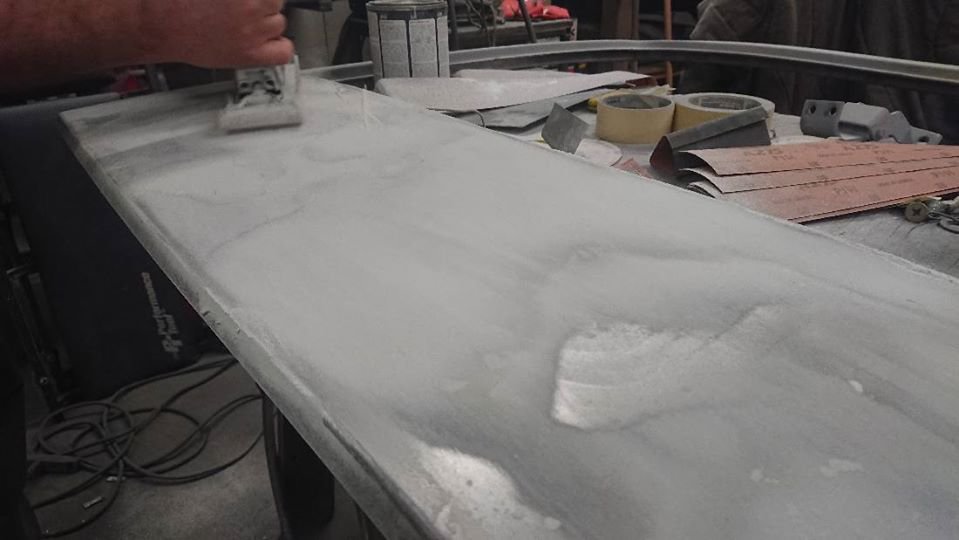
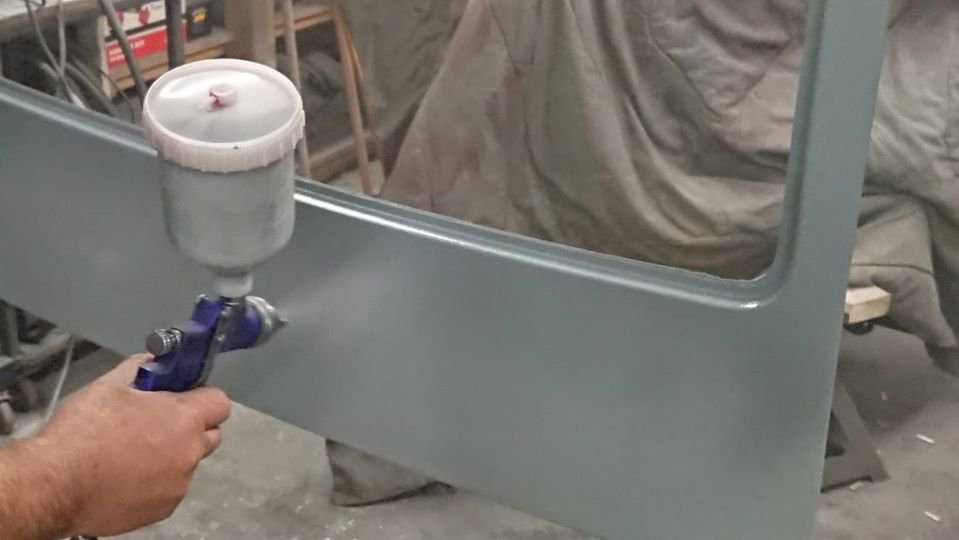
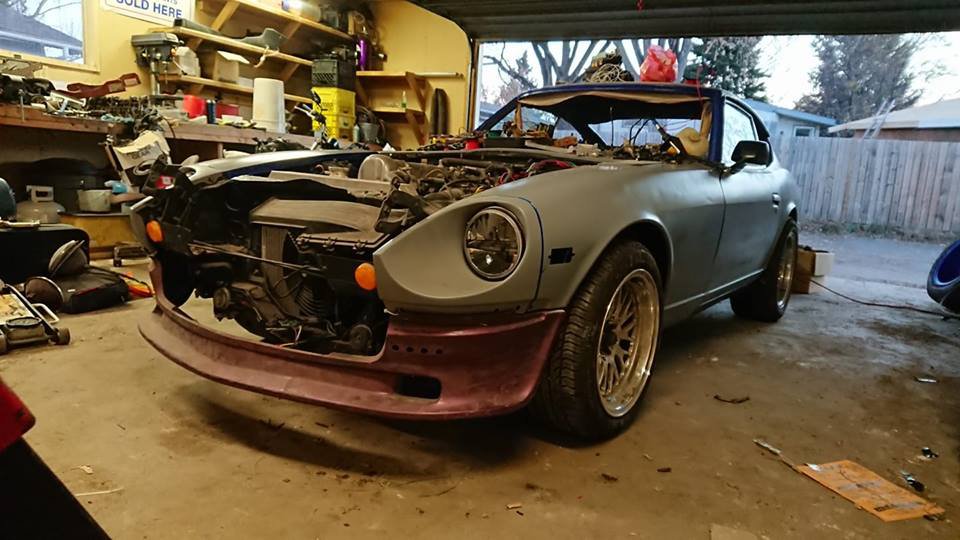
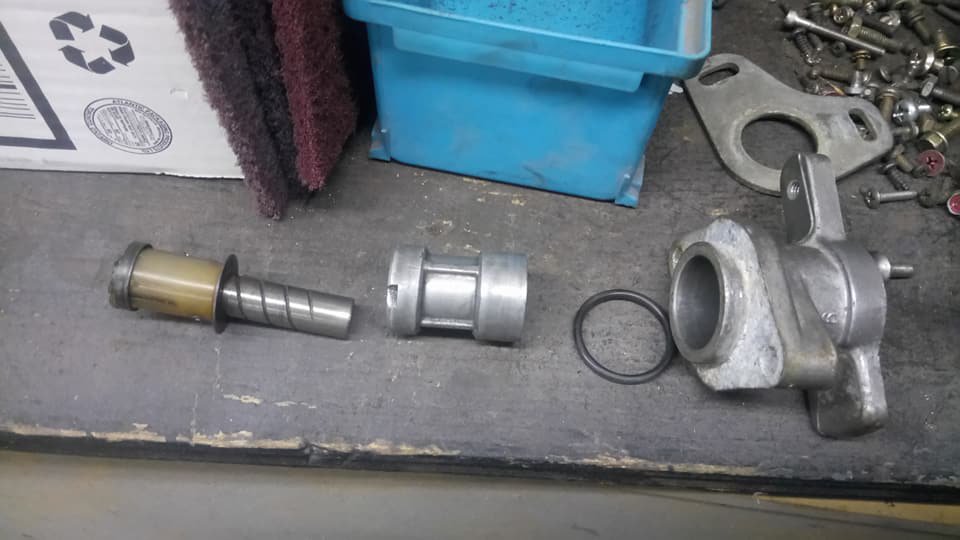
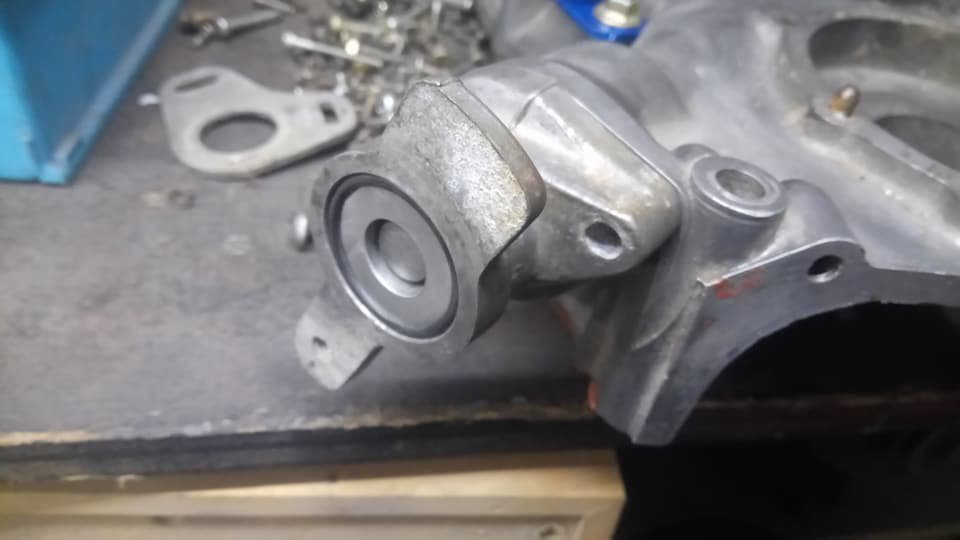
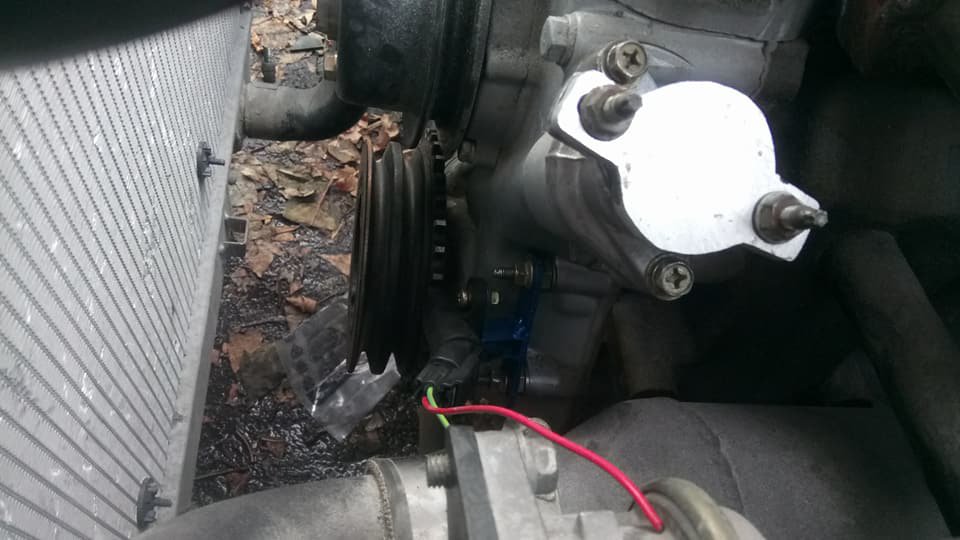
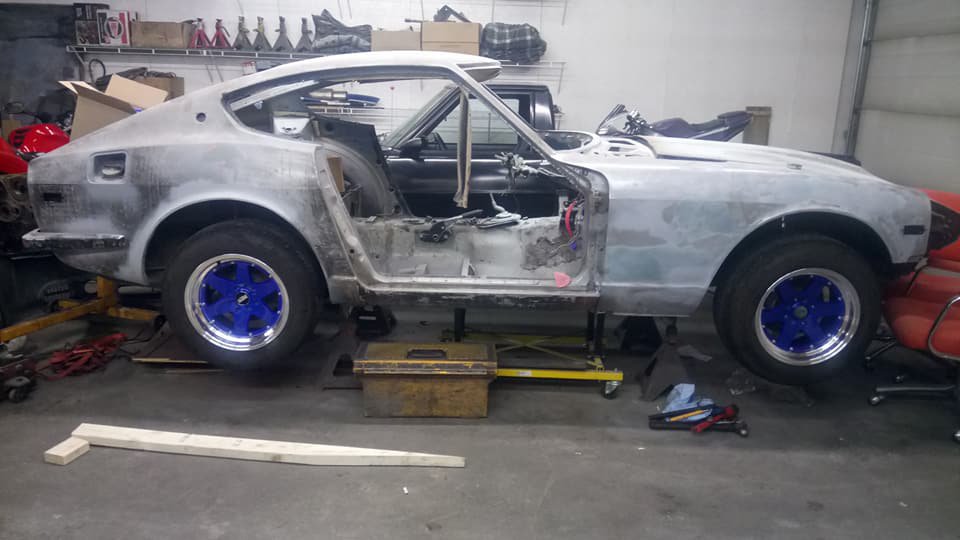
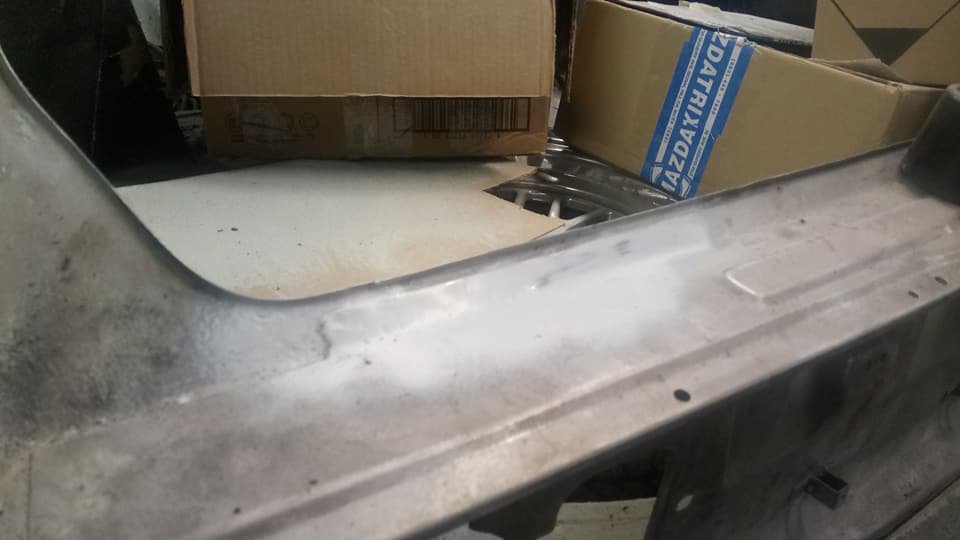
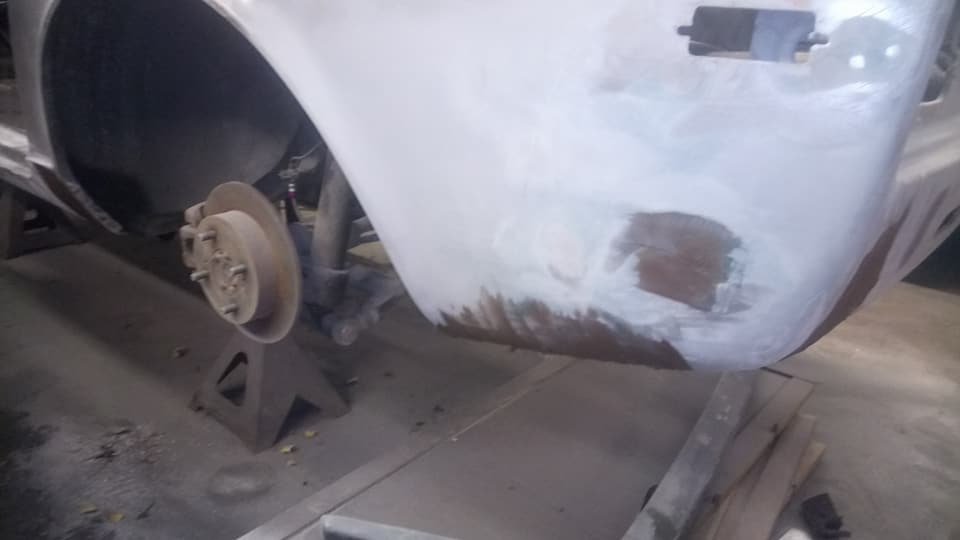
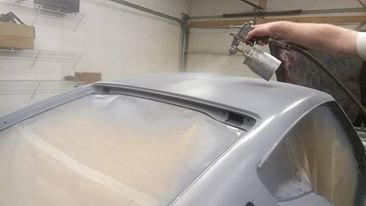
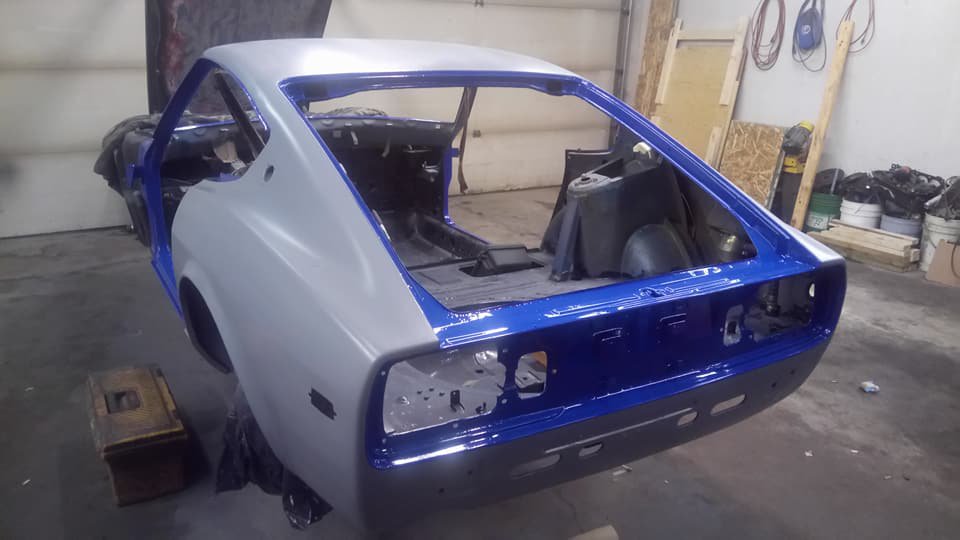
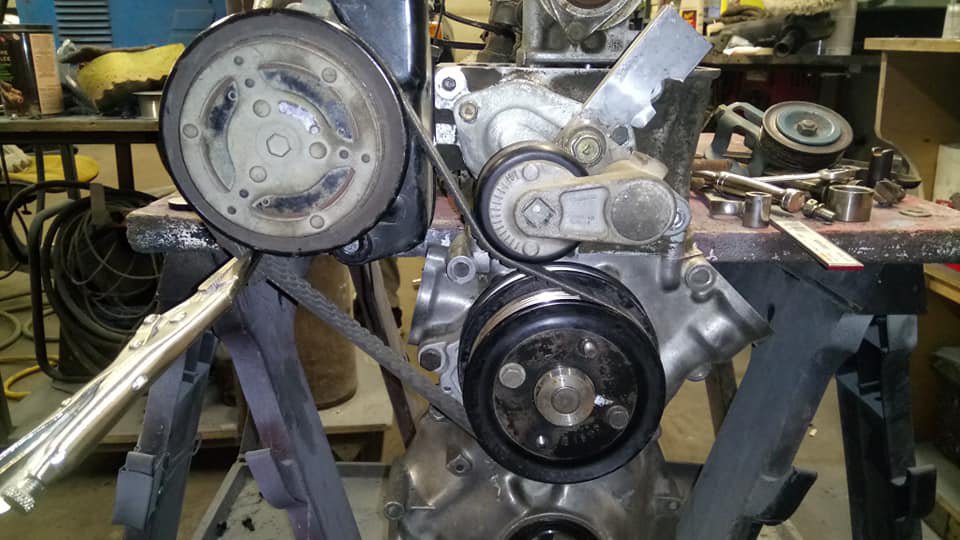
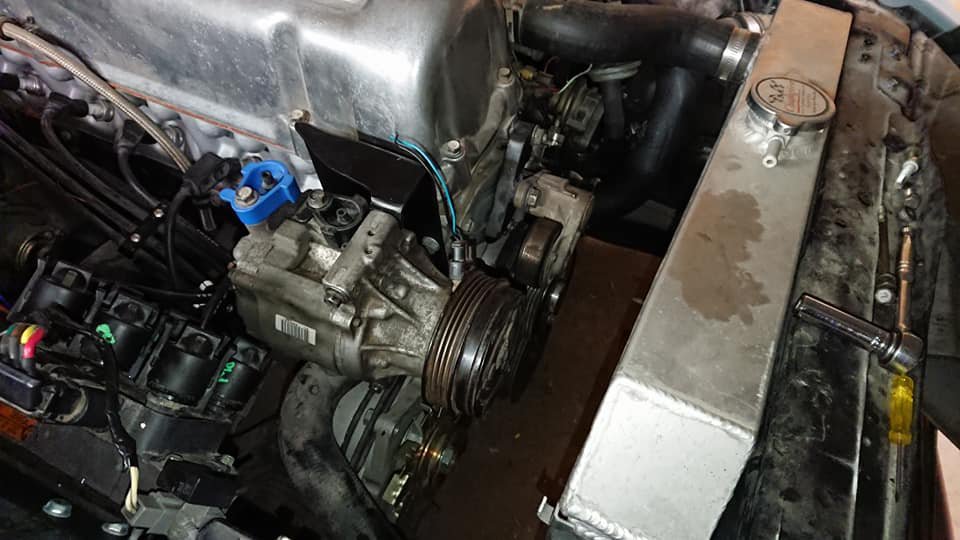
Hey folks! Having moved back to Calgary towards the end of 2017, I've gotten kinda busy with the car again. Here we go! First up: Bodywork: Around January, last year, we got to finishing the sheet metal repair, body filler and primer. The door jambs, hatch and windshield cavities have been painted body color to make it easier to blend later when the car finally gets painted. The fenders have also been done, but not pictured. Next up, HVAC: I decided to ditch the old heater box system, since I have zero confidence in the longevity of the original heater core, and went with a Vintage Air Gen II mini setup. Currently working on brackets and custom climate control panel involving a PWM variable speed motor controller for the blower. Also, yes, I'll be running A/C. Some people might wonder: "Where are you going to put the compressor if the factory location is being occupied by intercooler piping?" The answer: The opposite corner on the front of the engine: Where a power steering pump might have been on a ZX. Compressor's out of an '05 Subaru Legacy, and is a scroll-type compressor, making it extremely compact compared to a Sanden SD-5. Also adapted for use is an A/C belt tensioner from a Chevy Avalanche (any truck LS tensioner should be the same from the early-mid 2000's). How the system is supposed to work, is the Crank drives the alternator and water pump as per usual. Then, the water pump drives the A/C compressor, using a serpentine water pump pulley from a VG33E (2nd gen Pathfinder) stacked on the OE pulley. Like many things on this car, purely experimental at this point, but it looks like it will work swimmingly.
-
1978 280Z (project name: Mothra)
Barrel_Ball replied to Barrel_Ball's topic in S30 Series - 240z, 260z, 280z
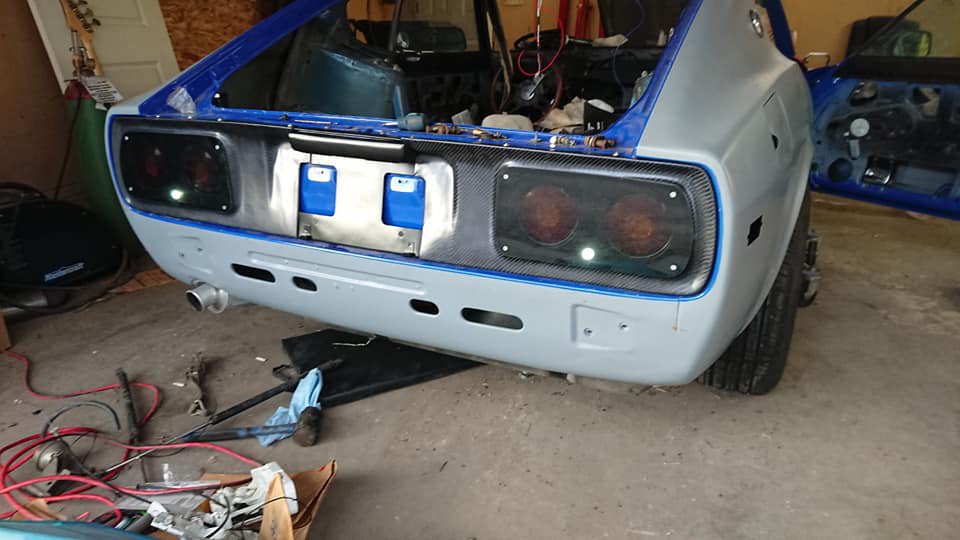
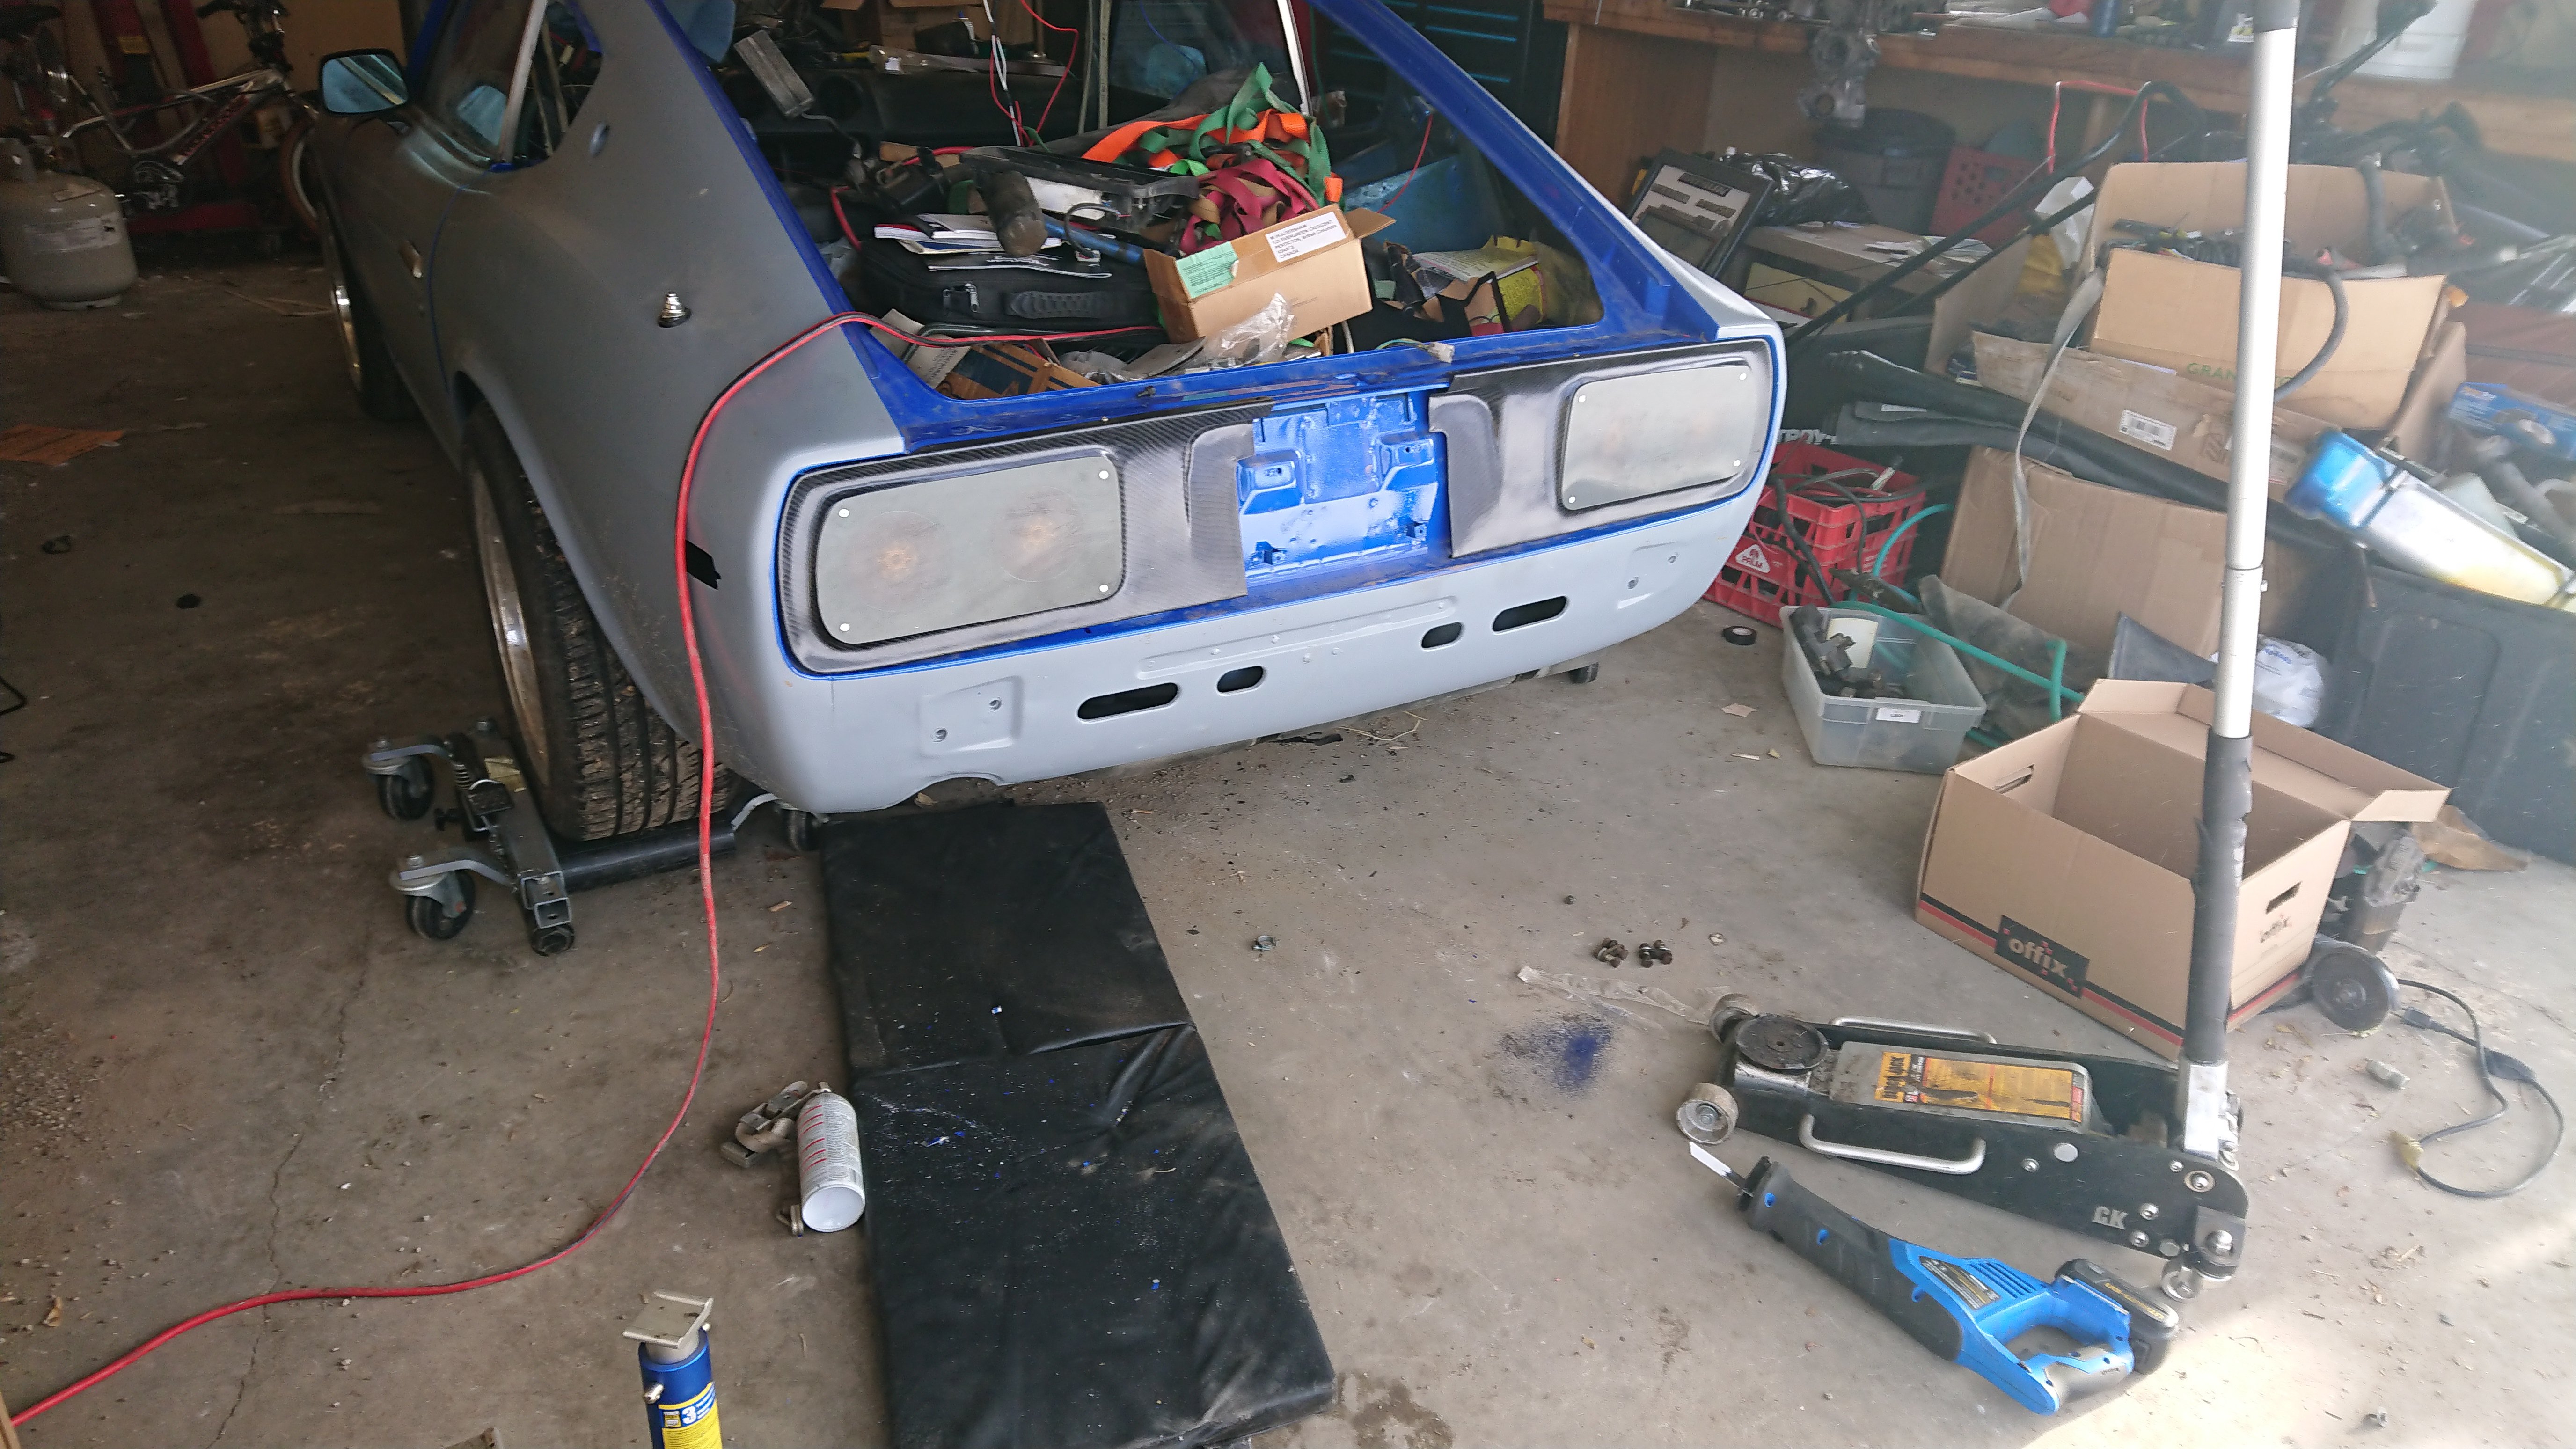
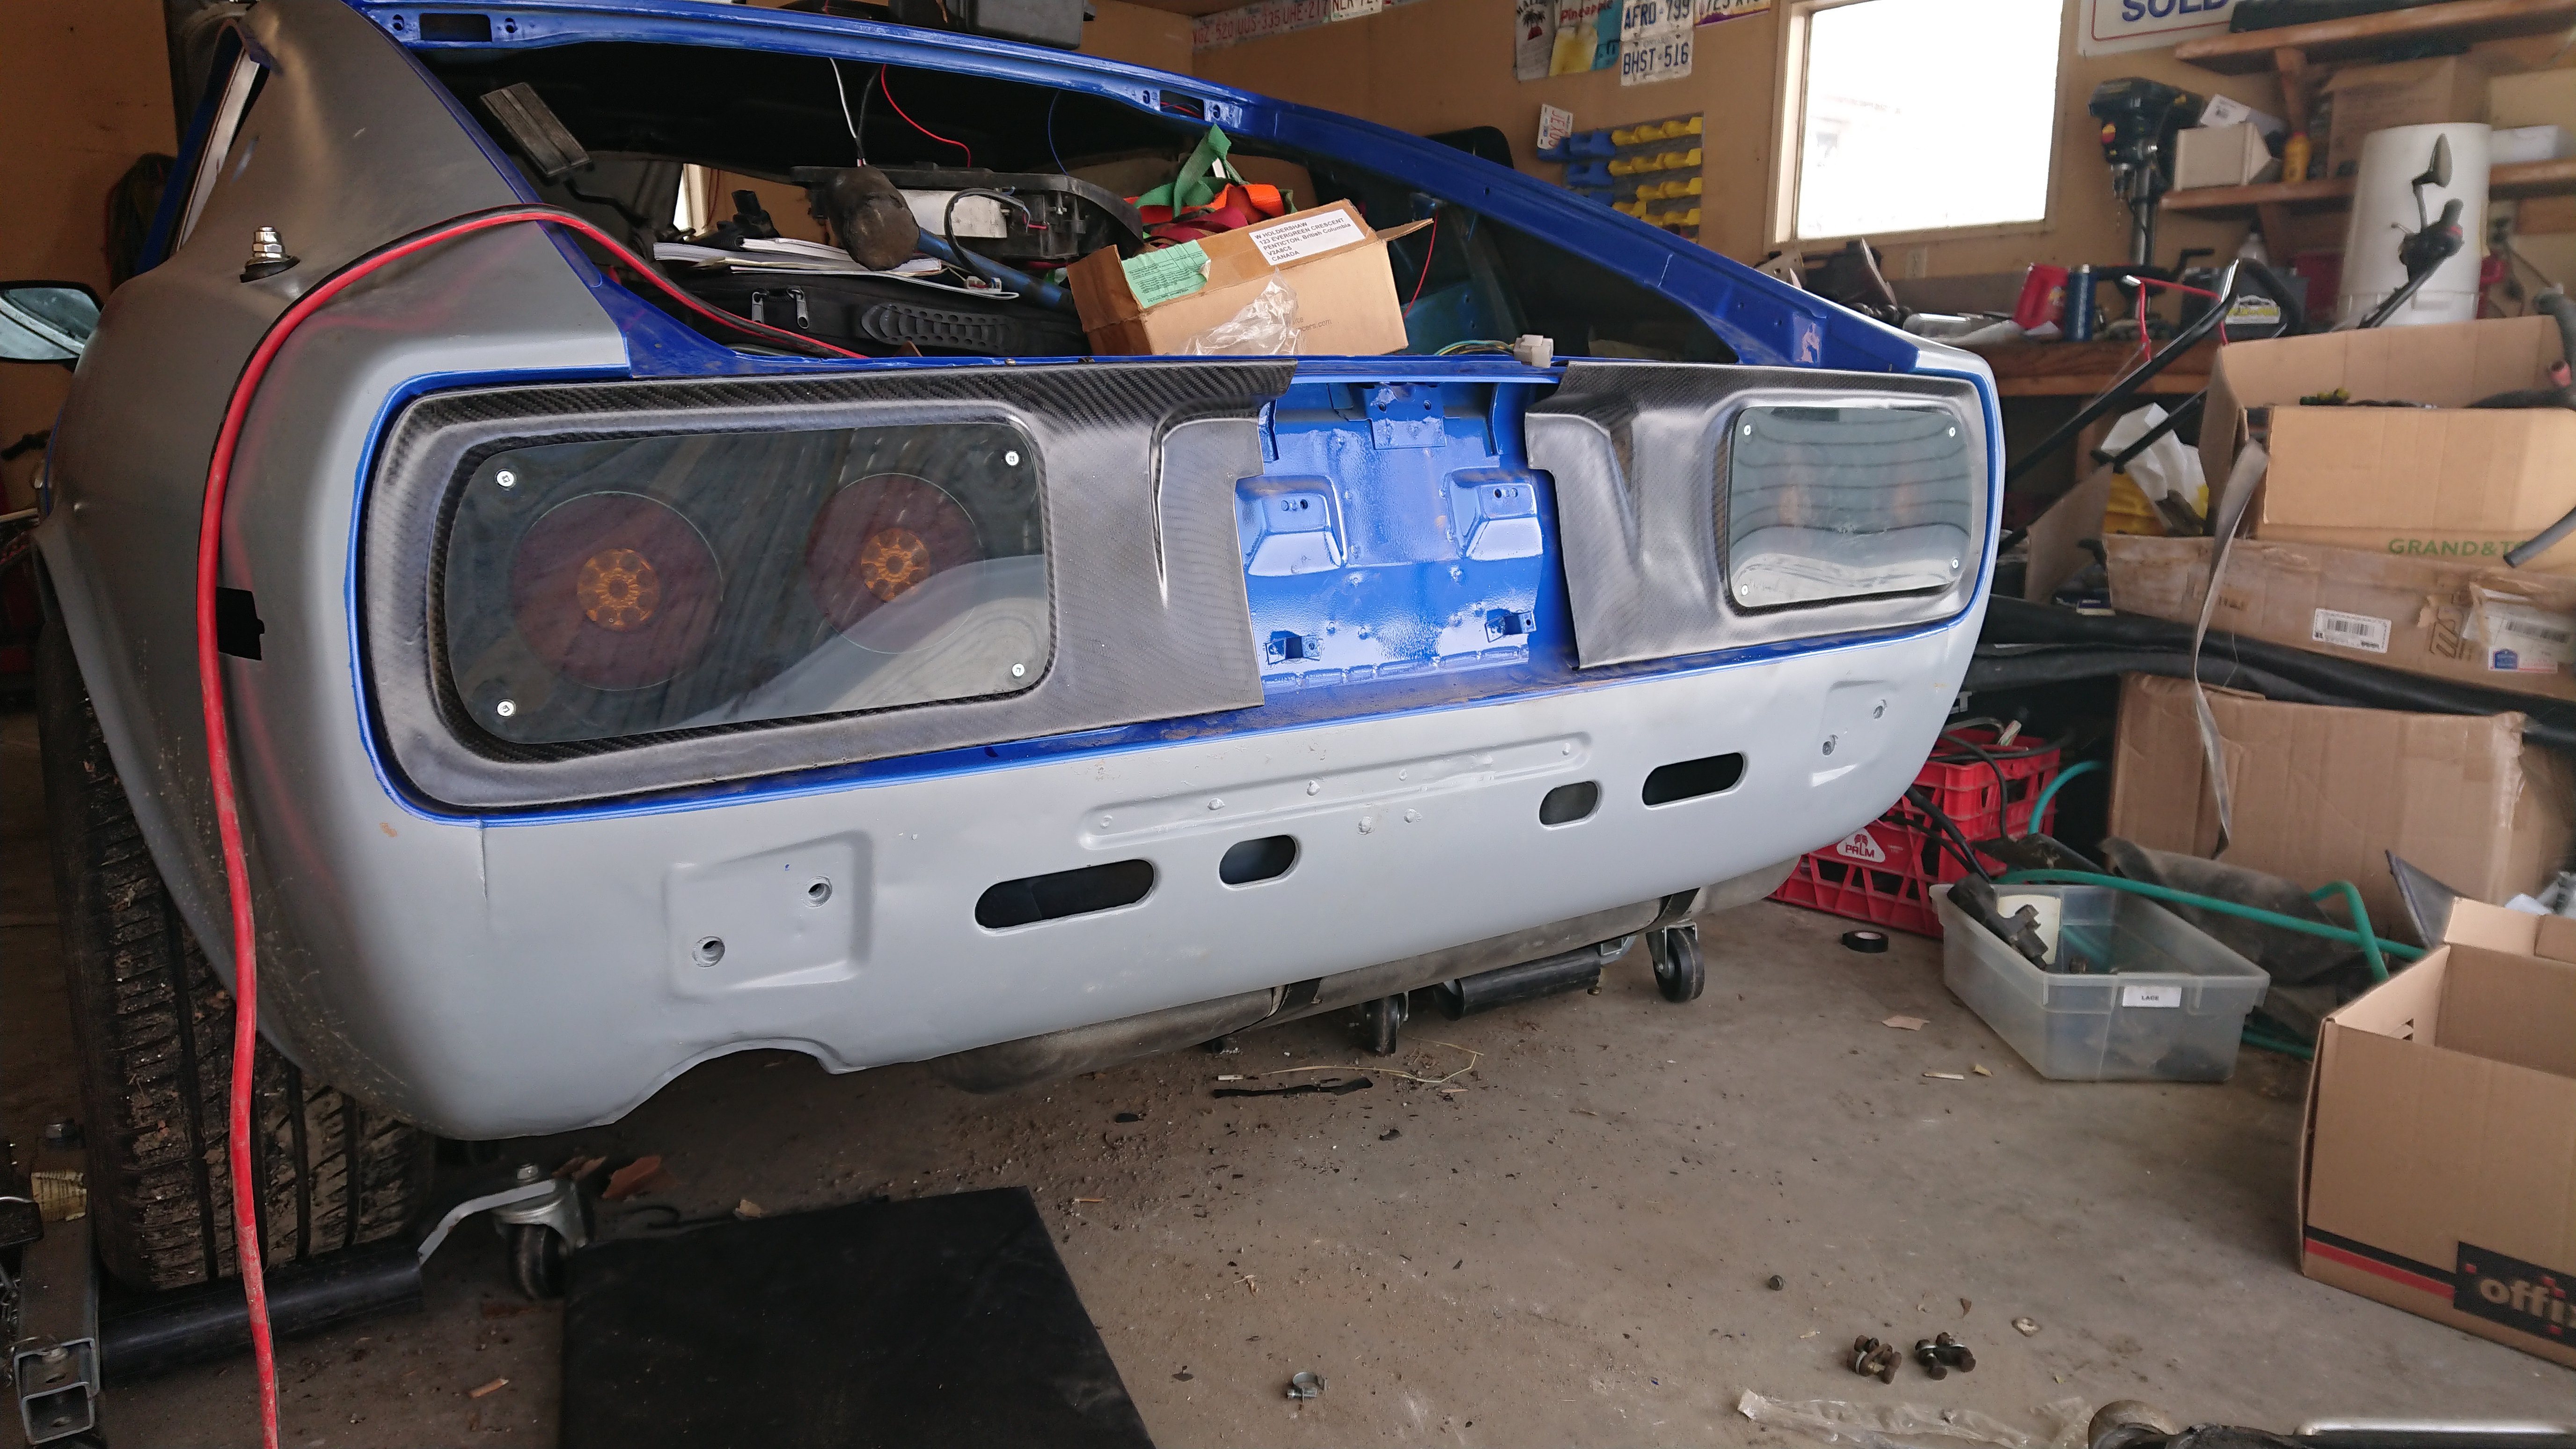
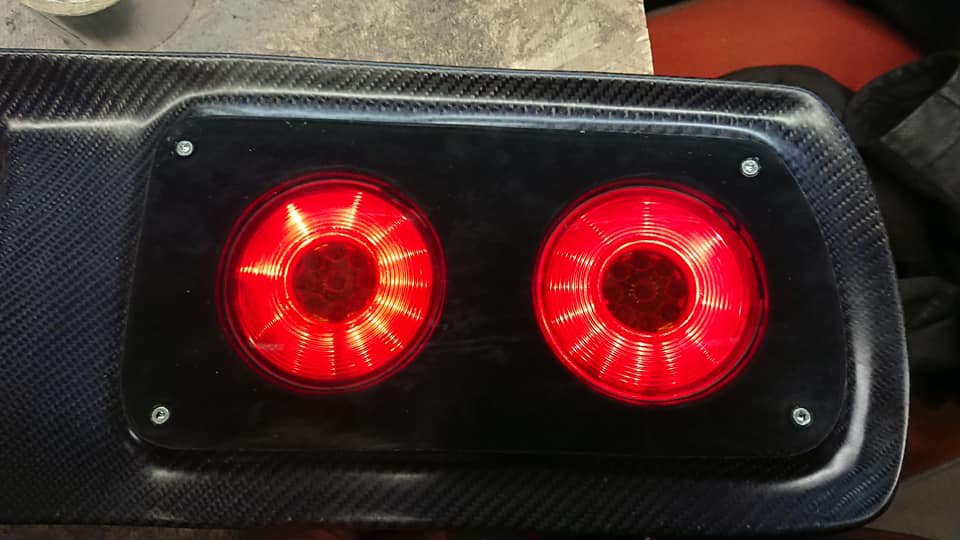
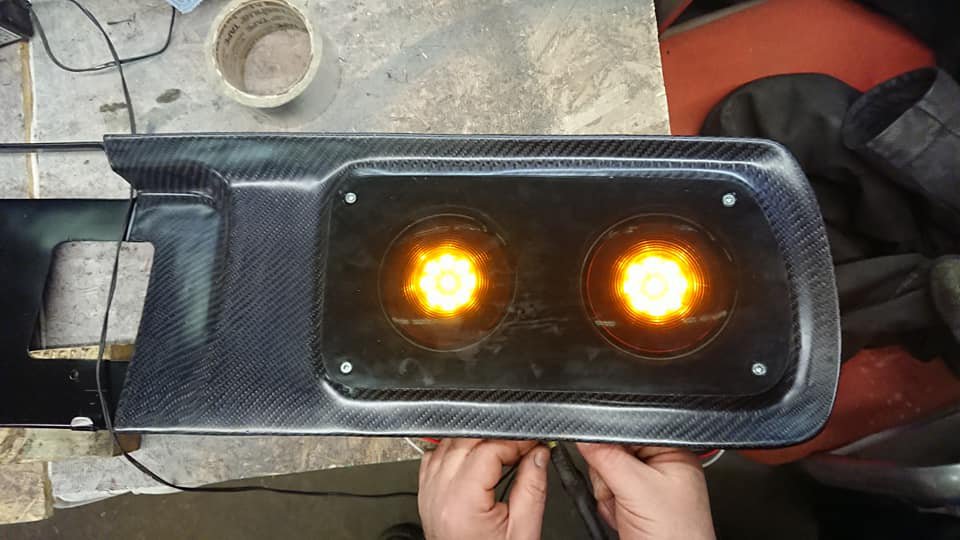
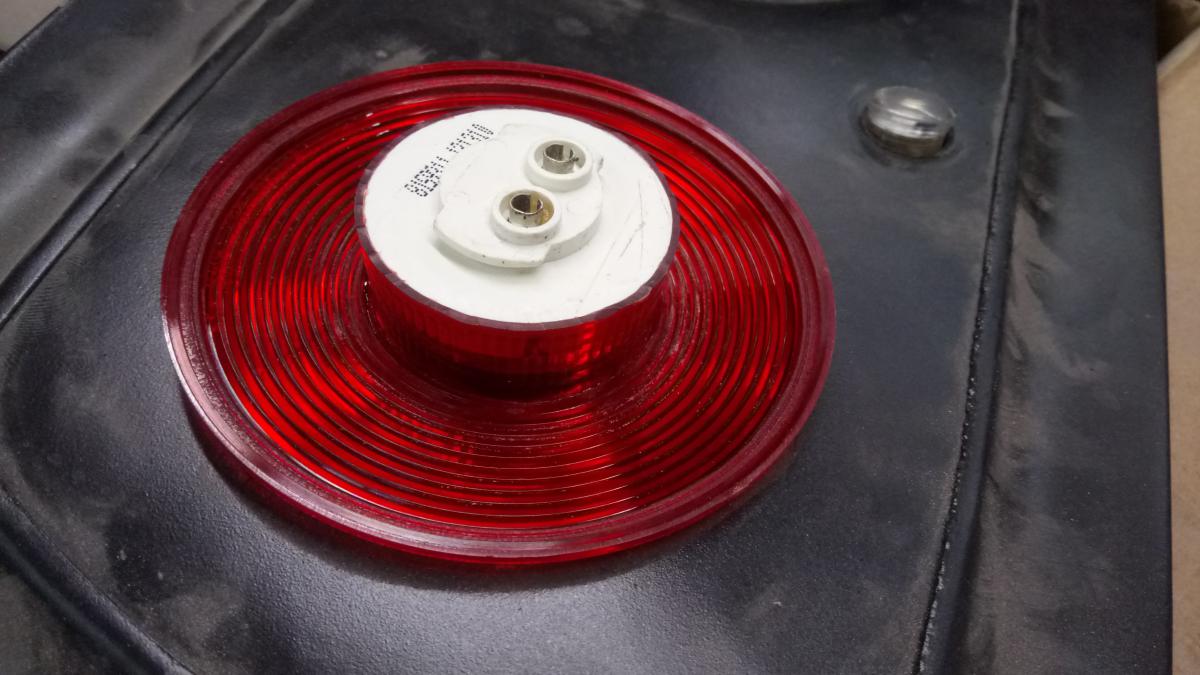
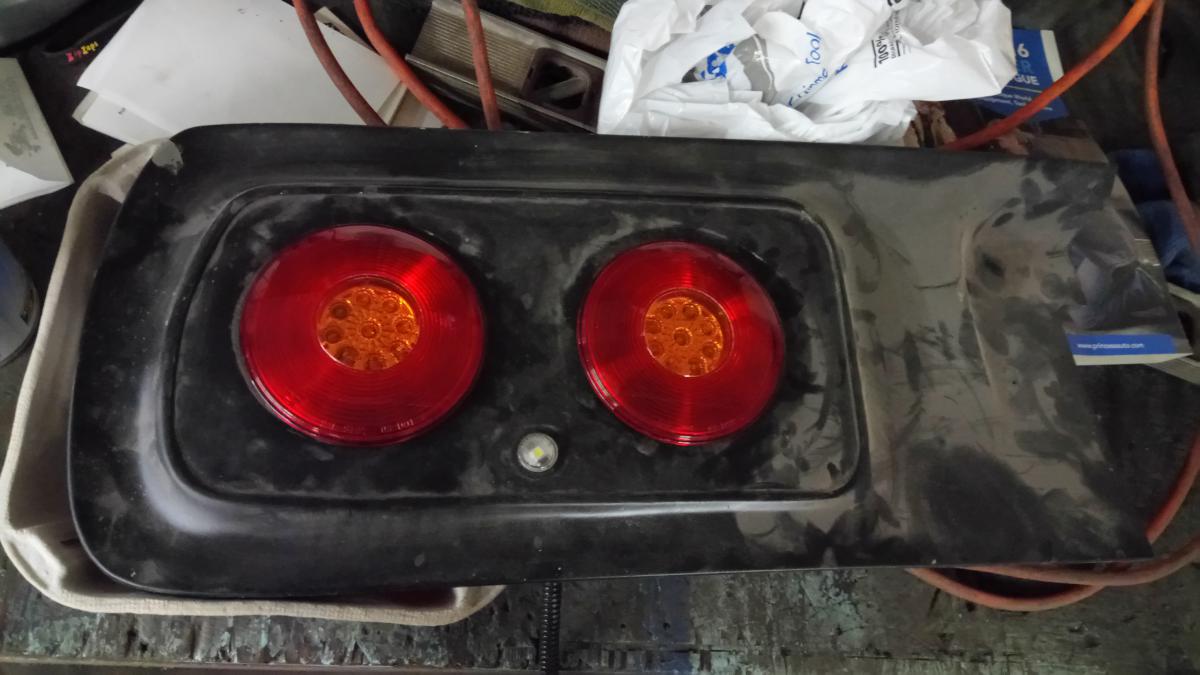
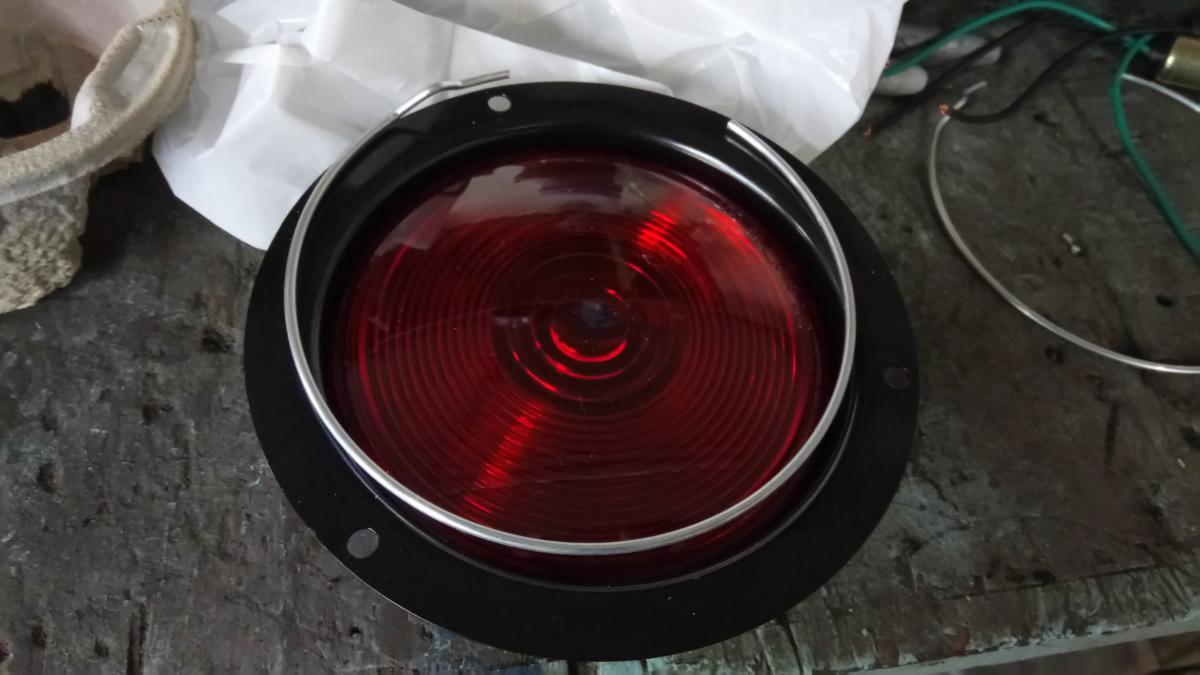
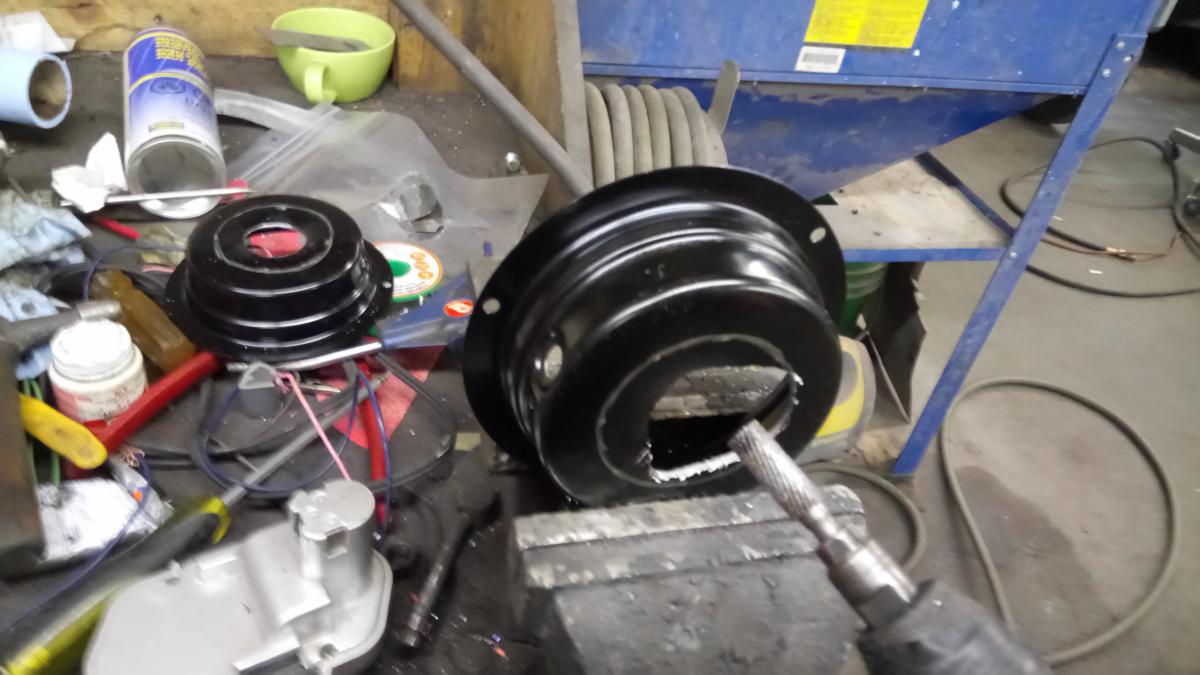
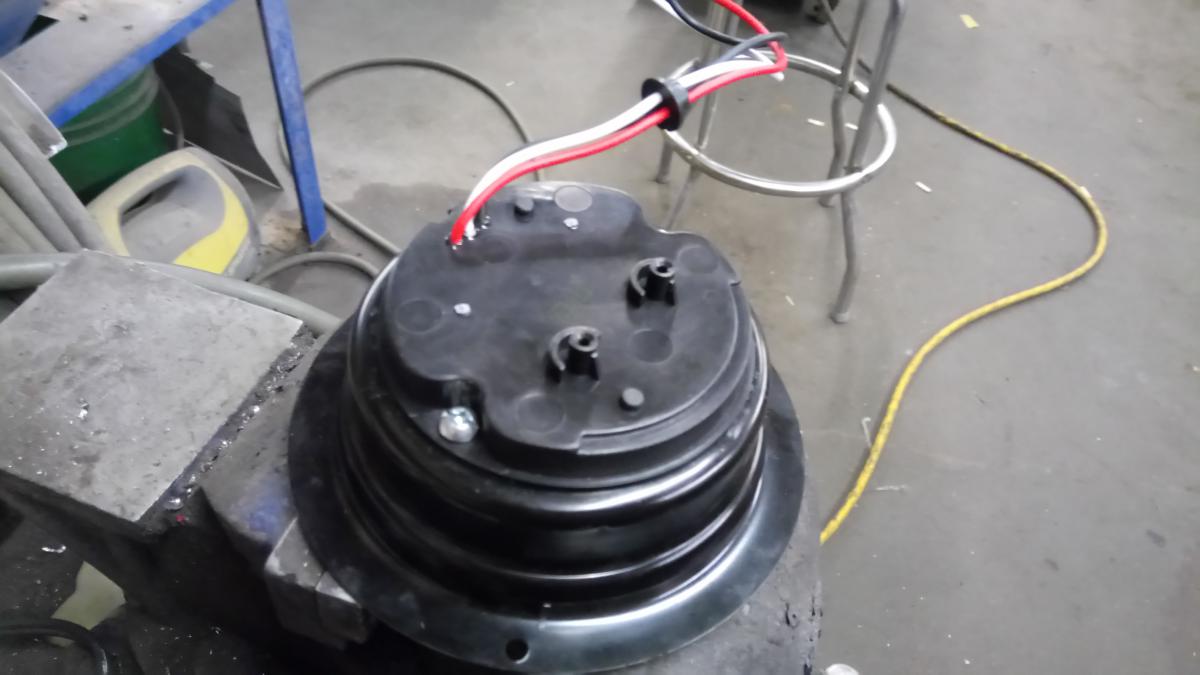
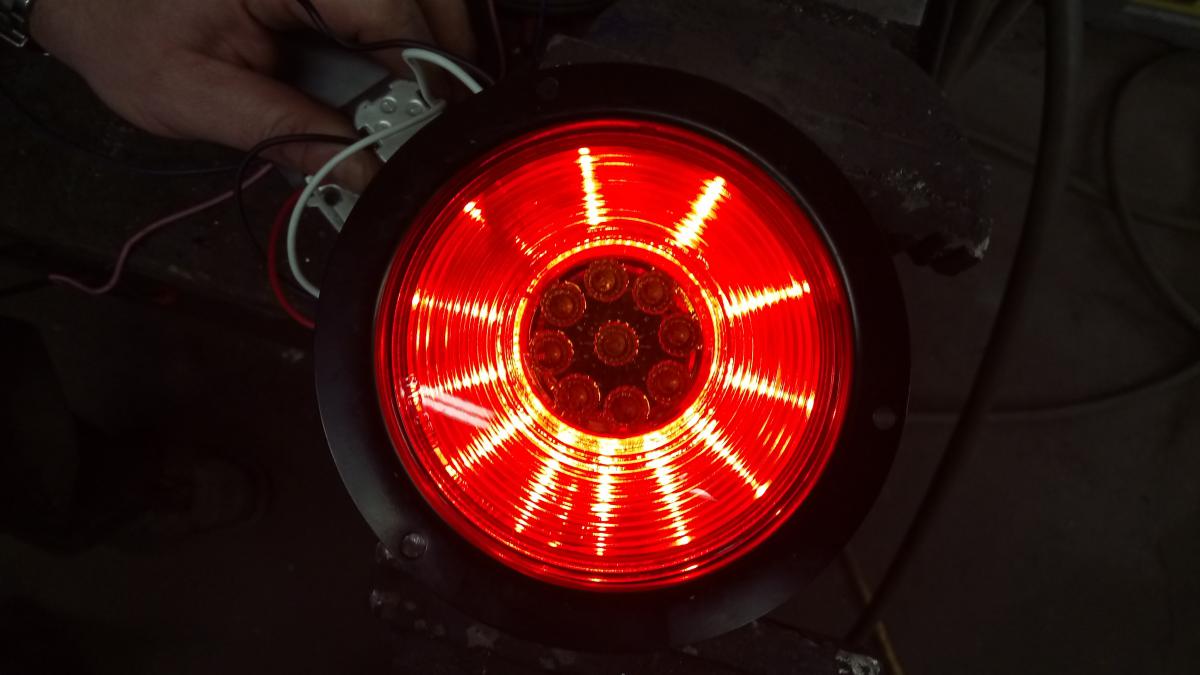
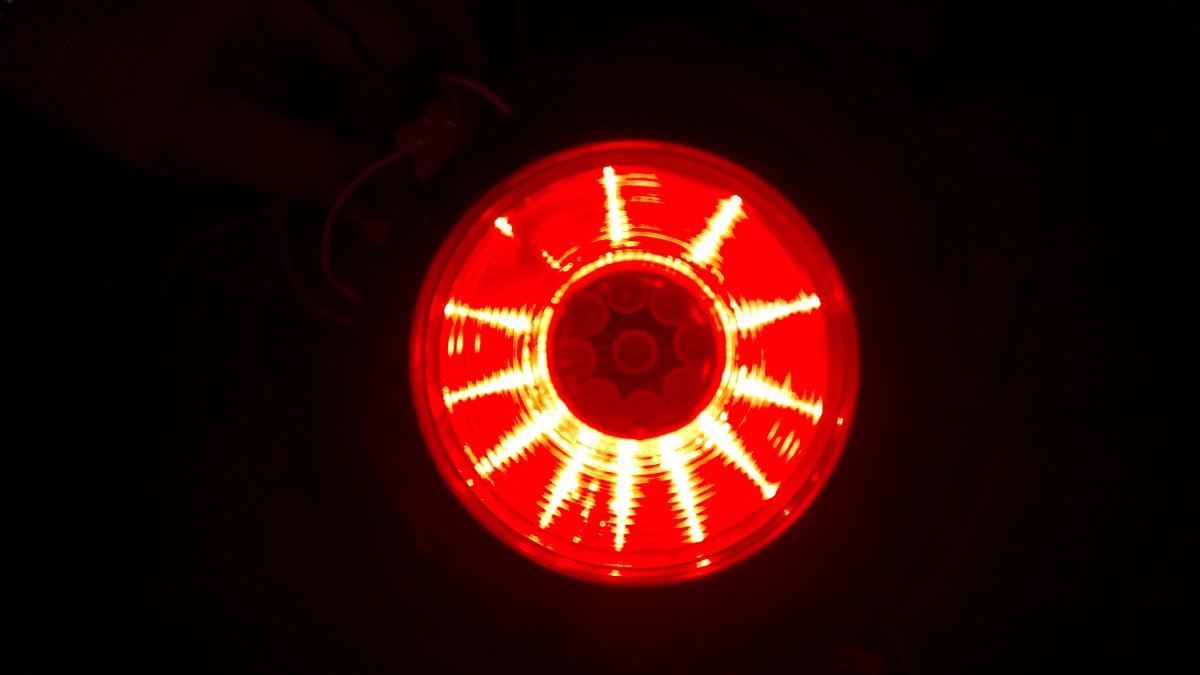
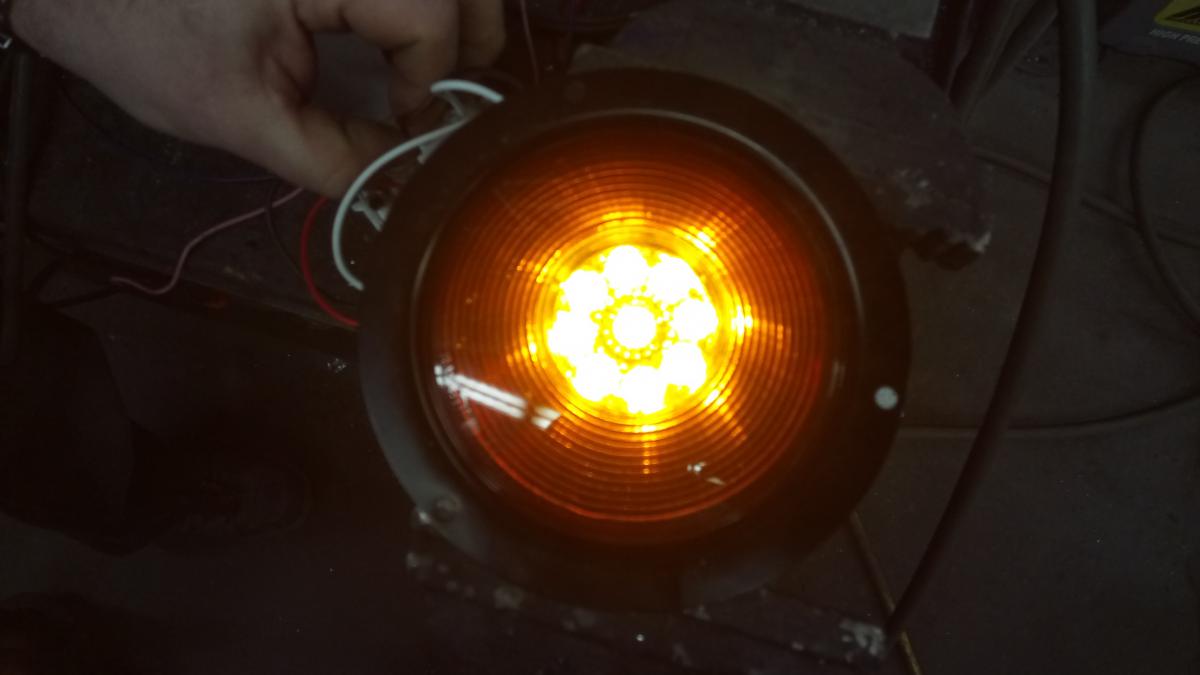
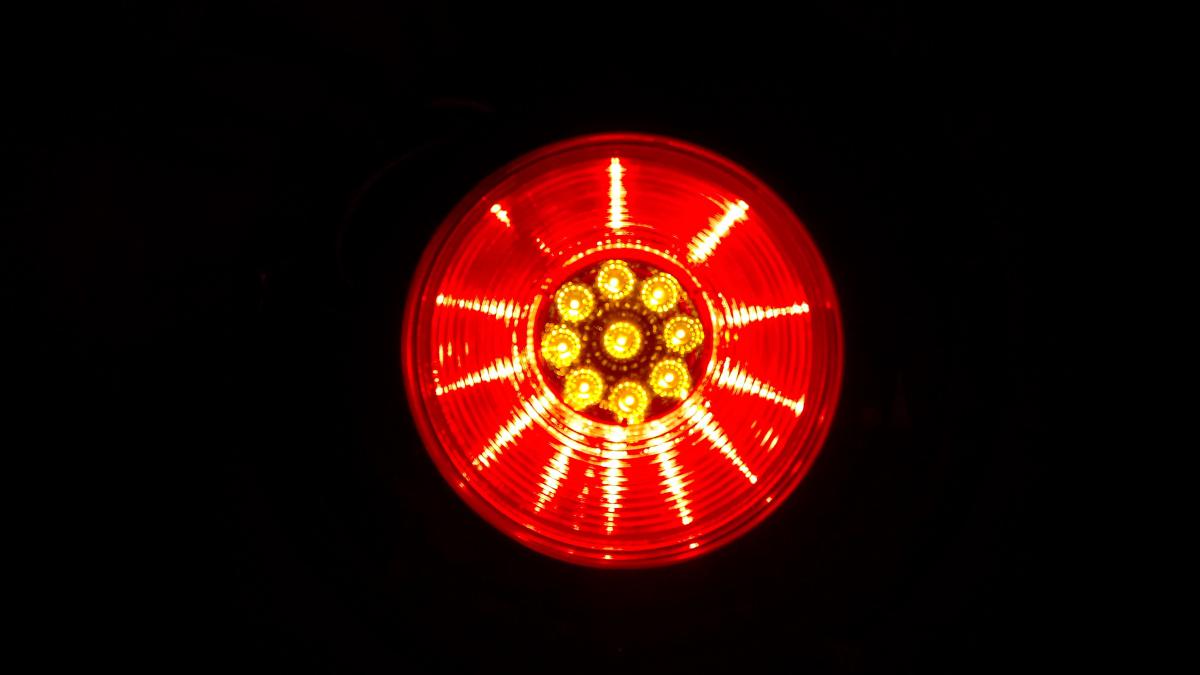
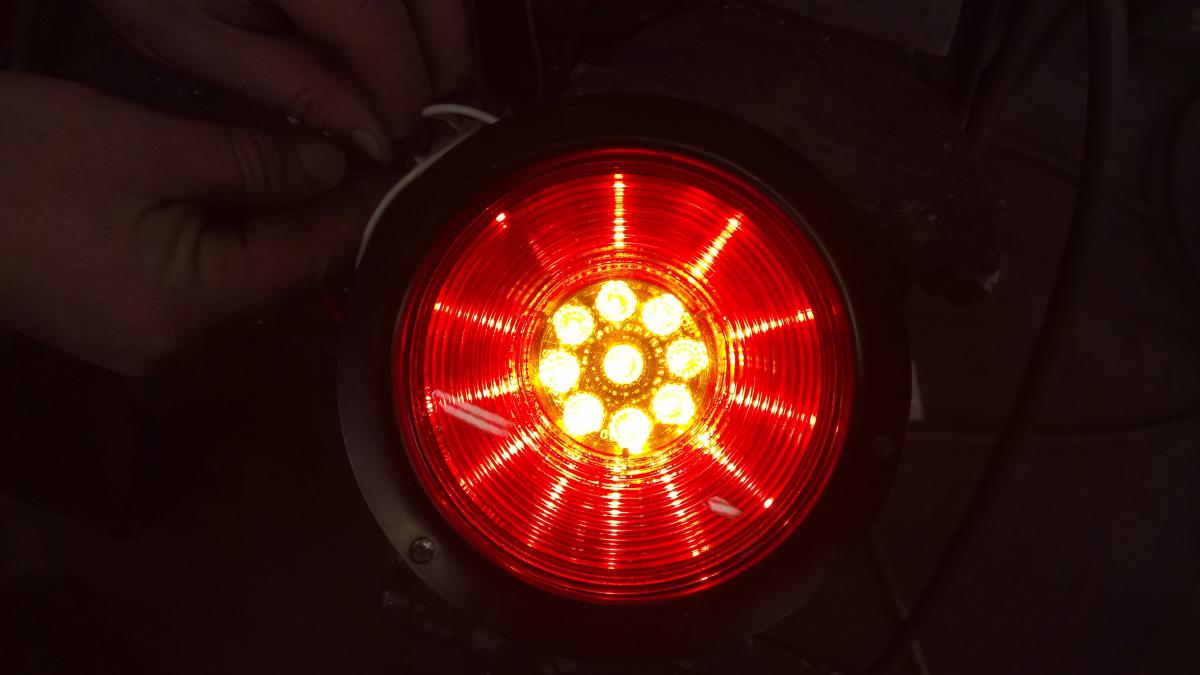
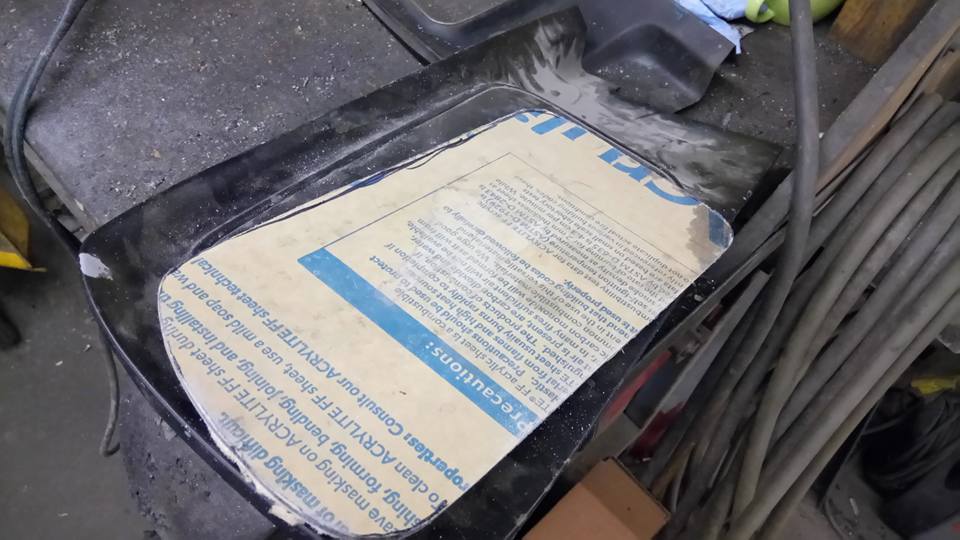
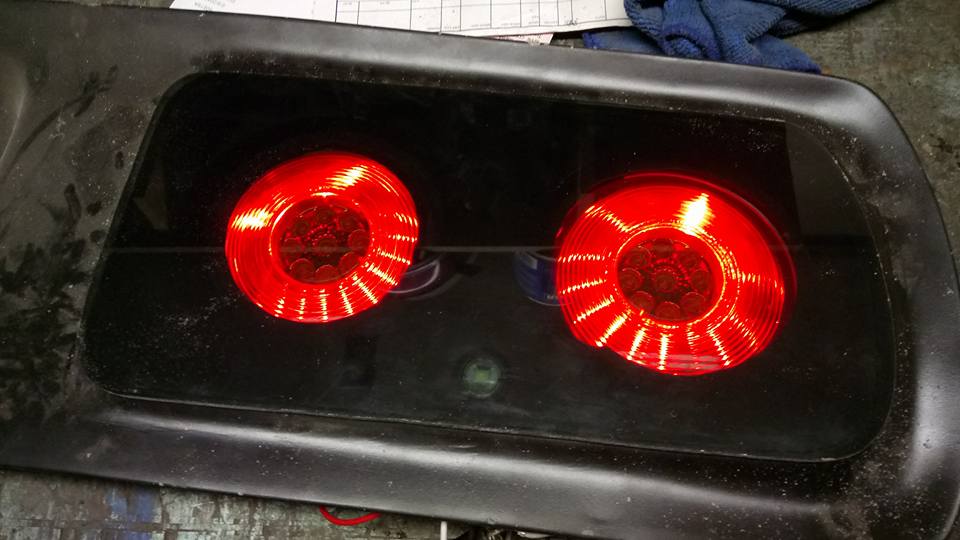
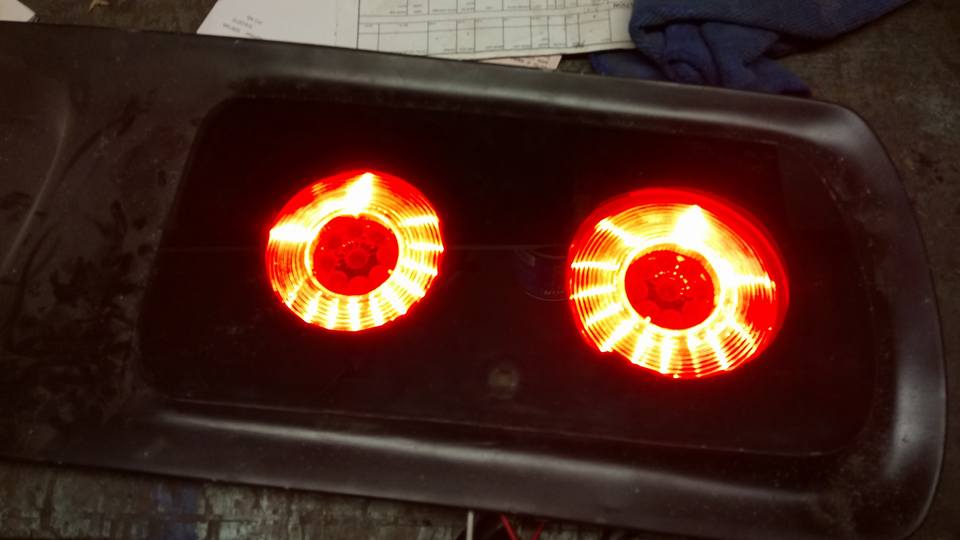
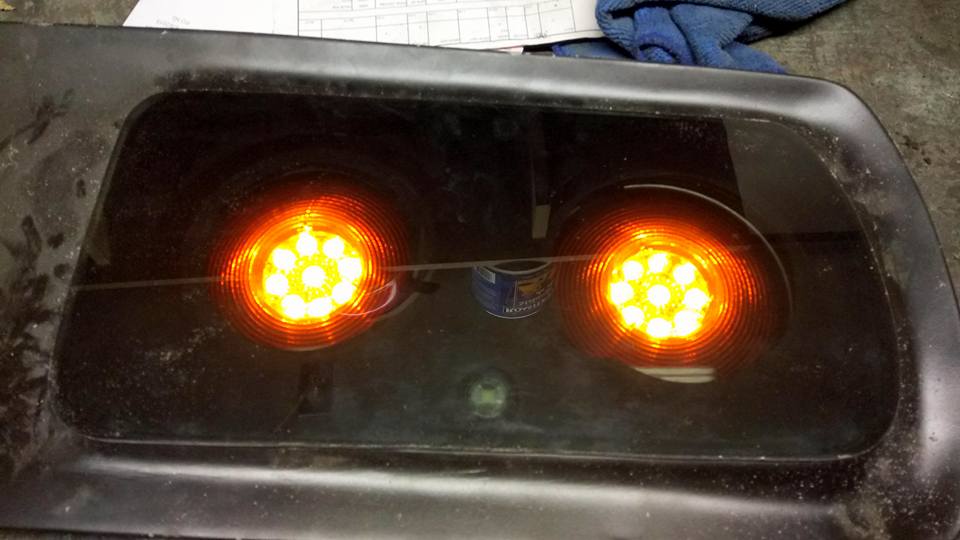
So... in this second update, today, we're gonna talk about tail lights, which is in a different post because I don't want this to get lost in a post about sheet metal. I decided to go this route instead of the PT-Cobalt (HHR) tail lights, because they sat too deep into the vehicle, and interfered with the fuel tank vent lines, and they stuck out from the panel more than I would like, so here we are. To start with, I tried a little experiment with that Q-bond adhesive, learning that it's actually a cohesive, which can melt/weld polycarbonate lenses together. I started off by taking a 4 1/2" trailer tail light lens, boring a hole through it, and then bonding a 2: LED clearance puck in the center. It turned out like this: I thought to myself, "This has some potential." I then, tried the same thing with amber markers, and a more flush mount to the lenses. These will serve quite well as turn signals. Sat against the panel for a rough idea of how it may look. Note the small reverse light in between... Then, the housings. These are the lighting assemblies the lenses came from. Just a 4 1/2" truck/trailer pot light. Nothing special. I start modifying these by removing the bulb socket... Then hogging a 2 1/2" hole in the back... To add this: An LED board from another stop/turn/tail light assembly. Yes, each light took 3 different ones to make, but don't question my insanity, and just go along with it, okay? Then, function tests: As follows: running light, brake light, signal, brake with signal, and running with signal. The lights have a depth of about 2 1/2: from the flange to the back of the LED board. The pots will be welded and blended into the back of the panel, making them one piece. The snap rings holding the lenses in will also be painted black to blend them in a little better. Then, I decided to play with some lightly smoked acrylic sheet: This is more "proof of concept" than anything, I guess. They will be held on by probably black button-head bolts, and sealed to the panels with closed-cell foam. Mainly for show purposes. I like them, personally. Simple, inexpensive, and somewhat unique. Finally, due to certain life-related changes and transitions, the car may go into storage after the metal/body work and the wiring is complete. Updates as they unfold...