-
Member Statistics
33350
Total Members5167
Most Online
All Activity
- Today
-
 FYI -- @Kickstand80 has not been active on this site for the last two years. You may want to try messaging him through the site's private messaging system. You can also try emailing him, or texting him, at the contact info he provided in his post.
 -
Hi kickstand80 is this part still available . regards john
- Yesterday
-
Is SuperDan aware of the problem? If not, someone should really contact him. I would think this is an easy fix.
-
Thanks for asking. It was equipped with a full cage and harnesses but after taking all of that out, I am going back to a "comfortable sporty". I am too tall to be in a full cage equipped car safely (don't wear a helmet all the time). The seals on the rear are so bad I feel like I am slowly dying even after 10min of driving. I am replacing the rear light and deck seals. Cleaning all the switches and electrical, replacing the interior and getting the heater controls working. I would like to drive it this summer to a few Datsun meets and then tear down the carburetors and front end for rebuilds this winter.
-

A tale of two Z's - NA vs Turbo
jeffer949 replied to MONZTER's topic in S30 Series - 240z, 260z, 280z
Was not implying that the only way to get work done on a project is to not have a wife and daughter!!! I can see how that could have come across. Mine is 14 and will be a freshman this year. Ive got 4 years..... Then who knows. As she has gotten older I've been telling the stories of her helping me in the shop when she was little. Her stepping into a drain pan full of oil in ugg boots that I promptly threw away with out telling mom, Me hearing a pppsshhhh noise and I turn around to see her with a my blow torch pointed at her face, Praise the Lord she didnt click the igniter She would have been around 2 also at those times. -
Using a VPN can also slow down network and website response times. If you're running a VPN, try turning it off and see if that helps the issue. Not an ideal solution, but worth a try...
-

1977 280z driving project from the Netherlands
74_5.0L_Z replied to Mitchel0407's topic in S30 Series - 240z, 260z, 280z
Congratulations. These old cars are a lot of work, but worth the effort. -

1977 280z driving project from the Netherlands
flatout replied to Mitchel0407's topic in S30 Series - 240z, 260z, 280z
congrats sir, hopefully the weather in your area is nice this time of year and you get get out and put some miles, (or kilometers) on it (never been to Netherlands so unsure if you guys use miles or Km) -
Well that laser is pretty handy. you do great work. keep it up.
-

1977 280z driving project from the Netherlands
Mitchel0407 replied to Mitchel0407's topic in S30 Series - 240z, 260z, 280z
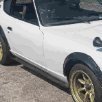
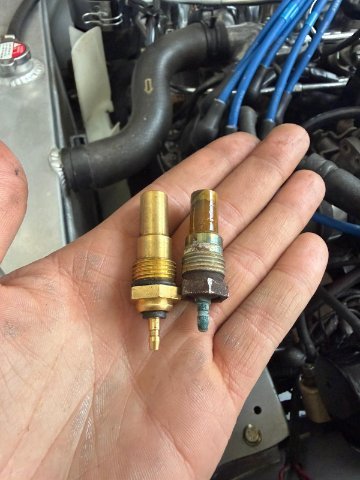
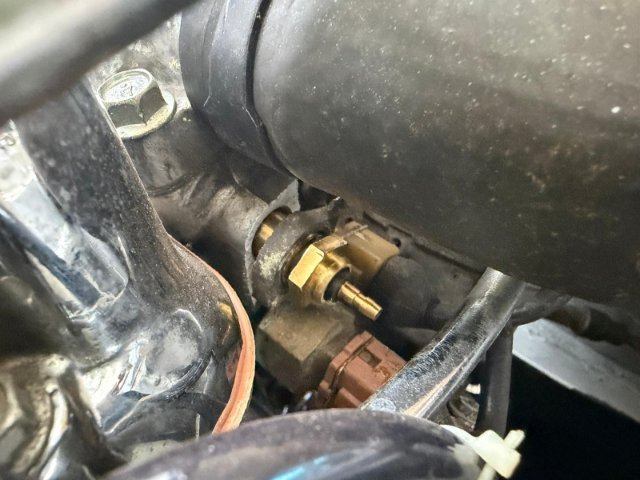
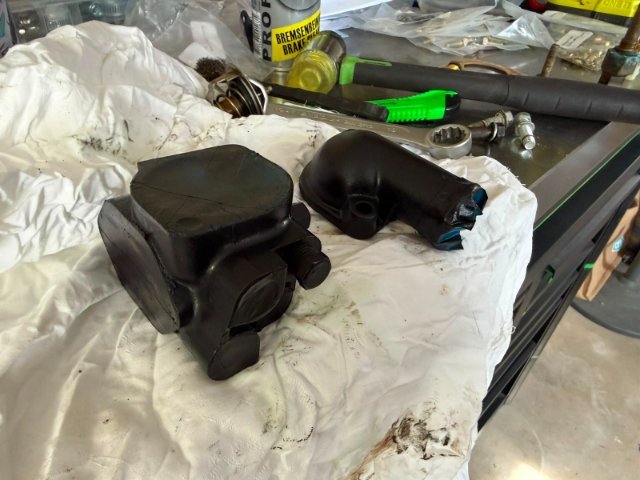
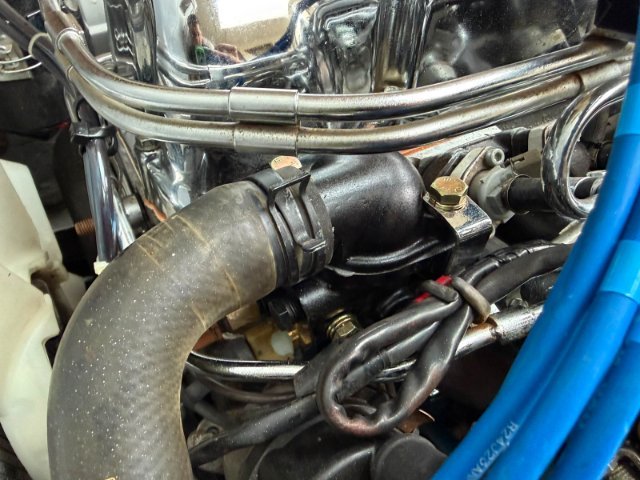
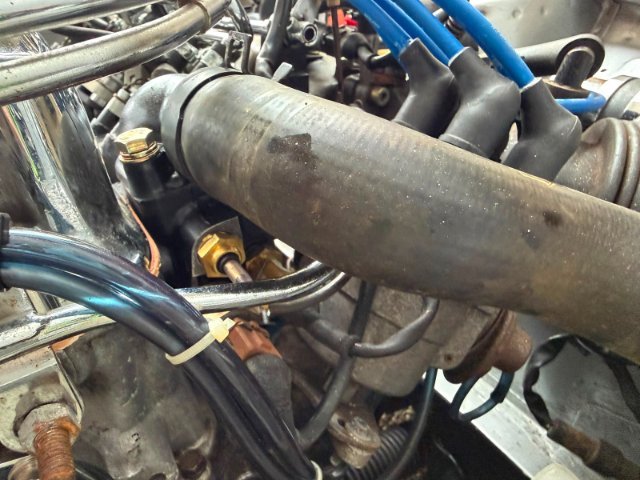
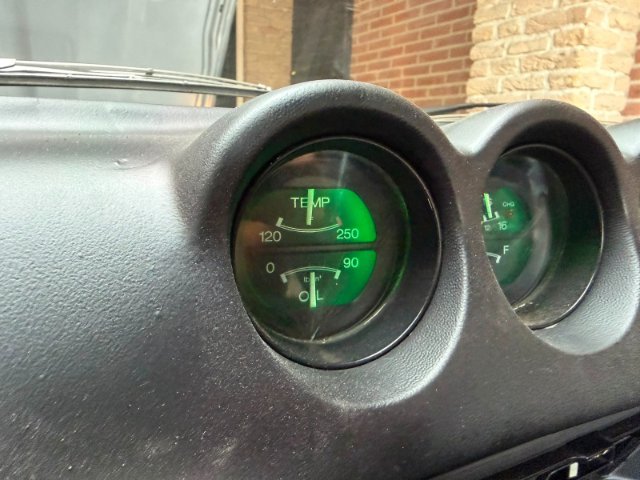
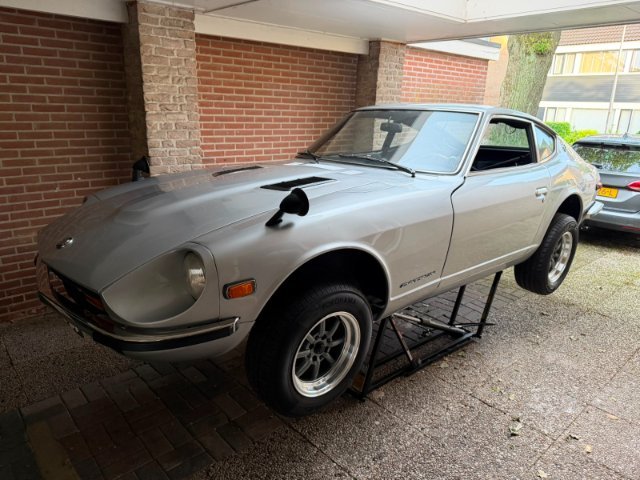
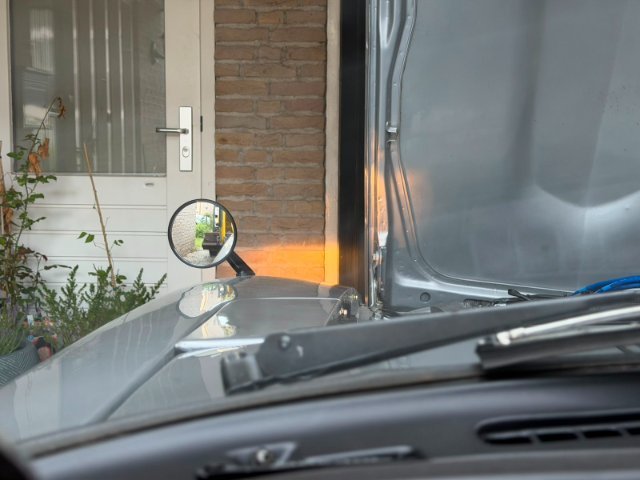
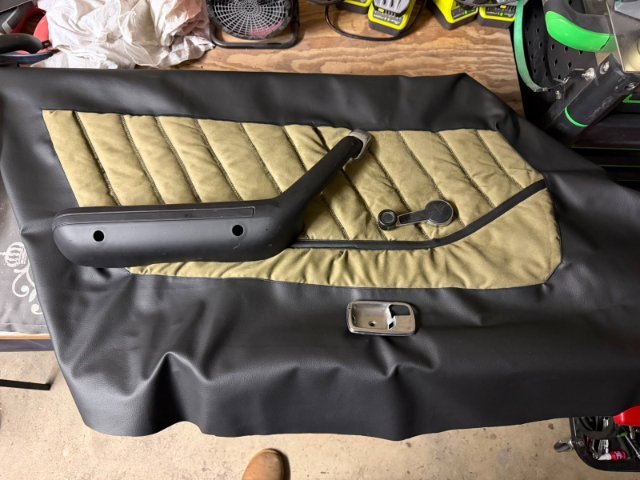
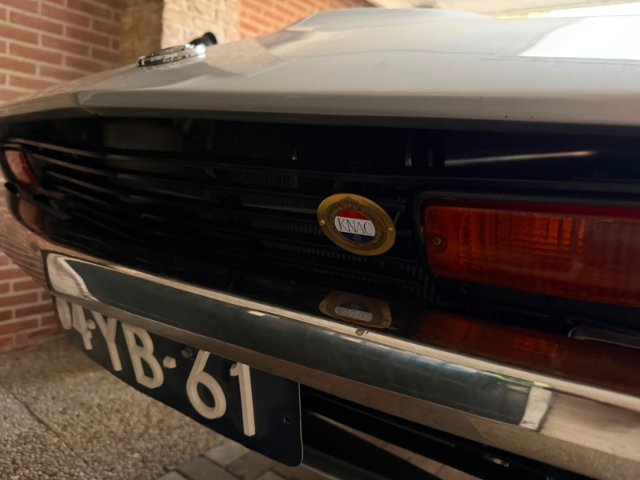
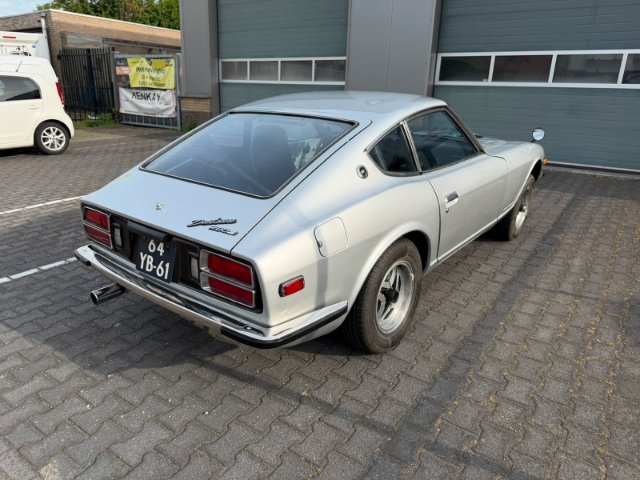
It took some time for an update but I am proud to say that I did it, the 280z is road legal again!! Aside from the car I have been very busy working in my backyard as the previous owners took out all the plants and then neglected the yard for 4-5 years. But back to the build log. One of the parts I still had lying around where the oil pressure sender and the coolant temperature sensor for the gauges in the dashboard. It really bothered me that both of them weren’t working and I had a feeling that it was just both of the sensors that were bad. So out with the old and in with the new. Or so I thought…. While installing the new temperature sensor into the thermostat housing the housing itself broke. As the break is a really weird one I suspect that the aluminum housing just became pours. Luckly one of the local Z club members had the correct version of the housing and send it to me. I gave that one a quick coat of paint and reinstalled all of the sensors. This time nothing broke and both the oil pressure and coolant temperature gauge finally worked! Now that that was fixed I started working on some of the smaller items on the list. I replaced the air filter, both exhaust gaskets, the horns, painted the front grill and installed the KNAC shield (translated: Royal Netherlands Automobile Club). As I had a bit of time left in the day I also replaced my pre fuel pump fuel lines and filter, installed the new speakers and fitted the fender mirrors. I expected the fender mirrors to be pretty useless but they actually gave me a way better field of view then my old door mounted mirrors! I believe these are the same metal reproduction mirrors as Zdepot sells. As I was in a bit of a time crunch for the inspection I unfortunately couldn’t finish the door cards and seats in time. Luckly the door cards weren’t mandatory for the inspection so I could just simply leave them off the car. As for the seats I reinstalled the covers for now and reinstalled them into the car. The aftermarket wheels the car came on where poking out a bit too much in the rear so to avoid any complications during the inspection I decided to install the stock wheels for now and switch them afterwards. I hindside this wasn’t necessary as they were allowed to stick out 3cm (1,2 inch) past the fenders. Then came the moment I had been working towards, inspection day! I dropped her of at the garage and they immediately started with the inspection and alignment. The only thing they found was they the washer fluid wasn’t spraying but the mechanic traced it back to a pinched line. Other then that the car was in great shape and both the mechanic as other customers were impressed with the car (S30 Z cars are pretty rare over here). Now I can finally enjoy the car and man she drives good! The only thing I noticed was that the rear shocks are gone but it isn’t a problem for now.
-

A 2026 SEMA SHOW 260Z Build all the way from Great Britain
toolman replied to toolman's topic in Body Kits & Paint
Part 15- The Rear Suspension is finally attached to the Middle Body Section- The Video deals with attaching the Rear Suspension to the Middle Body Section. The Gull wing doors require additional reinforcement to the Middle Section of the 260Z. This is similar reinforcement when installing a Convertible Top on any production vehicle. With only a small center section of the roof that must support the weight of Two Doors and provide structural support for the Roof Area that will cut be out will be a nightmare. -
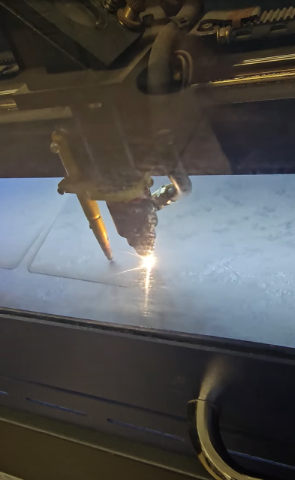
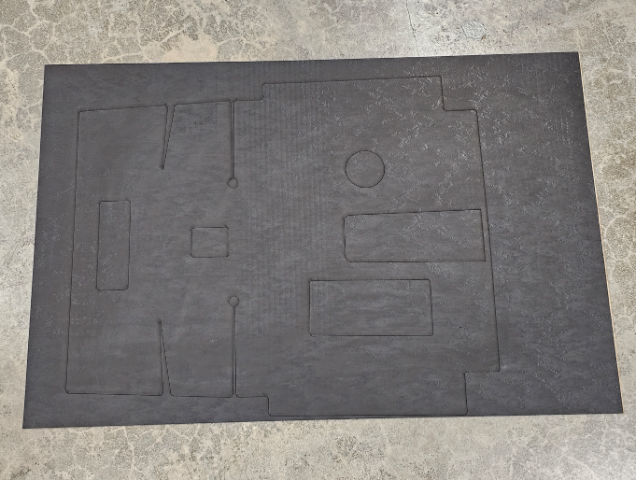
I also finished cutting the new Tar paper that will go on the interior floors and trans tunnel. I have a laser cutter at work. This is a Nissan part and still available as blank sheets. Unfortunately, even though it is correct, it is expensive at $100.00 USD per sheet. It took 6 sheets for the entire interior. This is the material on the laser After the metal is ready, I will epoxy coat it first then apply the sheets. Unlike OEM that had bare metal under it, this should be substantially better at keeping water from getting under it and rusting the metal
-
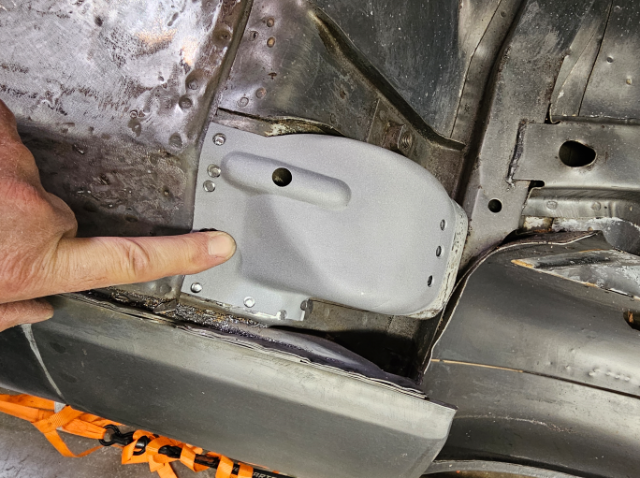
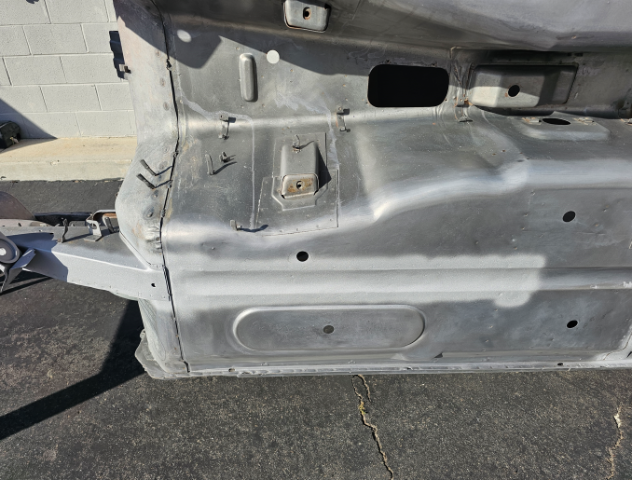
Another productive weekend. Unlike my Turbo chassis that has a late 71 build date, this car having a mid year build date has protection plates over the seat belt pockets. But of course they were used by the PO to jack the car and dented them up. I drilled out the spot welds and removed them, allowing me to straighten the dents and blast underneath them. Before: After: All sprayed with weld thru primer and ready for plug welding back on.
-
06-07-2026 ATLAS Z UPDATE: Continued progress on the engine harness wiring and installation. Starting to take shape....about 95% done. PICS:
- Last week
-
john fuller joined the community
-
Hi kickstand 80 i would like to order 1 are they still available ,i live i Australia regards john
-
06-06-2026 ATLAS Z UPDATE: I put everything to the side and worked on engine harness wiring. Not hard, just VERY time consuming. I had opened up all the wiring, and now I am custom tailor-ing it to the setup here. Making good progress. Cutting the tie wraps connectors as needed to slide under bolt heads and tighten back down and had to make 2 large ones out of aluminum to put under a couple bellhousing bolts. The idea being keeping everything off the firewall and sides. they are shaved, and everything needs to look separate and tidy. I am putting the chrome wire looms over it and making steady progress. PICS:
-
 yoel joined the community
 -
280z 1jz track build from a pile of parts
flatout replied to flatout's topic in S30 Series - 240z, 260z, 280z
Been a busy couple weeks but been chugging along. Got the fuel system started. mounted the ethanol content sensor, fuel filter and fuel pressure regulator. ordered line/fittings twice and still came up short on fittings and line. hopefully the last of it arrives today so I can finish it. Got the rear brake caliper bracket machined up from a high alloy steel. Due to the design i had to come up with i wanted a high alloy steel to be nice and strong. Got the clutch line made up and bled it. clutch seems to work even tho i just bled it solo. i'll get the wife out to get it perfect but it does work. I got the exhaust mocked up and tacked together. Need to come up with a nice tip to get it out just past the bumper.
-
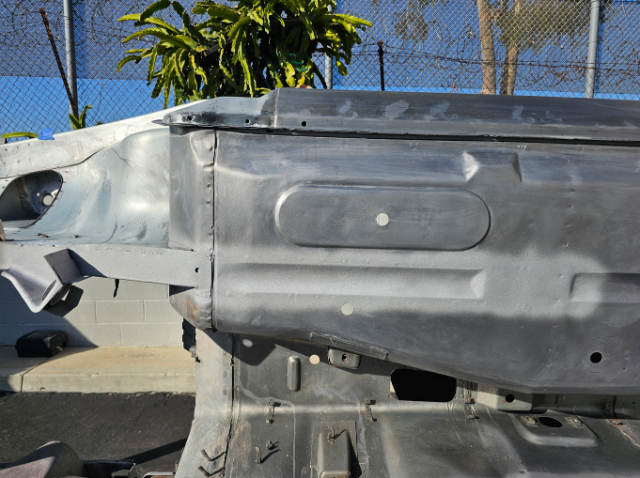
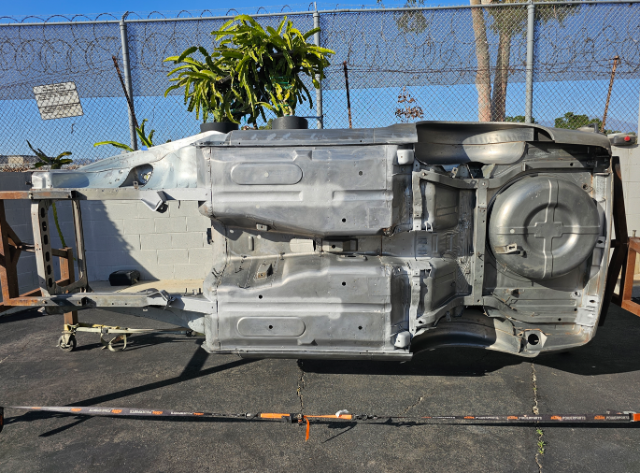
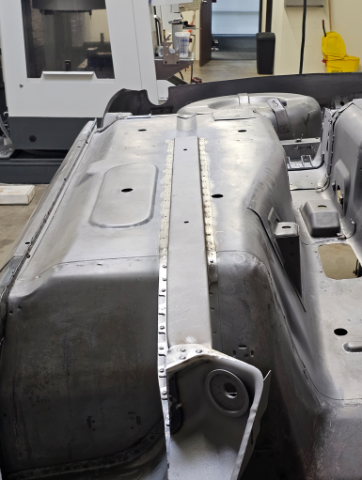
Since the frame rails were dented up pretty good from wrong floor jack positioning, I decided to replace them and this would also give me the opportunity to really get the original metal floors flat, and the metal shrunk and tight. They were surprisingly clean inside. This is the floor pan after removing the spot welds and frame rails. After some wire wheel work, and metal prep acid wash with Scotch-Brite, I worked and shrunk the metal with a shrinking rod and them smoothed it with a shrinking disk. Nice and flat getting it to what original would have looked like, leaving all spot welds and original deformations in place. I then lightly blasted the overlap areas and applied Weld-Thru paint. I then fitted the new frame rails, they took a bunch of work to get the correct shape and to match the original contour of the floor pans. I then copied all the original spot weld locations and drilled 3/16 hole to plug weld. I used several Cleco clamps to hold it in place and tight up against the floor pans. Next I used my MIG and plug welded them in place Finally I will grind smooth the plug welds More after the weekend
-
A 2026 SEMA SHOW 260Z Build all the way from Great Britain
toolman replied to toolman's topic in Body Kits & Paint
Part 14-Finishing the Rear Suspension Finally finishing the Rear Suspnsion and getting ready to put the 260Z on the ground. -
06-03-2026 ATLAS Z UPDATE: I had a few moments and decided to fit my intake screen. Another step forward
-
 That ship has sailed. Glad I got my order in. Love my stuff!
 -
 If this is still available, sign me up for a few Tshirts.
 -
 2.3.240z joined the community
 -
06-02-2026 ATLAS Z UPDATE: Well parts came in, so I was able to put together my T fitting for by boost switch and vacuum source for my Blow Off Valve (BOV). I used the tried and true 567 sealant on the threads, and then I covered the lines with some of my plasti chrome wire loom and plasti-chrome tie wraps. Not too bad, huh?
- Earlier
-
When I installed my cam, I had the engine on a stand with heads off, and used a dial indicator to find top dead center as accurately as I could. Once I found TDC on the #1 cylinder, I made marks between the rear flange of the crankshaft and the back of the block. Later, when I went to install the harmonic damper, I verified that #1 was at TDC, and that the timing marks were properly aligned with the timing indicator. They aligned perfectly. I'm using a Romac Balancer on a Ford 5.0L Stroker. The factory balancers have a rubber ring between the hub and the outer ring where the timing marks are located. The rubber fails and then the outer ring slips relative to the center hub. After that the timing marks are arbitrarily located and no longer consistent. Long story short: Find and verify TDC, and make sure the balancer marks can't slip.
-
 It's been a while. I moved from NC back to OH for work. My tools and vehicles have been locked up in a storage unit while we are in the process of buying a home. I took the car back to my parents' carport to try to get some work done. However, there were a lot of little things to do. There is a fuel smell on refills, exhaust fumes leak into the cabin, the carbs need tuning, and my shitty rust repair needs some work. Because there was so much to do, it made sense to me to pull the engine. Since I was pulling the engine, it made sense to me to just swap in an RB25. So I pulled the RB from the parts car, pulled the L24, and started fixing all my previous work. My welding has gotten a lot better, but it still has a long way to go. The thicker sway bar and improved suspension was tearing the frame rails apart where the sway bar attaches. So I drilled and tapped some thicker steel and 3/4 boxed the frame rails to try to prevent the same damage in the future. I scuffed up the engine bay, threw some primer at it, and painted it the same white as the rest of the car. I also pulled the dash, stripped the paint, put on some rust preventative paint, and added sound deadening. Next steps: I need to drop out the stock rear end and get an R-200 with an LSD in it. I have a new universal harness to go in it and new gauges in a crack-free dash. I need to figure out what brakes I want to upgrade to. I also need to figure out if I'm going to reuse or replace all the brake lines, fuel lines, and gas tank. I also need to chose what ECu I want to use. Right now, I'm leaning towards a Haltech Elite 1500. Finally, I need to rebuild the RB25 with the oiling upgrades and get it and the RB25 transmission thrown back in the car. I'm spending more hours at work in my new role, but I'll try to post updates. Photos-3-001.zip


-
Who's Online 0 Members, 0 Anonymous, 303 Guests (See full list)
- There are no registered users currently online