Leaderboard


Popular Content
Showing content with the highest reputation since 02/09/19 in all areas
-
Don't tell my wife Like I tell other people. some like to fish, some like to bowl, I like to make.5 points
-
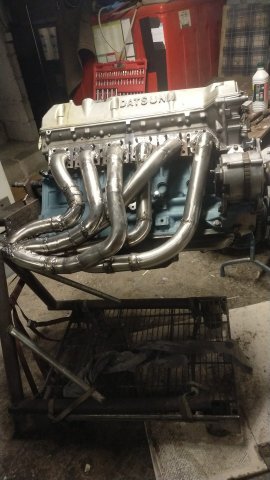
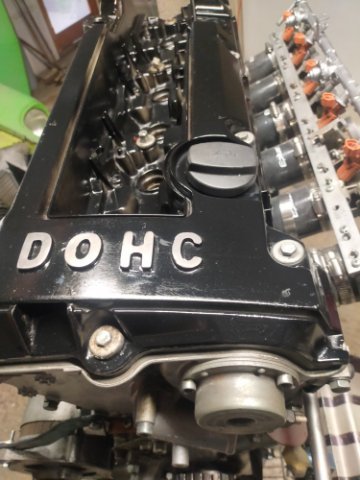
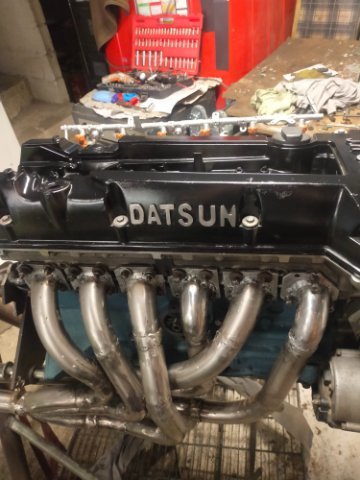
He's saying although we are launching a DOHC head in 2024 we readily admit it will be pale in comparison the mighty KN20 from Datsunworks. At least that's what I'm hearing.4 points
-
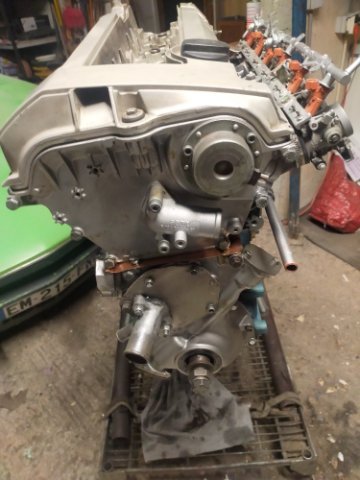
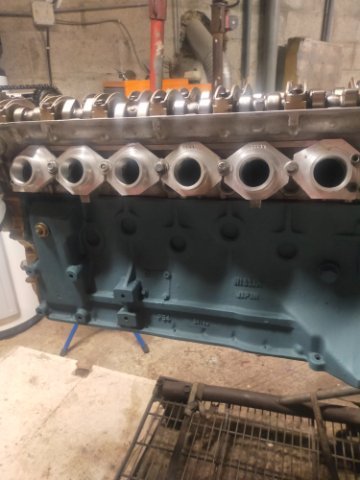
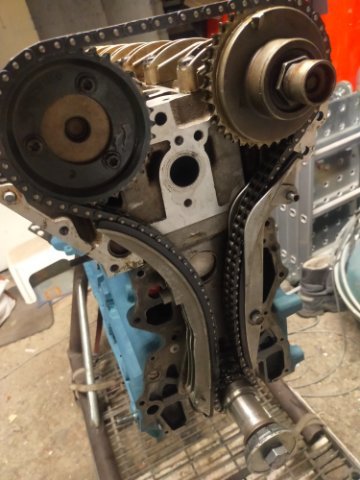
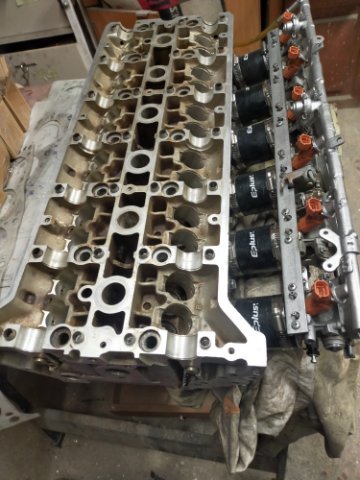
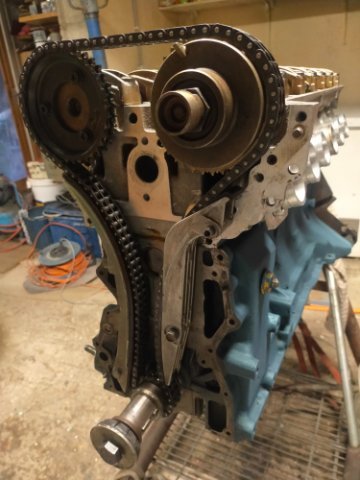
well old story , but MAG58 was right, mercedes M104 head is possible on a datsun L28 stroked , build is not over but we will see what happens soon bye bye Didier
 4 points
 -
**UPDATE Went to court yesterday and basically played dumb. Told the judge that "I went to the state ref and he told me since the car is so old that he couldn't do anything to certify it. So how do I go about taking car of this ticket. The vehicle is a pre smog vehicle so I've never had to SMOG it" The judge said "Ok so what Im going to do here is dismiss the case cuz it seems like your car doesn't qualify for an inspection. Sorry about the inconvenience Mr. Soto" I tried to play it cool but I was so happy. After reading all the horror stories from other people about having to revert to stock and all that I was lucky I guess Hope this thread helps someone going through something similar4 points
-
Greetings Everyone, Due to the increase in spammers HybridZ, registration has changed from being automatic to manual. That means one of the Admins will need to approve any new registrants. If you ask or tell someone about HybridZ (please do) let them know registration isn't automatic anymore. We'll do our best to stay on top of any additions and hopefully you all will see a lot less spam. Thanks, The HybridZ moderation team4 points
-
Unfortunately, it is too late. Maybe for round 6 in a couple of years Got the shirts in and will start breaking things down and shipping things out next week. This week is busy with work travel, so appreciate your patience while I get a few out each day on my lunch breaks.3 points
-
They received all of the shirts without backorders and are starting on printing this afternoon!3 points
-
I really wish things would swing back towards the forums. I can't tell you how many times I know the answer to or could add to a post on FB but I don't since it really has no longevity. I always felt like I was adding to the overall knowledge base when I posted here. I can go on and on but I really hate it.3 points
-
First start up since starting the restoration. Kind of shocked she started right up on the first go. Was expecting something on the MegaJolt to need fixing, but it worked great. Went with Magnacor wires, but they made a mistake and did not fit them up with the right coil boots. Being remade and shipped, so I am using 05’ ford explorer NGK wires for now. Went with a “7” heat NGK plug on account of the 10:1 CR. It’s raining this weekend, but just need to dial-in some crude alignment and she will be road worthy IMG_2339.mov3 points
-
Just wanted to say again a HUGE "Thank You" to @cockerstar for doing this (a FIFTH time)!!!! Really appreciate all his time and effort to make this happen. You da' man, Ryan!!! 👍👍3 points
-
Yup! Been daily driving it, 300+ days a year, for the last 4 years. Approaching 75,000 miles on the turbo build. No regrets.
3 points
-
I want to thank all of you here for giving me inspiration for my build. I have adopted the Hybrid Z name for my build years ago since this site provided a lot of information that I consider priceless. I was able to meet some great people at ZCON, some that know my build and others that just wanted to say hello and compliment me on my build. When I built this car I built it as my version of what a Z should be therefore I know a lot of people were not going to like it since it was my vision and nothing else. Taking my car to ZCON for the 1st time and walking out of there with these awards it’s just incredible, especially with all the awesome cars I was competing against. It’s great to see the judges appreciate all the hard work and effort that has gone into it. These are the awards I received. 1st Place in Ultra Modified Best Engine Gold Cup- This was totally unexpected and shocking it was given to a Z with and LS3 since most of these guys are Nissan purists. Again, thank you all for your support and keeping this site alive.
3 points
-
It's not the votage drop that matters it's what the voltage drop indicates. No spark will be created if the current through the coil is not stopped. You could also disconnect the coil negative at the coil and check the wire for continuity to ground, key off. Disconnect the wire, put one meter probe on the end and the other probe on a good bare piece of metal or the engine block. You should get OL or infinite/huge ohms on your meter.2 points
-
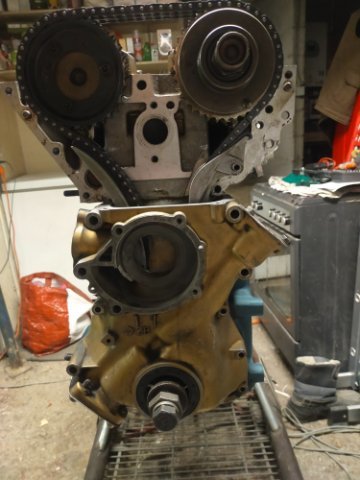
well yes , stock guides , just to make lower axes in the block, and the stock cover is modified to make some space, electric water pump ( davis Craig ) , and tensioner on the right side, in place of the water inlet ( spring and lock without oil pressure ) no need for oil pump drive or distributor for i put dry sump pump system and megasquirt ignition and injection EFI with yamaha bike itb's So simple and cheap , just a little of brain storming ! oh ! and a little joke for the head cover !! Lol !
2 points
-
There is no swap hardware to put the Z transmission behind a V8. It wouldn't handle the torque anyway. The 260Z engine is about 158 cubic inches, compared to 350 for a SBC. The old Z transmission bearings are typically ready to fall apart besides that, not uncommon even with the stock engines. It would probably last about one pull. I haven't done it myself, but I wouldn't even try it just based on what I've learned.2 points
-
You have packed a lot into your intro. There's some good advice below to consider in the posts to your question. But I have to ask you what is it about the 280 you love? I don't mean that coyly or as some flippant remark. What is it you really like? I'll give you why I like the Zs. I grew up around them when they were new, my uncle was a general manager of a Datsun dealership so we got to try out the new cars. We raced with my uncle at autocross and hillclimbs (I was a kid so I just went along). Back then the Z cars were fast and sounded awesome (I have the hearing loss to prove it), and were amazing at cutting through the corners both stock and modified. Our local racing club had about 10 people driving stock to all-out racing versions. 50 years pass and a lot of that coolness has mostly worn off except for the look of a lowered S30 with an airdam and rear spoiler. I have to admit the sound of a modified Z makes me happy when I hear it. But this site exists to help people get the most out of them. And the reality of that is as cool as the L28 engine is you're looking at spending a lot of money and you'll have an engine that makes 200 to 250 HP. Sure you can get more but then all the other parts that connect to that engine are starting to get pushed past their limits given the age. While I don't disagree with any of the posts below you should still read about a lot of the mods and why they were done. You'll find that in many cases they were driven by it costing too much, parts NLA, etcetera. A bit of advice from me. Never by an engine, transmission, or rear end unless you plan to use it within a few months. Even if you plan to use it that's not the same as ready to bolt in. If you want a street car with a certain coolness and triple Weber carbs, then build it. But when you spend 10K on an engine and find it's somewhat finicky to drive but cool all the same. But for less, you could have 350 HP V6 in the DI Chevy LV3. It won't sound the same as the L-motor but it's lighter, a lot newer, and will get excellent mileage, It will start anywhere if it's hot or cold by the sea or at altitude. This site has a ton of info on how to do the same for the suspension and how to get a cheaper rear diff, especially if you want an LSD. I could write a lot more but this is probably too long as it is. Welcome to Z ownership. Cary2 points
-
Yes, with the carbs you can get rid of the ECU and EFI parts. The complete EFI harness can be removed. The guys that know on the site (from the past) say that the exhaust system is restrictive and opening it up helps a lot (see John C posts from the past) , and that if you decide to use a performance cam go big (see JMortensen posts from the past). The typical "Stage" 1 or 2 cams don't add much, apparently. So, the simple and effective way to add some power is with a better exhaust system and a big cam. Cams are more expensive than they seem because you need to buy lash pads and rocker arms along with the cam. The collection of parts costs can add up. But it's a pretty simple operation to get it done. Many people like the lighter flywheel. It takes more finesse on the clutch pedal but they say it's worth it. Fidanza is a good choice. For street driving an LSD doesn't add much. You might wait on it and see if you have traction problems. There is a ton on the site from the old-timers, around the 2000 to 2015 time range. Things have slowed a lot on the site as people have moved on. But their contributions are still here. Many of the guys were racers and/or engineers/mechanics/machinists and spent a lot of time and money on their projects. Today's car hobbyists really only know turbos and EFI since that's what they were raised on. Good luck.2 points
-
My shirts arrived today, with the wait - huge thanks to Ryan for tackling this big job that benefits all of us and HybridZ! It was difficult to choose amongst all of the colors but very happy with my choices!
2 points
-
Even if 100 people commited to purchase, its still tiny small numbers vs an OEM production. Its got to be done out of passion and at least not to lose money. This is why this is such a huge acomplisment for someone like Derek, We are fortunate the passion runs deep. I cant imagine the hours of "un-billed" time2 points
-
Life has been kicking my ass lately! Between my job changing significantly, being super sick, and some significant medical issues with my daughter I haven’t made the progress on shipping orders that I have wanted to. Post here if you’re really itching to get yours and I’ll move it to the top of my list. Otherwise I’m moving along as ordered. I’d like to get these wrapped up so I can transfer the remaining funds over to Dan.2 points
-
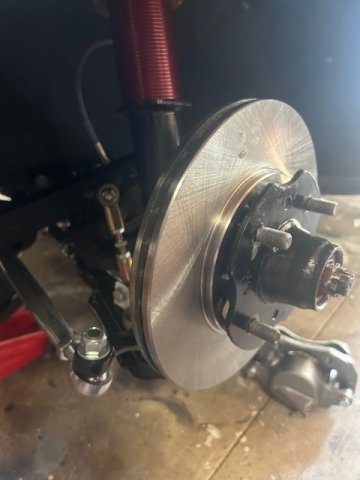
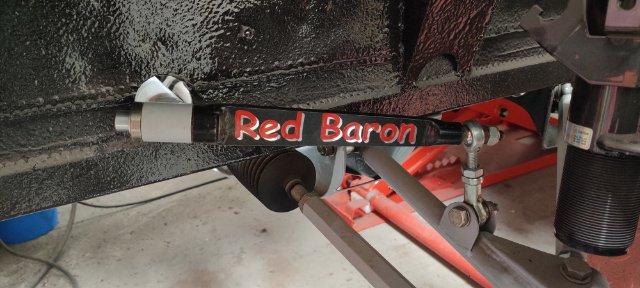
We’re going on track this Sunday at Willow springs Will set-up the car tomorrow at a friends shop since they have a flat-level garage floor (which I do not). Also in the middle of adapting the front brakes to 280zx rotor and caliper per EP spec-line. Caliper mounting on the strut assembly will require some welding and drilling, so it will have to wait till after this weekend. Greg Ira was nice enough to ship me some race pads he has that fit the OEM calipers.
2 points
-
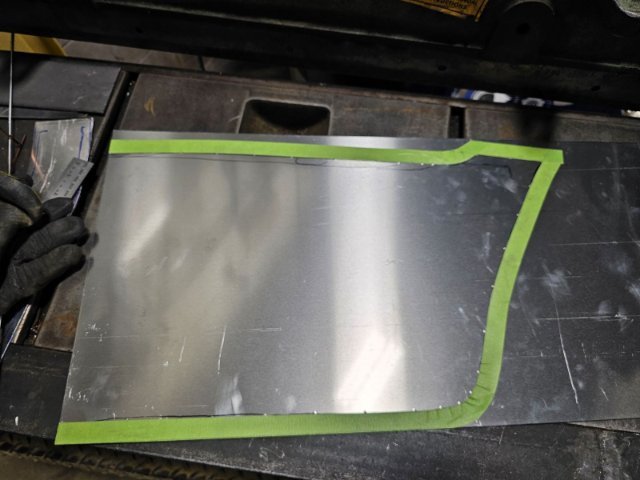
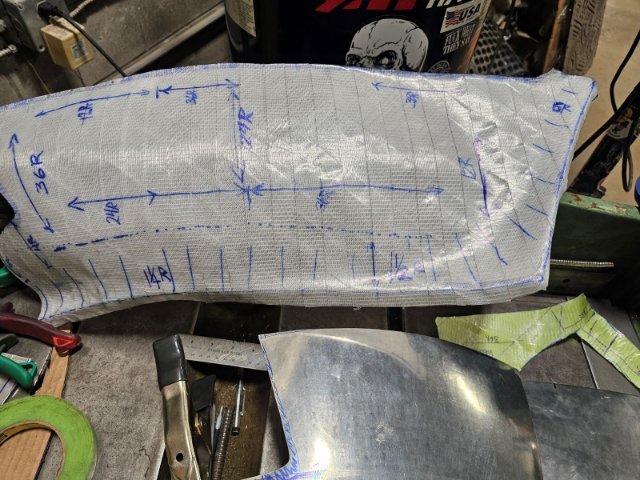
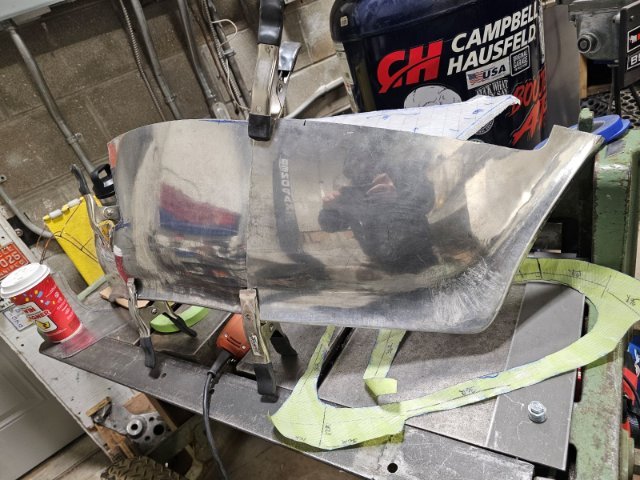
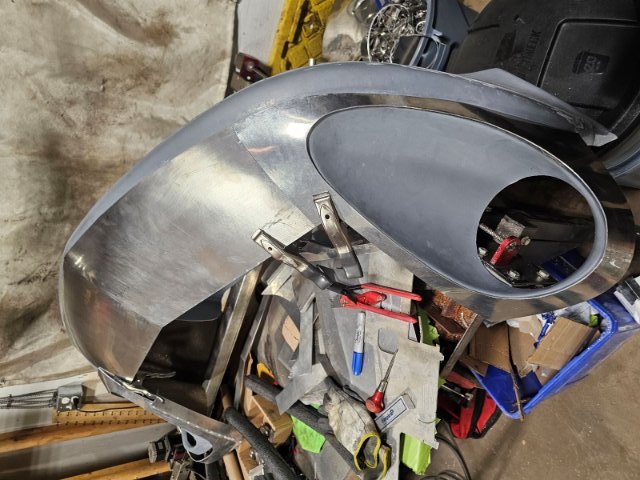
Lower part of the bumper is started. Used a fiberglass gnose to take dimensions from, happy with how everything is coming out.
2 points
-
Hi everyone! I have the shirts and should be able to start getting some out today. I was primarily working from home at least 80% of the time, but my job just got pushed to 60-80% travel so I haven't had breaks at home like I used to.2 points
-
Well, after more testing, it seems to be a user error. Was able to drive for a good hour today without and bucking/shudders. I think it's a combination of a new clutch and upgraded transmission/rear end that I have to get used to. The car seems to like higher rpms when starting from a stop, and a different clutch engagement that what it was before. Car is much more fun with the new parts. Not a fast car, but a fun one.2 points
-
No, you just pull the bearings off of the front of their shafts. The countershaft bearing is pretty tight to the gear and takes some trickery. The mainshaft bearing needs a puller with long arms. You can push the rods back to get more room. The transmission will have multiple gears engaged but it won't matter. When you reinstall the front case put it in a single gear (one rod moved) to avoid locking up the transmission by accident. Here's a decent video about the countershaft bearing, different tranmsision but same concepts. He did the same thing I did, clamping a two jaw puller in to the gap, otherwise the jaws pop off. The mainshaft is a more normal operation but the length of the shaft has to be managed. It takes some work. If you have friends that have pulled bearings or gears it might be worhtwhile to get some more ideas and tools on-hand. Notice the odd combination. Go to 4:00 if it doesn't start there.2 points
-
4th gear doesn't use the countershaft, it's direct drive. That's a good clue. Sounds more like the countershaft bearing. Looks like you'll need to split the cases, so you might as well do the mainshaft/input shaft bearing also. It's not a super-finesse job. Just needs some ingenuity. It's fun. Part of Z ownership. Here's a good illustration of the parts you'll be looking at. I'm sure that there are "how-to" videos out there somewhere. You can get a factory service manual on the internet that shows how to take it apart. Good luck. https://www.zhome.com/ZCMnL/tech/240SX5spd/Transmission2.htm2 points
-
"Grinding" is not very specific. Can you add details? Have you driven it? Is it the same in every gear? 71B's are known for destroying the adapter plate bearings. Did you find any metal on the drain plug magnet? If you've been driving it you might drain the fluid and see how it looks. Might also be worthwhile to lift the car and get underneath with the engine running to see if you can locate the noise. Replacing the main and countershaft bearings is not very difficult. You only have to split the cases and pull the bearings off of the ends of the shafts. The adapter plate bearings are more difficult.2 points
-
Order is with the screen printer and will keep you guys posted when I get an ETA on delivery.2 points
-
New car underway!!! look for it summer 2025.
2 points
-
@calZ, I spoke with John yesterday and I'm going to do another round. 36 item minimum from my print shop, but I think we can hit that!2 points
-
I am still around, I don't check regularly. I still have my Z. I joined here when I was 15, I am about to turn 38.2 points
-
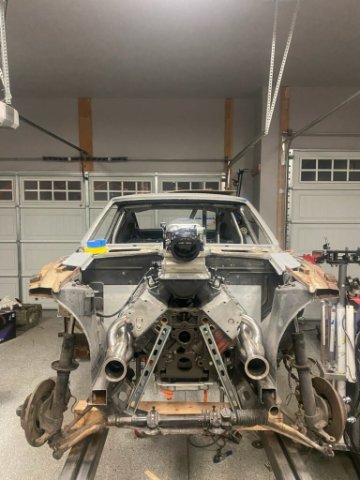
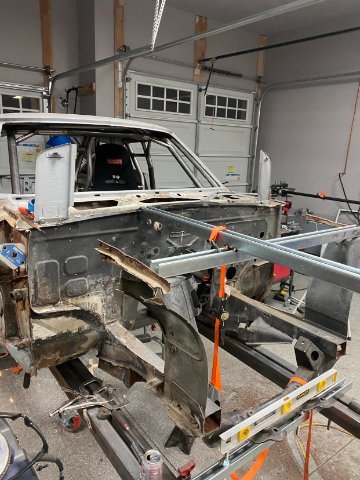
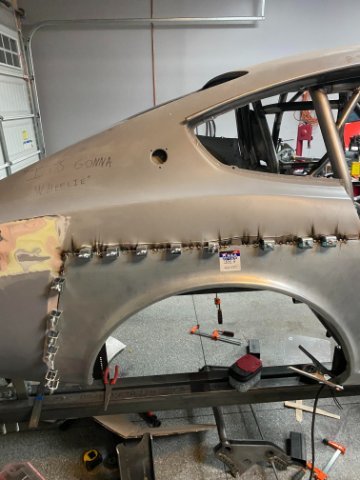
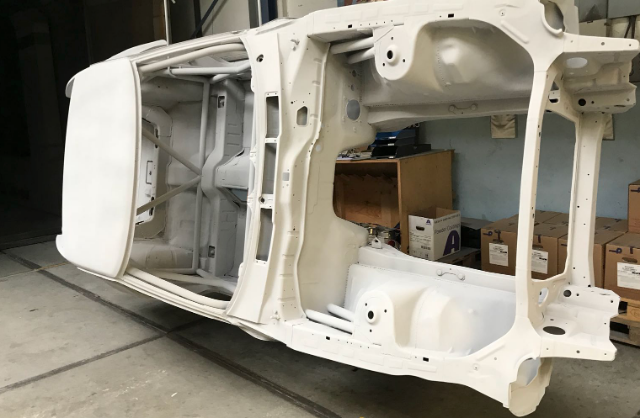
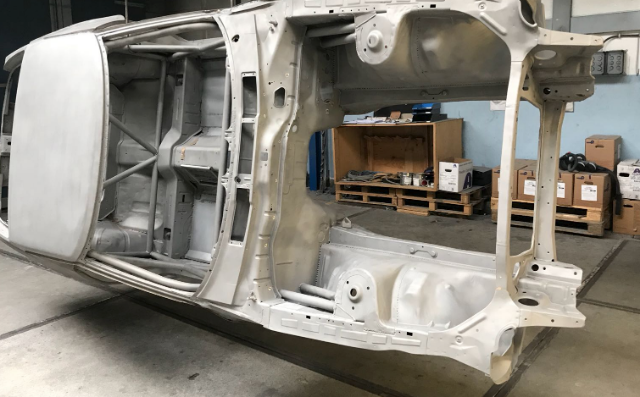
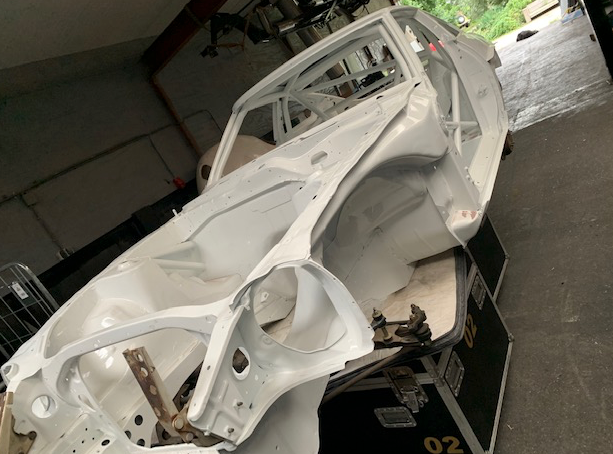
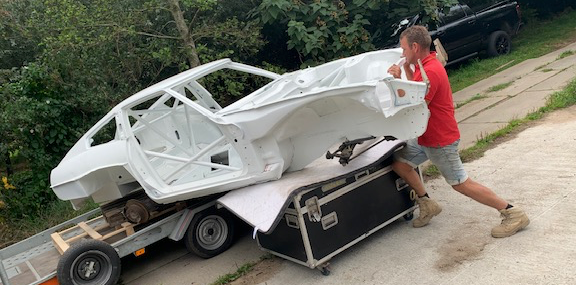
Hi All It has been a while and I have been racing e36's, TA2's V8's hard. But that Datsun bug bit me again, (It helps to have one sitting in your barn the last 11 years!!!!) Over that time there have been periods I have done several things to it, but campaigning the other cars always meant to revivals short lived. However selling after selling the Sprint race car and just having an endurance car it started to itch. And to be fair I first went on racecarsdirect before I figured that was a stupid waste of money and knowledge. So without too much fuzz... She is back. Here is a link to the original thread: I think it is a blessing in disguise that I haven’t finished it sooner, racing from 10 years means you learn allot on what is smart and what is not. And over the years allot of 'spares' have found their way to the chassis, like a Tilton pedal box, fuel cell etc etc And times change so supplies do to, there a solution for the rear control arms by these guys https://www.apexengineered.com/ So ill put in my order for a front and rear subframe for the car. Here are some pictures of the body as it sits now: First it has been blasted Then powder coated Saturday ill start with mounting some small stuff like the pedal box. For an engine it will run an L28 with forged internals, kameari chain drive, isky cam, worked head, race oil pan and probably ITBS over the set of Dellortos i still have. I might go dry sump but that has pros and cons, the con is it ads weight.
2 points
-
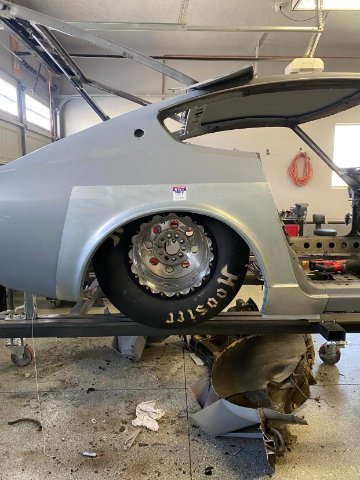
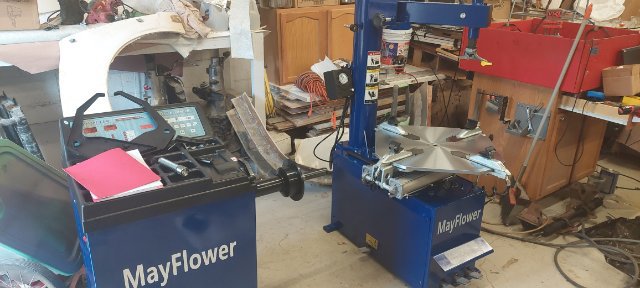
New addition to the shop! Almost destroyed my first tire, but didn't scratch the rim!
2 points
-
2 points
-
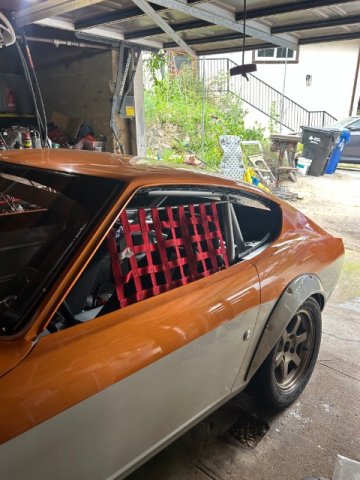
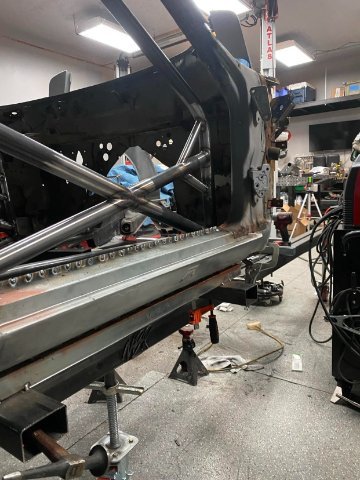
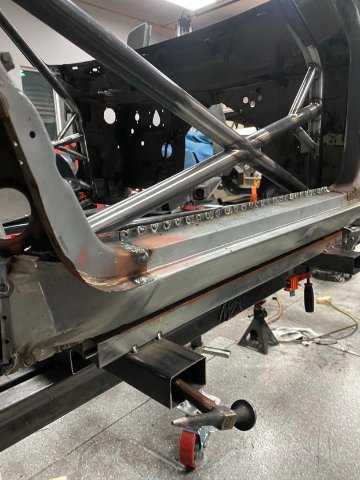
I welded 4x 1.75" wide 0.06" thick strips from the roll hoop to the body, two on the sides right below the window frame and two to the roof support .75" outboard of the dimple die holes. I cannot believe how much quieter the car is and how much better it handles bumps, hard accelerations, sharp turns, etc. Its really incredible, wish I'd done this a year ago.2 points
-
There was some conversation in other topic about blade type rollbar. So, i have one like this. 32x3mm cro-mo tube and 260mm blades. Blades are 35 to 25mm wide and 6mm thick, steel of course. Bar itself is more just a link between blades. This type rollbar works mainly with blades, i.e tube is stiff and blades are flexing (if they do) It depends how they are adjusted. If blade is vertical, it´s very stiff, horizontally they are pretty flexible. Any position between those, are something between, ofc. To adjust, just loose bolt (most left head of blade) and tur to desired position. Or attach cable and make remote control.
2 points
-
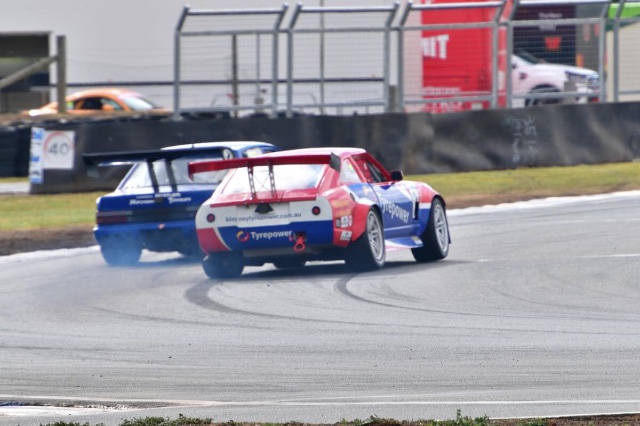
Car is still around. Still drysumped LS2, jenvey throttles with quaife 6 speed sequential and independent 9 inch. 18 x 11 wheels and 300 mm slicks all round, big AP brakes. Cool car, but the process over 9 years has been expensive. 3 x R200s, 3 t56 gearbox’s, 3 sets of coil overs, 2 sets of brakes (plus numerous rotors and pads -last set of maintenance rotors and pads was $3400. I motor blown due to oil pressure, one due to a lifter, one cooked, but still ran. Driveline is not bullet proof, but works hard so requires a little maintenance. Video is what I class as a diagnostic video. It also happens to show a Z doing a 2.18 lap around Bathurst. My quaife had dropped one tooth on 3rd gear.
2 points
-
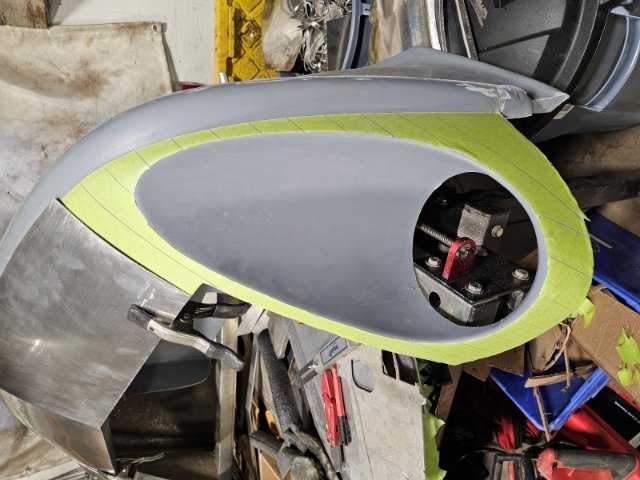
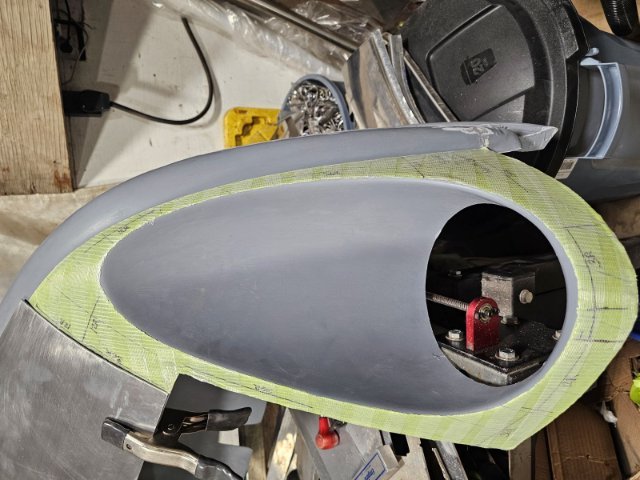
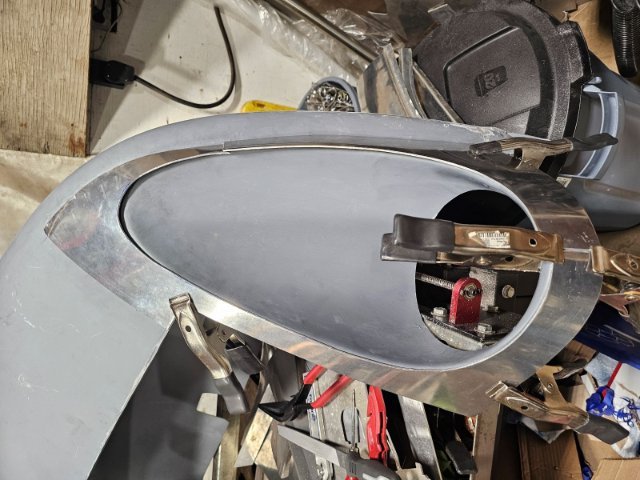
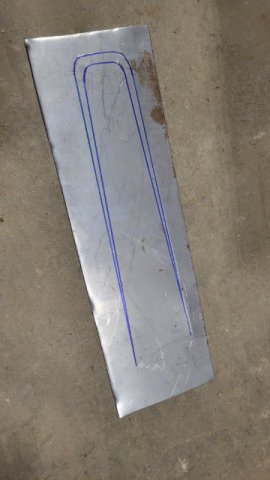
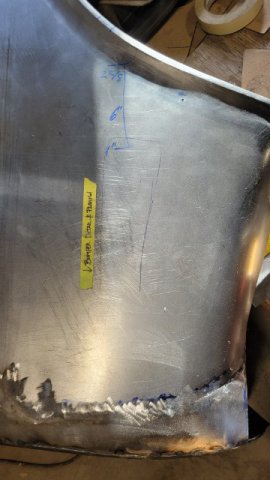
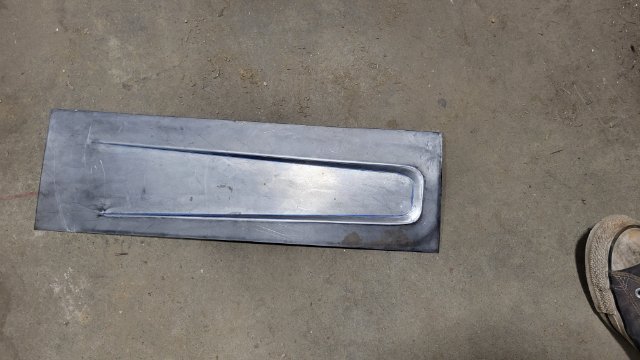
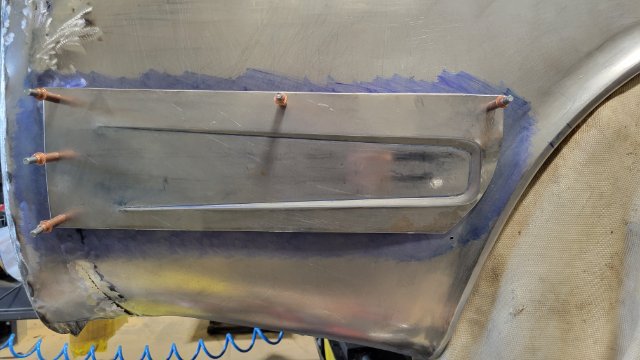
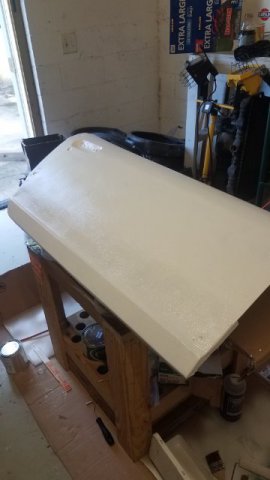
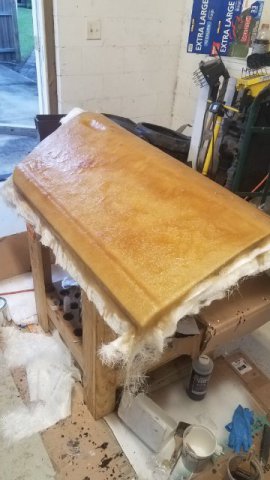
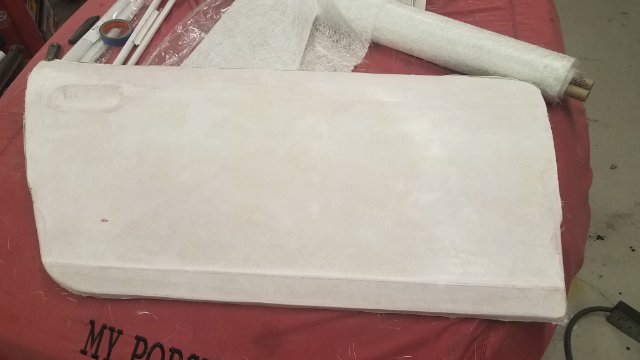
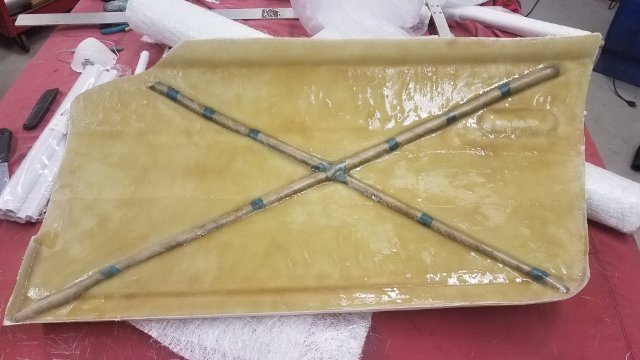
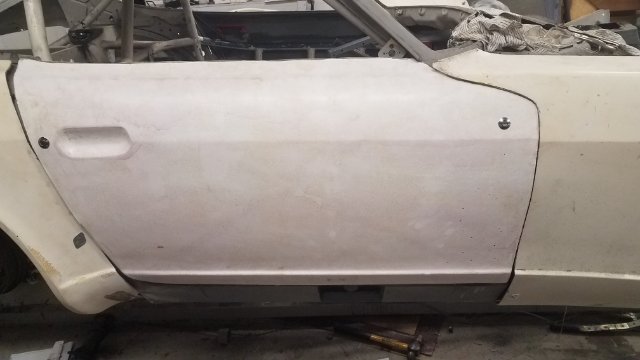
For this build I decided to jump in with both feet and learn how to build fiberglass. I found out early on that I would need to build up a custom air dam so I decided to build out a door as a trial to learn the process. I have done plenty of small FG projects but never something large that involves building a mold tool. You can see the process in the pictures. First sanding and waxing the door (plug) and applying mold release. Then a layer of gelcoat and then laying down multiple layers of heavy matt until the mold has enough strength and rigidity not to break when pulling the final part. The only mistake I made was not smoothing out the original door. I thought it looked fairly straight but it turned out to have some waves in it. It also had some small flaws I thought would be easy to correct in the mold. I was dead wrong. It would have been much easier to correct the flaws on the original door than to work on the mold. You can see the final surface on the mold. Then I prepped the mold, laid in some layers and a new door popped out. It's hard to tell in the pictures but the surface finish turned out great. I added some cardboard rolls in the back to make it stiff. It is attached to the car with push button locks and pins on the bottom. For the final touch I 3d printed a door handle.
2 points
-
thanks! Gosh I’m not sure how to adjust the res of the photo’s uploaded here. I can try e-mailing them to myself and uploaded from a computer instead of from my phone. The pictures themselves are huge files on the iPhone. Here is a vid I posted on IG today. Got my rear suspension in thanks to the helpful folks here at HybridZ @JMortensen, @jhm, @Ben280 And more IMG_5985.MP42 points
-
It would be helpful certainly, but I think in general, Apex and Techno (to name a few) aren't making parts which require that level of explanation. Quick steer knuckles, adjustable sway bars and RCA blocks are about as intense as anyone has gone until Apex started doing their subframes, allowing for roll center adjustment. Otherwise, listing a spec as "Up to 4* more camber over stock" or "3" wider front track than stock" or "Stronger!" are just, to my mind, stating the obvious. As a counterpoint, GKTech who makes a huge variety of drop knuckles and extremely modified components does a fabulous job detailing their R&D and decision making: https://blog.gktech.com/blog/gktech-rear-suspension-uprights/ I think if companies for the Z were making parts like this, it would make sense to detail choices.2 points
-
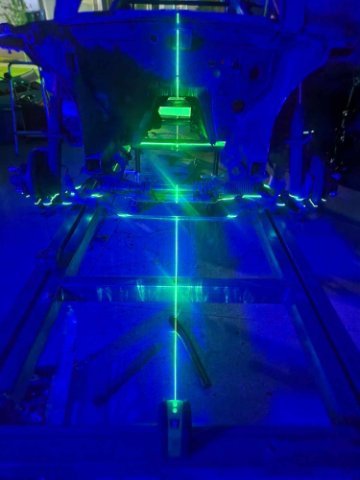
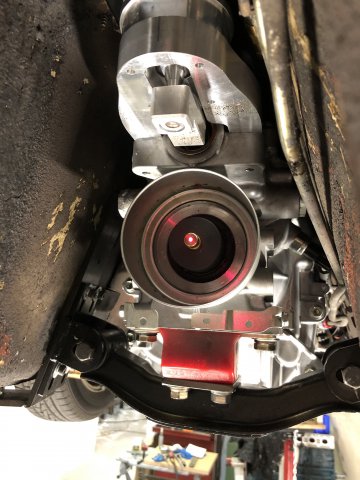
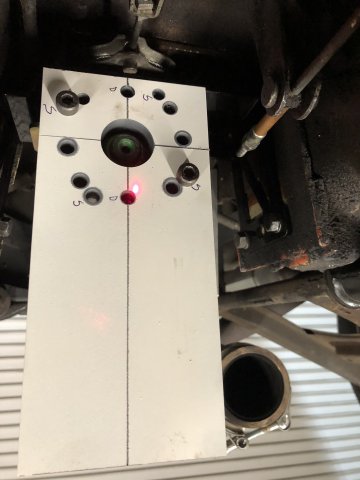
So I made a laser alignment tool based on a few Ideas I gleaned from the forum. I made a slip collar that fits over the CD009 output shaft that holds a 45ACP laser bore setter. I'm using this for the horizontal alignment. Works well. I made a target that has a couple of alignment lines. The bottom is parallel/perpendicular to those lines so you can use a level to get it plumb. I then proceeded to drill so many holes in it that it's almost useless:) The key word here is almost. That was a far over to centerline as I could get it. I need to rework either the Diff mount or the trans mount to get it any further but it's only about a half a degree so I may live with it. I'm running the Technoversions RT mount and I switched to the top mount instead of the stock bottom. This brought the pinion angle down to 2.8 degrees. The transmission is at 2.9 degrees so I'm pretty satisfied. Hard to tell if it made much of a difference but the math says it should.
2 points
-
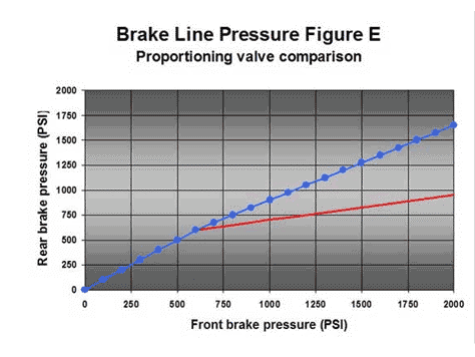
As I mentioned on the previous page, a prop valve in the front is never a good idea. As brake pressure increases, the proportion of braking done by the circuit with the valve decreases. With a valve in the front, the harder you hit the brakes, the lower the percentage of front brakes you get. This is not good, because the harder you hit the brakes, the more weight transfers to the front wheels and off of the rears. So the wheels with less traction get an increasing proportion of the braking effort as you step on the brakes harder and harder. "Proportioning Modifications We could start this section by clearly stating that you should not modify your proportioning valve. But, what fun would that be? In all seriousness, making changes to the proportioning valve to effect brake bias should be left to those with the proper tools and measurement devices, but if you have tweaked your vehicle beyond recognition, this may be your only solution to restore a sense of proper bias to your braking system. We’ll start here with three of the most basic rules regarding proportioning valve installation and selection. 1. If you have the deeply-rooted need to install your own adjustable proportioning valve, be advised that they should NEVER be installed if the factory unit is still in place. Proportioning valves in series with one another can do nasty, unpredictable things! 2. If you have the deeply-rooted need to install your own adjustable proportioning valve, be advised that they should NEVER be installed in-line to the front brakes. The effect would be to make your vehicle rear-biased before you could say “terminal oversteer.” Front brake line pressure should always be left alone – only the rear pressures should be considered for proportioning. 3. In all cases, the basic brake system balance needs to be close to optimized to start with. This is the only way that a proportioning valve can be effectively utilized. You should never assume that simply adding a proportioning valve will address all rear-bias conditions, as even the best proportioning valves must be well-matched to the target vehicle." https://www.apcautotech.com/getmedia/d958a29e-4ebf-41fd-931f-bf7e4451801b/brake-proportioning-valves.pdf
2 points
-
Found a site for downloading the FSM that I have never seen before, with a lot of nice information, link below http://240260280.com/Docs/2 points
-
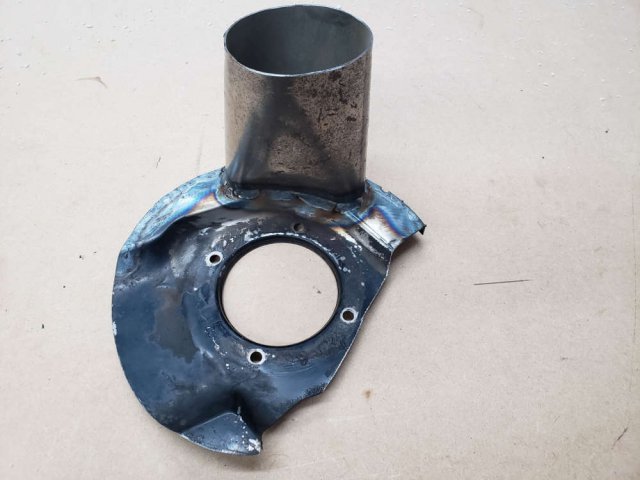
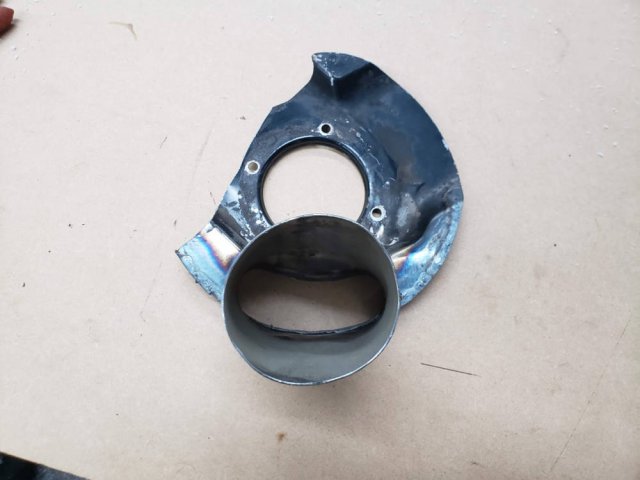
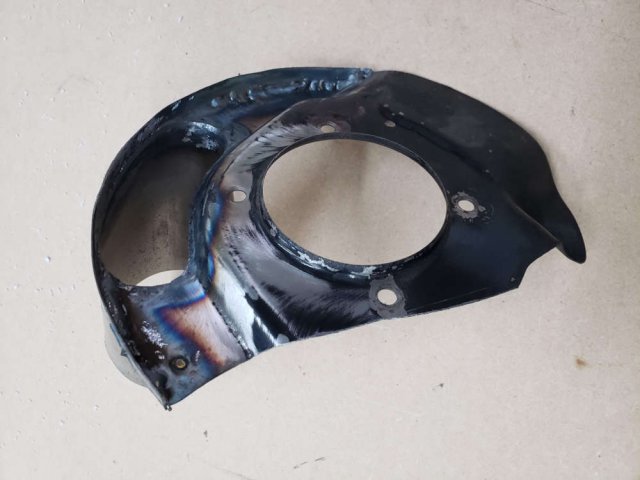
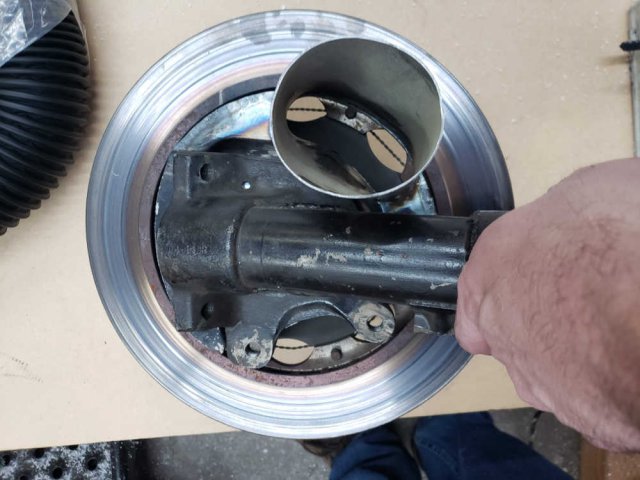
The plan was to do some track days this year, so I needed some brake ducts and an oil cooler. I sold/bartered a set of series 1 scooped backing plates I had for a set of normal ones. No need to cut up the rare stuff. Took the new backing plates, cut them to 8" diameter, took a 3" exhaust collector and modded it to fit the cut down backing plate. Welded, drilled holes in the duct hole and then used cut off wheel and die grinder to open the hole in the backing plate up. Also took a section of the rim of the stock backing plate and welded it on for stiffness and to close the gap between the backing plate and the rotor vents. Doesn't look all that wonderful but I think it's going to work well. 1 down, 1 to go, then can modify my front end for the scoops and hook up the tubing.
2 points
-
Old Thread, but if you are looking for a 280zx ducktail spoiler, we keep them in stock and ship out within 2-3 days. https://bhjautomotive.com/shop/exterior/280zx-tall-bre-rear-wing/ Thanks!
2 points
-
an LS is also vastly more expensive then a traditional 350 swap. He should do whatever he wants to do.2 points
-
Semantics is a big deal on this forum. It is one way that separates us from other forums. Making sure an item is called the correct name that people recognize will go a long way. If you want I can edit the title of your post which directly asks for a workaround to the combo switch. Semantically it seems to be called a multi-function relay. The relays themselves seem to last quite a while, I'm still using several stock ones in my 71 that was in use till 2010. I would suspect as miles pointed out it may be the switch contacts on the stalk going out. The hazard lights switch has its own set of wiring so it may be acting as a red herring if you are using that as the reasoning in your train of thought. I suggest taking a breath, people are here to help of their own accord, it may be frustrating to seemingly answer the same question or when someone is caught on a seemingly unrelated point, but realize we need clarity to try and help. It may serve to help their train of thought, and it may seem tedious, but given the free help, maybe try being accommodating? It may serve better to have a post where you clarify exactly what you are looking for that you or others can refer to someone asking a question in the post. I can't answer as I've only looked at the early Z wiring in detail, but it seems odd for the blinker wiring to go through the floor so I can identify with others as to the confusion. I'm finding a note that the part number was used for a fuel pump relay, might be something else to check. I do know the pins are a standard spade connector so you could wire in a modern relay if you can pin out the contacts and make little adapter lengths, I've done that for some older plugs before. Identify power, ground, switch ground, switch power, and output. Then you can use any modern automotive relay.2 points
-
katman? Where the hell has he been for the last 10+ years? Oh, that's me, back from the dead. That thread may have been on improvedtouring.com. Assuming your friend also has to run the stock drum brakes, here's how we made brakes last in an ITS car, which at the end of its development was probably as fast as any CP vintage car. I don't know what compound Carbotech has today, but back then the HT-9 was the only thing that would hold up to the heat on the front. The HT-10's that replaced them were not as good, but that was about the time that SCCA pissed me off by outlawing remote reservoir shocks so I quit thinking about Z brakes. I ran both the Nismo rear shoe, and the relined Carbotech shoe, I think. We cryo treated rotors and drums. We ran the parking brake so we could adjust the rears during the course of a race. That and having an adjustable prop valve so you can make the rears take their share of the load is critical. If you aren't turning the friction surface of the drums blue, then you ain't there yet. Scour the junk yards and find every Z drum you can find and have them turned and expect to rotate in a new set every weekend. Up front, don't fall into the trap of using a pad that maximizes the pad material, in other words instead of this | | , you want this \ /. The outer radius of the rotor runs hotter because its going faster (linearly) and wears the pad faster. Nothing worse than having to pump the brakes every corner to take up the slop from tapered front pads, maladjusted rear shoes, and expanded rear drums. We drilled holes in the backing plate on the rears for some cooling, but not much else you can do back there. Up front we ran three 3" ducts on each side, one to the hub area of the strut to cool the bearings, one to a custom "can" that blew air on either side of the rotor, and one that blew into the caliper overtop of the pads. That one was tricky to make as there isn't a lot of clearance between the caliper and a 14" wheel that we had to run. I also drilled a series of small holes around the periphery of the pistons just behind where they contact the back of the pads so air could circulate behind the pads from the aforementioned duct over the pads. PM me and I'll send you some pictures.2 points
-
It's a spacer for the flex plate. You need to remove it anyway to mount your flywheel. Pretty sure it just pries off easily. Then the seal will be exposed.2 points