Leaderboard


Popular Content
Showing content with the highest reputation since 12/10/04 in Posts
-
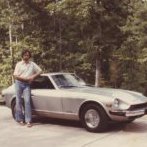
Don't tell my wife Like I tell other people. some like to fish, some like to bowl, I like to make.5 points
-
He's saying although we are launching a DOHC head in 2024 we readily admit it will be pale in comparison the mighty KN20 from Datsunworks. At least that's what I'm hearing.4 points
-
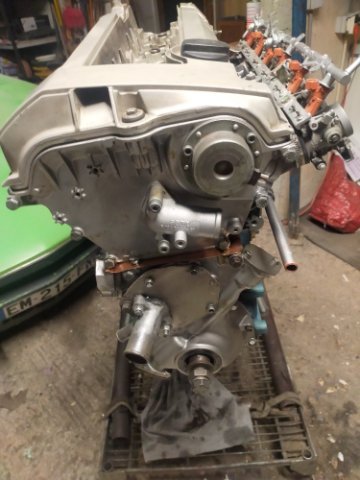
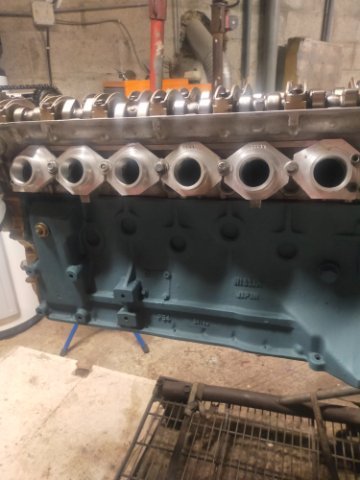
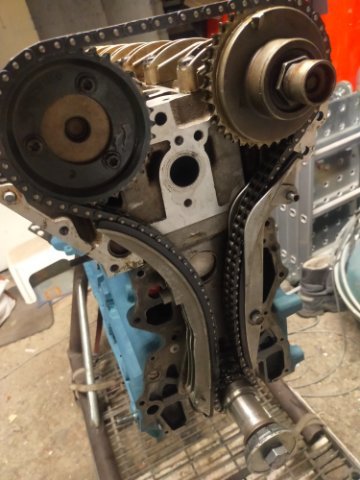
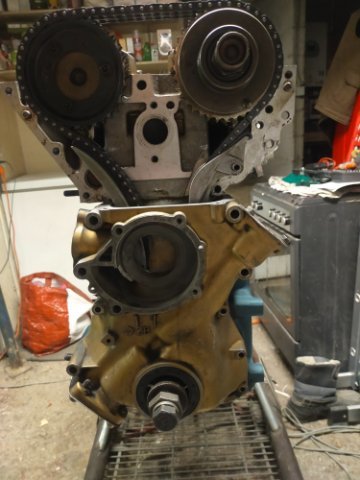
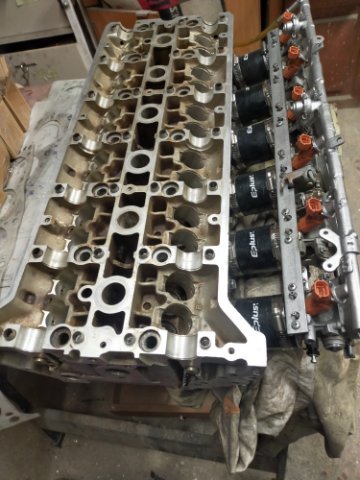
well old story , but MAG58 was right, mercedes M104 head is possible on a datsun L28 stroked , build is not over but we will see what happens soon bye bye Didier
 4 points
 -
**UPDATE Went to court yesterday and basically played dumb. Told the judge that "I went to the state ref and he told me since the car is so old that he couldn't do anything to certify it. So how do I go about taking car of this ticket. The vehicle is a pre smog vehicle so I've never had to SMOG it" The judge said "Ok so what Im going to do here is dismiss the case cuz it seems like your car doesn't qualify for an inspection. Sorry about the inconvenience Mr. Soto" I tried to play it cool but I was so happy. After reading all the horror stories from other people about having to revert to stock and all that I was lucky I guess Hope this thread helps someone going through something similar4 points
-
Greetings Everyone, Due to the increase in spammers HybridZ, registration has changed from being automatic to manual. That means one of the Admins will need to approve any new registrants. If you ask or tell someone about HybridZ (please do) let them know registration isn't automatic anymore. We'll do our best to stay on top of any additions and hopefully you all will see a lot less spam. Thanks, The HybridZ moderation team4 points
-
Unfortunately, it is too late. Maybe for round 6 in a couple of years Got the shirts in and will start breaking things down and shipping things out next week. This week is busy with work travel, so appreciate your patience while I get a few out each day on my lunch breaks.3 points
-
They received all of the shirts without backorders and are starting on printing this afternoon!3 points
-
I really wish things would swing back towards the forums. I can't tell you how many times I know the answer to or could add to a post on FB but I don't since it really has no longevity. I always felt like I was adding to the overall knowledge base when I posted here. I can go on and on but I really hate it.3 points
-
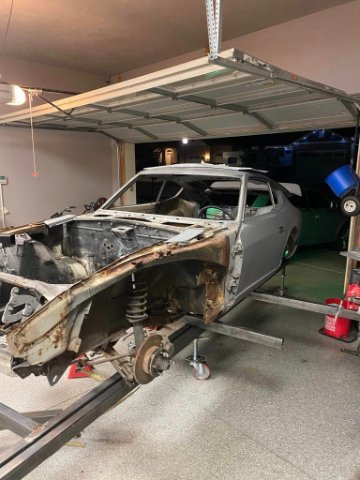
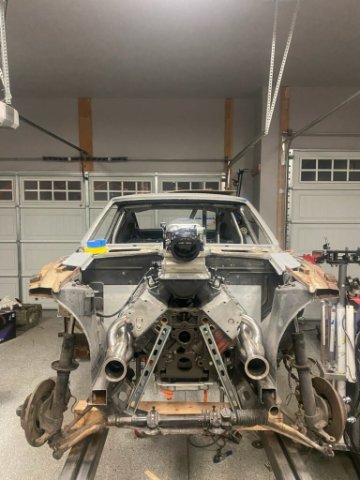
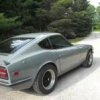
First start up since starting the restoration. Kind of shocked she started right up on the first go. Was expecting something on the MegaJolt to need fixing, but it worked great. Went with Magnacor wires, but they made a mistake and did not fit them up with the right coil boots. Being remade and shipped, so I am using 05’ ford explorer NGK wires for now. Went with a “7” heat NGK plug on account of the 10:1 CR. It’s raining this weekend, but just need to dial-in some crude alignment and she will be road worthy IMG_2339.mov3 points
-
Just wanted to say again a HUGE "Thank You" to @cockerstar for doing this (a FIFTH time)!!!! Really appreciate all his time and effort to make this happen. You da' man, Ryan!!! 👍👍3 points
-
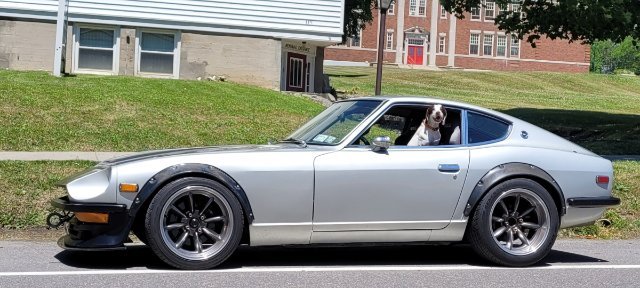
Yup! Been daily driving it, 300+ days a year, for the last 4 years. Approaching 75,000 miles on the turbo build. No regrets.
3 points
-
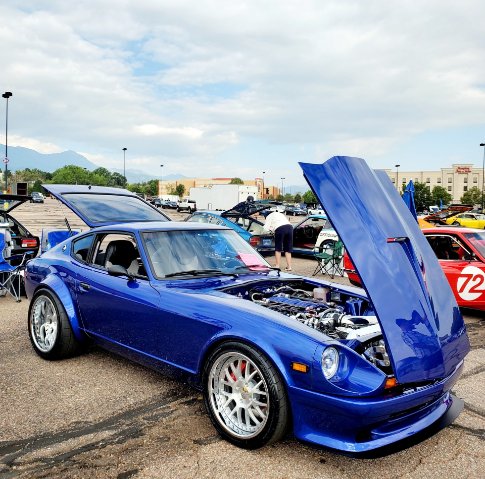
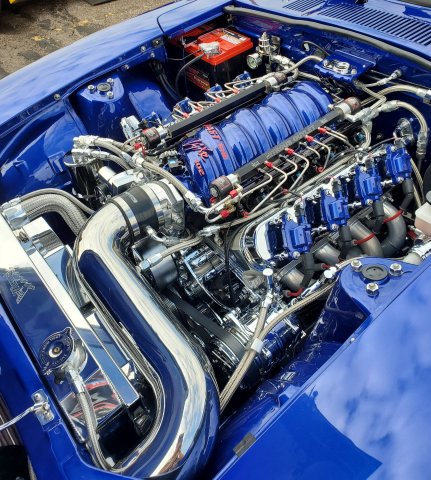
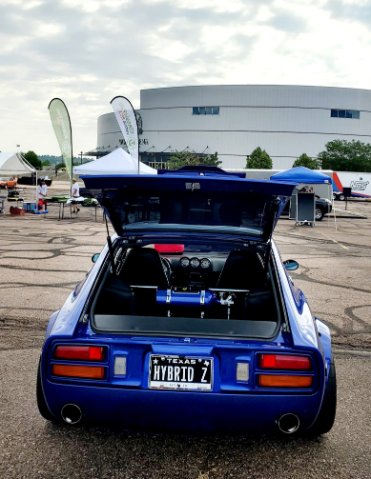
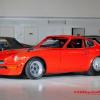
I want to thank all of you here for giving me inspiration for my build. I have adopted the Hybrid Z name for my build years ago since this site provided a lot of information that I consider priceless. I was able to meet some great people at ZCON, some that know my build and others that just wanted to say hello and compliment me on my build. When I built this car I built it as my version of what a Z should be therefore I know a lot of people were not going to like it since it was my vision and nothing else. Taking my car to ZCON for the 1st time and walking out of there with these awards it’s just incredible, especially with all the awesome cars I was competing against. It’s great to see the judges appreciate all the hard work and effort that has gone into it. These are the awards I received. 1st Place in Ultra Modified Best Engine Gold Cup- This was totally unexpected and shocking it was given to a Z with and LS3 since most of these guys are Nissan purists. Again, thank you all for your support and keeping this site alive.
3 points
-
It's not the votage drop that matters it's what the voltage drop indicates. No spark will be created if the current through the coil is not stopped. You could also disconnect the coil negative at the coil and check the wire for continuity to ground, key off. Disconnect the wire, put one meter probe on the end and the other probe on a good bare piece of metal or the engine block. You should get OL or infinite/huge ohms on your meter.2 points
-
There is no swap hardware to put the Z transmission behind a V8. It wouldn't handle the torque anyway. The 260Z engine is about 158 cubic inches, compared to 350 for a SBC. The old Z transmission bearings are typically ready to fall apart besides that, not uncommon even with the stock engines. It would probably last about one pull. I haven't done it myself, but I wouldn't even try it just based on what I've learned.2 points
-
You have packed a lot into your intro. There's some good advice below to consider in the posts to your question. But I have to ask you what is it about the 280 you love? I don't mean that coyly or as some flippant remark. What is it you really like? I'll give you why I like the Zs. I grew up around them when they were new, my uncle was a general manager of a Datsun dealership so we got to try out the new cars. We raced with my uncle at autocross and hillclimbs (I was a kid so I just went along). Back then the Z cars were fast and sounded awesome (I have the hearing loss to prove it), and were amazing at cutting through the corners both stock and modified. Our local racing club had about 10 people driving stock to all-out racing versions. 50 years pass and a lot of that coolness has mostly worn off except for the look of a lowered S30 with an airdam and rear spoiler. I have to admit the sound of a modified Z makes me happy when I hear it. But this site exists to help people get the most out of them. And the reality of that is as cool as the L28 engine is you're looking at spending a lot of money and you'll have an engine that makes 200 to 250 HP. Sure you can get more but then all the other parts that connect to that engine are starting to get pushed past their limits given the age. While I don't disagree with any of the posts below you should still read about a lot of the mods and why they were done. You'll find that in many cases they were driven by it costing too much, parts NLA, etcetera. A bit of advice from me. Never by an engine, transmission, or rear end unless you plan to use it within a few months. Even if you plan to use it that's not the same as ready to bolt in. If you want a street car with a certain coolness and triple Weber carbs, then build it. But when you spend 10K on an engine and find it's somewhat finicky to drive but cool all the same. But for less, you could have 350 HP V6 in the DI Chevy LV3. It won't sound the same as the L-motor but it's lighter, a lot newer, and will get excellent mileage, It will start anywhere if it's hot or cold by the sea or at altitude. This site has a ton of info on how to do the same for the suspension and how to get a cheaper rear diff, especially if you want an LSD. I could write a lot more but this is probably too long as it is. Welcome to Z ownership. Cary2 points
-
Yes, with the carbs you can get rid of the ECU and EFI parts. The complete EFI harness can be removed. The guys that know on the site (from the past) say that the exhaust system is restrictive and opening it up helps a lot (see John C posts from the past) , and that if you decide to use a performance cam go big (see JMortensen posts from the past). The typical "Stage" 1 or 2 cams don't add much, apparently. So, the simple and effective way to add some power is with a better exhaust system and a big cam. Cams are more expensive than they seem because you need to buy lash pads and rocker arms along with the cam. The collection of parts costs can add up. But it's a pretty simple operation to get it done. Many people like the lighter flywheel. It takes more finesse on the clutch pedal but they say it's worth it. Fidanza is a good choice. For street driving an LSD doesn't add much. You might wait on it and see if you have traction problems. There is a ton on the site from the old-timers, around the 2000 to 2015 time range. Things have slowed a lot on the site as people have moved on. But their contributions are still here. Many of the guys were racers and/or engineers/mechanics/machinists and spent a lot of time and money on their projects. Today's car hobbyists really only know turbos and EFI since that's what they were raised on. Good luck.2 points
-
Even if 100 people commited to purchase, its still tiny small numbers vs an OEM production. Its got to be done out of passion and at least not to lose money. This is why this is such a huge acomplisment for someone like Derek, We are fortunate the passion runs deep. I cant imagine the hours of "un-billed" time2 points
-
Life has been kicking my ass lately! Between my job changing significantly, being super sick, and some significant medical issues with my daughter I haven’t made the progress on shipping orders that I have wanted to. Post here if you’re really itching to get yours and I’ll move it to the top of my list. Otherwise I’m moving along as ordered. I’d like to get these wrapped up so I can transfer the remaining funds over to Dan.2 points
-
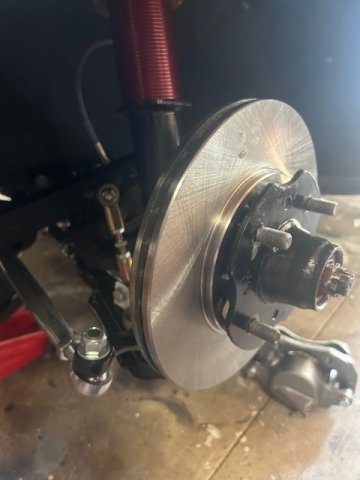
We’re going on track this Sunday at Willow springs Will set-up the car tomorrow at a friends shop since they have a flat-level garage floor (which I do not). Also in the middle of adapting the front brakes to 280zx rotor and caliper per EP spec-line. Caliper mounting on the strut assembly will require some welding and drilling, so it will have to wait till after this weekend. Greg Ira was nice enough to ship me some race pads he has that fit the OEM calipers.
2 points
-
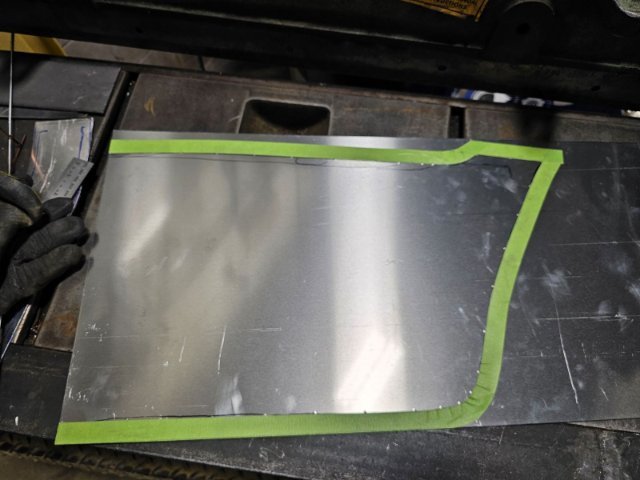
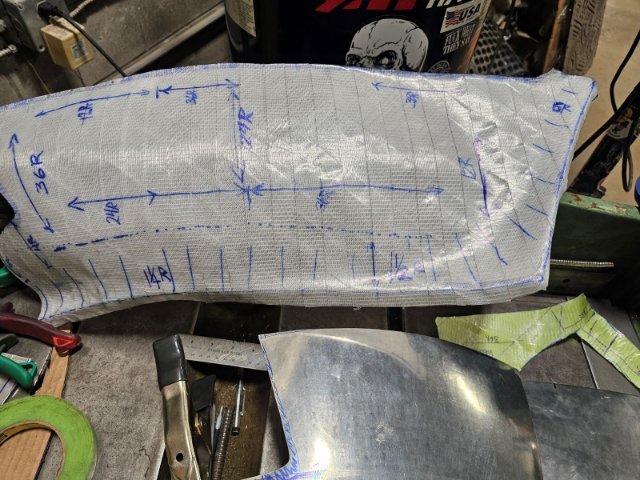
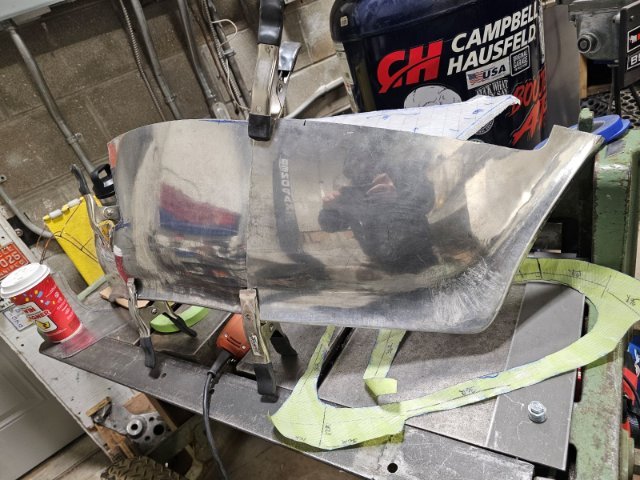
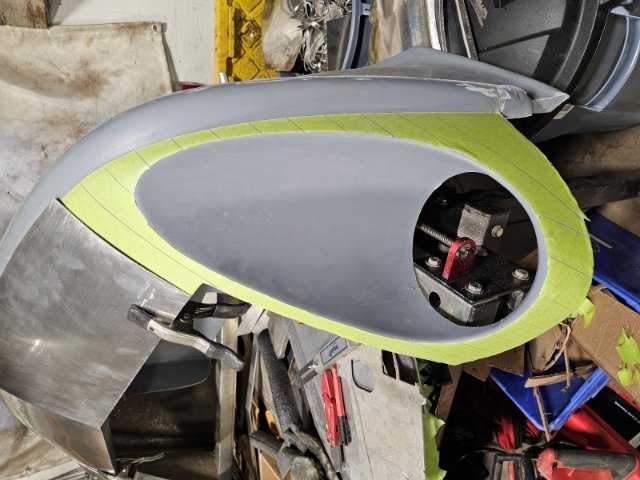
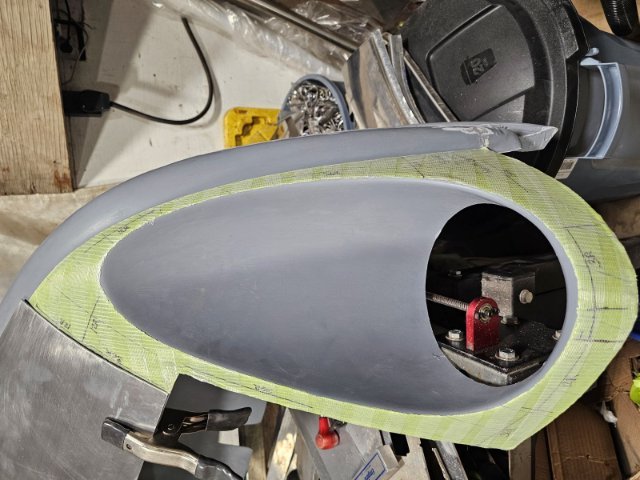
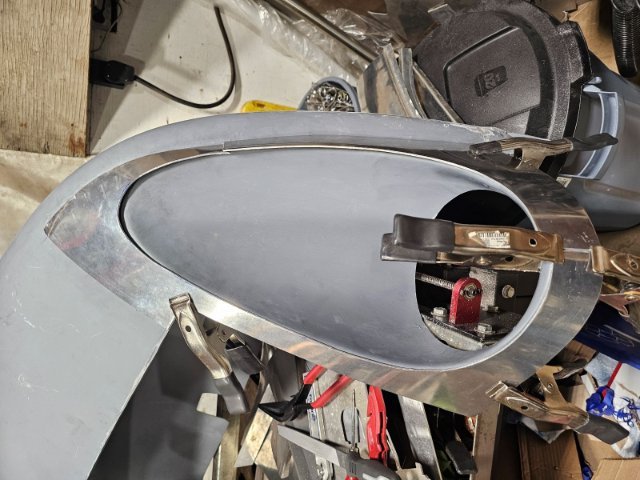
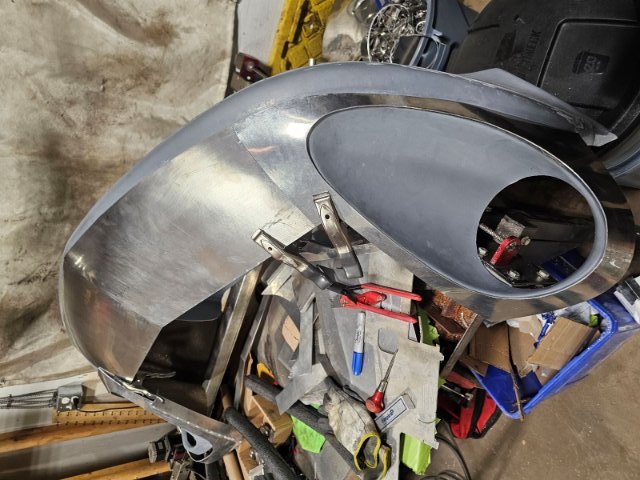
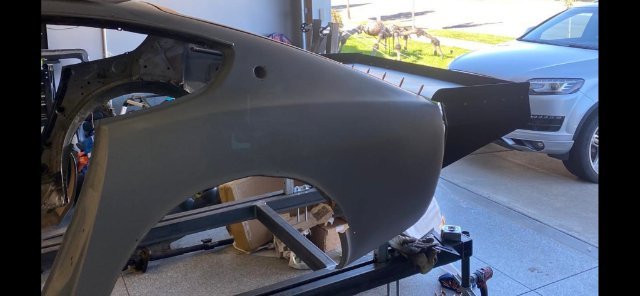
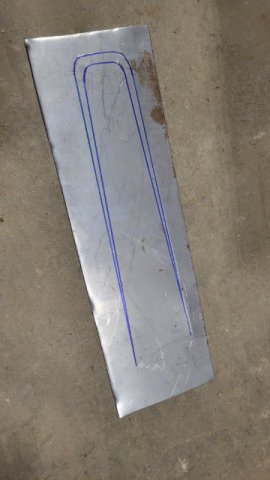
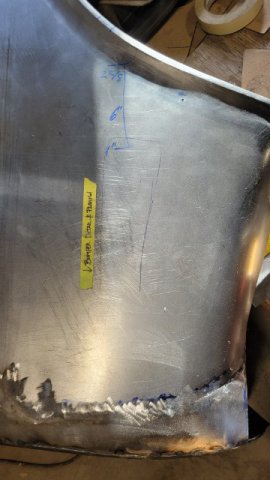
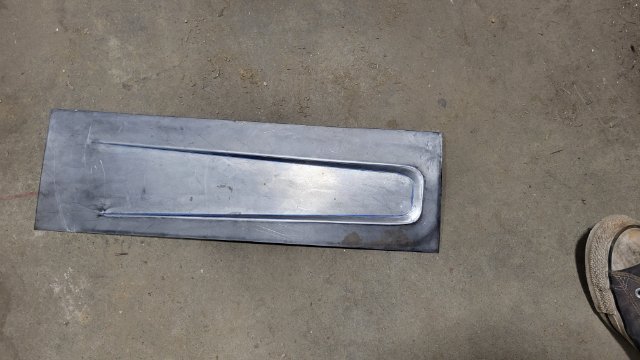
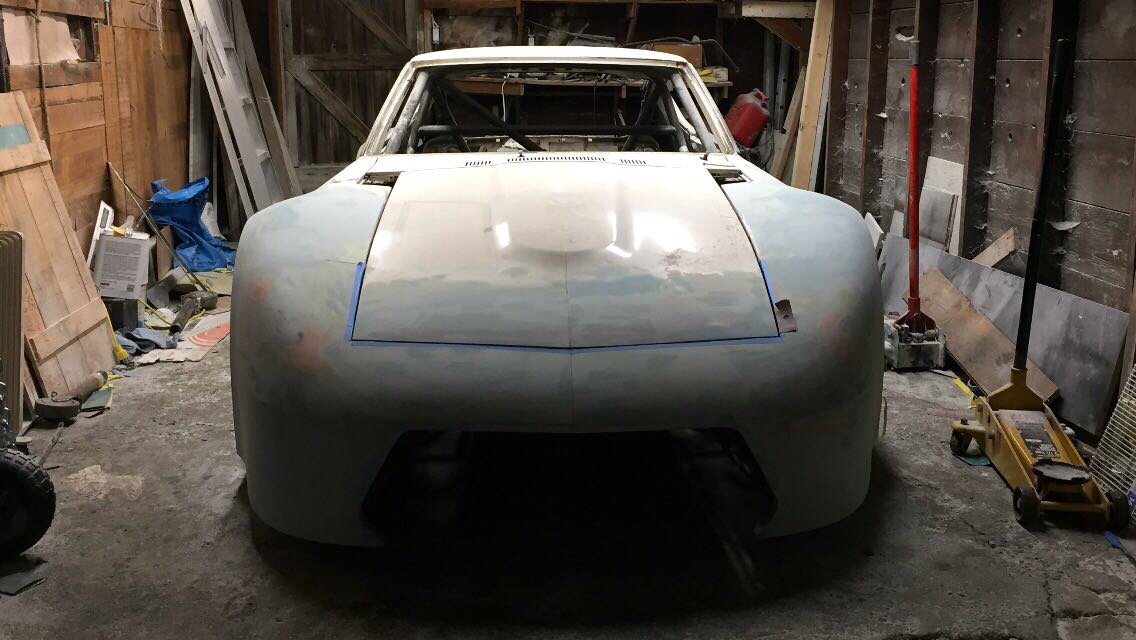
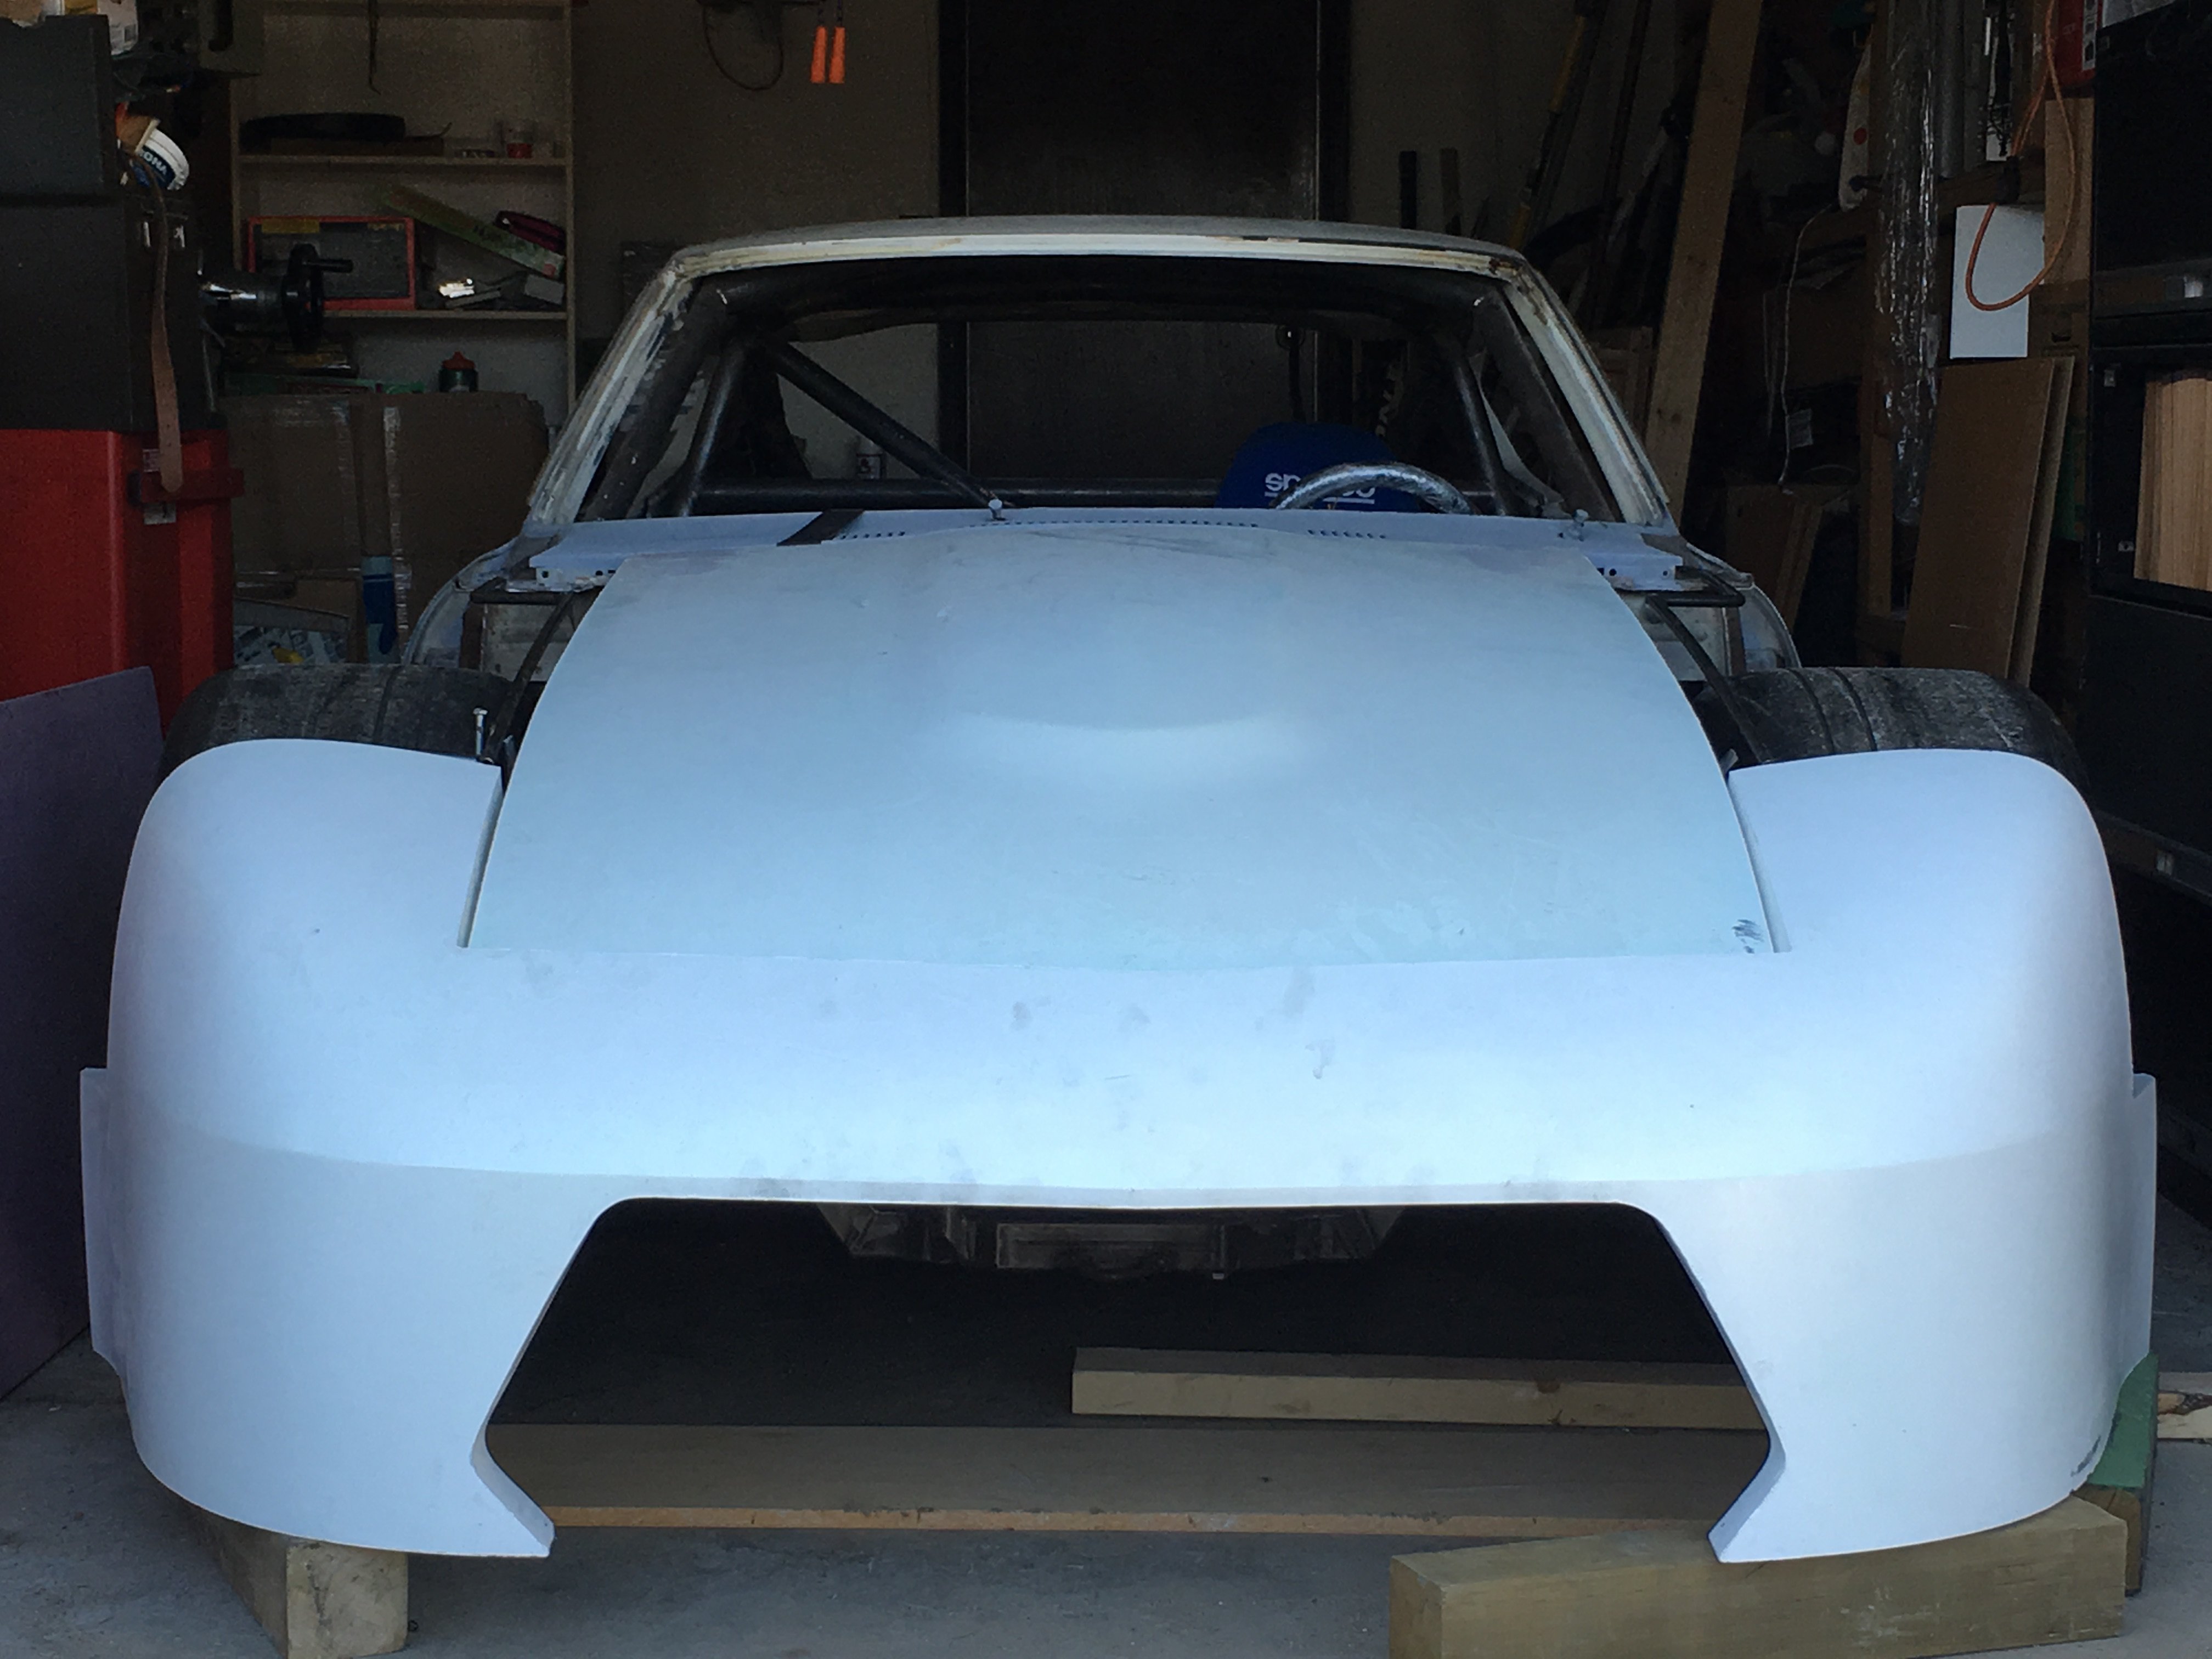
Lower part of the bumper is started. Used a fiberglass gnose to take dimensions from, happy with how everything is coming out.
2 points
-
Hi everyone! I have the shirts and should be able to start getting some out today. I was primarily working from home at least 80% of the time, but my job just got pushed to 60-80% travel so I haven't had breaks at home like I used to.2 points
-
4th gear doesn't use the countershaft, it's direct drive. That's a good clue. Sounds more like the countershaft bearing. Looks like you'll need to split the cases, so you might as well do the mainshaft/input shaft bearing also. It's not a super-finesse job. Just needs some ingenuity. It's fun. Part of Z ownership. Here's a good illustration of the parts you'll be looking at. I'm sure that there are "how-to" videos out there somewhere. You can get a factory service manual on the internet that shows how to take it apart. Good luck. https://www.zhome.com/ZCMnL/tech/240SX5spd/Transmission2.htm2 points
-
Finally got this thing tuned right, kept fighting an issue where the car would break up on quick throttle changes and in boost. Engine had NGK b6es-11 plugs, I went to a NGK bpr7es and all my problems disappeared. Engine is leaking oil pretty bad though from what looks like where the timing cover and cylinder head meet, l am genuinely amazed at how much oil can come out of there. The stock head gasket was torn there, and I RTVed it up a lot after the fact. Maybe my PCV valve is faulty and pressurizing that area under boost? Once I get this oil leak handled Ill take it to the dyno.2 points
-
New car underway!!! look for it summer 2025.
2 points
-
@calZ, I spoke with John yesterday and I'm going to do another round. 36 item minimum from my print shop, but I think we can hit that!2 points
-
I am still around, I don't check regularly. I still have my Z. I joined here when I was 15, I am about to turn 38.2 points
-
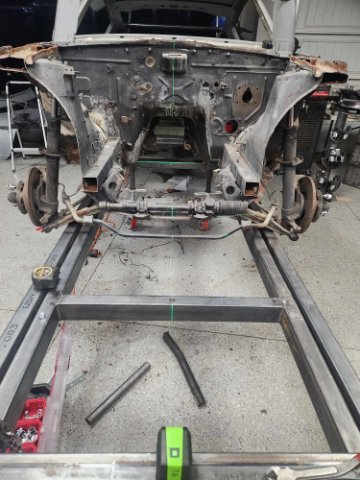
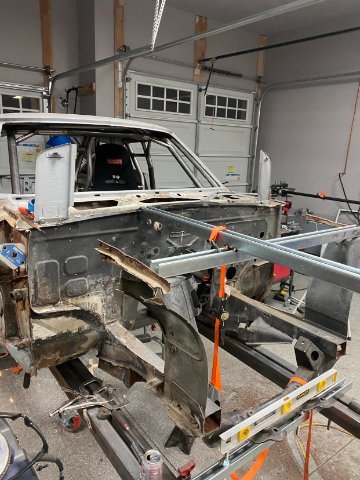
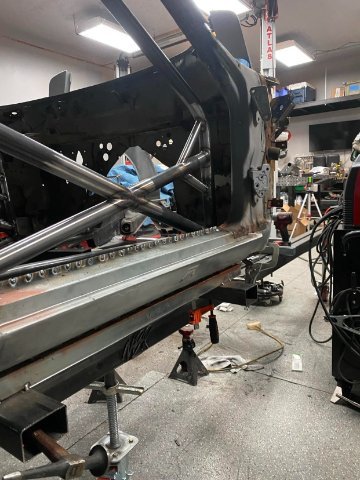
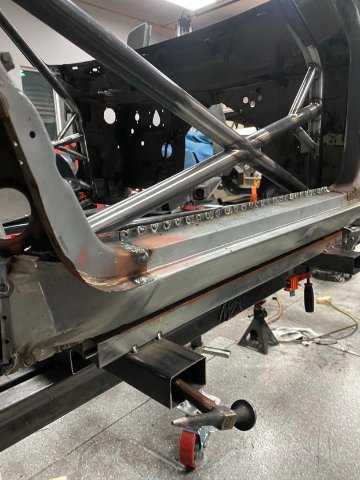
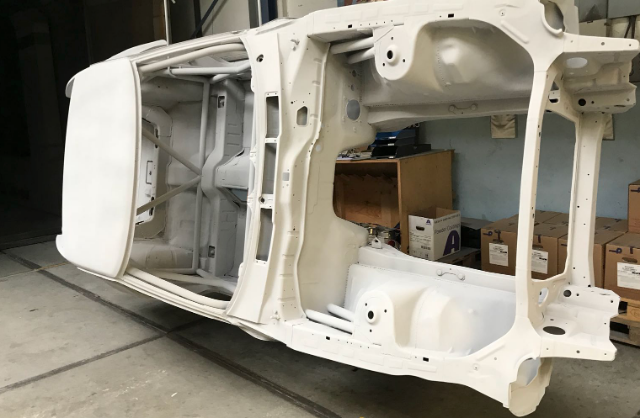
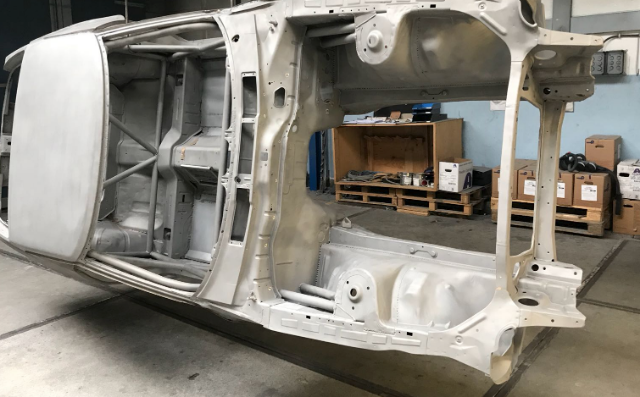
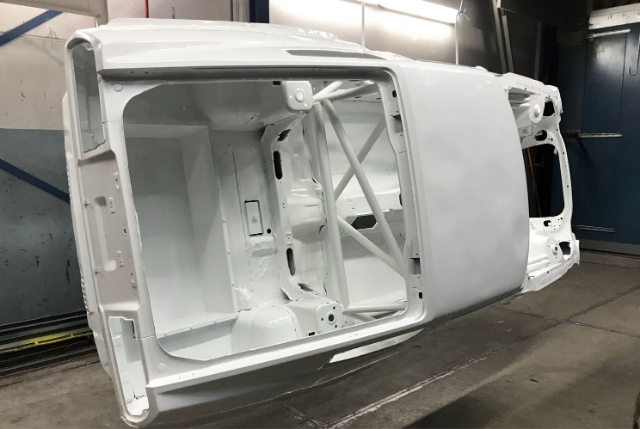
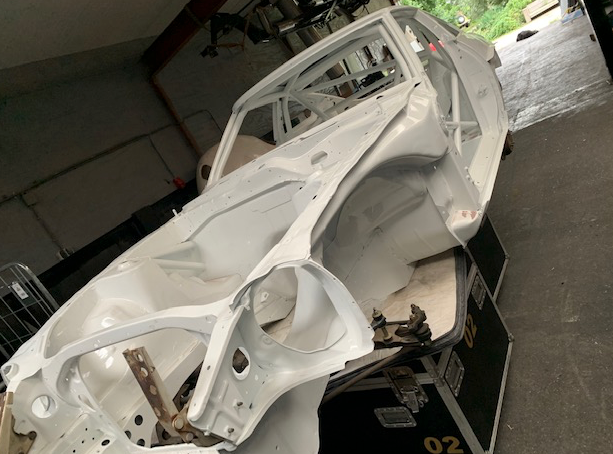
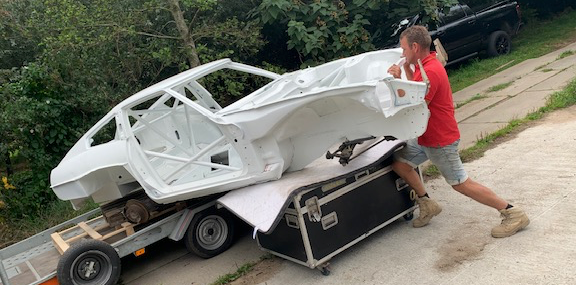
Hi All It has been a while and I have been racing e36's, TA2's V8's hard. But that Datsun bug bit me again, (It helps to have one sitting in your barn the last 11 years!!!!) Over that time there have been periods I have done several things to it, but campaigning the other cars always meant to revivals short lived. However selling after selling the Sprint race car and just having an endurance car it started to itch. And to be fair I first went on racecarsdirect before I figured that was a stupid waste of money and knowledge. So without too much fuzz... She is back. Here is a link to the original thread: I think it is a blessing in disguise that I haven’t finished it sooner, racing from 10 years means you learn allot on what is smart and what is not. And over the years allot of 'spares' have found their way to the chassis, like a Tilton pedal box, fuel cell etc etc And times change so supplies do to, there a solution for the rear control arms by these guys https://www.apexengineered.com/ So ill put in my order for a front and rear subframe for the car. Here are some pictures of the body as it sits now: First it has been blasted Then powder coated Saturday ill start with mounting some small stuff like the pedal box. For an engine it will run an L28 with forged internals, kameari chain drive, isky cam, worked head, race oil pan and probably ITBS over the set of Dellortos i still have. I might go dry sump but that has pros and cons, the con is it ads weight.
2 points
-
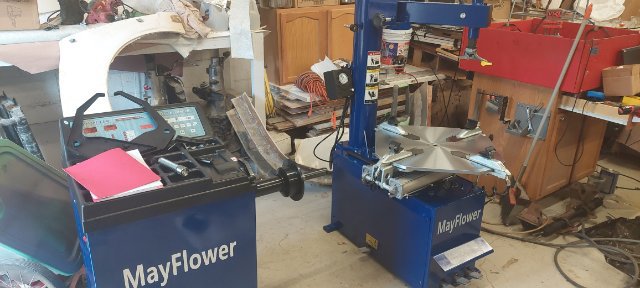
New addition to the shop! Almost destroyed my first tire, but didn't scratch the rim!
2 points
-
2 points
-
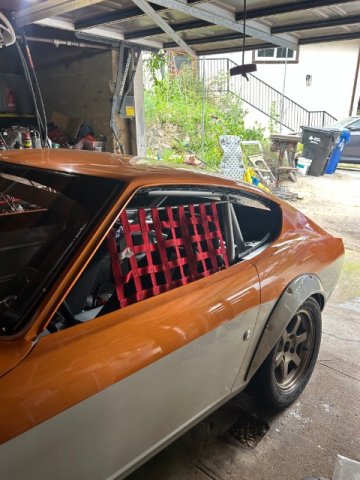
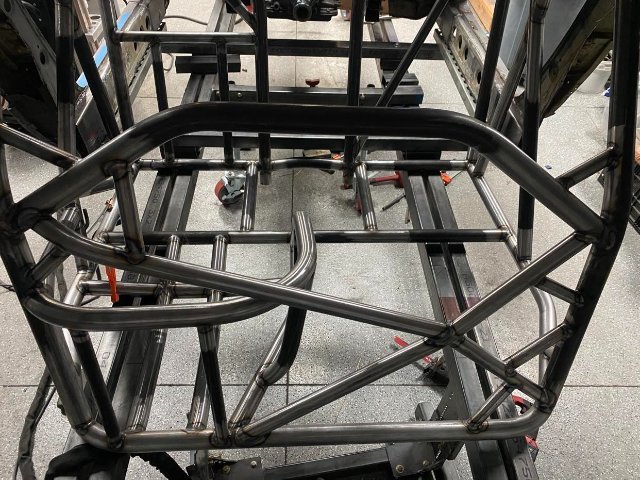
There was some conversation in other topic about blade type rollbar. So, i have one like this. 32x3mm cro-mo tube and 260mm blades. Blades are 35 to 25mm wide and 6mm thick, steel of course. Bar itself is more just a link between blades. This type rollbar works mainly with blades, i.e tube is stiff and blades are flexing (if they do) It depends how they are adjusted. If blade is vertical, it´s very stiff, horizontally they are pretty flexible. Any position between those, are something between, ofc. To adjust, just loose bolt (most left head of blade) and tur to desired position. Or attach cable and make remote control.
2 points
-
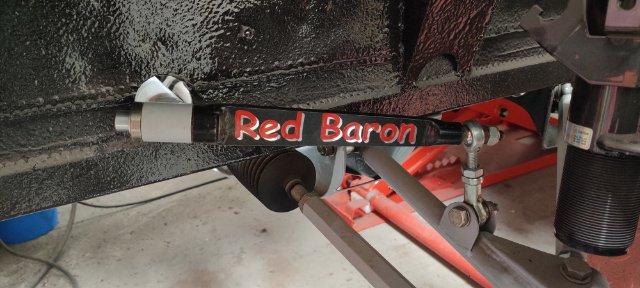
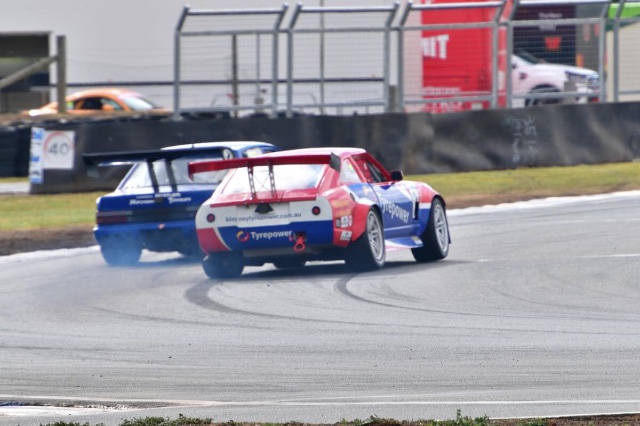
Car is still around. Still drysumped LS2, jenvey throttles with quaife 6 speed sequential and independent 9 inch. 18 x 11 wheels and 300 mm slicks all round, big AP brakes. Cool car, but the process over 9 years has been expensive. 3 x R200s, 3 t56 gearbox’s, 3 sets of coil overs, 2 sets of brakes (plus numerous rotors and pads -last set of maintenance rotors and pads was $3400. I motor blown due to oil pressure, one due to a lifter, one cooked, but still ran. Driveline is not bullet proof, but works hard so requires a little maintenance. Video is what I class as a diagnostic video. It also happens to show a Z doing a 2.18 lap around Bathurst. My quaife had dropped one tooth on 3rd gear.
2 points
-
thanks! Gosh I’m not sure how to adjust the res of the photo’s uploaded here. I can try e-mailing them to myself and uploaded from a computer instead of from my phone. The pictures themselves are huge files on the iPhone. Here is a vid I posted on IG today. Got my rear suspension in thanks to the helpful folks here at HybridZ @JMortensen, @jhm, @Ben280 And more IMG_5985.MP42 points
-
It would be helpful certainly, but I think in general, Apex and Techno (to name a few) aren't making parts which require that level of explanation. Quick steer knuckles, adjustable sway bars and RCA blocks are about as intense as anyone has gone until Apex started doing their subframes, allowing for roll center adjustment. Otherwise, listing a spec as "Up to 4* more camber over stock" or "3" wider front track than stock" or "Stronger!" are just, to my mind, stating the obvious. As a counterpoint, GKTech who makes a huge variety of drop knuckles and extremely modified components does a fabulous job detailing their R&D and decision making: https://blog.gktech.com/blog/gktech-rear-suspension-uprights/ I think if companies for the Z were making parts like this, it would make sense to detail choices.2 points
-
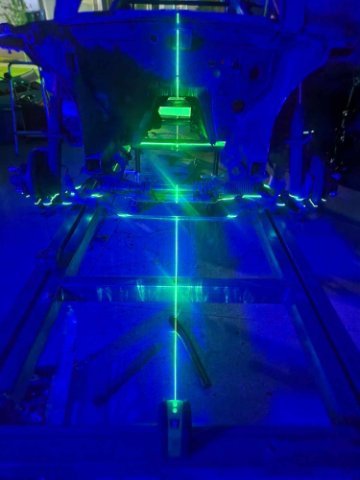
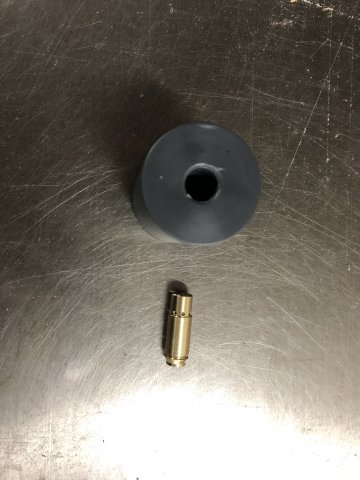
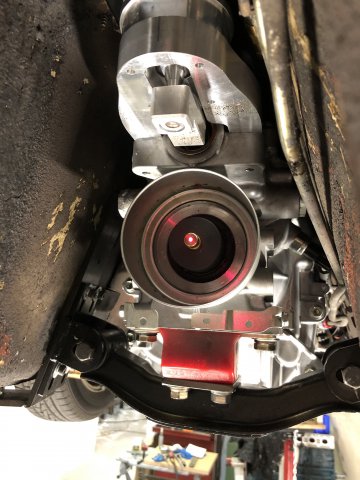
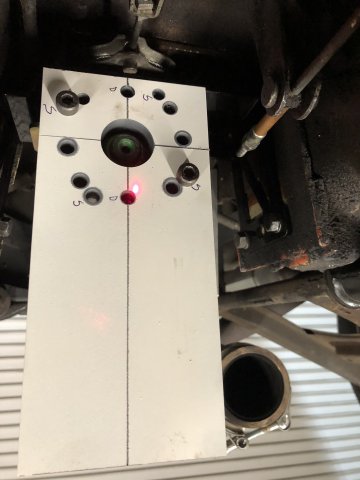
So I made a laser alignment tool based on a few Ideas I gleaned from the forum. I made a slip collar that fits over the CD009 output shaft that holds a 45ACP laser bore setter. I'm using this for the horizontal alignment. Works well. I made a target that has a couple of alignment lines. The bottom is parallel/perpendicular to those lines so you can use a level to get it plumb. I then proceeded to drill so many holes in it that it's almost useless:) The key word here is almost. That was a far over to centerline as I could get it. I need to rework either the Diff mount or the trans mount to get it any further but it's only about a half a degree so I may live with it. I'm running the Technoversions RT mount and I switched to the top mount instead of the stock bottom. This brought the pinion angle down to 2.8 degrees. The transmission is at 2.9 degrees so I'm pretty satisfied. Hard to tell if it made much of a difference but the math says it should.
2 points
-
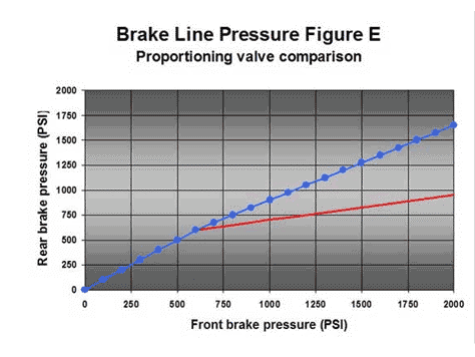
As I mentioned on the previous page, a prop valve in the front is never a good idea. As brake pressure increases, the proportion of braking done by the circuit with the valve decreases. With a valve in the front, the harder you hit the brakes, the lower the percentage of front brakes you get. This is not good, because the harder you hit the brakes, the more weight transfers to the front wheels and off of the rears. So the wheels with less traction get an increasing proportion of the braking effort as you step on the brakes harder and harder. "Proportioning Modifications We could start this section by clearly stating that you should not modify your proportioning valve. But, what fun would that be? In all seriousness, making changes to the proportioning valve to effect brake bias should be left to those with the proper tools and measurement devices, but if you have tweaked your vehicle beyond recognition, this may be your only solution to restore a sense of proper bias to your braking system. We’ll start here with three of the most basic rules regarding proportioning valve installation and selection. 1. If you have the deeply-rooted need to install your own adjustable proportioning valve, be advised that they should NEVER be installed if the factory unit is still in place. Proportioning valves in series with one another can do nasty, unpredictable things! 2. If you have the deeply-rooted need to install your own adjustable proportioning valve, be advised that they should NEVER be installed in-line to the front brakes. The effect would be to make your vehicle rear-biased before you could say “terminal oversteer.” Front brake line pressure should always be left alone – only the rear pressures should be considered for proportioning. 3. In all cases, the basic brake system balance needs to be close to optimized to start with. This is the only way that a proportioning valve can be effectively utilized. You should never assume that simply adding a proportioning valve will address all rear-bias conditions, as even the best proportioning valves must be well-matched to the target vehicle." https://www.apcautotech.com/getmedia/d958a29e-4ebf-41fd-931f-bf7e4451801b/brake-proportioning-valves.pdf
2 points
-
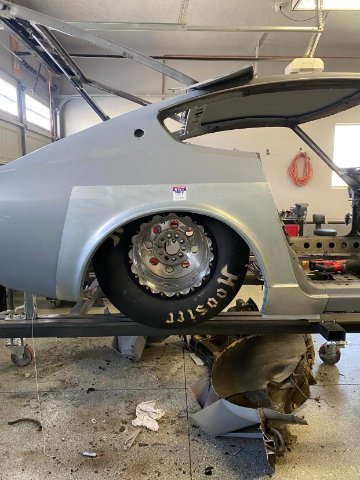
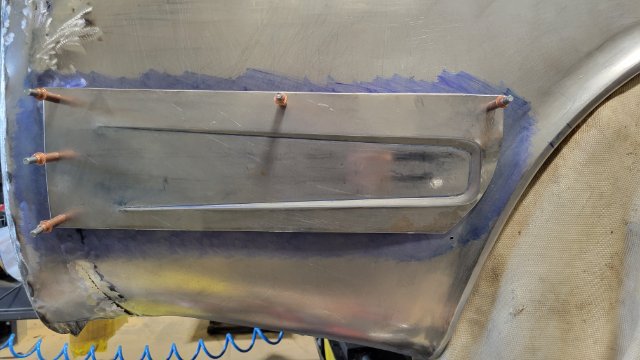
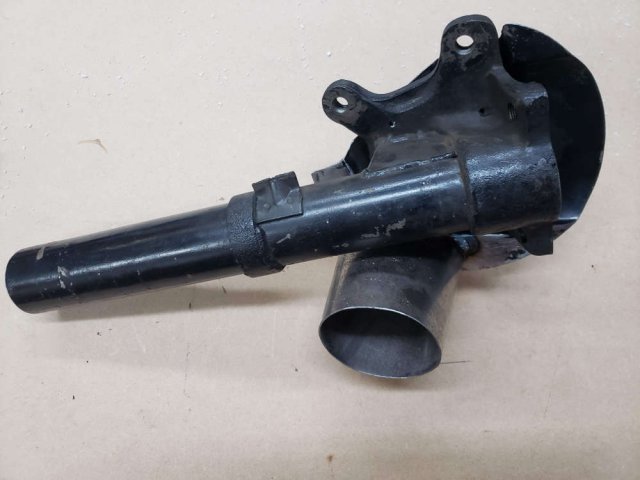
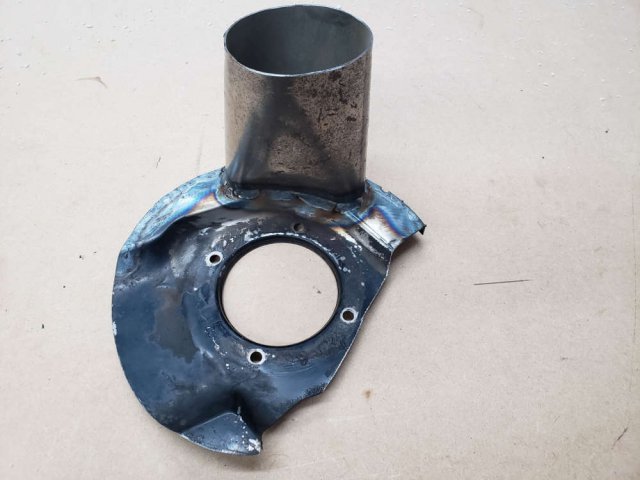
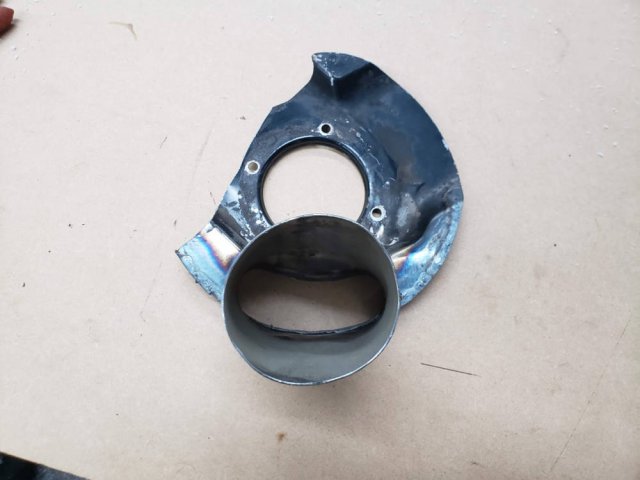
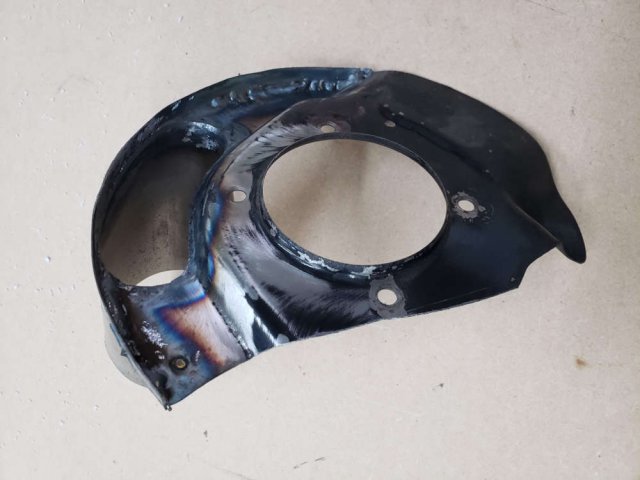
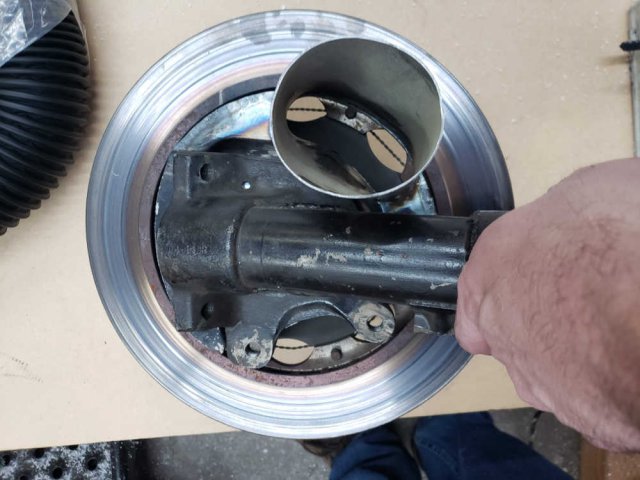
The plan was to do some track days this year, so I needed some brake ducts and an oil cooler. I sold/bartered a set of series 1 scooped backing plates I had for a set of normal ones. No need to cut up the rare stuff. Took the new backing plates, cut them to 8" diameter, took a 3" exhaust collector and modded it to fit the cut down backing plate. Welded, drilled holes in the duct hole and then used cut off wheel and die grinder to open the hole in the backing plate up. Also took a section of the rim of the stock backing plate and welded it on for stiffness and to close the gap between the backing plate and the rotor vents. Doesn't look all that wonderful but I think it's going to work well. 1 down, 1 to go, then can modify my front end for the scoops and hook up the tubing.
2 points
-
Old Thread, but if you are looking for a 280zx ducktail spoiler, we keep them in stock and ship out within 2-3 days. https://bhjautomotive.com/shop/exterior/280zx-tall-bre-rear-wing/ Thanks!
2 points
-
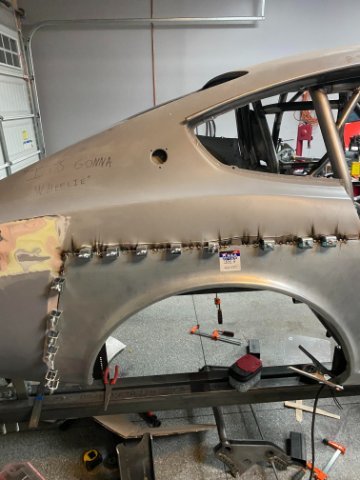
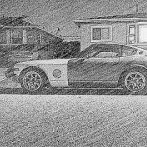
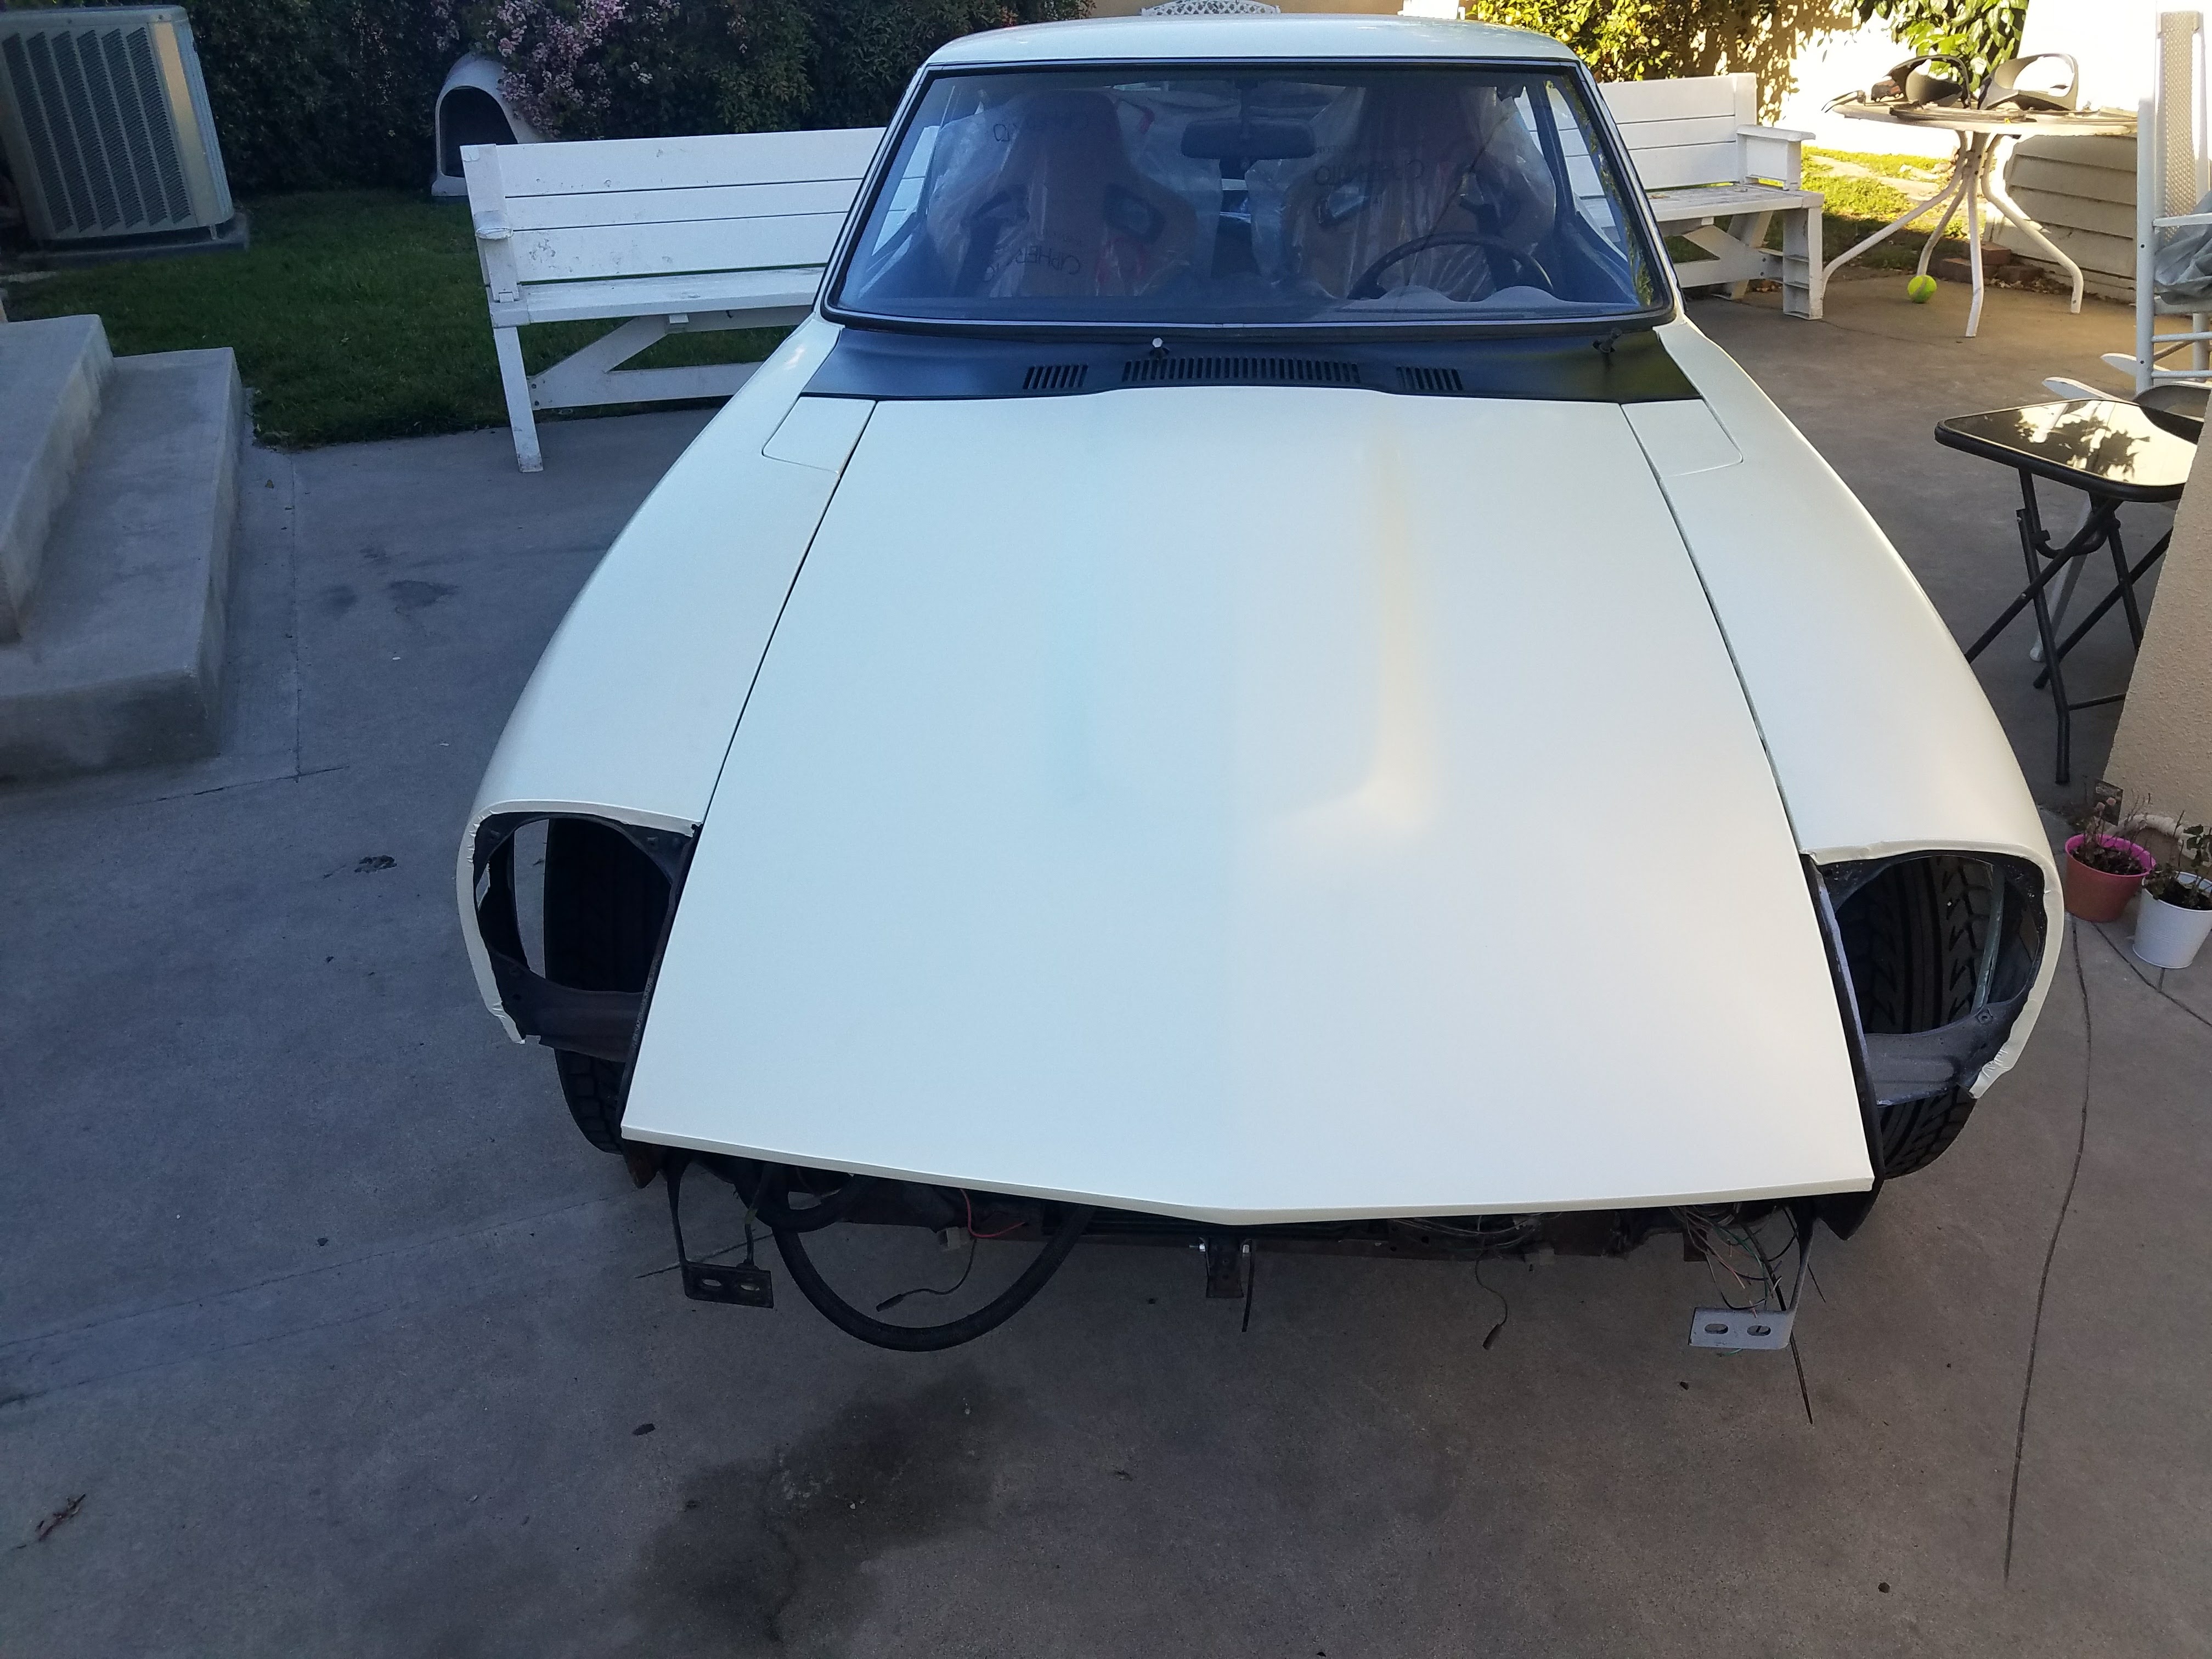
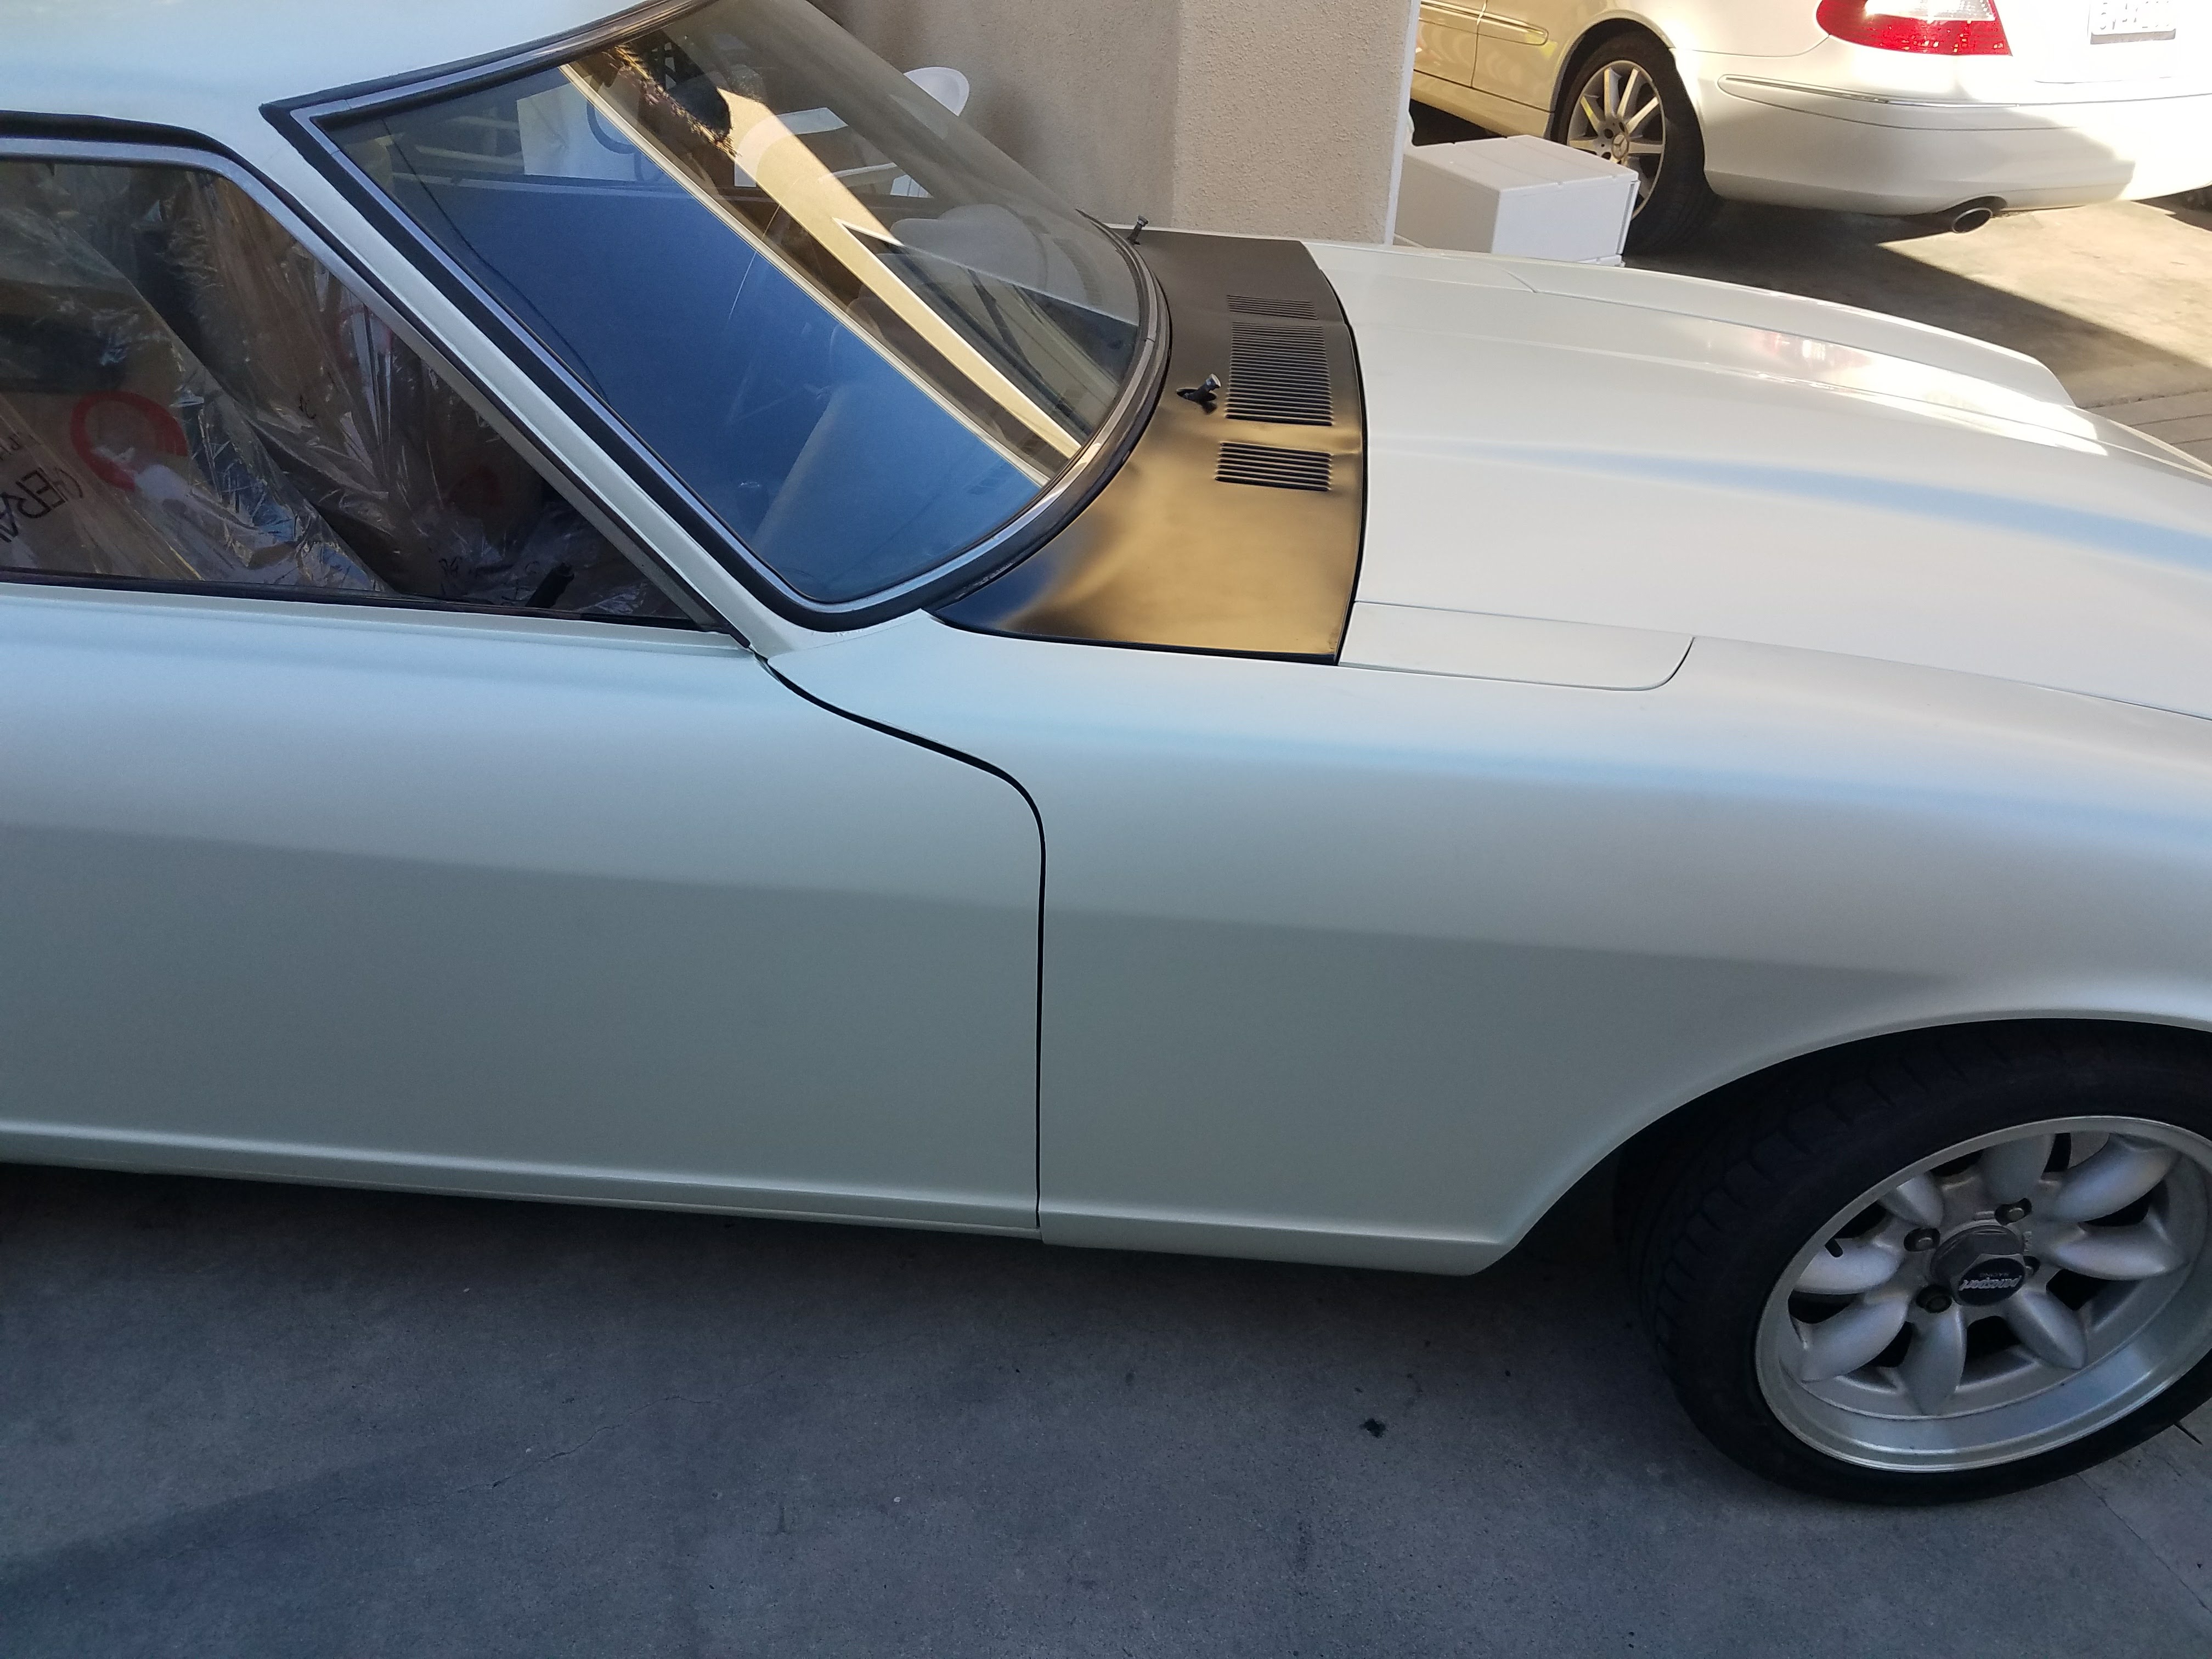
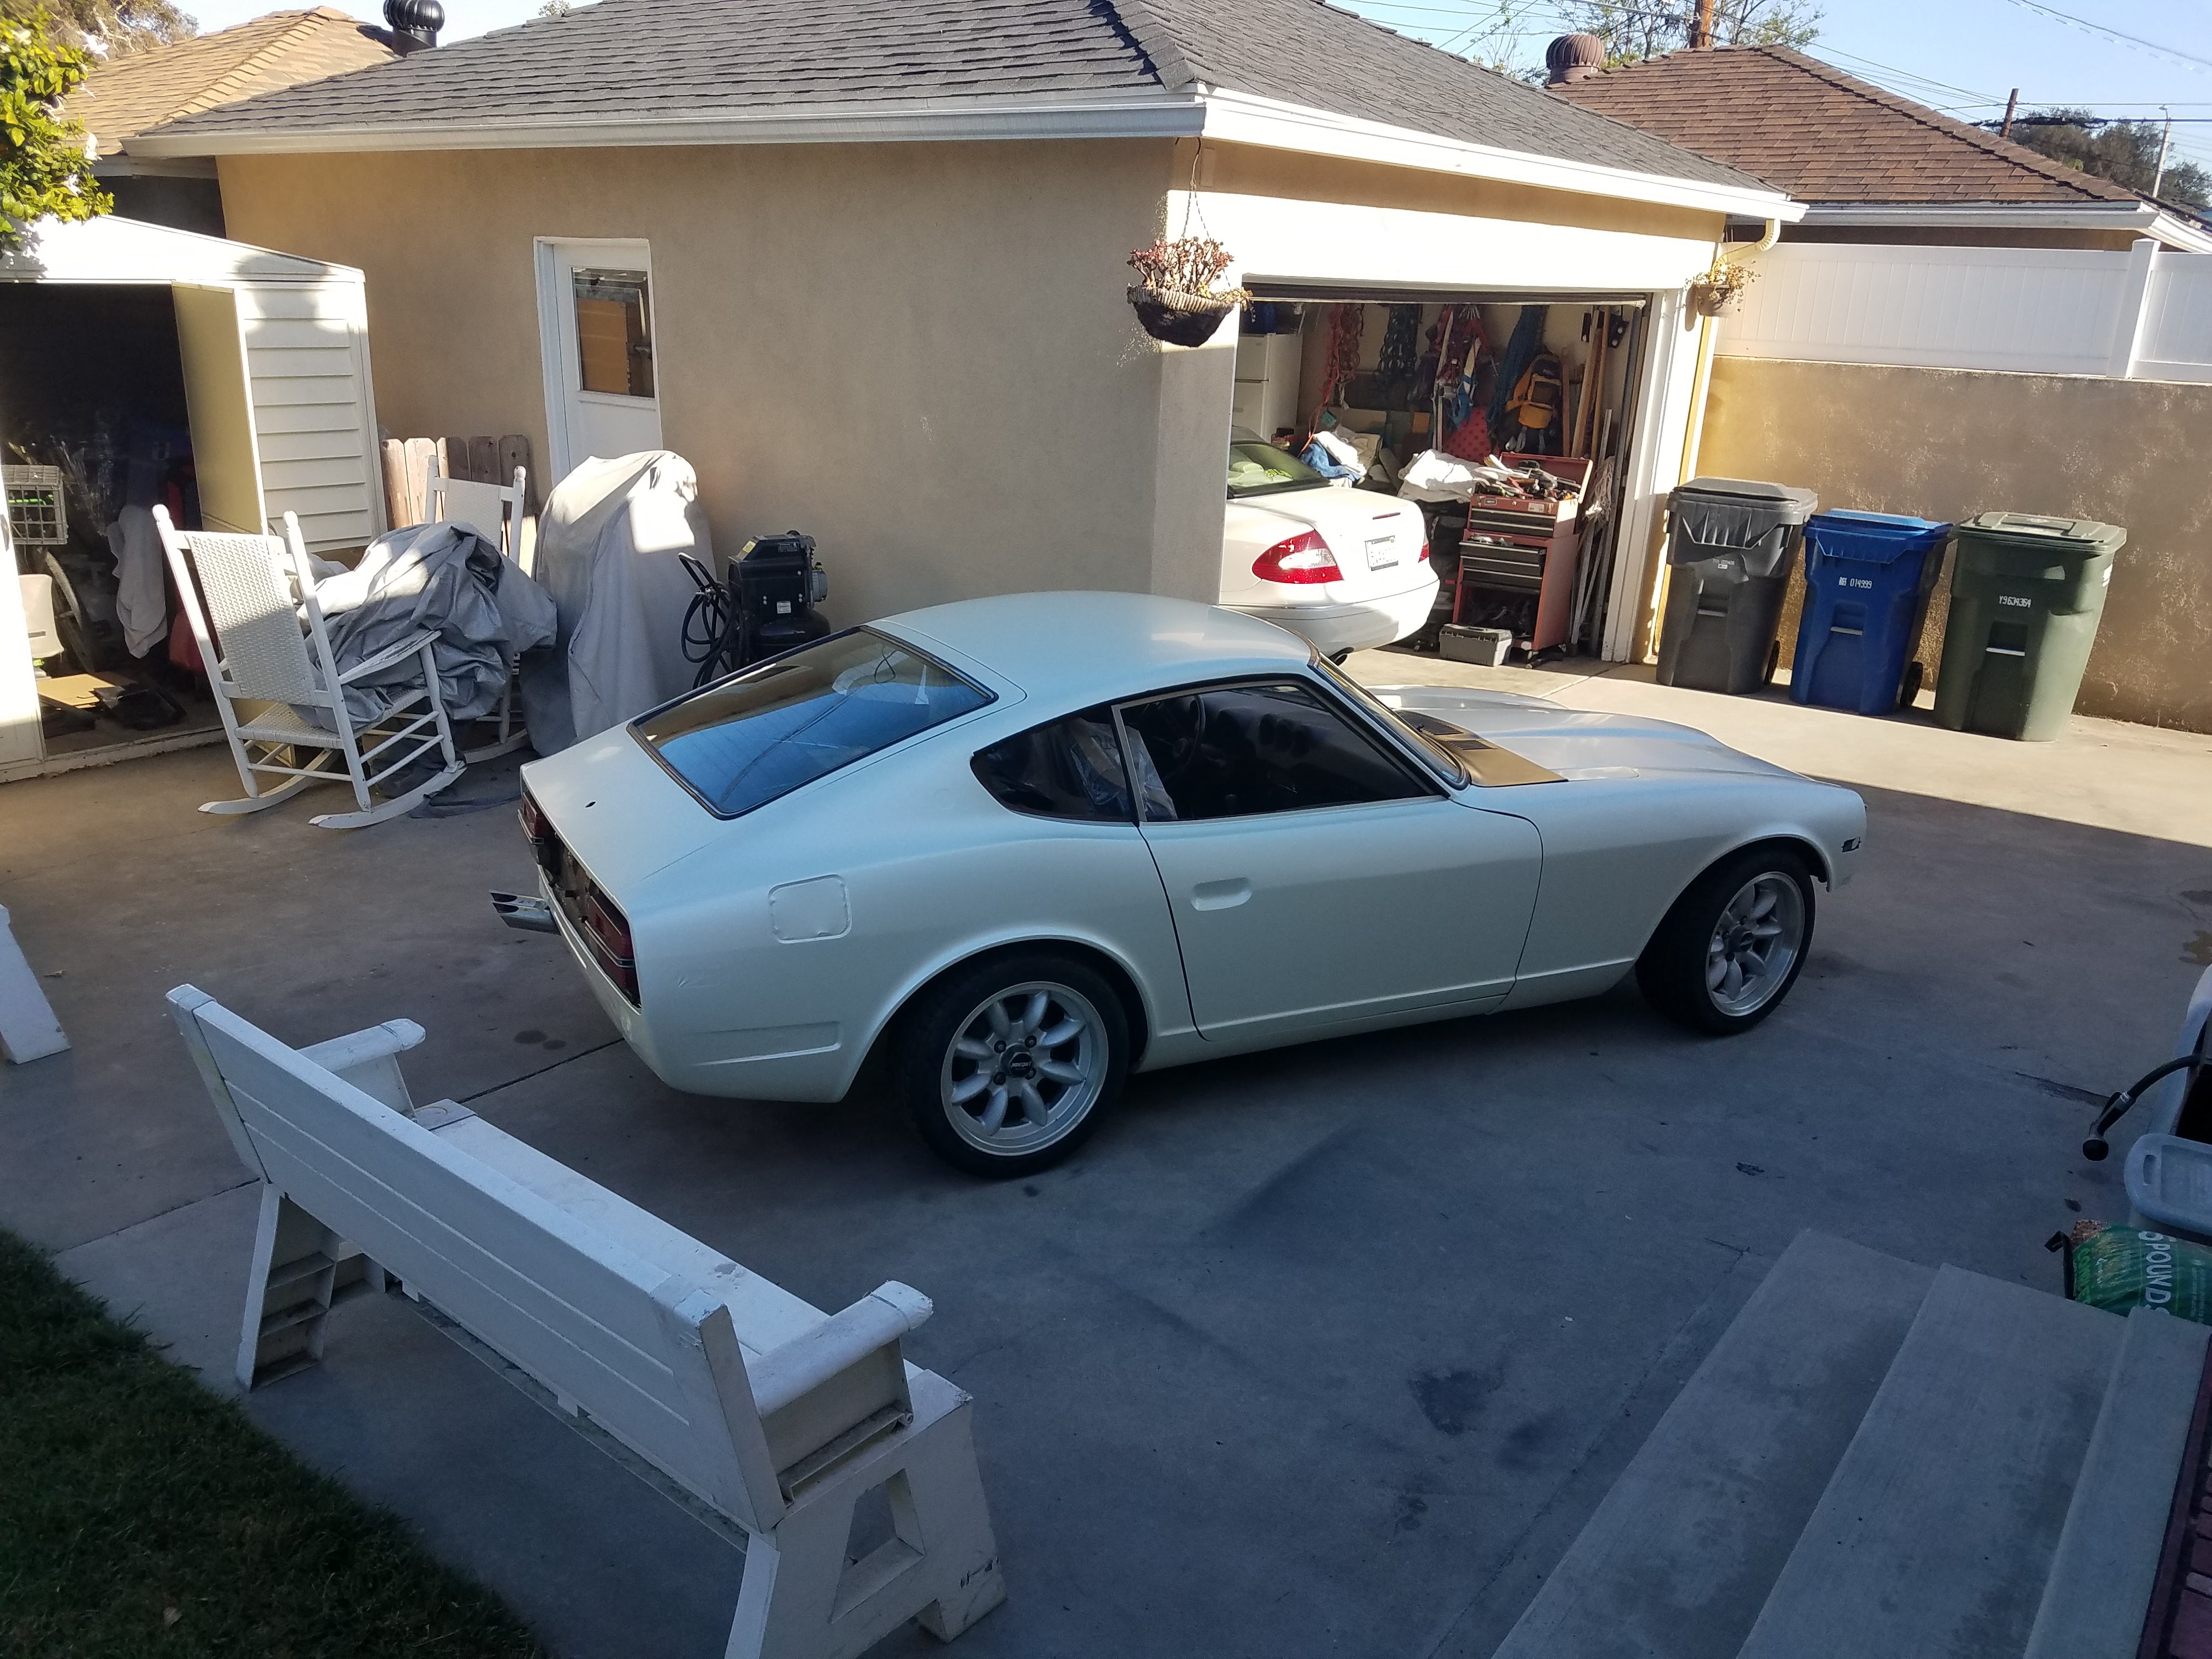
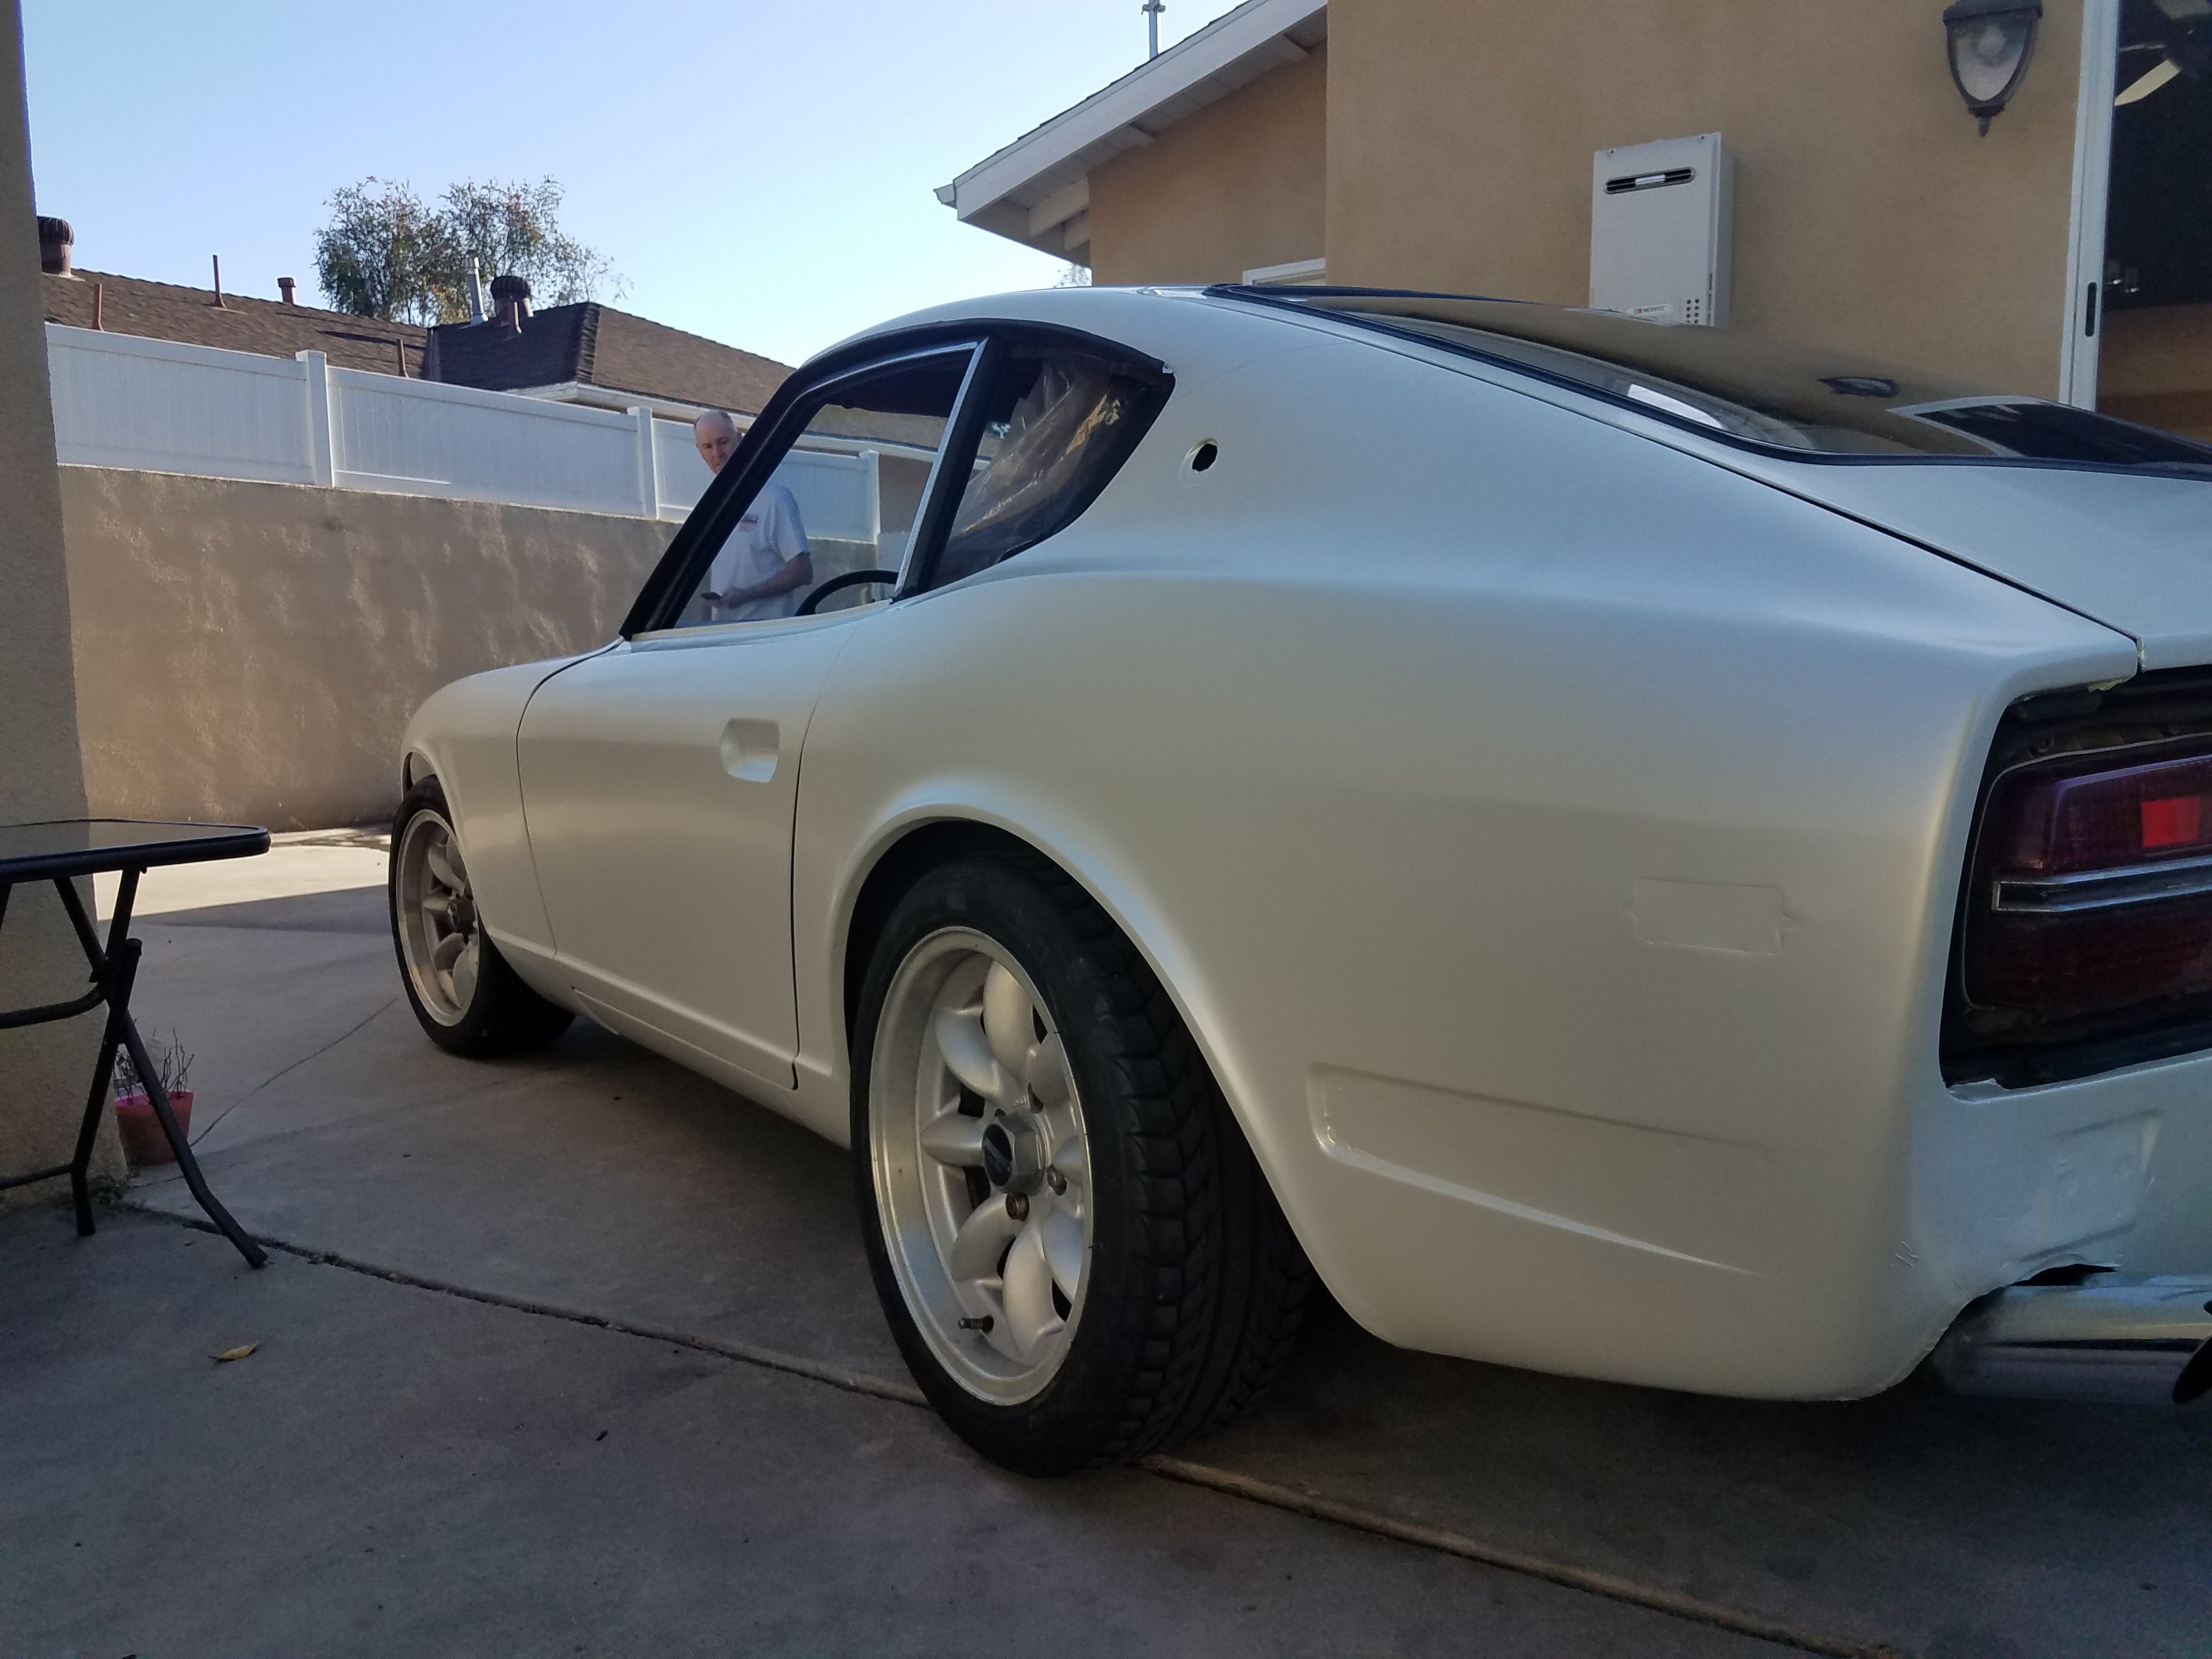
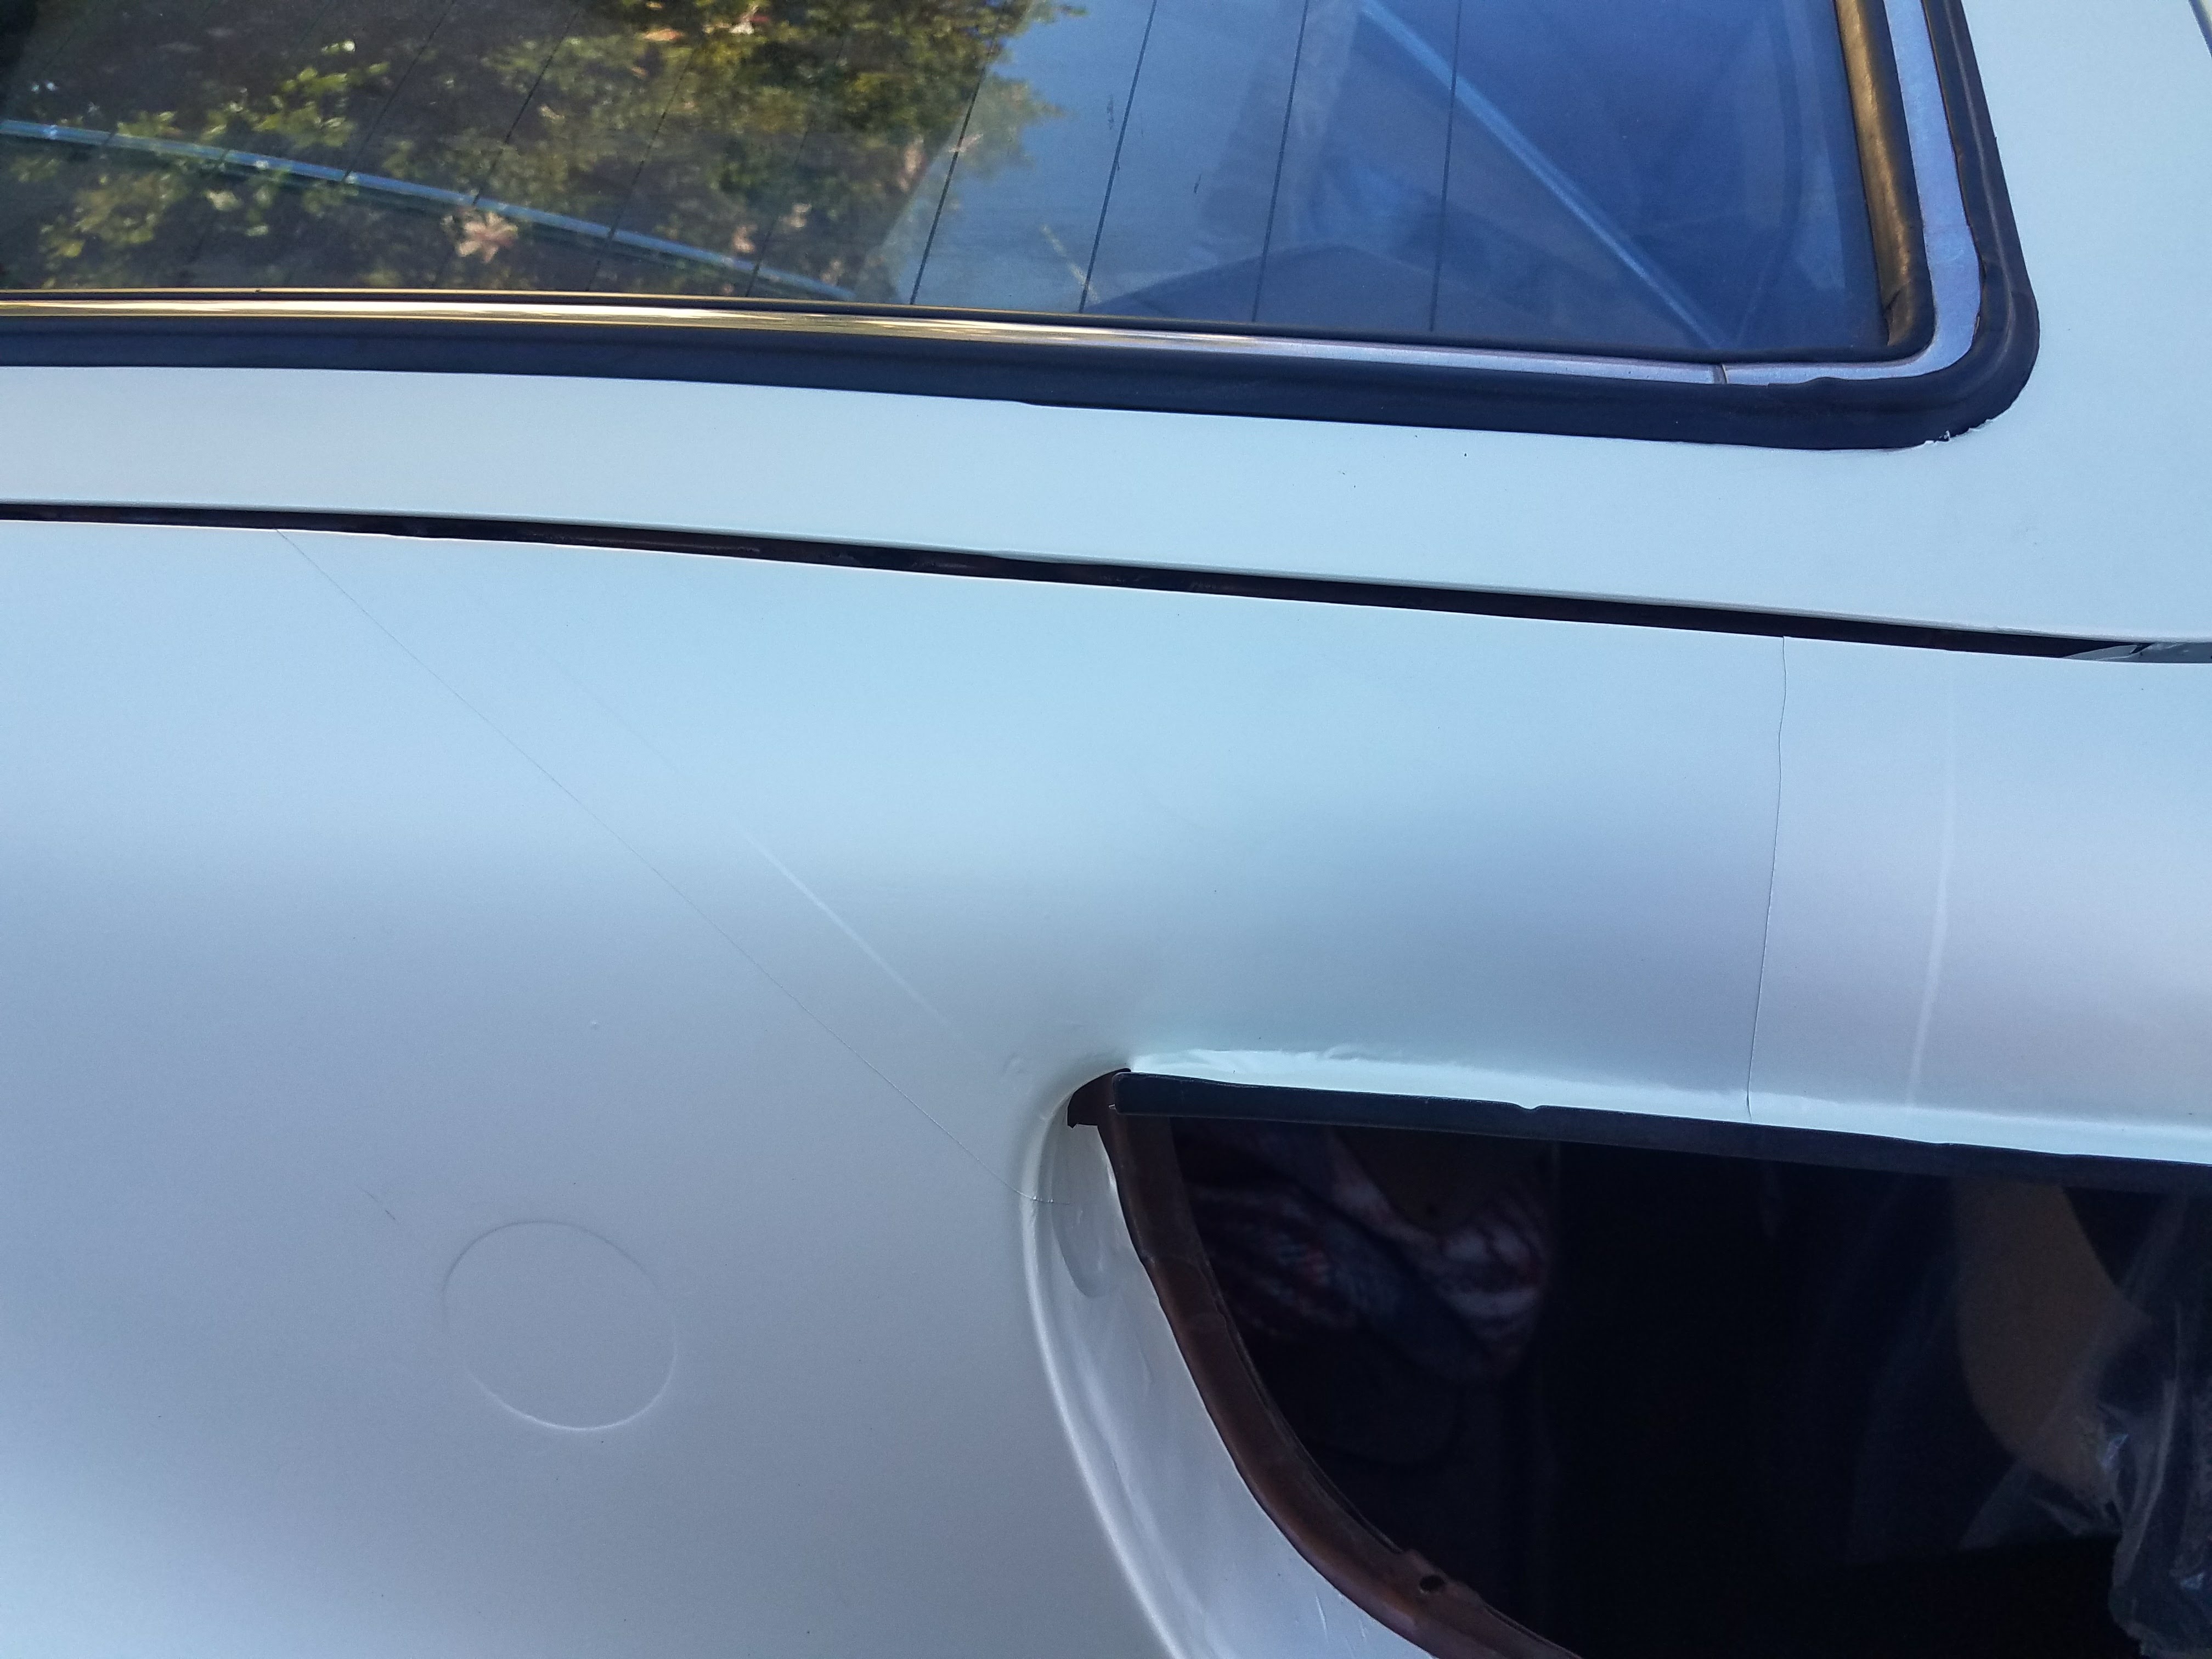
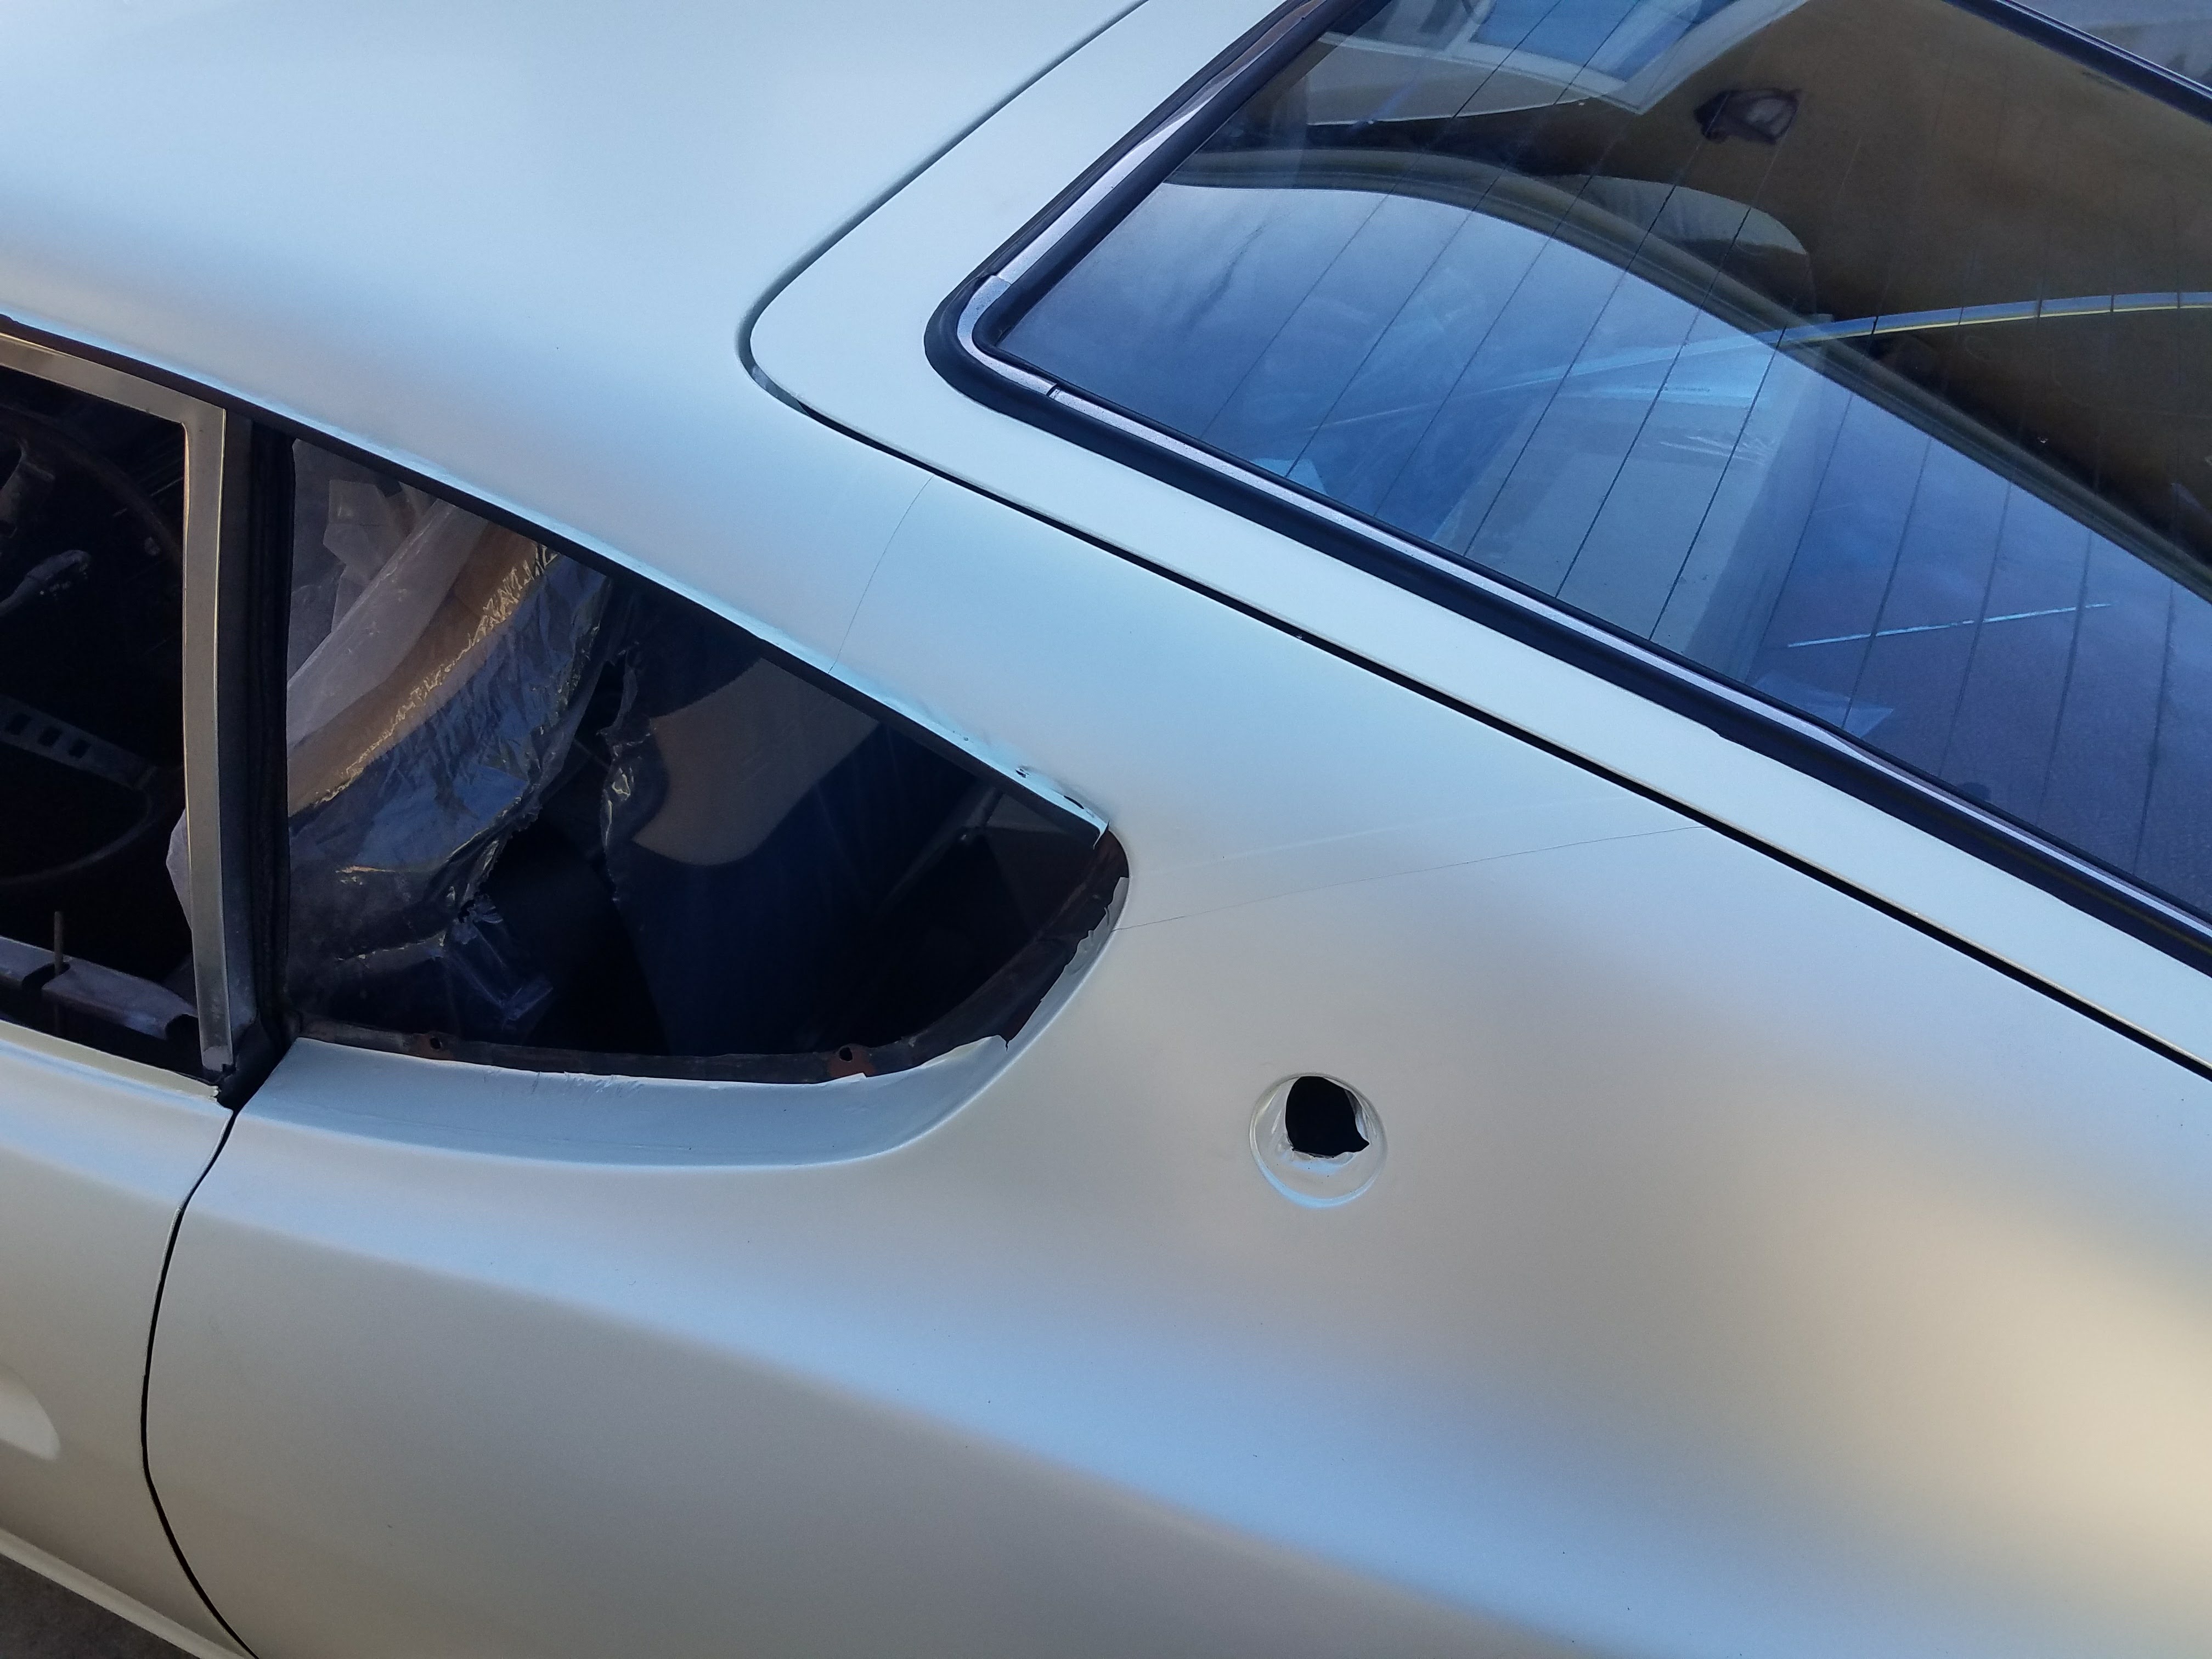
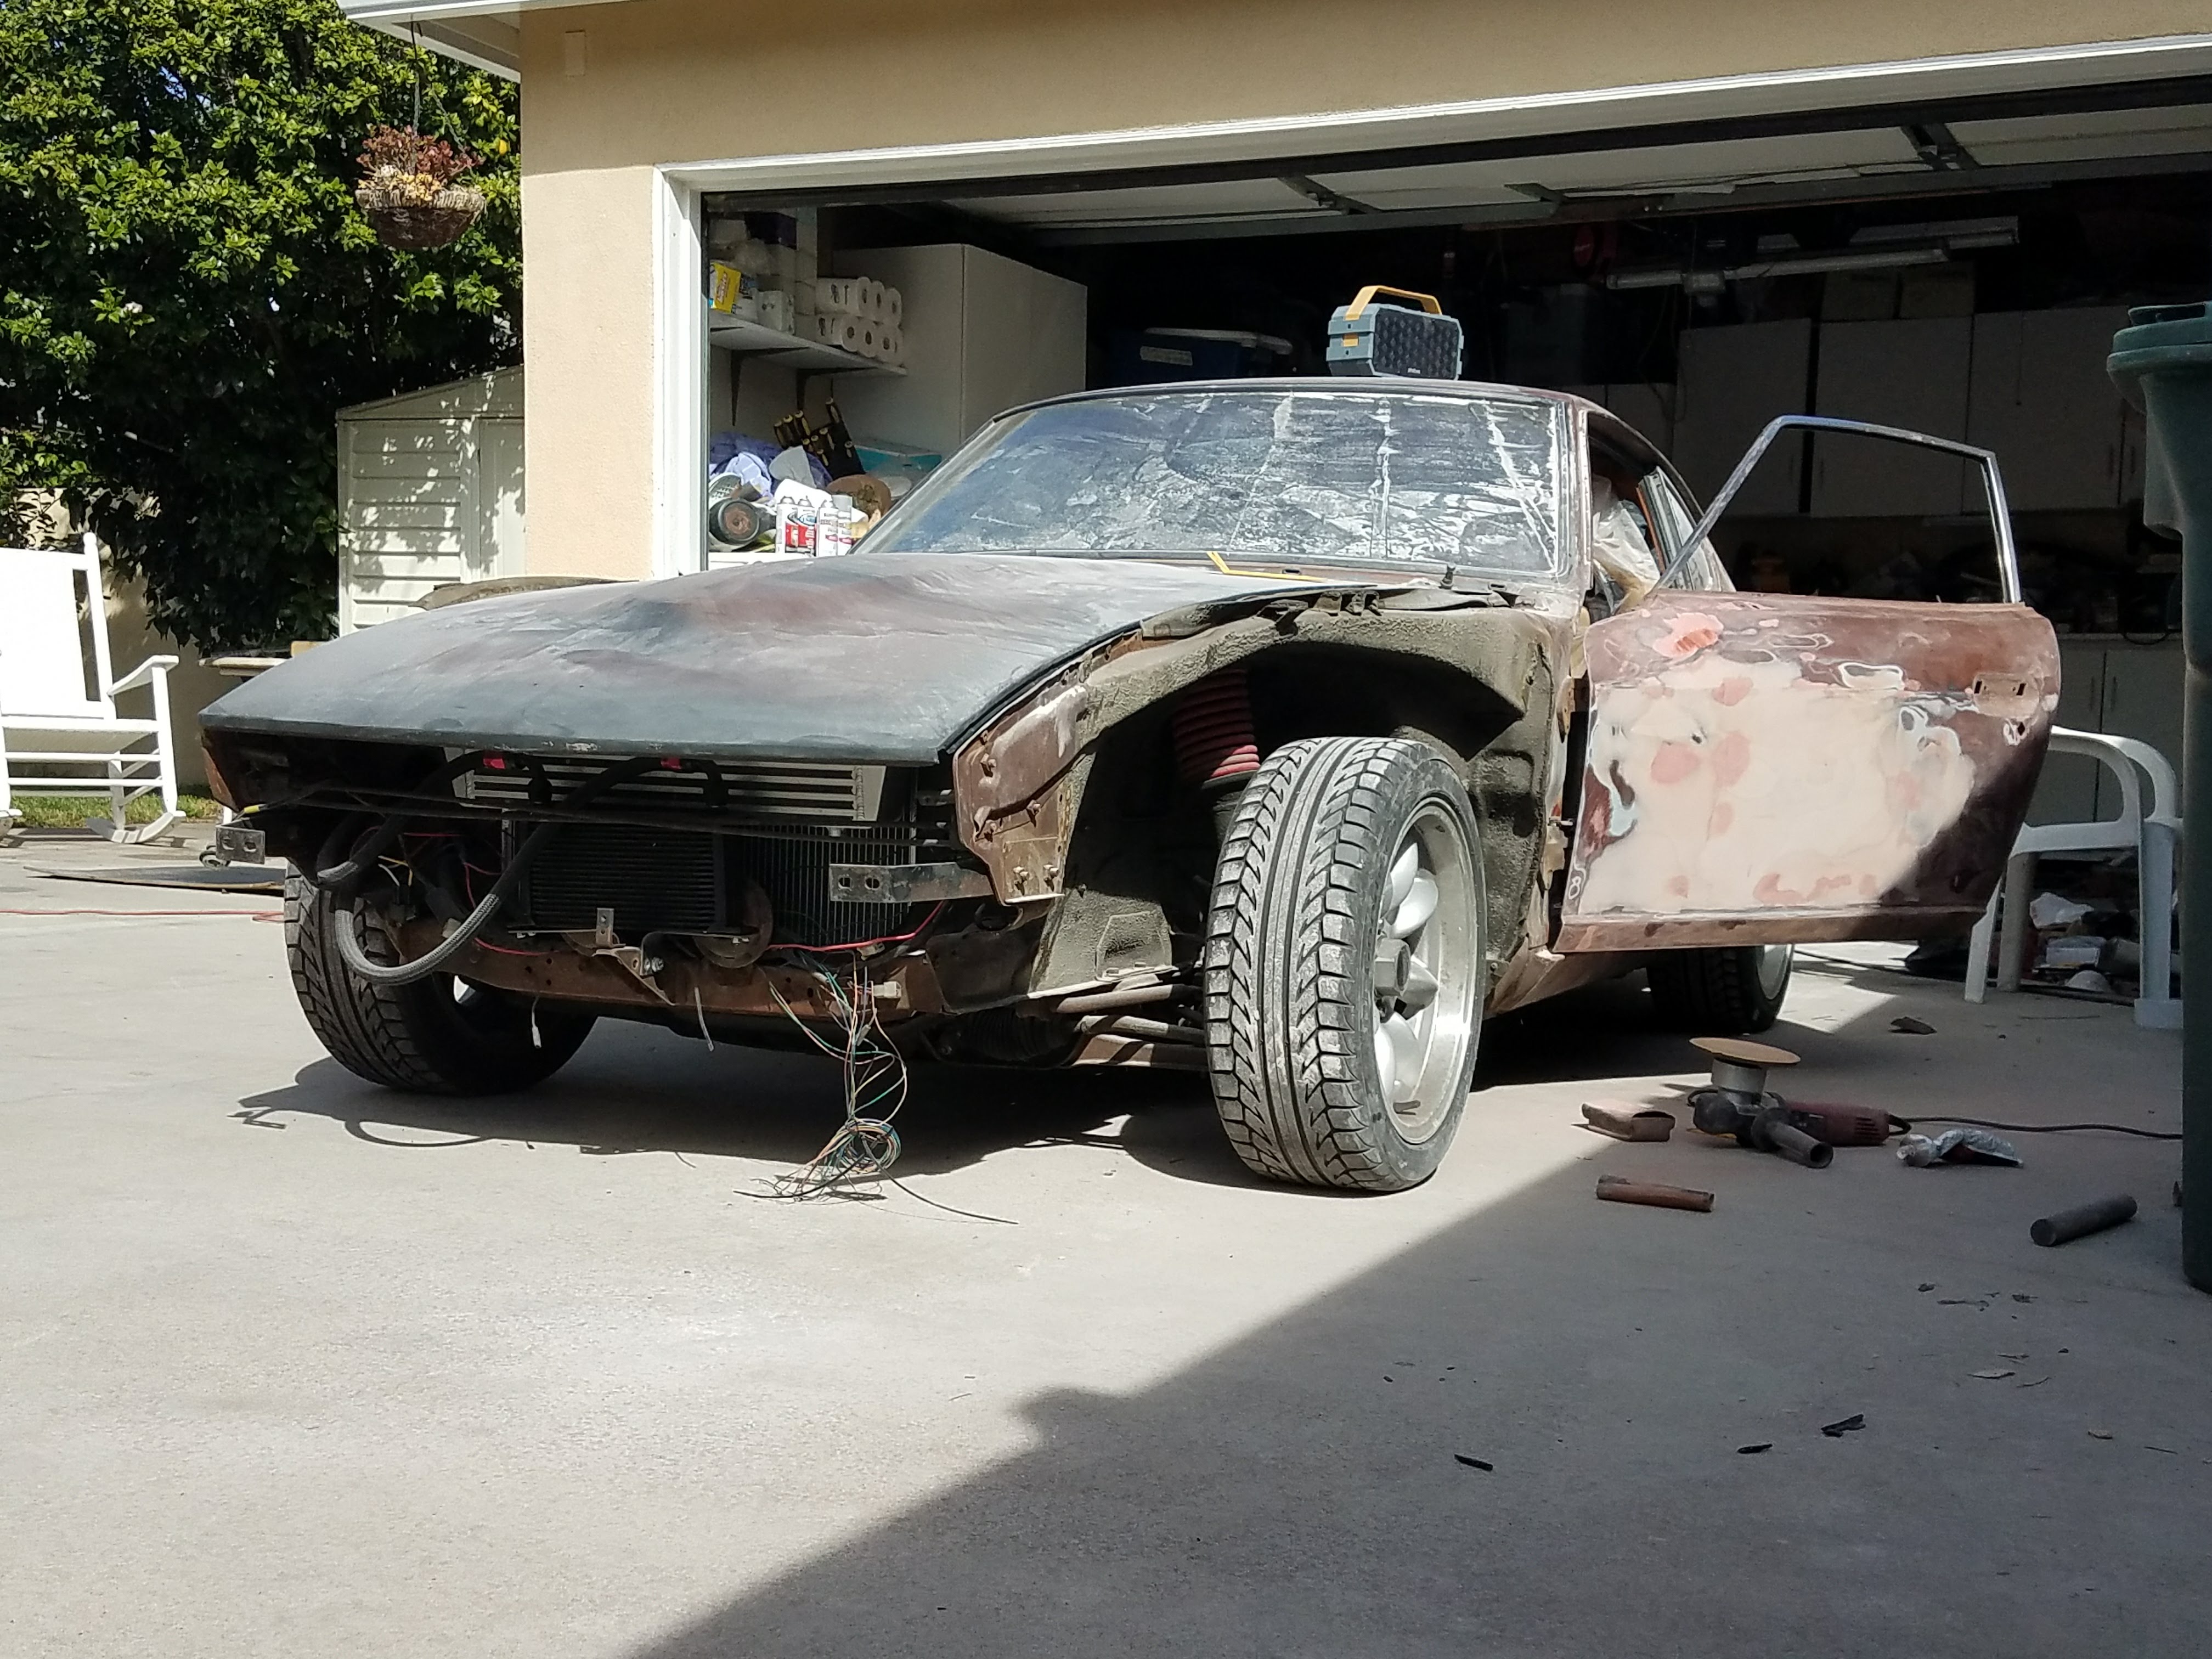
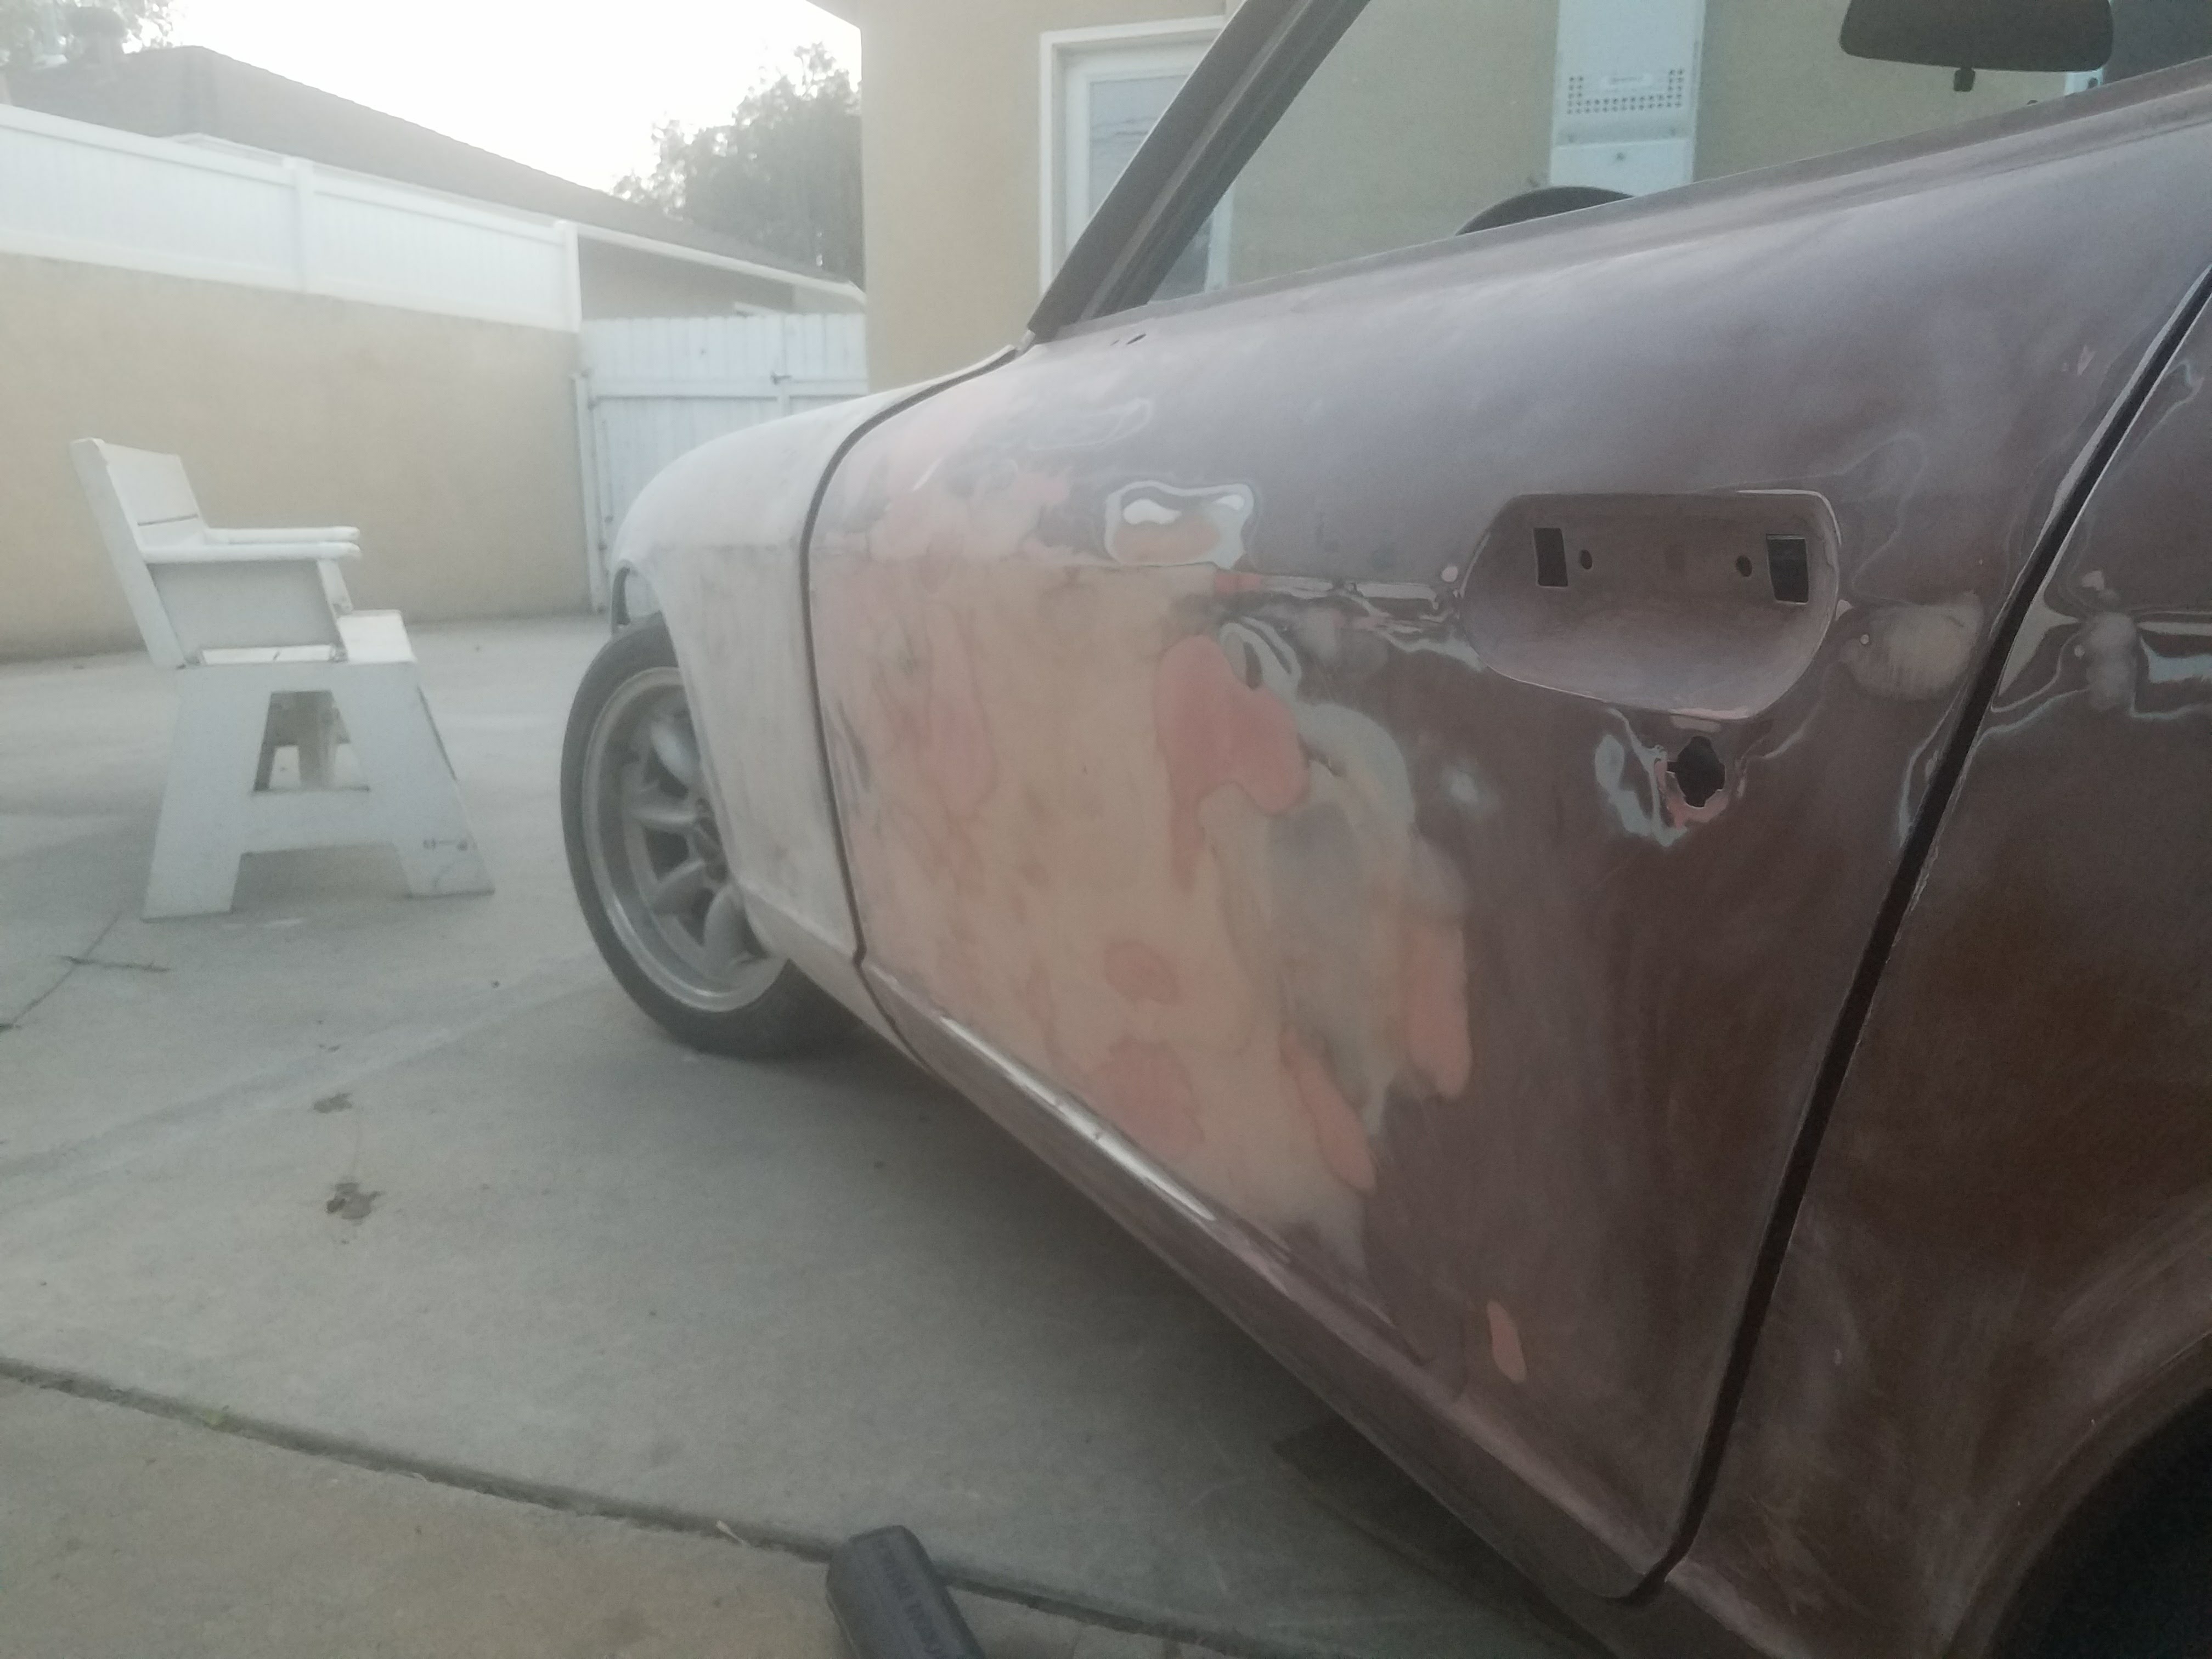
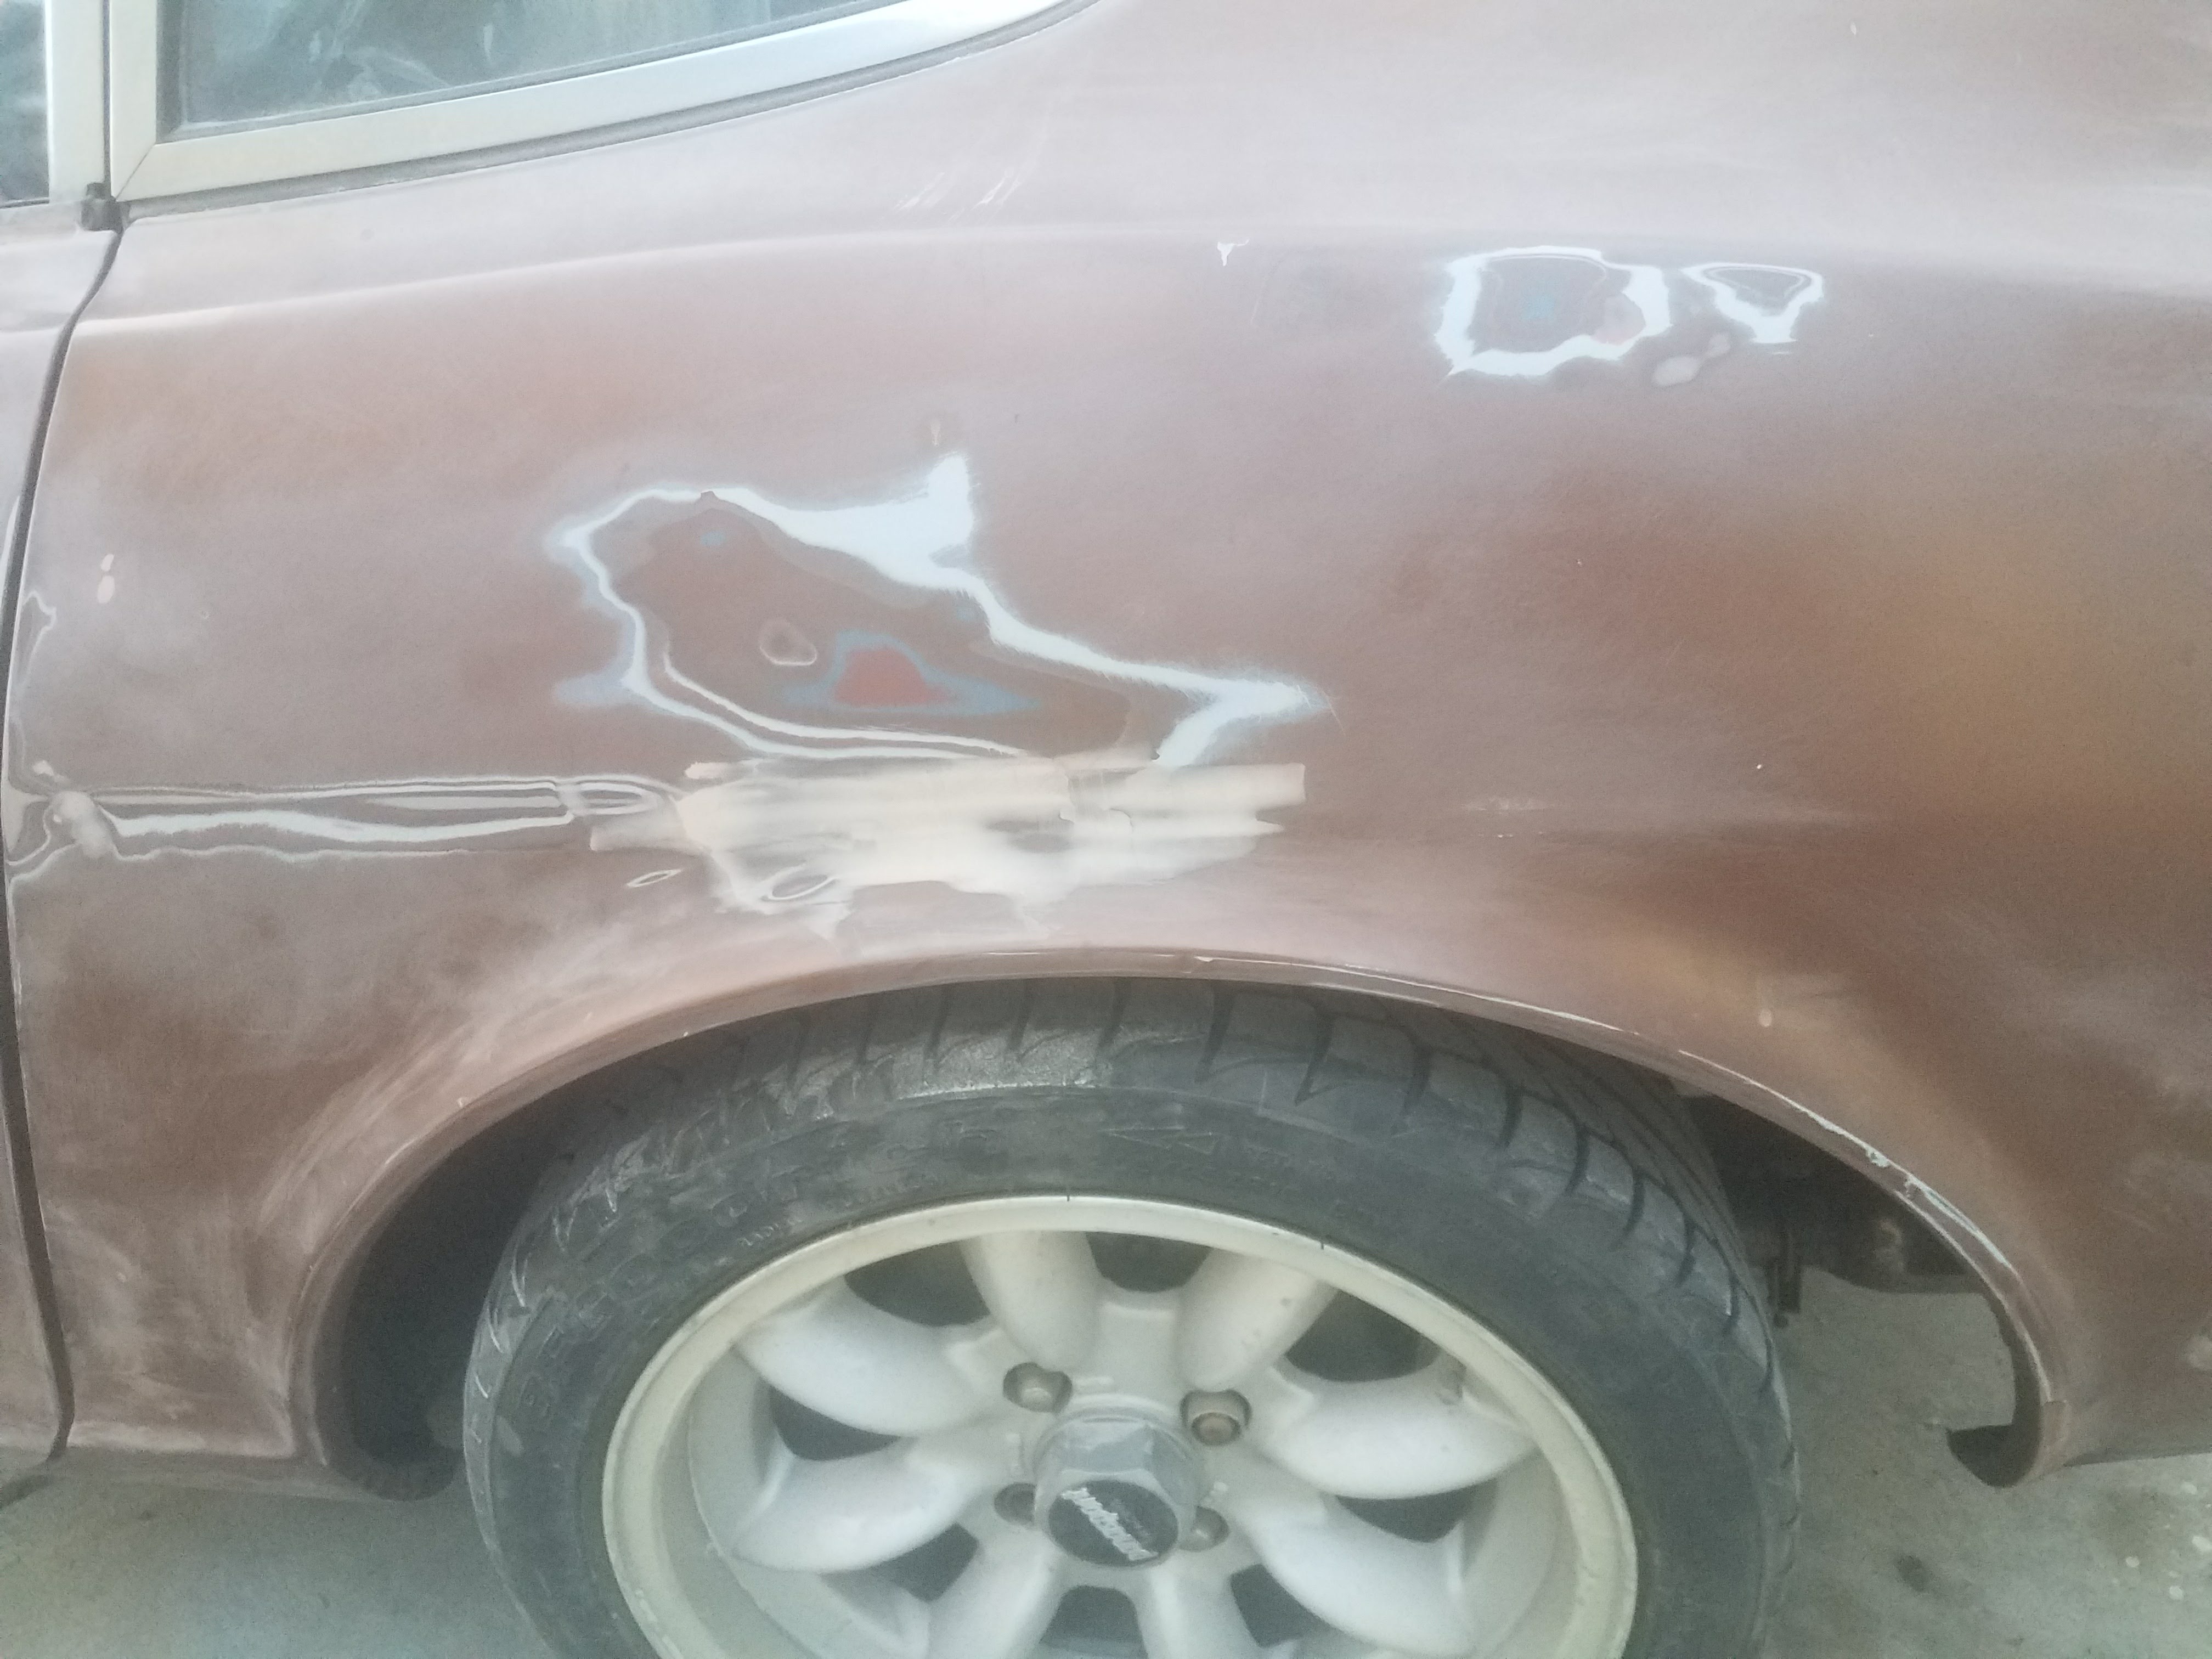
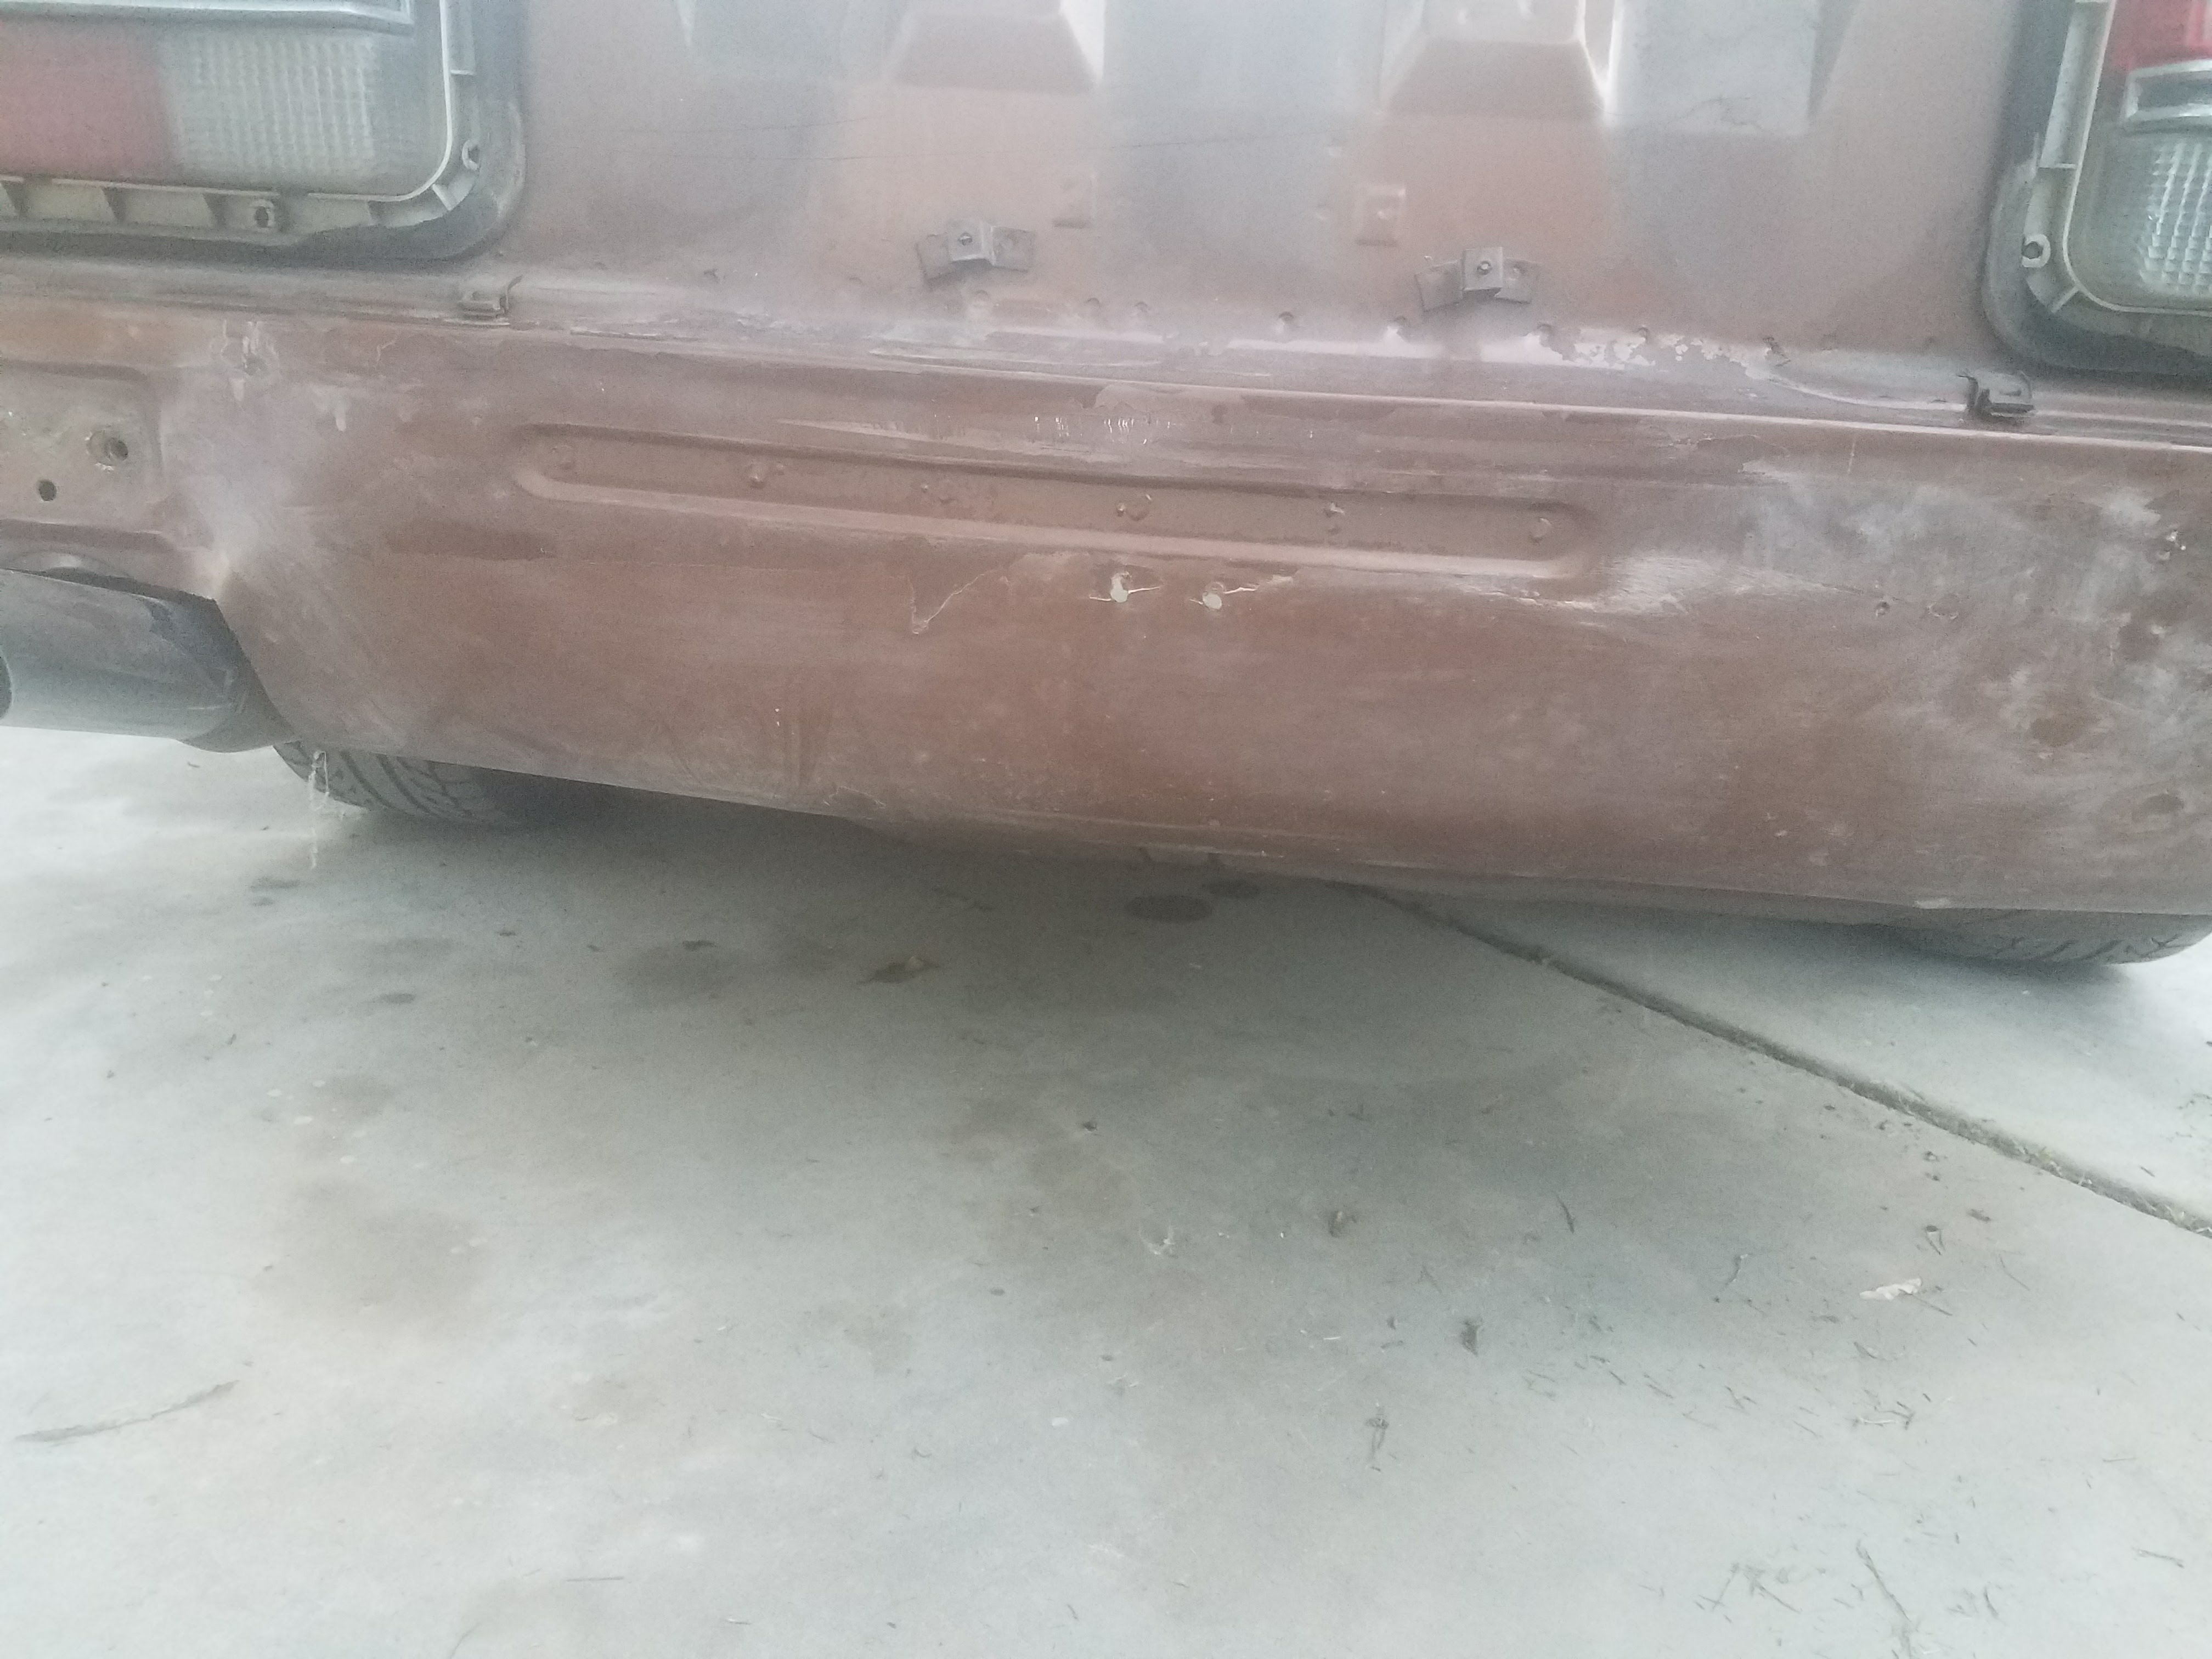
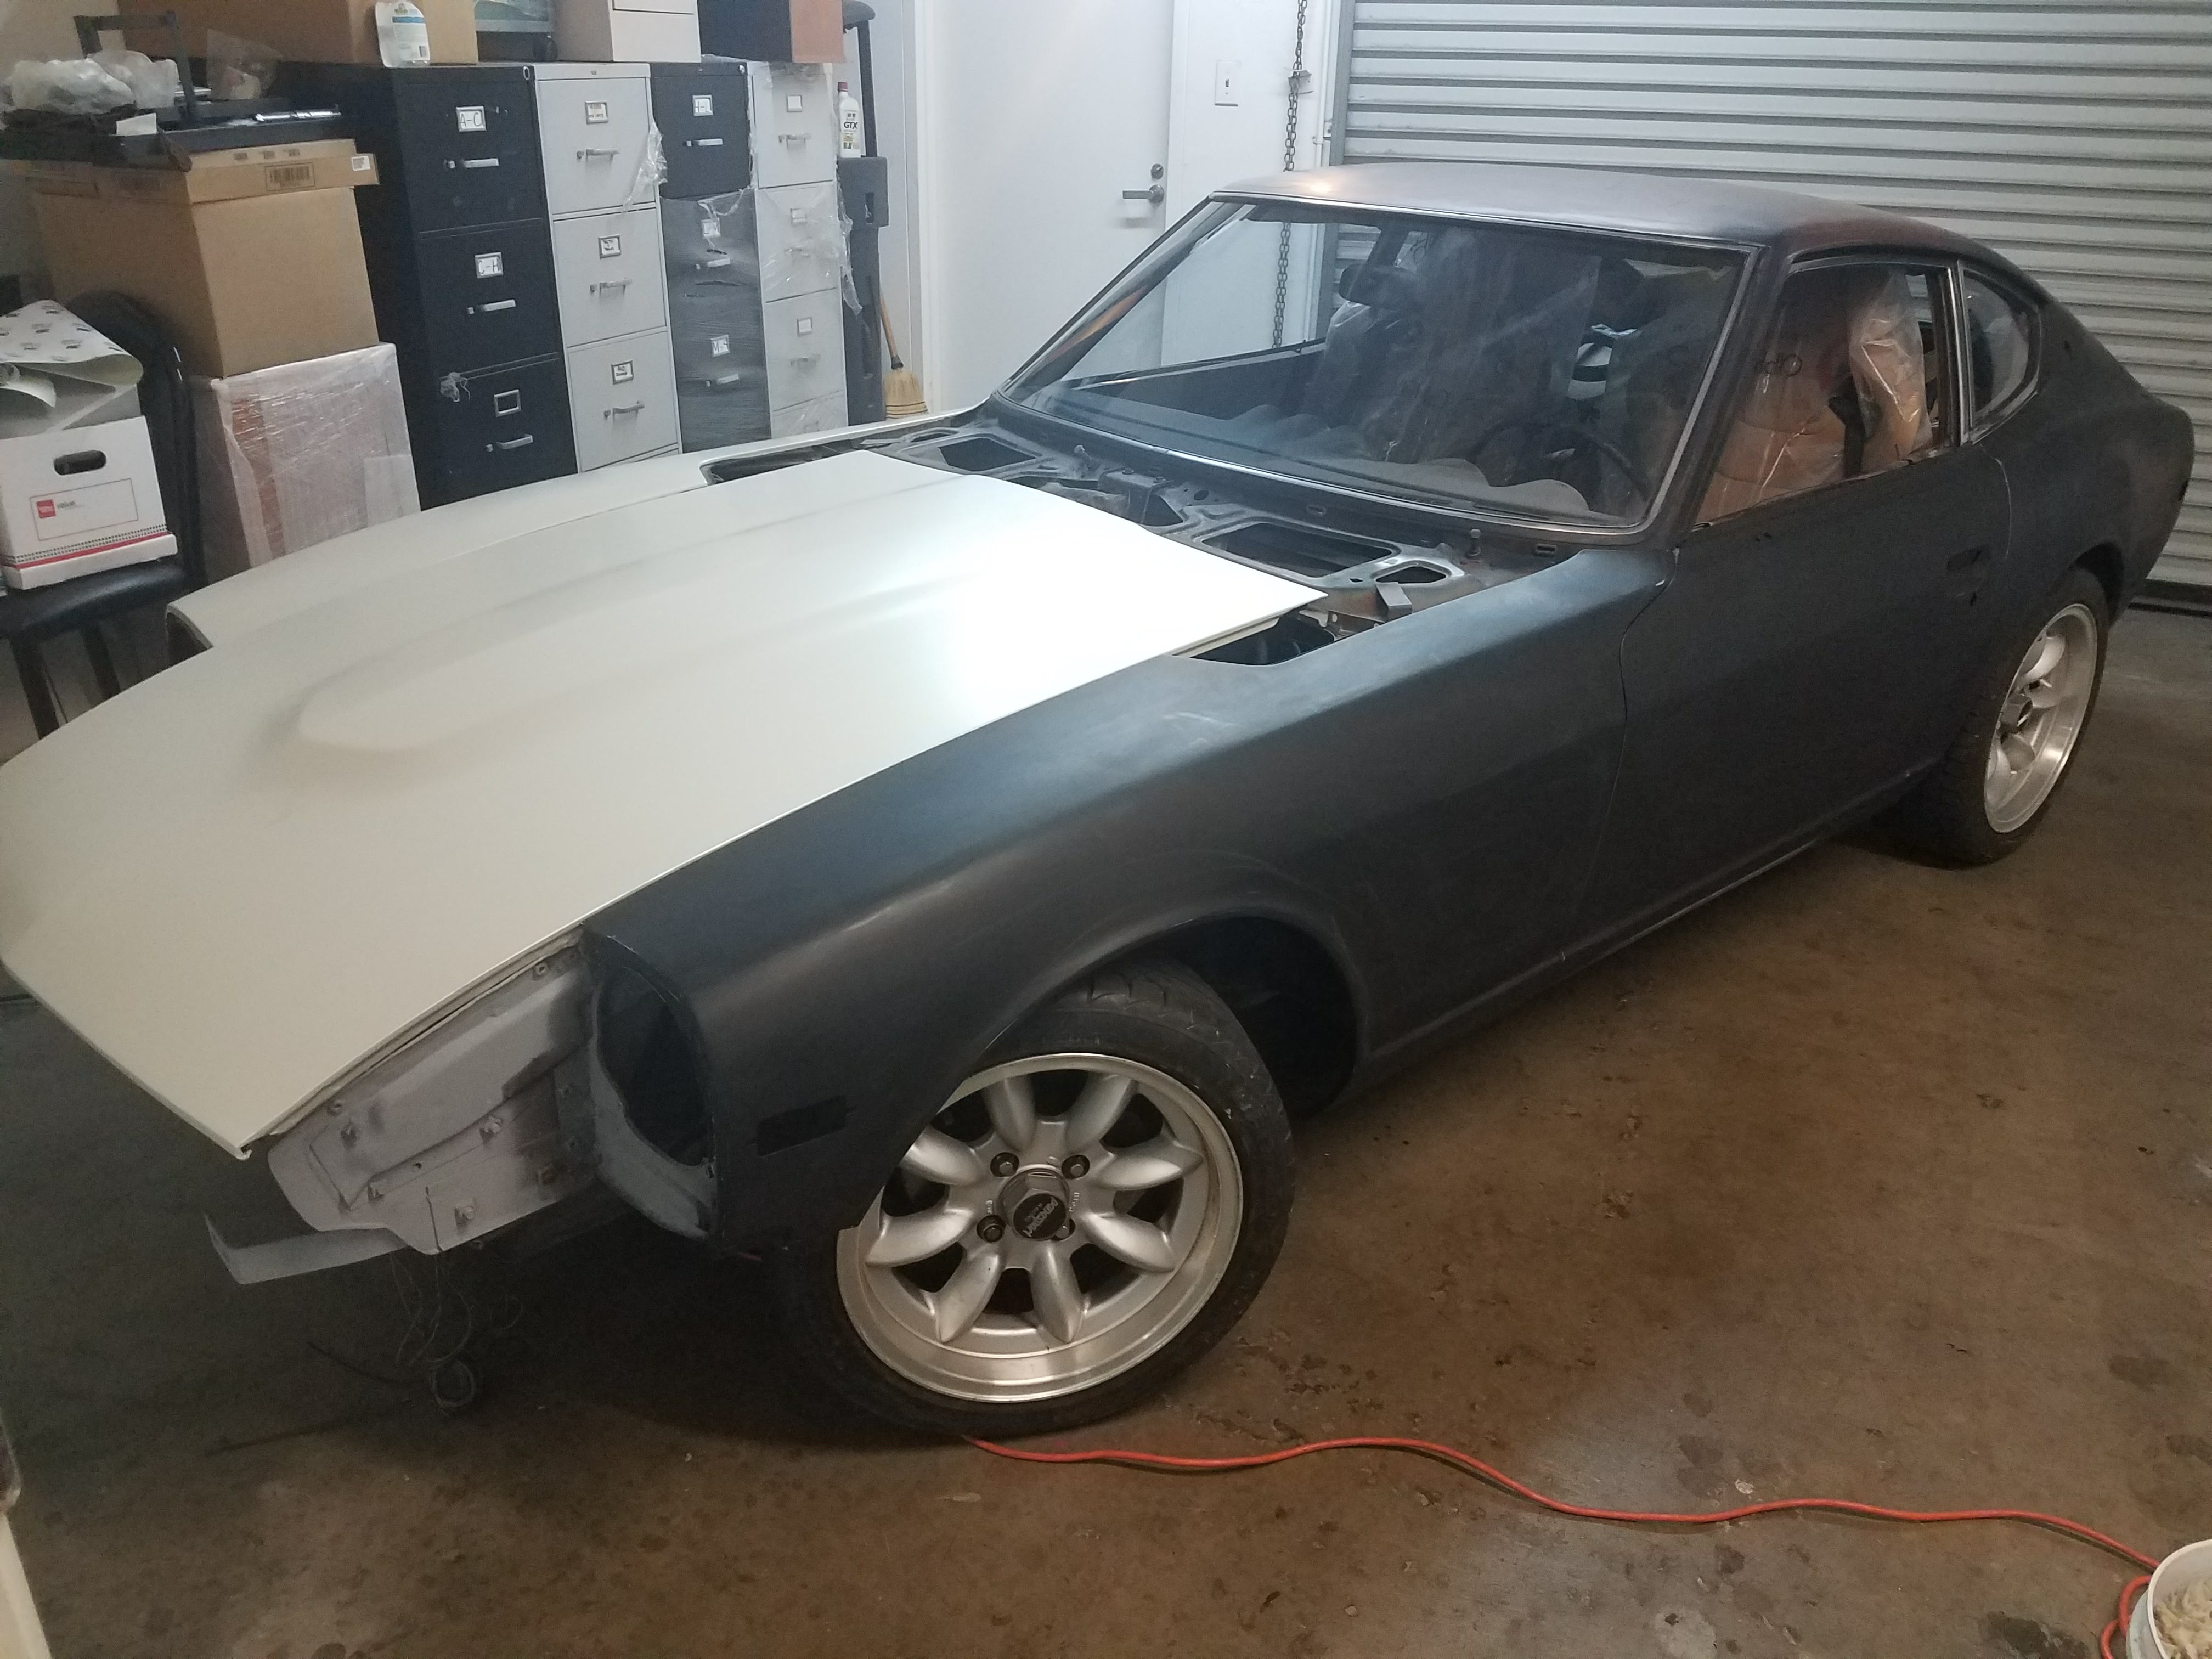
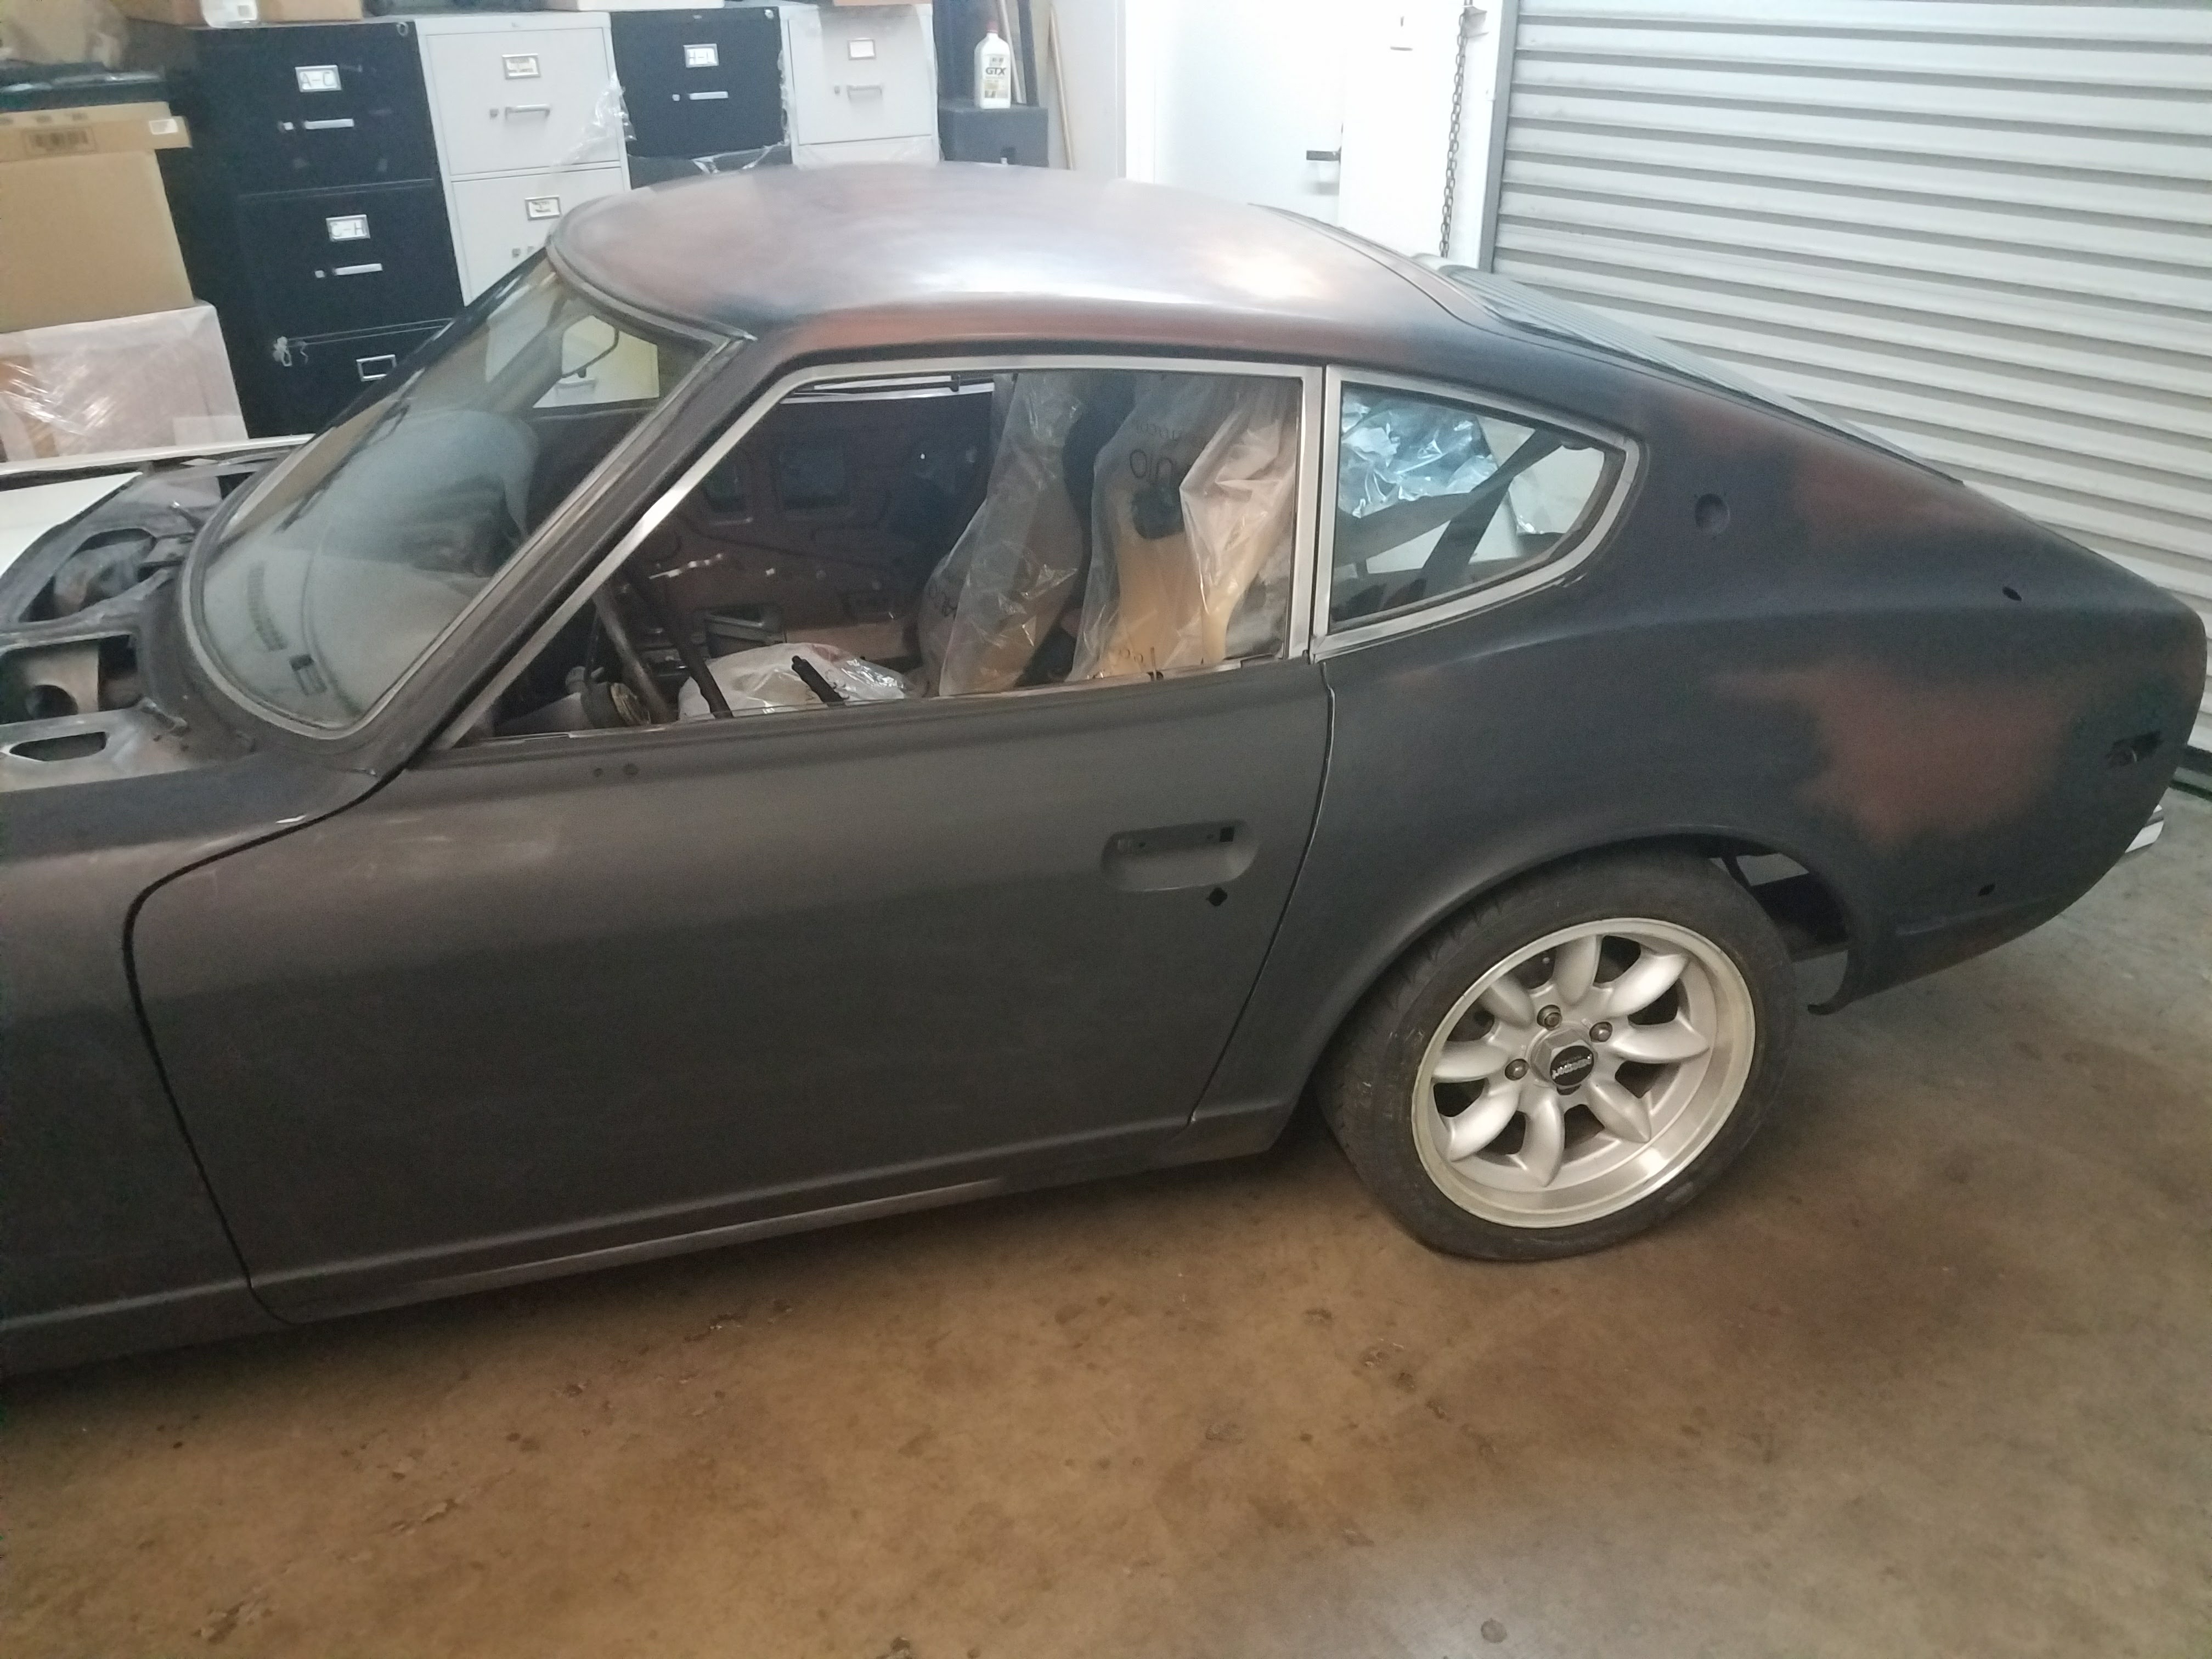
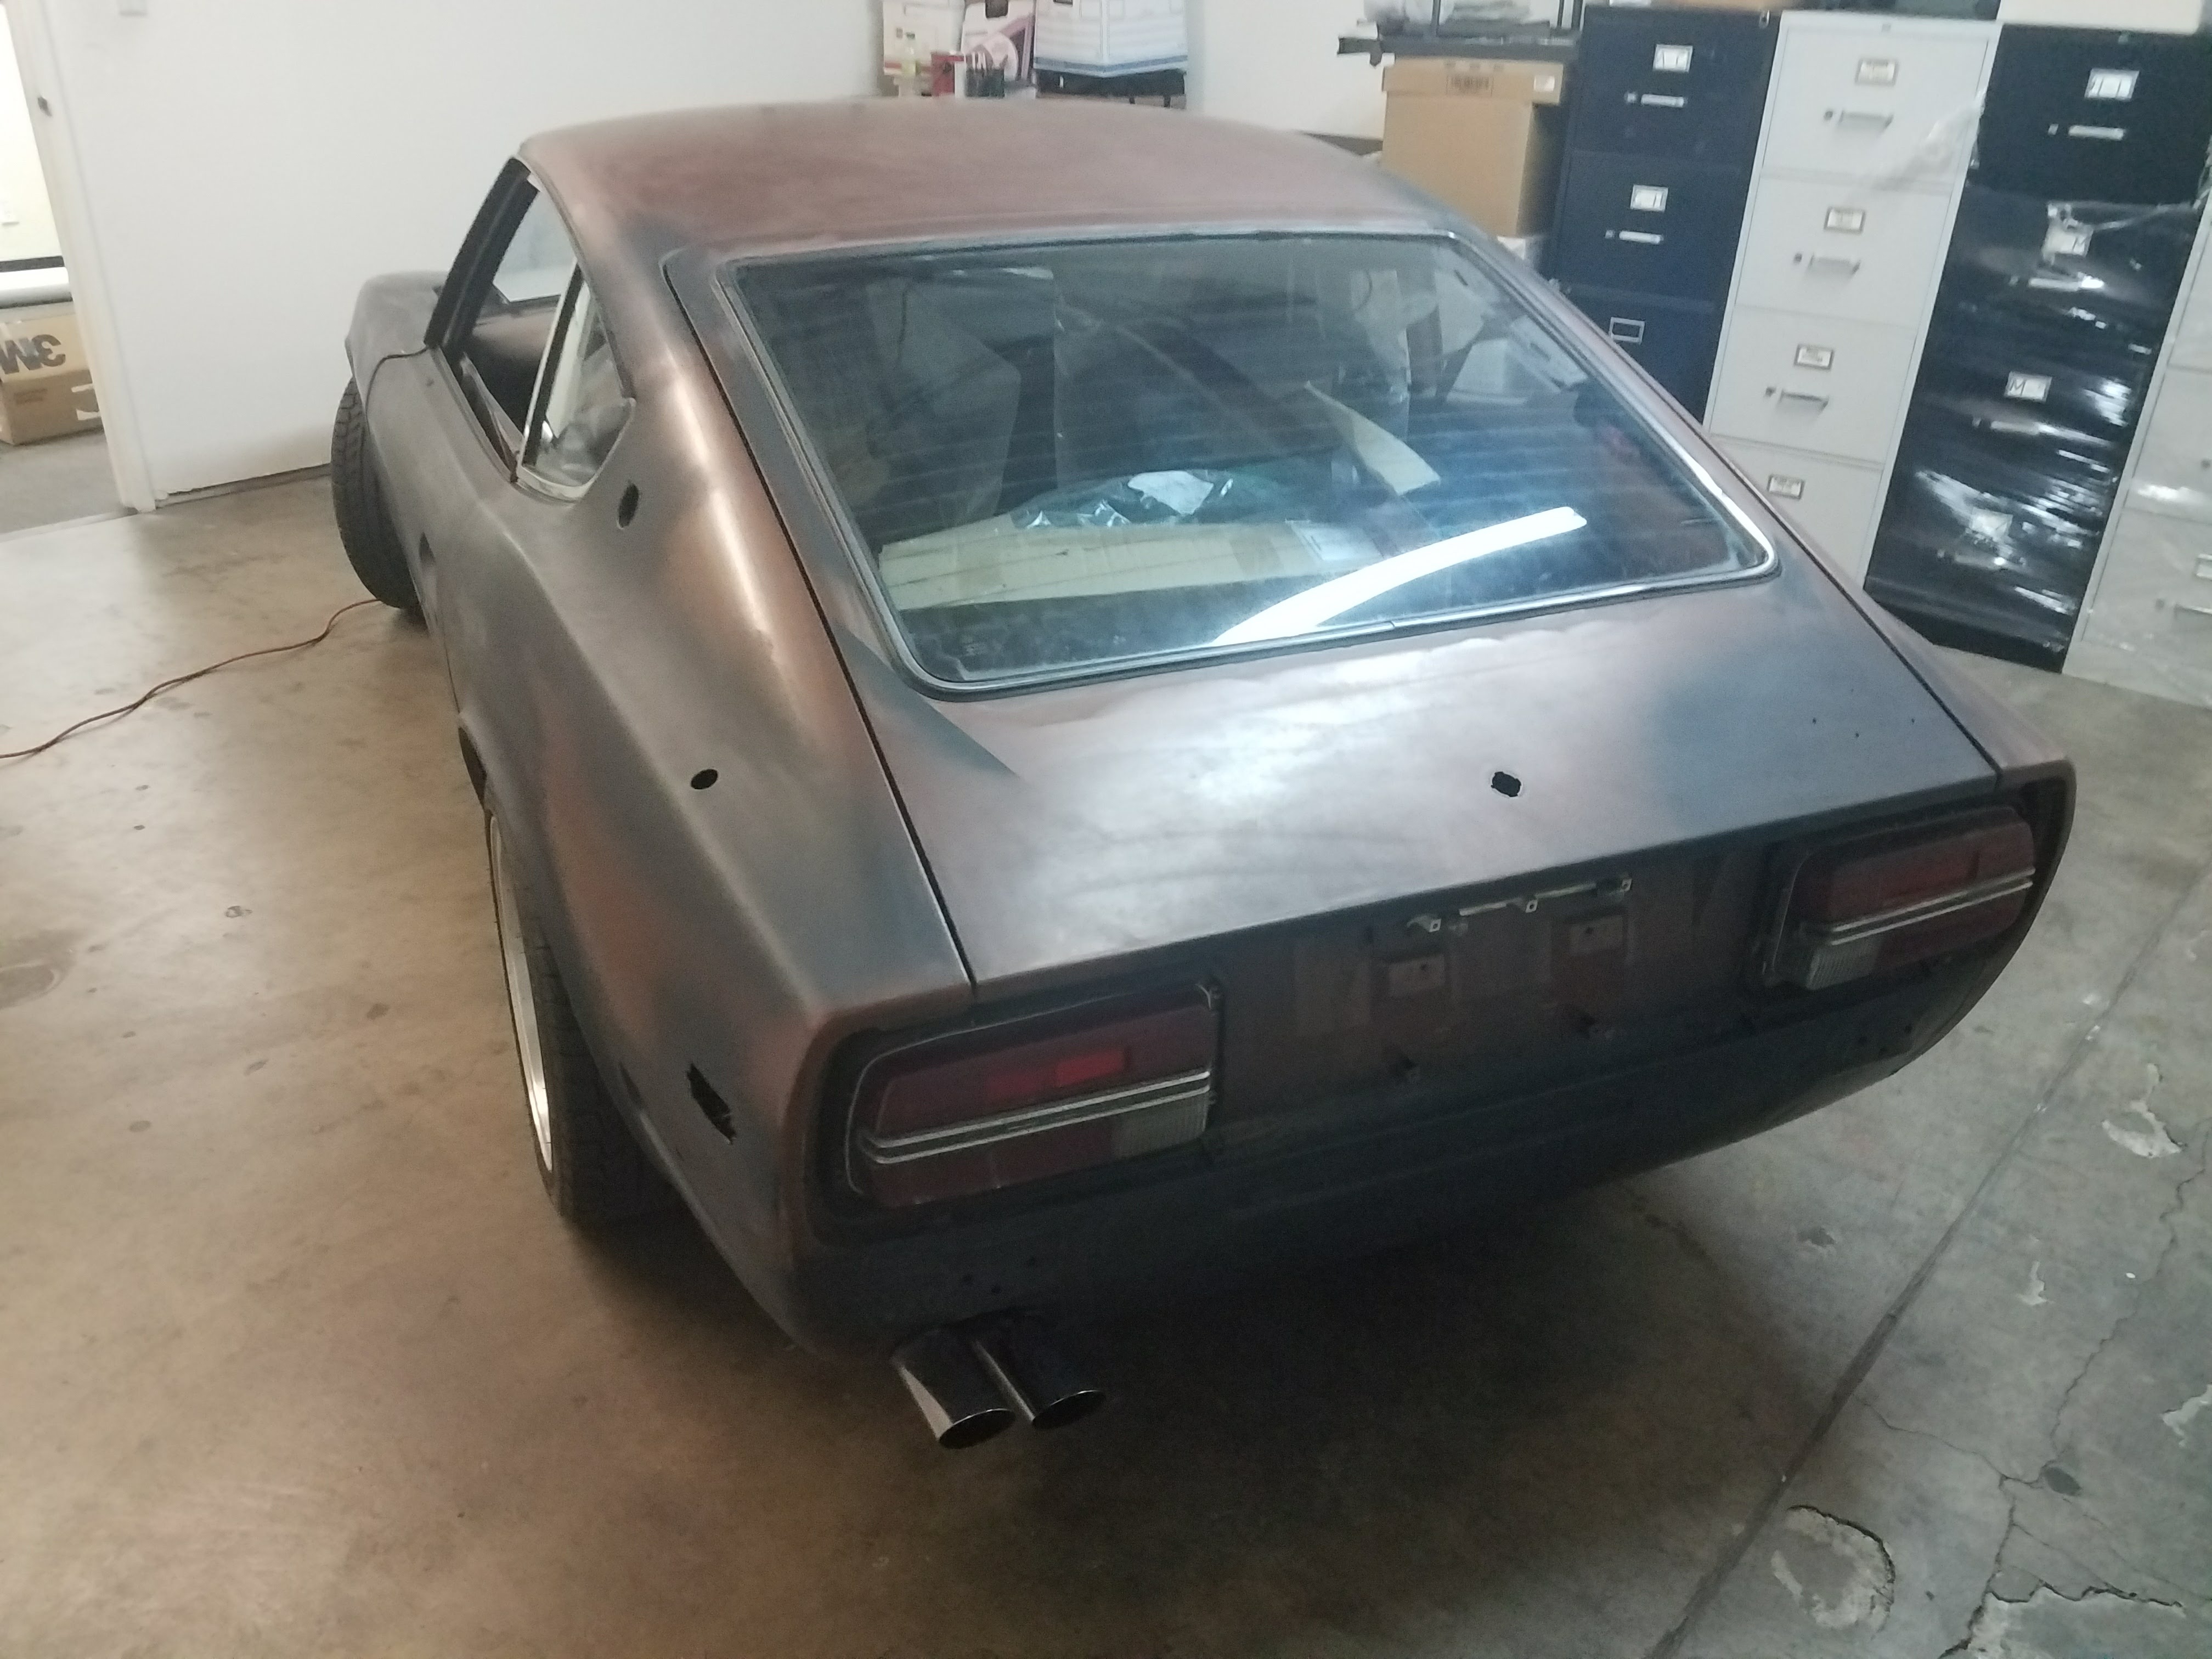
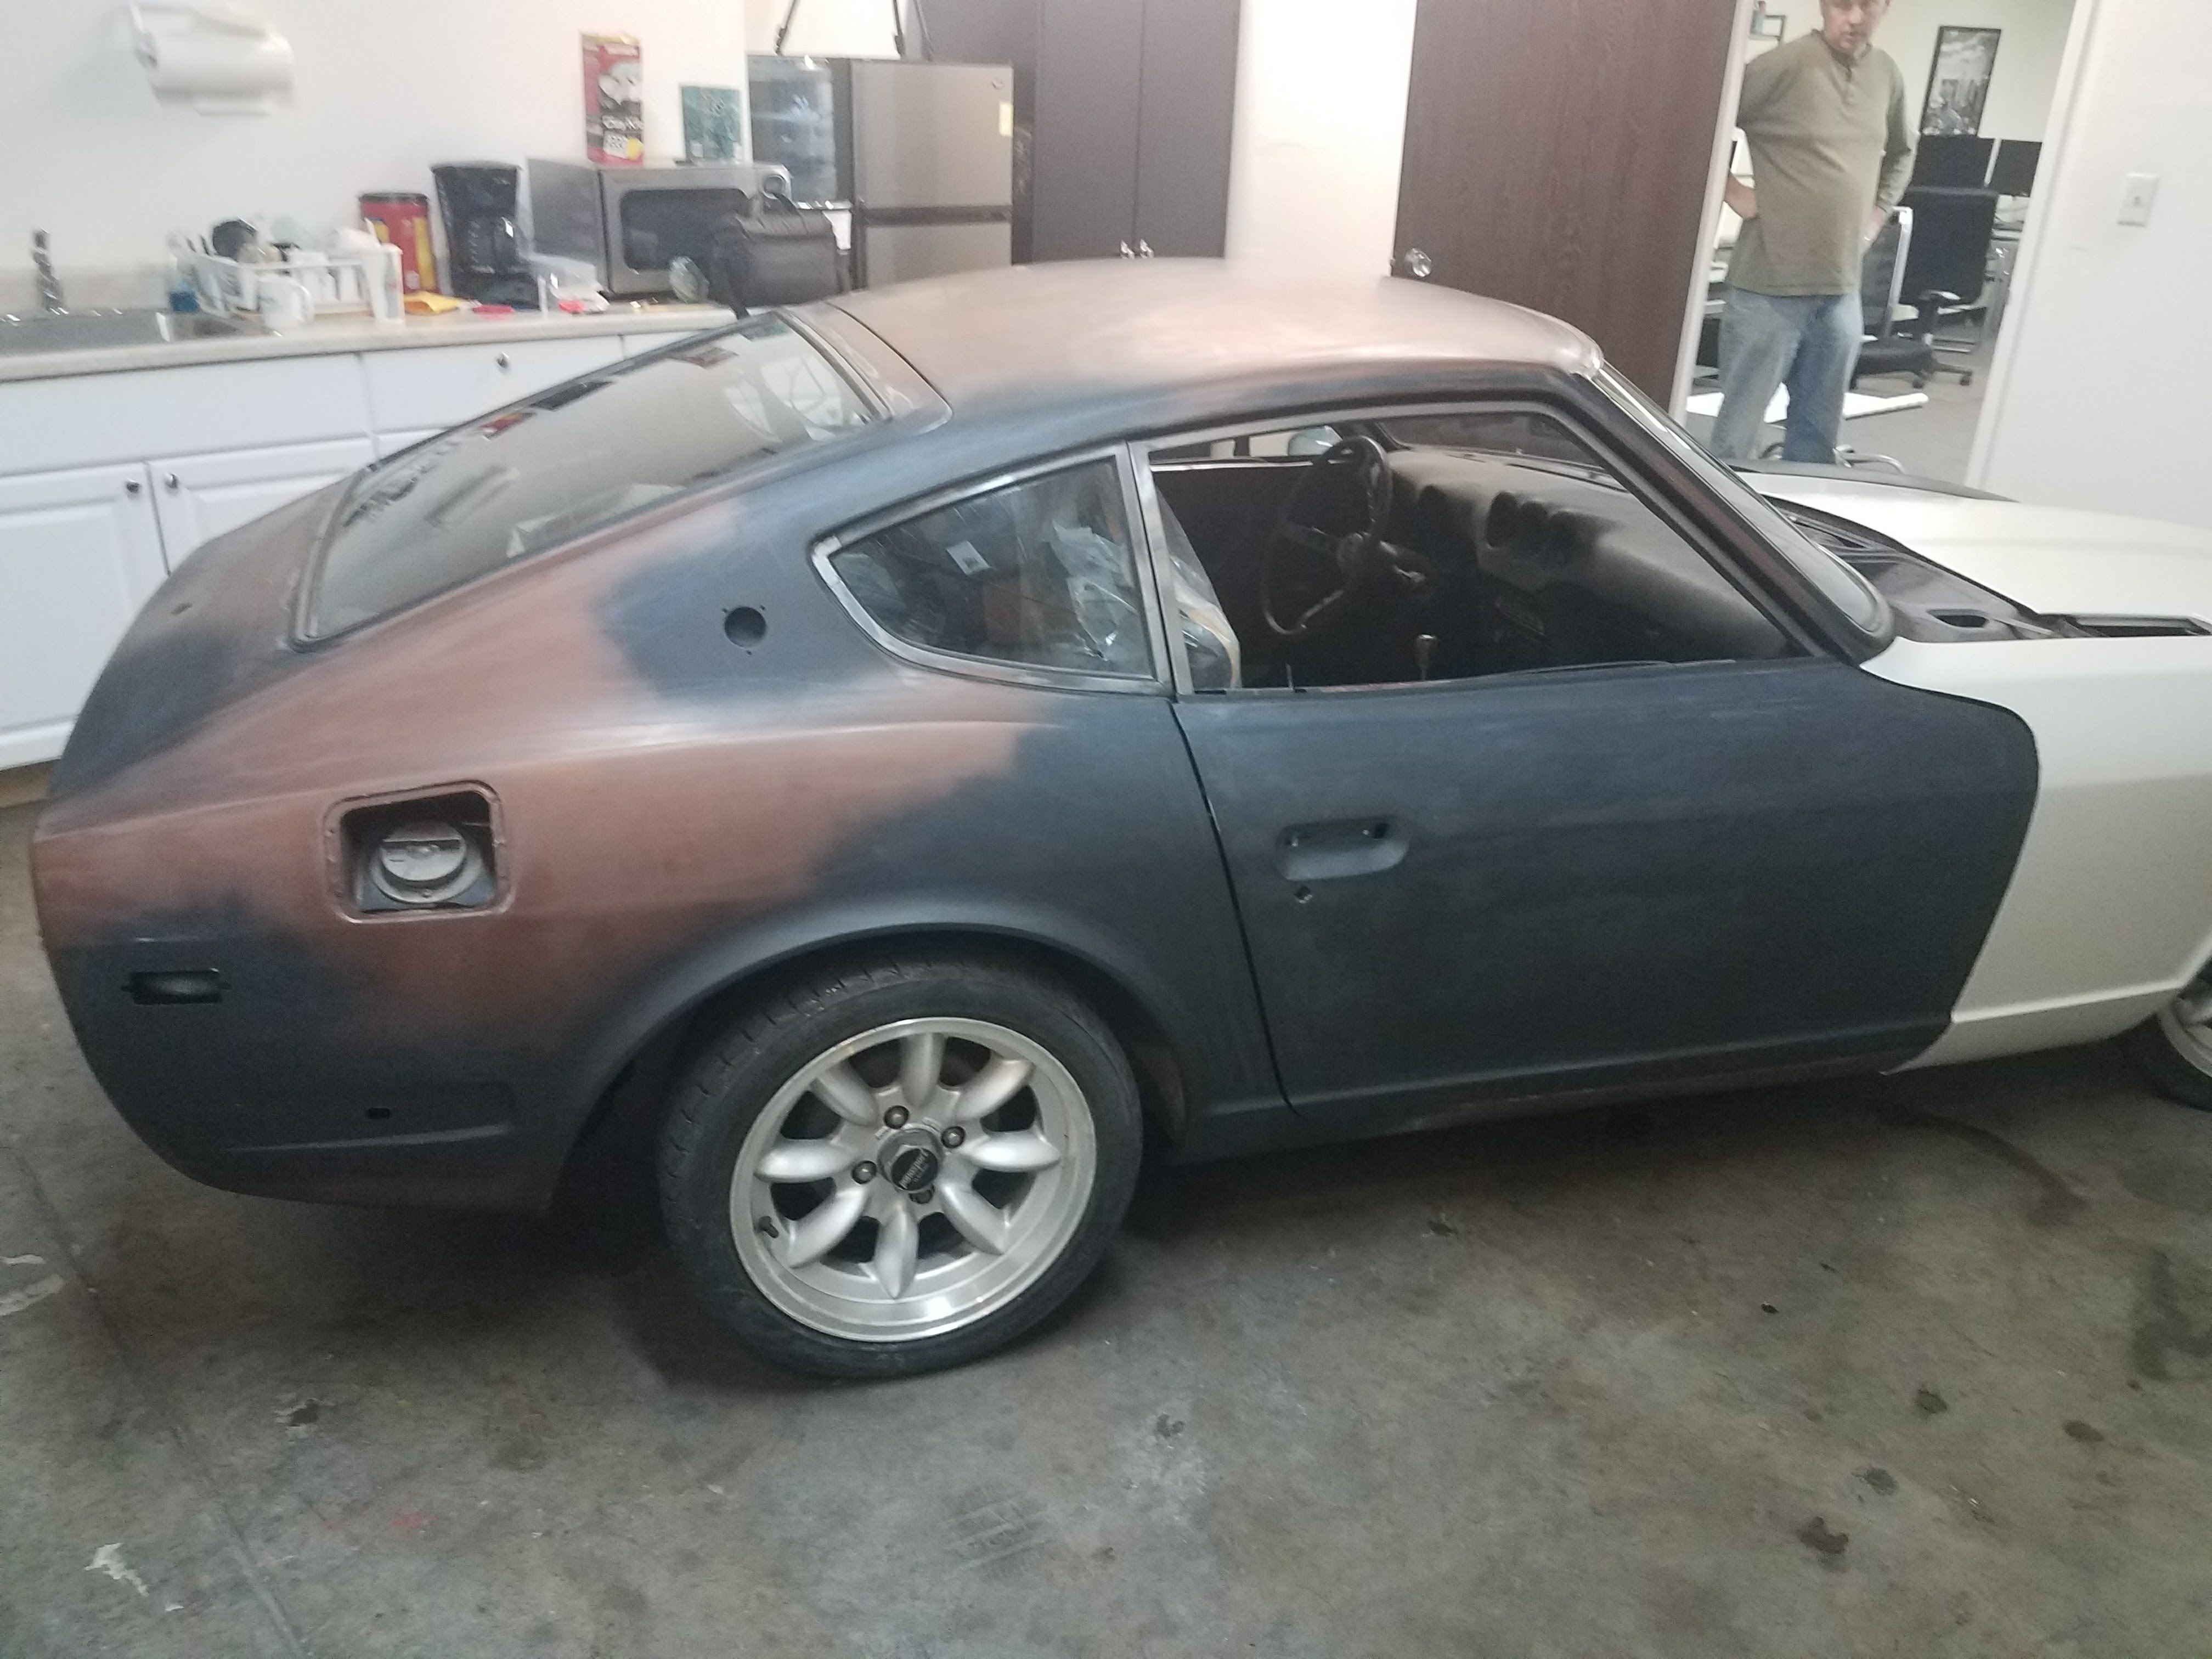
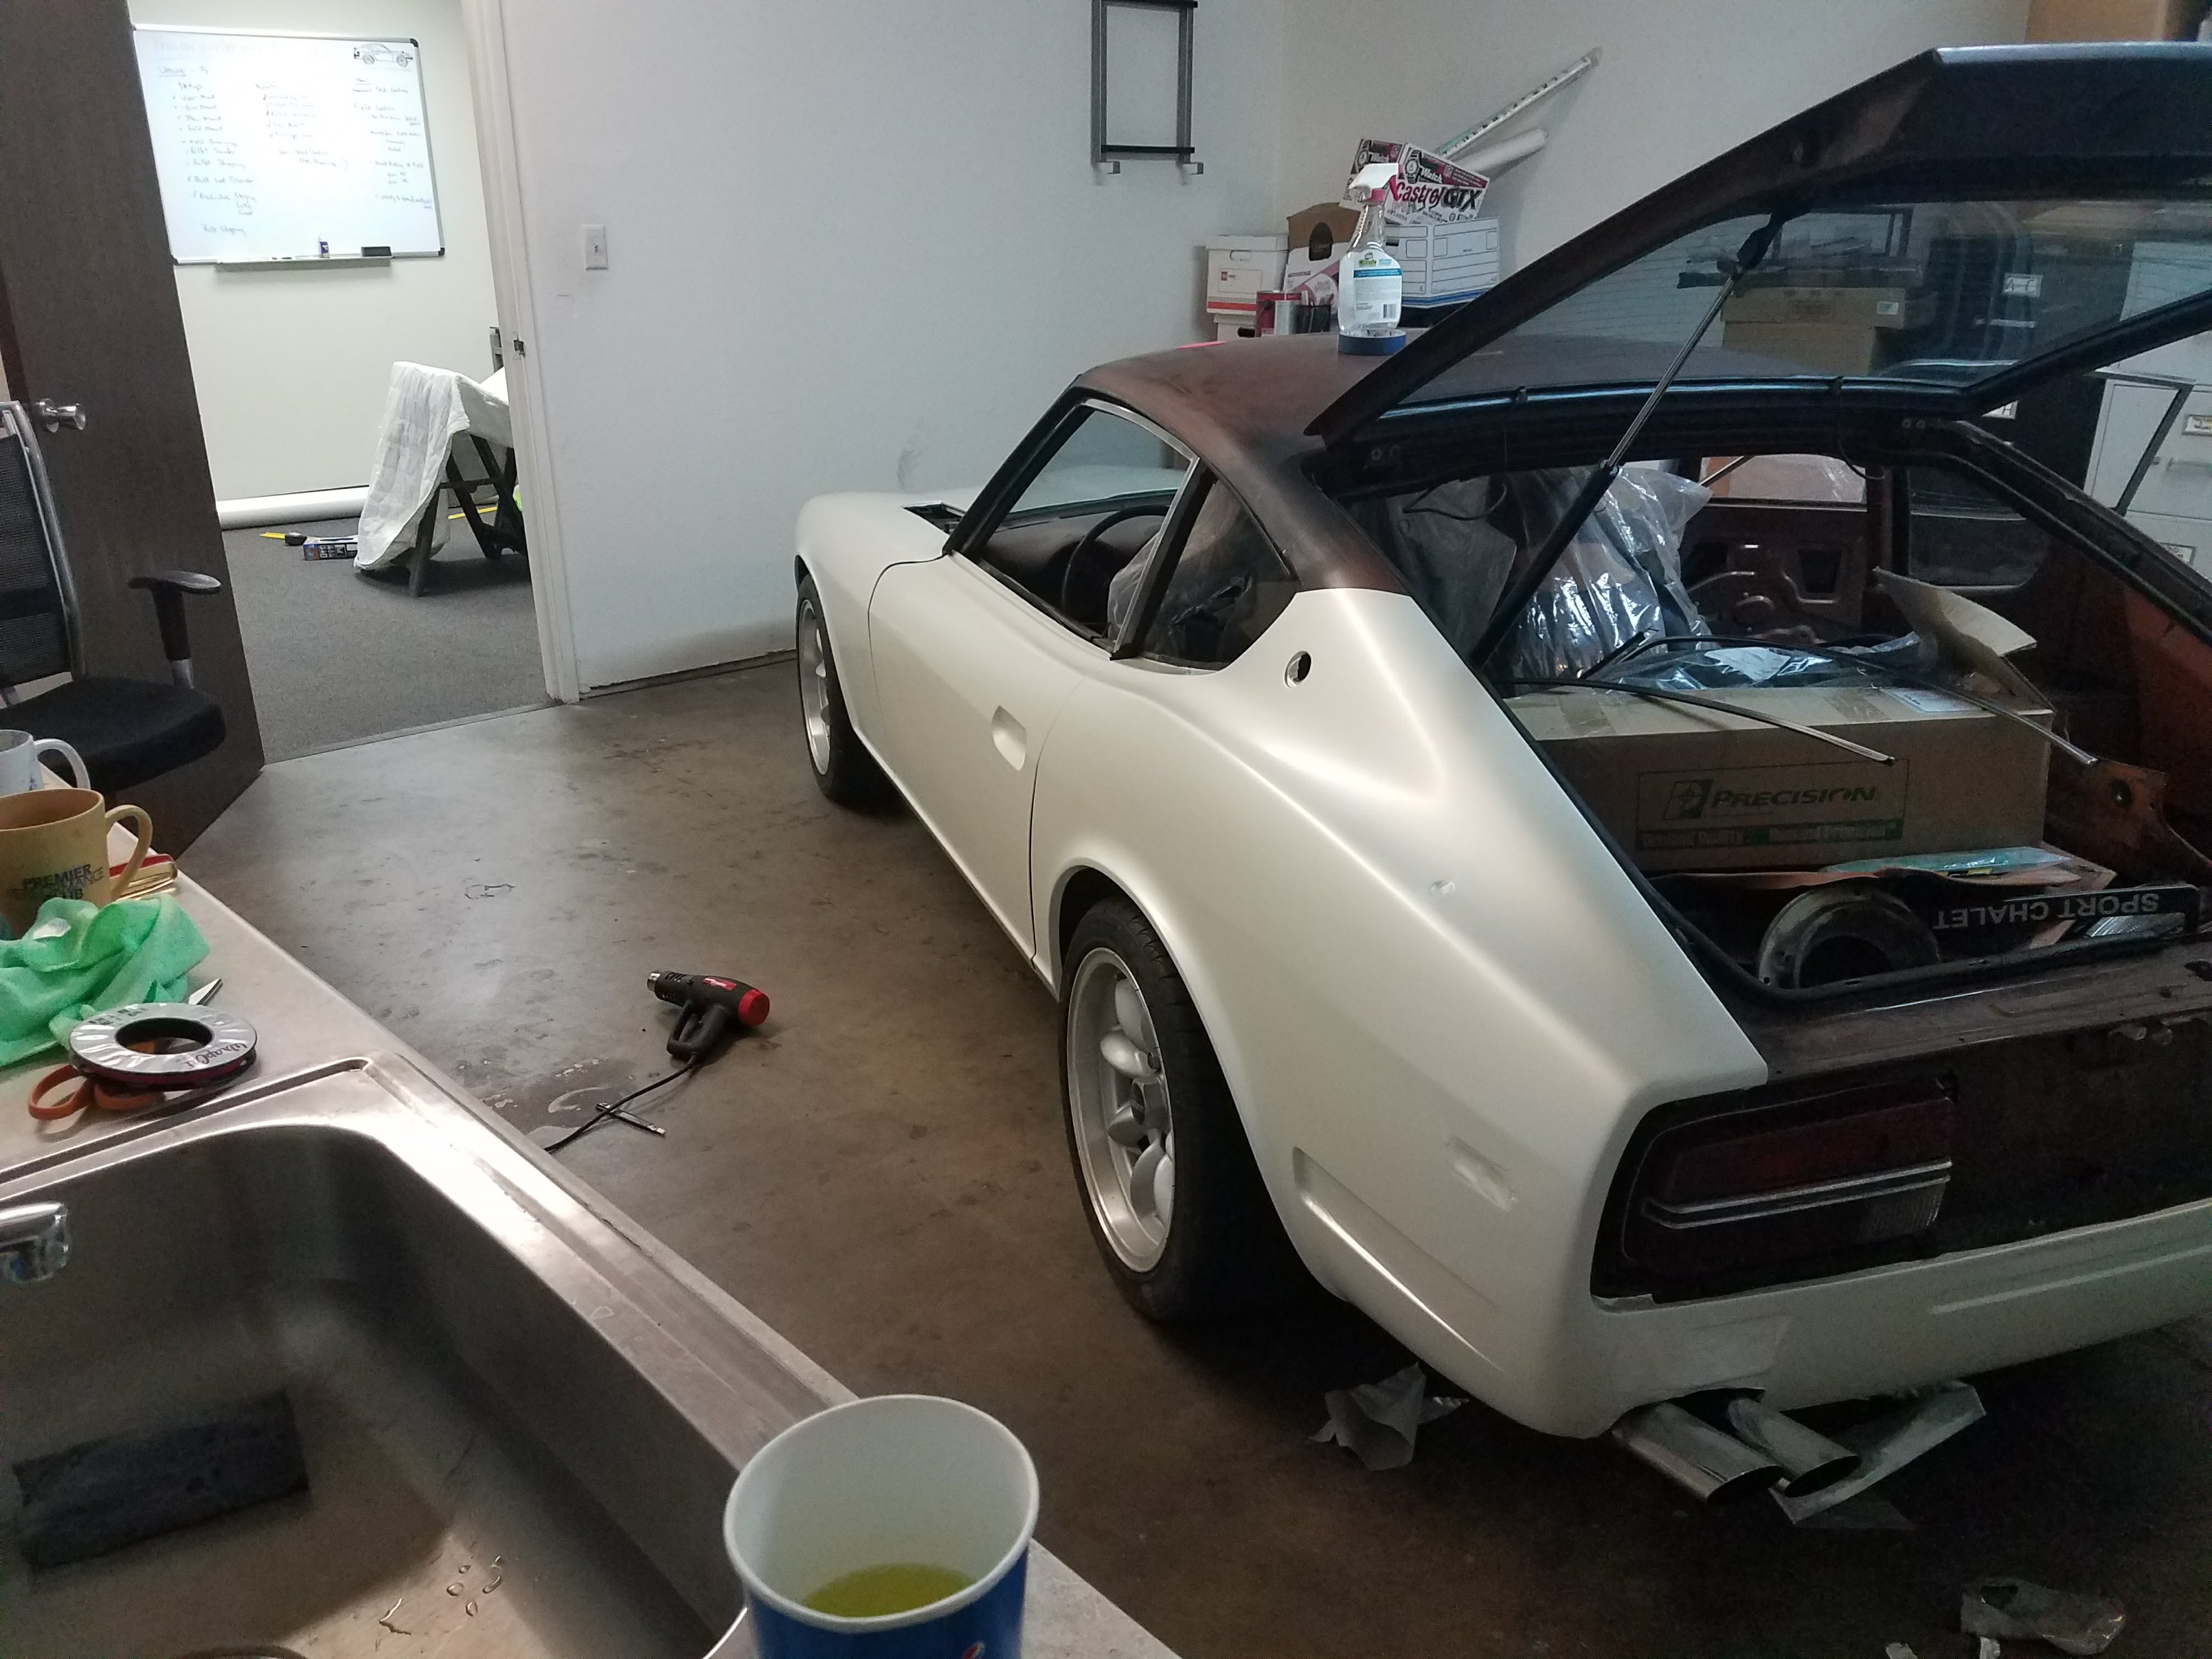
Hey Guys, I have been trying to figure out what I wanted to do for color uniformity on my datsun. I really wanted to get the car sand blasted and do a complete overhaul, but after swapping a l28et in the car, building and installing the megasquirt, and all the other tid bits... I was way over budget to say the least. To be cost effective I decided to do a vinyl wrap. 3m vinyl to do the whole car was only 500 bucks! The car itself was in no shape for vinyl. It had chips, dings, rust, you name it. I had to do all the body work to straighten it out. Here is some before pictures. The paint had to be sanded or removed to metal and bondo was applied. First time ever really doing body work and it looked OKAY. I did have a professional come and do the final things to the driver's side fender and door. Lots of chipping paint that needed to be sanded. After things were sanded and looked pretty good, spray can primer was sprayed on the trouble spots, then sanded, then black rustoleum, then sanded. Finally I wet sanded the car with 1000 grit and made sure all surfaces were smooth. Then the fun began. Vinyl took around 20 hours to finish in a weekend. This did not include the headlight buckets, turn signals, or cowling which I am still trying to figure out. The car being unibody caused issue. The rear bumper section is 1 piece which is then overlapped 1 inch by the quarter panel which is then overlapped by the roof. Knifeless tape was key to get smooth lines. The hood is harder then it looks because of the round center bubble. Really have to stretch and pull to get in on right. Also getting the vinyl to stick properly on the back required cleaning all edges and even applying loctite super glue.... I know not the right way, could use primer 94, but actually works! Just don't get that near any exterior surfaces or you will leave marks on the laid vinyl. Fenders are one of the easiest. Tucking around the wheel arch was a little tough. Make sure to clean these back areas so that no dirt is in between were you want the vinyl to stick on the inside. This is were I started to notice that my rusto paint would start to peel if we kept taking off and re-applying the vinyl. There are spots were you can see this for sure, but oh well.... it cost 500 dollars. Also you would get specs of shit for the same reason, small pieces of paint peeling up. Moral of the story. Only works on really good paint or paint that is strong against the body. Should have spent more time in that regard. Rear bumper area was pretty easy just a flat piece. The quarter panels were the most difficult. Trying to get around the rain gutter was a challenge. We accidentally cut the vinyl and had to pivot to a new plan regarding the roof. Paint was peeling up if we removed it so we went with what we got. If we were to peel it off... I would have to sand the whole quarter panel over again. Made it work, just needed to add an intermittent piece between the quarter panel and roof. Getting around the back taillight area was a little hard as you really need to stretch it. I assumed the inner edge would mostly be hidden by the taillight panel, but more is exposed then I thought. Might try to adjust this better. Roof and hatch were also pretty difficult. If you have old shitty gaskets around the glass. CHANGE THEM. Tucking underneath that shit would have been way harder than it already was. I got new rubber were needed and it was way worth it. If you mess up on a part like that... there goes 70 bucks in vinyl to redo it. Tucking worked best with knifeless tape in my opinion. Don't forget the sides of the windshield... I used a small inlay for that. Also the bottom area below the door is an inlay. Here is the vinyl result.... get it... vinyl result Might keep the windshield wiper area black... its scary when you see all the spots were it needs to be cut! Here is a picture of how we did the inlays from quarter panel to roof. It turned out pretty damn good if I say so myself. I have learned a lot about this process as I went because there is not too much info about unibody cars. I would say that this is a pretty difficult job and very tedious. Details are important, missing a cut or making a mistake can make it look bad. We had mistakes, bumps, paint chips you name it, but the point of this was to get the car looking good for a couple years for cheap until I am ready to get the car painted. What I would suggest if you want to do this... - Make everything really smooth. - If painting, take your time and get it to stick well. Paint peeling and sticking to the vinyl was the biggest issue I experienced. - Have a friend. My dad worked the whole time with me.... I can't thank him enough. I did a trial hood before all this on my own and it took 2 times as long and looked way worse. - Plan out all the cuts before you apply. Thought I would share my experience. If you have any questions about it let me know. I hope to reassemble the car in the next 2 weeks.
2 points
-
an LS is also vastly more expensive then a traditional 350 swap. He should do whatever he wants to do.2 points
-
Thanks to everyone that purchased a piece of apparel in the fundraiser to help @SuperDan with operating costs for the site! We sold a total of 88 shirts with a resulting profit of $1202.19, which I just sent 100% of to Dan. It won't show as a donation because I sent it via friends and family to ensure every penny made it to him. This should cover the site's costs for about 6 months. Moving forward, I'll be doing an annual apparel sale with 100% being donated towards operating expenses. Each year we'll do a different promotional item since many of you now have several HybridZ shirts in your closet! Looking forward to hearing your ideas on what you'd like to see along with the shirts. Hats, beanies, keychains, stickers, etc all come to mind.2 points
-
Semantics is a big deal on this forum. It is one way that separates us from other forums. Making sure an item is called the correct name that people recognize will go a long way. If you want I can edit the title of your post which directly asks for a workaround to the combo switch. Semantically it seems to be called a multi-function relay. The relays themselves seem to last quite a while, I'm still using several stock ones in my 71 that was in use till 2010. I would suspect as miles pointed out it may be the switch contacts on the stalk going out. The hazard lights switch has its own set of wiring so it may be acting as a red herring if you are using that as the reasoning in your train of thought. I suggest taking a breath, people are here to help of their own accord, it may be frustrating to seemingly answer the same question or when someone is caught on a seemingly unrelated point, but realize we need clarity to try and help. It may serve to help their train of thought, and it may seem tedious, but given the free help, maybe try being accommodating? It may serve better to have a post where you clarify exactly what you are looking for that you or others can refer to someone asking a question in the post. I can't answer as I've only looked at the early Z wiring in detail, but it seems odd for the blinker wiring to go through the floor so I can identify with others as to the confusion. I'm finding a note that the part number was used for a fuel pump relay, might be something else to check. I do know the pins are a standard spade connector so you could wire in a modern relay if you can pin out the contacts and make little adapter lengths, I've done that for some older plugs before. Identify power, ground, switch ground, switch power, and output. Then you can use any modern automotive relay.2 points
-
katman? Where the hell has he been for the last 10+ years? Oh, that's me, back from the dead. That thread may have been on improvedtouring.com. Assuming your friend also has to run the stock drum brakes, here's how we made brakes last in an ITS car, which at the end of its development was probably as fast as any CP vintage car. I don't know what compound Carbotech has today, but back then the HT-9 was the only thing that would hold up to the heat on the front. The HT-10's that replaced them were not as good, but that was about the time that SCCA pissed me off by outlawing remote reservoir shocks so I quit thinking about Z brakes. I ran both the Nismo rear shoe, and the relined Carbotech shoe, I think. We cryo treated rotors and drums. We ran the parking brake so we could adjust the rears during the course of a race. That and having an adjustable prop valve so you can make the rears take their share of the load is critical. If you aren't turning the friction surface of the drums blue, then you ain't there yet. Scour the junk yards and find every Z drum you can find and have them turned and expect to rotate in a new set every weekend. Up front, don't fall into the trap of using a pad that maximizes the pad material, in other words instead of this | | , you want this \ /. The outer radius of the rotor runs hotter because its going faster (linearly) and wears the pad faster. Nothing worse than having to pump the brakes every corner to take up the slop from tapered front pads, maladjusted rear shoes, and expanded rear drums. We drilled holes in the backing plate on the rears for some cooling, but not much else you can do back there. Up front we ran three 3" ducts on each side, one to the hub area of the strut to cool the bearings, one to a custom "can" that blew air on either side of the rotor, and one that blew into the caliper overtop of the pads. That one was tricky to make as there isn't a lot of clearance between the caliper and a 14" wheel that we had to run. I also drilled a series of small holes around the periphery of the pistons just behind where they contact the back of the pads so air could circulate behind the pads from the aforementioned duct over the pads. PM me and I'll send you some pictures.2 points
-
I noticed some traffic on my web site from HybridZ and was pleasantly surprised to see a thread opened on the CV axles. Thanks John! Mods, I'm new to this 'vendor' role, please let me know if I'm breaking procedures etc... I'll keep this theme to simply answering some of the questions raised above. Please don't hesitate to add questions and I'll continue to answer as best as I can - w/o giving up too much R&D. "...he seems to be quite a regular in the "Dime" community" - that I am. For the past 7 years I've been a proud owner of a 1972 Datsun 510 2 door, orange. I also own a 1976 280z that currently being built up into another fun toy and R&D test bed for future products. Much of my involvement on 'The Realm' has been sharing in my experimentation (Yamaha R1 carbs on a KA24e and MegaJolt EDIS ignition etc...) and learnings. "..I wonder if he is just cutting flanges off old u-joint axles and welding them on to "CV" axles..." - nope. I manufacture brand new adapters/flanges, accurate up to 4 thousands of an inch on centering/mounting to make them dead smooth. The flange's bolt-hole placement is left to CNC machining for repeatable accuracy. "...Not sure that they're much better than a u-joint axle though. What's the benefit?" - Several benefits: As the U-joints in our axles fail, finding replacements has been difficult, at least for me. Also, with lowered Datsuns, the larger angles within the axle exaggerates a U joint's inability to rotate at a constant speed. These newer CV axles (short for Constant Velocity), can rotate at more consistent speeds with larger angles. The end result is a noticeably smoother ride - even for Datsuns with seemingly fine stock axles. Another reputed benefit is more drivetrain efficiency and a couple percent increase power to the wheels. "I wonder where the came up with the torque limit. Breaking welds? " : A LOT of engineering went into these CVs - down to shear calculations, metals selected for the adapters and how it interfaces with the CV, impacts from tempering, redundancy in fastening etc... Calculations showed that the fastening/welding technique is ~20-30% higher than the stubs at their weakest point. Back to the question, the torque limit was placed because that's the approximate OEM limit that the axle is designed for, and I wanted to limit anyone trying these axles on over the top machines. As previously posted the axles are comparable to the Subaru STI which are quite capable. My guess on the weakest link now lies in either the axle splines or the shoulder/D bolts themselves. " Being that the stub axle is such a weak spot..." - I'm not sure where on the stub you are referring to but I do offer an integrated stub CV where an OEM STI stub is directly fastened onto the CV housing - in 3 different manners (it's NOT coming off!). It's really slick with only 4 bolts to fasten the axle onto a clip-in diff setup. A similar R200 version is in the plans for this spring as well. I hope that answers the questions. My CV axles are designed to fill a niche market and not directly compete with existing products/vendors. There are already several options for owners with massive HP and/or heavy track duty needs. My CVs, and frankly the basis of all my future products, are intended to be an affordable & original solution that offers a level of reliability (read: lack of maintenance) you expect from a street car, be it stock or with a moderate swap/upgrade powerplant.2 points
-
Did it. Not a bolt on deal, but easier than a LS1 swap! Nobody here should be scared. rear parking hat brakes2 points
-
Here is a later pic with everything welded in, I think I did what you are recommending.
2 points
-
A little update
2 points
-
Quite a few things wrong with that Tune. No wonder you are having issues with AE. Made some revisions to. 1: AE settings. No where near correct. Made several changes there that should be positive. 2: Target AFR table far too lean at low RPM. VE table greatly affects transition off idle. Going too lean creates a bog. With proper Ve Table, less AE is required. 3: You were running Alpha N. MS3 has a special Fuel algorithm for ITB's. I have enabled that. 4: Spark Table needed some work 5: I've noticed that you have your O2 feedback control disabled. I have enabled it but set proper settings and filters on it. Send me a PM with your E-mail address and I will send you a touched up Tune. This is just a Baseline . but should be an improvement. I also do Remote Tuning and offer full Tunes built for your particular engine specs.2 points
-
Ready for battle! Getting geared up to start machining the heads. Officially the first production run.2 points
-
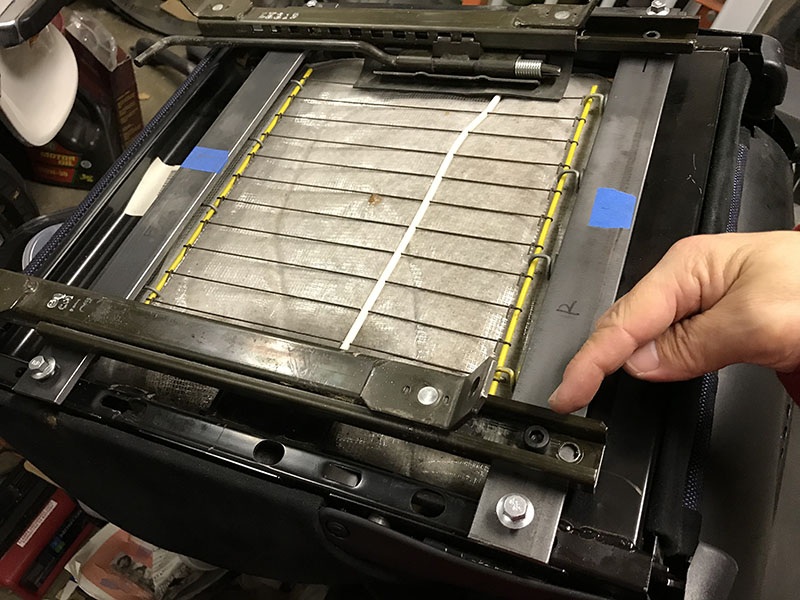
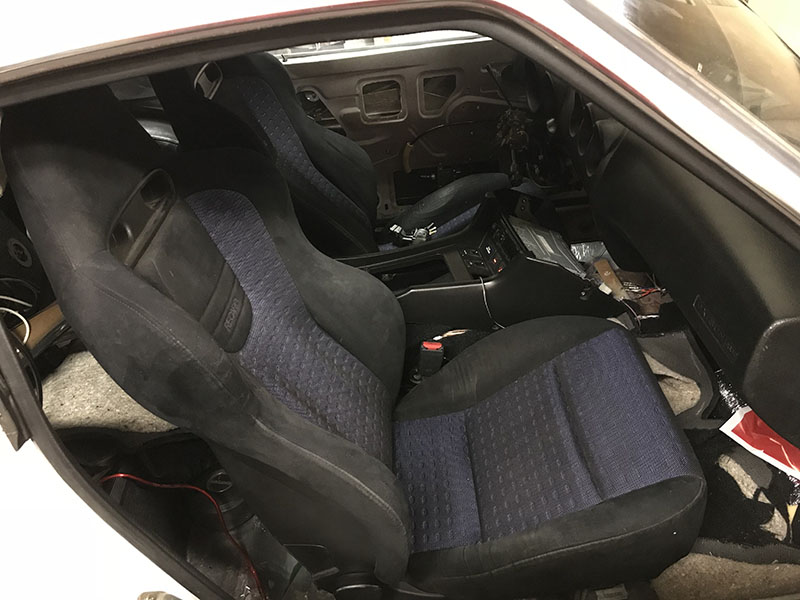
Just installed 5mm flat bar at the bottom of Lancer EVO8 Recaro seat. I need to drill a adjustment hole on the original seat rails.
2 points