

DUDE
-
Posts
43 -
Joined
-
Last visited
Content Type
Profiles
Forums
Blogs
Events
Gallery
Downloads
Store
Posts posted by DUDE
-
-
Does anyone have a diagram or a list of all the grommets and seals that at 240Z needs or where I could obtain that information ? I am needing every bit of rubber on my car but I want to make sure that I get every one that I need
-
41 minutes ago, itzgoten said:
This is a CRAP pic but it's all I could find from 2015.

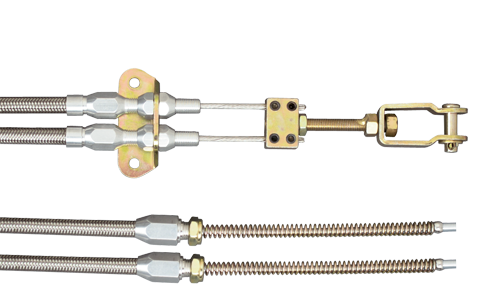
I used a U bolt/clamp and had a bar welded upwards to hold the e-brake lines.
You can see the OEM lines are bent too much, so this DOES NOT work. you will need to get longer aftermarket lines. The ends of the line must have a "spring return" or else the ebrake will not disengage after you pull it.
I hope this helps. It sucks but I'm digging through old low quality cloud back ups of the pictures so it's not high res. The other pics were just google searches but it'll get you on the right track.
Ok this is great I will see what I can pull together thank you
-
On 7/9/2013 at 6:42 PM, m1noel said:
The good news- I have a parking brake! And I took pictures....but, can't post them because I took them with my camera instead of my phone, and Vicki took my one camera to computer cord with her to France. And I don't want to take the wheels back off right now. If I get a chance, I will take them off and take some phone pictures.
I will tell you what I did.
I removed the old brake cable mounts from the lower suspension. I bought 2 2" muffler clamps at $2.99 ea. and 2 compression springs at $3.98 for a package of 2. I welded the old mounts to the clamps at one end, lopped off the part where it used to bolt on to the suspension. and mounted the clamps to the strut housing so the mounts are just to the rear of the strut housing and with just enough clearance to the outside of the strut for the cable. I put a spring on each end of the existing parking brake cable between the mount and the clevis. I bolted a 1/2"X 1/8" aluminum bar about 2" long firmly to the clevis and used the old clevis pins at the arm of the caliper. I used the bar instead of a cable extension because it won't bend and will push the arm back. I then adjusted the cables from underneath the car above the drive shaft until the were free with the handle down and clamped tight when I pull on the handle. It does use the full travel of the handle but works. For $10 and half a welding rod I'm pretty happy.
I will post pic's when I can.
Oh and yes, I have Dave's control arms, mustache bar, and sway bar mounts, but without coil overs.
Any chance that there is a way I can locate the pics you posted on this set up? im now at this wall and have noooo idea what to do
-
14 minutes ago, itzgoten said:
I'm not the original poster but I used his as a guide as well. You're going to need the longer parking brake lines. The way the caliper works it locks when being pulled back. Are you on facebook? I can message you quicker and share what resources I have. it's been a long time. I sold my Z a few years ago but I can help get you pointed in the right direction.
Yes that would be great! can you please send me a message to Buzzyme Zcar , and can you give me your FB name so I can try to locate you and send you a message in case you cant find me? Any help would be great and much appreciated so thank you
-
10 minutes ago, itzgoten said:
You do realize you're asking for pics from a 5 year old post? I was surprised I even got a notification still. Good luck on getting it all working! Shouldn't be too difficult once you have it all mocked up.
Yea im sorry I have been physically unable to do anything for the past 8 years, but now im trying to tackle this but found this same problem
I have placed the emergency caliper on to the rotor but I haven't the slightest clue how to place the cable since it seems to be to short and there is nowhere to mount it? I was hoping to copy your plan to have some success? is there no way for me to see pics on this site that are that old?
-
On 7/14/2013 at 1:47 PM, m1noel said:Update, Picture added. I also drilled the supplied bolts for safety wire. Don't trust lock-tite alone.
Hello im glad I found your post because im now dealing with this issue but do you happen to have more pics so I know what parts to buy and how to install? im more of a visual person
-
51 minutes ago, bradyzq said:
True, but there's the factory painted-over sound deadening that you're describing to deal with on the inside. I figure you can be less delicate on the underside, and since the undercoating is not factory, it may come off more easily.
Ok thanks for input 👍🏼
-
6 hours ago, bradyzq said:
Would it be easier to look on the underside of the car? It's just the other side of the same floorpan.
Good idea but was told the undercoat would conceal it
-
5 hours ago, bunkhouse said:
The same problem exists on the underside with the undercoating. Air pockets that allow surface rust. Both surfaces (inside and out) need to be cleared of rust. Hopefully you won't find any spots that have rusted thru the sheet metal.
Good thought I will do my due diligence checking
-
17 hours ago, bunkhouse said:
The tar mat ("rubber") that has rust around the edges typically has rust under it too. You'll find many places that the mat didn't adhere to the sheet metal. Those air pockets allow surface rust to form on the bare sheet metal.
I can’t catch a break 😅 ok I will rip it off and hunt some rust
-
5 hours ago, BJSZED said:
All the spots that look lumpy are likely rust bubbling up, pushing up the surface of the mat. Sometimes if you push on the bumps it sounds crunchy. I would remove it so you know what you have.
OK I will add this onto another step that I have to do , Thank you for the info hopefully there’s not any bad rust where I have to replace the floorplans
-
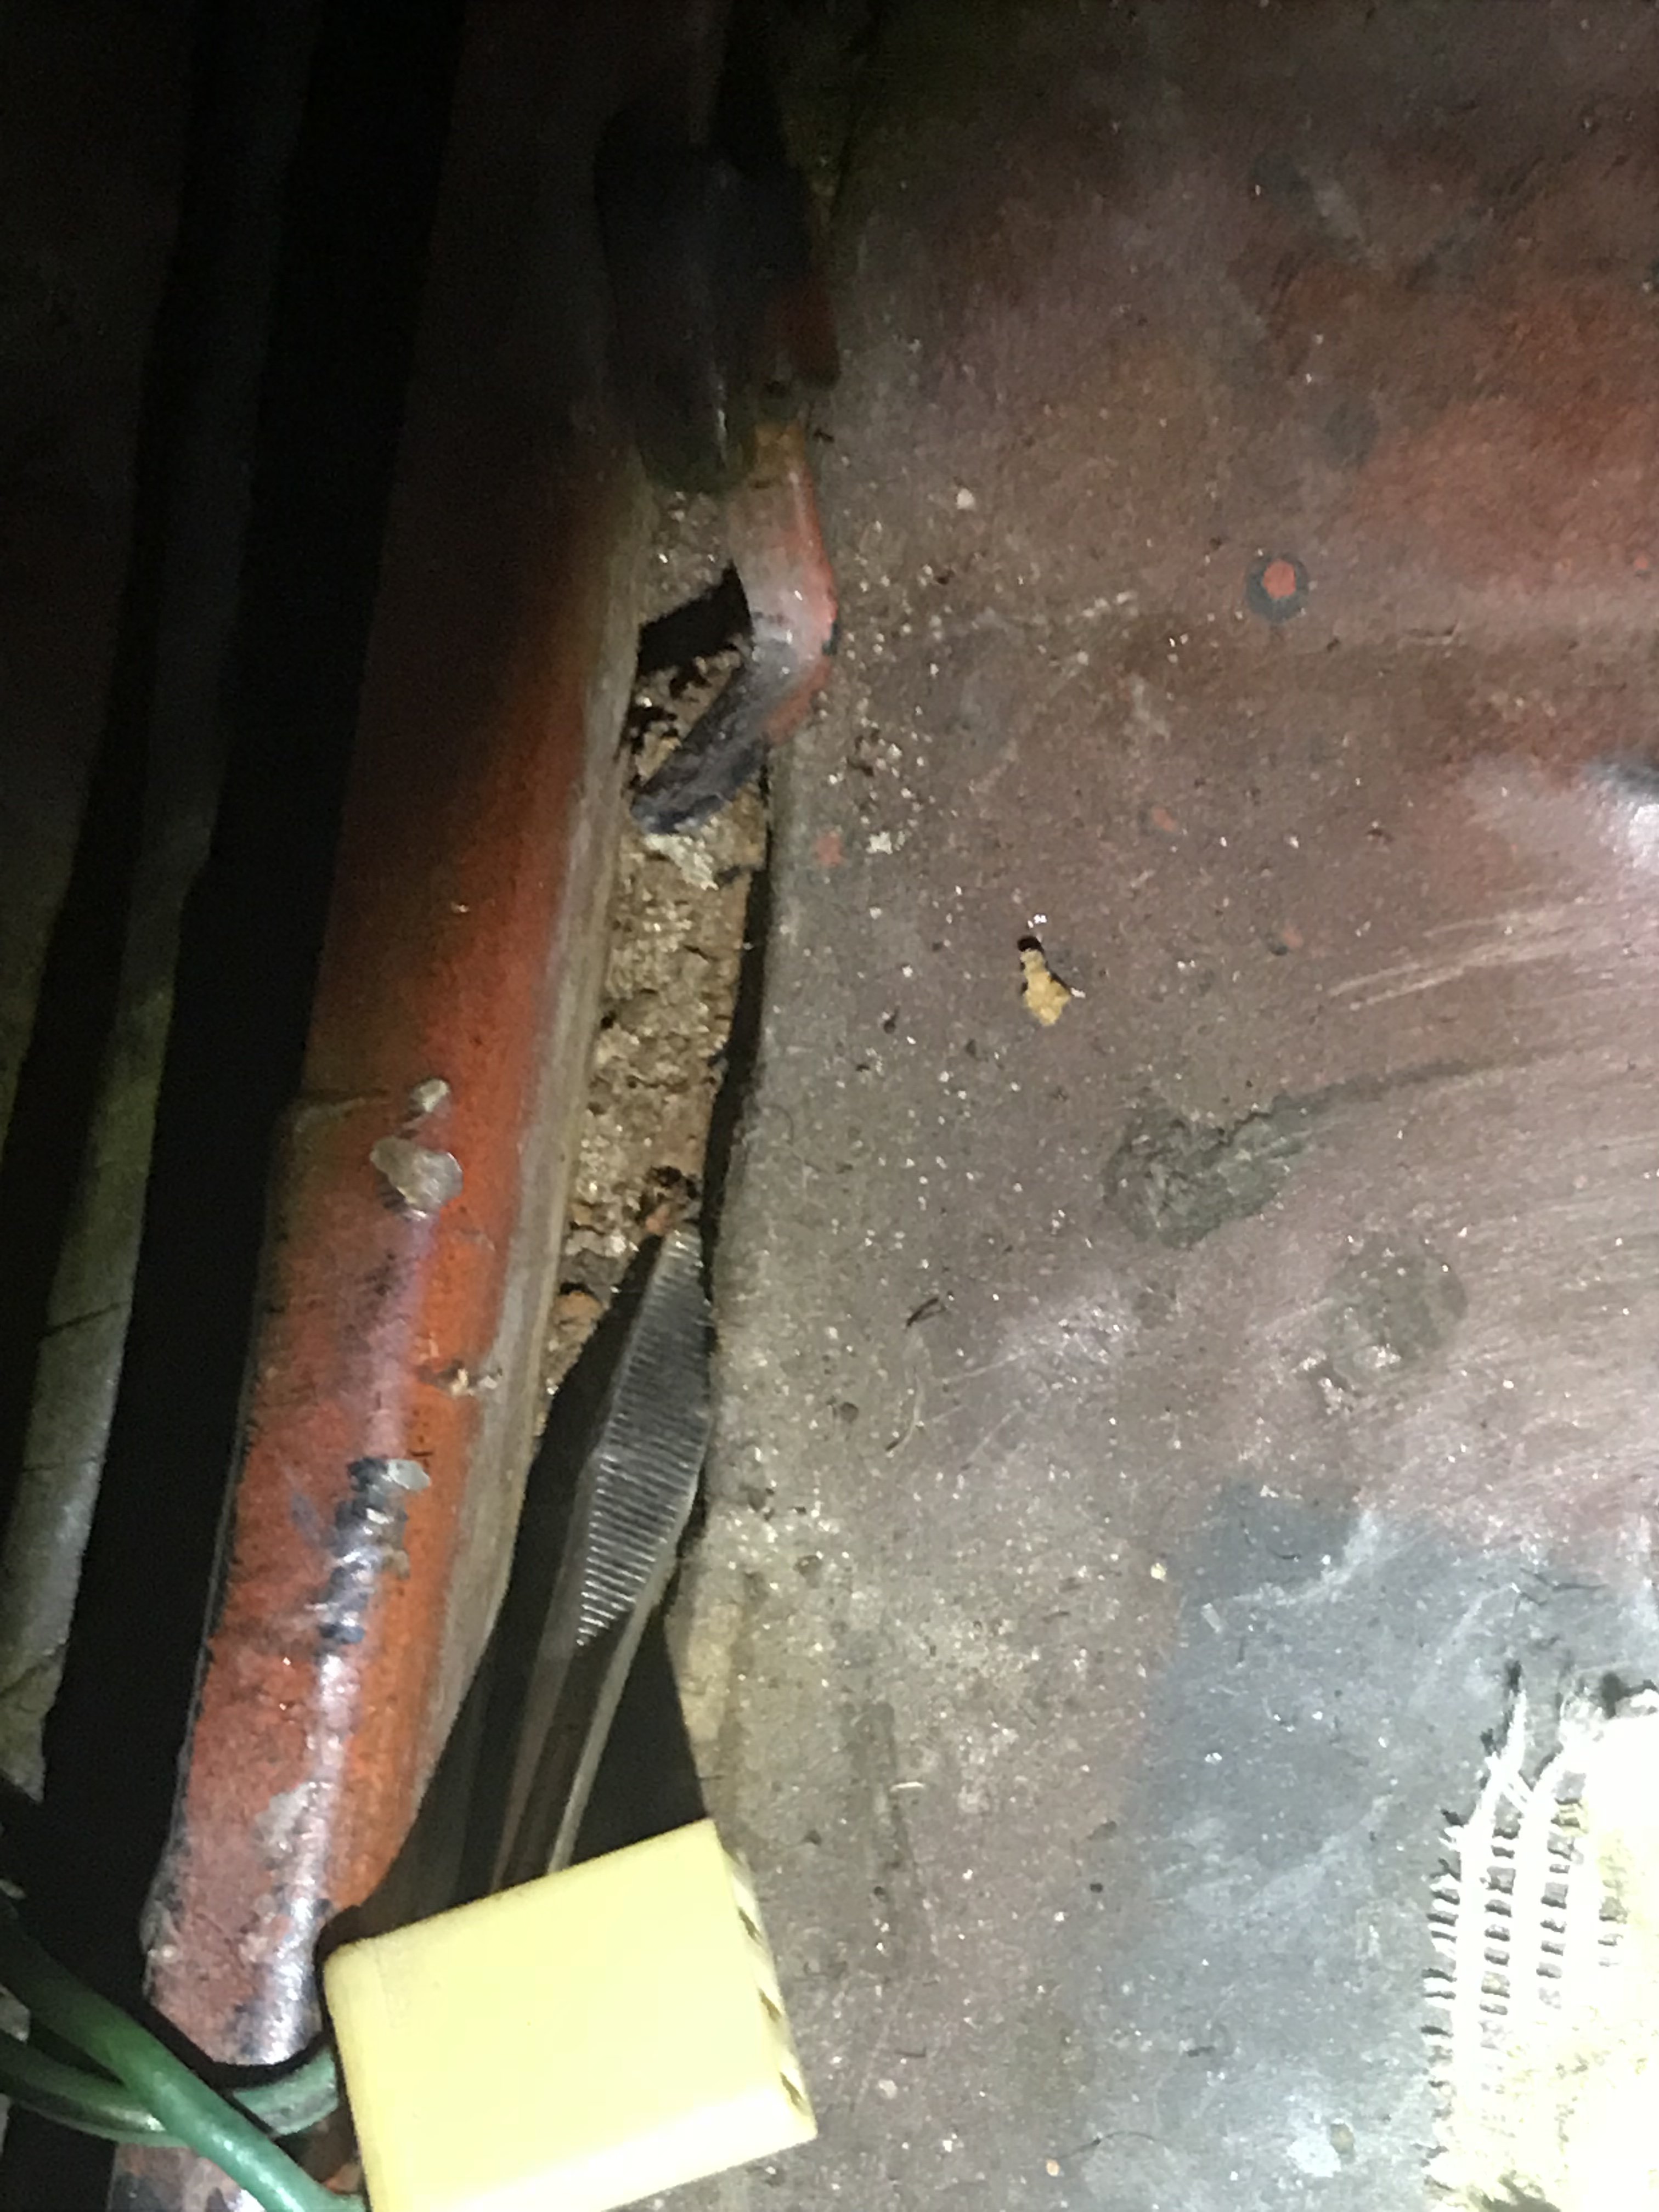
I was cleaning out the inside of my car took off the seats checking for rust and as I was doing so I found on top of the floor pans there was hard rubber that seems to be stuck on top of my floor pans and in certain spots at the edges you could see small rust spots. My question is should I rip off this rubber to get to the floor pans to see if there’s any more damage? I posted soon pics and I put a screwdriver parsley underneath the rubber to show what I’m talking about — At first I thought it was the metal until I found out that it’s molded on top off the floor pan kind of like a sticker
-
1 hour ago, grannyknot said:
You can plate every piece on the car if you want but as you were told on ClassicZcar.com, basically any part that doesn't have paint on it was plated.
Grannyknot ok well I guess I just have to prioritize witch ones I would like done?
-
I am tearing down my 70 to 240z and before I put it together I want to get some parts plated just wanted to know if anyone happens to have a list of every part that I can get plated on my car before I put it all together?
-
Scarab73 You make a valid point I can least look into it a little further maybe rent a welder practice a little and see if I feel comfortable with that idea thanks for the push! 😬
-
Ok good advice peeps and after looking into all my options and advice I think I might have to bite the bullet and see about paying to get it done 👍🏼
-
Hello I have never welded before and was hoping that you all can tell me if I should buy a "mig welder" and attempt to spot weld my entire car myself? If so any ideas of the most inexpensive machine and possible advice on how to learn to do myself?
-
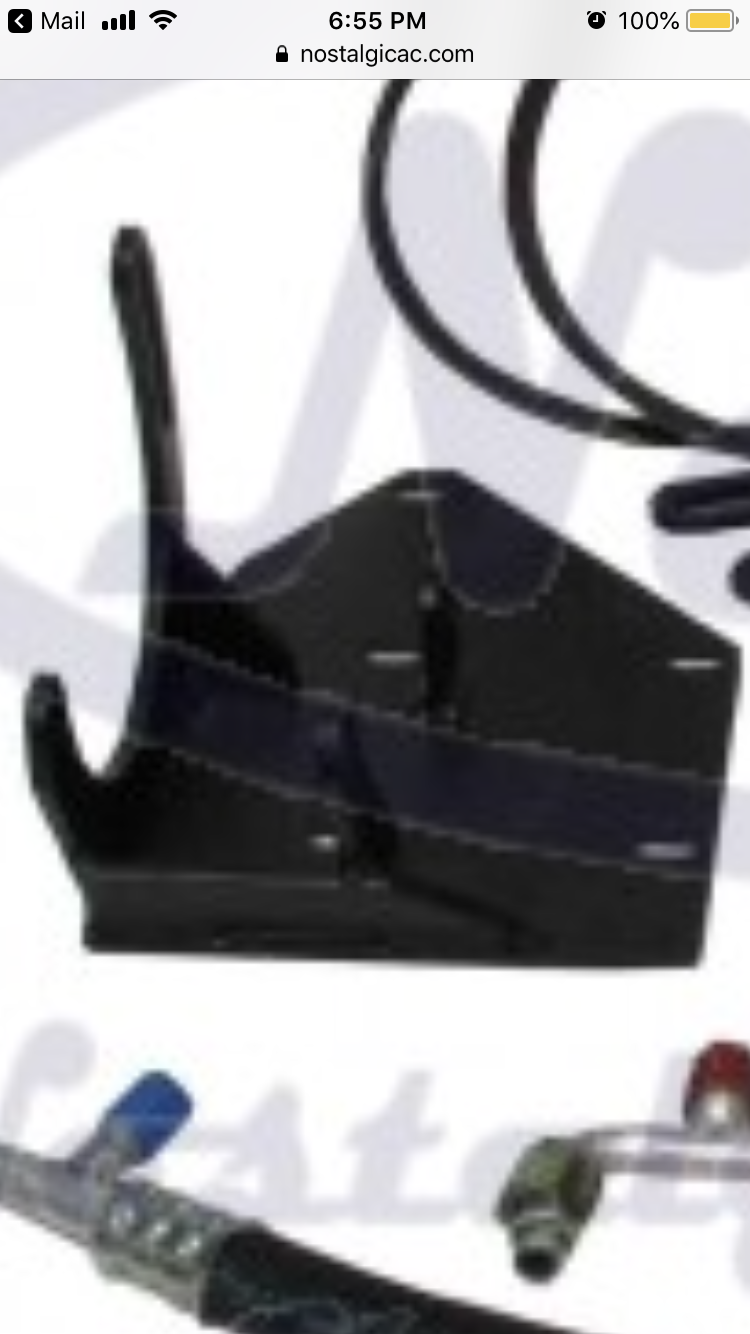
Does anyone know the size, length ,and pitch of the bolts that hold the bracket for the compressor on in L24 engine?
-
sweet I will take a look at them and see if I can apply that to my project thanks!
-
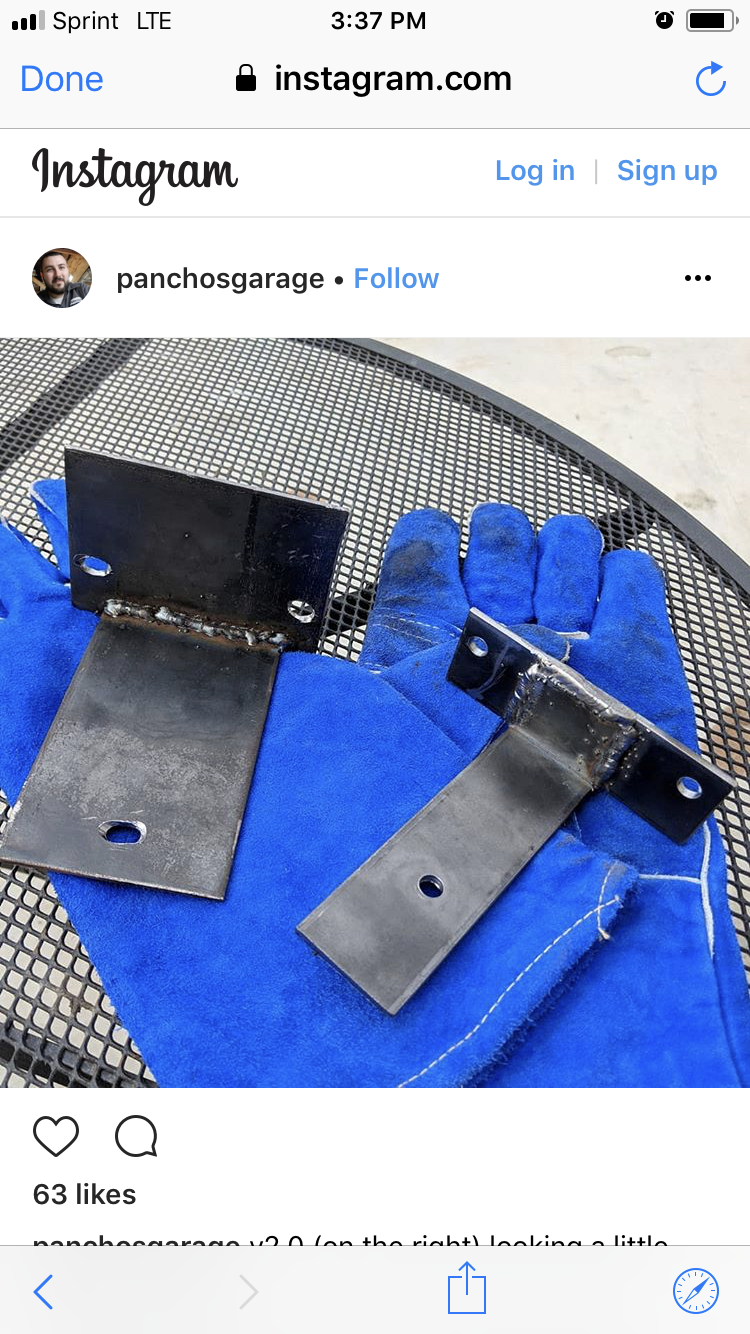
Thank Llava for all that info the only lucky part is I will be using the original engine but as for welding the brackets together heck ya I will take you up on that offer! 😀 I will see if Pancho can get me the sizes to get that done 👍🏼😬
-
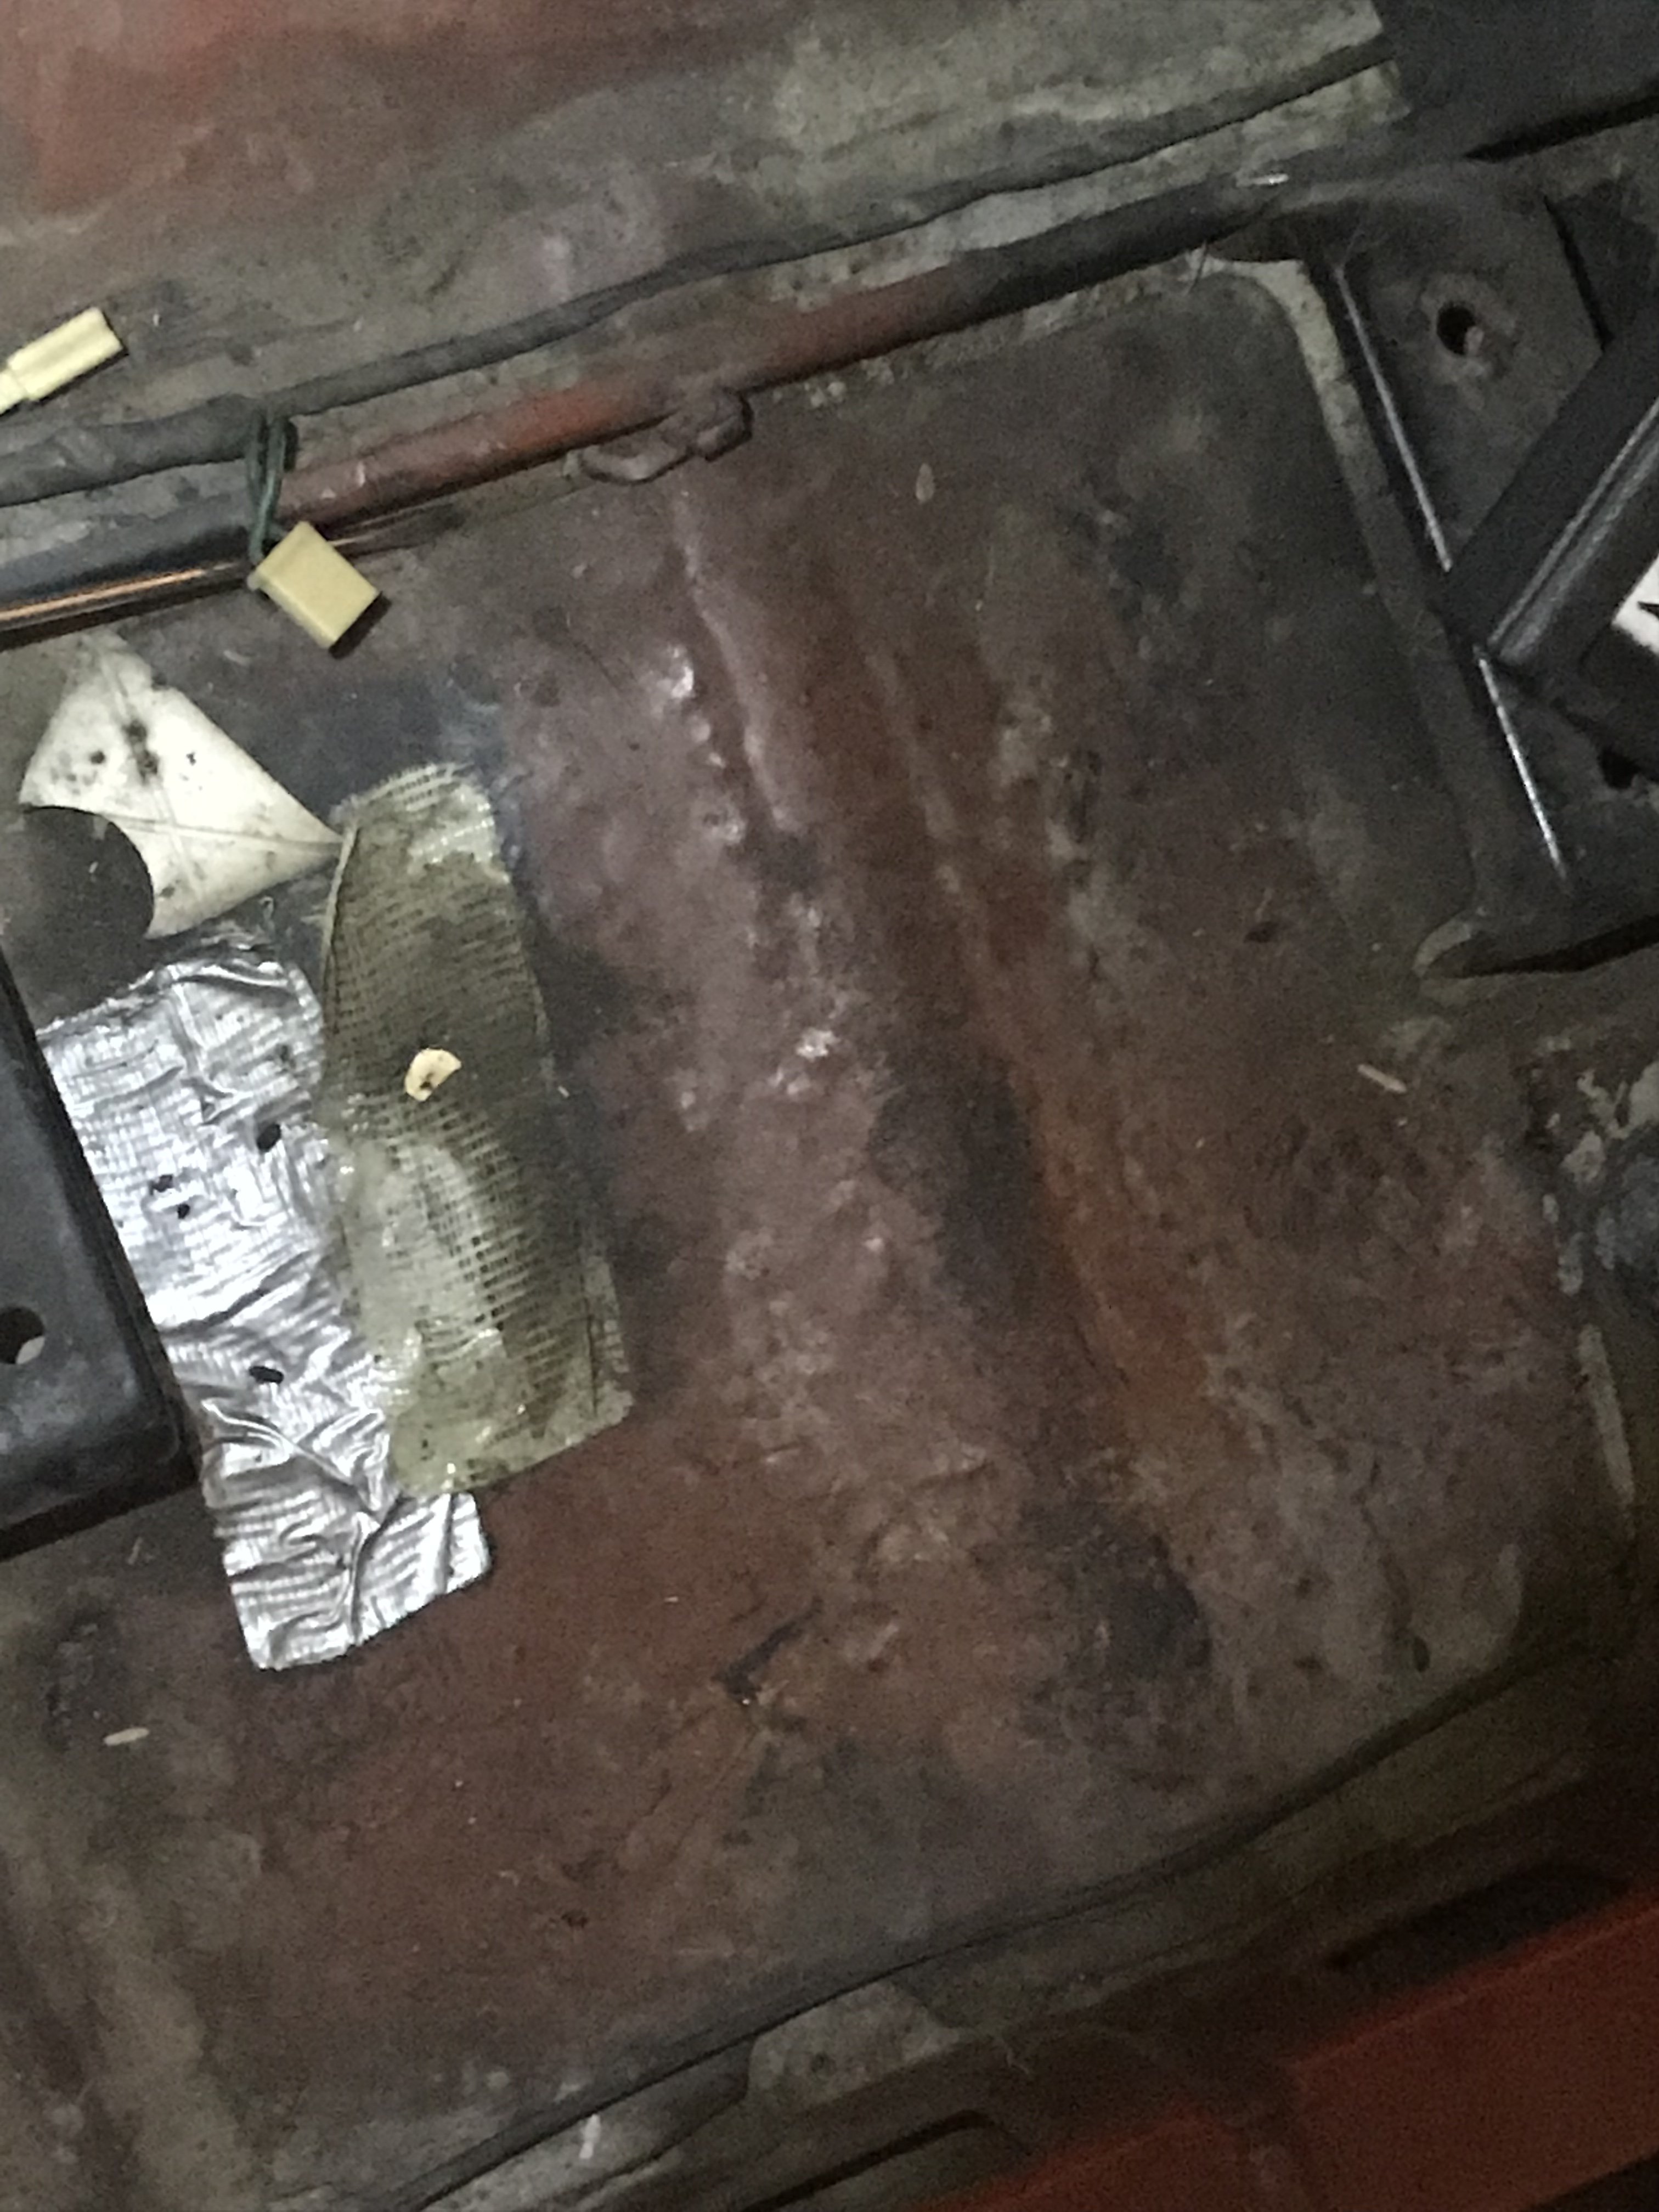
I have purchased the vintage air 2 for my 70 to 240 Z I was hoping someone knows the specs/measurements for the brackets to install the unit under the dashboard I cannot weld so I’m trying to just put together steel brackets and put them together to fit but I could use some help with how far up and down place it in side to side so I’m not spending an arm and a leg on the brackets. Or if anyone has got extra ones welded I’m willing to purchase them ?😀
-
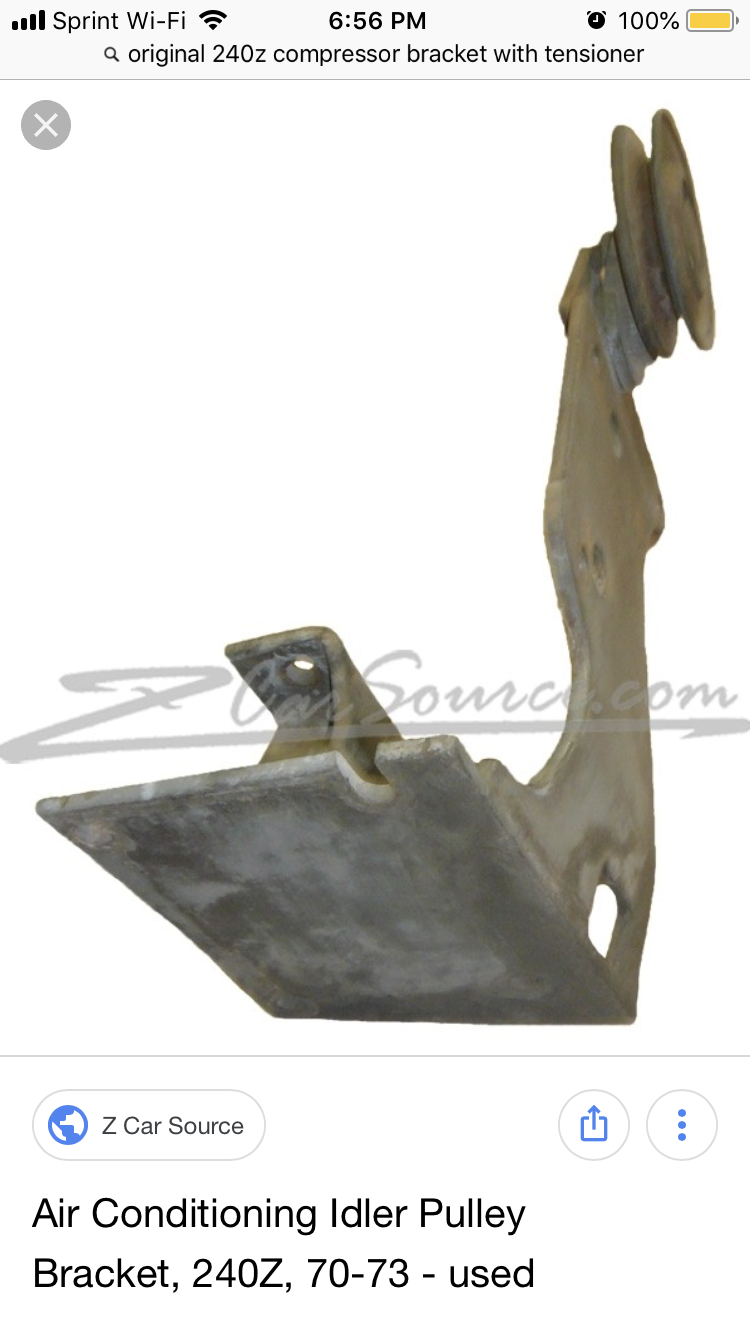
CalZ thanks and sorry my brain acts up a lot LOL Yes you’re right compressor 👍🏼😬
-
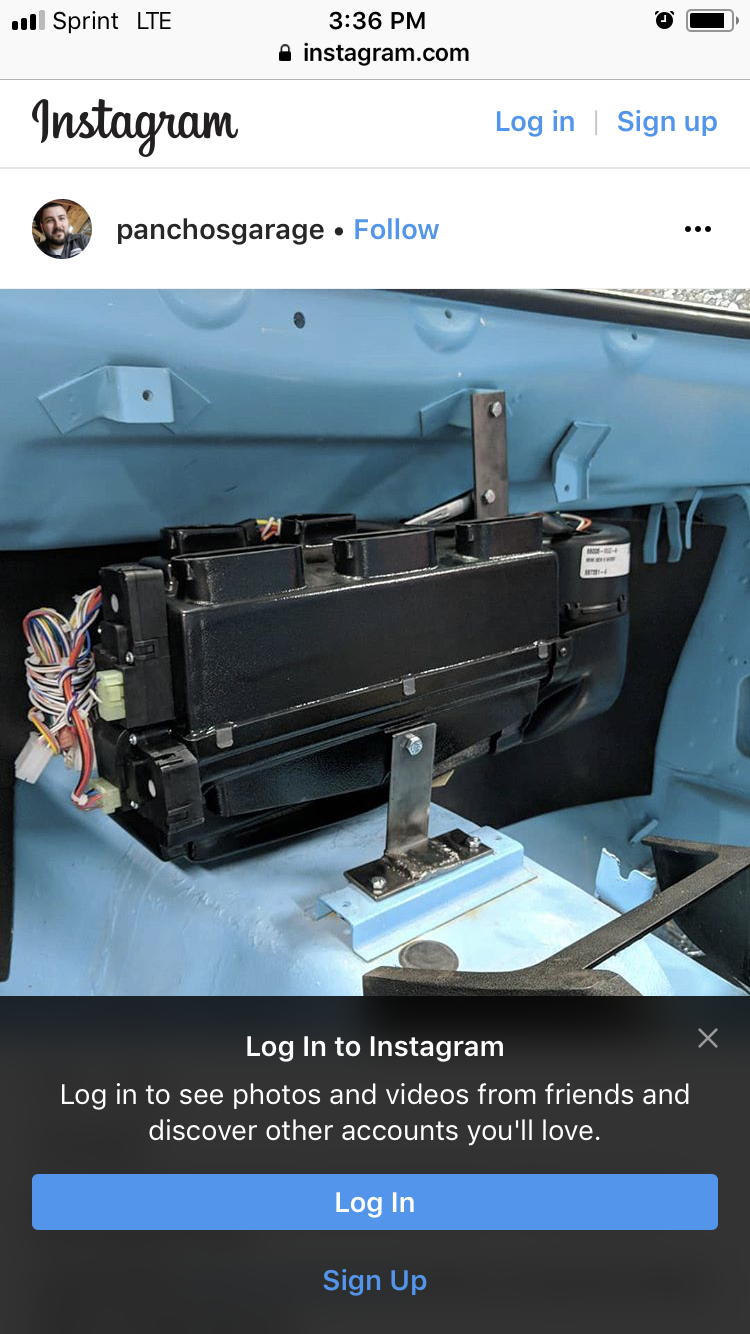
Here is a pic of the bracket I’m purchasing The picture of the original bracket that I think goes on at 240 Z for the compressor


LD28 V07 stroker crank
in Parts for Sale
Posted
IS THIS STILL AVALIBLE?