

Perfect240z
-
Posts
394 -
Joined
-
Last visited
-
Days Won
3
Content Type
Profiles
Forums
Blogs
Events
Gallery
Downloads
Store
Posts posted by Perfect240z
-
-
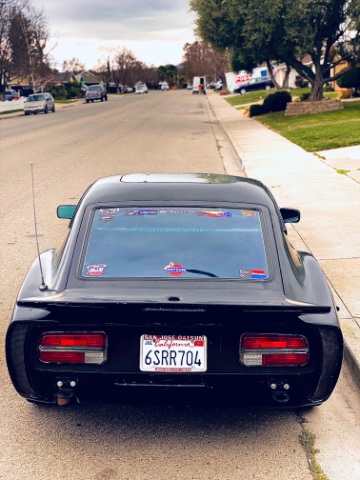
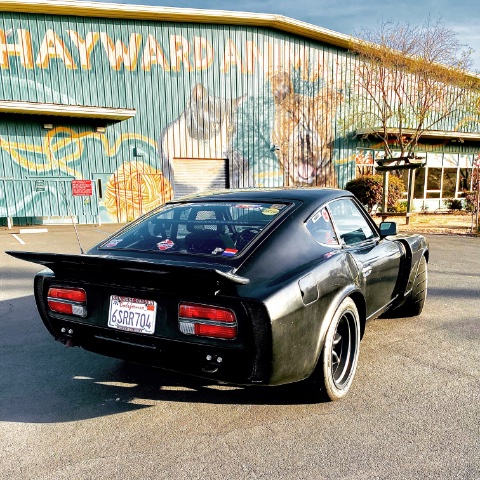
I have the old Jim Cook Racing(JCR) kit on my car. It’s obviously a look that not everyone is down for but slot of guys used this kit for drag racing back in the day since it could accommodate wider wheels and tires then just fender flares. The kits isn’t available like the ztrix kits but they do pop up from time to time.

-
-
I know you can find cheap ones on EBAY for $300 bucks. But They have those seats on JDM car parts.
-
-
Not a JCR whale tale, but it’s still pretty cool. GLWS
-
 1
1
-
-
I have an update coming soon! Finally getting some parts in for the Z after this long of not finishing it. And the other Z is just about road worthy. We all know it can take awhile to do a build...never give up!
-
I'm down for stickers when their ready to be ordered
-
Wish we could these in sticker form again.
-
Qty 1 short sleeve black L
Qty 1 Forrest green hoody M
94551
-
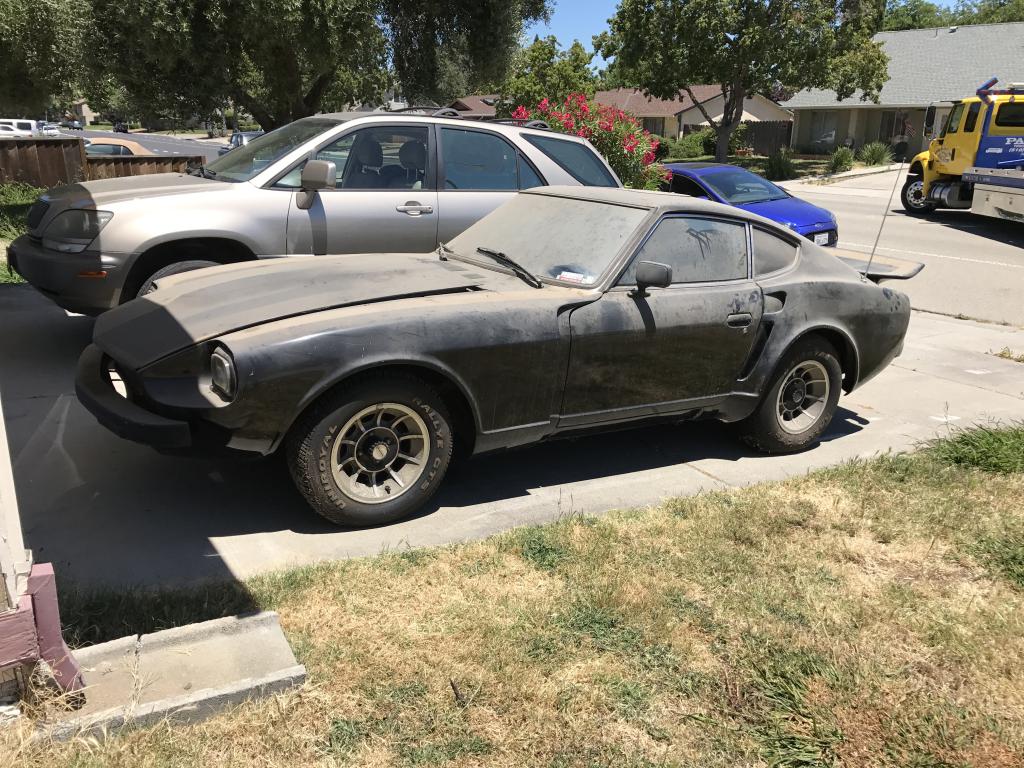
Thanks! Going to be a driver for sure!Great find, perfectZ!
-
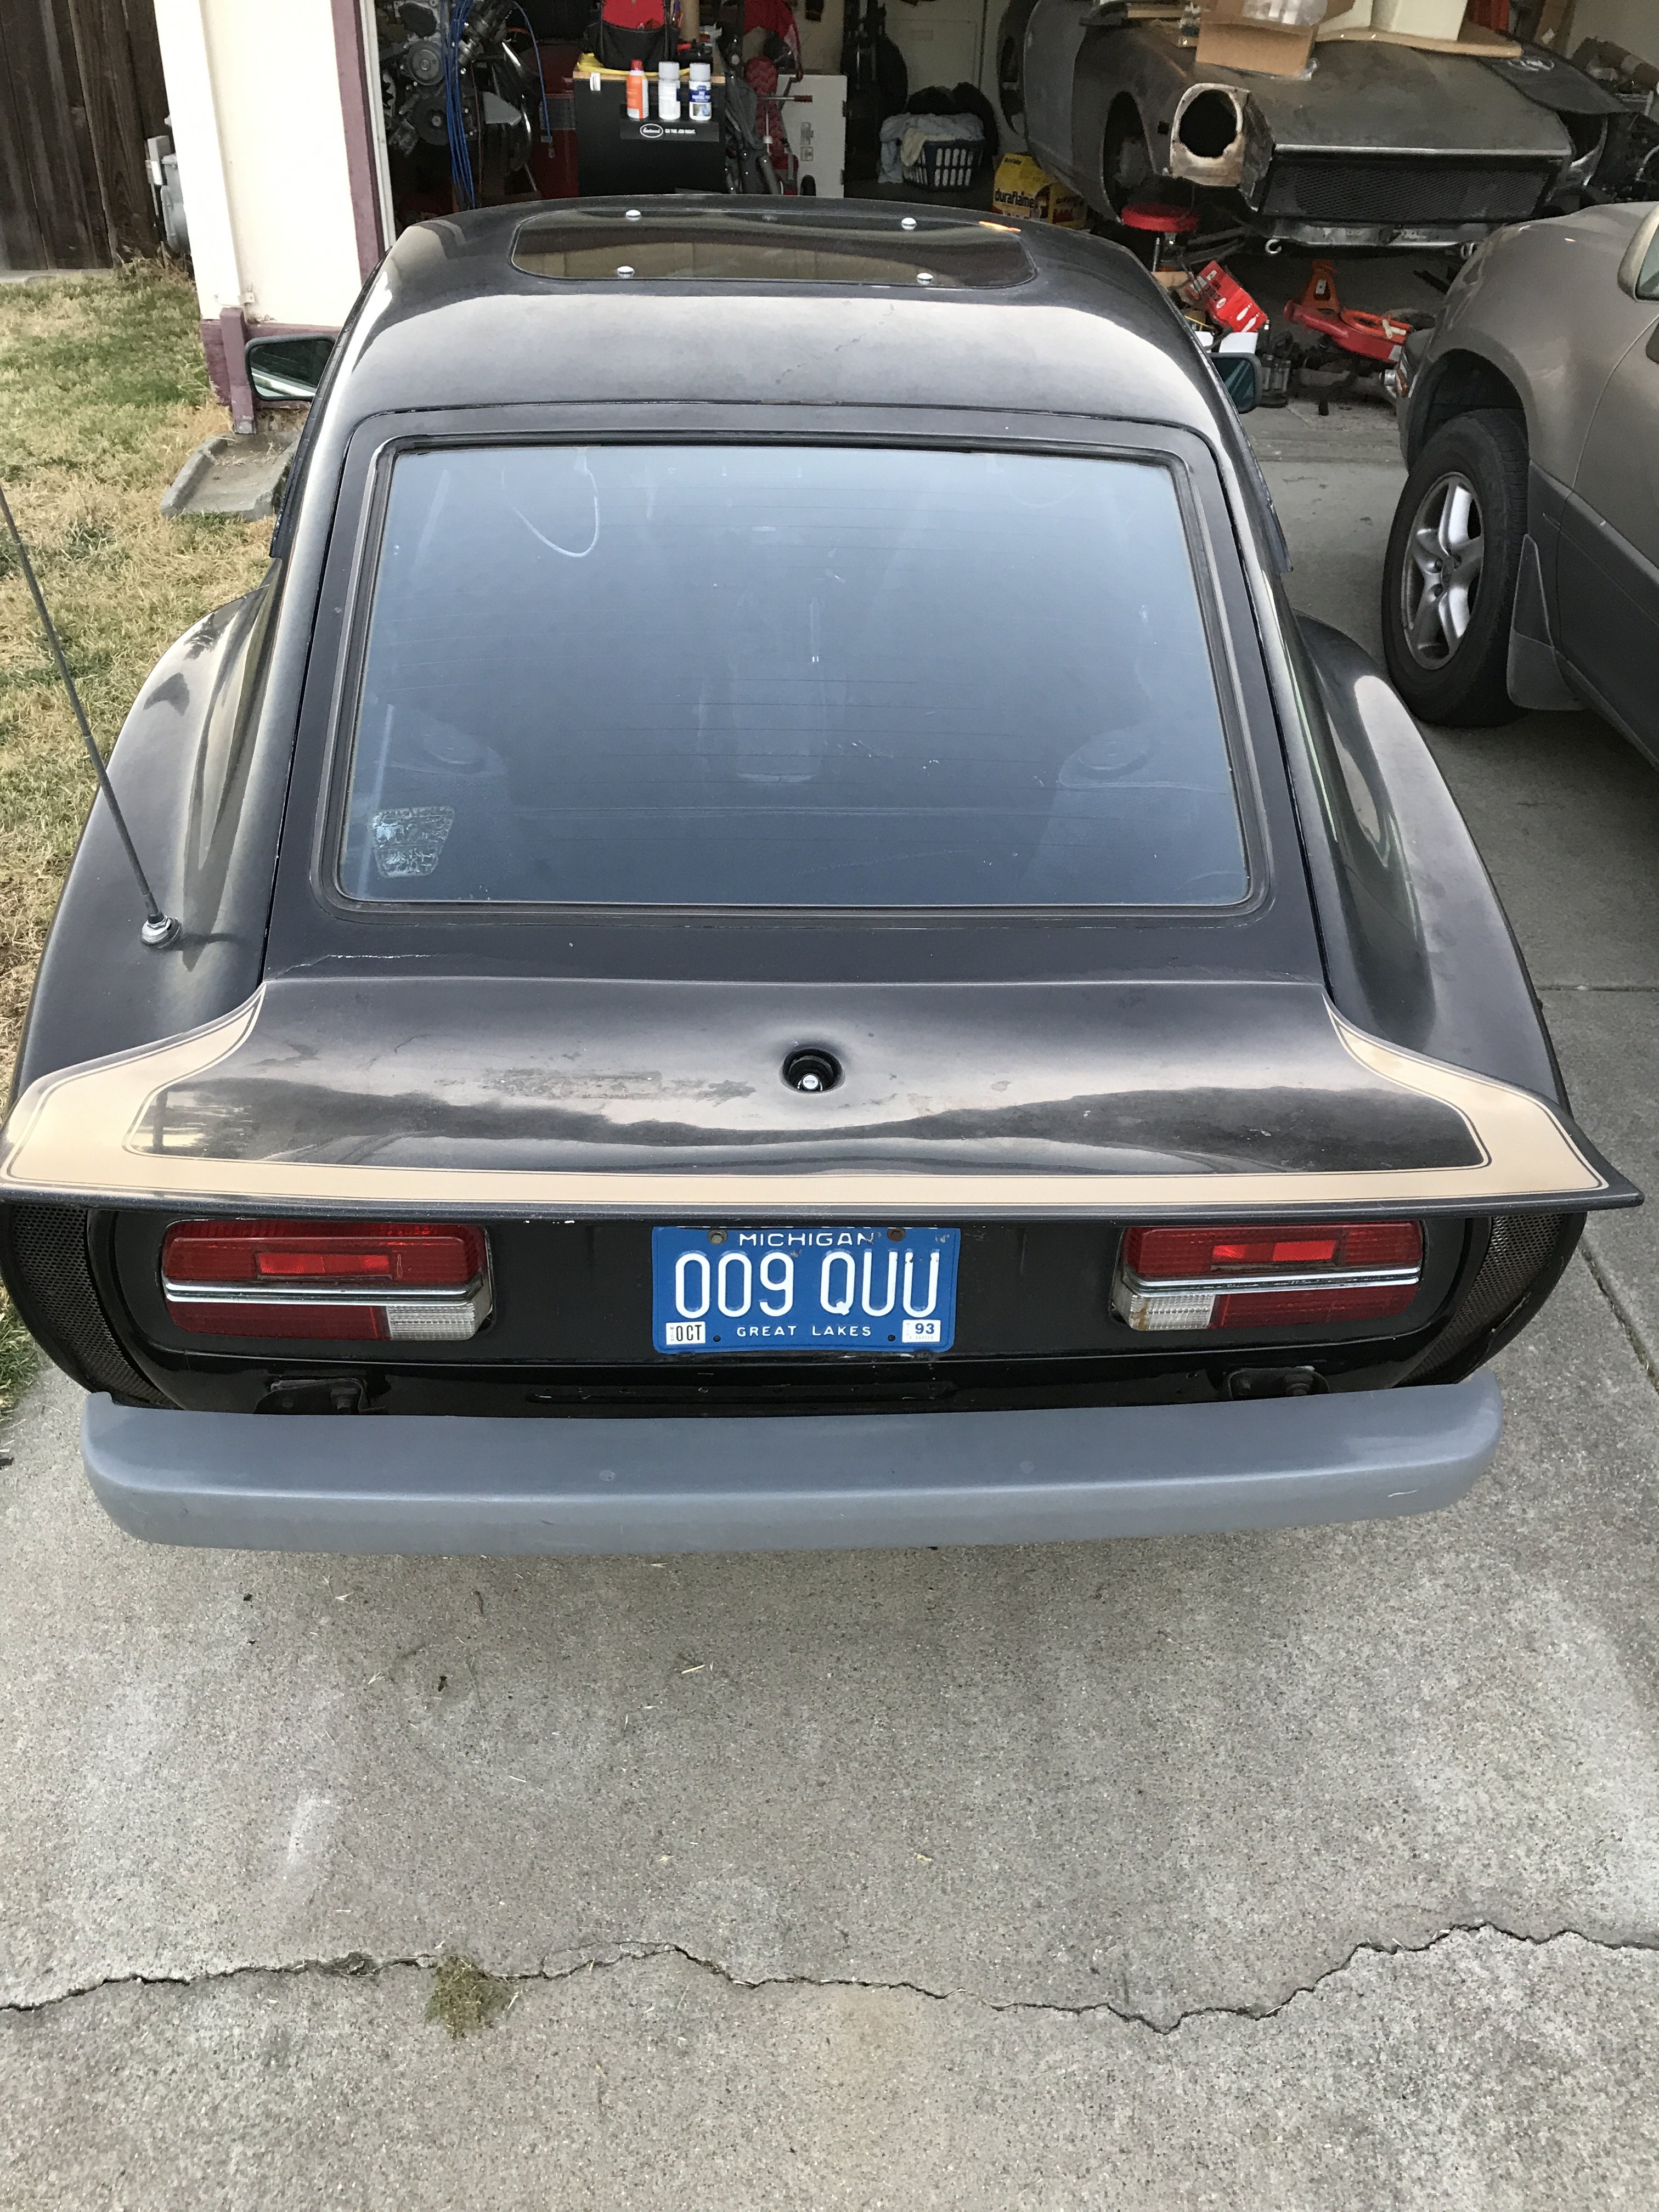
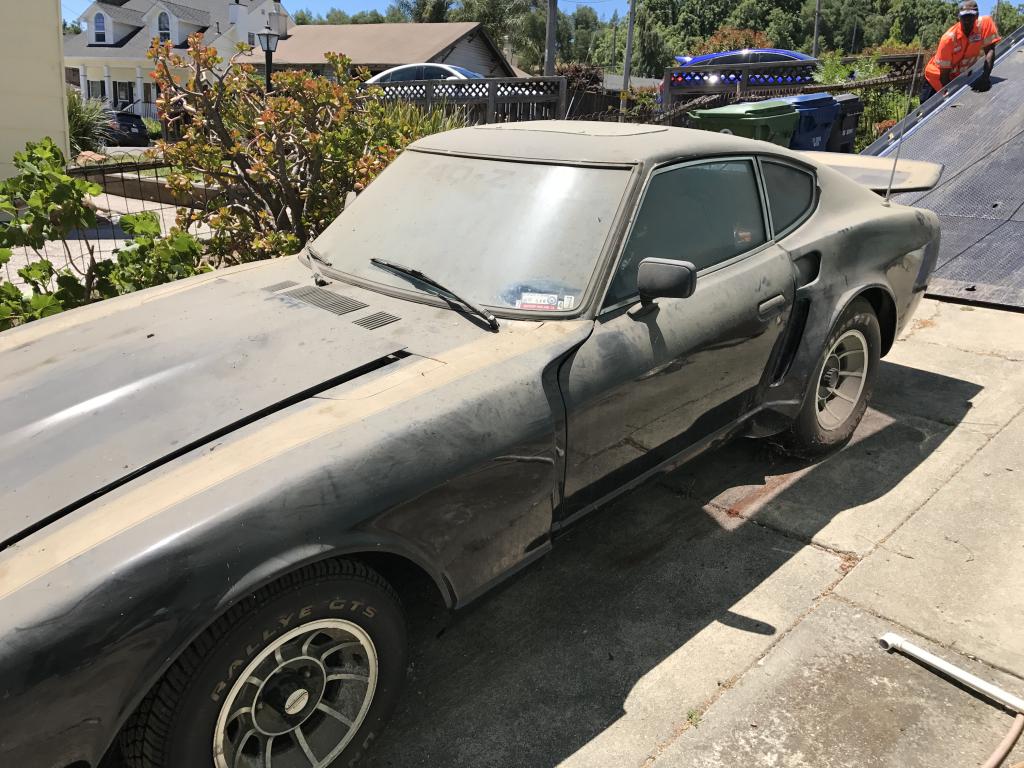
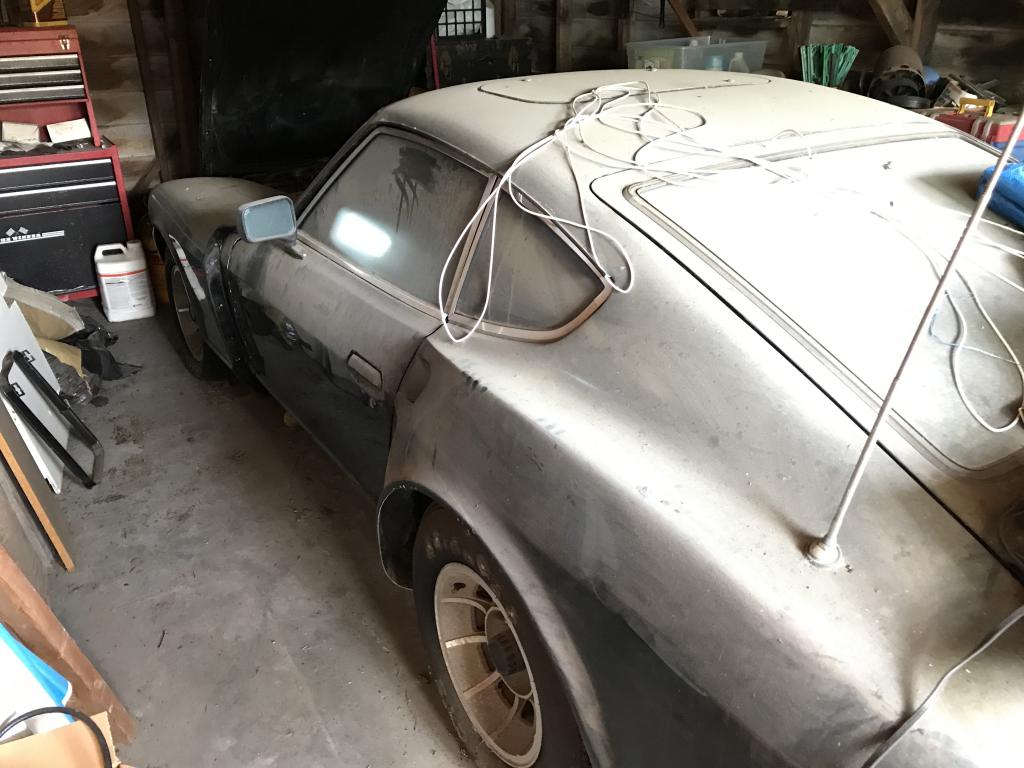
Nice time capsule you found there. Take some more shots once you get that 20 years of dust washed off. Amazing how the dust has not been disturbed at all. Hopefully she comes back to life relatively easy for you.
I'm going to give it a proper wash, maybe do some clay bar if the paint isn't too bad. This car was completely restored in 1981, but the paint has tons of chips in it. I may be inclined to get a little respray done at maaco just to have it nice and shiny. Parts are in the mail so I hope to try her out soon when the heat dies down a bit. 111 degrees is no fun.
-
Here's mine I picked up yesterday! Hiding in a garage for a very long time.
-
 1
1
-
-
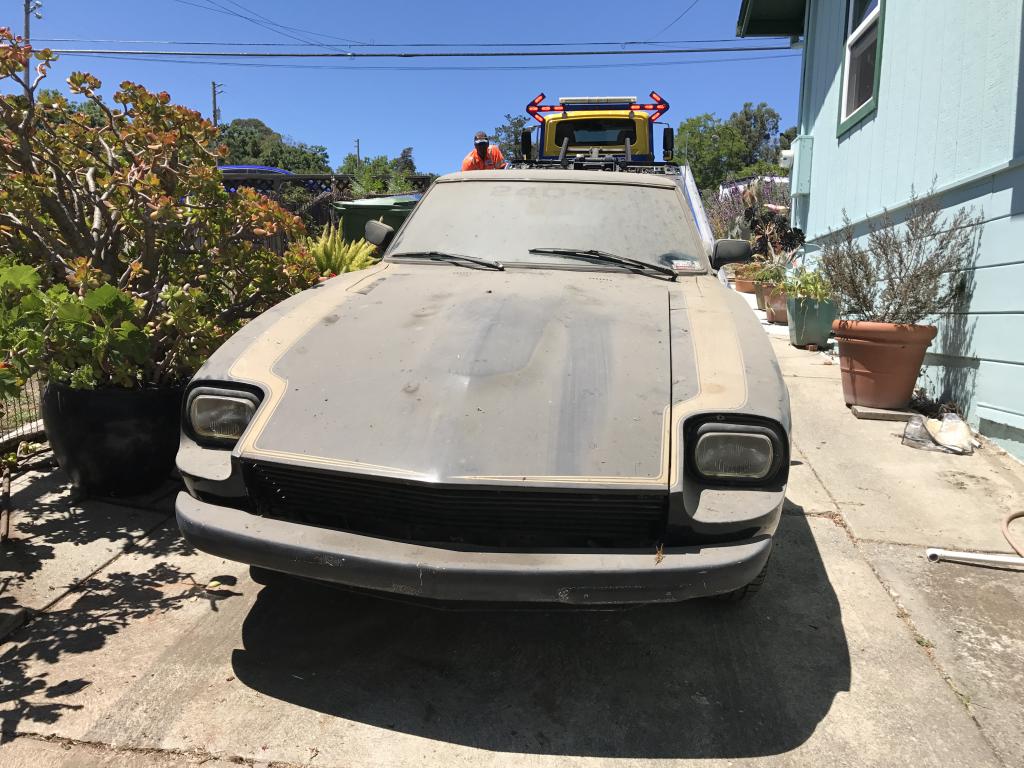
Brought home my new Z today. It's a 1972 Datsun 240z with JCR body kit on it. This car was completely redone in 1981 by the first owner, and I got the car from the second owner. The car comes with an L24 that's been milled 1mil, with 45 triple webers and a competition header, comp clutch, cam, and frame strengthening. The car was driven up until 91-93 the garaged since I brought it home today. She's going to be a driver for now
-
So does anyone still make the JCR body kits for at least the 280z's? Or a somewhat close copy that needs some massaging to fit?
Jim cooks son James has kits. I know he's on Facebook Datsun parts and needs. I just picked up a 240z with the jcr kit on it.
-
In between making the seat brackets, I removed the diff and the mustache bar. I wasn't able to find any info on the bolts being removed for mounting the mustache bar, so I made a video on what do to in case anyone will need it in the future.
-
This is Part one on me making the seat bracket for the first seat. My phone wasn't doing so well with recording so I switched over to my older canon camera(that will change when my new camera comes in next week) I still wanted to document the process on what it takes to make your dream car.
-
Video update on my build from a couple months back. It shows how the seats look and I talk about making my seat brackets. I was thinking originally of trying to get some Z seat rails to work. turned out to be easier to fab up some brackets to make the recaro seat rails work.
-
Thanks! I originally wanted the more colorful remarks, even found some leather ones, but I thought these ones with the net head rests were pretty sweet and way more classical looking then the others I saw for sale in worse shape online.
-
Nice work! Keep it up!
-
I found these photos on my surface.
I was searching for some classic recaro seats for a long time. I know I could have easily picked up some seats from the z store or Craigslist but I know I wouldn't be very happy until I found what I wanted. While I was looking on Instagram I came upon a post for some seats. It led me to speaking with the person selling the seats on eBay. The seats were organically from a 1970's Porsche. They were used for a few years from the original owner then pulled out for the car to be turned into a racecar. The seats were basically put into storage and not used. I knew I had to have these seats. I purchased them and was extremely happy with my purchase, they were still very brand new looking and the c They fitushioning was very stiff still. The driver seat has a little where maybe from being in storage or before they were removed from the original car but that's something I can overlook. They fit well in the Z and I'm currently making bra
-
Wow! I can't believe it has been 2 years since I updated my blog. OK well here it goes, the car is not done yet... surprise surprise
I have however finished building the motor, updated my garage a little bit, removed all my suspension, and rebuilt the hatch area(except install the hatch plate, I need to bend it back to shape a little bit and I've been putting it off since I hang out with my kids during the day and all the loud stuff can't happen unless I get a moment outside). I have primed the passenger door and the hatch both inside and out. I have painted the interior hatch and most of the passenger area with anti rust paint with installation of sound deadner(peel and seal). So I have been busy We have another baby due this week so I'm sure I'm going to have to take a break from all the work I have done, but I know that I will get beck to it since I have been way more productive with the baby around then in the past. I have all my pictures of the work I did on my camera, and I'm on the tablet right now so let me do some attachments later.To the previous post I made.... well the price was a lot, so that's why I went ahead and started welding myself. It took awhile as a learning curve since I was welding on metal that was thinned from removing the rusted areas on the hatch. And I have done a few hole fillings which was easier. My next daunting task is fixing the rear fender well. I had to cut the rust out but unlike cutting one layer for installing flares I had to cut the bottom layer as well, so I'm going to try to repair it the way you would with installing fender flares(slicing, bending and welding) If I have to add extra metal to get it to flex and touch then I do have extras. Pics will come in hopefully by tomorrow.
-
I'm almost 100% sure I'll be doing flares now. I've cut so much that I would be doing a lot more repairs that will prolong my build. I will have to repair some of the putter fender but not as much if I run flares.
-
"Shop now that I found more I have to cut out would it possible to use some epoxy to reattach too close up the fender well or does it have to be welded?"
That was kind of difficult to read.
Do you mean you want to use epoxy to close up the fender well? Or do you mean you want to use a patch panel to span the gap and use epoxy to attach the patch panel?
If you are going to do flares, then it really doesn't matter, welded would be the best option to close it up. You can find the cheaper/shortcut answers on your own.
If you want to keep the stock body lines, then you are going to cut out everything with rust, find a donor piece, transfer the cut line, then weld everything back in. Epoxy really doesn't come into the equation.
I meant "So now that I found more rust" don't know why auto correct decided to add extra letters haha. Anyways I was thinking of a quicker solution. Since the inner fender well is now shorter then the outer fender I can't do the slicing and folding like you would normally do. I'll have to find a way to weld in there all the way around. I was thinking of using the structural adhesive with those panel repair kits to reattach it that way. Just wanted to know what people thought of the adhesive idea since our cars or unibody.
-
I wouldn't use it to fill that hole, I would use it with those panel bonding pieces from Eastwood to keep certain parts of the panel together. That hole was a seam sealer that fell out from old age, that I will have to fill but I won't be using the structural adhesive. Just FYI to the big hole you see.


 I have however finished building the motor, updated my garage a little bit, removed all my suspension, and rebuilt the hatch area(except install the hatch plate, I need to bend it back to shape a little bit and I've been putting it off since I hang out with my kids during the day and all the loud stuff can't happen unless I get a moment outside). I have primed the passenger door and the hatch both inside and out. I have painted the interior hatch and most of the passenger area with anti rust paint with installation of sound deadner(peel and seal). So I have been busy
Race Car Garage Sale ('77 280z)
in Parts for Sale
Posted
Is the Head ruined minus the cam and cam towers?