

~KnuckleDuster~
-
Posts
1294 -
Joined
-
Last visited
-
Days Won
3
Content Type
Profiles
Forums
Blogs
Events
Gallery
Downloads
Store
Posts posted by ~KnuckleDuster~
-
-
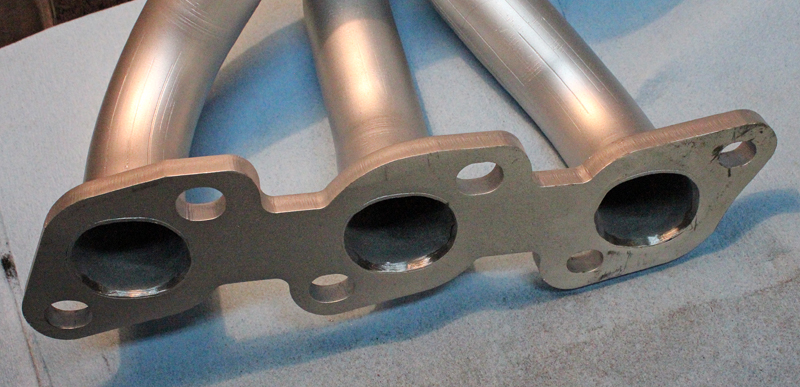
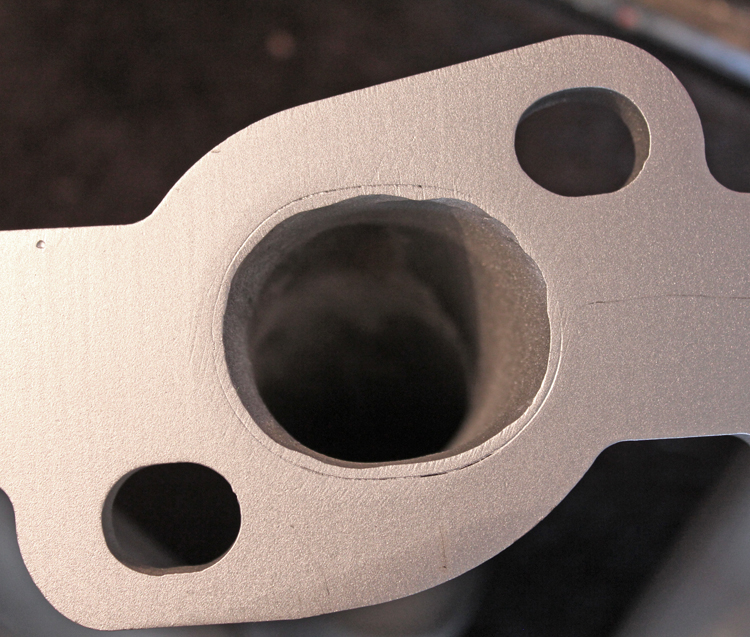
Finished smoothing the inlets out and gave them a little beveled edge.
Before:

After:
Bolted up with a new set of locking nuts
-
Yeah they look great. I waited over a month for mine but well worth the wait!
-
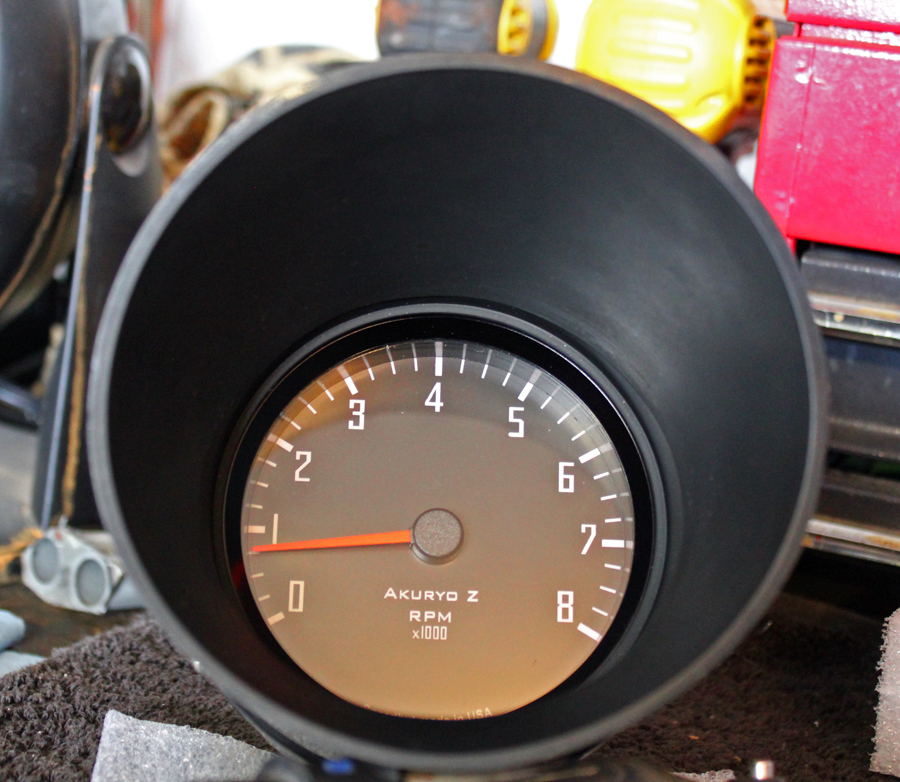
I decided to change directions with my gauge situation or lack their of. Ordered a custom set (tach & speedo) from Speedhut with a nice black friday discount. 4" versions so I could have them in the stock location. The speedometer is GPS so getting that going will be super easy and it will tell me things like 1/4 mile, 0-60, max mph, and a few other things. It will be nice to have a pinch of technology in the ol girl. Some of you eagle eyed viewers may have noticed the speedo is backwards. I was surprised to see this as an option when ordering the gauges and for some reason intrigued me enough to go for it. I think it will be pretty cool to see both needles rise out from the center, and heck what other Z is running a counter clockwise speedometer? Apparently some older cars such as Cobras ran counter clockwise speedos. Anyway I've talked myself into it enough, hopefully I'll like it because there's going to be no going back!
So far I've got the tach retrofitted into the oem housing. Turned out well, the speedo housing is totally different so I'm hoping I'll be able to match the same level of fit & finish. Oh ya and got Akuryo Z put on the tach face.. for $10 why not?
The needles are actually much more red than orange but hard to pick that up with the camera apparently.
-
Next step is going to be smoothing the inlets a bit, most of them are a little wonky like this one. Probably won't make any bit of difference but I'll sleep better at night knowing they're all ported nicely.
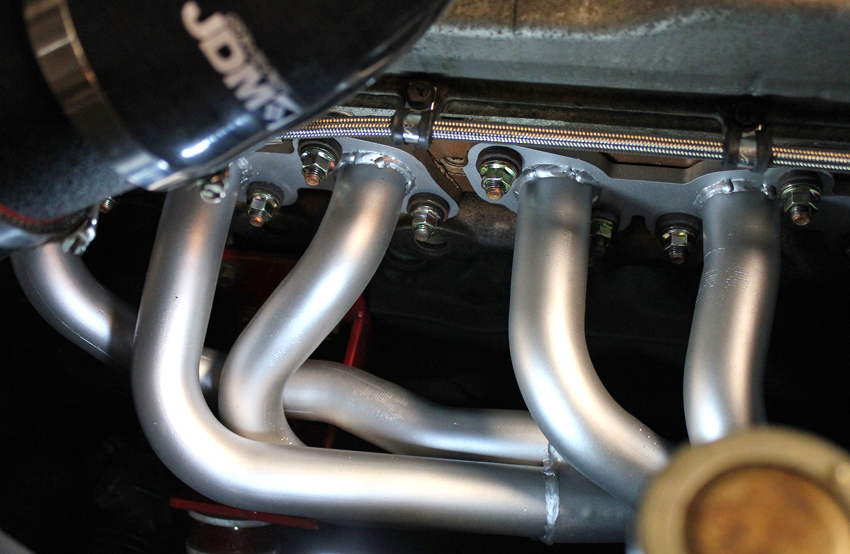
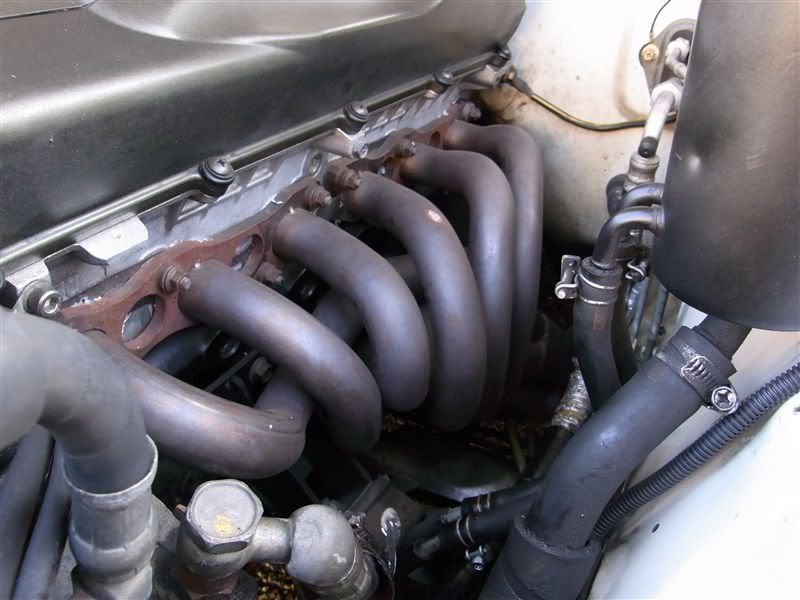
Starting to look like an all motor engine should. It's too bad the intake pipe is going to cover half of it up. I might have something to remedy that coming up here soon.
-
Gotcha, that makes sense now. Cut and smoothed out. Both sides are nice and level now.
-
How does $40 strike your fancy?
-
You might enjoy this, its an R32 documentary, to bad it's not translated..
https://www.youtube.com/watch?v=WtnX4BQ-PfY&t=789s
https://www.youtube.com/watch?v=zpWB8mmzKWQ
-
Let me look in my rb26 hoard stash. Pretty sure I saved a couple. Get back to you later on....
Awesome thanks
-
Looks like this, need the valve and assembly it bolts to just as you see here:
-
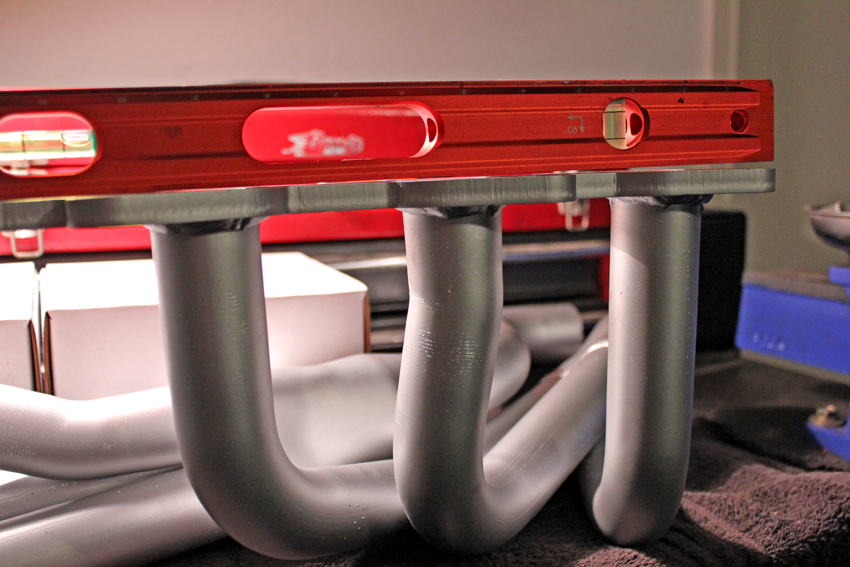
I'm thinking I'll cut the exhaust flange in half with a band saw. With a straight edge cylinders 1-3 are level, and the 4-6 side is level. So by separating the header into two pieces they will be nice and flush being that the problem area is the high middle point. This won't put any stress on any of the other welds since I've already got the other connecting points separated and I'll end up with two mini headers so to speak.
Looks like the Autech R32 had the exhaust flange separated in the middle. I wonder if it was to avoid warping issues..
The gap in the collector is right where two of the primary's come together, as long as a welder can get up inside it, it should only need a couple little tacks and shouldn't effect the flow. Ill try and snap a pic inside there. I've got to take it somewhere and see.
-
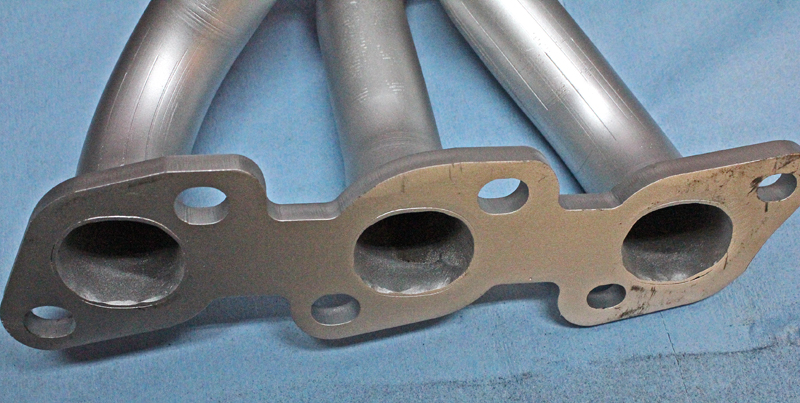
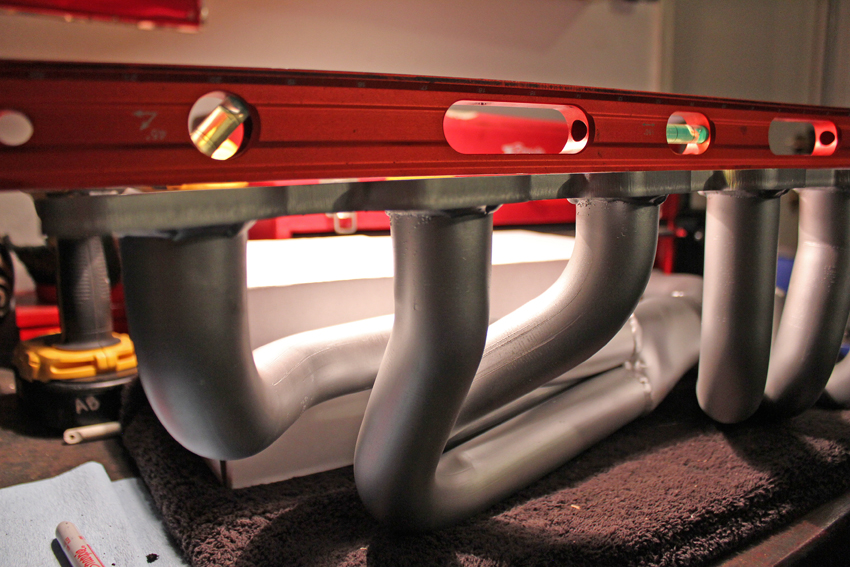
Came across some issues with this header I'm worried about. For starters I found a couple centimeter gap in the collector that didn't get welded. You can see the light shining through it here. Do you guys think a welder can still reach up inside there?
Second issue is the flange isn't straight at all. There's a high spot in the middle so the two ends have a decent gap. Does this thing need to be decked by a machine shop now? The flange is obviously more flexible than cast iron and should still seal is what I'm thinking but I'm not sure, I don't recall having this issue in the past. I would hate to go through all this trouble just to have the ends leaking.
Edit: After contacting DEA Performance about the issues I found they were unwilling to do anything about it. They used the excuse that because I modified it they couldn't do anything. They didn't even say sorry. Pathetic really. I would stay away from them and find another source or just have one made locally.
-
Neat find anyways, I usually just end up with bottles, the best one being a Jack Daniels bottle from about 1880
I love hunting for old bottles. I wish old stuff was easier to find out here on the west coast.
-
Same thing 1.5
-
So I haven't been driving the car for the past couple weeks because the factory rear exhaust hanger is hanging on by a thread now.
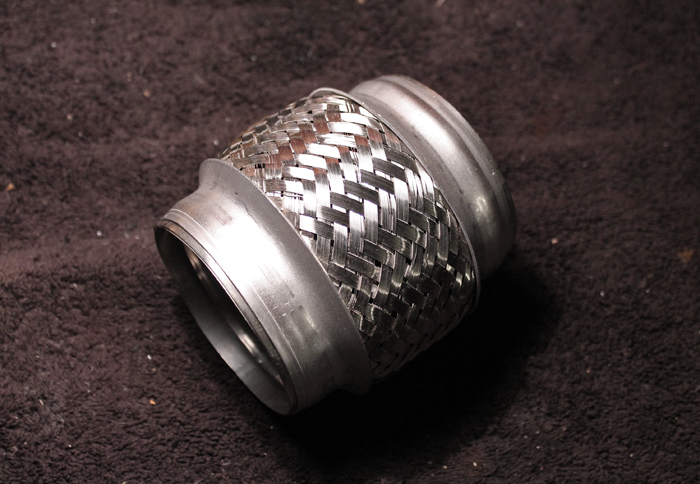
Probably just from the weight of the bigger exhaust system and overall age. I bought a flex pipe to have welded in so it will cut down on the vibrations and other stresses, not sure how big of a deal it is on a RWD motor that isn't flopping around but seemed like a good idea at the time.
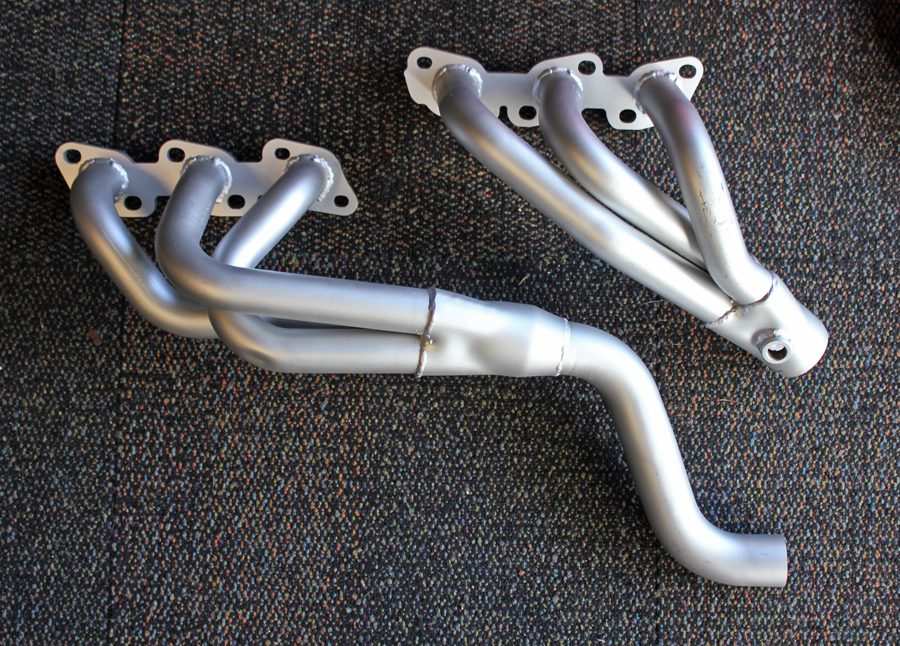
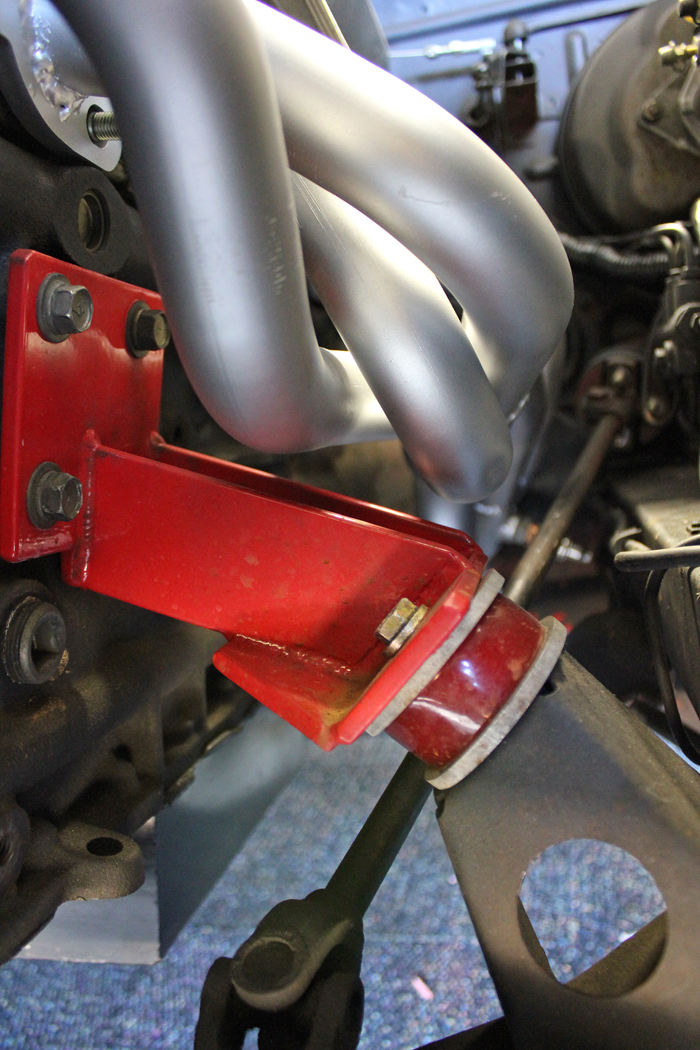
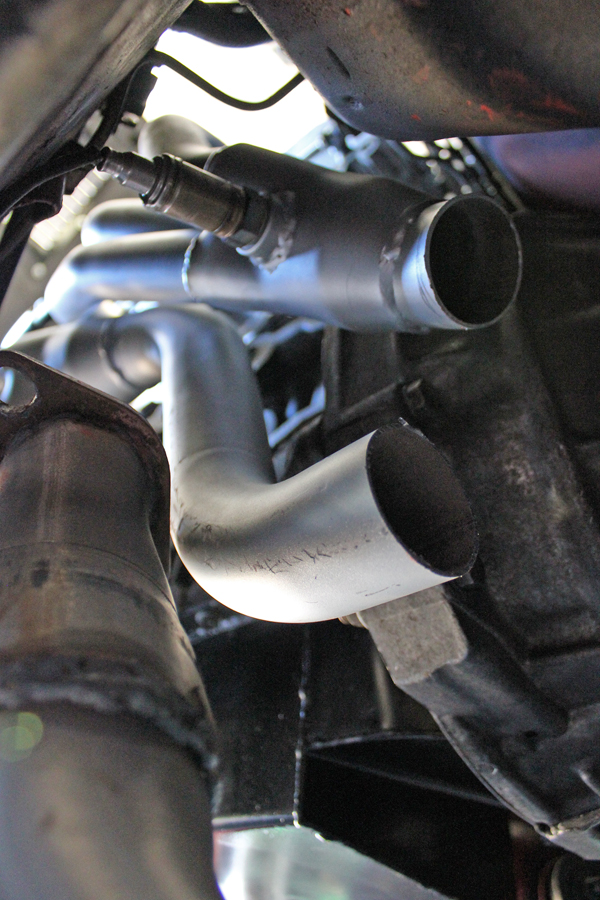
Since the cars going to the exhaust shop again now, I figured I would try and shoehorn the auzzy made extractors in there. I figured it would be a 50/50 chance of fitting. After some measurements this is what had to be cut off to possibly make it fit.
Thankfully it fit in there perfectly and I didn't have to cuss and put the old one back on.
Now I just need to order up some new nuts and washers and I can bolt the ol girl in. The new unit is 11 pounds lighter than the cast iron manifold.
-
The suspension looks nice! Did you have any bump steer issues prior to the install? I notice the steering wheel jerks around while cornering and hitting dips and bumps. How has it improved?
Well I've only driven the car hard in the twistys once since my alignment was completed, I keep starting the next project on my list rather than drive the thing lately. As I recall the previous set-up was slightly twitchy when turning on uneven ground. My last drive out with the new set-up was a big difference mostly from the addition of negative camber and a good alignment, turn in was amazing on tight low speed corners, the car rotated as if on rails. I didn't notice the wheel being twitchy and as a result didn't have to white knuckle grip the wheel. I initially just bought the bump steer spacers to gain back proper geometry of the FCA's. With the car being as low as it is the control arms were totally horizontal, the spacers give back a better angle closer to the factory design and eliminating the bump steer problems that can arise from being lowered.
-
My concern with the holes is that it will eventually act as perforation and tear when you apply a load to it like say going over a bump and you bounce in your seat.
I have heard por-15 can actually add some structural integrity back, but I have also heard it does it by curing really hard, making it a pain in the arse to remove later on.
I get it though, sometimes you just aren't able to work on a piece, and this is way better then just letting the rust fester.
That rear end is looking a little dull now with all those shiny parts on the front
.Yeah I figured I would at least halt the cancer and keep an eye on it and if it gets worse go from there. Body work is kind of the last thing to happen to this project and I don't see it happening for quite some time.
Hah I know. That's the beauty of a 43 year old car, the list of things to do never ends.
-
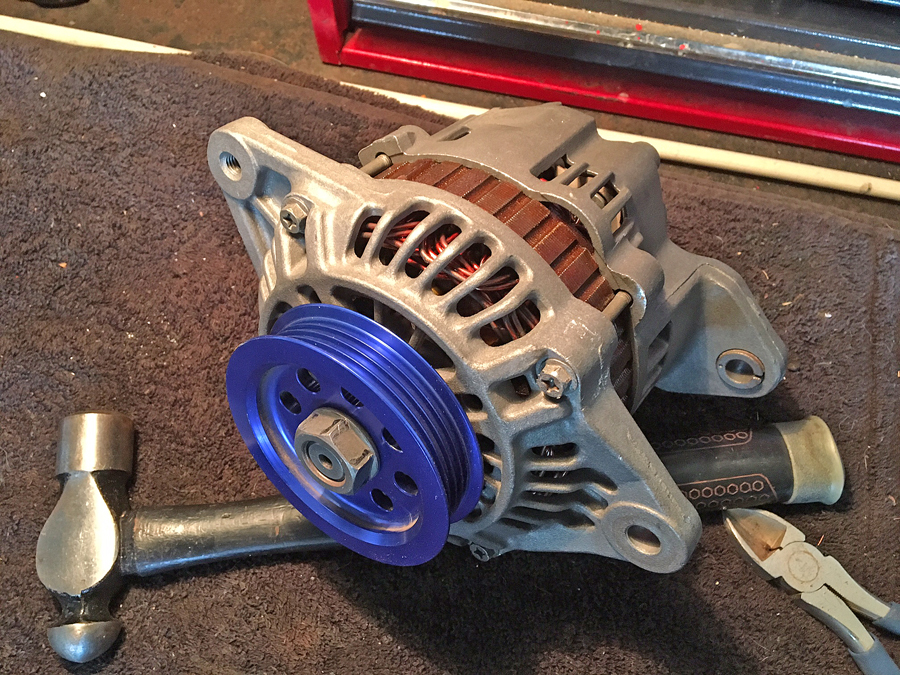
So the new alternator I bought turned out to be defective. When it arrived on my door step it looked like it had a 6 foot drop. Rather than attempt another one I decided to just get the old one rebuilt which actually saved me money in the long run.
Here's the oem unit, new brushes & voltage regulator, everything all cleaned up.
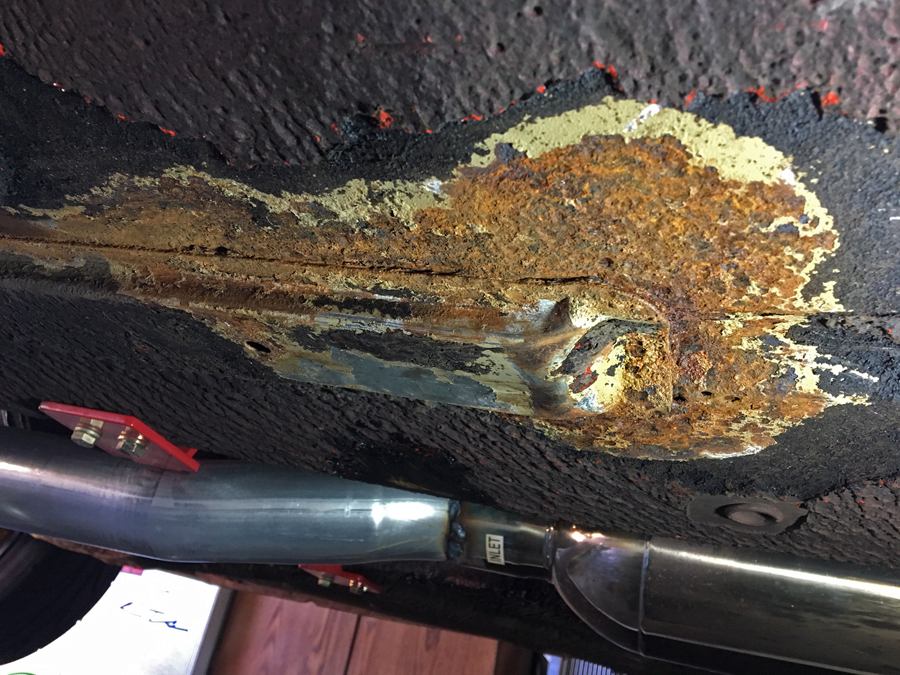
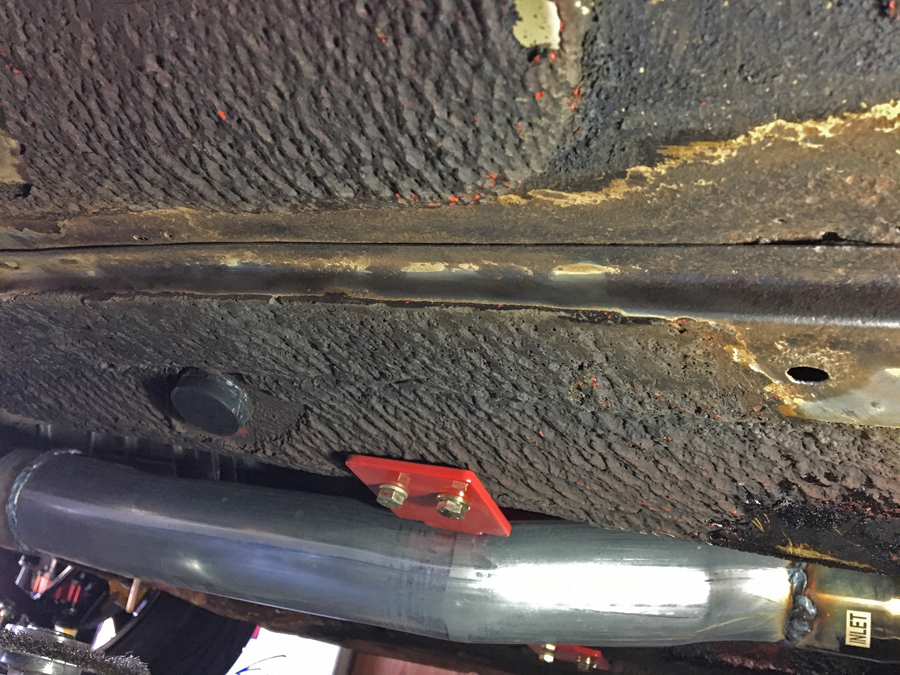
While I was waiting for the alt to get rebuild I decided to attack the one spot of rust I knew was there but have been avoiding.
Just this little spot on the driver side floor..
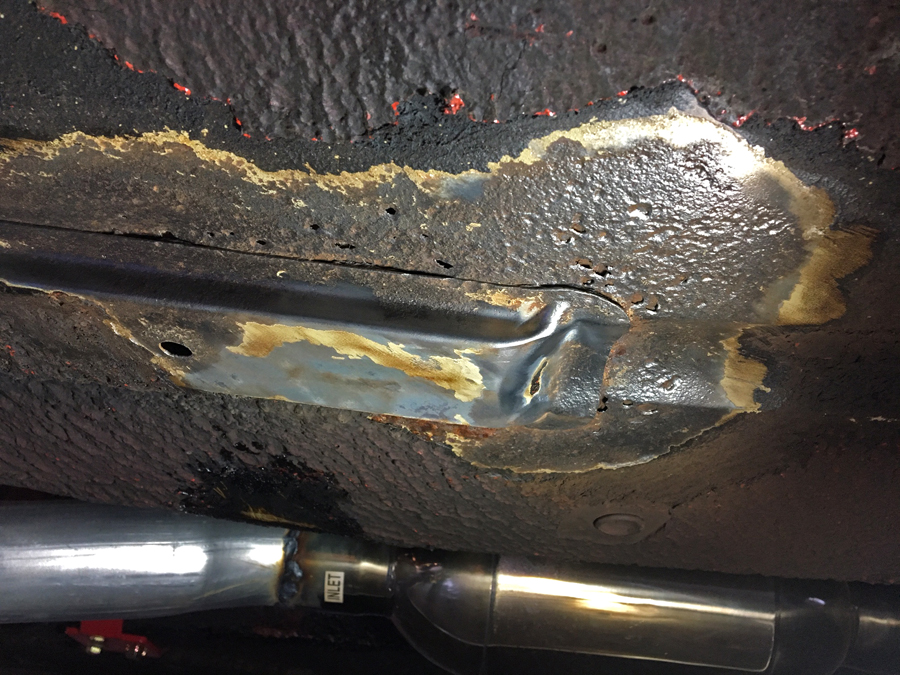
Upon closer inspection the rust had grown under the sound deadening material and starting eating through the floor just a bit.
Took the wire wheel and removed the rust scaling.
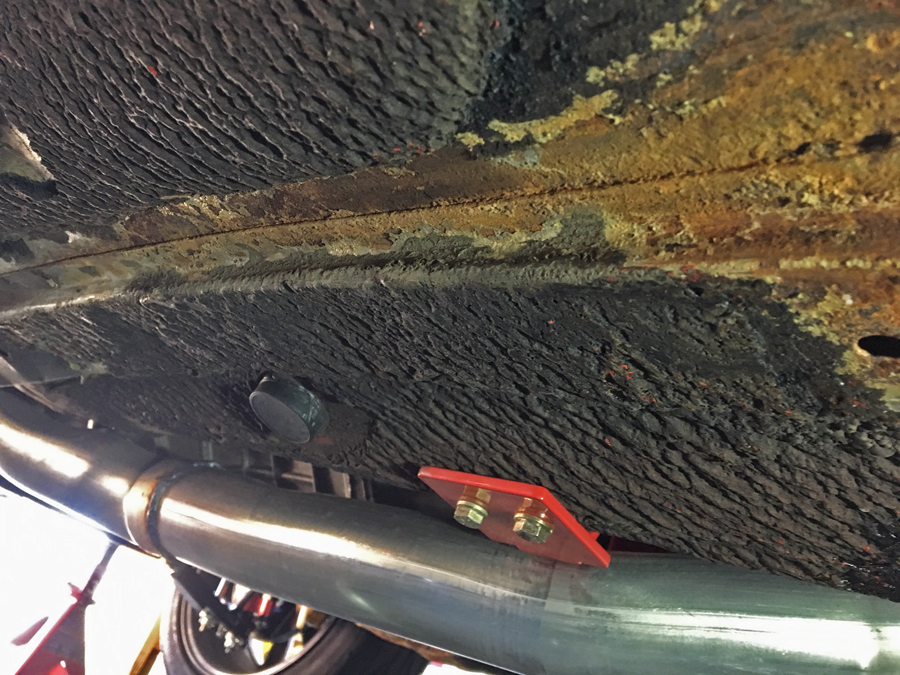
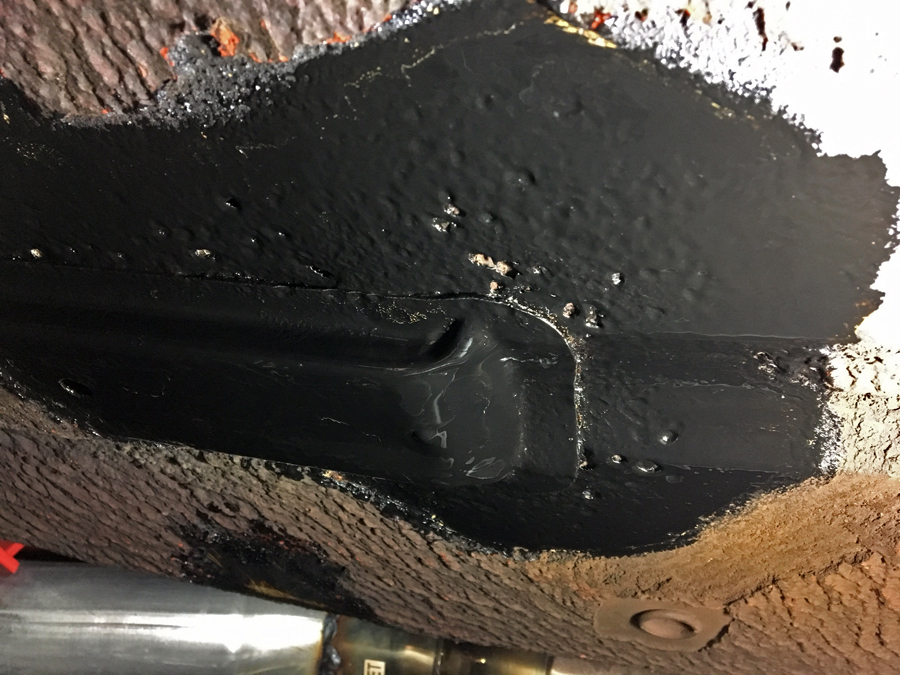
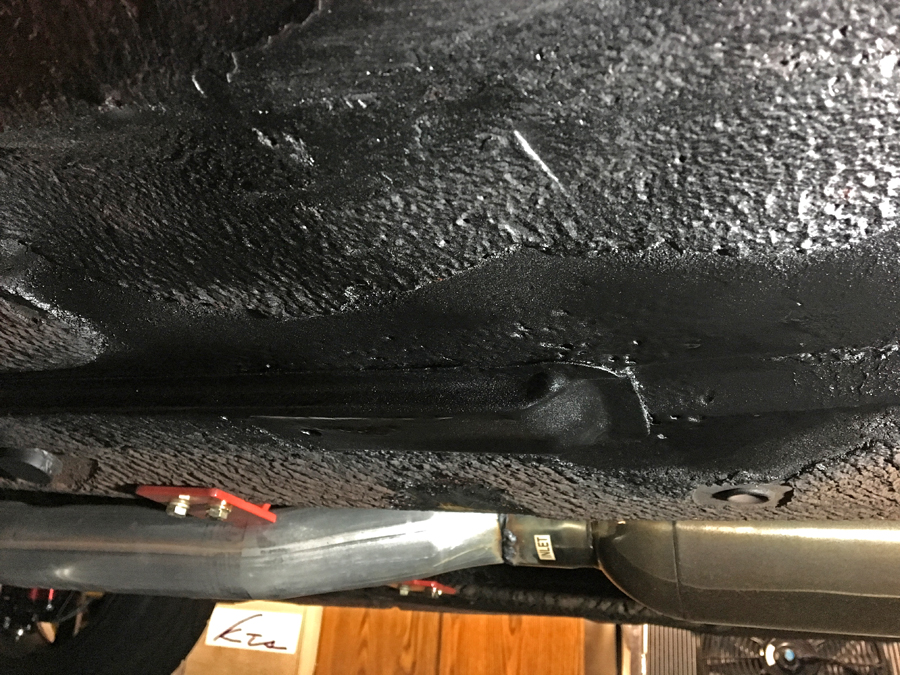
Two coats of POR 15
And two coats of spray on truck bed liner.
I know this probably isn't the most preferred method of dealing with rust like this but given my time frame and lack of work space this should be a decent quick fix to last me awhile.
-
Shame on you for not putting this in the Parts Wanted section.
This?
-
Anyone use one of these with success? Says for USDM speedos only..but ya never know. Would be nice to have the stock gauge running with a motor swap.
-
I miss being able to toss the hood up with a finger..
-
Nice, started watching episodes
-
"CAD" I like that hah. Looks good further back.
-
Yep that's definitely it. Interesting thing to find I guess. Thanks!
-
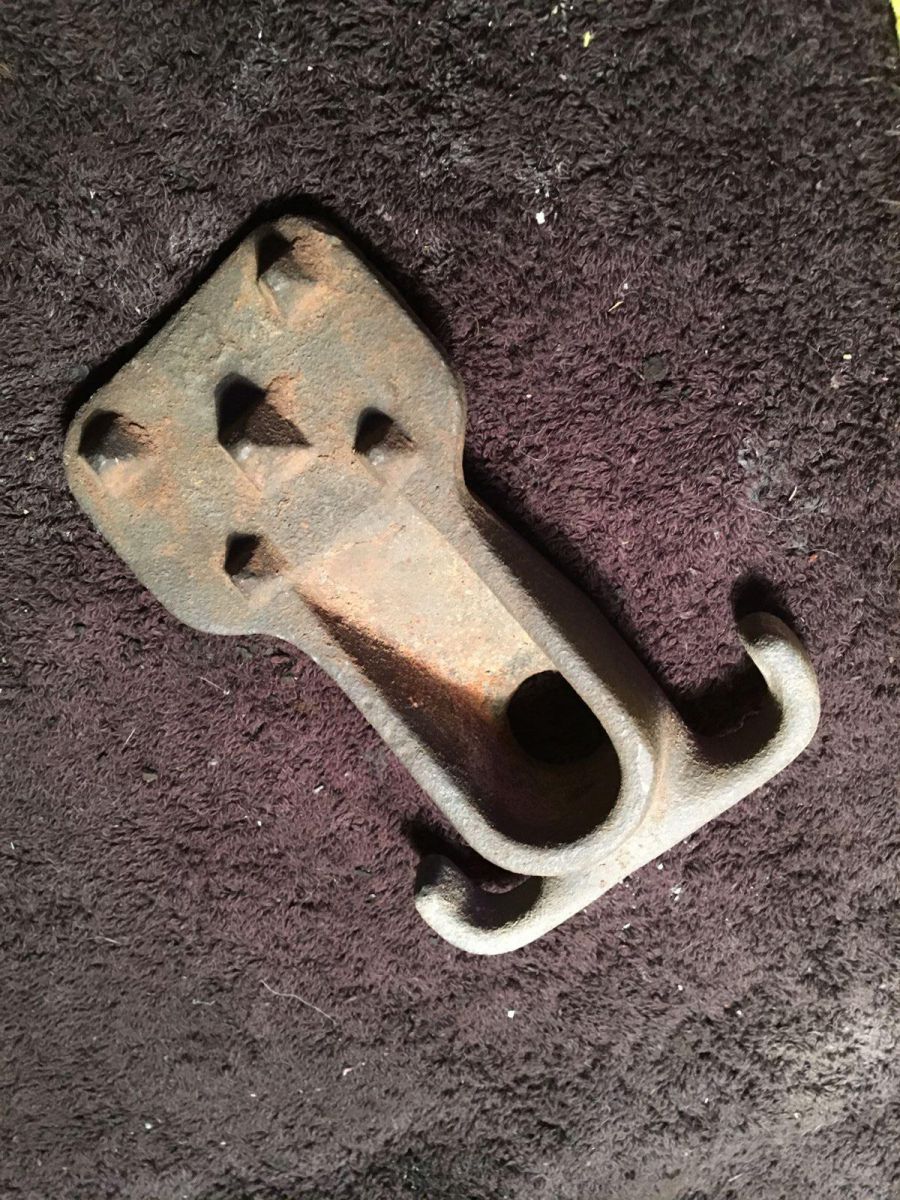
So I found this a while back in a field near my house. I'm pretty sure it's a foot peg or step of some sort but from what? If I had to guess I'd say some sort of farm equipment but being a California native I don't have much experience in such things. What do you guys think?


~73 Turbo L28 to N/A RB25 240z Project~
in S30 Series - 240z, 260z, 280z
Posted · Edited by ~KnuckleDuster~
So I found a near complete RB26 ITB / intake manifold set-up from an R33 for only $180 shipped to me. I couldn't pass this up since I see just the intake manifolds going for $150 and the throttle bodies/linkage going for $200. I began pondering on the possibilities of doing this swap on my motor and it just may turn into a future project. I would want to keep the oem plenum in order to retain the maf and therefore use the oem ecu. This would likely hold back some of the power to be made but should keep tuning it much easier. This is my understanding so far at least, feel free to tell me if this is a pipe dream.
I would basically be attempting my version of the Autech RB26DE. The advantages I'm after would be a much cleaner engine bay, the sound, throttle response, and the ability to run a strut bar again. I honestly wouldn't be expecting to make much power at all but the other advantages make it worth it in my eyes.