
rayaapp2
-
Posts
994 -
Joined
-
Last visited
-
Days Won
5
Content Type
Profiles
Forums
Blogs
Events
Gallery
Downloads
Store
Posts posted by rayaapp2
-
-
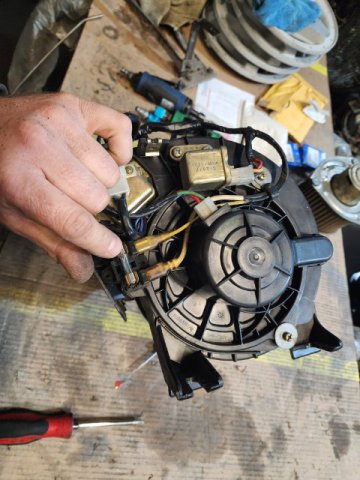
S130 install
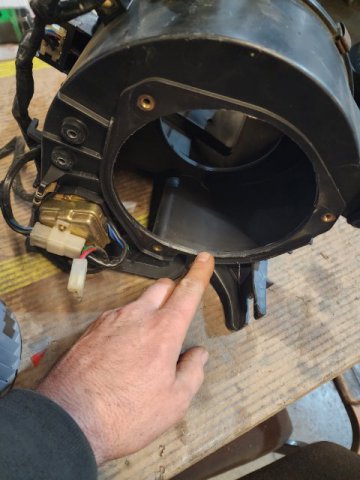
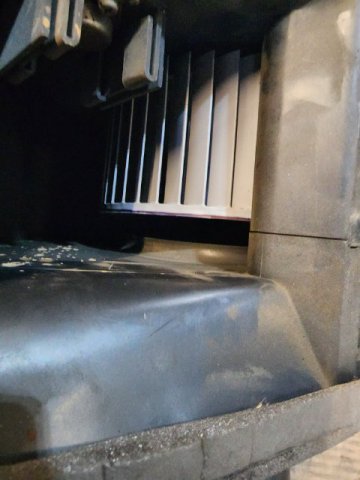
Dremel the housing

Make sure the blower fan ledge seats into the blower box.
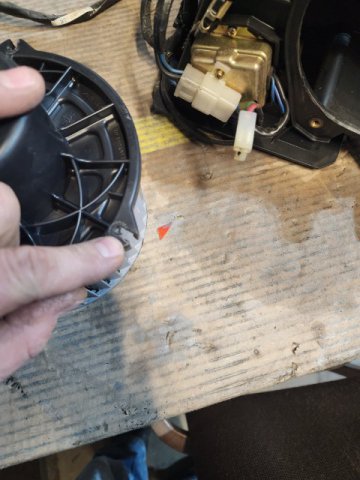
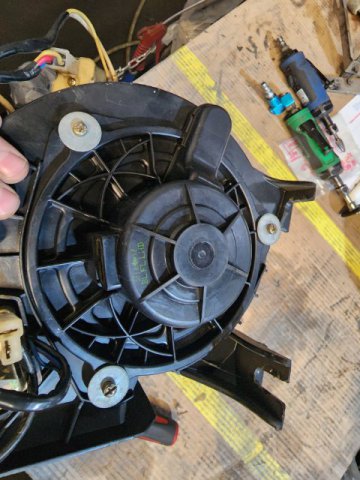
Next you are going to want to slot the blower fan mounting holes to match the s130 box pattern.
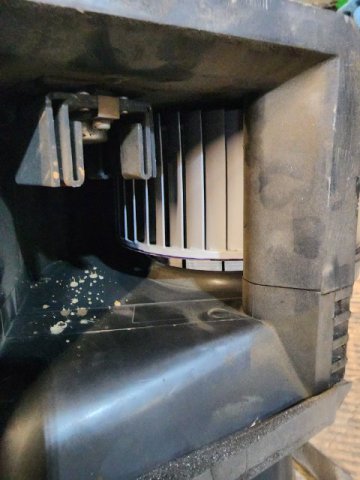
You will see a gap between the fan and the top of the fan seat. It will work this way, but it will be more efficient if you take this gap up. You will see the original fan has a much smaller gap. I made a temporary funnel for it for my car, but Im working on a 3d printed insert that will be available eventually. If you want maximum efficiency you will want to take steps to close that gap.
reinstall your original screws with washers. Retain the wire tie strap.
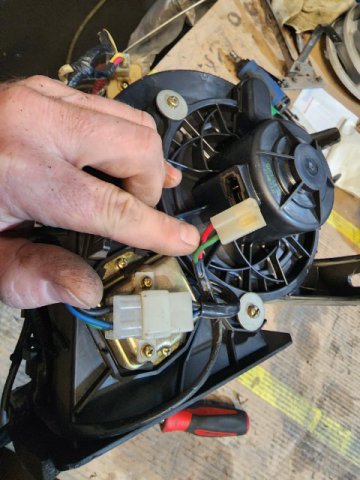
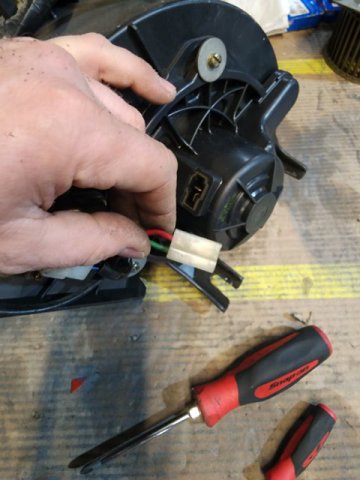
next you need to swap polarity as the connector is wired backwards. A T pin or the correct pin tool is needed here. Dont destroy your pins. Replace pins that are heat damaged!
Here is stock above.
Here is swapped below so the fan will turn the correct direction.
There is no retainer for the fan blower fuse any longer. You can choose to strap it, zip tie it, or drill a couple holes to remount it to the box itself. I left it underneath tucked away like so.
Reinstall your box with fresh seals and enjoy!
-
Long time no post for me, but here goes.
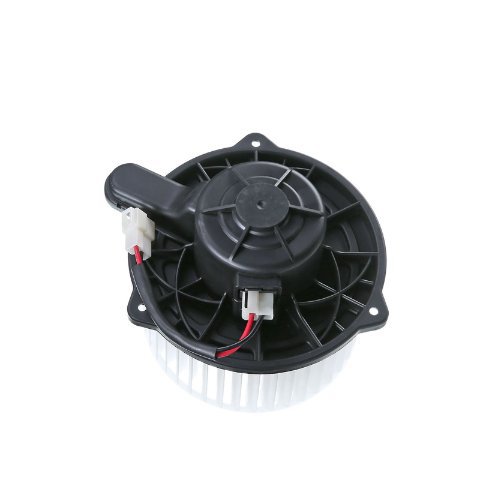
The old 90s civic blower fan upgrade is quickly becoming obsolete. The motors are available, but usually without fan and lets face it, many of the yards dont stock 80s and 90s cars so much anymore. So I went on the hunt, after once again reading the social media and internets myths regarding what will work.
It turns out KIA was a usable option with easy mods. I spent 2 days hunting through the wrecking yards in the Sacramento area searching for suitable blower motors. I hope this is helpful to you guys here.
S130, 280zx
07-09 Kia Sorento 6"(not the 5-7/8"). You will need to dremel the plastic housing for it to fit your box opening Approx 1/8". The plug will line up, however the polarity is reversed at the plug. The fan is the correct direction, so just swap your stock pins in the connector and plug in. One major note, the fan is about 1/4 shorter than the original, and you will want to make shift a spacer or 3d print a spacer and glue it in. I used double stick tape for now.
The fan mount holes are not the same diameter, so you will have to slot those out to the end to reuse the fasteners from your car. The second major note, the case also has the fan motor cooling port orientated so that it will bolt into the s130 blower box without the need to remove the fan duct!
S30
03-06 KIA Sorento, Similar install to the 90s civic, dremel the opening for fitment. Fan fits nearly perfect. No need to slot the holes, it lines up really close. A couple of housings I have done required me to file the holes slightly. Get VDO brand aftermarket, itll be the right one. Its the correct depth and rotation. Grab the pigtail for early s30 models. Its been some time since I messed with late model S30(i.e. 280z), but the plug may or may not be the same, and itll be up to the installer to determine polarity at the connector so it spins the correct direction. I did have to dremel one of the housing nuts near the fan on almost all fo the housings. I tried 280z and 240z, same gig. Just knocked the edge of the nut back to clear the fan blade, since the fan is so much larger than the originals.
-
Here is my Jig work

Im still working on these parts. Mostly I need to box them in, but they will line up with the new position of the front box frame I removed behind the seats.
-
Also found some seats
-
I actually didn't have a problem with leg room, I had an issue with how high the seat was with the slider. I want to try to hard mount it to lower it.
Also it looks like you have to relocate the giant sub frame bolts also. and maybe shorten some of the suspension pick up points?
Also I'm assuming you're going with a smaller fuel cell? or will the stock tank fit?
Lastly, thanks for the great pics, this is the most documentation on this I think anyone has ever done. Some of the pics from the first few posts don't seem to show up anymore though.
Yeah, Im knocking that floor back a couple of inches. I spent a few hours cutting up mounts and stuff on the mockup floor. Now I have a good idea where to cut, once I get it squared on the floor pan, Ill jig up some alignment mounts to transfer to my car. What was interesting is the stock S13 brackets that go over the front mount bolts to the floor pan, are nearly identical to what I need if mounted to the outside holes on the ZX floor... But the old box frame isnt needed to mount the sub frame. Ill be cutting it up and moving it back just far enough to mount the interior compartment floor that holds the speakers and stowage bins. Its needed for rigidity between the rockers and floor pan so it cannot just be removed completely.
I have plenty of room for the stock tank, and Ill be leaving in the center of the rear box frame that has the tank strap mounting holes. The one hangup I dont know about yet, is how I will run the exhaust. Retaining the heat shields is my goal, but Ill play that game when I get mounted up.
The pictures are hosted on my facebook page. Its public, so anyone should be able to veiw them. Interesting that the links arent working, but Id suspect its a connection issue with as big as these pictures are. Datsunmotorsports
-
Playing around with geometry on the spare pan and subframe
So I dont know about you all, but putting a nice seat in this car and having adequate leg room is an issue.
So Im removing the old sub frame box frame, since Ill be installing a new box frame further back... What a pain to get all those spots out, I gave up on the spot weld drill bits and just started going at it with the plasma cutter...
-
Is there a kit of some sort to add an external wastegate to the l28et manifold?
No kit. You'd have to make one yourself. There are a few guys that make custom manifolds out there that incorporate a wastegate flange.
-
It looks like I need to modify the floor pan for the front diff mount hoop to clear, and both upper control arm mounts. I need to do some measuring to see if the floor pan is the same heights at the mounts for the S13 frame, and modify the new mounts to make the difference up. I did take some pictures from the front view and the frame is currently about 2" from seated to the chassis floor pan, and it appears the frame is clear of the ground(will not hang lower than the frame rails, which is what I was worried about after reading this 260DET? Im not sure how low you would have to be, to be concerned with sub frame height if the rails have the same or less ground clearance? Really wish you guys had some pictures... would go a long way!
Transplanted a rear S14 subframe assembly years ago for a race two seater S130 and the biggest problem by far was not being able to get the assembly high enough. It's a race car so low is good but it's not a disaster, it's done quite a few laps and drives great.
-
Finally got both subframes in.
Spare Floor pan
Out with the old
Mock up Subframe on Mockup Floor pan.
-
-
In hindsight some of my posts are not the best but the one above says it all and deserves thanks. My avatar car, S14 suspension front and back.
Do you have any pictures of your work?
Ive been working on the motor lately and havent got back on the rear suspension yet. My main goals at the moment are to get the wastegate plumbed up as Im running an external. But Id love to see another version of how the rear sub frame was swapped. Thanks
-
-
I hadnt considered how far it would drop from the frame rails(seeing as the stock sub frame hangs no lower than the rails). Thats good to know. Ill have to take some measurements. Im still waiting to get my sub frames shipped up from down south.
I have no interest in paying the money that kit wants. Its not that I cant fab up a mount, I totally can, but the to do so vs just buying something thats is well built sometimes wins. I ended up plasma cutting out the whole rear deck box frame with studs from a donor car for mockup purposes. I might chop it up and pull the pins and mounts from that as they are super clean. I also salvaged a nice cowl area for my car from that donor.
-
I would love to see you put those mounts in. I'm at the limit where I can either put an s13/14 subframe in or just do the late model swap like you did.
I took some measurements Turns out those mounts are not going to be the best solution. The sub frame is approx 23" center to center on the rear mounts. After getting the tape measure up there it appears the box frame that incorporates to the the floor frame rails up to the rear box frame structure where mounts are needed is the same width apart and 3-3/8" wide. So these C channel mounts would require that an ear be cut off, and without knowing that the C channel is precisely the same ID of 3-3/8" it seems like a tremendous waste of nearly $200 and that starting from scratch is a much better idea. I know several guys cutting up S130 chassis right now, and Ive ask 2 of them to remove the front sub frame pins, and cut the mounting box for those pins with plenty of meat for me. So with any luck Ill be re-using the stock parts from the donors, but Ive also contacted a local fastener company that says they an get me a M20 bolt in fine thread if needed. As I understand it the fronts should be 5" long and the rears should be 6.5" long, but I have yet to get the sub frame in my hands. My buddy is still packaging it for shipping.
-
Ive been dying to do a BMW engine plant into an early Z car. This inspires me even more. Ive been drooling over a N52 swap for some time after watching from of the european guys strip down those 1 series. Though my idea of fun is to put that into abase model slicktop manual everything S130.
There was a car that kicked this all off many years back that disappeared. I feel like it was wrecked, the one that got the full 3 series suspension. Maybe BRAAP was involved, but I I have also been watching RTz as well. At least in the USA, BMW is one of the last manufactures offering a viable Inline 6 still in production, thinking of the future swaps available. So keep up the good work!
-
The Crusher Update. Its minor but Im happy to share.
Shes covered in dust.
I inspected my floors and rails underneath. I might need to replace them. We shall see.
I might get some Bad Dog Frame Rails and Zedd Findings Floor Pans yet.
John William's Stubs in my STI diff
Isnt this cute... a 8 track... LOL
Disaster...
But repairs are happening
Ive re-fitted my spoiler. Feels good to have that back on.
-
I was under the impression that the front 2 mounts line up exactly with where the old subframe mounts.
I think they do, but need to be moved back to get the centerline of the wheel correct. Ill know more when I get my sub frame to the shop and start measuring.
-
I stripped most of the car out.
I also took the time to start measuring the front suspension stuff for new parts.
So out with the old
In with the new to me.
S15 Spindles on crappy coil overs(change for Stance later).
I got underneath and took a look around to see how the sub frame is laid out under there for myself with a tape measure.
Last time Ill have this stuff under this car so I napped some pictures.
And then I really dug into it... checking how deep the entire cowl went... which as it turns out is a lot farther than I thought.
Tar Removal...
Rust located... pencil sized hole.
Transmission back out
A real mess now...
These brakes are much larger... but still clear the Rota 15x8 Grids I have. I checked. I am unsure what the final wheel that goes on after will be.
Bat Sheet Wild Much? I hope not.
My phone gets drunk often and takes blurry pictures...
Lovely right?
Well, I got the paint in...
So Im off to choose a good epoxy primer.
-
Some inspiration/research
http://www.takkun.net/dri-z-101.html
http://www.takkun.net/dri-z-323.html
http://www.cardomain.com/ride/2281236/1981-datsun-280zx/photo-gallery/
That is an effective way to do it... easy too, but not how Im going to do it.
Guy is listed right here in Sacramento. I wonder if he is still around.
Not exactly how I would mount mine at all. Those mounts would simplify this greatly and reduce chances of error in squaring it all up!
Rims seem to suite it well.
-
The Dreaded window removal... not cause the glass might break, but because you fear the rust...
And here it comes
This is gonna be fun. At least its not too much over the edge.
-
I took some measurements, I have a rough plan in place. I have to have the subframes shipped up to me from SoCal. After seeing all that JeffP went through to keep his stock subframe in, and all the mess that is getting the geometry correct on the stock subframe... not to mention a total lack of options for brakes and stuff... Im over the S130 setup. I already have all the Z31 outter hubs, axles, and the vented rear brakes all collected for the stock sub frame and Im probably going to give them to a friend of mine that could still use them. Franks Z31 axle writeup has some issues, he doesnt mention in there that he is using Euro stuff! Its not the same. JeffP figured out the mess of parts needed to make that all work together using US model parts at least. Anyway, here are some pictures of where I am at... Just gutted the rear out.
Im thinking I can drill out the spot welds that hold this box frame to the rockers, and the floor. Ill leave the box frame under the tunnel and console, so Ill have to cut straight down through the box frame on both sides. Ill have to make a new panel to the floor from the new position of the box frame. Ill work out the re-informent of the center tunnel after I position the new sub frame mounting pins in.
-
Parts Blasted, and painted! Half Shafts rebuilt!
-
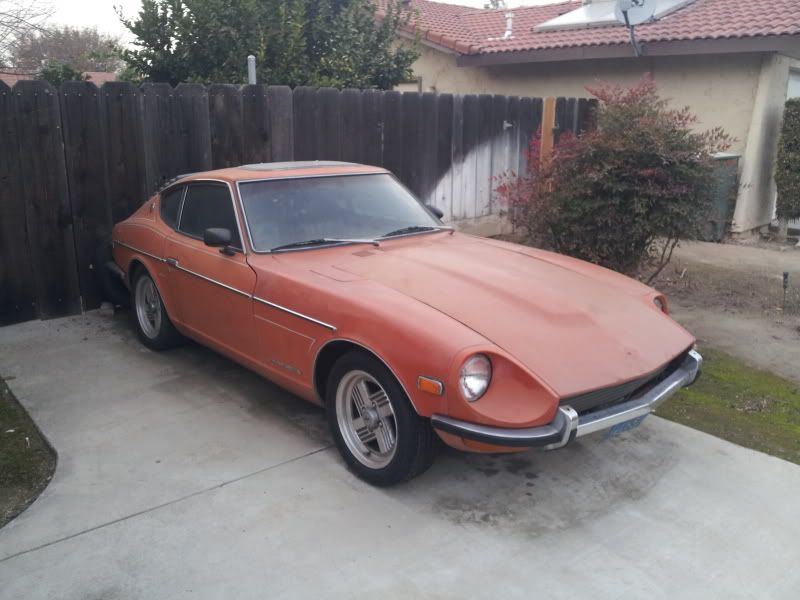
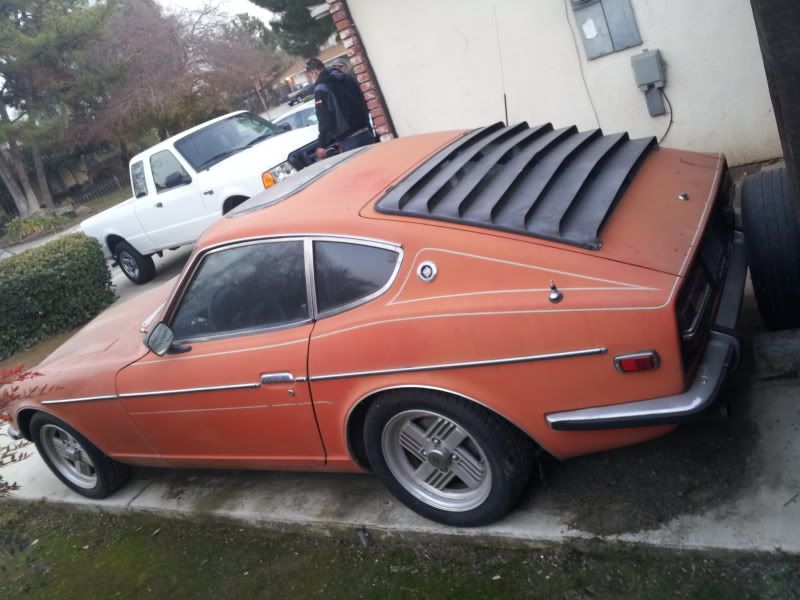
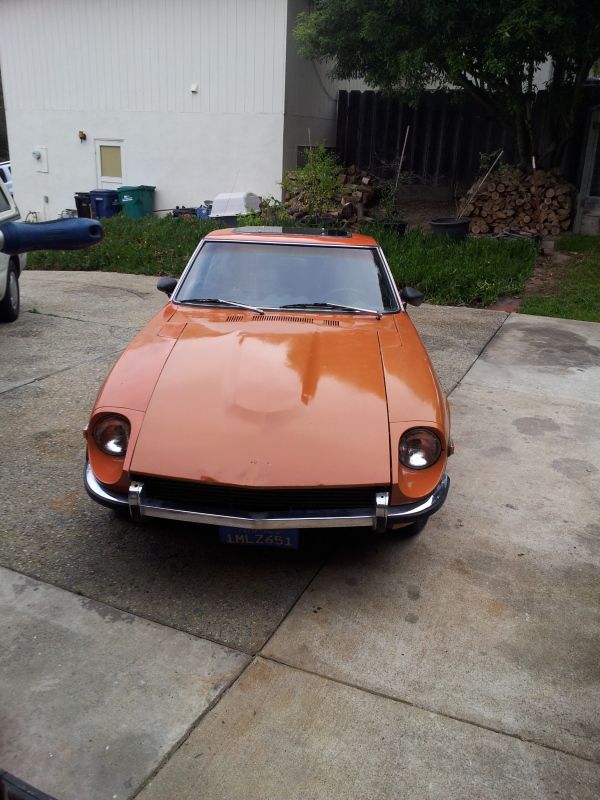
ASE_MAT's old car.
I purchased this car in mid 2012 from Mr Banks. Having been around this car since 2002 I had grown attached to it despite its known flaws(mainly rust).
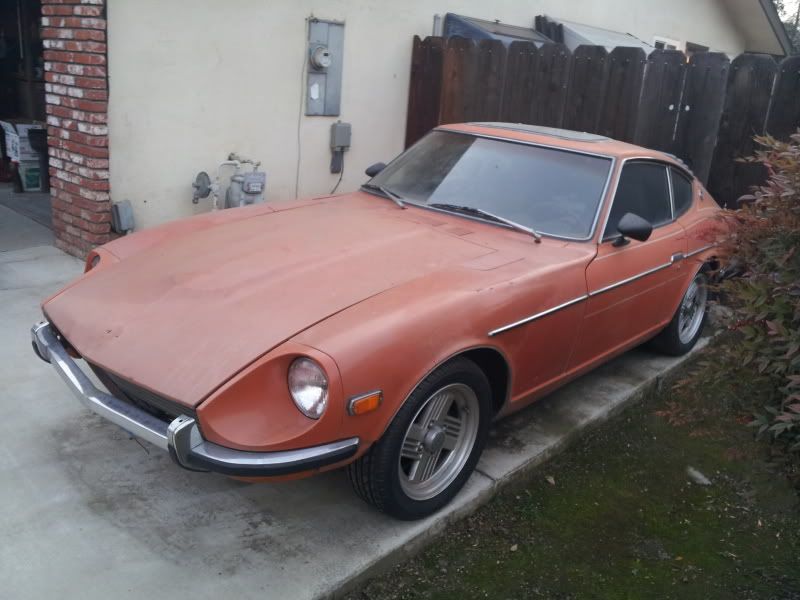
In ASE_MAT's Driveway for the last time after sitting on the side for over a year.
But its me so Im gonna drive this thing home right?.... YEP!
So its, clean and set SU carbs back up, replace fuel lines, check coolant system, check lights, bleed brakes, bleed clutch, and break drums free from sitting!
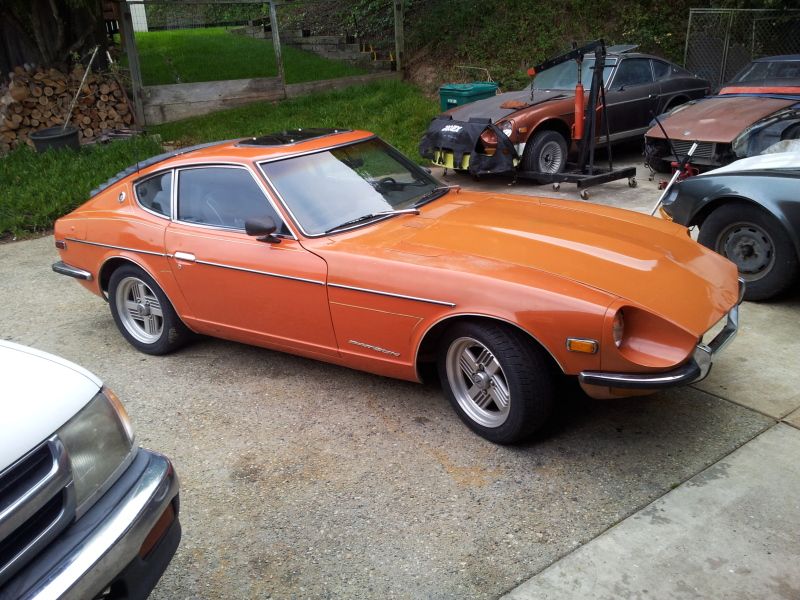
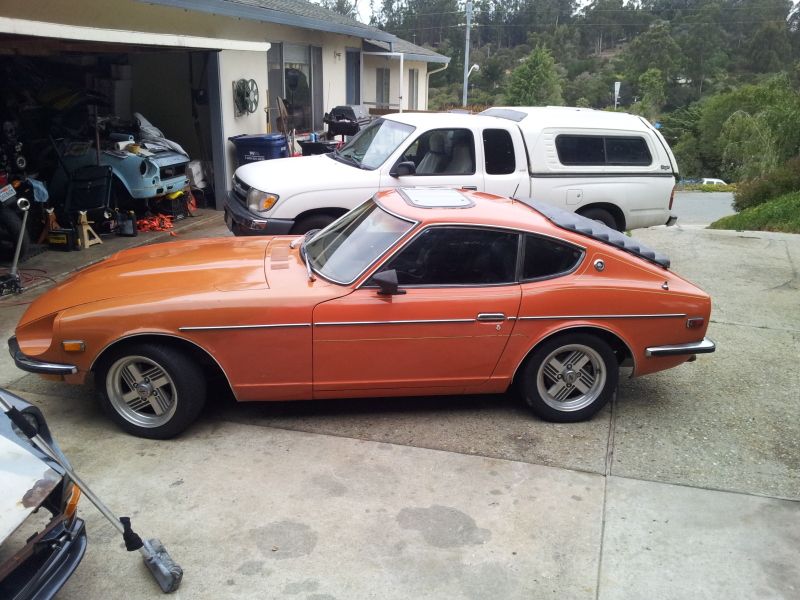
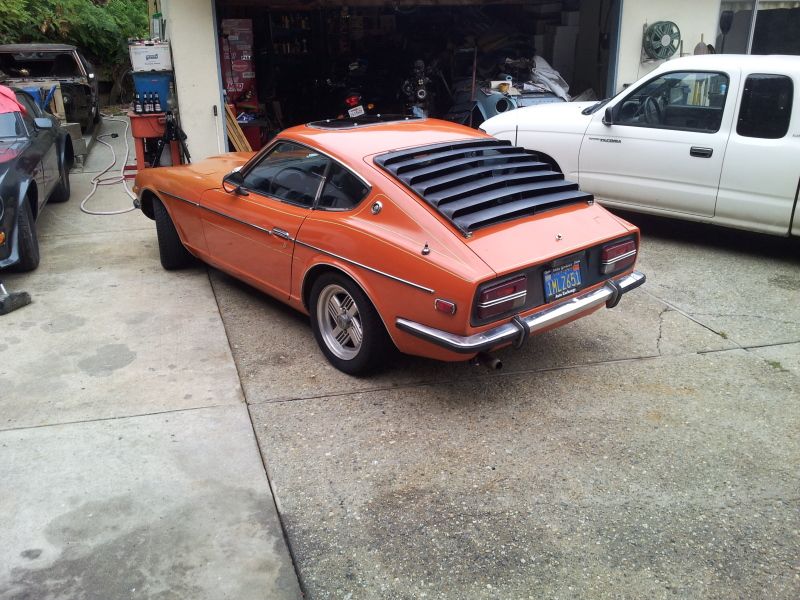
Well, I got it home safe and sound, and kept going. It got a good cleaning to remove the oxidation.
3 shades of Orange shining through.
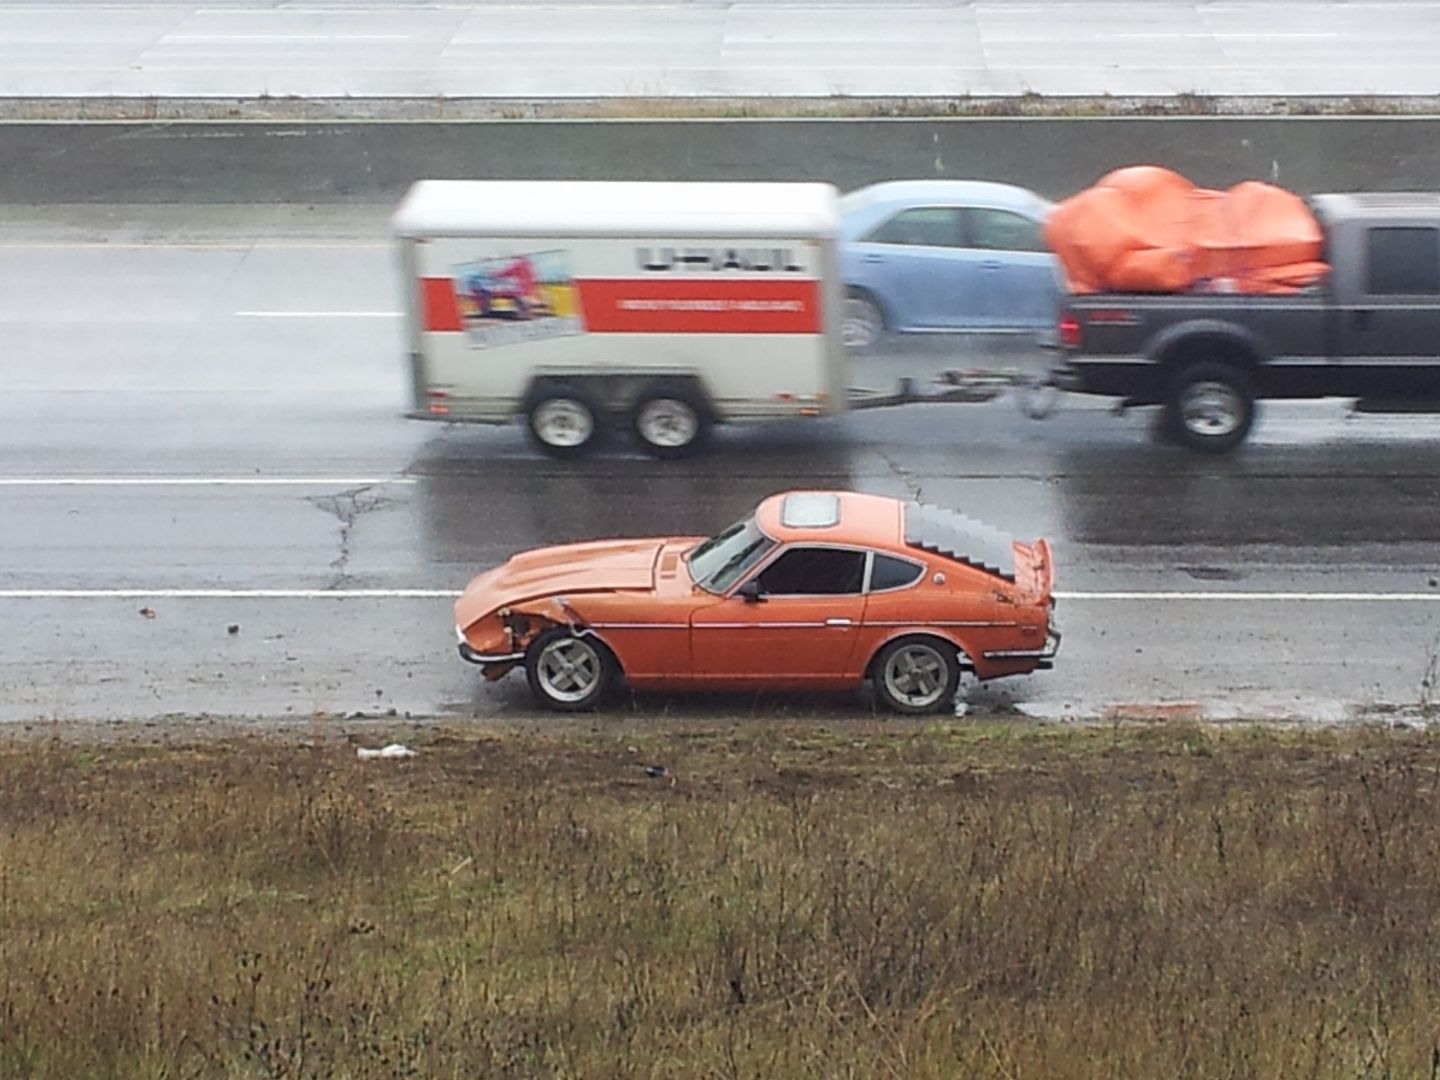
And then one cold rainy Dec day came around and I got caught out driving in it.
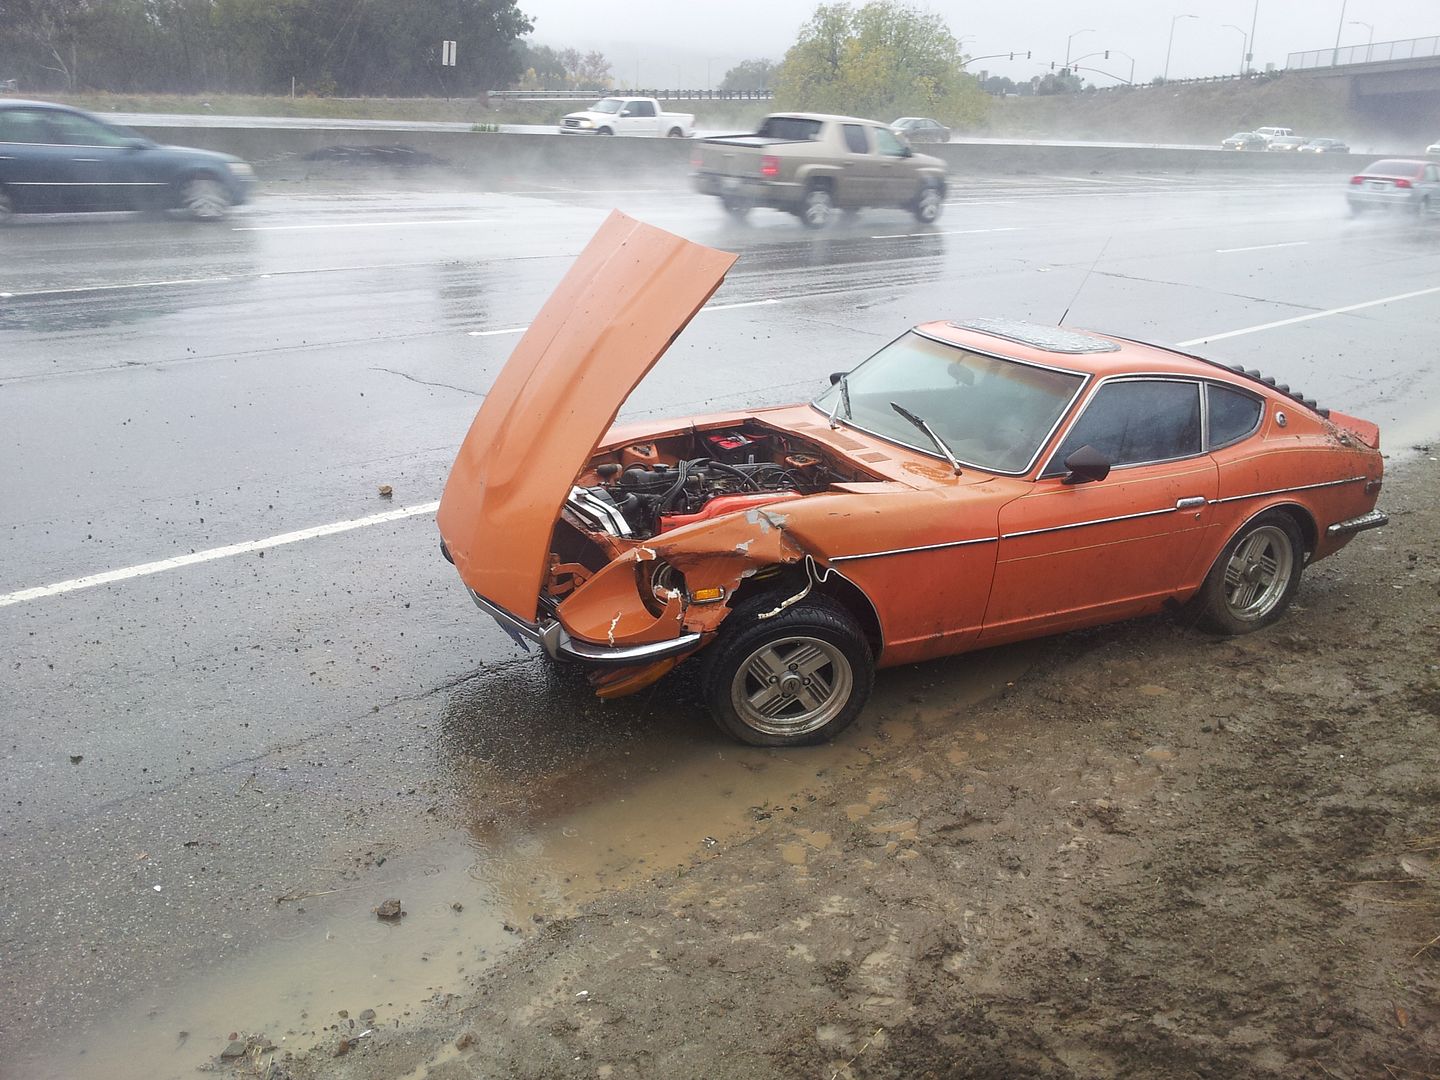
This guy had hydroplaned across from the far left lane to hit me and spin me 180, I got it stabilized in reverse, using the clutch in 5th with braking to attempt to stop... I was traveling 50mph in the slow lane, visibility dropped significantly, I saw him about 6' before he slid into me through the wheel spray. The rain let up just a few min later for me to take these photos as the ambulance arrived to check the other guy and his 4year old in the back.
I got hit off to the left in the above picture, half way between the edge and the guy in the black rain coat... where the large water basin is.
It was time to recover the car the next day.
I rented a trailer and strapped it down as best as I could.
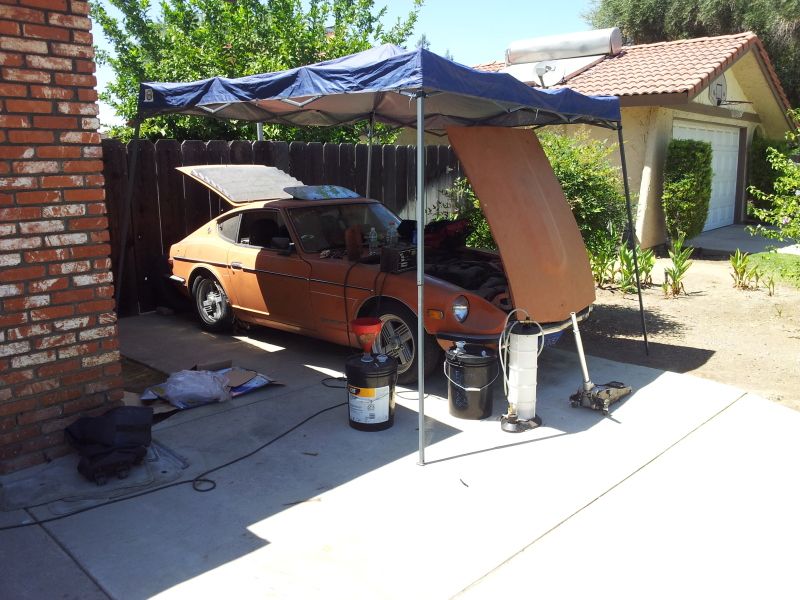
After Getting it home, I installed a new clip on it.
But After reviewing the costs of now finishing the clip up by painting, then replacing the dog panels, replacing the hatch, replacing the floor pans, and hatch sill, it was time to call it. It was time for a new chassis with my budget, and to pass the torch on to someone else that wanted this one.
I sold the shell welded up with no suspension, no interior, no drive train, and not much else for $400. The guy already had a beat up wrecked 240z, so I was fairly confident that it would be used as a builder. It was a mixed decision for me, but I am determined to transfer all the components to a nice shell and rebuild the Orange Crusher.
Clean this thing up a bit
After some digging I came up with this Shell for $1800
Its a complete 73, with a nice interior, no sun roof, and straight body...
There are some small signs of rust... but I was planning on painting it orange, man I was in for much more than I thought.
Cleaning all the crap off the bottom is always fun
Fitting The Crushers panels
And one Fairlady Grill
I discovered a Datsun 8track and EQ
I also pulled the trigger on some TWM TBS
And an LD28 pan
You can probably see Dereks crank trigger stuff and his block off plate for the distributor. And the TWM TB's installed. Im going to need a nice cold air box with horns I think. My header could use some help, I dont want to change it, but its not replaceable unless I have Troy Ermish copy it and spend several grand... which would make me question if I want to keep it at all or if there was something better... So I dont know where I am going with that. I do have ARP head studs, fresh bearings, and the aluminum bar stock drilled oil bar. There are some old Schneider valve springs in this engine as well. Kameari head gasket. But it is questionable if this will be it. Im seriously tempted to open it back up, put some flat top pistons inside this, get a nice cam, port the head, and max grind the crankshaft. We shall see where it goes.
And then the car waited its turn for a year....
Are you ready? What have I gotten myself into? Out of the frying pan into the fire... sigh
Oh yeah,
Off to the Watsonville Shop where Eric Crafton will work his hand crafted tig metal skilled magic!
Safe and Sound.
I sprung for an '05 Subaru WRX STI R180 CLSD rear end.
John Williams Stub axles
A very nice writeup on it here: CLICKY
Subaru Says the Spring Clips are 28033PA070 and Ive ordered them, but havent confirmed fitment yet.
I have absolutely failed at my suspension documentation. The Maxima rear brakes, Toyota 4 piston calipers, Cleaned and painted control arms, and related bolt on suspension components, the differential, the axles with fresh new U joints, and everything else Ive put under this car. I will be going to watsonville(250miles from where I live) and installing the hopefully correct spring clips for Johns stub axle conversion. Ill make sure and actually take pictures.
-
Techno Toy Tuning parts incoming!
Look at all this interior
Camber plates in!
Rear Sway bar! and Ron Tyler Diff mount!
T3 First Aluminum Drop Bars!
Mess of wires
DIY Autotune MicroSquirt going it!
Bosche 300LPH@5Bar Pump.
Engine Building
I replaced the Radiator with a nice newer Northern Unit
You can see the huge by large oil cooler Im installing below. Pirtex is going to come over and get all my hyrdraulic lines taken care of!
And this needs 2nd gear synch replaced!
Thats all for now.
I just got my Flex Fuel composition sensor in, and a new power brake pump brackets(PS pump).
I also made a large order from Black Dragon this past Nov and got about half of what I ordered. So there will be slow steady progress here soon.
Transmission is off with a friend getting completely gone through!
.jpg.3258733cd53c18555f7901c796b1d88d.jpg)


S30 & S130 LHD Blower Fan upgrades
in Interior
Posted
S130 insert, 3d printed