Rrichterr
-
Posts
4 -
Joined
-
Last visited
Rrichterr's Achievements
")
Newbie (1/14)
0
Reputation
-
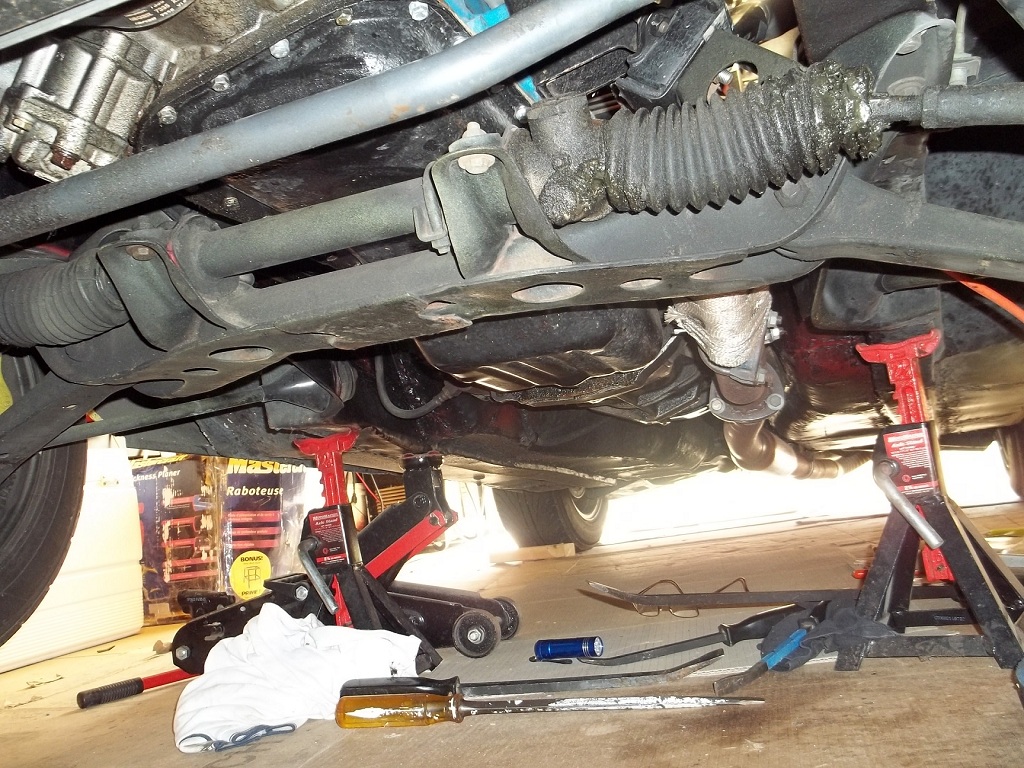
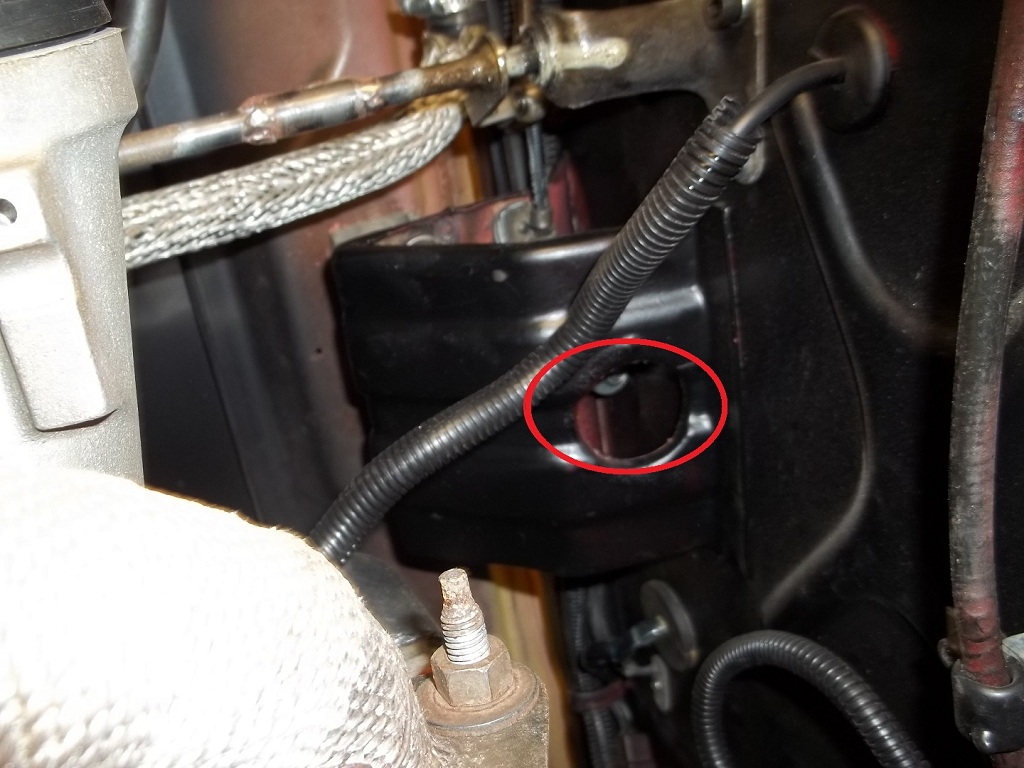
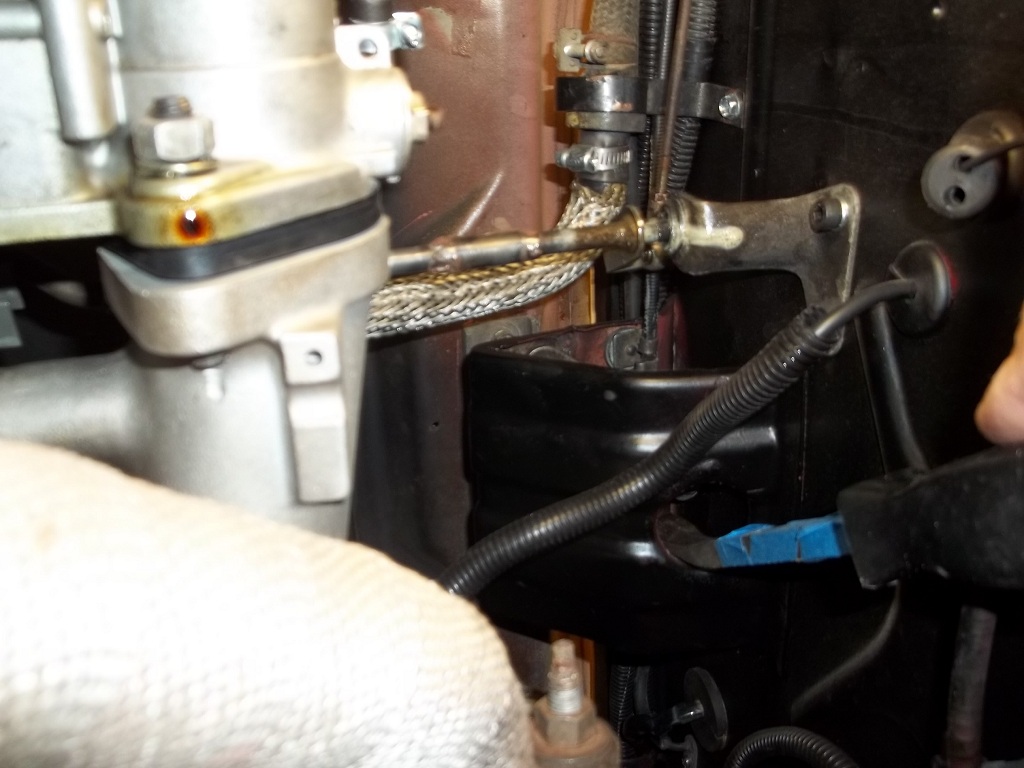
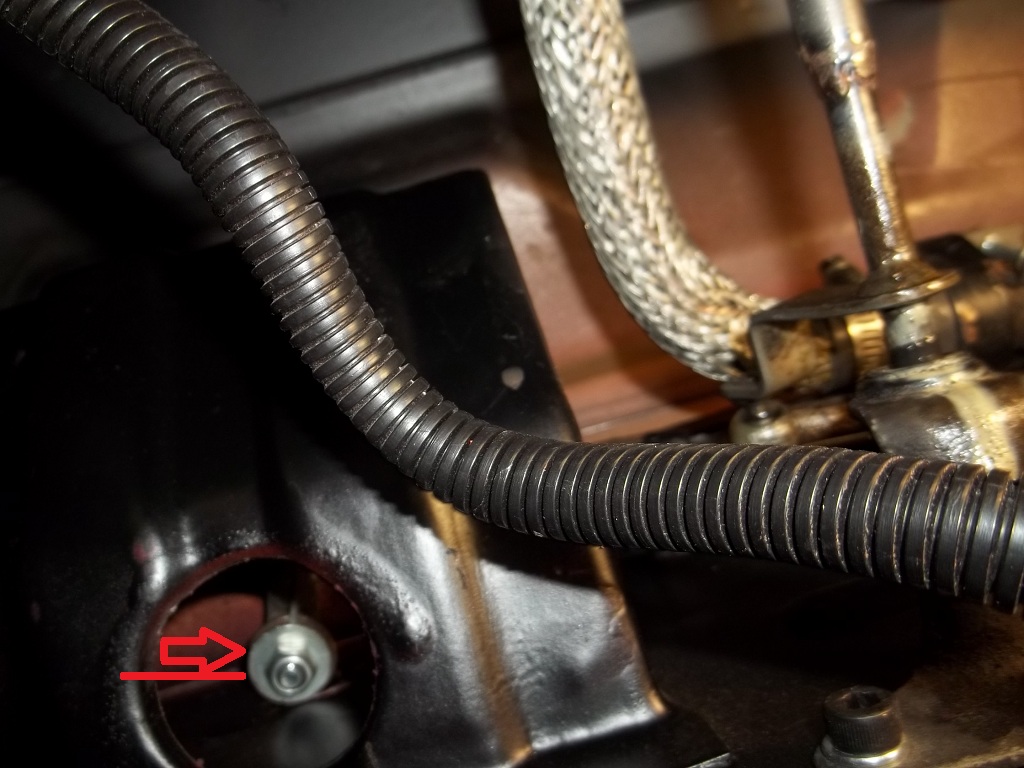
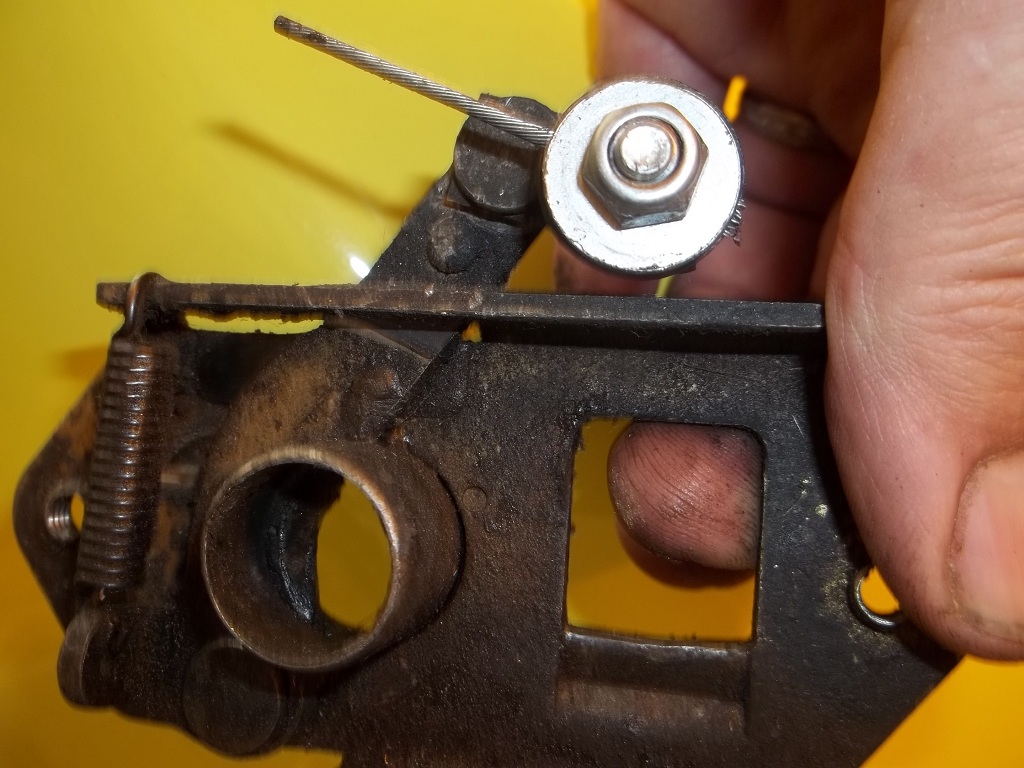
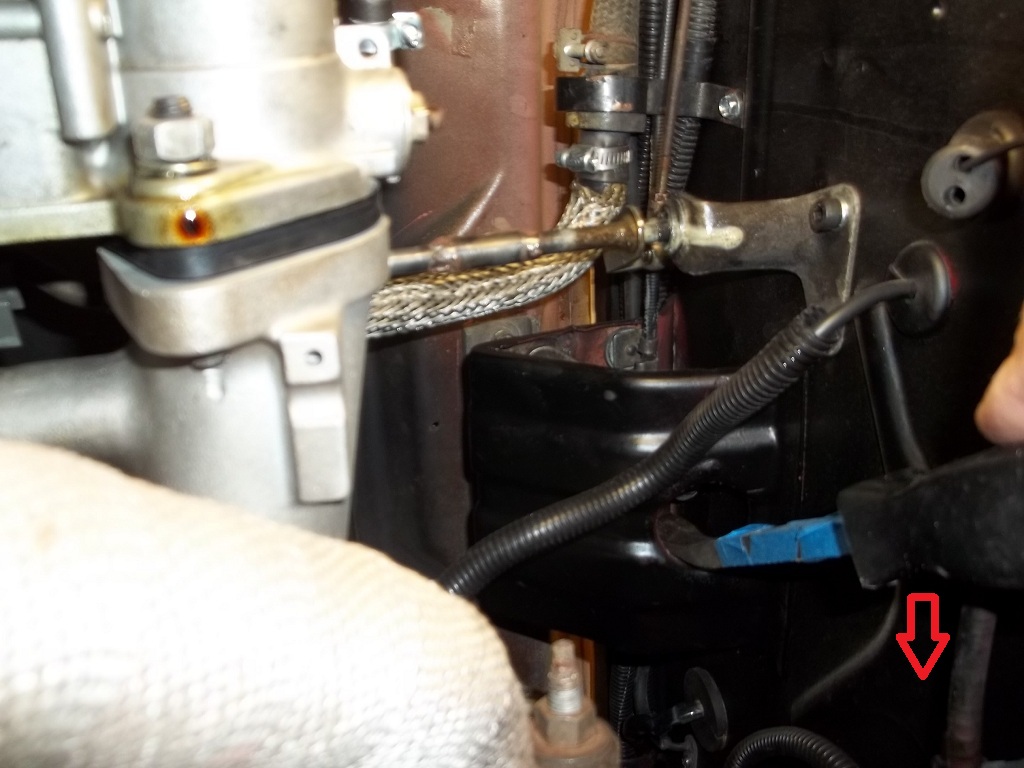
Well, the nightmare happend to me .. you pull the release and it just keeps coming out. It's at this time that you wished you'd paid more attention to the exact details of how that release works or had a nearby 240Z that you could orient yourself to before proceeding .. but I had neither. So checking the forums yielded a couple of methods.. from below or unbolt front hinges... but lacked detail as to exactly what one was to do... other than fishing around with a screwdriver.. So after tackling this from below with strategic lighting and those extendable mirrors, I finally understood what had to be done (besides applying bandages to my scraped arms thanks to those pipe clamp botls) If a detailed write-up had been available, it would have been a snap ... so here's my contribution for the yet to experience this joy of reverse hood openings Here's the plan of attack: 1) jack front up and place on stands (block rear wheels) .. you need room to crawl around under the middle of the Z 2) get a smaller pry bar ... about 10" long will do; shorter and you can't reach it (unless you have longer arms than mine) ; longer, you can't get any leverage to free it as the handle will hit the pipe/other. 3) you need to crawl under the vehicle and you are going to be using your right arm to access the area adjacent to the exhaust pipes ... so make sure you have allowed the Z to cool down before proceeding. Looking up past the pipes and toward the firewall, you should be able to see the hood release bracket assembly using a trouble light or a small LED... it has an access hole in the bottom of it. . here's a closer view.. 4) you need to insert the pry bar into the hole in the bottom of the hood latch bracket with the bent tip in the pry bar facing toward the drivers side 5) here's the release arm end (that shiny nut in the center of the bottom access hole) that you are trying to pry toward the drivers side. note.. mine has already been modified with a bolt inserted.. suspect original one is just the square black metal with a slot to hold the cable end. 6) placing the pry behind (toward the passenger side of the car) the release arm and using the edge of the bottom access hole as a leverage point, push the handle of the pry bar toward the passenger side, thus moving the release toward the drivers side... and it should pop the hood. 7) here's what the removed latch looks like on mine.. (note the sqaure opening is oriented toward the passenger side.) Having successfully opened the hood, and without a replacement cable to feed back thru the cable sheath, I found a similar cable assembly off of a snowblower (the one they use for clutch/drive or for auger engage) and modified it to be installed along side the original as a temporary workaround until I can secure an original cable. Hope this helps you if this ever happens to you. Pics too large... have modified to 1024x768..thx,

-
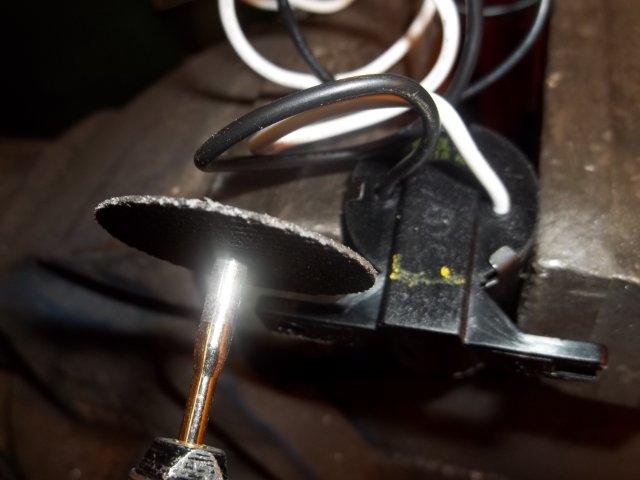
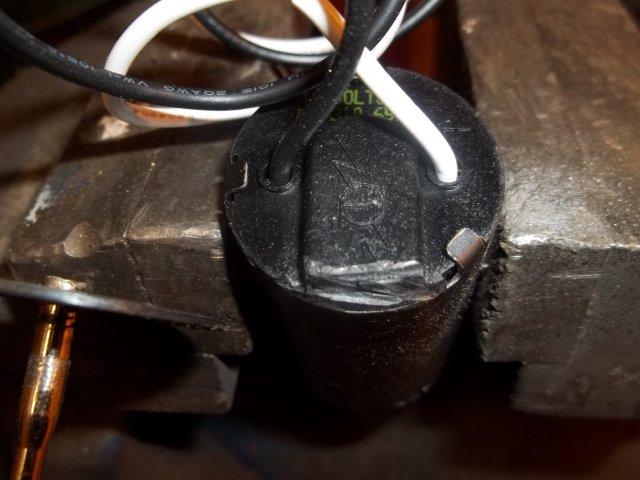
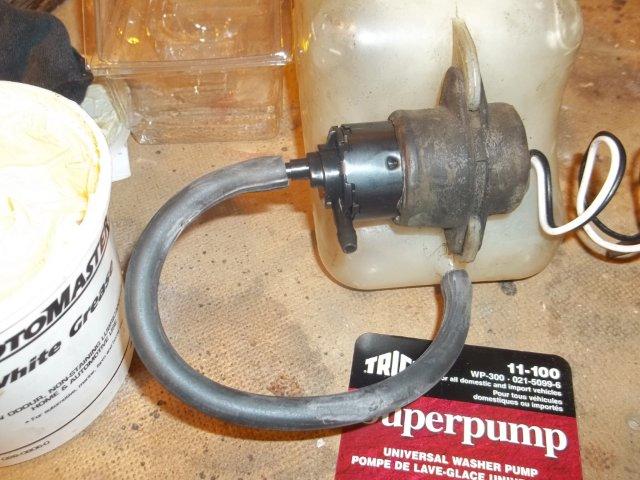
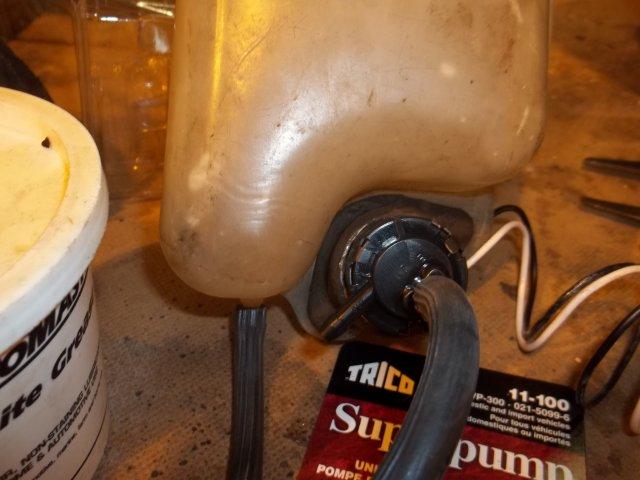
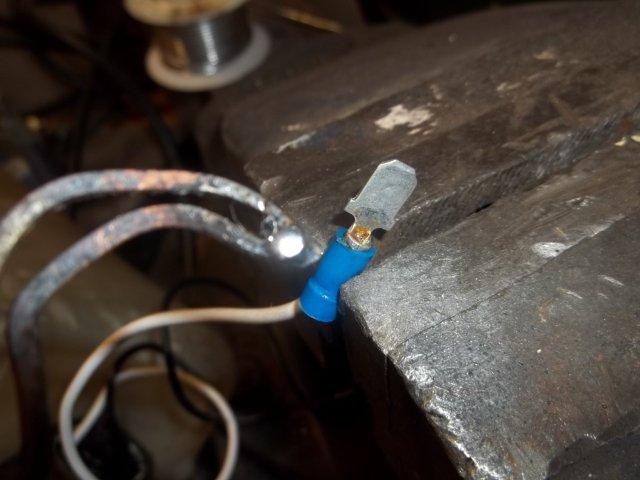
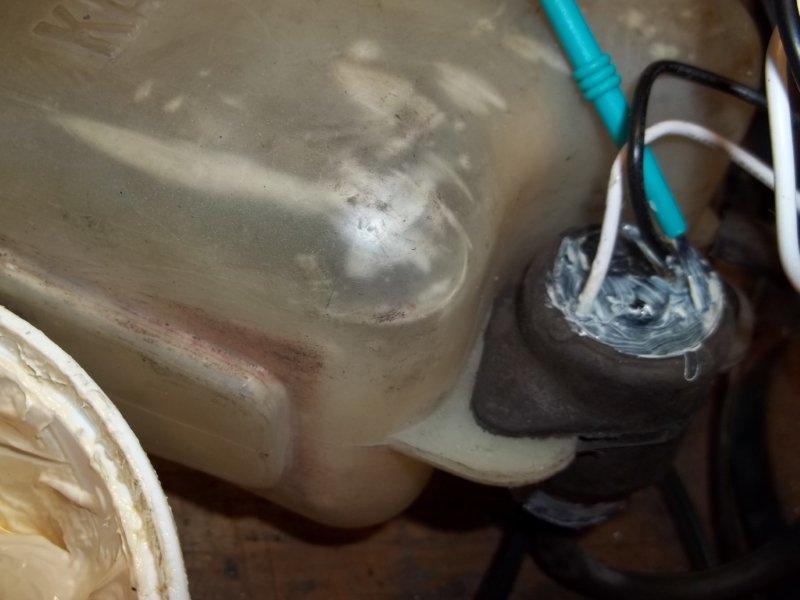
Having just purchased my first 240Z and having just replaced the wiper motor with one from a '96 accord, appreciate this site when someone files a thorough "how to do it" complete with pics. I don't understand the relay part of the wiper to auto park.. but working on it. Was searching forum for a washer replacement. I read one entry about a NAPA generic.. for $30 but no part# etc. So for the fun of it, I asked the Parts Counter at Canadian Tire if they carried a washer motor for a '71 240Z .. after a snide chuckle.. wala.. he found a listing. Here it is .. a TRICO 11-100 for $17.99 !!!! (made in USA) Instructions talked about mounting to fender/firewall with attached bracket, but the round shape of it looked like it might fit the rubber holder on the jug. So I bought it and here's the install since it worked perfectly. Pump Model and size with jug in background: You need to dremel off the attached plastic mounting plate: Once cut off flush to circumference, it looks like this: I used white grease to lube the cylinder & rubber holder to assist in insertion and then attached tube to inlet on pump: Note outlet tube alignment (follows fender well profile) so you can hook it up to your washer hose: Next I soldered new connectors that would mate with the original wiring harness [one male +, one female - ]: Since the bain of these motors is rust, I covered exposed metal with film of white grease: That's it.. re-install jug with wires hooked up and the outlet tube attached and test it out.....mine had great pressure/flow. So far, the best $18 fix I've done. Rrichterr