

Eric Z
-
Posts
14 -
Joined
-
Last visited
Content Type
Profiles
Forums
Blogs
Events
Gallery
Downloads
Store
Posts posted by Eric Z
-
-
Ah, figured it had a gear assembly or something. Oh well.
Nothing quite that cool I'm afraid.
Eric
-
Hey, can you tell me more about that crank on your rotisserie? I've been looking for something like that.
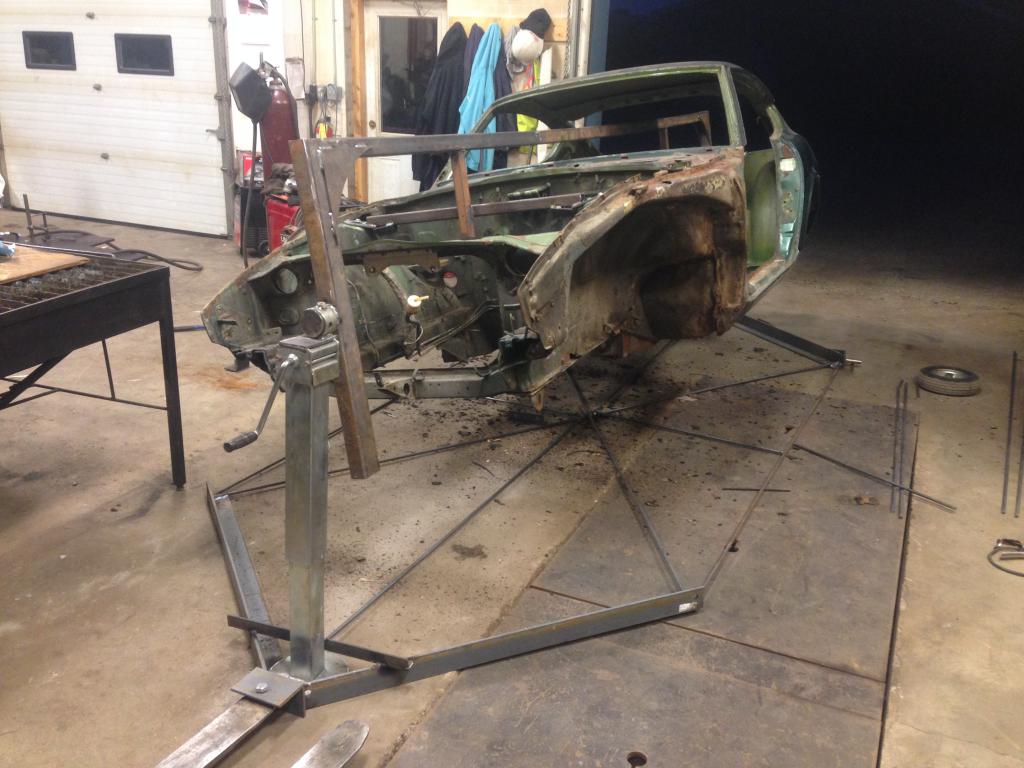
The crank on either side is just to lift the jack up and down, they've got about a foot of travel. It should give enough flexibility to put the car at a comfortable working height. To spin it, I have a 1/2" bolt set screw on each side that just needs to be loosened, and then cranked tight to prevent the car from moving. The car rotates easily by hand as the spin axis is [as close as I could get] to the center of gravity of the car.
-
Thanks tamarac attack, I'll definitely be doing that.
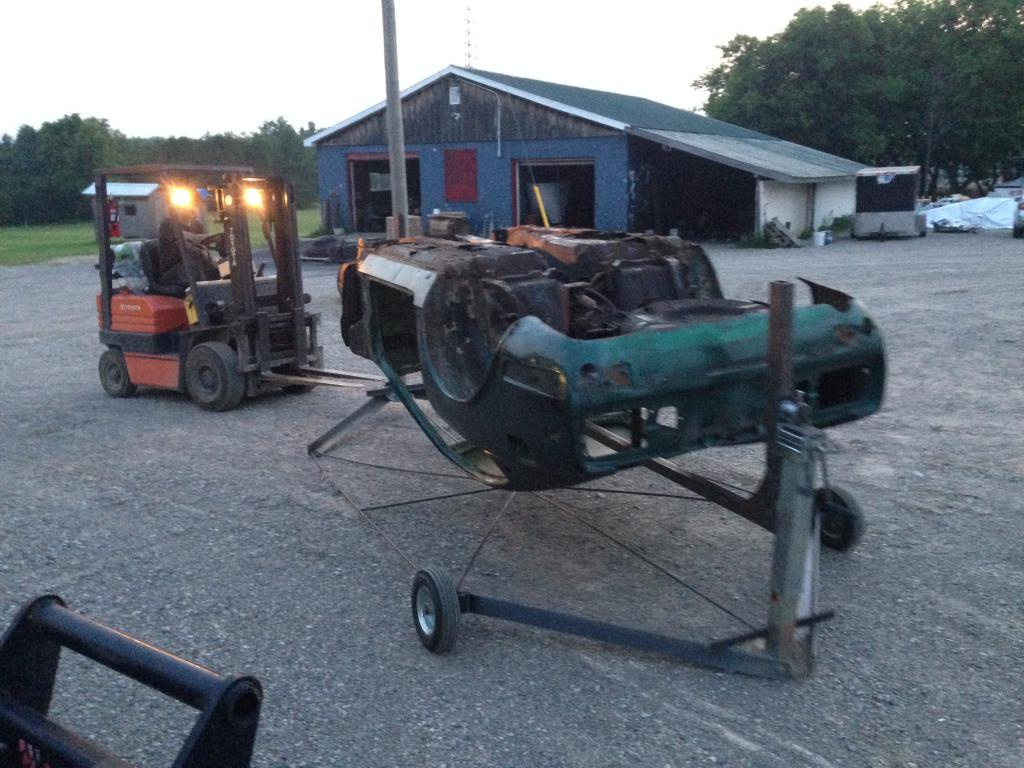
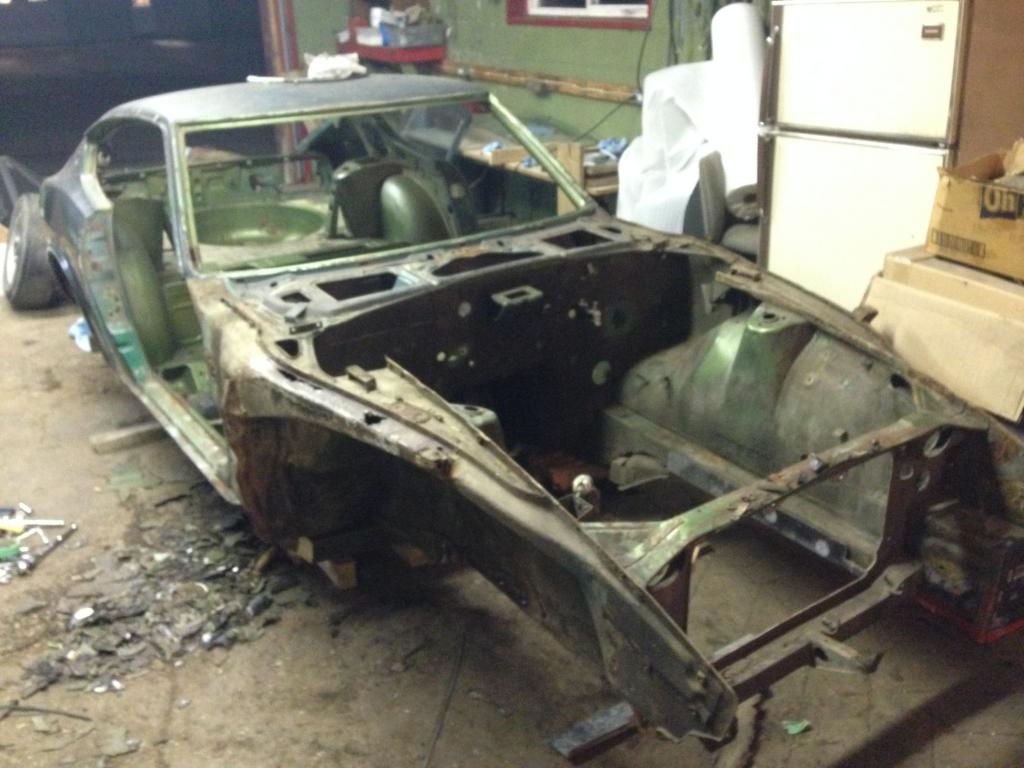
The 260 is up on the rotisserie finally. We ended up making one with some jacks I found lying around on either end for vertical adjustment. The car is supported by the strut towers instead of bumper brackets like usual, should give more stability while I'm cutting out the frame. It's got wheels on one end, and a hitch for the forklift on the other - works like a charm for moving the car between shops for working and storage. I'll be sandblasting her this coming weekend hopefully, and finally see exactly what kind of rust issues I've got to deal with - pretty excited.

Eric
-
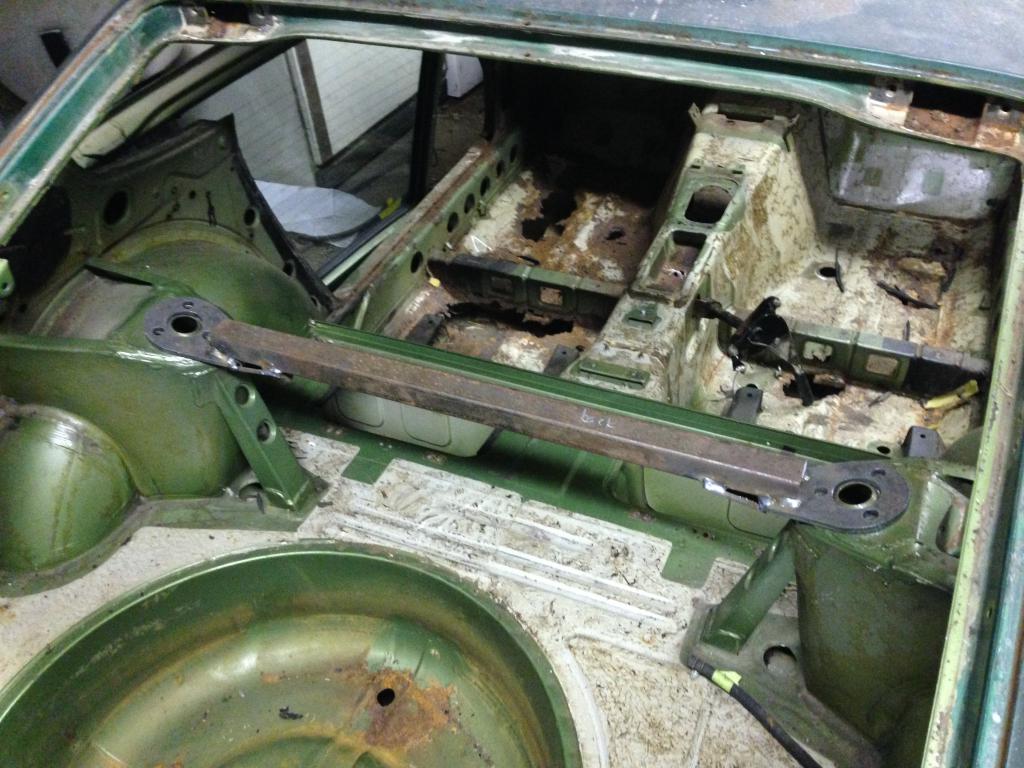
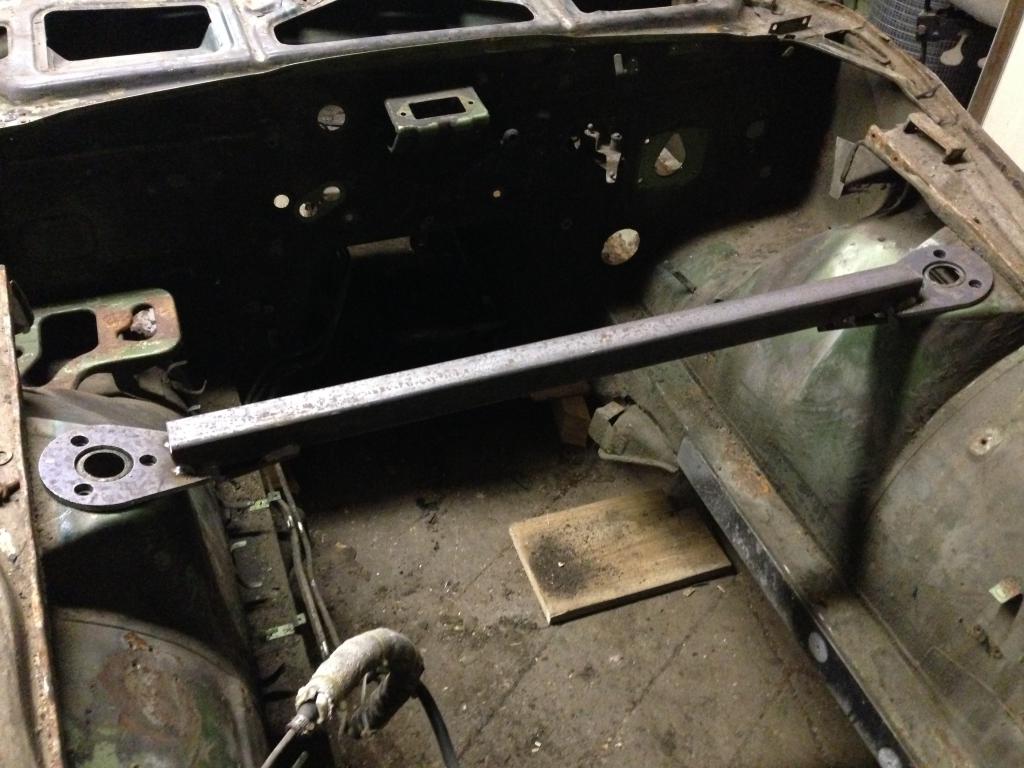
With midterms about finished, I'm hoping to spend more time with the Z. Last night I whipped up a couple brackets to be bolted onto the strut towers to support the car while we flip it upside-down. I might end up using them to mount the rotisserie instead of the bumper brackets (they're just a little bit rotten)
Priming your parts after bodywork and letting them sit for a while isn't a bad thing. Once you do your bodywork, treat any bare metal surfaces with some sort of metal pretreatment wipe. It will cause a chemical reaction on the surface to really help corrosion resistance. Then you can shoot some high build primer on, couple coats, then your good to go. Letting the parts sit in primer for a bit will let the primer really sink in to the bodywork. As long as they are kept somewhere dry, you'll be fine. Then you won't have to worry about any possible soaking show through the clear coat later on.
Thanks Justin, it's definitely good to have a professional opinion on this. When I get around to sandblasting it, I'll do a coat of primer to prevent the rest of the car from disappearing while I'm trying to fix what's already gone. Would you recommend an epoxy primer for this kind of application?
Eric
-
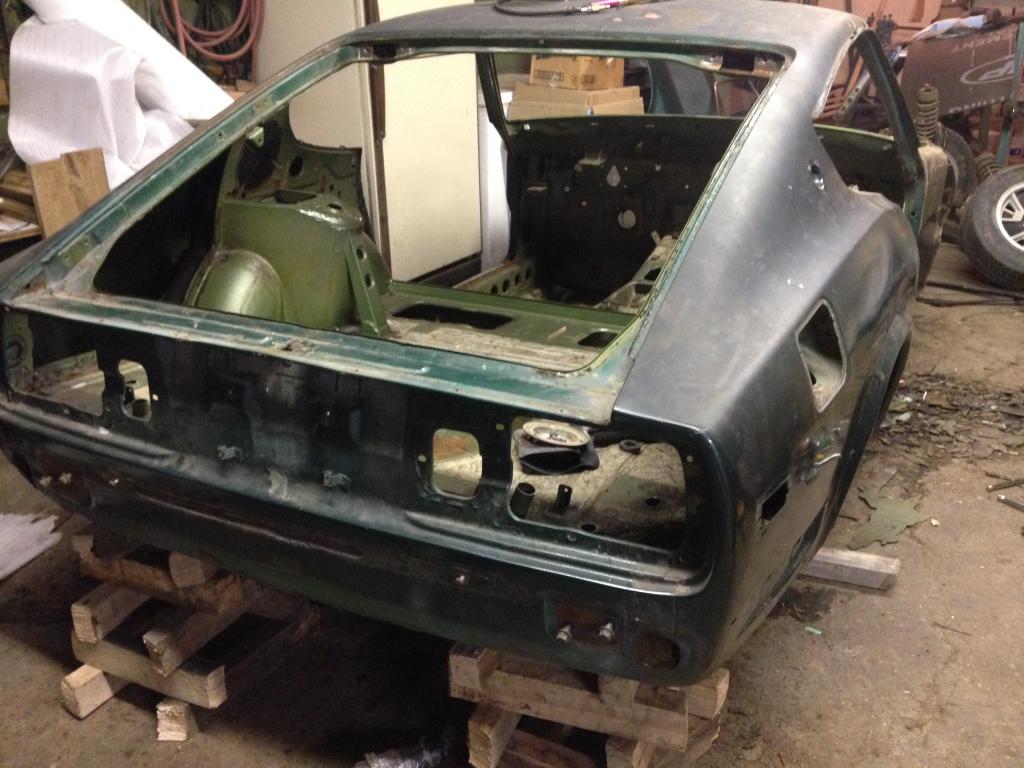
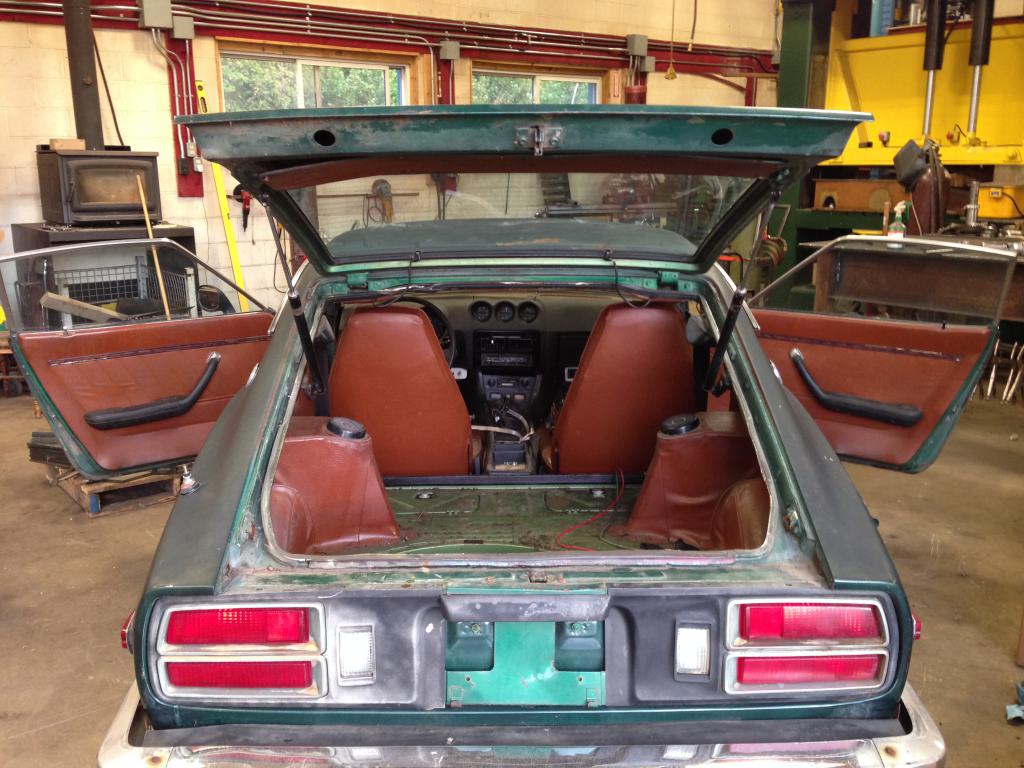
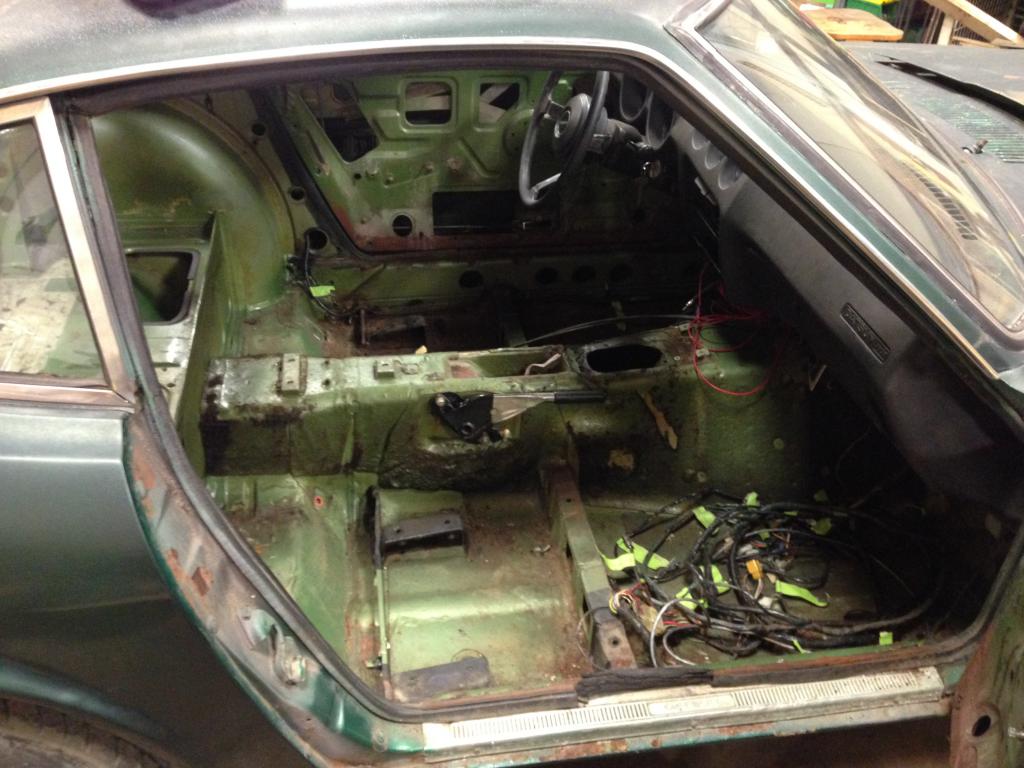
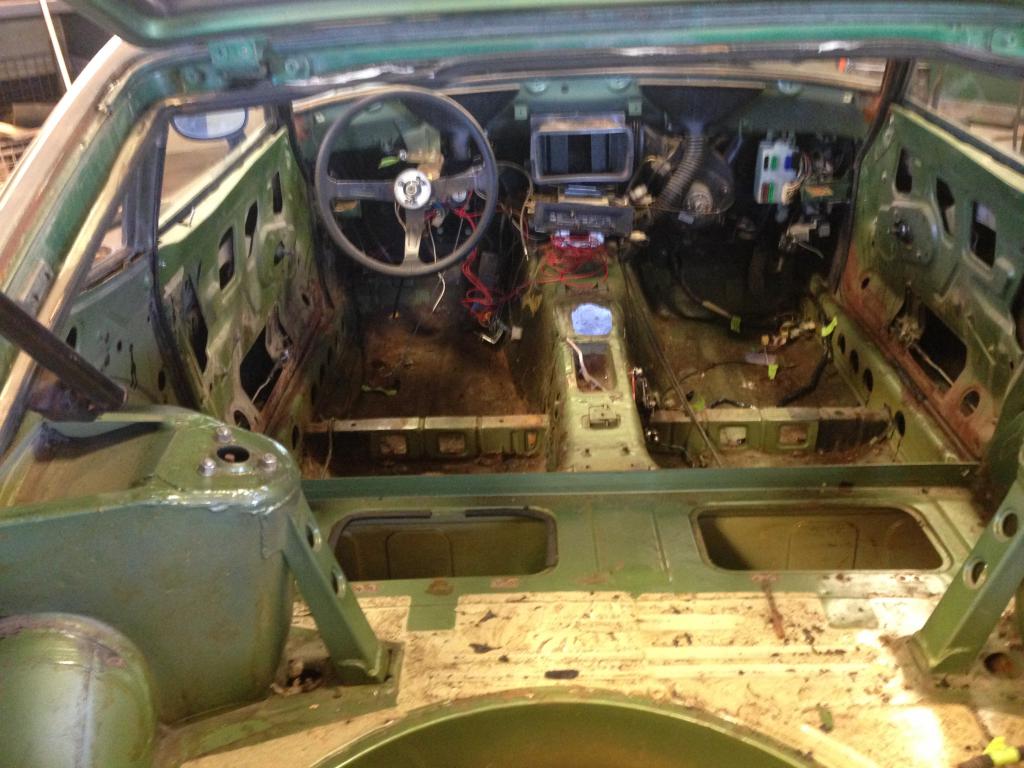
So midterms are happening, and the car isn't quite getting the attention I'd like to give it. I've managed to sneak out to the shop for a few hours now and again to finish clearing out the shell. That's what it is now, just an empty shell, I don't think there's anything more that can come off - now to start the actually fun part
Here's what she looks like right now:
I've been trying to find a good way to support the car while I replace the bottom and front frame rails to ensure it doesn't bend/warp the body. What I've come up with is whipping up 2 brackets that will be mounted to the tops of the front and rear strut towers, tying them together securely. The car will then be flipped upside-down, resting on these brackets. I'll make the frame rails up, and weld them in solid (besides to the floors, those are getting replaced too). After that I should be good to make the rotisserie, mounting it to the front and rear frames so I can flip the car around as needed and access all the hard to reach areas.
Thoughts?
Eric
Depending on the level of body work, the little spray can primer will all be removed by the body shop that tackles the job. If this is over a long haul, you might just consider primer/paint combo cans to just coat it a bit to keep the moisture out and expect them to sand blast the car before paint in the future.
Seems like you have a good groove, keep it up!
Thanks seattlejester. I hadn't thought of just putting on a quick primer for now, then taking it all off and repriming it before the final paint - good idea!
All I see is potential!!
Haha, that makes two of us.
-
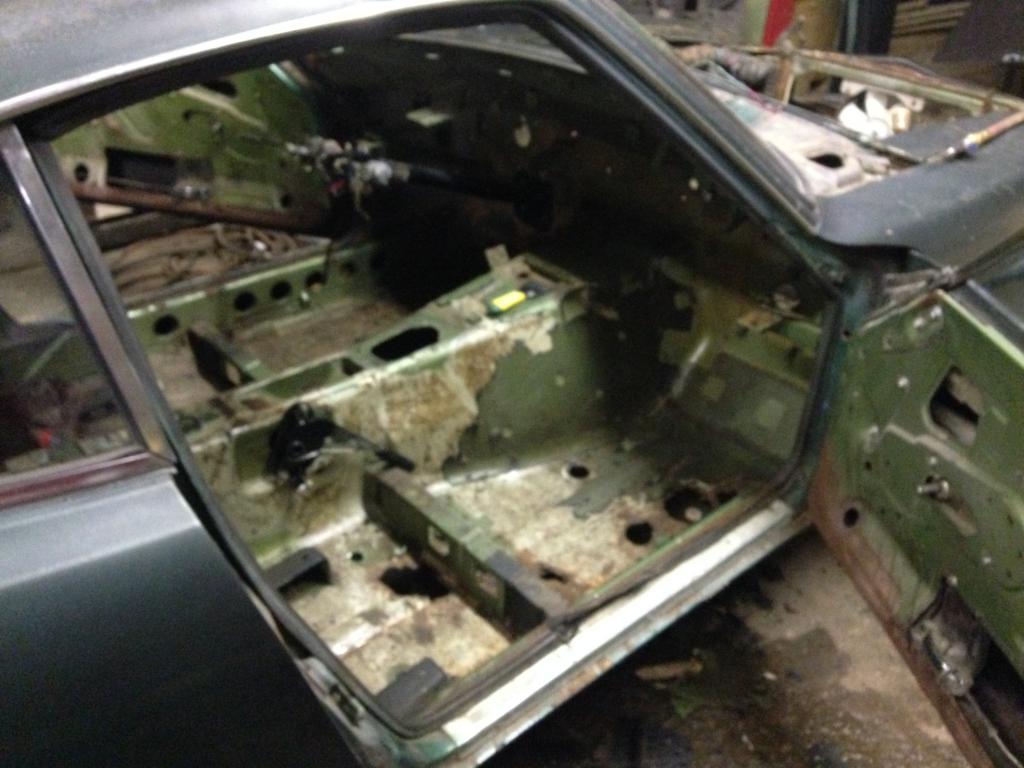
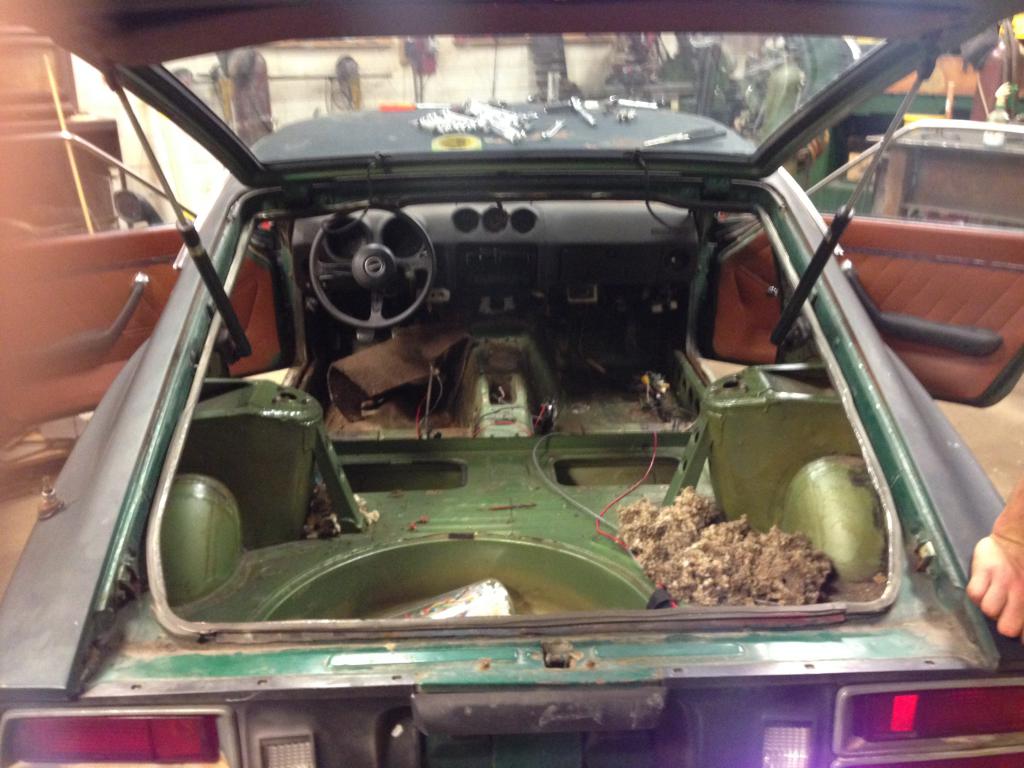
Spent more of the weekend pulling the rest of the interior out of the car, it's nearly ready for sandblasting/paint-stripping and bodywork. Should be nice to stop going backwards and make some positive progress on the car.
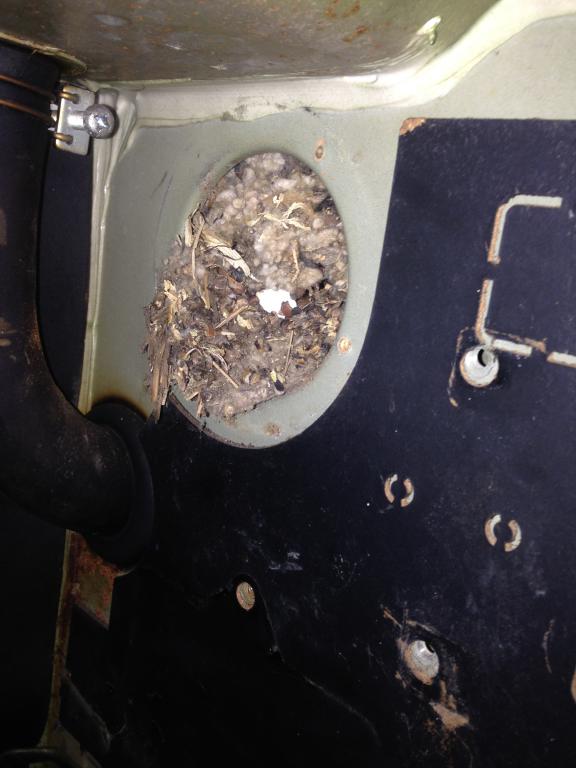
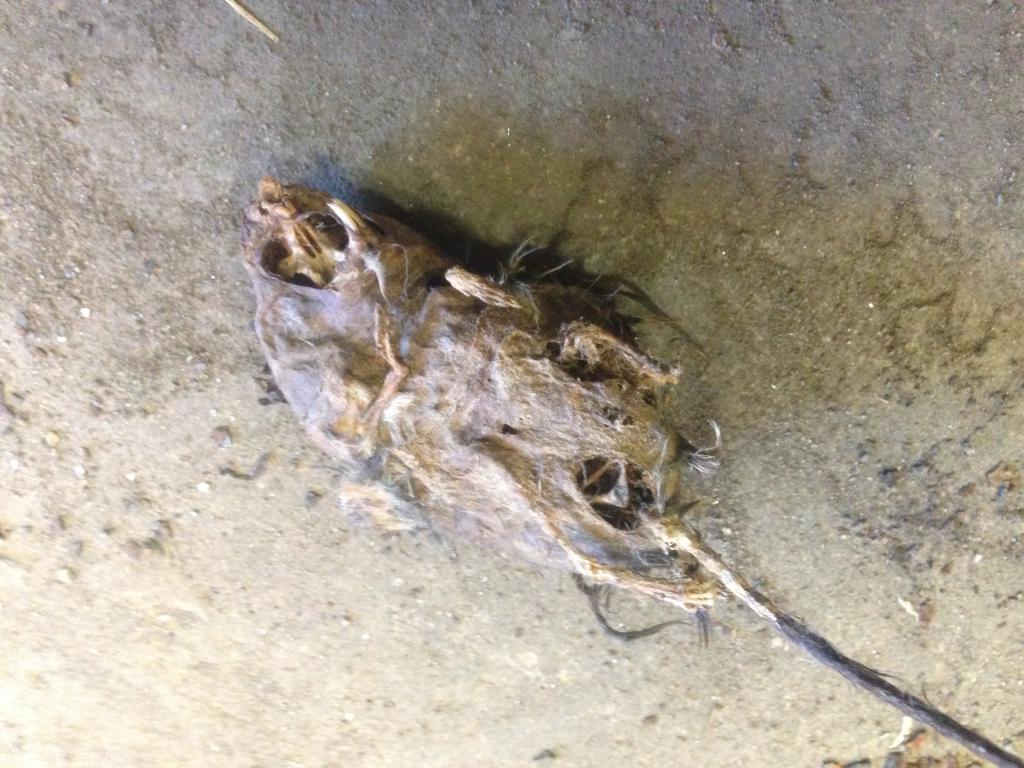
Found where the mice made their comfy home, in the passenger air ducts. Pulled an excessive amount of lint and corncobs out of there, but it should be rodent-free now...
Primer "can" soak up moisture in the air and cause rusting underneath if not properly applied, if it will never be out in the rain I would worry too much though.
Yeah that's what I thought. The parts will be stored in a controlled environment, so it shouldn't be a problem.
-
Thanks SRRTz! I'll check it out
-
Serious question: If I do some body work on a smaller panel, get it cleaned up and looking how I want, I'm going to want to primer it so it doesn't rust. I probably won't have the whole car primered, ready for paint for months yet. Is it bad to leave parts in primer and not paint? I read somewhere that moisture can get absorbed into the primer and ruin the paint job, but I'm not sure I believe that. Maybe if I store the parts inside a dry shop it'll be fine...
Lemme know what your experiences have been! (I have access to a full professional paint shop, so I'll be painting it myself)
Eric
-
Caig deoxit would be the stuff to use for cleaning electrical contacts. I feel your pain on the hacked up wiring. Just get the factory diagram if you haven't and take your time, you'll get it fixed up soon enough!
Yup, I'm planning on getting the factory diagram (there should be one floating around on the forum somewhere, just haven't looked for it yet) and double checking the whole harness. Job for later on I'm thinking - after bodywork
If you end up deciding the wiring is too far gone, I have a 95% complete harness for the whole car out of my 260 parts car.
Thanks NW240Z! If I end up giving up on the harness, I'll give you a shout
I am pulling my working engine from my 1974 260z today of maybe this week. I will be selling it. Let me know if you have an interest in it. I will also be replacing my electrical.
xringx: I suspect shipping will be significant cost from Ohio across the border, but let me know how much you want for it. My original plan for the car was to just get it going and slowly improve it over the next few years, but it's turning into more of a ground-up build, so I'm seriously considering getting a bit bigger engine for her. What drivetrain are you putting in yours?
Also, just a general question - what's everyone opinion on the brown-orange interior? I didn't really like it when I got the car, leaning toward black, but it's growing on me. Maybe I'll put it back in when I put the car back together and change it in a few years if I find a complete black set for sale, I dunno...
Eric
-
I'll check that out, thanks!
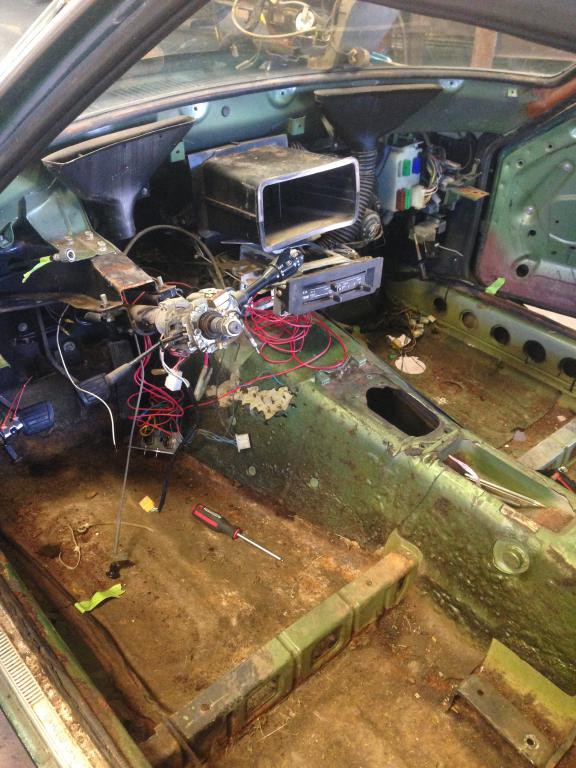
The PO messed with the wiring pretty good for [it seems] a sound system, hardwired fuel pump, and a few other things I haven't quite figured out yet. I'll probably be remaking good chunks of the harness..
-
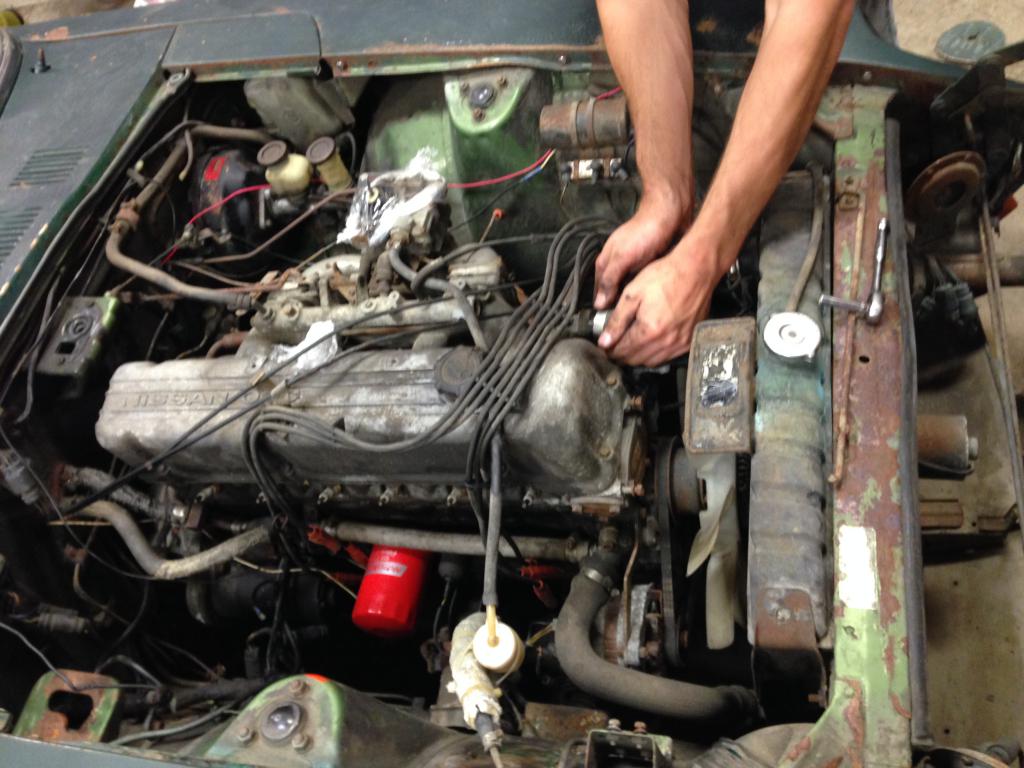
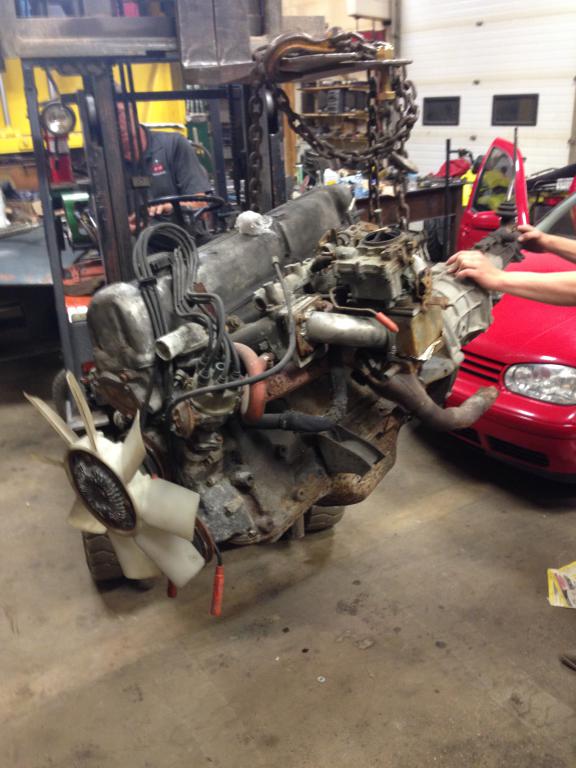
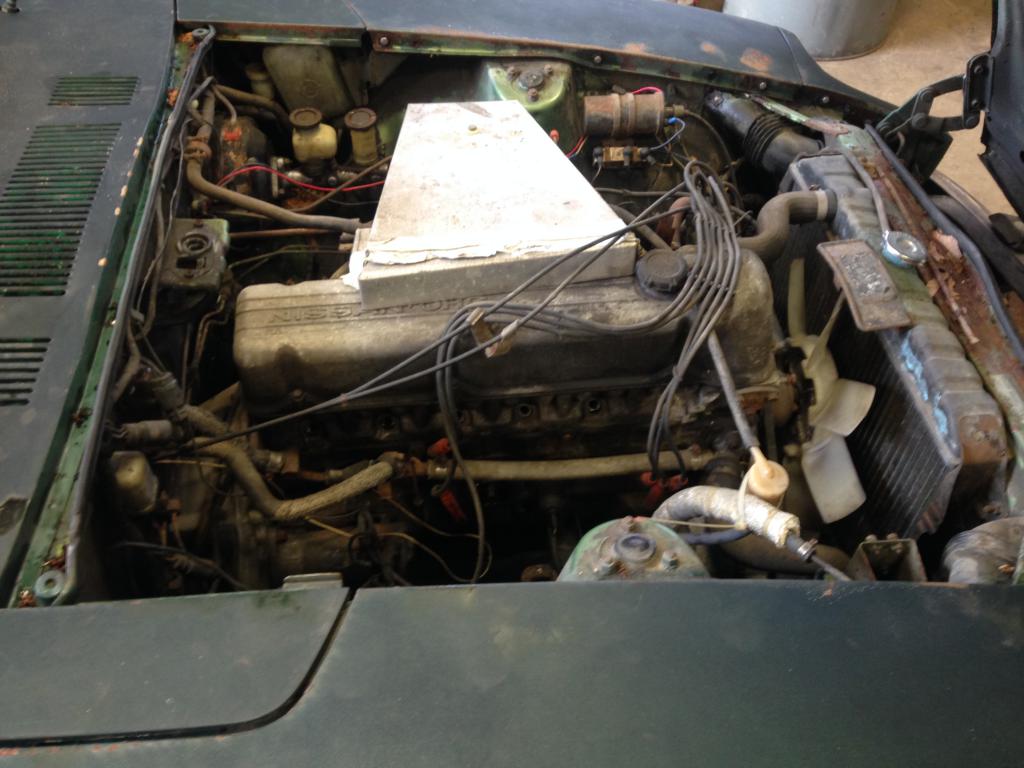
After letting the engine sit in rust penetrant and WD-40 for 3 days, we tried to get it to turn over - no luck. This engine is just plain stuck, going to need a full rebuild or a scrap bin. Looking at the price of a L28et versus the price of a machine shop to rebore it, I think I know which route to go... (more HP is a good thing anyways eh)
We pulled the L26 + 4spd tranny that night. Everything went pretty smoothly, just keeping track of what hoses go where, and which ones will need replacing is a bit of work. Having a pit and forklift makes the engine pulling process go pretty fast, no complaints.
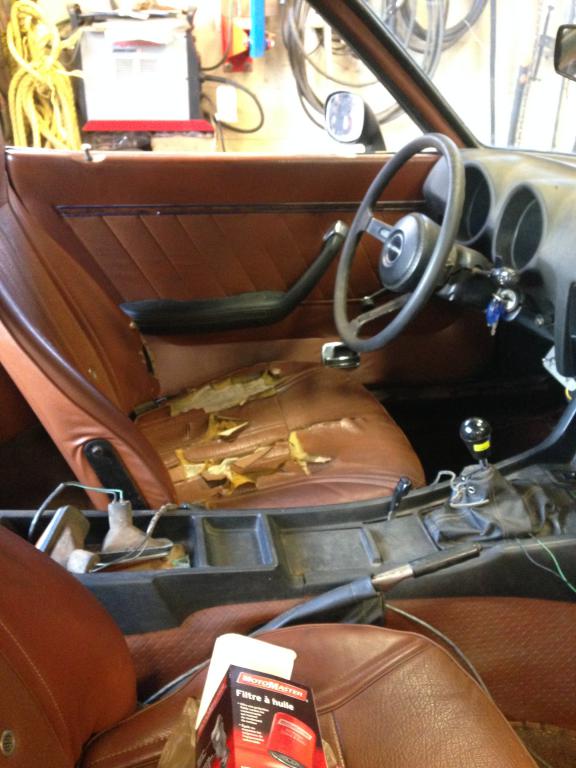
Over the past couple days we've been stripping the interior to get ready for some serious bodywork - replacing floor pans, possibly rocker panels, remaking the front frame rails, and sucking both bumpers closer 2" closer to the body. Once that's done, we're whipping up a rotisserie for the frame to do the more intricate bodywork, sandblasting and paint.
Some small rodents decided to make their home in the car during its sitting life, one stuck around for the long haul
Getting the front dash off was a bit of work, but I think I did OK. I'm planning on fixing the cracks rather than getting a cover.
I know that it's a lot faster to clear the car out than put it back together, but I don't think it'll be that bad. Whenever we disconnected any wires, or took off any part, we labelled them. Any screws that were removed were zip-tied to the part they were supposed to hold on. I've found this to be a great way to keep track of hardware.
Progress has been made, enjoying the project so far. The goal is to have the body finished by August-September, I don't think that's over-ambitious.
Eric
-
I sprayed in some real rust penetrant down the bores first, I'll try tonight to see if it did anything. There might be hope for this old engine yet
-
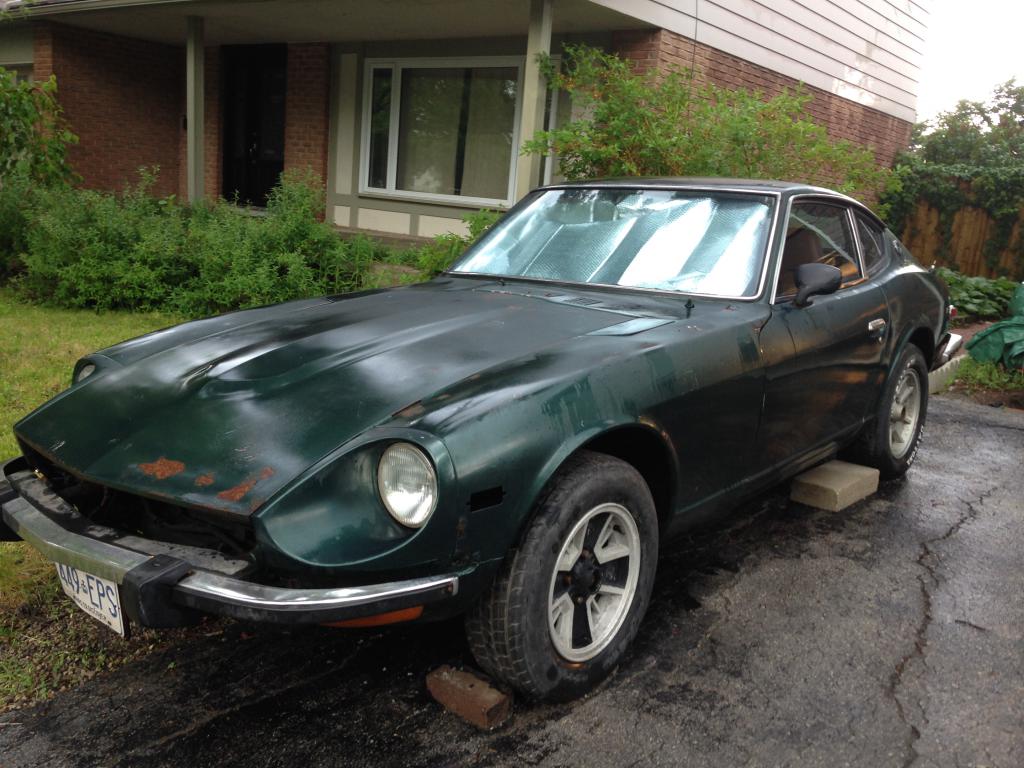
Hello all,
I've been lurking on the site for awhile, and finally decided to take the plunge and pick up an S30 Z-car from a fellow forum member over at OntarioZCar, along with my brother (Adrian Z). (If you're in ON, and not on that forum, I highly recommend it - great bunch of guys). This is going to be a dedicated build thread, I will try to make it picture-heavy, as those are always the best ones.
She's a 1974 260Z with 46k miles on the ODO. I thought it was mostly original, but on closer inspection in the shop it's had some work done on it (not good either, going to be a bit of a pain to fix). The front frame appears to have some damage and they fixed it poorly. The floorpans are shot, there's typical rust everywhere you'd expect from a 40 y/o car in Canada, but nothing that's not fixable with a bit of work. The bigger issue is that it was sitting neglected in a barn for the past 15 years, and the engine seems to be seized. Clutch is unresponsive as well, breaks nonexistent (work on moving first, then worry about stopping). The previous-previous owner jimmy-rigged the wiring, so that needs to be redone, and he took the stock carbs off in favour of a single-weber setup - not sure why.
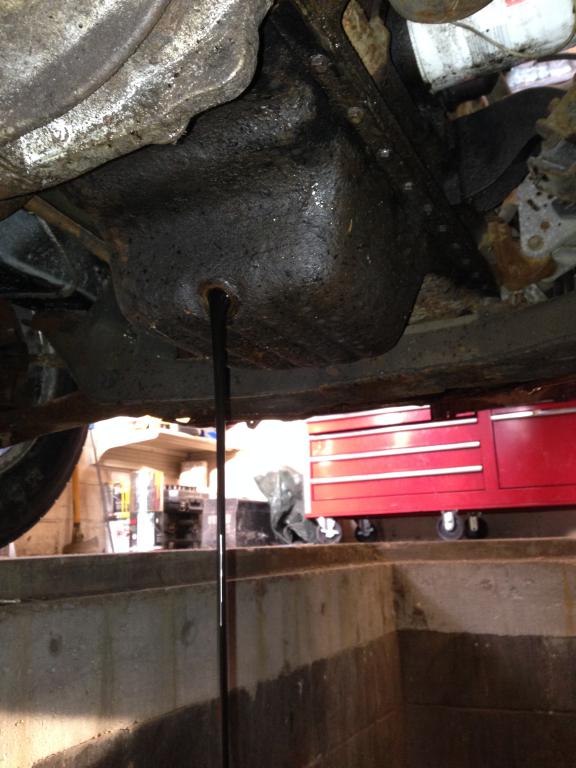
So far I've just been inspecting and figuring how deep of a hole I've dug for myself. I washed the car, drained the goopy old oil, and slapped a new oil filter on. Filled it with 10W-30, not sure if that's best, but some forum folks seem to think it works, so that's good enough for me. I'm pretty sure the rings are rusted to the bores, so I pulled the plugs and filled each cylinder up with WD40, leaving it overnight to try penetrate the rust, see if it feels like turning tomorrow...
Taking her home
Weird single-weber setup
Interior - Driver's seat shot, the rest is ok
Badly repaired front frame under the engine (not going to pass safety here...)
Rotted floor pan
First of many oil changes
Eric


New [for me] '74 260Z Project
in S30 Series - 240z, 260z, 280z
Posted
New update here:
It's been a few weeks, things have been busy, but some progress has been made. This past weekend we sand/media blasted the under-body and engine bay. Discovered a few rusty areas that more closely resemble a certain holey cheese than a car, but nothing that's not fixable with a bit of patience. We are using an industrial grade sandblaster, and are a bit afraid it will damage the body panels if we hit them too hard. The plan is to chemically strip the rest of the paint, then hit the rusty areas with a finer sandblaster - better safe than sorry.
We did try to strip the exterior paint with crushed walnut media, but it wasn't hard enough to eat through the primer, just the paint... so we scratched that idea.
Picked up some epoxy primer from a bodyshop buddy of mine, I was assured this is the best stuff. The writing on the side seems to verify that haha.
On a sidenote, I've got a few plans for the steering wheel. The stock one wasn't in the best condition, and I've always loved the look of wood steering wheels, so I think I'll attempt at a steering wheel build as well - I want it to be some blend of classic with a sporty vibe, I haven't seen anything out there quite how I would like it. Below is a first iteration CAD model, a 3 piece sandwich reusing the stock spokes and metal ring. Let me know what you think!
I'll throw a few pics up of the sandbalsted car later so you guys can see what kind of rust issues I get to deal with, I could use a little sympathy haha.
Eric