
northwoodz
-
Posts
57 -
Joined
-
Last visited
Content Type
Profiles
Forums
Blogs
Events
Gallery
Downloads
Store
Posts posted by northwoodz
-
-
My cheap EBay fuel pump has gone bad (surprise) and so I have not been driving the Z lately. I have an Airtex with a lifetime warranty picked out to get her back on the road. I have lost interest in the car again so may be going up for sale not sure.

-
Had a great time at autocross over the long weekend with the z! Went great had a blast .
-
Memorial weekend is going to be packed with local car events I thought I would miss but the Z is actually at a point where if I decide to not start any body work besides fitting the flares I could attend. Friday there is a local car meet and saturday there is an autocross event as well as street night at the local drag strip and autocross again sunday. I am really going to push to get this z back on the road so I can attend all of these I think it will be a blast.
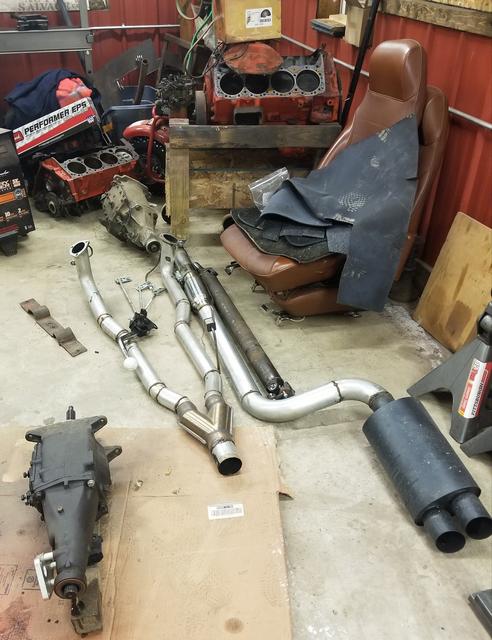
Forgot to post pic of exhaust reworked for new trans and trans mount
Vogtland Springs installed. Went smoothly old struts were in good shape.
Liking the stance a lot that these springs gave
-
Did you take the small bolt out of the middle? I believe it is there to keep the pin located. That mount certainly is interesting.
-
Another update. Tax return parts are rolling in!
Shifter relocated back and down and linkages modified.
New moog radius rod bushings vs. old onesNew sway bar links vs. old ones
Tires came in
Picked up a R200 from a buddy. Was supposed to be a LSD from a 300zxt but I immediately could tell it was from a 280zxt instead by the mount. Turned out to be a welded up open diff 3.54. Bummer but price was right and I guess the 280zxt cv's are a good future upgrade.
Driveshaft fit like a glove
Urethane mustache bushings in
Copper-nickel fuel lines run
Wheels!
Carpet kit also came in so will be installing that in the next few days and getting interior back together. Waiting on Vogtland springs and flares to arrive and will start repairs on rear quarters and body work
-
Unpacked the wheels last night, got tires mounted and test fit on the car. Interestingly once they were in the states were sent next day air to me. Very pleased with the overall quality of these. The castings and finish is very nice, the powder coat is tough too I had a couple whoops moments getting the tires on, not a scratch left behind. The only negative thing I can say so far is there is clear packing tape holding the lip protectors on in the box, if you don't take your time removing it will leave residue all over your new wheels.
It will be awhile before I can actually road test them though, I still have a ton of work to do to the car. Should be a good test subject for them being on a heavy 2+2 with some torque.
I will post plenty of pics in my build thread. Didn't want to clog up your post with my junk. Hope this helps in your decision. I would not hesitate to deal with this guy on EBay. We talked back and fourth for a few days before pulling the trigger. He is good to deal with.
-
The watanabe knockoffs. 15x10 and 15x9 -25. Going on a v8 street car.
-
I have a set of wheels that just arrived at the house from that same EBay seller, will let you know if they fall apart and attempt murder on me. They showed up really fast all the way from Malaysia.
-
I would for sure grab the hazard switch from the console and plug it back in the car. All the lights usually work in my 280 but the second I removed the console and that switch all kinds of weird stuff happened. Turn signals in many vehicles will partially ground through the running lights and cause weird things to happen when they loose part of the circuit. Not saying its your problem but it only takes a second and won't cost you anything. Just trying to help.
-
Definitely check the 4 big fusible links by the battery. One of those feeds the lighting for the car and those have messed me up so many times. They often have a loose connection at the blade terminal or the wire snaps off.
Also make sure you didn't remove your center console for whatever reason. I chased having no turn signals all day once to figure out it was because the hazard switch in the console wasn't connected.
Is your multi-function switch working for any other functions (wipers?) maybe it got disturbed when replacing the blinker relay.
-
Sorry for the bad luck! But welcome to the forums. I'm sure there is more than a few people with the parts you are looking for. Cool Z you picked up there. Hopefully back on 4 wheels soon!
-
Well,
Sorry to disappoint Nick and any others, the ETA on the Japan Racing wheels were 6-9 months so I scrapped the order and went with similar wheels off Evil Bay from that seller in Malaysia. These are very similar in price and fitment with a nice gloss gun metal color that should be unique. Hopefully they are OK, they don't seem as nice as the JR wheels but I bought what was available.
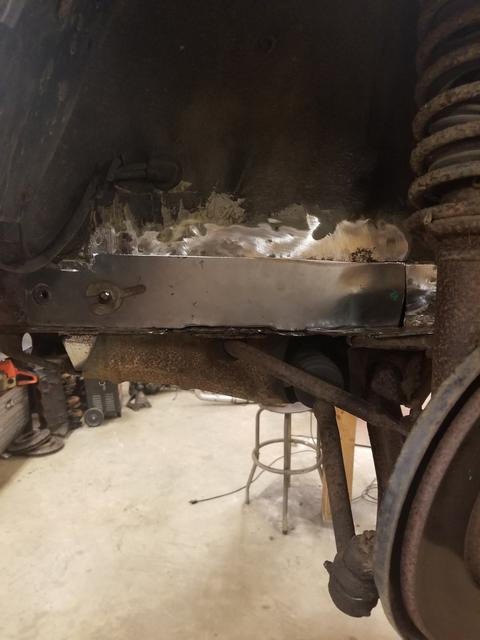
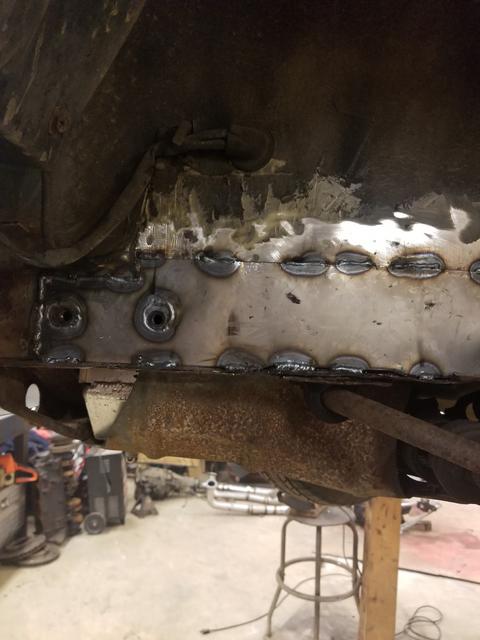
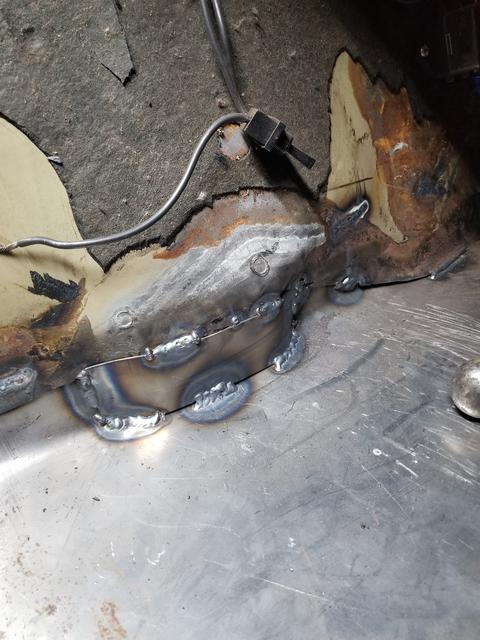
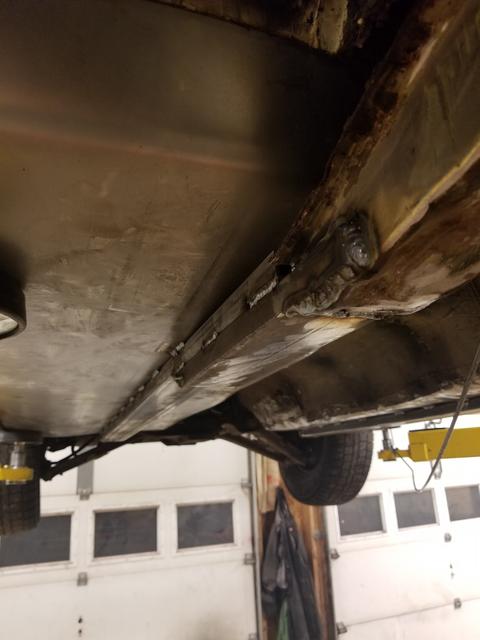
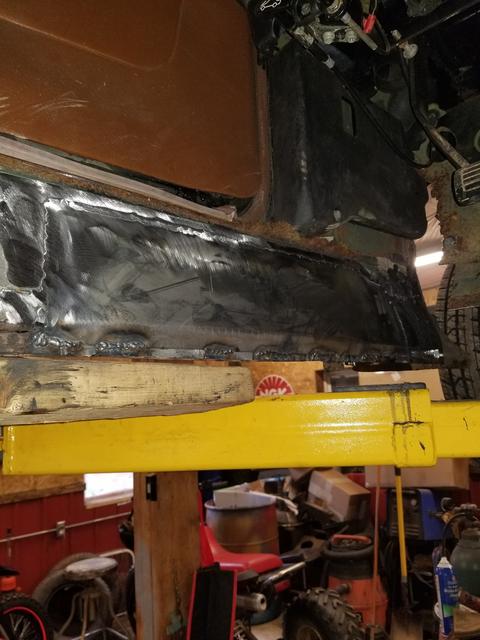
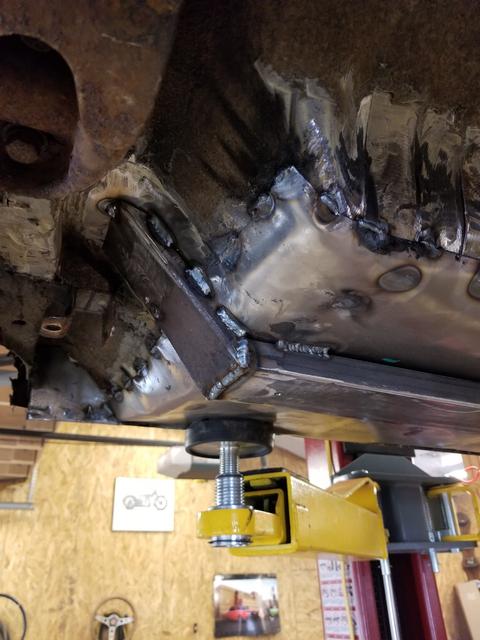
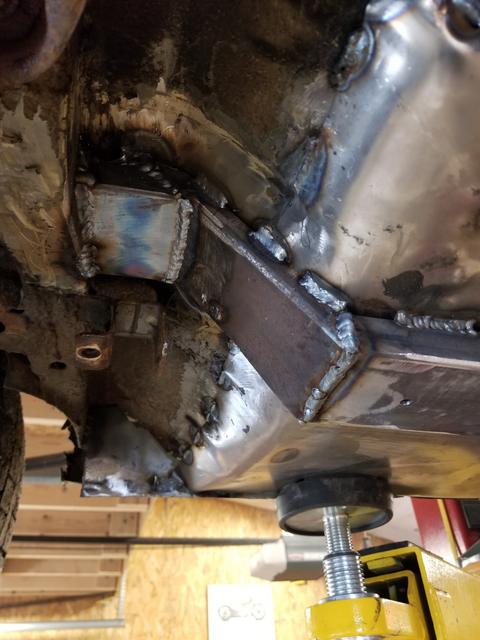
More metal work,
Outside fish plate/wheel well patch with plug weld holes. I was impressed with myself on how this picasso came out. Getting the groove right for the existing pinch weld up the middle is a challenge.
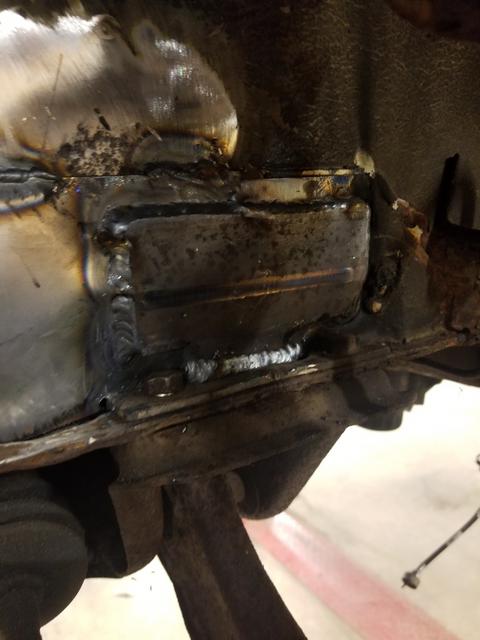
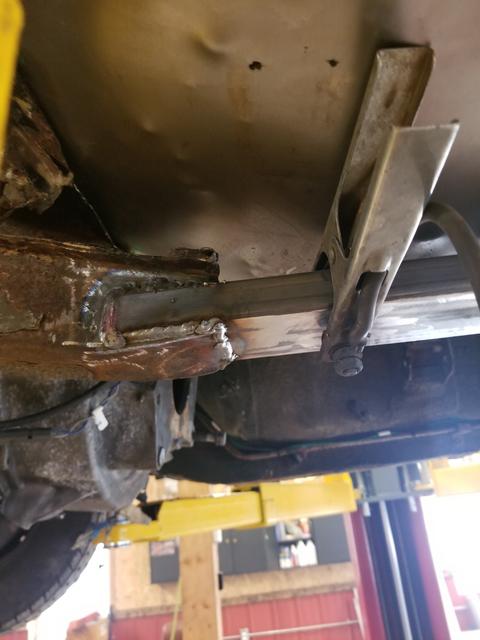
lower fish plateTransmission mount version 2. Much beefier. Used part of original Z mount.
Sanded all the metal work with 80 grit d-a before primer
Zinc self-etching primer and then SEM seam sealer
Satin black chassis & equipment enamel
Made a pass at the trans with the wire wheel. Working on relocating shifter rearward and extending linkages before installing this unit. -
11 hours ago, nicksoccer22 said:
I've been looking into the Japan racing wheels as well, are you going with the 8 spoke style? When they come in I'd appreciate it if you commented on the quality of the finish and your initial impressions.
They have two bolt patterns cut into them, I don't want to derail your thread, but have you or anybody in the community heard of that making the wheels less durable?
Thanks, Nick
Hey Nick,
Feel free to post all you want in this thread. Otherwise I feel like i'm talking to an empty room.
The Japan Racing wheels appear very high quality in the pictures, are moderately priced and carried by some high end dealers so I expect the quality to be pretty good. So far performancealloys.com has been great to deal with. Real car people. They carry all the top brands as well and seem to like the JR line.
The JR19 are the 8 spoke ones like a traditional wantanabe, yes.
It is pretty common for a lot of aftermarket wheels and even aftermarket brake rotors to have dual bolt patterns. Even high end brands like ssr, bbs and wilwood. So I wouldnt worry about that at all.
-
I was notified today that the wheels I ordered for the front are on factory backorder
I have a long ways to go before that regardless but hopefully they'll be in soon.
New sway bar links and strut rod bushings from rock auto showed up. Still need to install mustache bushings too
Balanced driveshaft from fastshafts. No more shaking like a mexican spaceship
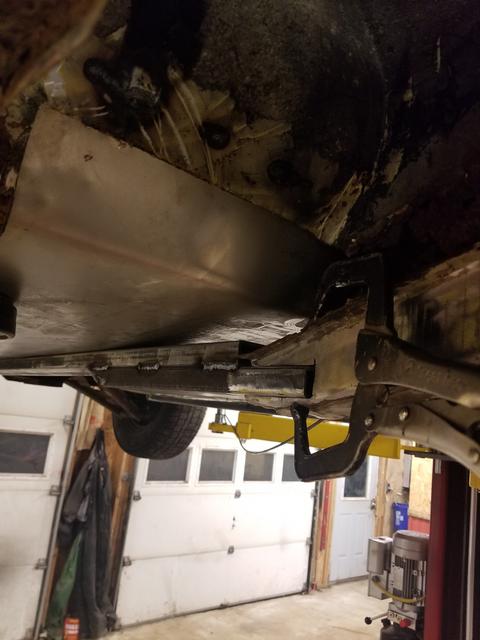
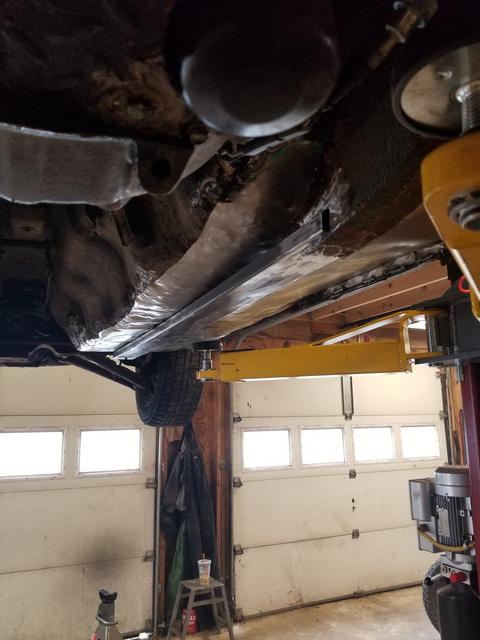
Got the passenger sub-frame connection done last night
Passenger support done
Inside filler / fish plate
List of things left to do:
-outside fish plate & wheel well patch
-design & fab new trans brace w/ clearence for exhaust & hard lines
-sand, wash, self-etch, seam seal, paint new metal work
-run fuel, brake lines, fuel pump wires
-replace bushings
-install np440 trans
-install and modify shifter
-install driveshaft
-reinstall exhaust
-drop springs & struts
-fix rear quarters
-cut fenders, mock up zg flares.
-body work, paint
-lsd
-interior revamp. Seats, carpet, gauges, sound, dash repair. recolor?
-roll bar
-5.3 or 6.0L NA buildup & swap
-
rockauto.com I just bought stock style bushings from them cheap. They are just regular rubber replacements.
-
Ordered wheels today!
Japan Racing wheels shipping from Ireland. 15x10.5 -32 rear and 15x9 -13 fronts. For tires I went with vitour 265/50 rears and 215/60 fronts. More staggered than I wanted for tire sizes but there wasn't anything in between with the correct 25" diameter. Got good deals on all of it really excited to see it come in. -
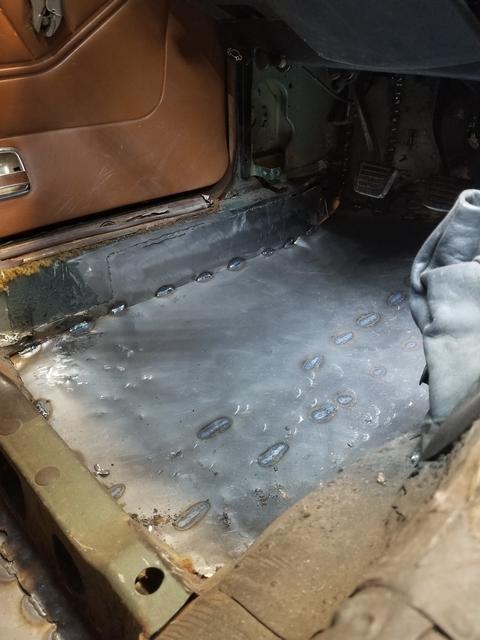
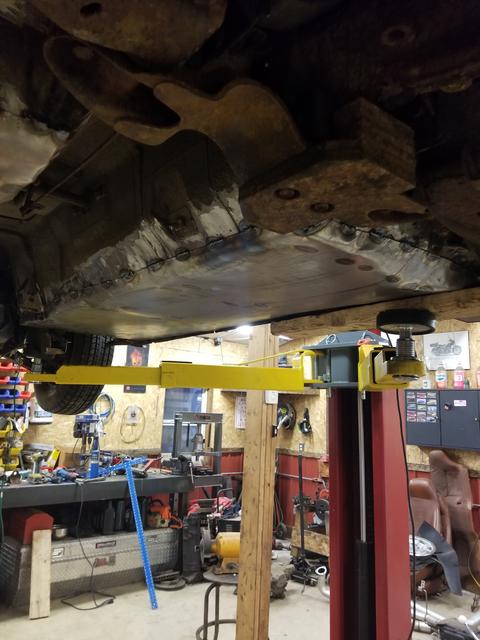
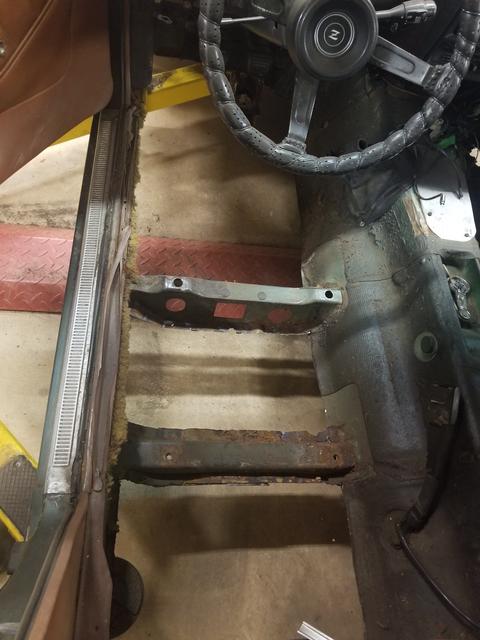
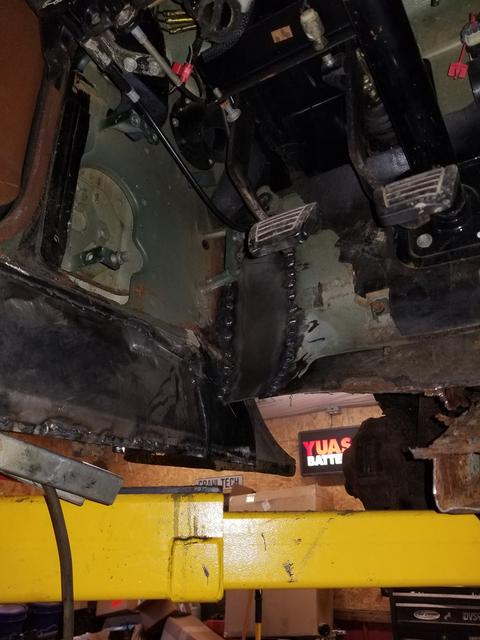
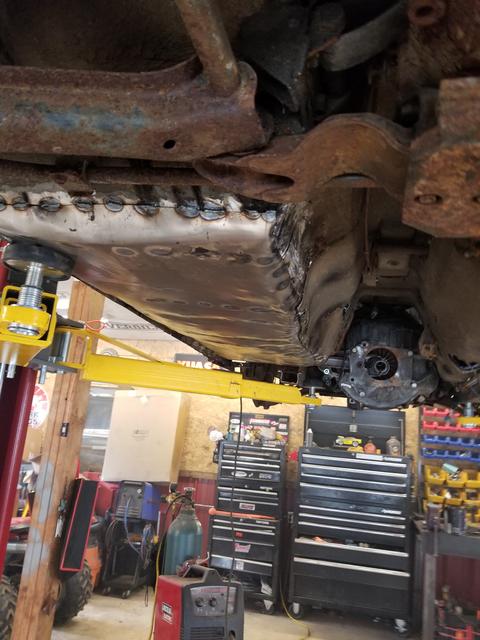
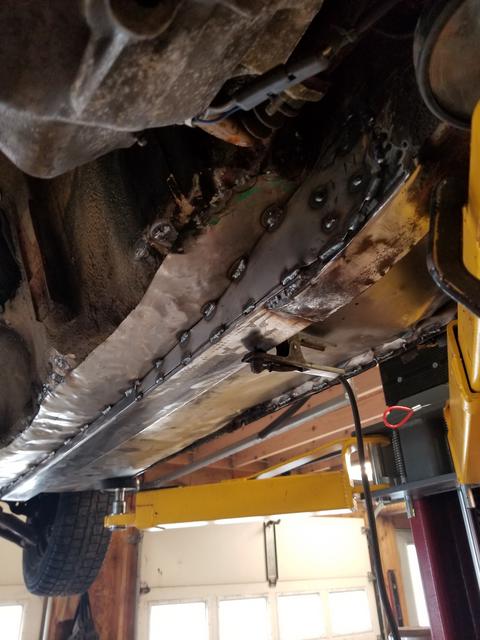
More progress on the underneath of the car. I was in Mass for the weekend so didn't get much done but had a couple hours to work on it again last night. The passenger side of the car went much quicker and with a better result because I decided to install the new metal from the bottom side and I was practiced up from doing the drivers side.
On the 2+2 model the passenger floor support is twice as tall as the drivers and extends the full length of the car. I found I had to put an offset in the support in order to get it run level in the car and be able to tie it in to the front structure without running into the pinch weld section.
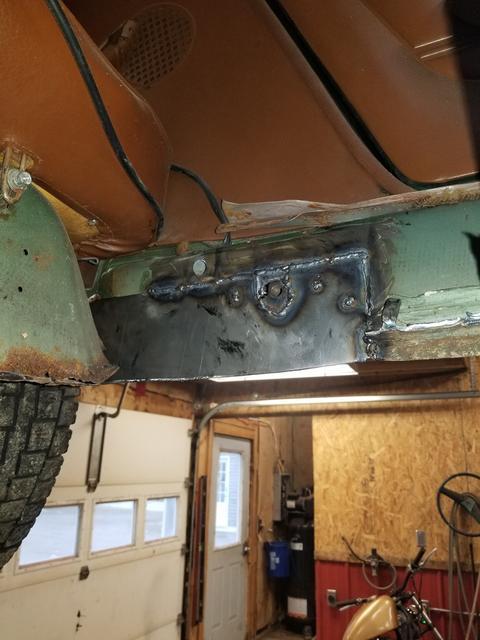
Section under tow hook on front drivers side
1/8" support above front cross member
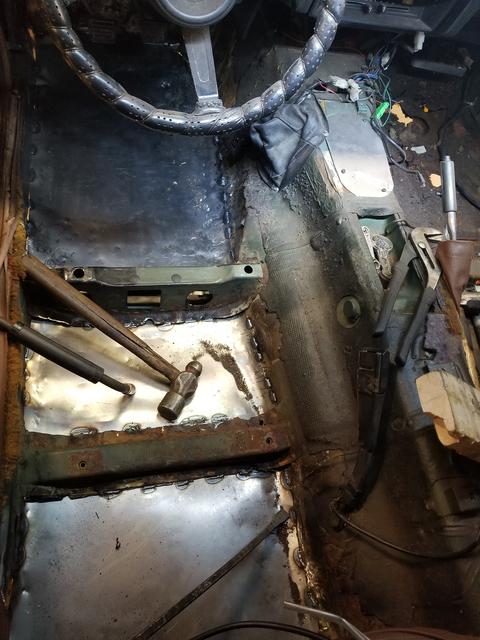
Another view of completed drivers floor and inner rocker
Pass side cut out
A little heat helped form the heavy 18ga to trans tunnel
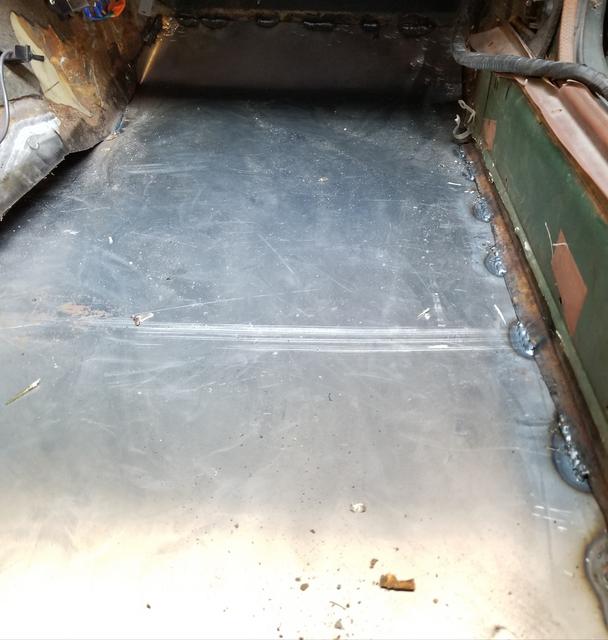
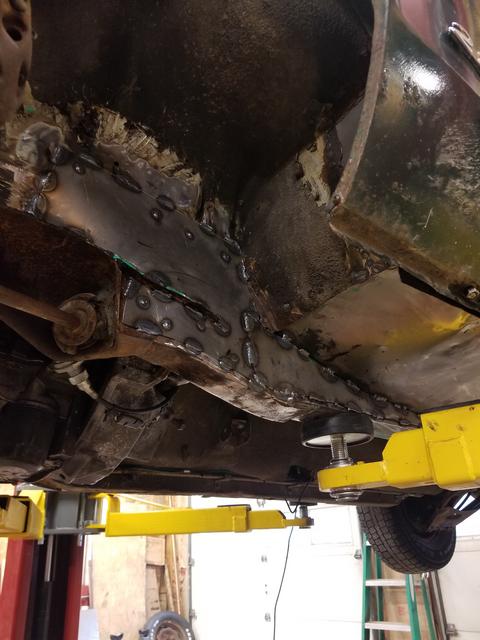
Partially installed pass floor section and toe board
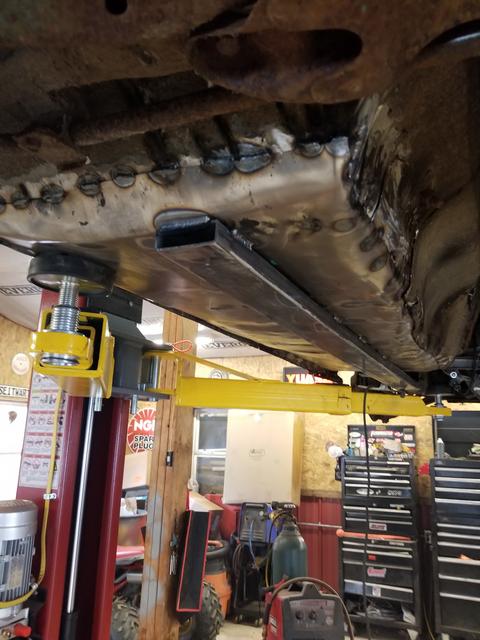
I struggled to work around the bump where the old trans mount is. Ended up using a filler piece.
This side ended up much flatter with less hammer dents
Offset support piece set into the notch and held up with a self tapper in rear for welding
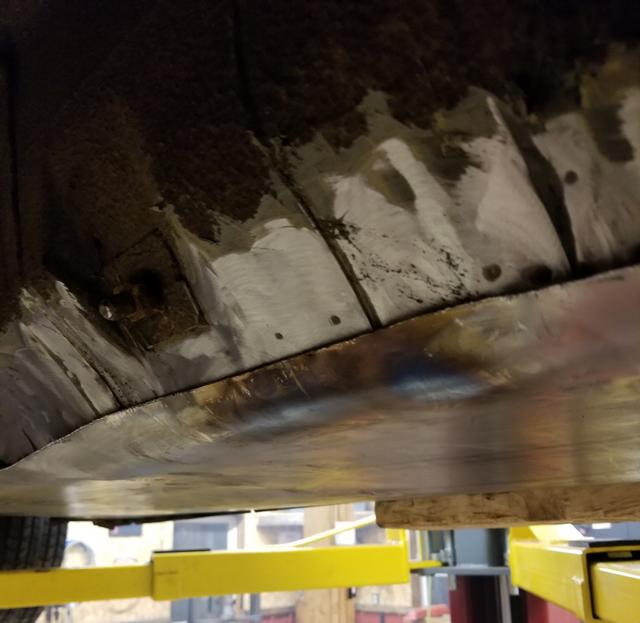
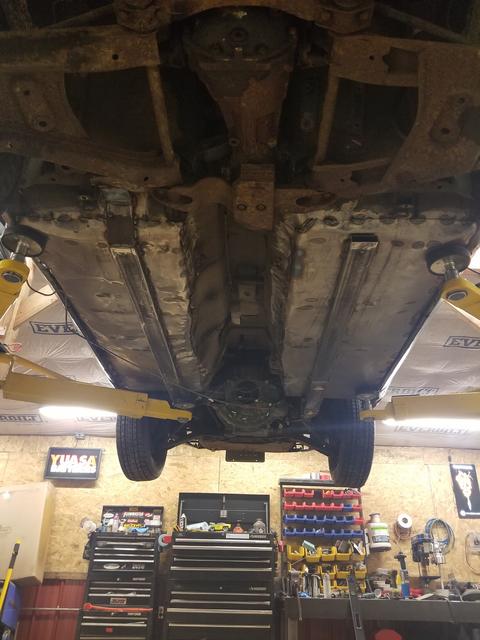
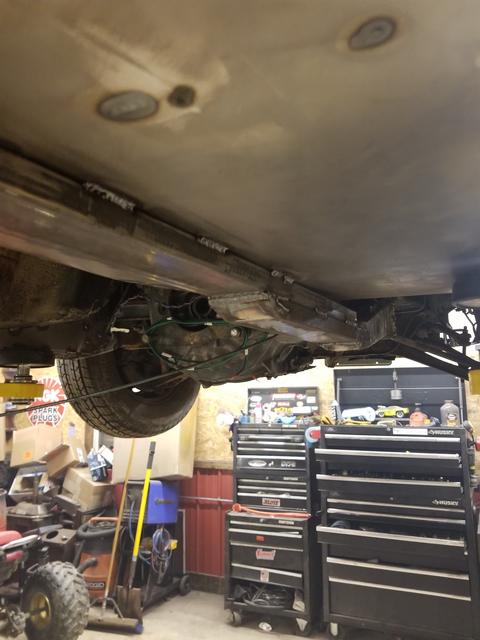
View of the bottom of the car where I finished off last night
Welded in
-
Has anybody viewed the new show on Motor Trend 'JDM Legends'? it premiered April 17th.
I'm sure some of us are familiar with the company but I did a search and didn't see any mention of this new show yet. I watched about 20 minutes of the first episode and I think its a pretty good car show without all the tv drama. They begin the episode with a 240z restoration and feature an ae86.
That is where i stopped watching but I will be sure to keep up with the show. You have to subscribe to MTOD to watch the newest episode but the first one is available right now check it out
https://www.motortrendondemand.com/detail/jdm-legends-new-series-sneak-peek/0_rytdjgds/
(I have no association with either company)
-
41 minutes ago, Whitley_280z_2+2 said:
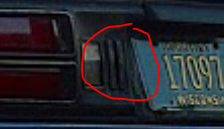
Sorry, the one in the junk yard is not a 2+2. I didn't know that the tail lights were 2+2 specific.
Oh, just going by the shape of the rear quarter glass in the picture it sure looks like one, sorry. And the 2+2 have two little raised stripes between the backup light and the license plate in the rear taillight surround. I accidentally broke mine towing it into the garage with my jeep. I'm thinking I can repair it with fiberglass though. Thanks.
-
Great progress. My 78' 2+2 has suffered similar rust and I am in the process of patching it back up too. Would it be possible for me to PM you on a part I need from that 2+2 in the junk yard you posted? I need the rear left tail light surround I broke mine. They are 2+2 specific and I can't find one anywhere. Thanks.
-
I think bigger is better until a certain point where it is adequately large enough and won't make a difference. A bigger filter might perform longer before needing cleaned/replaced?
The guys on Engine Masters tested all kinds of air filters and what they found in a different scenario (domestic v8 with a carb) is that the turbulence in the filter has more effect on performance than anything. They found that a funnel or bowl shaped (velocity stack type) shape really helped performance. It is an interesting watch: https://www.youtube.com/watch?v=EkpsydS8JXI
-
Awesome car. I love the bare metal. Lot in common with my project, except you've used quality parts. It's a shame you're selling it. I recently tried to sell my Z, after 2 test drives with interested buyers I backed out, couldn't let it go. Glad you posted it anyways so we could check it out!
-
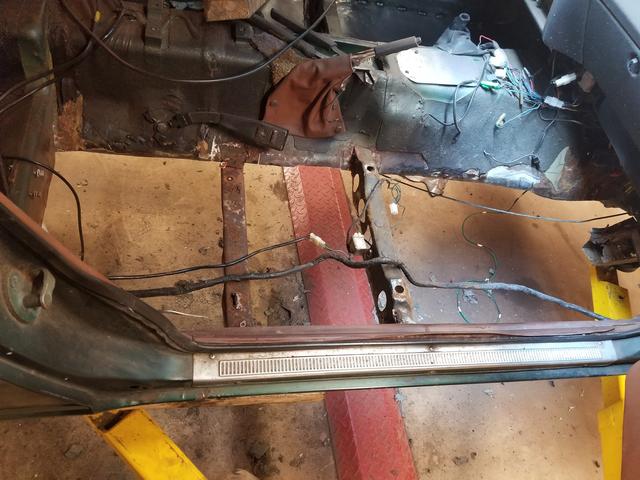
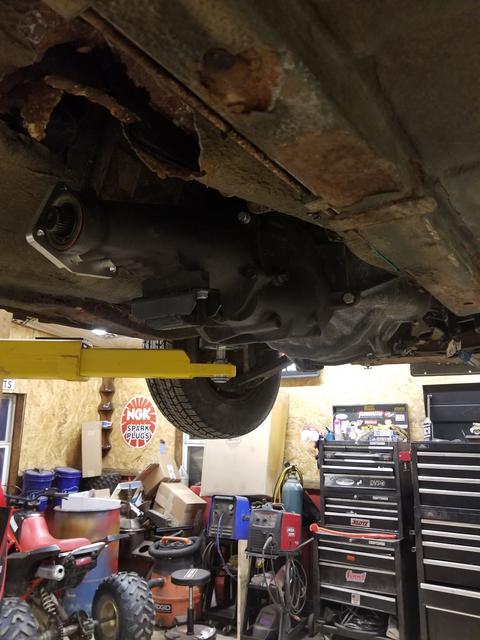
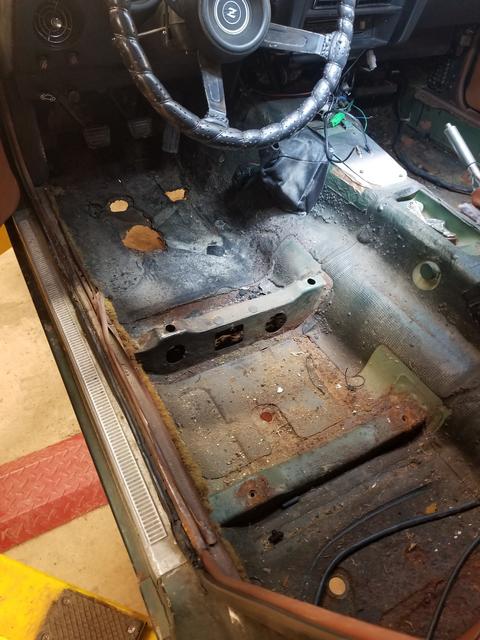
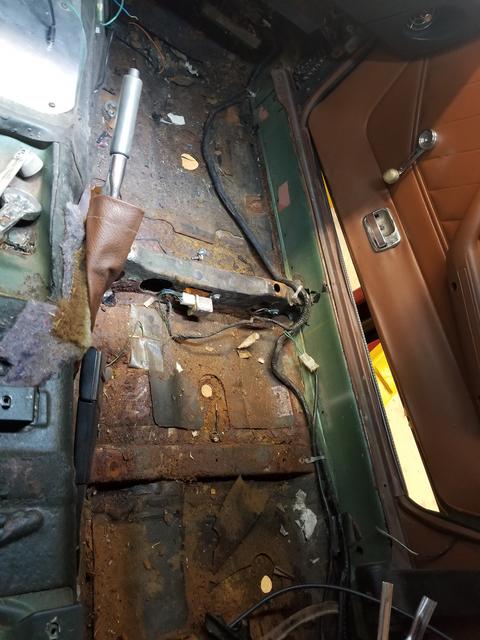
I have started work again on my rust belt Z. I started by removing the seats, carpet, exhaust, driveshaft, shifter, and trans. Also the rear sway bar and ecu in order to gain access to the floors. Once the rust work is done I will be swapping the trans, replacing the driveshaft with a balanced one, and integrating a new trans mount as well.
I am rebuilding the bottom of the car with 18 gauge sheet and 1x3" rectangle tube. I worked around the seat brackets and cut everything else away. The car's inner rocker panels also needed extensive repair. I coated the back side of all the panels in any cavity I could reach as I went along with generous amounts of equipment paint which seems to hold up well over time on my other projects.
Overall I am happy with how it is turning out. I just need to do the other side now
-
20 hours ago, Whitley_280z_2+2 said:
Thanks for the info and great build!
No problem, though with the quality of work in this forum I am pretty embarrassed of any of my own work, I'm a hack. I've experienced a few broken motor mounts over the years in different cars, it isn't that scary. Unless you have linkage throttle
Going 4.8 was all about the manual trans configuration and price. I will upgrade to a modified l33 or 6.0L at some point soon hopefully.


480Z - cheap 2+2 build
in Gen III & IV Chevy V8Z Tech Board
Posted
Thanks, and I know it only started out inexpensive! (maybe I should update the title?), the recent work added up but was well worth it. I do plan to increase the handling before my next auto-x event and I also plan on doing more to the aesthetics to the car like bodywork, fresh paint, a front air dam and rear wing. I also want to upgrade the instrumentation and possibly cam the engine or upgrade to more displacement. We'll see how things go.
I appreciate the comment!