
280Z-LS3
-
Posts
208 -
Joined
-
Last visited
-
Days Won
2
Content Type
Profiles
Forums
Blogs
Events
Gallery
Downloads
Store
Posts posted by 280Z-LS3
-
-
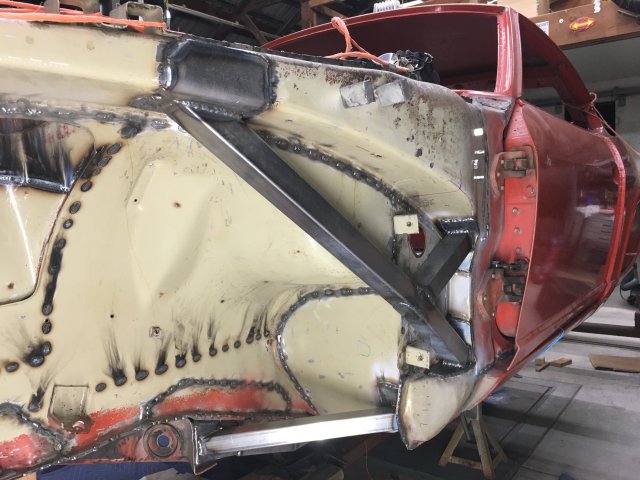
Finished up the passenger side upper frame horn and T/C bucket support tubes.

-
Sure, it's josephsulse@instagram.com
I don't post much but really going to make an effort to be more involved. Heck, going to post something right now!
-
That is very encouraging although a change from what I was told by AiM USA rep. a few months ago. Holley may have changed stance on release of Terminator Canbus... Will check again on my end
-
Holley Terminator ECUs come with "startup" tunes but doubt they offer complete tunes. Further tuning after startup can be done via lap top while driving. However, the best possible tune would be achieved on a dyno I believe. The tuning software is free to download if interested in viewing functionality. I watched a few "How To" videos of the Holley tuning software and was sold on it's abilities.
RacePak (owned by Holley?) has PDMs but have heard they are not as feature rich and don't carry as many amps as other brands including the new Aim.
-
Availability for the AiM PDM is still unknown for USA market. Word is it should be out this month but have not checked to to see if this release date still valid.
One issue that's putting me off is Holley will not release Terminator X Max CanBus software to AiM so the PDM screen is not compatible. I want to run the Terminator X Max on my LS3 swap. AiM has the Holley Dominator ECU CanBus but that means spending $1-2K more than the Terminator kit. Since I am going N/A that means spending more for the Dominator's rich functionality, which I will never use, just so I can run the PDM.
-
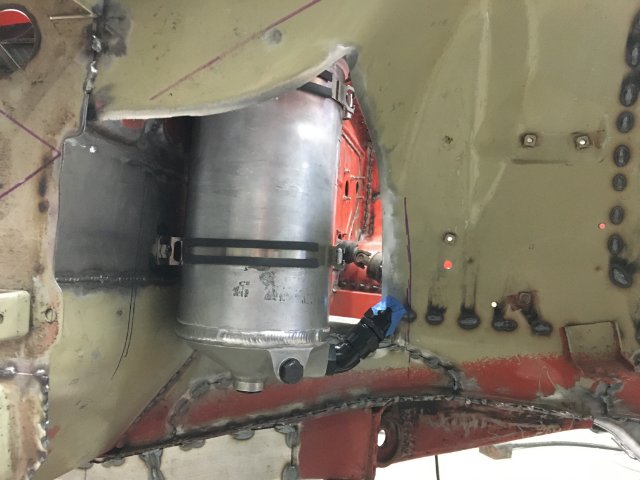
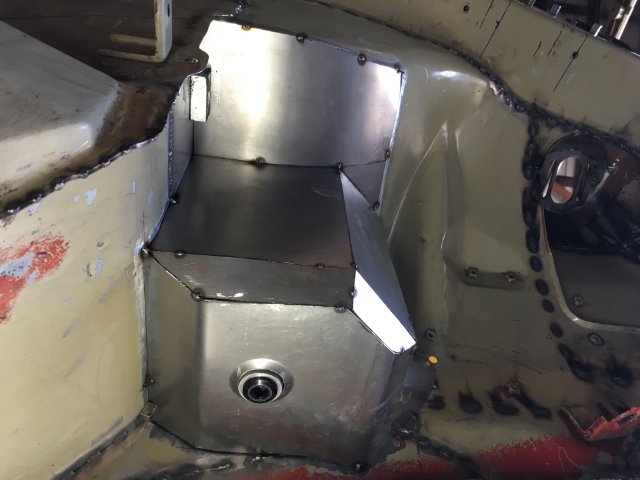
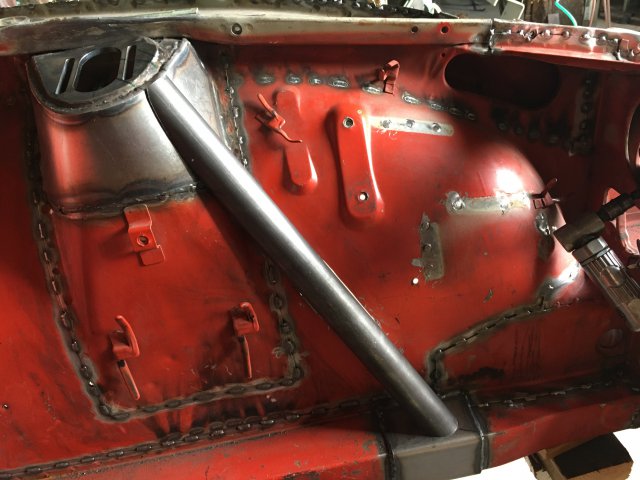
Bouncing around on different aspects of the build as usual. Completed mounting the dry sump oil tank so I can weld in the outer upper frame horn support tubes (did not want to work around these when making tank box).
This a 7"x20" 2 gallon tank. A 2 gallon tank is the recommended minimum volume so was determined to make it fit and the only possible logical place is OEM battery location. The challenge was it's 20" height. Hood clearance necessitates the return line at bottom of the tank to sit below the frame rail. Luckily, the bottom of the tank is pretty darn close to level with the return fitting on the oil pan. I minimized the amount of height the return hose would gain coming out of the tank bottom over the frame rail so to reduce the possibility of "toilet bowl/air trap" effect. With this design the return line should only gain about 3" before sloping back down to the oil pan. Between the oil level being higher in tank and scavenge strength of the stock oil pump I should be fine with the slight rise/bump in oil return line. In a perfect world the tank bottom and return hose would all sit higher than the return fitting on the oil pan...
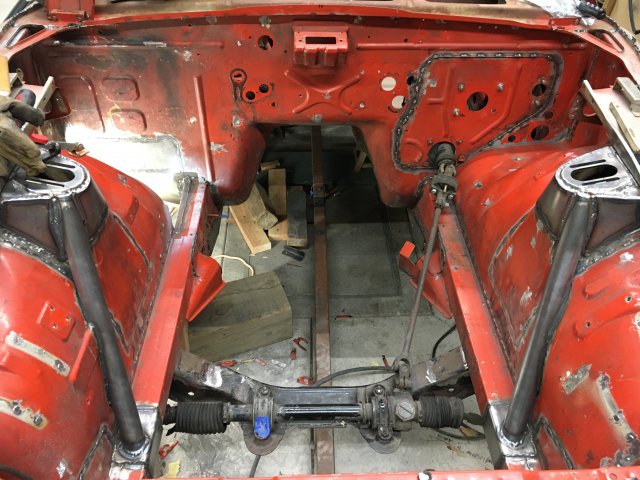
My initial plan was to mount the tank against the outer wheel well wall but that location would interfere with the strut tower to roll cage support tube so moved it over to the frame rail.
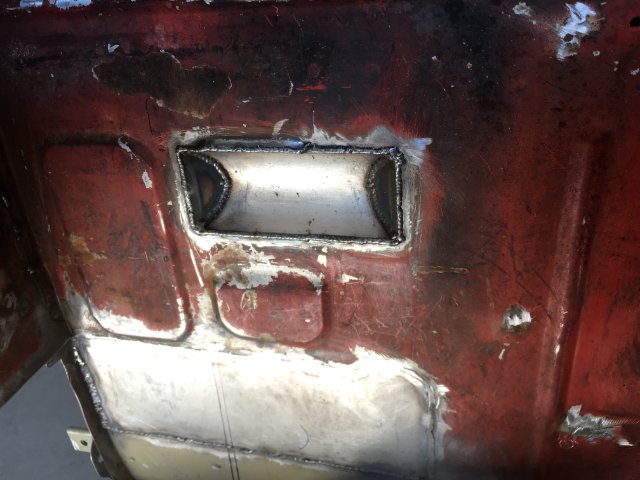
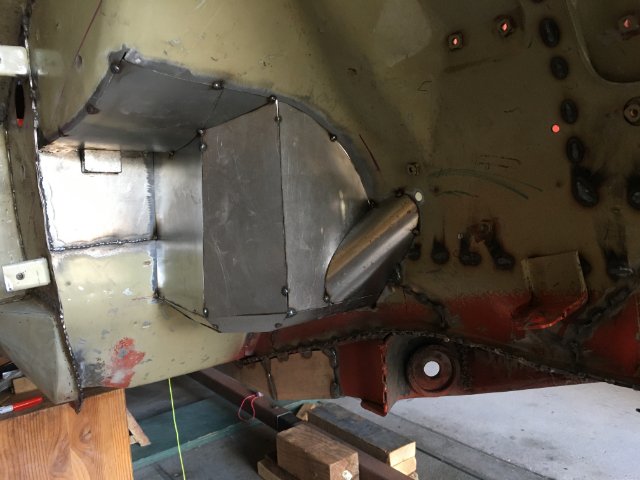
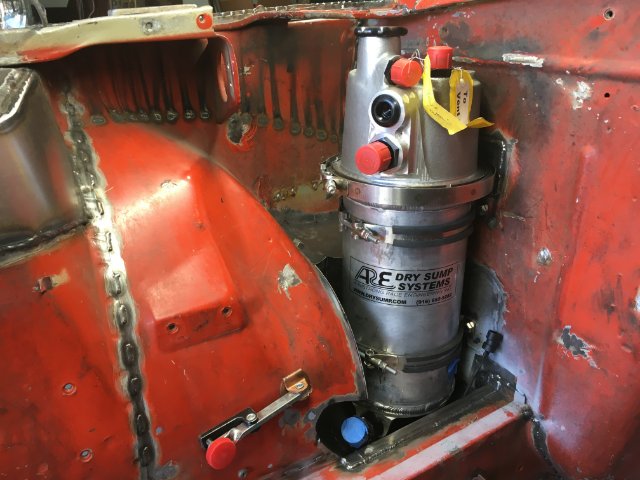
I fabbed up a small recess in the firewall to get the tank as far back l as possible for tire clearance. The compression strap that connects the tank top is a larger diameter than the center section.
The nice tank strap mount that ARE sells have plates that bolt to mount hoops. Ditched those plates too to gain 3/8" more tire clearance. Weld nuts to fender washers and then welded those to cabin side of firewall. Here is tank in final position. Note the ORB 45 degree -12AN fitting. Ordered that from AutoPlumb as they are a distributor Australian company called AeroFlow. Surprised no US vendor makes this fitting, at least that I am aware of, and I searched... Sure, BMRS and others have crimp versions but I don't have a $4000 crimp machine...
Started with fitting the bottom so I could use a dimple die to flare drain hole then moved onto angling the corners, building walls and return line area.
With tank installed.
Thanks for following my progress!
-
Nice work on the motor mounts. Interested to see your Trans mount design to compare with my prototype.
I too decided to make my own mounts because all the companies that offer LS swap mounts place the engine quiet far forward. Mine are puck style and till messing around with design. Currently they come off frame rails but may rethink design to come off cross member. When the DIY stainless steel header kit I ordered arrives will help answer any remaining questions on engine placement.
-
Sorry, I skimmed over the part where you wrote 2" needed.
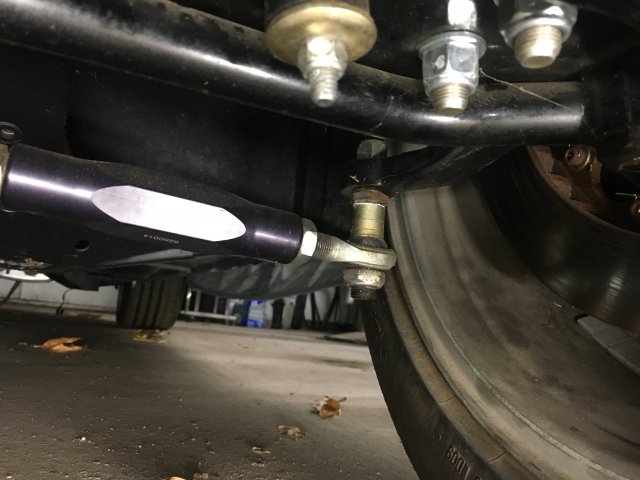
Maybe a combination of something like Arizona Z Car Bump steering spacer can work or possibly using it in conjunction with Baer type spacer at rod end can work to get you 2".
-
I have Baer bump steer kit on my 68 Mustang. When I purchased the kit from Street or Track the owner Shawn told me don't bother testing amount of shims just use them all. The total height of all shims is about 1". Don't know the amount of shim you need or if this info helps but plenty of people have been using the Baer bump steering kit over the years of various racing and street cars so it has proven the test of time.
-
Feel you on the re-engineering of parts. Thought I had the engine placed right where "it should be" and now not so sure. A few specialty fittings for the oil pan return line will and a few more thoughts on allowing space for headers should get the issue sorted.
As for priming oil systems on LS motors I've seen some videos of guys employing SBC oil pumps and oil 5 gal buckets. Basically, pressurizing the system by methods other than using starter to turn motor/oil pump.
Excited to see your build move under it's own power!
-
DonH, what did you use for radiator mount? Seems there are a few ways to mount universal radiators...
-
While attempting to fit the Cobra Suzuka seat I took note how far back the seat rails were located. The Ultra Shield seat is placed a fair distance more forward. I decided to add some stub frame rails to the rear of the cross seat frame rails for added seat adjustment in case I ever want to change to a composite seat like the yet to be released Bride. The stub rails also gives 4 more bolts to hold seat.
Really want to get the sump tank enclosure fab'd engine mounts and trans mount welded up but waiting on some AeroFlow Full Flow ORB to male AN fittings to dial in placement. These particular fittings made in Australia and could find only 1 vendor here in the States who offers them in 45 degrees and of course they are not in stock. While waiting for DHL to do their magic keeping busy with stuff...
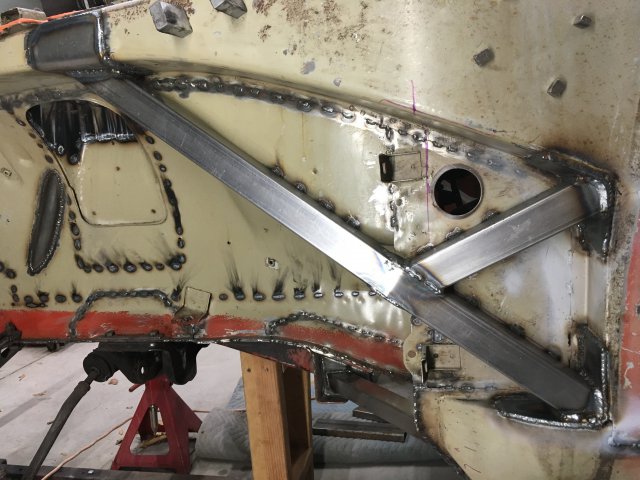
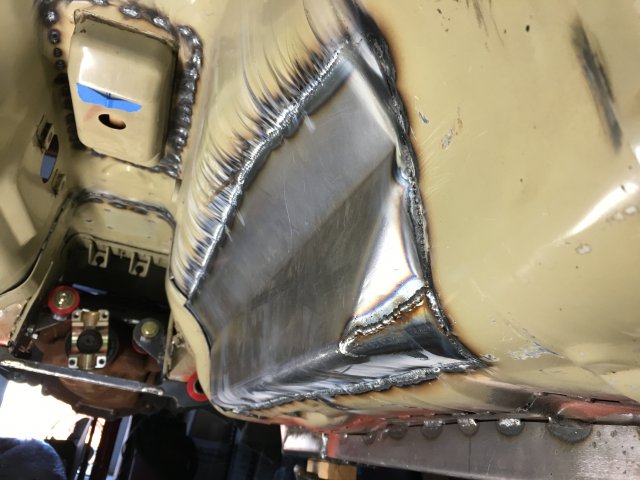
Welded in the driver's side upper frame horn and TC to rocker supports.
Made up and welded in some 20 gauge delete plates for the front and rear side running lights.
-
Thanks BoonZ!
Would the PMI test indicated the use of a filler rod other than ER70S-2 or ER70S-6 rod? Put another way, will the S-2 or S-6 rod be sufficient for welding the brackets with the alloy you detected?
-
Humm, I plan on using the new AiM PDM32 and 10" screen. It's slated to be released in Feb 2021. Not sure if the 280Z OEM motor is ground signal reliant for operation or if the AiM can handle ground signal but assuming it won't. The Jeep wiper motor, or similar, maybe a good way to go for me as well.
-
What's the advantage of going with a Jeep wiper motor and what car was it sourced?
Looking forward to the reports of getting your car fired up and suspension sorted!
-
Installed the front sway bar support tubes. They are made from 1.5" 0.065" wall DOM and come off the frame rail at 30 degree up to the top of strut tower at approximately 40 degree off perpendicular line pulled between strut tower centers.
-
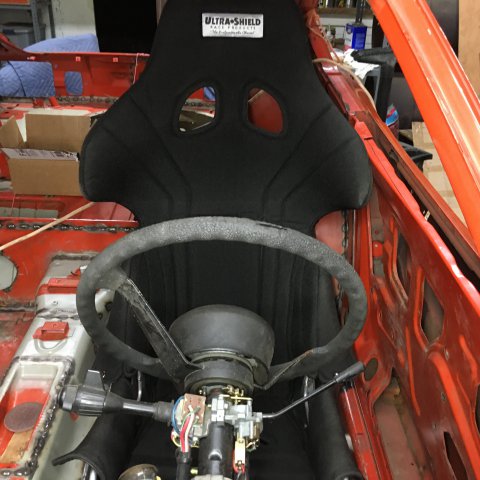
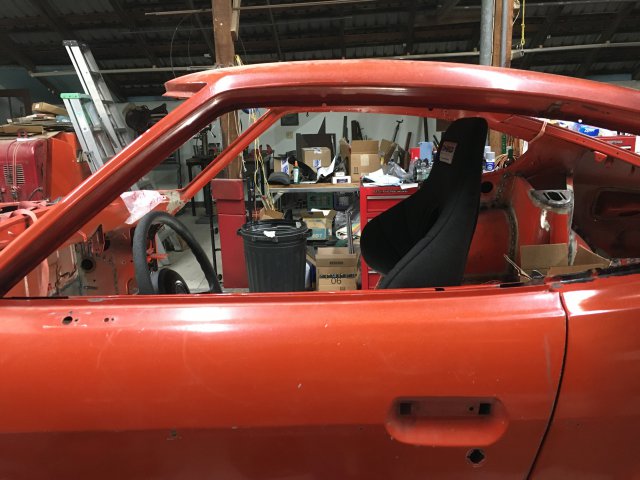
I purchased a Ultra Shield Pro Road Race 14" 20 degree aluminum seat to replace the Cobra Suzuka. It's not as comfy as the Suzuka "out of the box" so will either buy some high quality foam or a Creafoam Bead Insert kit to customize the fit. With the seat centered on the steering wheel the shoulder bolster just kisses the door.
Getting the seat in desired position took a bit of time and not sure if I made this overly complicated. This is how I installed the seat.
First, I mounted the nice Cobra aluminum seat mounts to the Ultra Shield seat. I could not return the mounts due to all the scratches and figured I'd use them, what the hell, right? Placed some scrap square tubing on the floor to get a good approximation the height I liked. Shot for a bit on the low side to compensate for the custom seat foam kit. There is also height adjustability in the Cobra mounts. This is my first seat install complete from scratch so did a little research as to common race seat fitment. What I came up with is fore/aft should allow pedals to be depressed completely with some bend remaining in legs with wrists able to sit on top of wheel arms extended, top of steering wheel level with tip of nose for height and rear tilt is preference but more upright is encouraged, between 10-25 degrees.
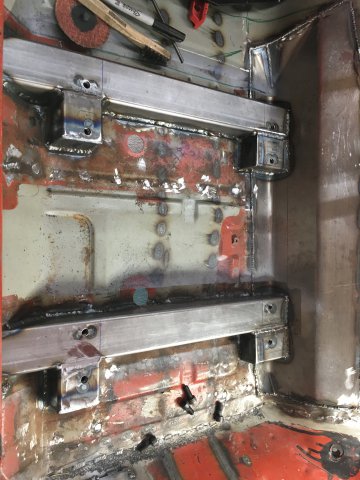
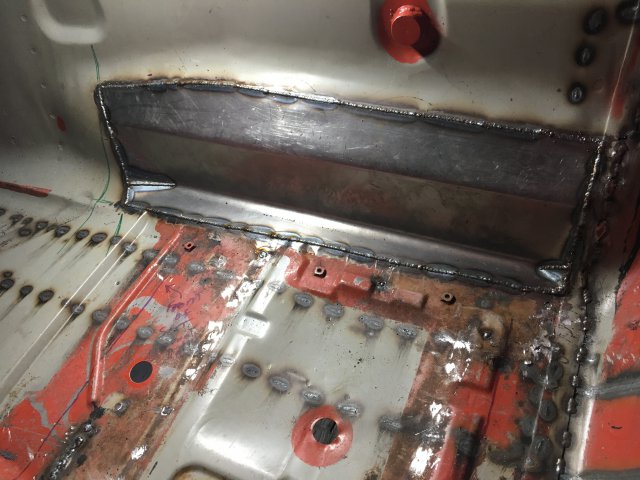
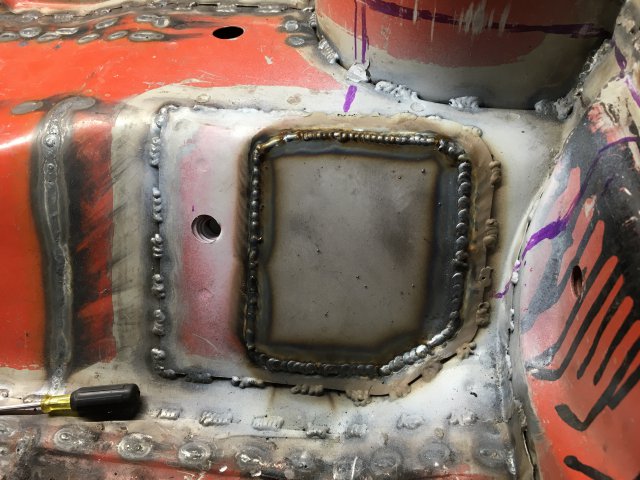
After getting the approximate location of the seat time to patch the huge ass hole I cut in the trans tunnel for seat clearance. Formed up a patch panel from 20 gauge.
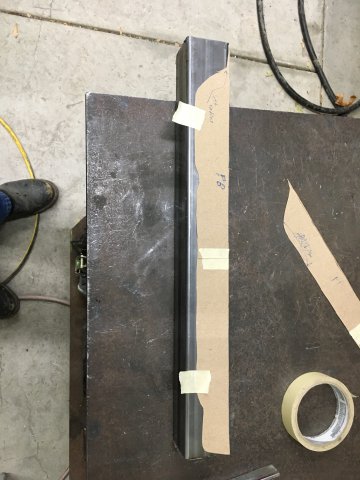
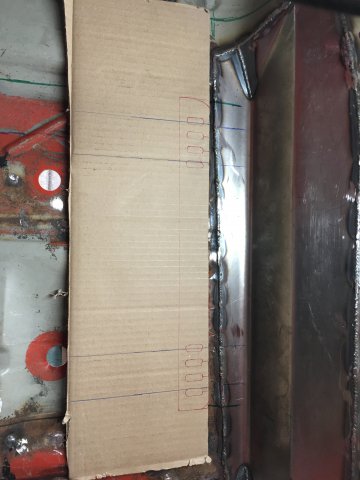
Drew a level line on the trans tunnel the height of the seat frame mount and carried it over to the rocker with mason line. Then cut out cardboard template of irregular floor to transfer to 2"x2" .095 wall tubing.
I transferred the base of the Cobra mounts to cardboard to approximate the location of seat frame rails.
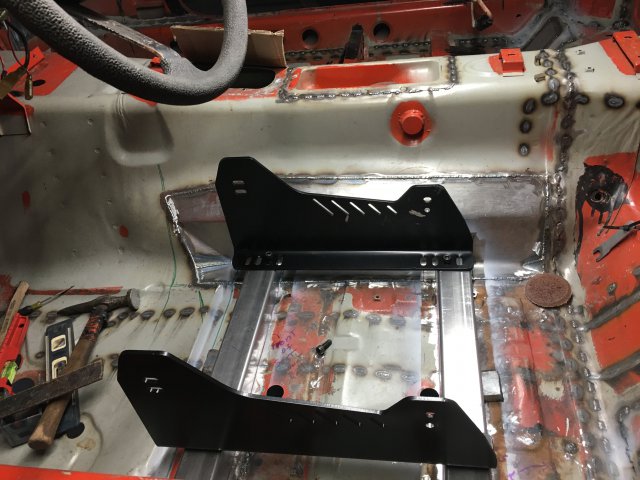
Cut out the seat frame shapes and welded nuts.
I choose to give myself one adjustment forward (3/4") and two rearward (1.5" total). Here a few pic of seat installed. Aluminum seats require a back brace which I will incorporate into the roll cage.
Thanks for looking and Happy New Year!
-
I have encountered this as well a few times most notably when I attempted to purchase some JBA headers for my Mustang. The JBA is based in SoCal and sells in CA. Summit would not sell to me and the headers are even CARB compliant! I think it boils down to the fact that it's not worth Summit to jump through the legal hassle hoops to sell in the CA market. They are big enough to be on CA Gov radar so they choose to just give up on the market for certain items.
-
Oh, did you use the Setreb HP recommendation to size your cooler? I am looking at the 25 row unit spec'd for 325-425 hp. Ultimately plan on making more in the area of 500-600 hp and the cooler in that range is huge at 40-60 rows! I believe the recommendations are for WOT for hours at a time so thinking a smaller cooler will better fit my application.
-
It must be that the steel braid supports the hose wall helping to keep it from deforming.
I spoke with Joel at ormebrothers.com about hose. He said there are only three companies in the USA that make quality hose which most companies rebrand as their own. The non convoluted pfte he sells is really rigid and not recommended. He steered me to BMRS, can't go wrong there right? But I don't want the hassle of sending off lines to be crimped.
Bonus, the Ultra Pro product line is on sale till end of year so need to get an order in soon.
Merry Christmas!
-
Good to know you like Earl's Ultra Pro because that is the front runner for me out of all the numerous brand choices. Certainly will steer clear of the Chinese knockoff brands...
My game plan right now is to use the fabric braided for everything in the dry sump system except the scavenge lines. For the scavenge lines will use the steel braided because it has a higher vacuum rating of 28mmhg vs 20mmhg for the fabric covered hose. Better safe than sorry...
-
Well done as usual!
What hose did you use for the dry sump system? Gary at ARE is an advocate of Aeroquip Push Loc. I want to make sure scavenge lines from pan to pump are rated for enough vacuum so they don't collapse, everything else is such low pressure most anything will work. Not sure how much vacuum my 3 stage will make per line but certain a hose rated at 28mm hg will be fine, 20mm hg not sure. I like the idea of Teflon (ptfe) lined hose because it will last forever but does come at a premium price. Steel outer braid is not necessary for me so a lighter weight synthetic outer braid is preferred. Some of the brands I am looking into are Earls Ultra Pro (ptfe), Areo Quip and Fragola.
Oh, did you use an oil tank heater and oil thermostat before the cooler?
-
I gave 1/2" of "stand off" distance from B pillar for main hoop and A pillar forward bars, think that's enough? Worried anything more starts intruding into cabin for rear seat clearance and left foot dead pedal to clutch pedal movement.
I have not practiced any methods for welding on back sides of tubes yet. I like your suggestion of tig technique. Watched a you tube video of a mig technique. Basically turn the gas up, 15 psi is normal so thinking 25 psi, start weld a good distance from back side to get heat into the work. As the weld proceeds toward the back there is a ton of gas shielding and the heat in the work helps the weld flow out.
You kinda get one shot at this so will weld a bunch of practice mock ups to see what works best for me.
-
Returned the Suzuka to HMS Motorsports. This company has a bunch of great employees and deserve a shout out.
After some seriously agonizing seat searching ordered up a 14" Ultra Shield Pro Road Race with 21.75" width. The new Bride Xero VS is promising coming in at a narrow 520mm but it's back ordered till at least Feb 2021. Beauty of an aluminum seats is the shoulder bolsters can be bent or even trimmed so if it's close to fitting out of box then I'll make it fit. I have been told having the seat off center of steering wheel is not that much of an issue but personally I think it would bother me to no end hence the search for a narrow seat.
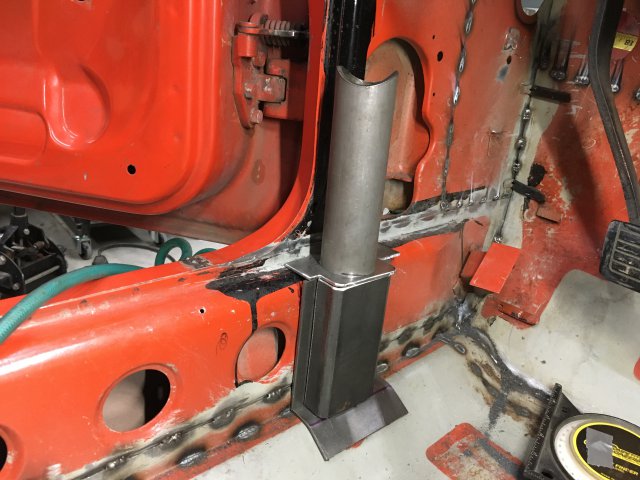
While waiting for seat moved on to making roll cage bases for the main hoop and forward bars. Both came in at around 12 sq.in. above the SCCA 9 sq.in. minimum. Will only tack weld these into place which will enable me to drop the cage to weld top bars after all bars have been fitted. The rear are made of 12g plate and the fronts were made from cut down 2.5" square tubing and 12g plate. Oh, my bar will be made out of DOM 1.75" 0.95" wall.
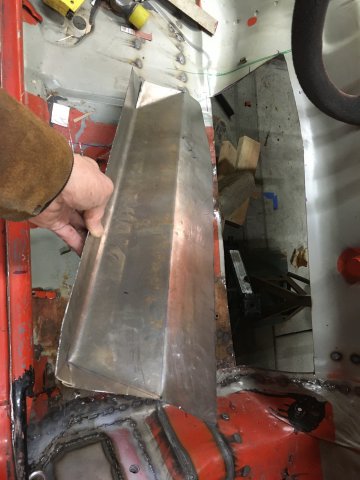
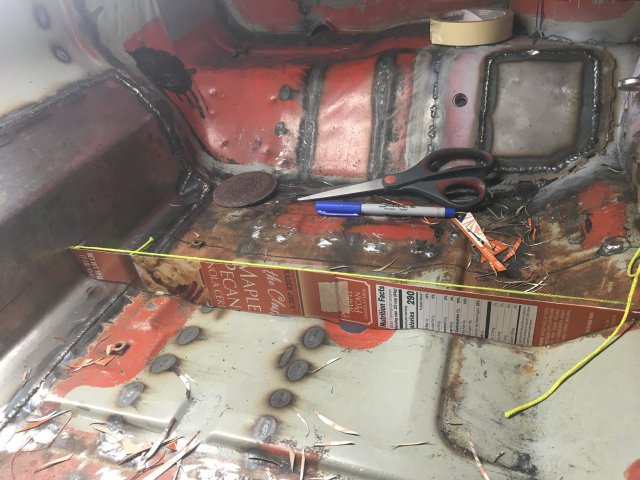
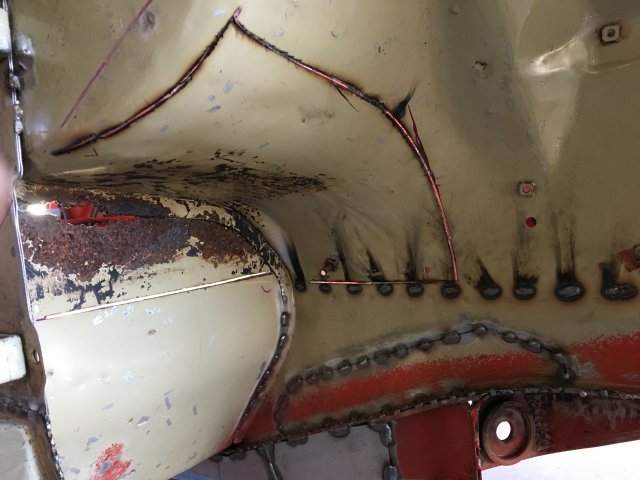
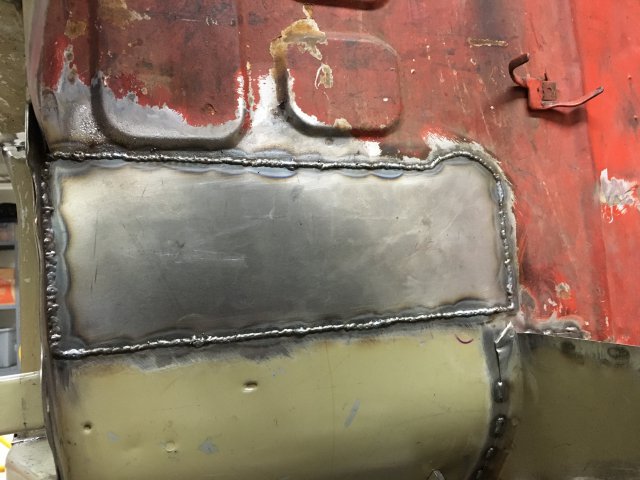
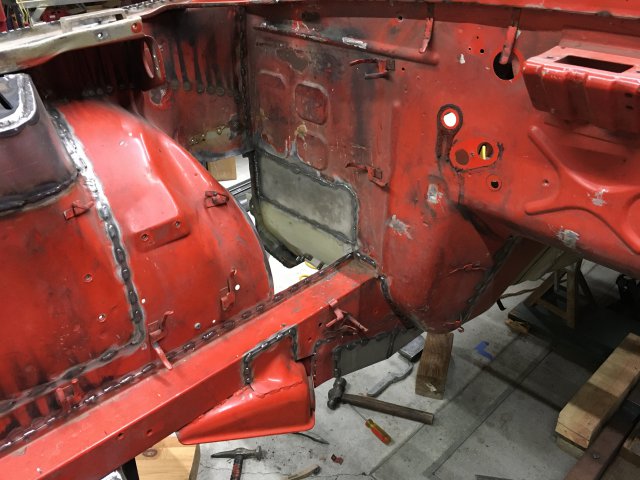
Also killed some time repairing some rust damage and making room for dry sump tank. Will post up pics of finished sump tank area soon.


Jboogsthethug's 1971 240z build
in S30 Series - 240z, 260z, 280z
Posted
Looking great!