

A to Z
-
Posts
709 -
Joined
-
Last visited
-
Days Won
9
Content Type
Profiles
Forums
Blogs
Events
Gallery
Downloads
Store
Posts posted by A to Z
-
-
Tim,
Do you have any place that sells or will modify a torque convert for a higher stall?
If not, I am wondering if a torque converter out of a 510, being a 4 cylinder.... would be smaller, and thus give me a higher stall in my 1972 240Z.
Please respond.
Thanks.
-
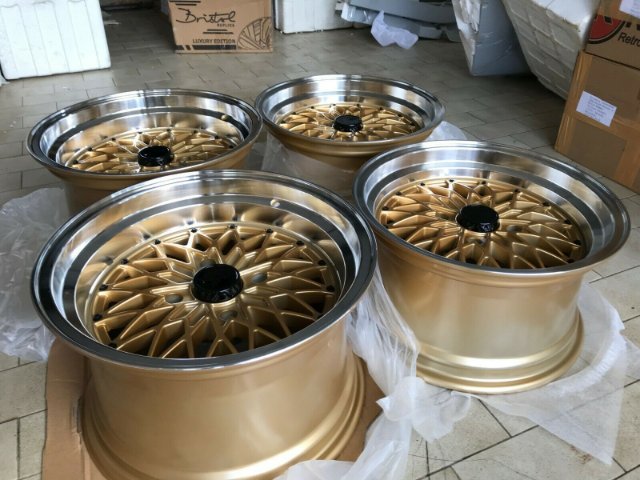
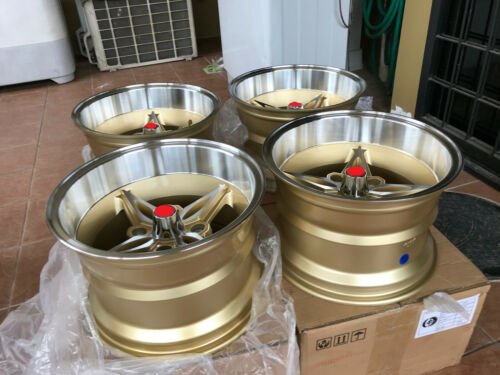
6-18-2022. Wheels showed up today from Malaysia:
TIres on order. HankookVentus R-S4..... 225/45ZR15 in the front; 245/40ZR15 in the rear.
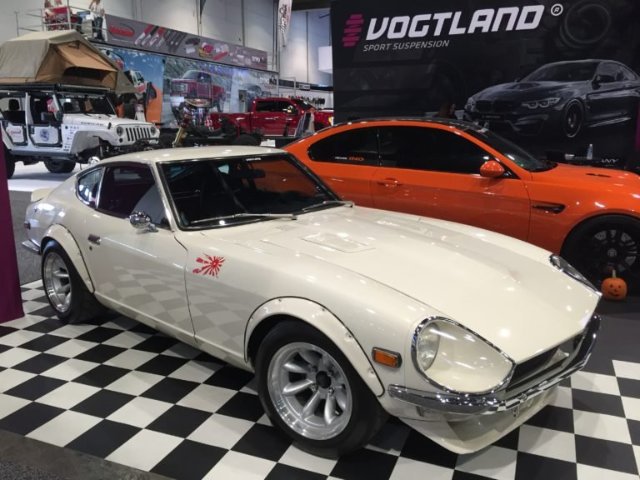
The car is REALLY starting to come together. Just past a year on this project. This one is a keeper!

-
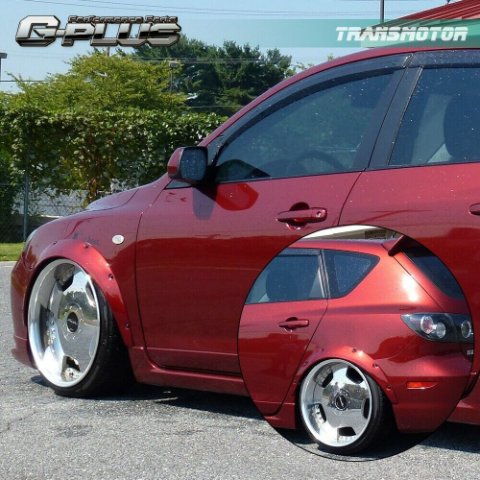
After I laid plans, I found this Z car online, which is extremely clsoe to mine. You can see the painted flares with the black welting between the flares and the body. This is what I am doing.
")
-
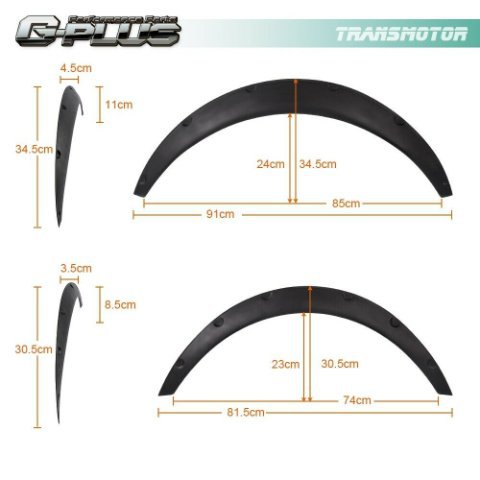
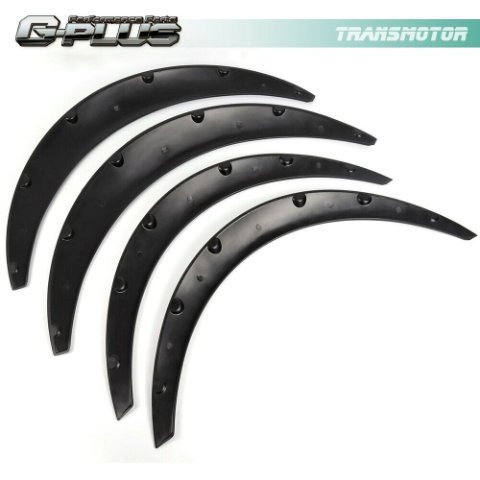
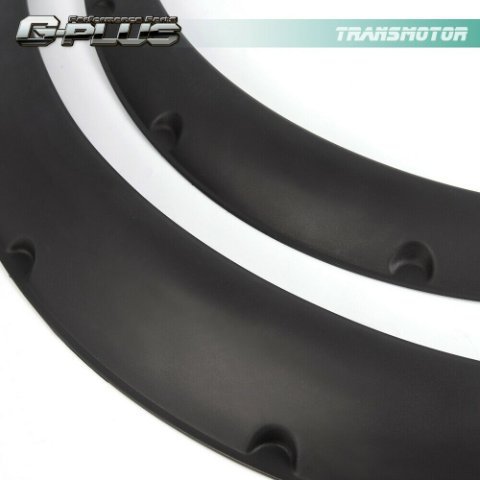
I have given the car a couple of baths, and then used a broom to push the water out. The wheels will stick out 1 inch in the front, and 2 inches in the rear. I have bolt on "ZG" flares for the car, and I got VW Beetle rubber welting to go between the flares and the body. The flares I will paint white. I also have stainless screws to attach them!

-
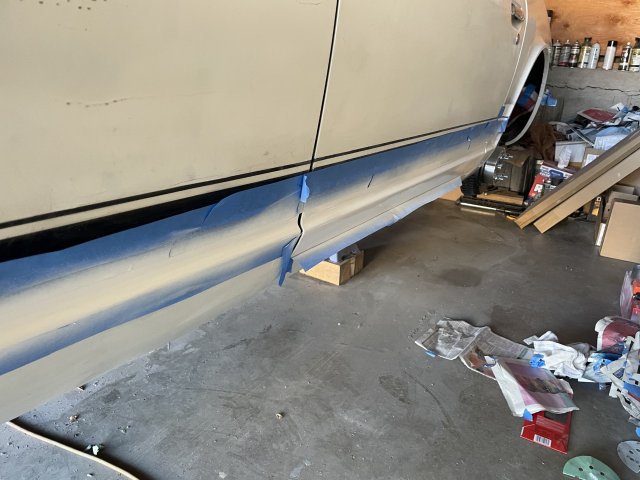
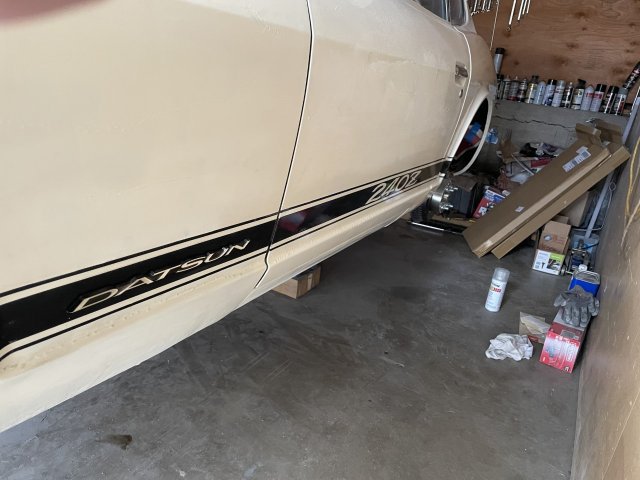
6-12-2022 UPDATE: So, I spent the day working on the side stripes, rockers, and doors. The lower rockers on both sides are color sanded out and are awaiting buffing. The stripes I finished up, color sanded out the clear over the stripes on the left side and sanded out the part under the stripe where all the drips went. Found it was easier to sand it back down and respray, the right side stripe still needs to be cleared. I then color sanded out the doors. almost done on both...the razor blade trick helps a lot on runs. The first pic is me taking a bit of poishing compound and rubbing a spot on the right door.....shiny, but has swirls....which will come right out on final buff. Here are some pics.

-
1 minute ago, Dat73z said:
Are you worried at all about compromising the structural integrity of those spacers? It looks like you ground it pretty close to at least one of the bolt holes which is likely where a fracture or failure would occur.
In person, it is fine, it is a spot where trying the die grinder left a knick. Thanks for the concern, but in person it's fine.
-
6-6-2022 UPDATE. Continuing saga of finishing up the paint work. I worked on both rockers and the rally stripe on both sides, made some progress.....I also preppred and finished the painting on the driver's side (left) upper quarter panel, and then color sanded out the other side, save for 2 spots that need a tad bit of white and clear. I have finally figured out the way to sand out runs, so I am really happy about that....as my clear really looks great and is tough, but is RUNNY when wet.....you have to master very quick moving shots, and even then, you may still get 1 or 2. At any rate, the left rocker is in clear now, emblem included.....but will need a tad bit further sanding under the rally stripe, as the paint just ran down the vinyl.....put the vinyl stripe on the left side is now buried in clear....YEA!! next week, God willing, I will finally finish the painting, leaving only finishing out the color sanding and then buffing/polishing. Cheers!
-
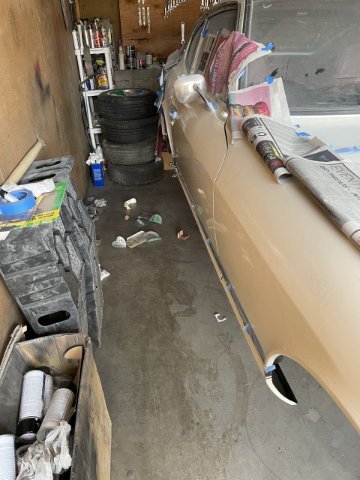
6-5-2022 UPDATE. I had some time today so back to the garage. I clearanced my front wheel spacers so that they would sit flush all the way on....and then painted the right side of the car. Only a portion of both quarter panels remains and the rockers, and the paint work will be done. Polish it out and move forward!
-
Since I made this thread things have changed, I changed the order to Gold mesh 15X8's and 15X9's at 0 offset. I will be using 225/45ZR15 and 245/40ZR15 tires from Hankook. Spacers are going to give me the offset I want and the poke out I desire.
Thanks for the replies.
-
 1
1
-
-
Ah, cool! thanks for sharing!
-
Sounds good, but PICTURES are priceless.
-
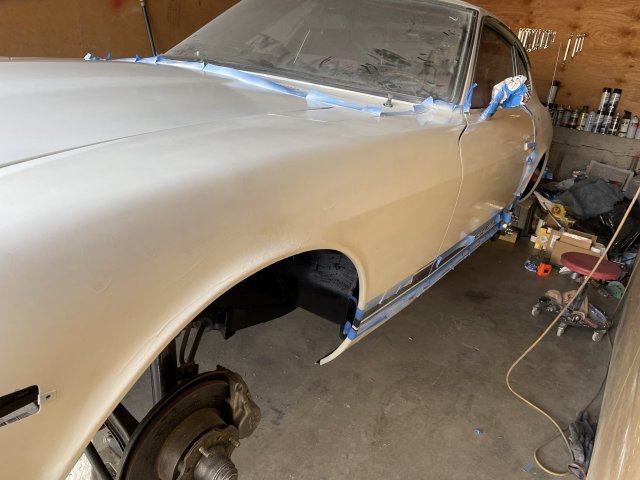
5-30-2022 UPDATE: I got the brakes all put back together, worked on getting the front-end alignment correct, almost perfect.....then got the hood, the tops of the fenders painted to match, and then the left (drivers) side painted back to the end of the door.
-
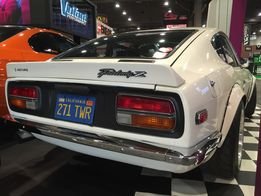
The wheels and tires will stick out 1 inch in the front, 2 inches in the rear, and still have tire on the inside to fill the wheel well!
When you have a hard time finding wheel with a lot of negative offset, the way around it, is to get 0 offset, and then use spacers to push out as desired. You then end up with a negative offset, but with a rim that goes back in towards the spring perches, so you have tire to fill that in, so you don't have the "skateboard look".
245's in the rear with factory spring perches!!!
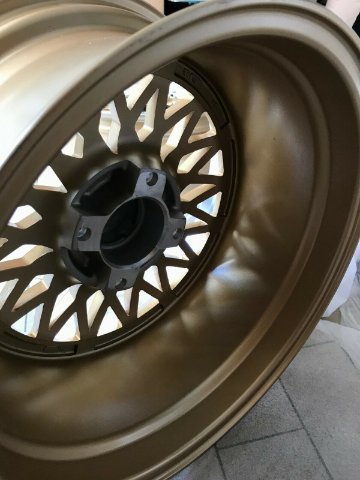
Now, look at the pic below......those "pockets" between the lugs are for the studs! Because they did this, when using spacers, you don't have to cut the studs! A lot of wheels don't have that......this is a real bonus!
-
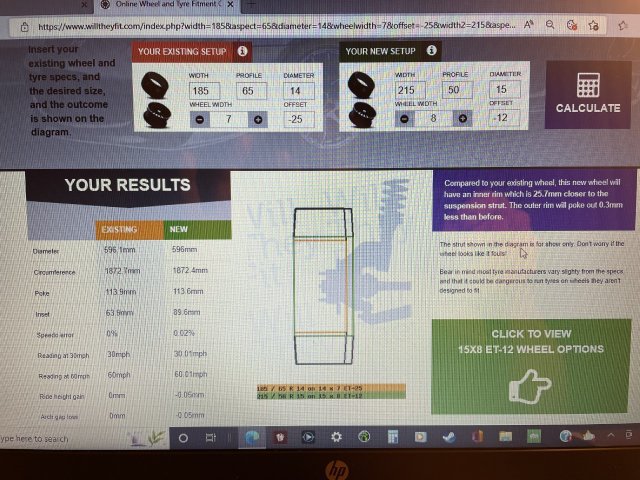
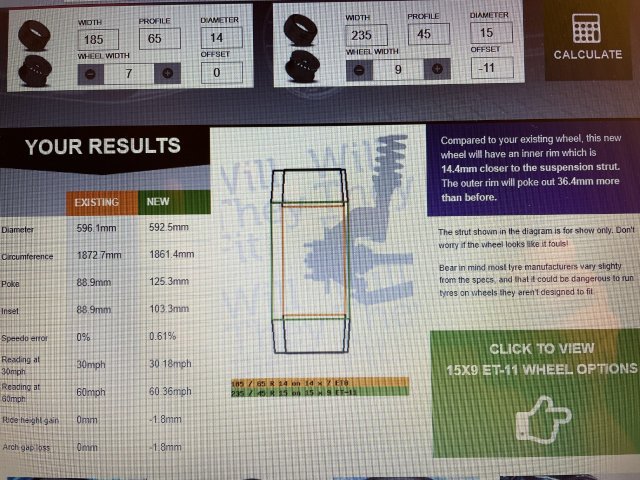
0 offset, with the spacers I am at -38 in the rear and -25 in the front. This keeps my backspacing at 3.5", which is the clearance I need for my spring perches.....also leave enough room for the sidewall should I need it. Tires are wide enough to fill in the void. Here is a pic from willtheyfit(dot)com of my plans:
-
I changed my order before it shipped. I got 15X8 and 15X9 gold mesh wheels. Star Road knockoffs. Will put 225/45/15's on the 8's, and 245/45/15 on the rears. They are 0 offset, so I will space them to clear. I took measurements today, with the spacers to give them some negative offset, I will have 2 inches poked out in the rear, and 1 inch poke out in the front. The spacers I wanted to return are actually EXACTLY what I needed! Thank you Lord Jesus! Glad I did this.....I agonized and agonized over it, and decided to just jump up and get what I have always liked, gold mesh. They are 1 pice.....just "look" like 3 piece.....I don't care.
-
I ordered some Riverge style wheels, 14X9 with -13 offset. It looks like the tires need to be a minimum of 235, and the sizing I am finding is 235/60R14. By going to the "willtheyfit" website, and my calculations, it looks they will JUST clear.......and I am hoping no rub at full lock.
do any of you have experience with this setup? If so, what kinds of issues may I run into?
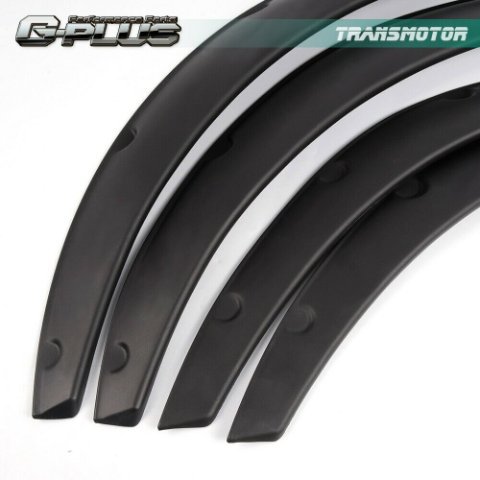
I will be putting my ZG style flares on afterward.
Thanks in advance.
-
-
Thanks. I was thinking about it. Since I have brand new tires on my Appliance mags, I really need to just restore the finish and see I think. I have always liked the gold mesh wheels with the polished lip on these cars, but I like these also. The flares can be mounted such, that the 1.5-2 inch gap I have after my Eibach springs, can be taken up with these....
-
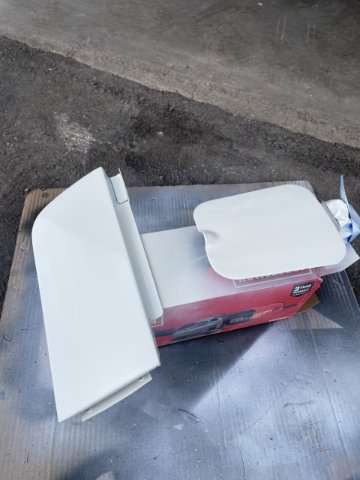
I have been contemplating for some time now, getting these headlight covers. They are on the jdm-car-parts.com website. I would like to know if anyone on here has any experience with them? Is the rubber seal effective? Please respond if you have Real experience with them. Thanks!
-
5-23-2022 UPDATE: Well, my phone crashed on me, so no pics tody.
 I put a wheel back on and took some measurements, and I found I have between 1 inch and 1.5 inches of clearance from the tire to the lower spring perch. I then measured the wheel WITHOUT spacers, the sidewall sticks out 3/8's of an inch from the lip. It is the EXACT same distance in the rear! I didn't measure the inside clearance on the back though, I guess I forgot. I then put the 1.5 inch spacer on front and rear, since it cleared the front hub.....pushed the wheel out 2 inches from lip and REALLY looked bad, the wheel is too narrow. So I packed up the spacers and will be returning them. They are a nice quality piece from the Z Car Depot" except that the studs are the wrong thread pitch the car is 12x1.25 and these are 12x1.5. So, anyone using these will have to buy new lugs or re-tap these studs to work. With the wheel on the rear, I took a FRONT flare and held it up there, and to my surprise IT WORKS! You can mount it at the lowest possible point, and it will stick out jsut over the tire AND hang down 1 inch and get rid of most of the gap between the tire and wheel well! So, I just need 2 more front flares, and all 4 corners will have the same. After all of this, I spent the rest of the day sanding the drips off the driver's (left) side of the car and prepping it for paint, I color sanded the hood, and found that the part I didn't paint this last time needs more white to match, so another coat of white and clear on the back part of the top of the hood. I then sanded out the front spoiler etc., now I just have to polish it out, and I got the headlight buckets all polished and done! Just need a coat of pure Caranauba wax!
-
-
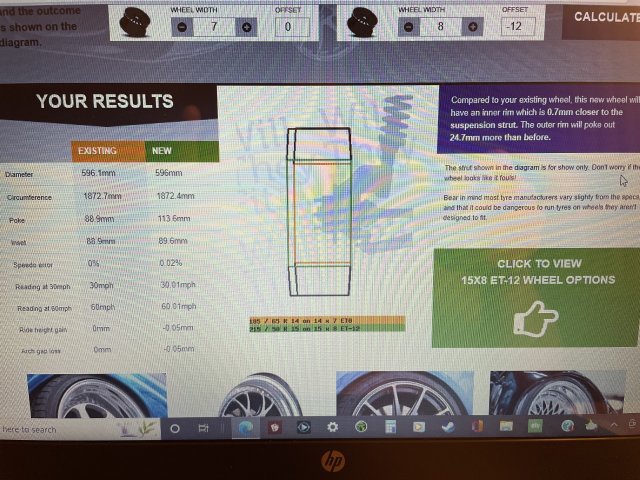
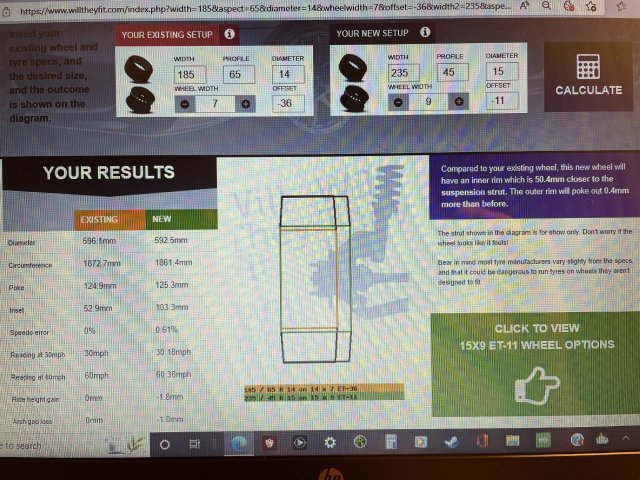
Ok, and here are my results for my front wheels. Again, the original is orange using where they will sit with the spacers, to then play with rim width and tire sizes, and offsets to get the inside wheel edge same as stock, and the outside edge where the old wheel sits at when spaced out. 2 pics for reference. Again, the site is www.willtheyfit.com. Cheers
-
here you can see my current wheel and where it will sit with it's spacers in the rear. The green is the new measurement which will be the same, but wider on the inside back to it's original spot before I spaced it out. These are for the rear, the front still have to be figured. In my case I am looking at a 15X9 with -11 offset . You play with the tire sizing as well....in my case, the rear will need a 235/45/15 to maintain close to the same outside diameter size. I just need to do the fronts now. Even if it is some time before I do it, I will know what I need should I decide to get different wheels down the road.
-
www.willtheyfit.com
An invaluable tool that can help you figure out what to do with wheel sizing for your Z car. You will have to get under there and measure some distances, but this will help you in figuring out what to get to achieve the look you want. I attached a couple screenshots of me working on finding out what wheel and tire I will need to replace my current wheels with my spacers at some point. The goal is to get the wheel that will sit at the edge just like my spaced-out ones will.....but no spacers. Go check it out!The first one is the end result of putting my spaced wheel on their building the new one in green to match, and then I moved the original orange back to where it is now to see the difference. the next page shows my wheel spaced out in orange with the green overlaid over it.


Joe's 1972 240Z adventure. // 16 JUN 21 - 13 Jul 24 // 3 years 27 days build
in S30 Series - 240z, 260z, 280z
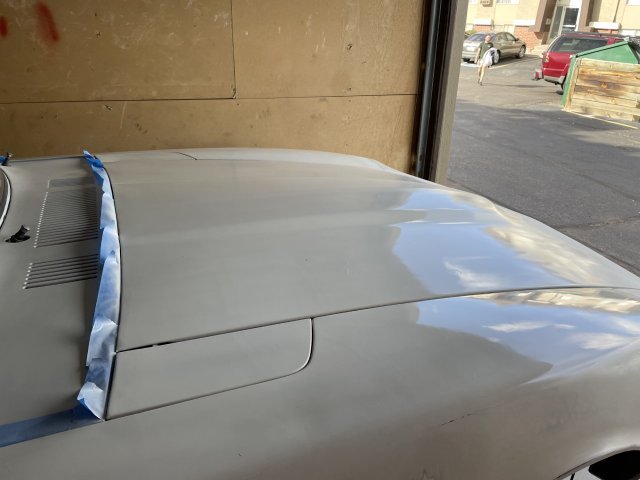
Posted
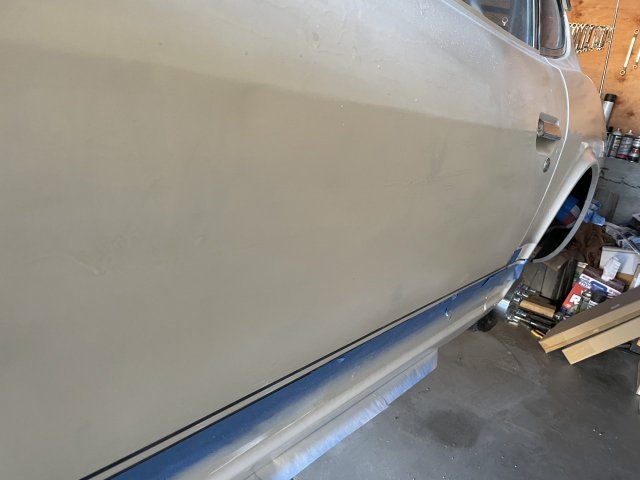
6-20-2022 UPDATE. Passenger side (or right side) paint work. I got the right side ready for final buffing. I finsihed some painting, and got the rest sanded and hand rubbed out. It is ready for final buffing on that side. Here are some pics, the big side picture is a not quite finished pic. If time allows, tomorrow I will get the other side, the left side done and ready for final buffing. The top is really close to done, and the hood needs to be color sanded out and buffed. Once done I will use some stronger cutting polishing compound by Turtle wax I got at Walmart with the blue pad, then use the final black pad with the Meguires compound to make it glisten! Then wax with Meguires Gold paste wax. I am so ready to get the paint and body done! Finished the day with some garage cleaning to get back some working room! Cheers!