sippelcj
-
Posts
22 -
Joined
-
Last visited
-
Days Won
2
sippelcj's Achievements
")


-
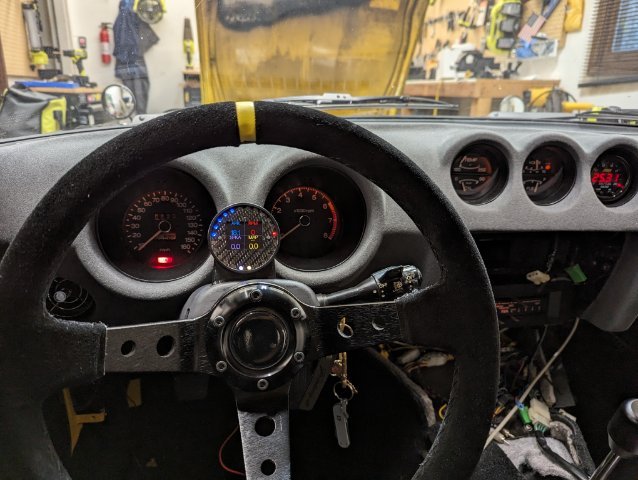
Installed on the car now. The rest of the interior is just about finished, I'll likely start a separate thread for that as I 3d modeled a few other hard to find parts as well. Also I still have two other sets of the column covers printed if anyone is looking for a replacement.

-
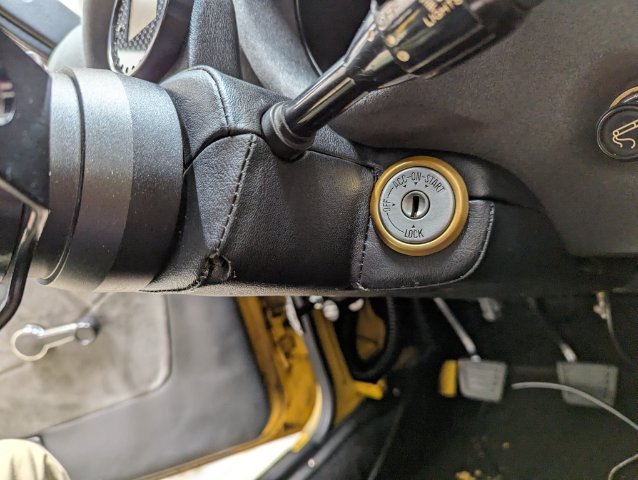
Got around to making some vinyl covers for the set I will be installing to match what I upholstered the rest of the interior in. They aren't perfect but they will do the job just fine. It was a decent bit of work to get them sewn up and glued on, painting them would have been much easier.
-
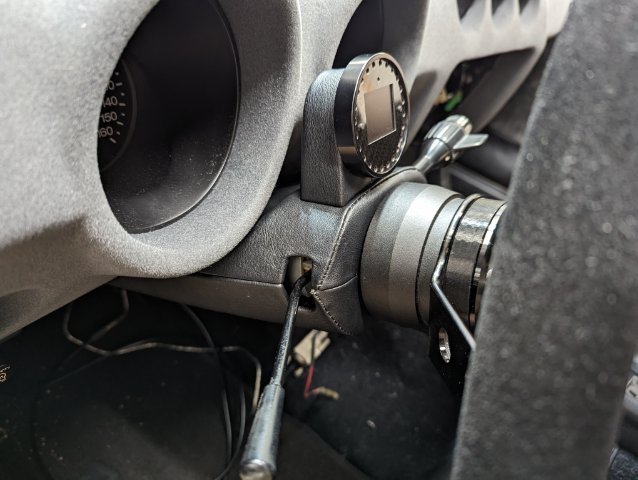
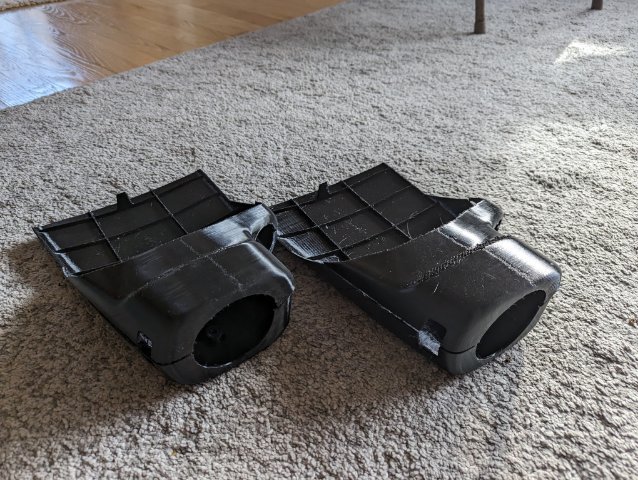
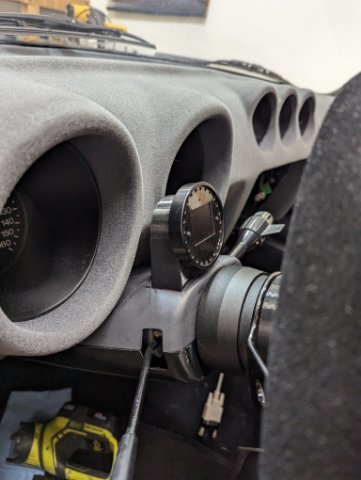
Alright I have two complete sets printed. The finish didn't come out as nice as the prototypes because this material (PETG) is harder to work with but they are functional. I tested sanding and painting this material and it worked without issue but I plan to fabric wrap mine. @ihavearustedz @mutantZ Feel free to send me a PM and we can work out payment/shipping if you are still interested. I was thinking $100 for the upper and lower piece, I'm not really making money on these considering how much time I invested getting them produced but they will be significantly more durable than any original parts. Also if anyone is curious here is the gauge pod I designed to mount onto the upper cover. I just drilled holes in the cover to mount it. It's a 52mm gauge pod but the gauge I have has a 60mm face, but still does not block view of tach or speedo at all, even though it appears to in the photo.
-
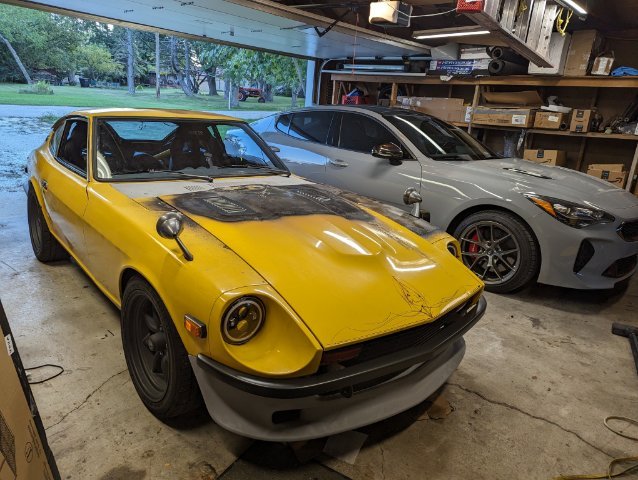
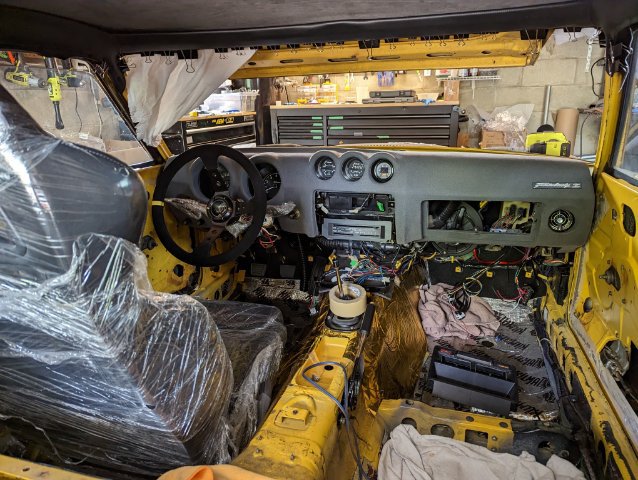
It's been awhile, been super busy between trying to get the car drivable and regular life responsibilities. Writing up progress posts has been a low priority but I do have a few detailed write-ups in progress I still plan to share eventually. For now I'm pleased to share the car is on the road and driving again! Finally had a chance to take it out for some longer drives last week after getting it running and moving a couple months ago. Felt great driving it again although I was very nervous as last time I drove it didn't go so well 🔥. Currently running on wastegate pressure (6-7psi) and an ultra conservative spark map it's definitely making a little more power than pre-turbo and power delivery is nice and smooth. Next big priority is getting it 100% tuned, the fuel maps are looking pretty good but it seems pretty difficult to tune spark on the street so I'm planning on booking some dyno time next spring. I've done a bit of research but If anyone has any megasquirt spark tuning tips I am all ears! I made some DIY knock ears and the engine is definitely audible but its not super loud through the ear muffs so have to concentrate a bit trying to listen for knock on the road. Put the damaged hood back on for now, its too far warped for me to fix. I found a fiberglass hood locally so that will go on eventually. Powder coated valve cover and also did any other brackets that had to come off. Used AN lines for fuel this time and routed them slightly differently. Apex Engineering front brace which had some fitment issues. Also reinforced the firewall/fender using the apex fender braces. Interior is about 90% done, mainly just the center console is left to purdy up. Still need to patch some rusty metal around the gas tank and rear bumper but otherwise just about all the pre-existing rust has been fixed.
-
It's been awhile but I am working on getting some final versions printed. We ended up moving to a new house so I had a lot of other priorities. Started a few prints last week but had a bad roll of filament that jammed on me multiple times and ruined some multi-day prints. The lower covers take 2 full days to print and the uppers are about 1 day so it might not be soon but I am working on it.
-
I am done printing prototypes, just need to finalize any print settings and I will have a few sets printed. Also a few little things still to figure out such as the proper screws to use. The ones for the oem covers don't quite work as the posts on these are thicker and thus need a screw with a slightly smaller head. I'll also be printing a gauge pod for a gauge I'm mounting between the tach and speedometer, the final version will mount the gauge slightly lower than this one.
-
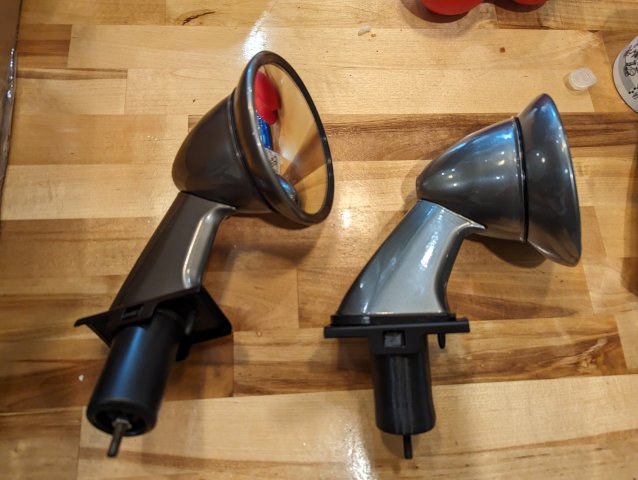
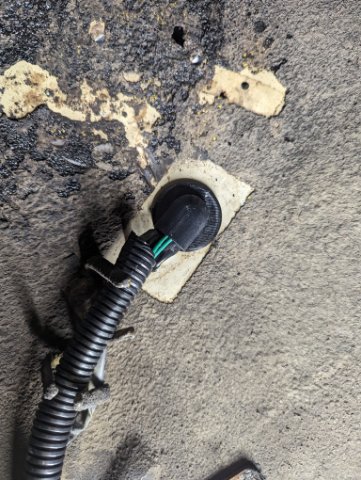
Alright printer was backed up finishing other projects but finally had time to print a full prototype for the lower cover, fitment is looking good, just need to make one more slight tweak and finalize the best way to print such a large piece. Somewhat off topic but here is some of the other stuff I have been designing and printing: Replacement fender grommets for headlight wiring, same style as OE. Replicated all of the plastic pieces on the Fender mirror reproductions I had, and designed some TPU gaskets to hold new mirrors in place. The housings are powder coated black chrome.
-
Will definitely contact some venders once I have them finished. I know It's been awhile but I have made some progress on the lower cover but that one takes a very long time to print and I'm trying to get the fitment as perfect as possible. I should have another revision printed in the next week or so which could be the final version.
-
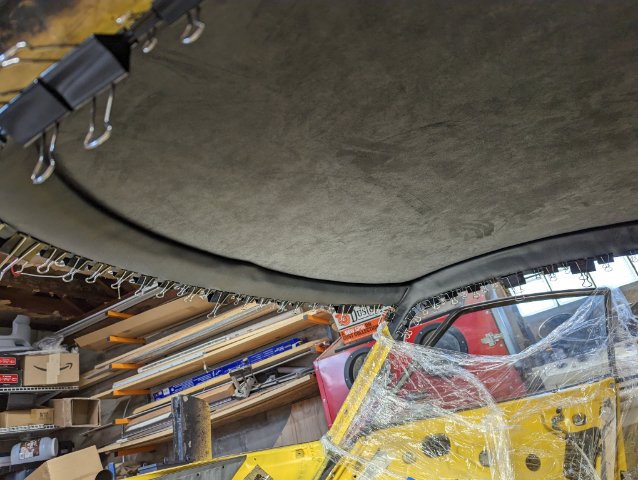
Thought it might be helpful to post my experience and some lessons learned after just completing a restoration on a cracked dash. I found a lot of different methods/tutorials online and it was hard to tell which of those methods were best long term. Heres where I started: Crack Filling At first I cut out and filled the cracks with fiberglass reinforced bondo, but when moving the dashboard around I saw that the dash flexed enough to create some new hairline cracks. So If you are going to bondo any of the cracks, it seems absolutely necessary to skim coat the entire upper dash if you want to ensure it doesn't crack again. Also, my dash was pretty badly damaged so it was a good idea to cover the entire top in bondo anyway, as it would likely just crack again in the future. I also experimented with plastic welding (I used cheap off the shelf plastic welder from Harbor Freight) and for smaller cracks this method seems superior to bondo filling. It was able to flex with the dash so I would expect it to much more durable. For smaller cracks and a dash that doesn't have a brittle top this seems like a superior repair. I followed a process similar to this: https://www.polyvance.com/video/dashboard-repair/cracked-dashboard-repair-padded-dashboard However if you have many large cracks it will be extremely time consuming and probably not feasible to plastic weld every single crack. A ton of cracks, and the "skin" on the top was very brittle in some spots. Initial crack cutting and filling Coating the entire dash Many rounds of sanding and coating and sanding and coating to get to a nice smooth surface. Take your time and look at any reconstructed curves from every angle to make sure it matches the existing shape. I can't understate the amount of time it takes to get this step right. I painted it black mainly just to give it a uniform color to see any final issues. Flocking Prep From the start I planned on flocking the dash, and even though the flock has a lot of texture to it you still want the dash to look completely uniform before moving on. Any slight variations in texture could show through after flocking. Glue Application Highly recommend a helper for this. I applied with a combination of a brush and small roller which worked well. I could have sprayed it but was concerned with getting good coverage in the harder to reach areas. I also experimented beforehand with trying some other glues, but the flock-it brand glue by definitely seems to be the way to go. 3oz of flock may not enough for a full dash unless you want to try and reclaim it in the middle of the coating process which I wouldn’t want to mess with. Flocking Application The instructions say 10-15 minutes working time but the glue stayed very sticky for much longer than that. I started rushing a bit trying to apply as fast as possible and It seemed completely unnecessary. I think it would have been better to take time and focus on an even application. The glue took a long time to fully cure, It was tacky for days and took about a week to fully harden, so I would plan on letting it sit for awhile. After flocking, the charcoal grey which matches very well to some other charcoal grey microsuede I am using in the interior. Installed in the car Also flocked the inner cower trim to match Feel free to ask any questions, hopefully this helps someone going through the same process! My full build thread here:
-
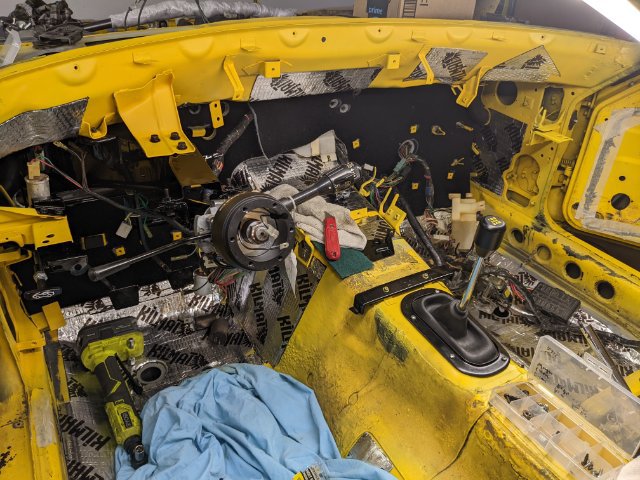
I’m way behind updating progress on the build, a few of these topics will be gone into more detail in a separate thread but want to get caught up at a high level here. -New radiator, electric fan conversion and custom shroud made from a baking sheet(The shroud was probably more work than it was worth). -All fuel/oil/water lines remade with AN fittings. Heat protection for any lines anywhere near the exhaust. -All Clutch lines and master replaced -All engine bay brake lines and master/booster replaced. -Majority of interior done and/or ready to be installed later. Pretty happy with everything for having never done upholstery before. (Will be following up with more detailed thread) -Remade firewall pad -Redid my toolbox mounted 6.5 Subwoofers (Will be following up with more detailed thread) -Hvac system disassembled/refinished and reinstalled. -Cracked dash filled, refinished and flocked. (Will be following up with more detailed thread) -Gauges refinished and reinstalled into dash. -Replaced the RB25 turbo with a GT2860RS, the plastic compressor wheel was damaged and I tried to replaced the wheel with a cast aluminum version but it got stuck on the shaft and I broke the ceramic shaft of the RB25 Turbo. Compressor housing powder coated gold and turbine housing coated with Cerakote. -I attempted to repair the hood but it was too warped for me to get to fit perfectly. I plan on getting a fiberglass one eventually but this one will work for now. -Working on designing and 3d printing replacement steering column covers. The end goal is to integrate a gauge pod into the upper cover. Details here:
-
 sippelcj changed their profile photo
 -
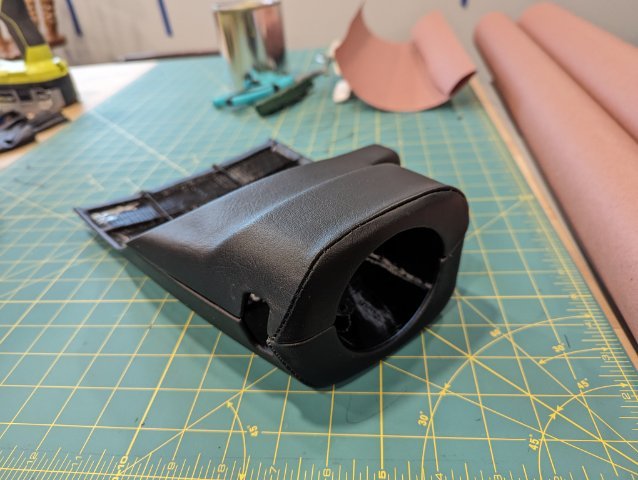
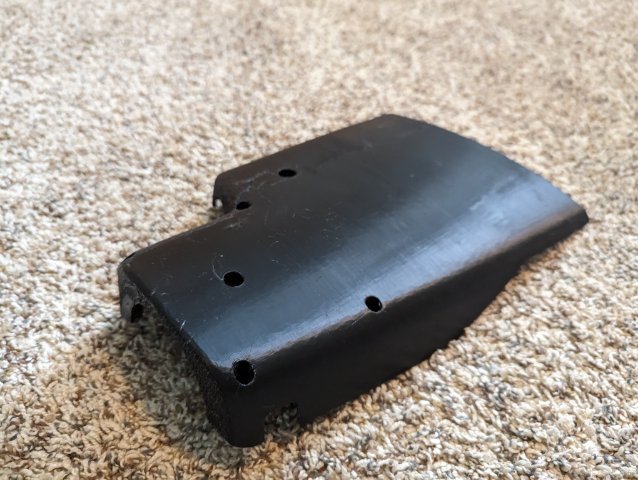
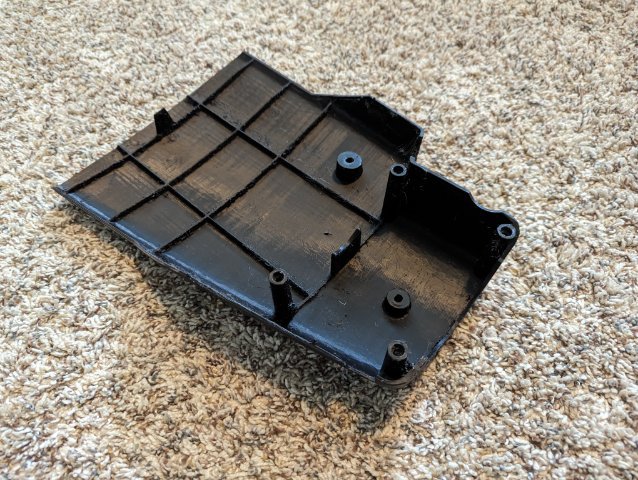
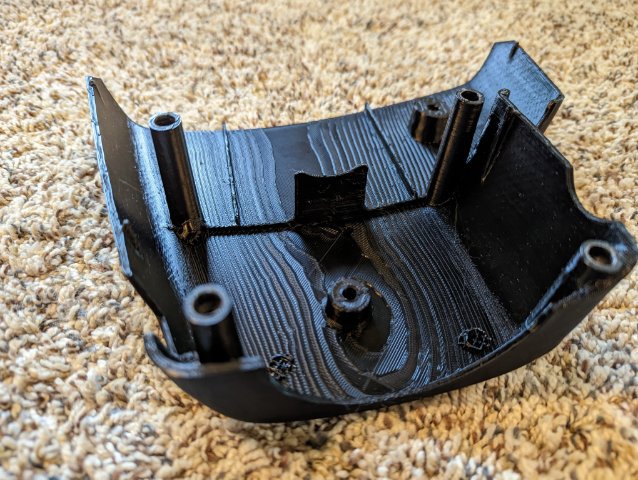
Had some difficulties creating the model for the lower cover so took a bit longer than expected but but finally have the first prototype. Fitment is pretty good for the first print but will be making some tweaks to get it looking as good as possible. I chopped off some of the model to reduce print time. Heres how it looks connected to an oem upper cover.
-
It's the factory trim ring that I powder coated candy gold from prismatic powders. I had an engine fire which is why I am now redoing the whole interior. I started a build thread here but I haven't updated it in awhile, should probably get on that.
-
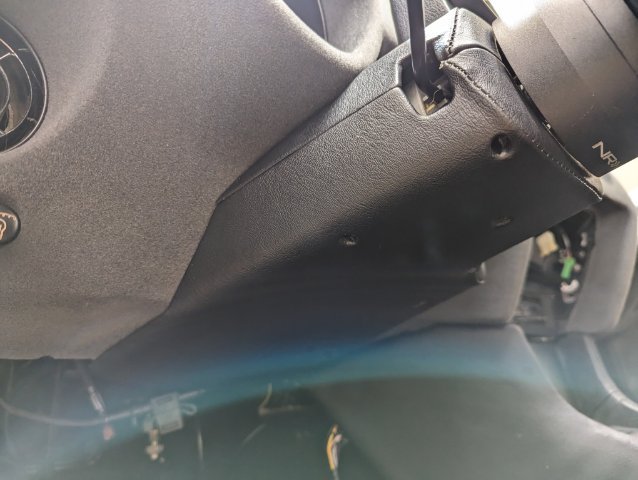
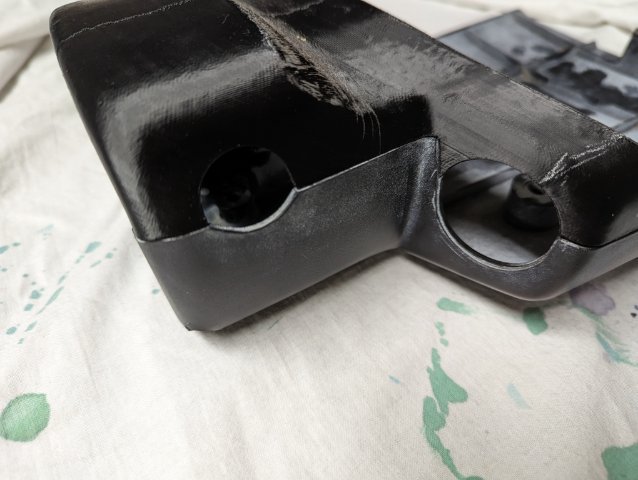
I spent a lot of time tweaking the model to get as perfect of fit as possible and am finally done. Really happy with how its looking so far. Next step is to experiment with the final print materials and then work out any printing issues and the upper cover is done. Here are some pictures of it fitting up with an oem lower cover on my car. @mutantZ @ihavearustedz Also want to make sure you understand what the raw finish will look like. The final print will likely look the same or very similar to this piece, ill just be using a more heat-resistant plastic. But because of the way this piece is printed the faces that face the dash have some rough marks where the printer has to print on top of supports which is shown in these pictures. These could be filled/sanded and painted but I wouldn't be doing that with the raw finish option. I'll start working on lower cover reproduction soon, but it could a month or two as its pretty time consuming and my time to work on it is limited.
-
It's not really thicker by design but it will definitely be more durable than the OEM piece. This plastic will flex quite a bit before it would break. Was also debating using heat set nuts to avoid plastic threads stripping which would require all new hardware but haven't gotten that far yet.
-
Sounds good! The lower cover could take awhile to complete. I have not started working on that model at all yet, and I will have to recreate all the mounting holes from scratch. The upper cover is very close to done. Here is the latest print, just tweaking the alignment pins on the rear and getting the fitment as good as possible. I'll post updates to this thread when I have them. Thanks!