
clarkspeed
-
Posts
840 -
Joined
-
Last visited
-
Days Won
29
Content Type
Profiles
Forums
Blogs
Events
Gallery
Downloads
Store
Posts posted by clarkspeed
-
-
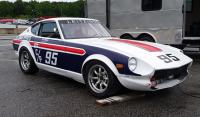
Starting a new topic based on hijack of Ben's FP 280 thread. There are a couple people, including me, building competition cars or running them at this time. Scope of this thread should define minimum requirements of an autox, time trial, or race prepared Nissan Z car along with advanced path for future upgrades. But mostly minimum requirements suggested for competion based applications. Hence the post under the Motorsports heading.
First observation, amazing how long it's been for activity on this topic.
-
 1
1
-
-
This was a horrible hi-jacking. My apologies. You car is incredible.
-
Reviewing posts, I think I missed posting the weight. As you see it in pics, with shell, interior panels, most of suspension, missing calipers and front rotors, rear rotors and external shocks. Came in at 834lbs on scales. Nothing else. Not sure if this is good or bad. I started with 500lbs in first pics of thread with no floor, firewall, or suspension. This is the stuff that keeps me up at night.
There is an incredible build thread out there for a pink panther MGB built in Canada for D Mod autox. Amazing to follow and many years of work. He ended up rebuilding 3x to get a decent car out of it. His first shot with similar fab to mine was like 3200lbs or something for final car.
-
Cheap numeric control changed my life, in the most geeky ways imaginable. I have an engineering background and a natural attraction to building my own parts, so 3d printing opened another world. Basically I noticed the technology getting cheaper and cheaper and after some research, realized I could modify a relatively cheap machine to print final parts in durable, lightweight, and heat resistant materials. It has been a journey, but now just as important as my Sawzall and hammer. I work with guys who design 3d printed parts for a living (metal), have years experience printing, and have multiple hobby machines at home. But none have developed the material capabilities that I have. Printing Delrin is took me about a year of trials.
The above pictures represent my first step 4-5 years ago. And if interested in this technology, maybe the only step you need to take. I designed these parts way before I had interest in buying a printer. Just posted them on 3dhub, chose a supplier, and chose material. Local guy who had 20+ machines and was very easy to work with. After I made a couple of orders with him, I would receive new parts in mail before I even paid him. So to make a long story short, designing in CAD is the first skill you need to master, and the hardest. The parts above cost around $100 maybe. If I printed myself, maybe $30 in material.
Now I have my own home built CNC mill I am playing with (separate post) for $500. Building up aluminum and steel capability for decent size parts. And there are DIY designs for CNC laser cutters and plasma cutters also.
And to wrap all this back into original thread, I printed the hood supports just to check dimensions. After verification, I will print the final versions in ASD I think. And I have a design for a multi-port NACA duct that pulls air out of the tiny Gnose opening and directs to the oil cooler and brakes. I will print pics of that once I print the prototype. I have many printed parts in this car I will post as I install. I designed my own cool suit cooler with helmet cooler I am quite proud of. Necessary for racing in Southeast.
Judging by the length of this post, can you tell this topic is interesting to me? I really need to go into production with some of this stuff.
-
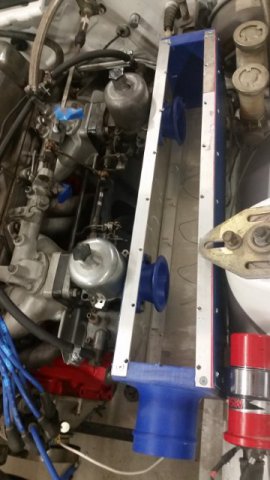
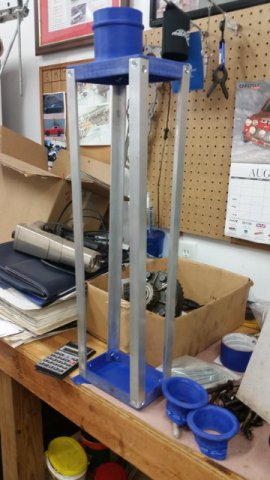
And speaking of old photos. Here is the cold air box I made for the last car. I 3d printed the ends and air horns. Then used aluminum angle and sheet to complete. I got a lot of requests to buy this part.
I may do something similar for this car, but not sure yet. Not positive it will make a power difference on this car. So I will most likely fab one up after it is running and then test to see if it makes more power. I am working on the radiator shroud right now and adding a NACA duct for pulling air to a box. I plan to use 4" hose on this car instead of 3".

-
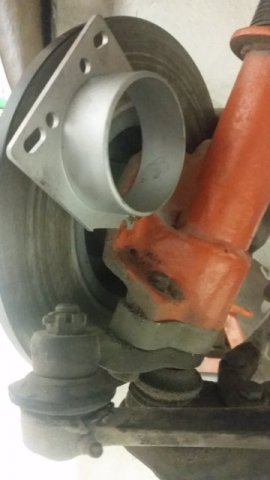
Here is a shot of the cooling on my last car. I use an inlet flange for a Mazda MAF attached with the existing threaded holes used for the backing plate. Shown with stock rotor.
I noticed the ones I purchased are not available any more but this looks the same:
-
On 9/1/2022 at 11:31 PM, AydinZ71 said:
I felt a bit guilty for this (I shared with Ben): his unfortunate accident gave me an idea for a secondary oil pressure sensor. Instead of a broad spectrum sensor, I’m thinking a more reliable (simpler) pressure switch set to something like 4-10psi (for idle). The switch would connect to a micro (super bright) LED I sourced but also cut-out my ignition system via a relay. I could “arm” the system with a switch, but a more complicated timer delay is also possible (so I can start the car). I’d rather have the engine die than run at 0 pressure! The pressure gauge seems more like a troubleshooting instrument than a means to immediately address a serious problem.All my previous cars I ran a pressure gauge on dash, gauge on the Accusump I could see from my seat, and a pressure switch wired to a big yellow light on the dash I could not miss.
On the new car I will have a programmed readout/warning as described above, but will still have the Accusump gauge as a redundancy reading. And if I dry sump, I will add back the switch/light.
-
On 8/31/2022 at 9:22 PM, AydinZ71 said:
Thanks for sharing Clark! let me ask you, do you feel cooling is better with the hat and rotor in a 2-piece configuration like that? I assumed having your ducting feeding right into the vanes without a gap would force more flow through the vanes, but I'm just guessing. I could section the 280zx rotor on a lathe, but from what I am reading they are intended to be "disposable" after one or two races?
I'm going with the 3" velo stack in the headlight recess, like all the other EP cars (sigh). I was trying to get fancy, but we cant cover the headlight bezel so might as well use the 7" hole for something.
I asked Greg about the knockback, and he didn't seem to have much trouble with his setup.
I don't a clue how these will cool. Maybe a little better due to more air fanned around. But I personally think cooling is mostly influenced by mass of the parts. Pretty simple heat transfer problem. Friction from pad generates heat, heat transfers through conduction to pad, caliper, rotor, hub, and on. Air blows on rotor to remove the heat with convection hopefully before parts get too hot.
Ducts in the headlights works well. You need to direct the air centrally to the rotor so the cool air moves radially outward through the vanes. I will post a pic if I rember too.
-
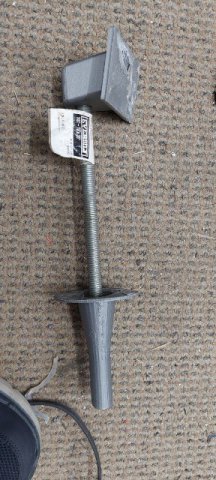
Prototype for my hood pins. 3 of the brackets with 1/2 round aluminum pins will mount on underside of hood by firewall. 3 receptacles will mount in firewall. Hood slides in, then latched at the front.

-
Not familiar with AEM. But if it runs ok when driving, take a look at the cold start settings. The EFI needs to shoot a little extra fuel to start, but not too much, and dependent on engine temp.
-
Thats a good idea to add another safety feature when using a crank trigger. I will think about that for my car.
I had a drive gear shear off like that 1 time. I attributed it to hitting the track full steam before the oil was warmed up. Cooler the oil, more torque required to turn pump. NISMO used to sell a brass gear substitute for the crank gear to prevent failure on race cars. Since then I have always made sure the oil temp was over 140 or so before doing high revs.
-
More pics.....
-
Hub centric most likely means then bored the hub true to the lug/wheel diameter. Sometimes custom wheel manufacturers don't take the time to do this. Without the true hub, you need an adapter that bolts up to do the spin balance.
-
Sorry I did misread your post (with history).
I would assume the wheels are still lug centric.
-
I'm in the middle of logistical nightmares trying to assemble my race car. Trying not to order too soon so I am wasting capital sitting on the shelf, or ordering too late where I am caught up in a global supply chain freeze up. Shout out to the following suppliers who are solid as a rock.
Jdm-car-parts, just ordered a stack of Kameari parts and they arrived quicker than my orders from Summit. Packaged great.
Summit, always there, not always cheapest, but always honest on what is in stock and multiple national warehouses. Summit Brand parts usually decent also.
Coleman Racing. Easy to work with on custom orders. Amazing customer service and dirt cheap on Americam made race parts.
Motorsport Auto, always there for Z community and massive inventory.
And last Speedway Motors. My choice for the cheapest race parts when I want the cheapest race part. But I have to be careful with them. The cheapest race part may not be the best choice, eapecially when they brand it. Found that out with 1/4 fasteners and a few others. But pleasantly surprised by some also.
There are many others, but these are recent buys that I can attest to. I am not going to go through my most hated list right now. That will be another post.
My career is in manufacturing and quality and a general statement that I stand by: Country of origin has no significance. Only the specification it is manufactured to and quality control standards imposed. So thinking about who controls those those parameters goes a long way toward satisfaction.
-
Yes weld it unless you have some rule book preventing you from doing so. Then forget about any fatigue issues.
-
Hopefully i understand the question correctly.
I think you will be fine. The wheels should be self centering with tapered lugs so they only need enough clearance in the middle. It is more important that rear rotor hats (if running them) have a nice spigot fit over the hub centers. Just like the stock drums do.
Which is next question, what are you running for rear brakes? Depending on what you slide over the rear hub, you wheel interference may go away.
And Forgeline is A1 Top Notch wheel.
-
Yes the alternate parts on same line are accepted with no penalty. I did not think he runs a wilwood caliper on EP car that I can remember. It looked like a Maxima setup.
EP allows alot of mods, dog ring box, brake upgrades, and EFI. But you have to pay it back in weight. Greg has optimized each of these with the stock parts. And even tested against the upgrades to verify his stock based parts are best. For example, he runs a stock 4 speed because he proved to himself that even the additional weight from a 5speed was not worth it and engine torque curve beat out better ratios. Think about that for a minute.
It's funny I can talk about Greg's car freely without giving away any secrets. I've been all over it throughly, and there are none. Just 20 years of development, attention to detail, solid chassis and a damn good driver. If there is a secret, it's his constant experimentation, he is always testing new ideas.
So yes your thought process is good. You could even start with stock soild front rotors to get going. And drums with good shoes are fabulous. Just a little more difficult to keep adjusted. Again, put race tires on a car and it becomes a race car with corresponding G forces.
-
Oh hell, I have not been on their website in a couple years. Check out DP Racing. They are the only company offering a "small" big brake kit that I know of. They have the right idea. But you can go even beyond this if desired.
-
So I am looking at the GCR production class. If I am reading this correctly, you can substitute brakes for a 2% or 43lb weight penalty. Measured with driver coming off track.
If substituted:
1. No more than 4 piston
2. Aluminum caliper
3. Unrestricted rotors as long as they fit inside wheels
4. 2pc hat allowed
5. Rear rotor no larger than front
6. Rear must be solid rotor.
Hmmmm. I know Greg would say it is not worth the penalty. But he only runs his car in pursuit of Runoffs trophy and intends to win every race. No regional races. And he can extract the last couple of 10th's out of a lap better than most of us.
Something to think about. Would cost alot more up front. Might be able to save a little overall weight. As stated before, probably not stop 1 inch shorter, but could add a ton of consistency.
-
Here is a shot of the front brakes (For Aydin). Custom hat from Coleman, wide 5 floating adapter, floating T-nuts, and 11.75x0.810 rotor. This will be combined with raidial mount 6 piston Wilwood SL calipers.
-
 1
1
-
-
Oh your gonna need to throw everything you can at those EP brakes. Again, best to ask Greg what he runs. I know he struggled for years with pedal feel before he got it right. I would copy his pads and fluid if possible. And make sure you have very good cooling air up front, if pulling from buckets that sould be good, but make sure it exits efficiently. Again you are going to need a very good race pad for "small" EP brakes. Street pads will cook immediately. With those big brake kits, you have alot more options to control the heat.
I never put any extra money in the stock based hardware, and I don't think Greg does either. Greg's car did 155 at Daytona and is usually 10mph faster max on every track than my vintage cars. But Greg is a relatively light on brakes. So cheap calipers and rotors on Rock Auto unless he does something I dont know about. Start by Putting the money in the consummables fluid and pads.
Weather you autox, track day, race, or endurance race, brakes are just one of those things you should upgrade to the level you need, no more or you are either wasting money ot taking a weight penalty (outside of cooling air, gotta max that first). I know many that run track days in a Z and have to bleed between sessions. As long as they don't go beyond 20 min, no problem. But that is right on the edge, but then again, brake fluid is cheap! If they wanted to upgrade, I would evaluate their system and go just 1 step more. And 1st thing I would check is if cooling air can be improved.
Hope this helps, and if something is off, hope someone else will chime in.
-
Just my opinion, and you can get many, but the 12.19 x 1.25 rotors (or bigger!) whick is what most big kits go with, are way overkill. My car did 135 to 145 max on track, weighed 2350 total, and I brake really hard. I could not understand why I had such a crappy pedal feel after trying a few different pads. We put temp paint on the rotors and found they never got hot enough for the race pads. Ended up going to a performance street pad which felt much better. The pads lasted forever. The rotors never show any wear but eventually heat crack after too many cycles. All this combined with their huge weight convinced me I had to downsize. Unless you really want your brakes to last over multiple weekends, it's not worth the weight penalty. After driving multiple "vintage" setups I mentioned before, I am convinced I don't want much more for my unlimited car. The weight savings is a noticiable performance improvement. Hell the circle track guys only run 11.75x1.25 rotors and they weigh 3000+.
Brakes are really about heat management and pedal feel. It's the sticky tires that stop you. With that said, the IT guys always ran to totally stock set up with drums. If everything is fresh and adjusted correctly, they will pull your eyeballs out, but they need lots of cooling, maintenance, and may only last 1 weekend. They will start boiling fluid when the pads reach 20% wear. PITA.
So it's your decision. You might consider running same as the EP car. You may get some quantity breaks, can swap stuff around, and will always have some spares.
If you want to go down a different path, I can make some recommendations. And fabbing your own setup is roughly similar in cost as the big kits. Or you could upgrade with Bremo or AP if you really want to go big time.
-
How much do you want to spend? I'm not a fan of the big brake kits, they are way overkill. And depending on organization, the will get you bumped a class. Check the vintage rules, many also require a cast iron caliper. In front I prefer the stock solid rotors with Toyota 12+8 caliper. You can adapt 2nd gen RX7 pads which opens up a cornucopia of choices at a fair price. Cheap pads, calipers, and rotors that work with proper cooling and fluid. The rear you have about the same options as EP including drums. On the rear of the car I just sold, I adapted stock front calipers to the rear using a SAAB solid rotor. They worked great, SUPER cheap, and within the "spirit" of the rules. Calipers are wide so you have to run wheel spacers to keep them out of the wheels.
I don't have any restrictions on the tube car other than they fit in the wheels. That is why designed my own setup based on floating 11.75 x 0.810 vented rotors in front. 2 options for rear I have not finalized yet.
I have all the measurements and can adapt just about any race rotor/caliper combination if you have something else in mind. Floating rotor mounts, radial mount calipers, etc.
I have an old Arizona kit I will probably sell once I prove out my newest design.


Data Acquisition, fact or fiction, requirement for any car, or advanced.
in Motorsports / Events
Posted
My first comments are I posted a primer on analyzing basic data a few years ago but cannot find it on any of my searches. Please post a link if found.
Next comment, data collection and analysis should be super quick, accessible, and comprehensible for autox and time trials.
Next comment, overall data analysis is 80% driver, 20% car 90% of the time.
And finally, if starting out, what data is needed? Where would you start with a new car and new driver?