

gmanatc97
-
Posts
56 -
Joined
-
Last visited
Content Type
Profiles
Forums
Blogs
Events
Gallery
Downloads
Store
Posts posted by gmanatc97
-
-
Its been a wild and crazy couple of months. I have gotten a lot done on the car and thats why I have not posted in a while. I will be back dating the progress on the car over the next few weeks about what I did since my last post. I found out I was moving here in a month or two so needed to get as much work done as possible. I am now able to drive the car and have some fun with it. I even took it to ZDayZ up at the Tail of the Dragon (Deals Gap) back in May.
Here is a quick run down of what all I got done and will be posting details about in later posts.
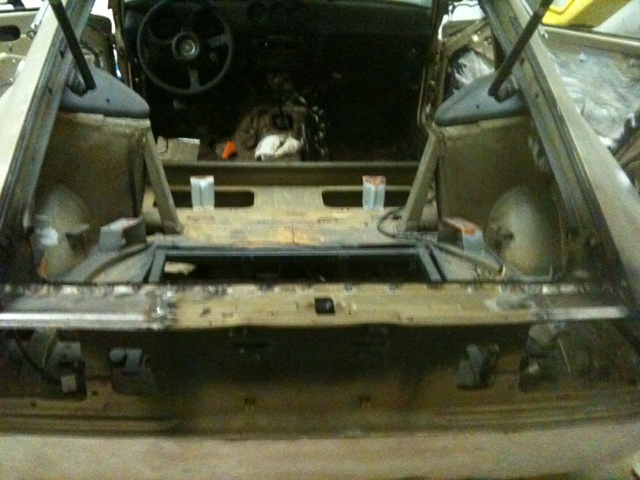
I finished the passenger side floor pan
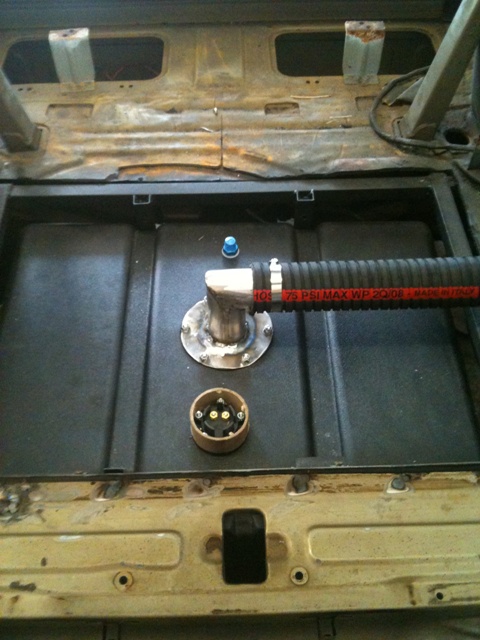
Finished the rear hatch area (fuel cell tucked in and covered)
Wheels and tires mounted (needed spacers and longer wheel studs)
Front air dam and grill put back in (at least until they get painted)
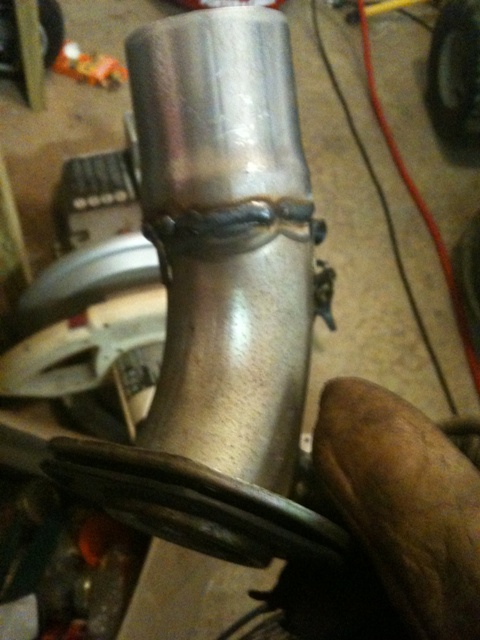
Headers and full exhaust in
Engine fully put together and runs real good (this project will never be 100% complete)
Installed new carpet and padding for less than around $200 (just need to finish one door panel and interior is done, for now)
Made and installed new hood vents
Like I said, I will be going in more detail in the coming days.
Thanks to HybridZ for helping me and getting this car from a yard find to a drivable fun Z!
-
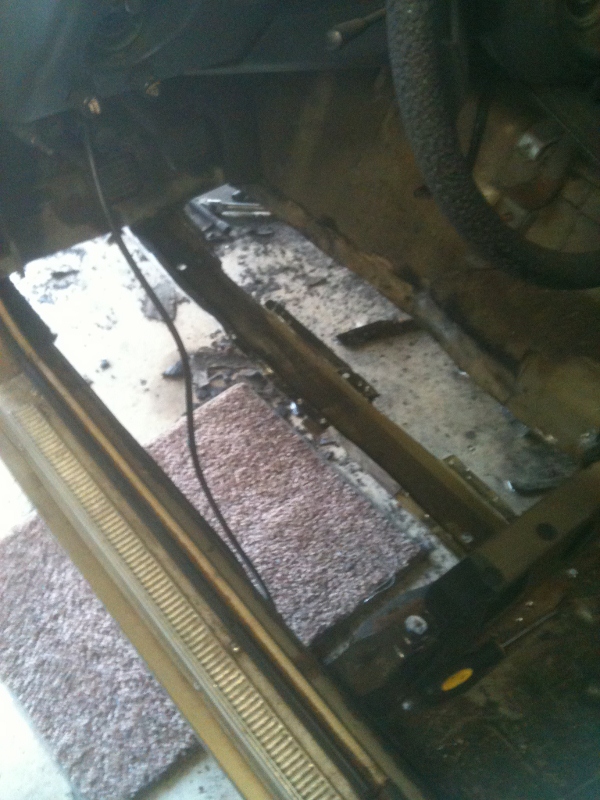
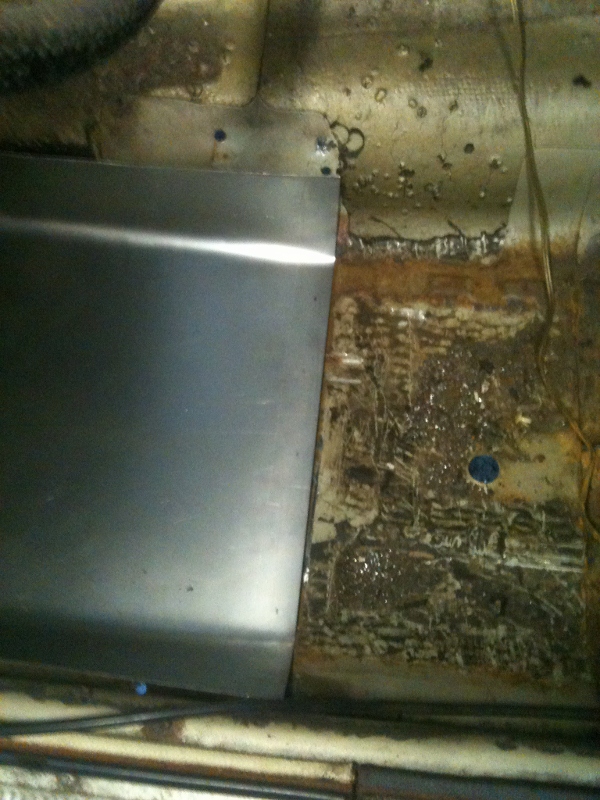
I had the same issue on my car. It looked like just a small hole, but the more metal I exposed, the more rust and holes I found. I have now replaced the majority of the drivers side floor pan and now finishing up the whole passenger side to include part of the frame rail. What it looks like on the surface is just a small indication of whats under all the paint, tar... These cars were not made with very thick metal to begin with, so when the rust starts it spreads like wild fire and eats through just as fast.
I would expose as much as you can and replace the bad metal, don't patch it.
-
I would, but that is a hell of a plane ride!
-
Thanks for the info. Guess I will go that route.
-
So what do you guys use for the rear hatch?
-
Sweet, you staying at the Dragon, do they still do that?
I do like what you have done with the car though. Your pics gave me an idea what mine will look like soon. I have the same air dam and planning on only using the upper grill and no bumpers.
-
You have been in Korea for the last 13 months? Are you ARMY? I only had to spend 12 months in that country, Camp Red Cloud, but that was 00-01. Nice to see the drivers in Korea are still aiming at military vehicles for a check from government.
-
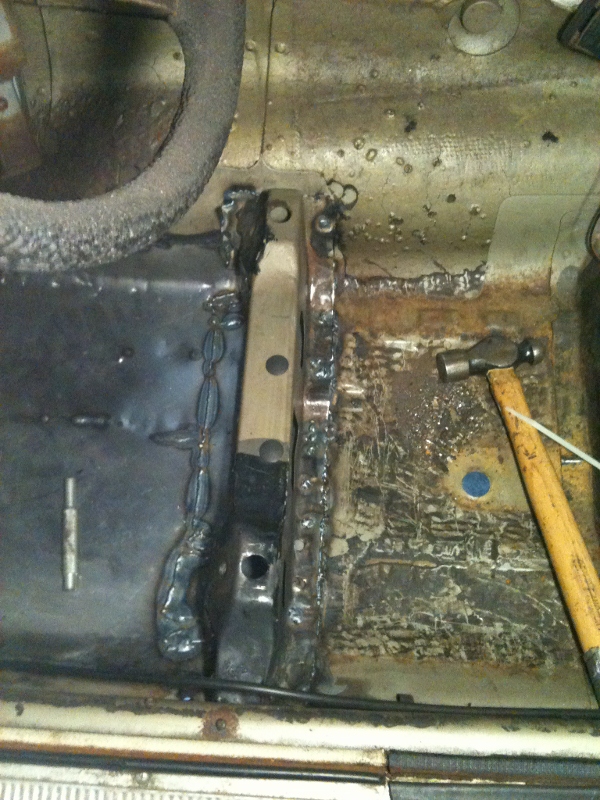
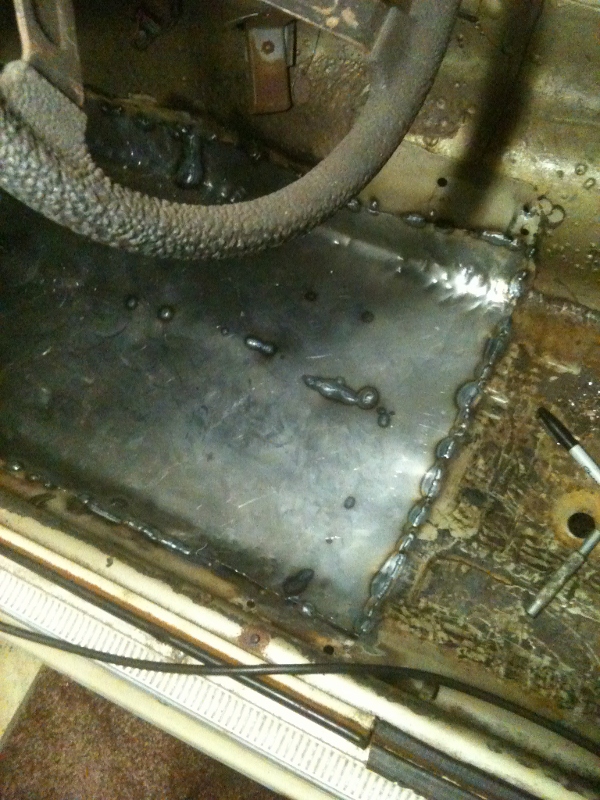
I had to cut out the seat mounting bracket so that the new floor pan could replace the bad metal under it. When I did that I realized just how bad the front of it was. I ended up cutting about half of the front metal off. After rebuilding the front, I welded it back in the car. It took a little talking to it to get it back in the right place. The last thing I needed was to have to beat on it or modify the seat to line up.

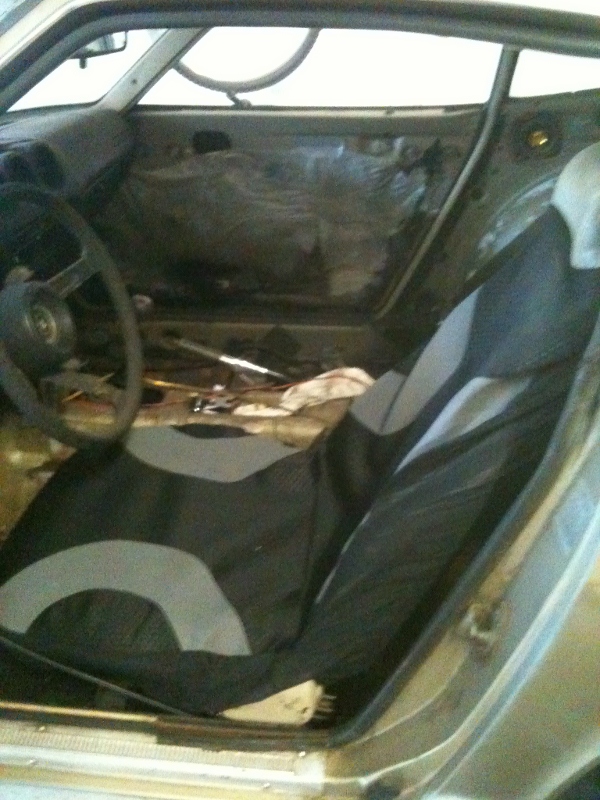
I test fit the seat and thankfully it went right in and the bolt holes lined up perfectly.
Please excuse the ugly seat cover, I put it on the seat so I could sit and see how the seat felt finally back in the car. Now hopefully the passenger side goes just as well as the drivers side did.
-
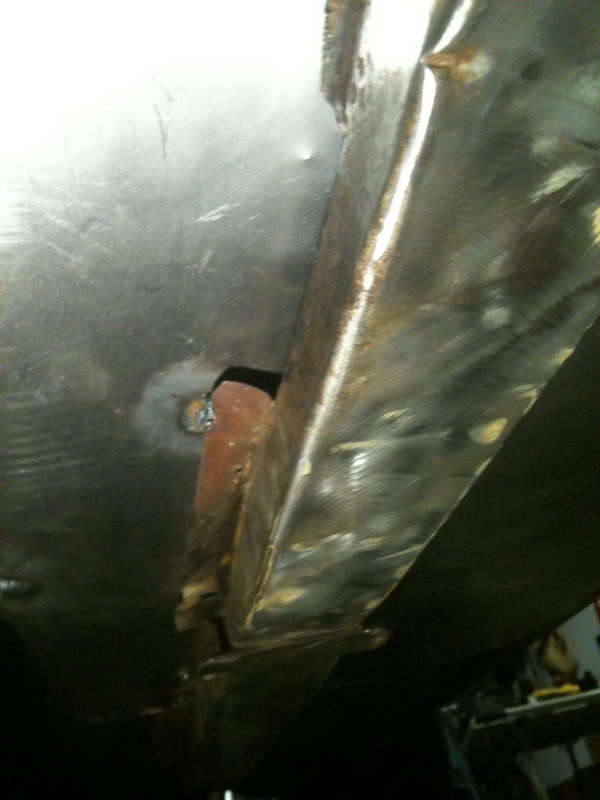
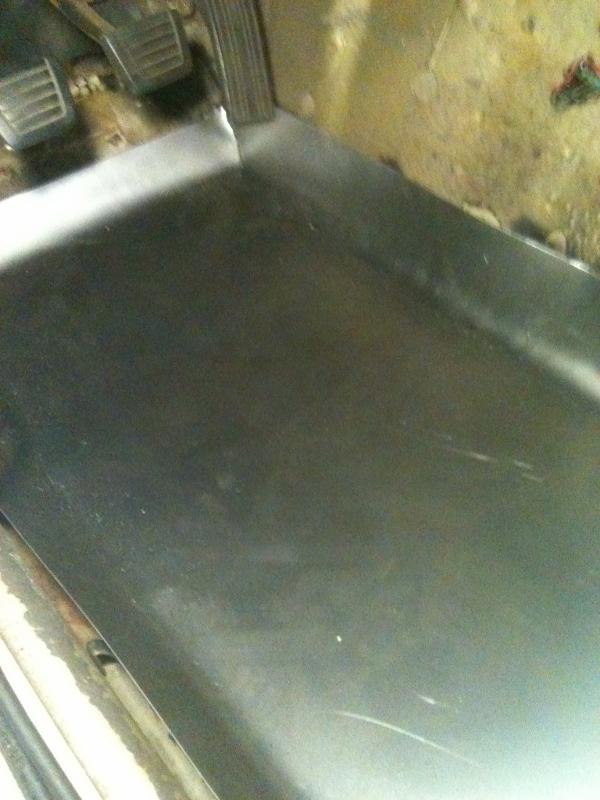
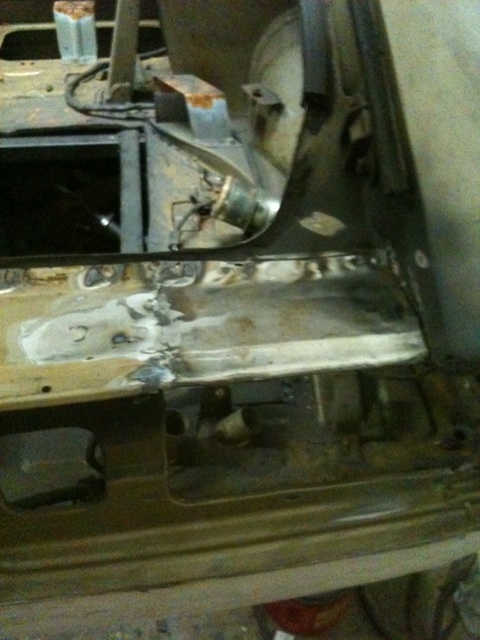
After getting the new pan in place I spot welded it just to hold it in place while I used a hammer and a few other tools to form it to the curves of the car. Took a little while but ended up working pretty well.
I ended up having to take a small chunk out of the frame rail due to rust
I just then cut and bent a small piece of metal to fill it in. The floor pan sits pretty well along the frame rail, after talking to it a bit.
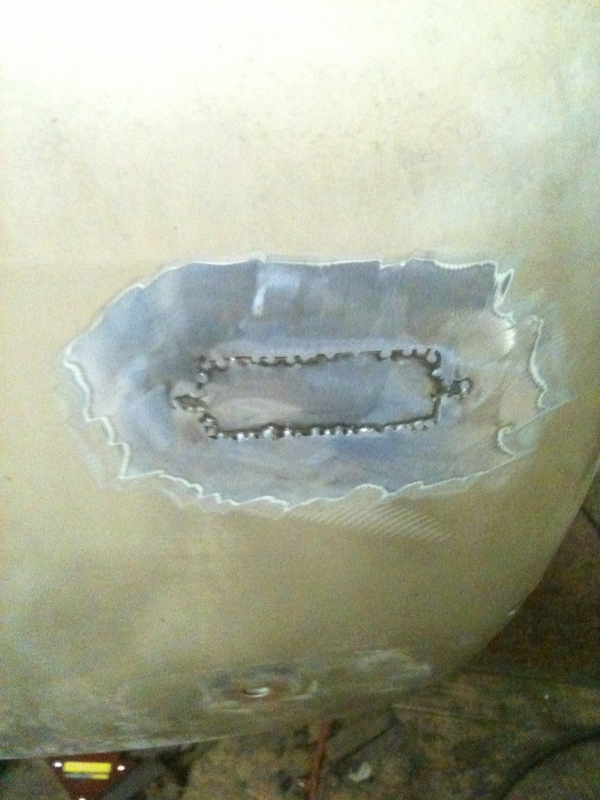
I also got the running light openings closed up. I just cut a small piece of metal and welded it in slowly so I didn't warp the body panels. I will fill in the rest with a thin layer of body filler.
-
Got a few more things done in the past few weeks.
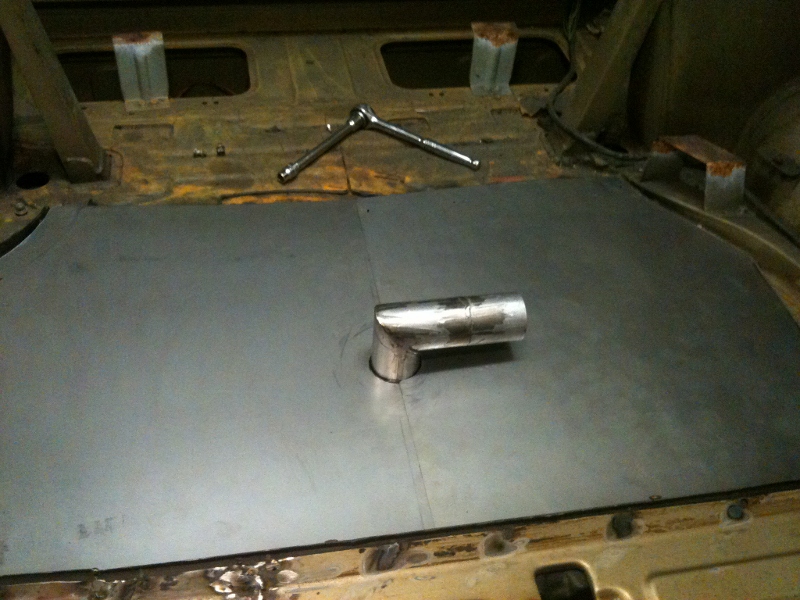
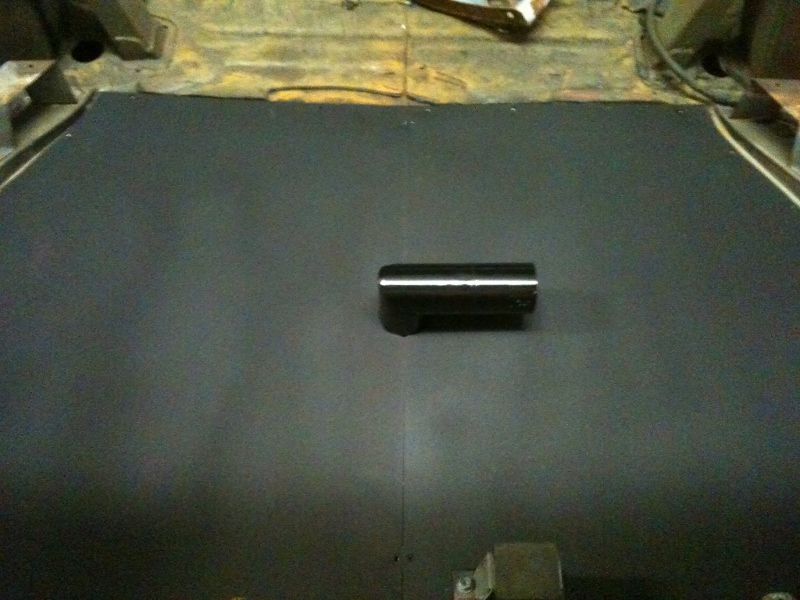
I got the fuel cell area finalized and painted. I made a two piece cover for the fuel cell well with a hole in it for the filler neck.
Then I painted it with some rubberized undercoating. I also painted the filler necks. I think it turned out very well.
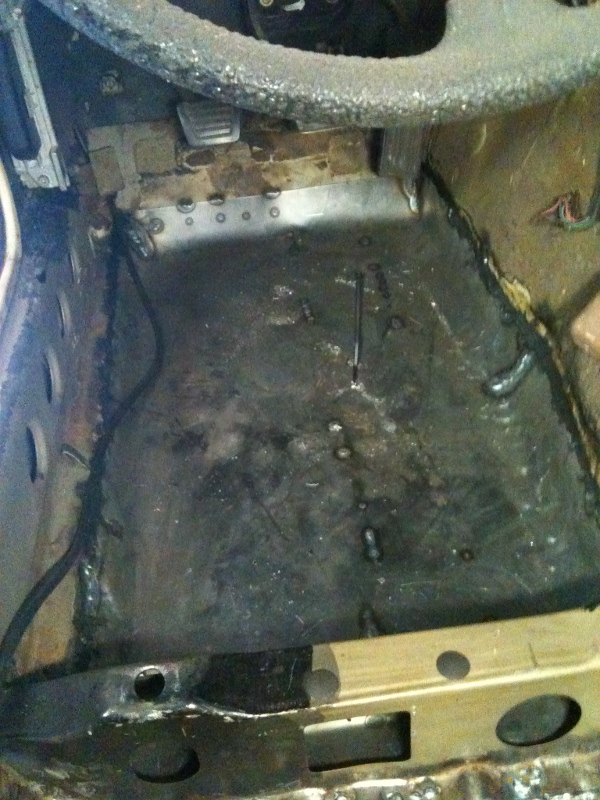
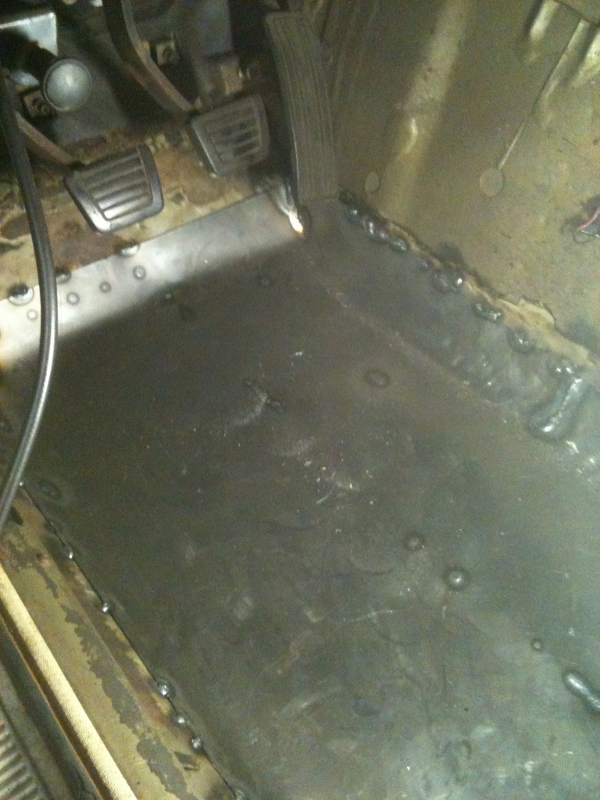
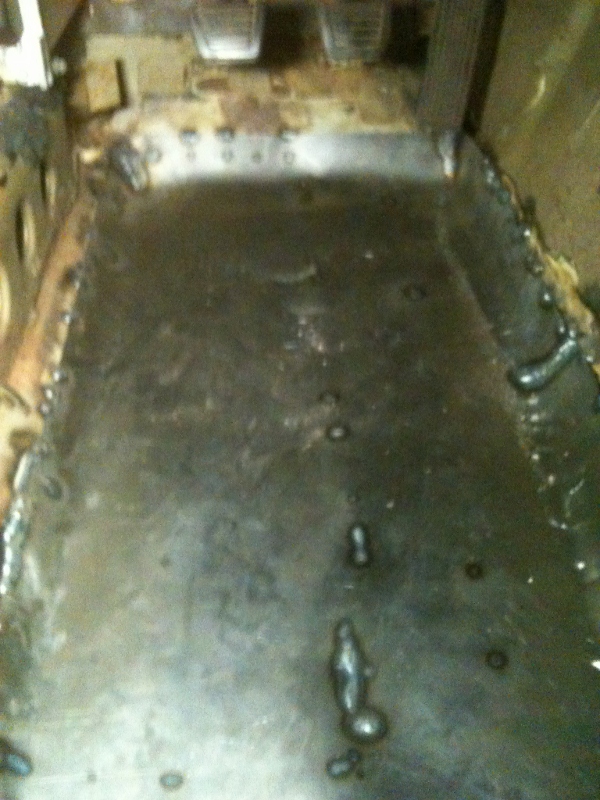
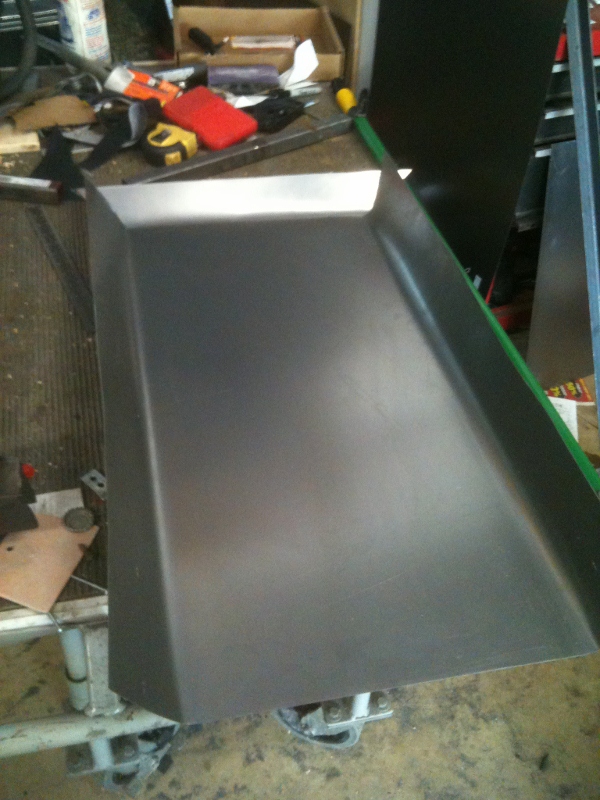
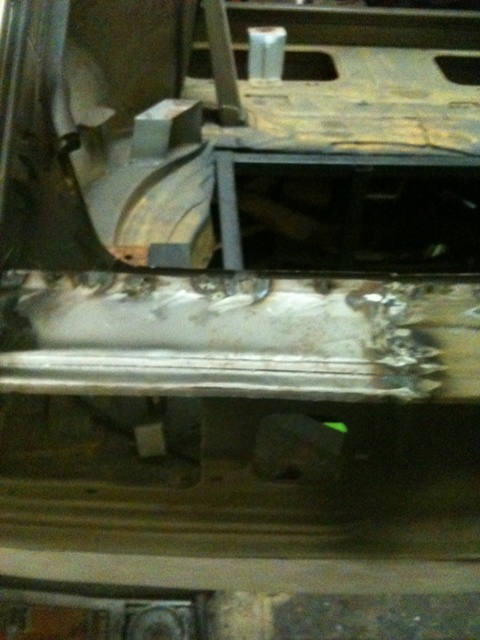
Then I started on the floor pans. I started with the drivers side since that was the side with the least amount of rust. I cut out all the bad metal and then about half to one inch beyond the good metal.
Then I measured out the area that needed new metal. Then I cut and rough formed the new pan.
After some adjustments and some trimming the new pan fit pretty well.
-
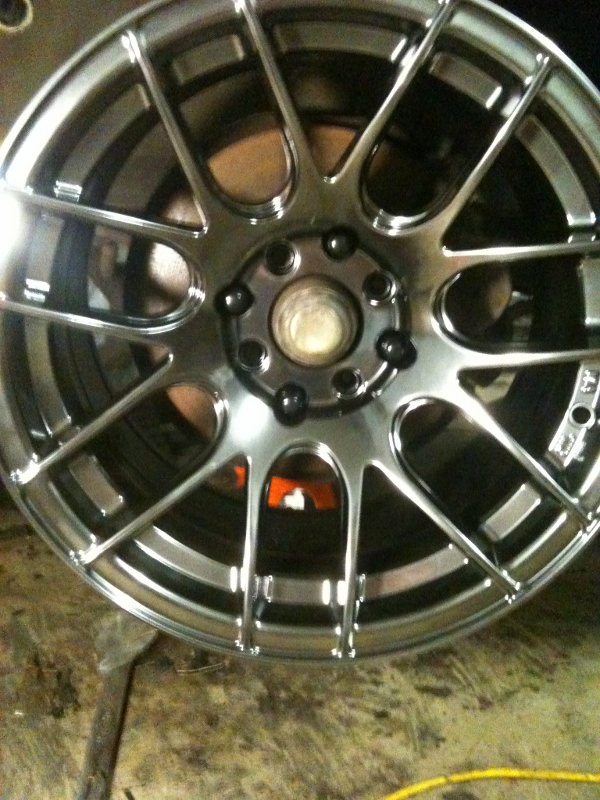
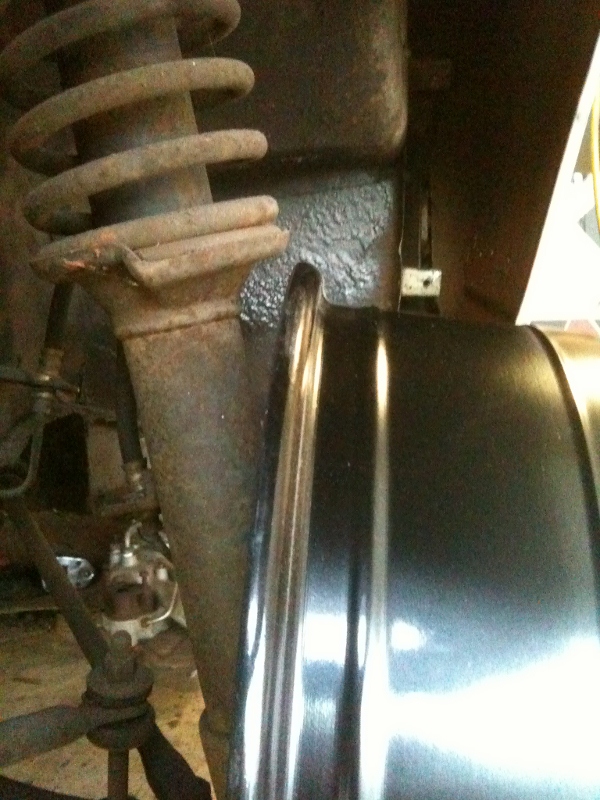
I got my wheels a few days ago. I ended up getting 15x8.25 0 offset, because of my budget.
I was told on this forum by roger280zx that I could run 225/50-16s on all four corners, but whats the most you can get away with without any rub issues on a 15" rim?
There is very little gap between the wheel and the shocks with the car on jack stands, so how much room will I have with the car on the ground?
I think I can only get away with 215/60-15s on all four, am I wrong?
-
Thinking about buying the one piece outer seal from MSA, any thoughts?
-
Has anyone used the MSA inner and outer weatherstripping? Looks like you can get both for $110 plus shipping.
-
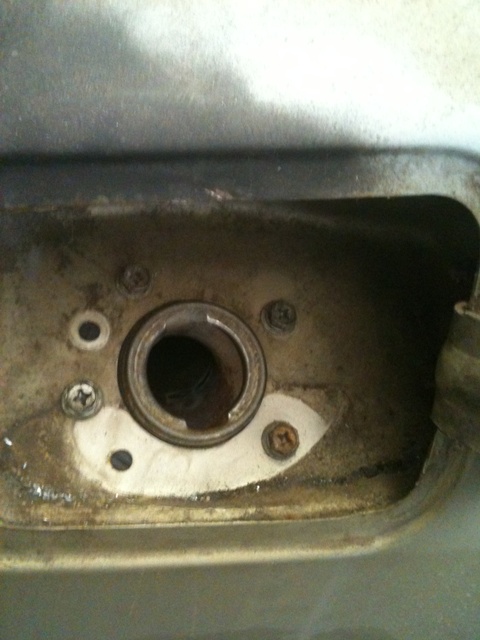
So what is everyone using for the inner and outer hatch seals? Mine are done and need to be replaced. I cant seem to find a good alternative on McMaster-carr
-
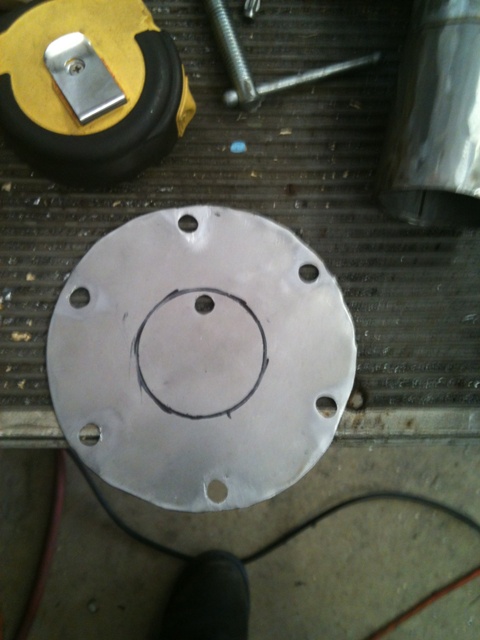
So this week I got a lot done on the fuel cell setup. My plan since the beginning was to be able to use the stock fuel door and location to fill the car with gas. With the new fuel cell, that was a bit of a challenge. Here is what I used and how I did it.
2' section of 2" exhaust pipe from Advanced Auto (about $4)
6"x12" piece of 22GA steel from Lowe's (about $6)
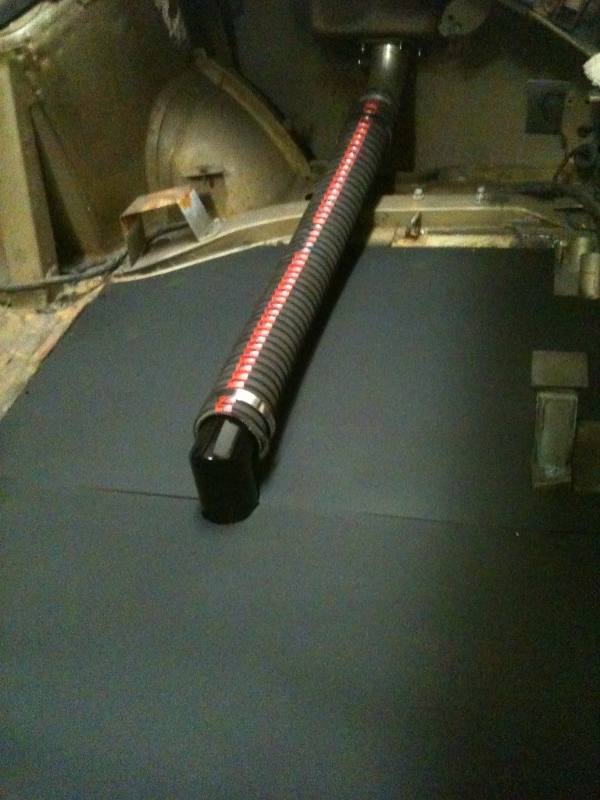
3' piece of 2" fuel hose from a local hose dealer. I suggest just getting it from Amazon. (I paid $40, but I saw some on Amazon for around $30)
Stock filler neck that attaches to the rear fender
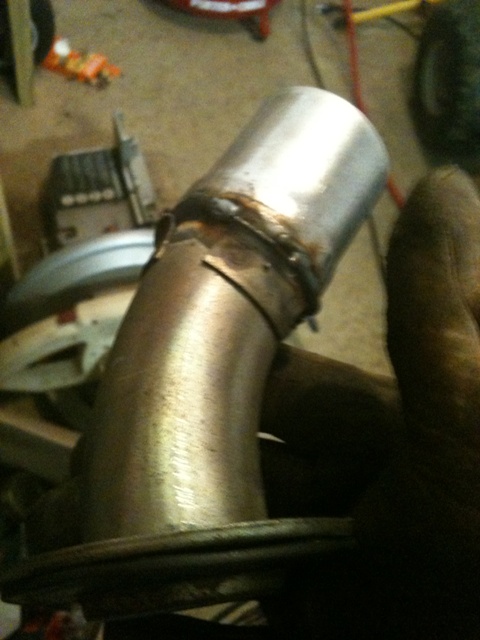
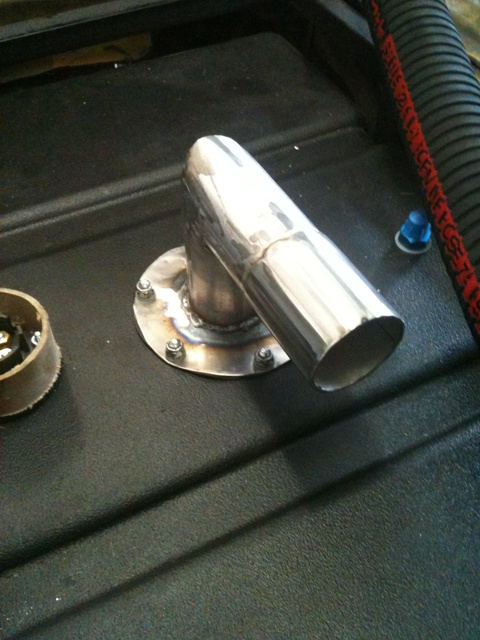
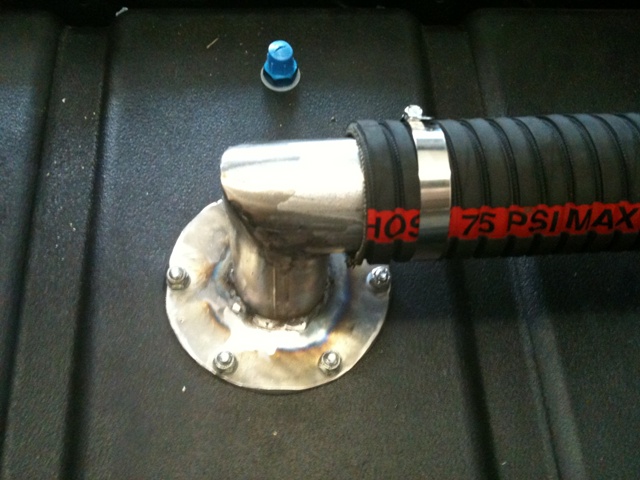
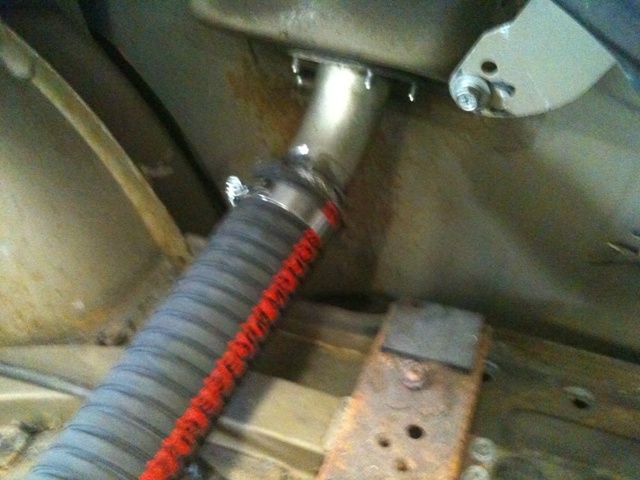
I stared out by turning the stock filler neck 180 deg and drilled 2 new holes so all four bolts could be used. Then I took a 2" section of the exhaust pipe and welded it to the end to increase the diameter of the tube. The stock neck is 1 7/8" and would be too loose in the new hose.
Then I got started on the filler neck for the fuel cell. I could not bring myself to pay upwards of $100 for one. I took the cap off that came with the fuel cell and used it as a template for the next couple of pieces. I made a lower ring, inside the tank, to hold the bolts in place. I cut it in two pieces so it would go in the hole. I welded the bolts that came with the fuel cell to those to make studs essentially. Then I made an upper ring to weld the neck to and hold it to the fuel cell.
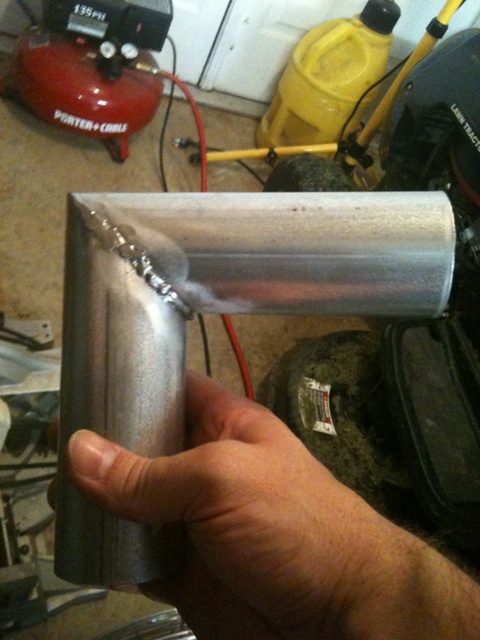
To make the filler neck, I cut a 45 deg angle in the remaining pipe, turned it to make a 90 deg turn and welded it together. After welding and grinding it I checked for any pin holes and re-welded any I found. It will get a thin coat of JB Weld around the joints before paint, to make sure there are no leaks. I originally welded a collar on the hose end to make it tighter in the hose, but that made it too tight so I cut it off.
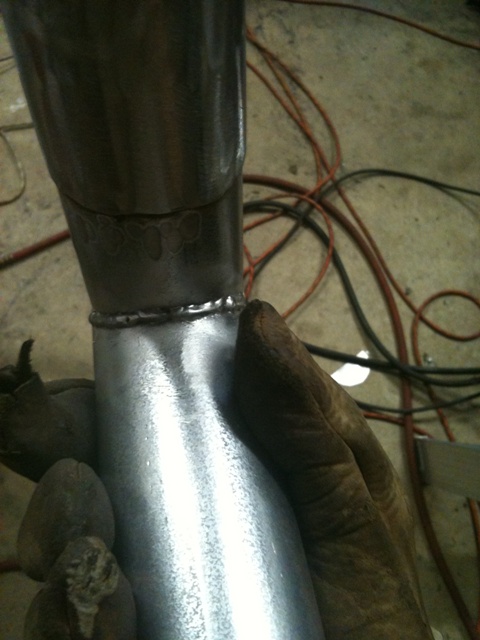
Then I welded the neck to the base, cleaned it up a little and bolted it to the fuel cell.
And here is the mostly finished product. Unfortunately nobody will see most of the hard work that went into this. In order to keep all the exhaust gasses and such out of the inside of the car, there will be a cover over the whole fuel cell.
-
Finally got a chance to post some progress pics. Here are some of the rear hatch deck lid I cut, welded and rebuilt. I still need to smooth it out with filler and seal the seams up before I paint it.
-
Been a while since I posted so here is a little update, I'll post pics soon.
I finally got the manifolds off and only broke one stud, so I ordered the kit from TheZstore.
Got the rear hatch deck lid fabed and welded back on. It looks pretty good, I'll smooth it all out with a little filler before paint.
I started cutting the floors out. Went and picked up some sheet metal from Lowe's since the local metal shop just blew me off.
I started fabing the filler neck on the fuel cell. Just using a piece of 22GA and a 2" piece of exhaust tubing. Located a piece of 2" fuel hose ($30 for 3') its more expensive than I thought but I have to do it.
This coming weekend I would like to get at least one of the floor pans fabed and welded in and the filler neck done.
-
What is everyone using for the inner and outer hatch seals? And has anyone used the ones from Black Dragon? I am going to be buying here very soon and would REALLY like to only do it once.
-
I have one out of a 78 280Z. Outside is perfect, inside needs to be cleaned.
-
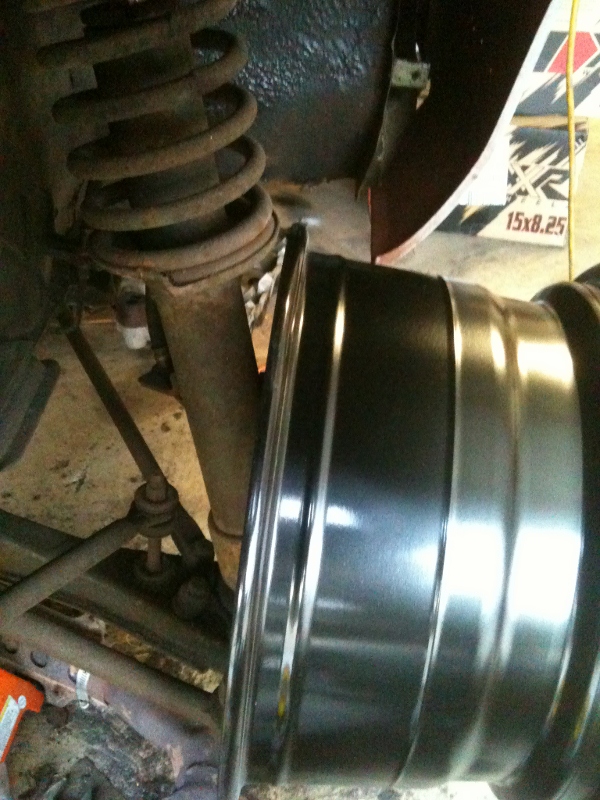
Cutting the springs is kind of a half thought at this point. If I can put the 225s on, then I am going to go that route and see how it looks like for now. Then down the road I will lower it. I don't plan on slamming it down, just get a little more aggressive stance (1"-1 1/2"). Thanks for the info on the fitment.
-
So do you think I could run 225/50-16 on all four corners without any problems with the stock 78 280z suspension? I plan on running the XXR 530 16x8.25 0 offset and going to cut my stock spring to lower the car about an inch or slightly more.
-
What's the offset and backspace of those wheels str8pipez? I tried to measure to see if the XXR 530s with 0 offset would fit my 280 with the stock suspension and 205 to 215 tires. Still not sure.
-
Had a little time tonight and wanted to get a few things at least started. I mocked up the tail lights with the covers and realized I do have to complete the top piece. I also started to get the intake and exhaust manifolds off so I can put on the header I bought. I wasn't able to get the flange bolts off the lower part of the exhaust manifold, so tomorrow I will go to Harbor Freight for some tool reinforcements! Also going to look around to see if I can find a nylon sleeve to fix the wiggly shifter. Hopefully I'll have some pics of some progress tomorrow.
-
So I mocked up the tail lights with the top piece removed. Its been so long since I had the lights and the tail light covers on the car. Looks like I am going to have to put the top piece back on AND finish extending it to the corners like it was. There is a 1/2" gap between the metal and the covers. Oh well it was worth a look and a thought. Back to fabrication, welding and grinding. It just really never ends!


Fuel Smell Problem
in Nissan L6 Forum
Posted
I finally got my 78 280Z running again after putting in the new floors. So here is my problem:
Engine runs really good, but when I let off the throttle (at any RPM) I start to smell fuel like its running really rich.
It is a mostly stock motor, all I changed is:
Header, 2 1/2" pipe to a flowmaster super 44, took out the charcoal canister and added an aftermarket adjustable fuel pressure regulator.
Thanks in advance for everyone's help, not only on this issue but with the whole build.