
BluDestiny
-
Posts
2251 -
Joined
-
Last visited
-
Days Won
10
Content Type
Profiles
Forums
Blogs
Events
Gallery
Downloads
Store
Posts posted by BluDestiny
-
-
So what you're saying is what matters is if the spacer is there to make up the distance to the gland nut. I can then leave the tubes themselves the same and make sure the insert itself comes right up to the gland nut. I am artifically raising the car by however much that spacer length is in the tubes.
Then I can play with whatver length springs I need to really get it centered.
Or are you saying the spacer is needed because of how the tube is centered and welded to the cast portion?
-
So I bought my 240z with sectioned struts, tokico illumina struts and hyperco springs. My driver front was leaking so I decided to take some time this weekend and see what I actually have. My fronts are Tokico BZ3099, the common 87-89 MR2 rear struts, and my rears are Tokico BZ3015, which are 240z front strut inserts used in the rear. Since tokico is no longer available I'm thinking of just going with koni 8610's since this is mostly a track driven car at this point. The problem is in the measurements.
Below is an except from the strut sectioning sticky by John Coffey
QuoteSECTIONING DATSUN 240Z STRUTS
For Koni 8610-1437RACE Inserts
General
Remove stock lower spring perch from all the struts and remove the brake line brackets from the front struts. Use a cutoff wheel to remove all the spring perches and brackets above the welds and then grind the welds off the strut tube. Get it smooth but be careful not to grind off too much of the tube itself and thin it.
Front
From the dished bottom center of the strut to the top lip the overall length should be between 12.875" and 12.938", measured from the inside using a tape measure. The threaded collar weld-on ring height (assuming 10" tall springs and 5" tall threaded collars) measured from the top of the spindle casting (opposite spindle) is 5.250". The strut tube is cut at about 6.5" up from the top of the spindle casting to put the welded section under the threaded collar. From 1 to 2" is cut from the bottom of the top half of the strut tube but you must measure first to be sure of the exact length as specified above. The most important measurement is the overall length of the strut tube (12.875" to 12.938").
Rear
From the dished bottom center of the strut to the top lip the overall length should be between 14.938" and 15", measured from the inside using a tape measure. The threaded collar weld-on ring height (assuming 10" tall springs and 5" tall threaded collars) measured from the top of the hub casting (opposite hub) is 7.250". The strut tube is cut at 8.5" up from the top of the spindle casting to put the welded section under the threaded collar. From 1 to 2" is cut from the bottom of the top half of the strut tube but measure first to be sure of the exact length as specified above. The most important measurement is the overall length of the strut tube (14.938" to 15").
Tokico Ilumina BZ3099 and BZ3015 Inserts
General
Basically all the steps are the same except for the measurements and the tightness of fit of the Tokico inserts in the 240Z strut tubes. The Tokicos are a little smaller OD then the Konis and slide in easy.
Front
From the dished bottom center of the strut to the top lip the overall length should be between 13.375" and 13.500", measured from the inside using a tape measure. The perch height (assuming 10" tall springs and 5" tall threaded collars) measured from the top of the spindle casting (opposite spindle) is 5.250". The strut tube is cut at about 6.5" up from the top of the spindle casting to put the welded section under the threaded collar. From 1 to 2" is cut from the bottom of the top half of the strut tube but you must measure first to be sure of the exact length as specified above. The most important measurement is the overall length of the strut tube (13.375" to 13.500").
Rear
From the dished bottom center of the strut to the top lip the overall length should be between 14.938" and 15", measured from the inside using a tape measure. The perch height (assuming 10" tall springs and 5" tall threaded collars) measured from the top of the hub casting (opposite hub) is 7.250". The strut tube is cut at 8.5" up from the top of the spindle casting to put the welded section under the threaded collar. From 1 to 2" is cut from the bottom of the top half of the strut tube but you must measure first to be sure of the exact length as specified above. The most important measurement is the overall length of the strut tube (14.938" to 15").
The rest of the process is that same as for the Koni inserts and Tokico includes the gland nut for their shocks. They are hex shaped so a large adjustable wrench (or gland packing nut wrench) is needed for installation.
So in the front, the koni's require about 0.55" less length than the illuminas, and the rears are the same. Koni's need to have an overall length of approx 12.9" and illumias need a total length of 13.5. The rears are the same for illuminas and konis at 15"
The problem I have is my measurements are a little off. My rear overall tube length is 15.25" with the perch at 9.5" from the bottom of the tube, and my front tube is 14" with the pearch at 8.375". My rear spring is a 10" 250lb hyperco spring, and the front is a 9" 225lb spring, both on 5" sleeves.
I have not fully removed the insert, just enough to see the part number. I have to assume there is a spacer at the bottom of each to fill the space and bring the strut insert to the gland nut. I want to drop in the Koni 8610-1437RACE inserts and increase my springs to 325f/350r rates using 10" springs as listed in the faq.
Does that sound feasable or will I need to section my struts again to get the proper length?
-
Looking for some new struts if anyone happens to have sets laying around. Blew one of my fronts and I figured I should replace them all.
-
Looking for some wide 17's. I don't care if they're rotas or volks. Trying to pick up in Socal, but can make a trip to phoenix is needed.
PM me here
-
I went to 2 machines shops, Burbank speed and machine and Deed automotive in moorepark and they could do it for about $400 for machining only, but it cost less to ship it to and from texas for Godzilla to do the machine work. Myself and a friend shipped Godzilla about 4 bellhousings to have done to cut down on costs.
-
So this is the members projects, not a question sub forum. But, all the factory service manuals are available on http://www.xenonzcar.com/s130/fsm.php and you can find the wiring schematics from there (not in color which sucks).
-
Man that looks fancy. It's next on my list with a trans mount and motor mounts.
-
All my suspension clunking is gone. The car is extremely solid now. The steering is a lot more reactive also. Overall I can't wait to try it out on the 21st at Buttonwillow. Also started the process of rebuilding an SR trans and and just waiting on a machined L series bellhousing right now from Godzilla Raceworks
-
 1
1
-
-
The driveshaft is from a 72 or later S30 Z (as long as it had a manual trans). The biggest thing is to check the length, which I posted pictures of.
I did try flipping the T3 mustache bar, but the drop mounts would not line up. That was before I even got the diff lined up, so it was an immediate problem. The T3 bar is meant to be mounted more towards the gas tank. It's a fairly tight fit with all the T3 stuff.
I'm bringing the car to get aligned this week since I just eye balled the toe everywhere. Will have first impressions of the drive after this weekend.
-
On 3/20/2019 at 3:57 PM, Gollum said:
What's your plan to smog it? Still has the SR right? With any luck we'll have good news in a week and it will be a non-issue.
The usual "I got a guy". It still has valid Iowa registration, so not too concerned as I don't drive it daily at all. But I will need to take it in before end of May.
-
I don't remember them being much different, but I did just use a large adjustable wrench to get them off. It s possible they weren't factory, but they did have 2 opposite threads, which leads me to believe they were certainly older.
-
So in the pic I posted I had already put on the new inner and outer tie rods. I rounded the lock nut off the passenger side, and then the ball from the inner tie rod ball came out. So I just got new inners and outers. The inners come off just with a 14" adjustable wrench and the outers come with it.
-
The car hasn't really done much. I moved back to CA mid sep 2018 and it's just sat. It has a strange misfire type issue at a specific throttle at what i guess is 2500-3000rpm. If I floor it through that range it's fine, but if i'm trying to accelerate like a normal driver it starts to burble till I get out of that range.
When it was weighed at Touge Factory (when I picked the car up) it was 2460lbs with 5 gallons in the tank. So it's around there. That's with bumpers and 15" wheels. So it's lighter than most S30's. My S30 weighs 2160lbs, but it's completely gutted.
I have been doing more work on my S30, swapping in T3 goodies. The next steps for my ZX are some rota wheels, then dropping it off at a shop to get a whole new set of gauges and a retune on it. I've been mixing 100oct with 91oct to get 93ish oct.
-
Doing the fronts now. Small problem I ran into was the T3 front control arm ball joint bolts were longer than factory and therefor I couldn't just bolt the strut back onto the steering knuckle. I had to buy some bump steer spacers/roll center adjusters, which was no biggie since I probably needed them. Also could not get one tie rod off and the new outer tie rods I bought are both right hand threaded. My driver side inner tie rod was left hand threaded and crusty. So I got some new inner and outer tie rods. along with a solid steering rack bushing and poly steering rack mounts (still have to put those in).

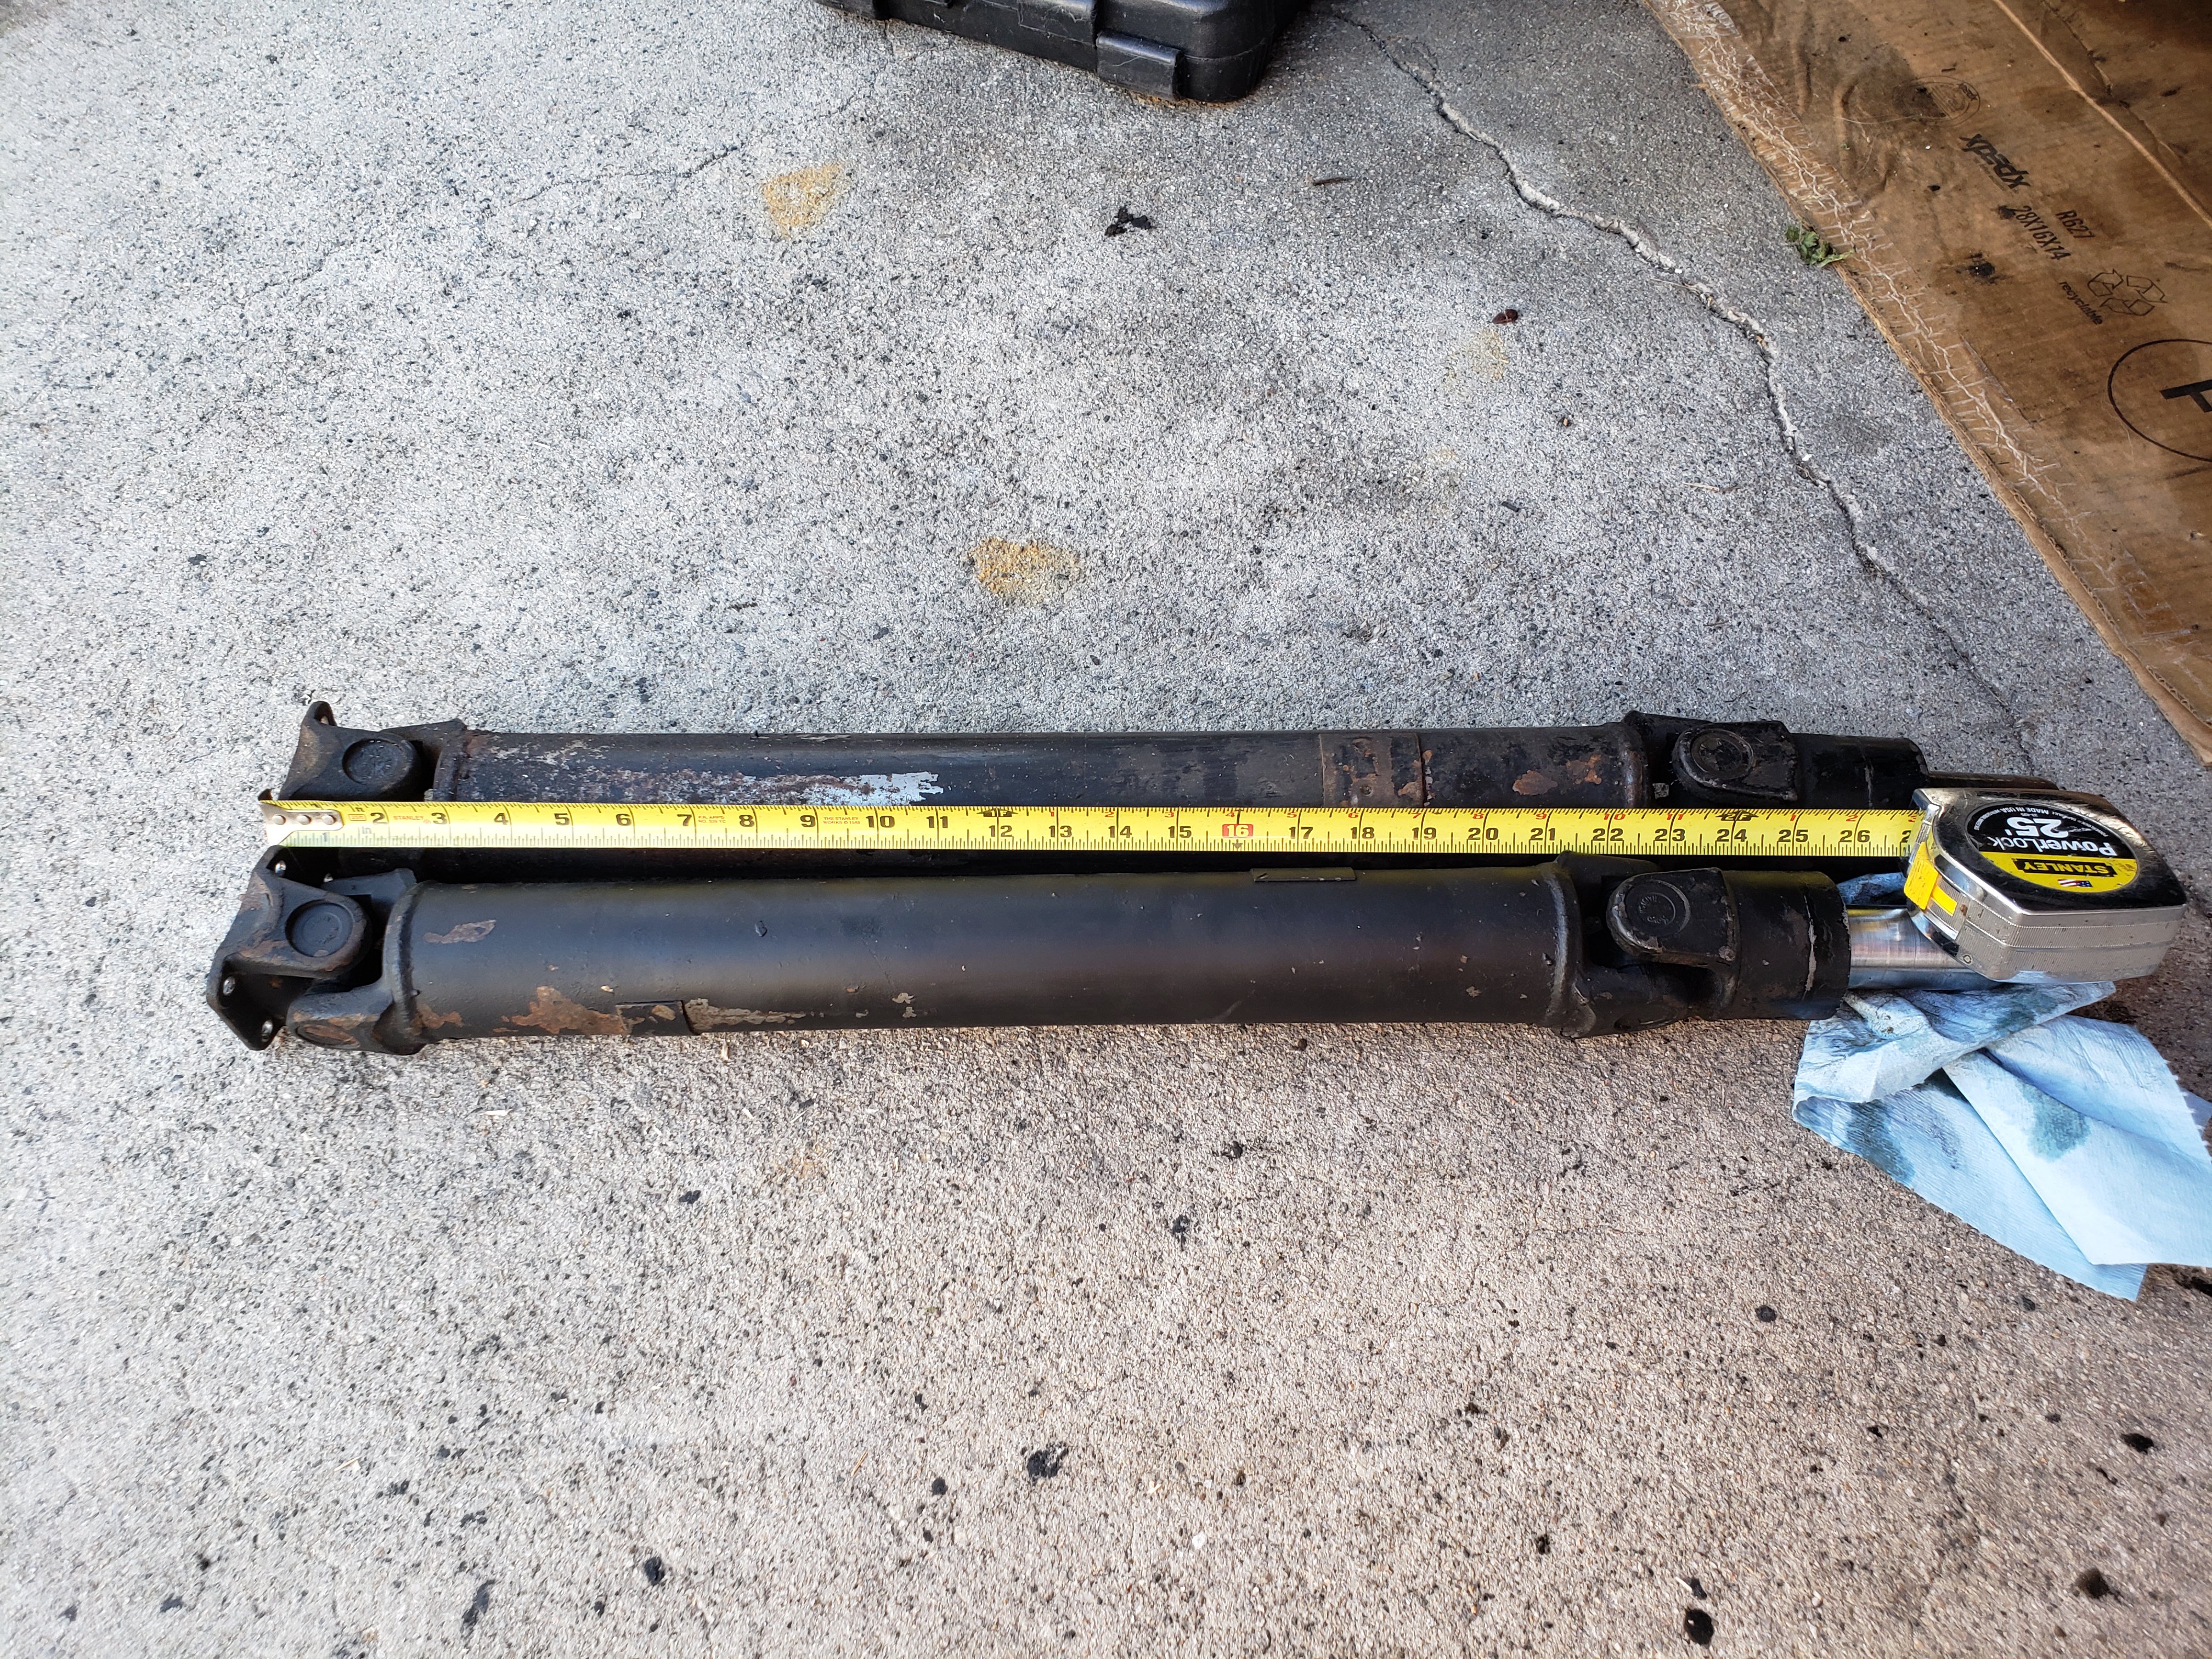
Also got the later and longer style driveshaft.
-
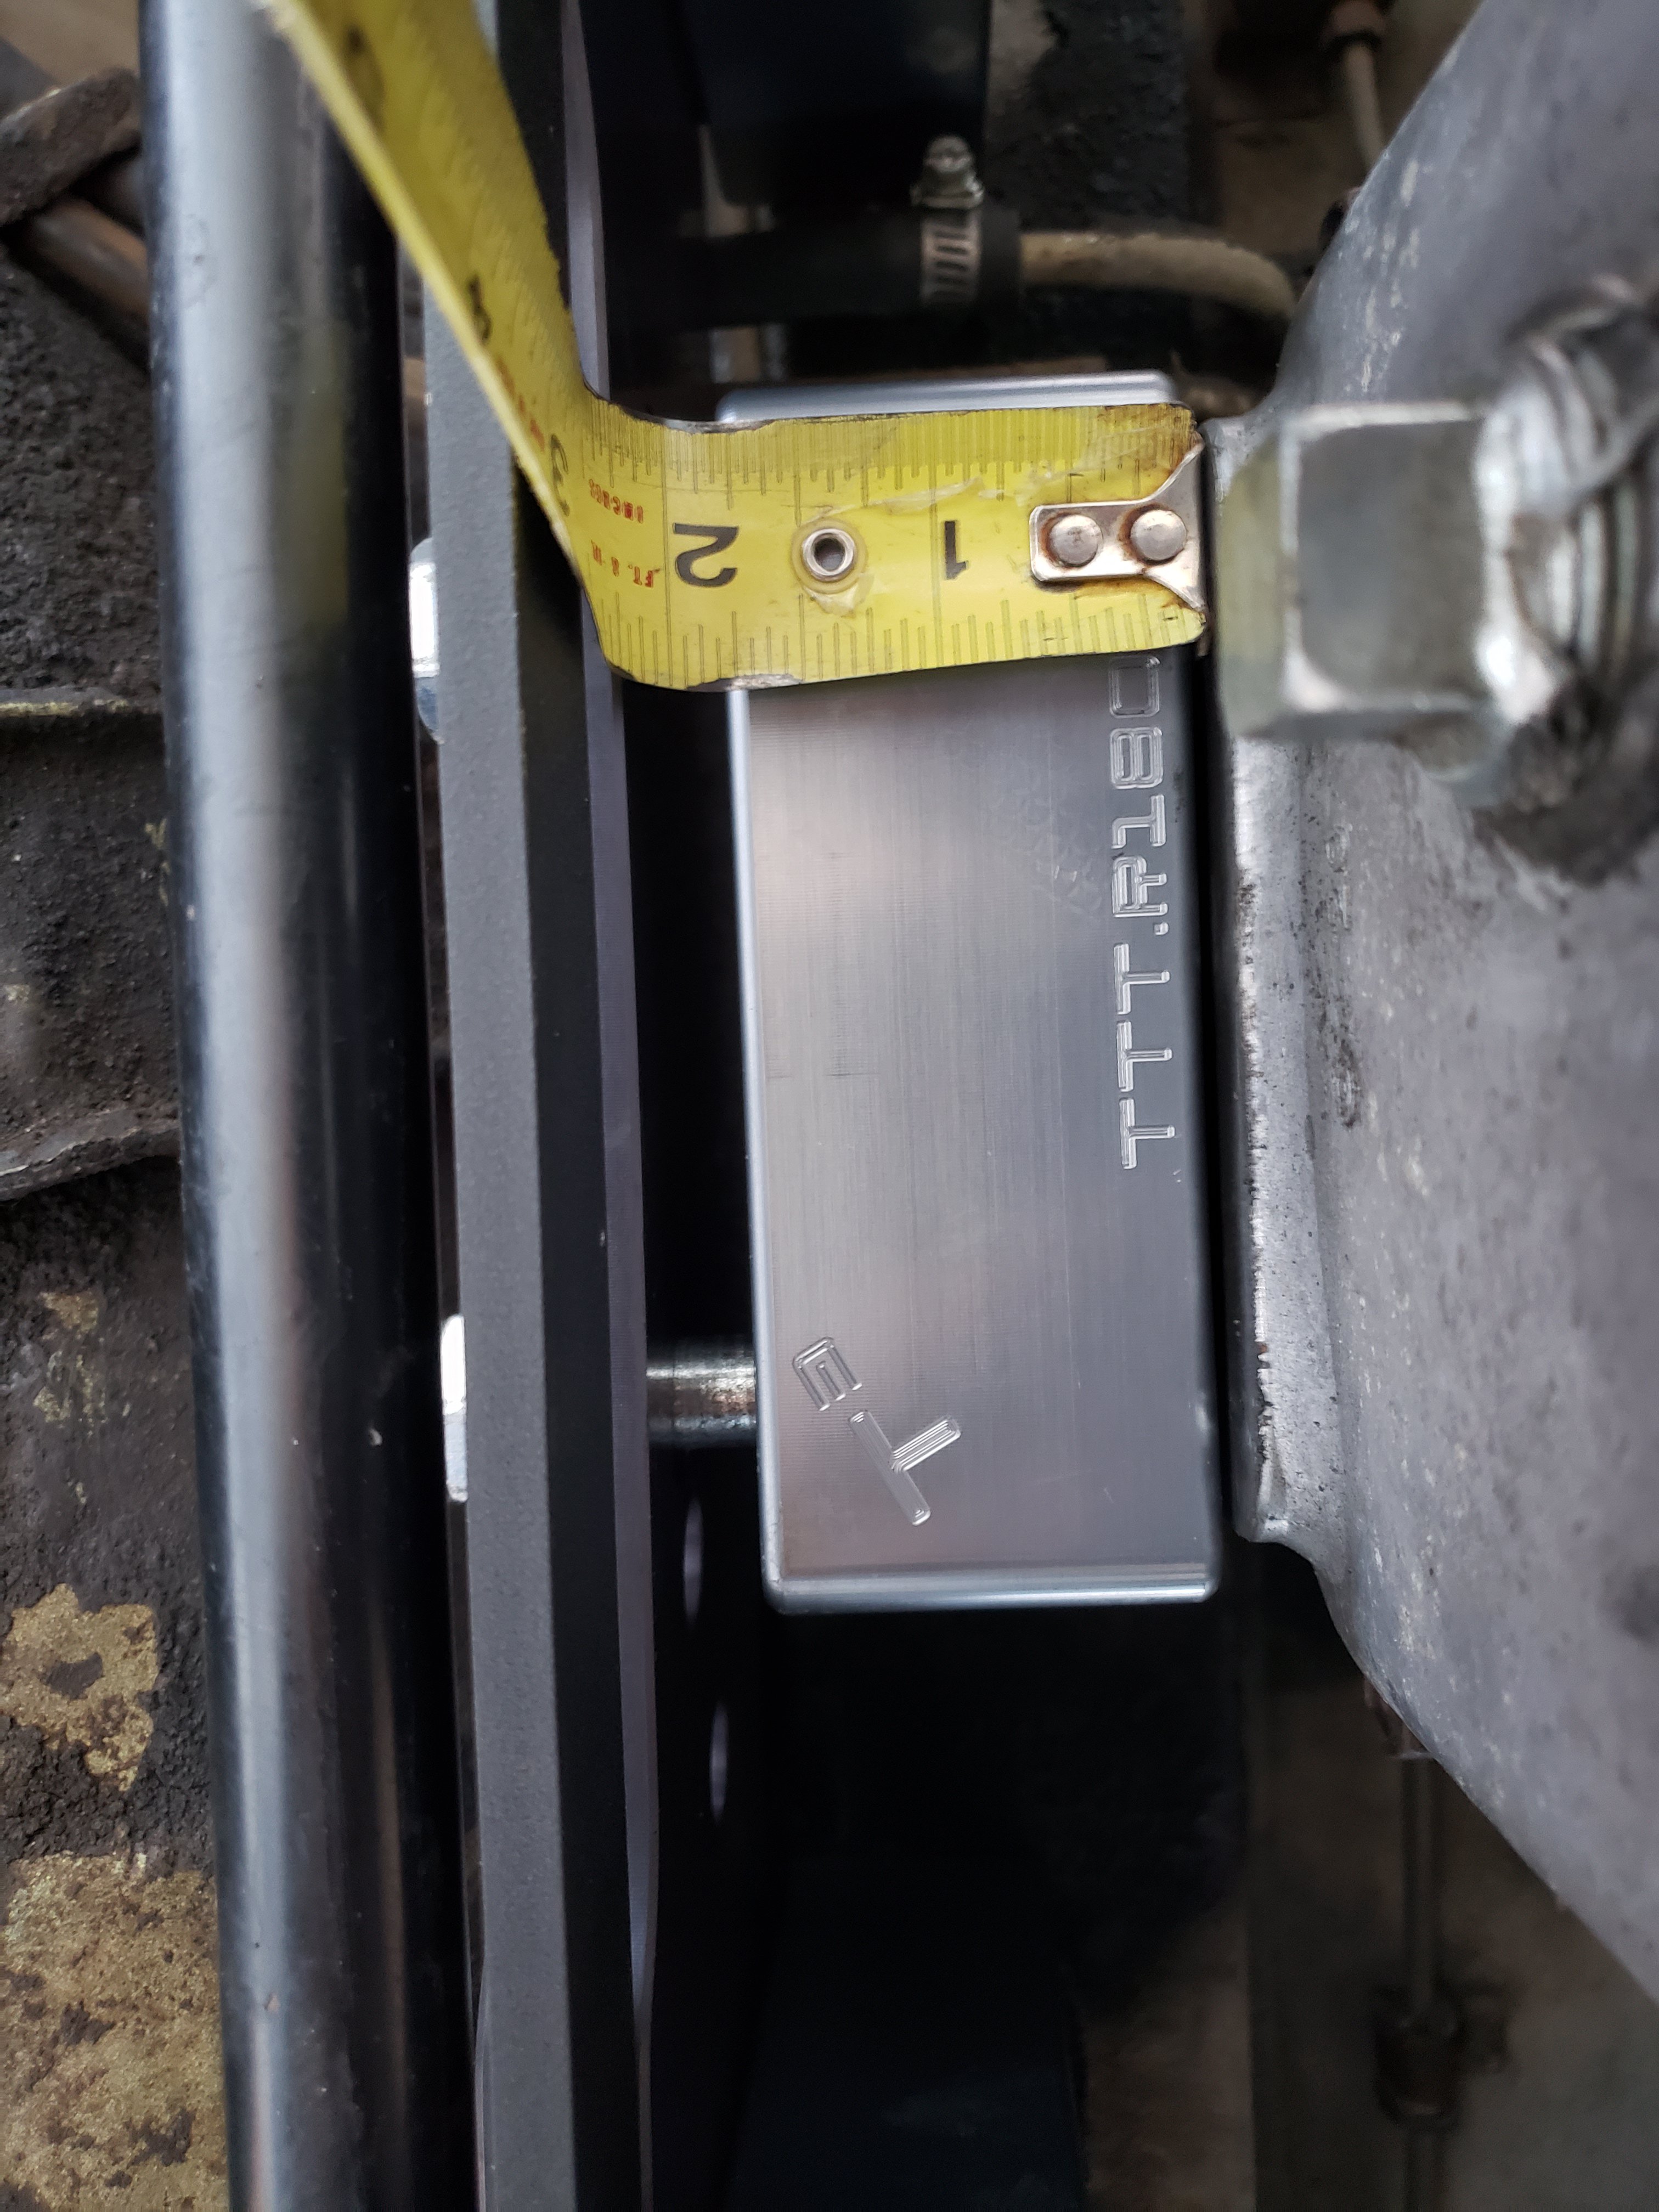
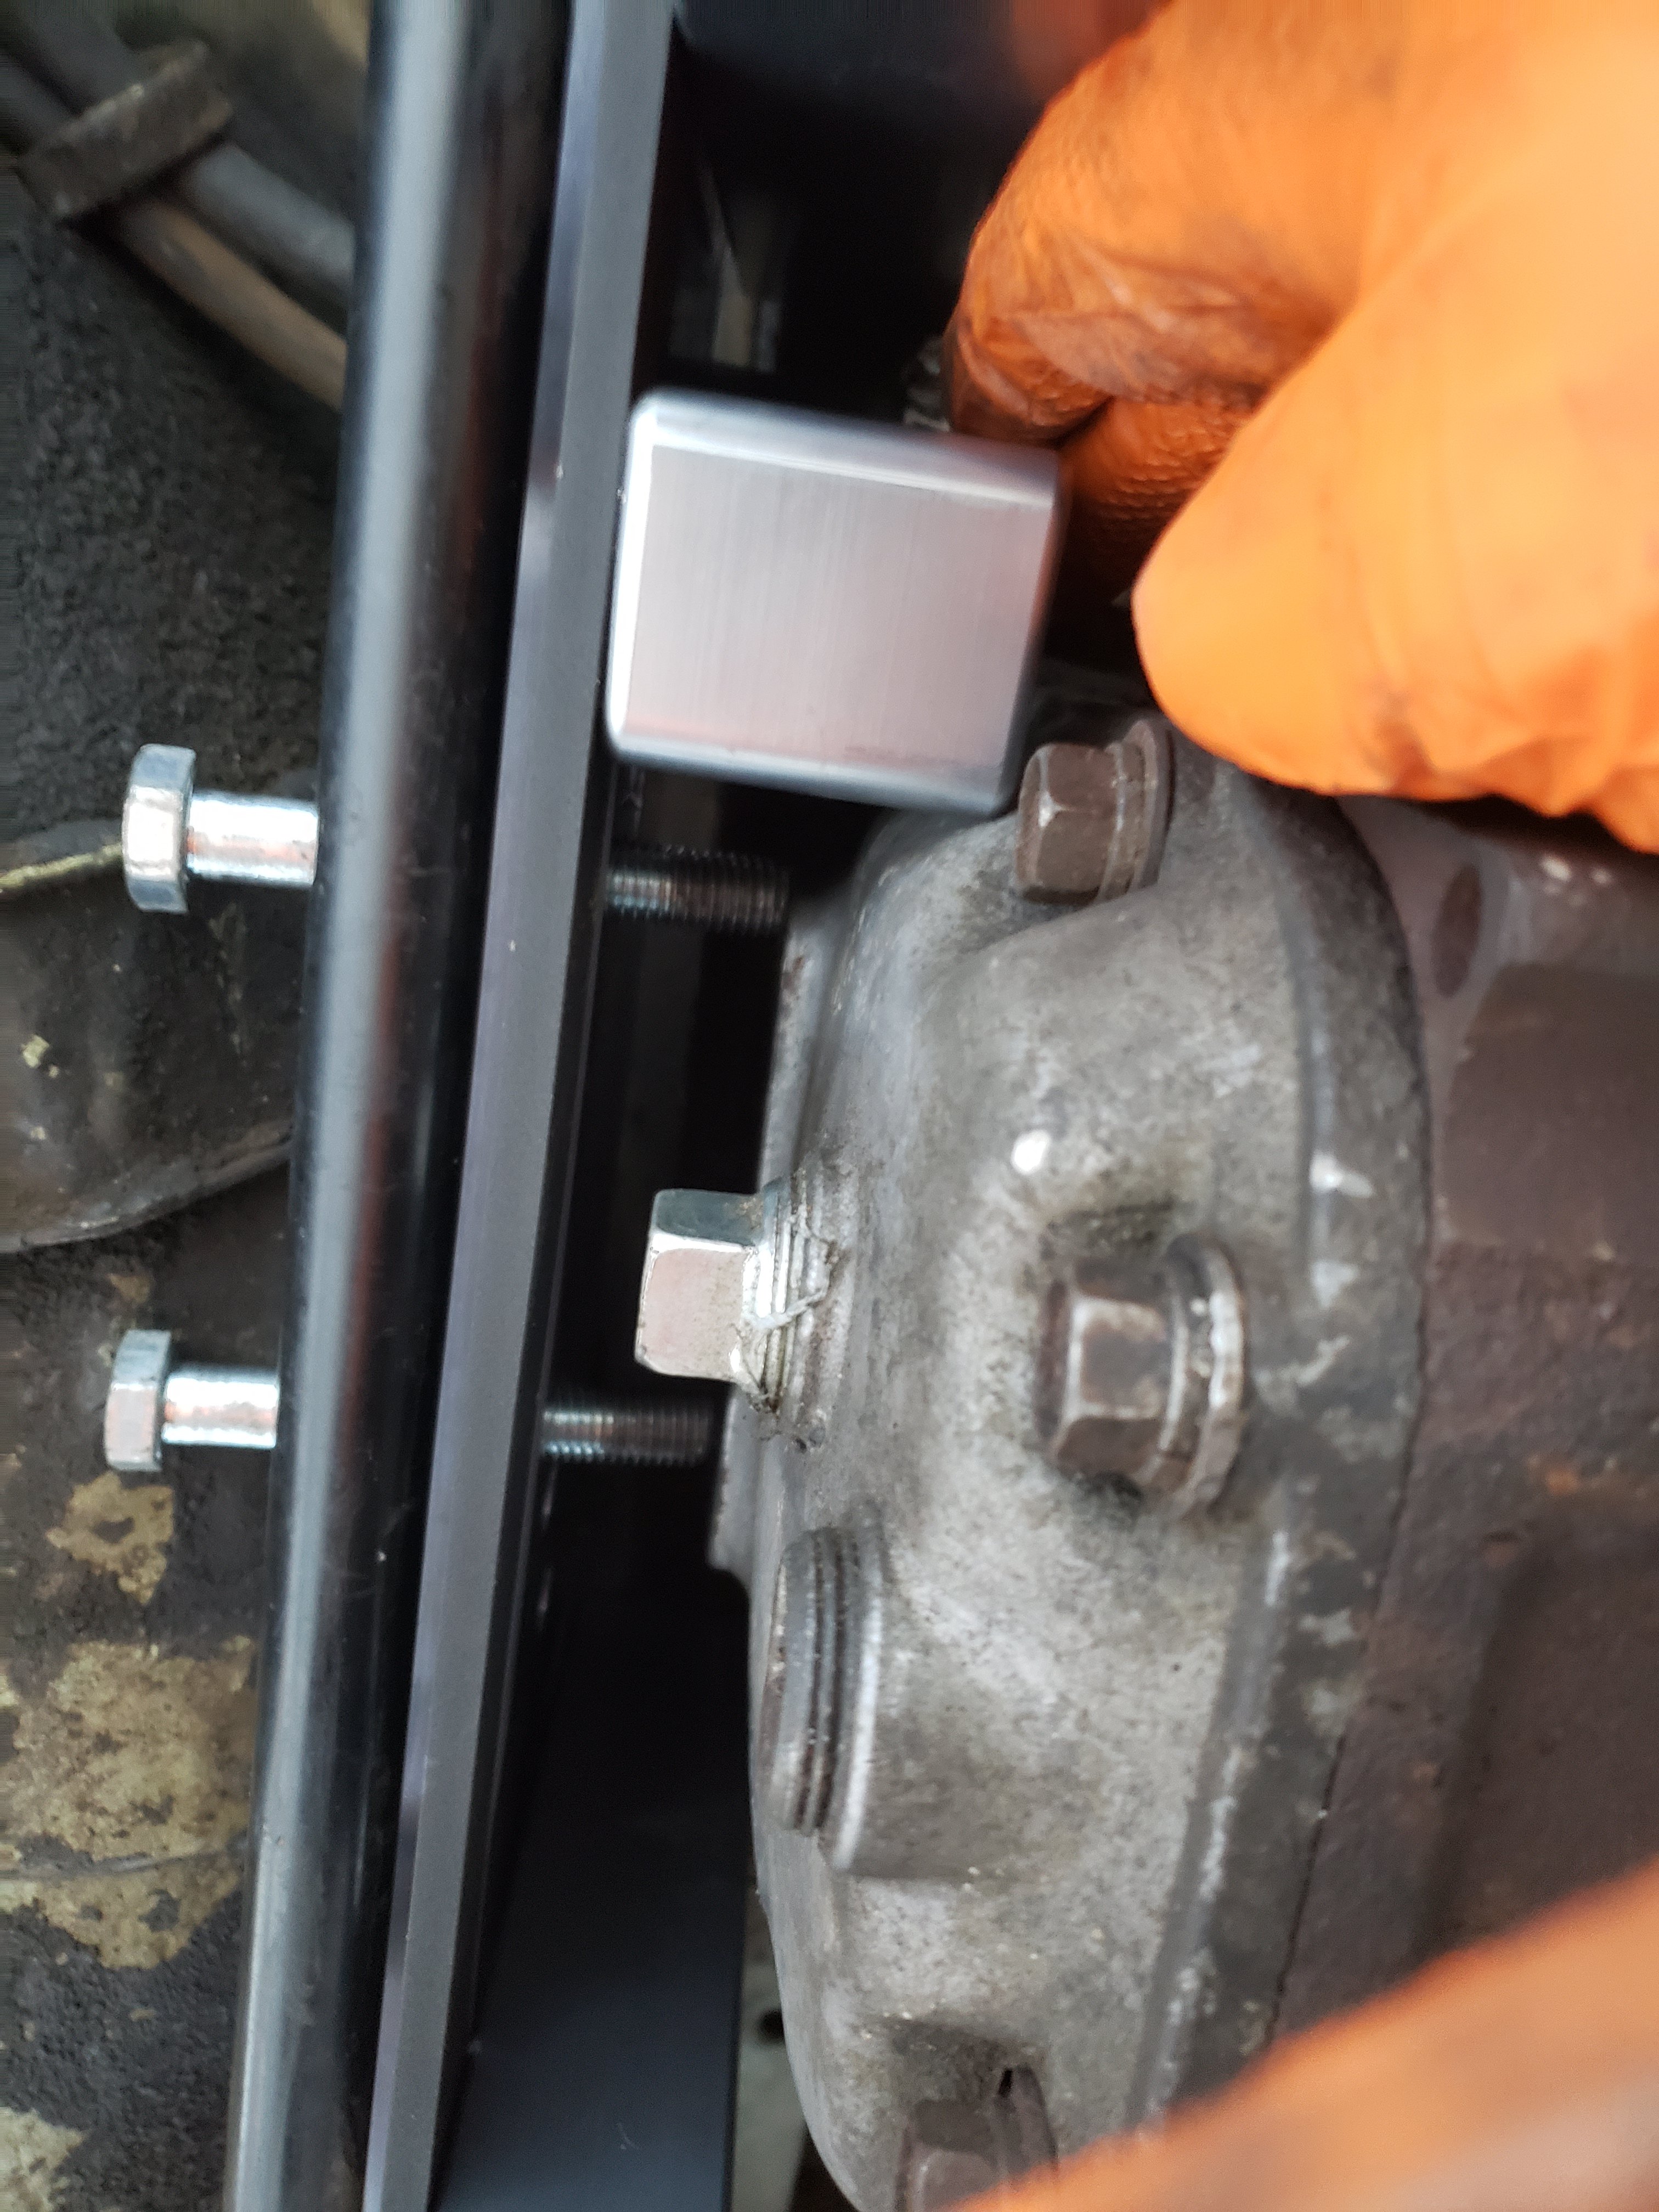
So I got it all in, I did have to flip the diff mount (move the diff position backwards aka the later style) and I had cut the spacer down to 15/16ths and buy some new length bolts.
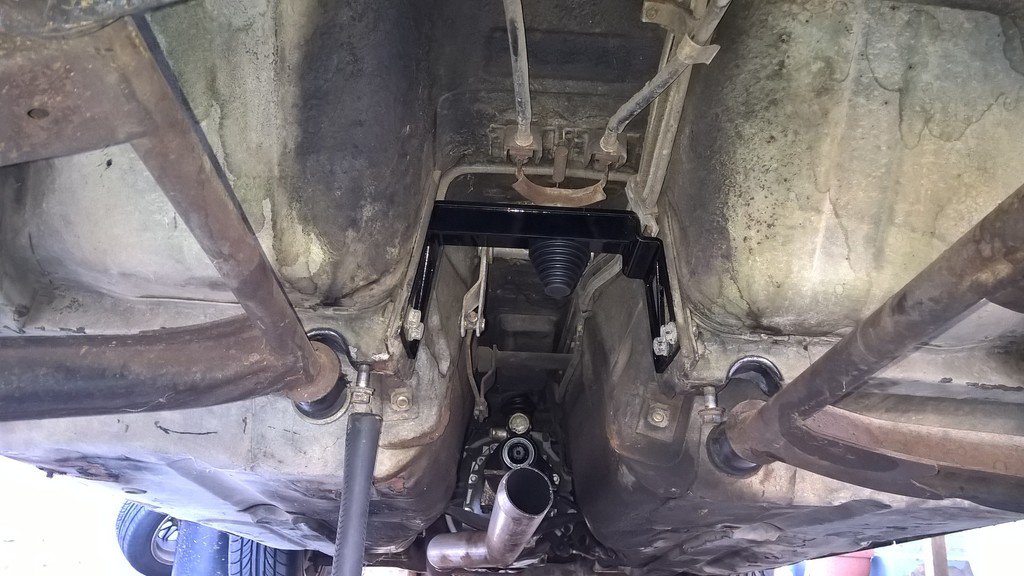
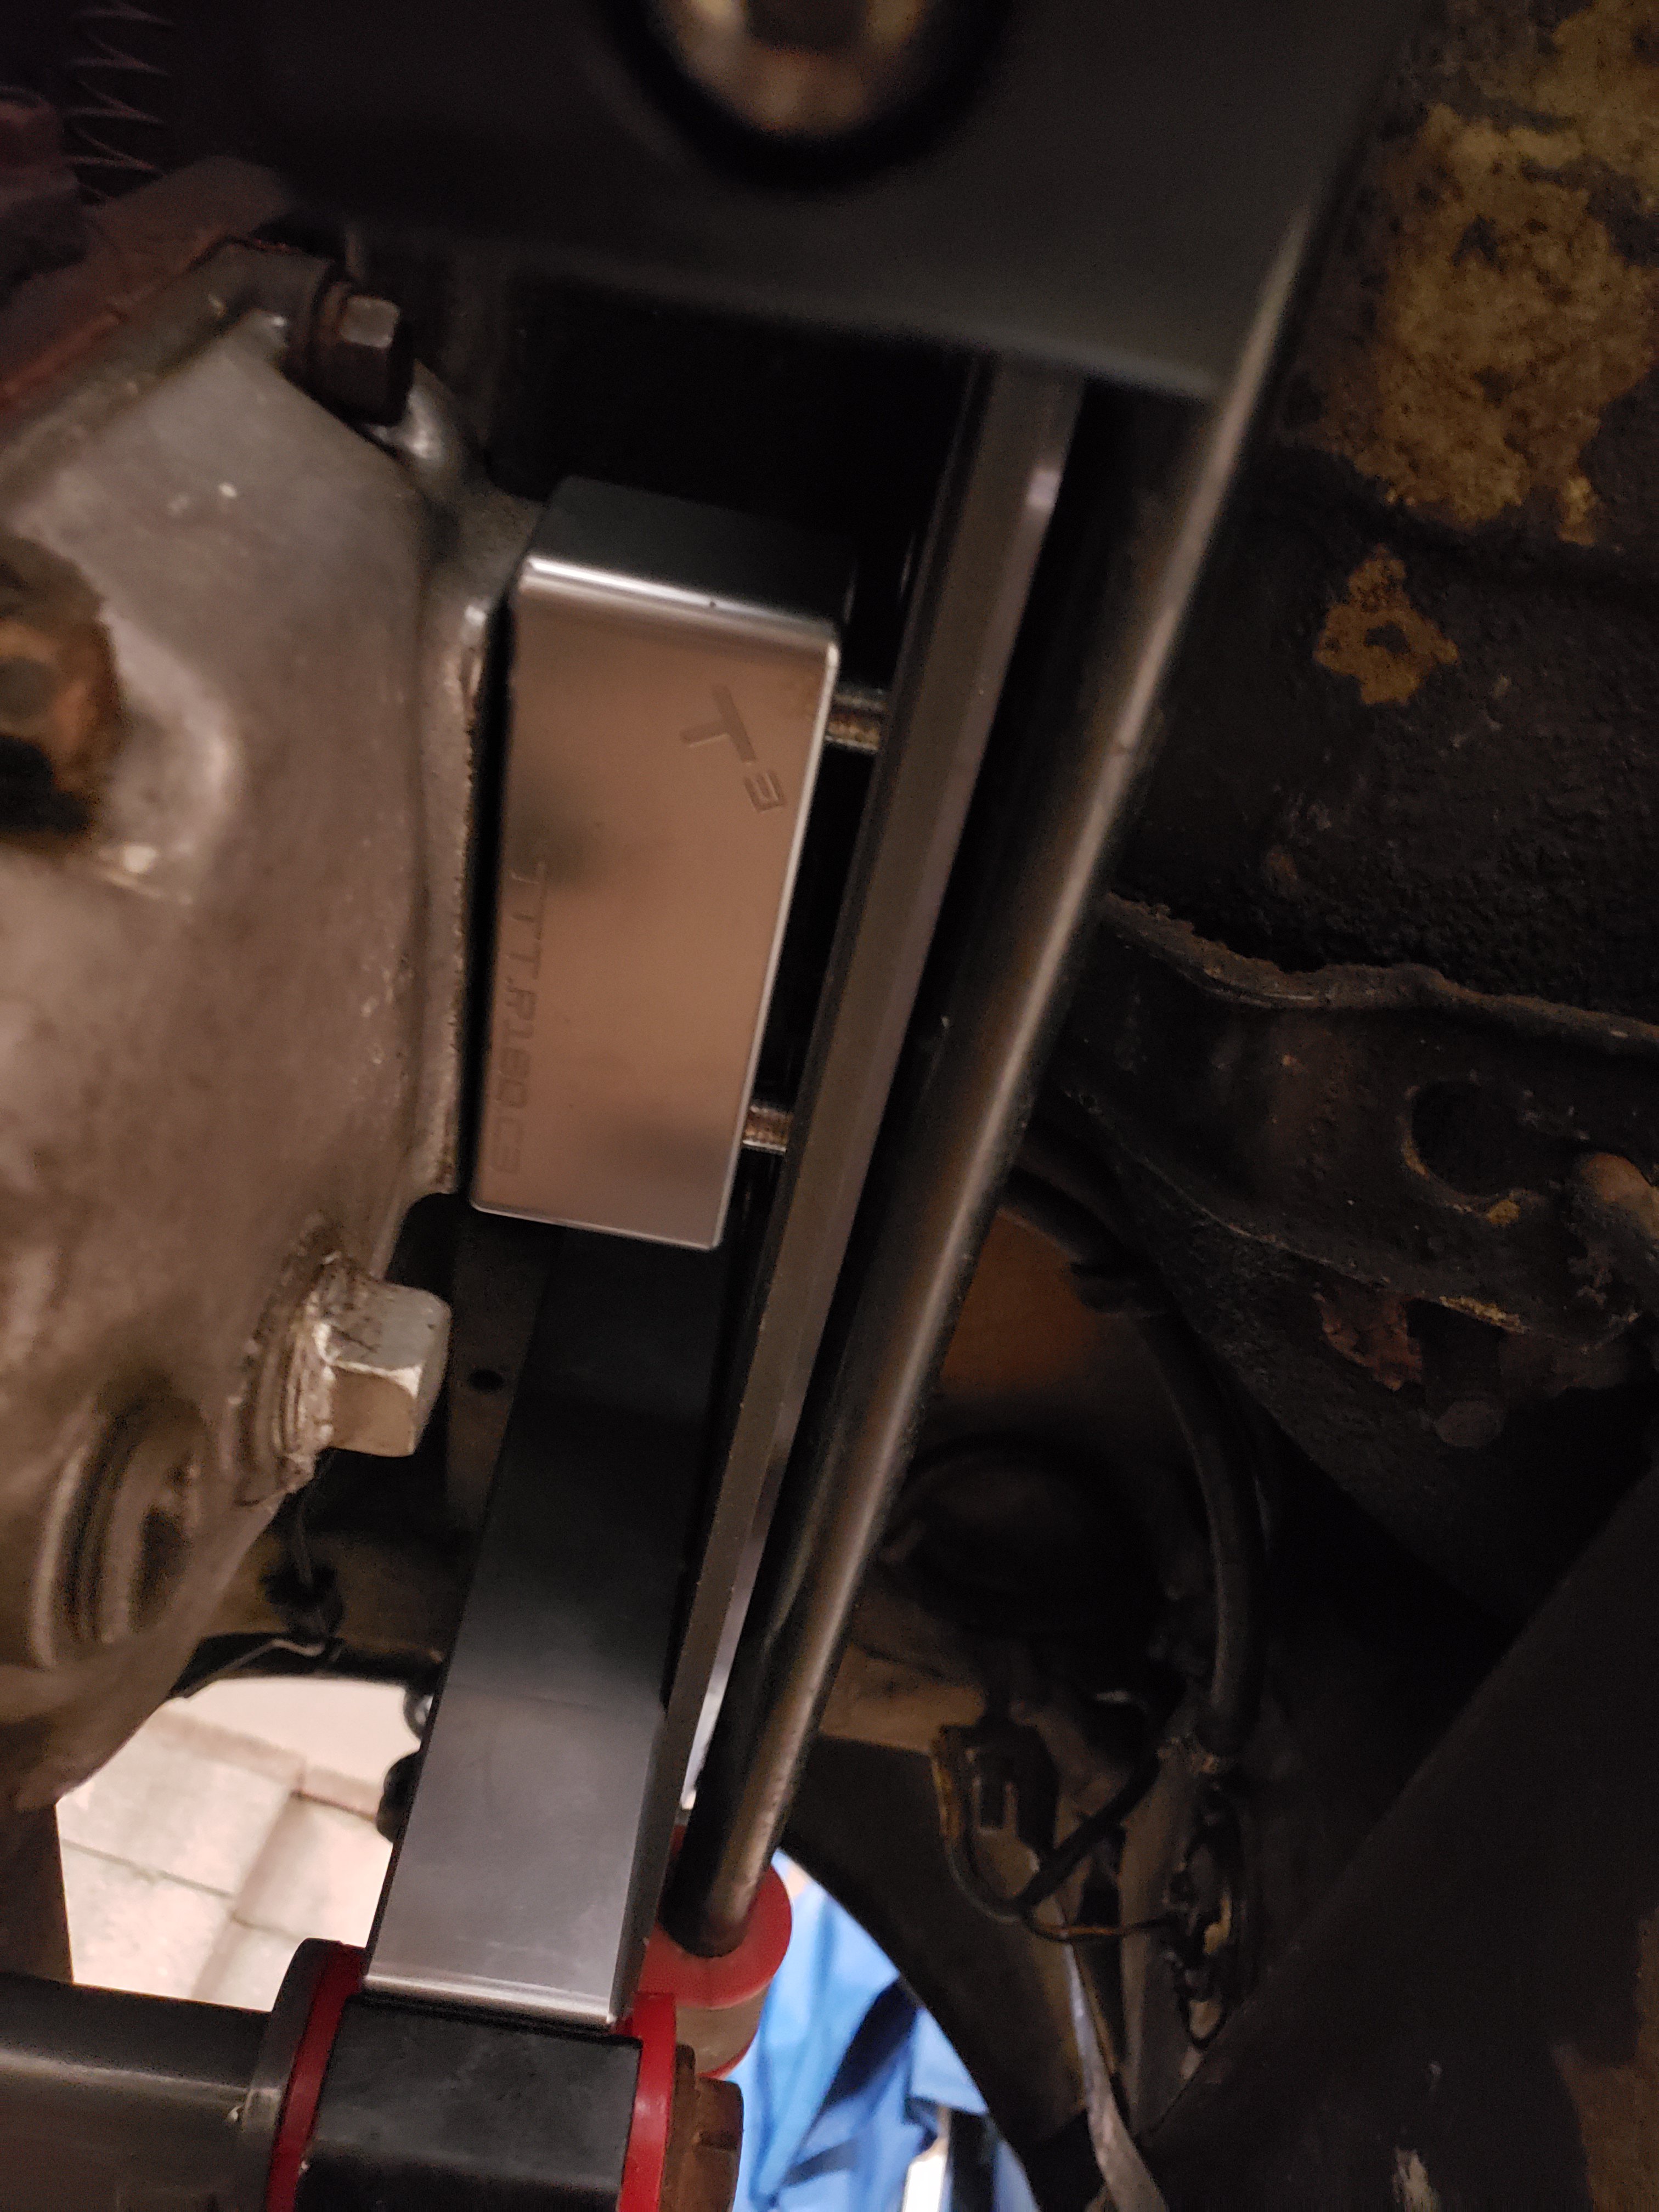
Here are the spacer pics when I had the diff in the stock, forward 1970 position, notice the amount of "slack" in the spacer to diff cover vs when I rotated the lower diff mount 180* forward to move the diff back to the 1972 position:
And this is the final product. I need to get it aligned still, but I have work on the front also
Here is are some bonus pics of the Trans mount (type 2) that I will be replacing with the T3 KA trans mount (when I get the trans rebuilt)
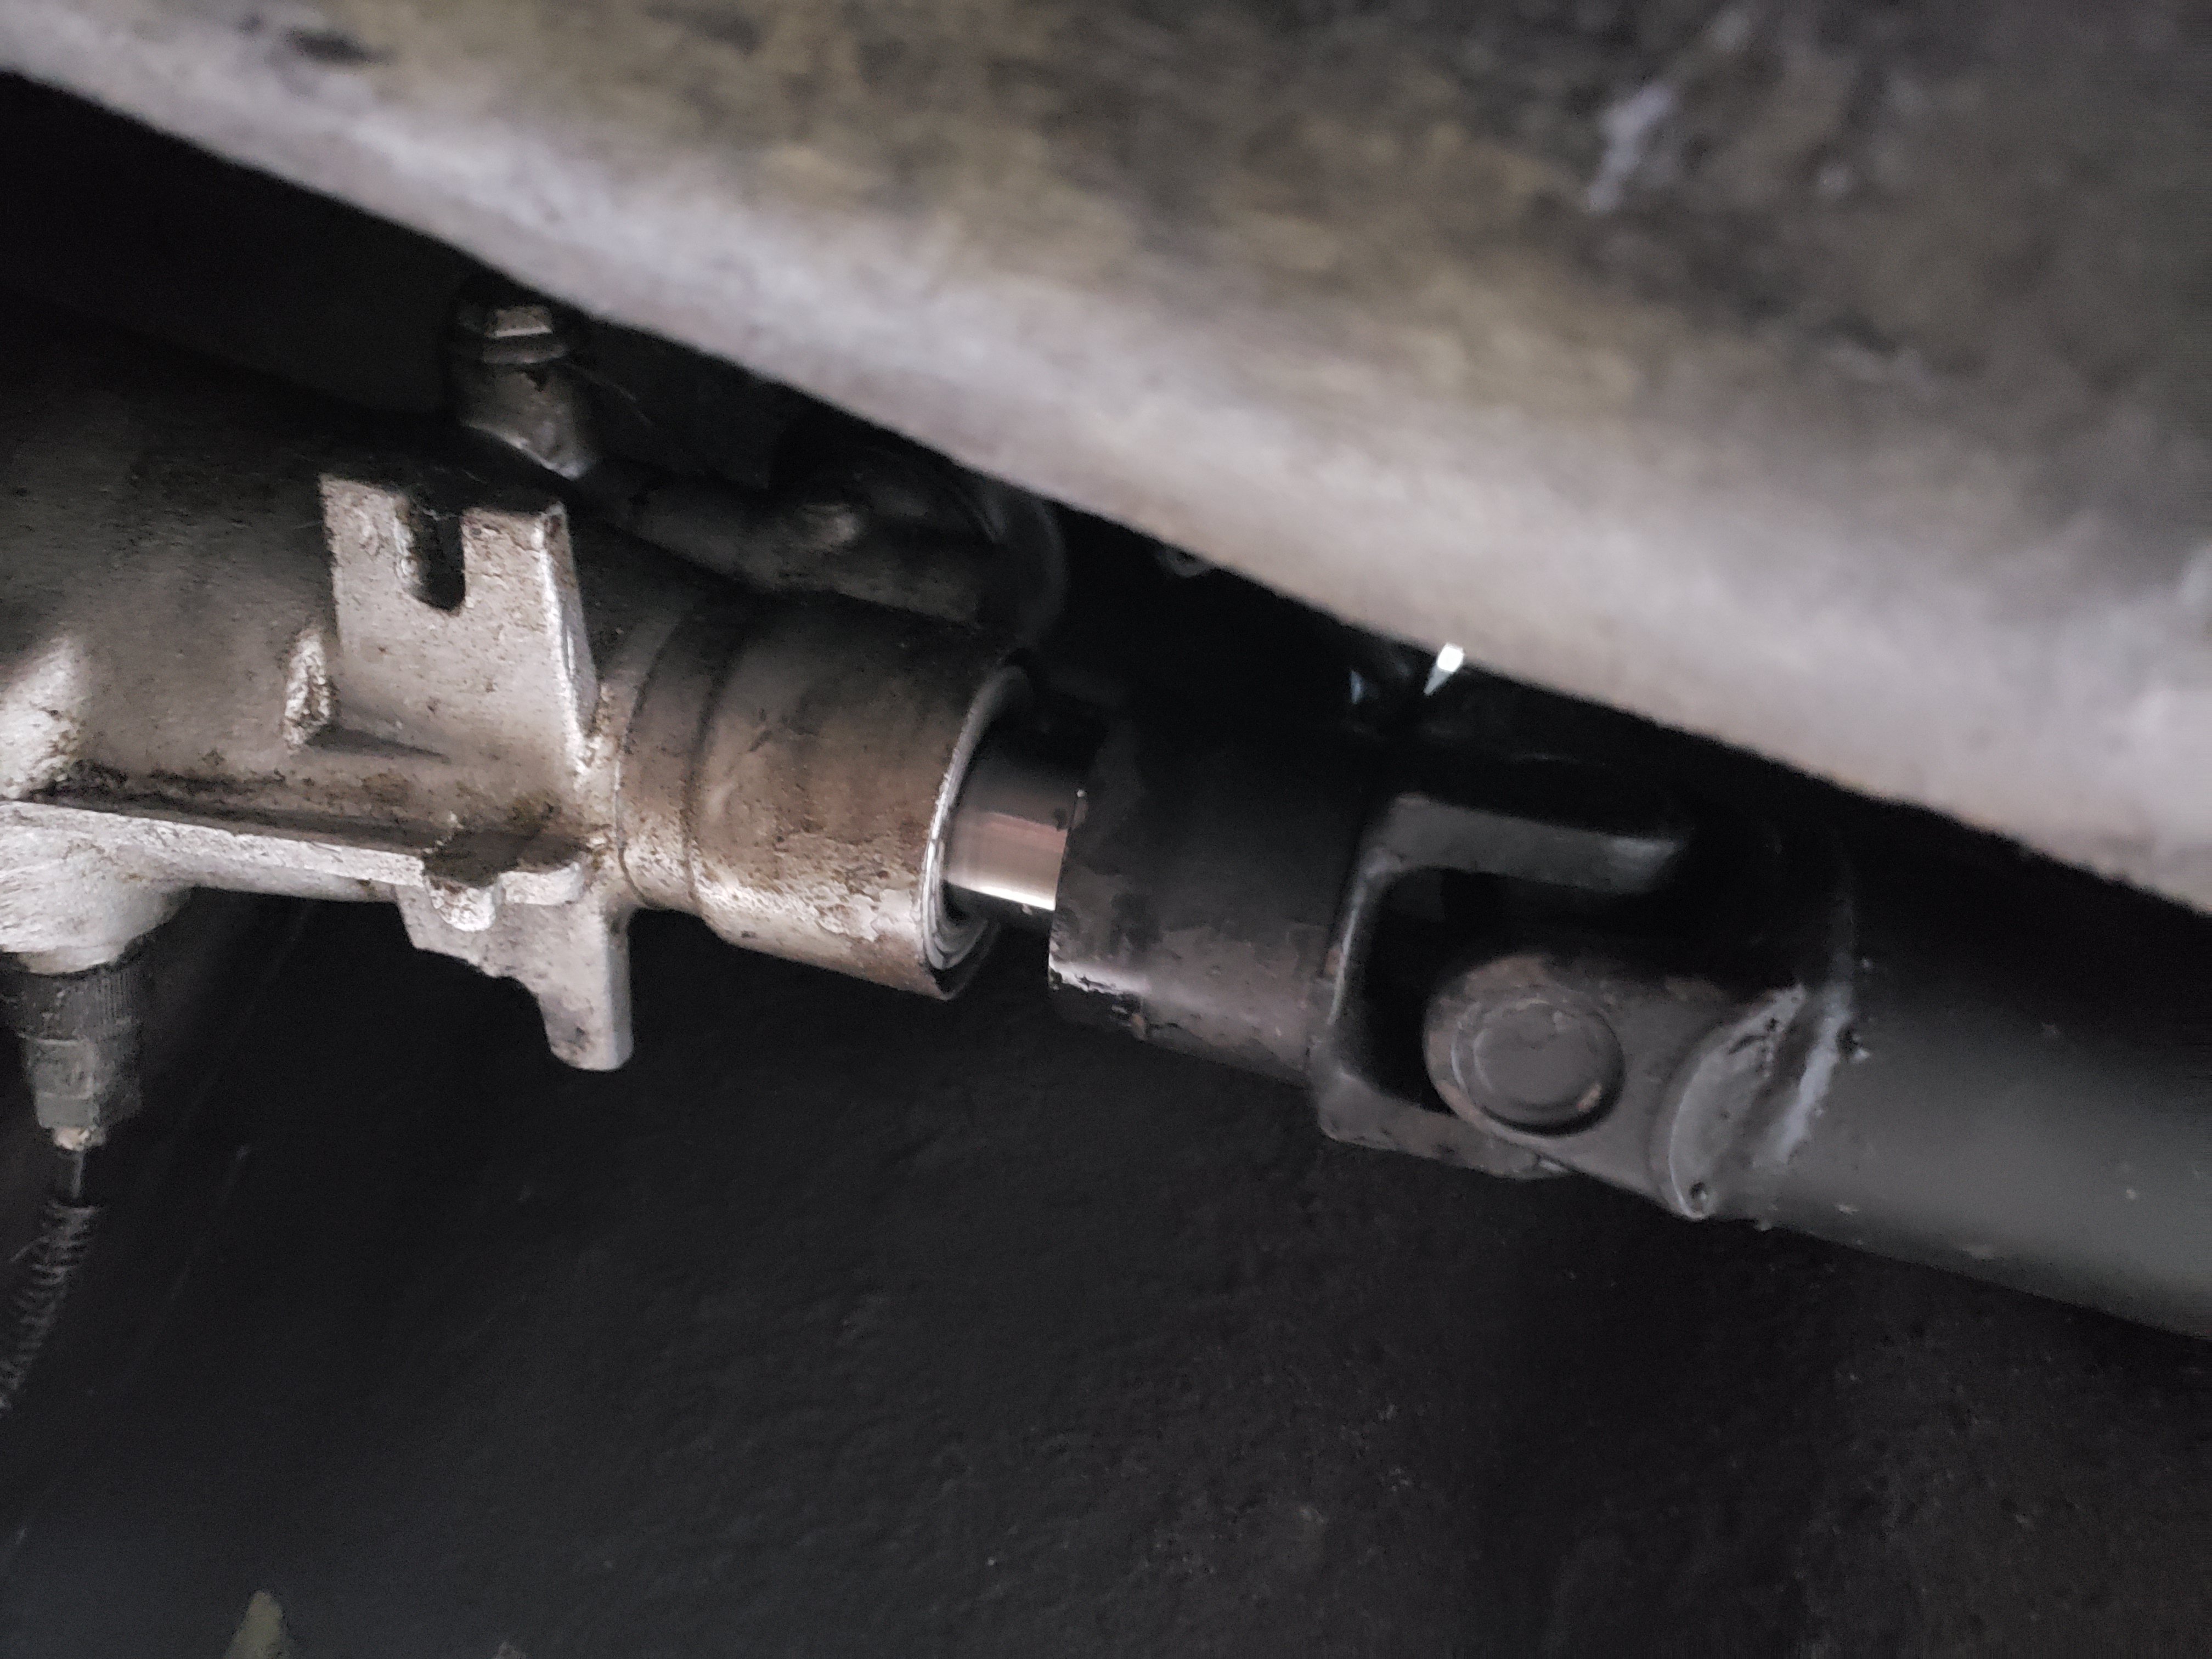
And here is the amount the driveshaft pulls out. My driveshaft measures 21 1/8 inch from u joint center to center, so I'm looking for the longer 22 1/4 inch. I have a few leads, but need to pick it up.
Final plans are to go with the Ka transmission with a converted L bellhousing, T3 KA trans mount, T3 front diff mount and the "power braces" they sell. The front is getting T3 arms and TC rods, and new tie rods. Eventually I'll get the steering rack rebuilt and put in new bushings and a solid steering knuckle. Then I think the suspension will be done.
-
On 12/16/2011 at 3:04 PM, BluDestiny said:
I know this is for S30;s, but I weighed my s130 base model coupe that I've been working on and it came in at 2470.
Specs:
Full 20 gal tank, all fluids
no Sound deadening, no spare tire or tools
completely stripped save for the dash, center console and 2 sparco tec seats (40lbs for the pair)
No AC lines in the bay( still have under the dash stuff)
No power windows, or power steering
s13 coilovers, s13 alum radiator.
6-2-1 headers w/o cat and shaved n42 intake
No front bumper( have a fiberglass Gnose on)
I didn't have my whale tail on, but it cant be more than 30 lbs.
I had an SR20 Swap done on my 280zx by Touge Factory in Chicago about 2 years ago. They put the car on a scale when they were done (they got the car without an engine in it) and it was at 2460lbs. All the same things as above apply, except I had some roller steelies on the car, it did have a front bumper since my Gnose was obliterated by a brick on I-10, and I did have my whale tail on.
-
I meant lengthen first then shorten later, as you said. I'm probably going to start getting a bell housing machined so that I test fit a KA trans.
I have a track day 3rd weekend of April so I'm hoping to get as much of this done as I can before then, pending funds.
T3 has mounts that work with a KA trans along with a new front diff bracket.
-
Yeah I think the driveshaft length will be an issue. I'll also have to move the RT mount rearward if there is space.
So I've also planned on going with a KA transmission down the line as I have 2 cores to rebuild and a lead on a lot of L series bell housings. But I know that will shorten the driveshaft even further. I don' t want to lengthen my driveshaft, then shorten it again later this summer.
I've also read that that GM poly mount causes too much lift on the nose of the diff. Not going with that bushing as my current rubber bushing is doing fine.
-
I do have an RT mount, but I'm not sure what you mean by snubber on the bottom? My mount was bought from Technoversion and has the 3 bolt holes.
-
So I just found this thread, and this might be the cure if anyone can confirm that they re positioned a 70-71 diff to the 72-73 position and only had to flip the diff bushing. Here is the thread, and the main picture from the thread. I will try that later this week and see if that solves the problem. I tried it quickly last night and the center line of the diff cross member didn't seem to line up, but it was getting dark. https://www.classiczcars.com/forums/topic/59052-71-z-differential-front-mount/
-
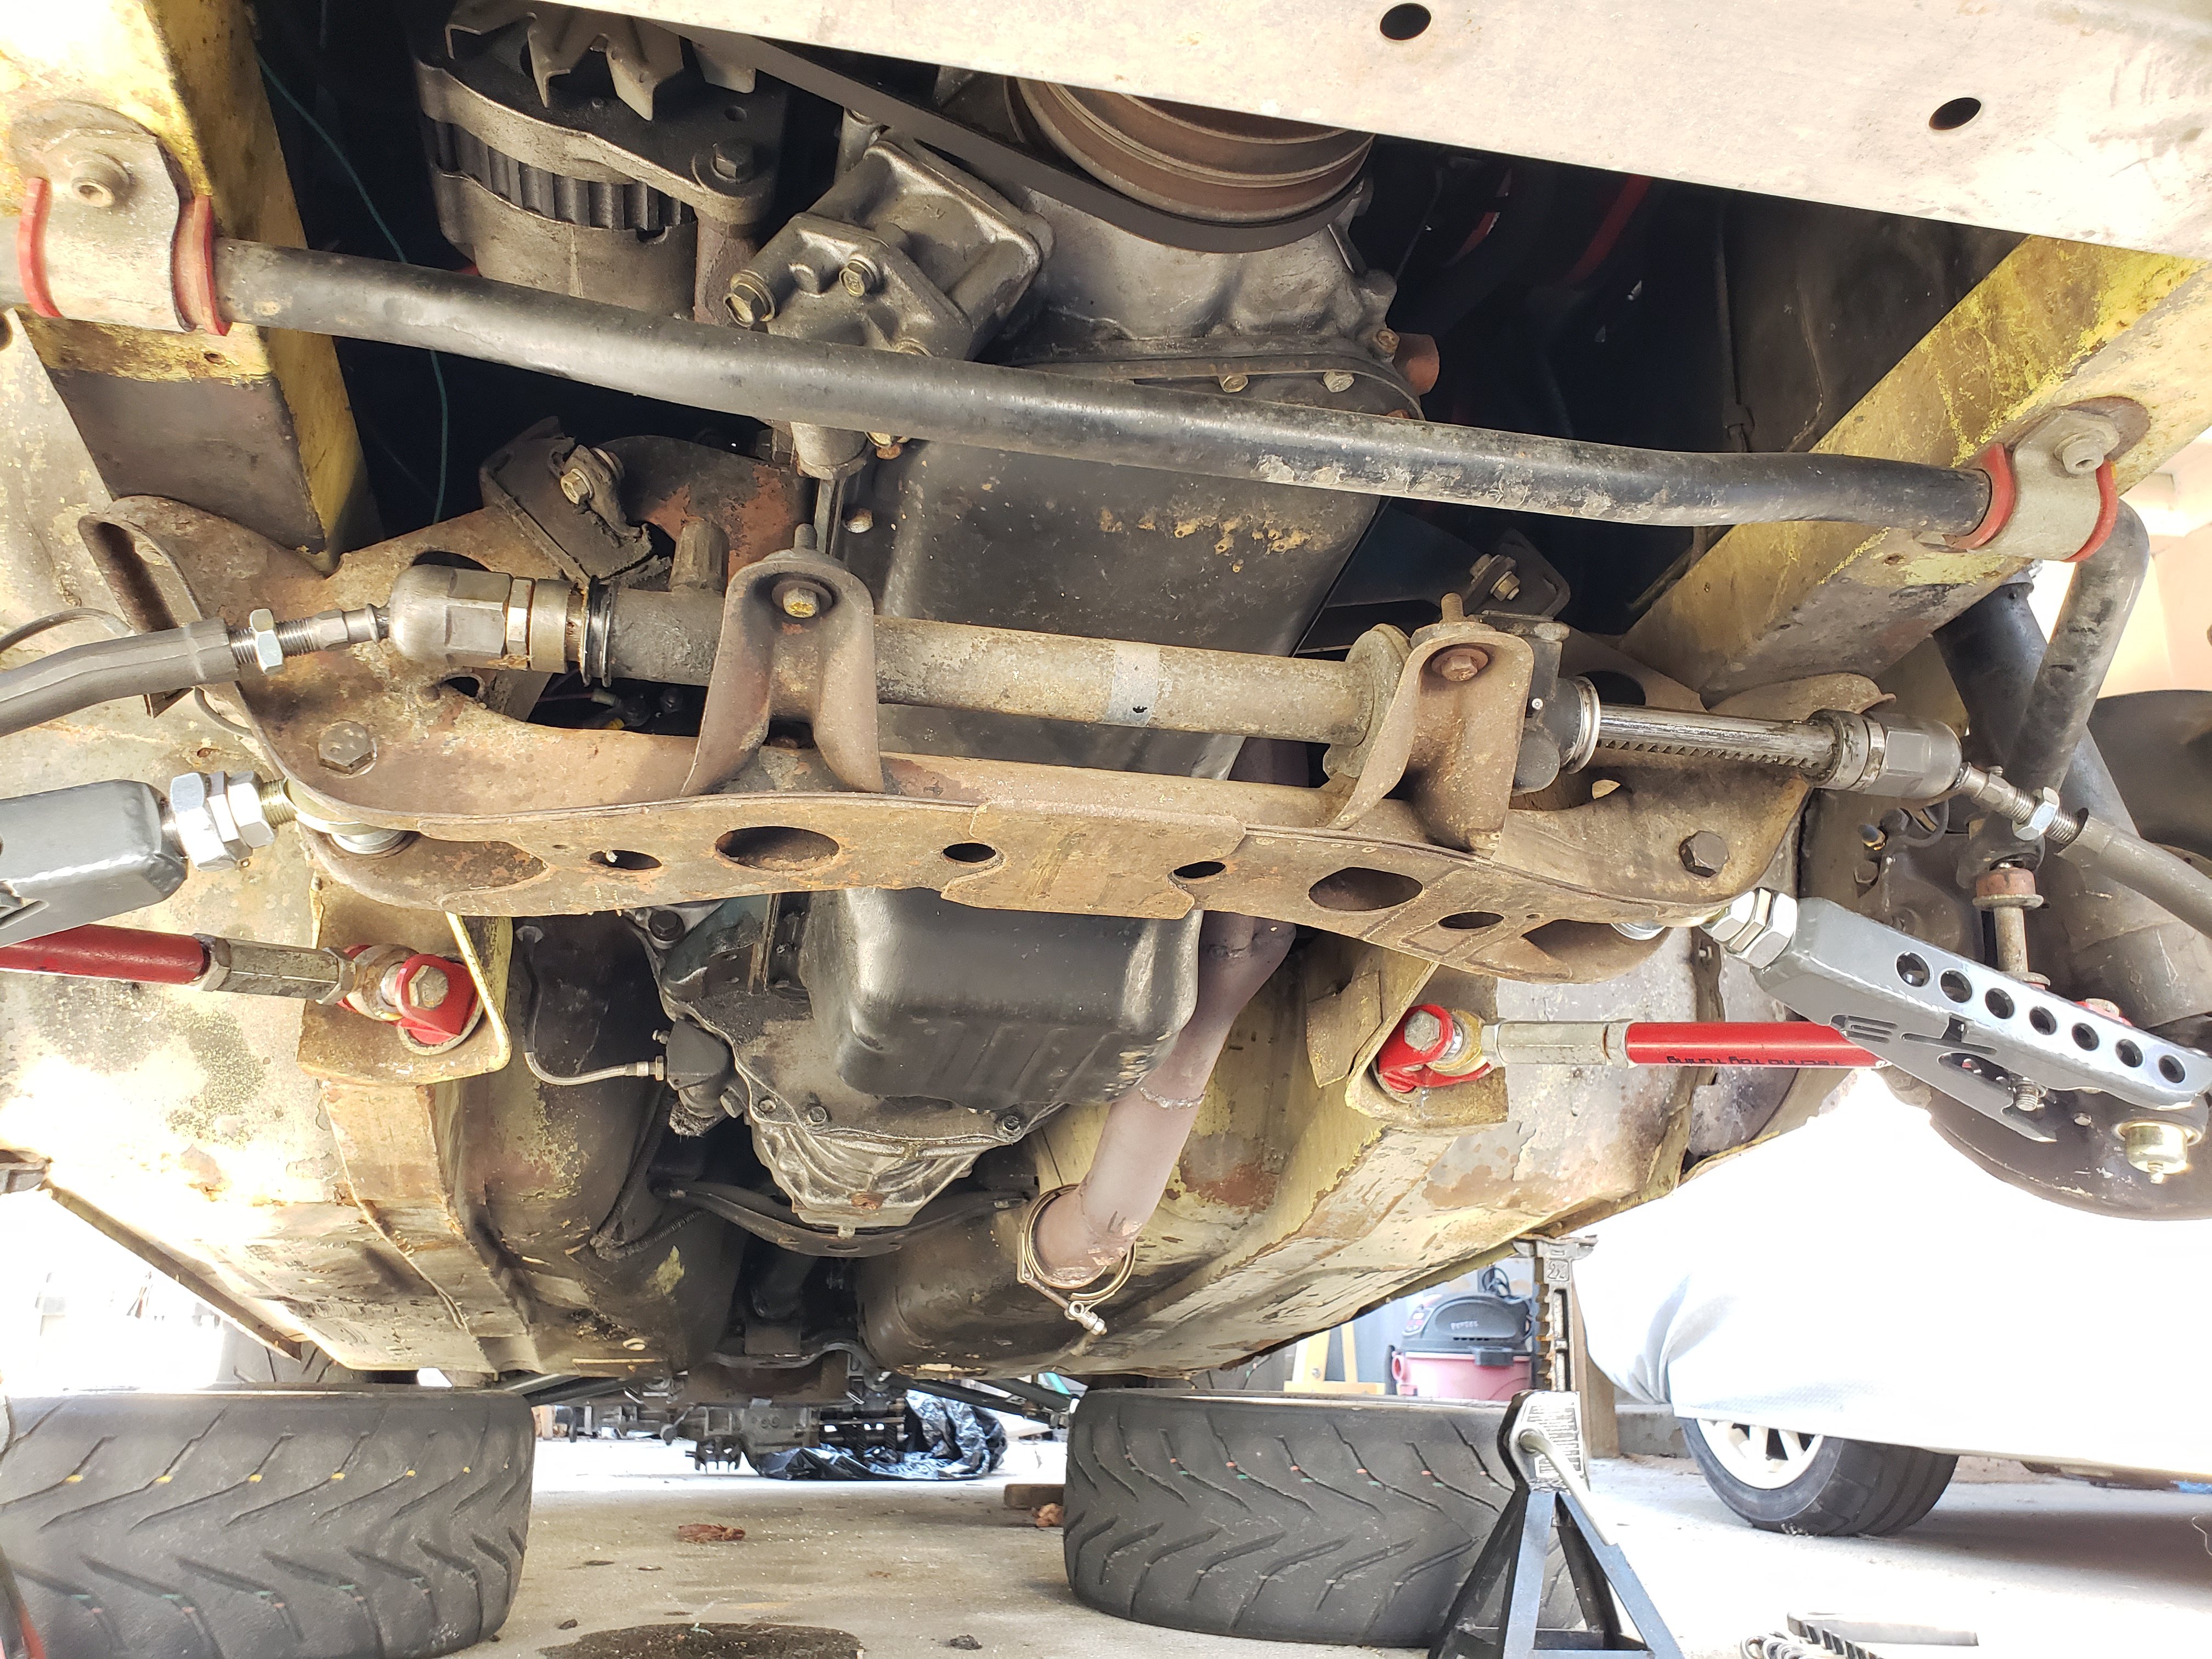
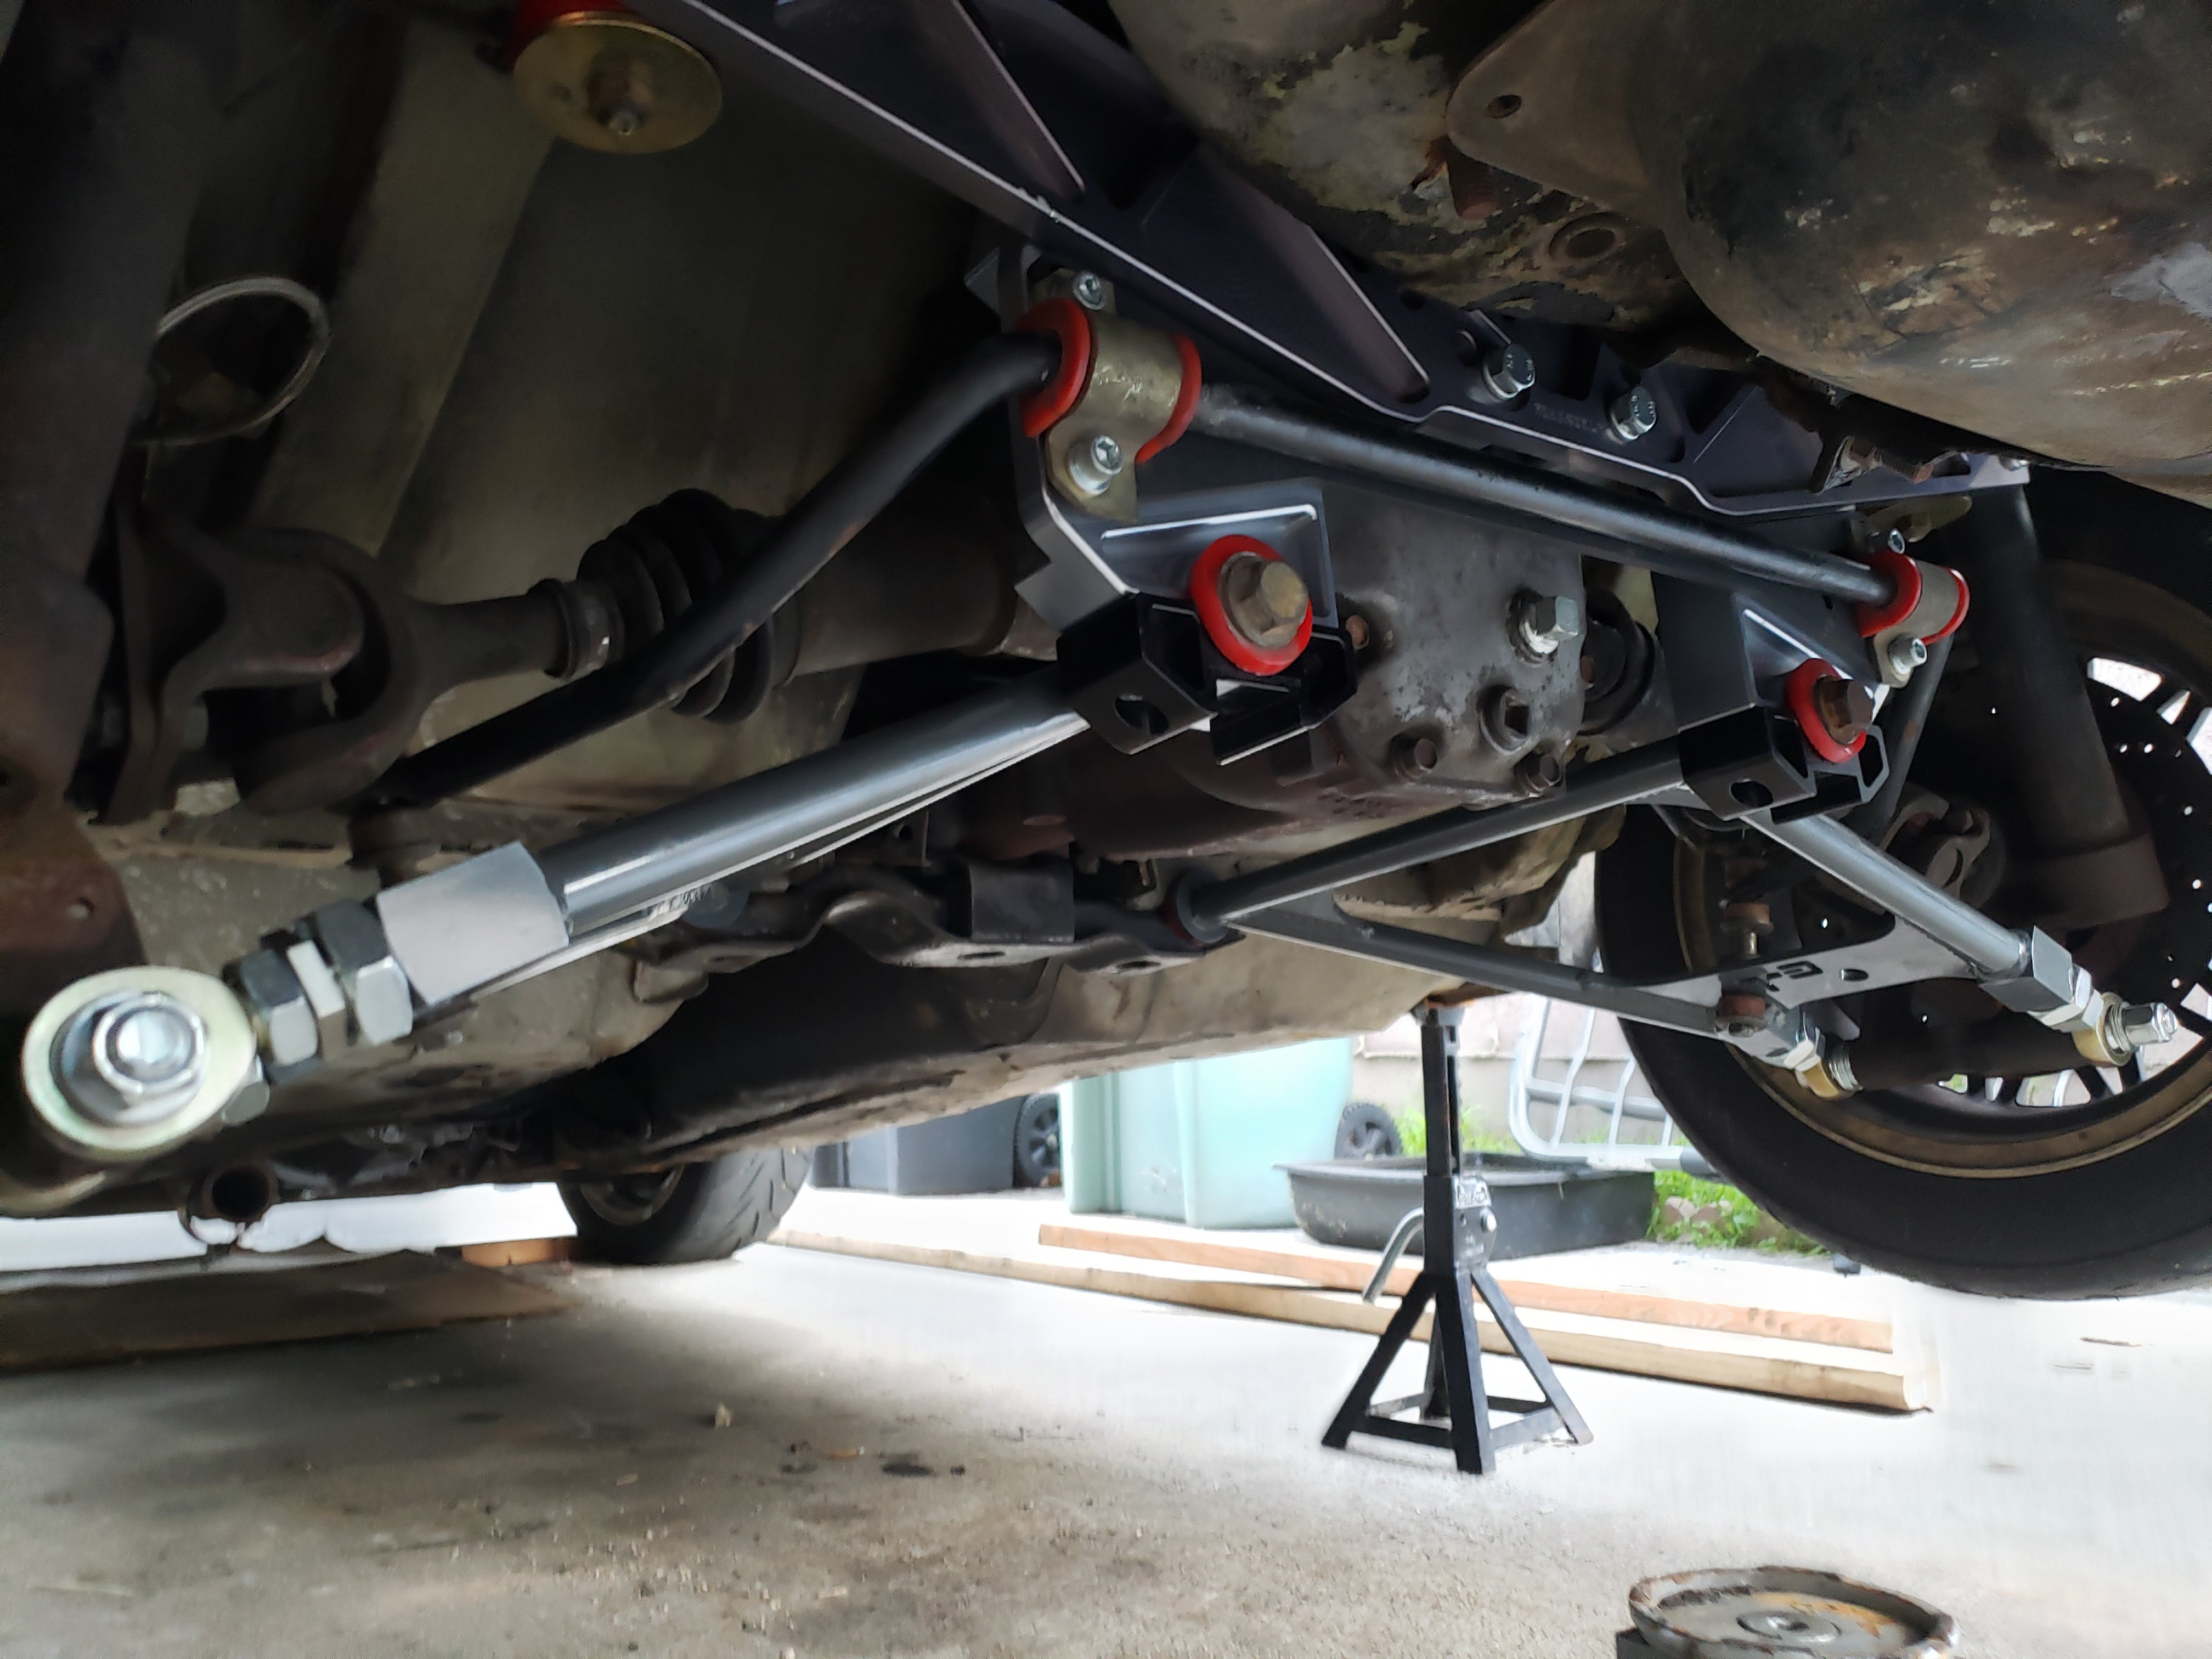
So I started to install my T3 goodies from the black Friday sale this past weekend. I have the mustache bar and drop mounts and rear control arms going in.
I currently have an STI r180 diff with Beta motorsports stubs and stock 240z axles and a RT mount.
The issue I'm having is that after fitting the T3 mustache bar, it pulls the diff back about half an inch and that is causing the front diff crossmember to not line up. This is pictured below:
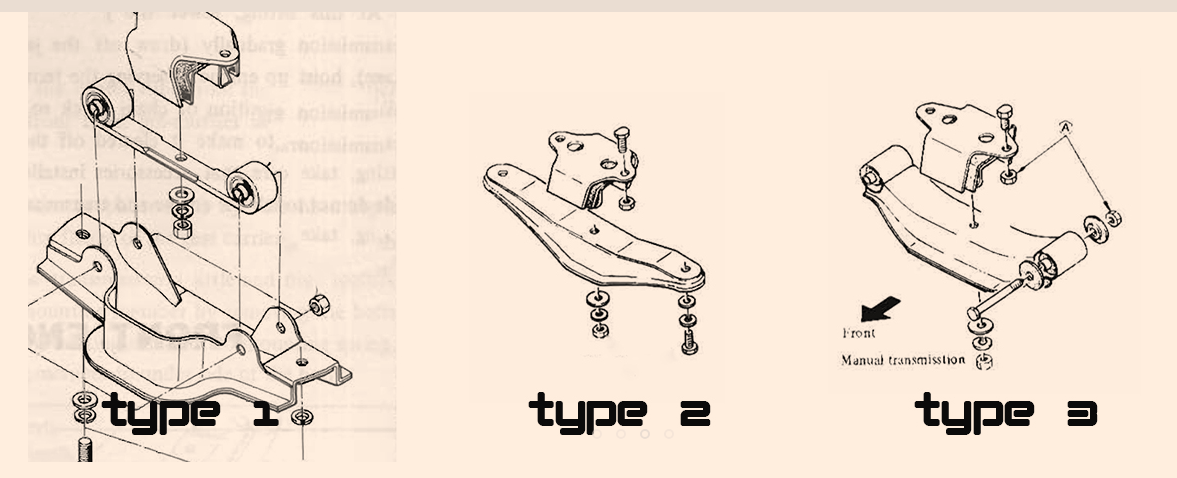
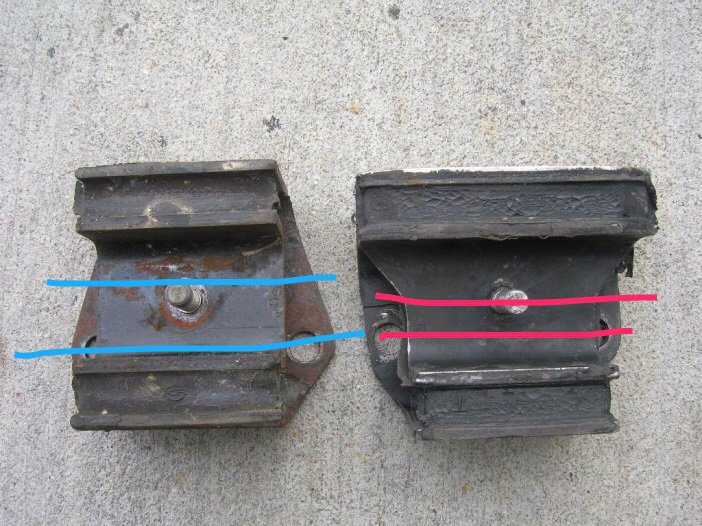
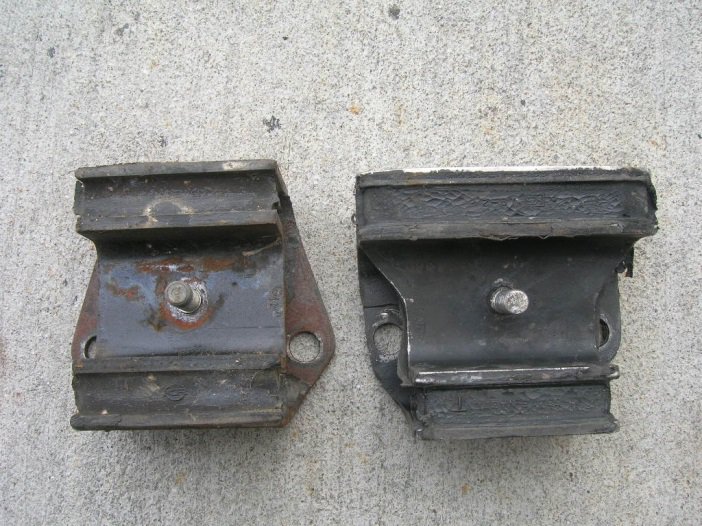
I understand the early 240z had the diff slightly more forward and htis was fixed in the 72-73 cars. I am wondering if I need a different cross member or mount. Below is a picture of the early 70-71 mount and later 72-73 mount, which look almost identical (but I have not found any evidence that they are different), along with a picture of the crossmember and mount I have.
I managed to get two bolts in the cross member, but I had to really loosen the bolts for the T3 mustache bar to the diff, I don't think it will all bolt down snug unless I can get the front dif mount to move back.
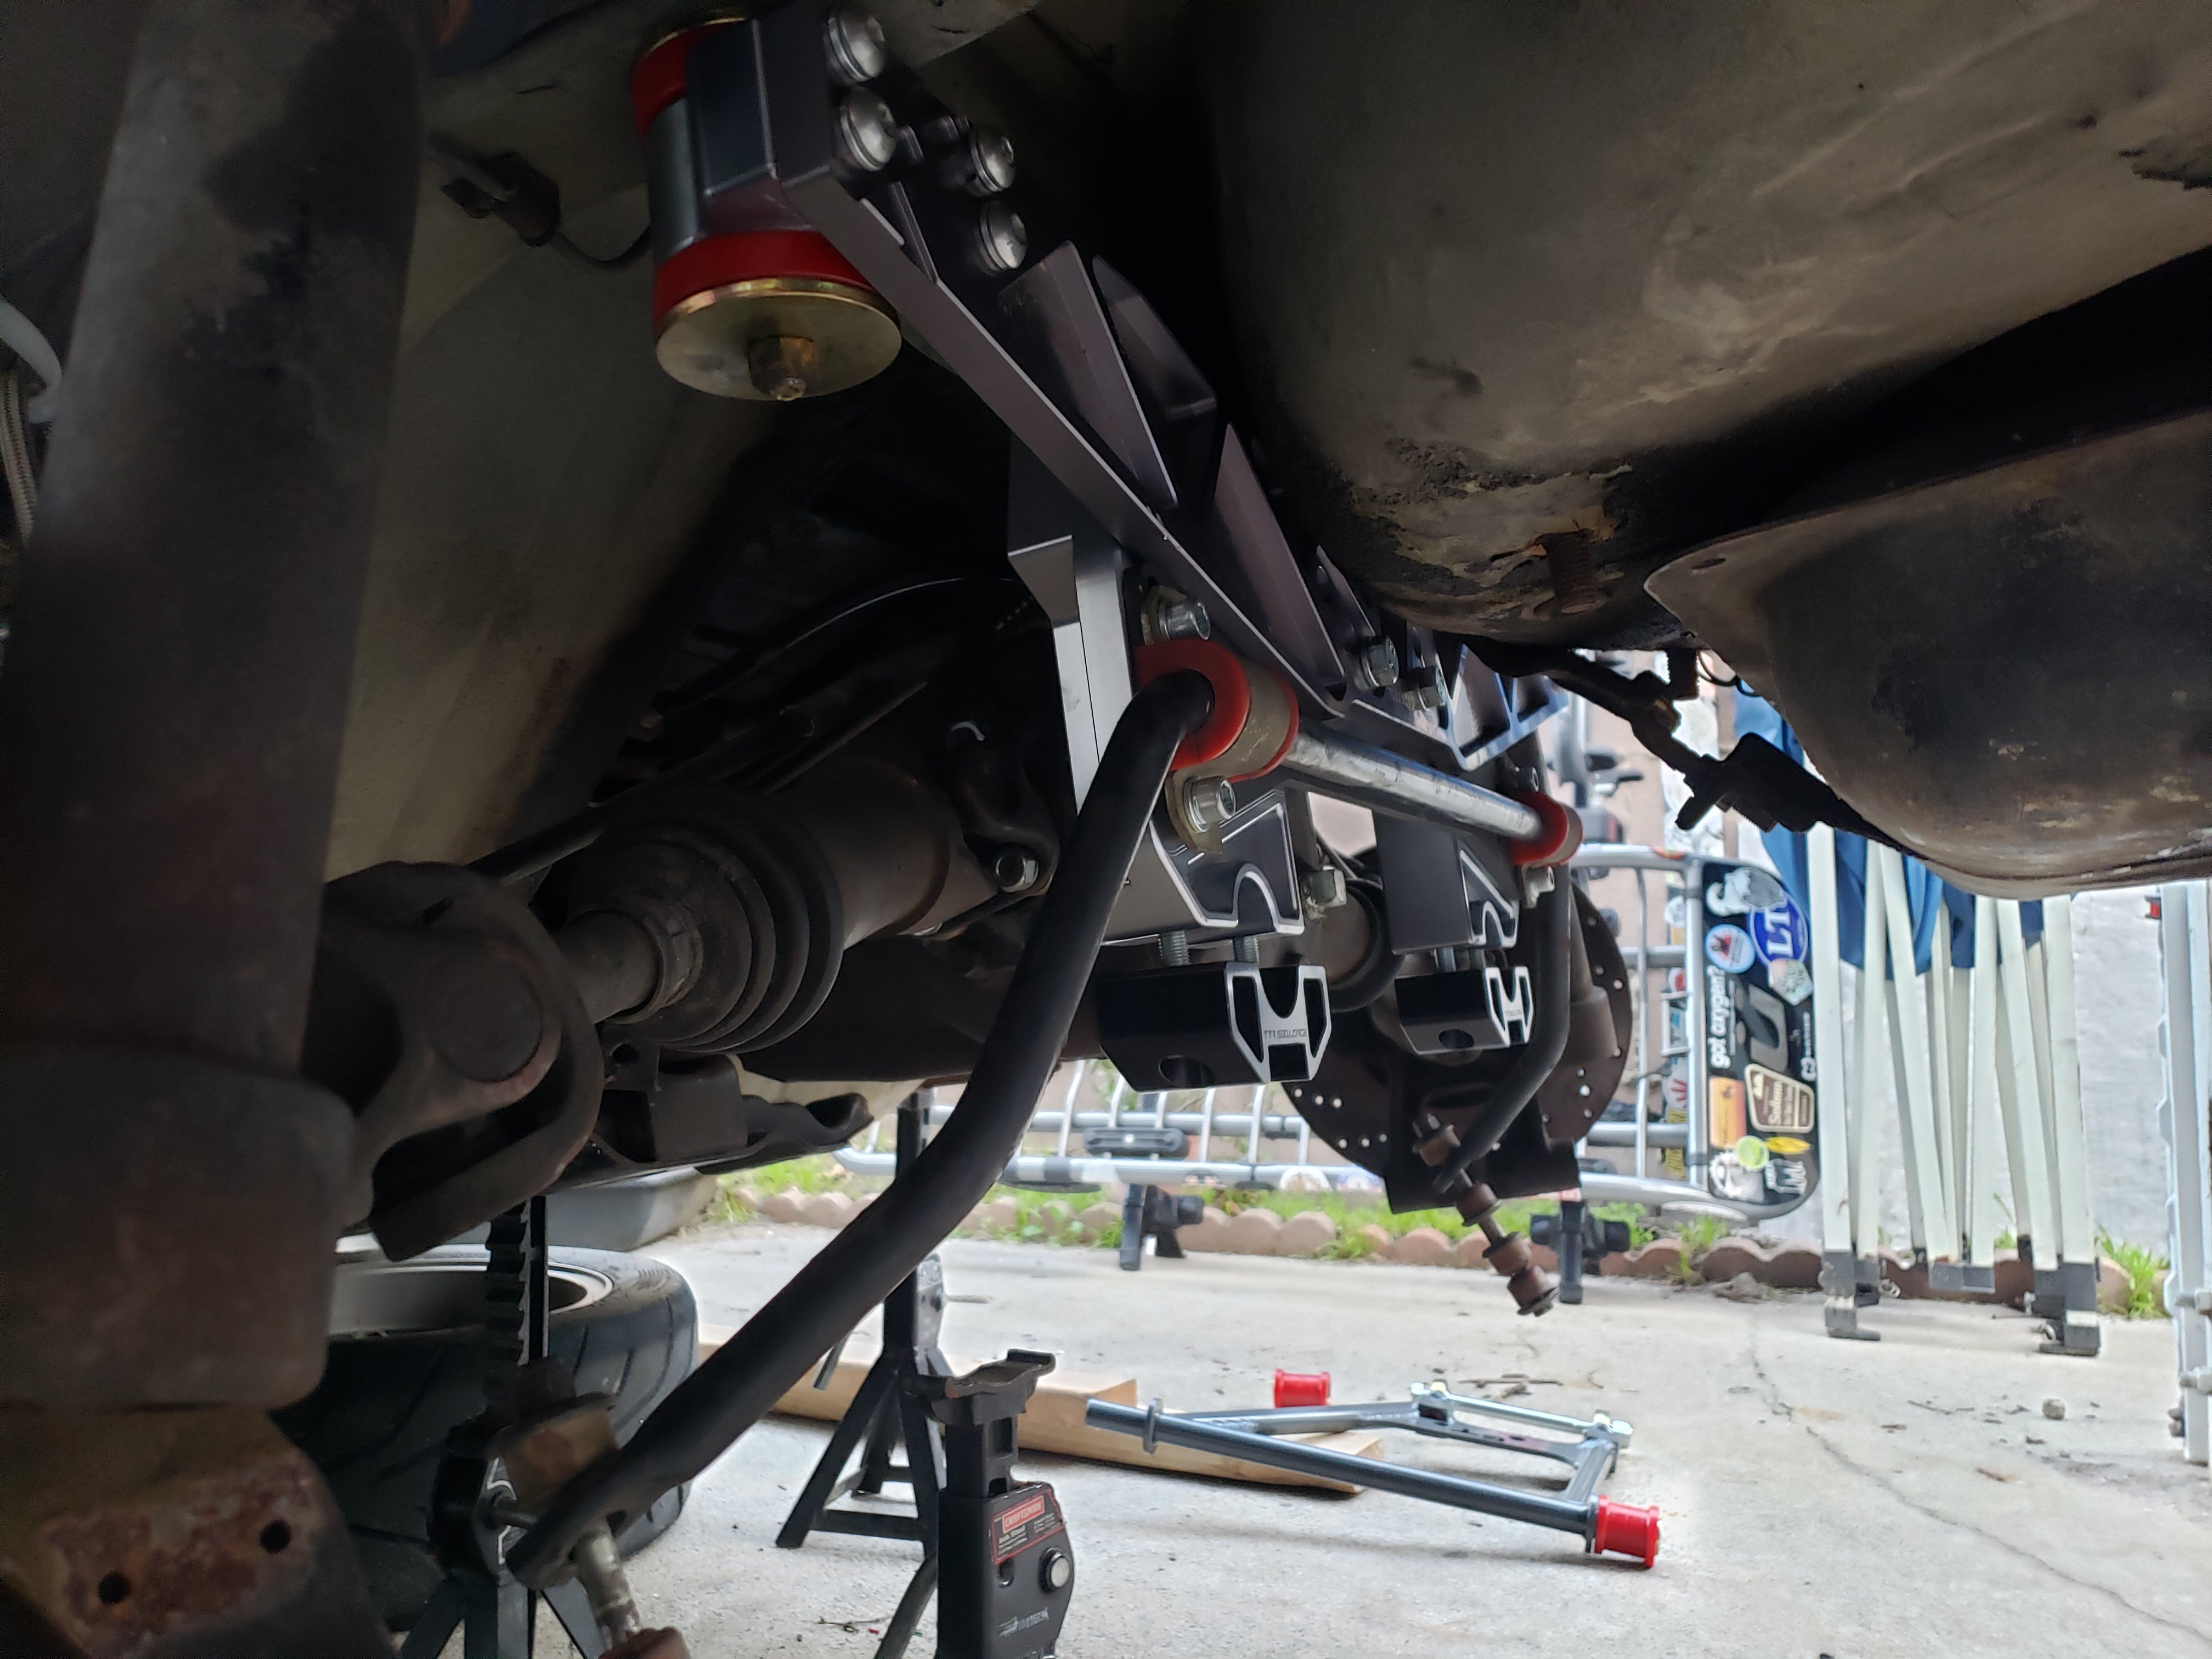
Here is a picture of how all the parts are installed currently. I want the diff positioned towards the rear to correct the axles angled, but I don't know what I need to make the front of the diff line up properly.
-
Is anyone still a dealer for this or do I have to get them from Racing lab?
-
Love this thread, I saw your video on youtube and thought you had done this all years ago.
-
Any updates on this? I'm thinking about picking up another project, and a 3rd gen z would go nicely with my 240z and 280zx.


Sectioned struts not matching any measurements from JohnC, want to go from illuminas to koni 8610s
in Brakes, Wheels, Suspension and Chassis
Posted
I already have perches welded on. The owner who did this must have kept it longer than normal for the suspension travel, which means I just have to use spacers to keep the articulation points the same. So that helps a lot. I just need to get the spacers and inserts to match the tube length and I should be good.