ehren Posted April 26, 2016 Share Posted April 26, 2016 Thanks for the reply. I'm interested in seeing all the individual parts you used to assemble the upper part of the coilover. The insulator and all that stuff. I think I figured out what my problem was but if I saw the layout of your parts it would be a tremendous help. Thanks again Quote Link to comment Share on other sites More sharing options...
Stock Car Mafia Posted April 28, 2016 Author Share Posted April 28, 2016 I should be able to get to it here hopefully tomorrow or Friday. I will be gone most of the weekend. I'll post the pictures when I get there. Quote Link to comment Share on other sites More sharing options...
ehren Posted April 28, 2016 Share Posted April 28, 2016 Thanks. I figured out my issue. I'm using those bolt in, urethane camber plate/insulator things and there were some conflicting parts to deal with but i got it sorted. I lowered the back end down on my wheel/tire combo and it is SLAMMED. LOL Gonna have to make some adjustments. I'm still interested in seeing your parts list and how it looks on wheels. Quote Link to comment Share on other sites More sharing options...
Stock Car Mafia Posted April 28, 2016 Author Share Posted April 28, 2016 Thanks. I figured out my issue. I'm using those bolt in, urethane camber plate/insulator things and there were some conflicting parts to deal with but i got it sorted. I lowered the back end down on my wheel/tire combo and it is SLAMMED. LOL Gonna have to make some adjustments. I'm still interested in seeing your parts list and how it looks on wheels. ehren can you provide these measurements so we can compare? Rear Shock Manufacturer and part number: Mine is Tokiko BZ3012 Length of rear strut from top of spindle casting to top of gland nut: I think mine was 15" Length of spring and spring rate for rear: Mine is 8" spring with 250 lb. weight. Spring perch/weld ring: length from where it's welded to the top of the spindle casting. I welded mine at 8" Tire and Wheels sizes? Mine is 17 inch wheels with 275/40/17 profile tires. I will have pictures hopefully within a week. Quote Link to comment Share on other sites More sharing options...
ehren Posted April 28, 2016 Share Posted April 28, 2016 yeah man i'll get some specs for you Quote Link to comment Share on other sites More sharing options...
Stock Car Mafia Posted May 1, 2016 Author Share Posted May 1, 2016 (edited) ehren, my rear struts were really simple. My brother and sister in law were up here so I didn't get to take too many pictures putting it together. It consisted of the billet hat that sits on the spring. I took the isolator bearing from the front and put it on the rear, then the isolator went on top. The isolator is notched in the rear and only fits on the shock rod one way. This made it easy to tighten down too. Edited May 7, 2016 by Stock Car Mafia Quote Link to comment Share on other sites More sharing options...
Stock Car Mafia Posted May 1, 2016 Author Share Posted May 1, 2016 (edited) I am several days behind in posting so I won't include too much detail as bolting most of this stuff up was pretty straight forward. I wanted to bolt up my shit to a clean car, so I spent a bit cleaning the front and rear wheel wells. I thought they woud be black underneath, but man I am shocked at how clean this shell is. I couldn't be happier with this car as a candidate. I had my brother sandlbast the tow hooks too. Lubed up the bushings for the steering rack and bolted it to the crossmember. The new tierods went on and antiseized the crap out of those. I don't have the toe out adjusted yet. This is where I ended up putting the steering rack brace. Bolted the damn thing up and put on the tension rods and LCA's with new bushings. They went on really easily. That bushing lube that is provided is SUPER sticky and doesn't come off bare hands very easily. I have to say I am getting pretty good at working by myself for bolting stuff up. It can be rather difficult at times. I still need to get a fish scale and test the torque resistance on the front hubs, but that will be easy to do on the car. The motor mounts got bolted in too. I forgot that I can't get the LCA bolt in with the steering rack bolted down. I had to loosen that to get them in. Here is the car after that night of work. The next day I went about pressing in the new inner bearings and grease seals for the rear. I cleaned up the brake components and reinstalled everything. Good lord I hate trying to line up brake shoes and get the springs to lock. I had sore hands after that. I pressed in the new studs and went about repacking the rear bearings. I put the stubs in and used the stock flanges for now until my order from Joe comes in for the Z31T axles. Shocks and coilovers went on as well. Next I hung the rear suspension with new bearings. I spent some time either cleaning the bolts or wire brushing to clean up any corrosion. We bolted eveything in and put the wheels on the car. This is how the car sat with zero preload on the springs with the spring seat resting against the spring to hold them in place. The car body sat on the rear wheels so I had to thread them up 1 inch. Edited May 7, 2016 by Stock Car Mafia Quote Link to comment Share on other sites More sharing options...
Stock Car Mafia Posted May 1, 2016 Author Share Posted May 1, 2016 Yesterday I took 10 minutes to thread the rears up another 1/2". I truly believe Ground Control has the correct measurements and I am glad I stuck with it. Now keep in mind the ride height will be dialed in when I have full weight on the car, i.e. motor, trans, and drivetrain, driver. I am so excited to have the car rolling again! It is really motivating now to get the remainder of the car done. Quote Link to comment Share on other sites More sharing options...
Stock Car Mafia Posted May 4, 2016 Author Share Posted May 4, 2016 (edited) I spent a little time yesterday installing new stainless brake lines and getting the parking brake hooked back up. I am still admiring the new suspension paint. I'm sure it won't be long before it has some road rash character. The Russell brake lines looks great. One complaint about them is the vendor stated the hex heads were the same size as stock and should hold in place when you tighten the brake line. False. They spin inside the bracket and I think I had to use a 18 mm wrench to hold them where I wanted the lines to flow and then tighten them. The retaining brackets then help everything nice and snug. I haven't heard from Joe yet on if the parts shipped. I really would like to get the drivetrain done. It was an action packed weekend with lots of company and places to go, but it was nice to have the girlfriend there to take some pictures in action. Edited May 7, 2016 by Stock Car Mafia Quote Link to comment Share on other sites More sharing options...
Stock Car Mafia Posted May 5, 2016 Author Share Posted May 5, 2016 I did some rough math today and I think I am going to scrap the stock caliper rebuild and return what I have. I will be picking up some S12W calipers from O'Reilly tomorrow. I just placed an order with Edan at Silvermine for Centric drilled, slotted, vented rotors, bolts and the spacers needed for the swap. I was going to go with Porterfield for pads but decided to give the EBC Yellowstuff pads another shot. I have them on the Mustang and I really like how well they grab on the street. Quote Link to comment Share on other sites More sharing options...
bramagedained Posted May 6, 2016 Share Posted May 6, 2016 By the looks of it, we have pretty similar ride height. I ended up mounting my fuel cell a bit higher than yours, though. Quote Link to comment Share on other sites More sharing options...
Stock Car Mafia Posted May 6, 2016 Author Share Posted May 6, 2016 By the looks of it, we have pretty similar ride height. I ended up mounting my fuel cell a bit higher than yours, though. I looked at yours quite a few times before I lowered mine. I like the ride height you have. I'd like to keep the gap between the tire and fender roughly the same all the way around. This isn't possible in the rear. I think keeping the flares lip close to the stock height will look the best. Quote Link to comment Share on other sites More sharing options...
bramagedained Posted May 6, 2016 Share Posted May 6, 2016 (edited) Unfortunately I didnt take any pictures when I cut the fenders, The lip of the flares are just above where the OEM Arch would have been, I think at the top the piece I cut out was about 2"-3" wide. I'd have to bottom the whole car hard for the tires to rub. With the shocks fully compressed they can hit, but, that hopefully doesn't ever happen. If I went for mounting high enough that they never hit, it would have looked bad so that was the compromise I made. Edited May 6, 2016 by bramagedained Quote Link to comment Share on other sites More sharing options...
Stock Car Mafia Posted May 7, 2016 Author Share Posted May 7, 2016 (edited) What you did is probably roughly what I'll end up doing.Man I reread some of my posts and I don't know why I don't proofread. The spellcheck on this site is terrible I swear I don't talk or type like that. Lol Edited May 7, 2016 by Stock Car Mafia Quote Link to comment Share on other sites More sharing options...
Stock Car Mafia Posted May 7, 2016 Author Share Posted May 7, 2016 I didn't get too much done yesterday. The Energy suspension bushing kit doesn't come with replacement front sway bar bushings, so I had to order those (7.5101G 18mm set). It kind of stinks working by yourself most times. The bolts were just not long enough without someone compressing the bushings a bit. I took a c clamp and some wood to pull the sway bar down on the tie rod and this got it close enough I could start the nut. All the bolts were tightened to 20 ft./lb. I believe. I also got the push rod depth set for the new booster and MC. That was rather straight forward using a digital caliper. Quote Link to comment Share on other sites More sharing options...
Stock Car Mafia Posted May 7, 2016 Author Share Posted May 7, 2016 Today I got the S12W calipers from O'Reilly. I am definitely going to paint these, but I haven't decided what color yet. They are going to be either metallic gray or the common red. I stopped at Menards and also got a cap and plug for the A/C lines. These are the parts numbers if anyone is looking for these. Since the brake master cylinder fittings are not longer available to hook up to the 10 mm lines I picked up a flaring kit. I cut the ends off of the two lines and threw on new 3/8" fittings. I felt pretty good about flaring for the first time, but if they leak it is pretty easy to fix. I also got a coult 5/16" nuts today. These thread to the Tilton 75 Series clutch MC push rod. I drilled out the OEM rod clevis and welded on a new nut. The brake MC and booster got put on as well. Those are bolted up to the pedal now. I hate crawling under the steering wheel. What a crappy position. For me I couldn't add the tilton reservoir until I had the MC tightened. There just wasn't enough room. The push rod will get connected and adjusted tomorrow. The other thing I did was drill out the radiator holes to 1/2" for the rubber O-rings that will go outside the bolts. Something that I should have done months ago. Quote Link to comment Share on other sites More sharing options...
Stock Car Mafia Posted May 7, 2016 Author Share Posted May 7, 2016 I have just a few things left to do until I can drop the motor in and hopefully for good now. I need to add the fittings for the gauges to the block. I just want to make sure there is room for them so I don't have to dick with it when the motor is in the car. I am not sure if the sending unit for the oil pressure gauge will fit on the back of the intake. Fingers are crossed, but I hope I can get the motor in tomorrow. Quote Link to comment Share on other sites More sharing options...
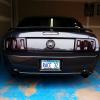
Stock Car Mafia Posted May 8, 2016 Author Share Posted May 8, 2016 So the good and bad news on the front brake lines. The good: They fit over the Hawks mounts. The bad news is they are about 1/8" away or touching the headers. They are ceramic coated, so I am not sure if heat wrapping them will help? My best option is to get some lines and have them head to the front and bend around in FRONT of the motor mounts and headers. The next problem is the oil pressure sender is too bit to screw in to the back of the intake. I do not want this down by the header and oil filter, so I will either be getting a 45 deg/ fitting or making some AN hose to relocate the sender. I put the oil pressure and coolant sensors on the block for the autometer gauges so I didn't have to screw with them with the motor in the car. I got the back end put together for now too. I am not sure how I feel about the taillights yet but I think this thing looks pretty nasty! My buddy Matt came over to help give me a hand on the car. My other friend Mike came over to detail his new car and helped work on it as well. It really is a 2-3 person job to get the motor and headers in at the same time. And this should be the last time the motor has to go in! I've got a few things listed that I still need. I am hoping to get my drivetrain parts so I can get the diff in and weld up some exhaust. Short post today as I am heading out the door for Mother's day. Hope everyone is treating their mother's to a great day! Quote Link to comment Share on other sites More sharing options...
RebekahsZ Posted May 9, 2016 Share Posted May 9, 2016 Put a 3/4" hole in the inner fender and pass the brake line thru to avoid the headers. Looks great! Quote Link to comment Share on other sites More sharing options...
Stock Car Mafia Posted May 9, 2016 Author Share Posted May 9, 2016 Put a 3/4" hole in the inner fender and pass the brake line thru to avoid the headers. Looks great! This is exactly what my buddy Matt suggested. This will probably happen! I do want to shout out to Edan at Silvermine Motors. I ordered the vented rotors, bolts, and spacers for the 4Runner conversion and the stuff showed up on Saturday! I seriously was shocked at how quick it came. Can't wait to get them on the car! Quote Link to comment Share on other sites More sharing options...
Recommended Posts
Join the conversation
You can post now and register later. If you have an account, sign in now to post with your account.