

Yoak
-
Posts
506 -
Joined
-
Last visited
Content Type
Profiles
Forums
Blogs
Events
Gallery
Downloads
Store
Posts posted by Yoak
-
-
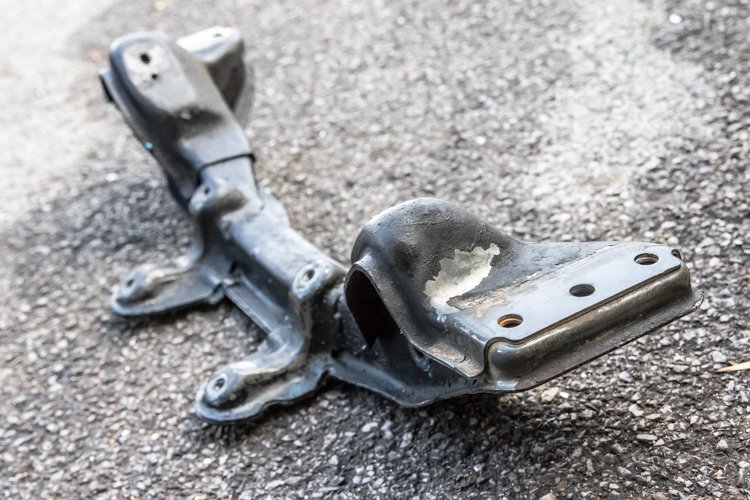
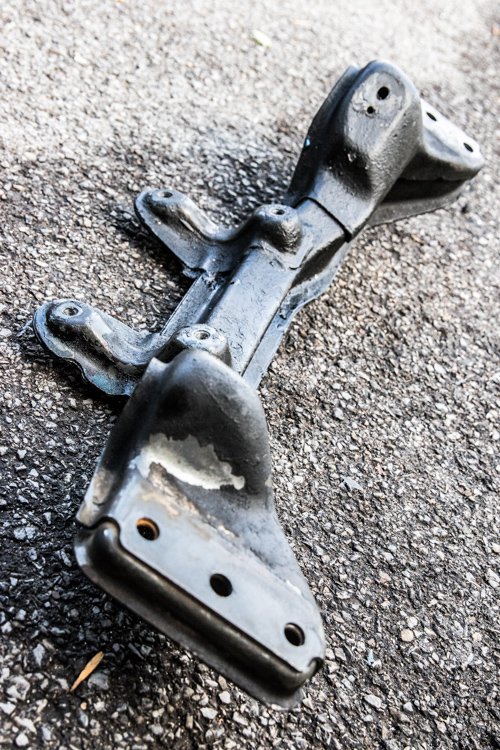
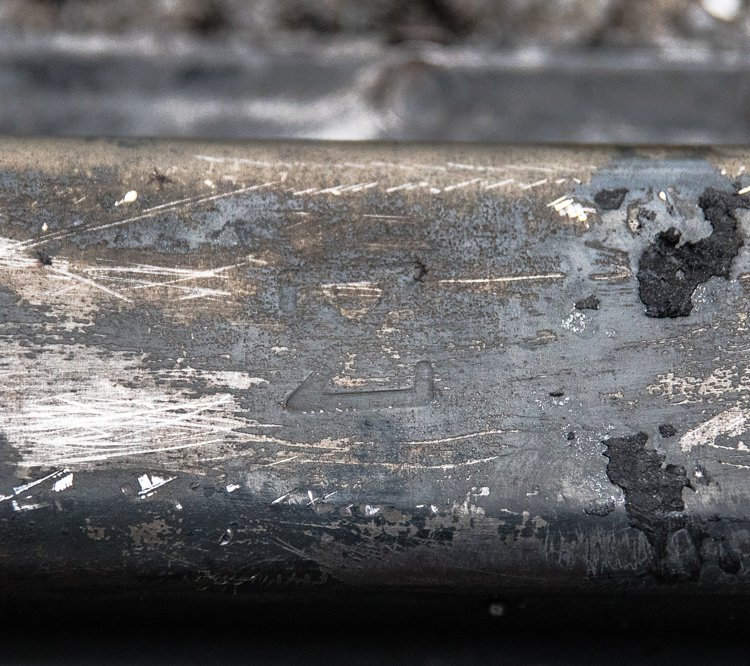
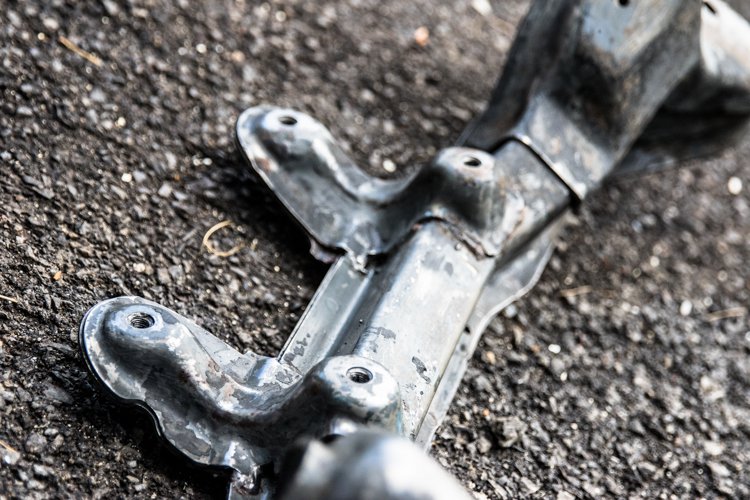
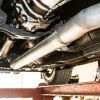
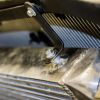
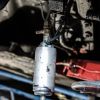
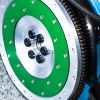
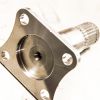
Several oil leaks appeared fairly quickly around the classic areas of the new oil pan so I had to finally pull it after attempts to stop the leak had failed. Additionally I needed to "modify" the rear of the pan with a hammer as it was kissing the cross member. The job is generally a pain with a stock pan but with the additional size of the custom pan I was forced to pull out the front cross member to ease re-installation and it needed repainted anyway.

Pictures Taken in June/Early July 2017
Few Additional Images: http://www.doitinadatsun.com/yoak/2017/09/oil-pancross-member-280zx/
-
Wow, it's been about a year without an update!
The project (280ZX) is still ongoing and the 240Z is still on hold- and I have some pictures altough for various reasons I haven't been able to take/post as many as I would like.
Brief update as of today (pictures in a future post)
- MS3 - Installed, Car has 700ish miles on it in the year that I rebuilt it
- Front end had to come out for an oil leak and "modification" of the DP racing fan to clear the steering rack mounts
- Rear End is out again, camber/caster issues & TTT rear end coil over install
- Installed the 240Z roll cage in the ZX because it was taking up to much room in the garage
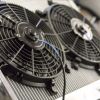
- Upgraded Alternator (GM) for the new electric fans.
- Rewired a good chunk of the original harness/upgraded grounds and charging cables.
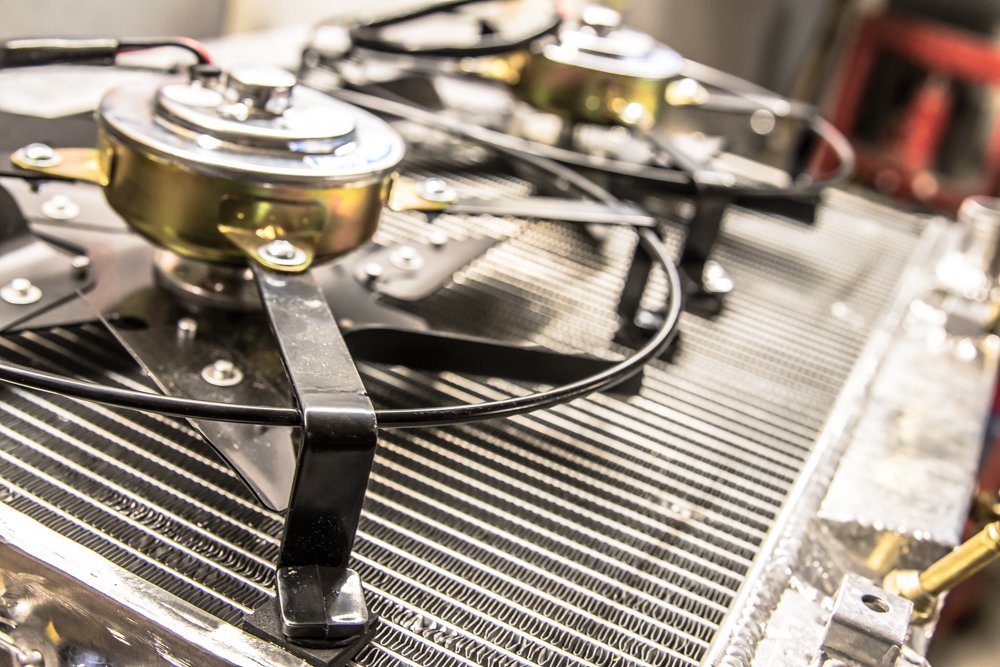
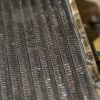
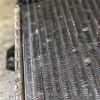
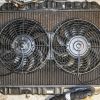
The Following Pictures were taken in January of 2017: I replaced the CX racing Fans with PERMA COOL fans and had to cut the original fan shroud brackets. These fans barely fit, and required some rewiring and an upgraded alternator to give me some breathing room as the original was dying anyway. I did not take as many pictures of the fans while installing them as I would have liked but you will get the idea.
http://www.doitinadatsun.com/yoak/2017/09/280zx-radiator-modificationnew-fans/
-
I would be interested on a ZX as my transmission is going and I would rather upgrade
-
Looking for a set of Oil pan (sandwich) brackets from a late model z
-
Looking for a gauge cluster for a 280zx in decent condition, does not have to be in working condition.
In case anyone is interested in why: I am using this to do some test fits for some aftermarket gauges fitment (specifically water/fuel as tach/speedo are fairly well documented). Depending on the results this will just be used so I can make a custom new face for the cluster similar to http://forums.hybridz.org/index.php/topic/84946-finally-installed-the-new-gauges/
Please send pm, thanks
-
Tried to send you a message but it says you can't accept any new ones right now. If you can send me a PM
-
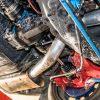
Slightly out of sequence pictures again, but it was easier to show the process this way as I did not take many pictures of the CV install.
The difference is a torsion out of a Subaru WRX STI (R180) Torsion type (3.54). The CV/Flanges are the Wolf Creek Racing kit, I was told when I did this I was the first person to try this in a 280ZX. The only difference was I had to use 240z bolts on one side and 280ZX on the other (wheel side) to make the new CV's work.
The Exhaust is 3 inches all the way back. I am still trying to source a flange for the 280ZX Stock turbo so I can remove the cast piece.
Pictures Taken May/August 2016
More Images: http://www.doitinadatsun.com/yoak/2016/09/280zx-exhaust-cv-axles/
-
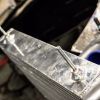
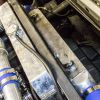
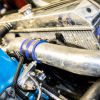
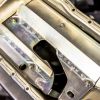
So I had to cut into the ZX to do the intercooler installation, I did not take many pictures of the process but I did try to give ample room on each side and keep them even. While it is not obvious in the pictures they came out pretty close.
All of the brackets I had to fabricate myself, my kit was missing (I later found them after project was done) some brackets and I did not like how it was going to mount anyway. I made to "sandwich" brackets to give the core support better support the adjustable "L" brackets I had made earlier. I just did not like the idea of it hanging the way it was without some re-enforcement.
I then drilled holes on the lower area of the support for the longer threaded rods that are on the lower section of the intercooler. I then used a rubber grommet to cover the bottom nub to give the intercooler something to sit on and slightly wedge it so it would not move back and forth.
Not the new radiator, the process was the same as the old one to make the fans work so I do not really re-document this process.
I also had to cut the piping a bit shorter near the coupler in front of the engine for the newer throttle body + spacer I was running.
Pictures are slightly out of sequence but posted this way to make more sense to the context of the post. Pictures taken July /September 2016
More images: http://www.doitinadatsun.com/yoak/2016/09/280zx-intercooler-new-radiator/
-
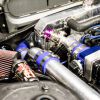
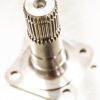
Engine was a VERY tight fit with the new pan, I am actually going to have to raise it a 1/4 of an inch or so to keep it off of the steering rack mounts.
Pictures Taken May 2016
http://www.doitinadatsun.com/yoak/2016/09/280zx-engine-drop/
-
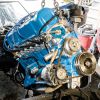
I haven't had time to post much lately, but I am doing to try and get this current over the next few days.
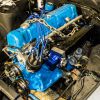
The First few pictures are of modifications I made to the original Radiator for the electric fans. I had to weld this up as they lost the original support they had. The head was off the engine prior to removal as I believed it was damaged (which does not appear to be). The engine will be likely used in the upcoming 240 with different pistons. The pictures are from me removing the original AFM bracket...with it in place it was making routing of the intercooler much more difficult and wasn't needed anymore now anyway.
Pictures Taken April 2016 (pictures are out of sequence with previous posts)
Same thing at link just higher rez:
http://www.doitinadatsun.com/yoak/2016/09/280zx-engine-pull-modified-radiator-etc/
-
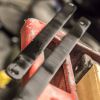
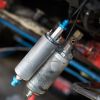
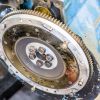
A bit of a random assortment of pictures from the project.
Pictures 1-2: Old Fuel Pump vs new
Picture 3: Old Flywheel
Pictures 4-5: New Engine/Flywheel
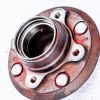
Pictures 6-7: Subaru R180 with new Stub Axles and aftermarket cover
Pictures Taken April-May 2016
Same stuff at link this time just higher resolution: http://www.doitinadatsun.com/yoak/2016/07/2678/
-
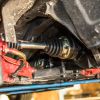
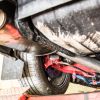
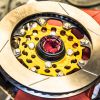
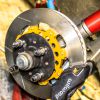
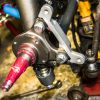
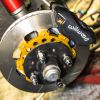
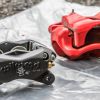
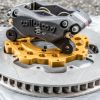
TTT Coilover/brakes/armsPictures taken around June 2016
-
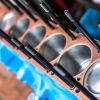
Various Images from a few stages of the project.
Completed Intake, Subaru R180 Differential shafts, and TTT S130 front brakes for the new TTT suspension.Note: Car Engine cranked today, did not start but got the oil pressure established!Pictures Taken: March/April -
Looking for a Engine bay harness for my 79, I have been having trouble with it and now I have to get a new one.
Send a PM thanks
-
Thanks, I am glad to know people are enjoying the pictures
I haven't been taking quite as many as of late as I am trying to get the car up and driving. As a note...as of this moment in time the engine is in the car - I am working on the intercooler/Megasquirt wiring this weekend
Just shows you how far behind I am on these. -
I am a photographer on the side
-
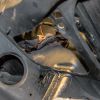
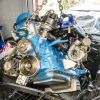
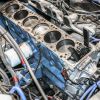
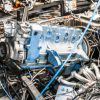
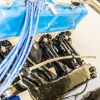
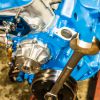
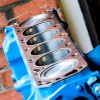
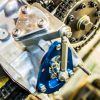
Quite a bit going on in this post and it spans a few months of winter.
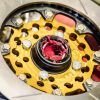
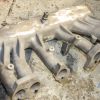
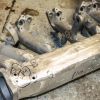
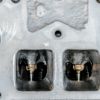
Pictures 1-2: Another View of the modified oil pan
Pictures 3-4: Modified Oil pickup
Pictures: 5-6: My Intake prior to sending it out to Lonewolf performance to get it welded up again. I had removed the unneeded provisions as I am going to a MeagaSquirt Setup. Note: I do have it back and it came out nicely.
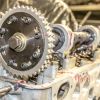
Remaining Pictures: The other pictures cover the pulley and new key install (mine was damaged).
Pictures Taken Late 2015/Early 2016
\http://www.doitinadatsun.com/yoak/2016/06/280zx-misc-engine-work/
-
Shoot me a PM, as I don't check the thread everyday - I can give you my contact info
-
Shoot me a pm and we can talk - I travel to CA a few times a year as well.
-
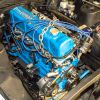
So as I am writing this my pictures are about 5 months back...I am going to try and get them caught up as I am about to drop my engine into this car this weekend (hopefully).
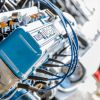
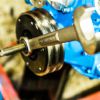
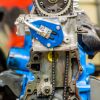
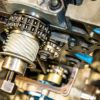
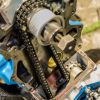
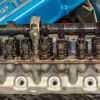
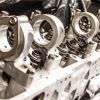
Several day progress on the engine including the Kameari timing chain tensioner install. Note that I had to grind down the head (pictures 4-5) to get the full travel. Also note, do not use a thick gasket between the blue piece and the block as it will cause the chain to bind on the lower gear.
More Pictures: http://www.doitinadatsun.com/yoak/2016/05/blockkameari-engine-works-timing-chain/
-
Looking for a 240/280 car to drive during the summers while my other one is finishing up project status.
Some work is, but not looking for a major project at this time (I have 2 atm)
-
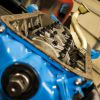
http://www.doitinadatsun.com/yoak/2016/04/280zx-p90-turbo-head-rebuild-iv/
Pictures Taken December: 2015
-
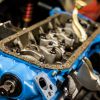
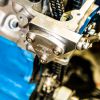
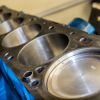
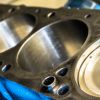
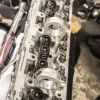
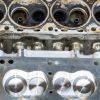
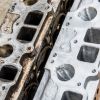
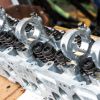
I can’t remember for certain but I believe this was the second time assembling the head (which is why it is a bit messier) as I managed to strip out a cam tower bolt because of a wrong torque spec in the How to Rebuild Your Datun OHC Engine book. Ironically I had been cross referencing everything up to the point with the FSM but obviously did not on this one as there is a huge difference in torque (10 vs 25 iirc without looking). So I had to tear everything down and retap and helicoil the towers bolt holes (some others were damaged and did not want to take a chance). To add to the difficulty I even managed to break my helicoil tap off in one of the holes. Thankfully, I was able to extract it by using a Dremel and a sand strong bit. Eventually after sanding the center down I was able to use a screw driver to reverse it out without and additional damage. After all of this I had to do some extensive cleaning and then put things back together again.
Same Stuff on my site...not had much time to post updates
http://www.doitinadatsun.com/yoak/2016/04/280zx-p90-turbo-head-rebuild-iii/
Pictures Taken December 2015
-
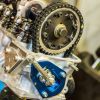
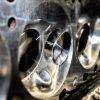
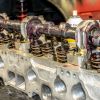
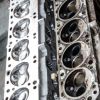
More Pictures of ports/progress - Note pictures make things look rough...they are not
Pictures Taken December 2015


WTB 280ZX Rear Taillight Panel/sheetmetal
in Parts Wanted
Posted · Edited by Yoak
WTB 280ZX Rear Taillight Panel sheet metal in good condition/straight.
Please send me a PM.
Located in WV bear Northern border