DeputyDog1428
-
Posts
1 -
Joined
-
Last visited
DeputyDog1428's Achievements
")
Newbie (1/14)
0
Reputation
-
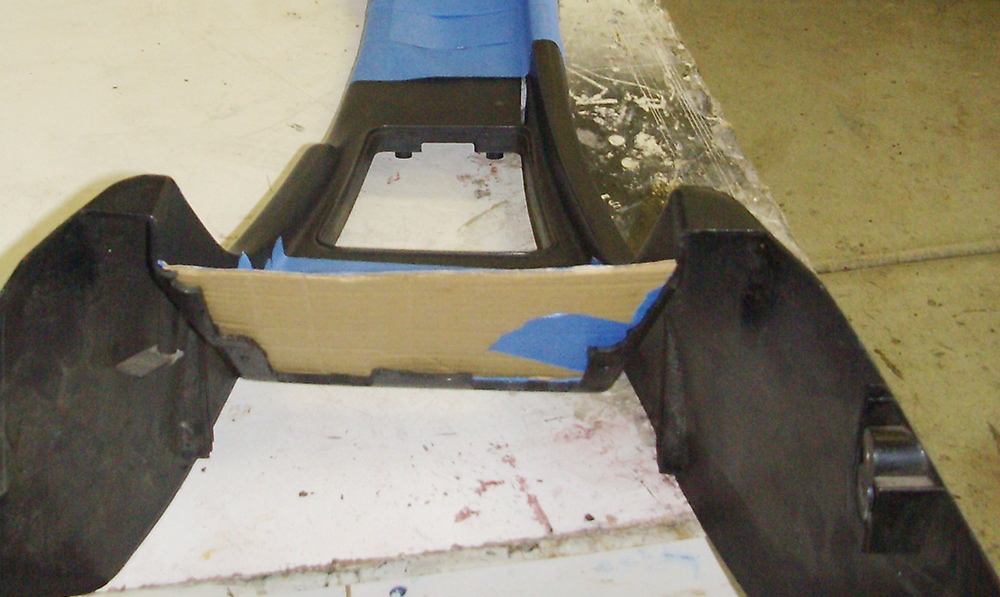
Hi All!! I have not been able to login under the Fauxre screen name since the site went down last week. Attempting to login under the old account deposits corrupting cookies on my computer that completely blocks my access to HybridZ. Until the administrators can fix it, I'll be posting as DeputyDog1428. Gravityflyer...thanks for the support... and no need to apologize for asking questions. That's what this is all about. 1. The blue painters tape in #2 was just to visualize the shape of the final piece. It was all removed before glassing. 2. In #3, I've already glassed the panel for the stereo. I cut cardboard to fit. I mounted it on the front side like in this pic. I wrapped the cardboard in aluminum foil to act as a release agent, then laid down 4-5 layers of fiberglass matte to get a good thick panel. The middle gray area is sheet metal bent to shape and taped to the underside. I waxed it heavily so it would pop off easily after glassing. In #4 I ran a continuous sheet of glass cloth down the center to prevent cracks from forming in the final finish. FAIL! 3. That is light weight body filler in #5 and #6. And I did use it to get a nice smooth finish. Unfortunately, I did not wrap the underlying glass cloth around the whole piece. Cracks have developed where the black plastic meets the glass/filler. I had originally planned on covering the console in material, so I wasn't too concerned. But now that I'm considering hydro printing, I'll need to wrap the whole console in glass matte and sand it all down, like I did on the dash. 4. The paint you see is just automotive primer. This thread has a technique for finishing the dash. It didn't work for me, but you might have better success. http://forums.hybrid...ir-alternative/ 5. The stereo mounting frame came with the stereo. It secures itself in the hole with tabs on the back side that you bend against the mounting surface. No screws required. I took a look at your new build. As a dad I found the back story heartwarming. Looks like you're off to a great start and have a good place to work on it. I'll be watching for more progress. Regards, Wes