
Thomask
-
Posts
18 -
Joined
-
Last visited
-
Days Won
1
Content Type
Profiles
Forums
Blogs
Events
Gallery
Downloads
Store
Posts posted by Thomask
-
-
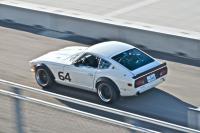
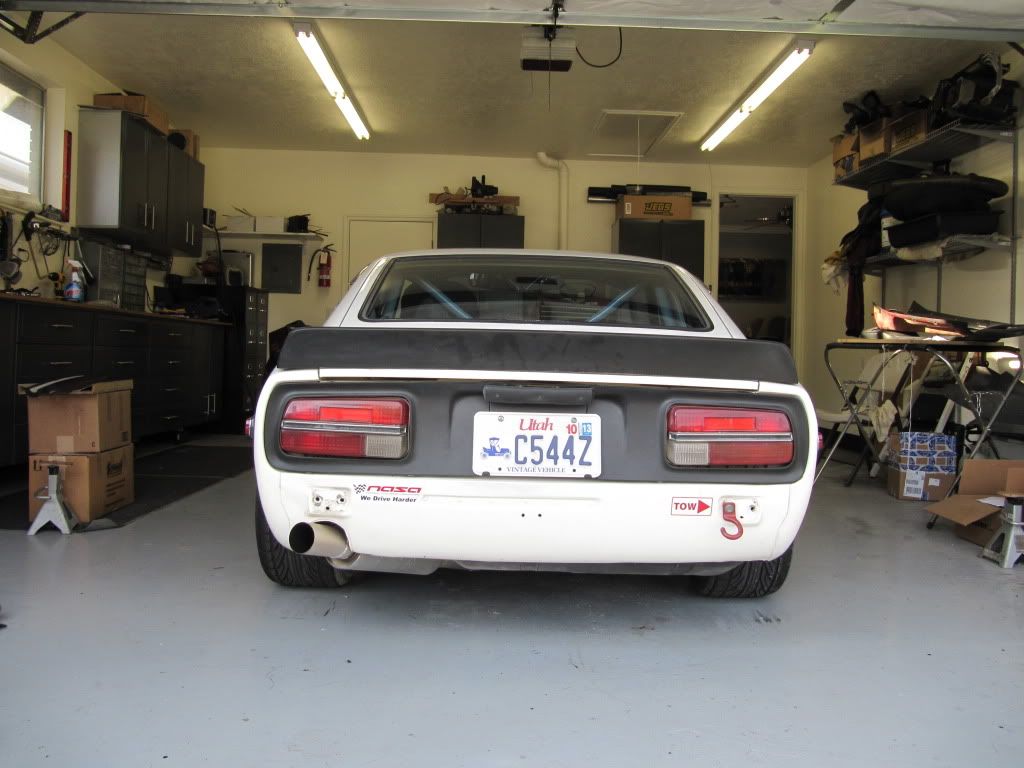
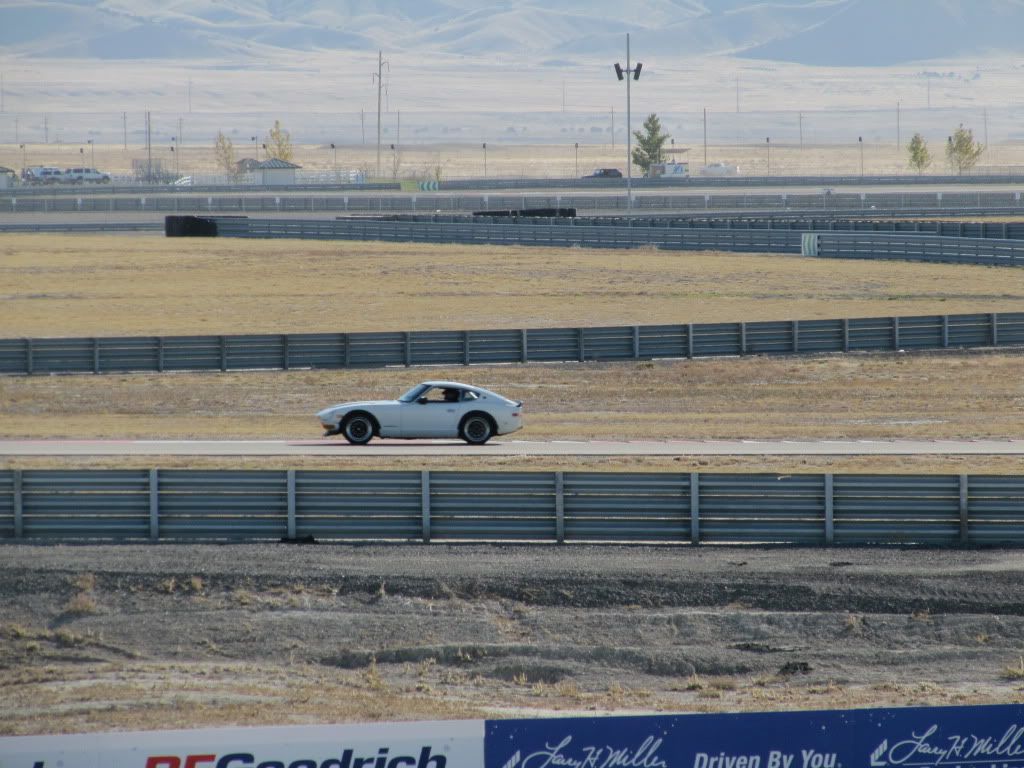
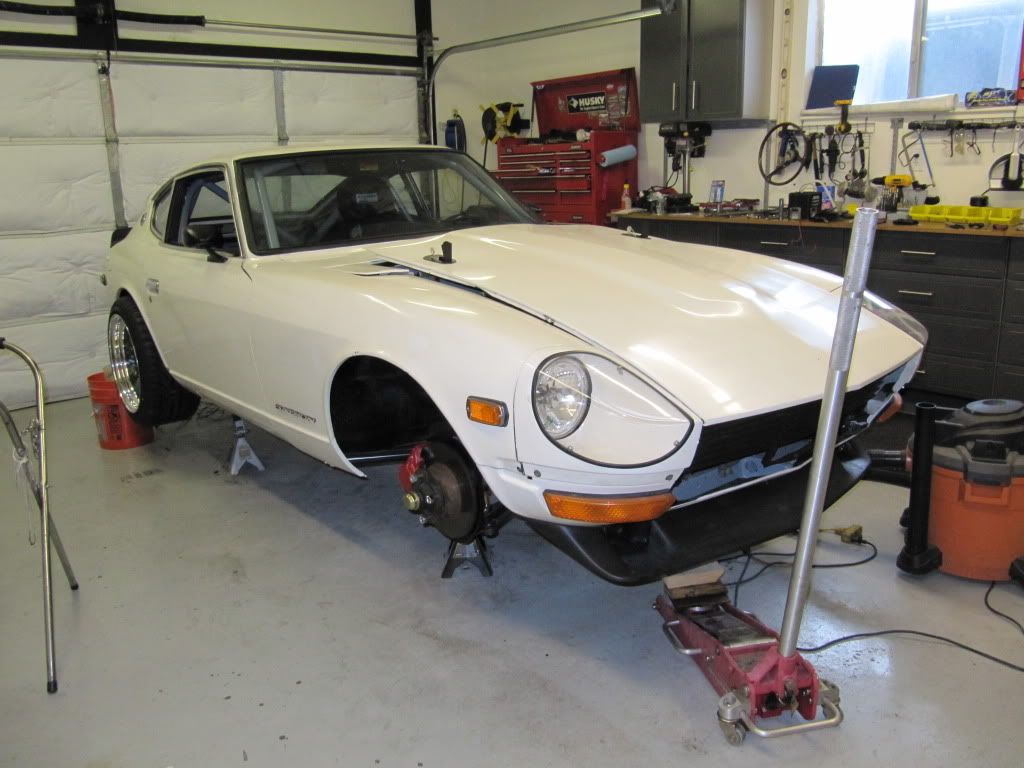
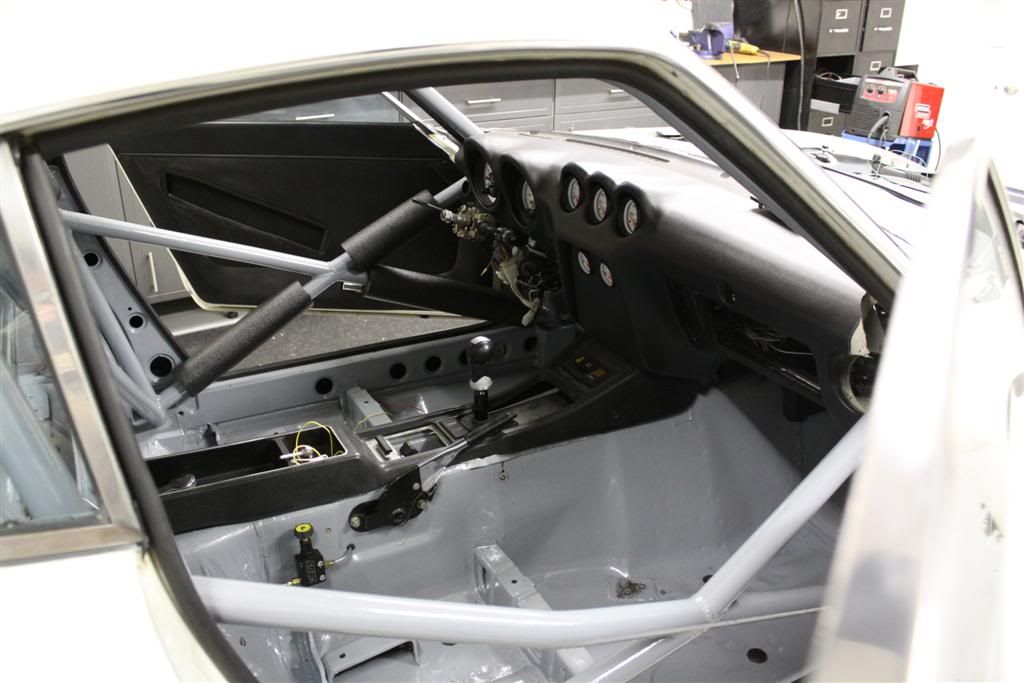
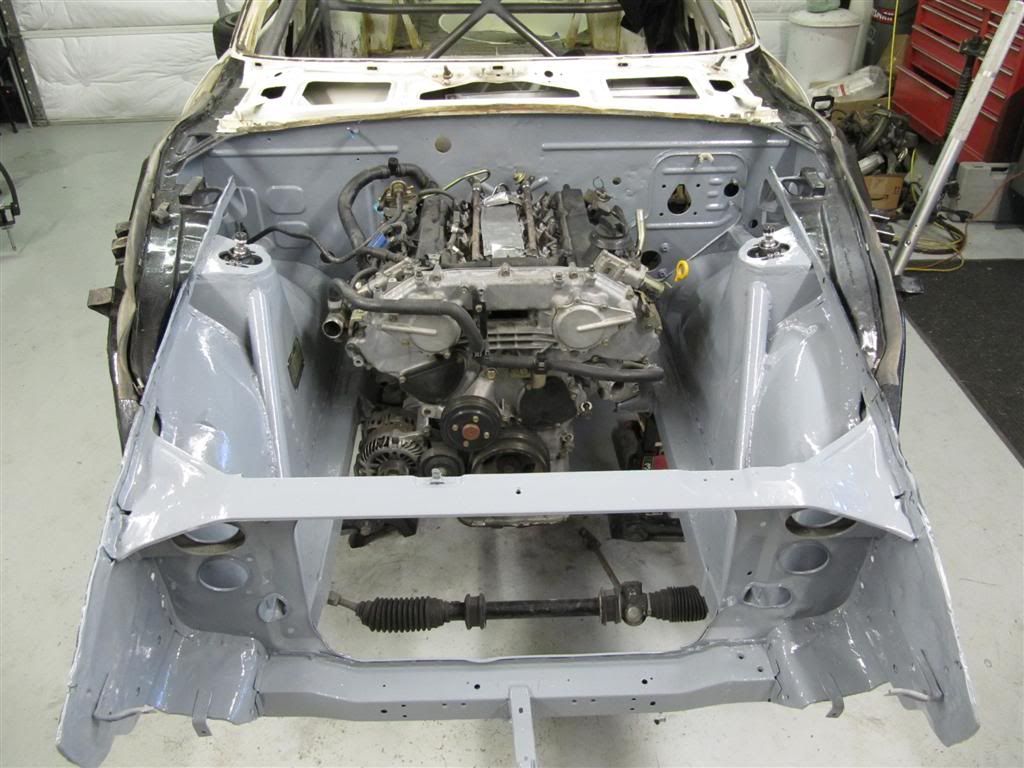
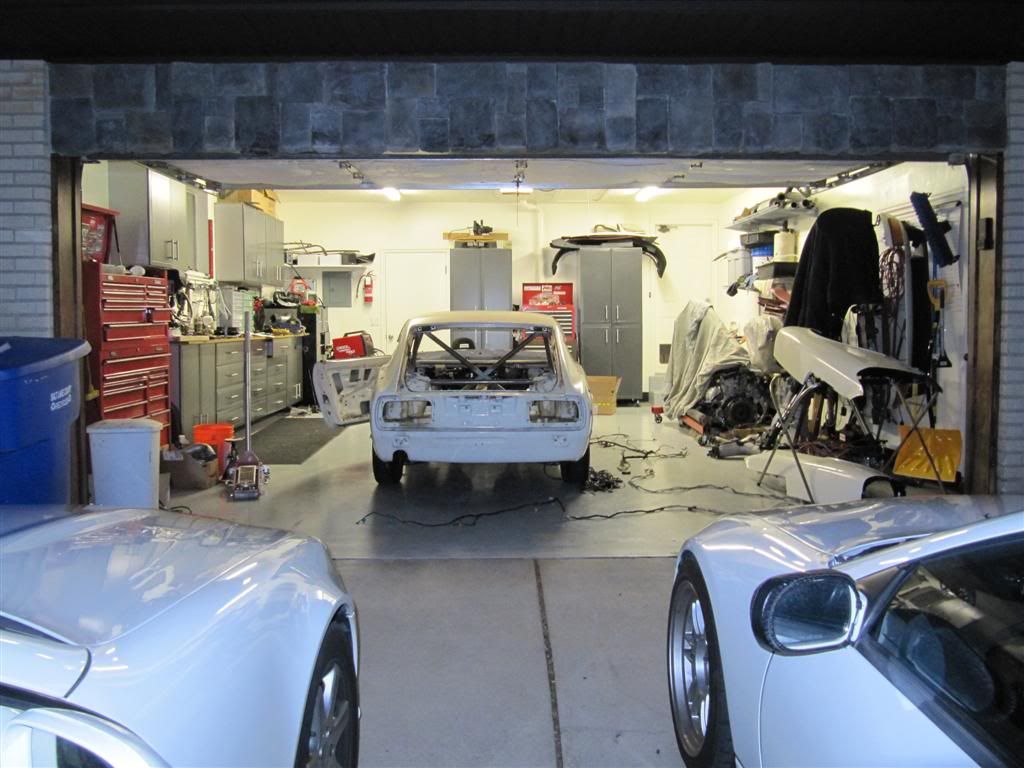
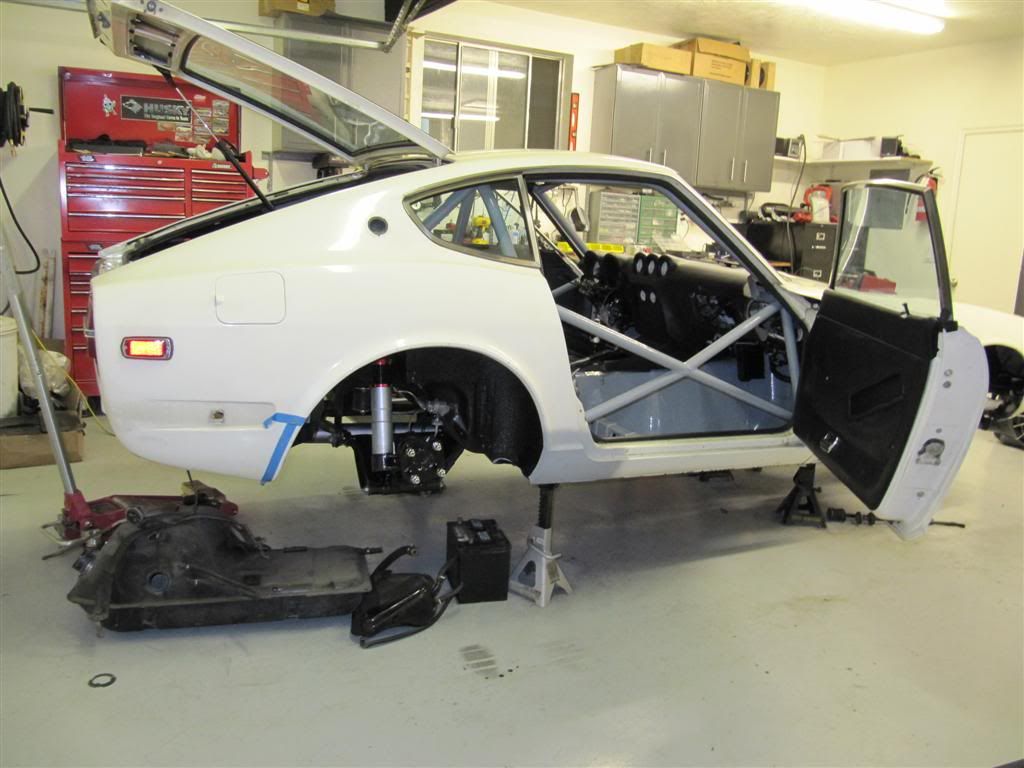
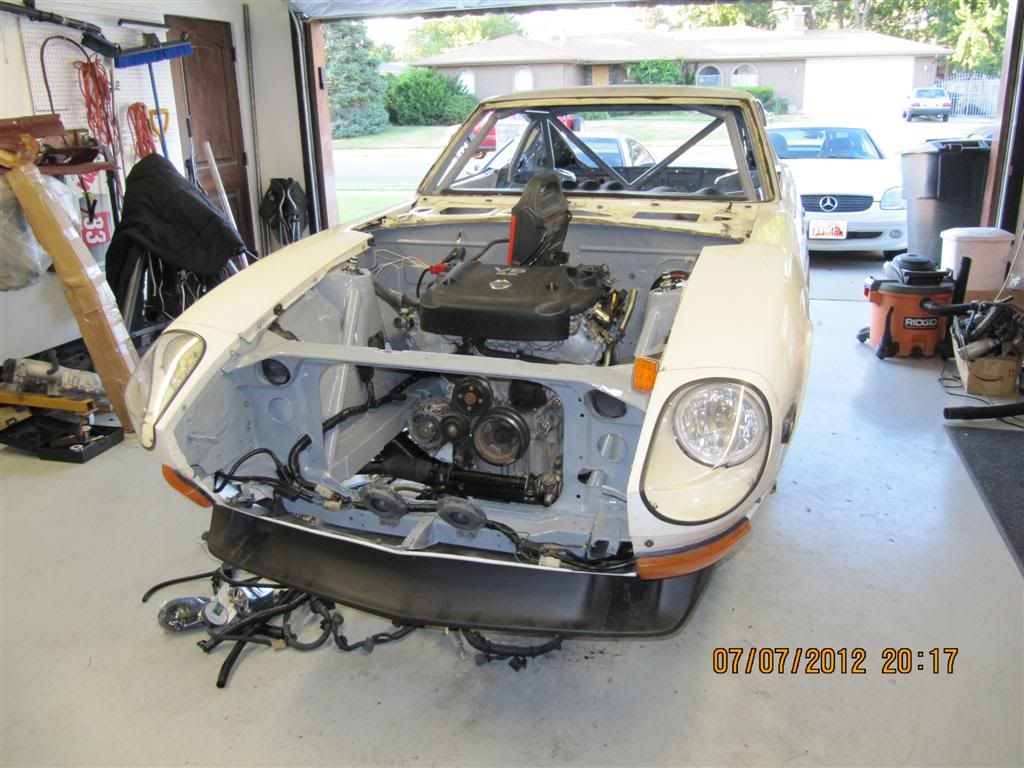
the "finished product". i had my first track day yesterday with it and i have to say it handles really well with no real issues. some tweaking necessary, but for the most part the outcome is better than i hoped for.

-
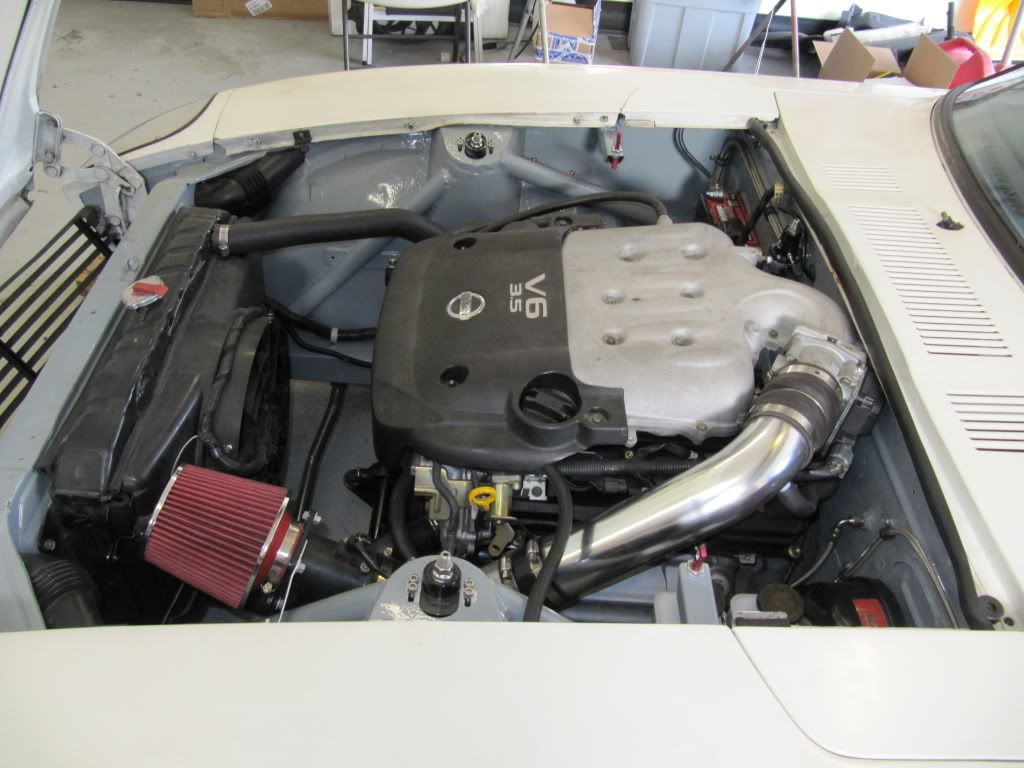
Hey I was just reviewing your pictures. I really like how you moved the radiator top hose to the right side of the radiator. that looks awesome. Your steering wheel looks like what I was going to use, a 91' Z32 steering wheel, though I'm going to use the version that has the cruise control buttons because I want to setup the factory cruis which is built into the ECU.
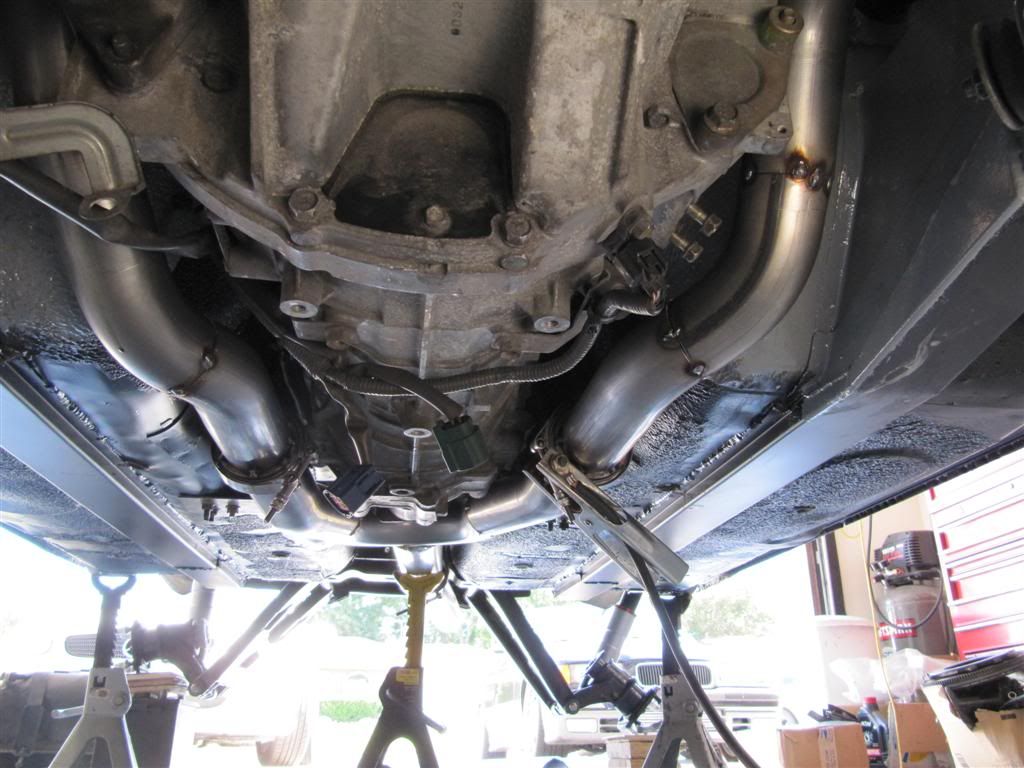
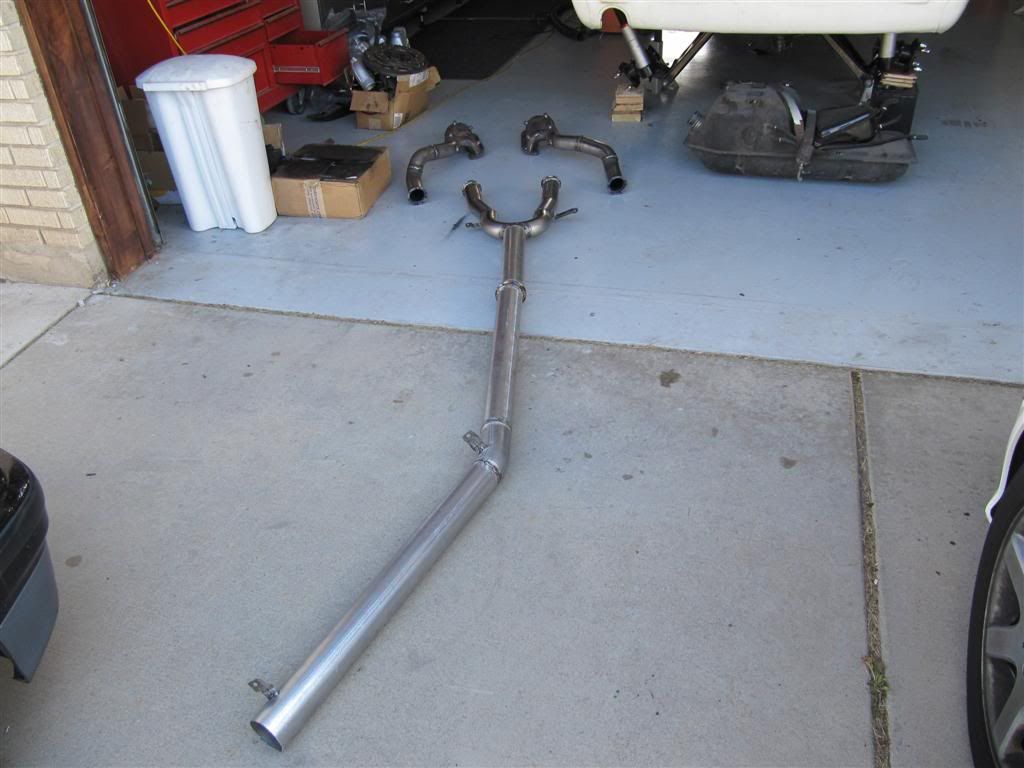
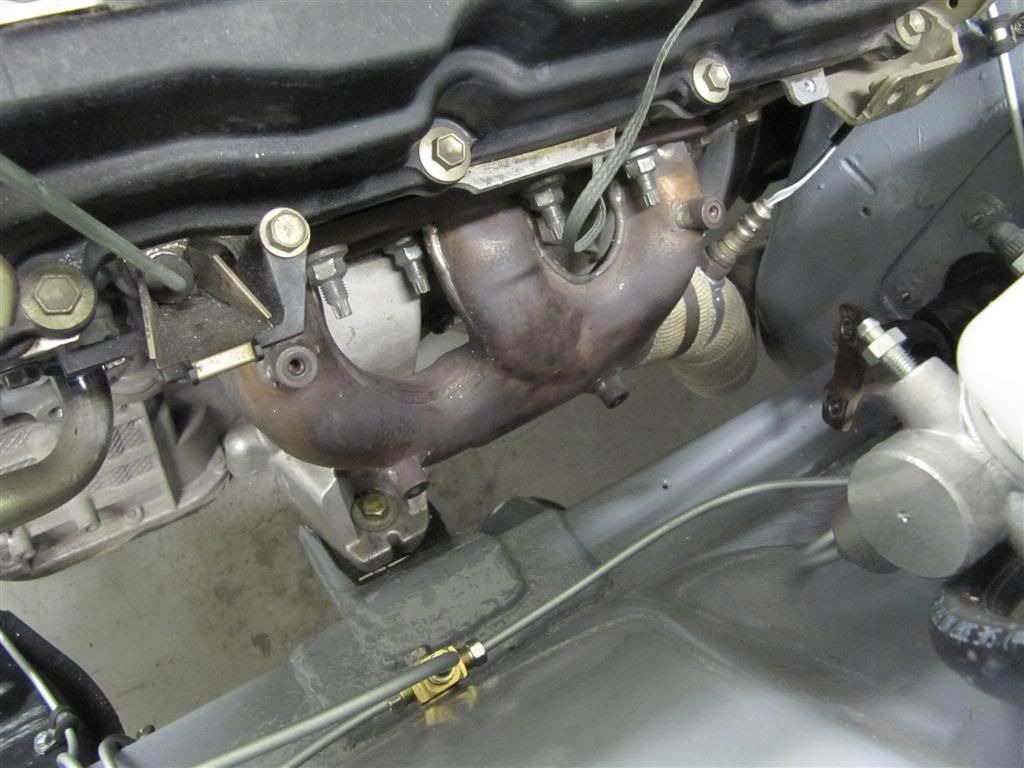
Your exhaust: I was planning on modding a Meagan Y pipe to work for mine, basically I just have to narrow it which shouldn't be too hard. Cut/flare weld. It's the modding of the downpipes that's got me a little worked up, I've for 2.5" pipe cut for an almost 90 degree bend off the collector on the HR headers. I'll then go from that 90 down through gutted cats to the Y pipe. Might delete the cats. I don't know if NM is going to require them. I think I have to comply with 08' emissions, but we'll see. From the Y pipe I'll be running 2.5" in basically the same route as the Stock 280z. To you might consider hacking up a megan y pipe, they're about 100 bucks or so on Ebay.
Phar
thanks! the radiator actually works really well that way. the fan comes on being controlled by the factory relays. i think i used the low speed output from the IPDM to control the low speed on the fan. im going to see if i can get away with just that for now. I run running no thermostat as well because it heats up pretty quick anyway, within a few minutes. I was having issues with coolant not flowing, after multiple attempts to bleed the system it just never worked out so i pulled it.
that steering wheel is an old Tomei wheel ive had laying around forever, i finally get to use it on something.
note taken on exhaust, ive wanted to remake my center pipe for a while, but it will have to wait, i have a track day on the 6th of october, gotta hurry.
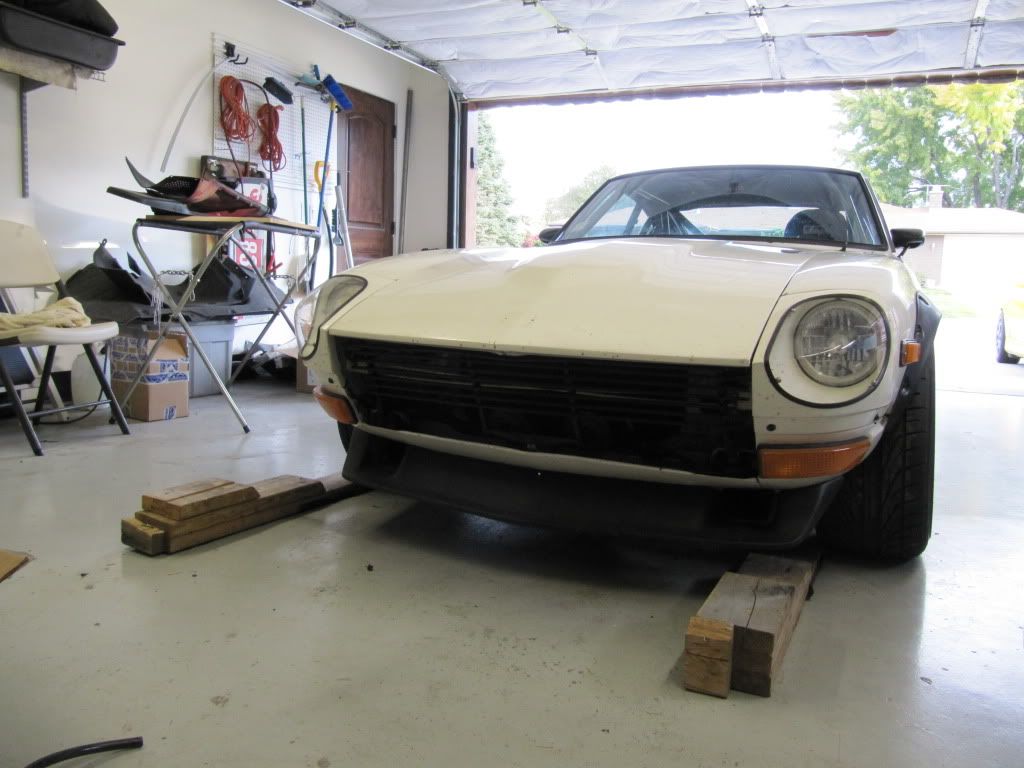
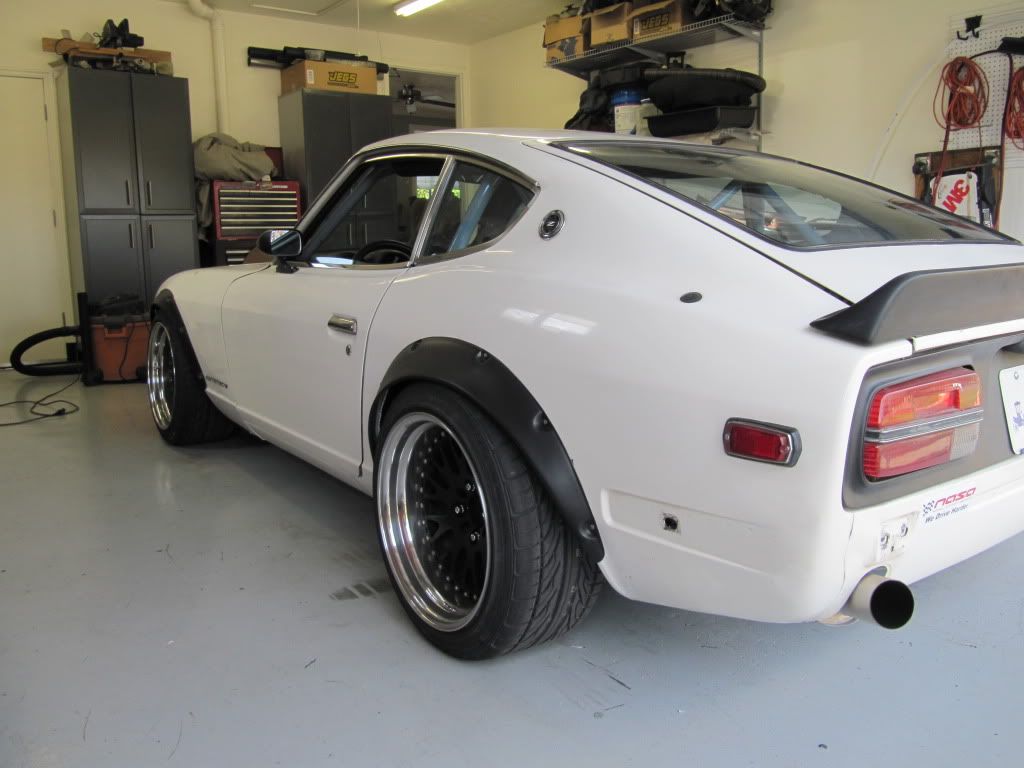
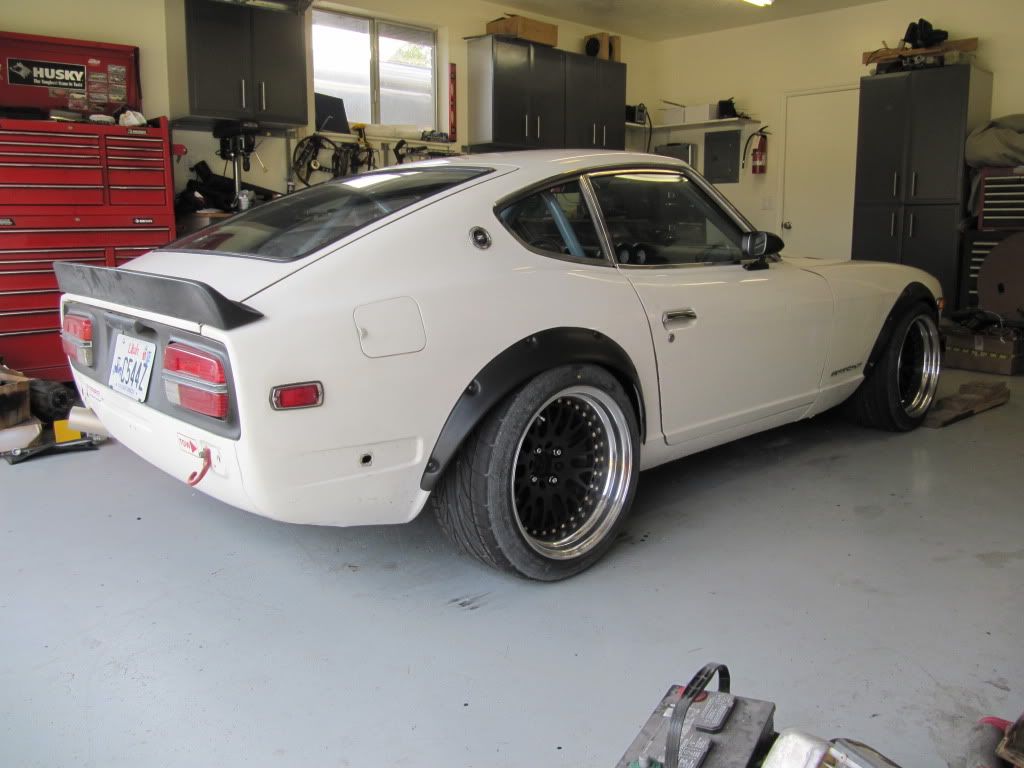
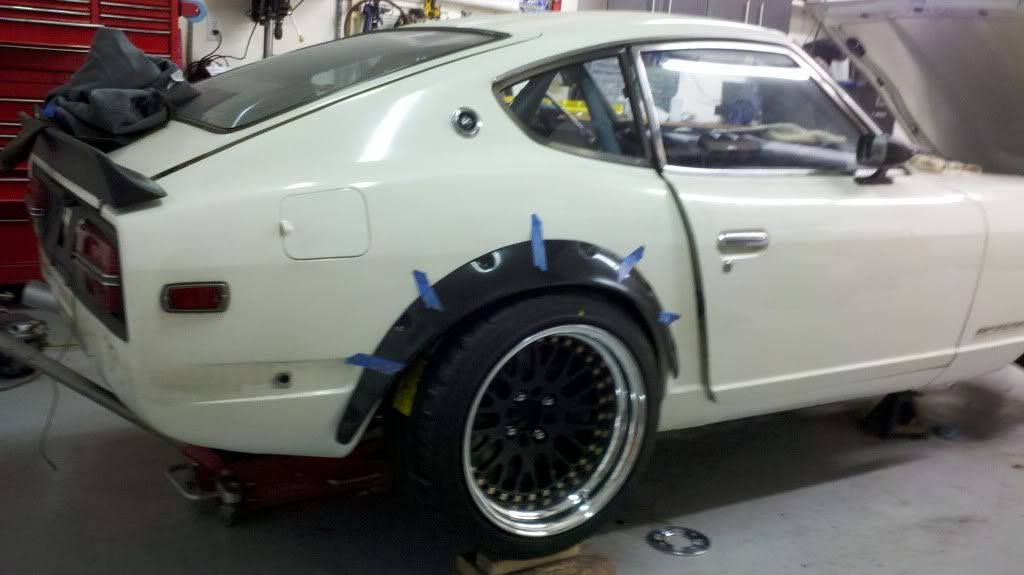
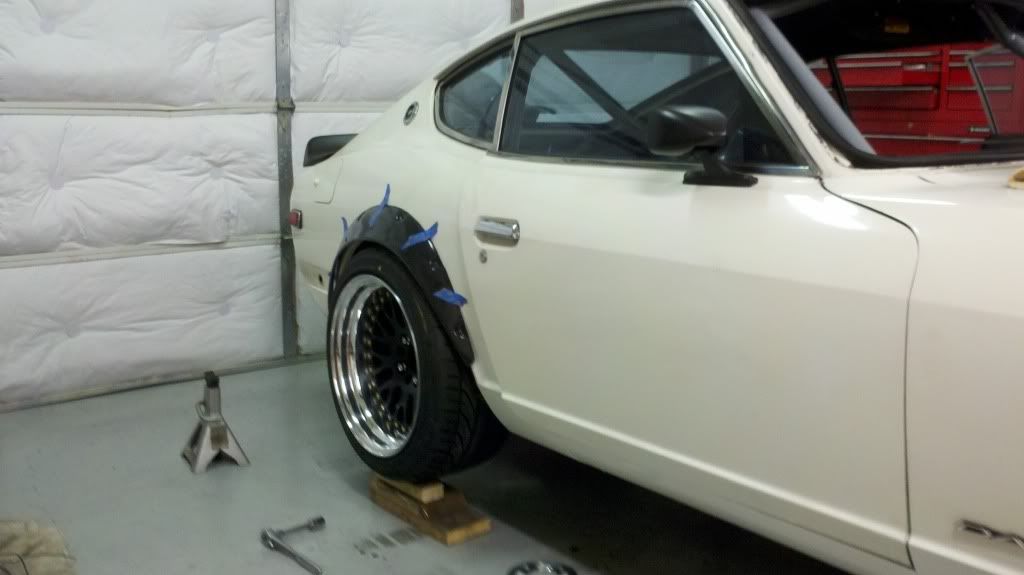
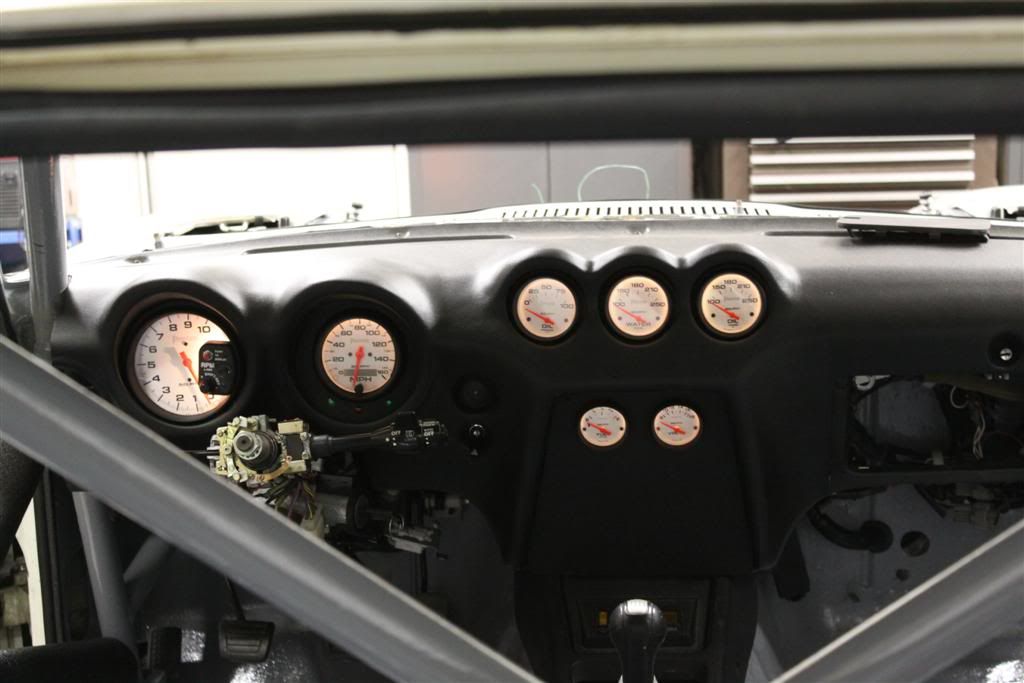
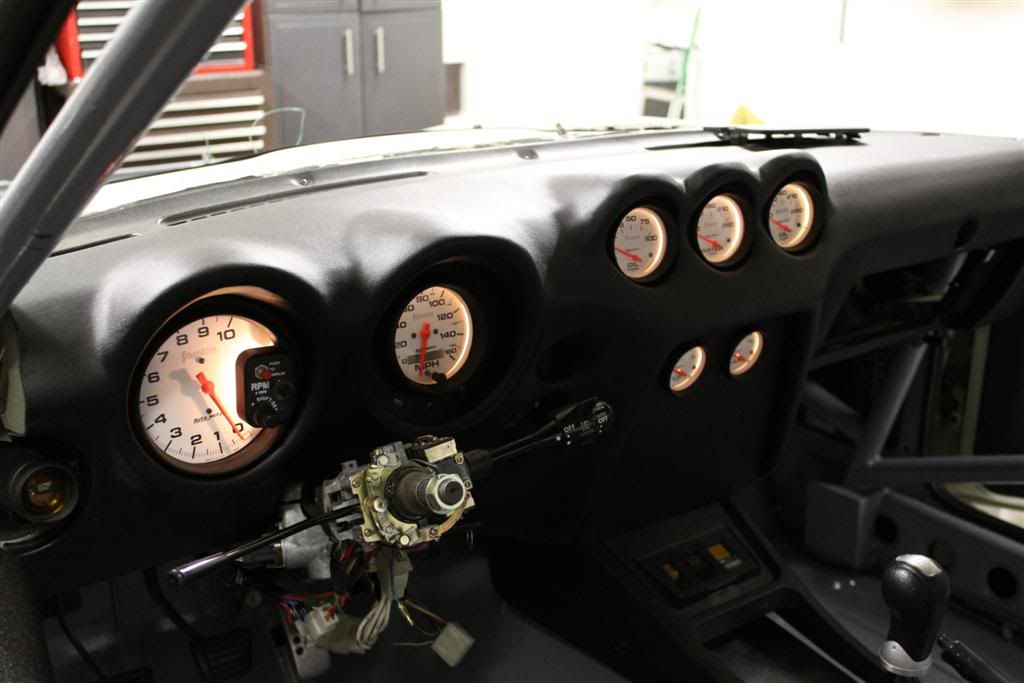
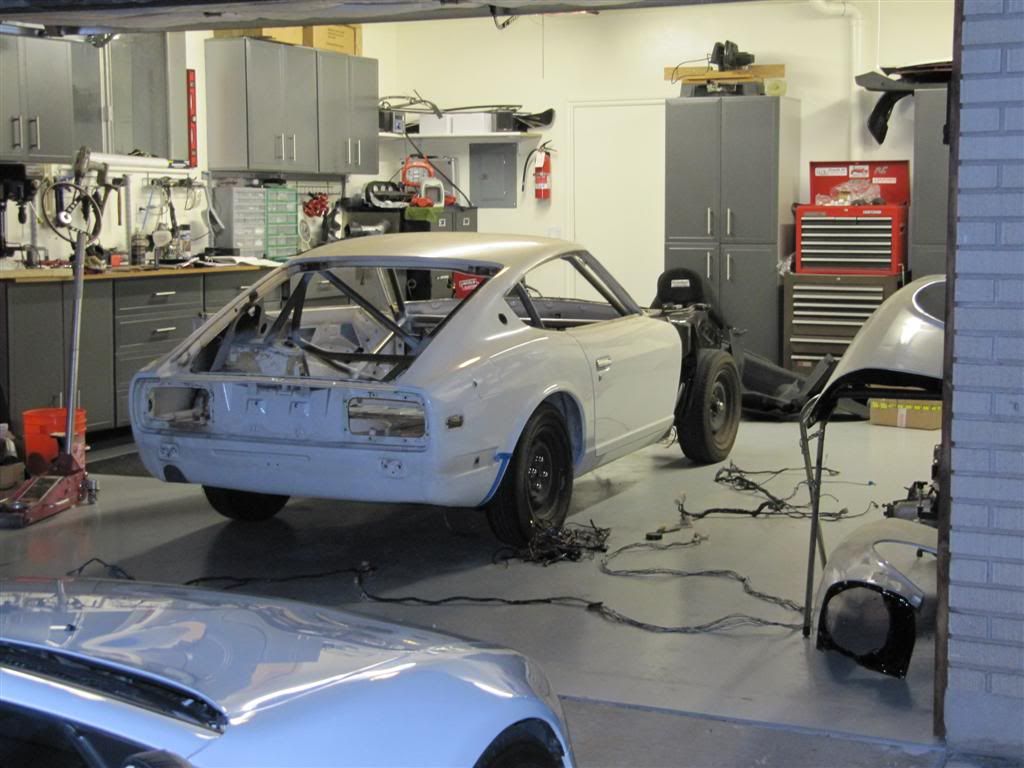
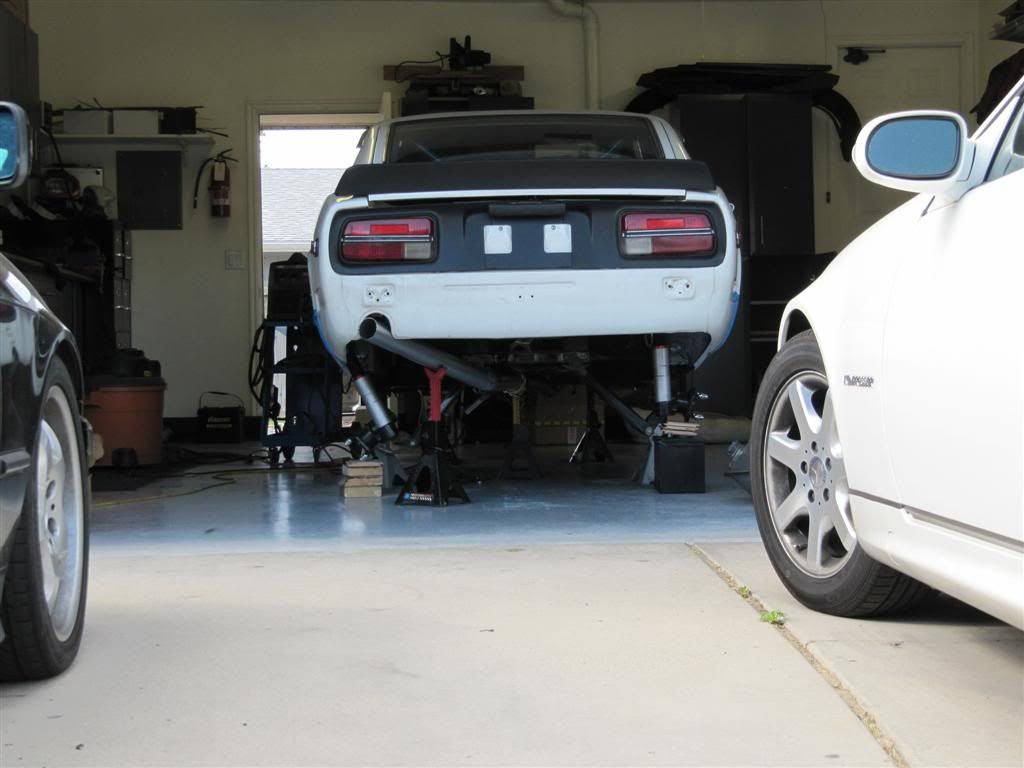
here are some updated pics.
Got the test fit CCW classic! these wheels are so awesome.
-
Thanks for the shout out. You doing great work! keep it up
I would consider making the exhaust collector more into a "V" shape rather than a "U". You'd be surprised how well the VQ responds to exhaust tweaks like that.
Thanks, your build was awesome and it really inspired me! i definitely want to revise the exhaust yet again, right now i have the borla xr1 and with my current U pipe, it sounds nice, but i will probably do a V shape pipe soon. i just failed several times over making the V pipe, i dont know what it was, lack of sleep, or the gears just were not turning that day, it just never worked out.
-
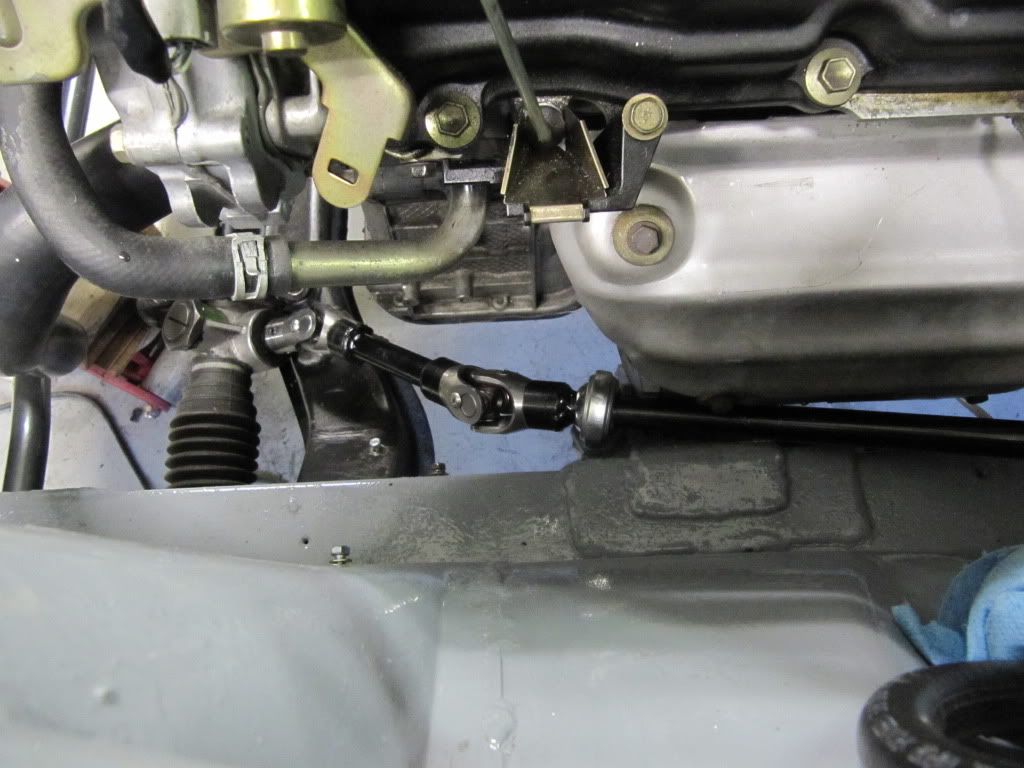
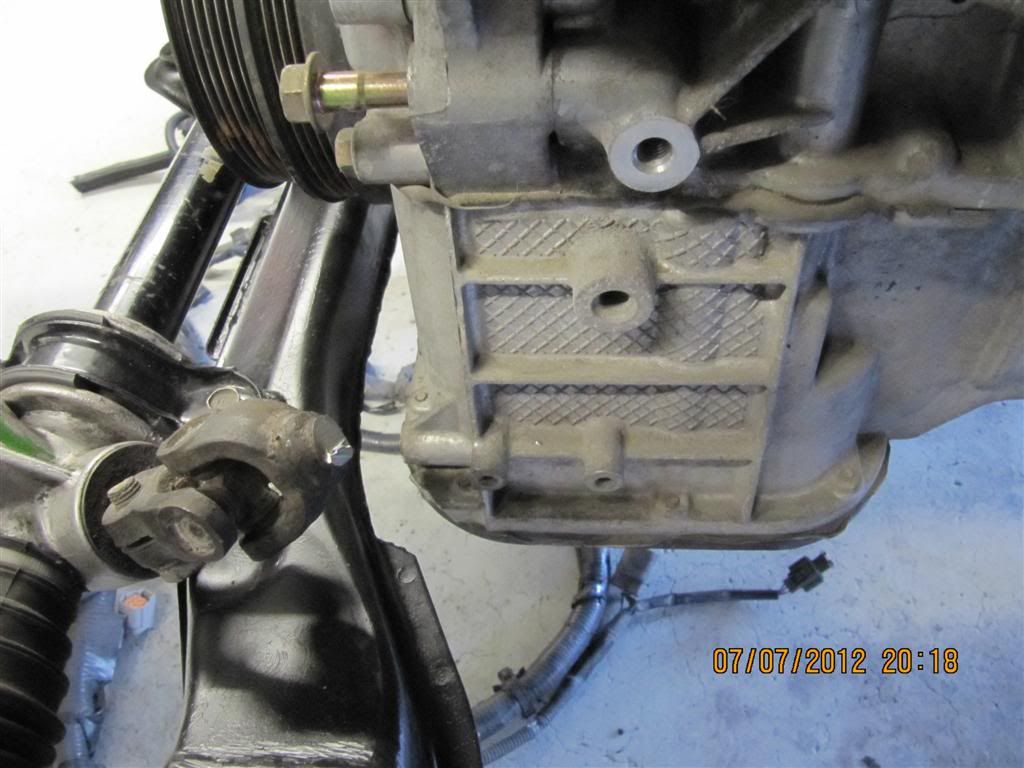
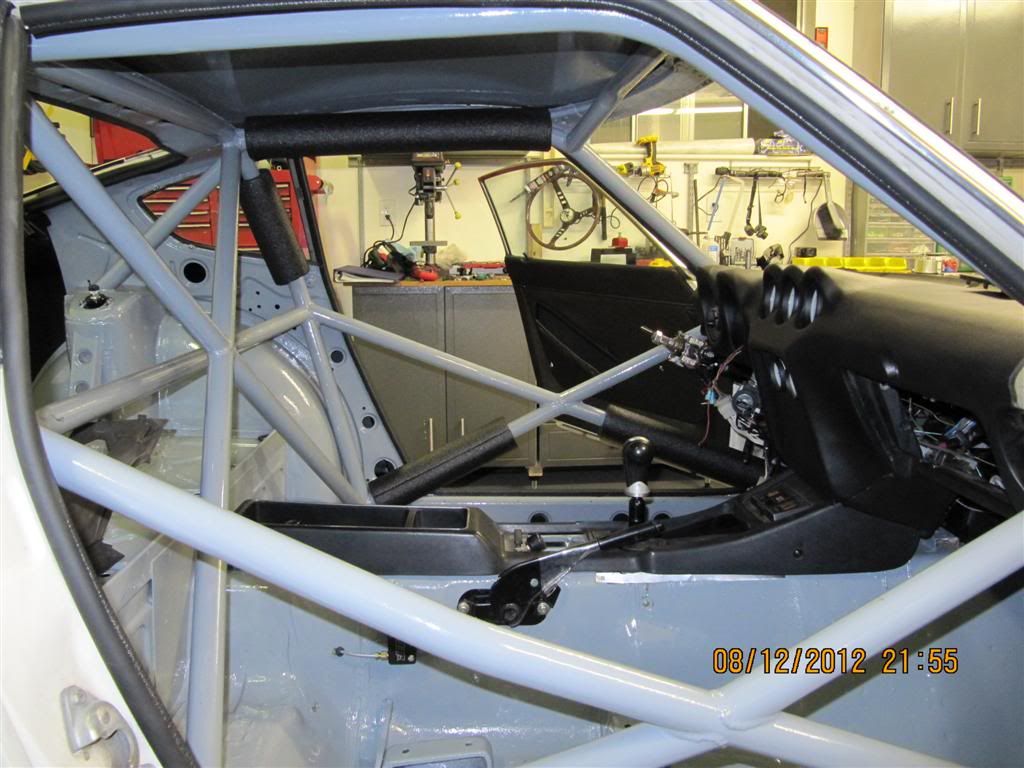
What prompted the steering shaft removal?
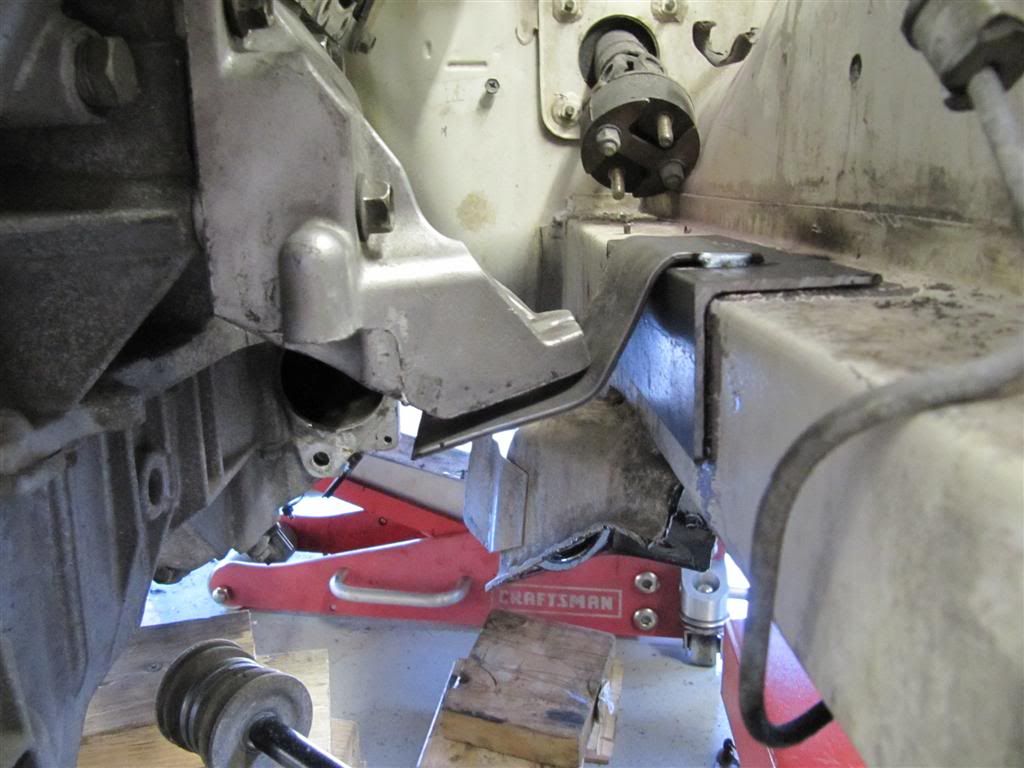
the stock shaft was right in the way of the mounts.
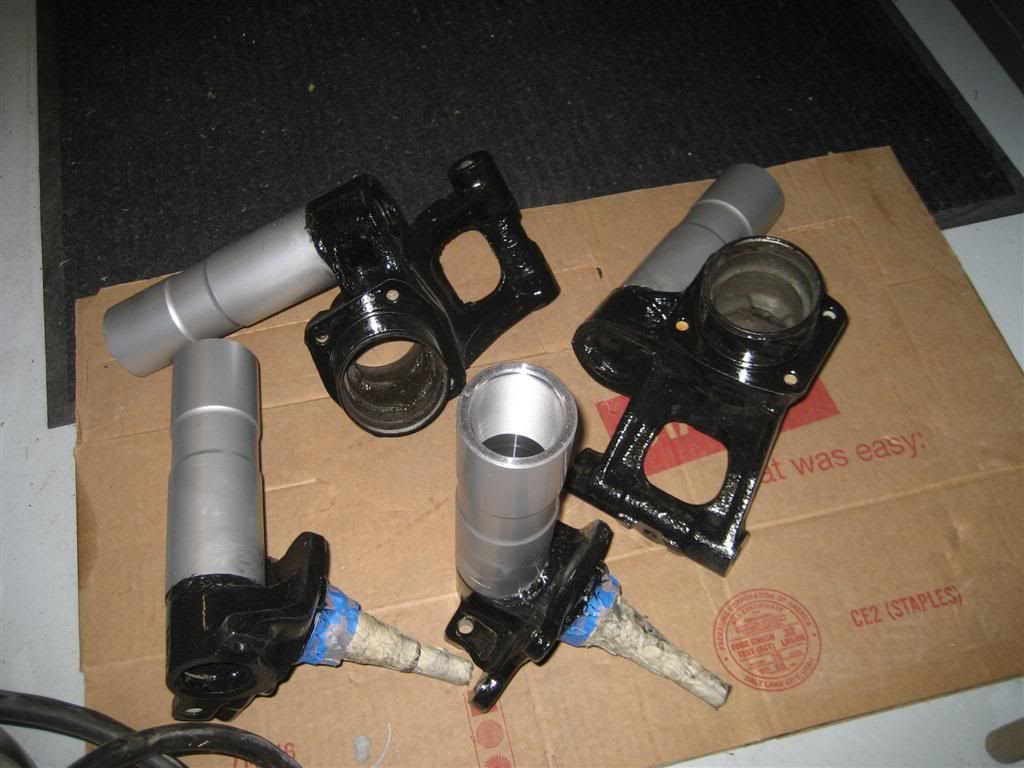
i went with willward steering components because they made u joints that connect directly to the datsun rack!
i did something similar to emrwhyrohen's setup.
-
Yeah, Mine is an HR. The wiring should really be about the same I don't forsee much if any issue with it. but your idea of testing along the way really makes sense. I will do that when I get to installing the wires.
What Fuel pump are you using? A 240 was carb'd and low pressure. I imagine you're going walbrough 255, as it's pretty common. but how are you planning your lines? I'm going to use the stock 280Z lines with the FPR in the engine bay, with a small pressure/surge tank. This way I can have a larger hose from the bottom of the tank to the engine for heavier accelleration under the same pressure. Any bubbles will flow out the top through the FPR and back to the tank in the low pressure return line. The Stock diameter Fuel line to the engine is the same as the 280Z, so unless I'm going Turbo or with larger injectors it should be adequet.
Changing the flow direction shouldn't be a problem depending on the design of the radiator. I doubt they've done anything exceptional in their flow design, so moving the inlet should be cake. I've been looking at different radiators to try to find one that doesn't need modification. I'd thought about having a radiator shop actually cut down a 350Z radiator, but that might not work. I was planning on using 350Z fans if they look like they'll fit. If not then the Ford fans will be used.
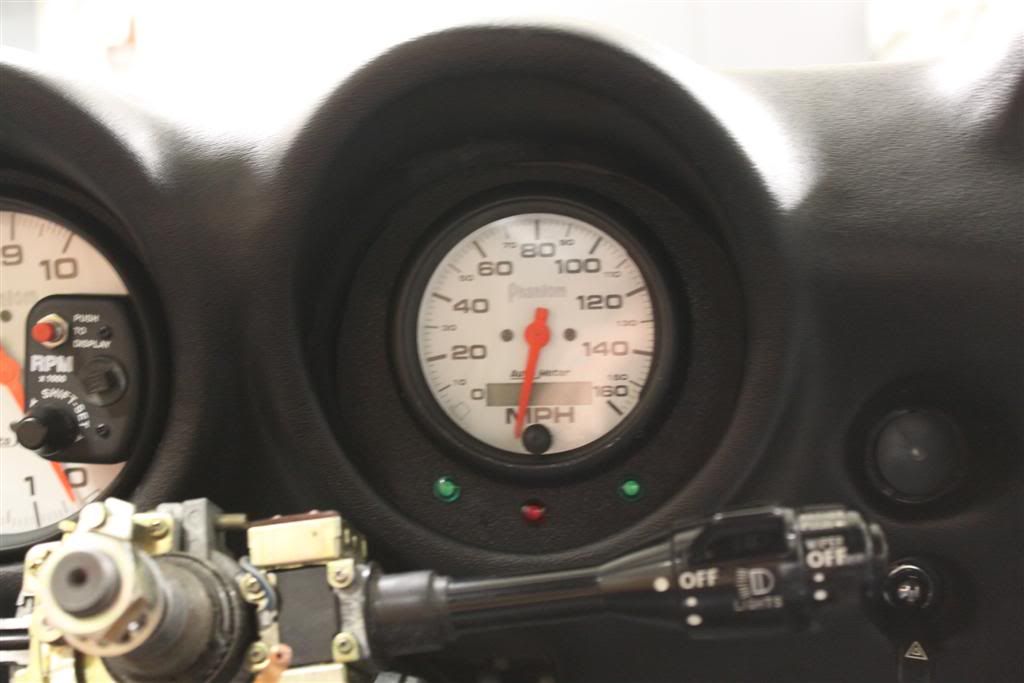
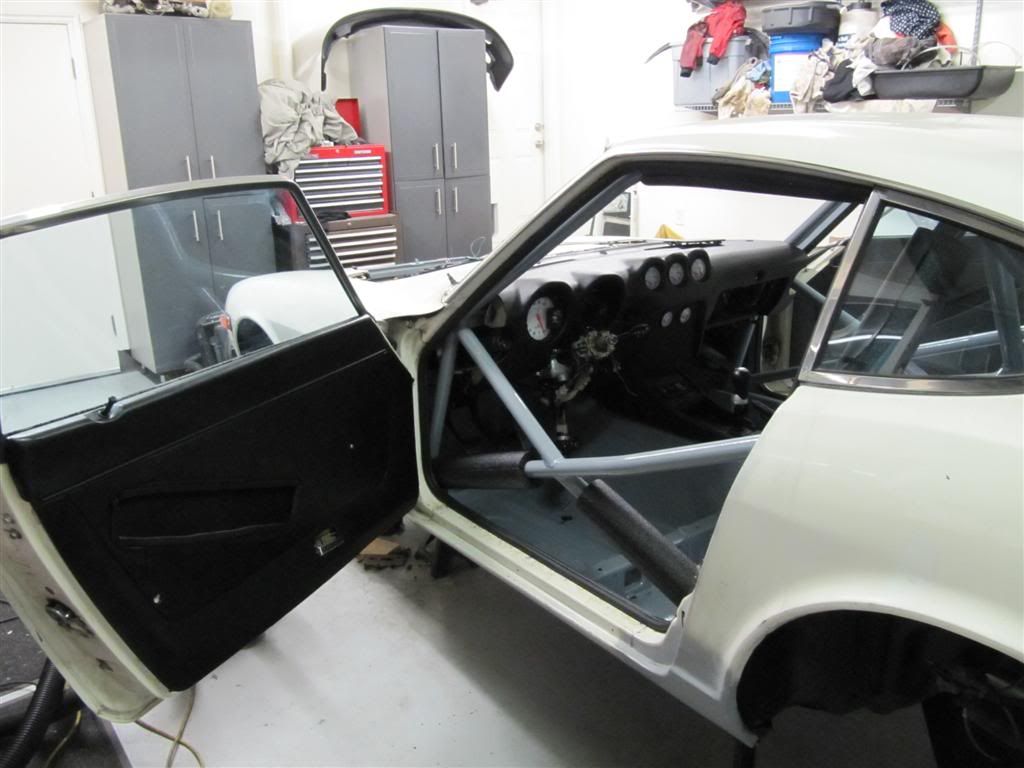
Gauges. Yours look great. The Speedo is a little small maybe, but as you said budget and you work with what you got, you can always upgrade later. For mine, I'm going to get a little ambitious. I'm going to take the Stock 350 gauges, cut the boards and make pigtails so that I can mount the 350Z gauges in the 280Z cups. Yeah I know it's going to be a pain, but I've looked at them and read enough that it shouldn't be a problem. Doing so will allow me to keep the 350Z info pod in place of the 280z clock pod. I'm planning on using a lot of the 350Z internal systems like Cruise and tire pressure. Assuming I don't run into major issues or too much difficulty in swapping in systems. My biggest issue I haven't solved so far is the front wheel position detection, though I'm probably not going to try to use VDC since that would involve adding antilock braking, which could be dangerous until I know the systems a lot better. Crazy I know. So I'm sticking with the easier systems, pulling Speedo signal off the 350Z rear diff. and so on...
That Dash you have looks great, too bad it's cut up for the cage. Was it just capped?
Phar
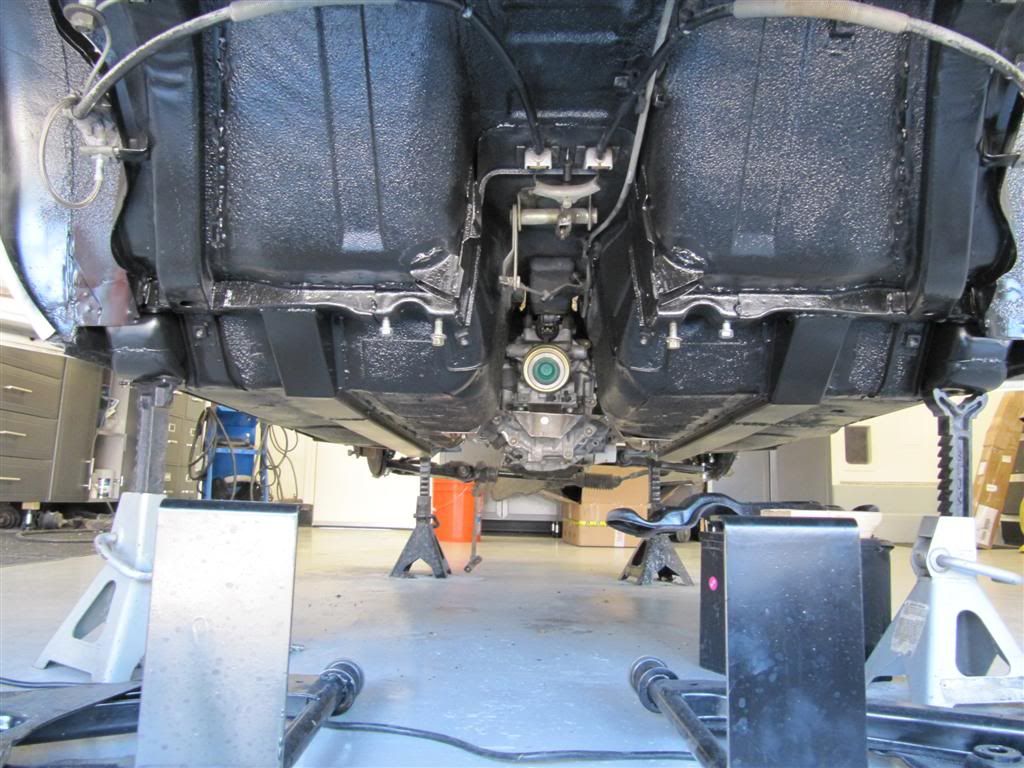
i am going with the ATL "black box" surge tank with HP fuel pump. it has 3 trap doors to keep fuel at the pump pickup. im just dropping this at the bottom of my tank and securing it there. Then running (2) -6AN lines up to the engine and modifying the rail for a return and using an adjustable FPR. this part of the project is the largest left and i have a track day beginning of october so this car needs to be done by then, so no slacking for me. that setup should be pretty robust, its a little pricey, but i dont want starvation issues, especially when i want to boost it.
from my 350z i looked at using the rad/fans but they are just too wide. i am hoping the stock Z radiator will work fine in that configuration and the ford fan should be sufficient. if this all fails ill have to get a custom radiator made and go that route, but since this option is free then im trying it first.
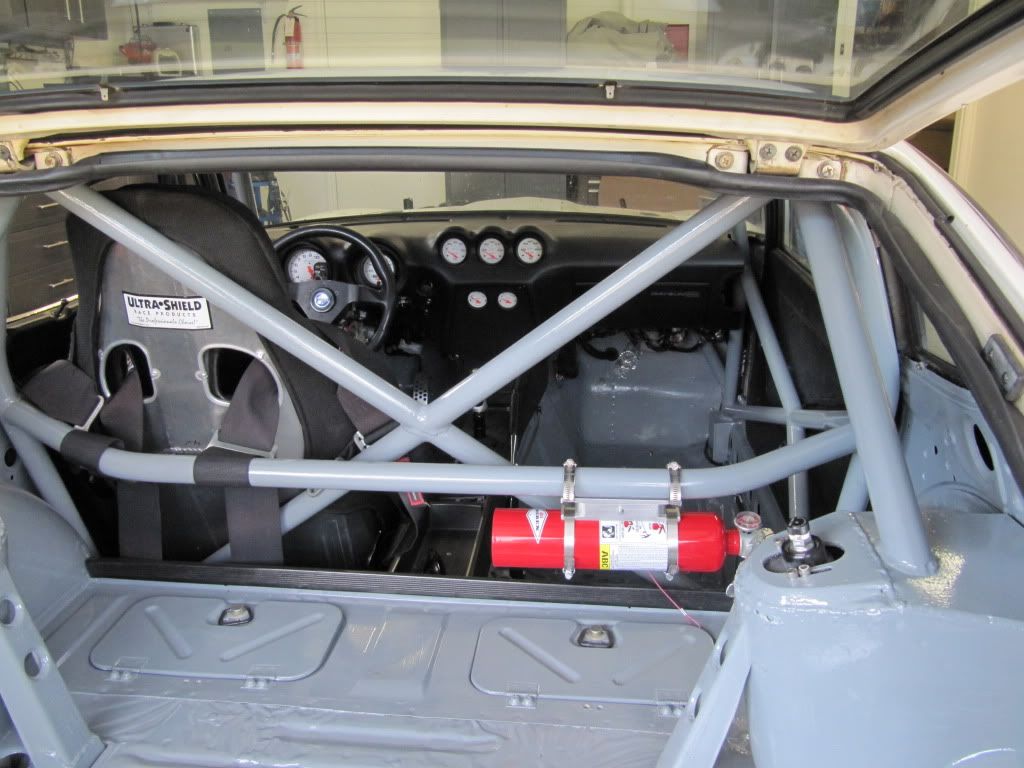
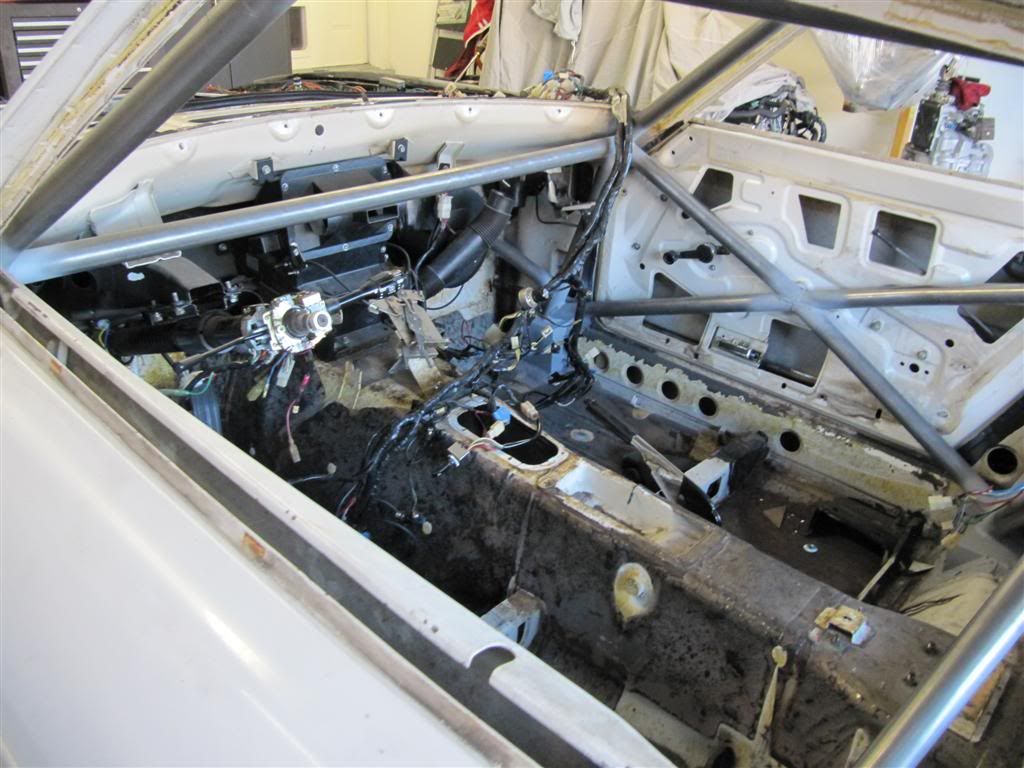
Your idea to use the stock gauges will probably work out for you, especially if you remove them from the bezels because otherwise the stock cluster is going to be whining about all sorts of things that arent hooked up, so it will be lit up like a X-mas tree with warnings and errors. if you keep canbus/modules and all the end device sensors in place on the wheels, diff, etc it should all work. However i am minimalistic, i wanted this to be a simple build with limited items to fail on me, so i took the most simple solution to almost every issue i was faced with. I would have liked to give my harness to Zfever to delete NATS but it actually turned out good this way because it gave me a bunch of extra circuits and fuses i could add later and do it clean, along with the security of NATS.
with all your trying to do electronics wise, i would definitely test in several stages...do you have the whole car at your disposal? that is the key if you want all this stuff to work.
yea my dash is capped because it had a few cracks. There was no way i would cut up an uncracked dash for a race car!
about how far are you on your build? what stage?
-
some updated pics. I had the smaller speedo left over from another build so i used it since i didnt want to buy another one. it turned out ok because i ended up putting the high beam indicator and turn indicator LEDs underneath it. It looks kind of silly being smaller, but meh its supposed to be a budget build using several recycled parts so im ok with it.
-
Pharaohabq,
sorry i forgot to answer the question about the cooling. I have a 3 row 240z radiator that is almost new, i want to basically move the inlet/outlet to the opposite sides where they are now. i think the radiator will still flow that way. I bought a mid 90's ford taurus fan/shroud from the 3.8L. its a rather powerful 2 speed fan. I am going to wire the low speed output from the IPDM to the high speed input on the 2 speed fan/shroud.
that is my next thing to tackle since i just installed my speedo and turn signal LEDs tonight.
-
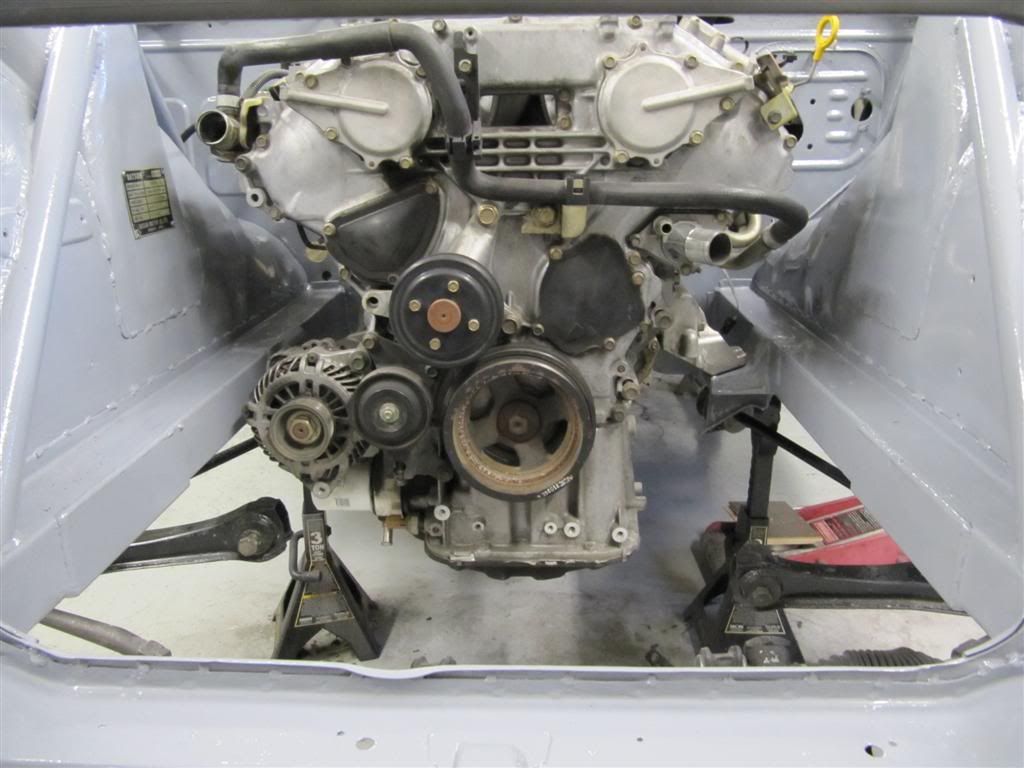
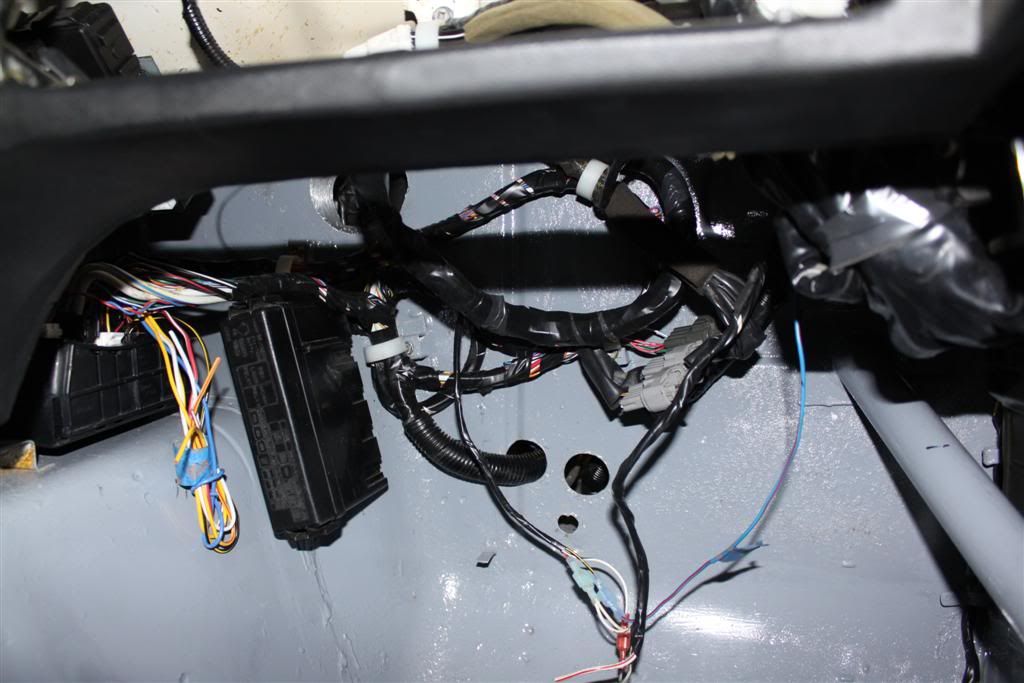
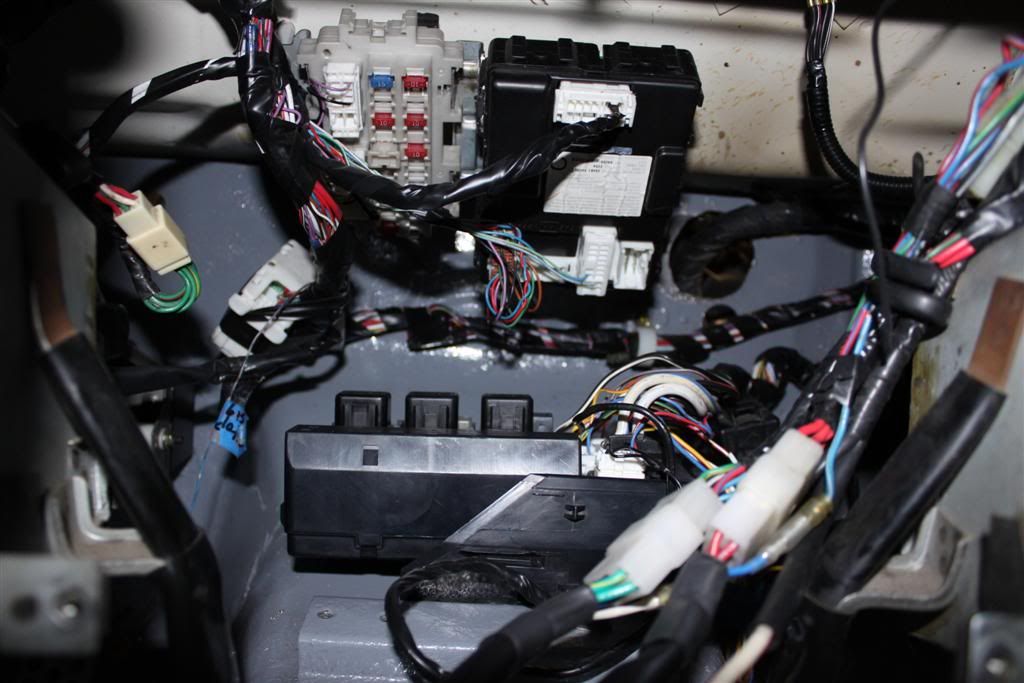
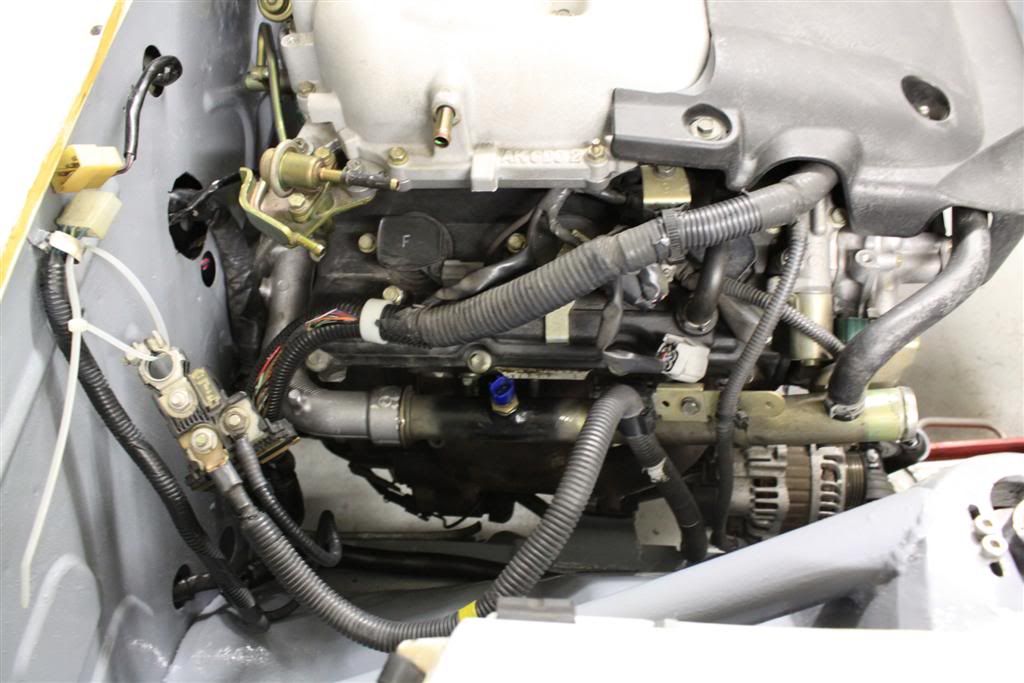
Hey Nice Job. Looks like you did a great deal of work in a very short amount of time. I see you'd mounted most of the VQ electronics on the center dash tranny tunnel. That should work. The Fusebox in the center is handy. Really it looks pretty good to me. The Stock Y pipe would probably have taken too much modification to make it fit I guess. That was my plan, but after seeing your headers, I'm really liking them. I like your liberal use of Por15. I'm planning on following suit. It should undercoat my car more than adequetly since all I have in NM is Heat.
Oh you didn't notate any of your cooling solutions, Are you piping in the stock radiator?
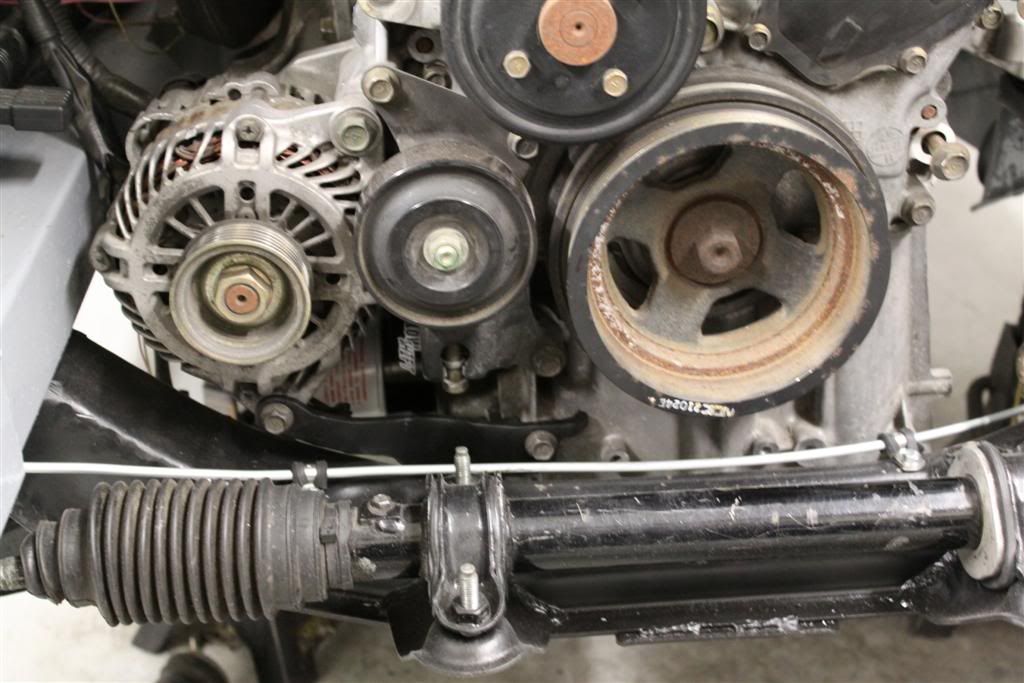
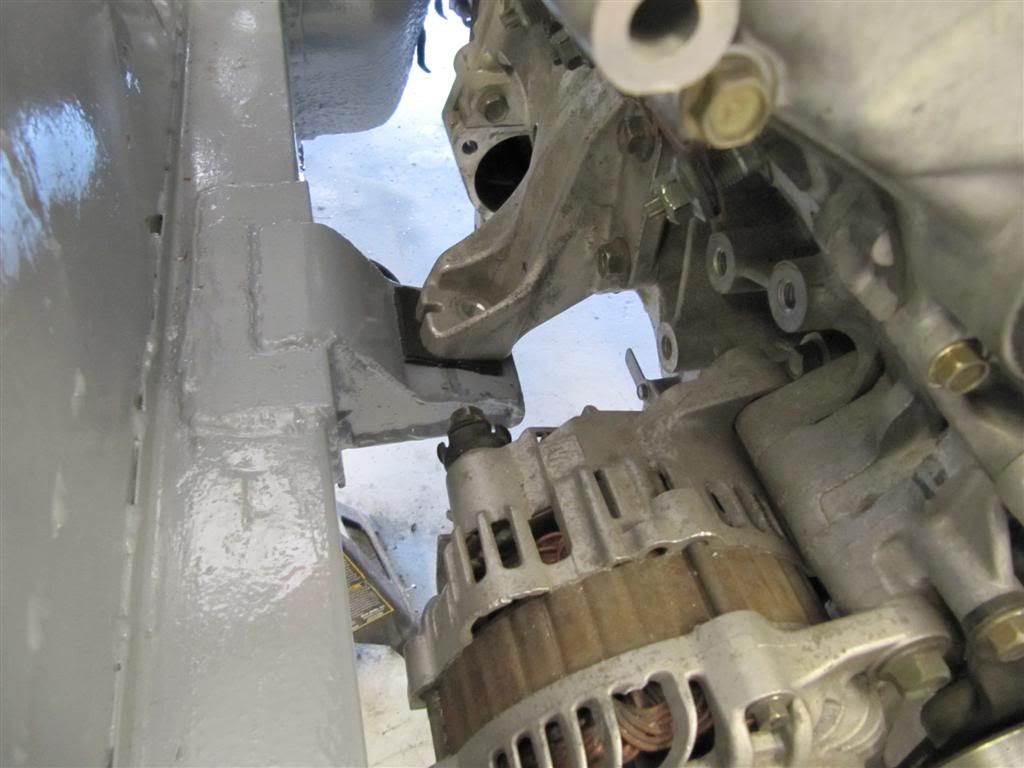
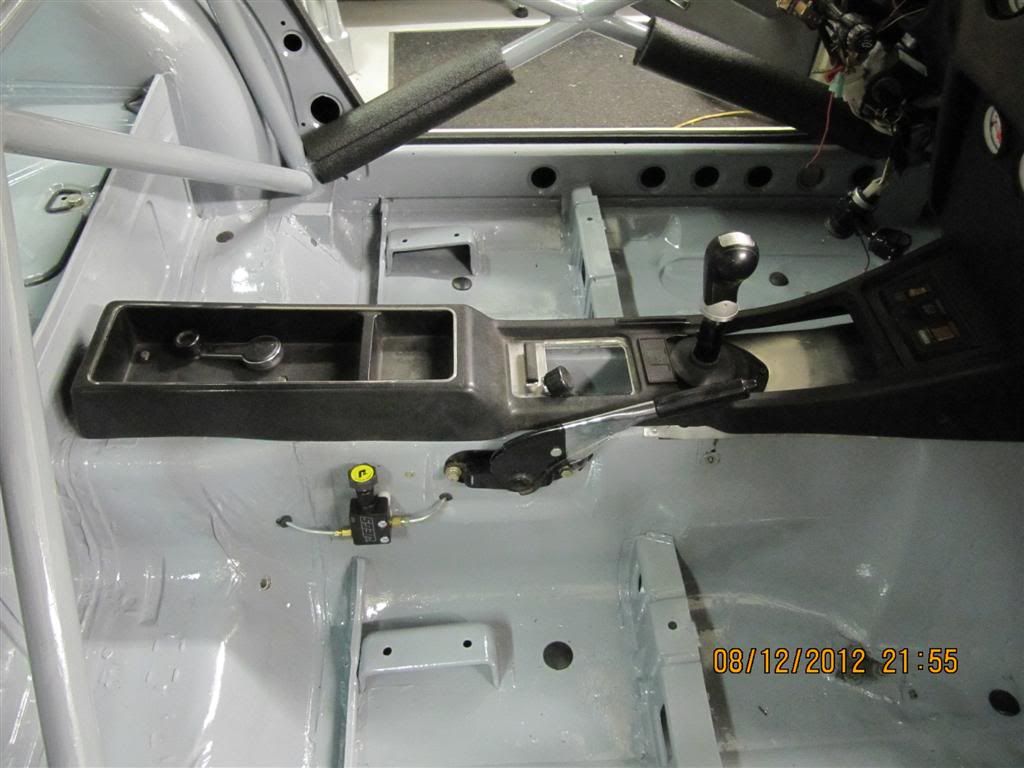
Your Brake line across the steering crossmember may not be the best location. If you hit something and jar the motor, or lose a belt I could see it tearing that line loose which could compromise your front brakes. I understand you may not want to move it, but just keep it in mind.
The whole thing looks great as a race car. You did a good job with each step. I'd like a more detailed description of your electronics experience, since you'd said it was a bear. You pulled out all the unnecessary circuits. It looks like you left the basics, Key/Nats ant, IPDM, ECU/BCU, pedal and fusebox. I didn't see the AC AMP, I'm sure that's because you're using aftermarket gauges. What was the hardest part?
I'm looking forward to reading more.
thanks for the comments. The 350z i bought had a borla exhaust so i didnt want to cut it up for a Y-pipe. the U pipe will be ok i think. the locations where i mounted all the modules are ending up to be good locations and easily accessible. i wanted to mount them on the passenger side floor but eventually i will have 2 seats in the car and i didnt want the passenger hitting things or the modules hindering a seat install.
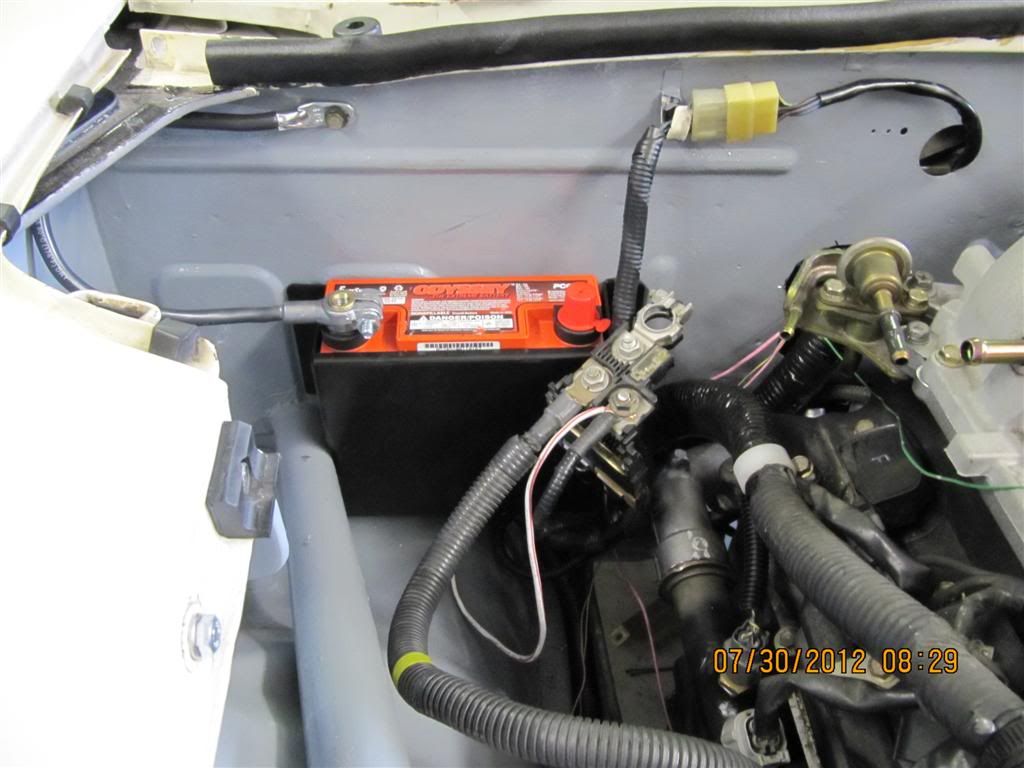
i thought about the same thing regarding the front brake lines, but i clamped them down pretty good and they are about 2.5-3" from the crank pulley and i would hope to never really break a belt so ill just take my chances. i wanted the lines to be cooled by the wind across the Xmember.
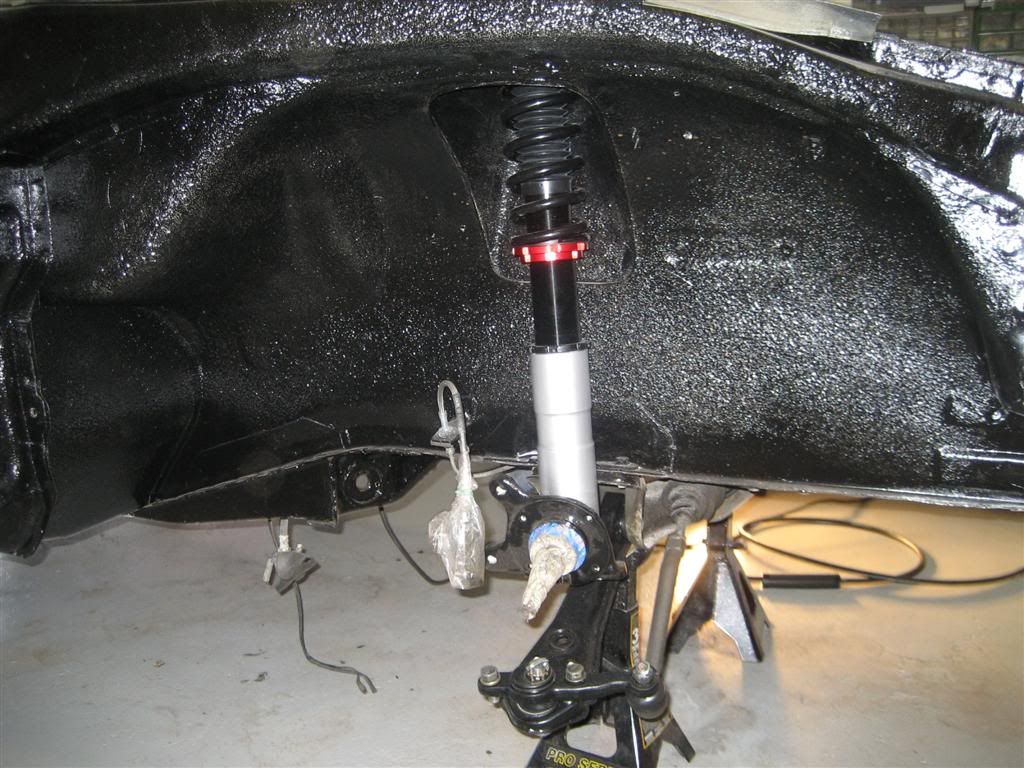
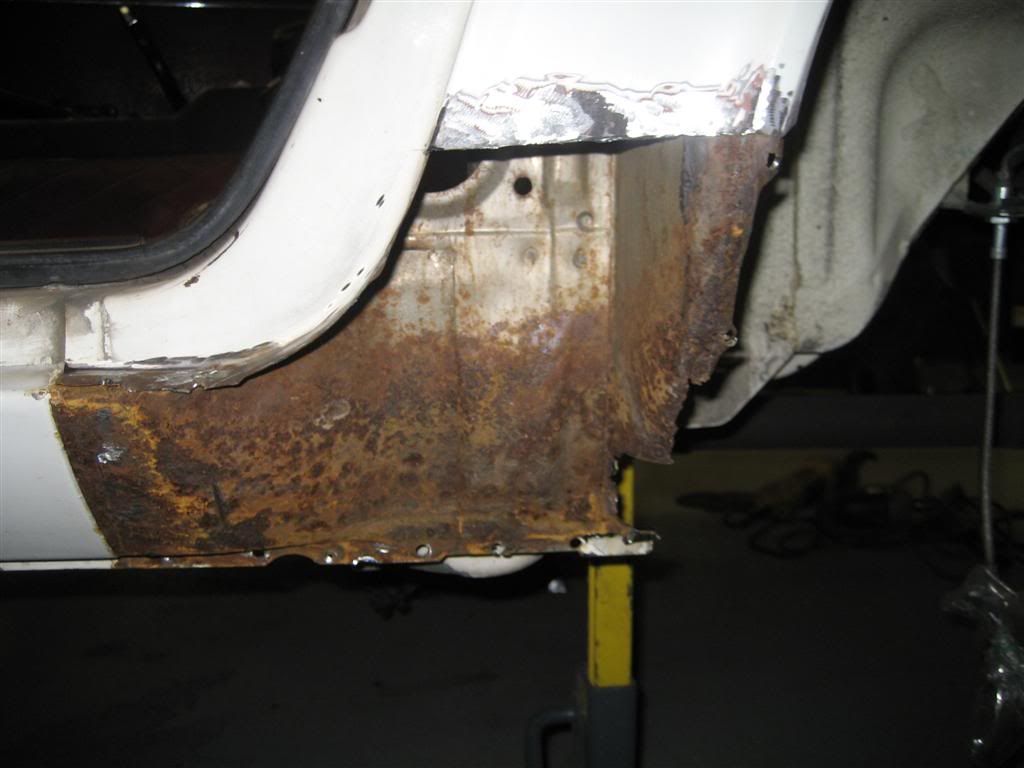
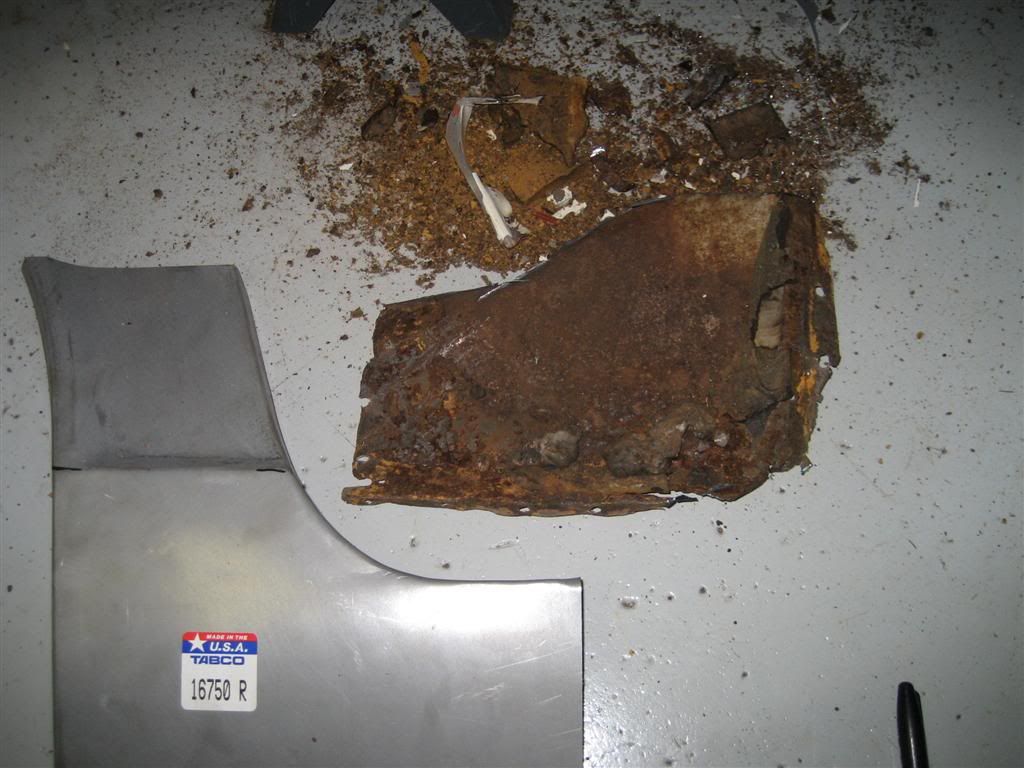
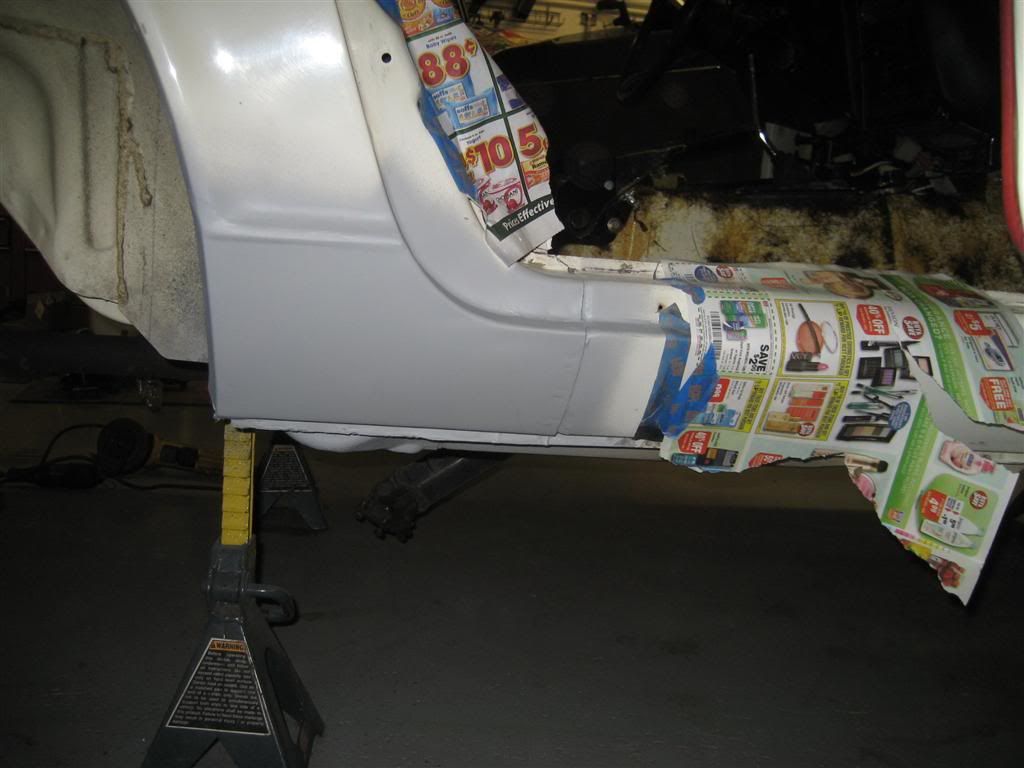
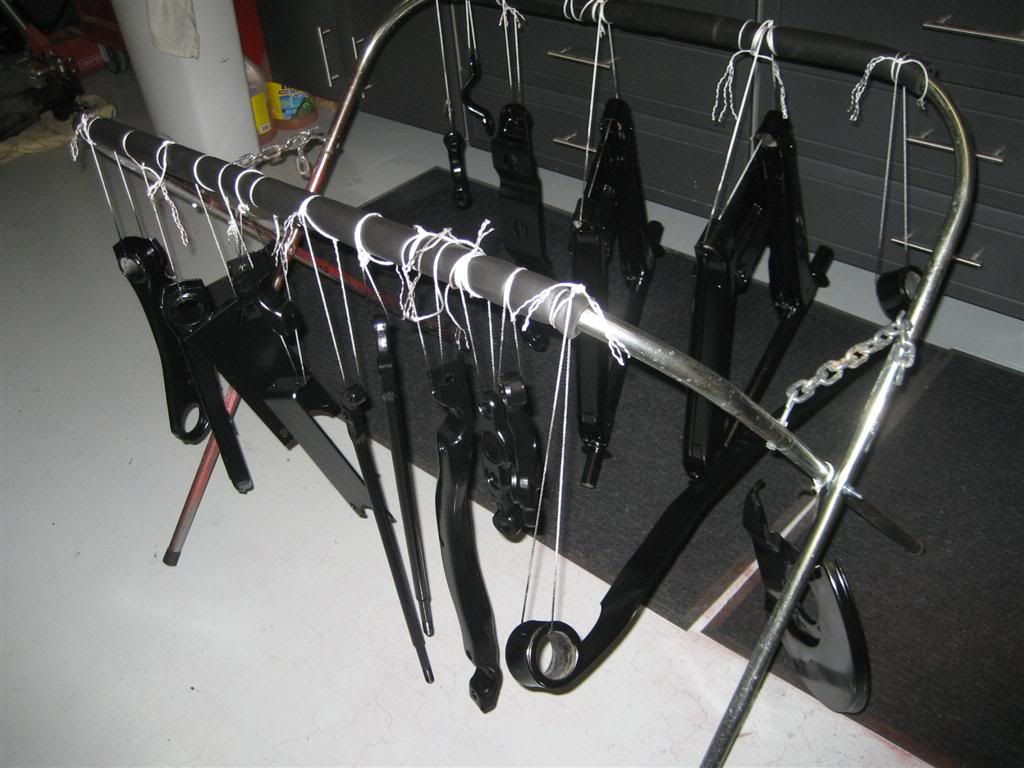
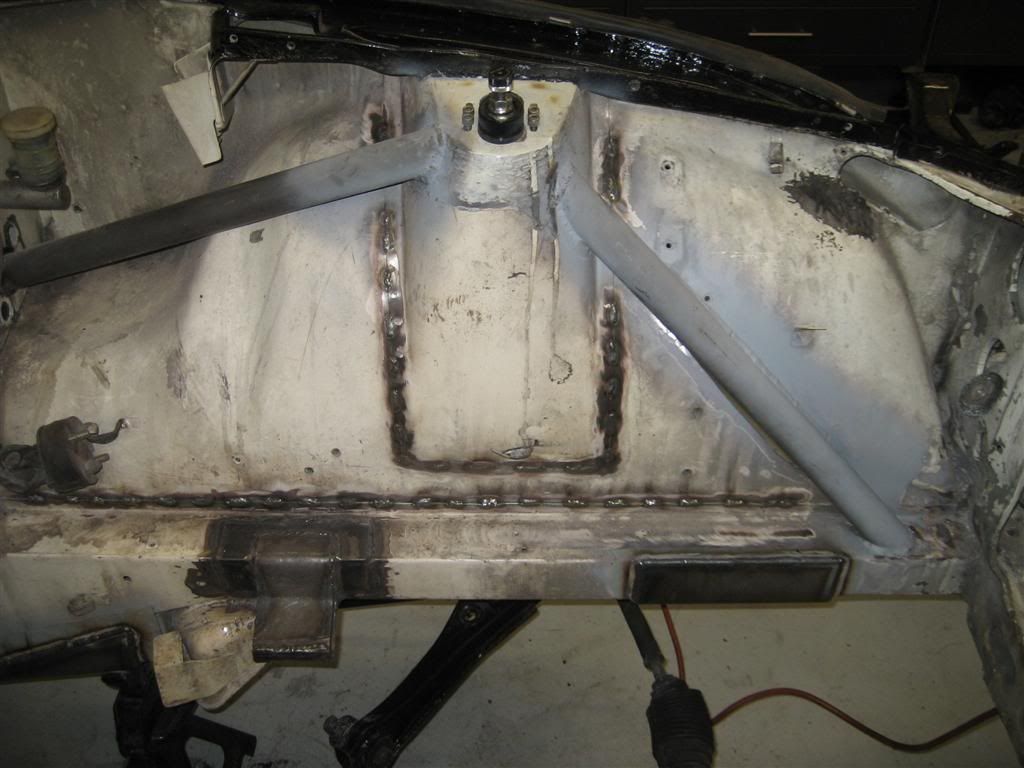
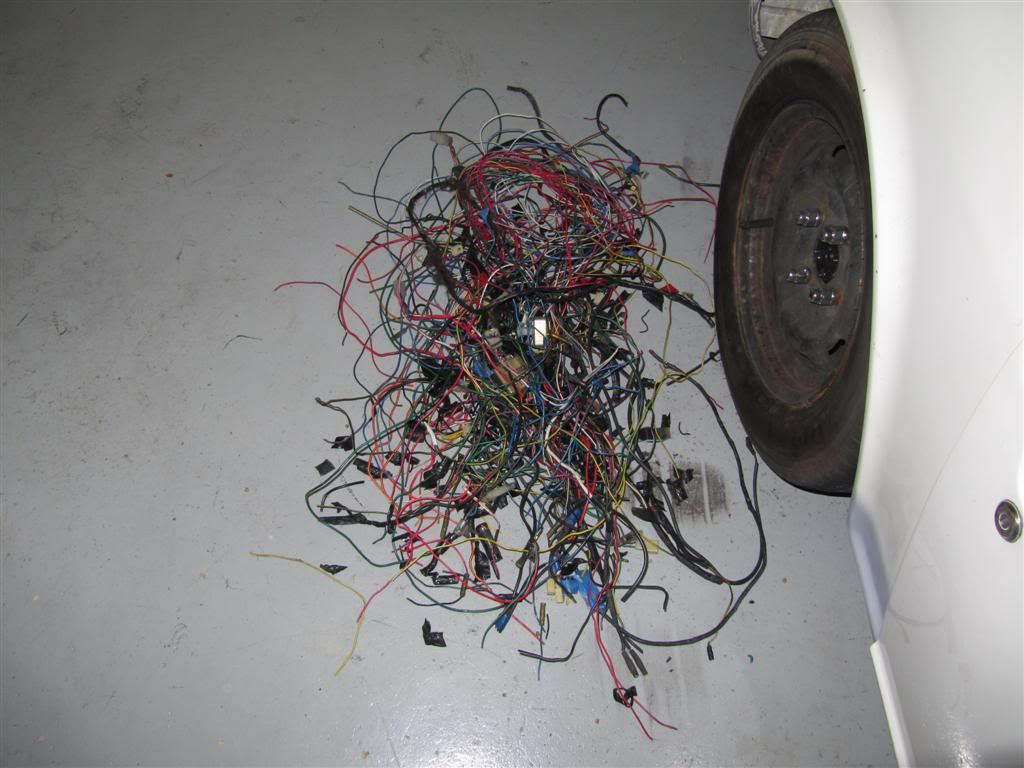
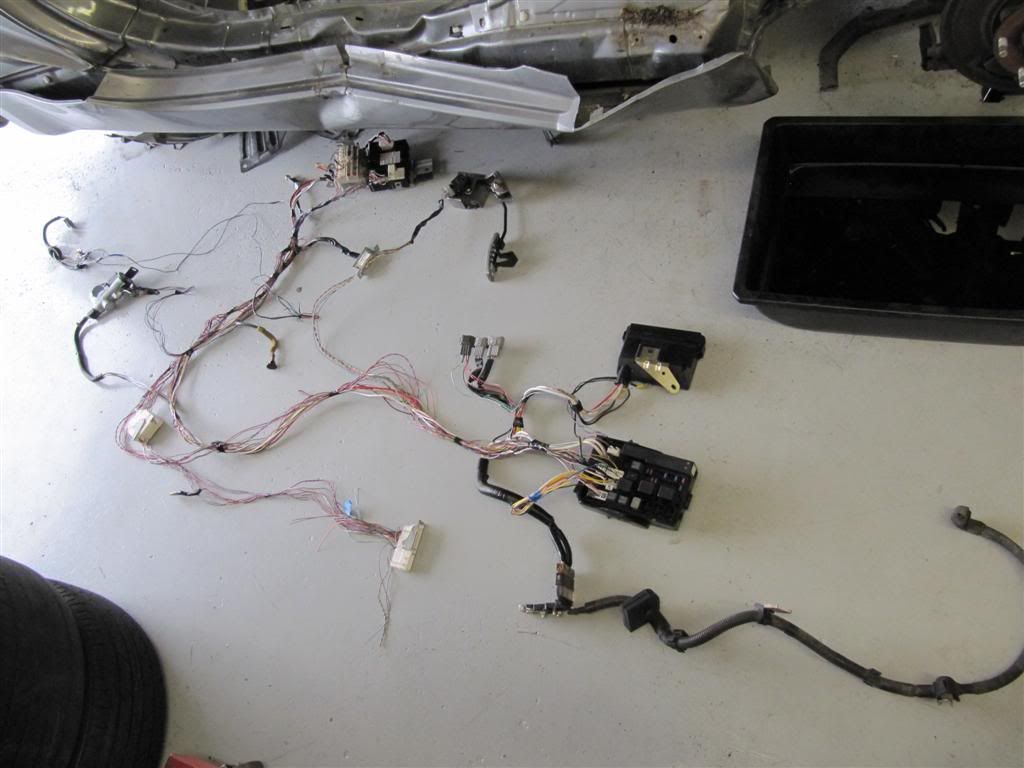
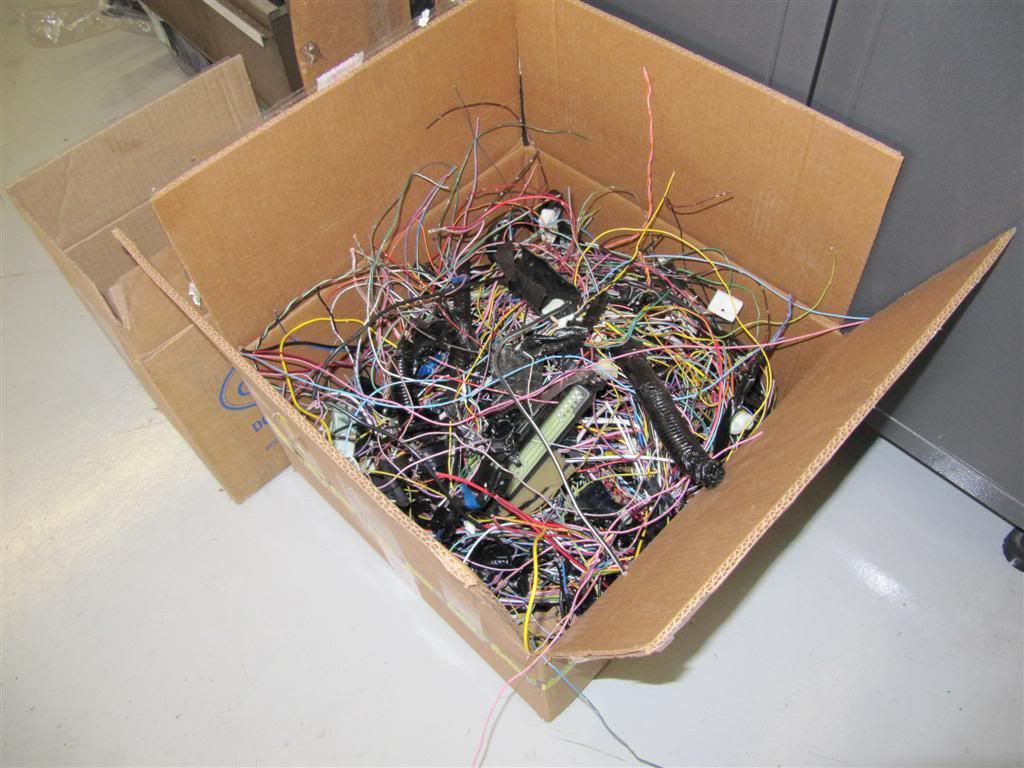
i really suggest using POR or Rustseal. The interior/engine bay is KBS RustSeal Gray. the undercoat was cleaned and sanded and coated with either POR or VHT black epoxy coating. If i was to do it again body wise i would get the whole car soda or sand blasted. Prepping everything by hand or wire drill, etc was an absolute nightmare and by far the hardest part of the whole restoration. The hardest part of the swap was pulling the harness out of the 350z and simplifying and sorting harnesses/gauges. I simplified the harness in stages while keeping the engine in the 350z until i got the harness down to what i wanted, made sure it still ran properly, then pulled it all out. I did the same to the body harness of the 240z. The key is to test in stages so you can troubleshoot small issues easily.
wiring wise everything needed for NATS to function was kept (ignition/antenna, BCM, IPDM, status light, ecu). i wanted to keep it since it is one security measure against thiefs (along with my GPS tracking device). I didnt see the reason to keep the AC amp, i went with autometer guages because i had an extra set laying around from another build and they fit the stock holes ok. I really wanted Speedhut units but the budget wasnt there. I still have $4k to spend on ccw classics/tires. I would suggest using as many ecu controlled functions as possible, ie fan/fuel pump control. i think i have about 5 wires going between the 350z harness and the chassis, not too many. i had a bunch of extra 12v switched and constant power sources left which i used a few for my gauges, headlight upgrade harness, and parking light upgrade harness for the chassis, and i still have a few extra circuits for whatever i need in the future.
your build is an HR right? im sure most of the basic theory is still there. i would have loved the HR but i couldnt pass on the wrecked one i picked up. I ended up getting all my swap parts for essentially free after selling off the rest of the car/parts. Sorry, no more 350z remains with me...
-
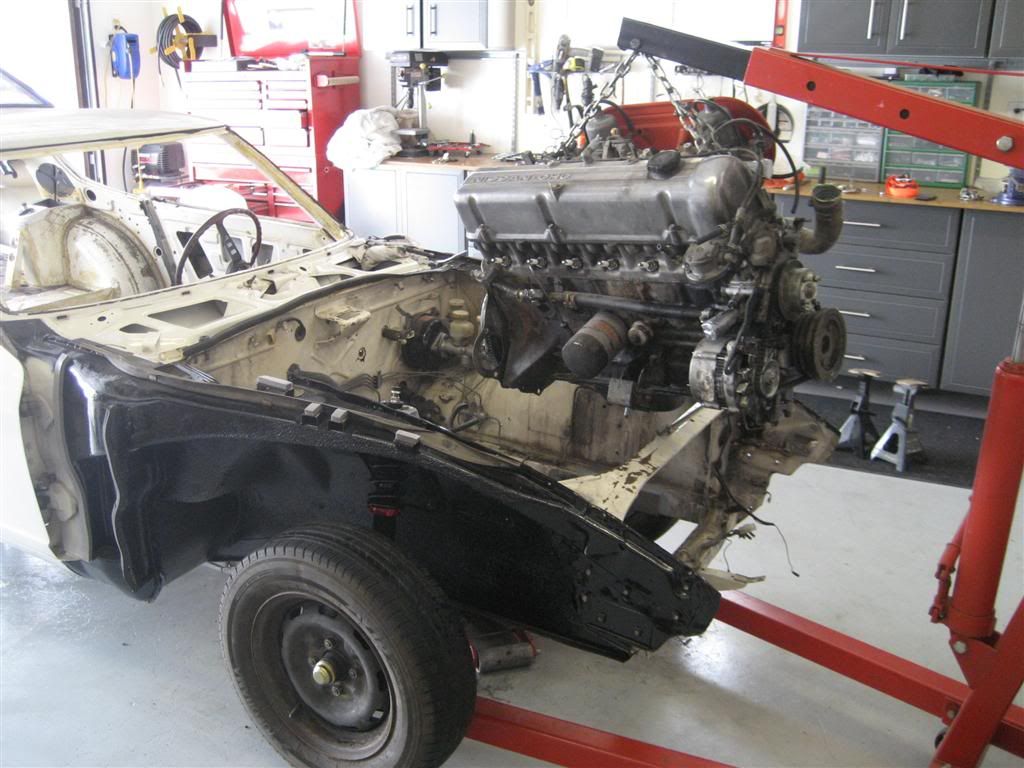
First i have to give credit where credit is due. Both Austin and Myrons 240z's gave me inspiration to build my own. Their build threads and websites gave me some great ideas and insight and i have to give many thanks to them publishing their builds. I took what i liked from both and spent the past year building my own.
Ive been a member for a while, mostly just lurking around and reading information about the swap. After that, i was basically a hermit in my garage while doing the build. Now that it is almost done, i figure i share it with the community and offer any advice to anyone doing the swap.
The body fabrication/coating/rust repair was by far the worst part, but swap wise, it is definitely the wiring. Getting the harness out and simplified from the 350z is painstaking.
I basically ignored other aspects of life besides my 9-5 job and this project. Im sure i lost brownie points with the wife, pissed off the neighbors with my neglected yard, and family members thinking i went crazy, but it is all going to be worth it in the end. im about a month away from putting her back on track for the first time since the rebirth.
my complete build blog is here: www.vq240z.weebly.com
here are some pics so far and i will add them as i get completed with more items. Enjoy!
-
Hi,
Ive got my 240z RHD conversion figured out and will need the following parts:
1) steering rack
2) pedal box
3) maybe the cowl/windshield wipers if available
no need for dash or steering column and im going to make new brake lines anyway.
if anyone has these parts please let me know.
thomas.kaminski@williams.com
thanks
Tom
-
I'll ty to gets some pics for you today.
Any update on that rotisserie? Im trying to get this blasted within the next month or so.
-
I'll ty to gets some pics for you today.
ok cool, because i have a soda blasting company that can come to my house to blast this thing. i will have to have it on a rotisserie if i were to convince them to blast the underbody for a good price.
Does it fold up at all? I have a ford explorer but could have access to a small trailer if need be.
-
Problast in Dallas does all my media blasting. Z car and convertible challenger. Priced right and I recommend them. Do you come to dallas often to make the trips worth it? Truck trailer and gas could wipe out any savings real quick in travel time and expense.
oh cool thanks. There are a few places here in houston that do it also, but the cost to blast inside and out of the unibody, doors, hatch, hood, and fenders cost around $2000. Im looking to spend about $1200 max on blasting the whole car inside/out.
thanks for the reference.
-
I have one I'll sell you for a $150. But you'll have to come to Dallas to get it. I ready to get my 240Z off of it.
Do you have any pics of it? I would consider buying it, have no problem coming to garland. Just give me some more info about it, etc.
I am also looking for a place that can media blast my whole unibody/body parts if you know people there. I am mostly needing the rotisserie for welding repairs, body work, etc.
Let me know, i need one relatively fast.
thanks.
-
Looking at making one or buying one, but i think this is the only car i am planning on restoring and cant justify the cost.
Im in Houston, TX and if anyone has a body rotisserie i could borrow or rent that would be great. Im trying to strip down all the crap on the body. It is down to the bare unibody and its about that time to get under it and get this done.
Thanks.
Thomas.
-
You don't have to take it down to change the color. The trick to changing the color is painting ALL of the car. including all of the door jams, hatch jams, underside of the hood and engine bay, and anywhere else paint is visible, but you shouldn't strip it to the metal. Just spray a self etching primer and then a sealer over the old paint and you're ready to go. Only strip the old paint if you have underlying issues, such as rust or the current paint isn't adhearing to the body and could peel off. I learned this a long time ago, as I used to think removing all of the old paint was the "right" was to do it. Actually, it's better to leave it on.
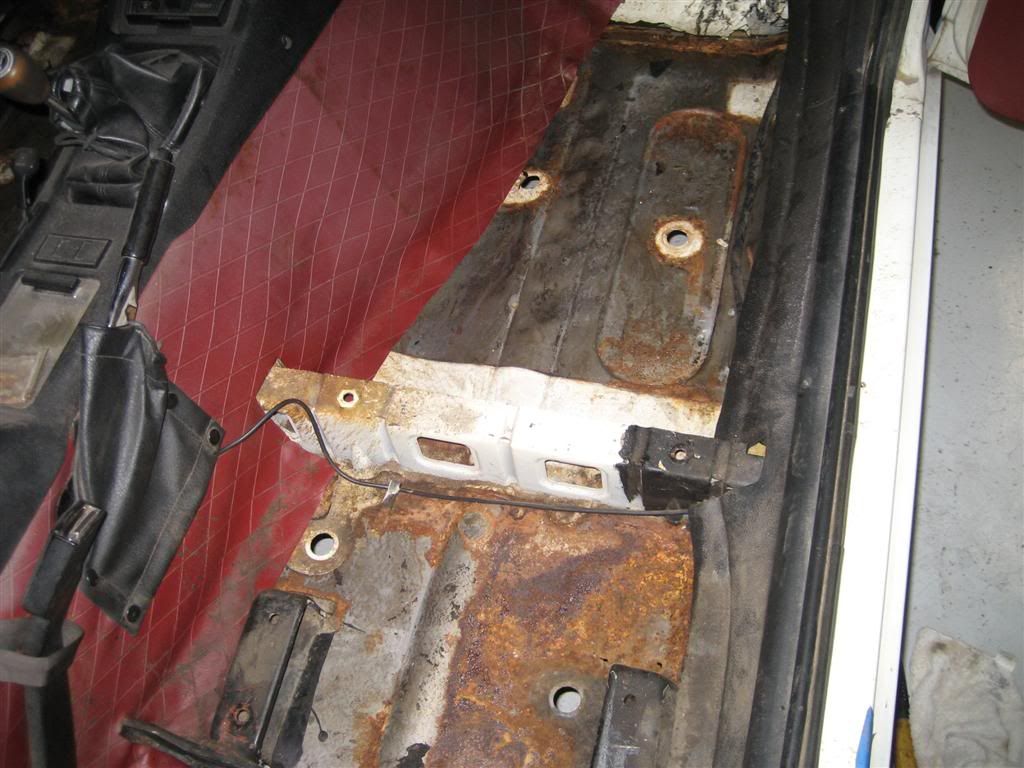
yea, im just worried about what is under the paint on a lot of areas. There are a lot of areas that have rust "spots" and dont know how far i need to take down the paint. I guess ill just have to play it by ear what i need to take off and what i need to just sand down. I dont know a whole lot about body work.
Ill also have to take off all the original undercoating and re-coat that as well. I guess i am at the stage where im here, i might as well do it kind of thing. And if i do it right the first time, i will enjoy it more in the end.
-
I found a place in Conroe that will do media blasting (soda and sand) for $85 per hour PLUS the media.
Now i personally think its too high, but i guess its for the facility, etc. Since i am going to change the color of the car, the whole thing needs to be taken down, which is going to be a pain, time consuming, and expensive if i get someone else to do it.
I almost just want to buy a soda blaster that can do soda and sand and go to town on the thing and just pay for media. however i will have to upgrade my compressor.
-
I almost have my unibody/other body panels ready for media blasting but dont really know of any place in or around Houston, TX that does it for a reasonable price.
I would think they would either dip the whole body in something to clean it or manually media blast it.
I was also thinking to buy the eastwood soda blaster and go to town, but this is a lot of metal to do, and it will cost a lot in media.
Any thoughts?
Thanks


VQ35de 240z Almost Complete!
in Nissan V6 Forum
Posted
sorry, ive been enjoying the car so much that ive forgotten to respond. Sending me a private message is a lot easier. i have some more pics of the car for you viewing pleasure. if anyone has questions dont hesitate to message me.