

mmendes
-
Posts
13 -
Joined
-
Last visited
Content Type
Profiles
Forums
Blogs
Events
Gallery
Downloads
Store
Posts posted by mmendes
-
-
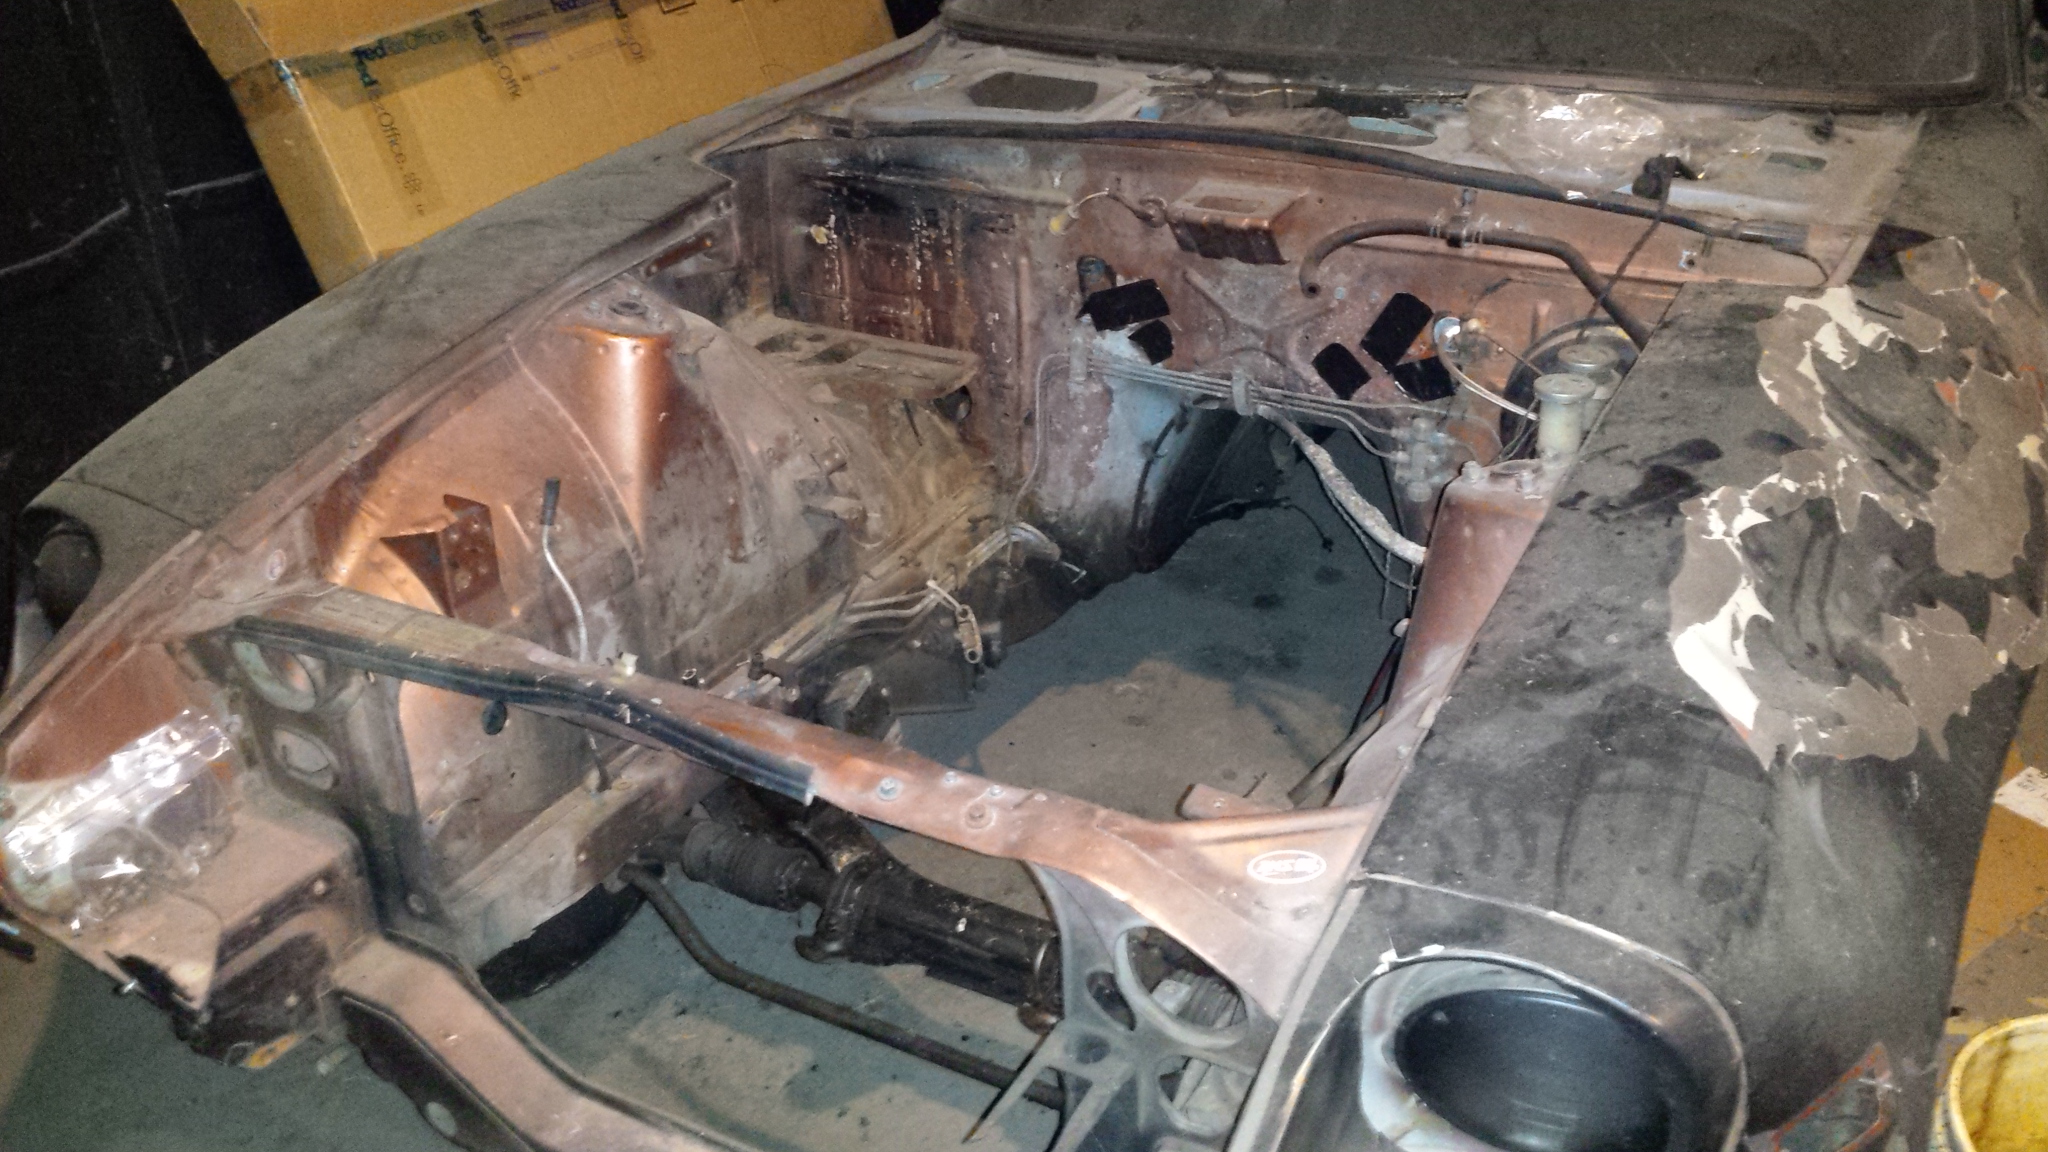
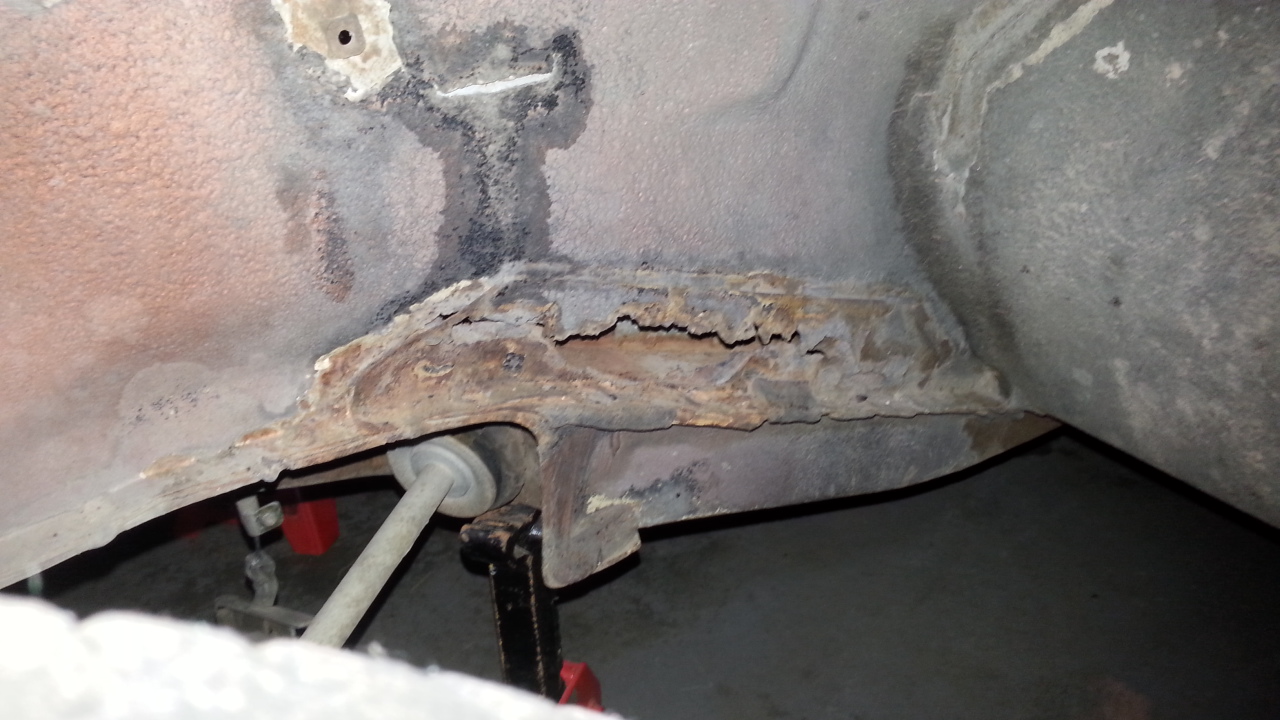
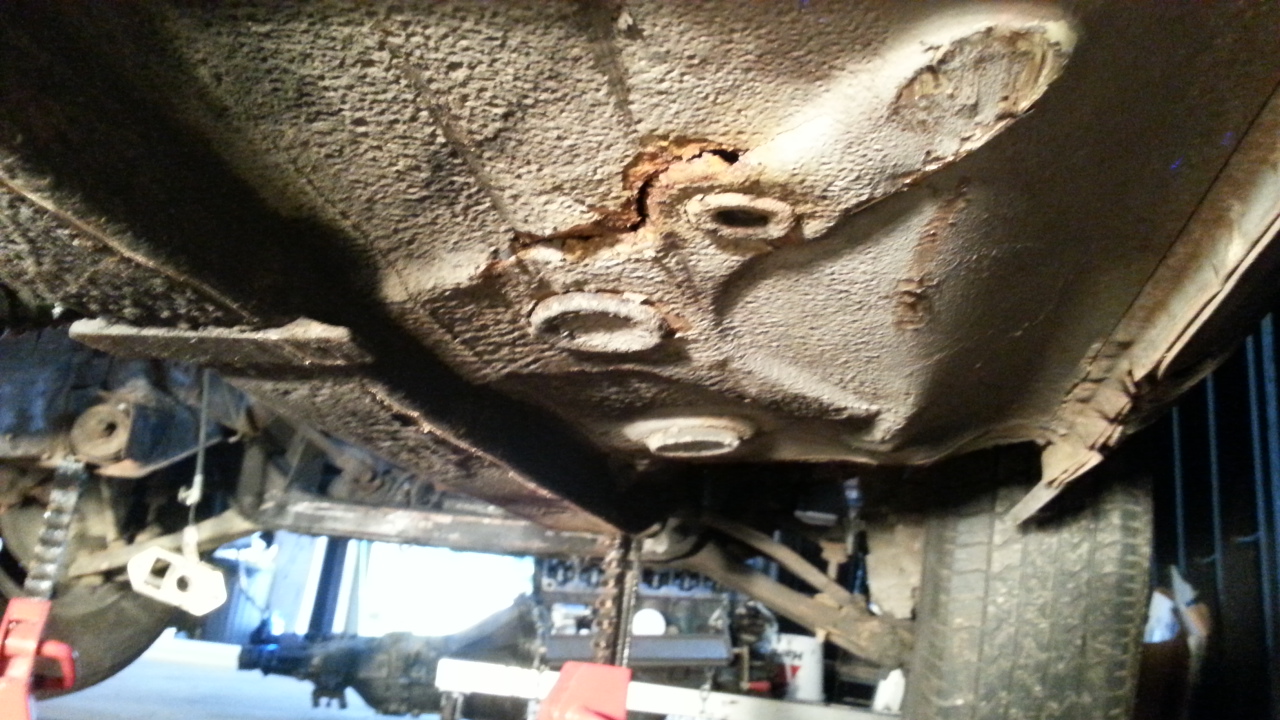
Selling my 280z project. I bought this with the intention of stealing some parts off it for my other car and then building this one as well. Well the other car is pretty close to complete and I no longer feel like doing another Z car. The car still has all the steering and suspension installed along with the rear diff and driveshaft. Radiator, Dash and some other misc pieces would come with it as well. The car has rust but is worth saving in my opinion. I don't think it would be too hard to fix the rust but it would also be perfect for someone looking for good glass, patch panels or a usable suspension, differential and driveshaft. You would need to fix:
-Sheet metal ABOVE the front drivers frame rail in the front,
-Drivers Frame rail after the seat
-Hole in drivers side floorboard where the body drain rusted away. The rest of the floorpan is solid.
-Passenger side floorpan and frame rail
-Drivers side hatch metal
Asking $800
Fastest way to contact me will be to email me directly
mmendes413@gmail.com
Thanks for looking
-Marc

-
I love these posts.
I would say this is not a feasible project unless you have the skills to design, fixture and weld tube frame chassis. You would have to tube up the front at minimum. Flat and Inline or V engines require completely different design considerations in the engine bay. GO look at how tight even some of the V6 swaps are, like the VQ.
I would recommend looking at swapping into a 914, if you're just dyyying to put it in something else.
-
Can you point me to the sanctioning body or class rules you have to work with? Is there anything preventing you from installing a diffuser, or any other modifications to the bottom of the car? If it were me, I would look to address the front end, hood and mainly the underbody/diffuser since you already have a spolier with a known directional improvement.
If you are looking to change the rear spoiler from the off the shelf parts you have tried I think you would want to make the spoiler closer to 90 deg to the surface of the hatch. IE The rear window and spoiler make a 90 degree angle between each other. You can also likely go a bit taller. My experience is with an underpowered road racer so we are less concerned with drag but IIRC in MCbeaths book they continue to see efficiency gains as they make the spoiler taller; past the point of anything you would install on a car or be legal.
One low hanging fruit thing you could do would be to block the front of the rear tires.
-
Ya. gotta stop updating while im staring at things at work. Feel like such a newbie with this car, first time I've really had to fix anything. I will report back whether 6.36cm is not enough travel for someone down the road who might have the same problem.
Thanks for your help.
-
Hmmmm so I couldnt get a picture with just my two hands but I am at roughly the same distance from the salve as I begin to see pressure. From the nut I start to feel pressure by hand at 6.35mm, yours looks dead on 6mm. I grabbed my crowbar to get some leverage on it and could feel some actuation. I could move it a little more than half an inch with maybe another 3/16 to go to the end of the hole
Think I can make up the distance with a new slave, bled properly and an adjustment on the pedal? im going to need all the travel though? Uggh it might not be RIGHT but it does sound better than pulling the motor in the cold, when its just about to sit for 5 months...
-
I suppose dragging may be the better term? Regardless you nailed the symptom I was referring to.
I will take some measurements when I get home.I think you confirmed what I suspected though. You have a boot covering yours in the pic, in the video I can move the clutch fork against each side of the hole in the casting without feeling ANY resistance. So I also have a L28E and 4spd in the barn, would the throw out bearing from that work? I read that a few others have used OEM nissan parts as well.
Man I was really hoping to save some money for some dampers that actually work at my ride height.
But while im in there.... Any recommendations on trans fluid or any other seals, bearings I should replace? The history of the drivetrain is unknown so ill also probably take the time to figure out what parts it was built with. Thanks for the help.
-
I recently went to replace the clutch slave cylinder on my 1972 240z with a 4 spd transmission becasue the clutch was slipping on the street. By slipping I mean that with the pedal fully depressed the car would still try to lurch forward when in gear. Neutral was fine. Ive only put about 1200 miles on the car since ive had it but its always been difficult to shift.
I bled the clutch slave cylinder that was already installed and tried adjusting the slave cylinder rod with no improvement in the clutch engagement, both feel or physically disengaging the clutch all the way. The fluid coming out of the old system was pretty black so I decided to replace the slave thinking there was a bad seal, it was super cheap and already apart.
After removing the old slave cylinder and testing out the clutch release fork I found very little resistance and I could easily move the fork through, what looks to be, the full range of its travel with just my hand. Video attached, im thinking I need a new pressure plate. OR the PO has an aftermarket clutch installed and did not use the longer throw out bearing I've read you need for a centerforce
-
On the second time you focus in on the reading from the MS and it "sticks" to 13.5, what is the gauge saying? If they are drastically different I would be concerned.
What are the default settings when you select the Innovate LC1/LC2? IF they are un-deitable they are still calibrated to .1 V for AFR14 ---- 0.1 V for AFR15 then the readigns will be off in tunerstudio
Check this video out on setting unique AFR ranges for your wideband for the megasquirt. only 2 minutes and hes got visual aides
-
My strut towers were hacked up to begin with and about two years ago i decided to go to a T3 bolt in camber plates. I did a ground control type coilover setup, but i didn't like that the springs would be completely unloaded when the car was jacked up and I wasn't happy with the available suspension travel at the ride height i wanted to be at. So i decided to go with the BC coilover setupthat is basically the exact predicament im in. How do you like the BC setup so far?
Also, I see you're in south Lyon, I live in waterford, work at chrysler. any chance I could come by and see it in person? I'm thinking of swapping out much of the suspension and brakes this winter but it'd be awesome to see the fitment before spending the cash. I'm also pretty handy with a wrench but an excellent buyer of adult beverages.
-
The issue is analog 1 is being used for the gauge ( could I just tap into this signal for ms? )
Yes you can. I would run the wire primarily to the MS and then splice or tee it from the ECU to the gauge. You can even run a small wire inside the MS to connect pin23 to an open pin on the DB37 connector and that might put the free end closer to the actual location of the gauge without overlaying a wire through the whole car.
Analog 1 is a narrowband output and has very little to no resolution. I think your term "sticky" is that the stock innovate programming, and lots of OEM sensors, are really only able to tell you whether the AFRs are stoich, rich, or lean. I only use this output when I am trying to simulate a stock o2 sensor to keep from throwing a code.
1.1 V for AFR14 ---- 0.1 V for AFR15.With the O2 sensor setup this way the gauge will only change when your AFRs are between 14 and 15 which is usually just at idle. Any other time the gauge will just be maxed out on the rich side while driving or maxed out on the lean side when coasting; not really giving you any useful data on your tune.
-
anybody have Link to where that fantastic dash and center console came from?
-
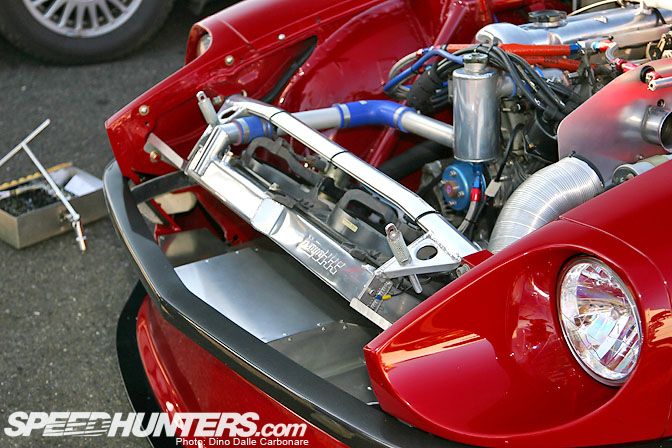
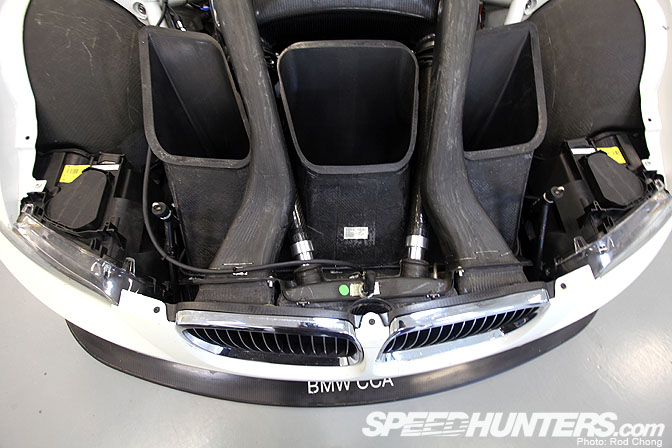
First off Id tip the radiator as far forward as it would go so I have as much room to vent out the top of the hood. Two fog light sized brake duct holes. I guess I wont go into the aero portion since were focused on cooling. Ive always thought running a short wide radiator towards the bottom of the opening would allow more space for a trans/oil/inter cooler in what is left of the opening.
If you look at the pic you can see what this team has appropriated the frontal area to each cooling device. You can also see what are either brake ducts or one is for that hose feeding the carb area fresh air. I guess I would combine this radiator placement with ducting like you see on that BMW.
check out this tread for a good examples and ideas of ducting. Amazing aero work being done on this car once it got serious
http://www.dsmtuners.com/forums/custom-fabrication/386716-my-ducted-radiator-setup-road-racing.html
-
I also want to run a dual element wing for that exact reason. Flap on for AutoX off for the track. I wouldnt be too scared of making an element yourself. These is a huge database of profiles online. You are shooting in the dark though.
On my fsae team we would usually start with a high lift airfoil and then modify its shape in 2D CFD until we got an airfoil with good flow attachment. Theres a company that can make the make the profiles out of foam with a CNC hotwire. Lay CF or fiberglass around the foam core place it back in the block it was cut out of, vacuum bag the whole thing and voila. They re relatively cheap so you could experiment with a few different designs.
Theres also an APR option that you KNOW will work. The only thing you would have to optimize its the overall height. This was designed for a time attack mitsubushi eclipse. This is the whole write up and has other good info in it.
-
Wow, thanks for the info. I was thinking about picking up a set but now I will probably look at something different.
Any idea if they fit any better on the 280s?

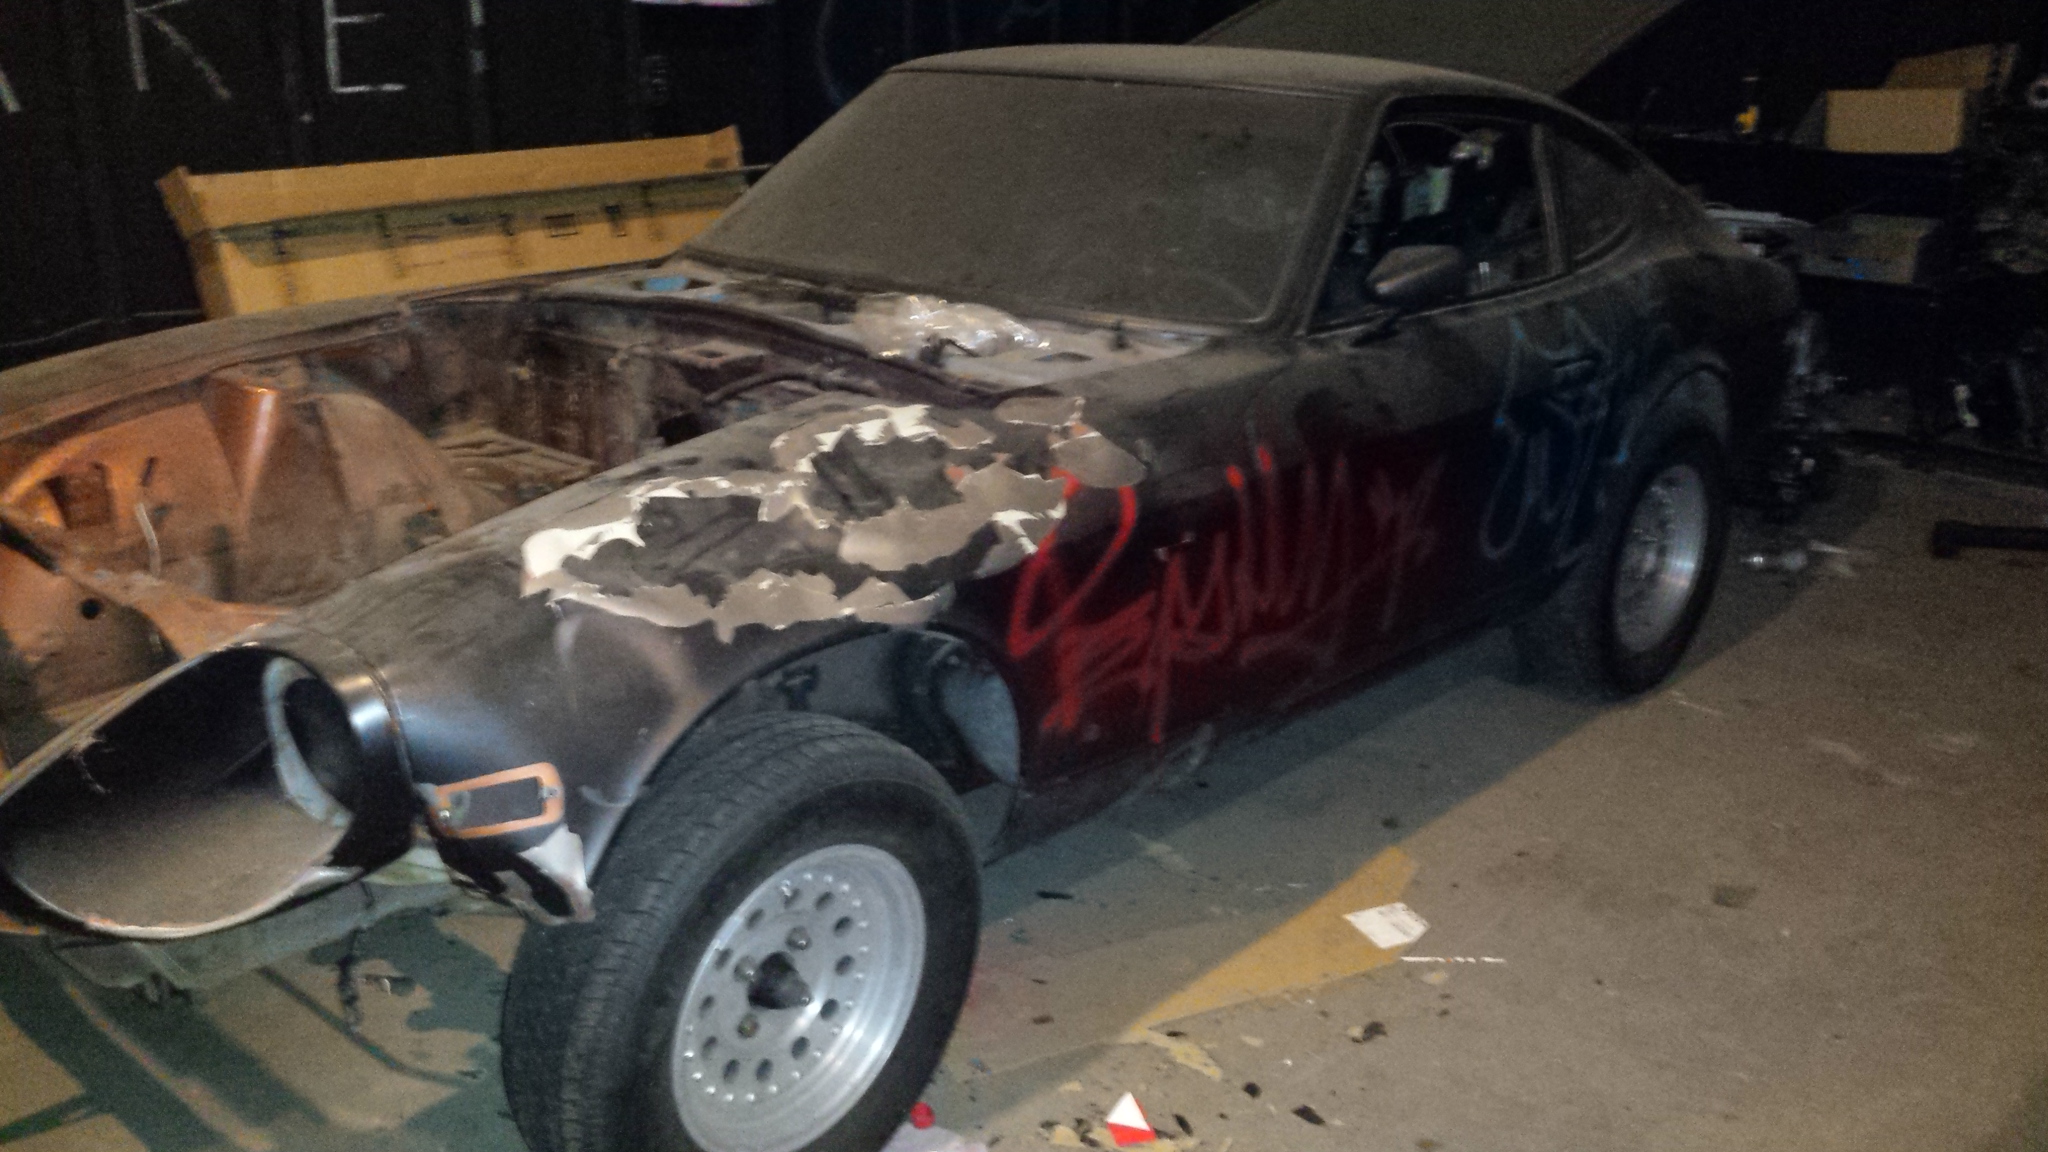
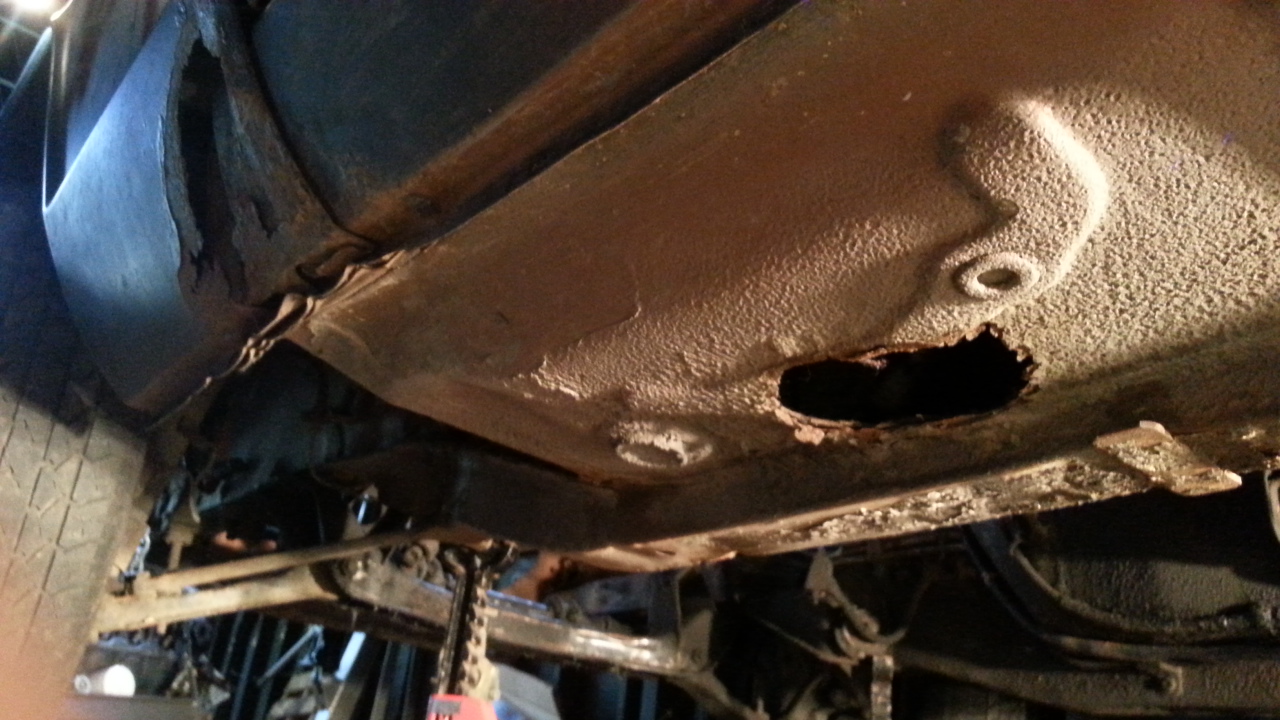
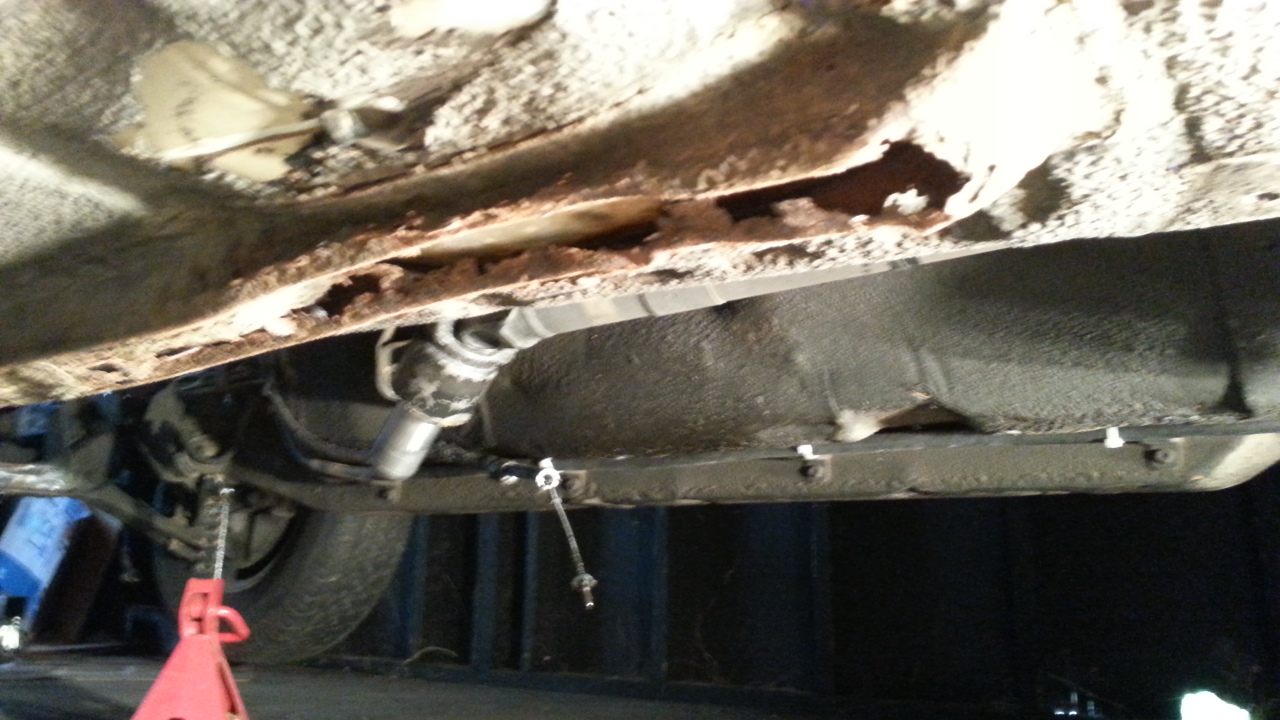


280z Rolling Shell -no title MI
in Cars for Sale
Posted
Bump. Would make an excellent lemons/chump/endurance car candidate!