-
Posts
148 -
Joined
-
Last visited
Profile Information
-
Location
South Dakota
78_280z's Achievements
Newbie (1/14)
0
Reputation
-
I'm looking for a passenger fender that is clean and someone is willing to ship. I'm willing to pay for the shipping and fender but it must be clean. Had one I was going to use but it's too far gone and z parts are very hard to come by where I live. Willing to drive if your somewhat close I live in southdakota. Any help would be great!
-
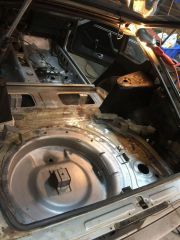
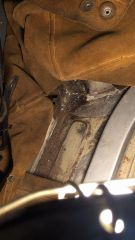
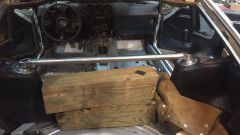
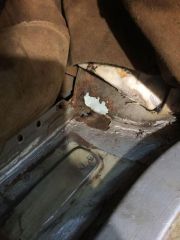
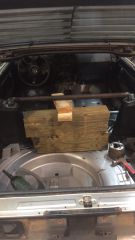
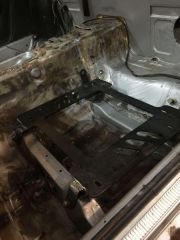
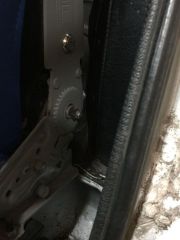
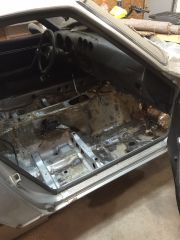
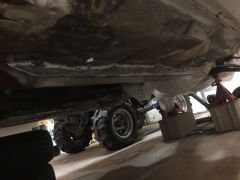
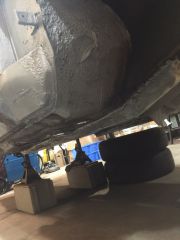
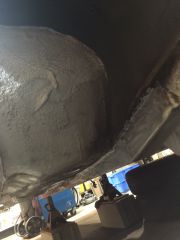
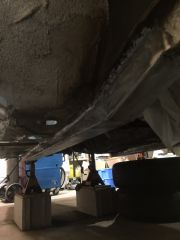
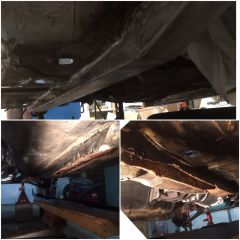
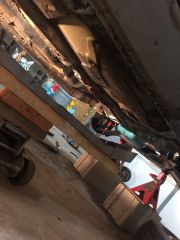
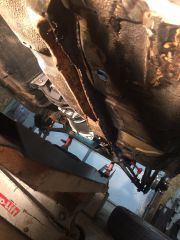
Well I am lacking a few pictures but ill get them posted when I am back in the shop. So for now here's this post. Its been about -30 wind-chill out here in South Dakota about -15 not in the wind either way its pretty damn cold. Luckily I have a heated shop so the show must go on.. I finally got the last of the rust holes in the floor done so that's a accomplishment for now. Not the most fun job but getting better at it every time defiantly not afraid to cut stuff out any more. I think it turned out pretty nice the exterior side looks perfect ill upload a picture when I get it. I am currently in the middle of placing a rather large order of things for the fuel system under the car so stay tuned for that. Nothing fancy just new Efi hose fuel pump filters etc. all the good stuff. The floors have finally been re sealed completely I wound up removing the sound deadening in the hatch area ( couldn't live with my self if I left it). The middle section of the underside has been re sealed seam sealed then undercoated and looks phenomenal. The back hatch area undercoating got scrubbed with simple green and a tooth brush then washed off sealed where its flaked and re undercoated in those various spots. The original undercoating is in great shape in the back. and will get the finished product pictures. I also gave the wiring harness and wire management some attention. I un wrapped the whole harness from the firewall back to the taillights and rewound it with new electrical tape. Took forever but the finished result was so clean and new you cant pass it up. Also got some stickable zip tie mounting plates and routed the wires nicely and made everything super slick and clean. (Pictures to come) With all this tedious work getting done it was time to knock out one of the last things in the hatch area to fab up for now. I wanted a rear strut tower bar to mount my harnesses off of and Simtec Motorsports makes a super nice one. But for me I needed the money to spend on other areas of the car so I wound up fabing my own plates and pieces replicating there's. and built one completely out of scrap I had around my shop. Personally this strut tower brace probably is beefier than there's, my tubing sidewall I had was pretty thick so this thing should stand up to abuse. in my opinion it turned out pretty clean and simple. I plan to make some aluminum plates for the strut tower tops to cover where the stock seat belts mounted.
-
-
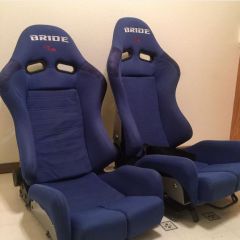
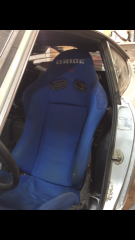
All cleaned up touched up where the fabric was torn with some superglue to stop the fabric from parting any further then used some blue paint I mixed up for a close match to fill in the spot where it was worn through cant really tell they aren't perfect but like I said they look good and I plan to drive this car a lot so I don't really want perfect seats that I will cry over if something happens to them .
-
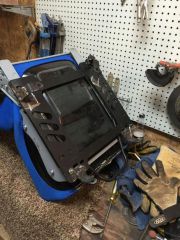
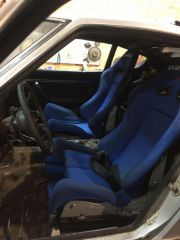
So this weekend I worked on the BRIDE Low Max seats I picked up off of a extremely good friend. He happened to have a child and so his racing seats had to go. Picked up two seats harness's and his mounting plates out of his rsx for a extremely reasonable price could they be knock offs? Probably do I care not really they look damn good and it would have cost me double to redo stock seats. They aren't perfect fabric is a little worn but itl work. I cut off the tabs on his mounting plates and ended up setting them in my car where I wanted it and was able to mount them as far back and as low as possible using the stock seat mounting points. I chose to do this because I want to be able to revert to stock seats if I chose to do so and keep originality.. I do believe these are the absolute max width that could be put in this car I was able to mount them within less than half a inch of the doors nothing rubs and the fitment was tricky with the 280z hump in the floors for the cat ended up smashing down the floor to match the passenger side and It worked out great. I am 6ft 3 so this seat height is pushing my leg room to the max that I can tolerate height is fine but without major modifications I am kind of stuck with where it is for now so ill try it. Currently washing the fabric as I write this and its looking super clean brought the blue back nicely.
-
Totally get what your saying haha defiantly don't want to be working on this for three years without being able to drive it a little get a break from it so you don't end up so burnt out. Defiantly just want to show that people around my age can do quite a bit with research and patients frustrates me when people think someone young wont be able to do such a large project. But then I also see why some may think that judging by some of the extremely thrown together projects built by the younger generation that I have seen haha. But I agree either way most defiantly excited about it and that is what keeps me focused and not burnt out. - throw a build thread together your self! I love reading them!
-
For sure! Defiantly the plan get things sorted out then work on body basically same thing as you enjoy it for awhile then take it apart and paint it. I'll keep it updated glad to see there's some interest! Thanks!
-
Thanks for reading guys! Ill keep it updated as I can! Till then Happy Halloween!
-
After getting the motor in it hit summer time so I ended up working a lot of hours to pay for the car and school. During that I ended up having to move shops. I am very lucky to have a extremely good friend who has a great shop setup so I moved the project over to there. That flag tho Before I moved I had dropped the rear suspension in order to gain access to the ear floors and go through the suspension so here's how that sits at the moment. Currently I have been working on the floors again on the weekends I don't work. I wound up tackling the huge problem of the frame rails. So I ordered up a set of baddog frame rails that fit amazingly. After hours of prep work to weld on the car I jacked the rails up and welded them on. Anyone who has done this knows how much it sucks under the car. I then ground everything down so it was nice and pretty. Everything will be getting painted with chassis saver then seam sealed followed by undercoating. As it sits today I have been working on the interior floors. My friend helped chisel out the sound deadening which revealed what I didn't want to find out that there were a few holes. So hole patching has been happening. I picked up a set of bride seats from him that I will be fabing into the car. I will get some pictures next time I am there. till then ill leave this here.
-
Ended up using the Z for my graduation project was judged by a group of people and graded. We had to write a paper and such over it so it gave me a reason to take it out and give her a quick wash. Ready for the engine to sit back in!? Nah couldn't get over the ugly transmission so pulled that out and gave it a sand and respray. (Good thing I did classic Z problem with the stuck trans filler bolt! That was fun . With the trans done I could finally put everything back into the car. Was ready to see some sort of progress instead of throwing money around. I ordered a new flywheel thinking it would be better but I was shipped the wrong one frustrated pissed and not willing to wait I called in another favor from a friend with a machine shop who resurfaced my original flywheel the next morning turned out gorgeous and at 1/4th the cost of that new one should have just done it the first time. Live and learn... Got the clutch mounted and trans on and shoe horned the extremely long setup into the car by my self.
-
With the engine all sorted to the point where I could move on I focused my attention on the nasty engine bay. Really all it needed was a lot of TLC I got lucky with my battery tray being perfect and everything just surface rust through the bay. I wire wheeled everything then sprayed it with por15 rust stopper product and coated it with silver chassis saver for protection. I then went over it and re scuffed everything with a scotch brite pad and sprayed self etching primer over it all. over 30hrs of prep work I would say but the end result was pretty good for a home paint job! For the final color and paint I went with my rattle can skills. Yes hate on spray paint but I went with a factory color matched silver paint from the local auto part store and let me tell you after some coats and a good hand followed with clear it turned out about as good as I could ask for! Now the very front was left with a little bit of cancer so I cut that out and patched it followed by some paint. How she sat for awhile:
-
Since painting was done on the block naturally I wanted to assemble it. Wound up watching some interesting videos with a interesting Japanese man on YouTube who explained some points in the re assembly of the timing and oil pump parts so I followed that and went together flawlessly. I have a lot of automotive friends and usually can find great deals. My one friend has a shop who was able to hook me up with a huge discount on all the engine rebuild parts I needed basically so I was set. Some odds and ends things need to be done/bought but that will be done later.
-
With the head done I decided to focus my attention to the block. Now with it completely fill of grime and sitting open for along time it was in pretty good shape. Hard to believe from the pictures I know. My pockets are not very deep so doing this whole car on a pretty tight do it your self budget has been a challenge. I had the block looked at by a few of my engine friends and they agreed to give it a shot and just clean up the cylinder walls and try it. So I proceeded to clean up the cylinder walls with various products and some steal wool on the top edges where slight flash rust occurred basted it out all clean and then started cleaning up the block for paint. I'm sure people will disagree on not taking the whole entire bottom end apart but it spun freely and perfectly took a main cap off when doing the rear main seal and the bearings looked brand new so its worth a shot for now. After a TON of paint prep and cleaning and more cleaning and prep I went with the closest thing in a can to stock color I could find that everyone else has used. and here's my results. (I for some reason have a pretty good hand with spray cans)
-
I next decided to focus my attention to the head that would make or break the engine choice. To me I love the idea of the nostalgic inline 6 and am not too into the swap idea for my project. Dis assembled the head and brought it to a engine teacher I had in high school who helped me remove the broken sparkplugs. I then brought it to a local machine shop and was able to have the head baked and flattened perfectly! they also put in a helicoil to fix a damaged sparkplug hole. After that proceeded to re assemble the head. Attached are pictures of the head complete with new valve seals and freshly ground valves for a tight seal:
-
Decided to seal up the floors. I wasn't too interested in the sound deadening removal at the time but ended up later going back and redoing this whole process over to where I felt I should have done it. It lingered in the back of my mind that I half did it and needed to properly go back. Proceeded to wire wheel the whole interior floors front to back and treat it with the pour15 spray products to stop the rust then seal it with silver chassis saver. (Looking back what a waste when you redo it all )

