

MRGierut
-
Posts
32 -
Joined
-
Last visited
Content Type
Profiles
Forums
Blogs
Events
Gallery
Downloads
Store
Posts posted by MRGierut
-
-
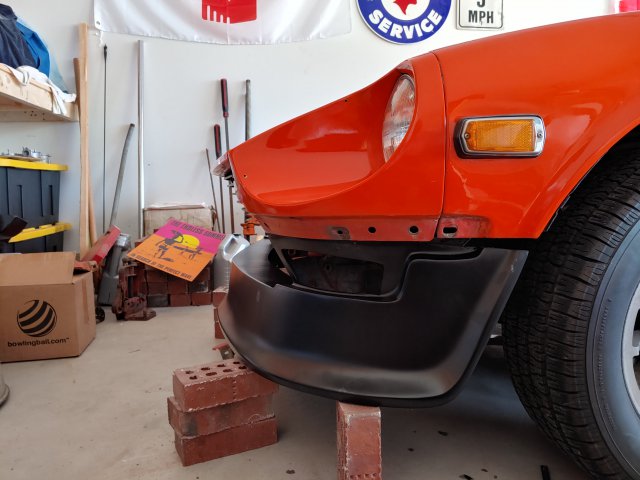
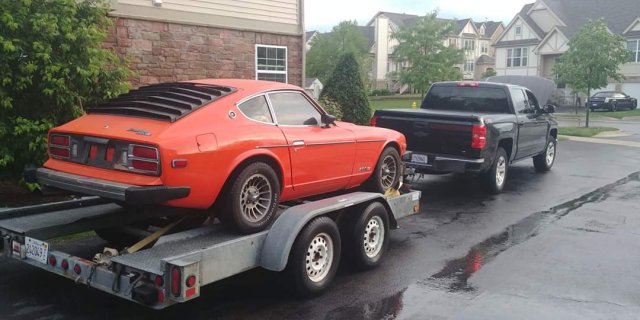
Wow...It's been 3 years since I've updated my thread. Yikes!! For anyone keeping score at home, I have not given up. I ended up selling the Silver '77 mainly due to the sunroof...and because a gem popped up local to me. An Orange '78 Califorina/Nevada 280 with no sunroof and a fairly solid floor.
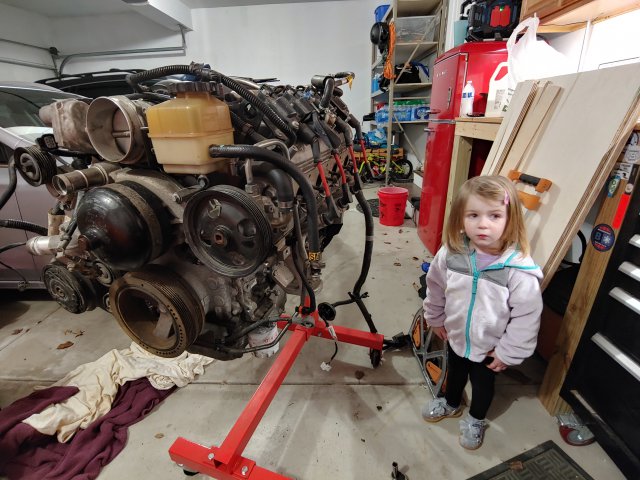
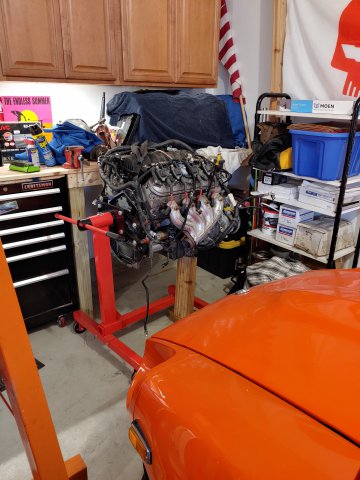
I bought the orange one at the end of May in 2018 and sold the Silver one in July of the same year. Since then, I've been pretty busy with work, family, life, and unfortunately death... nearly lost all motivation for the project and only able to dedicate a hand full of hours over the last 2 years. I have still been scooping up some parts here and there, some new some used. The most recent addition to the parts pile is a complete LS2 out of a 2005 GTO. Very excited to grab this locally for a reasonable price. Snagging this motor, combined with the warmer weather and hearing all the other cars cruising around really got me back on the swap hype train.
I have been officially furloughed due to The 'Rona. My wife is still working and extremely busy, which leaves me in charge of the kids. And that's fine, my kids are awesome. They drive me nuts, but I wouldn't trade this extra time with them for anything. With that said, I'm hoping to squeeze a few hours in the garage here and there. So stay tuned!

-
-
Just now, BZ's said:
Thanks! Helpful.
No problem. It's really not that hard, just take your time and don't try to rush. It will probably take more than one day.
-
2 minutes ago, BZ's said:
Is there a link to the Polyvance instructions? I cannot seem to locate.
Thx!
This is what I used when I did my dash.
-
Wish we could these in sticker form again.
I'd probably buy a sticker or two.
-
1 T-SHIRT XL BLACK
1 HOODIE XL BLACK
Zip code: 60463
-
Welp, Still waiting on the Speedhut gauges.
I ordered them on St. Patrick's Day and they just shipped on April 21st, I knew they were going to take a long time. Speedhut was very good with staying in touch with me and are very accommodating. They can add just about anything you want to their gauges, you just have to ask. They offer a GPS Speedo with turn signals, high beam indicator, and programmable fuel gauge all in one gauge housing! On the Tach I asked them to add two extra LEDs labeled "Brake" (red) and "Check Engine" (amber). They should arrive this week!
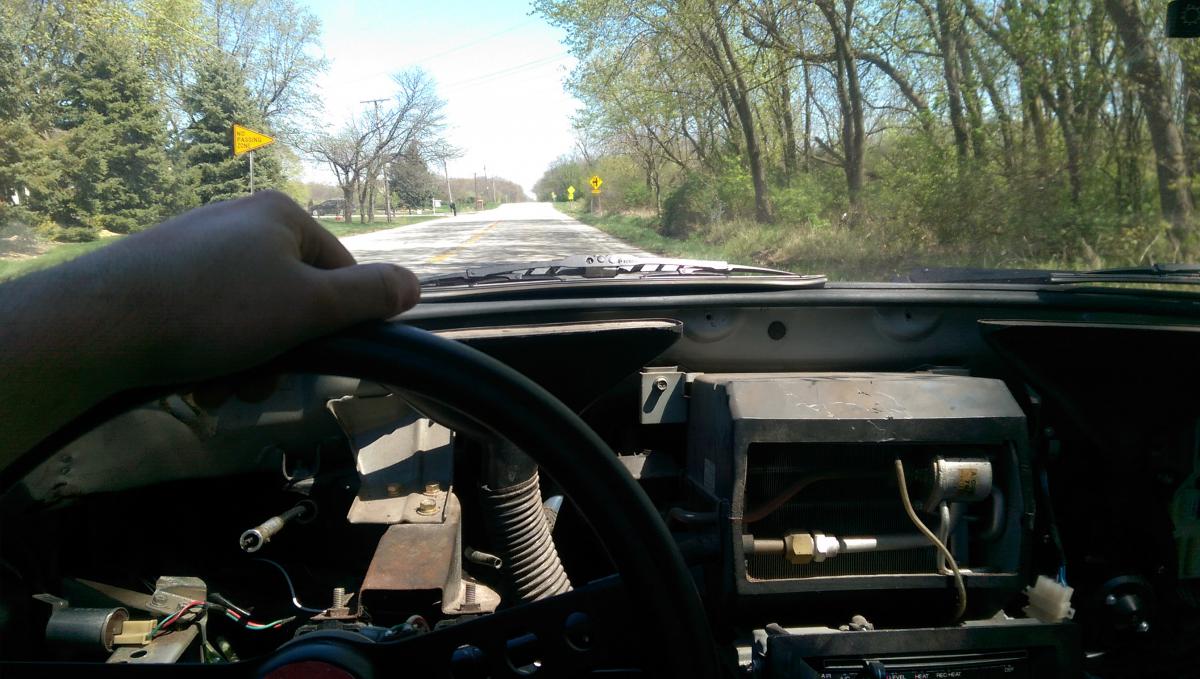
Since the car has just been sitting in my garage for the past couple weeks, I felt that she has being neglected...
Tow bolts on the driver's seat and tossed the steering wheel on...no problem.
-
Those connectors are pretty slick! I like that idea! Are those pictures in the engine bay, or the cabin?
-
That thing looks pretty damn good rolling down the street. Great pictures!
-
Thanks man! I appreciate it. Taking out the dash was easier than I anticipated. The hardest part was disconnecting the speedo cable. Putting it all back in correctly might be a different story!Looks like you're making great progress! it's no small job removing the dash.
Keep up the good work.
I'm just waiting for new gauges to come in, hopefully sometime next week. I got the seats back from the upholstery shop and the new carpet is partially in. The aftermarket radio is hooked up and it'll power on just fine, but no sound is coming out of the speakers. After further investigation, the speakers (yes, there's 2!) start disintegrating once you touch them, so new 4" speakers are on the way, as well as speaker wire.
Once I get the interior back together that will be it for a while.
-
Anyone tried the Polyvance flexible dash repair kit?
Yup.
http://forums.hybridz.org/topic/127012-silver-1977-datsun-280z-project/
Dash repair is towards the bottom of the first page.
-
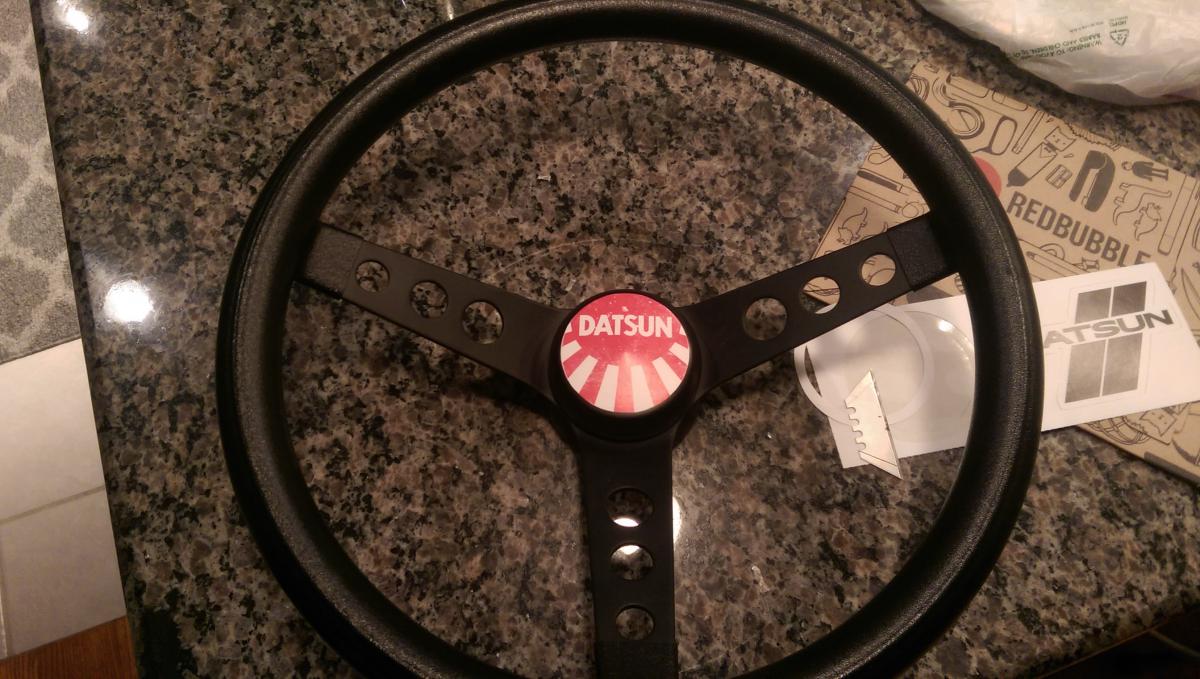
$38 Grant steering wheel with sweet ass Dastun Rising Sun sticker!
Don't look too close, I had to trim the sticker by hand...
-
I'm pretty sure they can do this if you call and ask but as far as I can tell there is no place to request it on their website.
The turn signals work fine as is.
I emailed them and they're going to change it for $10. Thanks again
OP: I ordered 4 1/2" and 2 1/16" for the three small gauges. The only reason I went with 2 1/16" is because I wanted the 90* sweep instead of the full sweep. I also ordered the Skillard gauge mounts for the speedo/tach and Mill House Huston pods for the smaller gauges. There is a link on Skillard's website for the Mill House stuff. I'll be sure to post everything here when the gauges finally come in. Turn around time is like 3 weeks to a month now!
-
Mine are activated by ground.
Incidentally, I saw someone mentioning on another post (can't find it now) that they needed to add a relay to get the high beam indicator to work, since it's looking for +12V to illuminate the indicator, and the switch at the column completes the ground, so it's inverted. A simpler solution is to tap the low beam signal at the steering column (red with black stripe on my 78) instead. Since it's "inverted" also, it's grounded when the low beams are on and draws a +12V feed through the headlights when highbeams are selected.
Gotcha.
I ordered a set last week with 2 extra LEDs and I just guessed that they should be activated by ground since every other circuit in the car has the switch on the ground side. Thanks for the tip about the high beam light! I wonder if I could just ask Speedhut to have the high beam LED activated by ground? Do the turn signal and flashers need to be flipped as well?
-
Interesting.....
-
Very nice! I thought my dash was bad!
-
Lookin' good man. How does it look under the battery tray?
-
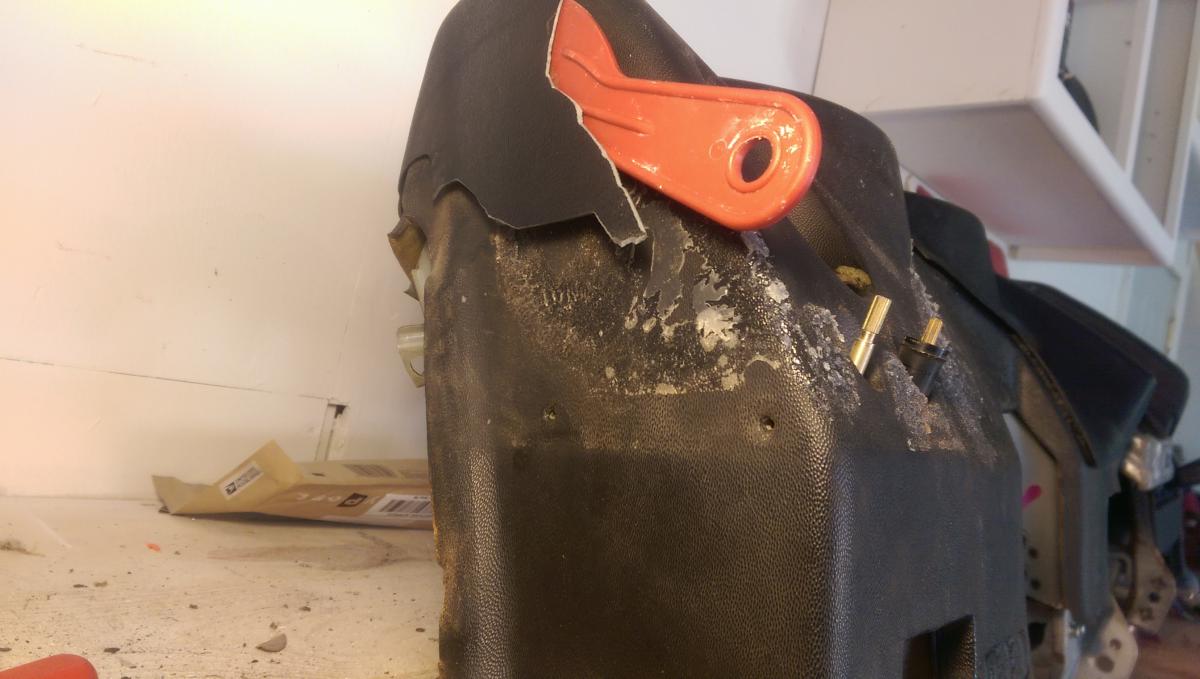
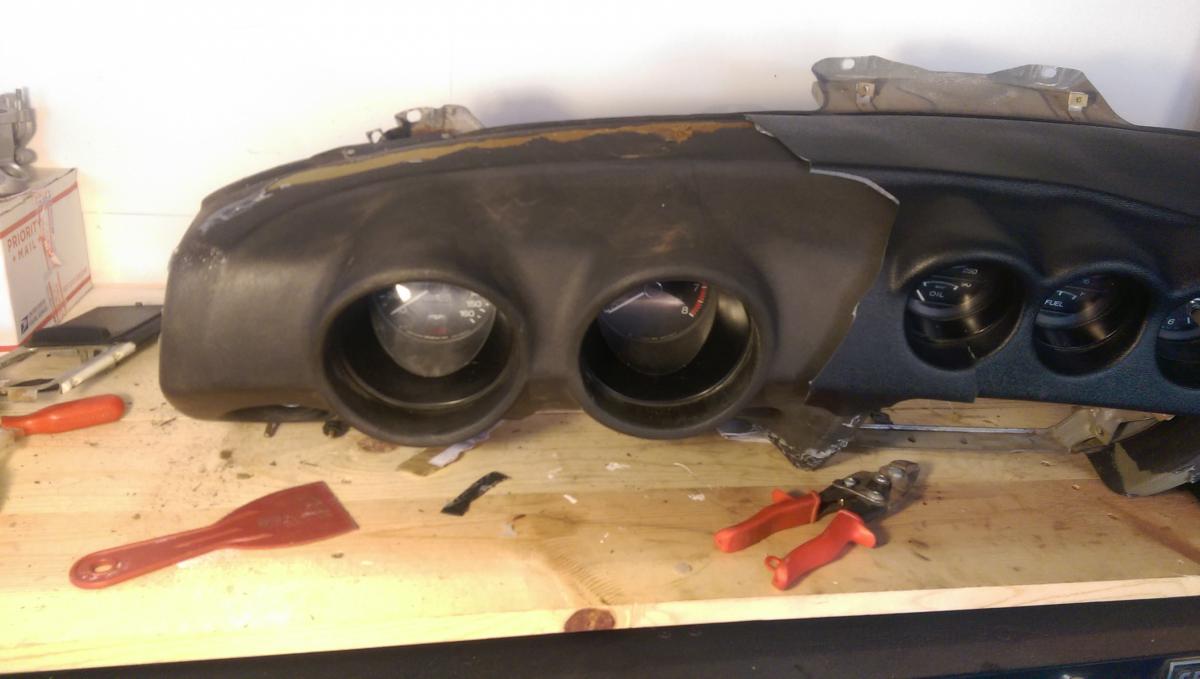
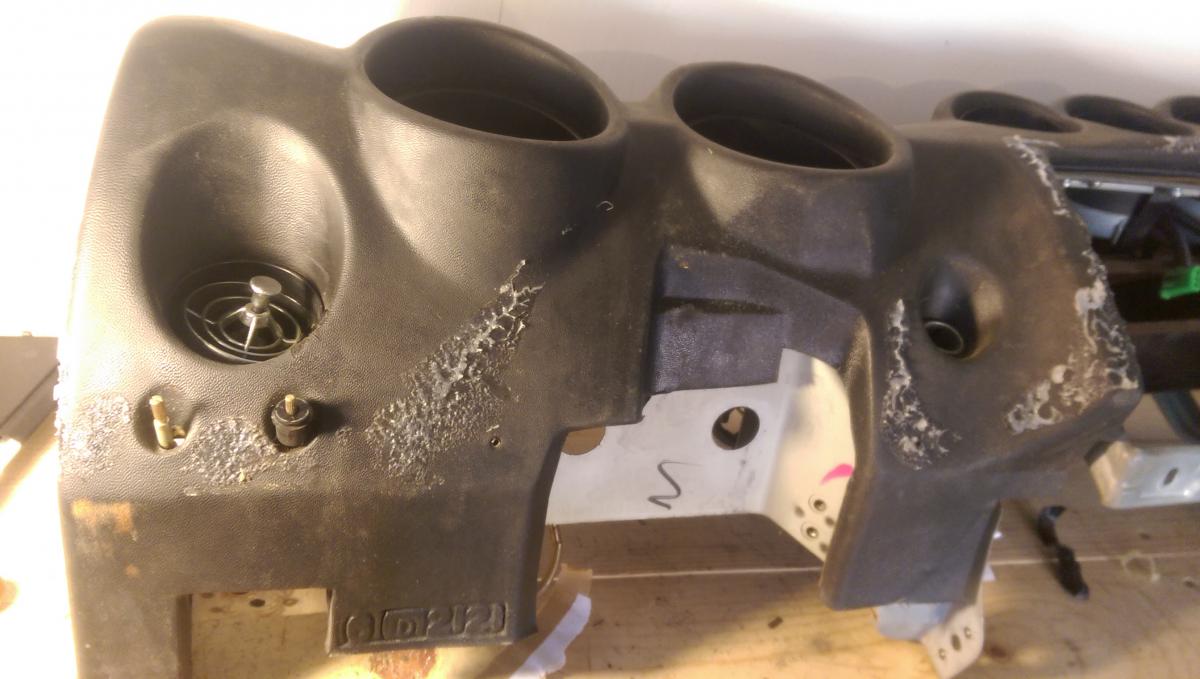
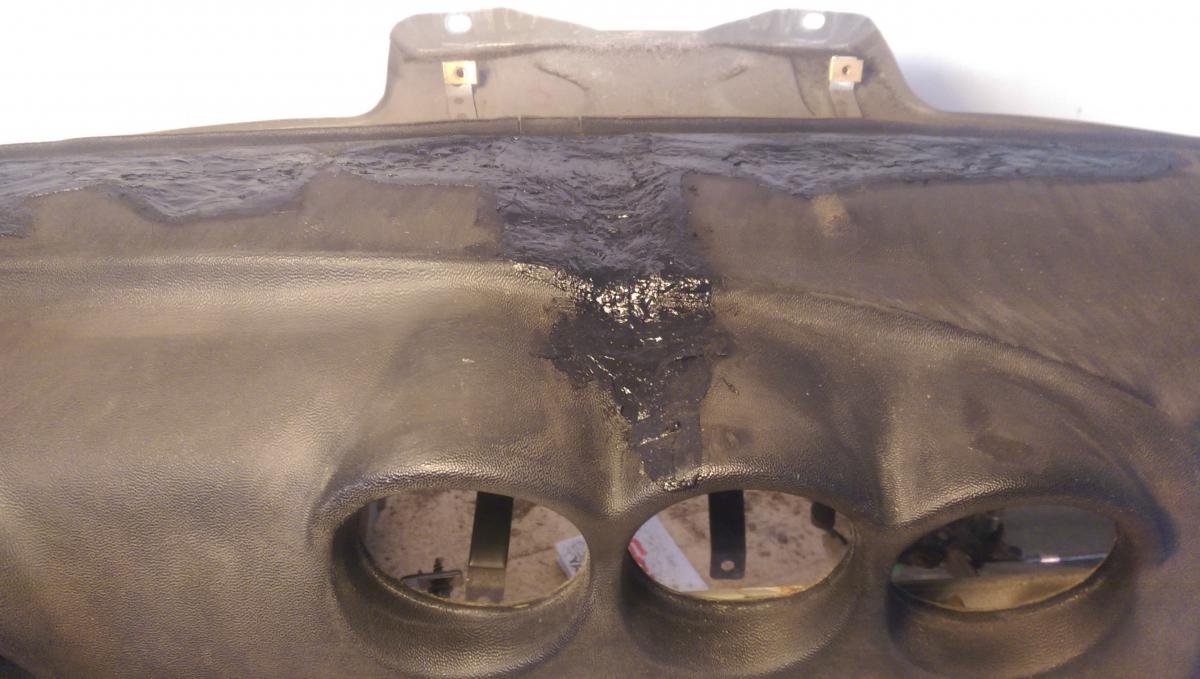
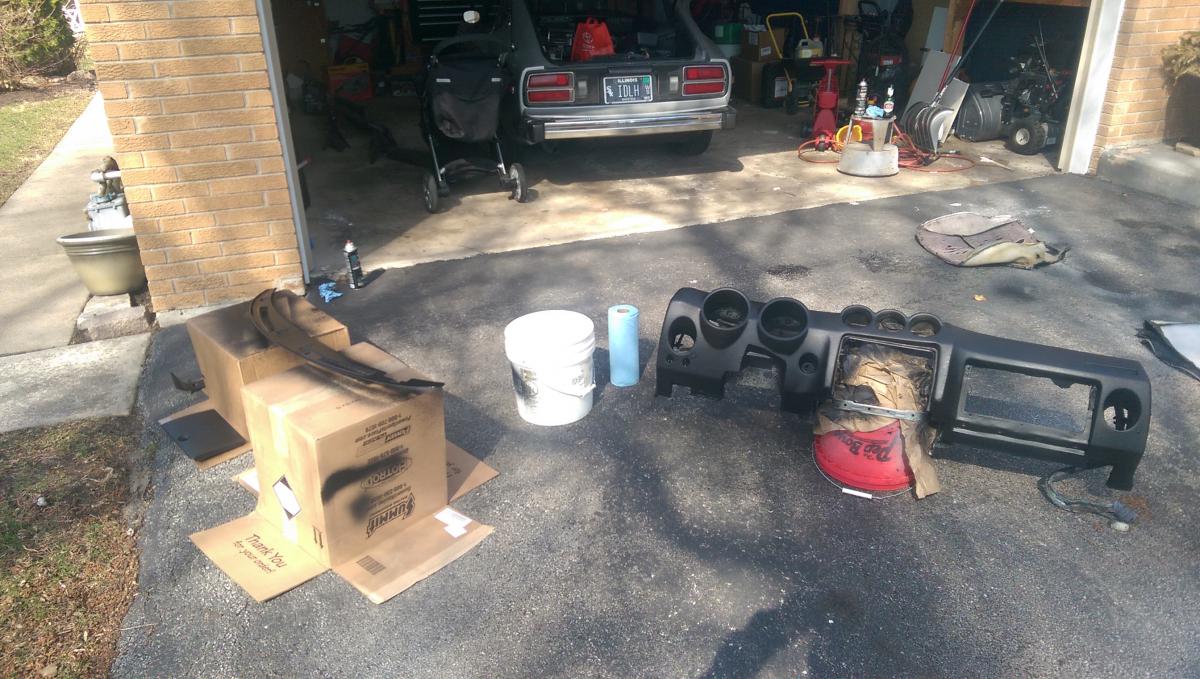
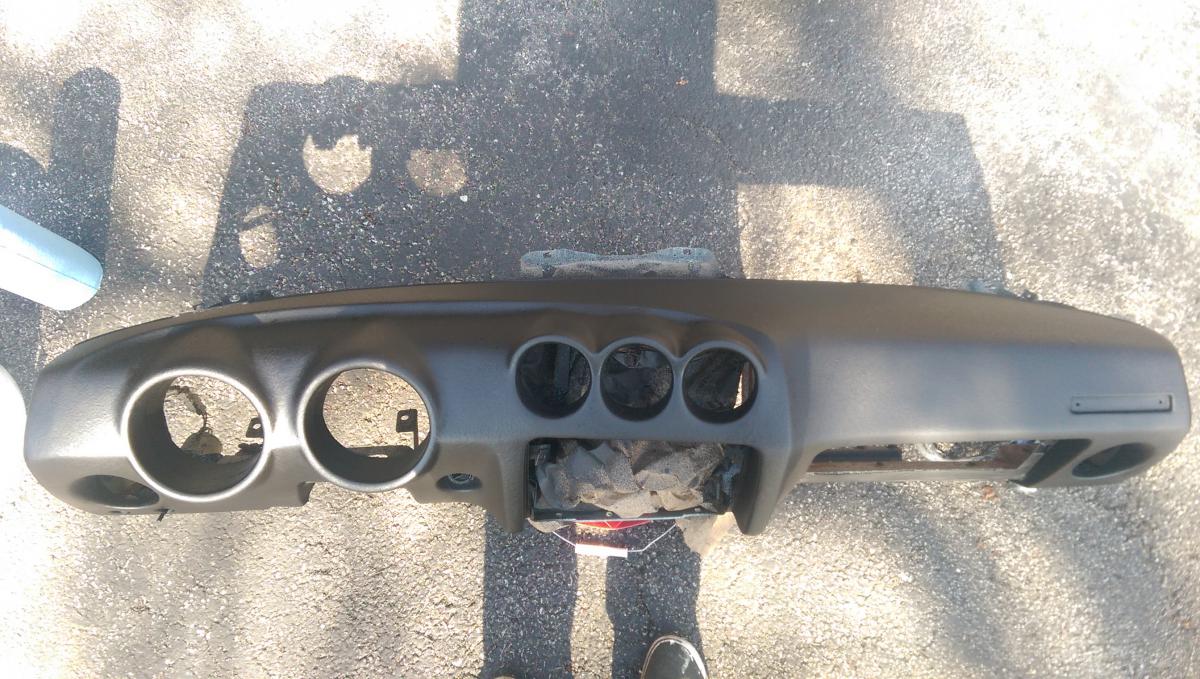
I have spent the last couple weekends tackling the dash. I'm pretty happy with the result!
Dash cover removal
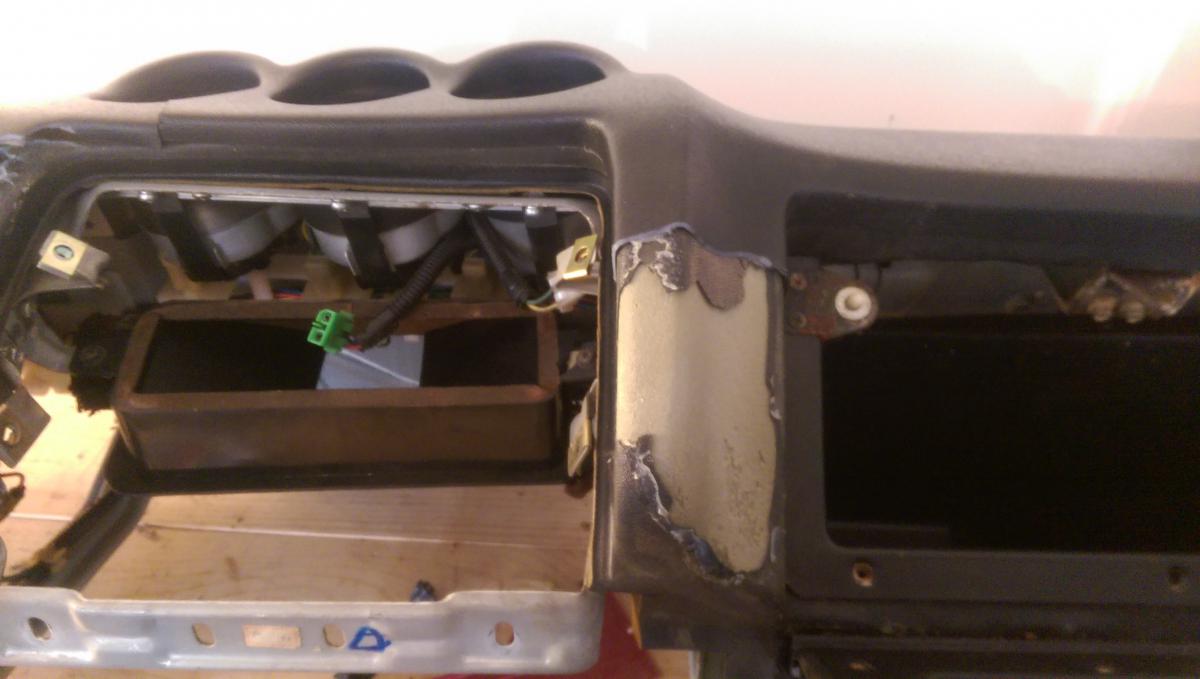
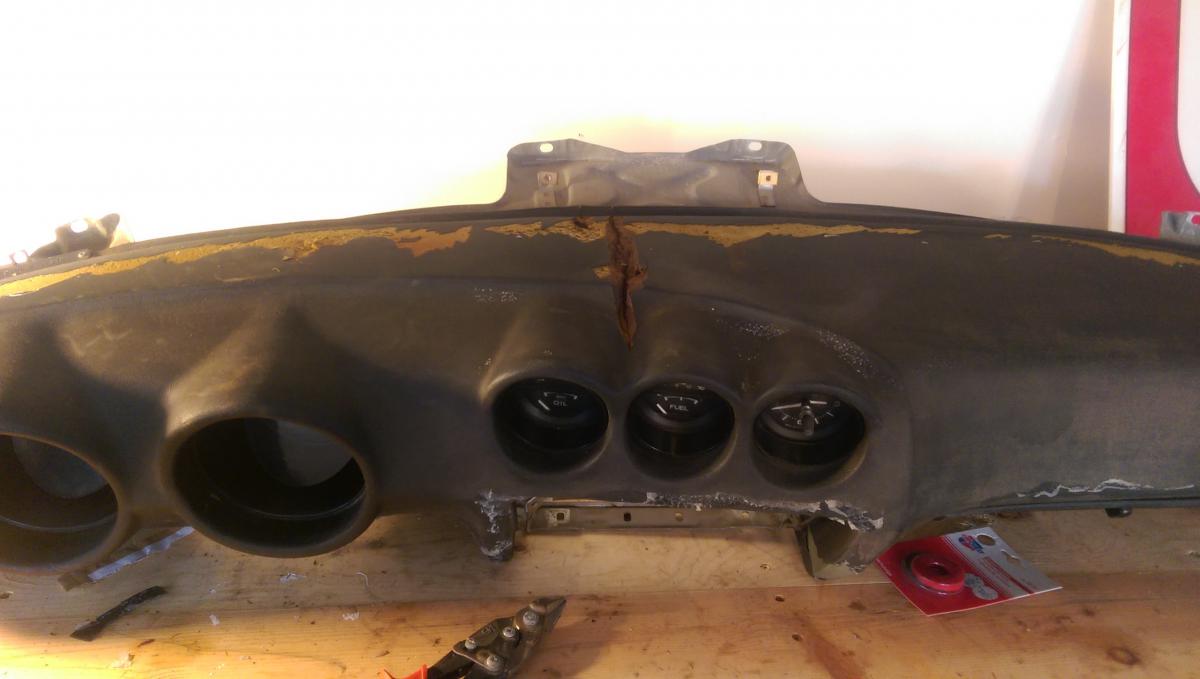
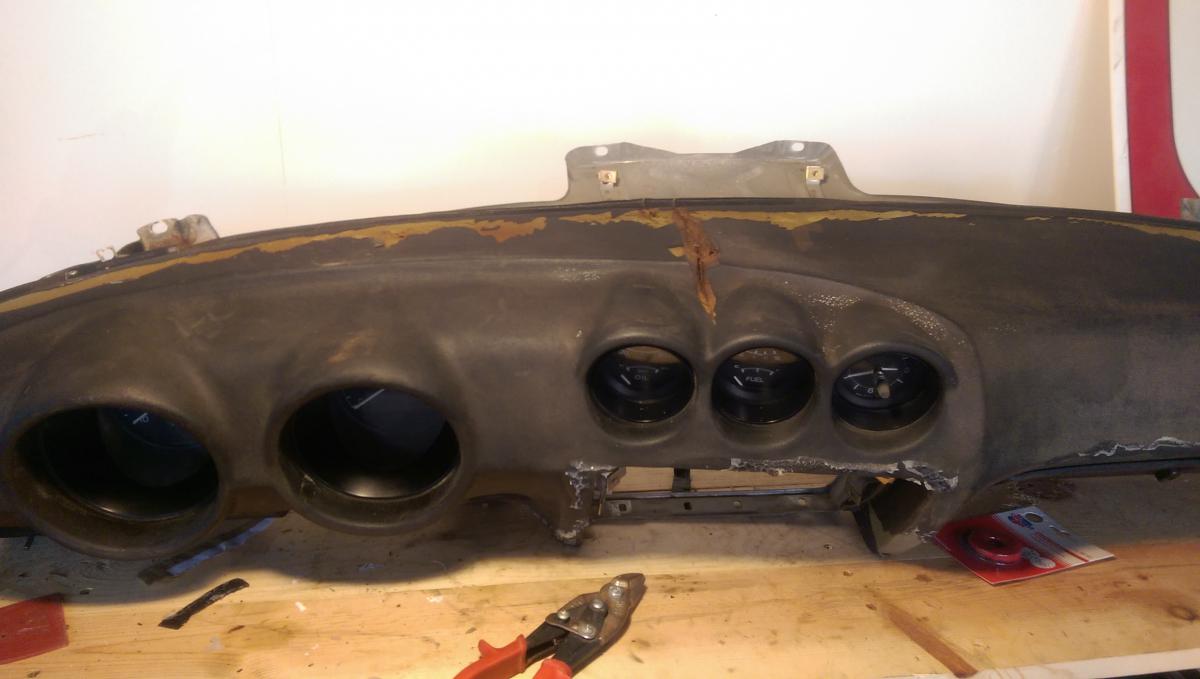
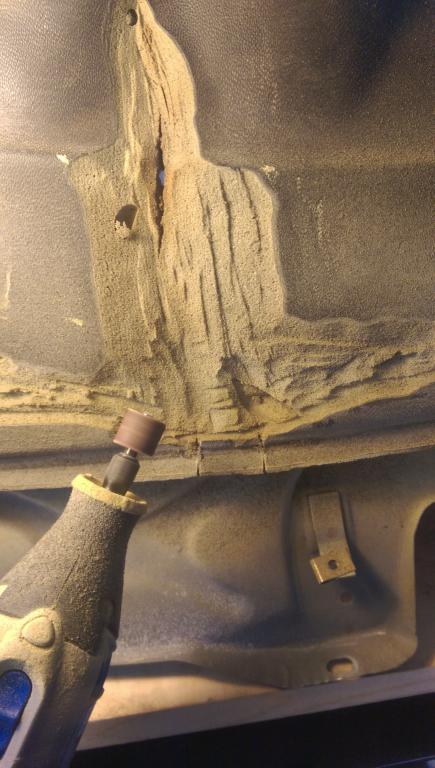
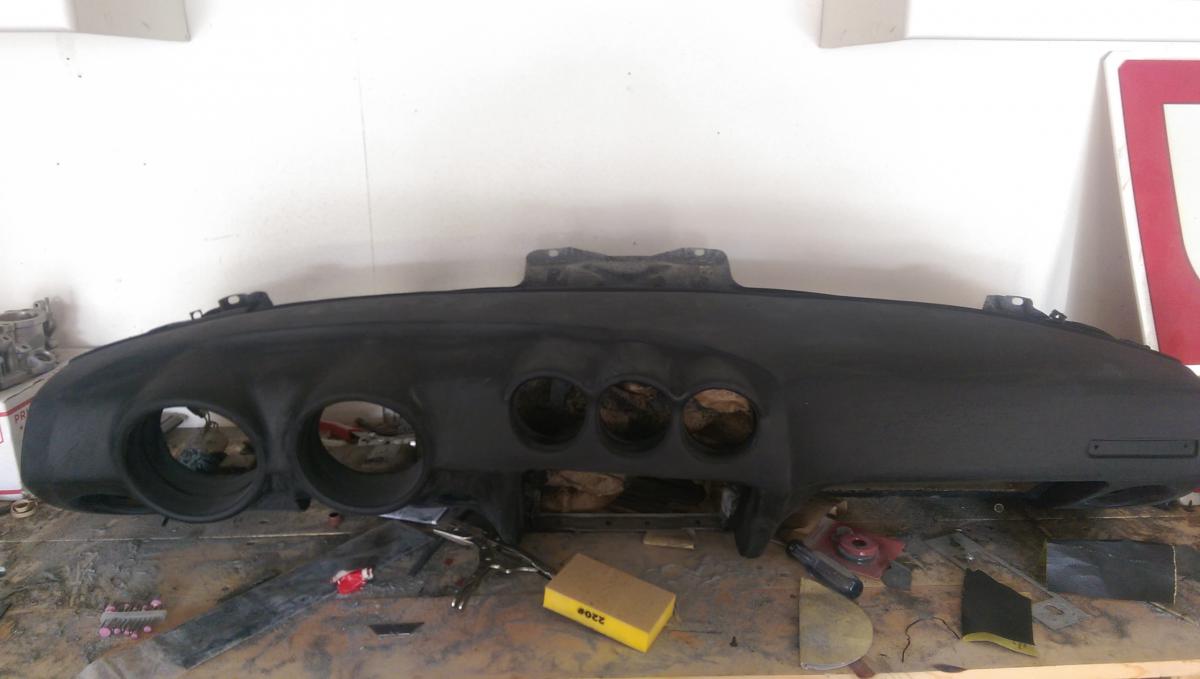
The damaged original dashboard, I was actually pleasantly surprised. Only one crack and some of the vinyl stuck to the back of the dash cover and came off.
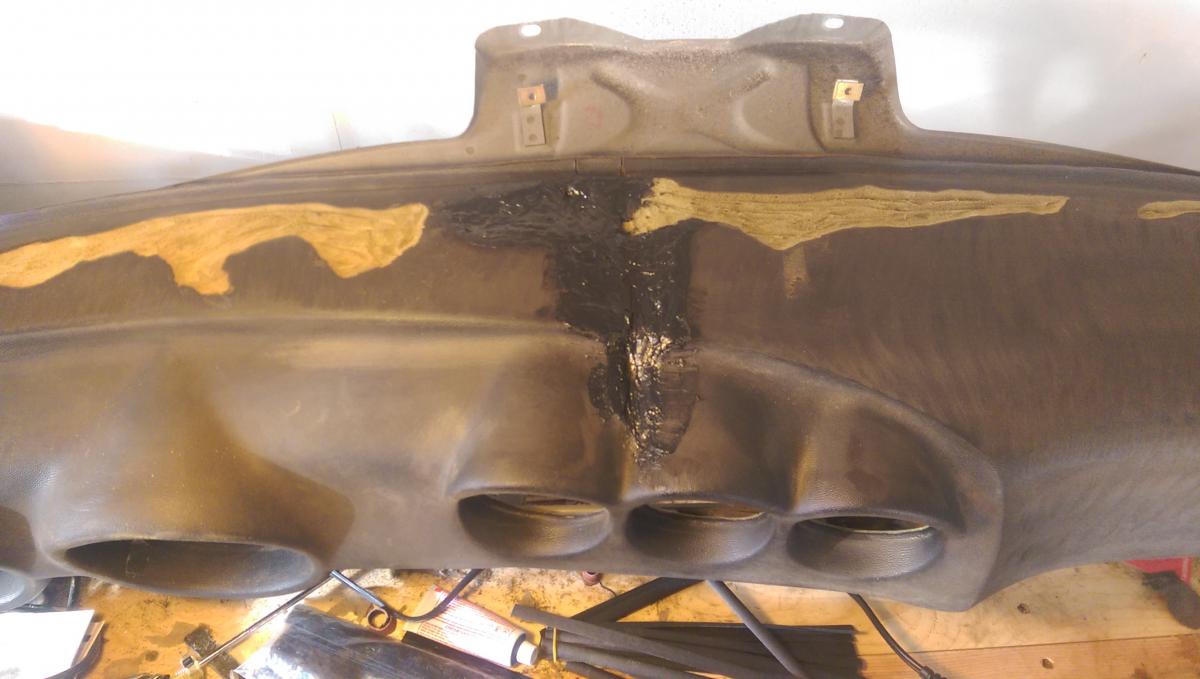
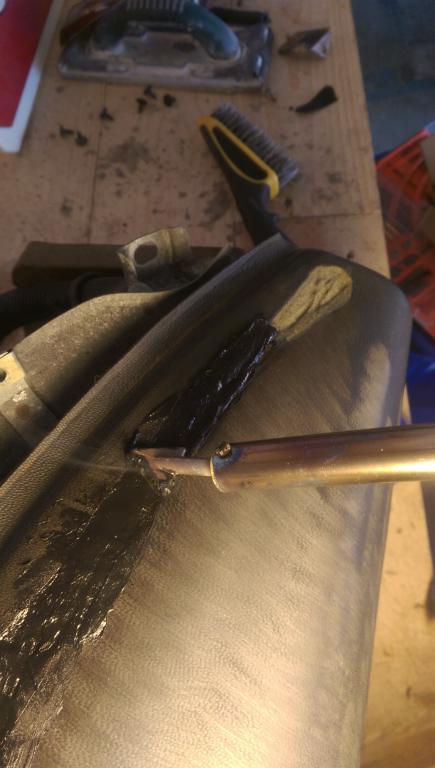
I first started removing the bad foam and vinyl, then filled the exposed foam with plastic welding rod. After the welding rod was sanded, I applied some filler to smooth everything out. I followed this turtorial: https://youtu.be/_x8qtvG-Y8U. You can find a plastic welding iron at Harbor Freight for $17.
I used Polyvance plastic welding rod, filler prep, padded dash filler, and flexible primer surfacer. I didn't realize I bought primer surfacer, and not primer...Whatever, we'll see how it holds up. I left the dash bolted to the frame while I did all of this so it stayed true. I was worried that it might flex and lose it's shape if I took it off. Also, if you use a DA sander, be careful. Mine jumped quite a few times and caused some damage to more areas.
3 coats of Duplicolor Truck Bed Armor with a couple scuff in between.
PRO-TIP: Make sure the can is warm before you spray this stuff. I let the cans sit in hot water for like 10 minutes right before I started spraying, it really helps with the splatter.
The seats are getting re-foamed as we speak, new carpet is sitting in my garage, and I bit the bullet and ordered a set of Speedhut gauges.
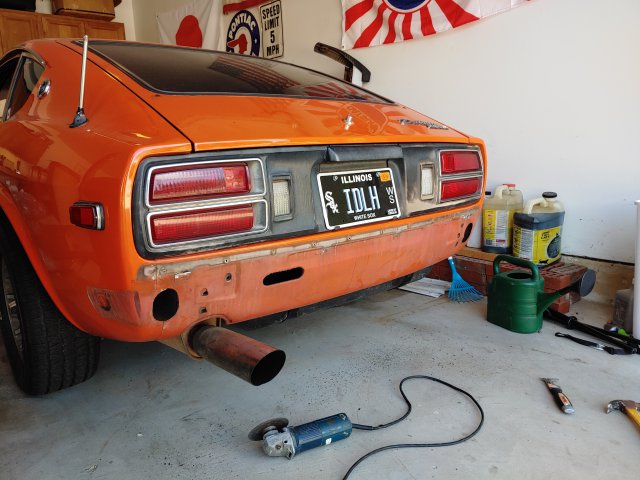
I've decided I'm going to hold off on re-sealing the floor pans because I'm probably going to replace them and the frame rails. After further investigation, these floor boards are just patched. On the driver's side, it looks like they just put a piece of sheet metal on top of the existing floor pans. Furthermore, that big ass frame rail is only on the passenger side, the driver side frame rail appears to be original and slathered with under coating. Yay! Everything feels solid, and I really just want to drive it this summer.
-
Yes - apparently they can do up to three lights to your specification - I'm having them do a red brake warning light and an amber check engine light. You can also specify whether it is activated by applying +12V or ground.
The turn signal/high beam lights for the speedo are obvious on the ordering page, but no so much for these "new" lights. I just RMA'ed my tach to have the lights added - happily they are willing and able to retrofit (for a fee), but it would have been nice if I had known beforehand.
Very cool. Did you order the additional LEDs to be activated by ground or 12v? Does it matter if your car is LS Swapped?
-
Damn! that's super nice. I wasn't planning on doing gauges yet, but since I have my dash out for restoration I might as well just bite the bullet.Thanks everyone! Now that Skillard has a 4.5 inch speedhut bracket for speed/tach, i'll probably get that for the mains.
In case you didn't catch it yet, the skillard speedhut bracket:
I don't mean to thread jack, but for you guys that have installed the smaller gauges, how did you remove the old glass covers and gauge dividers? just cut them out?
EDIT: I ended up ordering the small gauge pods made by MillHouse Houston. They're listed on Skillard's website as well as a link to their facebook page. I'll be sure to take pictures of the install.
-
I've been looking at this stupid ass dash cover for a couple days now, and although it is in great condition, it makes removing the gauges a pain in the ass, I don't think there is a way to remove the glove box or speedo and tach without damaging it. While I have the whole dash sitting on my work bench I might do my future self a favor and tear it off and repair the original dash. When my future self starts the LS swap, new gauges will be installed too.
Looks like a lot of people have good luck repairing their damaged dashboards, that is, if I don't **** it up really bad while removing the cover.
Hopefully I'll get the interior put back together in the next few weekends.
-
If you re-cut your rear flares, put jackstands under the front to level the car. I had mine jacked up just in back like your photo, and my flares are rotated toward the rear a little and it looks "off" now that it is on level ground. All because the car was sitting at a nose-down attitude when I drilled for the mounting bolts. Longer coilover springs are available on Speedway.com for $55 each. Just figure out how much you need to raise the car and order longer springs.
What's the best way to check if the car is level, putting a level on the door sill or frame rail?
-
That is where the flares came from. They fit the best BY FAR. I had another set (can't recall who) and they fit like crap. If you are looking for the right choice, go with RHDJapan.
Gotcha. I checked their website and it looks like they carry a few different types/names. I wasn't sure which set you bought.
-
I would be a little more suspicious of the area below the battery box, since it was rusted out. I'd scrape that rail / tension box area to bare metal to be sure it's not rusted through...
Absolutely. I'll be sure to check that area out.


9 second ls swap 260z build
in S30 Series - 240z, 260z, 280z
Posted
Got any more pictures of the adjustments you had to make for the headers to clear the steering shaft? Would sliding the engine forward more help with the clearance?