

cpexcel
-
Posts
18 -
Joined
-
Last visited
Content Type
Profiles
Forums
Blogs
Events
Gallery
Downloads
Store
Posts posted by cpexcel
-
-
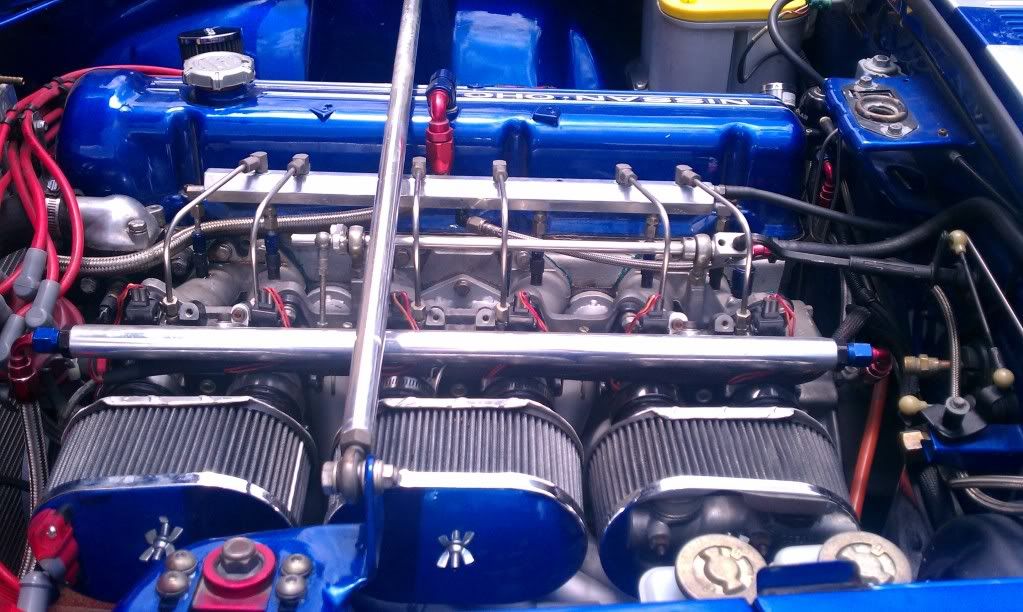
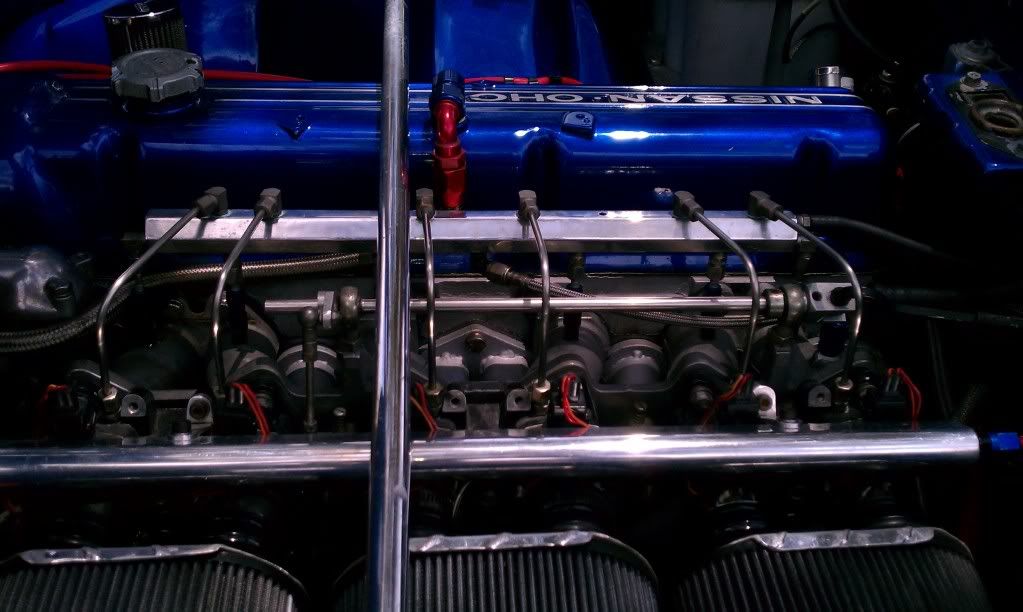
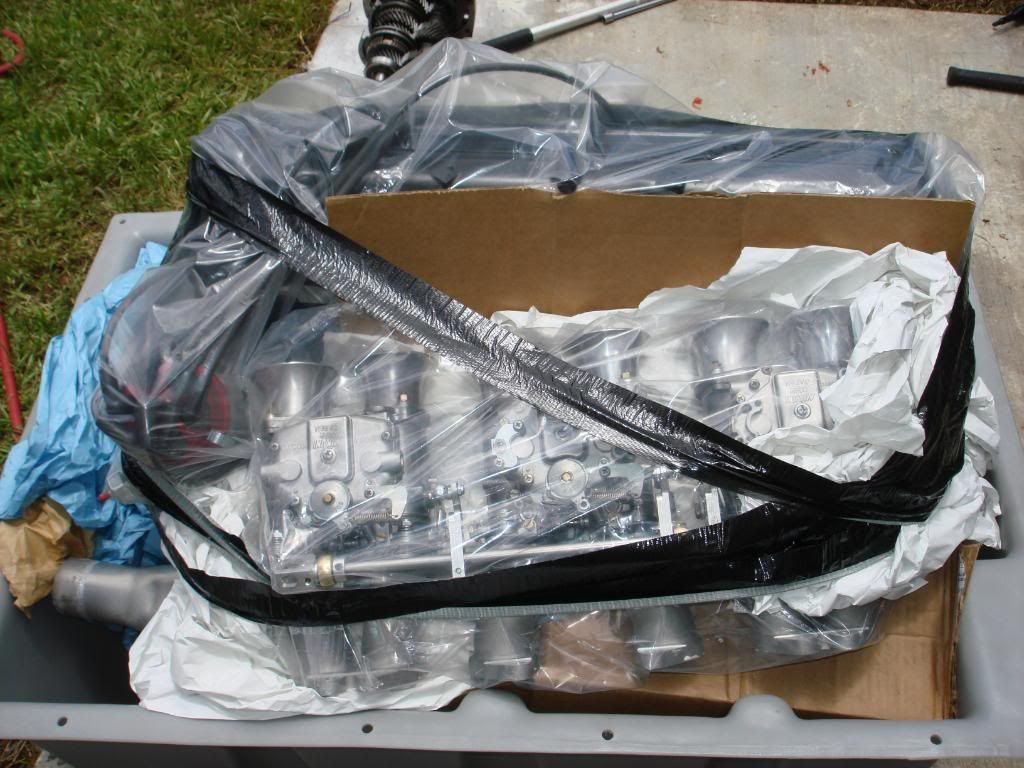
I hope those are ITB's I spy, Do you have a driving/ rev video? I would love to see it not a lot of videos of ITB L28's. How does the car drive as well?
JMortensen,
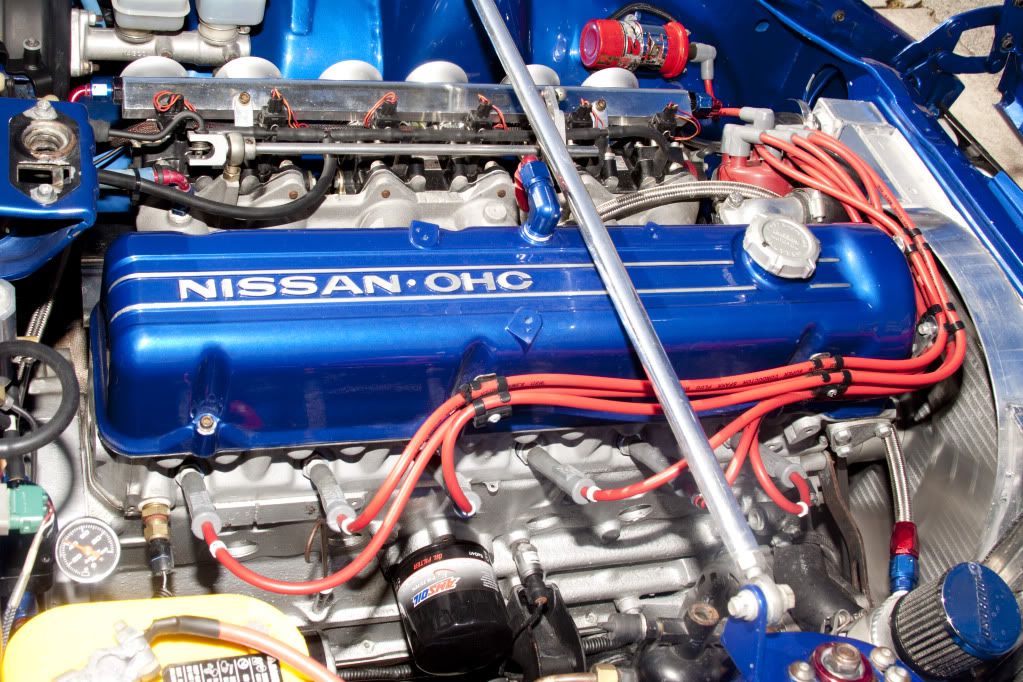
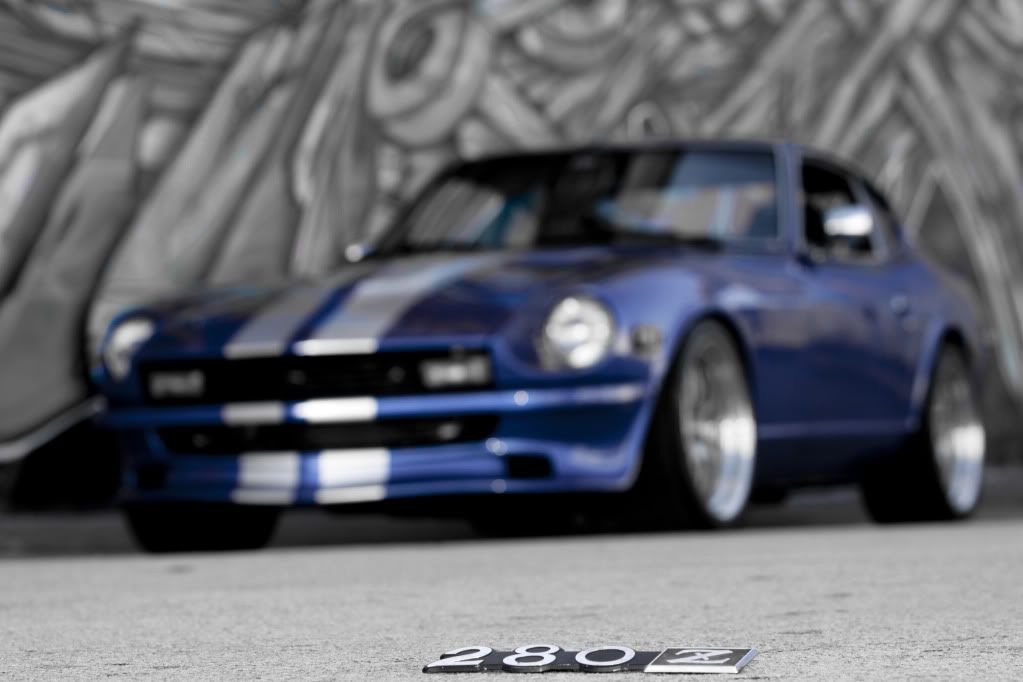
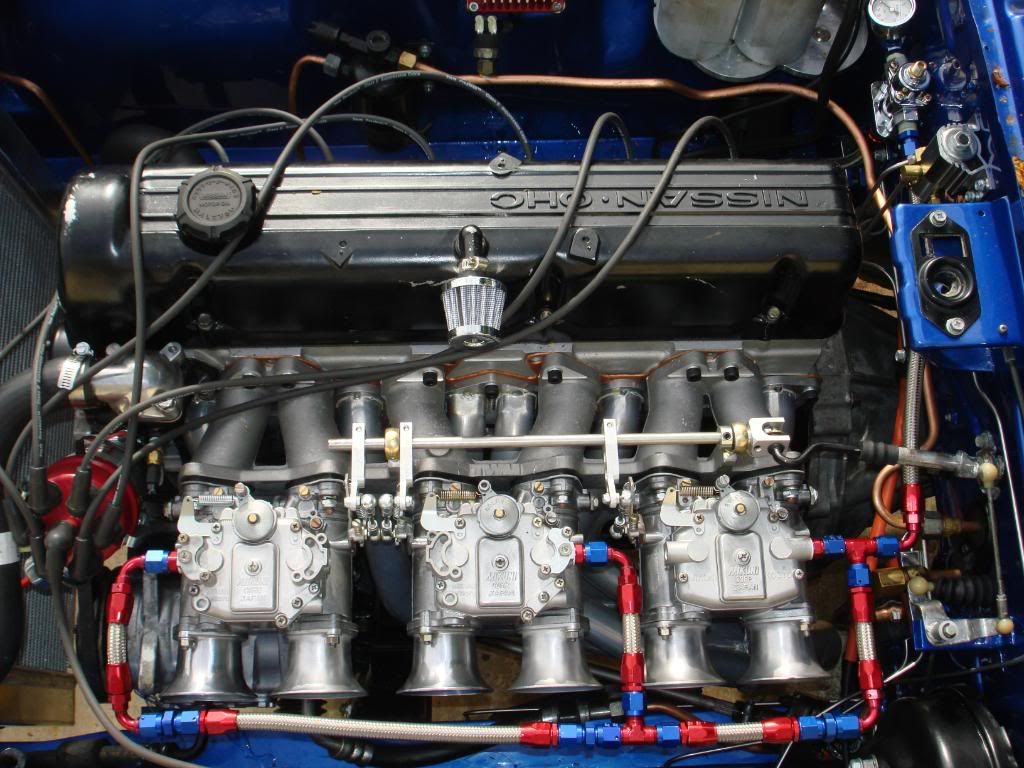
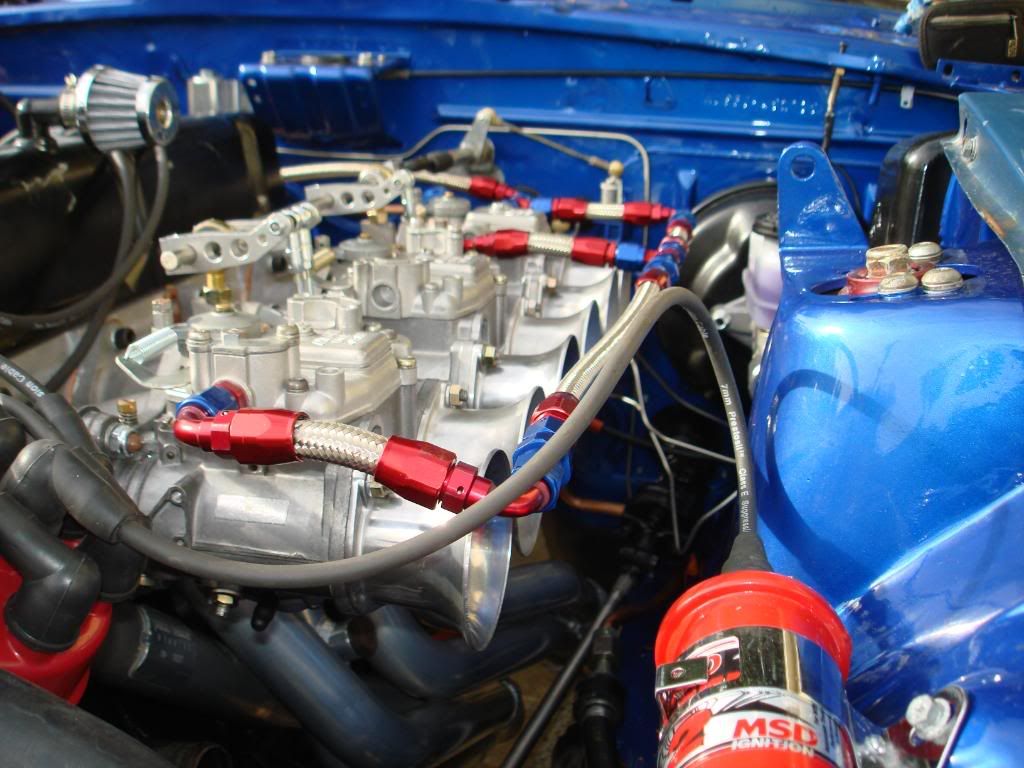
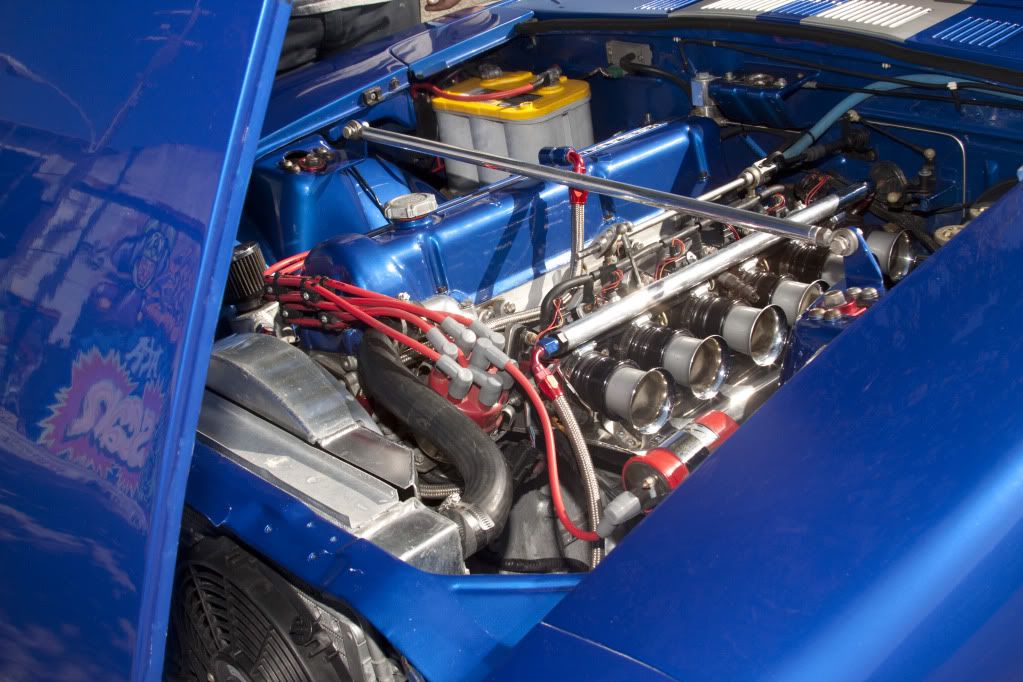
The motor is a 3.2 stroker built by Rebello. I first had it running with Mikunis, but I ran out of patience with the tuning process, actually the experience was a nightmare. I switched over to ITB's, installed an AEM stand alone and gave it a 100 shot of Nos....Much happier NOW. The car sounds very much like tripples, backfire and all...It's a daily driver if you wanted to. No videos yet, sorry.
You can see my build at http://forums.hybridz.org/index.php/topic/99820-carloss-280z/
There are pics before NOS and after with filters.
-
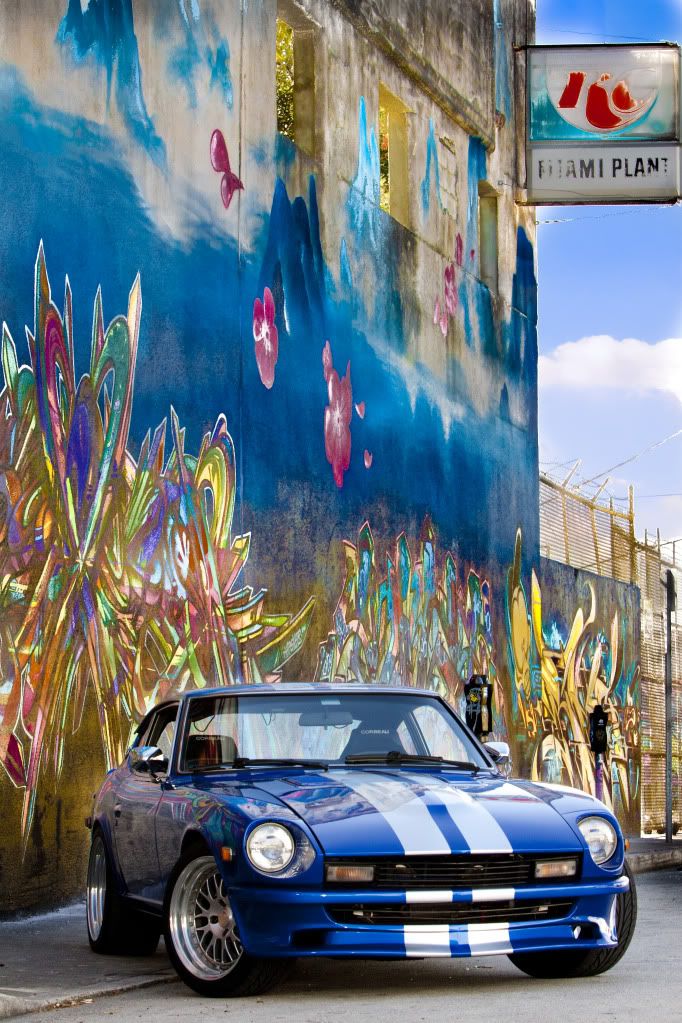
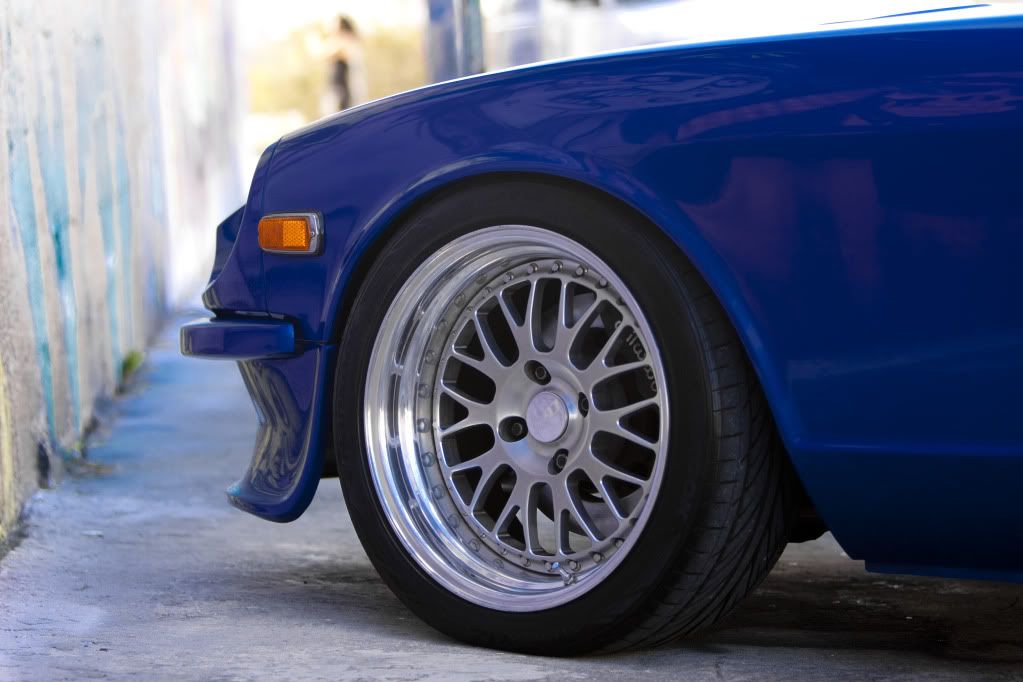
cpexcel- What wheels are those? BTW, Sexy Z

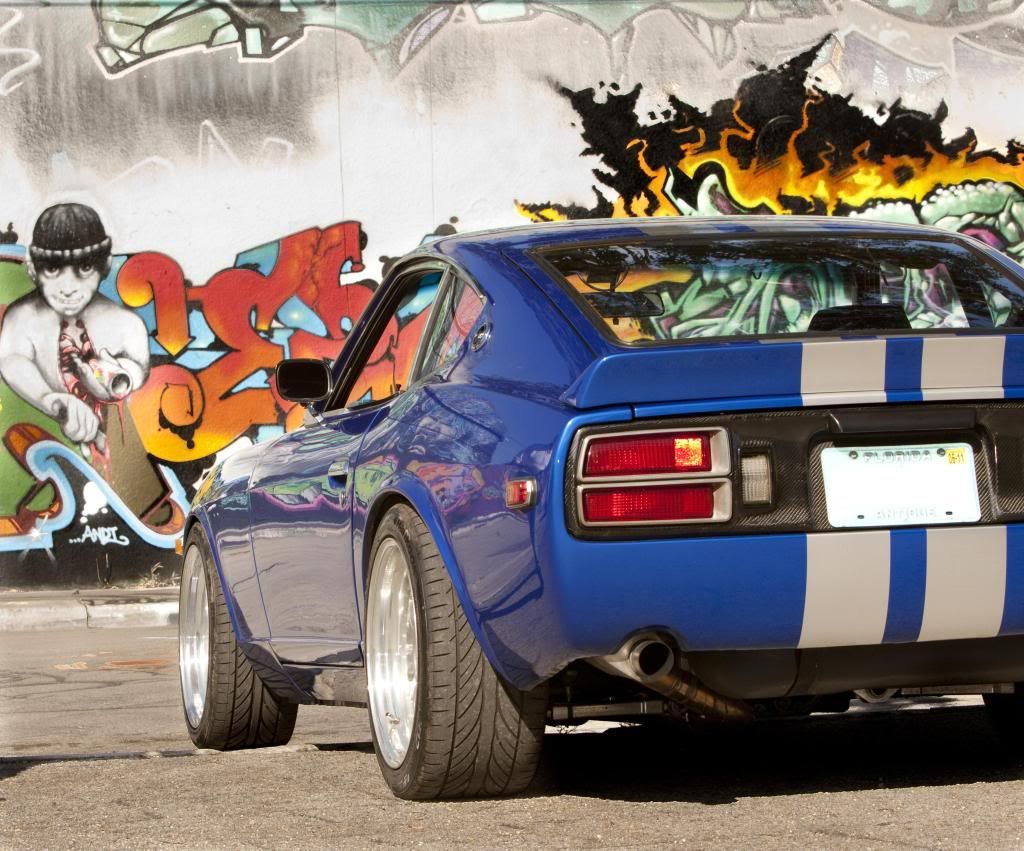
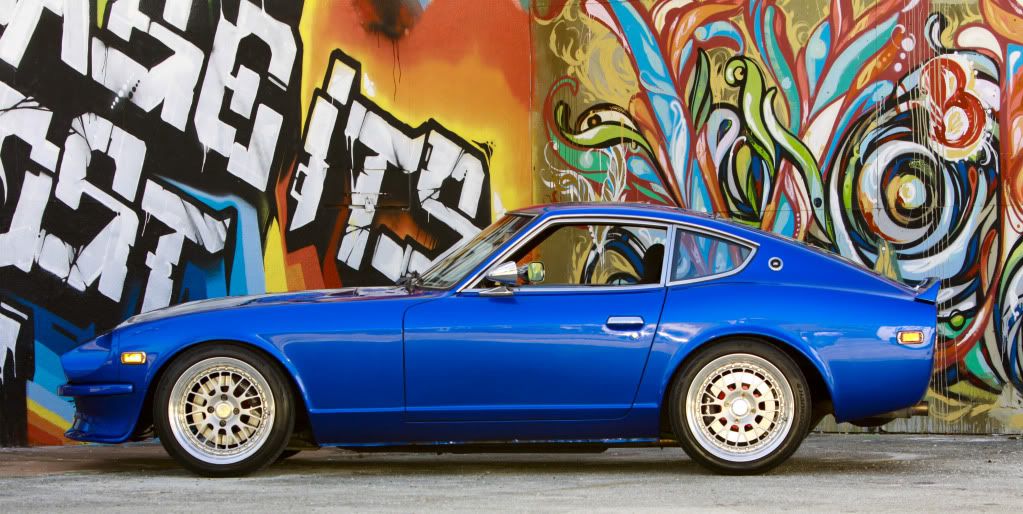
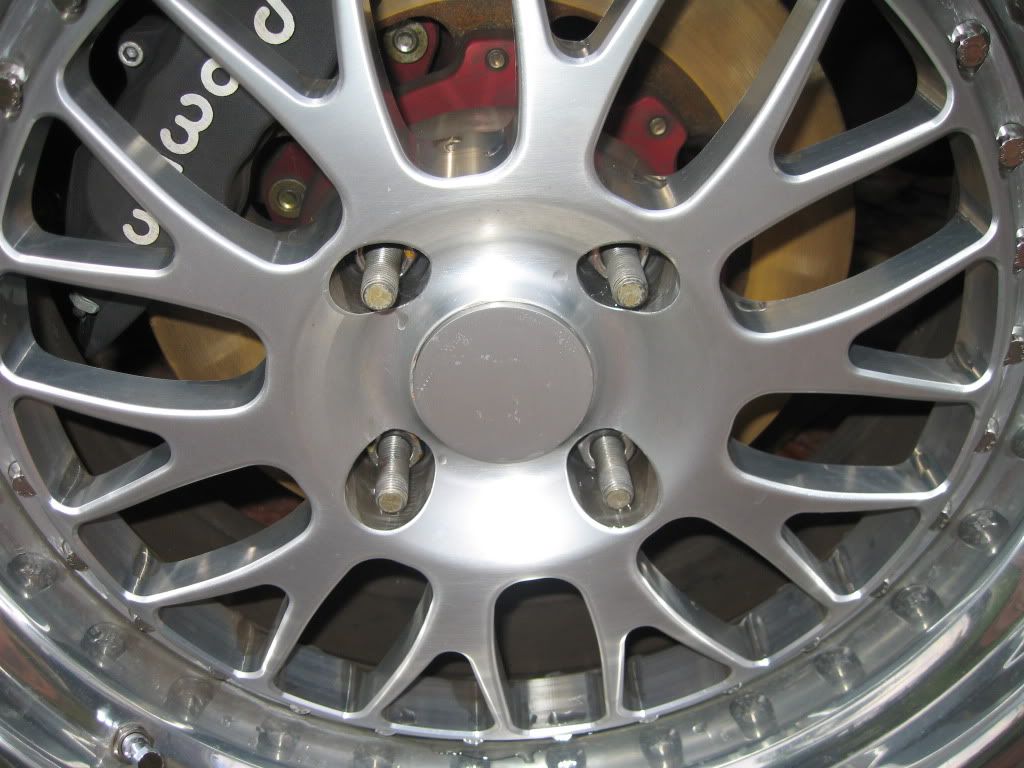
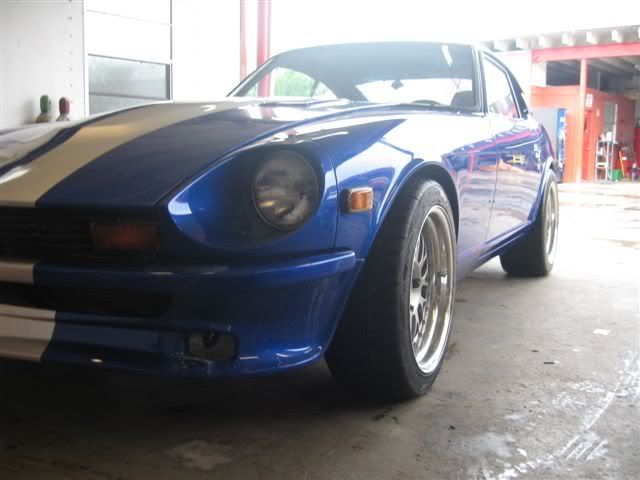
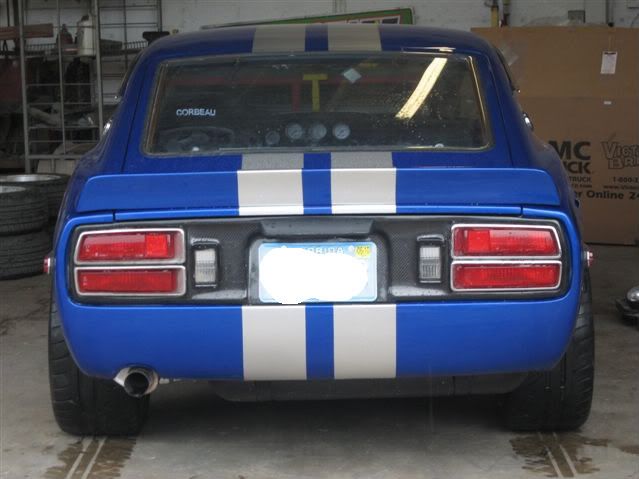
The wheels are CCW's, 9.5 with 255/40/17's out back and 8.5 with 225/45/17's upfront.
-
looks awesome cpexcel!
thanks richracing, nice ride by the way...Like your drop a lot.
-
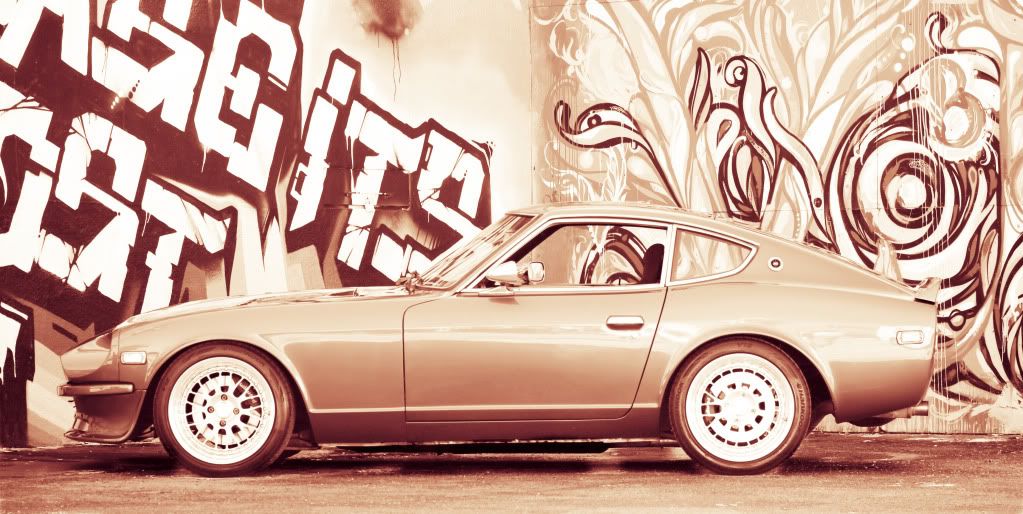
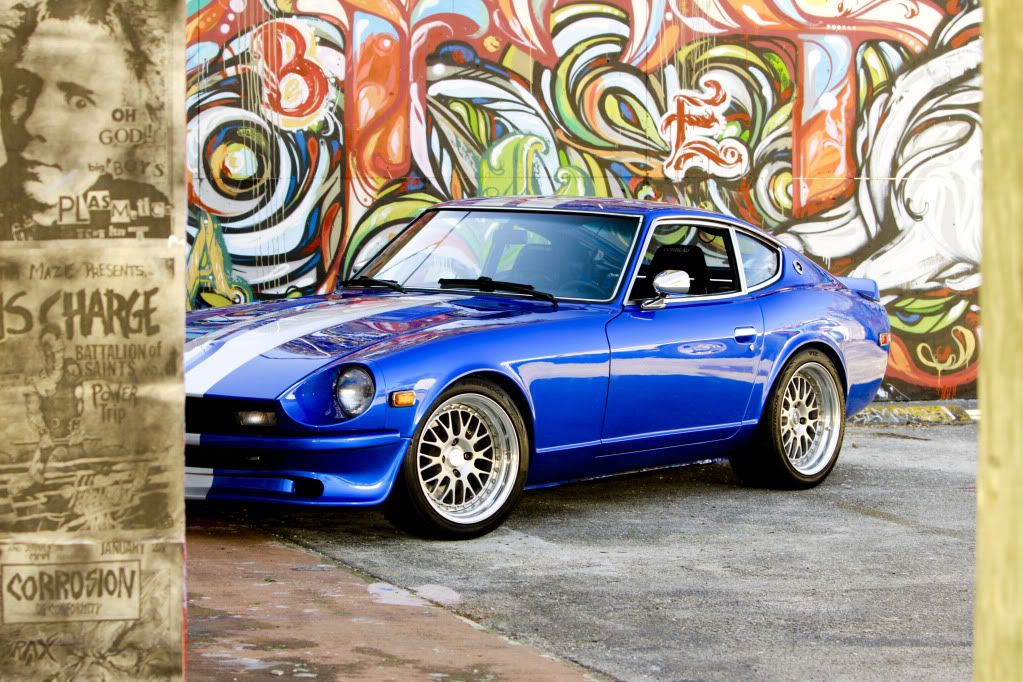
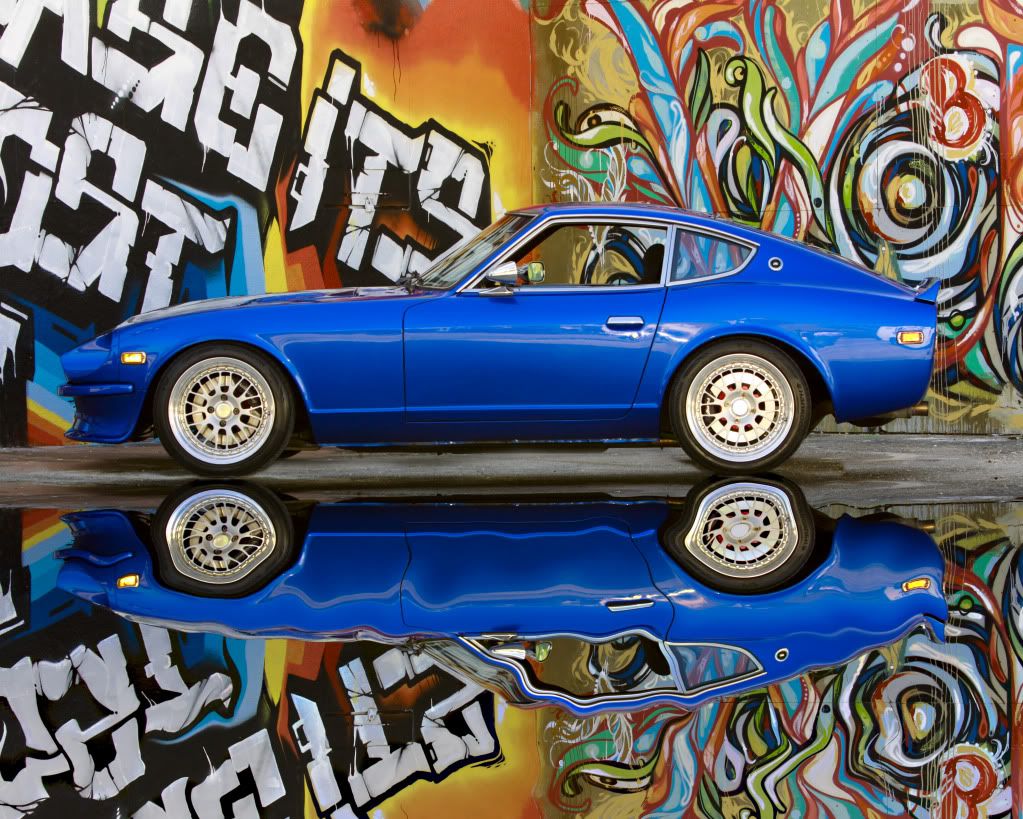
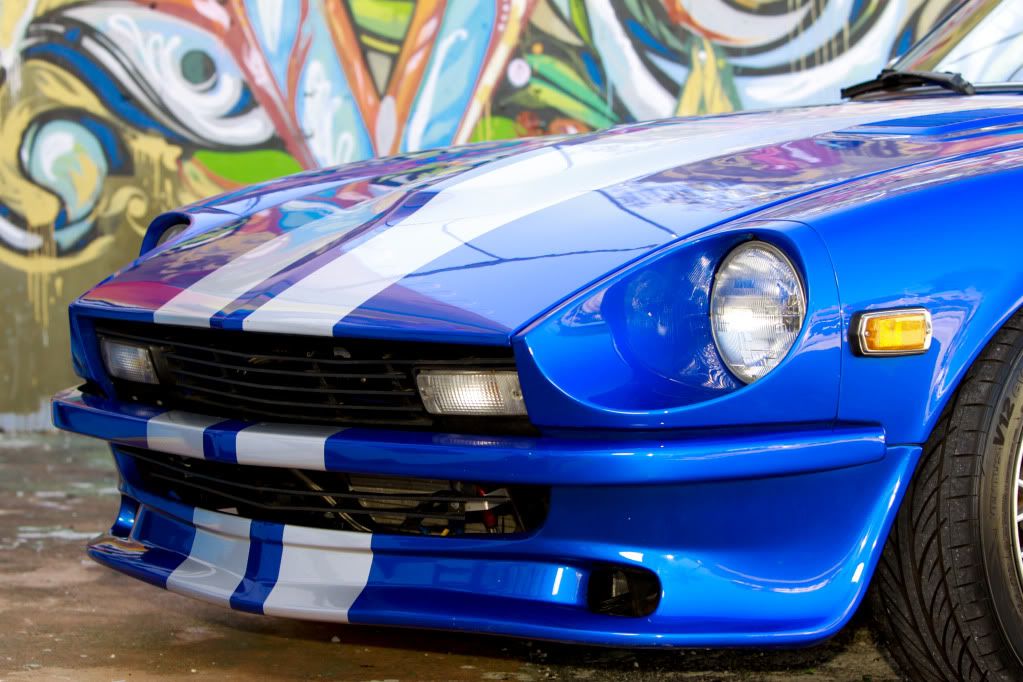
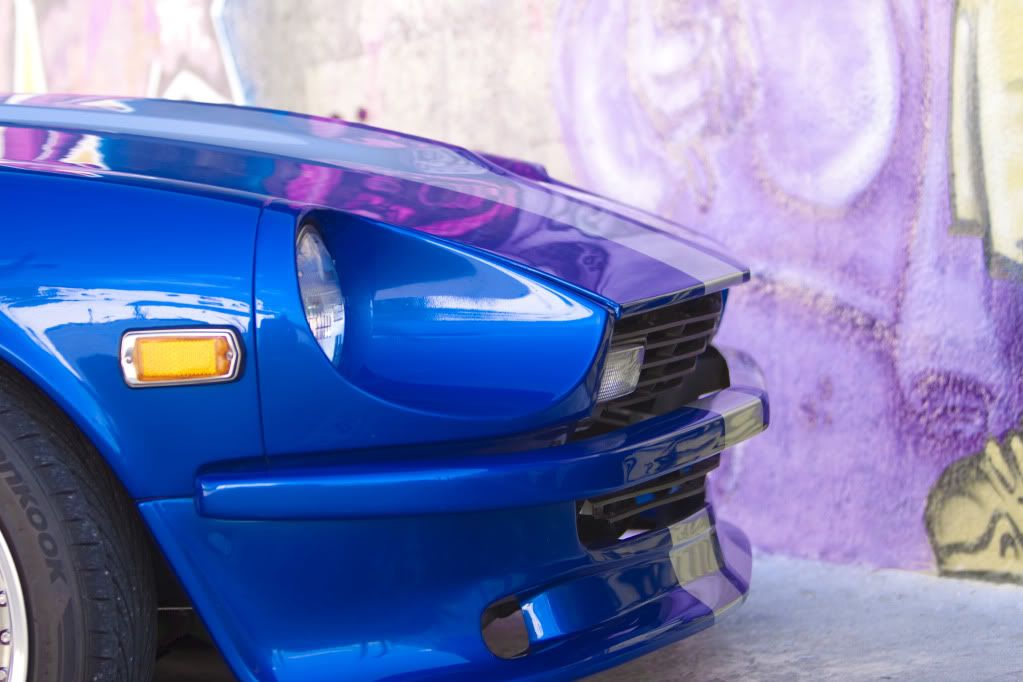
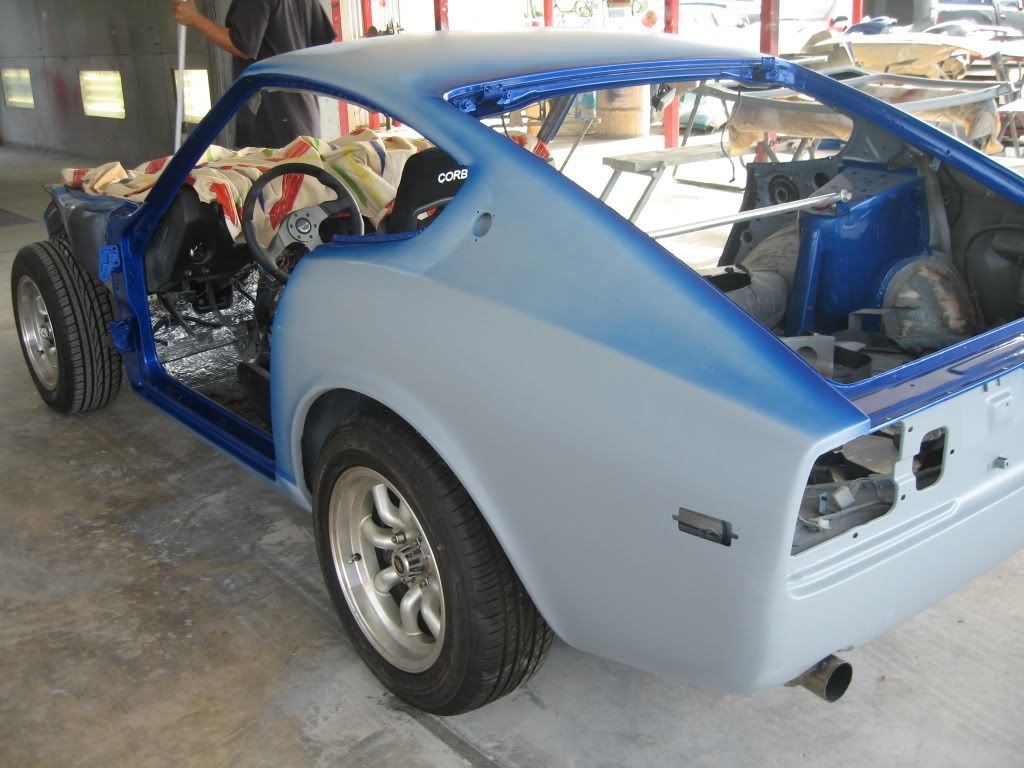
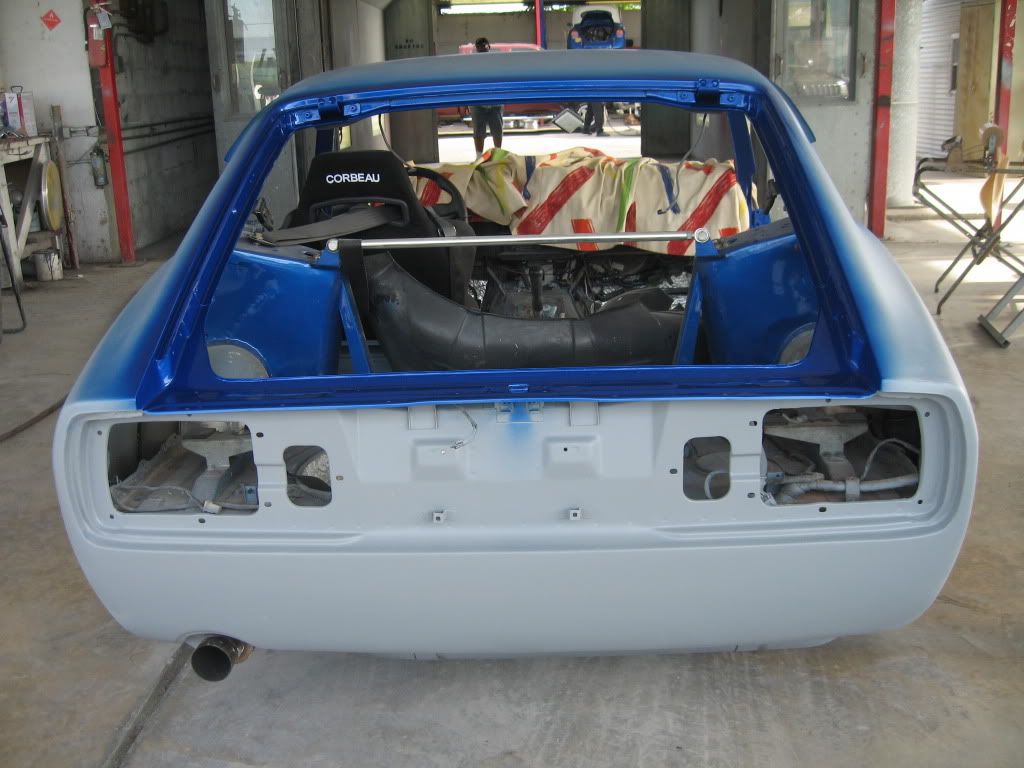
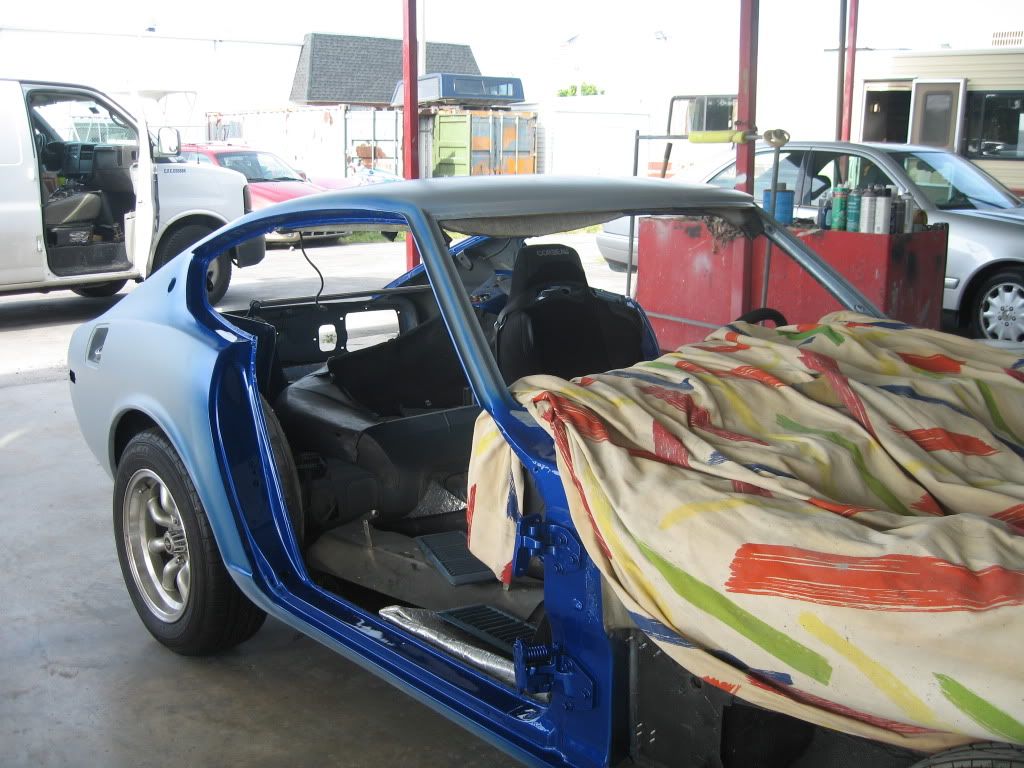
Hey guys, wanted to play as well...We just finished this recently.
-
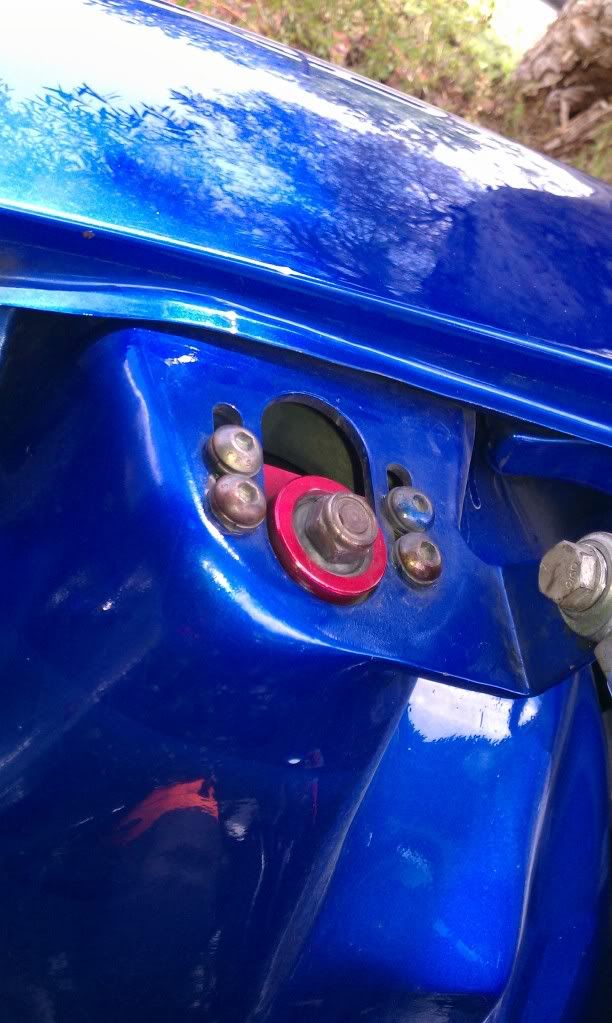
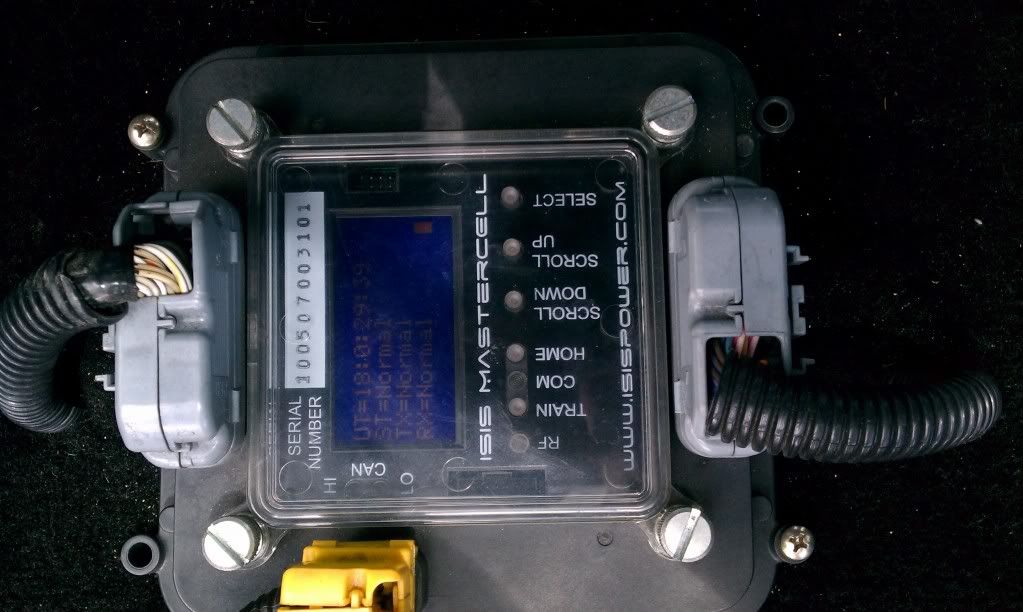
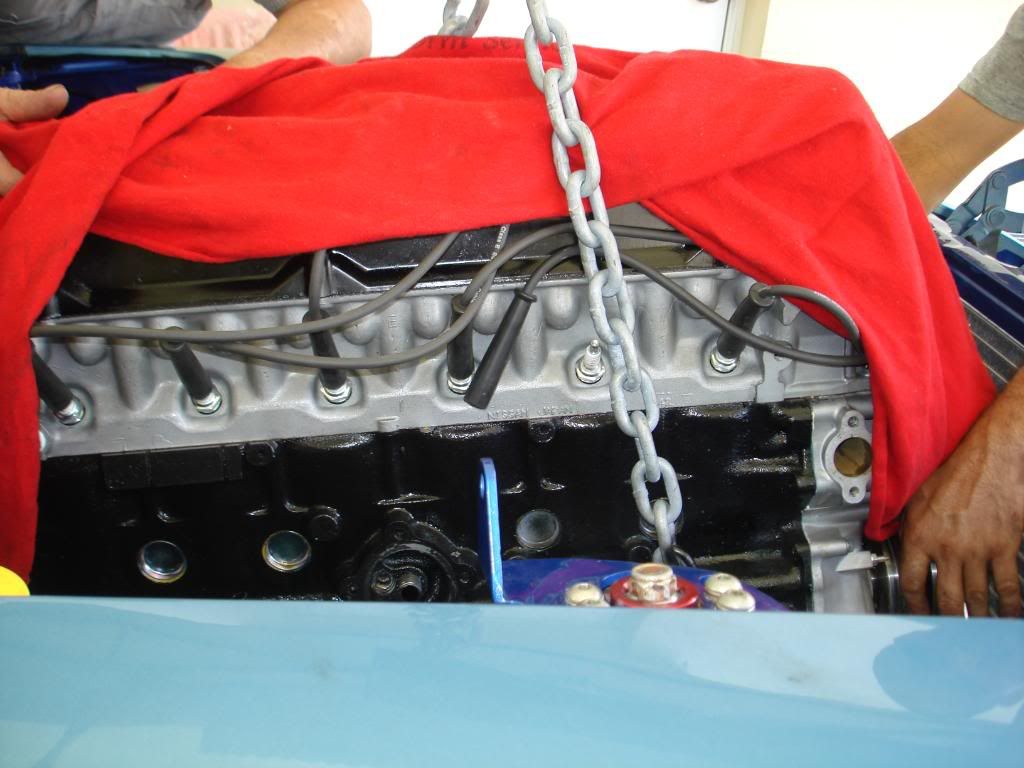
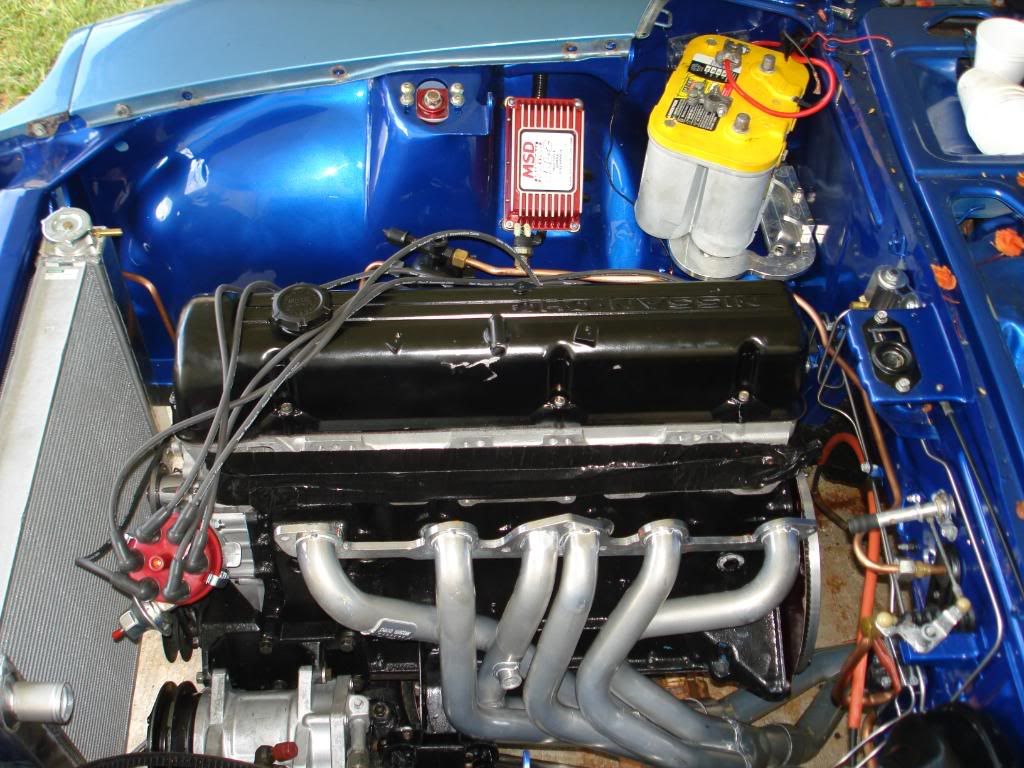
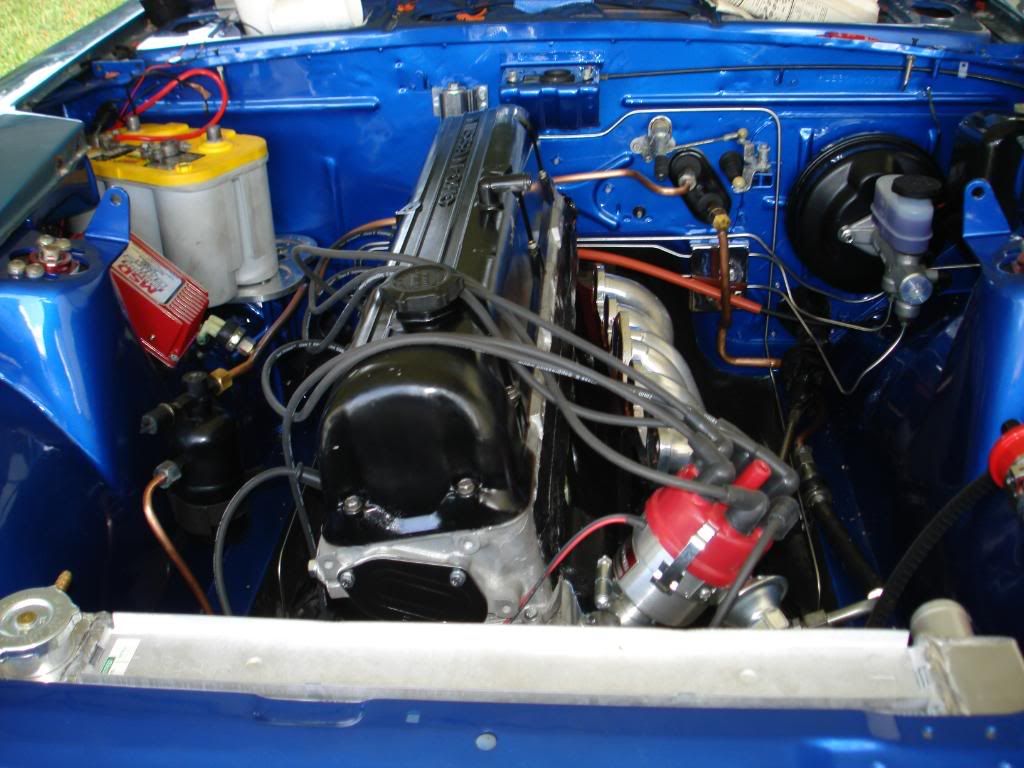
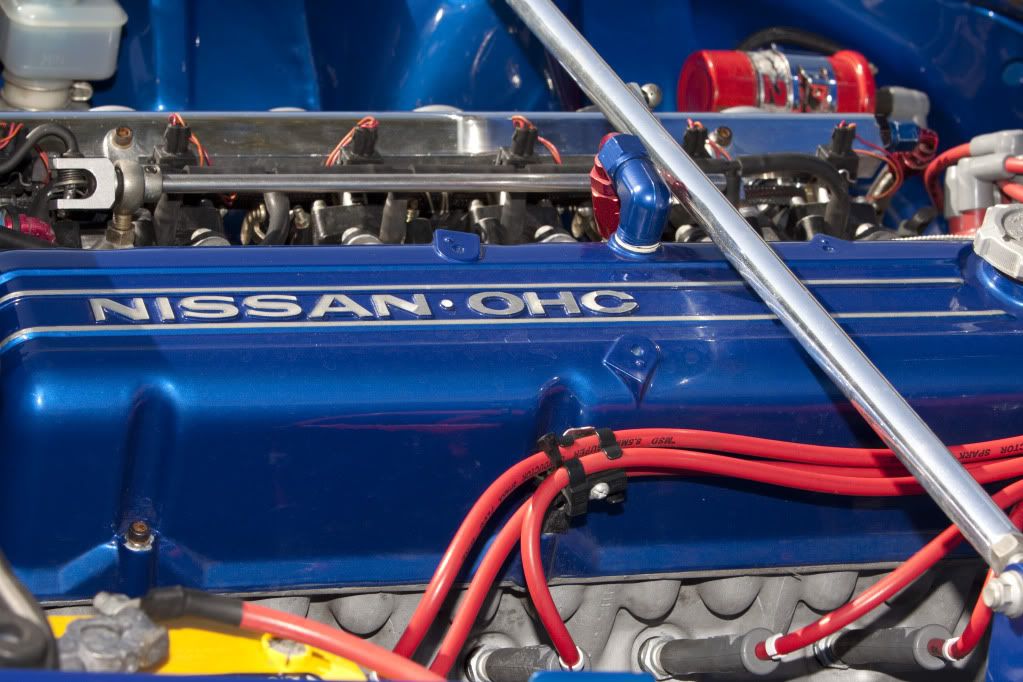
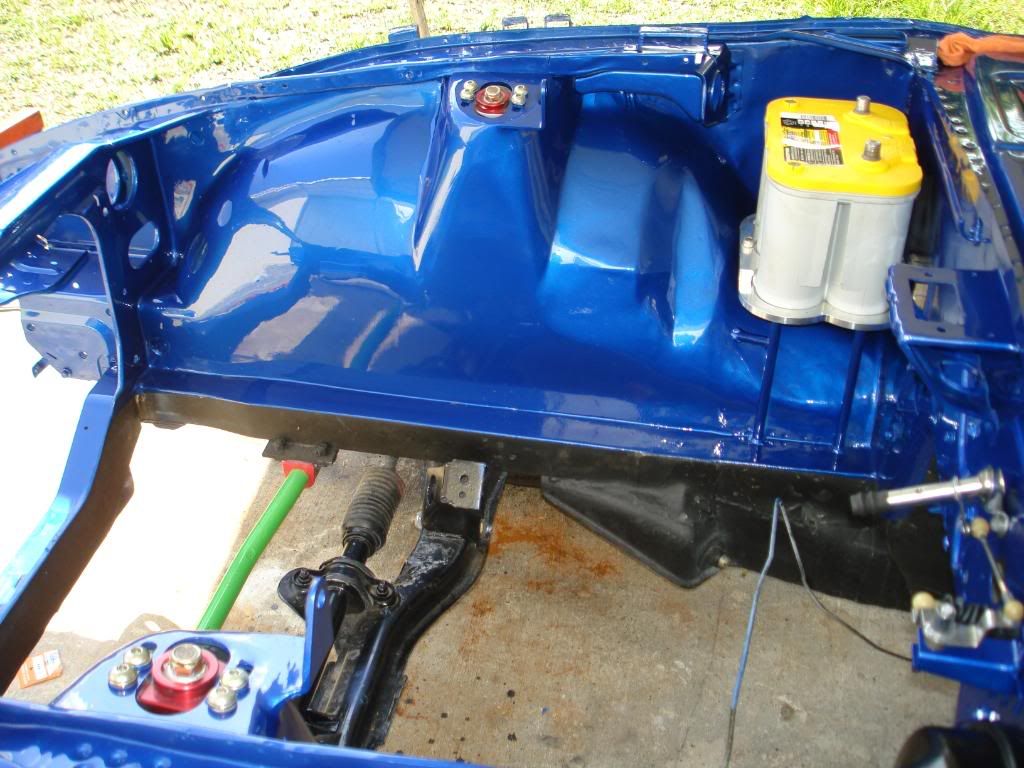
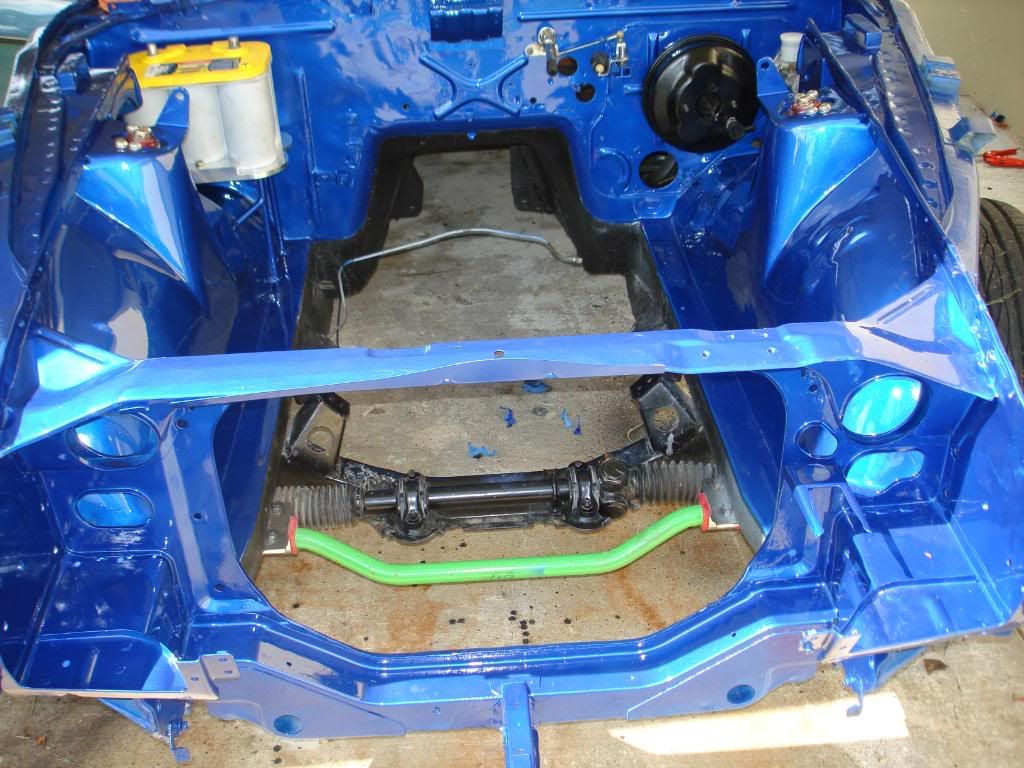
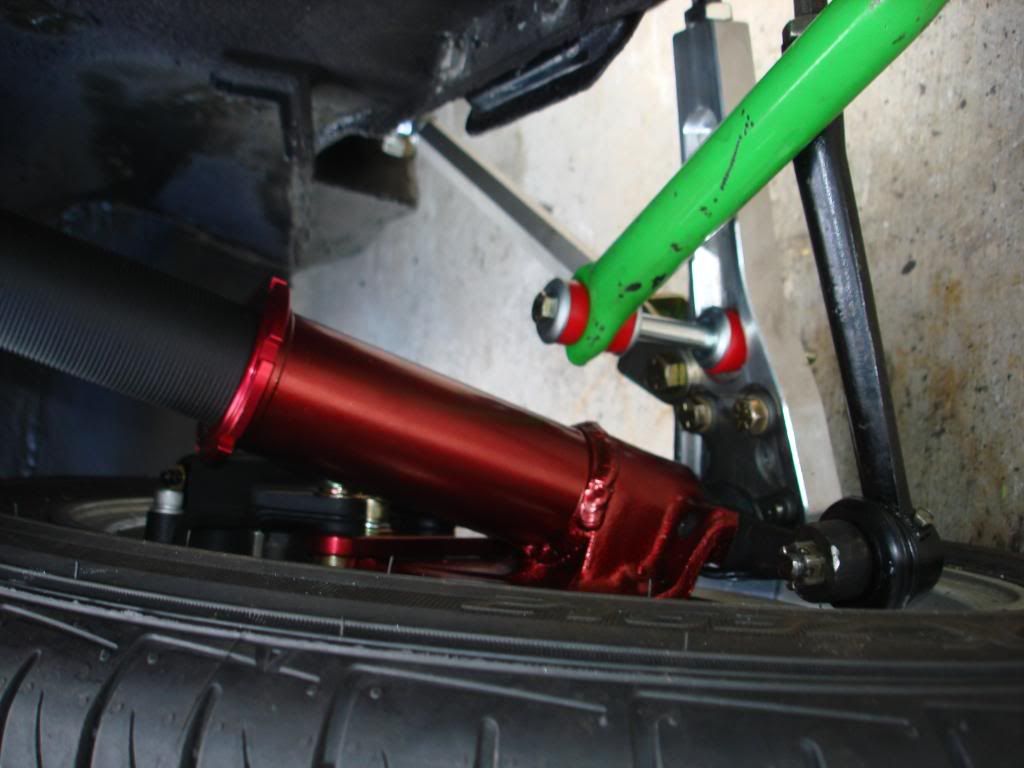
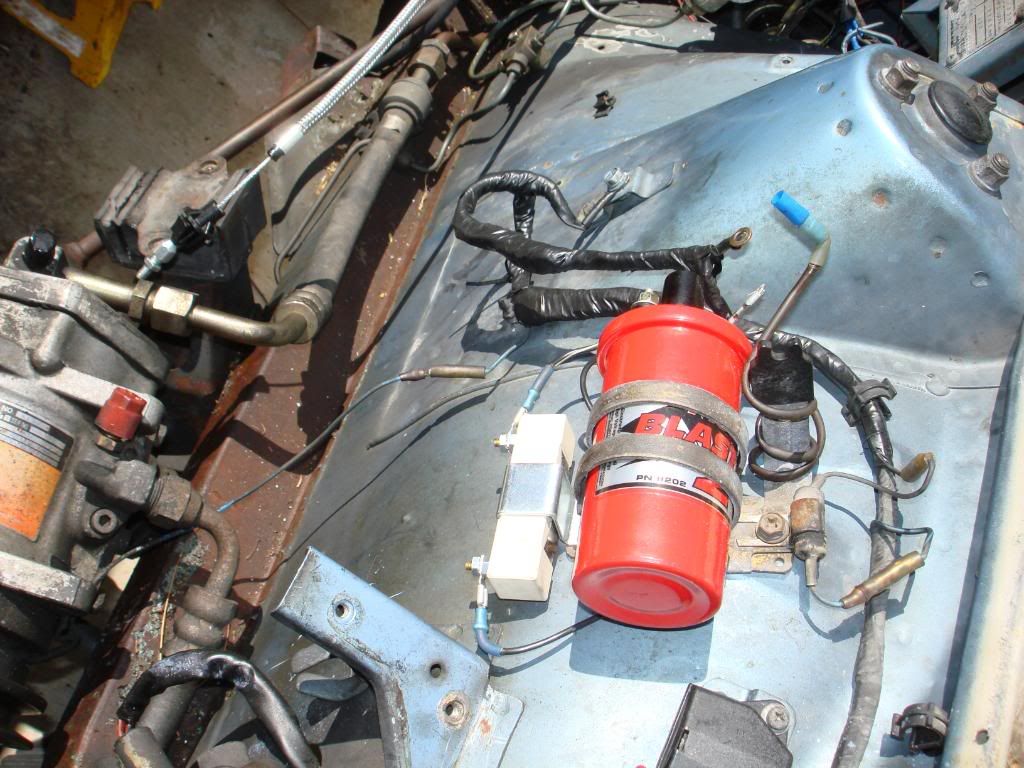
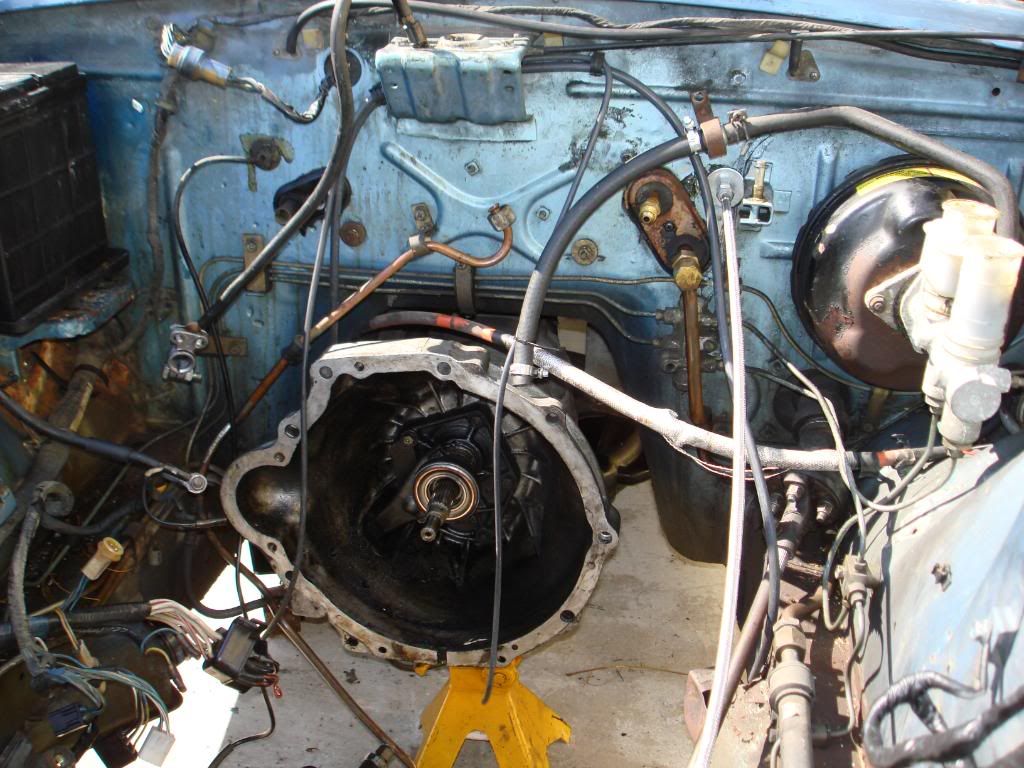
Snap shot of Nos and vac rail, dual tap bar. Fuel rail to itbs...Isis Power System and Strut Towers.
-
The car looks absolutely fantastic so far! I do think it might pull a little with the mismatched front tires.
And yes, I am kidding about the tires!
Thanks for your comments, very impressive collection of toys you have there yourself...
-
Carlos.
Nothing like seeing it all come together as a builder restorer, and inspirational to others who get the chance to see it in a build thread like this.
Stunning car and workmanship, concratulations.
Cheers
John
John,
I appreciate your comments...thanks
Carlos
-
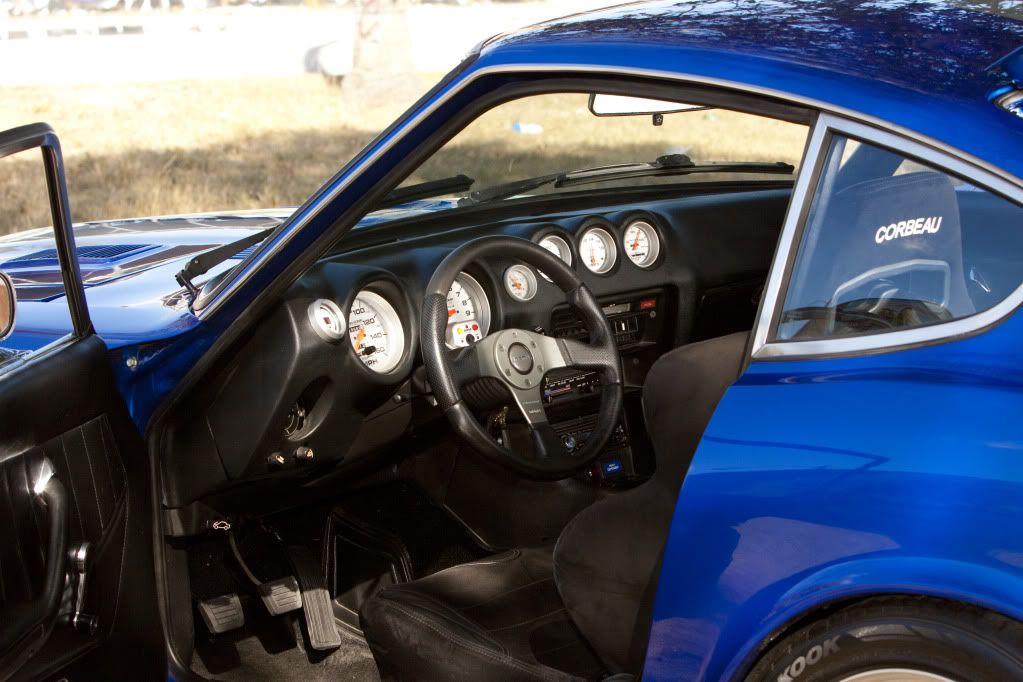
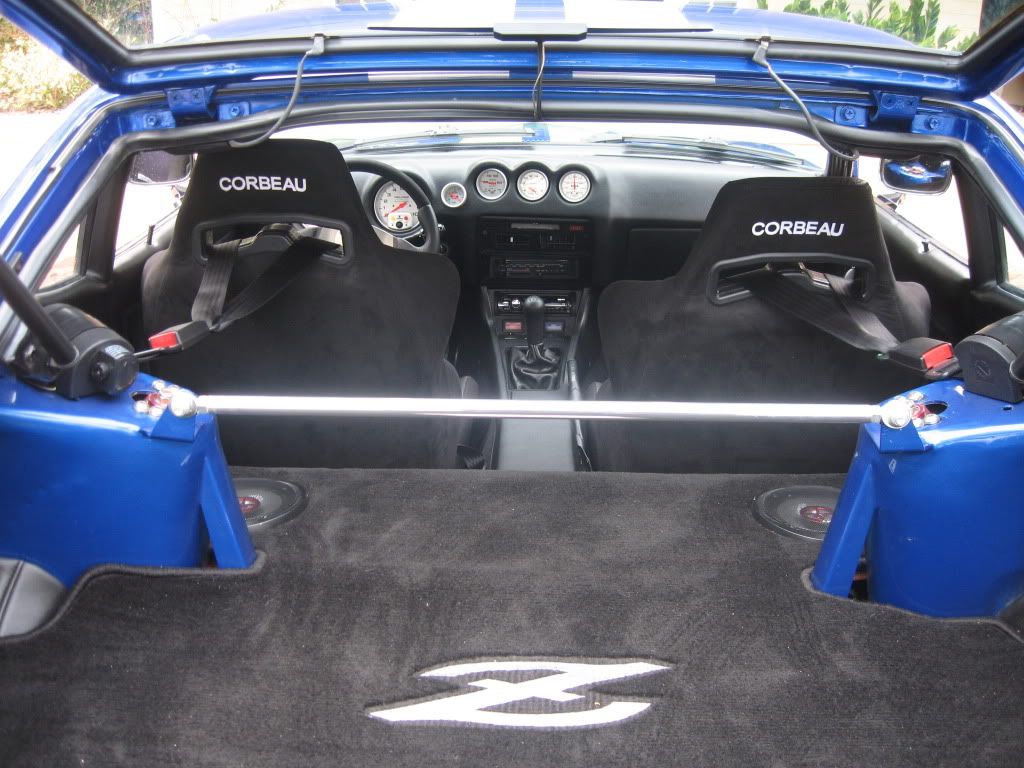
I am LOVING the interior. Can you take some more detailed pictures of your hatch area? I am curious to see how you mounted the "strut" bar, it looks welded.
Also, how is your sound system installed? Any boxes underneath?
The strut bars are welded to the towers upfront and outback as well...To the same piece that AZ mounts their coil-overs. The same picture above that reflects this item also shows a modest two speaker set up. I have a local guy, (Manny's Sound System) who is part of the south Florida Z club and a huge Z enthusiast himself. Eventually the car will get the sound system upgrade thru him.
-
Wow. That's some very impressive work and dedication! Welcome.
Thank You
-
How long did this take start to finish? and what about pricing on things i.e waht was your budget and what did it turn out to actually be?
To keep a long story short...I Had help from my cousins who both happen to work for me. These guys both have project cars as well. One had an integra at 500 HP or so and the other a mustang with internals and spraying. We decided to do the research and give this project a go. Anytime we were slow we jumped on the car. It started in April of 09 and basically wrapped it up by April of 2010(so we thought)...We added the fuel injection since then. Tuning issues with the Mikunis to blame...Also blew a head gasket and decided to go copper. The entire build, paint and all was mid 30's...Read a lot before you get going on a project like this. There is plenty of right and wrong decisions to live with and also consequences.
-
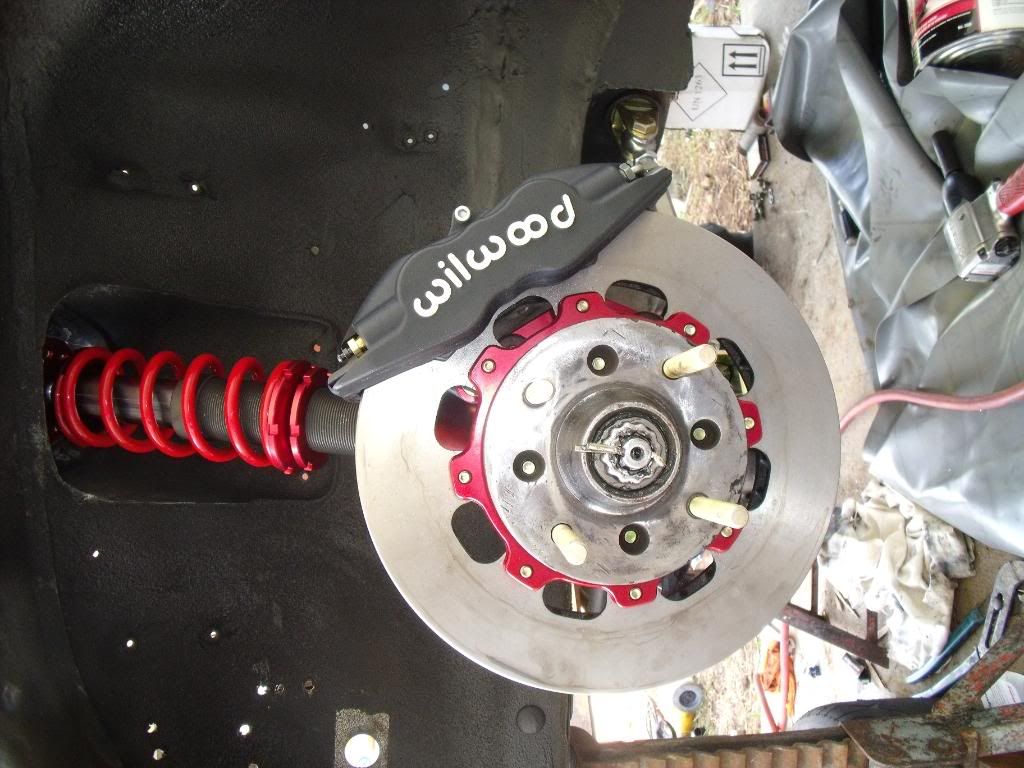
Amazing job. Wheel and tire specs, please?
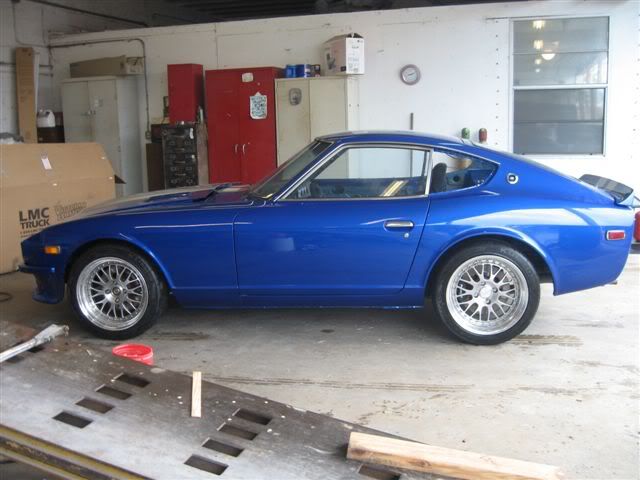
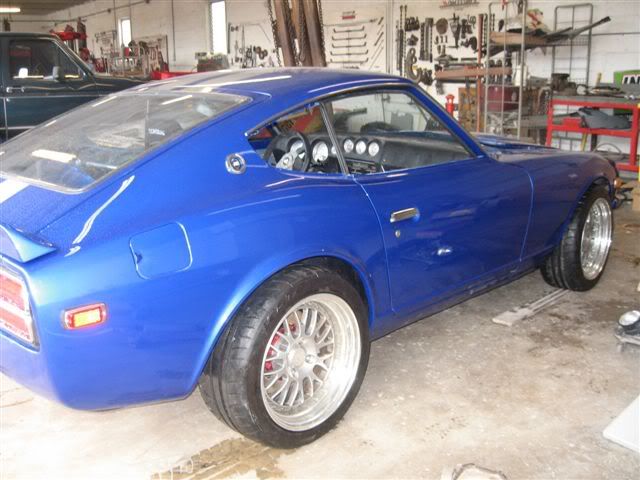
Wheels are from CCW model LM20, 17" Rim. I'm running 255-40-17 with 9.5 rims outback and 225-45-17 on front with an 8.5 rim. they are both 25" tall.
-
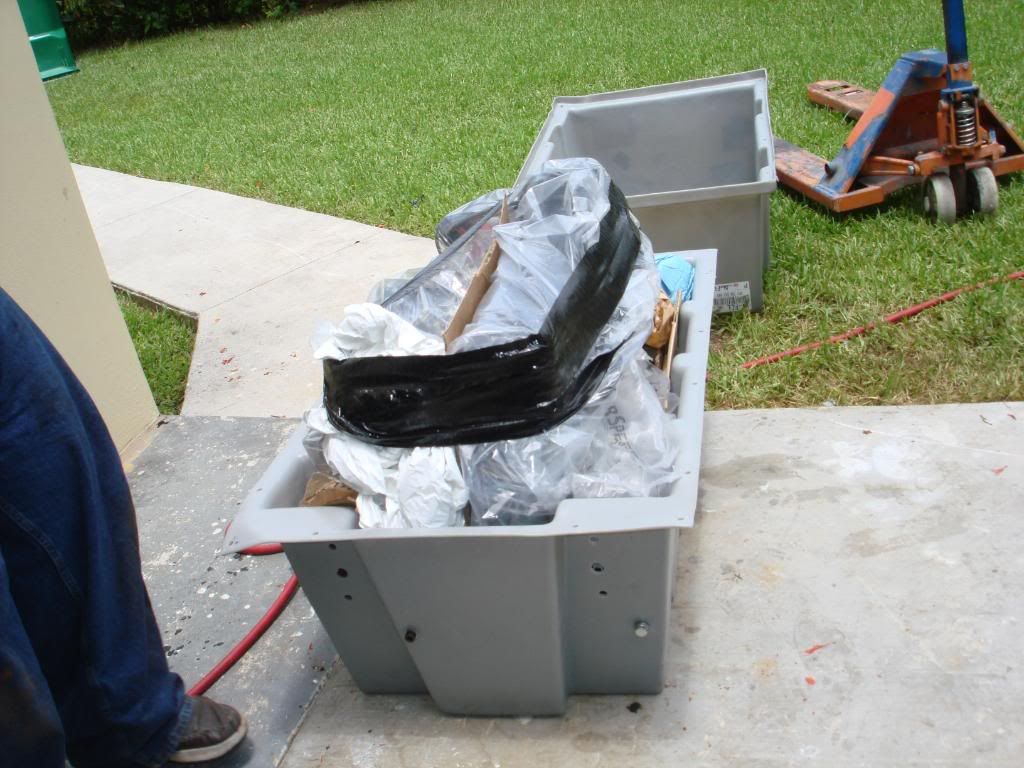
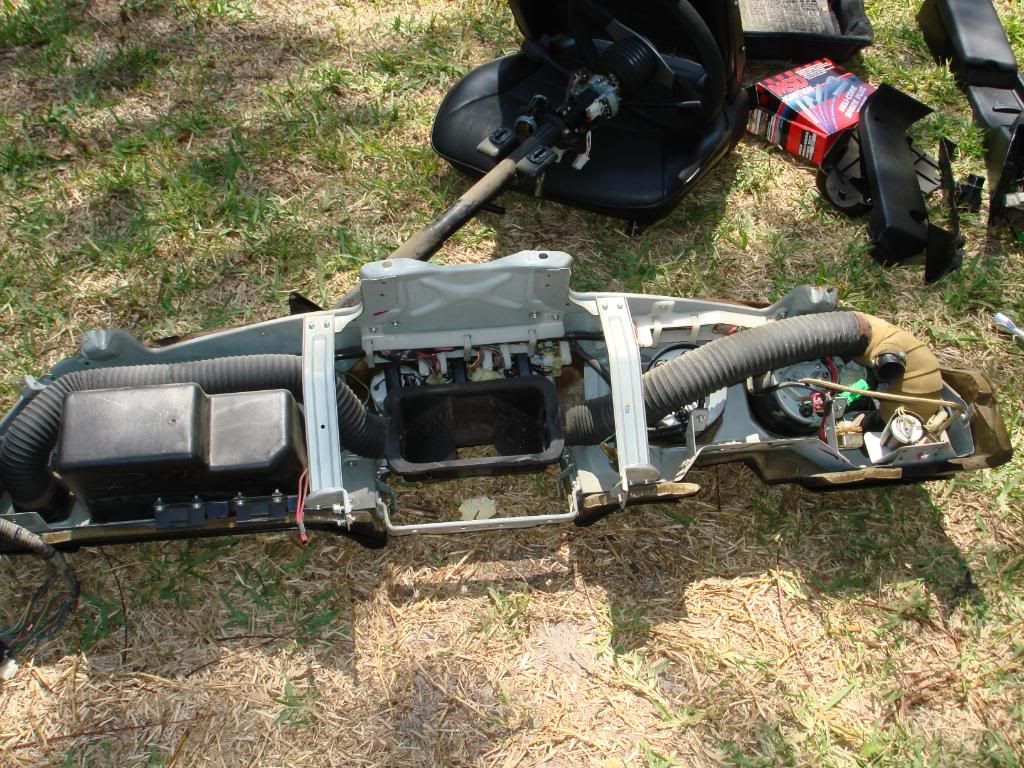
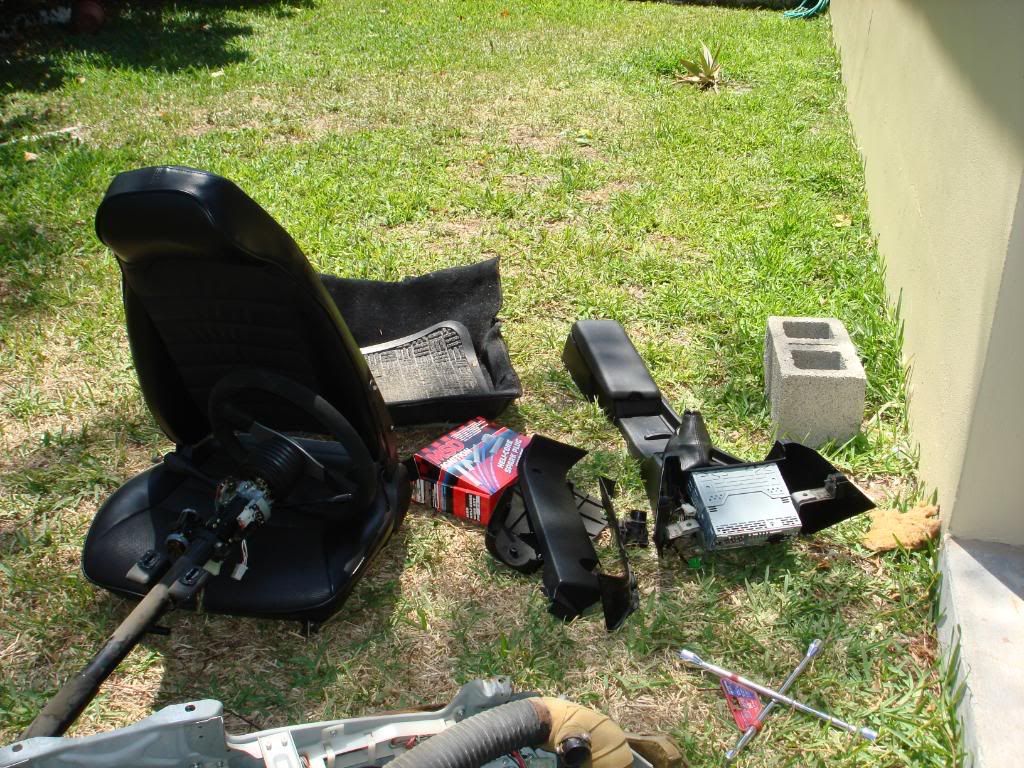
Well you get the picture...I'll post some of the goodies and finish product.
Other goodies not mentioned:
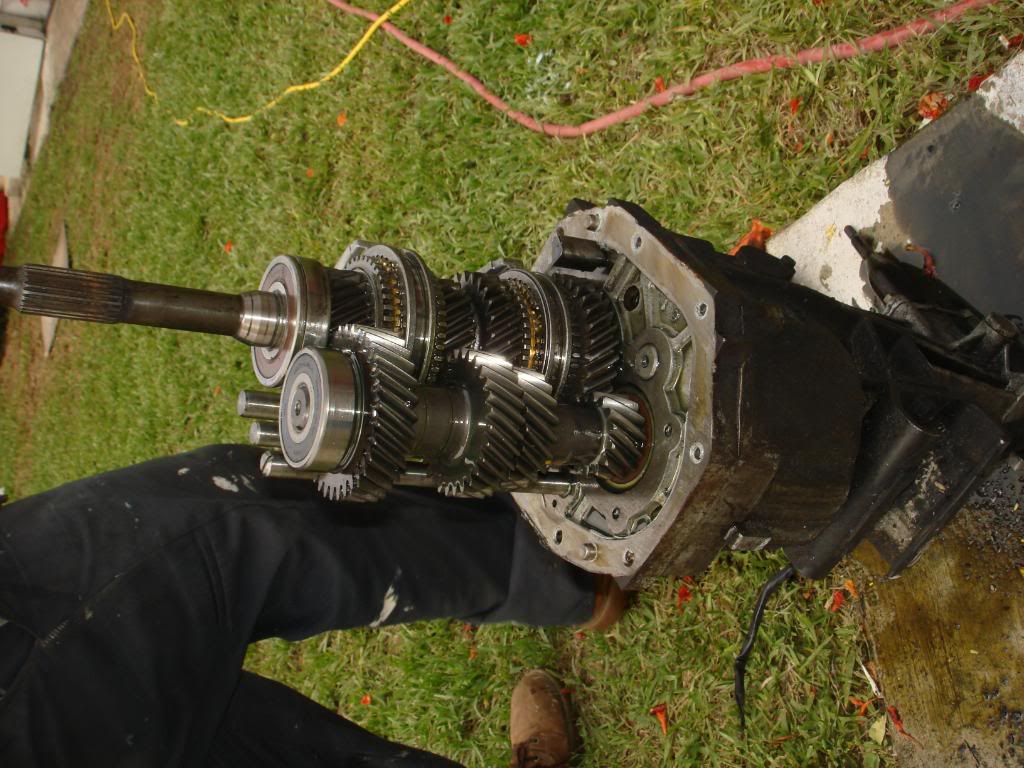
Custom shafts by DDS.
CCW Wheels
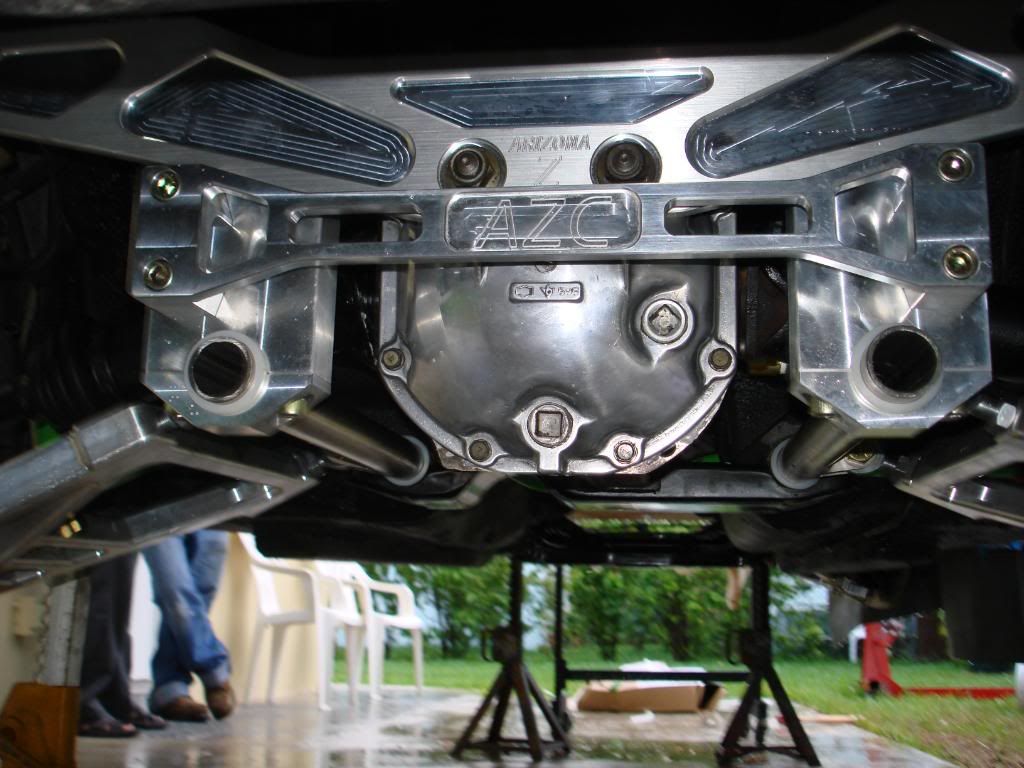
3.90 Diff with Nismo CLSD
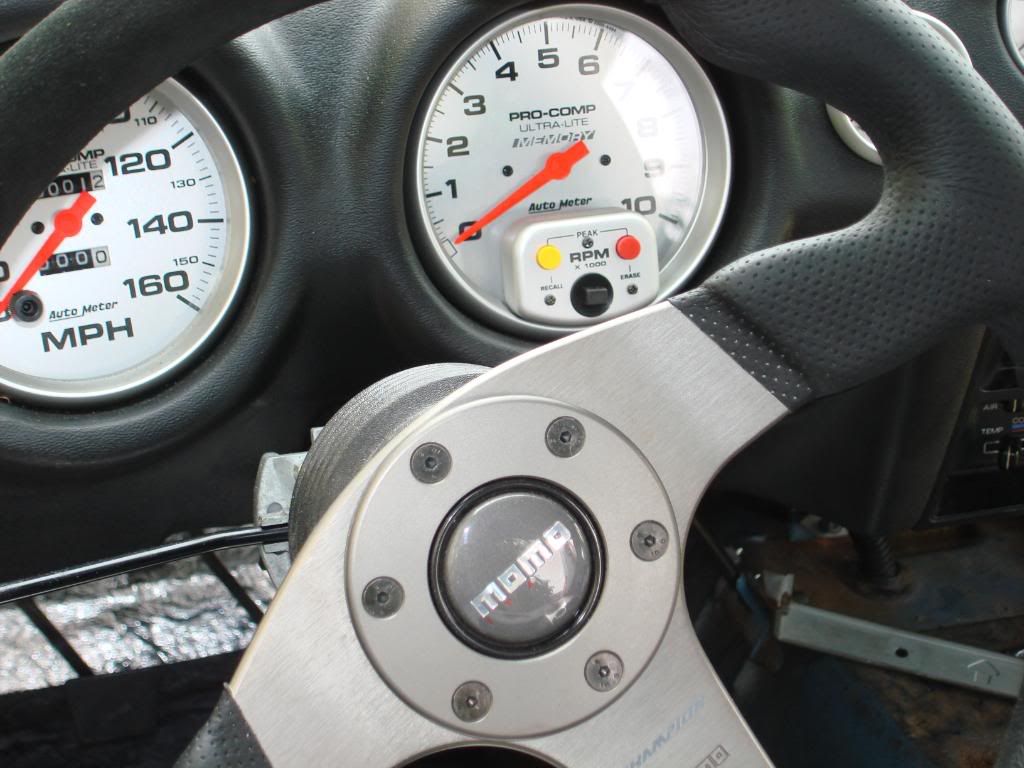
Momo Steering
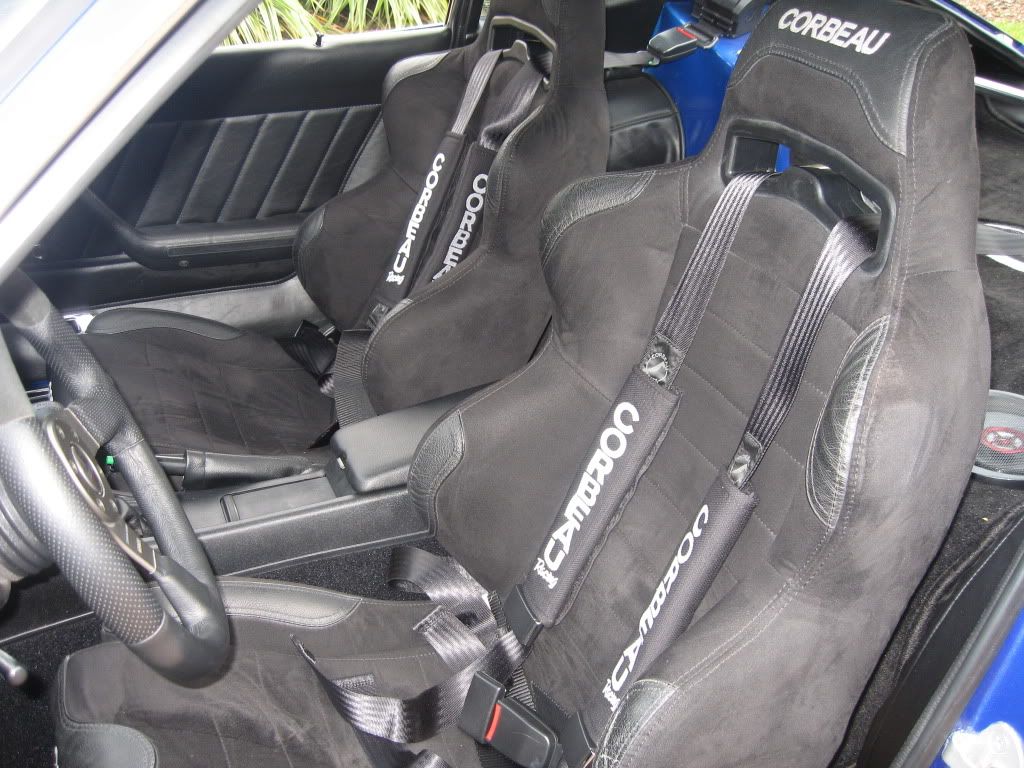
Corbeau Seats
And pics in this set were taken by Leo from Photography By Leonel
-
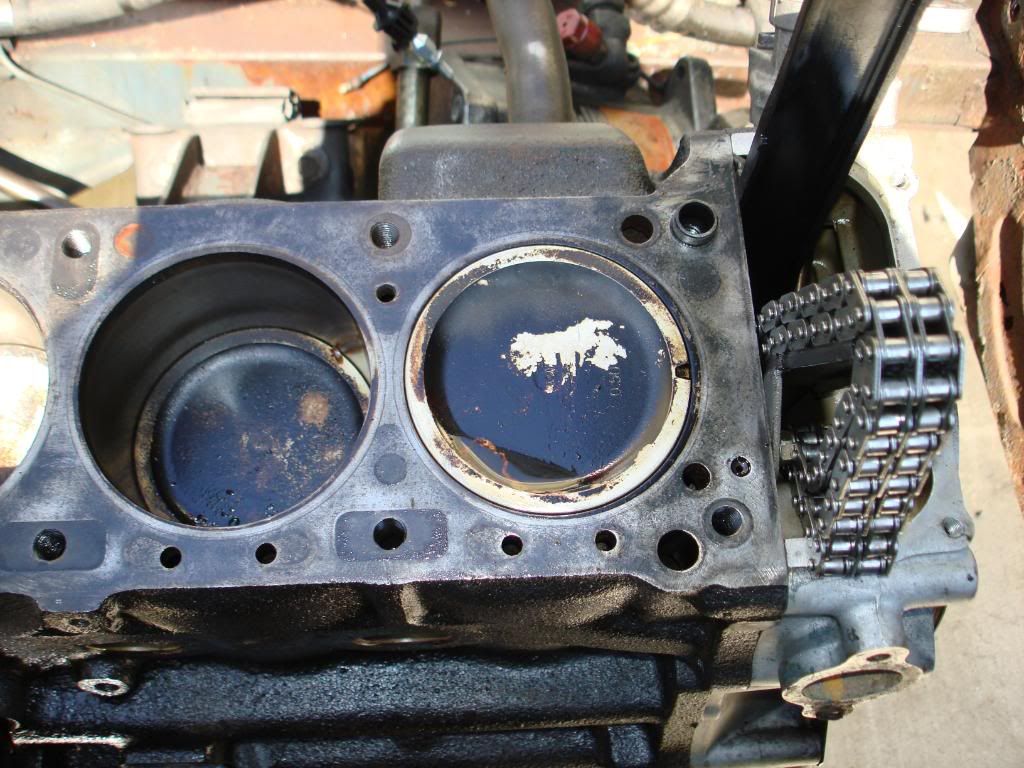
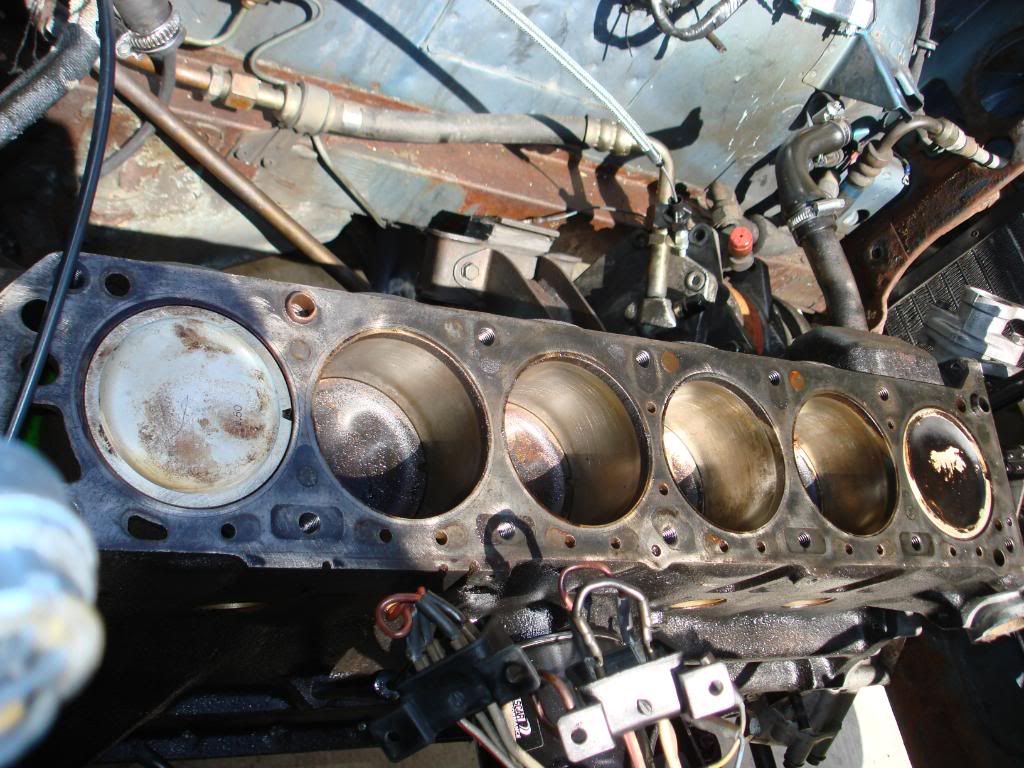
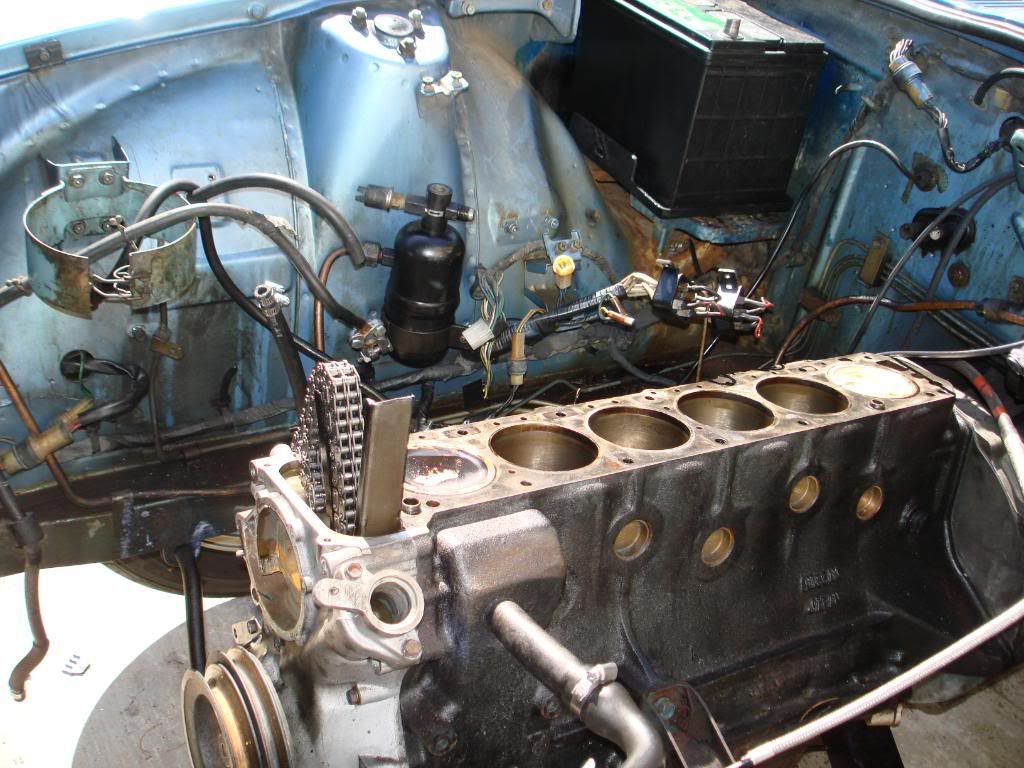
Ok now on to the heart. We called Dave@rebello racing and we settled on a 3.2
. We origianly decided on mikunis ( that was a f***ing nightmare). Eventually crapping that idea and going ITB's. Also installed AEM EMS and 100 shot direct port dry. Needless to say I'm much happier NOW. Thanks to all write ups on matting the KA tranny, We now have one as well. It handles this kind of power very well. -
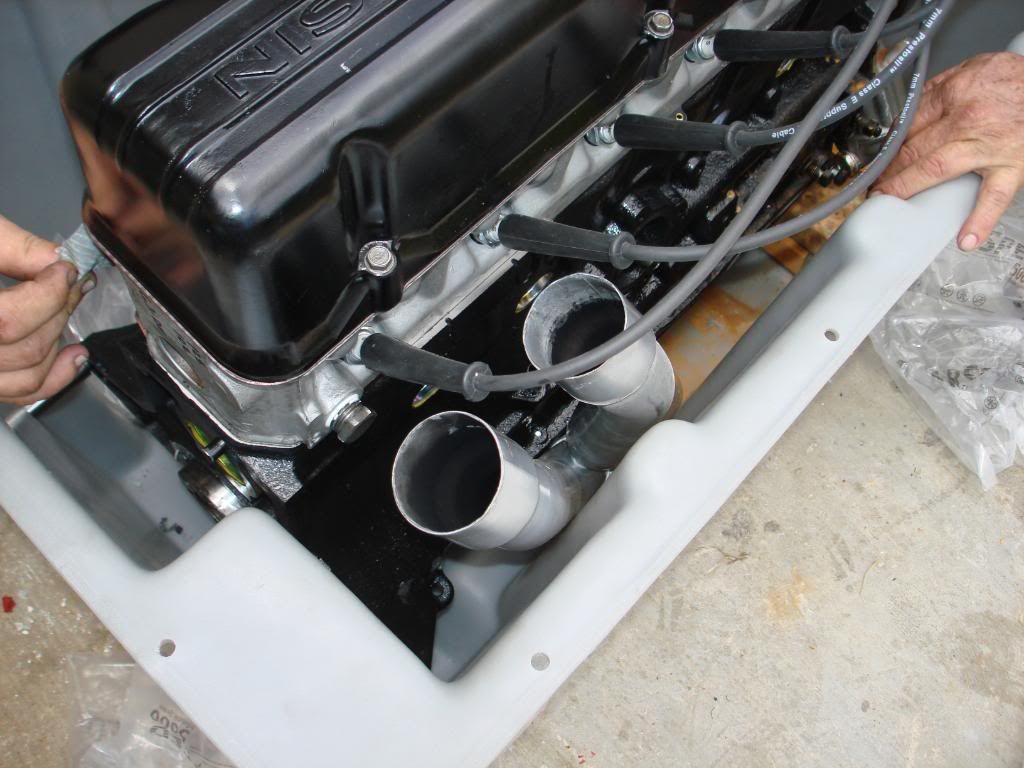
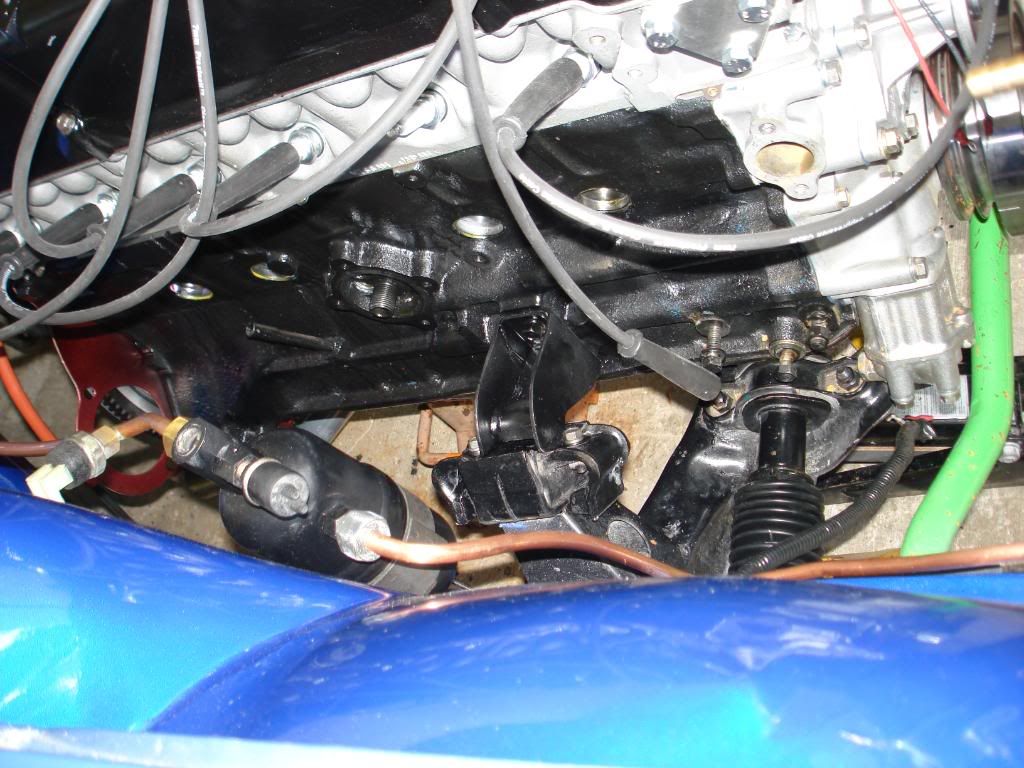
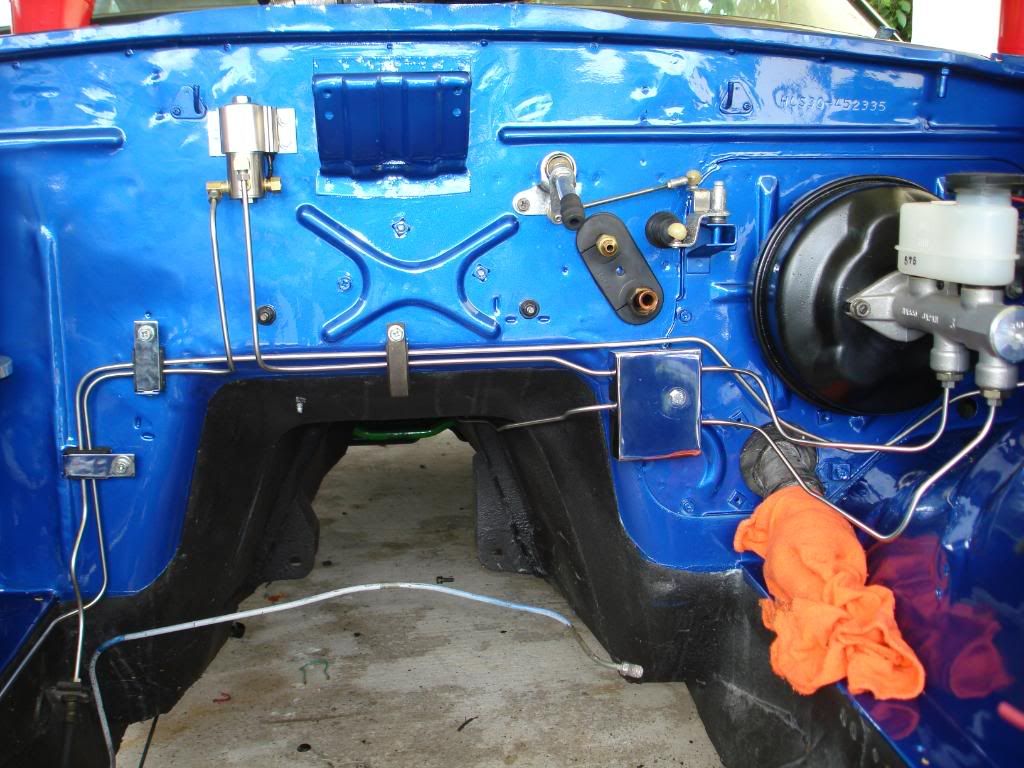
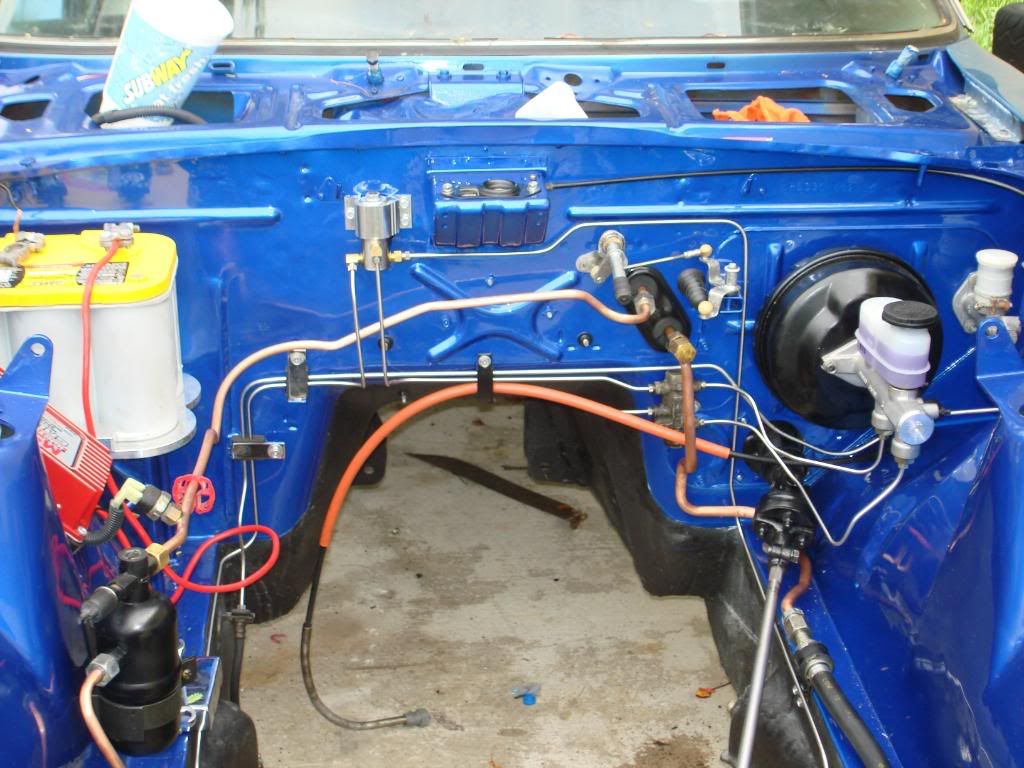
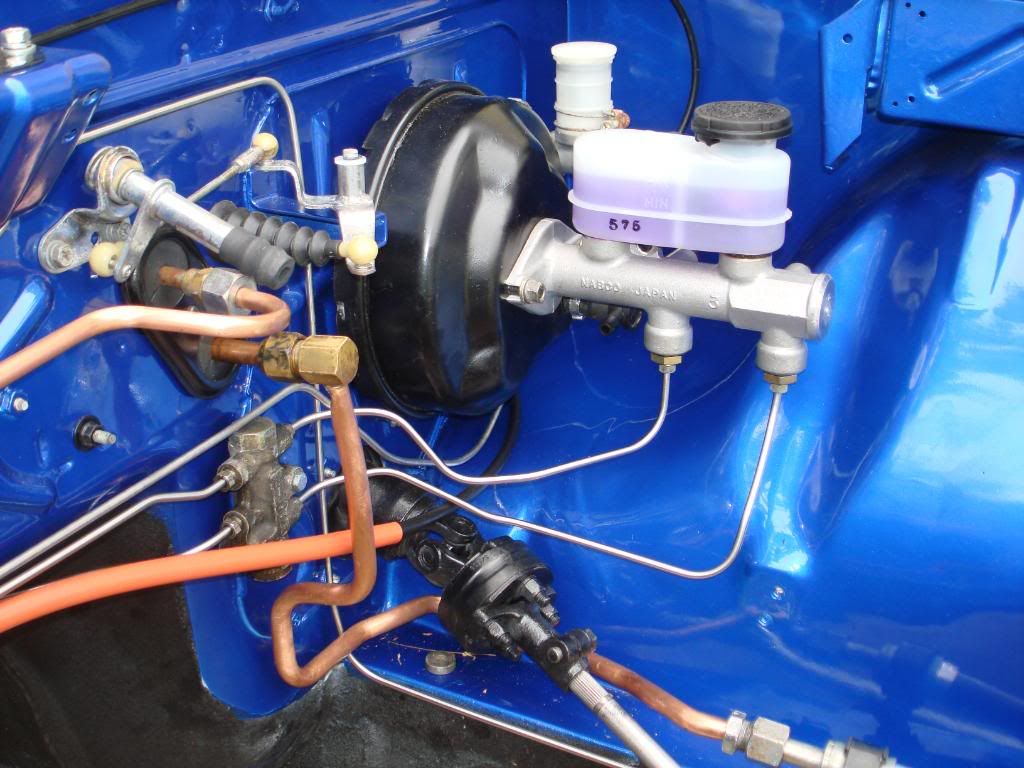
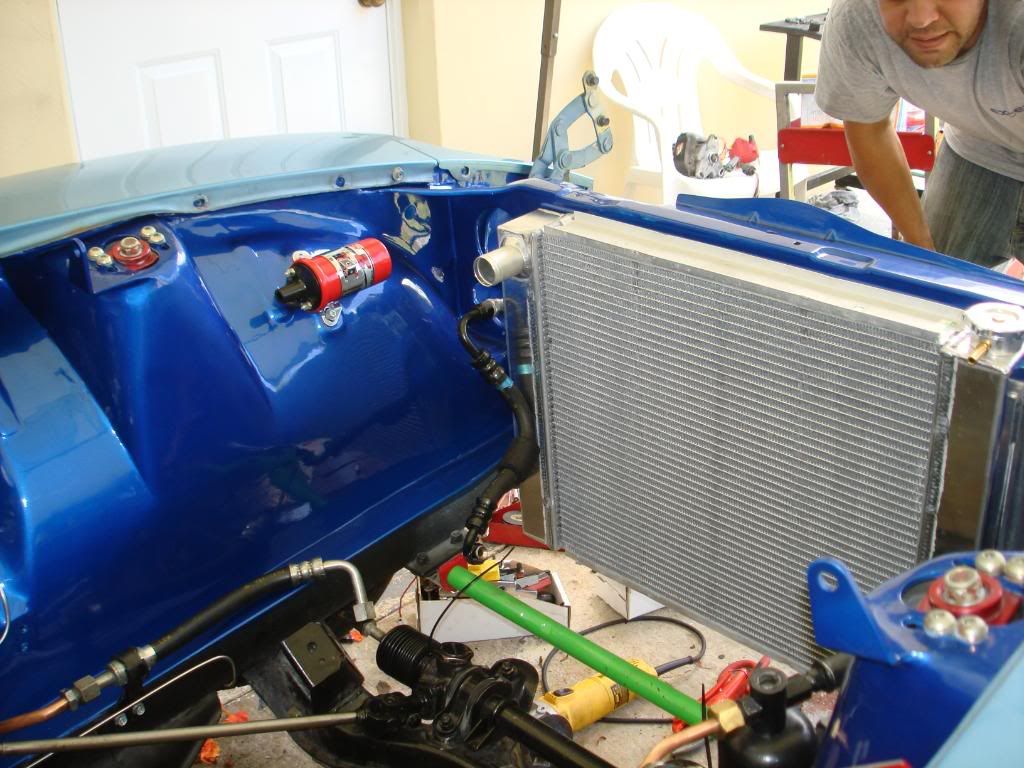
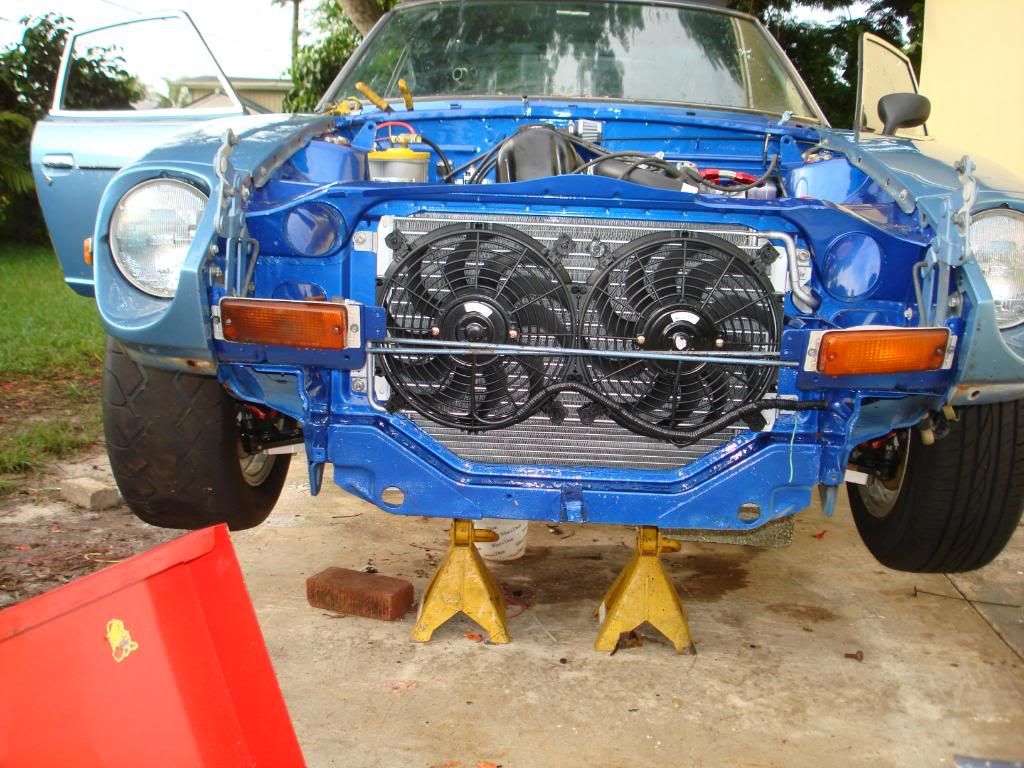
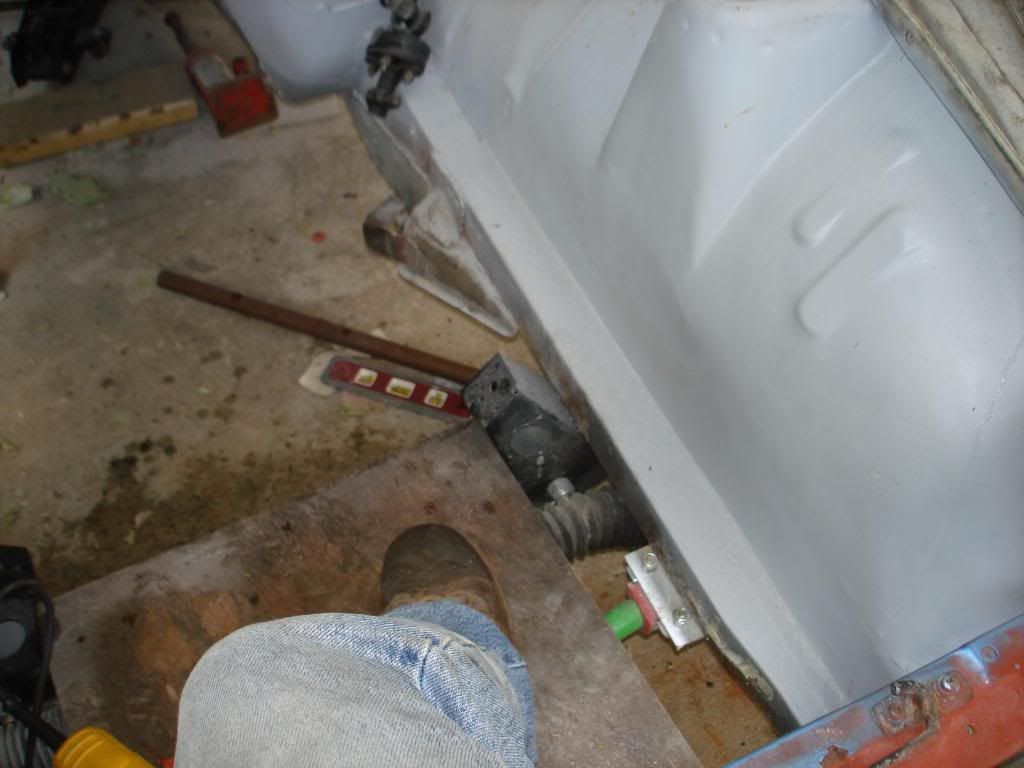
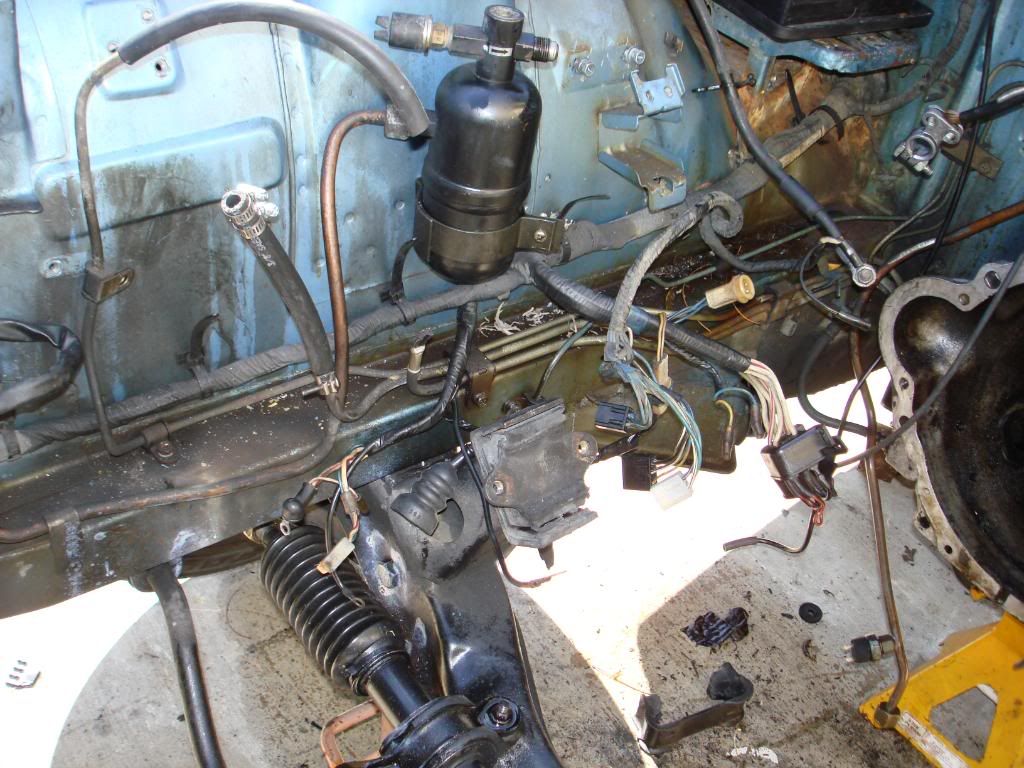
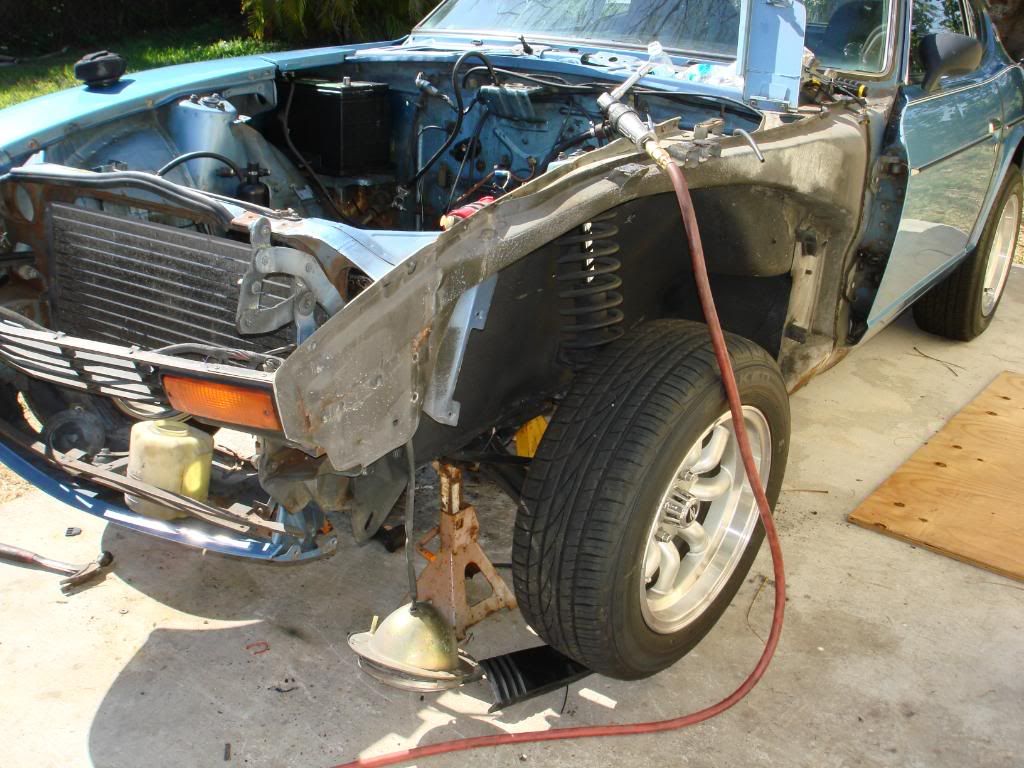
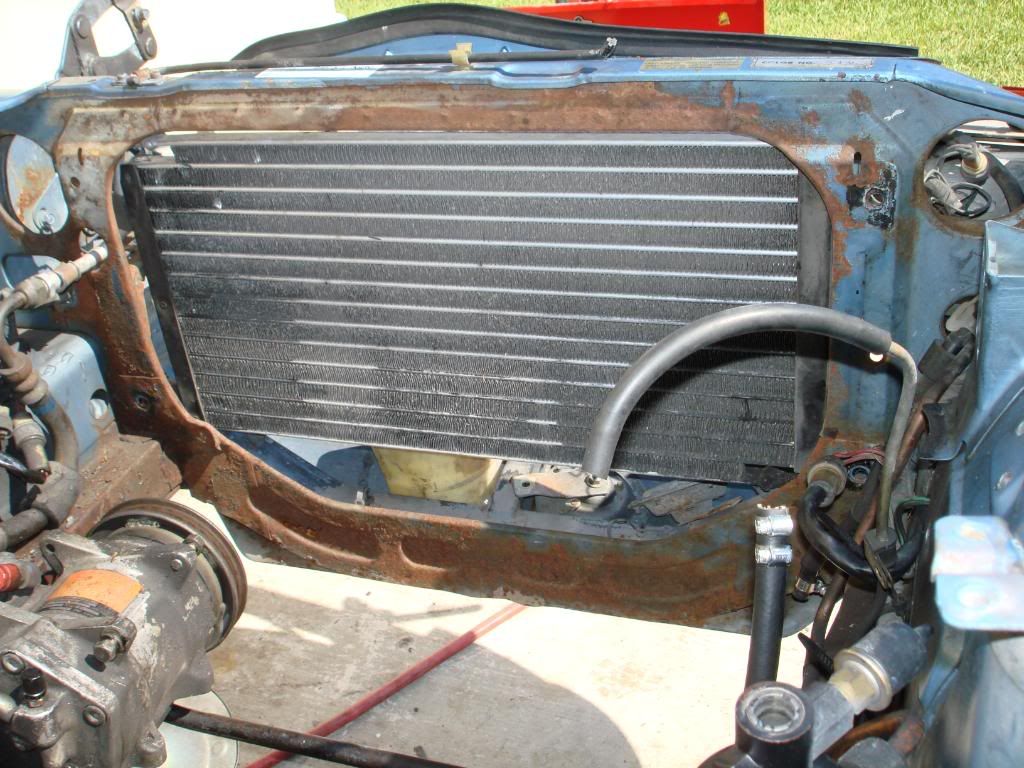
Putting the bay back together. All new brake SS lines, aluminium radiator and a rebello 3.2 stroker(but i'll talk more about that later).
-
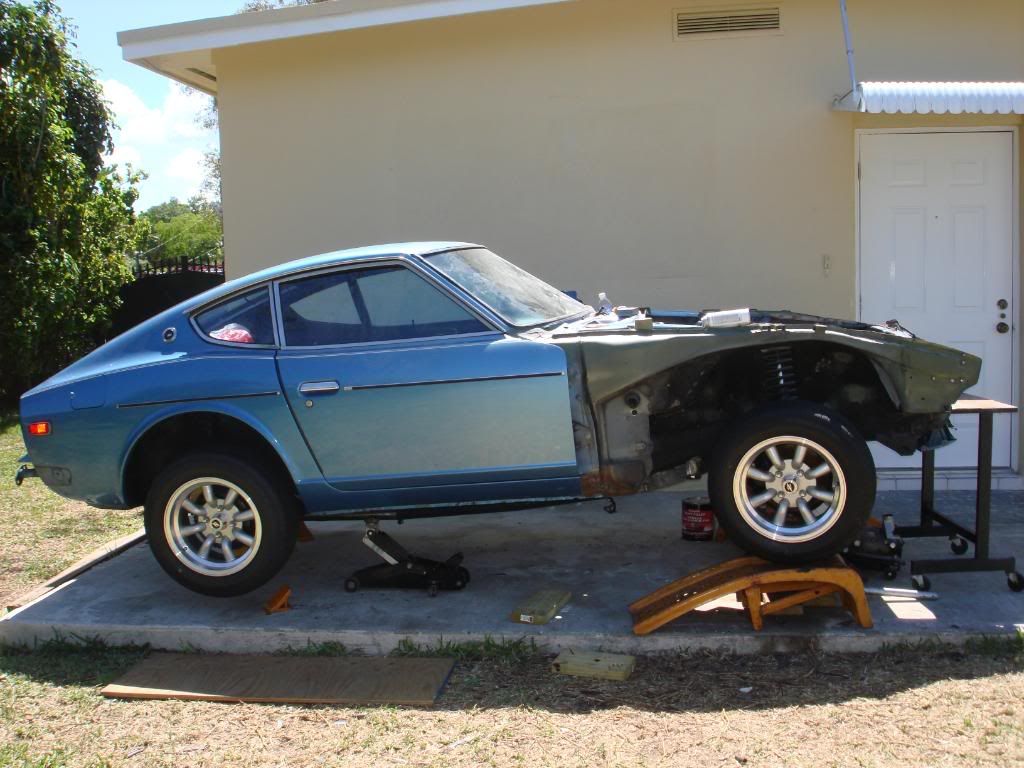
To the body shop....
-
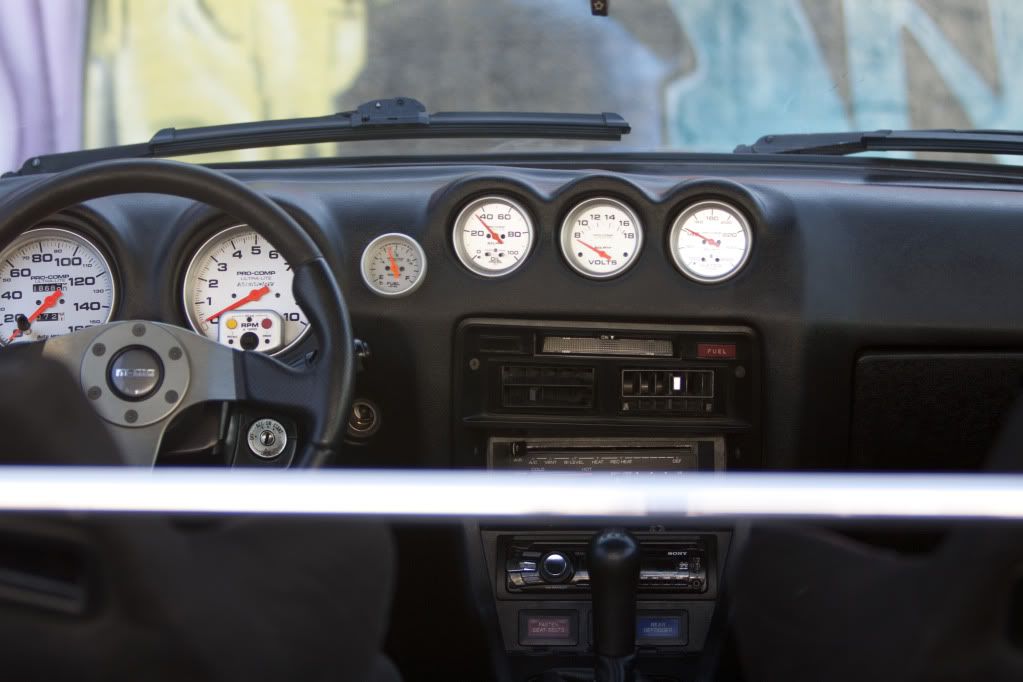
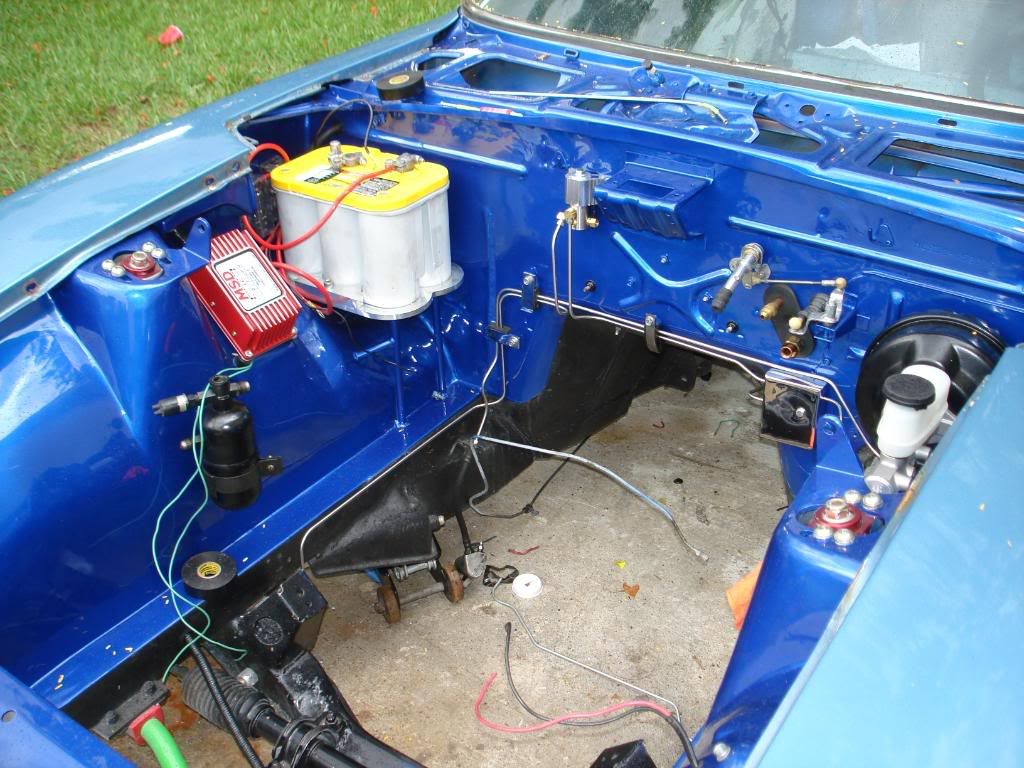
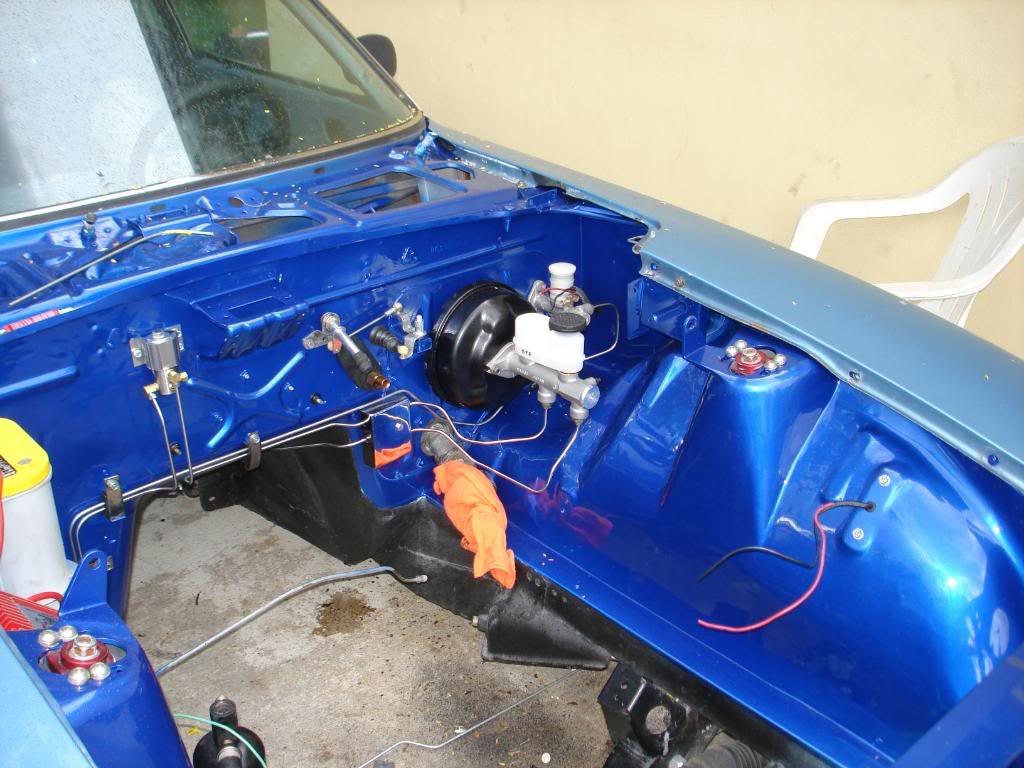
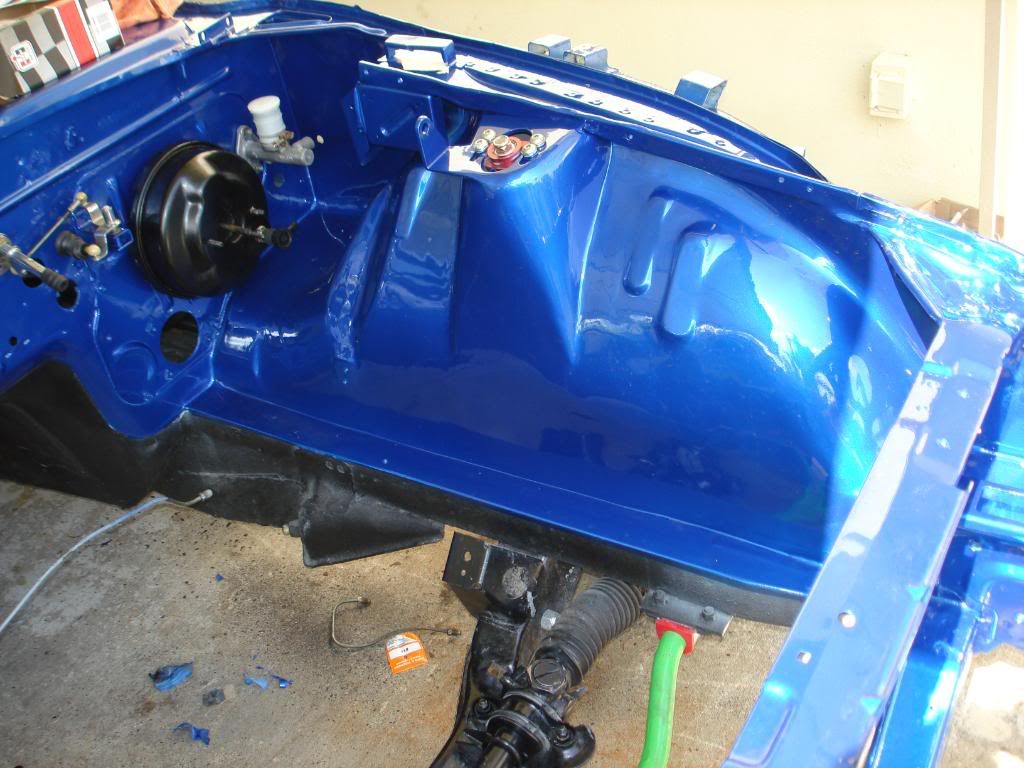
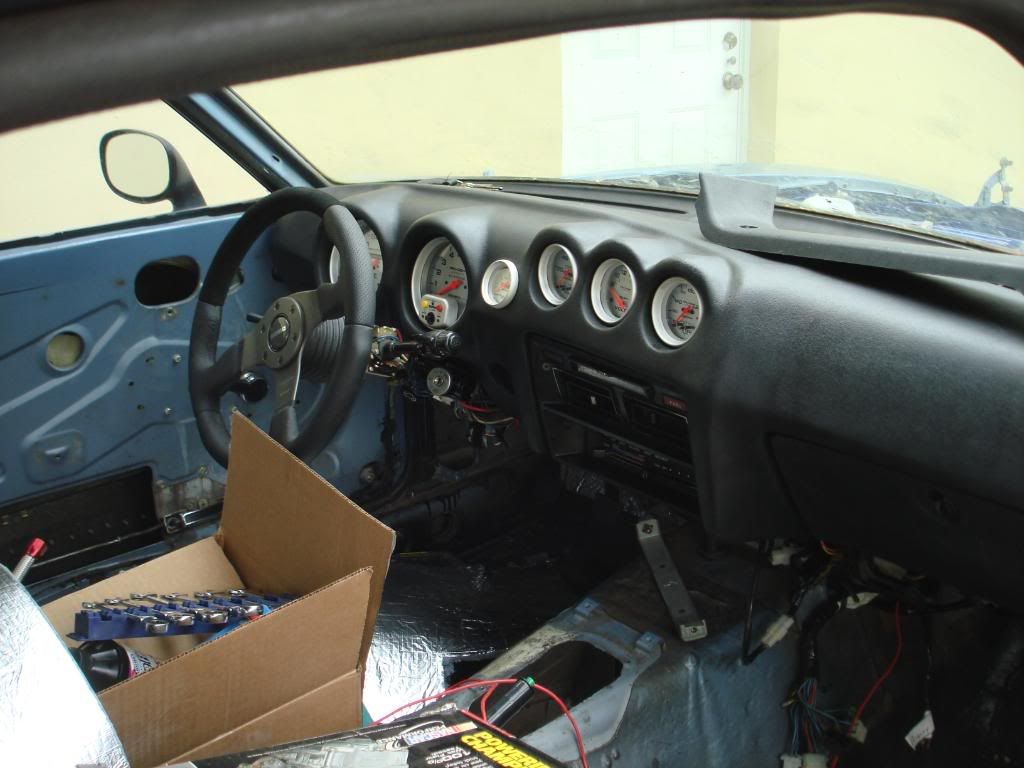
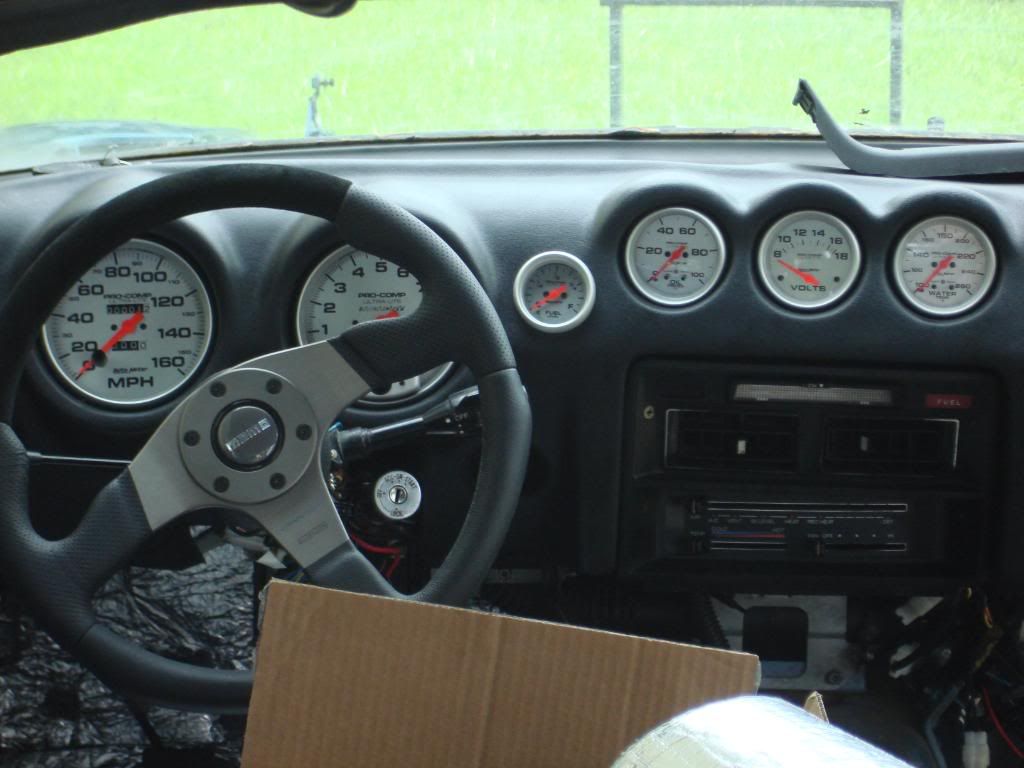
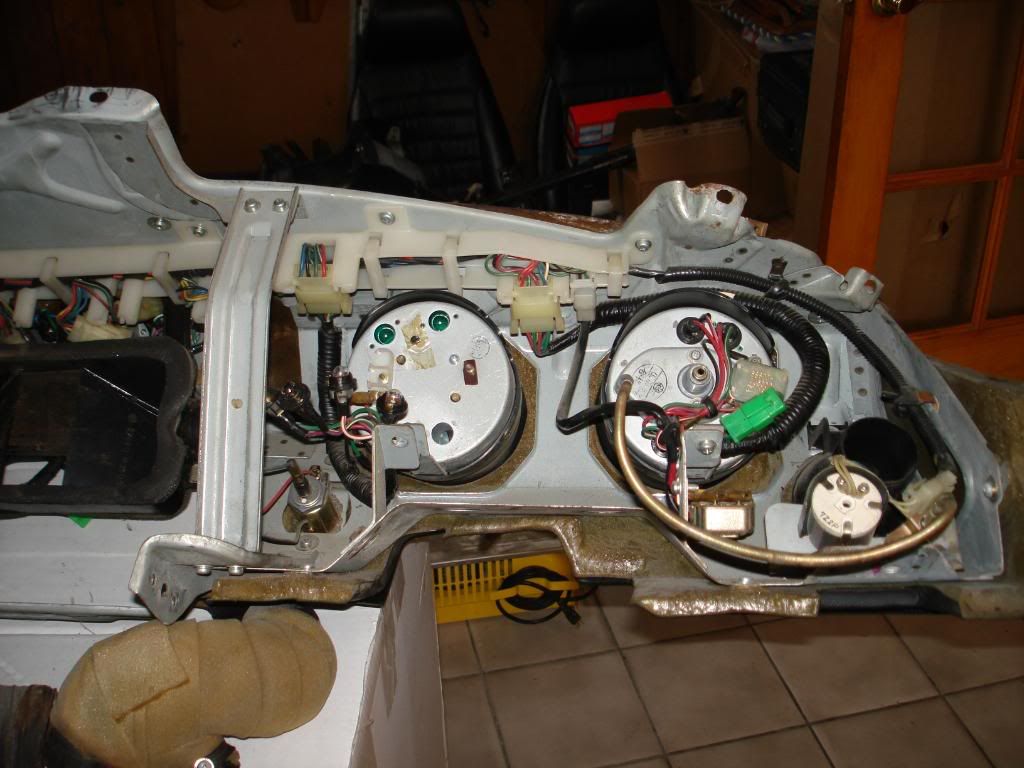
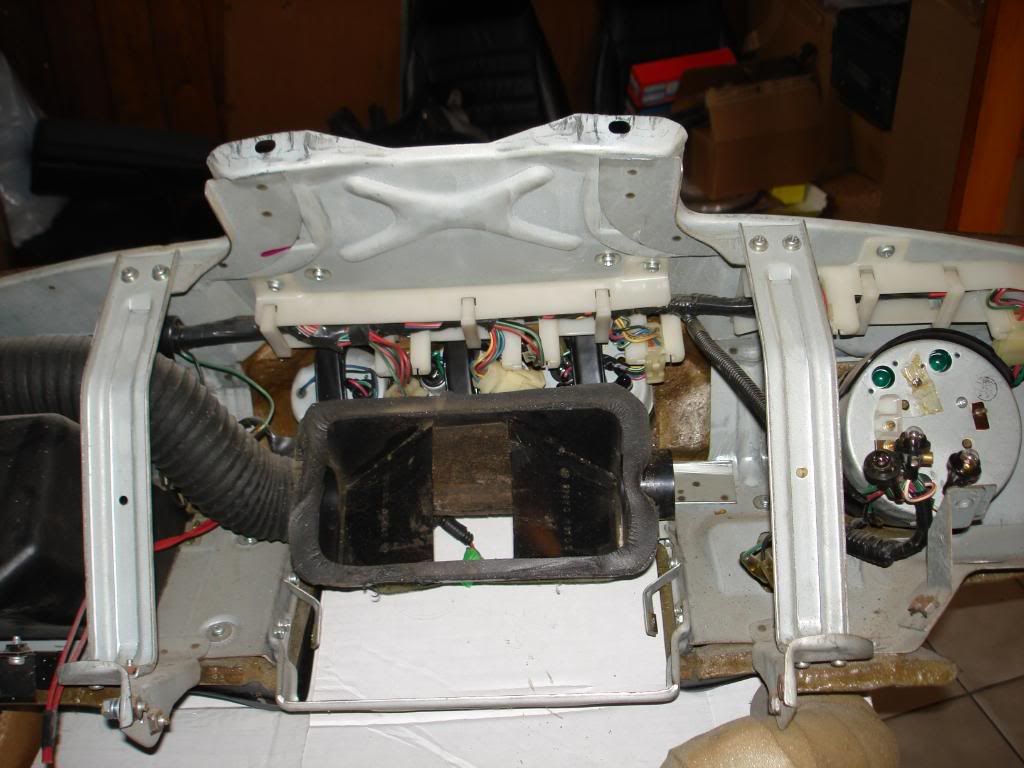
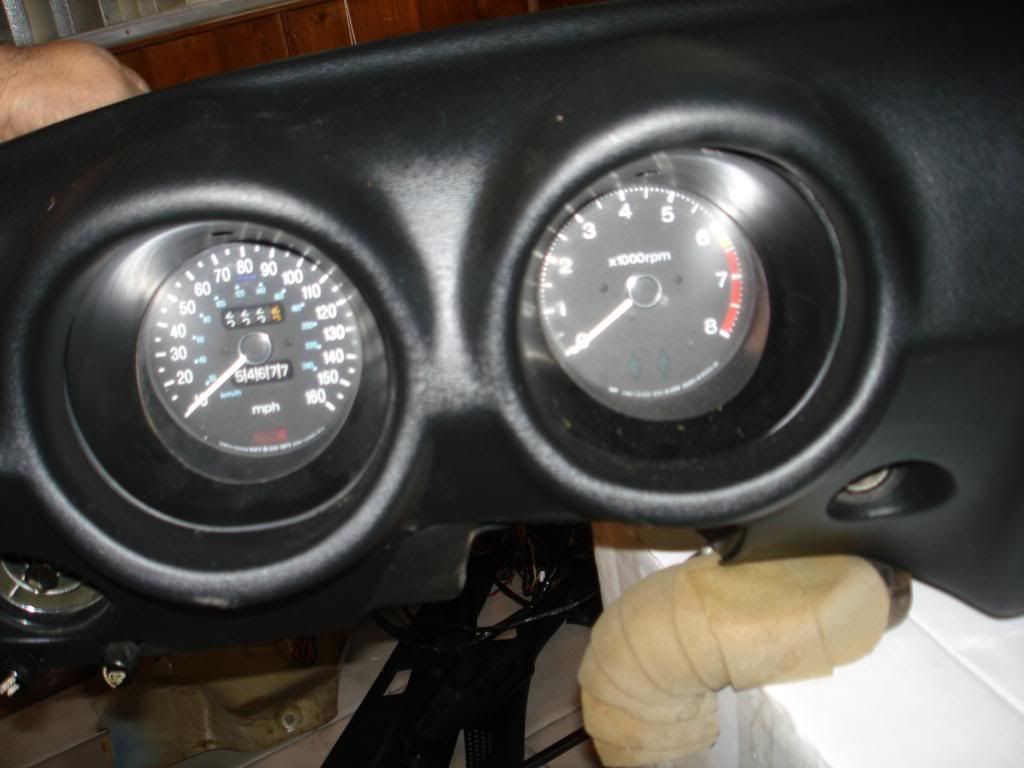
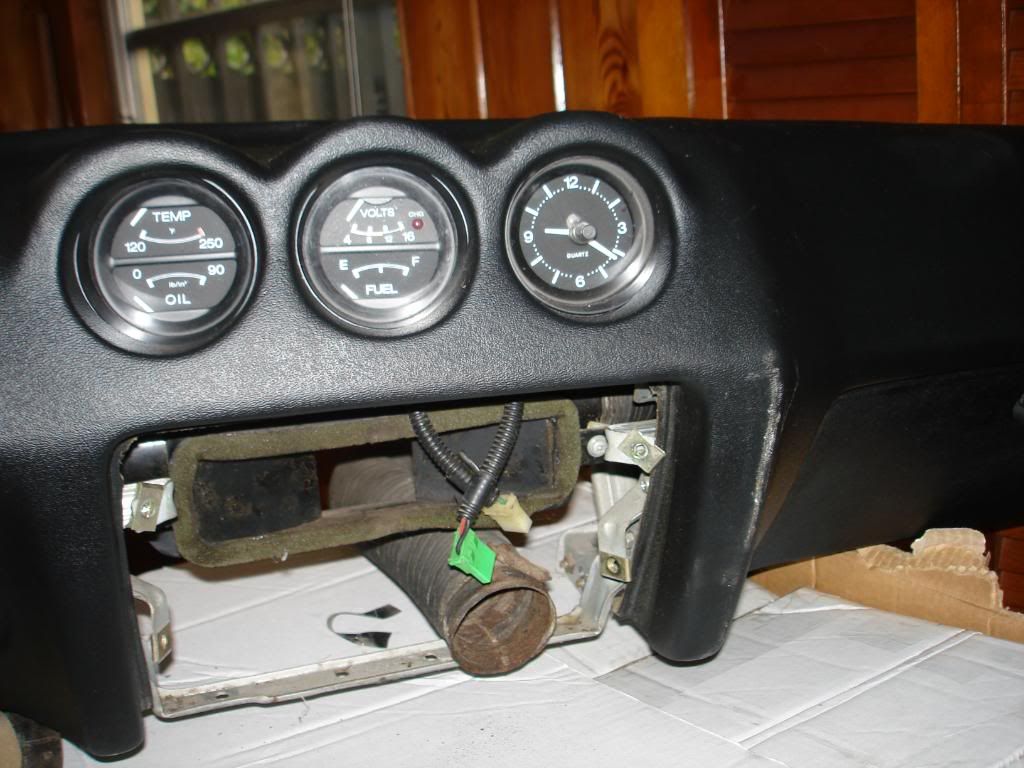
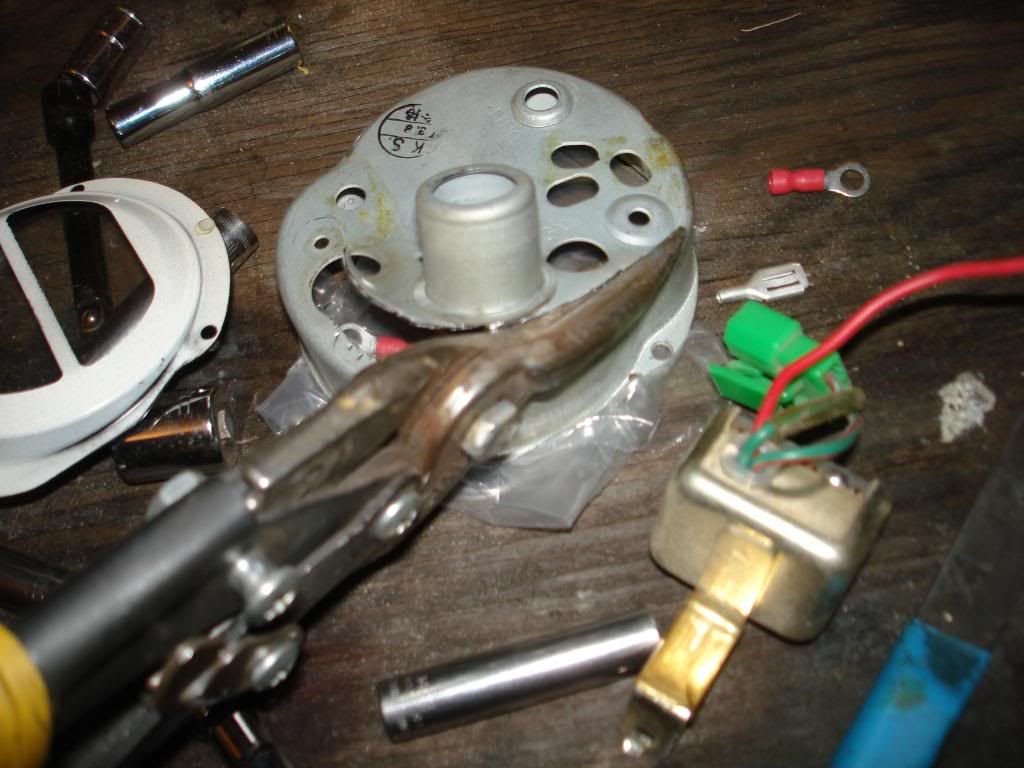
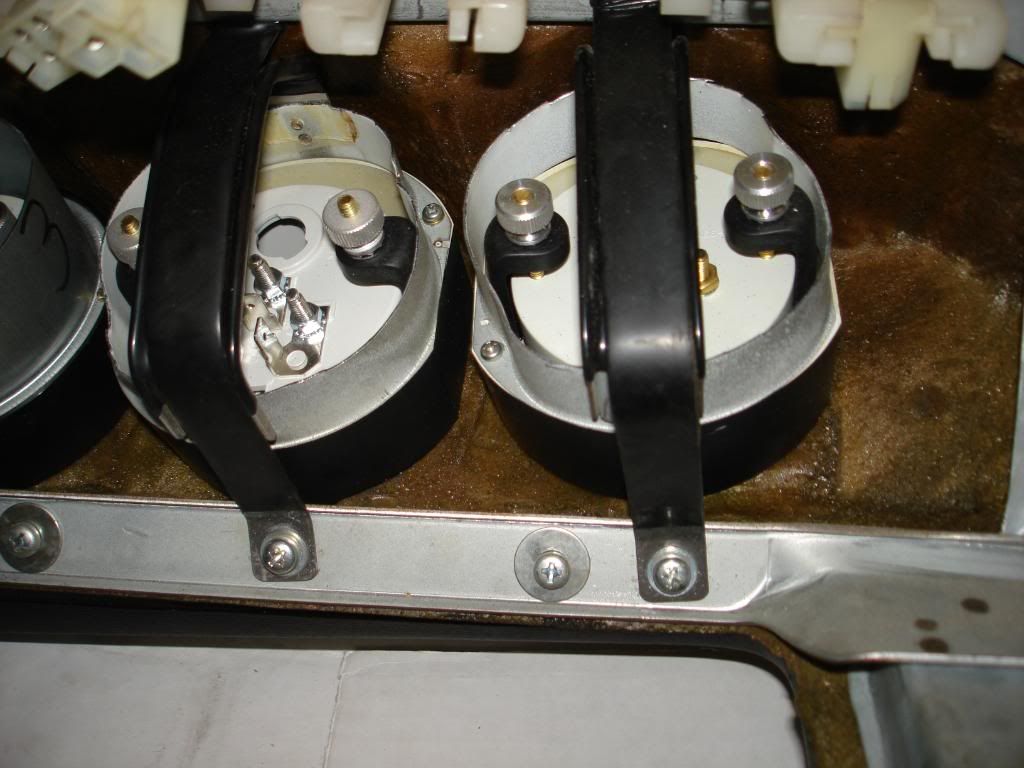
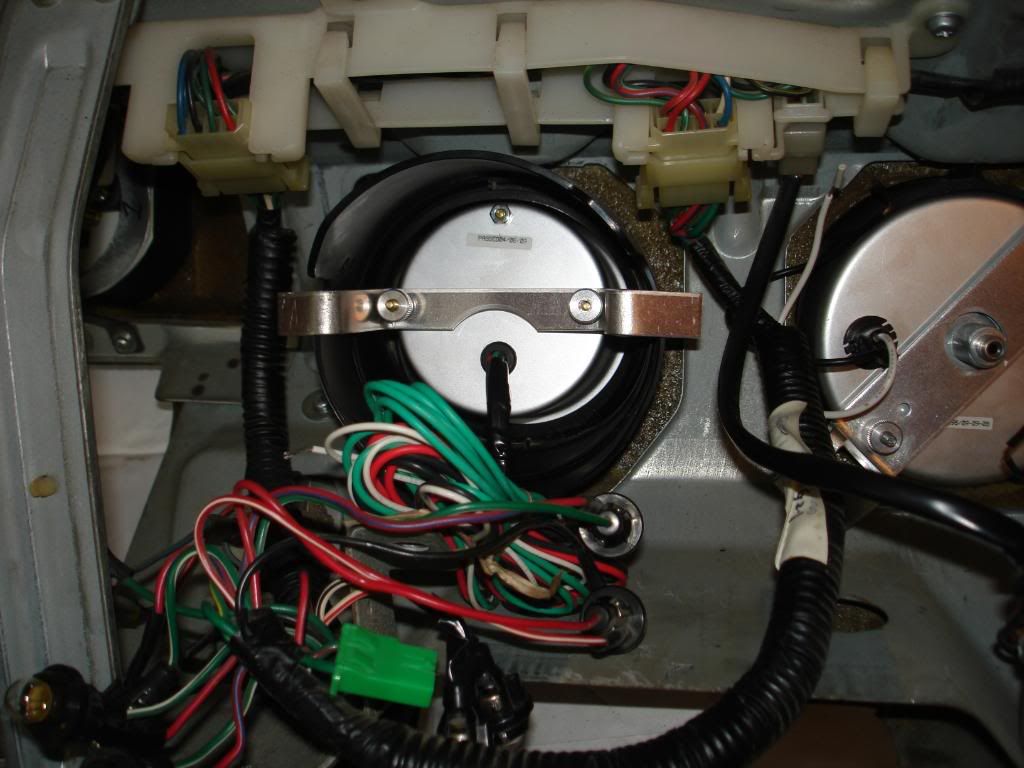
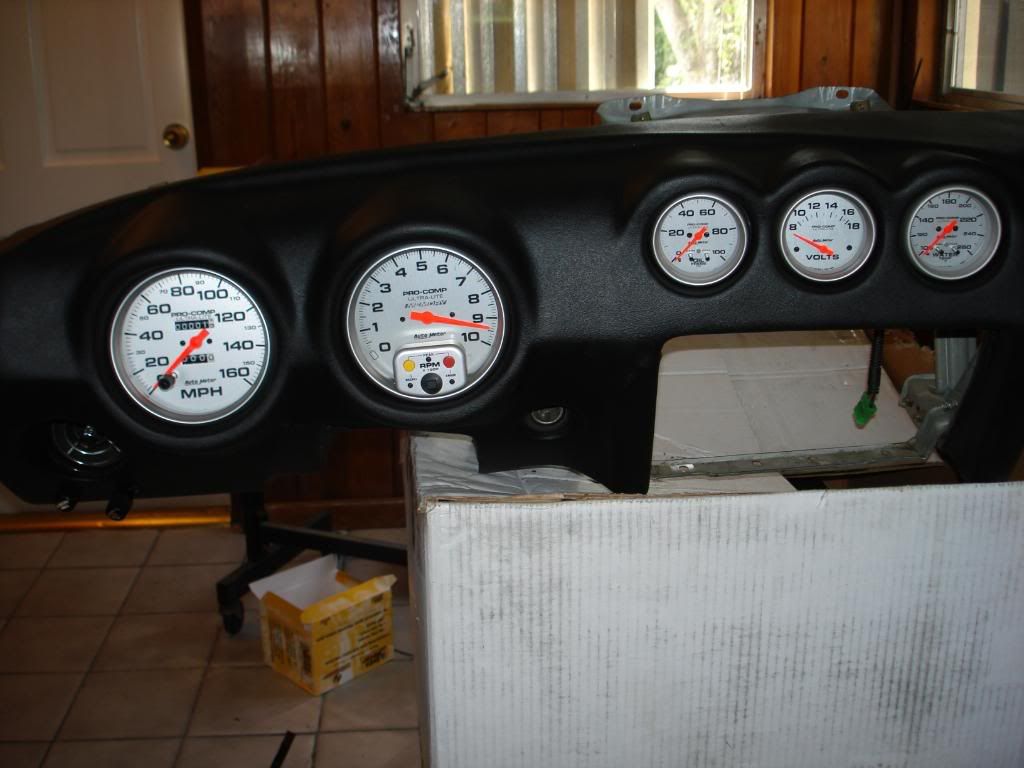
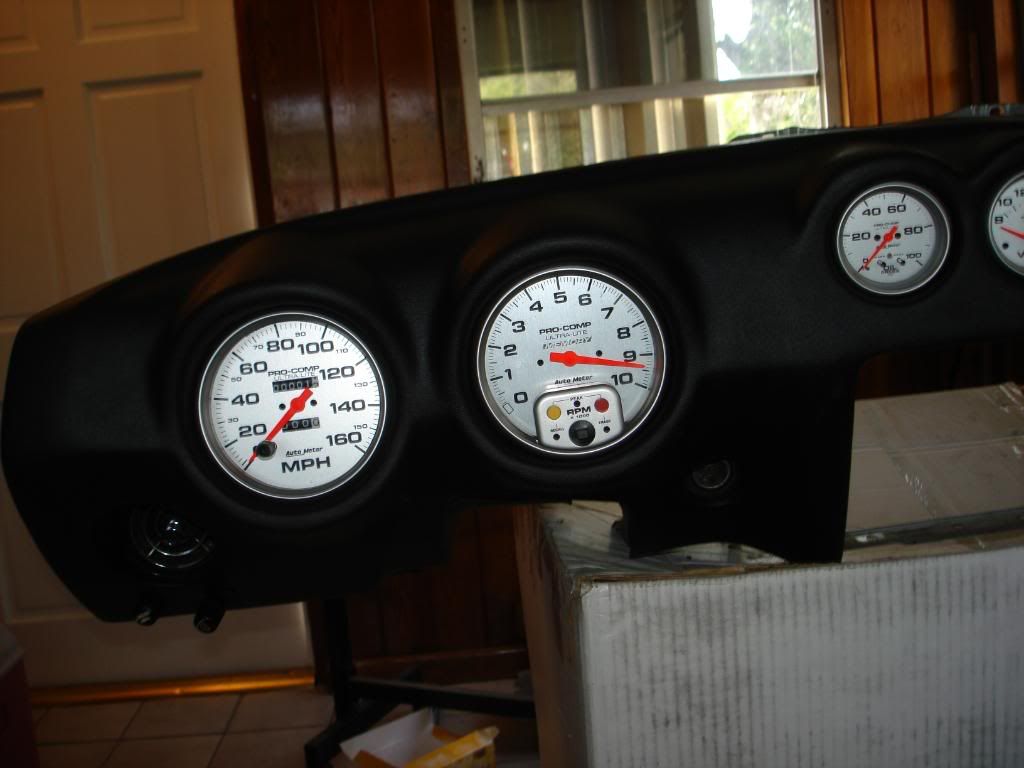
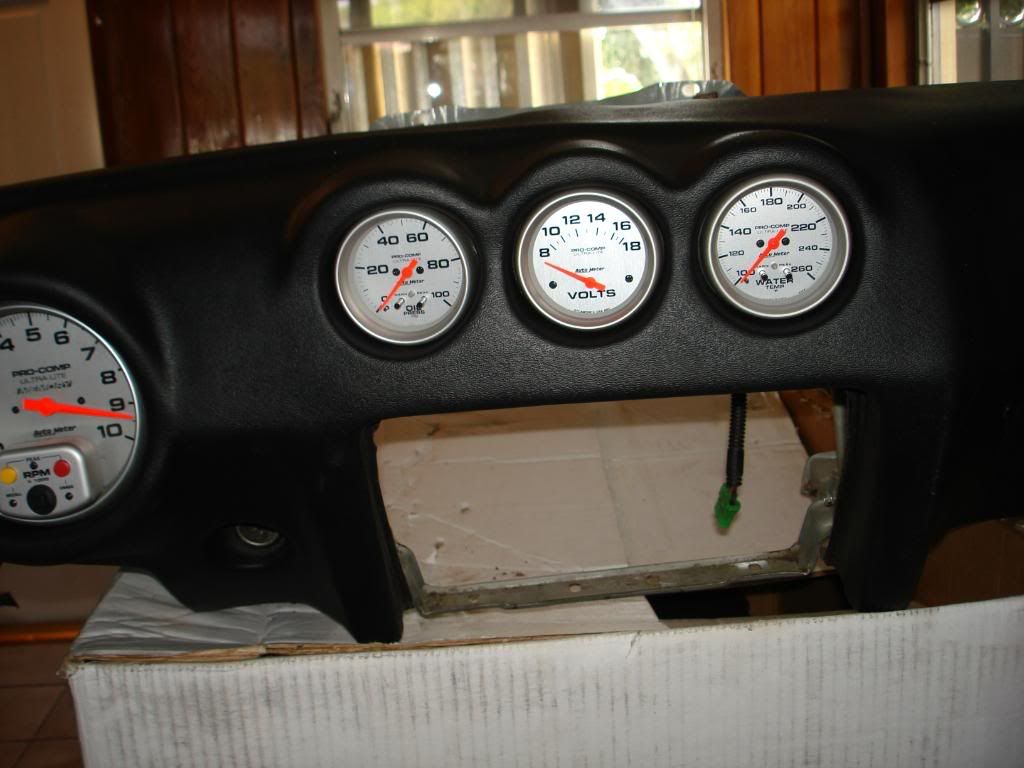
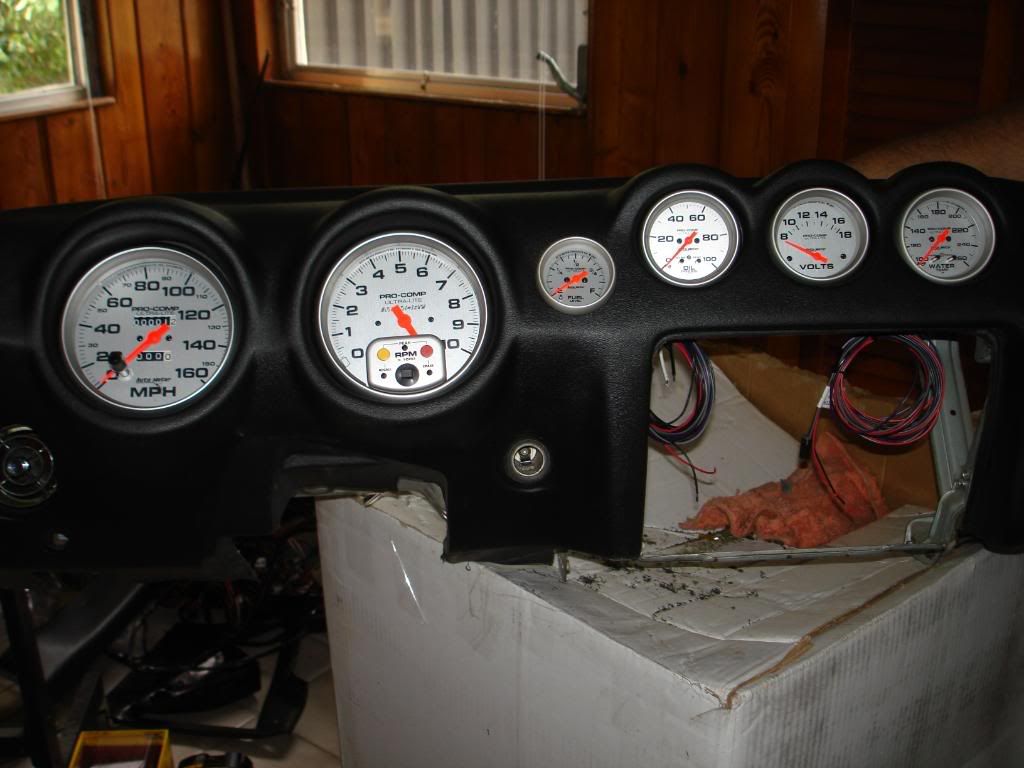
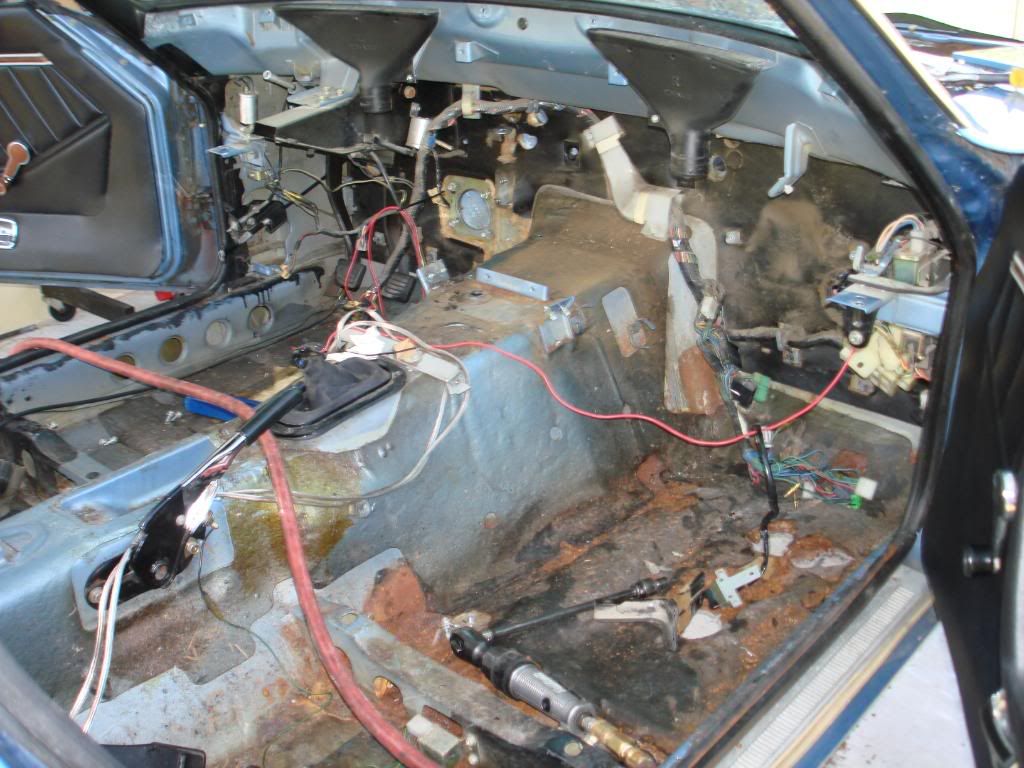
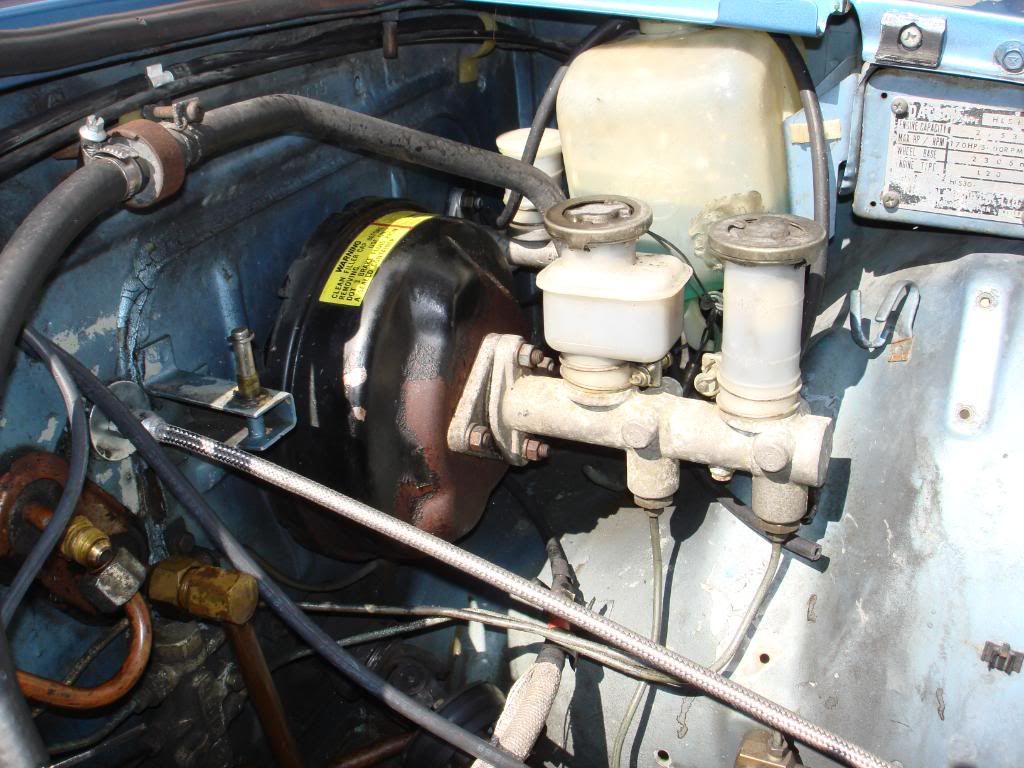
We also re worked the dash. We fitted autometer gauges and rewired the whole dash to work with the Isis power system. Which controls all the power(except engine mgt).
-
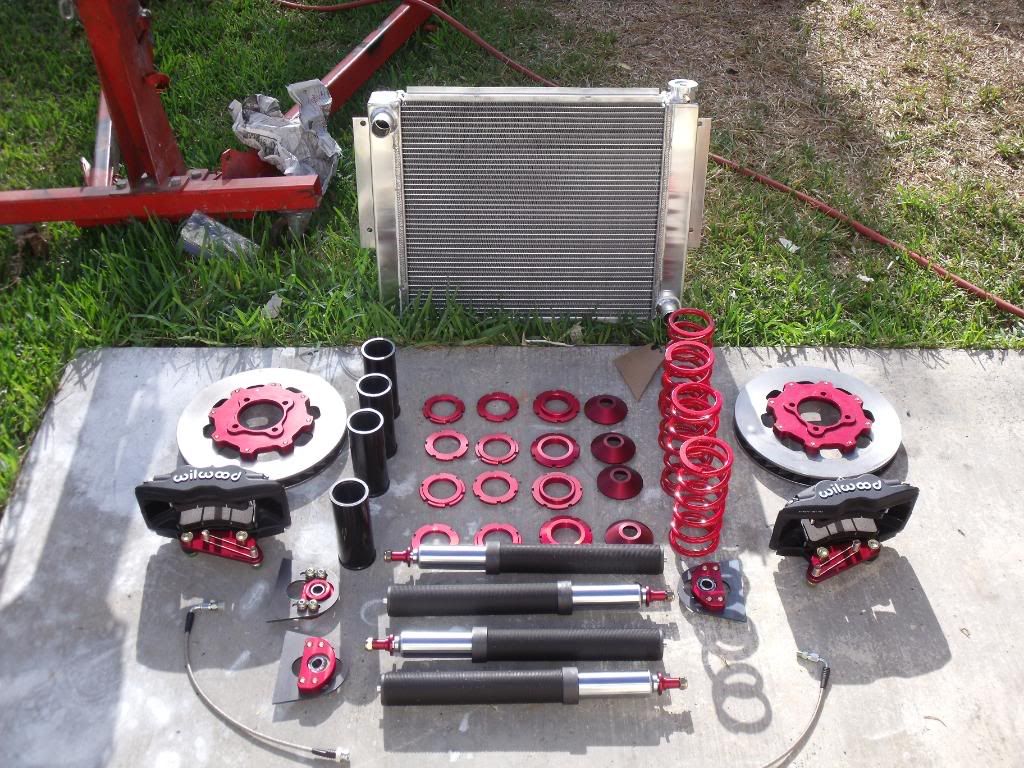
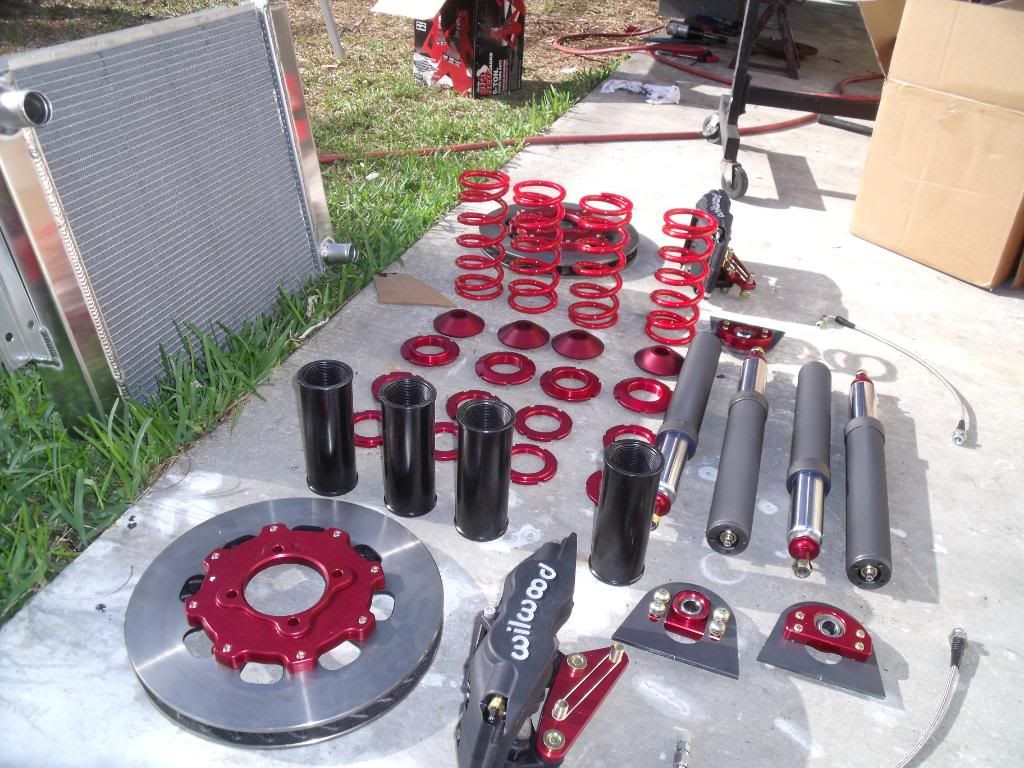
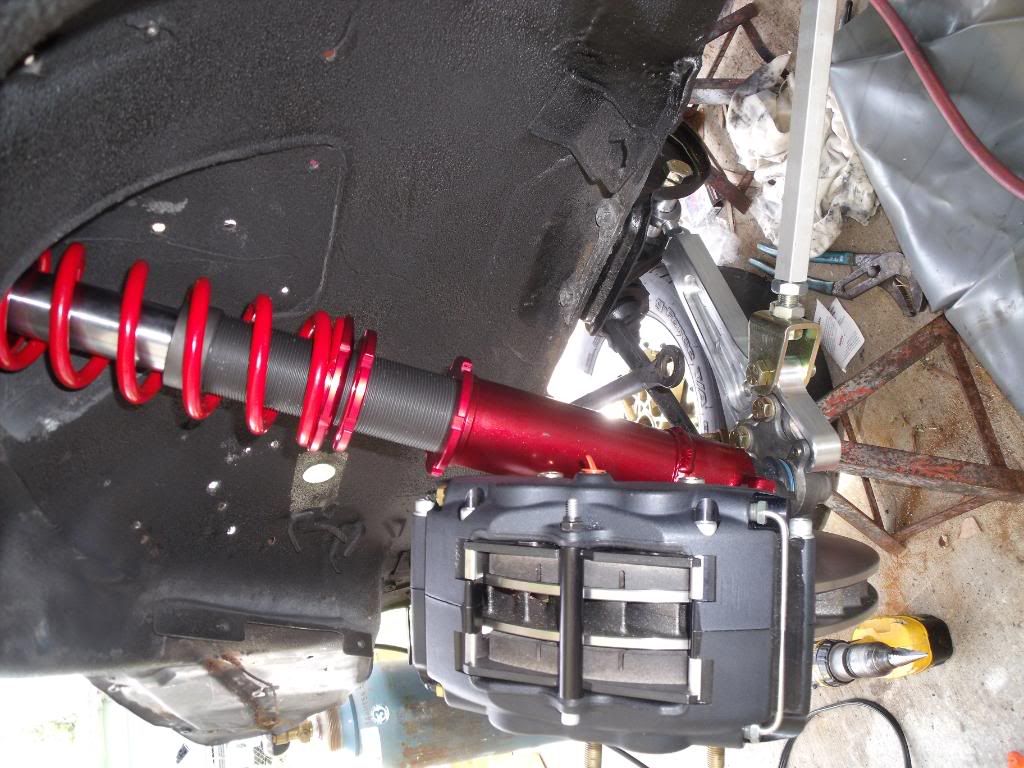
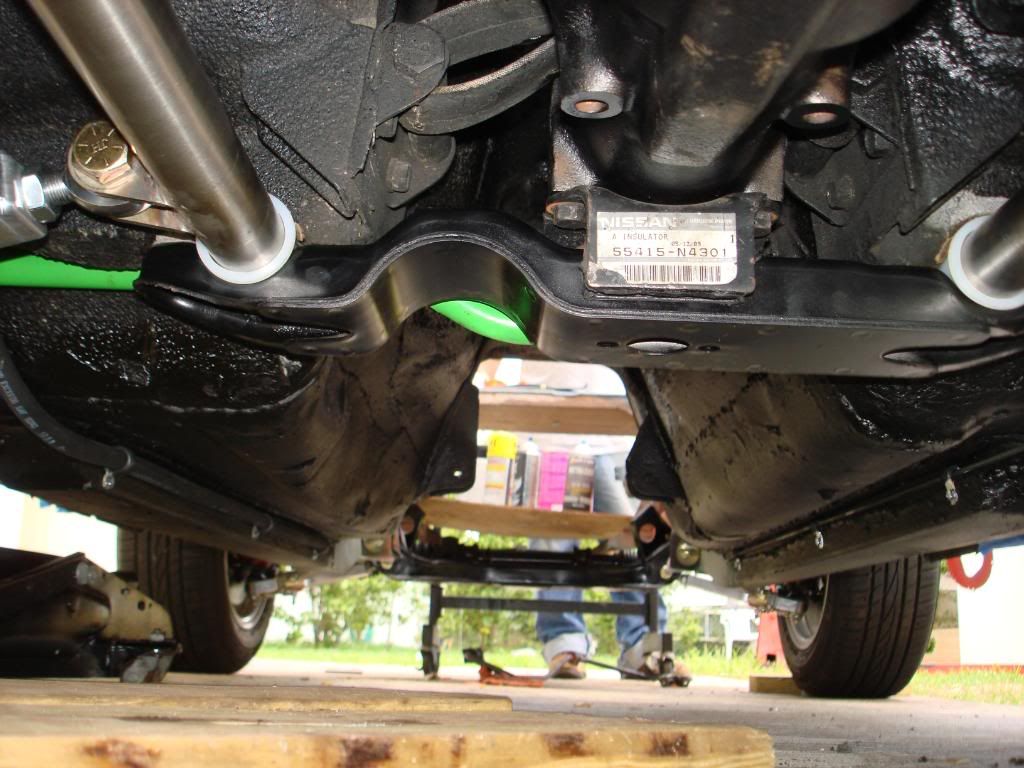
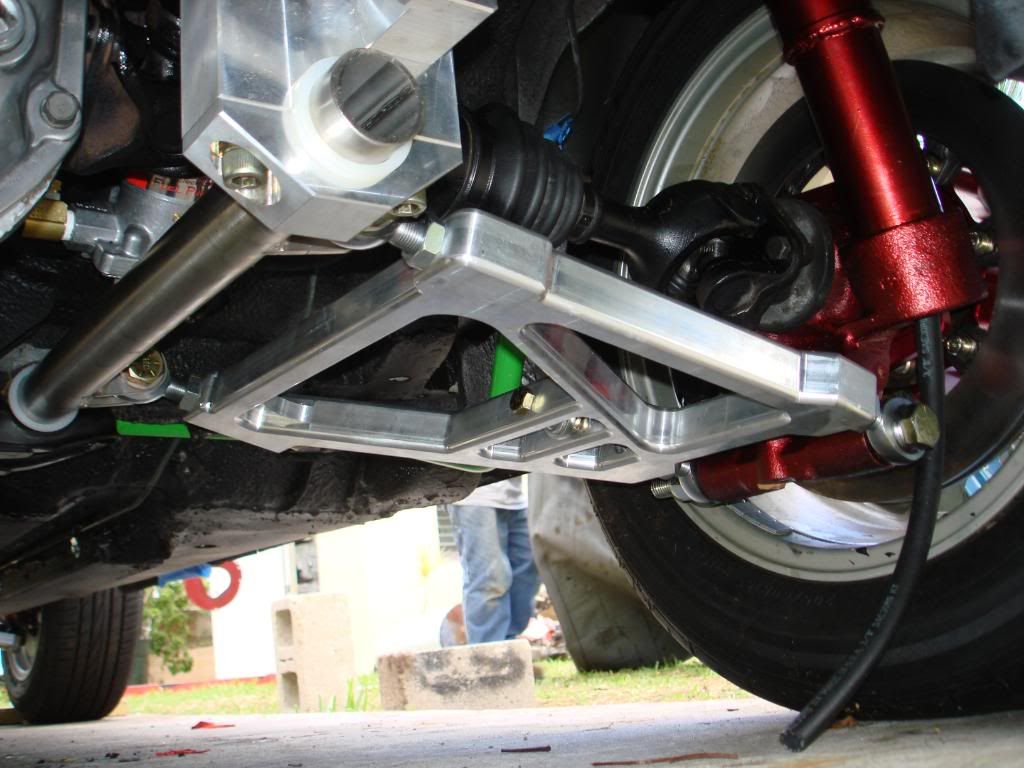
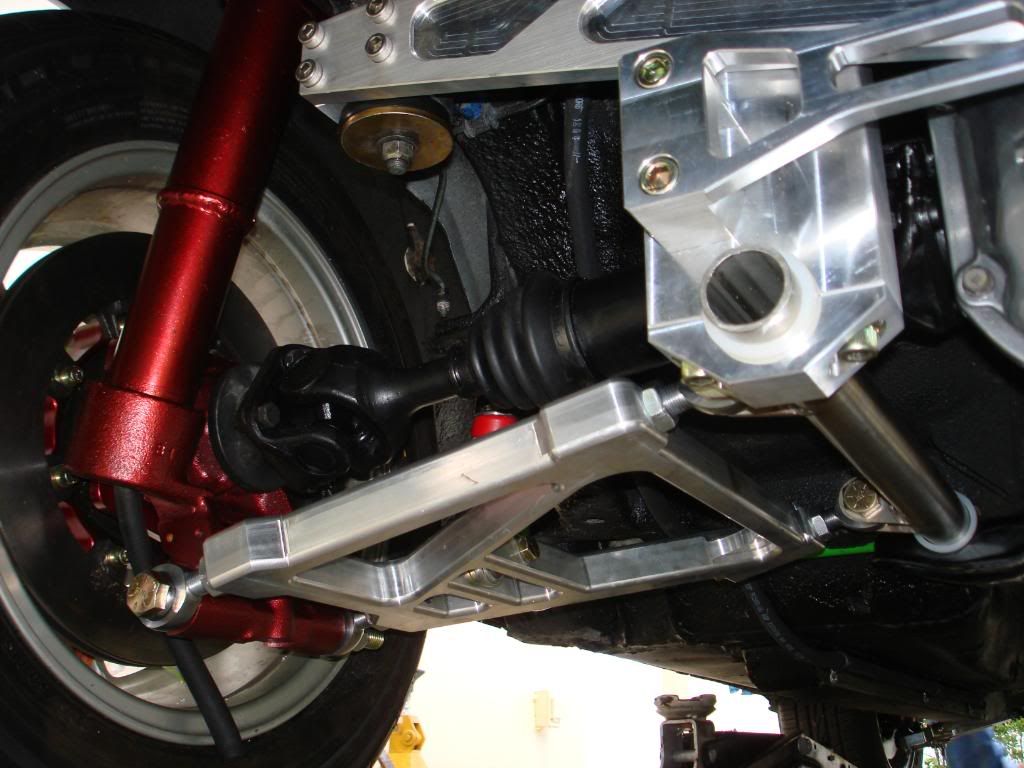
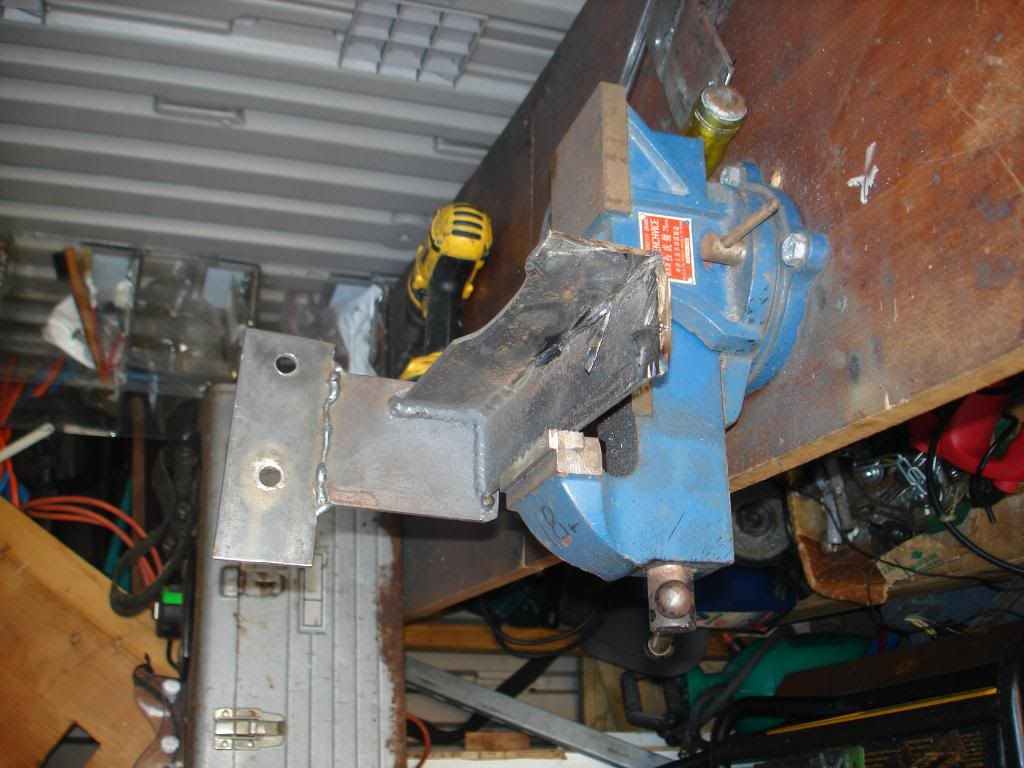
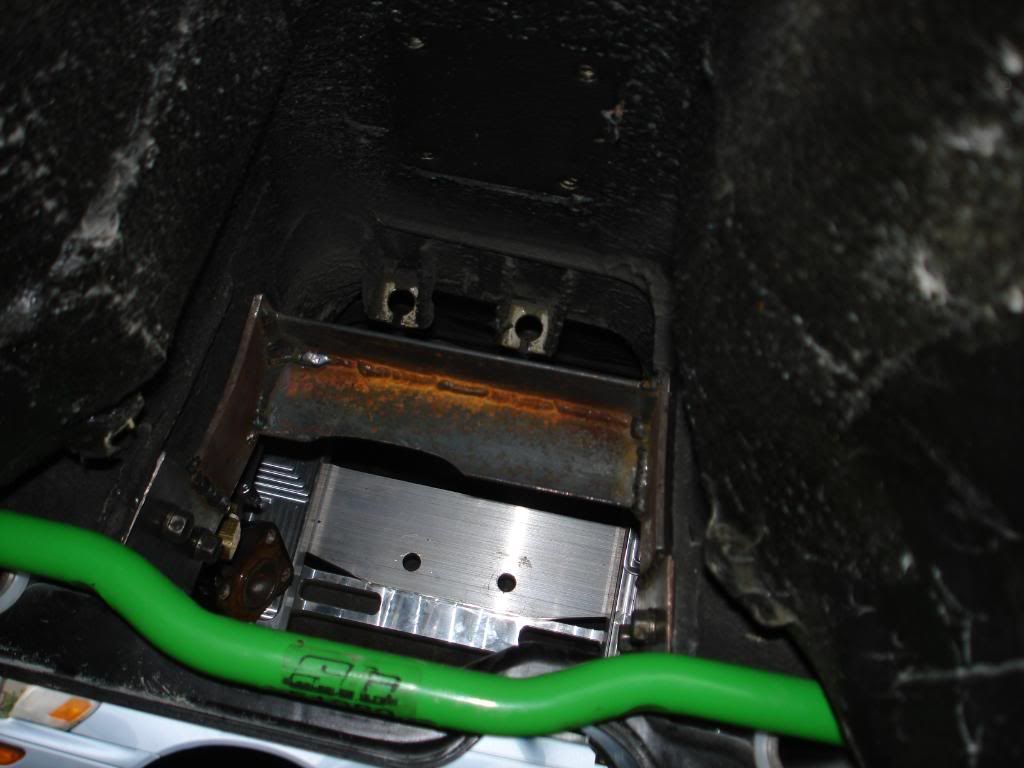
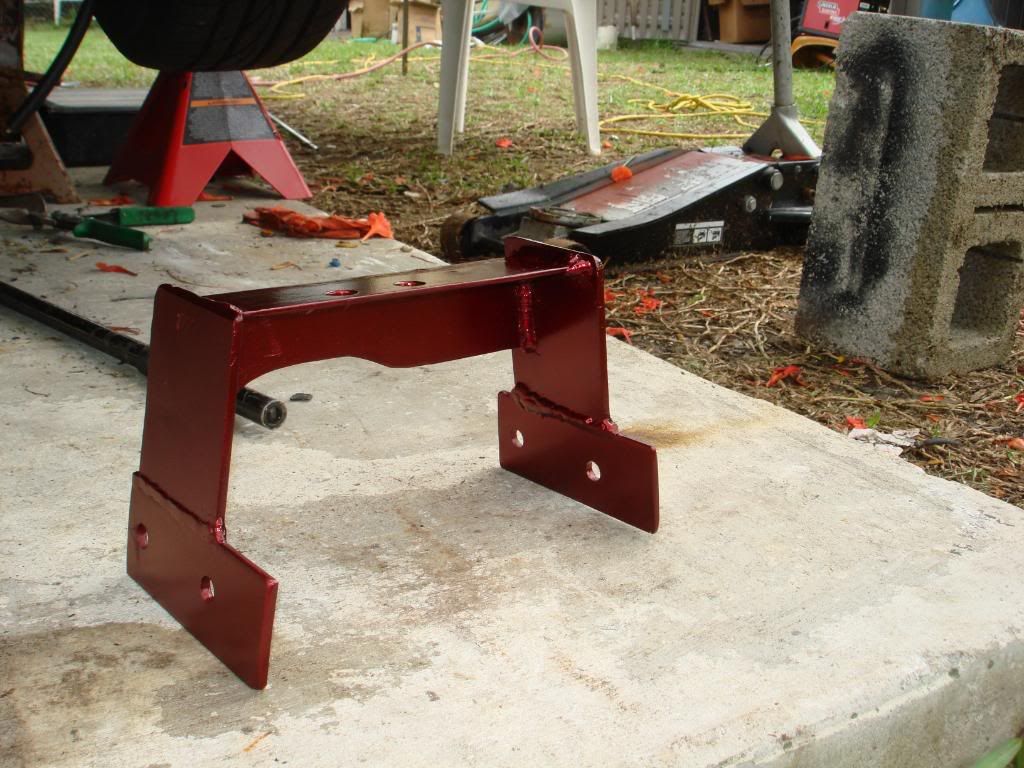
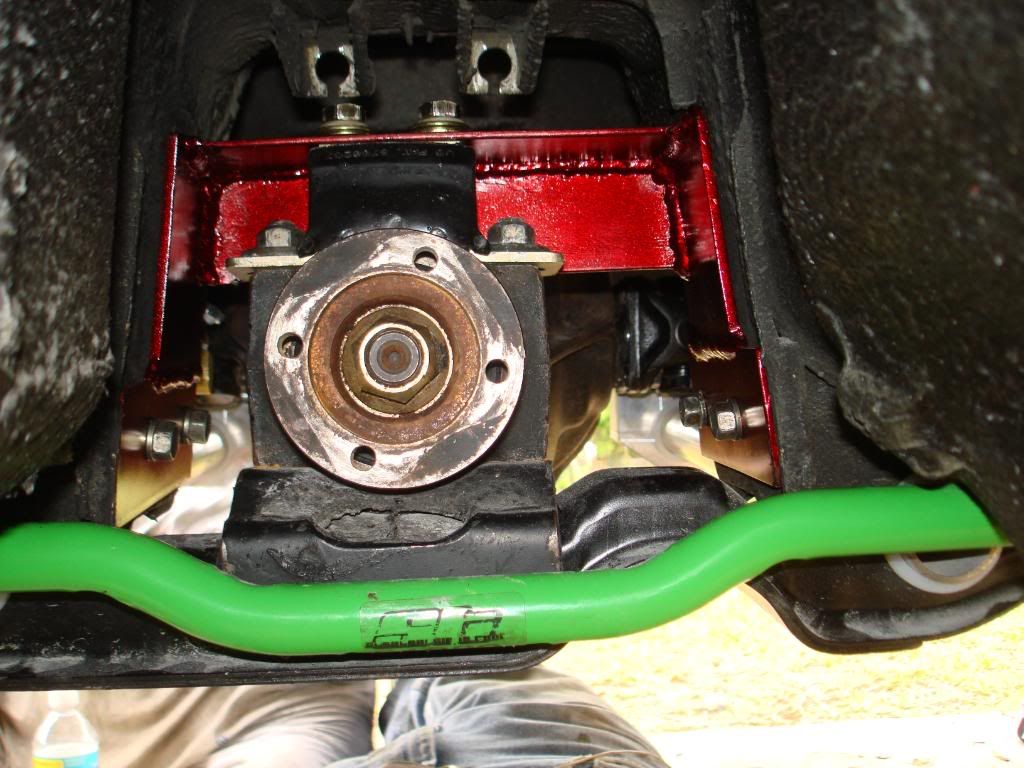
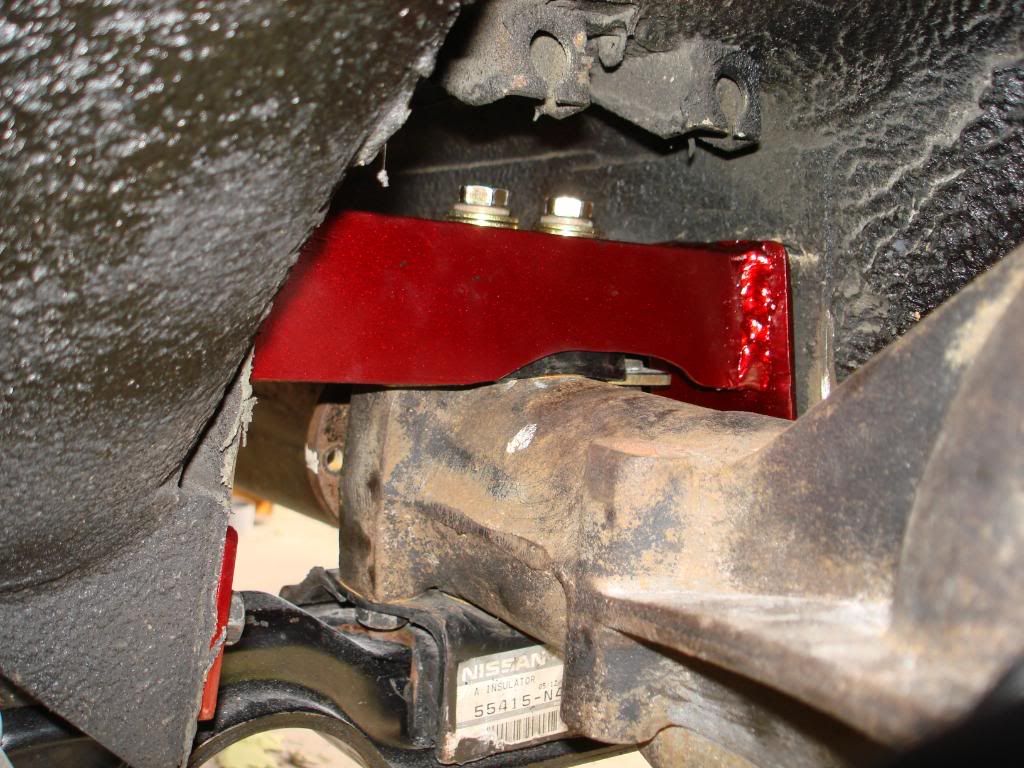
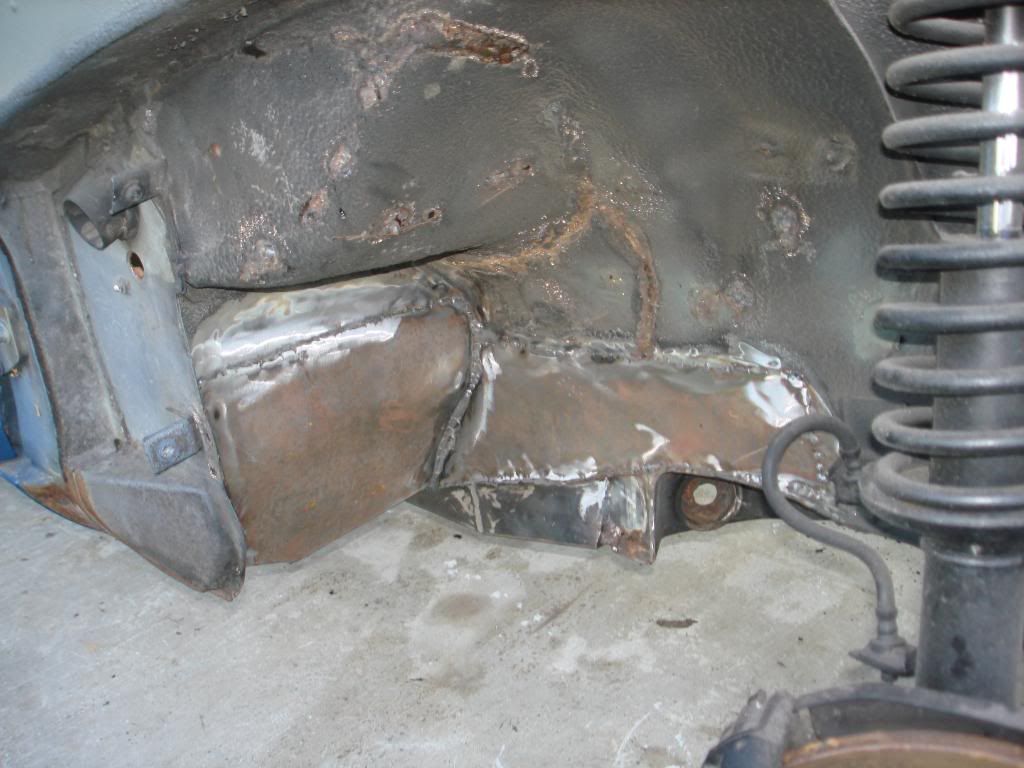
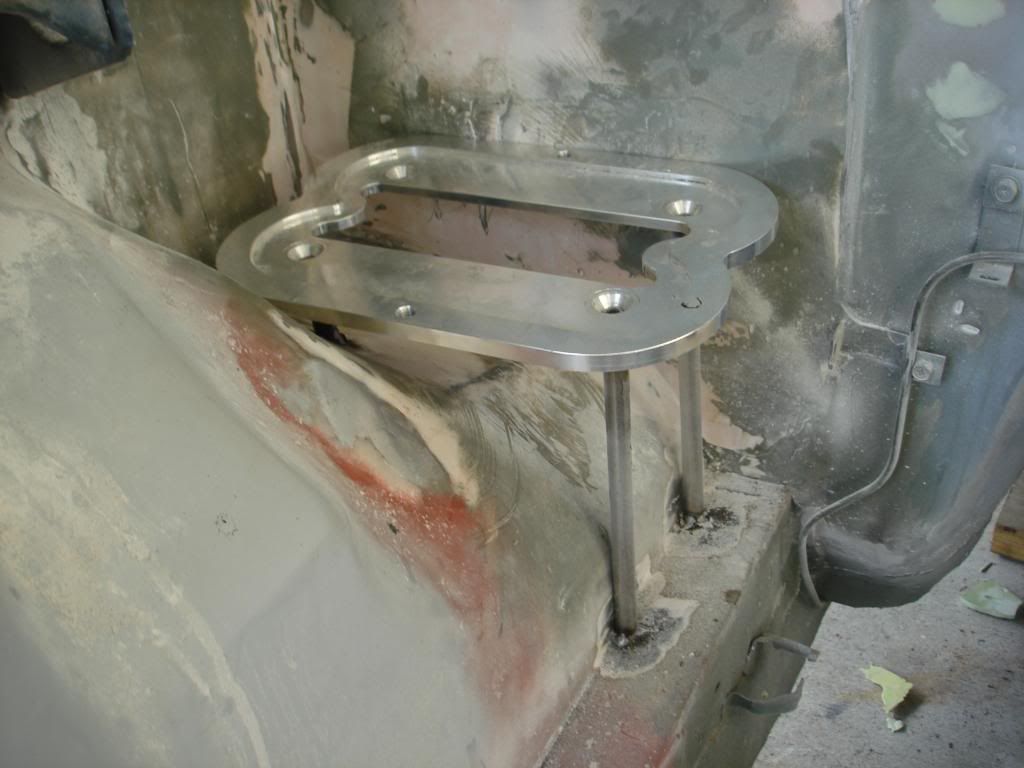
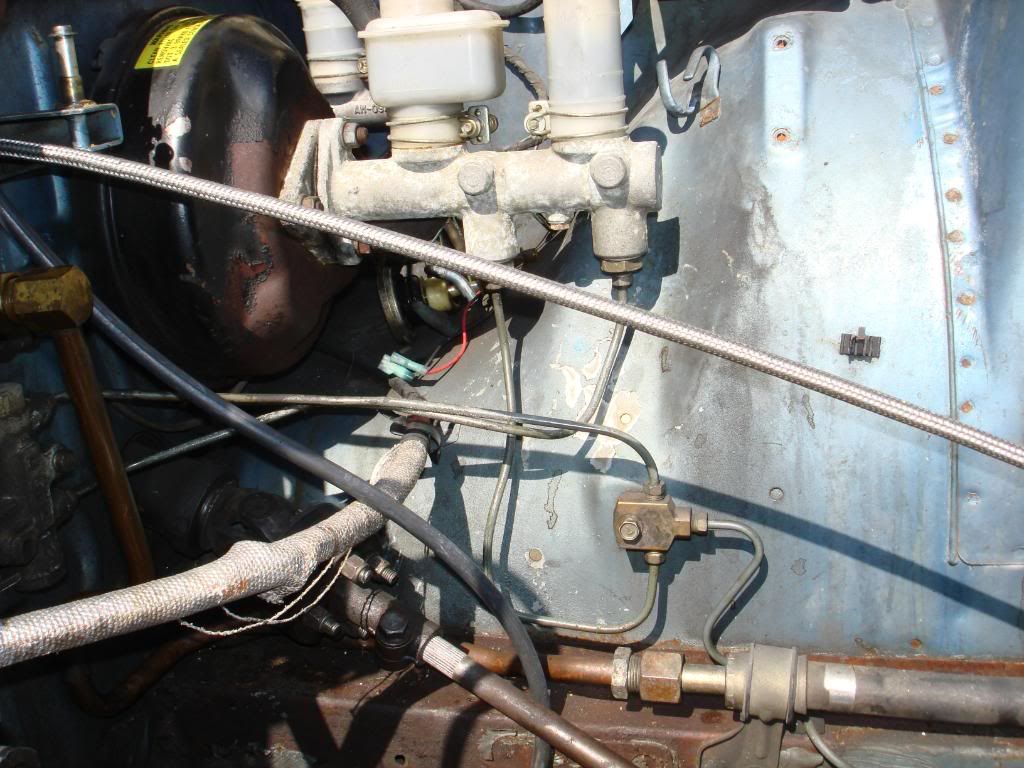
How about suspension..... we got the AZ stuff.Also got rid of the strap over he diff and made custom one.
And Thanks to Dave @ AZ Z car he was a great help on this part.
-
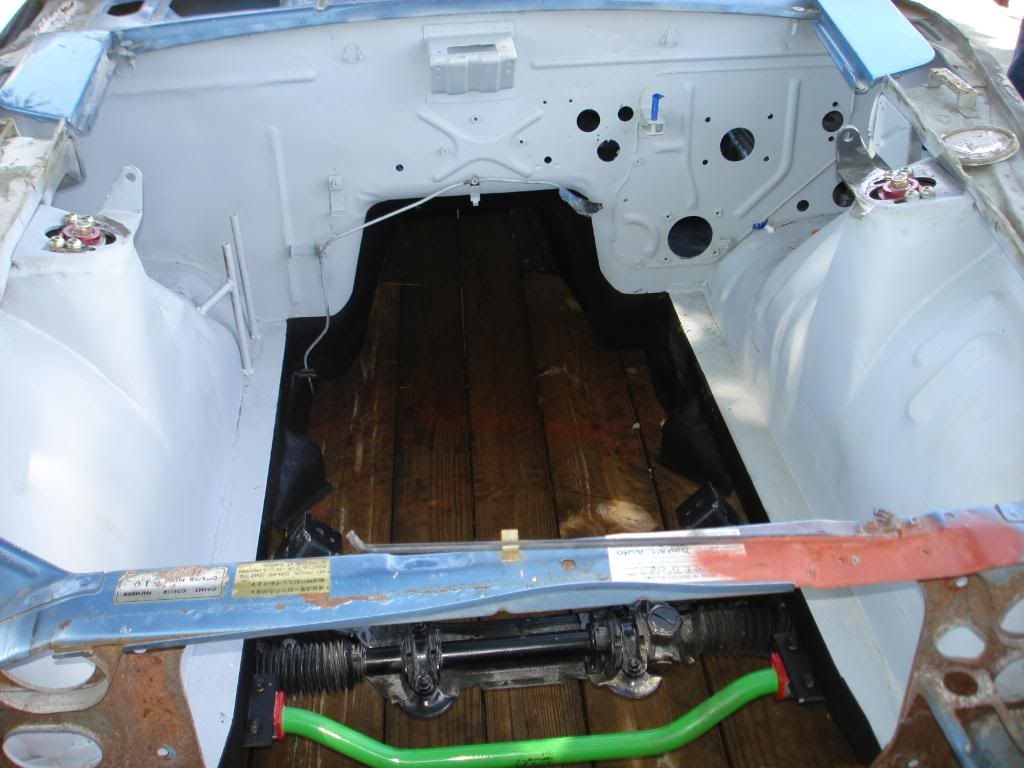
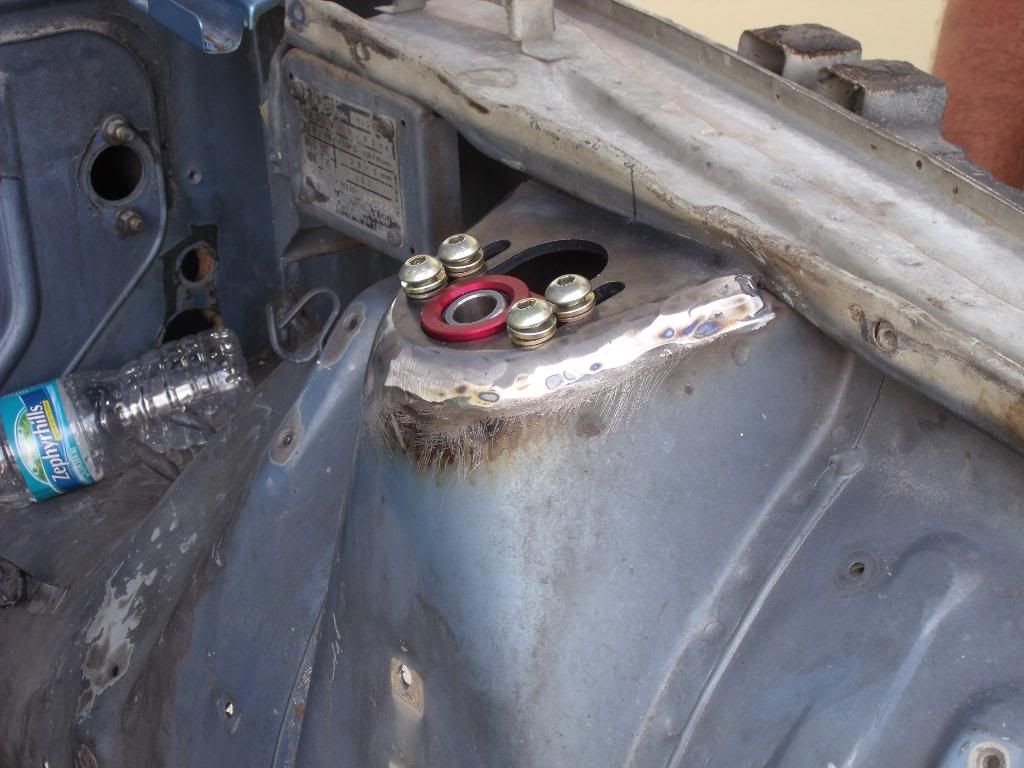
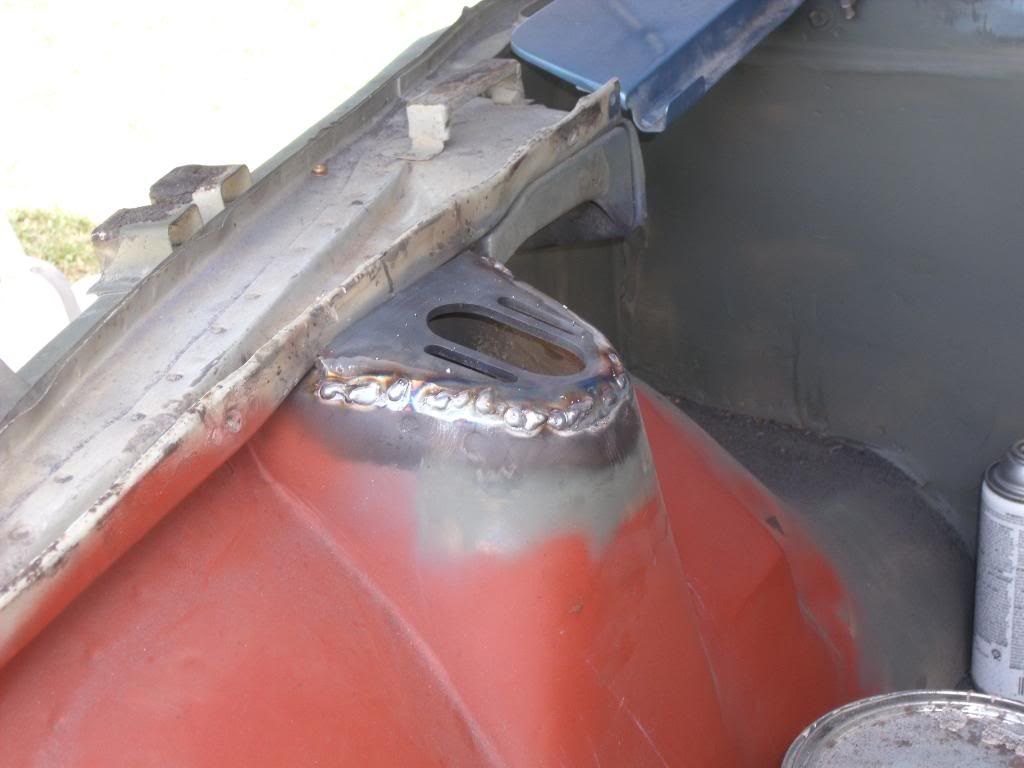
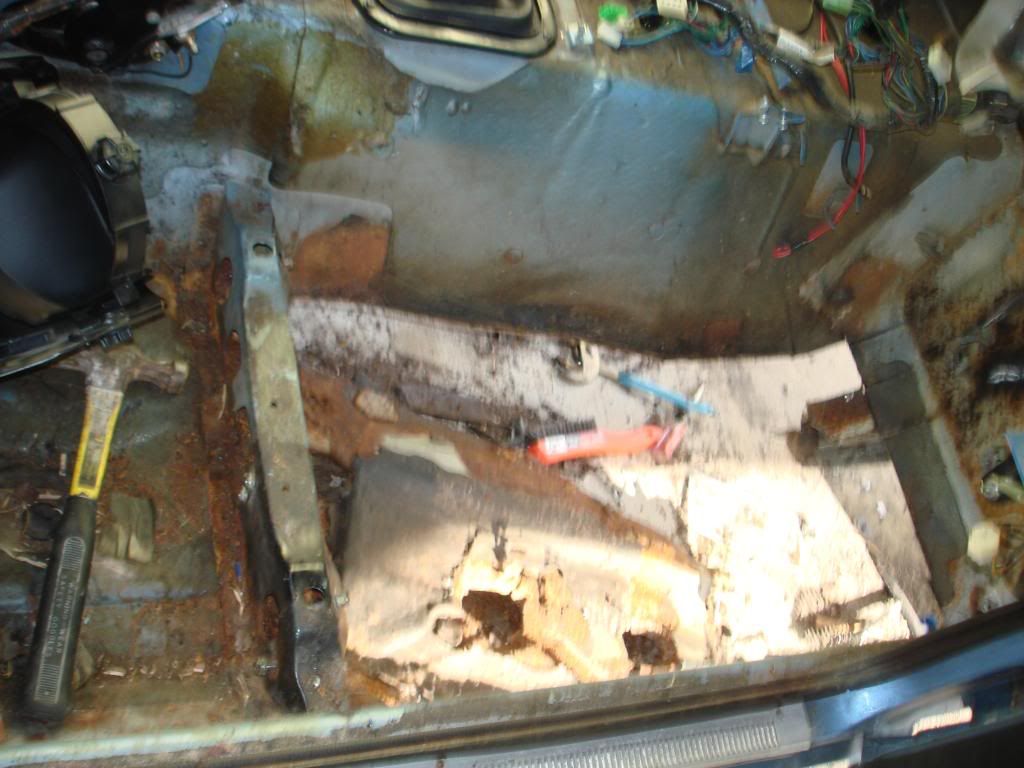
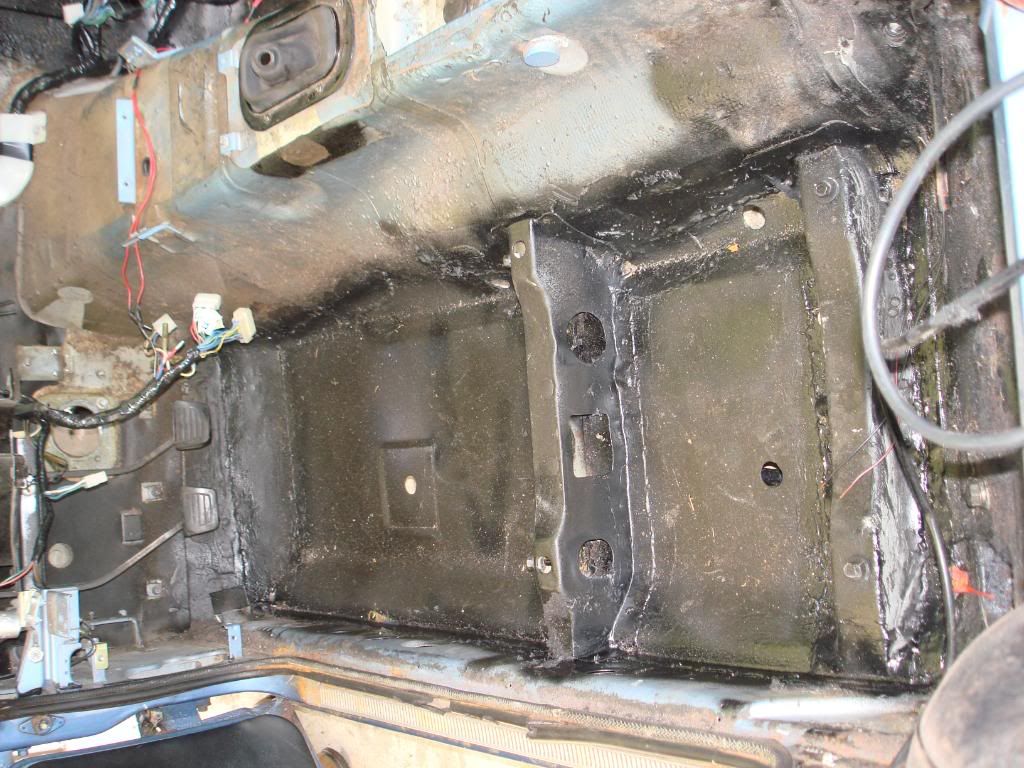
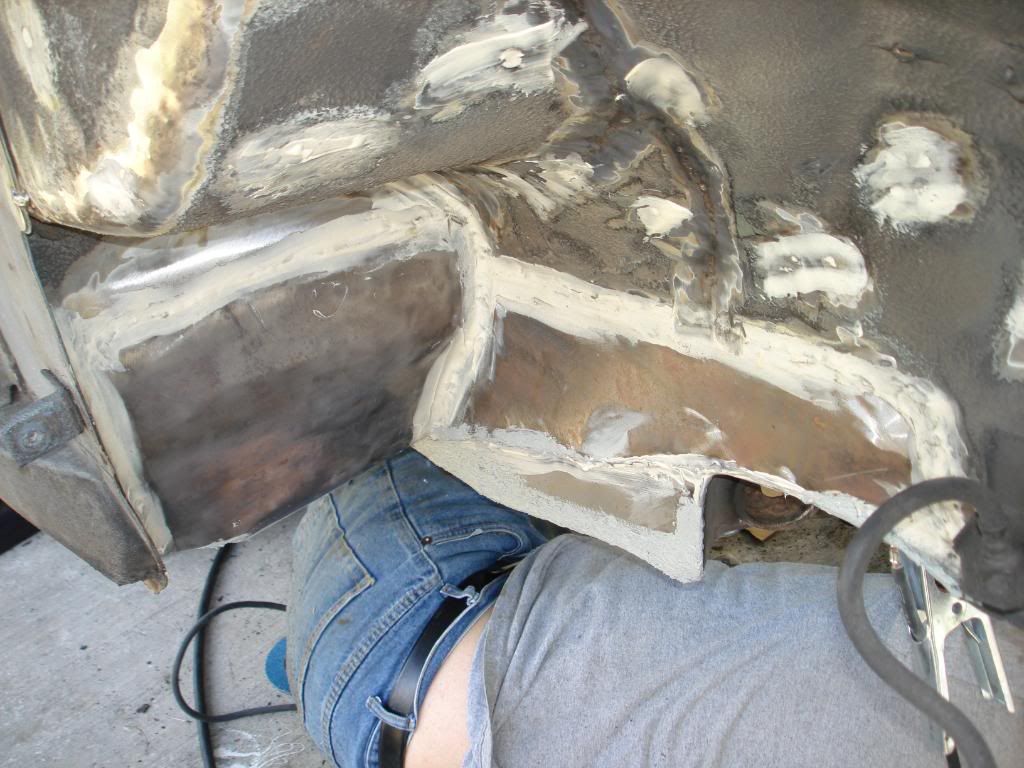
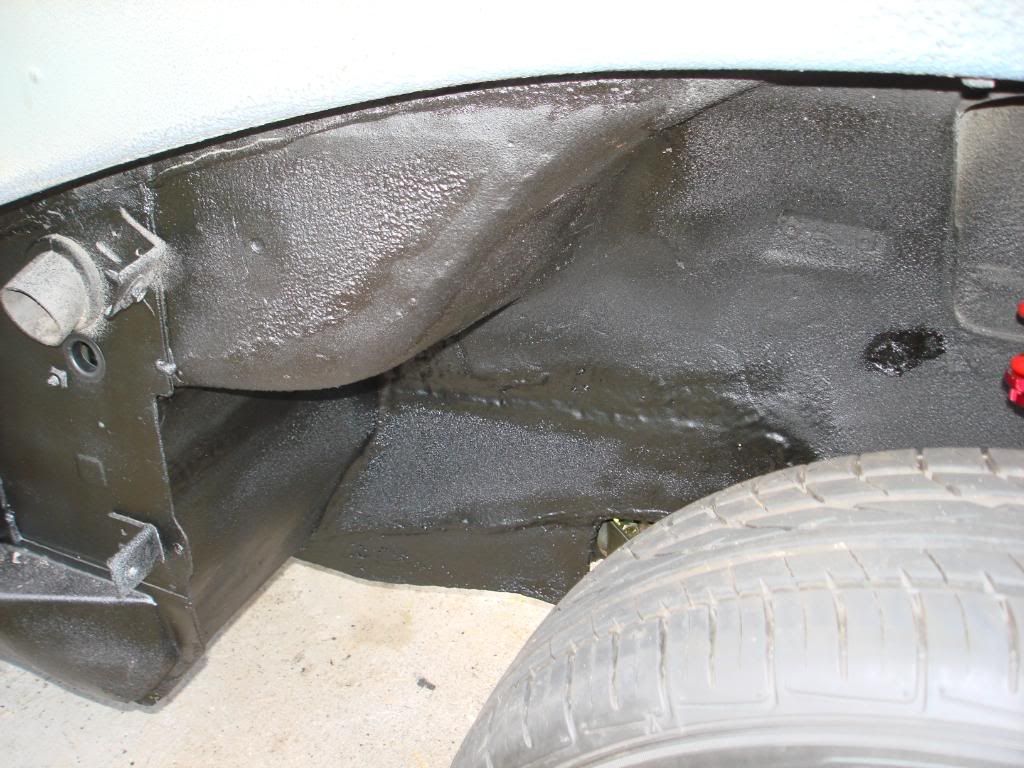
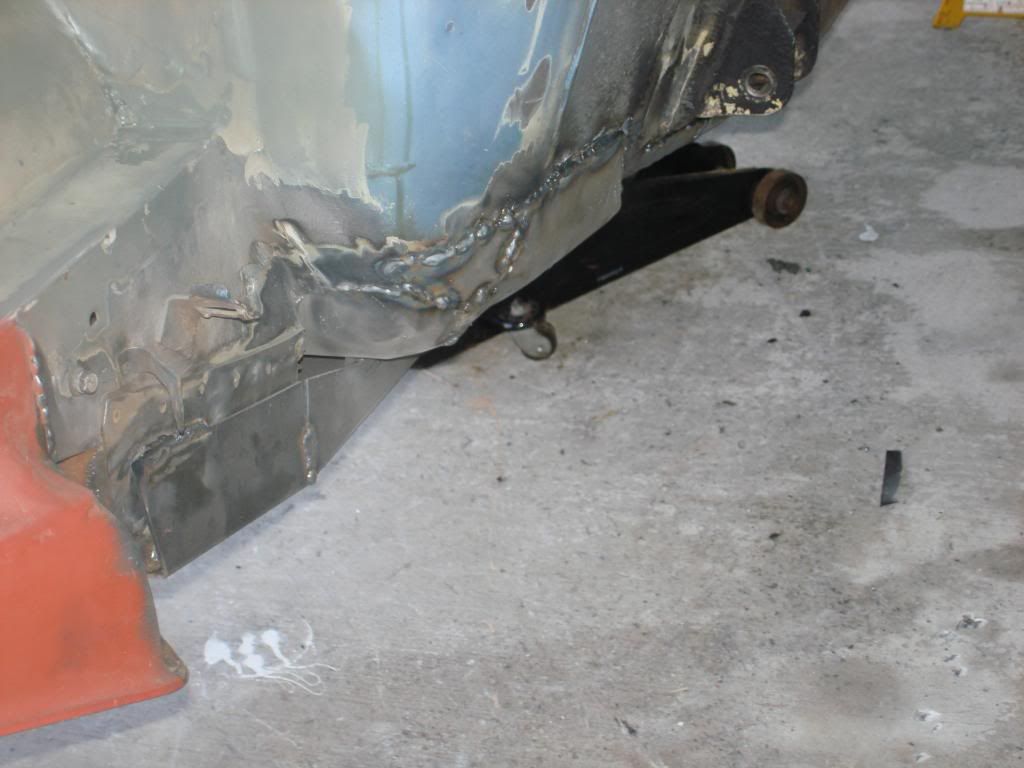
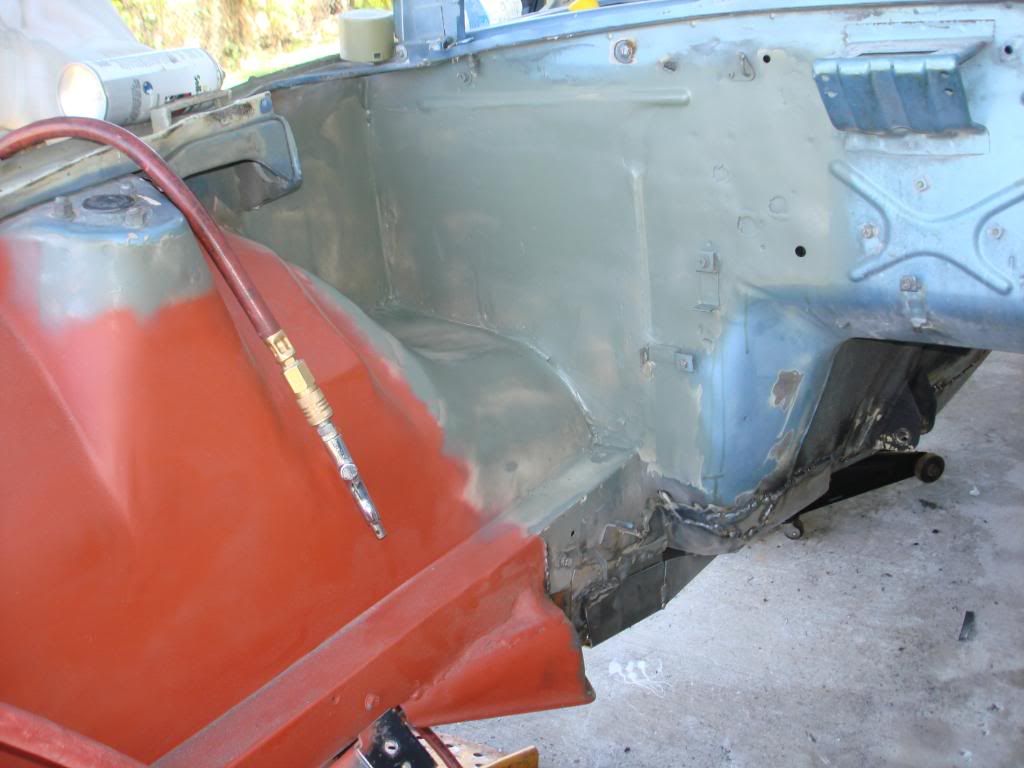
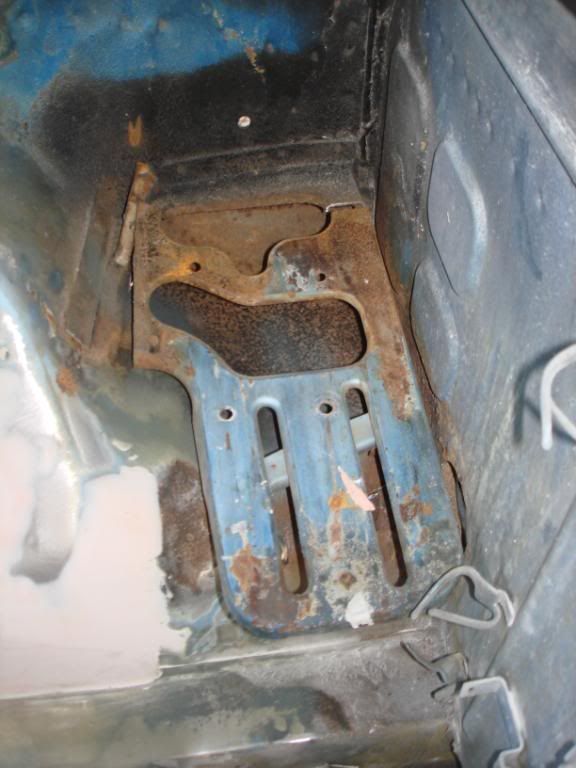
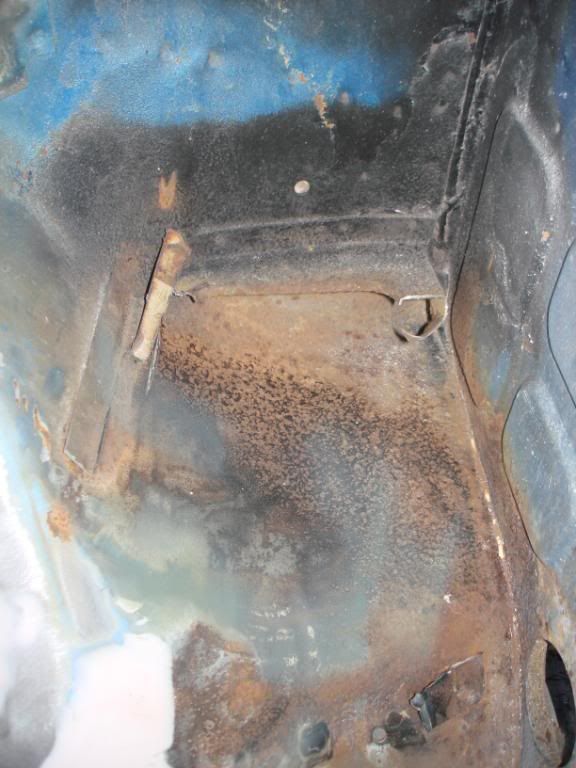
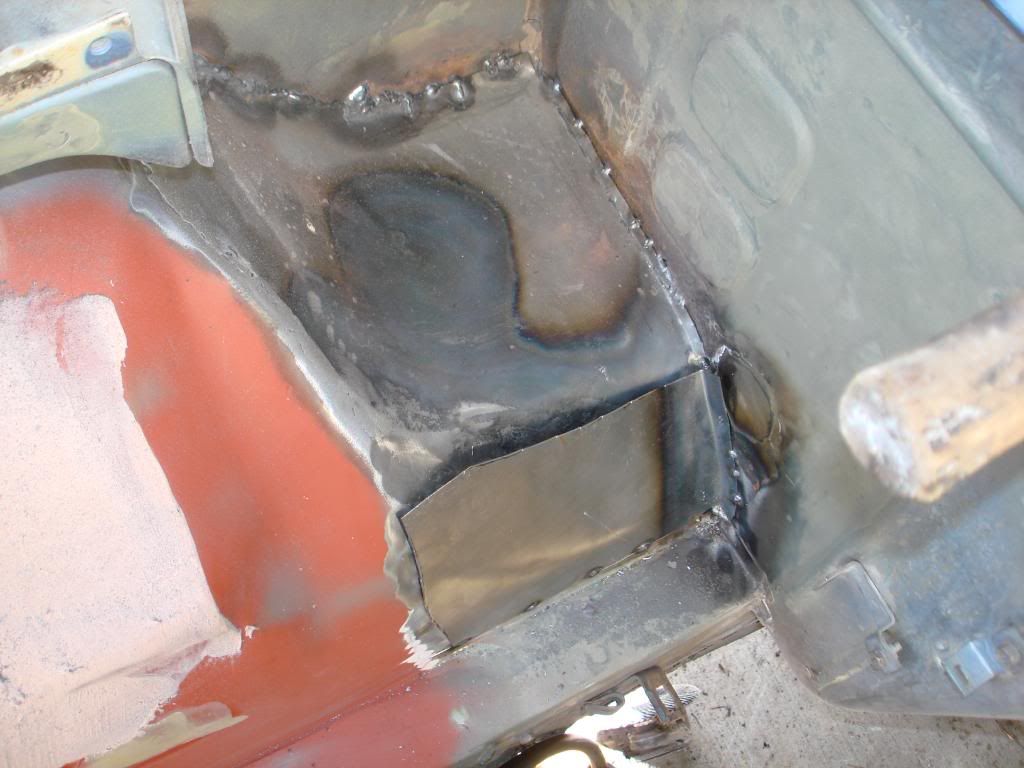
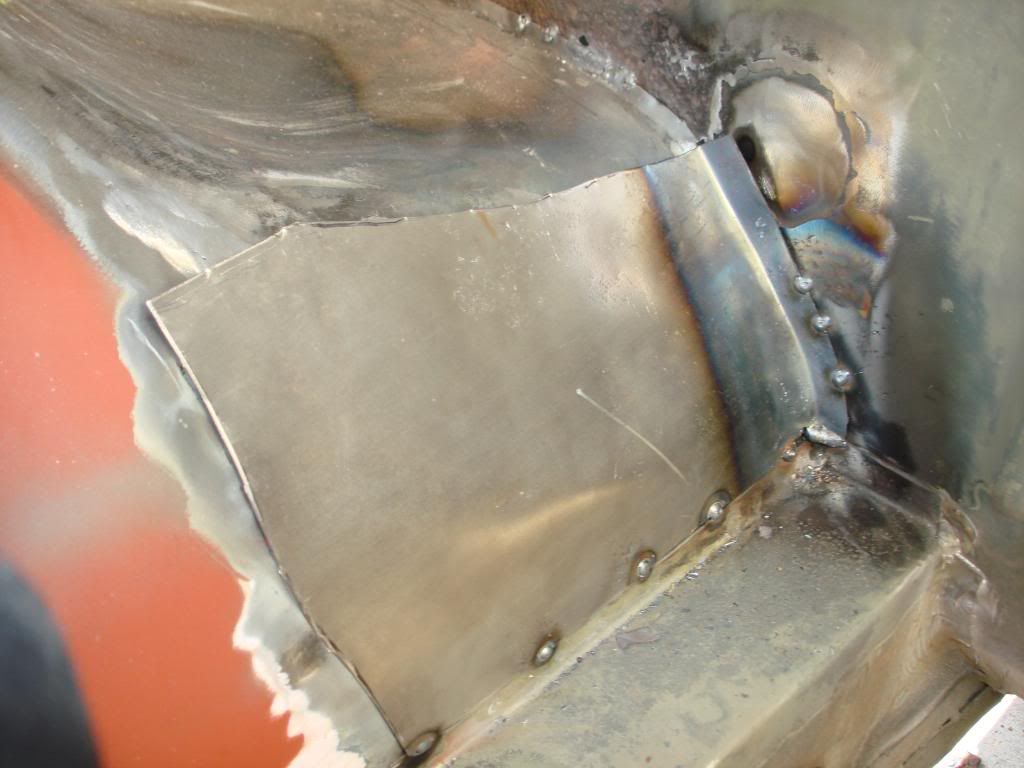
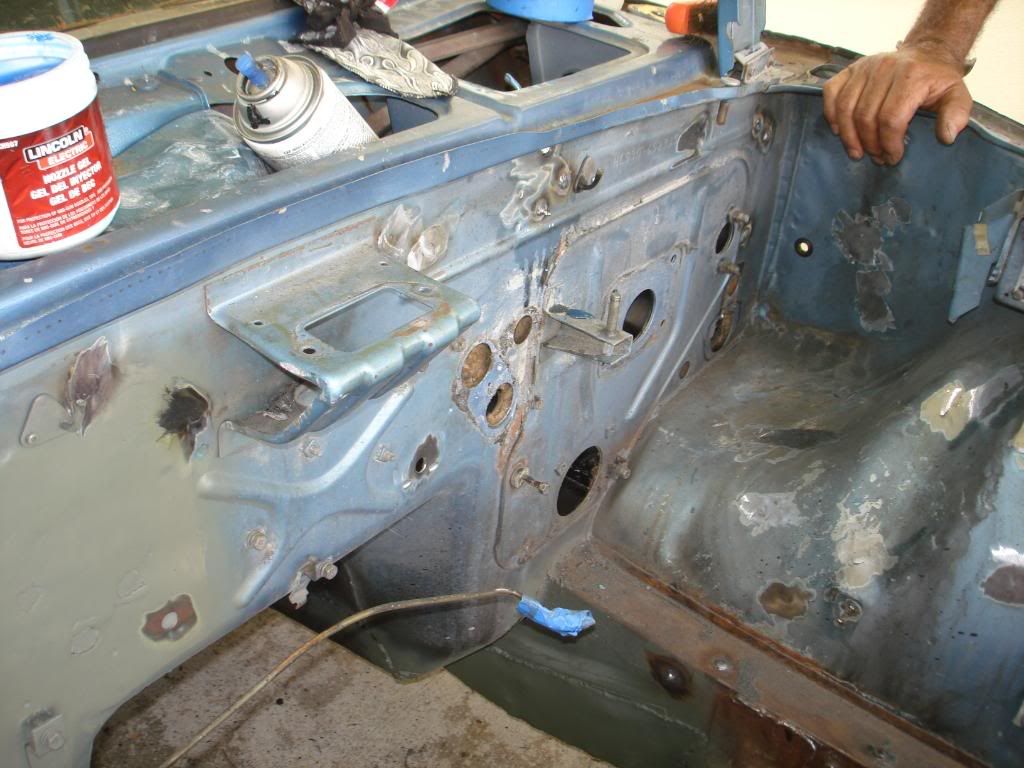
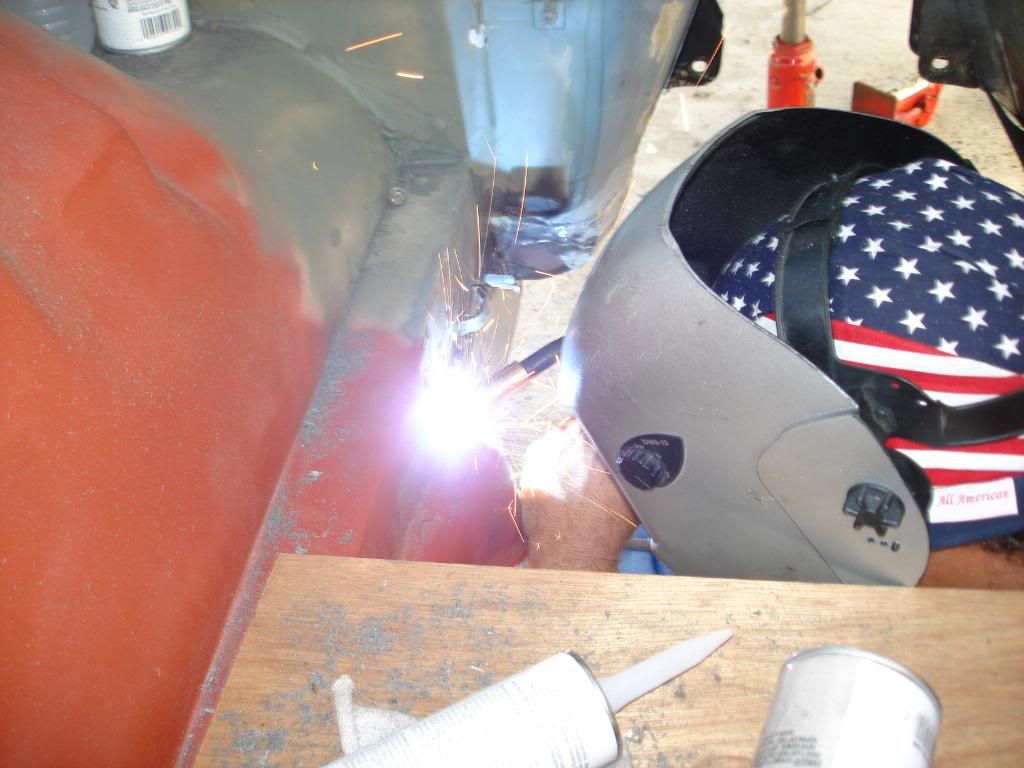
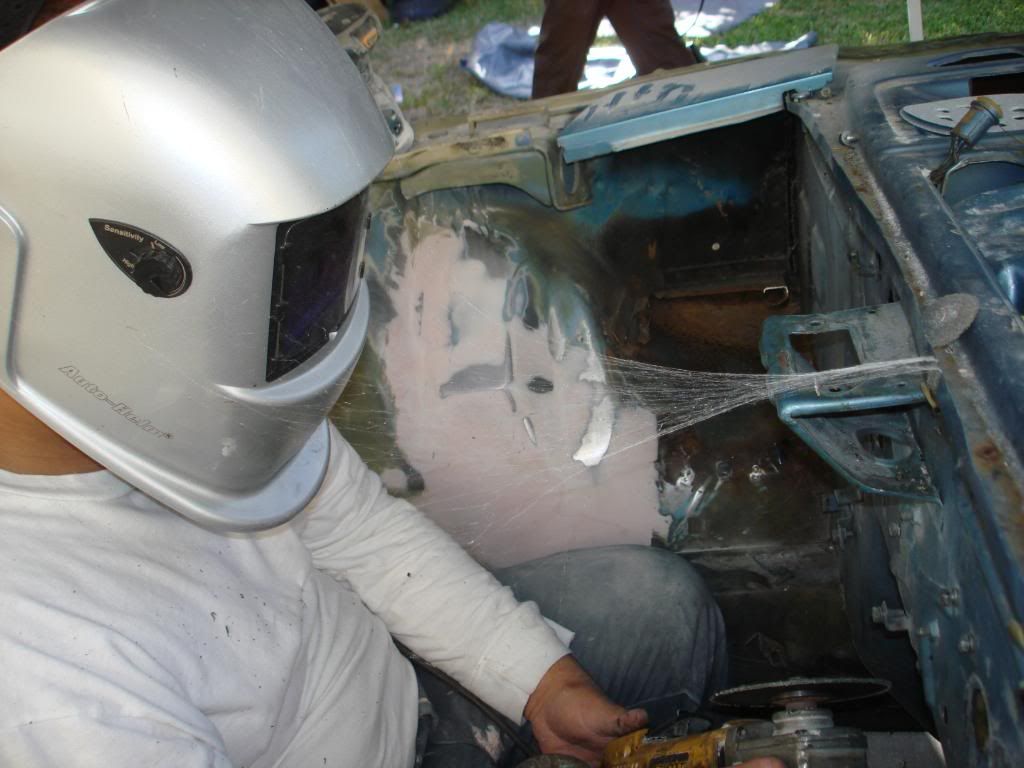
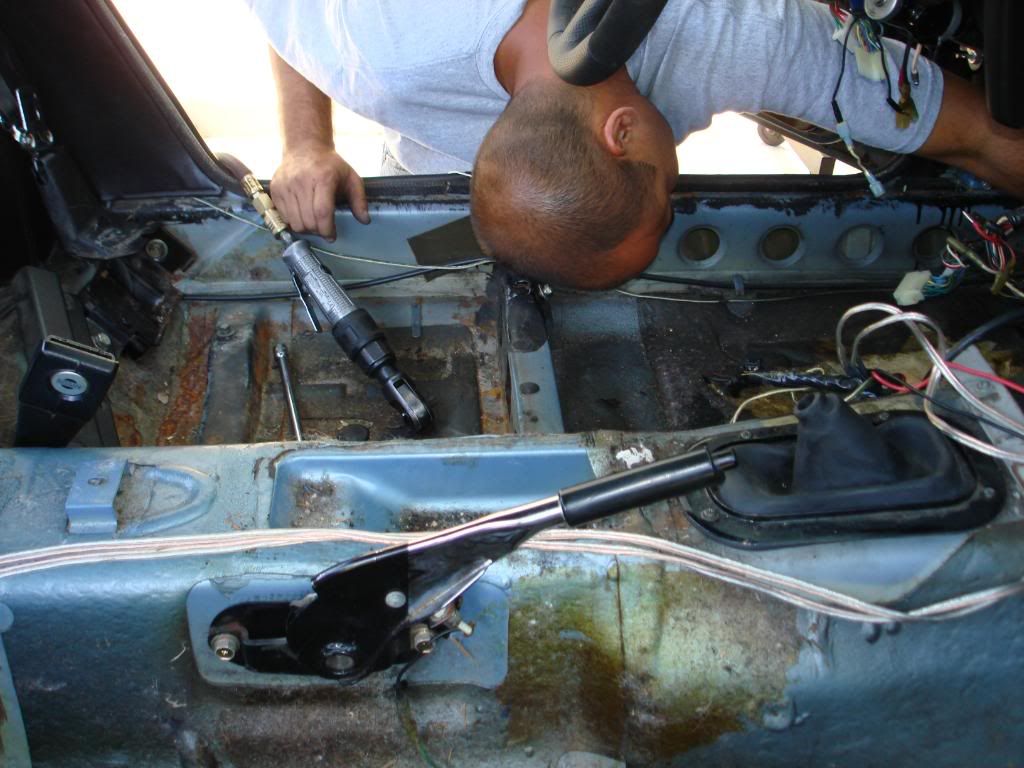
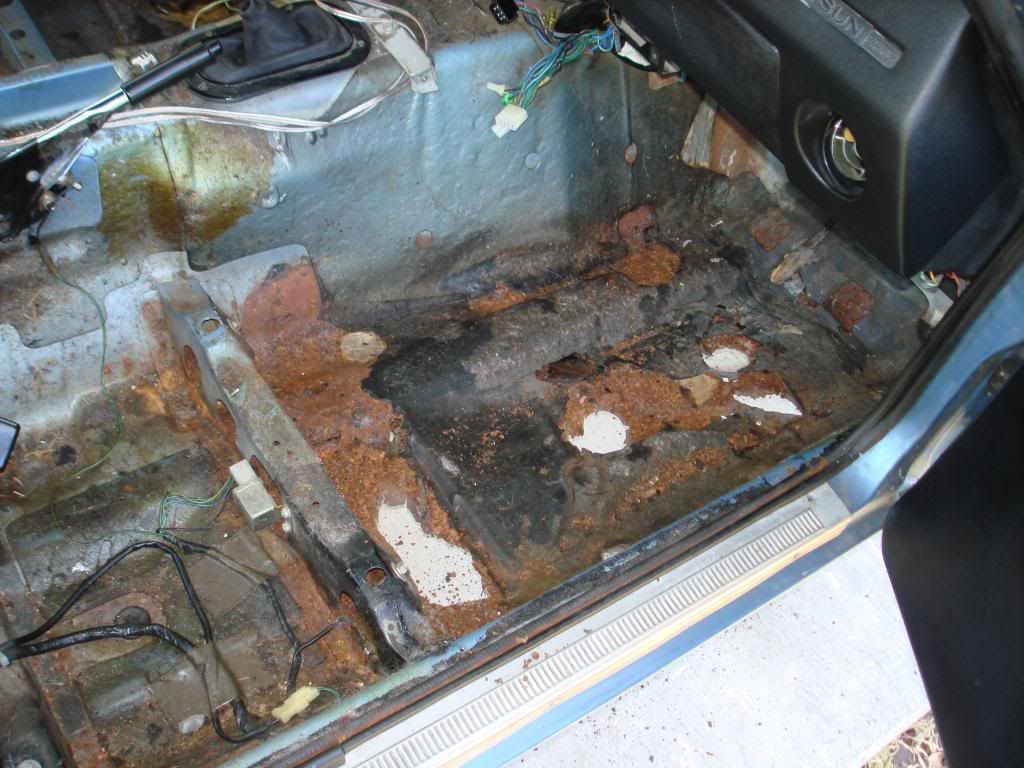
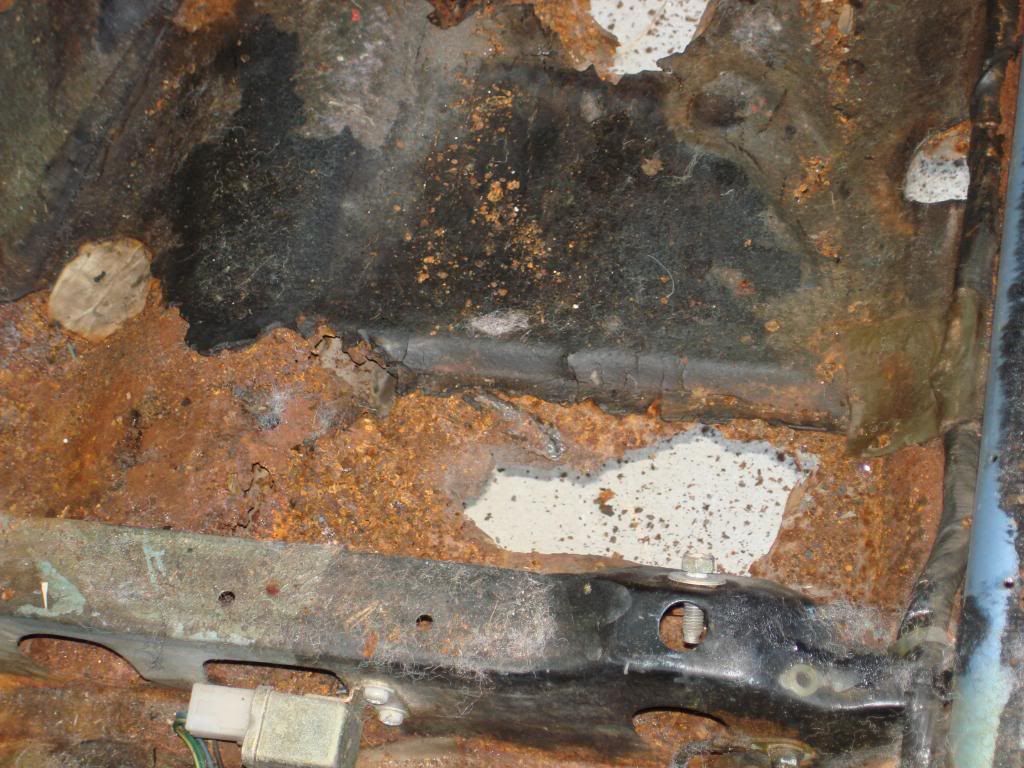
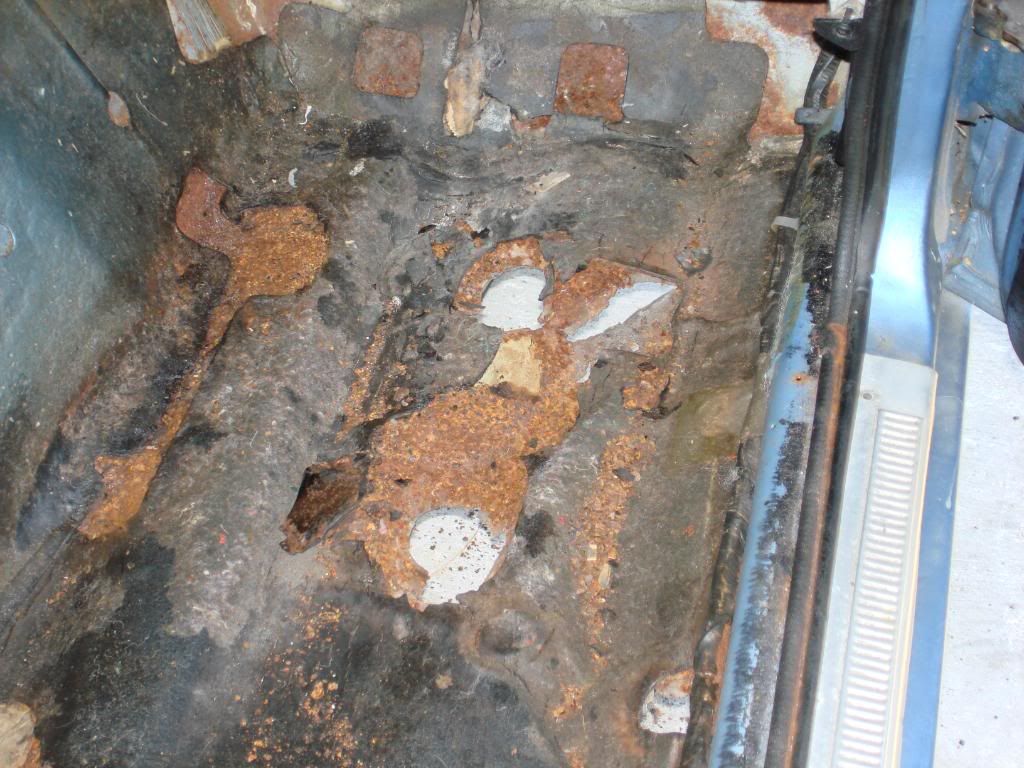
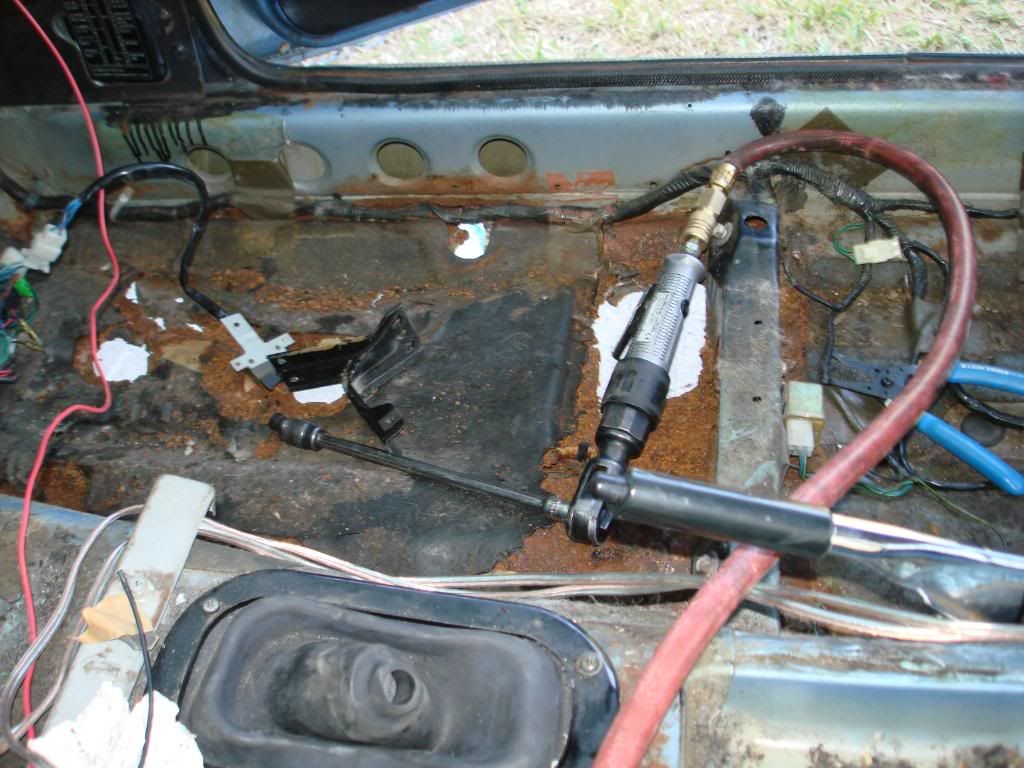
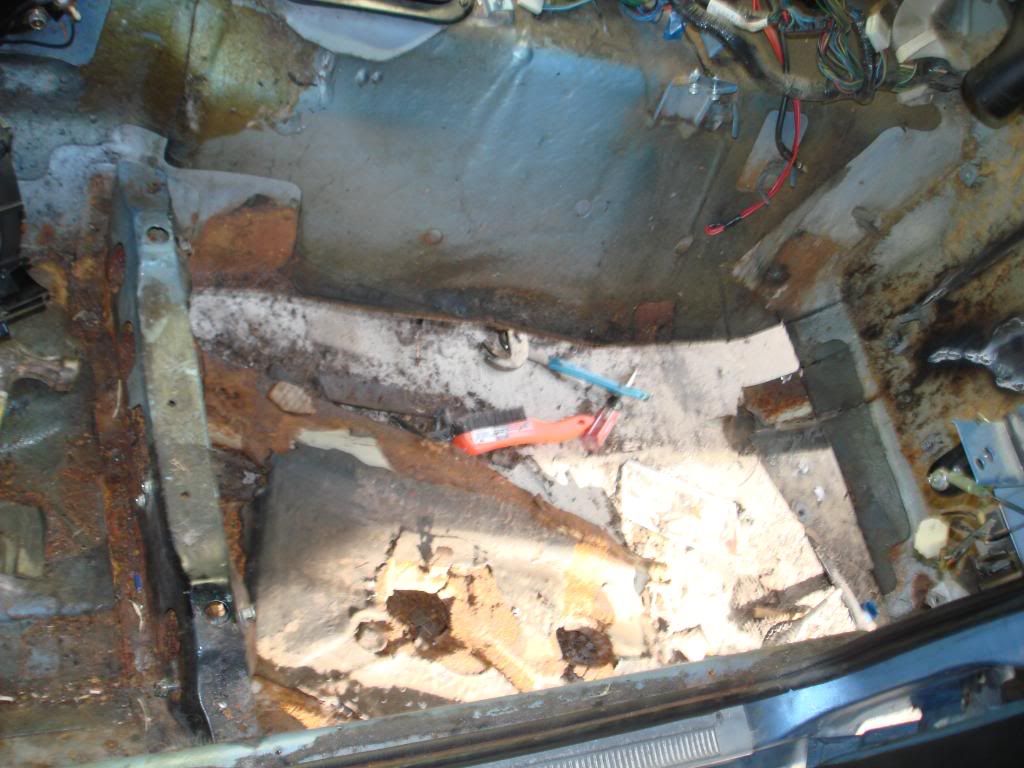
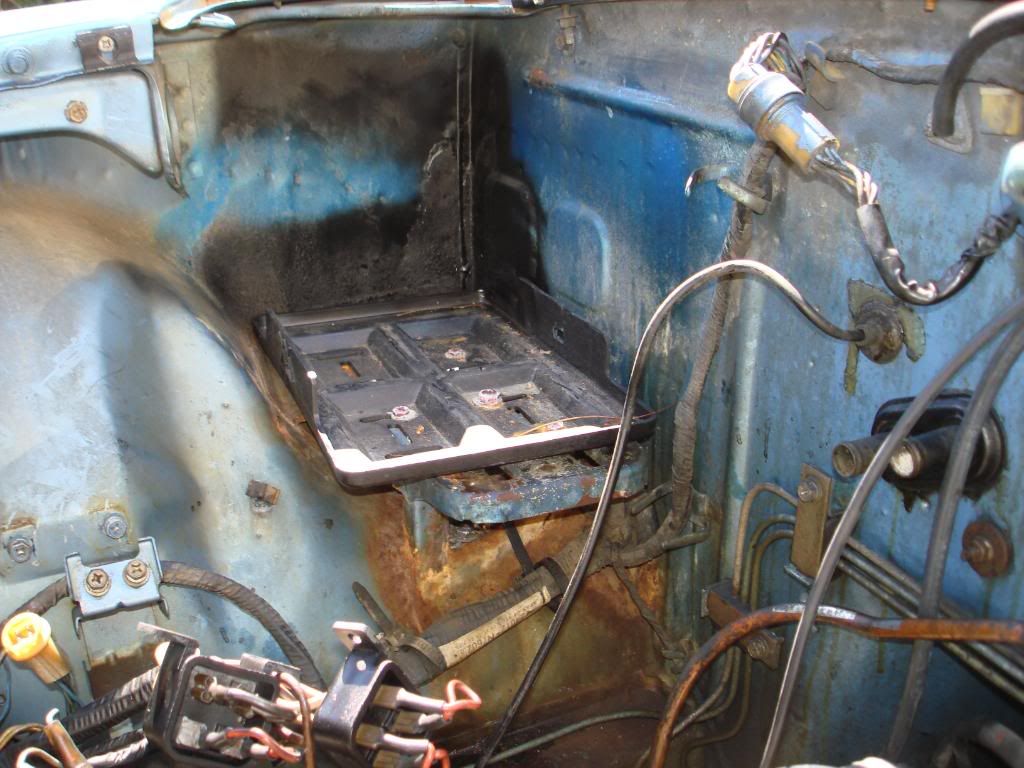
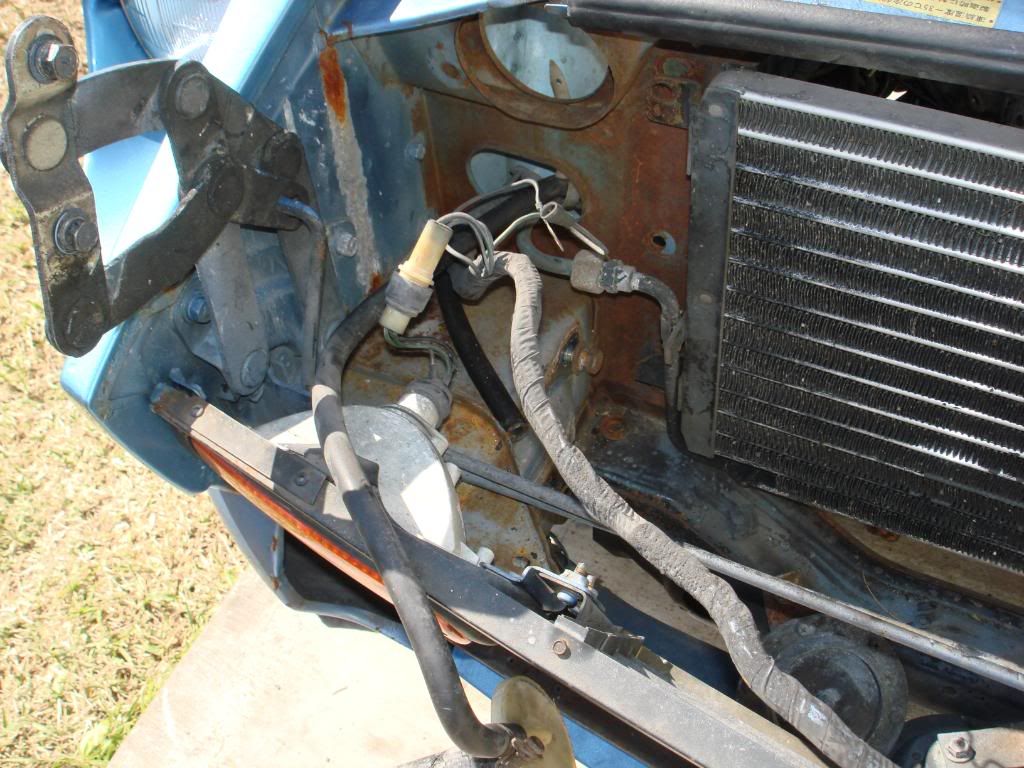
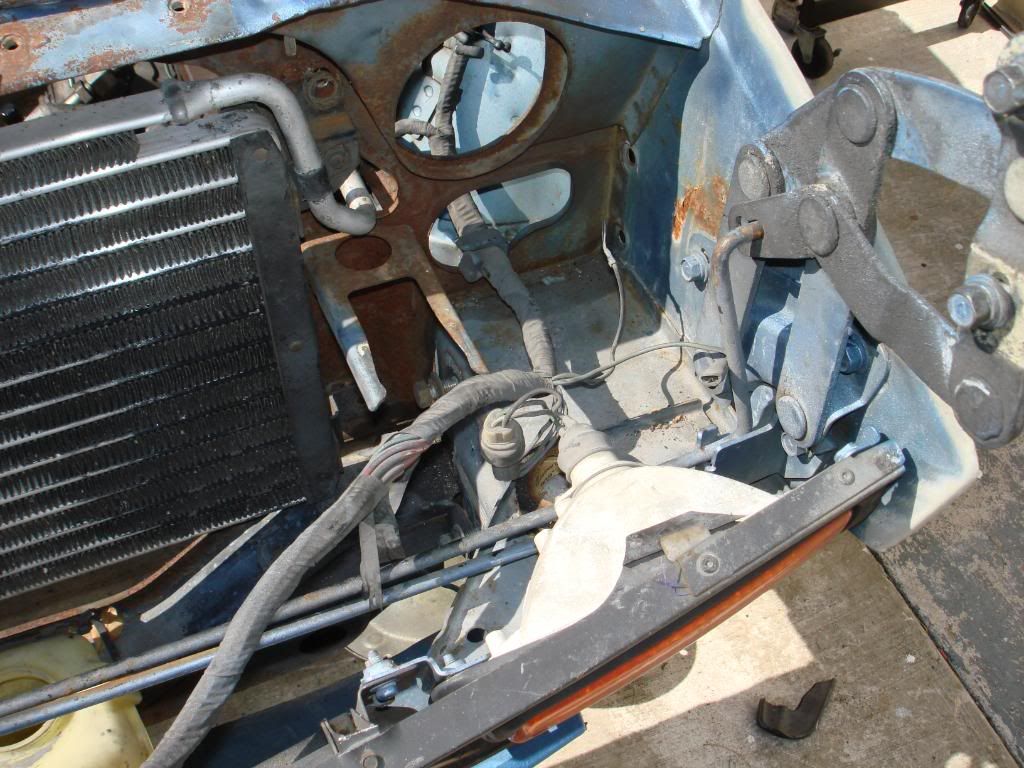
Now on to the sheet metal work. Replaced the floor pans and rails we also did bulldog rail. We redid the battery tray corner , lower radiator suport,
filled all the unused holes and shaved the engine bay.
-
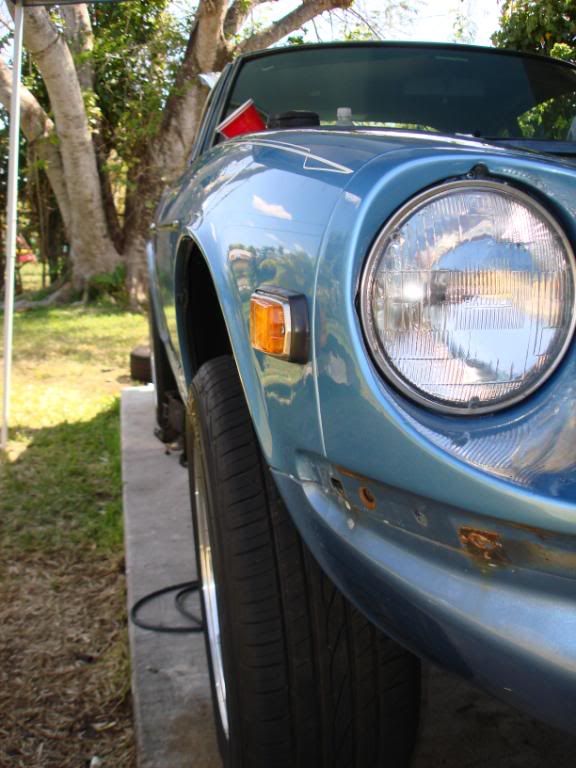
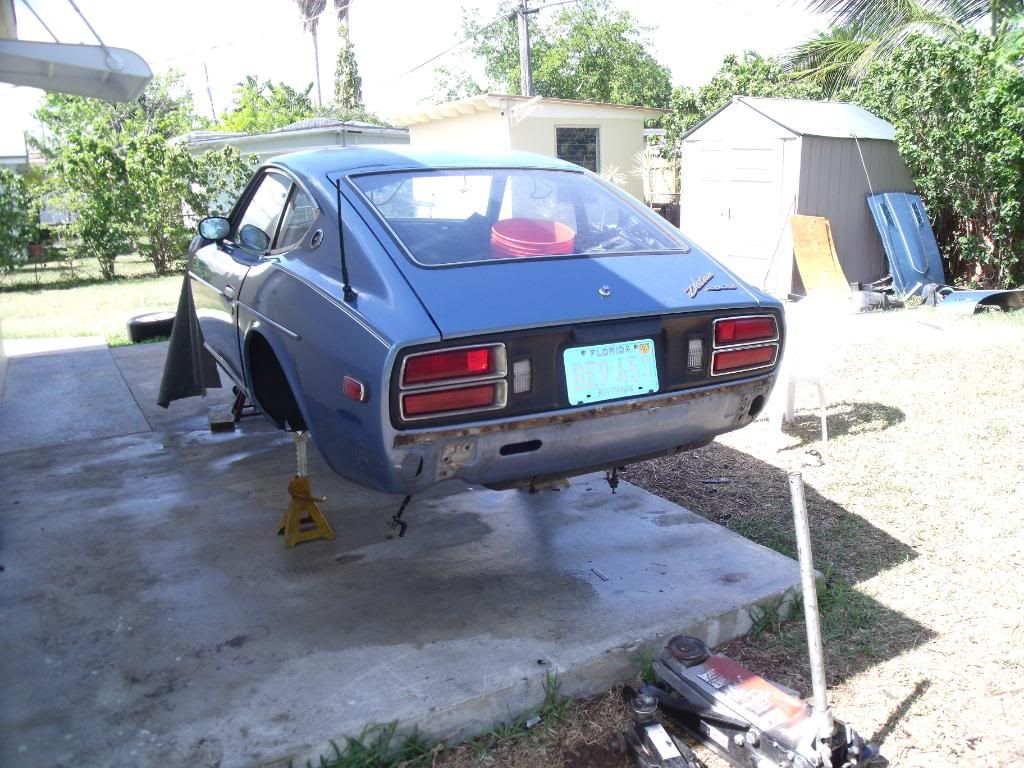
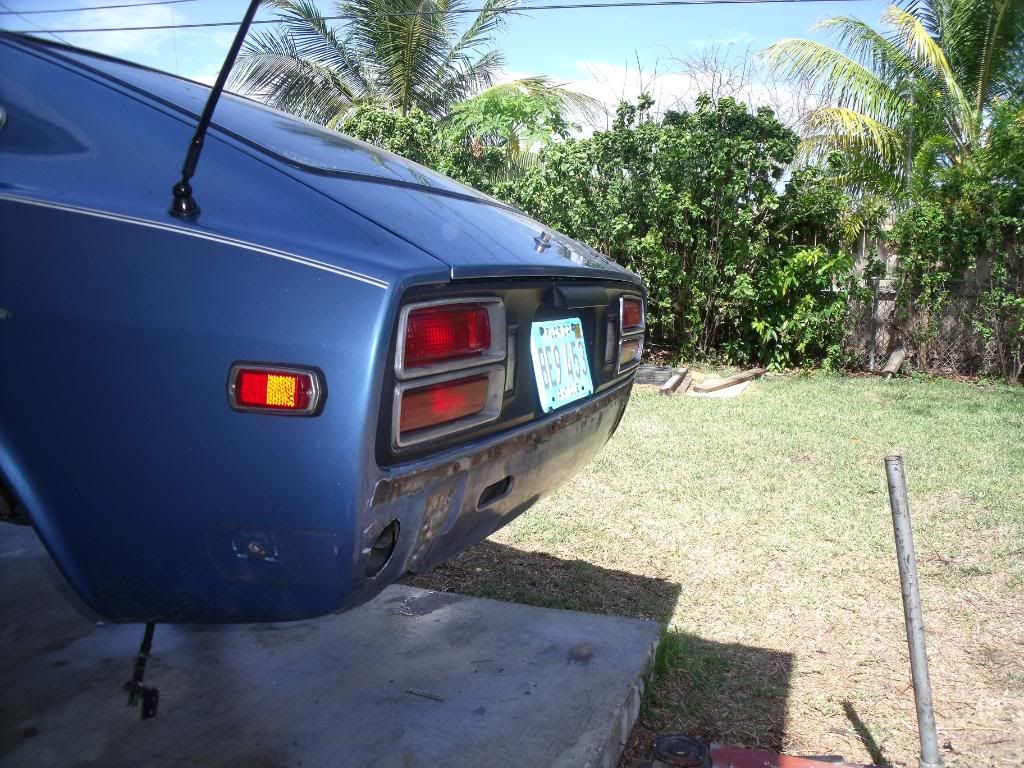
Here are some pics of what the out side of the car looked like.
-
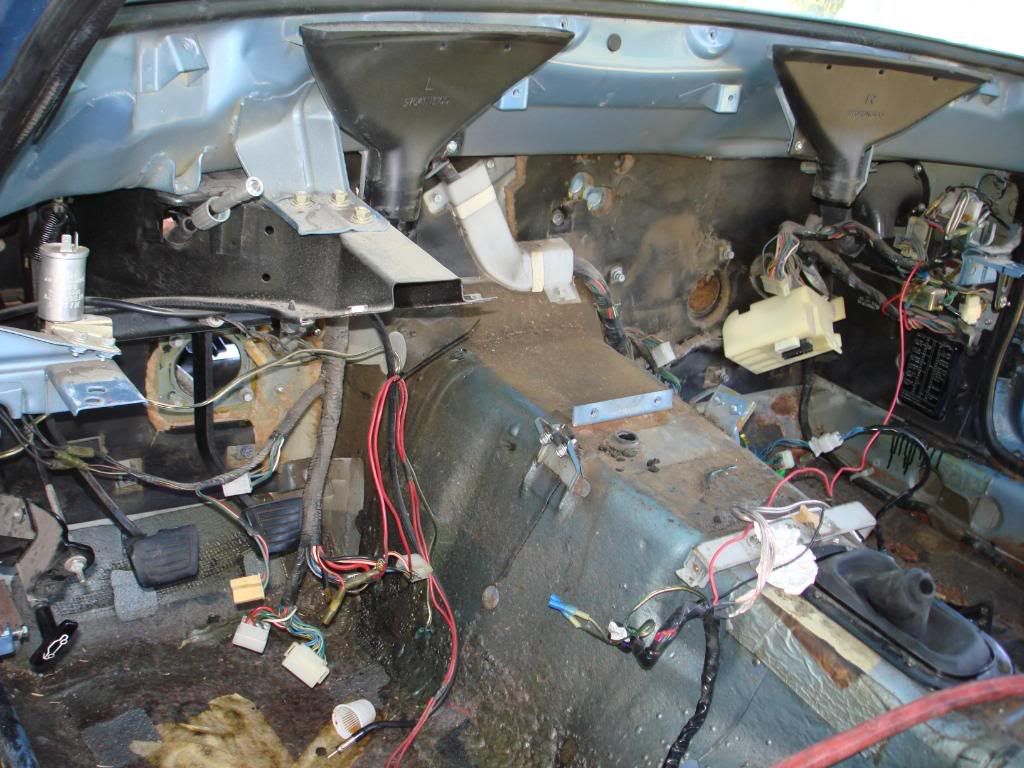
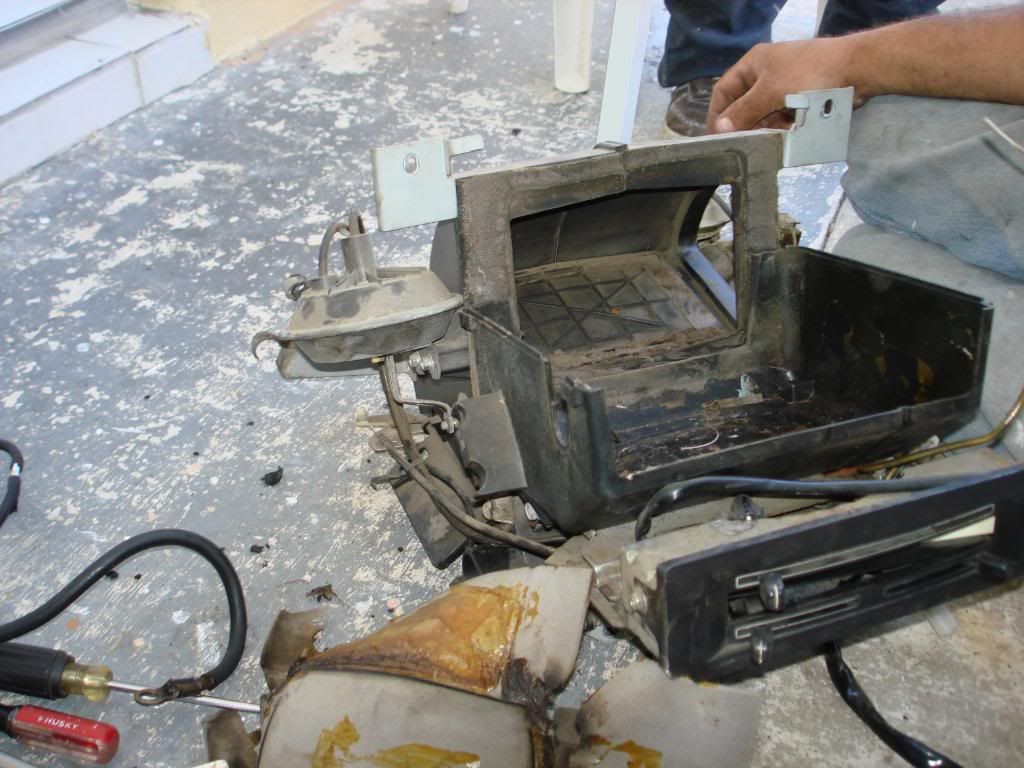
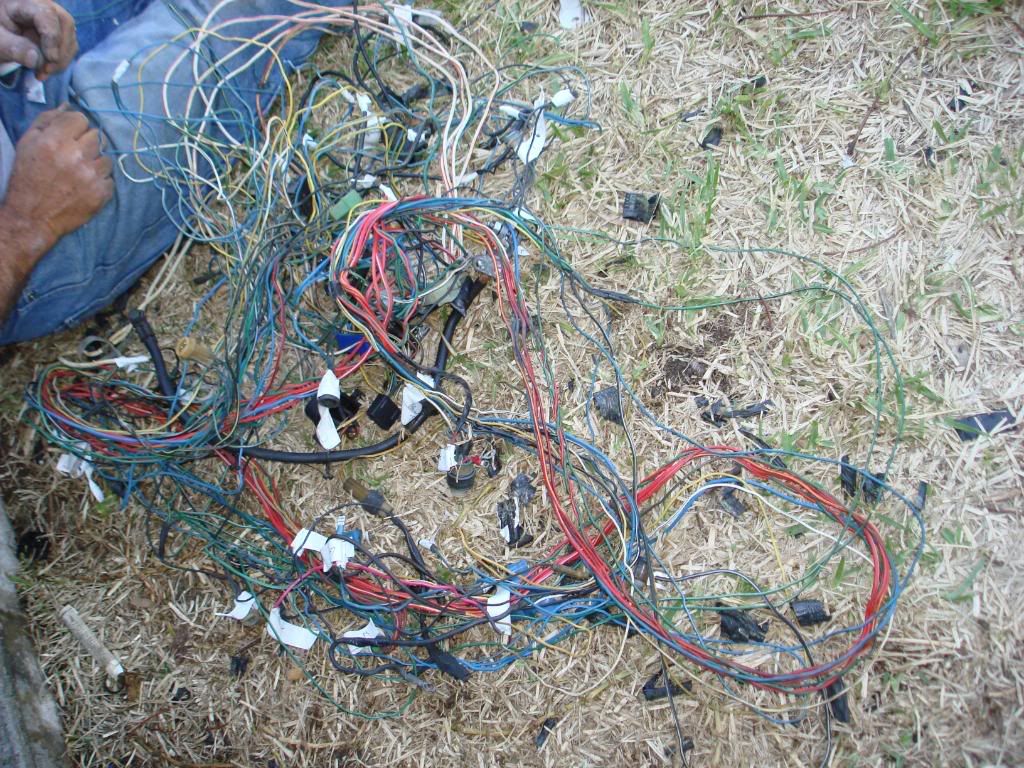
We said why stop there lets do the the inside to. so we riped out the old stuff inside, wiring and all. The floor pans(better said what floor pans lol) were shot, we cut them out too. Here are the pics of the inside.
-
Hey guys I've been a member of this forum for a while but this is my first post(LOL). This forum was helpful throughout my entire build and decision making process, I thank you all. We have been working on it for 2 years now. It was originally my neighbor's car, she was the first owner and she droved it till the day it died. When I bought it and revived it. I took it to a local shop (a story for another time) and had the motor rebuild, drove it around for a month or 2 then we noticed the head gasket was blowing oil from the side. Oil will blow though the cap and well, you get the picture. So it was then we decided to evaluate the entire process...What's our horse power goal, what budget, what engine? When parts start coming off, there is really no end to it. The rest is my story...


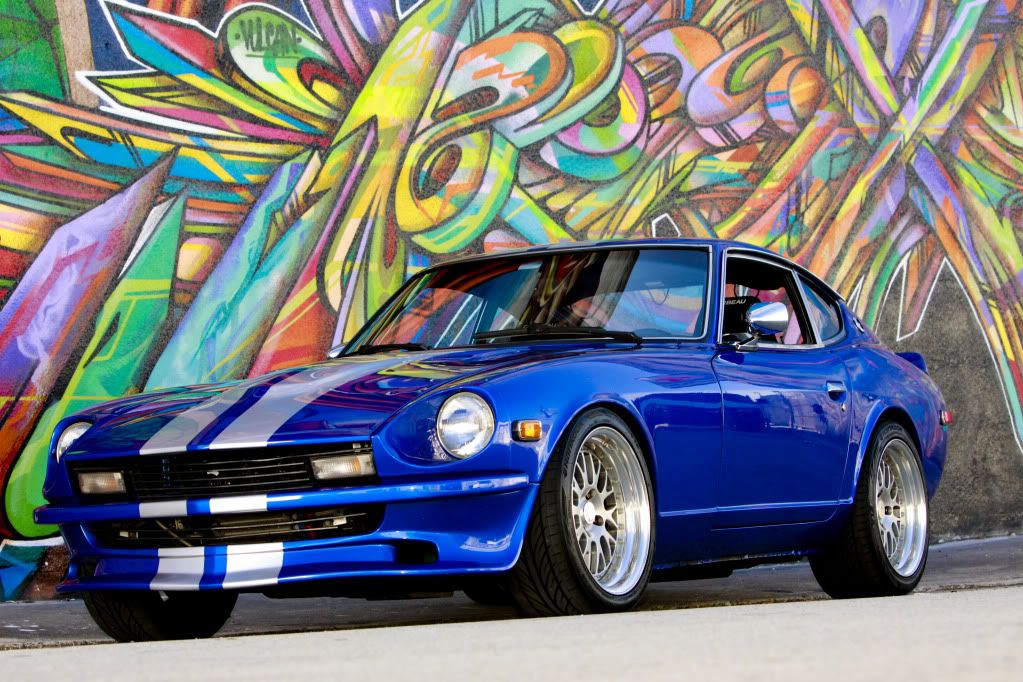


Carlos's 280z
in S30 Series - 240z, 260z, 280z
Posted
I have had them now for two years and they do wear well, they are also very comfortable. I'm not very big, so I slide right into them...The manufacturer sells the rail, the part number for my 78-280Z was D212T, I believe for your 240z the part number changes to C22011. I don't have the pictures to show you but, we cut out the brackets from the original rails and welded them to the new seat rails. I have about 3/4" clearance on the top of the seat from the door panel and around 3/8" from the lower section to the arm rest at the closest points. Hope that helps you.