thebruce Posted January 22, 2014 Share Posted January 22, 2014 Hello all! I'm starting this thread to document my progress and mistakes as I try to make this little piggy roadworthy and reasonable to look at for the coming summer. No huge mods planned as yet as my timeframe and budget just doesn't allow for it right now. I started out by spending a lot of time cleaning out my shop, organizing what I wanted to have close at hand and either throwing out or storing elsewhere a lot of the miscellany my shop seems to accumulate. A wood stove, couch, tv, and vintage game console make it a somewhat family friendly environment. Enough of that! I spent quite a while trying to decide where to start, so while I pondered, I decided to try using a heat gun and a razor blade to remove the various layers of old paint, bad bondo jobs, and whatever else the crappy black paint job hid. I read in various places on the 'net that it works great, doesn't work very well, or doesn't work and will warp your panels. I found it to be much faster, quieter and less messy than using my 7" polisher/sander. I have never tried using paint stripper on a car, and couldn't use it in my shop and have heat stay in at the same time. Possible explosive atmosphere condition as well, not sure if it's flammable. Long story short at least 75% of the paint that was on my car is now not on my car, having not yet attacked the hood, cowl, tail light area, headlight buckets, or anywhere under the lower body line. When I decided it was time to actually get my hands a little dirty, I pulled the hood off, front and rear bumpers and mounts, and had the motor out on the floor in about 150 minutes. Not too shabby. Found little rust patches that need attention as I went, but nothing I would consider terminal. In an effort to support this habit, I'm off to work, and after that, some more work... Quote Link to comment Share on other sites More sharing options...
DDean Posted January 23, 2014 Share Posted January 23, 2014 Any pics? Quote Link to comment Share on other sites More sharing options...
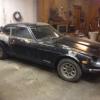
thebruce Posted January 24, 2014 Author Share Posted January 24, 2014 Yeah, I have a few. Couldn't figure out how to link to them from my phone (insert iphone rant here). I tend to keep them all in my gallery as well: http://forums.hybridz.org/gallery/album/1365-black-hole/ This is the car as I got it. It had paint chipping off in big patches, some useless wires added in some strange places, and what I thought was a head gasket leak. That story has changed considerably since then. The engine bay was fairly clean and complete. But not any more. I wish the lighting were better in my shop because this picture could be a killer search-and-find game as to why my motor is now not worth reassembling. The car as I left it new year's eve. I had pulled the motor, bumpers, and driver's fender. I thought I was doing pretty good. I have some rot to deal with... Not enough to cull the project yet. The rockers are ugly though, no pix yet. I stripped off the manifolds and other stuff that dangles off the long block. While pulling the head I broke a head bolt a little above flush with the deck, and one a couple inches up in the head - that snapped off below flush as I pried the head off. The front cover pix are the area where I THINK the water emptied into the oil... Paint and filler mostly removed. That's all for now. Quote Link to comment Share on other sites More sharing options...
thebruce Posted February 11, 2014 Author Share Posted February 11, 2014 It's been a couple weeks, and I have done a few things since. I spent a good few hours pounding the tar-like stuff under the carpets out of the car. I used a plastic dead blow hammer and a 1.5" putty knife that I put a little bit of an edge on with my bench grinder. It was fairly cold in the shop at the time so that may have helped, but by the end of the ordeal I was making that crap fly off the floorboards. Found some ugliness, but a whole lot more floorboard than I've seen on any of the 3 other Z cars I have had in my posession. POR 15 is going to be my friend in the near future... Does anybody else think this is a ridiculous place to put a seam? (right under the pedals) Driver's side rear section needs a small amount of patch. Truth be told I had to work pretty hard to stick a screwdriver through the thin spot... Passenger front area is probably the worst part of the floorboards, but a lot of what is rusty is just surface. Passenger rear also needs a little love. So the weather was not very cooperative the past little bit. Like -25* C for a week or so, so I didn't make it to the shop for anything other than to rob it of some tooling. This weekend being the first few nice (-10* C or so) days in a while, I set to removing anything that might be in the way of making rust repairs to the interior. I pulled the dash and blower motor housing, and got a good look at the carnage behind the battery box. Lots of stuff missing in the upper right. It makes me wonder if I will remember where it all goes... Looking in from the outside leaves a lot to be desired. Out of curiousity does anyone know the #gauge of the floorboard / non body panel material? From the searches I've done #20 seems to be right for body panels, but I don't think I have come across any other number for the floorboards. What to write next? My motor is fairly well buggered, as the P.O. (a good friend, so I can't say much) goofed on a clutch install and this left a smidge of preload on the clutch fork, which in turn left a bit of forward pressure on the flywheel that in turn ate the thrust surface of the center main crank bearing that determines crank endplay and wore a mm or 2 of groove in the crank. This thread lead me to this issue: http://forums.hybridz.org/topic/27716-mystery-solved-final-say-on-the-loose-crank-issue/?hl=%2Bcrank+%2Bendplay&do=findComment&comment=215050 The cam had seen better days anyway... On a random note I'm thinking of wiring the gas pedal WOT switch up with the "Fasten Seat Belts" indicator on the console (HAHAHAHA) unless I find in the wiring diagrams that it should do something. The car was an autobox, and I have a feeling it had to do with the kickdown. For now that's all I have. Dinner is calling. Quote Link to comment Share on other sites More sharing options...
Recommended Posts
Join the conversation
You can post now and register later. If you have an account, sign in now to post with your account.