

cobramatt
-
Posts
348 -
Joined
-
Last visited
-
Days Won
12
Content Type
Profiles
Forums
Blogs
Events
Gallery
Downloads
Store
Posts posted by cobramatt
-
-
I really like your CCWs, I was thinking about having mine redone in that goldish color. Your car looks great!! Can't wait to see some track pics and videos.
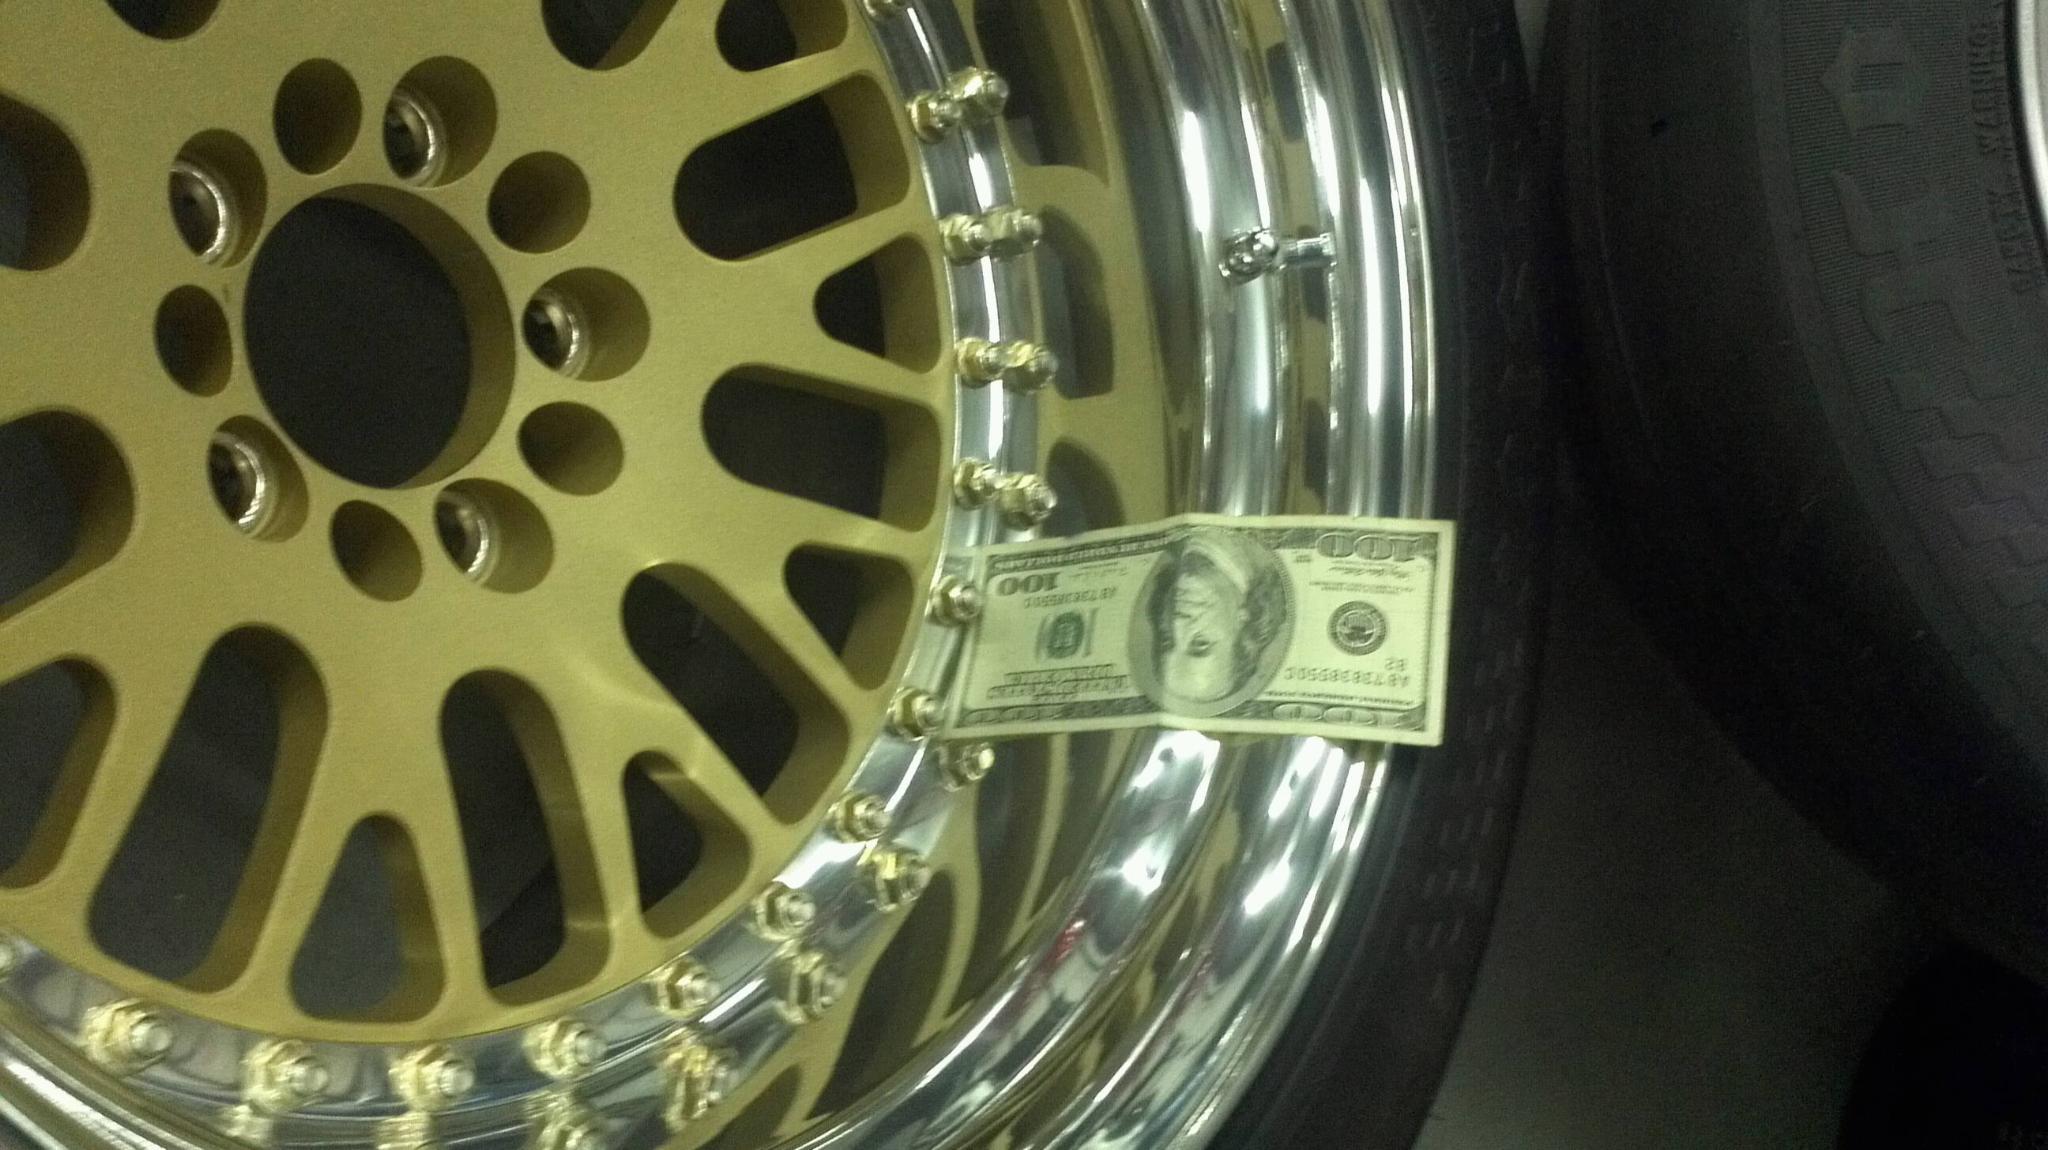
Thank you. I think the black looks great on your car. I wanted to have these anodized gold to give the look of the original three piece BBS snowflake pattern found on most all vintage IMSA GTU cars. I called BBS a year or so ago and inquired about getting a set made for this car as it was my original choice. That particular pattern has been out of production for some time now. They said they could certainly make me a set. All they wanted was $2,500 per wheel. I wanted two sets. I was born at night, but not last night. $20,000 for two sets of wheels, sorry but I think I could find some better options. I remember 30 years ago when you could buy the gold spray paint directly from BBS, I don't think they sell it anymore because of the amount of lead that was in the paint and the EPA made them stop selling it. You could maybe research that and have a simple solution to your wheels. As far as the pics and video... I am installing a two camera data acquisition system, so there will be plenty of video as well as data feedback that could help me, hopefully, as well as others in track setup. Stay tuned..........
-
i was at watkins glen a few weeks ago instructing and speaking with the owner of the organization i was attending. he has a very modified track mustang with new monster wing on it. i was looking at his 'new addition' and noticed a pretty trick looking aluminum frame that the hatch closed onto with pins that protruded through the hatch and base of the wing. clevis pins that went through a hole in the post securing the wing-which is also bolted to the hatch. the 'posts' are slightly larger in diameter than a traditional hood pin and similar looking. this provided mounting support for the wing and allowed quick access to the hatch area for refueling and such.
the frame has 4 pins that the base of the wing closes onto. hope the way i explained it makes sense. unfortunately i do not have a picture of his car nor could i find anything on the net.
I am trying to visualize what you are describing. If we mounted the wing to the rear hatch it would not have enough strength to actually work, it would just rip off, unless we fabbed a mounting frame under the rear hatch to weld to. I really think its going to be necessary to go straight to the frame rail for strength. I could see using pins or fasteners that could be removed then the wing taken off to access the back. I just don't like having to remove the wing every time I need fuel. My idea of the rear hatch being attached by pins, then sliding under the wing allows me to make the wing mounts as sturdy as possible and not have to remove the wing just to get in the back.
-
Looking great! Are those tires Hoosier R6's? That is alot of meat under that car.
Yes they are R6's and after looking at the amount of rubber on the front it has forced my hand once again. I have decided to install an Appleton "power" (race) rack and pinion with the built in servo. On a technical track it would have worn my ass out without it. I also think its the only thing left in the build that I haven't replaced. The upside is that I now have a 40 year old brand new car.
The one other thing that we were working on is how we could mount a rear wing, that the mounts would go through the rear hatch and be welded to the frame rails, and still be able to open the rear hatch to fuel the cell without having to take the wing off. (I know I could just add a fueling tube to the rear quarter, but I still have to access the rear to get to the cool suit box). We have decided to run the supports through the panels just next to the hatch, remove the hinges and attach the rear hatch with pins and it will simply slide off under the rear wing. If you have a better idea, please share your thoughts, you have been very helpful during my build and I appreciate your input.
-
cant wait to see those ccw's mounted!
I'm lovin the way the CCW's turned out. What do you think???

-
Nice looking project! That's quite the build you're putting together.
Expecting to see a lot of track time?
As much track time as I can afford. She's going to give some porsche guys a good run for their money.
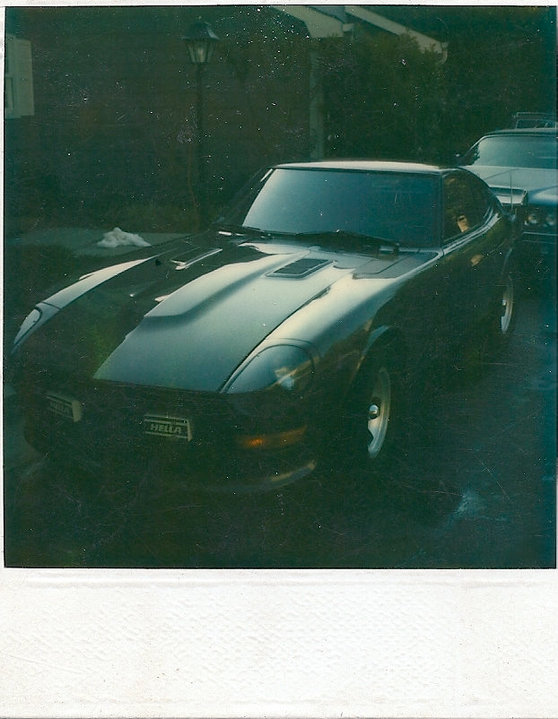
This is a picture of my first Z car 32 years ago. I did quite well in SCCA events. After my first I was hooked.
-
Looking fantastic!!
It should.....Its all your stuff. Thank you for all your help.
Matt
-
What headers are you using? I'm enjoying your progress.
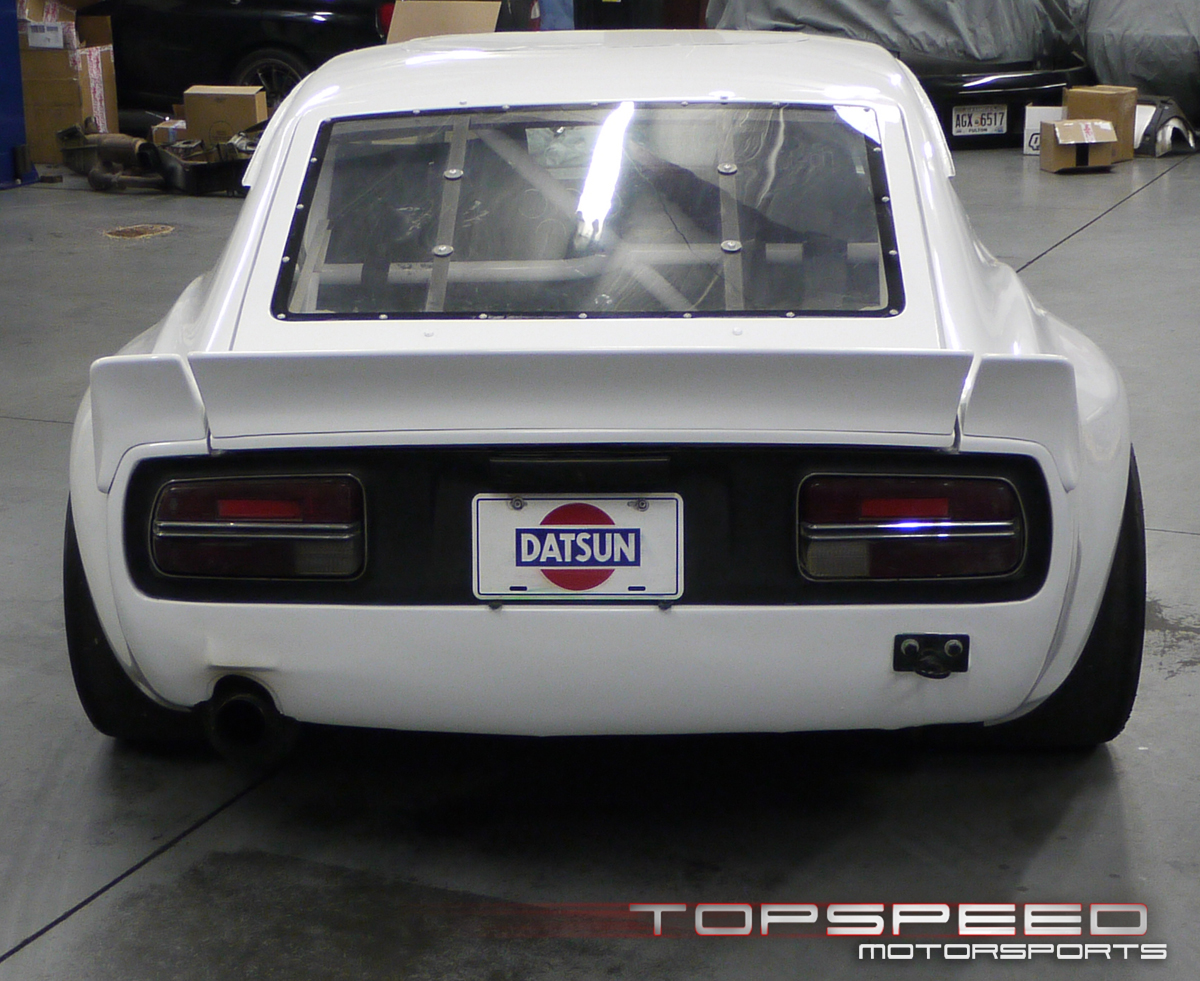
Kooks custom headers / Burns stainless mufflers / custom 3in. piping with crossover. I wanted to run just a straight pipe but it would exceed the decibel level they allow at most tracks. They are cracking down on it more than ever these days. It will still have a mean growl to it I'm sure.
I'm customizing the rear valance to accommodate both tips on either side. I want the pipes tucked as much as possible, not trying to build a custom show car, just want air under the car to be as smooth as possible.
-
So much eye candy. I love your build!
Thank you. I've owned, built, and raced Z cars for over 30 years. This is the one that I have always wanted to build, design and race. It truly is a fun build and your comment is very much appreciated. The R and D we do on the Aero package of this car will hopefully provide insight that will be useful to many forum members.
Matt
-
17 x 11 front 17 x 12 rear
Mounted the front today. I might need to put in a little bump stop. At full turn a slight rub. I cant think of the last time I ever turned the wheel, maybe in the pits while parking or something, all the way. Easy fix. Was disappointed to learn that we did not receive rear hubs with the AZ z track pac. I would have thought the five lug rear hubs would be included. Why wouldn't they be??? Front hubs were included. Anyway we ordered them from the local Nissan dealer and they should be in tomorrow.
Headers on the passenger side are mounted. Drivers side a little more challenging.
ALL GOOD PROGRESS.....
I have been also involved with a thread over on the "Paint and body kits" under (Race car rear wing and Aero). Any comments are appreciated.
-
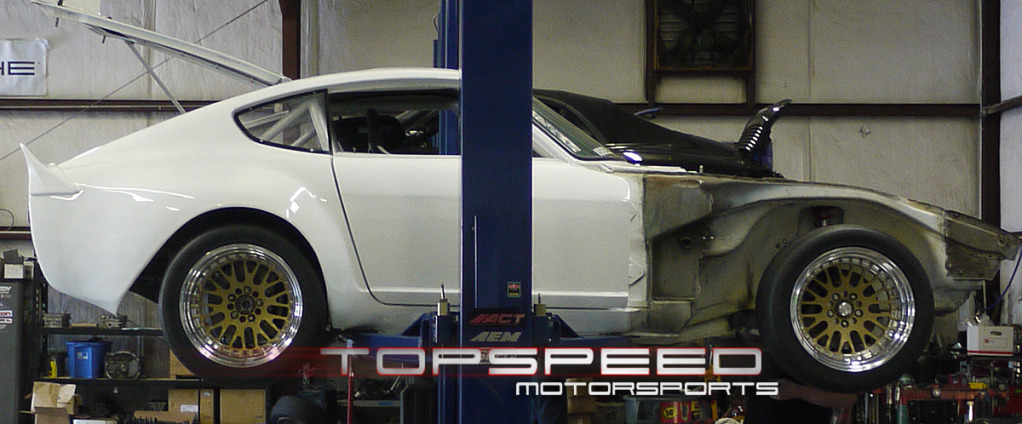
It took longer than expected but like most good chefs that make you wait on your food.........It's usually worth the wait. CCW custom race wheels are here. Hanging the new suspension and cant wait to hang these puppies and set it on the ground.
-
Oops, wrong link. Here you go: http://forums.pelica...g-many-pix.html
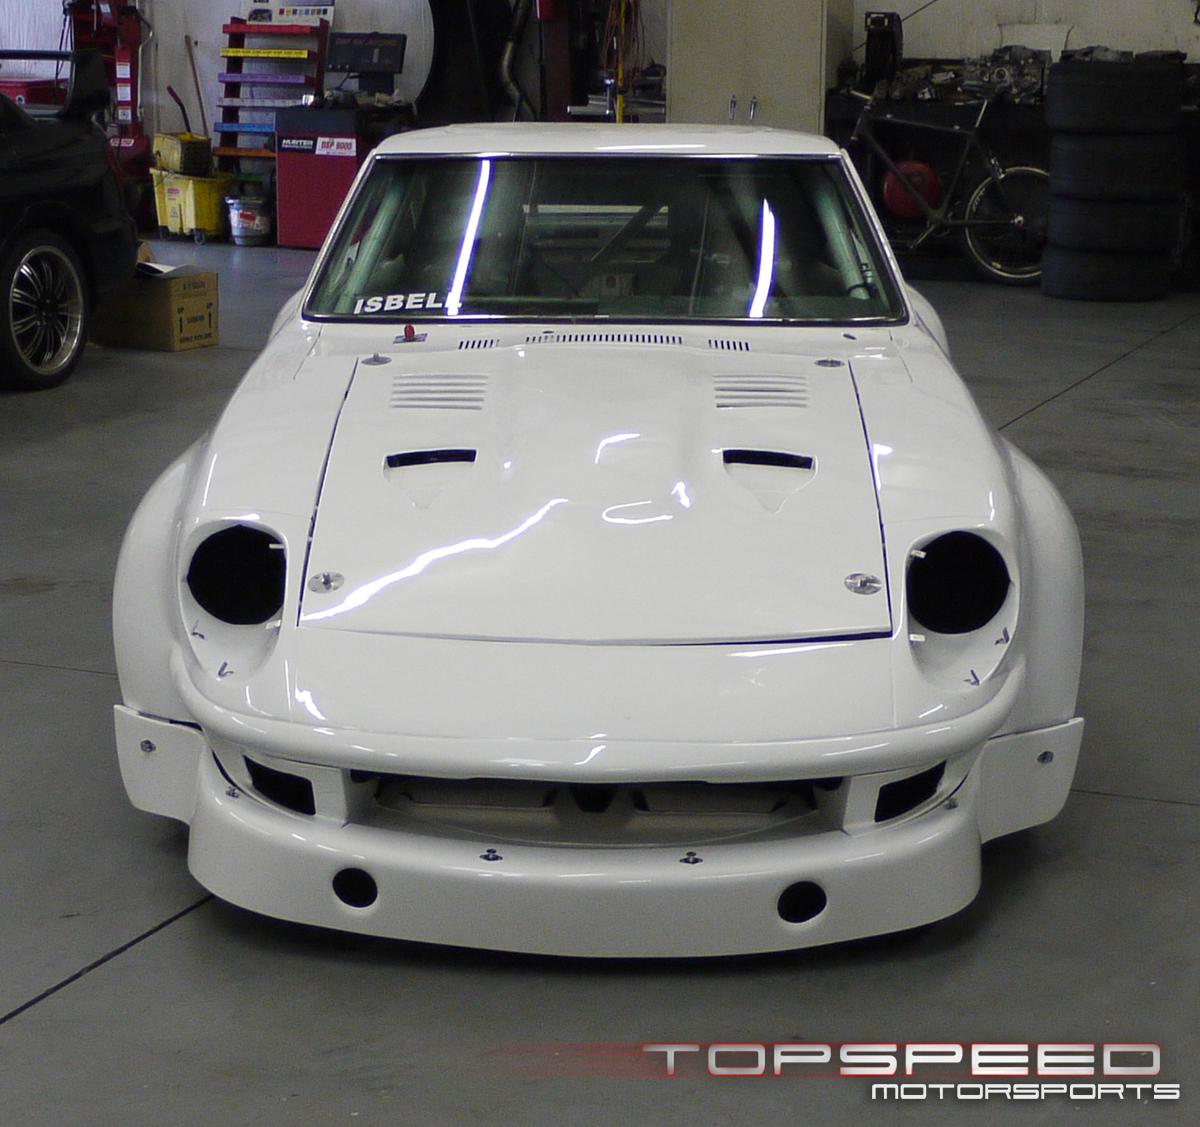
EDIT--I think the first thing I'd do is get rid of that hood. NACA ducts are going to put more air under the hood, and it looks like the louvers face the front too, so they would also push air into the engine compartment. You want the exact opposite.
Thank you for the input. I have read the wind tunnel test results and there are some conflicting opinions about the subject. My thought was to find a clear thread on... "This is how I did it, this is how we tested it, this is how it works, this is how much it costs". That's not asking for too much is it???
My thought was for some canards up front. Ducting. A splitter. A diffuser with as much underbody paneling as possible, when I go to the track I don't have a pit crew helping me, so I want it to be functional but accessible. A rear wing that was more than likely made for another car (Porsche GT3???) and fab it to the deck lid. I also have a question about how to reinforce the struts for the wing, as the deck lid thickness is not exactly beefy.
Your thoughts on the hood are noteworthy. The louvers are not facing forward though. (and I loved that hood)
Matt
-
I have been posting pics of my build over on the "Members Projects" page (My Dream LS240Z Car) and I need a little help. The car has an IMSA wide body kit and looks great. However with the 600 rwhp we are going to generate from the built LS engine I am concerned about the present spoiler setup. I am thinking that we need to fabricate a rear wing setup and front aero (to compliment the G nose) to create some more downforce. At 2000 lbs. and that kind of power, at anything past 150 mph its gonna get even lighter. I know there is someone out there that has either modified or fabricated a setup that works. Our plan was to test the car with the present package at the track then take it to the wind-tunnel for Aero testing. I just don't want to re-invent the wheel here.
Any suggestion will be helpful. This setup needs to be fully functional, aesthetics are important but I see to many cars at the track that the setup actually causes drag versus downforce.
Thanks,
Matt
-
Like I said I am very impressed with the new stuff from Arizona Z Car.........Beefy
-
Here are a few more pics just to update the build.
-
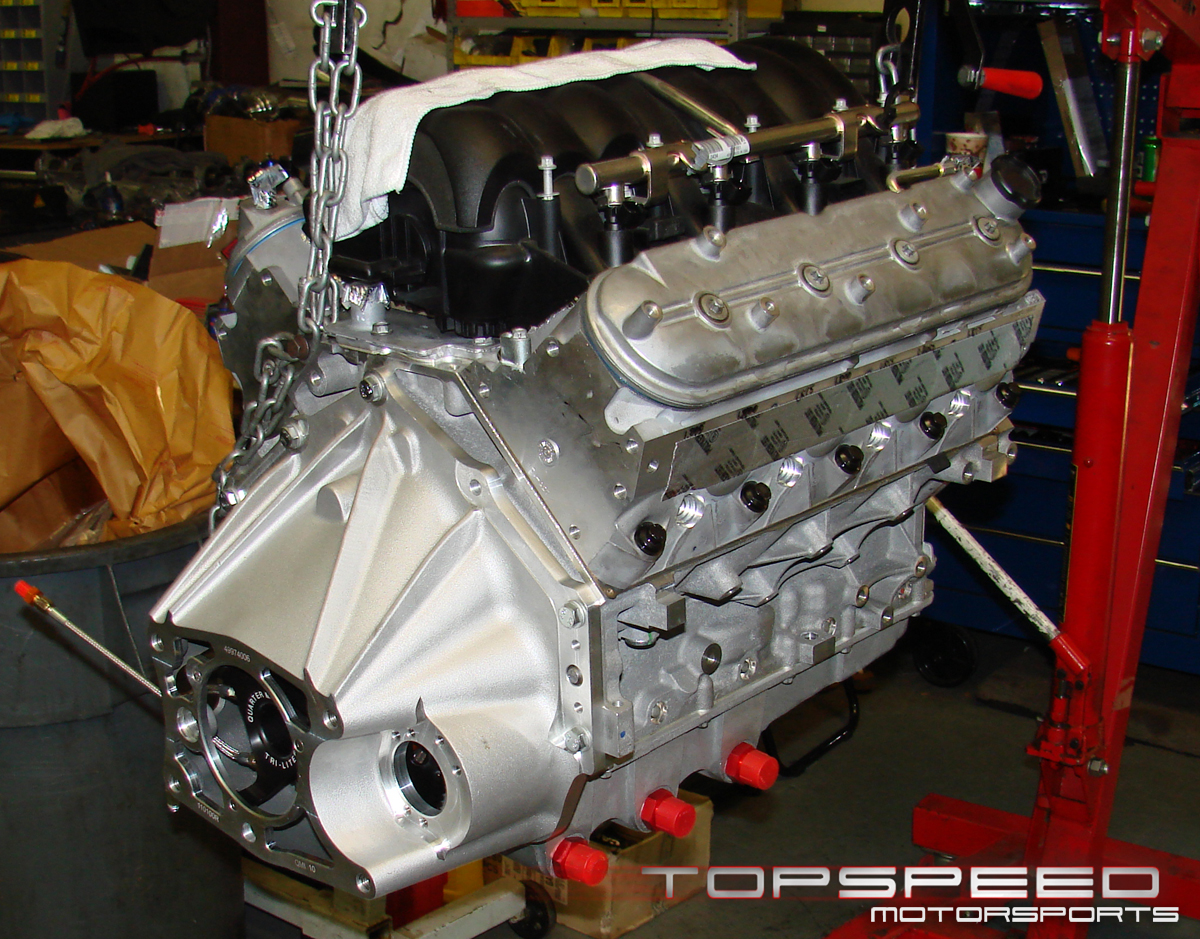
Mocking up the engine (it's sitting back behind the shock towers and looks soooooo pretty), got the tranny mounted. Waiting on the wheels and tires to come in so we can mount the new suspension. The new "Trac Pack" from arizona Z is so much more impressive up close than the pictures do justice. They really make an incredible setup. Made the decision today to install a Tilton Pedal / Brake assembly. We can do away with the master cylinder under the hood, as the new system is self contained under the dash. New 22 gal. race cell just came in and will be in this week.
Matt
-
http://forums.hybridz.org/uploads/2/2212.jpg
http://forums.hybridz.org/uploads/500/med_DSC00034.JPG I also had to modify the fender well a bit to make it all work.
http://forums.hybridz.org/uploads/1301953325/med_gallery_787_298_1275318.jpg At vir
Mark,
Thank you so much for the pictures. Very helpful....... When you said you had to modify the fender. Just notch out a hair to get it over far enough for clearance? I don't see how that would effect performance but did it conflict with the body/fender in any way. You said if you had it to do over again you would fab a custom tank. Wouldn't that make it smaller and ultimately effect cooling in high output situations? Or would it be the same size but just configured differently to fit the space?
Really appreciate your help,
Matt
-
I've got the same set up on my ls1. I mounted my tank where the battery went. Had to cut the firewall and set the tank back a bit. If I had it to do over again I would have had a custom shaped tank made to fit the space.. I'm enjoying watching your progress. I hope o can see it in person one day.
That's great input. I will certainly take a look at our space very carefully and consider the custom tank. Our first thought was under the passenger dash but I didn't want the extra heat in the cockpit (The firewall is getting well insulated). Second thought was behind the passenger seat but that would have filled the space for the cool suit cooler. The stock battery area is the best place after all is said and done. You wouldn't happen to have a picture of your old setup that I could learn from?
Appreciate the help........
Matt
-
Is that an ARE pan?
Yes, It is. The oil cooling system of the LS7 under race conditions can be a weal link. We went with the ARE Dry Sump system to insure keeping the temp under control during high output. We are going to have to mount the system where the stock battery would go. The battery is relocated behind the passenger seat.
Matt
-
It's a good day when items as pretty as this arrive at the shop. Gonna start mocking up tomorrow and determine our engine mounts. Any suggestions on whether to solid mount it or maybe a sliver of poly bushing???
-
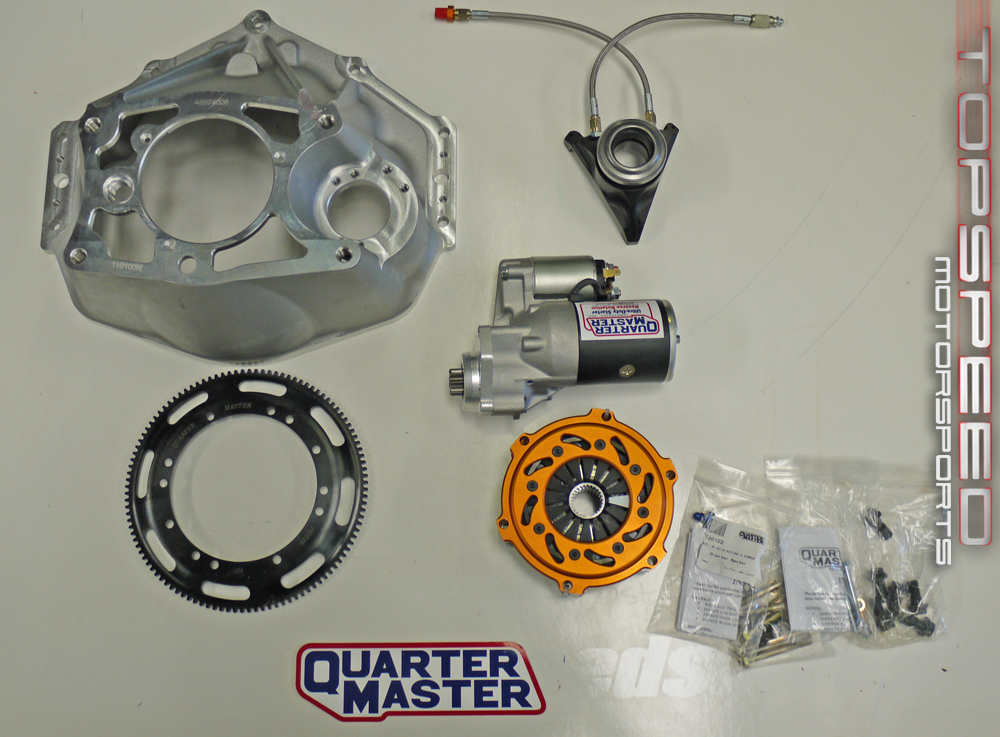
Parts are starting to come in. Nothing like new, right out of the box, clean parts.
I've attached a few pics to show progress.
Quarter master 5.5 triple plate clutch. It's ultra compact and will allow us to run a reverse mount starter and very compact bellhousing. This will allow us to wrap the headers and exhaust down and around the motor in a much tighter fashion.
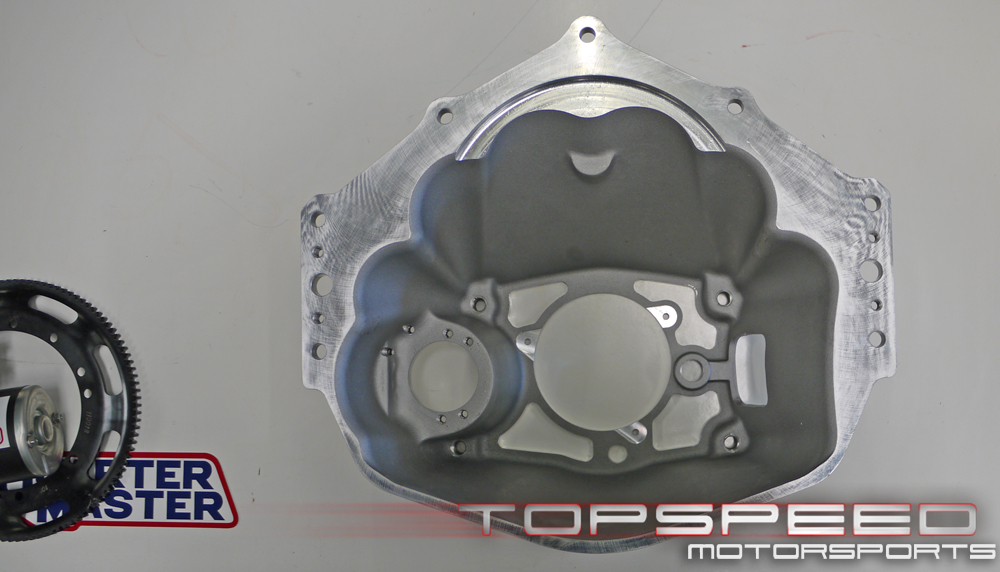
Here's a view of the bellhousing. This setup is all designed to work together, so there's no need to shim the throw out bearing
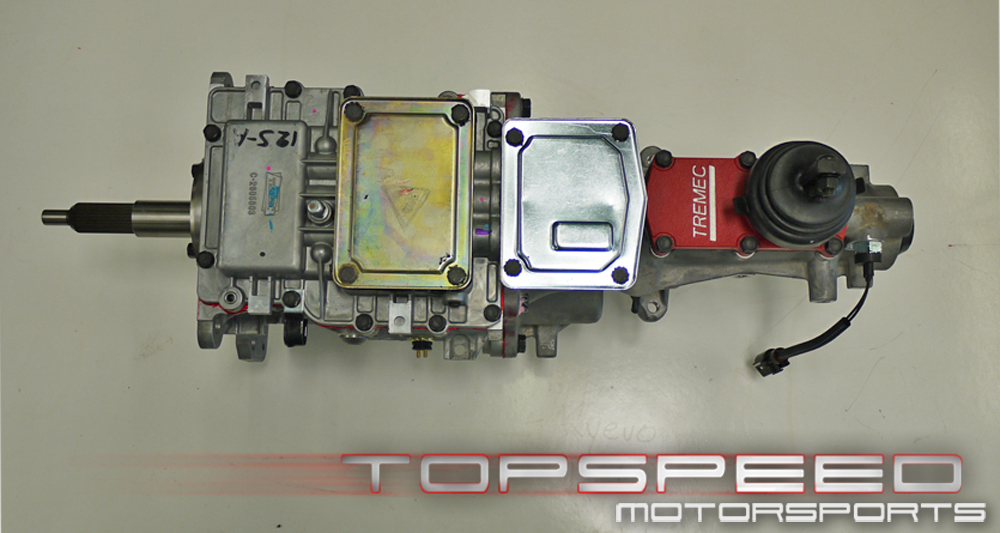
Tremec TKO-600 Transmission. It's designed to take some serious abuse.
Engine should be in by next week.
-
Good eye my friend. It is Clifton's old car. I've done a few things since then. I'm sure he would approve.
Matt
-
Guy's,
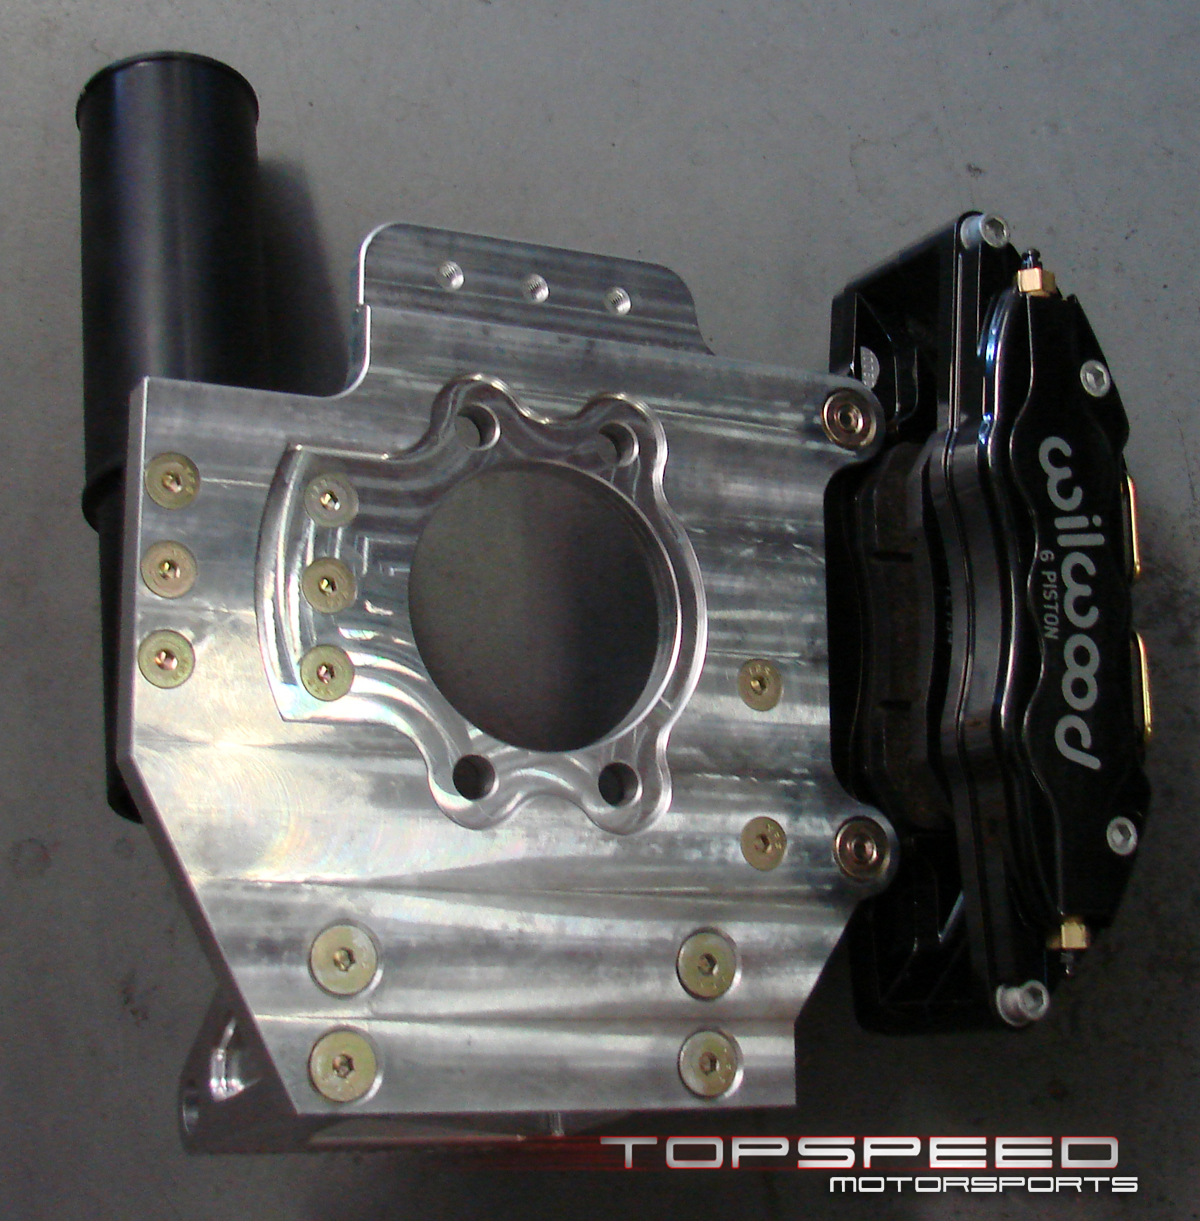
Engine is being built as we speak. Cleaning engine bay of just about everything. It should be ready in a few weeks. We are trying to figure a good location for the dry sump system, keeping in mind the balance of the car and heat factors. Transmission arrived yesterday. Getting template for new 22 gallon FuelSafe race cell and cutting that out this week. This is a real fun part of the build where stuff is arriving, it's like Christmas morning opening boxes. The new wheels and suspension are about three weeks out. I will be putting together a list of all the items I will have for sale soon. The L28 short block Turbo engine (minus the wastegate) with P90 head, Delta cam, Schneider springs, light port work, BHJ damper, 550 RC injectors, PT61 T4 Turbo with GT35R compressor wheel, supra intercooler, the coil overs, Koni shocks, 15/16th front sway bar, wilwood racing brakes and calipers, 12 gallon race cell, newly rebuilt 5 speed from a late model ZX (5th gear is racing ratio not overdrive), ArizonaZ front and rear adjustable chromolly control arms (older style, but real nice), Titlton twin disk racing clutch 5in. short throw, HKS 10 lb flywheel, 3 piece 15x10f 15 x 14r Kiezer 4 lug racing wheels with Avon slicks that have a few laps left in them, a custom race dash with all new Autometer gauges.
I just got to a point where I wanted to take the car in a complete different direction. If someone was wanting to upgrade their present ride here's the whole package. Haven't thought about pricing yet but will soon. Put the word out. It was putting out 348 rwhp at 15 psi and 408 rwhp at 20 psi on the last track day. I will keep updating pics as we move forward.
Thanks guy's,
Matt
-
My new project is underway.....'71 240 GTZ
IMSA widebody kit from JTM
RaceTech racing seats with halo
Momo quick release wheel
Full Roll Cage
Lexan side and rear windows
Custom duct 4 pin hood setup
Complete cockpit and engine bay fire system
ENGINE:
LS7 Block / Callies rods / LS7 Crank / Mahle pistons / MTI CNC ported LS3 heads / MTI Custom grind comp cam and lifters / KSTech timing chain / ARE dry sump system
TRANSMISSION:
TKO 600 RR Tranny / Quarter Master race clutch, bellhousing, flywheel, TO bearing, starter / Custom drive shaft
EXHAUST:
Kooks custom headers / Burns stainless mufflers / custom 3in. piping with crossover
COOLING:
Custom Griffin Radiator and fans / custom brake ducting
SUSPENSION:
Arizona full "TRACK PACK" setup / Q-45 Diff with carbonetics
WHEELS AND TIRES:
CCW race wheels / Hoosier R6 335 and R6 315
DATA:
Race Technology Digital Dash2 / RT Data logger DL1 Mk3 / RT GPS
I have attached a few pics to represent progress. I didn't attach the front air dam, hood or headlight covers, so please don't think it's finished, just for photo sake.
She's gonna be a screamer.....


My Dream LS7GTZ.......project underway
in S30 Series - 240z, 260z, 280z
Posted
I appreciate your thoughts, as well as any others. If I were to start running enduro the fuel filler tube would be a great idea. I only run in 25 to 40 minute races. That is why I installed the 22 gal cell, so I don't have any refueling needs during a race. I want to be able to remove the rear hatch and not touch the wing. Many people have wings and don't actually adjust the downforce effectively. We are going to test and adjust and I probably will leave it in a fixed position according to the track set up. I also see people with flimsy wing setups that cause more drag than downforce. I am a member of Atlanta Motorsports Park and recently installed a passenger seat to enable me to take people for joy rides. This forced me to install the cool suit box in the rear of the car. Its too much of a pain in the ass to remove the passenger seat depending on if I'm racing or messing around (it's bolted to the sub frame). One more reason for the hatch to be able to be taken off to access the back.