

disepyon
-
Posts
1199 -
Joined
-
Last visited
-
Days Won
1
Content Type
Profiles
Forums
Blogs
Events
Gallery
Downloads
Store
Posts posted by disepyon
-
-
Thanks OPTaiva
Starting to get lazy with documenting things, hehe.
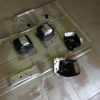
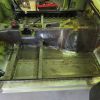
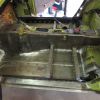
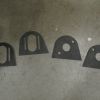
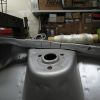
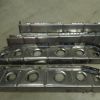
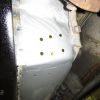
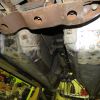
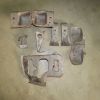
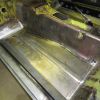
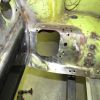
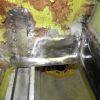
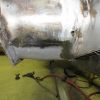
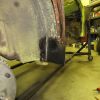
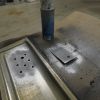
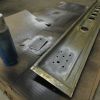
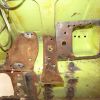
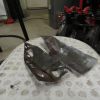
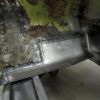
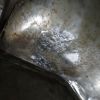
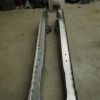
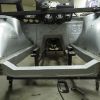
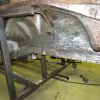
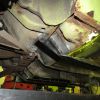
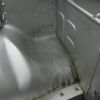
Filled in any rusted holes and sanded down on these parts pictured below. Coated those parts I sandblasted for the seat belt mechanisms.

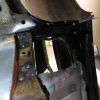
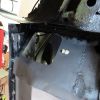
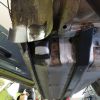
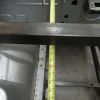
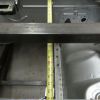
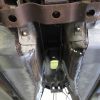
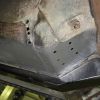
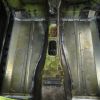
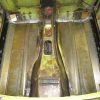
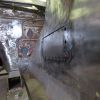
Parts welded on. Gonna hold off on welding the tie in plates for the seat belt mechanism housing (not sure what their called) because I have plans to make some jack support braces later on. The rear jack stand points will be in this area somewhere. Havent planned it out yet in details but will. Besides the tie in plates dont fit that great for some reason, most likely since everything I made wasnt an exact OE fit in order for the seat belt mechanism housing tie plates to fit perfectly. Also welded in the holes I drilled from removing the spot welds to the original transmission tunnel mounts.
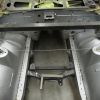
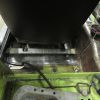
Well thats it for the interior, at least for now anyways.
Rear Tabco quater panel replacements.
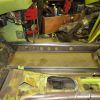
Though before I work on that, I want to get the front camber plates installed. Took me forever to figure out where I had placed them in this mess.
Found them..
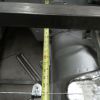
Get alignments made for when its time to weld the camber plates. Wanted to make sure first that the fire wall was same distance on each side, I just choose two points on the front end of the car.
Marks measured and scribed.
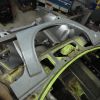
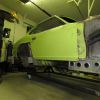
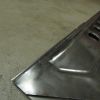
Rough mock up to see how it looks.
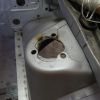
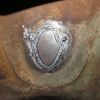
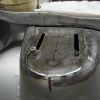
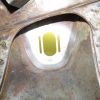
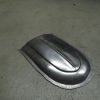
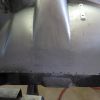
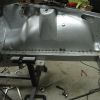
Started with cutting out the bulge in the strut tower top plate using my plasma cutter.
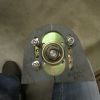
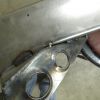
Another look at the camber plates I had bought from ZCCJDM.com on the strut tower.
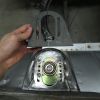
Discovered that they dont fit my Stance Coilovers. Reason I think is because these are probably for the Megan coilovers.
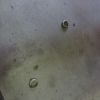
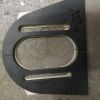
Comparison picture of the camber plate to the stance camber plate. As you can see the bolt holes dont align, and the main center hole is to big on the ZCCJDM camber plate.
The forth bolt wont go in, I can force it, but shouldnt ever have to force a bolt in
So I decided to ditch them as I didnt like the fitment, too tight and loose in areas. Also bothered me that the preferred method of welding these plates on is to weld them on top of the sheet metal of the tower wall/cover and not directly onto the stock upper plate as this is thicker and more structurally sound. But I guess that method was proven buy numerous of Datsuns to work. Plus I wanted a factory look for some reason.
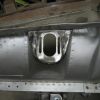
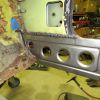
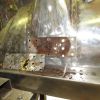
Here is how I did it. Keep in mind that I will later on be adding in strut bar mounts. Havent thought about how I will do it, will need my LS1 engine in place to see how much room to work with, but hopefully after I get the strut bar mounts welded in, the camber plates will much stronger and more connected with its surroundings.
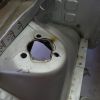
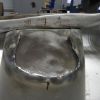
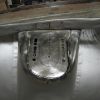
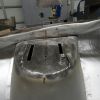
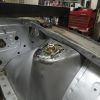
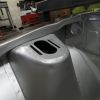
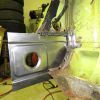
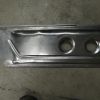
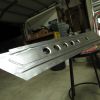
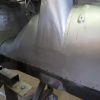
Played around with the idea of trying to make the stock top strut tower plate to work with out having to do a lot of work. Bad Idea, haha. ended up just welding a plate in to close up the holes and start with a fresh canvas. Got to do things right otherwise you will get a crappy result.
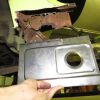
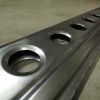
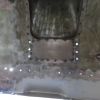
Holes closed up with tig welding plates in of similar thickness as the stock plate. Made damn sure I got penetration all the way through, purposely gave my welds loads of filler rod.
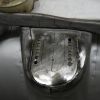
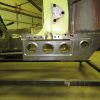
Sanded down.
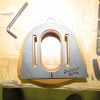
Made a template from the Stance coilover camber plate.
Comparison to the ZCCJDM plate.
Template test fitted on coilover.
Though for full adjustment locked all the way positive and negative, added some tape on and cut it out, this will make sure I dont place the template too far in/forward on the tower considering the limited room to work with underneath the strut tower.
Lines marked.
Since I dont have the proper bits/tungsten carbide bits or whatever to make life easier in making an elongated straight hole, I opted for the drilling of multiple holes and then used a cut off wheel on my air dremel tool to blended in the holes.
Centers punched in for drilling.
Checking the alignment one last time, always good to check constantly.
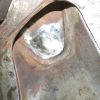
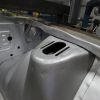
Started with drilling the bolt holes first.
Holes blended in. Probably would of been cleaner with a thinner/smaller cut off wheel. Oh well, it works.
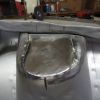
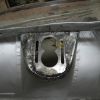
Then off to work on the middle hole. Used a 1 1/2' hole saw.
used my air belt sander (one of my favorite most used air tools) to blend them together.
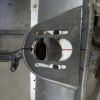
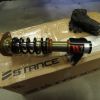
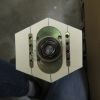
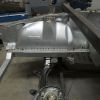
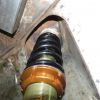
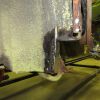
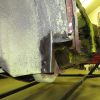
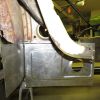
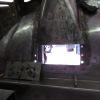
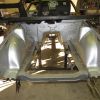
Coilovers test fitted.
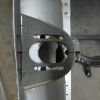
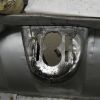
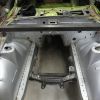
Finally coated with paint (for temporary purposes) and hammered down the lip of the tower wall cover or whatever you call it. Will need to spot/plug weld the lips later on, but will wait till I get the struct brace mounts figured out.
Doesnt look like much of a noticeable change from stock...
Thats it for now, stay tuned!!
-
Glad your ok John. That had to be a scary and painful experience. Hope to see you back to work on the car.
-
Great work here. No shame in feeling like your project is lagging. I feel like it with mine all the time. I should had been done with things long ago if it wasnt for my laziness. Loving your dimples, yours is actually more true/correct for automotive applications than the typical dimples you see, such as the ones in my thread. Supposed to dimple in, then flatten back out with a thin lip, as seen made by you. Thanks for taking pictures of the spare tire well removed. Now I know what to look for when I work on mine. Keep it going!
-
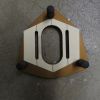
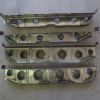
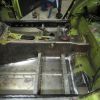
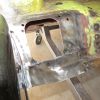
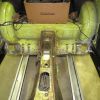
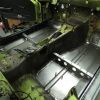
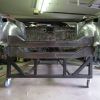
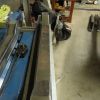
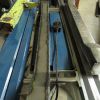
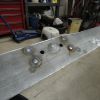
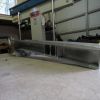
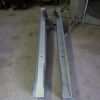
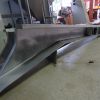
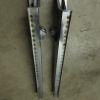
Decided not to reuse the rear seat brackets, would of been to much trouble to try and salvage them. Not worth it to me, so I made my own and copied the design of the front brackets. The rear I made also kind of matches the original rear cross brace thats attached to both rear brackets.
template made and fitted.
Decided to cut off the length of the rear brackets here as pictured.
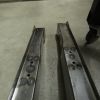
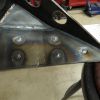
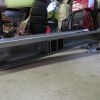
Brackets loosely fitted in place to give you an idea of what they will look like.
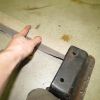
Close up side by side comparison of front and rear seat brackets.
Holes drilled for welding.
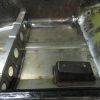
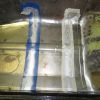
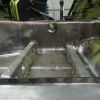
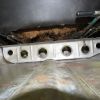
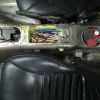
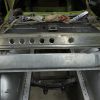
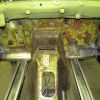
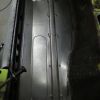
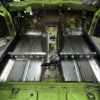
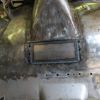
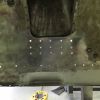
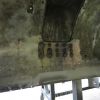
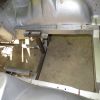
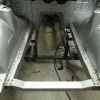
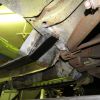
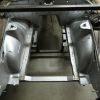
Figured this would be a good time to install the tie in plates that go underneath the rear floor near the tunnel side.
Holes drilled for the plates in the floor.
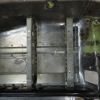
Everything primed before welding.
All welded in.
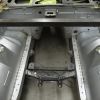
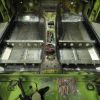
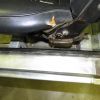
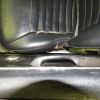
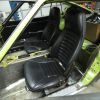
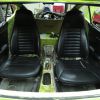
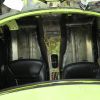
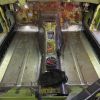
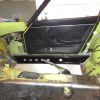
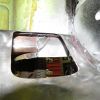
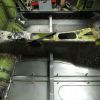
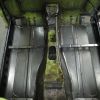
Seats test fitted
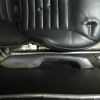
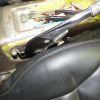
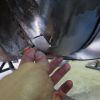
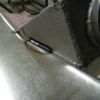
Passenger seat slightly touches the ebrake.
However when someone is seated, the cushion collapses in a way that the end of it distances is self away from the ebrake.
Me testing out the seats wishing my car was done and driving, hehe.
Thats all for now, time I actually get to work on those parts I blasted.
-
Beautiful work as always, would mind mentioning what you Mig set up is, wire size, settings and that sort of thing?
Thanks
Not a problem.
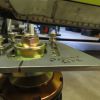
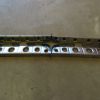
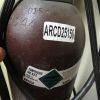
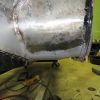
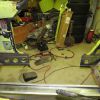
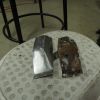
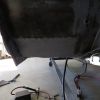
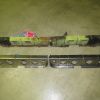
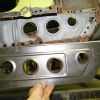
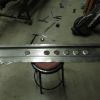
When I am using MIG welding on sheet metal, I use the the wire and size wire as pictured below.
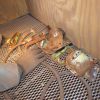
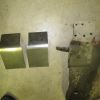
For gas, I use Argon Carbon Dioxide mix, as pictured below. I usually have my gas flow set around 20.
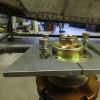
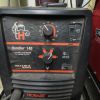
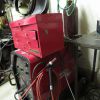
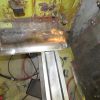
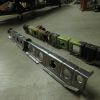
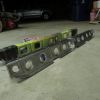
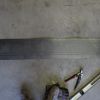
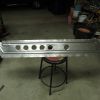
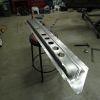
My MIG welder is a lower quality inexpensive one that wont allow for fine adjustment, but gets the job done. Id like to upgrade, but as of now there isnt a need. Depending on what gauge sheet metal I am welding, for instance if I am welding like my floor pans (the plug welds) 20g sheet metal to 16g sheet metal (floor frame), I had it set on dial 3 with wire speed of about 38-40. If I am welding a plug weld of 20g to 20g sheet metal, then I have it set to dial 2 with about same wire speed, maybe slightly less speed. I dont know off the top of my head right now what each dial number is rated at, id have to look at the machines specs. Depending on how many layers of sheet metal there are for a plug weld, I will max out the dial with a speed of about 45 or so, like when I welded the front frames to the engine bay, there were 3 layers, 16g, 18g, and 20g.As of right now, I only use the MIG welder for plug welds to mimic spot welds, since I dont have a spot welder. Might be cleaner to weld the plug welds with a TIG welder, but I dont have the patience on a car like this. Now for the welds like the floor pans to the tranny tunnel as pictured on the previous page , the long butt joint going the whole length on the tunnel, that was done using TIG Welding, pictured below is my TIG welder. I need to stock up on gas nozzles for my 1/16 gas lens, dropped my last one and it cracked on me, so as of now I have to resort using a regular collet body, but I managed to weld alright with it.The important thing is to Practice Practice Practice before you actually weld in whatever panel your welding. I did some practicing before I welded in the floor. Also you absolutely need to pay attention to the weld puddle, It will tell you what is going on.
Visit this site for great welding tips, dude is a master when it comes to welding.
very nice. Though I'm not there yet, i was thinking when I put my floor in, to let it run up inside the trans tunnel, use a few cleco's to hold it, then make my final cut just below them through the tunnel and new floor at the same time so I get a nice tight fit. My problem was how to hold it in place after that, looks like i'm making a bunch of little brackets for the cleco's like you did
I've also been re-watching one of my favorite youtube series, "project Binky" to get myself hyped up. It also makes my 240 look like an easy fix....
You couldnt had said it better with the Binky Project. I just love how all these videos of restorations is made to look so easy and effortless.
Right on, glad I was able to help with your problem. Though the credit should be given to Lazze, im glad to pass this knowledge to others. That is a Ferrari 250 GTO one side of the car he is building just for art. Should check out his other videos too, they helped me out so much.
-
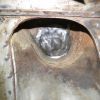
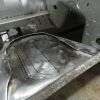
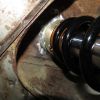
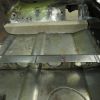
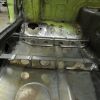
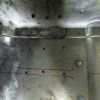
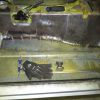
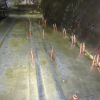
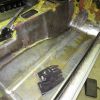
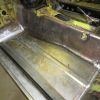
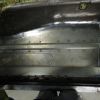
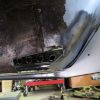
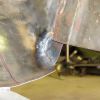
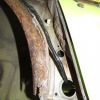
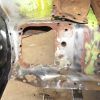
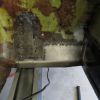
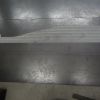
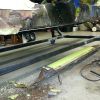
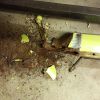
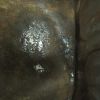
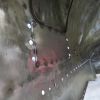
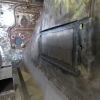
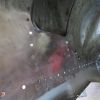
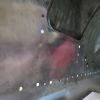
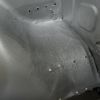
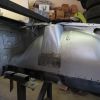
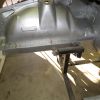
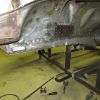
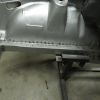
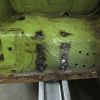
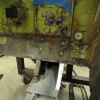
Sandblasted some parts. Appears I will need to fill in some rusted holes shut.
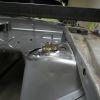
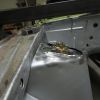
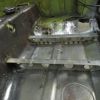
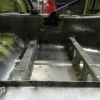
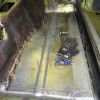
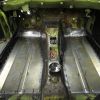
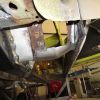
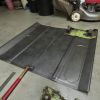
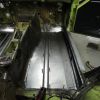
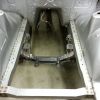
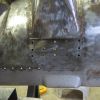
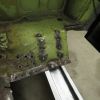
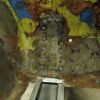
Finally got the floor pans in permanently, still have some miscellaneous holes to weld in shut though.
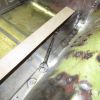
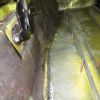
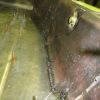
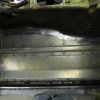
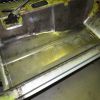
Pictures showing clecos holding in the floor to the tunnel and frame. Tried my best to get the edges aligned and butted with little gaps. Some areas had some gaps, the driver side near the front end and rear end had the largest gaps but managed to get those welded fine without hardly any warpage.
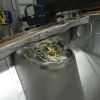
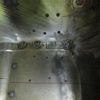
Tacked welded.
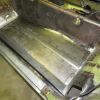
Tack welds sand smooth.
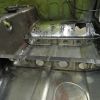
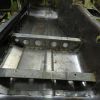
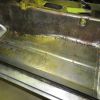
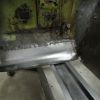
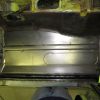
All welded in.
Welds sanded and smoothed out. Had to do some hammer and dolly work on the welds to stretch them out and get the metal flush again.
Will be working on the seat brackets getting them prepped for installation and the parts I sandblasted.
-
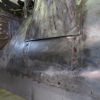
Small update:
Sanded down the welds of the rear corner of the floor where the seat belt mechanisms are and the front lower fire wall. On the driver side had to replace a small section of metal. Still working on blending the metal together after welding and sanding. Just hard to do in the flat areas. Though I will admit, my fitment in some areas were not that great, had some big gaps. I really didnt spend much time in prep work, that is having good fitment before welding. Also doesnt help trying to weld in awkward positions. Dont care too much on the back side/underneath the car side of the welds since you wont see them, just did some light sanding. I really just need to start practicing each day with welding, sanding and blending sheet metal together, at least weekly if anything...hehe
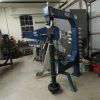
My English Wheel finally arrived earlier this week. If anyone is thinking about buying this brand (Baileigh EW-40), I would probably reconsider, I am not to happy so far with the quality. Had to modify the bottom anvil cradle on one side because the bottom anvil/wheels didnt align/set flush against the top wheel. Not only that but the bottom anvils are off centered from the top wheel. So far those are the only complaints I have. One other thing that kind of bothers me is that the top wheel is not the same width as the bottom anvils. Of all the videos and pictures ive seen, the top wheel is either same size width (majority of them) or wider, not thinner. Overall though, its a nice wheel for the money I guess, though I am a Noob at this, so I cant really say much. The frame is extremely robust, so there isnt any flexing going on when wheeling, which is good. The anvils that come with it are alright. Wish they would have ditched the useless step and bead anvils for tighter angled anvils. I really want now a more rounded bottom anvil to get into tight spots.
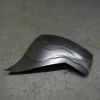
My very first practice pieces. Just screwing around, mainly practicing my wheeling pattern.
Kind of getting side tracked from the car since the english wheel arrived. Been on the interweb feeding my brain with a bunch of youtube videos and reading material on shaping metal with the wheel.
More to come...
-
1 tuff Z and Kevbo82, thanks for the suggestions. After checking those places mentioned among others, decided to order from ebay, had the best prices, though for the boxes I had to order more, but price per box was still best price.
-
How long do you have to wait on the LCA's?
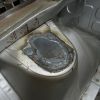
I think that magnet of yours could use a good cleaning, I still havent figured out a good way to clean mine.
Just curious John, What are you using to get your welds so smooth?
-
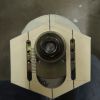
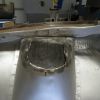
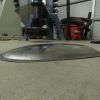
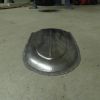
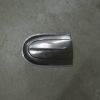
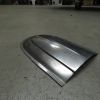
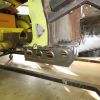
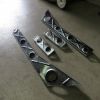
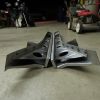
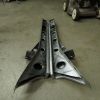
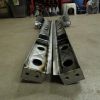
Dude that Rear diffuser is sexy. Awesome jig for the collector area of the headers. Are you able to weld everything with all the headers tacked like that?
-
Thanks Kevbo82
Here is an update to the Interior rocker panels your waiting on. Refer to my vendor thread for more pictures of the process. I am finished with the panels, now just need to make the seat belt mounts and tie in plates. Will probably go to my local shipping supply store to see if they sell any boxes that will fit this, if not I will most likely have to order online which isnt a big deal, however I would hate for the other customer and you waiting too long due to waiting on packaging materials, though better for the parts to arrive safely with proper packaging than damaged.
Lucky for you guys, these panels are damn near close to the originals, way better than the ones I made for my car. Somebody had to be the lab rat, hehe. I actually remeasured everything, tested some stuff out and finally made a template.
No problem with the pictures, I always feel I dont take enough and post, yet I sometimes go a bit crazy on some stuff, hehe.
-
Thanks LLave and Grannyknot
I can start posting more pictures of the tools im using. Some have already been posted. Been using my bead roller and sheet metal brake a lot.
I actually did not think I would be doing this much repair work, just thought it would be your typical minor common repairs most people do on these cars. Probably should had bought another less rusty Z but im kind of glad I didnt because I have learned a lot working with sheet metal and in the end I enjoy it even though it can get fruatrating at times.
-
To me
This is probably the best build thread with such attention to detail I have seen.
I only wish you were down the street so I could stick my head in and admire this in real life.
Cheers
John
Thanks John, your too kind, hehe.
I wont be able to work on my car this week and weekend due to making some rockers for some people. Hopefully I can knock those out fairly quickly and get back on this project.
-
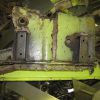
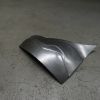
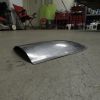
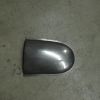
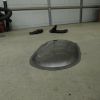
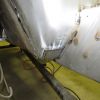
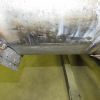
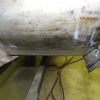
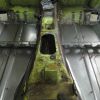
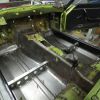
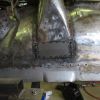
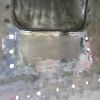
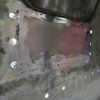
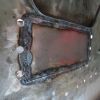
A bit of an update, I will again describe first then just throw all the images at you like the last heavy loaded image updated post.
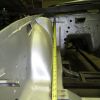
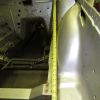
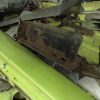
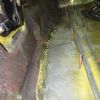
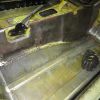
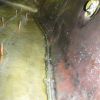
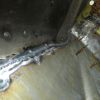
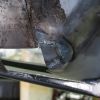
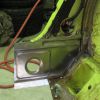
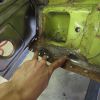
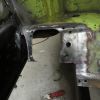
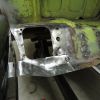
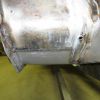
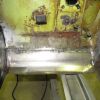
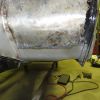
Starting where I left off from my last post, I made the rear end tie in plate. Worked on the rear end corner, the flanges from the inner and outer wheel well metal was all cheesed out. Cut the rusted metal and replaced it like I did the driver side. Tacked and welded the both front and rear tie in plates for the rockers. Welded a plate on with a nut for the seat belt mounting onto the passenger side inner rocker panel. Got everything degreased and ready with POR15 degreaser and prep and ready. Then painted everything with POR15 rust preventative paint. After sprayed on the weldable primer in the welding zones. Welded in the inner and out rockers.
Before I welded in the Passenger side rockers, decided to go ahead and put the doors on. Good thing I did because for some reason the passenger side outer rocker was a pain to align. Thankfully the driver side aligned, even though I never put the door on when I worked on that side. Lesson learned, if you can, Make sure to have the door, fender, and the rear quarter on as best you can to align the rockers. I know already, I will have to work on the fender to align with the rocker and door, oh well I guess.
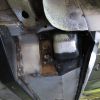
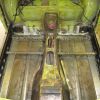
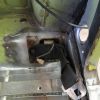
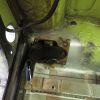
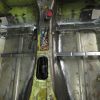
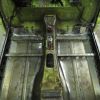
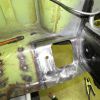
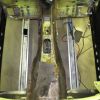
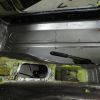
Worked on both the driver and passenger side rear seat belt mechanism housing (not sure the proper name, hehe). Also worked on the front driver and passenger side lower fire wall. Got everything cut out, made, tacked and welded.
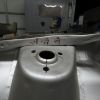
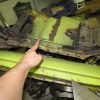
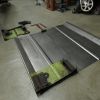
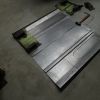
Then decided to work on the floor pans!! This was actually fun!! I decided to try out the tape method template for the area along the transmission tunnel, then cut it out with a razor blade, then tape it on to the floor pans. Worked pretty good, left some extra metal on when I cut the floor pans out so I could fine tune the areas that needed exact fit up. Other fun part was making the front drive side and passenger side seat brackets. Wasnt able to use the stock ones as the shape of my floor pans were a bit different, also I hacked up my passenger side when removing the old floor pans with the plasma cutter. Also if your wondering why the driver side seat bracket looks a little different from the passenger side with the beading on the top is because the original stock brackets were like that. Gotta be a reason why they did it like that, so I copied...
Where I am at now:
Still need to work on cleaning up the seatbelt mechanism housing parts, going to sandblast them first, get it all coated and welded in. Also still need to grind down the areas I welded so far flush with the surrounding metal. Then I can get the floor pans welded in and the seat brackets welded in aswell. Still deciding whether or not to make my own rear seat brackets or just use the original ones.
Also I finally pulled the trigger on a English Wheel, Waiting for it to arrive. This will open a whole domain of working with sheet metal. Cant Wait! Was thinking about buying only the anvil kit and building my own Frame, but shit for the price of the anvils I wanted, way out of my budget, So I decided to go with the Baileigh EW-40. Figure this will be good for a beginner like me for a while till I can reach Pro level, then I can get the nicer quality anvils and make my own frame.
Hopefully one day I can reach Lazze's level of metalworking, True inspiration!
Looks to me this was done free handed and by eye, dont see much of a template made or a Wooden Buck.
Pictures:
-
Do you plan on sandblasting before you tear into the rust repair work? Might be worth it, wish I did on mine. Though I am always afraid of the person blasting warping any panels.
Based on the Pictures you provide it seems your car is in alright shape overall minus the rotted areas. The darker the rusted area looks, the worst it is and should be replaced, the lighter the rust color is, chances are its alright, just surface.
Looking forward to your build, keep it up.
Edit: hehe just read the part you said the car will get blasted.
-
Amazing, I need you to grind away on my z. Seriously looks top notch.
-
Thanks Datz44, just takes some practice, Ive scratched numerous attempts at various stuff, I had help after lots of researching, reading, and watching videos to help achieve what I need.
Small update, got to work on it a little bit earlier today.
Got the passenger side interior rocker trimmed up and test fitted. Made the front tie in supporting plate, the stock on is actually not in bad condition, but I would like to match the other side though.
-
As always, Sensational work even if you did rip off one of my idea's LOL
LOL, Keep your ideas posted, I may end up taking more, hehe. Anyone is welcome to using any of my ideas, though so far, nothing is really all that custom/original idea, all so far mostly just remaking factory panels.
-
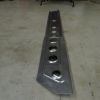
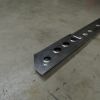
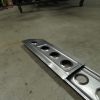
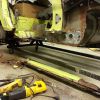
Made the passenger side inner rocker panel.
Started with a flat piece of 18g CRS sheet with everything marked up.
What it looks like after. Still need to add in the seat belt mounting. Left extra metal around the so when it comes time to actually fit it, I can trim it to exact size.
Next will be to make the supporting/tie in plates, Hopefully I can match the other side, should had made the passenger side along with the driver side at the time, but didnt think the passenger side would be this bad.
-
Any progress with the newly made tunnel?
-
Thanks for your input and concern Tume. I too had thoughts about the engine having to much force on one side of the subframe. I didnt want to weld anything to the frames. I guess the only way to find out is to drive it for a little while and see what happens. I might could make something tieing the subframe to the sway bar mounts, those sway bar mounts are beefy. I just may think about doing something like that.
-
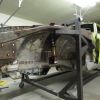
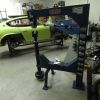
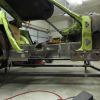
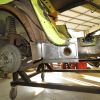
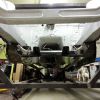
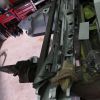
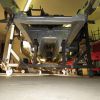
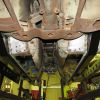
Subframe aligned and bolted on. Finally got to cut the subframe jig I had, was really annoying.
Passenger side inner and outer rocker panels removed. Decided to take a shortcut and just drilled out the spot welds attached to the front and rear tie in plates and hammered the damn thing off. Actually put up a good fight, but the one holding the hammer won!
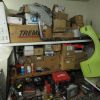
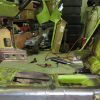
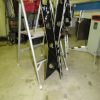
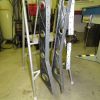
My scrap/junk pile is starting to get on my nerves, need to haul all this to the scrap yard.Just need to make all these things like I did for the driver side. Should be Fun....!
-
Thanks guys,
Hehe Ehh, I wouldnt quite go there with my work as you said Sirpent. I am actually disappointed with the plug welds/spot welds. Didnt want to use Tig welding, Im too impatient for that. Most of them look like turd. Tried my best to get them all flat and consistent as possible, didnt want to weld too hot cause then I would just be burning holes through all day. Guess just takes practice. Was getting better at it the last third of the way. Surprisingly for the plug welds underneath, wasnt too bad welding upside down. Its times like this you wish you had a spot welder...
Just glad that the worst of the rust on this Z is over with. Next up will be to tackle on the passenger side rocker then to get some floor pans made.
-
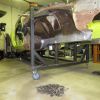
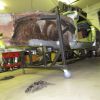
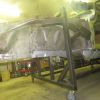
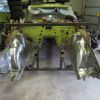
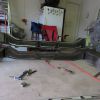
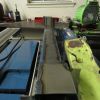
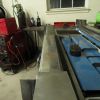
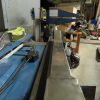
As promised, have some updates. Picture heavy!
Just been side tracked lately, but now I'll have more time for awhile working on this car. Just gets so damn hot and humid here in Oklahoma, been working on the car lately later in the day during sun set.
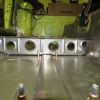
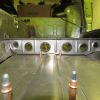
Since this update has so many pictures, ill just describe what all was done first.
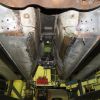
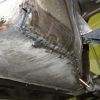
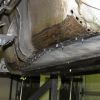
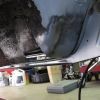
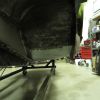
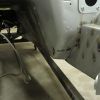
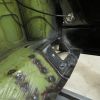
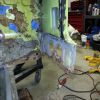
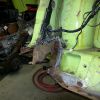
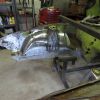
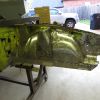
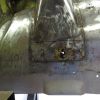
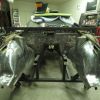
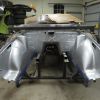
Floor rails and front frame rails, coated with POR15 and coated with rust preventive Weldable primer in areas of welding zones. Stripped paint and rubberized coating underneath the wells and coated the engine bay with that rust preventive weldable primer to keep things from rusting until the painters work on it. worked on the batter tray, just welded areas that needed metal and coated the rest with silver POR15 that contains metal filler, stuff is awesome, will go back and sand it smooth later. Also made sure to get this POR15 in between panels at the lips. Fixed the lower part of the driver side shock tower, cut out the rusted metal and welded replacement plates. welded any holes in the engine bay and smooth out any dents/dings. So the lower radiator support I had made, I decided to scrap it and remake it. Didnt like the way it turned out, was warped and did not fit flush against the frame rails. A lot happier with the second lower radiator support I made. Yesterday, got everything welded in place, Just need to go back and work on finishing up some things, like weld the Cleco holes shut, get the cross member aligned and fitted. I had to weld the pre drilled holes shut on the frame rails for the cross member bolts, did not align up. Incase your wondering, the Z is not straight/perfectly level with the Dolly frame I made. I was getting extremely pissed because the lower radiator support looked crooked. Finally figured out that the driver side is forward about 1/4" or so and passenger side is about 1/4" lower. Spent a lot of time wondering what the hell was going on. Lesson learned, next time make damn sure the car is straight on the dolly. The lower radiator support is actually a little higher on the driver side even with the car level, not by much though. The cross member is leveled with the car and straight when up against the frame rails, so no problems with suspension.
Just glad this part of the project is over with, So much involved, for a moment felt like I was overwhelming myself.
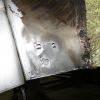
Enjoy the pictures!!


2 4 0 Z L S 1
in S30 Series - 240z, 260z, 280z
Posted
My Bad guys for the late responses and not updating.
Thanks, however by all means, the camber plate will still need some reinforcing. Just a little thin for my liking even though the thickness is like that stock.
Right on!
Thanks
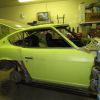
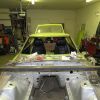
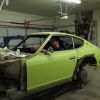
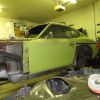
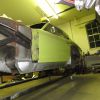
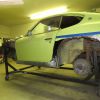
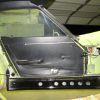
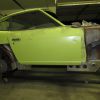
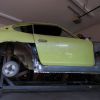
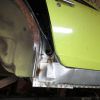
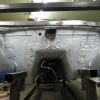
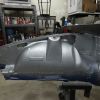
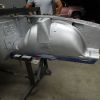
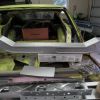
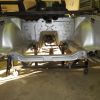
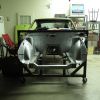
Since my last post, not much has been worked on. Been extremely busy with Work, though I probably shouldnt use that as an excuse. Just like saying, hey I dont have 30min to an hour each day for 3-4 days a week to exercise and workout. I did get the quarter panels cut out and welded in replacements. Some other small miscellaneous stuff too.
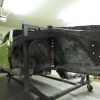
I try to get some pictures going and post them up soon.
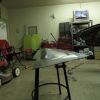
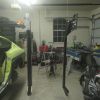
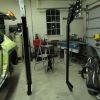
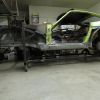
Here are a couple of pictures of where the car is at now.