

Yorgee
-
Posts
138 -
Joined
-
Last visited
Content Type
Profiles
Forums
Blogs
Events
Gallery
Downloads
Store
Posts posted by Yorgee
-
-
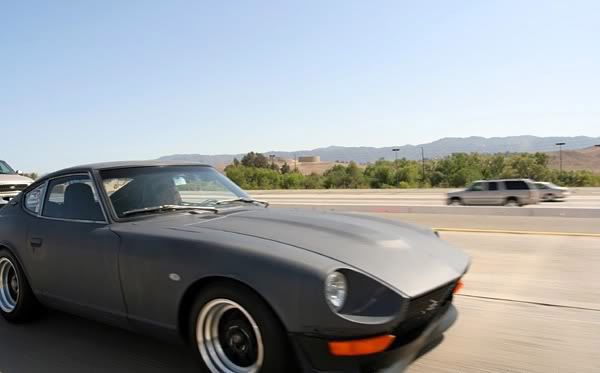
Ever since I saw a photo of my car on the freeway with the air dam pushed in because
of the wind, I've been trying to reinforce the urethane air dam. I'm not sure if all
urethane air dams have this problem, or if later version of this air dam are more rigid.

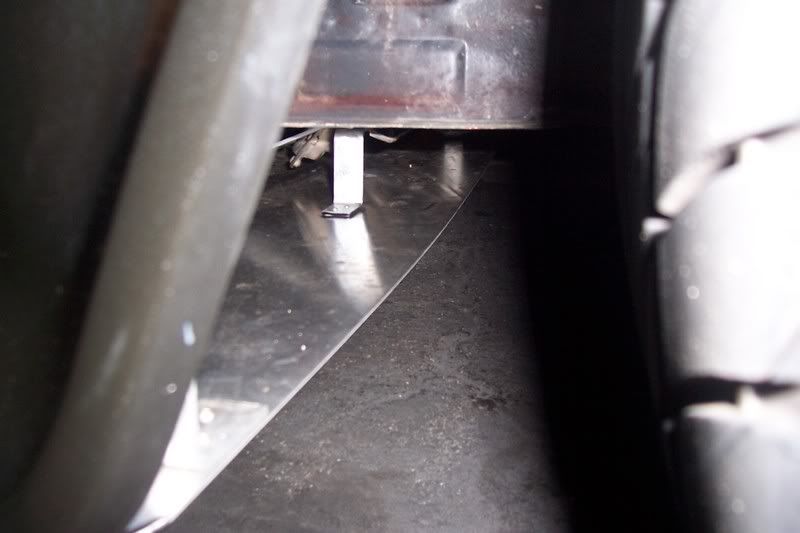
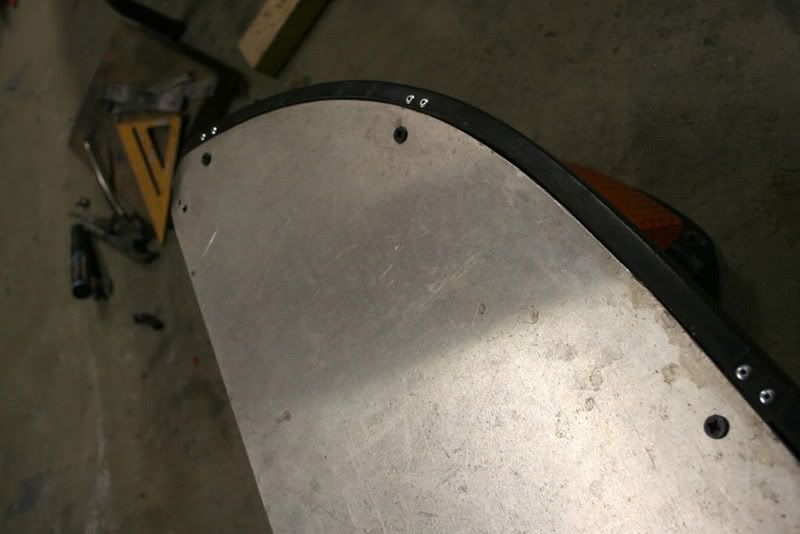
I first tried to simply attach some aluminum brackets on the radiator support to keep
the air dam pushed forward. Although it was a solution, there was still room for
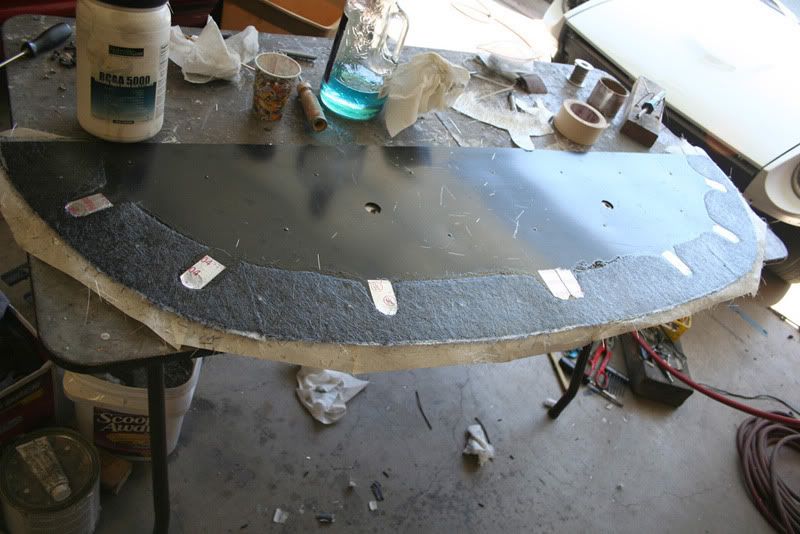
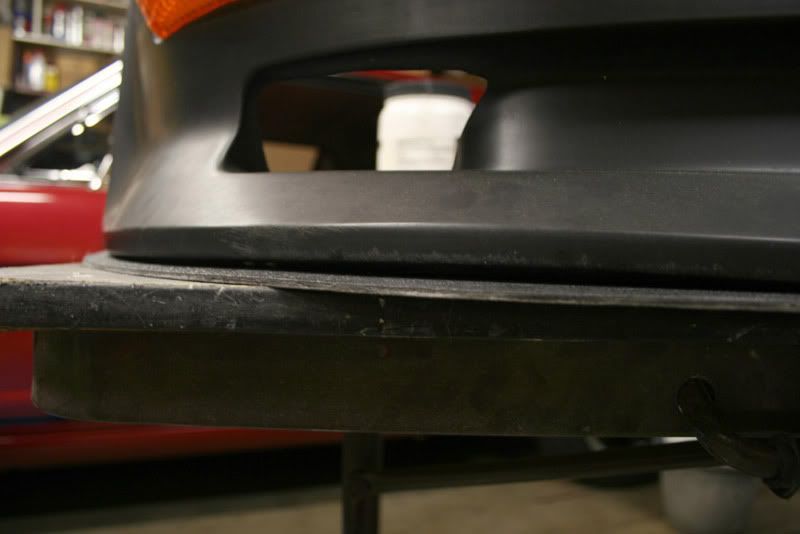
improvement. The inside of the air dam, along the bottom edge of the front lip, runs
a 3/8 extension. I ended up riveting some tabs onto this extension to be able to bolt
on an aluminum plate I had previously mounted with hanging brackets.
(old version)
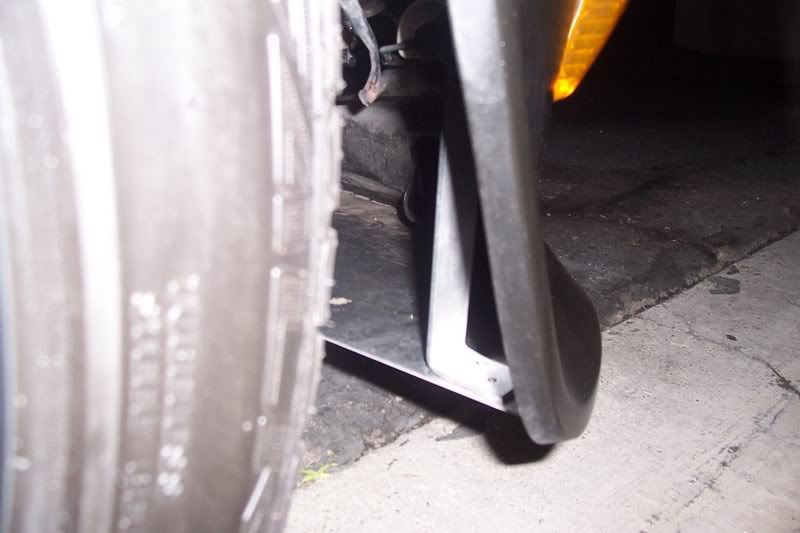
(new version)
(I ended up attaching another one of those brackets on the right side, to hold up
the plate.)
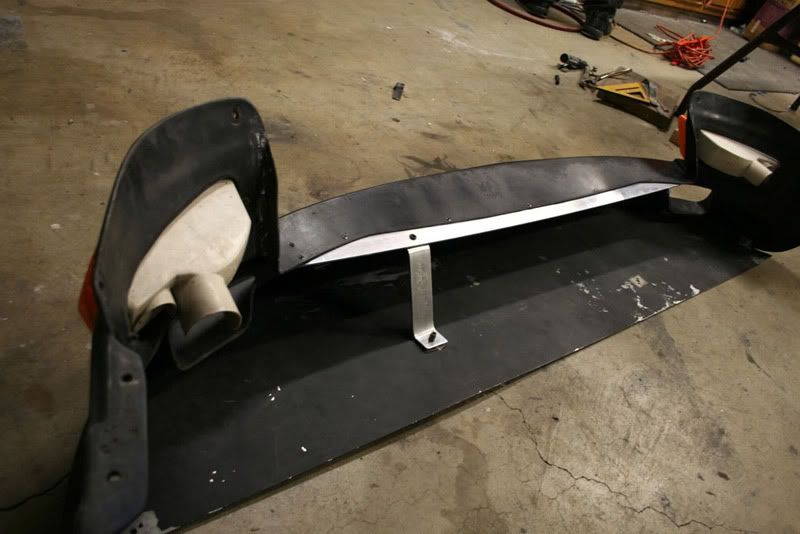
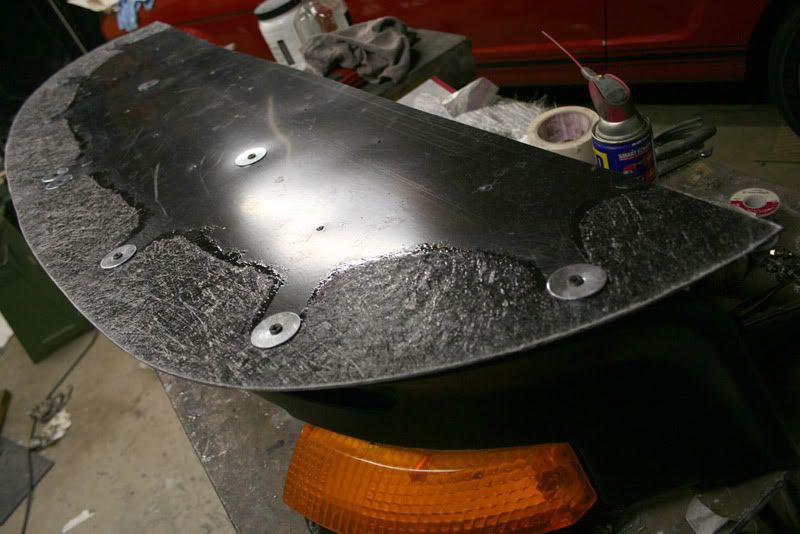
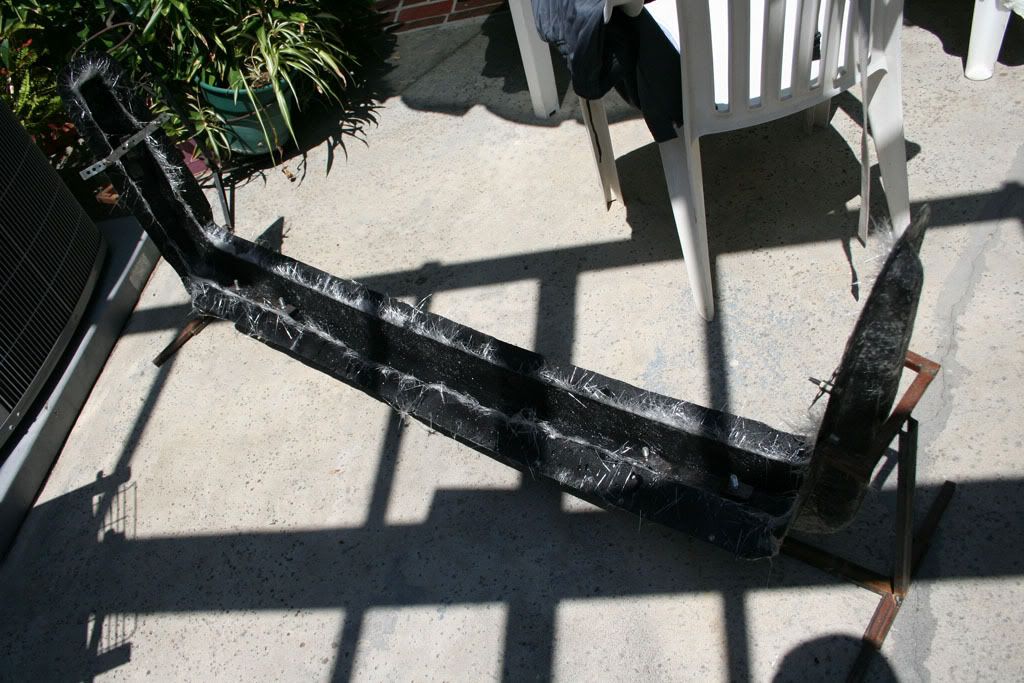
With the tabs riveted to the air damn, the plate and the air dam can be removed in one
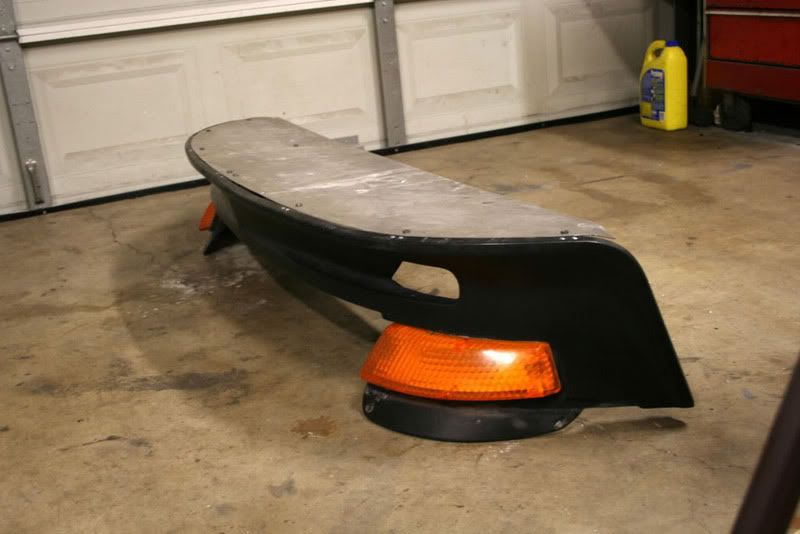
piece, and when bolted onto the car, it's extremely rigid. Going one step further...I got
a hold of some ABS plastic to make a little lip extension. I thought I'd might as well since
there was something to attach it to now. After a few days though, I didn't take into account
the heat of the sun, which was making the plastic sheet expand (probably should have got a
thicker sheet), distorting the lip. But that's nothing a little fiberglass can't fix. With 2
layers of mat around the border, the 1/8 inch thick abs is now close to 1/4 inch.
-
I totally would continue making some but I just recently started school and don't have as much free time as I'd hope. Have to get adjusted to the work schedule.
-
Hey Andy, me and my friend just did a bunch of searching on google and different sites to learn how to glass. Wish I could remember the video we found, but it basically explained step by step how to make your basic mold. And even though it was from like..the 80s and had the most unenthusiastic person hosting the video it was still very informative; What supplies you need, dry times, applying resin, releasing molds..etc.
As for the projectors, they aren't a set from ebay. I actually made a thread of how I made them out of some rx8 projectors. They work great though. As long as the cut off line is at a decent height, there shouldn't be a problem of blinding people. Haven't got any complaints from my friends or anything when I drive behind them.
-
yehhh about those "cutoffs"
a. had to stop the projector light leakage somehow
b. had some extra vinyl and was bored =)
-
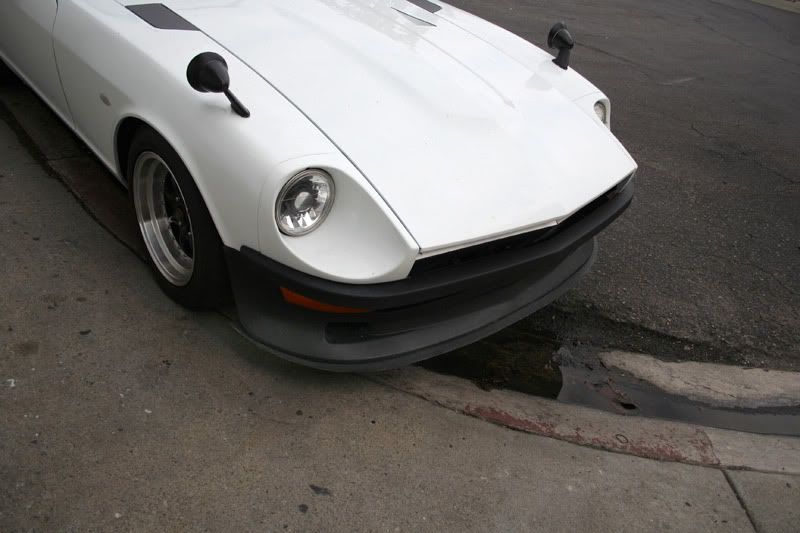
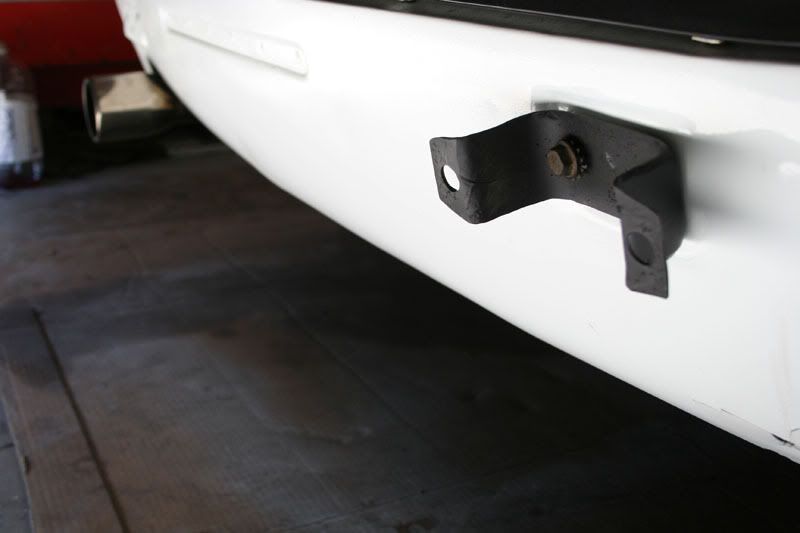
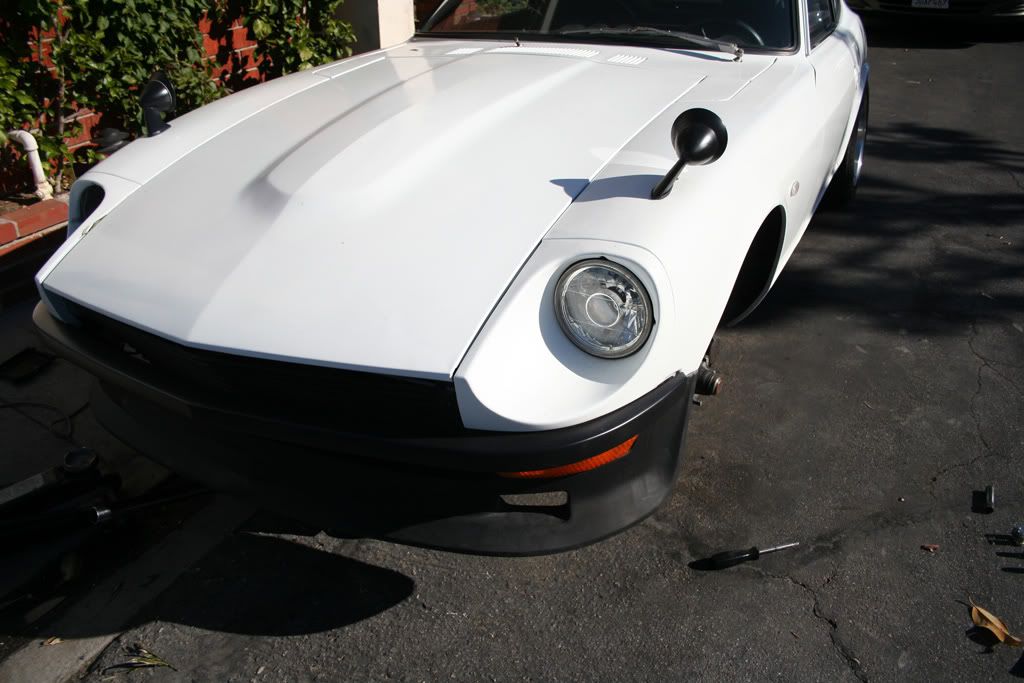
Got a chance today to trim the front bumper today, test mounted it and took some
pics. Although fitment with the metal bumper brackets isn't that bad, it is a little off.
I've got to make a pair of front brackets so I can make the holes bigger. Should give
me more adjustment to get the bumper lined up better on each side.
-
Yeah Brad, I did some searching yesterday and found a place that had some nice
boxes I could cut up and make a bigger box myself to fit the bumpers. And shipping
something with the dimensions I figured would be around 60-70 dollars assuming when
everything is packed it would be around 10 pounds (hopefully it's less).
On another note, had to adapt my mold rack to fit my front mold; glad I didn't have to
make another rack.. Finally got some glass down on the mold. Was a little bit more
messy than I'd hoped. The front bumper is a lot more narrow than the rear. Kind of a
hard area to work in.
-
You could try cutting the bumper into sections for cheaper shipping, maybe in the center of the brackets you made so you end up with three pieces.
Not sure if I would want to actually cut them up.. but that would solve the shipping issue, that's for sure.
-
I think I know those hills in the background . . . is that by the 241 toll road?
Tell you the truth, are you the guy I sold my engine and trans to?
Brought it over in a white truck.It's actually right off of irvine center drive, street called bake. As for the engine and trans, I think you might be thinking of some one else.
-
It's on my to do list, but would still have to figure out the best way to make one. Just trying to take on one project at a time.
-
True, it would be pretty light, however it would be an over sized package. Price always goes up for over sized packages. I'm guessing shipping larger items means less items
they can fit in the trucks, so they charge you more...
-
Once I find a box, the shipping issue really isn't the problem. If the bumper doesn't fit
well or something doesn't line up, it's my fault. You would have to ship it back and
everything, would be a whole ordeal.
-
haha, my first mold I made was for a bre rear spoiler, was trying to do something and
ended up messing up the mold. As for front air dams, definitely a lot more work and I
know how many times I've hit my urethane bumper on my drive way, streets, dips,
and making a fiberglass one does not seem worth it. Probably break the thing like
twice a day.
I did contemplate selling them but I've got to find boxes If I want to ship
them. Before I start making more bumpers though, I'd like to test fit another rear
bumper I made on another 240 and see how well it lines up since the mounting point on my car on the right side isn't all that straight. If anyone in so cal is interested.
-
what kind of fiberglass were you using? j
I'm using one ounce mat. It's pretty dense mat which can be a pain around tight corners but it's also very nice because you need less layers to get the thickness you want.
-
Been working with fiberglass for almost a year now and it's crazy how many
ideas actually pop into your head when you learn something like glassing.
Although most of the ideas are probably way too advanced for a beginner
to tackle, I thought I'd try something a little more plausible. So I decided to
make some bumpers...
I had already welded up my front and rear bumpers; Got rid of all the
seams and holes, so most of the labor was already done. All that was left
was to make molds. Just recently completed my front bumper mold but
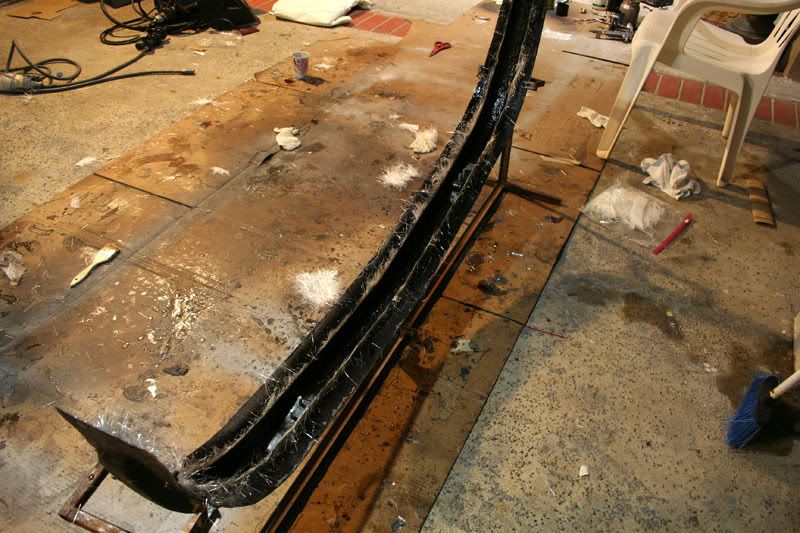
haven't been able to lay the glass for it yet. Here's a pic of the rear
bumper inside the mold.
Since the glass is somewhat thicker, and due to shrinkage, the space
inside the bumper where it's mounted is a little narrower, so the U shape
brackets used to mounted the bumper had to be modified. But instead of
cutting up the brackets, I just decided to make some.
The combined weight of the bumper with the two brackets is around 4 lbs,
which is definitely a great weight reduction; rather than having to take the
bumpers off completely.
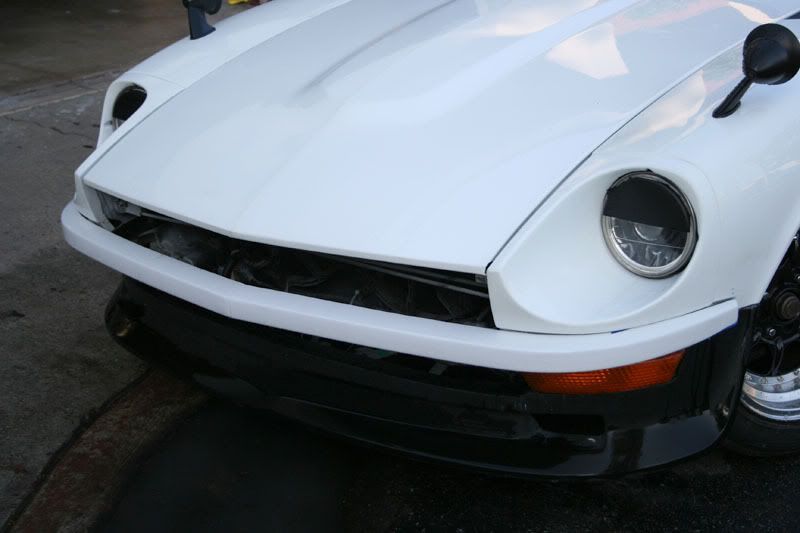
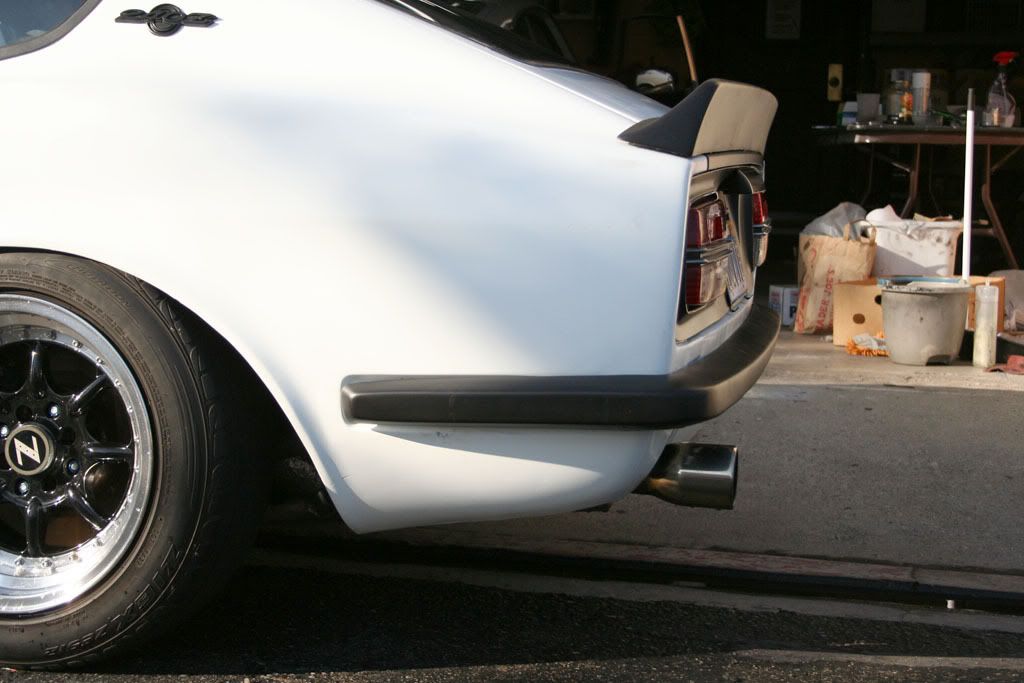
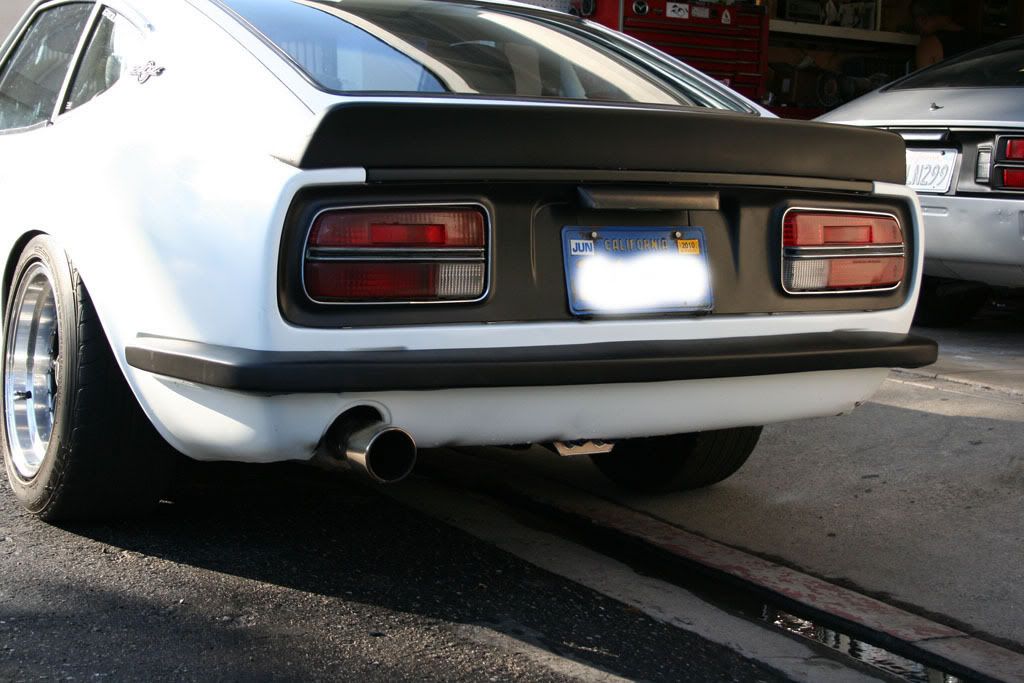
Finally got around to painting a finished bumper and got it mounted today.
Everything lines up nicely =).
-
Ah, is that what that is? I thought it was just something to help with alignment of the headlights. While I was trying to align them the light above the cutoff line seemed to line up. But man, for me to actually take the thing apart and cover the project side walls to stop it from reflecting, I'd have to break off the epoxy and I might break the headlight. It doesn't really bother me that much though and not nearly enough light to actually do any damage to drivers on the road. I've seen way worse.
-
Yah J. Soileau, I basically just cut out the portion that the spring actually attaches to so the casing could slide through. I don't think I have a picture of that though, of just that ring.
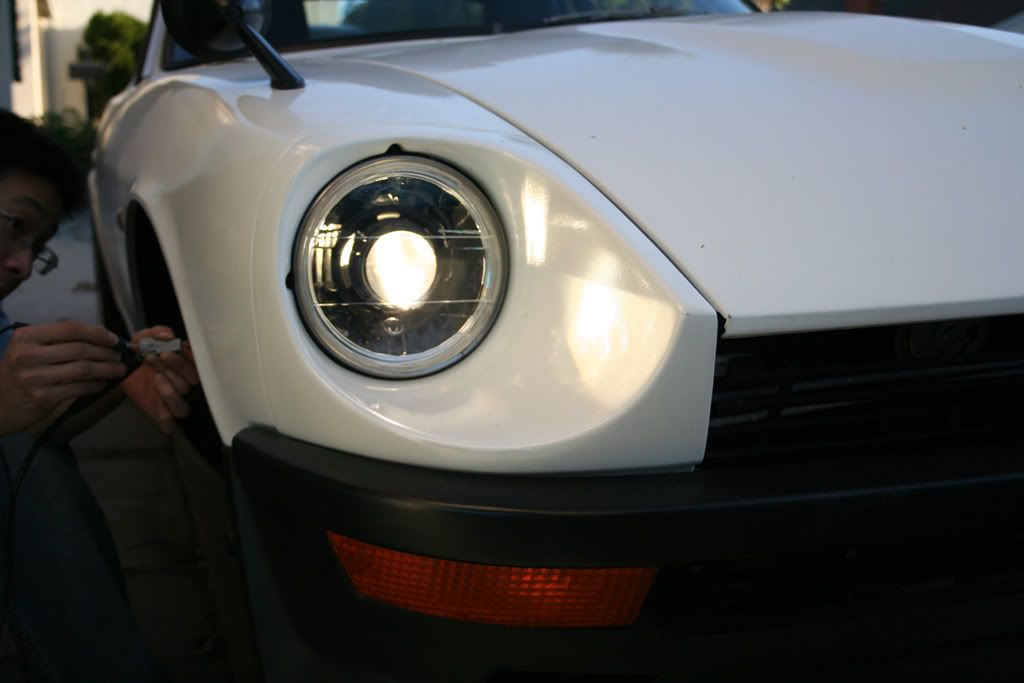
But it's been a long day and I finally got the headlights mounted, all that is left is wiring and aligning the headlights.
Only the right headlight is on in this picture, and it's still very bright. It's way to low though. I'm probably going to get my friends s2000 and park his car along side mine, try to align my lights with his or something. But definitely, an improvement. I'll have to work on it some more tomorrow.
-
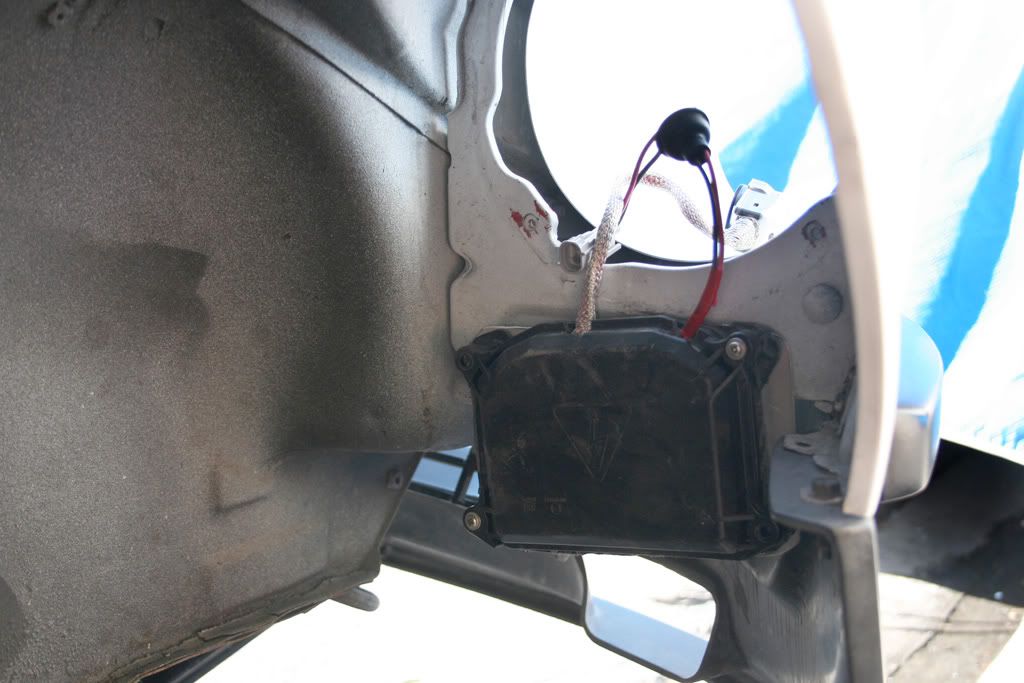
Got some work done this morning. Test fitted the second headlight and mounted both ballast waterproof cases under where each headlight is placed. Had to cut some holes into the outer fiberglass casing to insert the bulb wire. Then sealed it with silicone sealer. I wish the wires itself were longer, but I'd hate to cut them to solder on longer wires. Has anyone ever messed with these ballast units and know it's safe to actually modify those wires? I mean, if there is no power to the unit, it should be ok but there still might be a charge and yah never know. All I know is that it's a pain waiting for stuff to dry...
-
Hey Clive, my 240 is running 225/50/r15 all around.
and Justin, I was actually thinking when you mentioned making something similar for your soon to be new 510 and I'm not sure If you can approach it the same. Seeing as how the projector lens itself is almost in contact with the 7 inch headlight housing I used. The headlight for 510s is only about 5 inches in diameter, not sure how you would go about fitting the projector inside. Would probably just have to have most of projector assembly outside the headlight housing and just have the projector lens inside.
-
Yeah, it will definitely be an improvement. I was testing them with a spare battery in my garage. It's crazy how bright those things are. As long as you can find the materials to make a set, I can make some outer casings for you to cover it.
-
Not much Matt, just trying to finish up as many things as I can before schoole resumes. How's your car coming along, I heard Justin was sectioning your struts.
-
Hey Matt, my dad actually works for mazda and he just brought them home a few days ago, so I decided to try converting my headlights with them. As for materials, the most expensive stuff was the resin and PVA for the fiberglass. But me and my friend bought in bulk for some other projects we are working on. I think I spent around 80$ on materials, but only used 5$ worth.
Thanks Daeron, I'm really only doing the conversion so I can actually see on the road, as long as I don't have to modify much, and still looks stokish, the look of the bulb doesnt really bother me much.
-
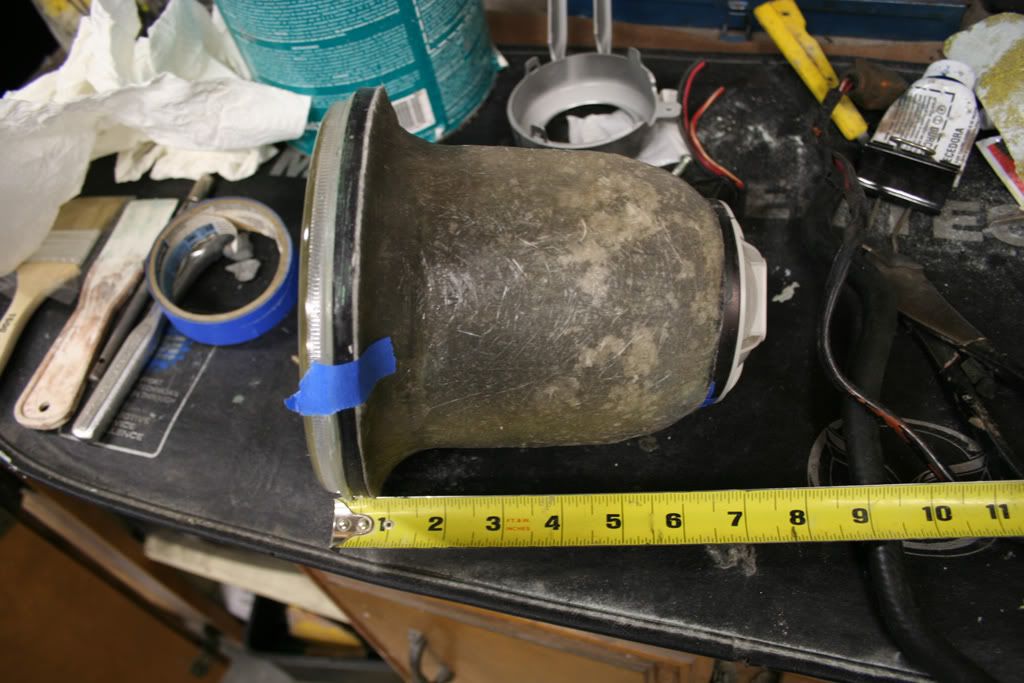
Haven't really been on hybrid much due to the fact that I haven't really been working on my car all that much. But when winter break came, thought I'd make a couple things for the Z. And for now, it's new head lights. The stock ones just don't cut it, especially on dark mountain roads... I just had a look at the some other posts on Hybrid and people are taking a similar approach which I'm not surprised, because it's a very simple solution if you have the right equipment. Here's my take on HID headlights.
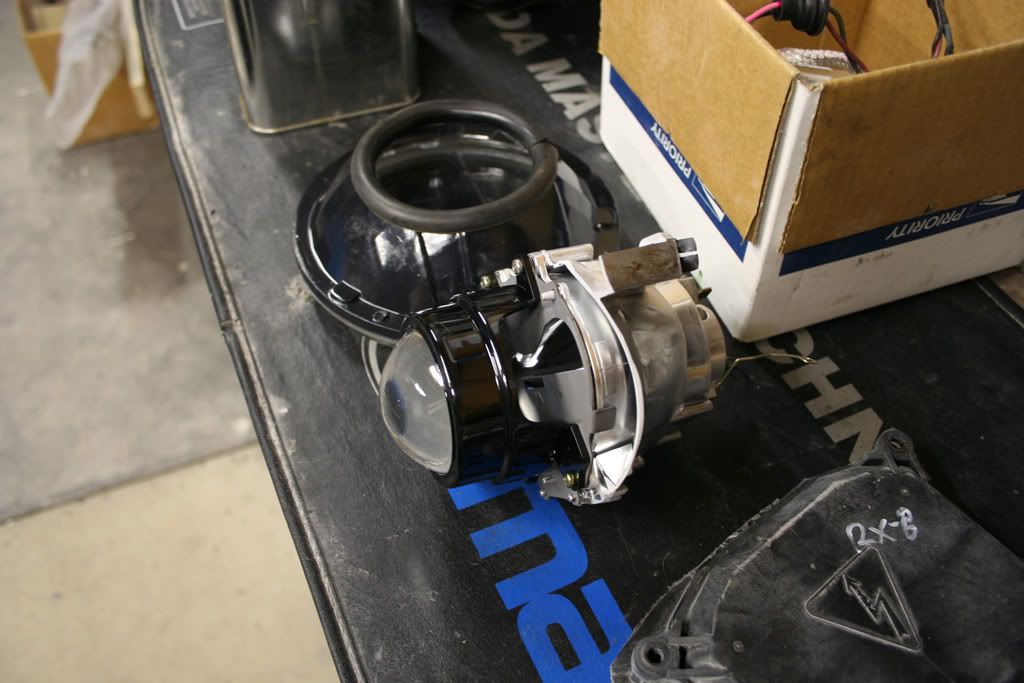
I basically got a set of rx8 headlights, cut out all the useless material, and took out the projector and the HID ballast unit. Pretty much all I needed.
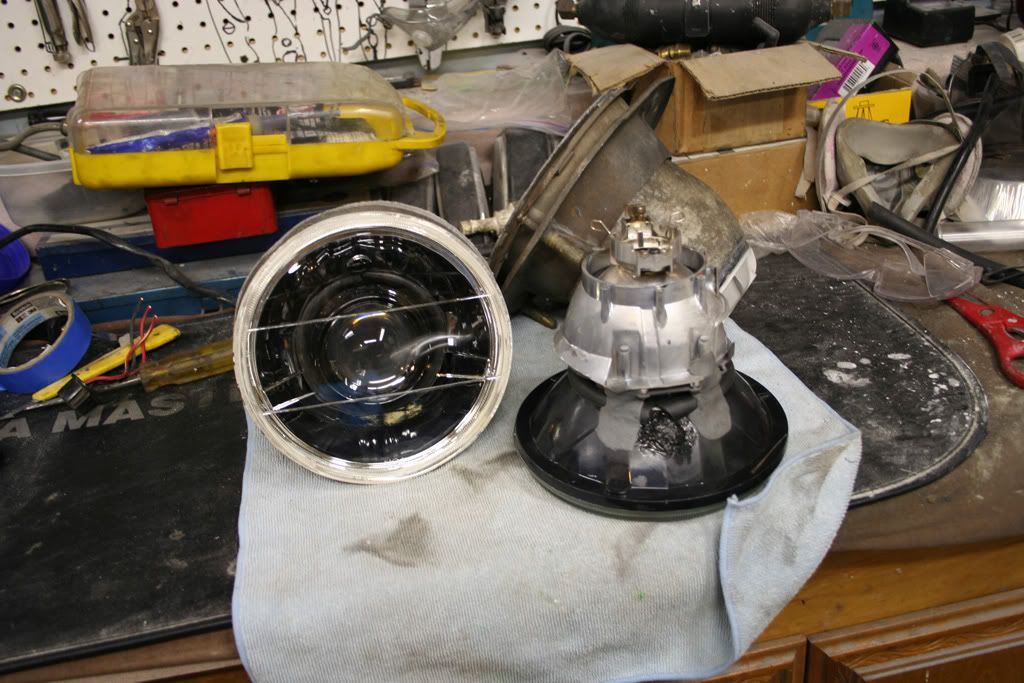
Then basically cut out the back portion of some cheap "projector headlights" I had purchased on ebay.
I was able to actually attach the project to the back of the headlight using something similar to jbweld called Permapoxy. It comes in a tube, and is basically like puddy. Hardens in about 4 minutes and gets pretty hard.
The biggest issue with this swap was completely sealing the head light and protecting it from water and whatever else your tires might kick up and definitely not making something too big that would have any chance of coming in contact with the front tires. I was planning on making a shape out of foam and fiber glassing over it to fully enclose the unit, but later found something a little easier.
Yup, a 3 liter shasta bottle. It fits perfectly around the entire projector assembly and made for a good mold.
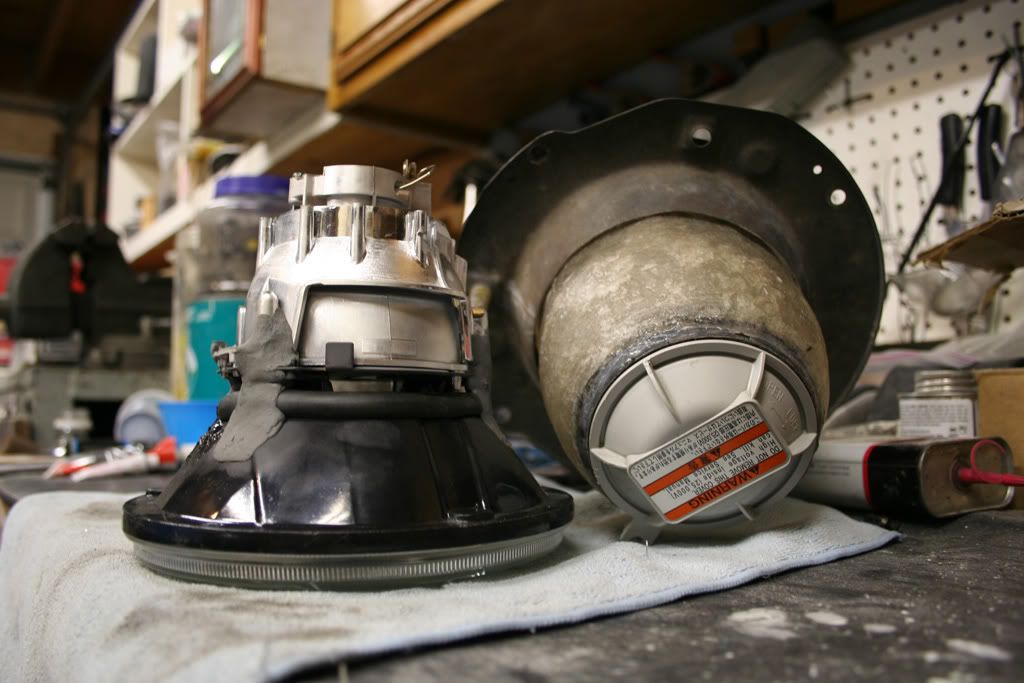
After trimming all the edges and fitting the back end cap of the rx8 headlight that covered the bulb:
All that is left to do to actually physically mount the headlight was to cut up the old headlight housings so that the fiberglass cover would slide through.
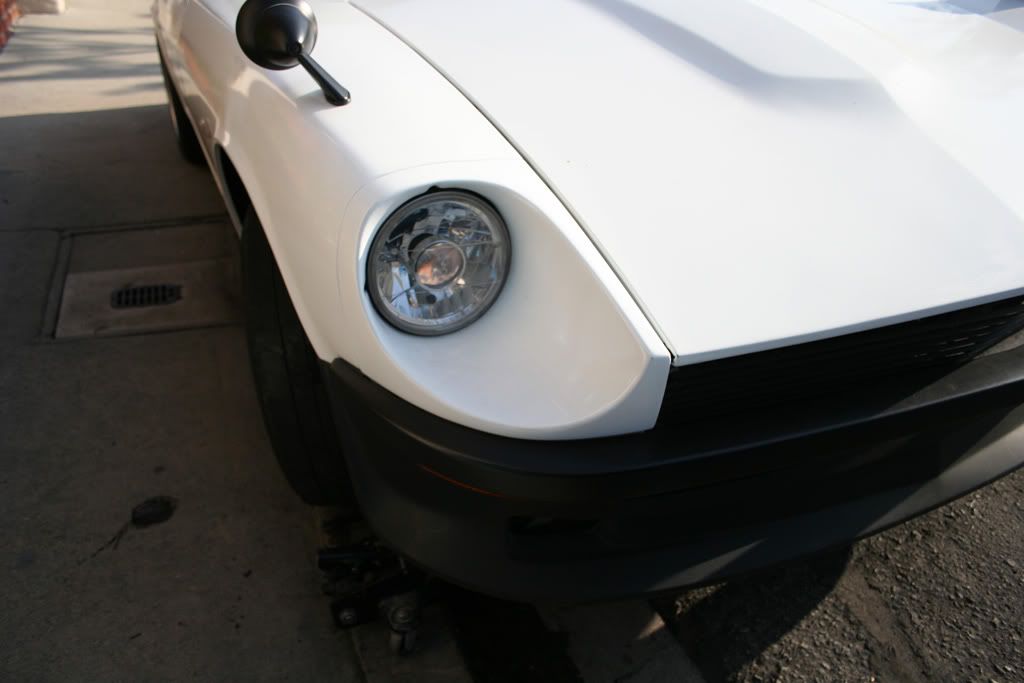
Got a chance today to actually mount the headlight on the car, and it's about a good 8 inches away from the tires and looks completely stock from the outside which is always a plus. (had to use a donor headlight for the test fit)
Not much is left, cut some holes in the fiberglass housing to run the wires, get some relays to wire everything up, mount the ballast unit right under the headlight and then just seal it all up. As for the High beams, since the ballast unit for the Rx8 is only for low beams, I'm probably just going to get some fog lights and put high beam bulbs. Looking to be done this weekend hopefully before school starts up again. Let me know what you guys think.
-
I too saw the new GT-R on the streets. Not only one, but 2 of them. They do a lot of road and track testing in Irvine, but I never knew where exactly. But I spotted them both, with Michigan plates (a lot of new cars on the streets that are being testing carry those plates, least, that is what I have observed), around the El Toro air base, right off the 5 freeway. They also had its competitor, the 911 turbo along with both GT-Rs.
-


240z Urethane Air Dam Modification/Splitter
in Fabrication / Welding
Posted
Thanks Lonestar. Yes, it is a xenon air dam. At least, it has a xenon brand on the back.