

siteunseen
-
Posts
30 -
Joined
-
Last visited
Content Type
Profiles
Forums
Blogs
Events
Gallery
Downloads
Store
Posts posted by siteunseen
-
-
According to this post it's IceHound's Z.
profile images...
https://forums.hybridz.org/profile/4193-icehound/content/?type=gallery_image
-
I am leaning more towards just cleaning and leaving it as is. There was no coating on the inside of the tank from factory so assuming you clean out the rust there should be no more problems??? Looks like you had a pretty nasty case of crud in tank,
I believe someone's kid put a bucket or two of dirt down that big ole filler hole.

My thinking on the lining was it can't hurt if done right and ALL newer cars have a lining. I drive mine on weekends and so sometimes it may not move for a couple of months. If the tank isn't full of fuel there's a chance rust could form from moisture created by the ethanol (ethyl alcohol) which attracts and absorbs water.
-
Here's what I remember right off. I'm sure I'll forget something so ask anything you're not sure of. I coated my 280s tank first, no idea what I was doing. The 240 tank was much easier. Baking soda and water mixed will neutralize the acid, no flash rust for me. it's a quick and time sensitive process so read a few times then write out a plan. have everything close by and ready to grab. A leaf blower in the filler hole for 10 minutes will dry it out after the soda and water wash then acetone and before the Red-Kote lining. I bought a rubber cap for closing off the filler hole, you'll be using it for the acid and baking soda and water then the liner. Tape off the vent lines, I used Gorilla tape.
You'll need about 4 five gallon buckets. 1st for pouring the dirty acid in, 2nd for baking soda and water premixed-reuse this one, 3rd for draining the excess Red-Kote into, 4th to sit on until you need it for something.
My "steps". Wear rubber gloves and don't breathe the acid's fumes, fans are nice to have blowing the air around. A respirator or just stay away from the fumes.
First take the tank to a spray car wash and blow the inside out as best you can, then clean the outside.
Second, cover all the holes but the filler hole. Have the rubber cap ready for that hole.
Third, pour a gallon of muratic acid in. Slosh it for 5 minutes, maybe a little longer if it's bad. carefully remove the rubber cap, it'll blow off in your face from the acid building up pressure, make sure it's tight while you're sloshing. Pour that nasty stuff in an empty 5 gal. bucket, put it outside. I killed ant beds with mine, scorched earth.,
Fourth, pour in the pre mixed soda and water. I did this in two rinses, first was a pound box of soda and one gallon of water, next 2 gallons of water with a pound of soda. pour this back in the bucket and put it outside.
Fifth, pour in a quart of acetone to evaporate any water, slosh that around then drain out and put a leaf blower in the filler hole for about 10 minutes. Make absolutely sure it's dry before you put the Red Kote in.
Sixth, pour in a quart of liner. Slowly rotate the tank all around covering every part. Then remove the rubber cap and stand the tank up on a empty five and let it drain. You should have a half of a pint left over, just chunk it. Remove the tape off the vent lines and blow them open with your breathe while it's draining. If you let one get too thick use about 30psi of your air compressor to blow through, DON'T hit it with 120psi ( ask me how I know).
Lastly, put the tank in the sunshine until dark then slide it under your car for at least a week.
If you read these two things you can do this. Study what you need to do and write it down in order, have that sitting on your workbench to look at real quick.
http://atlanticz.ca/zclub/techtips/fuel/gastank/index.htm
http://www.damonq.com/techsheets/red-kote.pdf, Red Kote's site is down right now but this is a link to their instructions.
Get a funnel and cut about half the drain spout off to make pouring stuff in the tank easier. Here's the rubber cap for the filler hole, the big one.
I Already remember something I forgot. I bought a new sending unit and O ring from Nissan so I pulled the old cruddy one out and cut all that float mess off so I could use the head of the sending unit to plug that big hole. -
I bought one that had been sitting with fuel that came out orange and smelt horrible, varnish I've heard it described. I put a Fram g2 clear plastic filter coming out of the tank and drove it half way around the block and walked home. Clogged it up pretty quick. Dropped the tank and cleaned it with muriatic acid then coated with Red-Kote liner. Replaced all the vent hoses too. Took my time and let the liner cure for a week before putting it all back together. Zero problems so far, did this about two years ago. I have a glass filter before the mechanical fuel pump and it has never been anything but clear or fuel color.
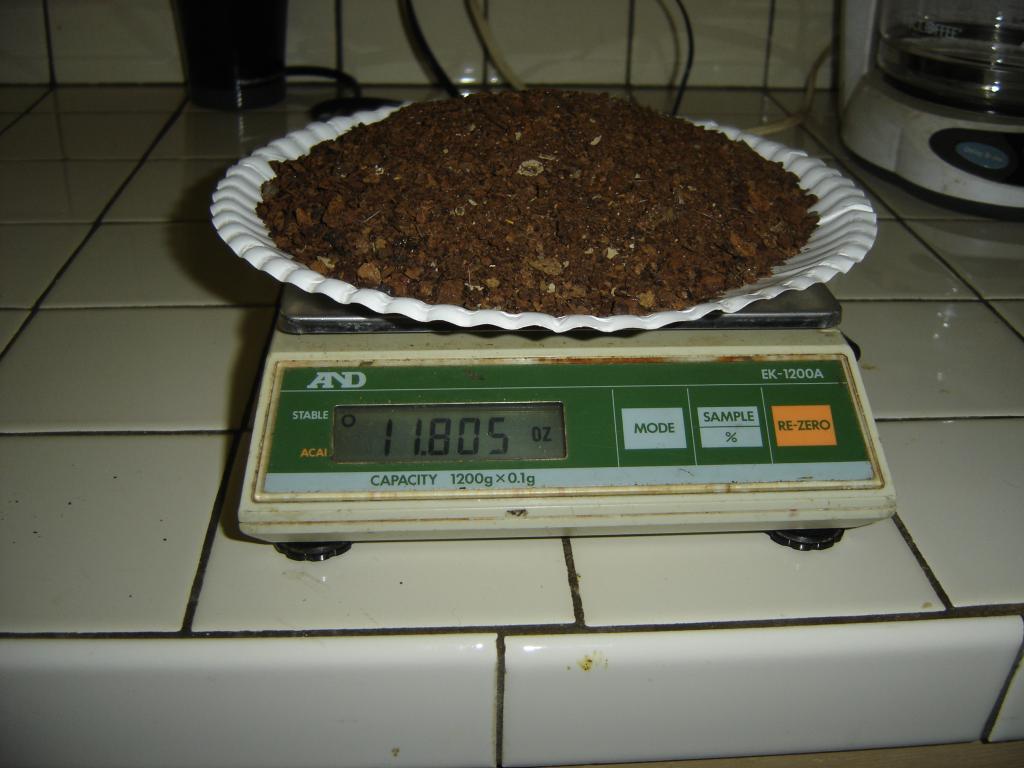
Inside tank crud, not rust, it wouldn't stick to a magnet.
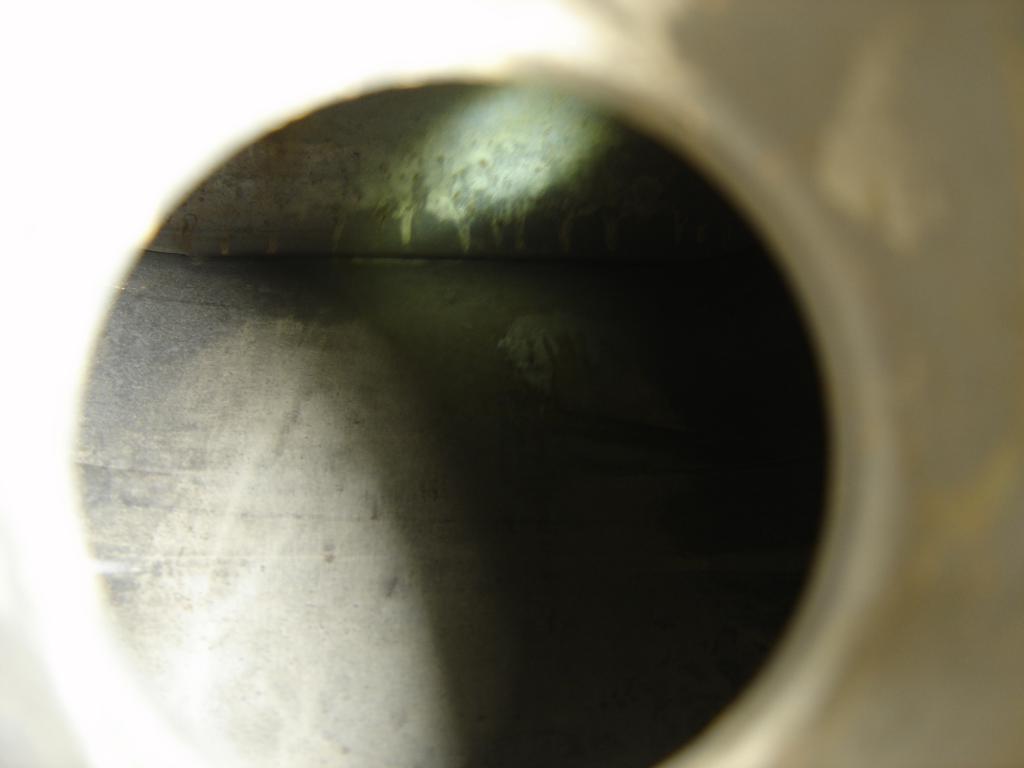
After acid wash,
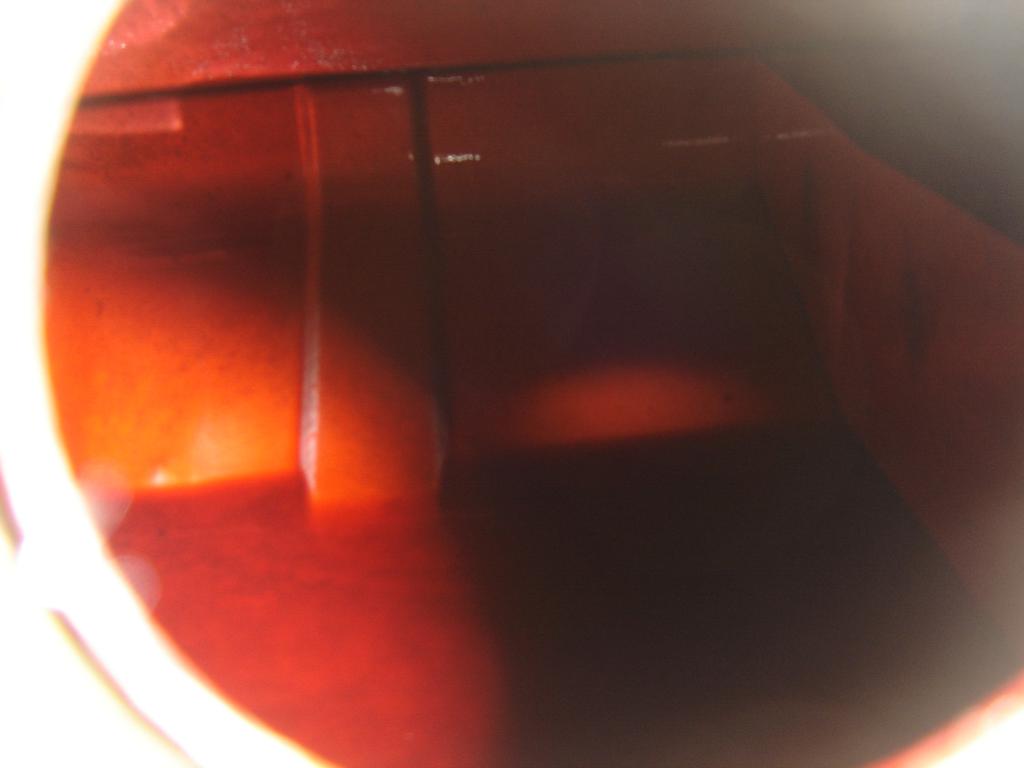
After lining,
-
The fluid goes in through the hardlines on my Z, air exits through the higher bleeder valve.
-
You'll need to slide the heat shrink tubing on before you solder the plug connectors.
-
Yeah, sounds like starter problems.
-
Could be the Cold Start injector dumping all that fuel and it's coming out of where the PCV valve goes. They're relatively close to one another. Unplug the CSV to see if it stops.
-
Mine is a dark brown, almost black wire. I'd think if you followed the harness coming out of the cabin to the engine bay you'll probably find it. It's separate from the big glob of injection wires.
-
I got mine from Ross Machine Racing, not in person though. It was their dash 6 and 24" was enough. It was flawless, no scratches at all. The taps are what cost so much if you don't have them already. I was very satisfied with the purchase. http://www.rossmachineracing.com/dash6.html
-
I like that way better than the original skinny wooden wheel. Not quite as big, more leg movement. I've got a MOMO on there now that's similar but not wood.
-
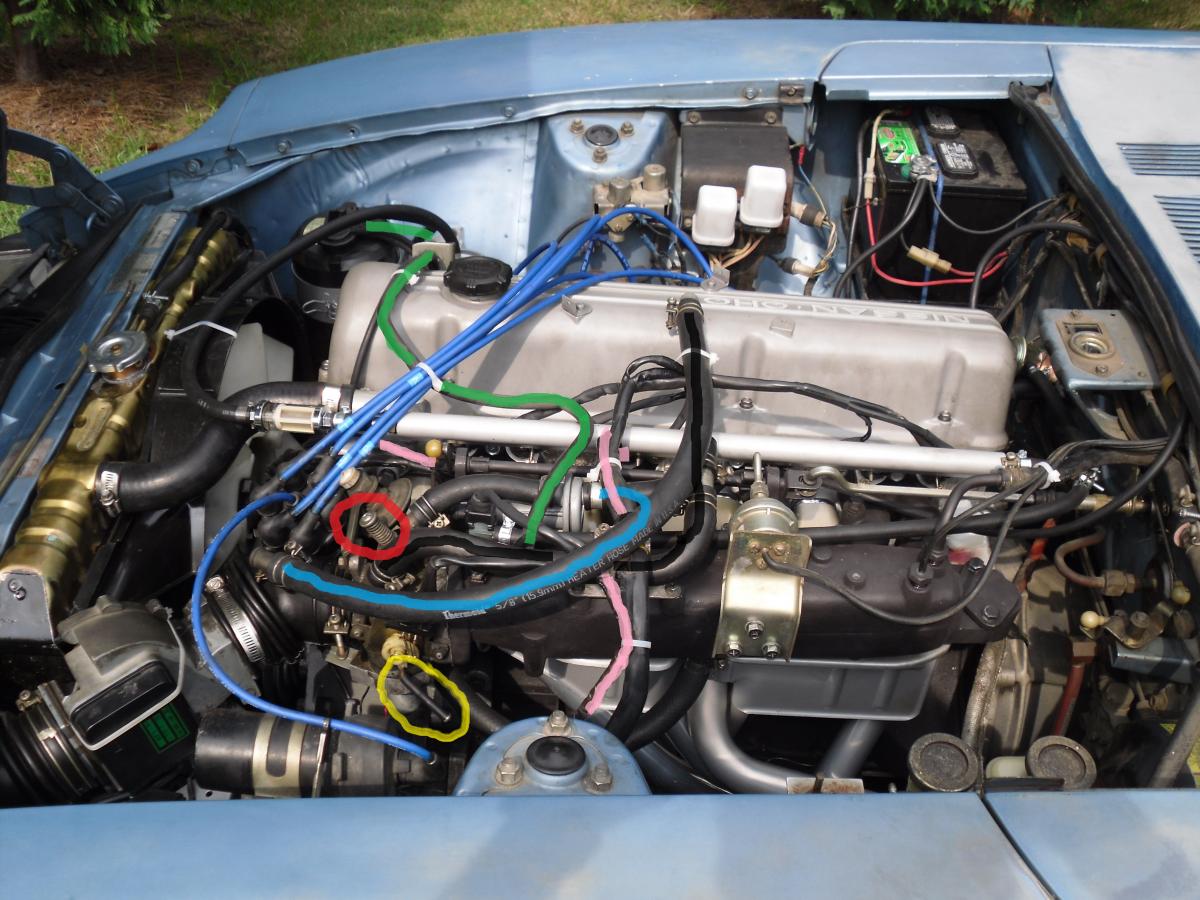
First, that is your temp gauge sending unit, the wire comes from drivers side near the strut where the ground wire is from the intake to the body of the car, by the strut. Runs alongside the wiring harness on my '77. PINK in picture
Second, the middle of my canister says "PURGE" and the hose goes across or in front of the valve cover to a bung on the intake behind the Cold Start Valve. Its a vacuum supply for the canister. GREEN in picture
And if your talking about the hose that comes of the ported vacuum switch on the heating plate with the coolant lines, mine used to go to the EGR, I've deleted all that crap off mine but it was connected to the BCDD under the TPS. I have mine plugged off. YELLOW in picture.
Hope that helps.
-
Did you install a new fuel filter up front close to the radiator?
-
Ad Choice has a Progressive ad under #1 post (on my screen) LOL. They will try and depreciate that bumper down to nothing. I would let my carrier handle it too, that's what your paying for. It's subrogation time!
-
I just realized who I'm talking to. Zed's the one that told me how to do this!
-
Yea that's what mine was, audio potentiometer, it's a volume knob for an amplifier or something. I put mine inside the cabin, ran the wire through a firewall grommet, then I could "tune" it while driving. Paired speaker wire worked for me.
-
Mine wouldn't fall out of a tree between idle and 3,000 RPM, after 3k it would pull like a tractor. I thought it was the Throttle Position Switch and carried it to a mechanic for adjusting, that didn't work. He slightly clamped off the return line to increase fuel pressure on the rail and said I needed a Adjustable Fuel Pressure Regulator turned up to 45psi. I ended up doing this for $5 from Radio Shack and now I'm able to lay down some rubber from a dead stop, it's like a whole different car. http://atlanticz.ca/zclub/techtips/tempsensorpot/index.html
-
This isn't mine but it's what I went by. Works good for me with a zip tie holding it to my heater hose in and out on the firewall. And cut the hose equal with the old ones, maybe a little longer, you'll have to figure out your barb length differences.
-
Add shipping for hazardous material and it was cheaper locally for me.
-
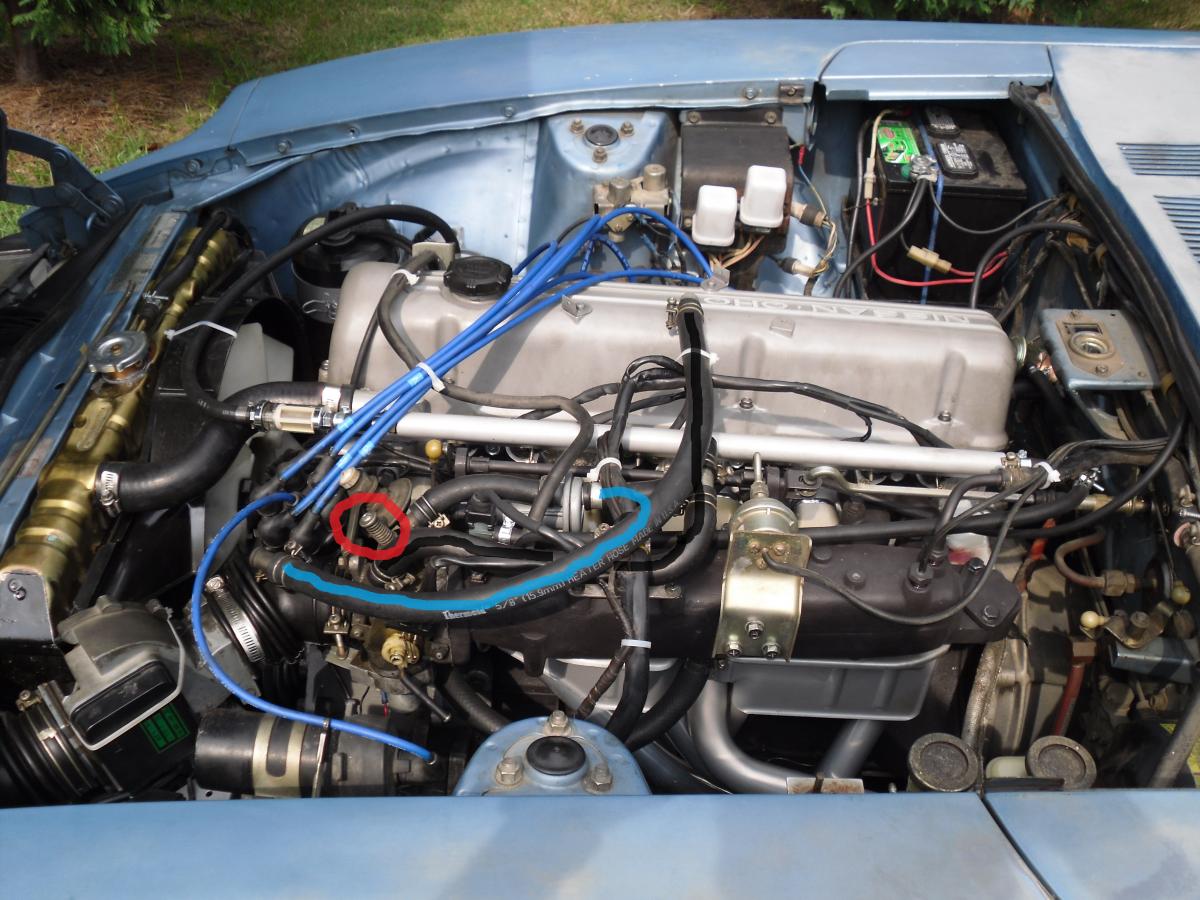
Mine is a '77 but my air/idle screw is in the red circle of this picture.
-
I adjusted mine with the lobes pointing straight up, the first few times. Then realized if I aligned them straight up with the cam towers they were much quieter.
-
Have you looked over the drive shaft? Could be something wrapped around it. Speedometer or odometer gears clicking? Put it up on jack stands and let it idle in gear.
-
That's hilarious.
-
Mean looking car and a good roofer too. I'd have nails/screws all over it.

 I Already remember something I forgot. I bought a new sending unit and O ring from Nissan so I pulled the old cruddy one out and cut all that float mess off so I could use the head of the sending unit to plug that big hole.
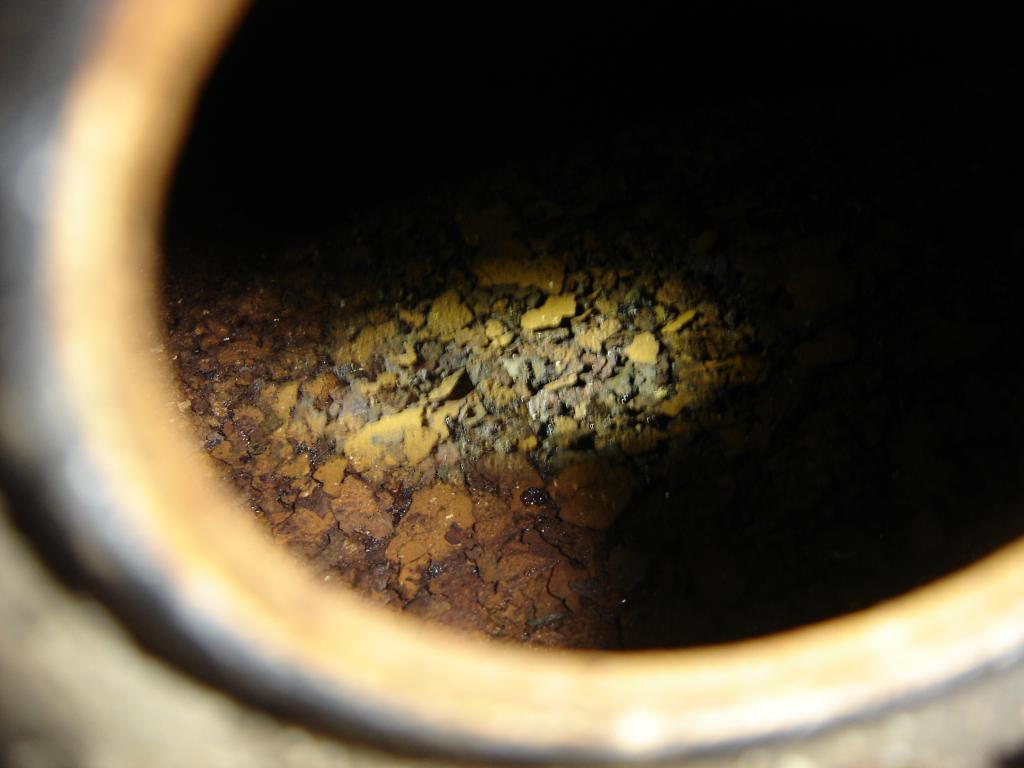


Help Me Identify This Cars Owner/Builder ! - I Need Info !
in S30 Series - 240z, 260z, 280z
Posted