
bfg
-
Posts
198 -
Joined
-
Last visited
-
Days Won
1
Content Type
Profiles
Forums
Blogs
Events
Gallery
Downloads
Store
Posts posted by bfg
-
-
Okay, I'll have to get some sand from them. Looks really good.
But I'm using a piece of box tubing with a bottom plate welded on and two little parts on the sides for the tongs to pick it up. I tend to melt down like precast stuff (like intakes and stuff) that I shave off small sections of so they'll fit in the crucible. But I'll need to build a larger one to try to get enough aluminum to cast the intake.
Several furnaces might work as well.
-
I found a nut that fit and went to the hardware store and got the EXACT same thread on two separate occasions for the other bolts and NONE of them fit! I waited a couple weeks because I had no idea what to do. I even tried the old stock bumper nuts and none of them worked except the one magical one I found. I eventually found another castle nut that fit in the depths of my friends garage. Heaven forbid I lose those nuts or I'll need some form of black magic to get new ones.
-
They have these >>>>>>>>>>>>>>>> http://www.ebay.com/itm/Datsun-240Z-Rear-Hatch-Grille-Vent-Set-1970-1971-NEW-/310680198157?pt=Vintage_Car_Truck_Parts_Accessories&hash=item4855fb9c0d&vxp=mtr >>>> http://www.ebay.com/itm/Datsun-240z-Fender-Emblem-Set-NOS-RARE-/221045260764?pt=Motors_Car_Truck_Parts_Accessories&hash=item33775301dc&vxp=mtr FWIW
Those would work but I'm currently a poor college student haha. I'm doing the casting as part of a school project so these emblems are part of the practice/testing. If I can make similar parts of equal or greater quality than the ones above and cheaper I'd be very happy.
Yeah, getting enough molten aluminum is the hard part. That's my issue with the valve cover now. I think I figured out how to make the hollow inside by suspending an inner mold in the middle.
But what sand did you use? I have some now but I feel that granule size is too large and leaves my castings splotchy.
I got my sand from this website:
http://www.petrobondforsale.com/
It works great. No complaints whatsoever.
As for aluminum there are a lot of found objects you could use. As long as you can cut it up to fit in your crucible you're good to go. I was fortunate enough to have a teacher who was moving his shop and happened to have a lot of scrap lying around. what are you using for a crucible by the way? I'm looking to upgrade mine.
-
I finally got around to replacing my PCV valve. (I know It's been slow going) Everything seems to be clean and no change. The throttle sticking was getting worse since I got the car registered and on the road so I figured it was time to do something about it. I think I'm going to try replacing the throttle return spring next.
-
This is awesome. Im in the process of building a casting setup like yours with a "blast furnace" (on the small scale of course) and start sand casting. I want to do those datsun emblems too!
And ive been trying to figure out how to do a valve cover.
But awesome work!!
Cool! let me know if you need any advice while making it. I ordered my sand online and it works great.
I think with a valve cover a bigger furnace or multiple furnaces might be needed with the larger volume of aluminum required. I'm looking into making a bigger crucible myself as the one I made is fairly small.
-
I have yet to mount them on my car but I noticed something interesting and slightly problematic the other day. The parts I'm casting are ending up like a 1/8 of an inch shorter than the actual part. This of course will make the pins on the "Datsun" emblem not line up with the original and two of the three holes will have to be re drilled. The same will be true of the hatch vents if I get around to putting pins on them. I'm going to try some other emblems that are shorter in length at some point to see if the aluminum shrinkage is the same for those.
-
Finally registered and on the road!

-
I have an extra set of vents somewhere in my garage. As well as a Datsun emblem. Let me know if you want to "borrow" them.
I'll definitely take you up on that offer. Once I get to a point where I know they will come out well I'll \ send you a PM.
Here are a couple photos to show how well they clean up. Since I didn't get a chance to mill the back of them off I painted those areas black. I think it came out pretty spiffy.
-
So I decided to add a piece to the back of the vents to make it thicker and essentially turning them into block off plates. They came out awesome and I think I'm going to use them for my hatch since I don't want to deal with water potentially getting in those holes (for now)
They need a bit of cleaning up but I'm very happy with them. I'm going to cast another the same way and machine the back of it until the thickness of the piece I added is gone. That way it will be a vent like it is intended to be. More updates to come.
-
I haven't tried that kind of casting before. I'll look into it though, sounds pretty interesting.
-
Thank you! that is all very useful.
-
So machining these things isn't going to work out. I have since made a sand casting set up and am currently testing various things out. I tried the hatch vents but I think because they are so thin the aluminum cools before going through the whole mold. I also tried the "Datsun" emblem and got really close to filling the whole mold. I'll have to try getting the metal even hotter. The amount of detail is amazing though and I am very surprised at how nice they come out. Unfortunately I am limited to the few highly corroded emblems that I have. But I will keep trying and update if there is any success.
-
I'll begin by saying I currently have a 1975 280z with a stock N42 block and head.
My original intentions when I bought the car was to run the L28 until it died and eventually put a V8 into it (mainly because it sounded like a cool idea). However, last fall I visited a shop here in Boston that used to deal with Z cars and came upon a spare L24. I'm not sure which block it has but it definitely has an E31 head.
I haven't been able to bring it to my garage yet but I'm hoping it will be in my possession fairly soon. On top of those two engines I also have an E88 head that I could potentially use.
Here are my current goals for the car and this is where I need advice:
-I want it to be a street car, probably a few autocross events here and there but not much, if any, racing as this is my first manual car.
-I think being around 200hp would be nice.
-I will probably be road tripping with it a lot.
-I should mention this is a long term project as I am graduating college soon and money will be scarce.
I was originally thinking I could rebuild the L24 with the E31 head and put triple carbs on it but I was told that is more of a racing set up. I really like the look and sound of triples though. The other issue is that if I have a higher compression engine I will have to use higher octane gas which is not ideal for an affordable road trip.
Another option is to rebuild the engines separately. Example: rebuild L24/E88 then swap it into the car. Then Rebuild L28/E31 and swap it again, which can be applied to whichever setup I want to end up with.
I just need some advice on which combination would work best for my needs. Being a long term project, money isn't a real issue as I don't mind waiting until I can save up for parts like triple carbs and such.
Thanks in advance and I look forward to hearing what you guys have to say!
Ryan
-
My car will be on the road in the next couple weeks (I hope) So I'll definitely be up for meeting up once it is.
-
Forgot to mention It's a 1975 280z
-
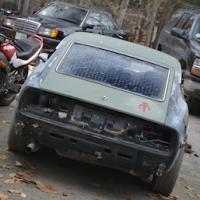
As the title says I need a gas tank strap in decent shape. Mines pretty rusty as you can see in the photo where there is a section of the body missing
-
Went to a junk yard and got myself some Kia Sportage door seals.
-
I was able to get the e brake to work (kind of). It works pretty well on flat ground but putting it on a hill it starts to roll slowly. The exhaust also got patched while it was on the lift and I got a new muffler.
I also went up north and picked up some nice rims and tires from a guy on the ZCCNE forum.
My original rims seem to be deeper than these though? Not sure if they are newer or older or something but both sets are from 75 280z's. I like the deeper ones though so I'll clean those up and eventually swap the good tires onto those ones.
I got a new brake line and was able to replace the bad one going to the rear driver side wheel. I had to do this in the driveway though and unbolting the line from the "T" splitter under the car was a pretty painful process but at least nothing broke.
Yes there are jack stands under there by the way
After that I was able to fix my front turn signal by grafting a socket from a spare taillight harness I have onto the plug. before and after:
I gave the entire car a good sand down and patched any minor dings and scratches but unfortunately towards the end of the process buy buddy dropped his motorbike onto my passenger door. The only damage was a long dent from his handlebars so I guess it could have been a lot worse. So I patched that up as well. Now it should be ready to paint next weekend providing it doesn't rain.
-
I'm looking for the socket that the front turn signal light bulb plugs into. it's held on to the housing with 2 screws. Mine is destroyed with corrosion and couldn't even get the light bulb out. I'm hoping some of you who have done the 240z turn signal conversion might have a spare or two.
Thanks
-
So earlier in the week I got a lot of body work done. Pretty much the only part left is the driver side rear quarter which is coming along nicely. I also got the exhaust patched however' I removed the old muffler and am now in search of a replacement as the old one got pretty beat up while trying to remove it. Here are a few pics of the progress:
Also got this sweet engine stand that had been sitting in the woods for who knows how long. It definitely has a home made base but it's pretty industrious and says USA on it so I think it's pretty cool.
I still have to get the E brake to work and replace one of the brake lines that attach to the rear T splitter thing.
Also need to get a couple holes patched under the body but after that it seems like it will be smooth sailing.
-
Was able to drive up and down the driveway with them today. I would say they work really well.
-
Good news everyone!
School is finished for a couple weeks so me and my roommate went up to work on our motor vehicles. I must say it was a very productive day and a half.
To start off I Got a new cowl to replace my rusty one and a 280z front air dam from Bad Dog Parts. I started out by removing the stock front bumper and valence and I can't believe how heavy it was! After the bumper was off I tipped it on its side and at least a liter sized pile of rust poured out. Needless to say it's never going back on the car.
A few weeks ago I realized my passenger door wouldn't lock at all so after I got the front end all nice and pretty I tackled that. Found what I'm hoping will be the last mouse nest (however I suspect there's at least on more inside where the rear suspension is.)
I wiggled all the mechanisms around for a bit and the lock magically started working again. After that I finally found a couple nuts that fit the rear bumper and I was able to mount that up.
Lastly a few holes in the doors and rear quarter were patched up. Here are the Before and not-quite-finished After:
List of things to do to get her on the road:
Finish the body work and paint
Get the ebrake to work
patch the exhaust
fix the front turn signal
Get some legal tires
I'm so excited!
-
Looking good! You get all that pin striping done?
-
True. I'm gonna take it off anyway to put the new turn signals on so we'll see if I end up putting anything back on after that.


Out with the old. In with the new(er)
in S30 Series - 240z, 260z, 280z
Posted
Nice Project. How was it getting the Intake off? I'd like to take both the intake and exhaust manifolds off on mine but the condition of the bolts holding them on are horrific. I was up in NH the other day and nearly died of heat taking my AFM and throttle body off. That was in the shade of my garage too! Definitely been a hot week in the northeast.