

Oddjob
-
Posts
129 -
Joined
-
Last visited
-
Days Won
1
Content Type
Profiles
Forums
Blogs
Events
Gallery
Downloads
Store
Posts posted by Oddjob
-
-
Well, here's the science of it:
There are two reasons for your relay to be hot. The coil that holds the relay closed will dissipate some heat. This is normal, and will have no effect at all on your fuel pump. The other reason is resistance across the contacts. A tiny amount is normal, but as you say you have a 0.2vdc voltage drop across the contacts, this could indicate a problem such as pitted contacts. The repair is to file the contacts smooth, and then burnish with emery cloth, assuming you can get inside the case. A new, good quality relay should show an unmeasurable voltage drop across the contacts, at least with a hobby-quality VOM.
What is of more interest is whether your pump is hot. The lower the voltage you supply to the pump, the higher the current (amperage) will go, creating more heat. The voltage drop to your pump is governed mostly by resistance, and that is chiefly a function of distance and wire size. The stock wire run to the rear is almost certainly too small a guage for a performance application. I used 10AWG on mine (a Holley red-top), without a relay, from the 12v source all the way to the pump. Another problem is the return path (ground). I measured the resistance across the stock return path and found it around 36 ohms. This results in a substantial voltage drop at the pump. Since I have star-grounded most of my car, the pump now has a dedicated 10AWG run back to the ground bus near the battery (resistance = 0 ohms). Most of the details of all this are posted elsewhere on Hybrid Z.
My initial reaction is that your pump is heating up after being run awhile, due to voltage drop. Since the Bosch 044 is air-cooled you can easly check it after a run on the freeway on a warm day. When a pump becomes heat-soaked, its performance changes for the worse.
-
Here's some information and pictures of the installation on my 1971.
The information starts at Post #21, on Page 2.
-
Sorry guys, but I'm confused. The wiring at the turn signal switch is a simple 3-prong plug. When the switch is in one position, it completes the circuit for the left signal; and in the other position, completes the circuit for the right signal....true?
Why can't this functionality be replicated by replacing the turn signal stalk switch with a 3-way toggle switch? Wouldn't the rest of the wiring in the system remain "as-is"? (Again, this solution assumes that the problem lies solely within the switch, and that all of the system wiring is good and can be used as-is.)
Again, my apologies if I'm over-simplifying the problem...electrical issues are my weakest area.
r/John
Umm... you haven't said what year your Z is. The switch has changed over time. My remarks above are specific to the early Z (mine is a '71). Sorry for jumping to the conclusion yours was, as well....
-
No, this won't work at all, unless you are going to rewire much of the car. A simple DPDT center off switch dosn't have anything like the number of poles you would need, nor does it have any possibility of recreating the switching logic of the original. I took a quick look at the wiring diagram I have, and it would take something like 13 poles to recreate the switch (just for the turn signals), and probably more when you start to do the logic.
For example, I set out to replace the emergency flasher switch, which you'd think could be a DPDT. It wasn't. Take a look at the eventual solution here for a preview of what you would have to do to "replace" that switch. Scroll down to posts 18, 19, and especially 20 (open the PDFs in 19 & 20). It took 15 connections worth of switching to do, and is much simpler than the combination switch.
I don't want to discourage you, it can be done, but you will have to do some circuit design. It won't be a half-hour project.
-
Here is what it looks like. It's not as pretty, but still functional.
I'm going to end up using a Ford type fuel cell sender with range from 70 to 10 ohms.
You are quite right, the tank shown is different than the earlier tanks. Do you have any idea what years this would cover? Yours is a '77, I gather. You might post as much info as you can for the benefit of the 280 guys (dimensions, sources etc.).
-
Try searching on "star ground" which will yield some interesting results.
The idea of cleaning up un-used grounds sounds attractive at first, but you may want to consider the rule of unanticipated consequences, which is likely to bite you.
The Z is unibody construction, not a frame, as you probably know. I have measured the grounds to various points, and have found readings from a few ohms up to about 250 ohms.
I ended up using a star ground, which measures below the meter resolution (<1 ohm) to each connected load. Works great.
-
There is a sticky on this around here somewhere. Since they moved the stickies, I'm not sure where.
In any case, here's an explanation about the "non-linearity" that you have observed, and why you can't fix it with resistors, different senders, etc.
The stock Z sender is designed to output in a non-linear fashion. The stock Z guage is linear. The Autometer sender is linear. The autometer guage is near linear, but compensated.
The problem is the stock Z gas tank. If you look at it, it contains much more fuel in the bottom third of height than the top two-thirds. What that means is that the tank fills in a non-linear way. Bending the float and/or putting in resistors will only change the F and E indications, but not the indications in-between. The stock Z sender was designed to be non-linear to compensate for the differing amount of fuel this oddly-shaped tank contains at a given height. Remember, the float indicates a height, not a capacity. In a regularly-shaped tank (a rectangle), the fuel height is directly proportional to a volume. In the Z tank, it isn't.
The solution I am using is to use the Autometer sender and guage combination, adjust the F and E points using the float arm, then fill the tank a gallon at a time, re-marking the guage at the accurate capacities for 1/8 through 7/8. In effect, I am re-calibrating the guage to read in a non-linear, but accurate fashion.
-
Hey so ive been trying to talk to the state patrol and there no help, So if anyone knows the laws and regulations about having a fuel cell inside your daily driver / track car, I would love to know the rules about whats ok and whats not, or if its allowed (ive seen plenty of cars with them but double checking). For example if i am able to put my cell inside my car, do i need an external fill?
Any help would be greatly appreciated!!!
I live in washington state if that makes any difference
Thanks
Whether or not it is legal, it is a really bad idea for about a dozen reasons. Search on this topic here on Hybrid Z, and you will find a great deal of information, including those dozen reasons.
-
The tank shown in this post can be filled with fuel cell foam (by the builder), as an option. It would be about $700, I think.
-
Bodywork on the car has started. It is being done in phases, as the car can't be off the street for an extended length of time. The first phase was a group of small, annoying modifications, including new outside mirrors, new marker lights, new rear bumper, better fit for the antenna, and sealing the badge holes. Note that these are not repairs, but hybrid solutions to various common problems. All of these are detailed below with pictures and parts lists:
-
Here's the high end of stock tanks. It doesn't seem to need either a sump or a surge tank, doesn't require any cutting, and is outside the passenger compartment. "Stock" tank
It was $590.
-
The brake lights only come on with the brake pedal pressed. The side marker lights and running lights only come on when the brake pedal is pressed, regardless of the position on the headlight switch on the column.
Your problem is almost certainly a bad or missing ground somewhere. When two seeming unrelated things happen like this, that is almost always what does it. To start troubleshooting, and get a sense of why this could happen, go to this discussion: Hazard Switch, and look at the drawings in post #1 and post #19. Good hunting.
-
Mirrors are Motorsport auto flush mounts..
http://www.thezstore.com/page/TZS/CTGY/FMM
No downside to sealing headlight bucket seams really unless you get in a wreck, but why plan for that? Headlight access is available through the wheel well.
The turn signal lenses on the taillight's are Klearz lenses.
http://www.klearz.com/products2.html#280z scroll midway down on this page.
Accually one thing I did with these lenses that nobody has done is i took the little lens reflectors off of the inside of the stock lense(that are clear) and epoxyed it on these clear lenses so the light is refracted the exact same way as stock. Use goof off to get the little reflector off and use clear epoxy to put it on(dry time doesnt matter)
On the front of the car the turn signal is inside the headlight and has a clear lens but flashes yellow to match the clear lens on the rear.
http://www.thehoffmangroup.com/autoloc/product.lasso?prodinc=headlights They are the modern styled "snake eye with clear turn signal". You will have to email them if you are interested in buying them as they are not listed on the website.
Electric hatch pop was sourced from autoloc. Instructions on how to install it was sourced on hybridz.(although i still have yet to install it haha)
http://www.thehoffmangroup.com/autoloc/configure.lasso?prodinc=powertrunks You have to buy either the PT1000 or the PT1500 as those are the only ones that will fit INSIDE the hatch lid where it has to be mounted. It is a very tight fit but it does fit. I forgot which one I ordered.
Thanks for the information. My first order of business will be the hatch lock. I'm going to go with the PT1500. I'm also replacing the stock licence plate light while I'm in the neighborhood. The plastic on the stocker is failing structurally.
-
My car has- <snip>
headlight bucket seam sealed allowing it to sit flush with the fender/
Door mirrors relocated to flush mount/
<snip>
rear turn signals clear/
Hatch lock shaved switching to power trunk pop/
I have detailed pictures in my cardomain. www.cardomain.com/ride/3218401
Really nice work! A few questions: Any downside to sealing the headlight bucket seams, such as maintenance issues, access to the headlights, etc? What did you use for the door mirrors? Are the turn signal lenses the ones MSA offers? What is the source of the electric latch for the hatch? I know good ideas when I see them, and I'm going to shamelessly borrow a few of yours.
-
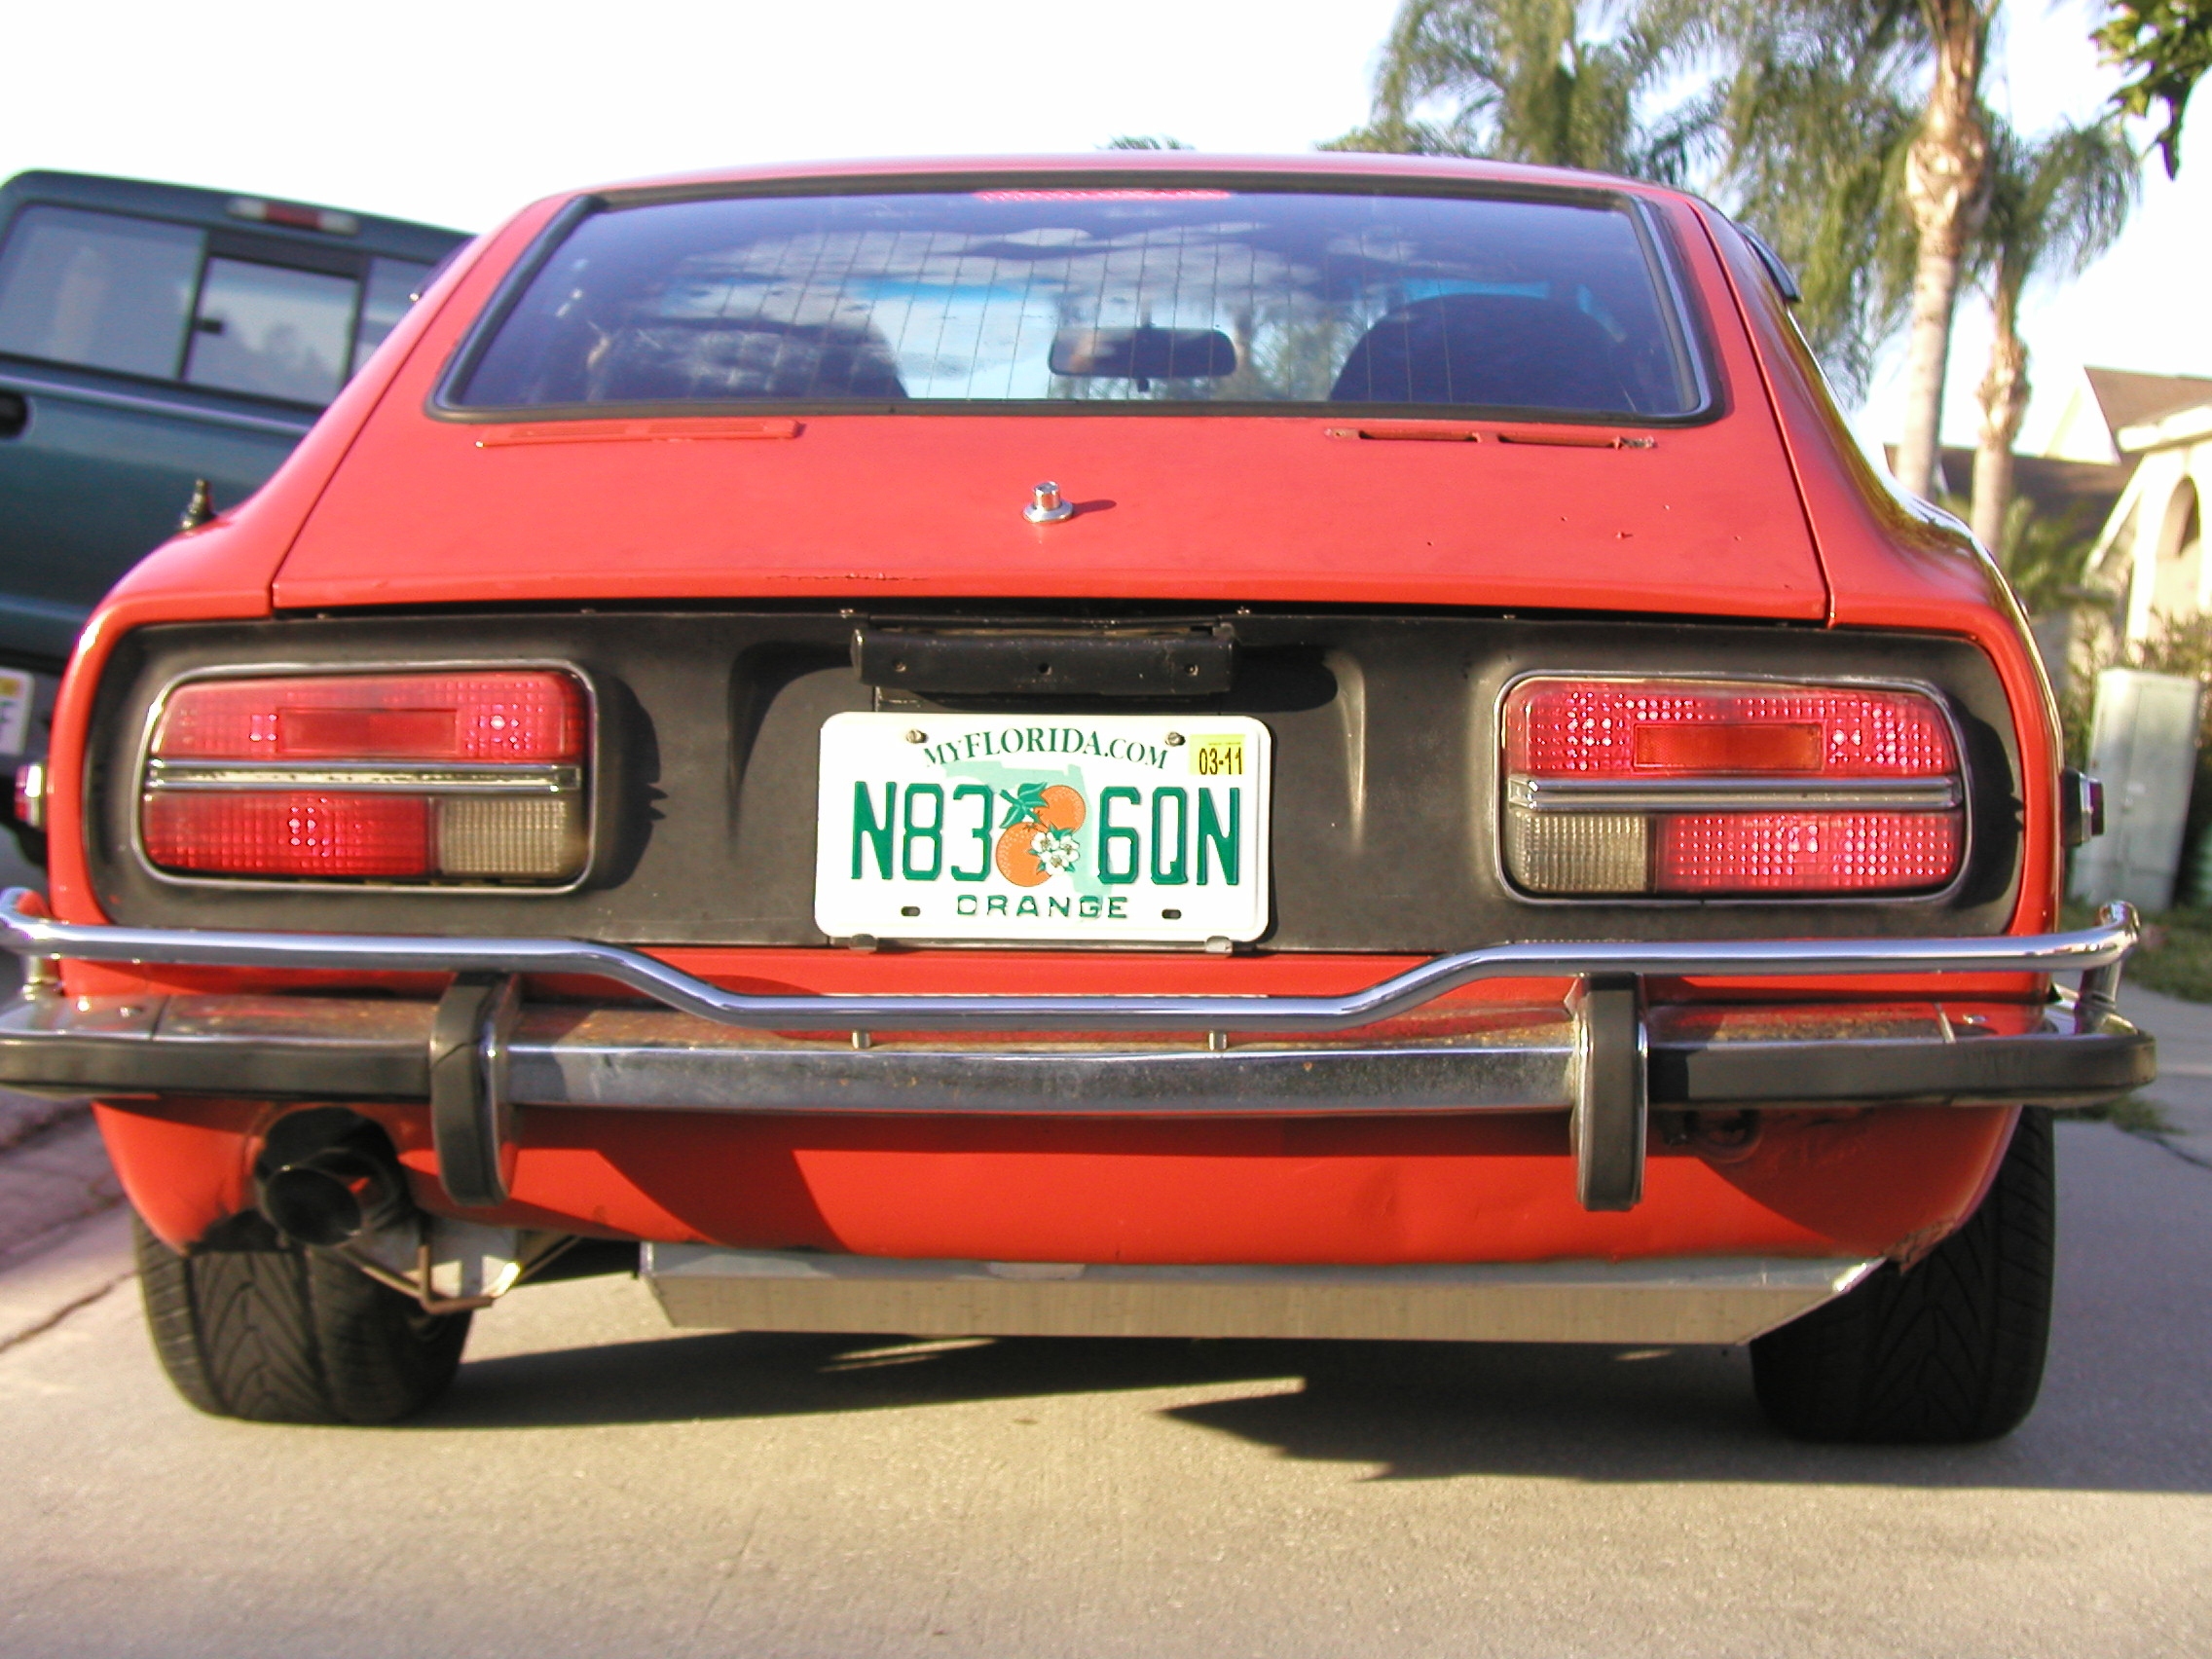
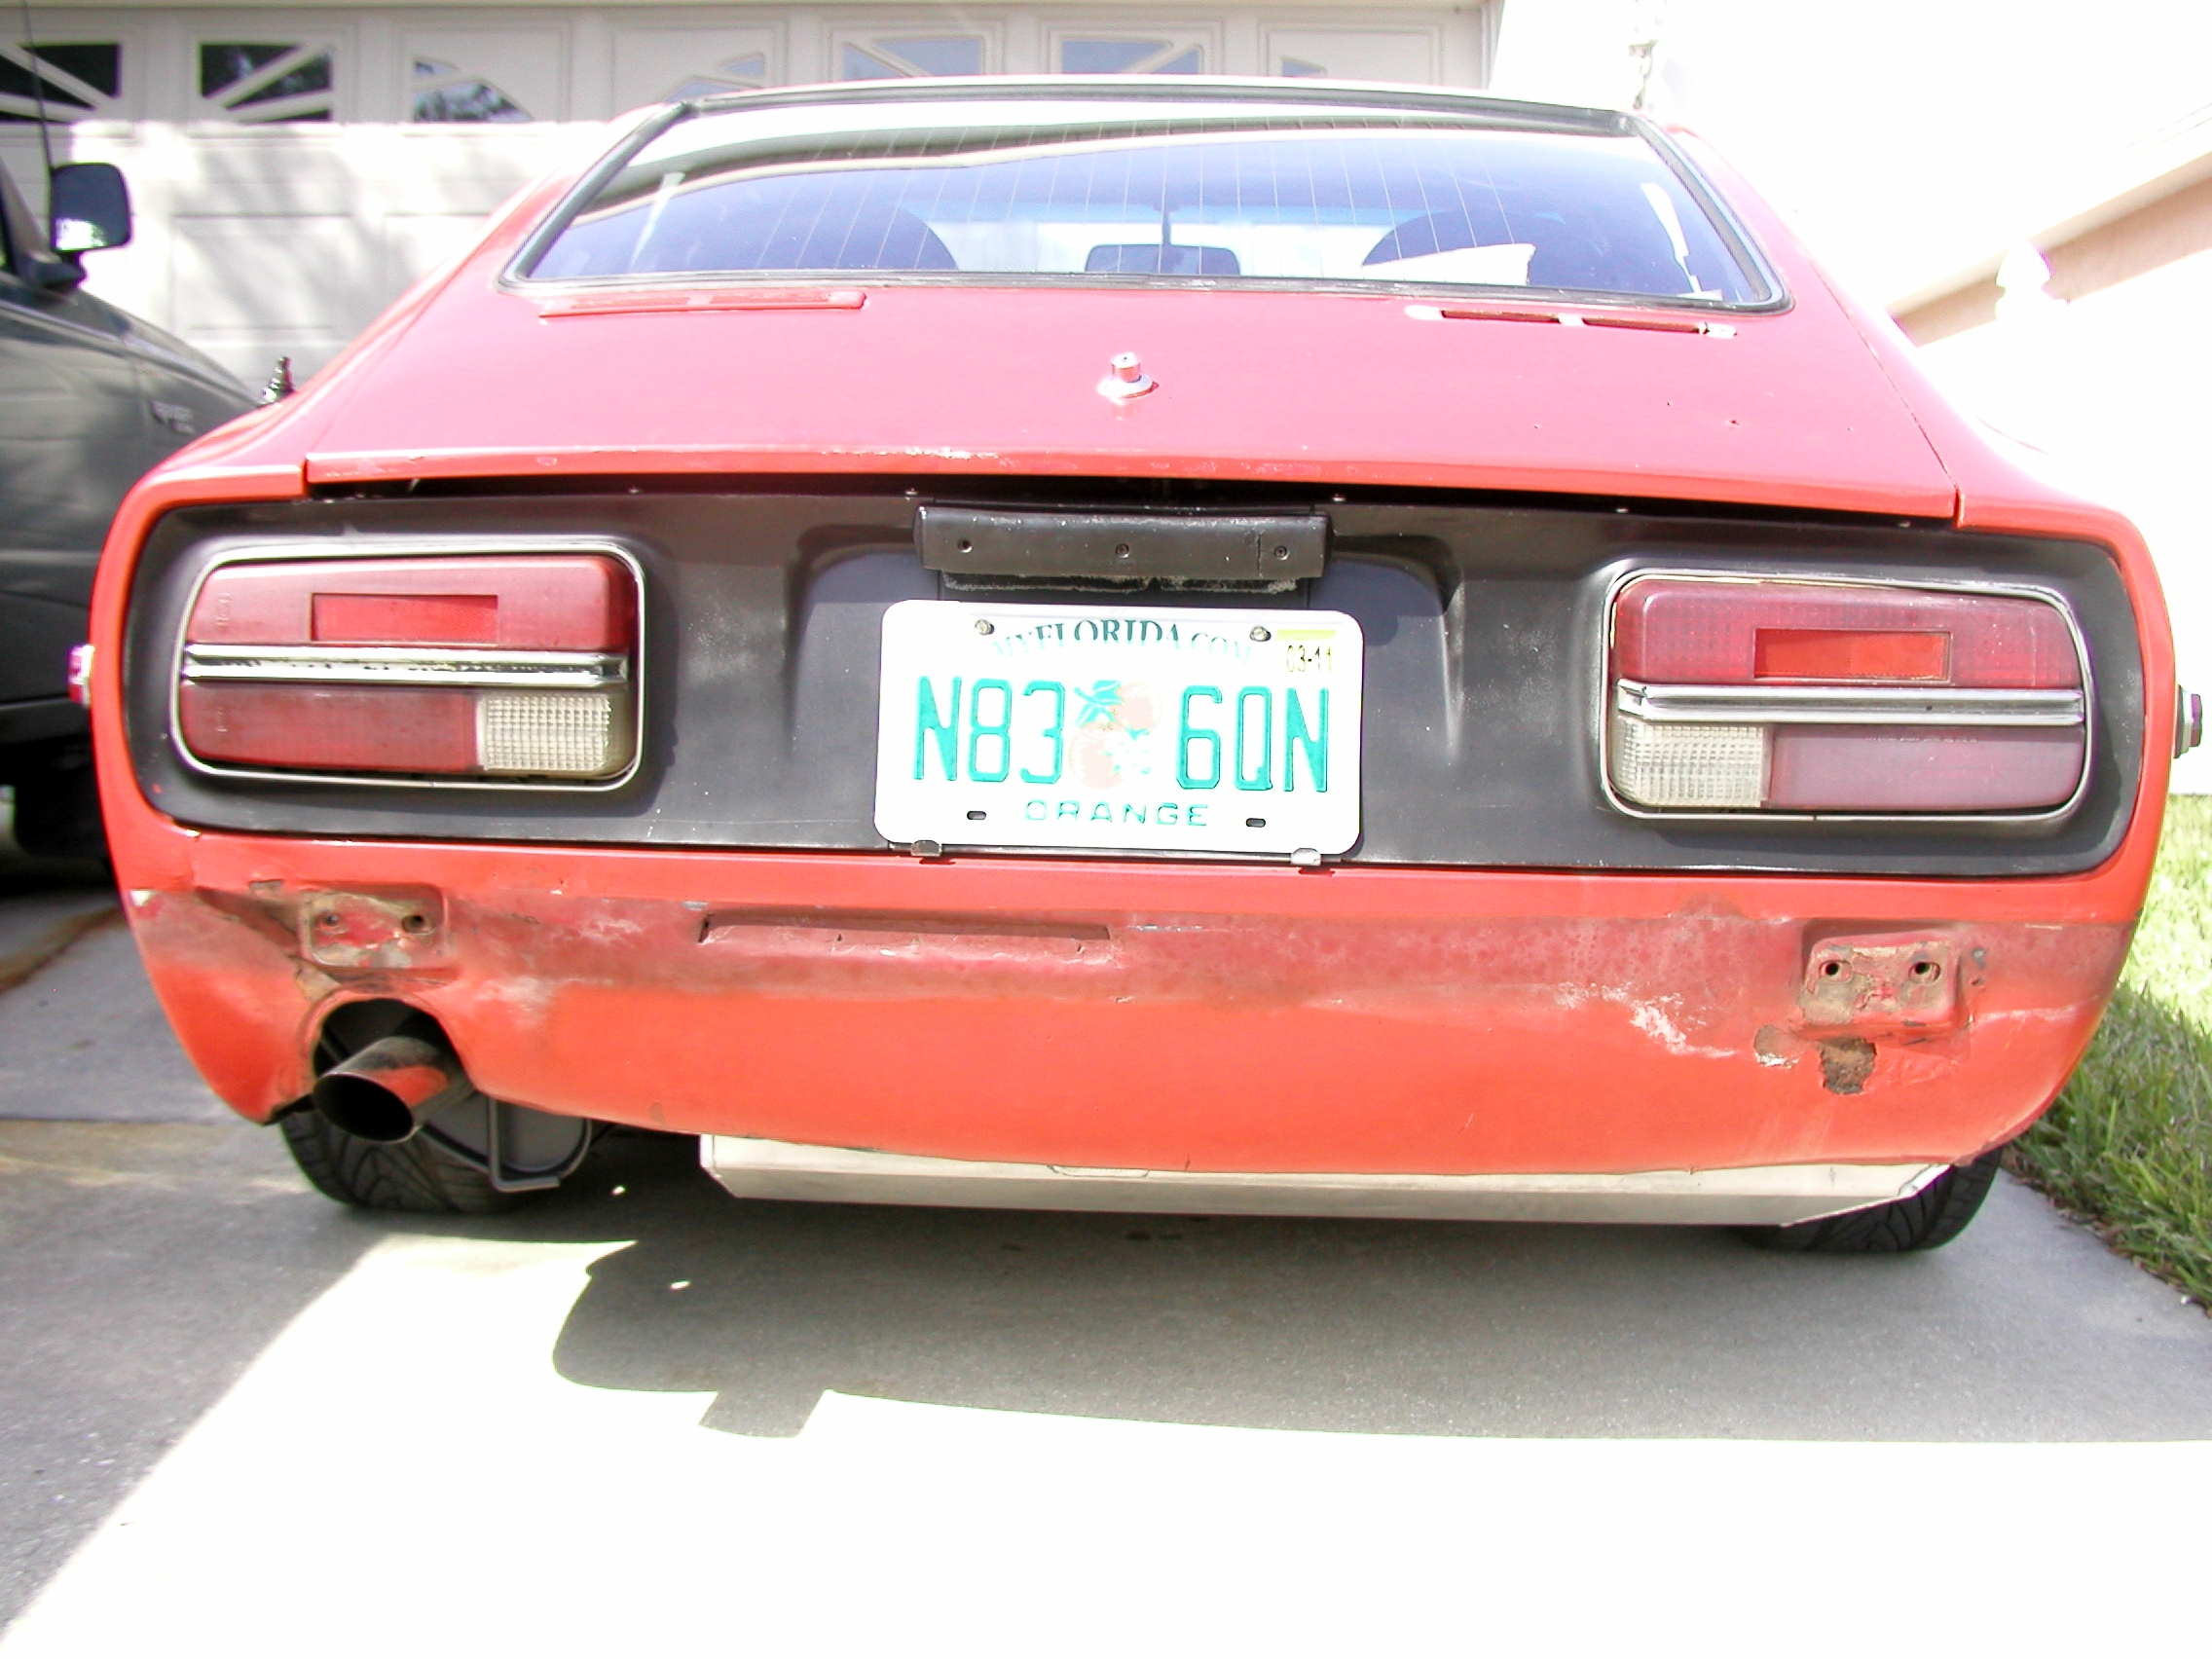
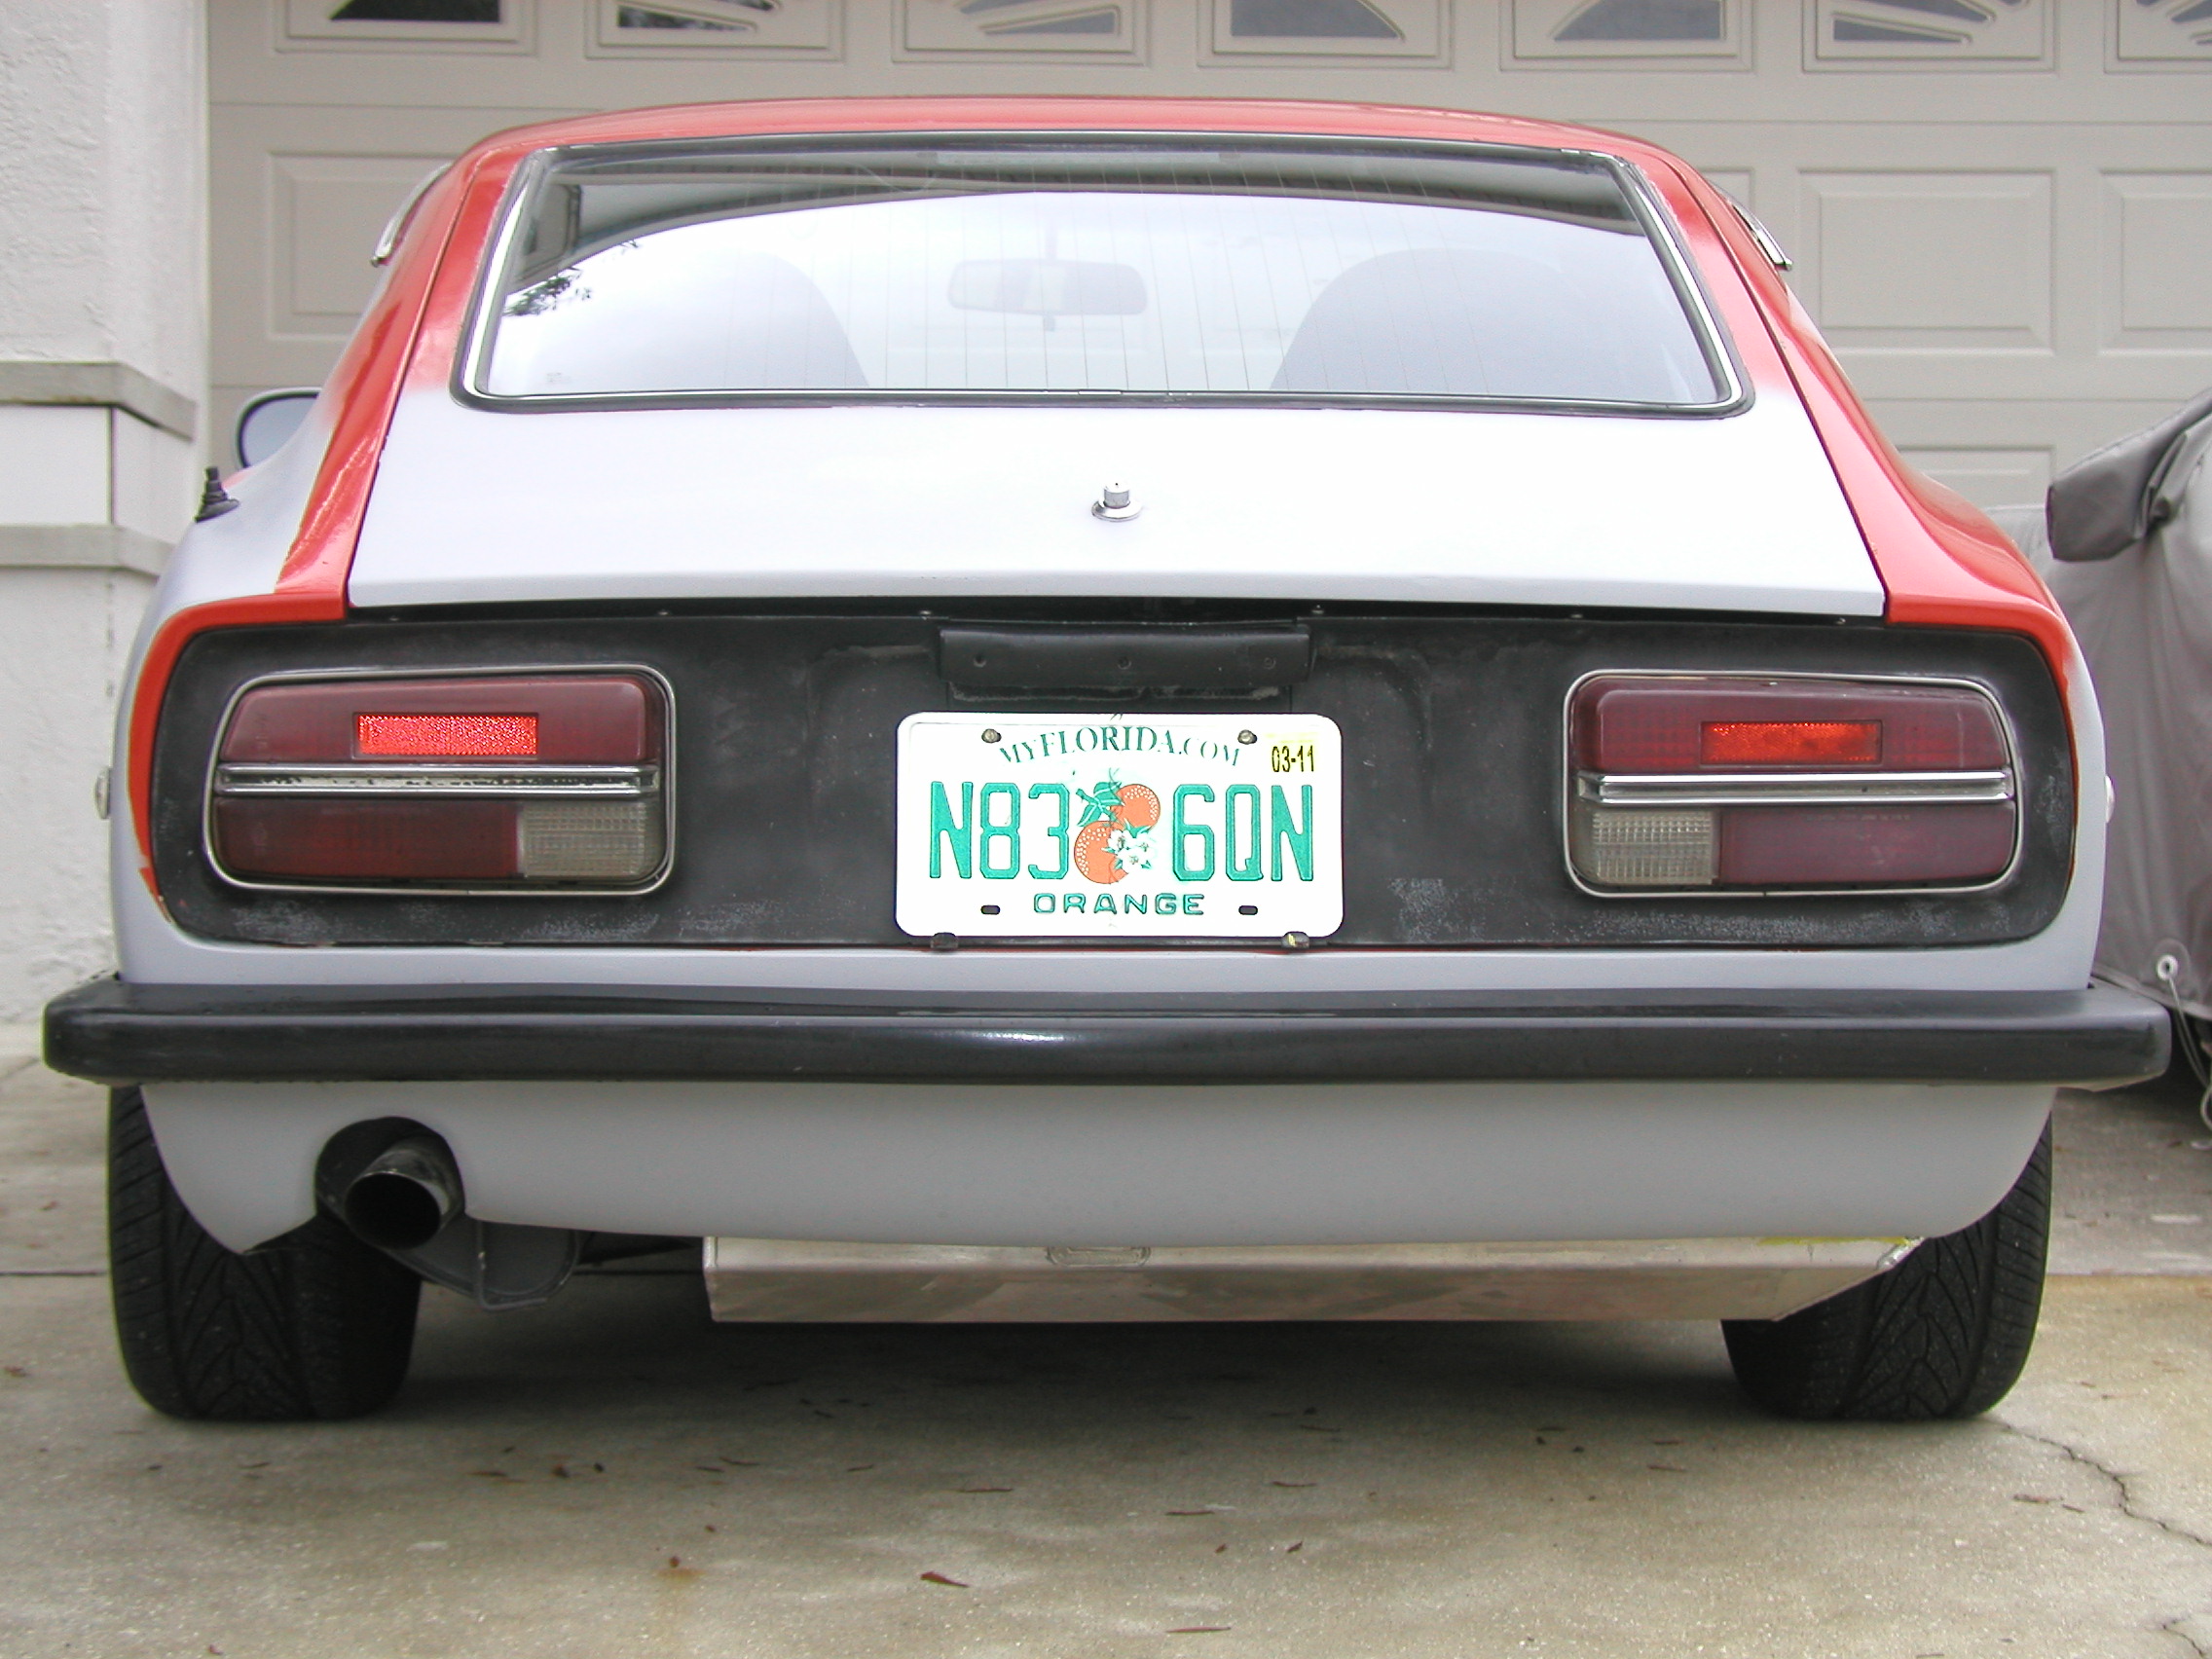
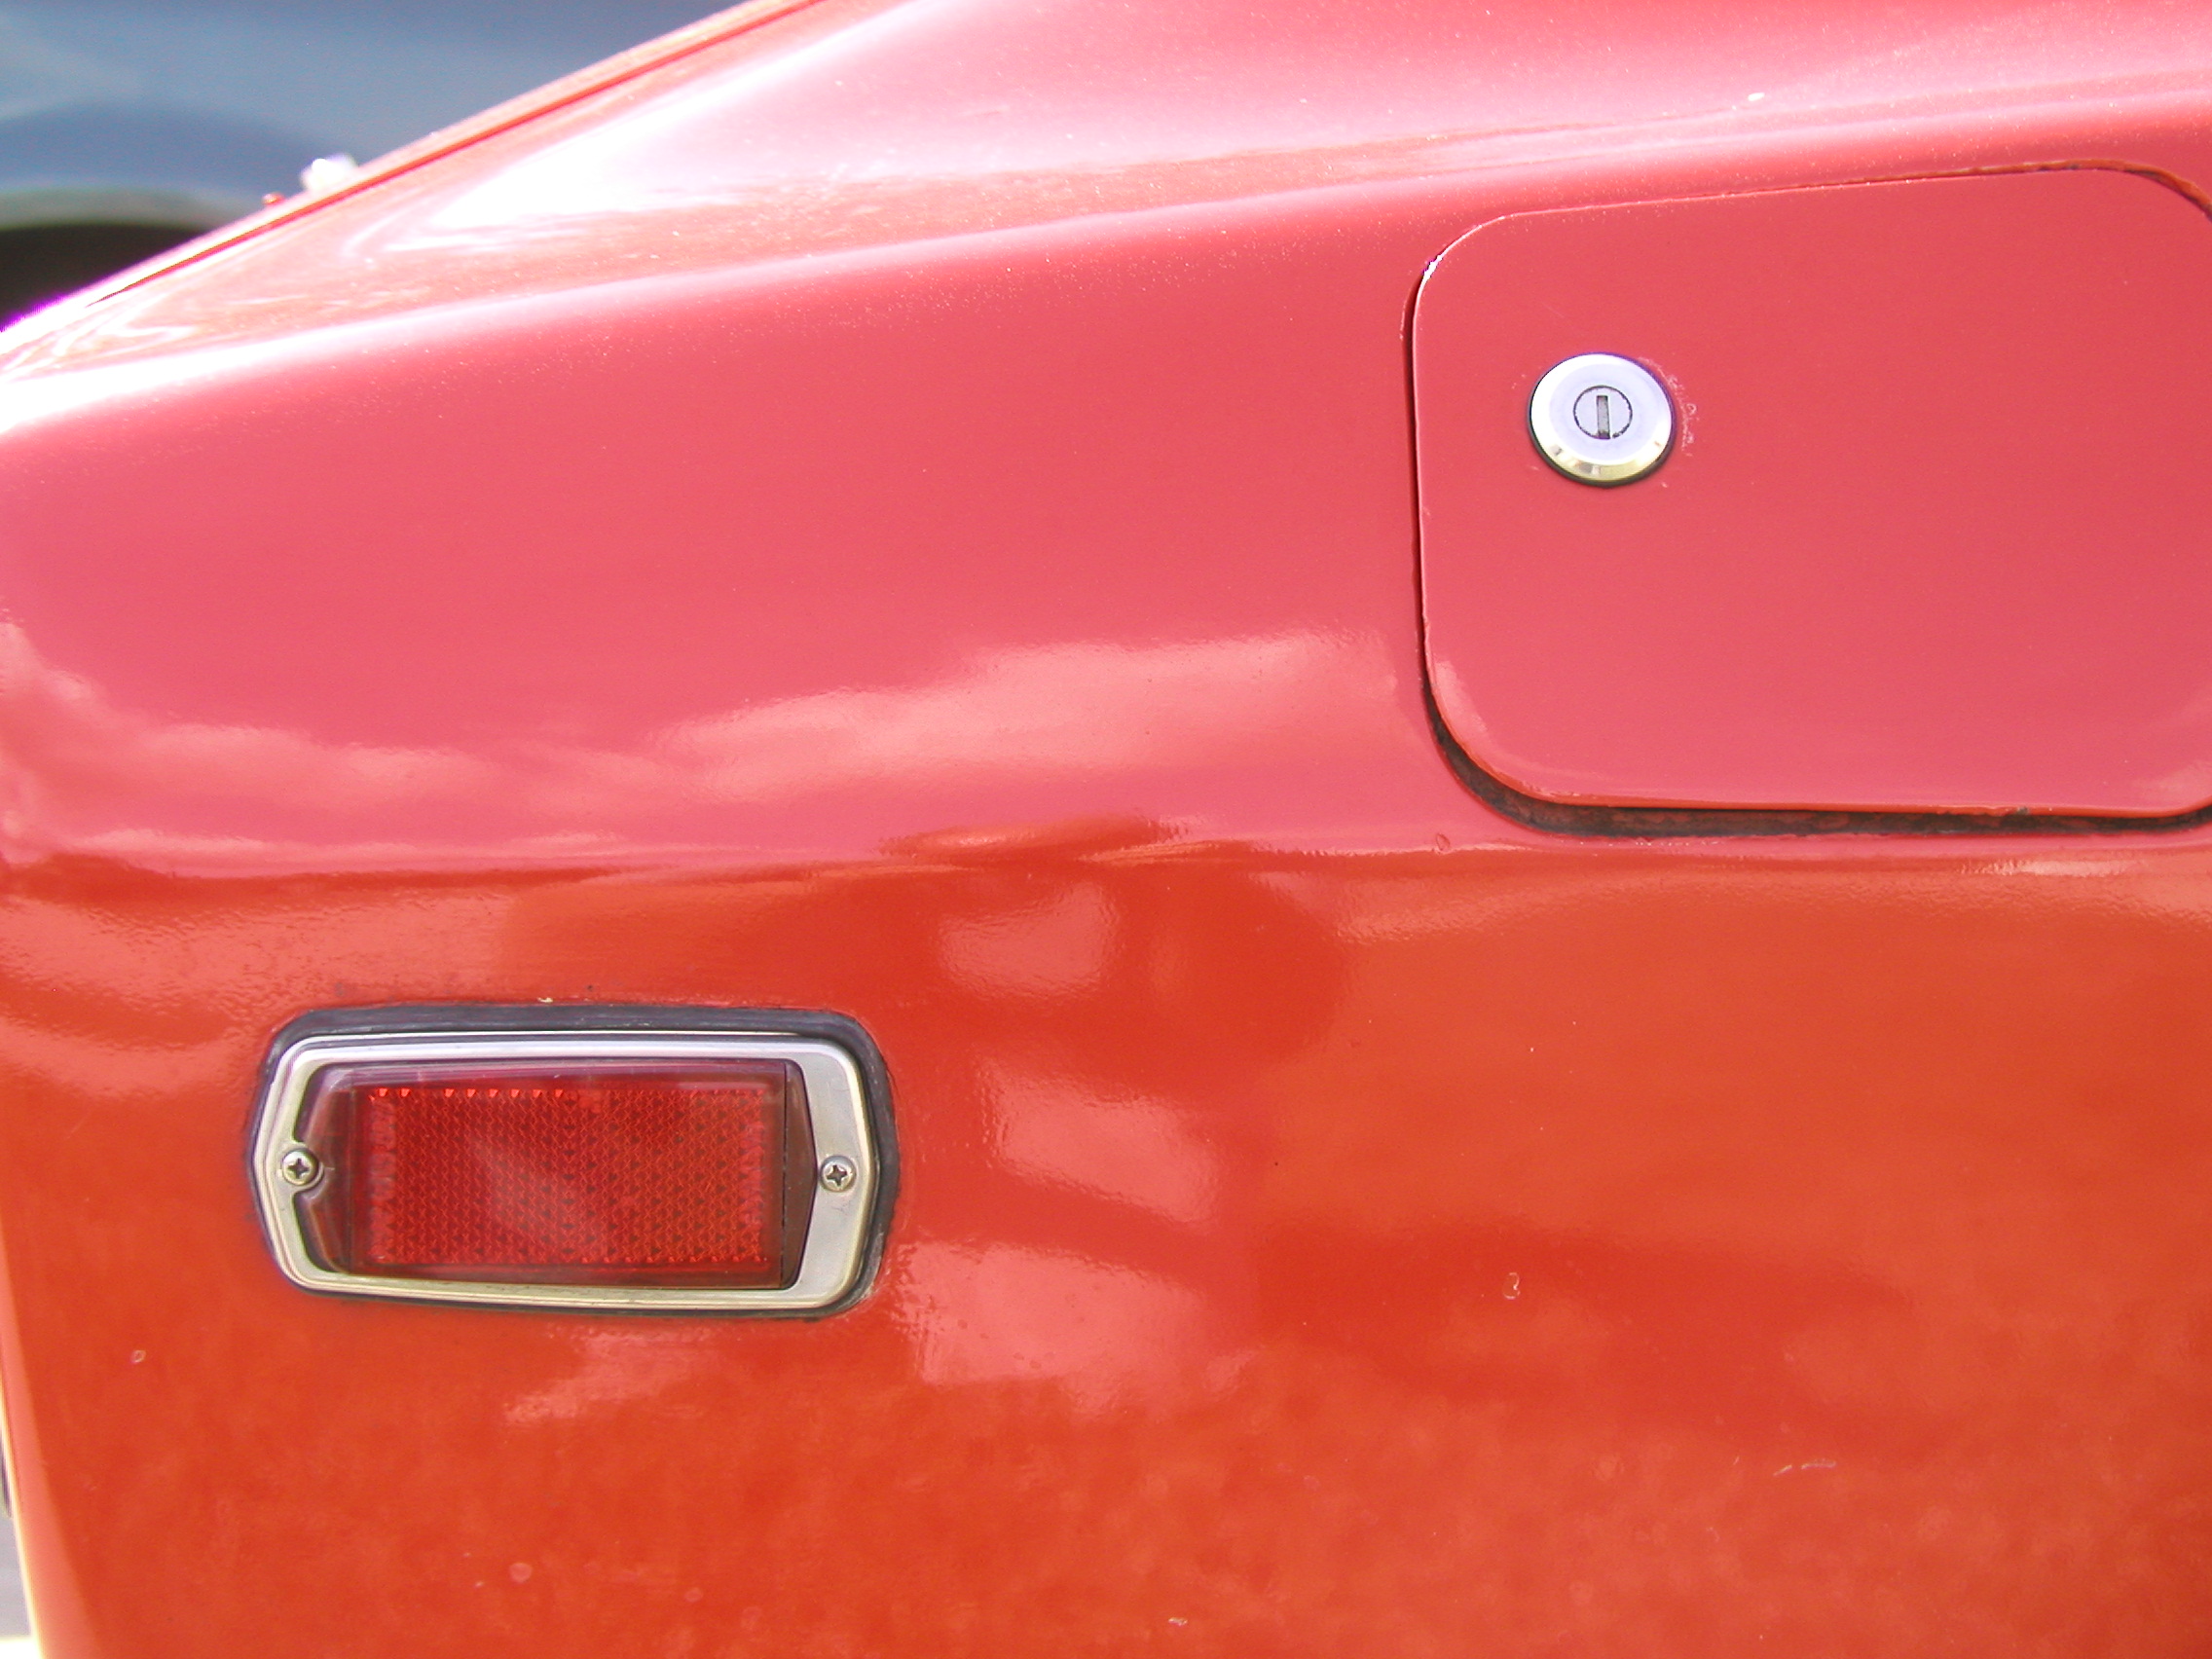
Bumpers
My ’71 Z has both its bumpers, but they are in sad shape. Both are corroded and bent. The first problem I found was trying to find a bumper shop. There used to be two or three in any city in the land. Just try to find one now. Worse, once I did find the only one still open nearby, prices started at $500 to straighten and re-chrome one bumper!
That ended that. As it happens, MSA has started carrying fiberglass and carbon fiber bumpers. At $175 for the fiberglass, that was a no-brainer. Aside from the fact that I like the looks, I calculate that if your Z gets rear-ended by an SUV, it isn’t going to matter what the bumper is made of. So, I’m saving money, saving the weight, and getting a good-looking new bumper besides.
Here’s the web page for the rear fiberglass one: MSA Bumper
The pictures below show the before, progress and after shots. The rear valance needed serious body work to straighten it out. Remember, the Z is unibody construction, so if anyone has hit your old rear bumper, it may have bent the areas where the bumper mounts. The LH mount had to be pulled out on a frame machine to get the bumper to mount correctly. The LH bumper bracket, which is re-used, also needed straightening.
I already have the front bumper, but haven’t started on that yet. I’ll post it later. If you don’t recognize the aluminum gas tank peeking out from underneath, go here for more information: "Stock" Fuel Tank

Vents and Badges
These pictures also show a couple of other details. Notice the two hatch vents have been removed and filled. Despite my best efforts to repair them, they continued to leak exhaust fumes into the passenger compartment. Now they can’t. The two drains for the vents (under the hatch lip) were also filled. In the first picture you can make out the holes and dowel for the 240Z badge on the rear deck (enlarge the picture). None of the badges came with the car, and I like the clean look of no badges, so those holes have been filled. The procedure is as above, weld, grind, fill, prime.
-
I really like your work. I am shaving my lights as well soon and reverting to mirrors with turn signals in them instead. Did you think about locating the new lights lower in the car closer to the bumper to blend in better?
Thanks. No, I did not consider relocating them lower. My theory is that the Z is low enough already, and I'd rather that approaching SUV see them as soon as possible.
A set of mirrors with the LED turn signals would be a nice touch. Have you identified a possible donor model?
-
Just a note on spray paint in general: flat is the least durable, satin is next, then semi, then gloss. Adding more coats will help, but the flat will still fail sooner than a semi-gloss.
-
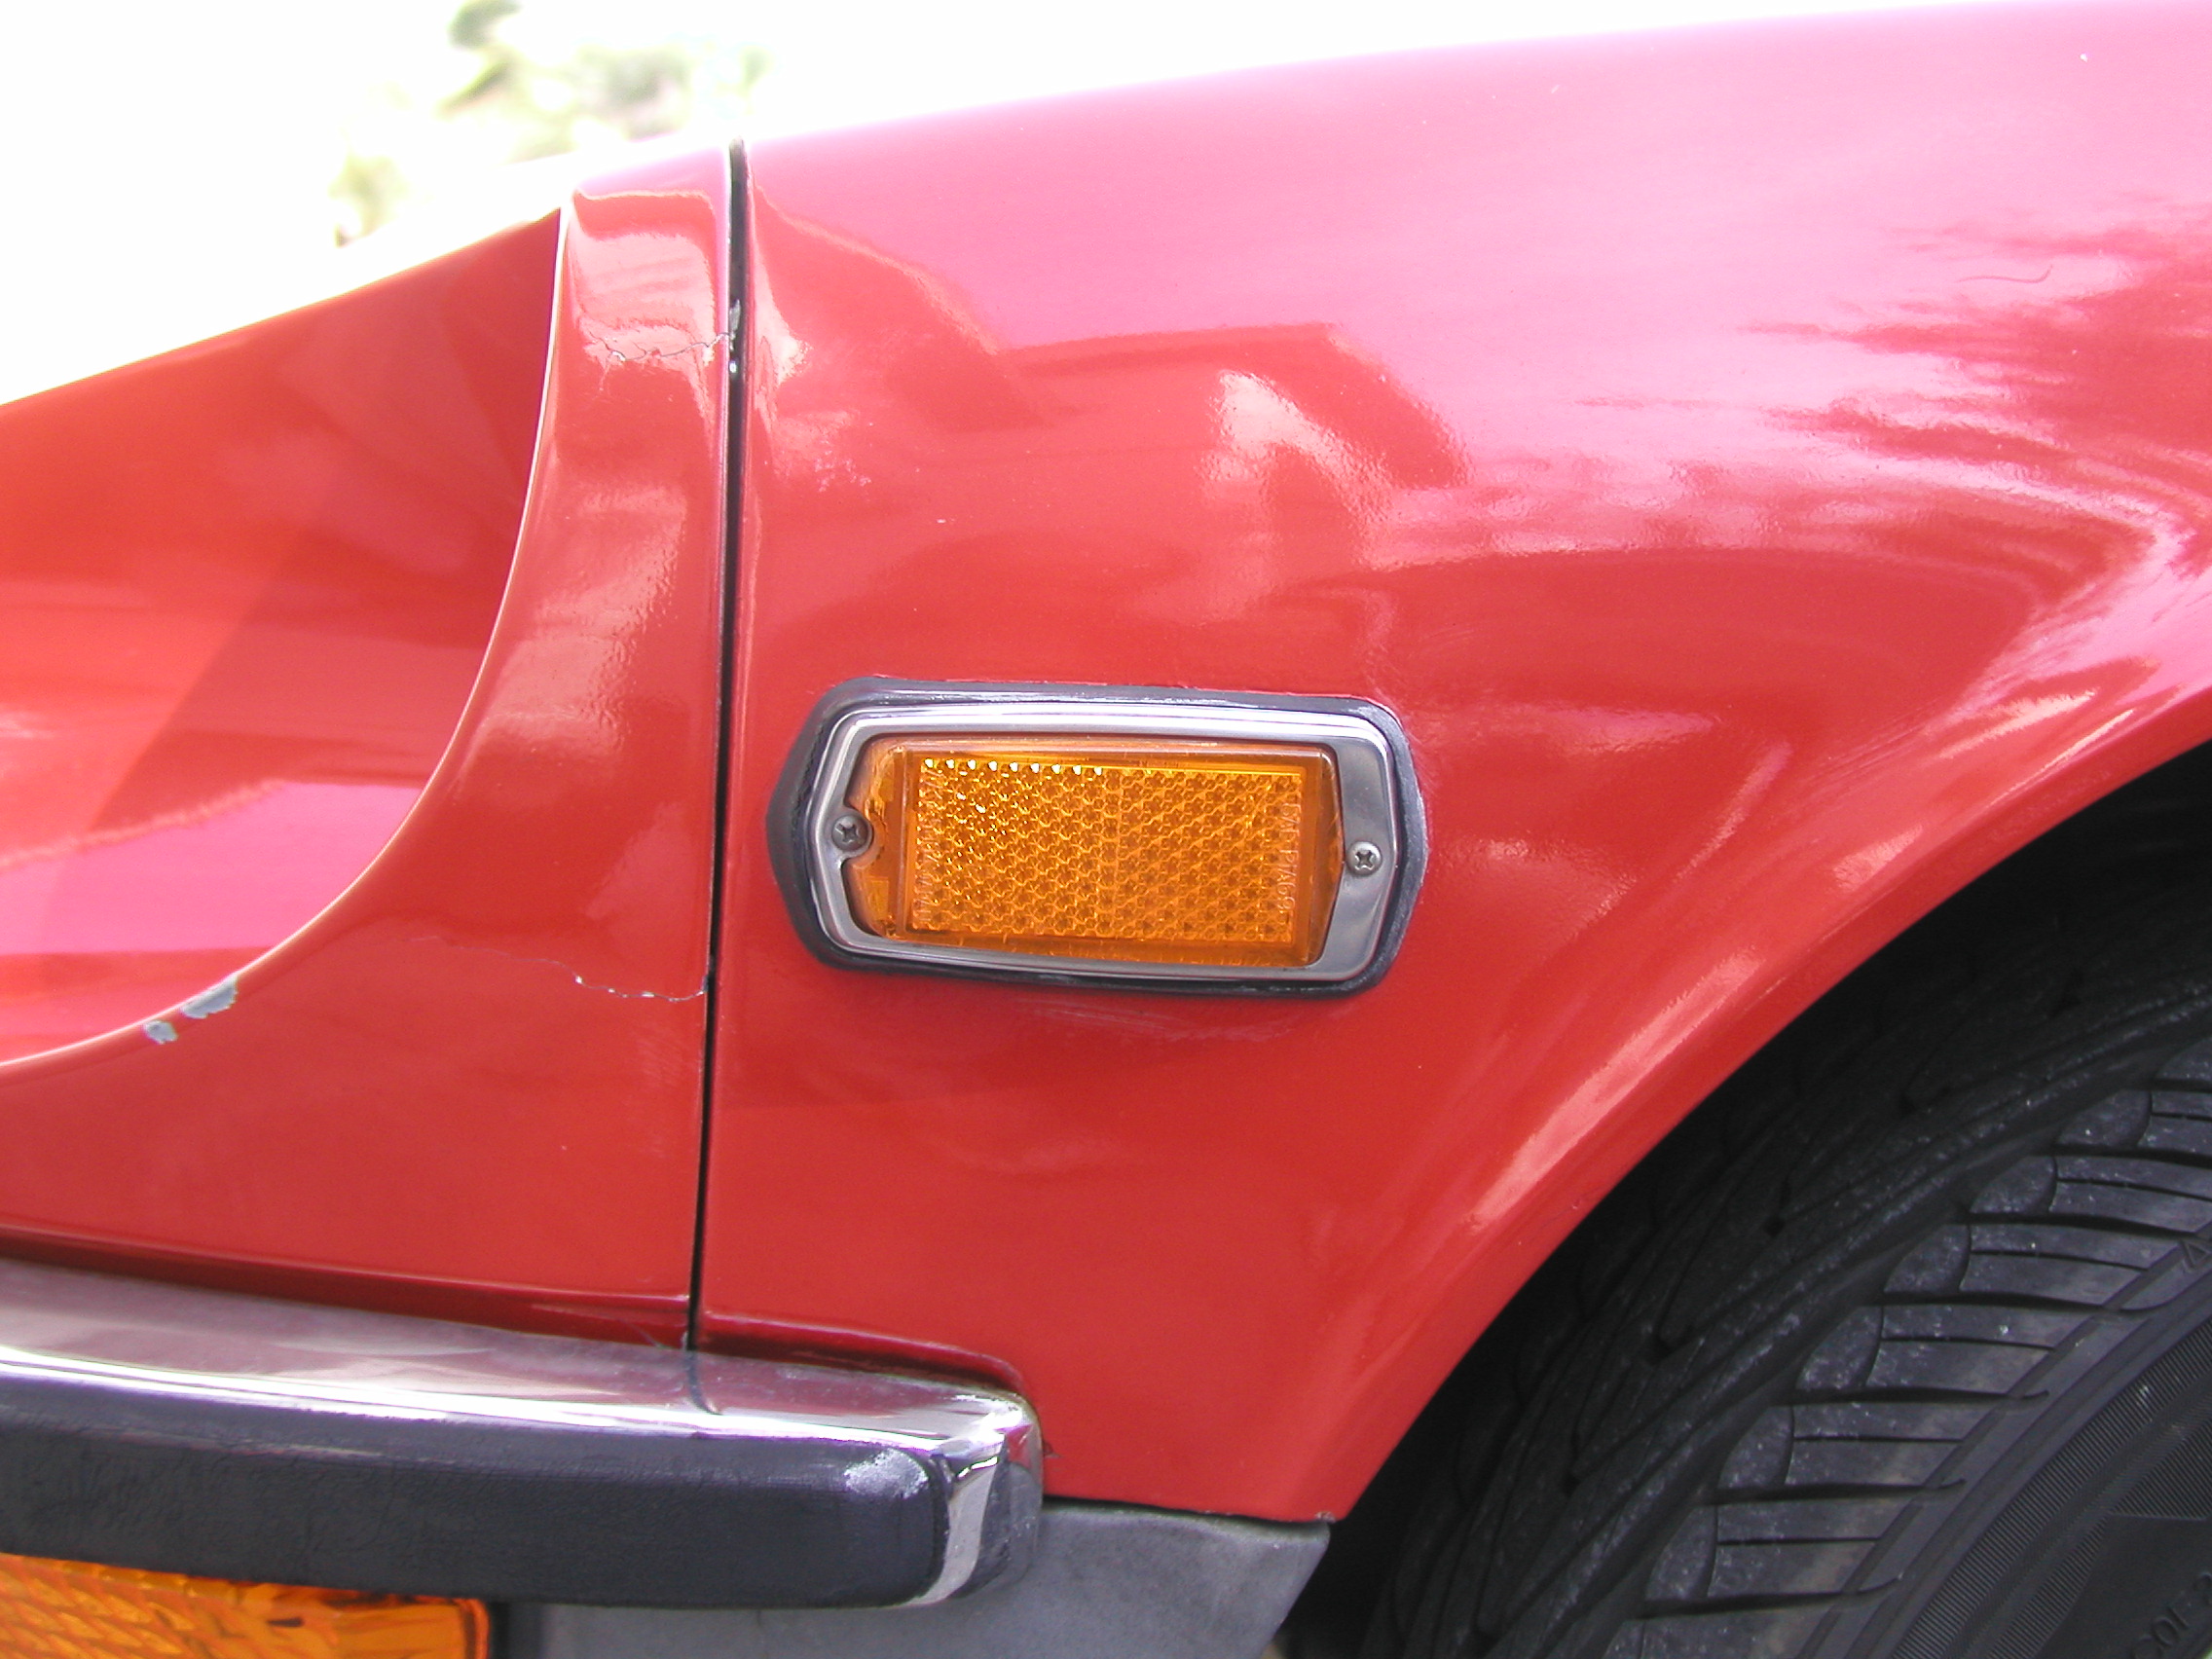
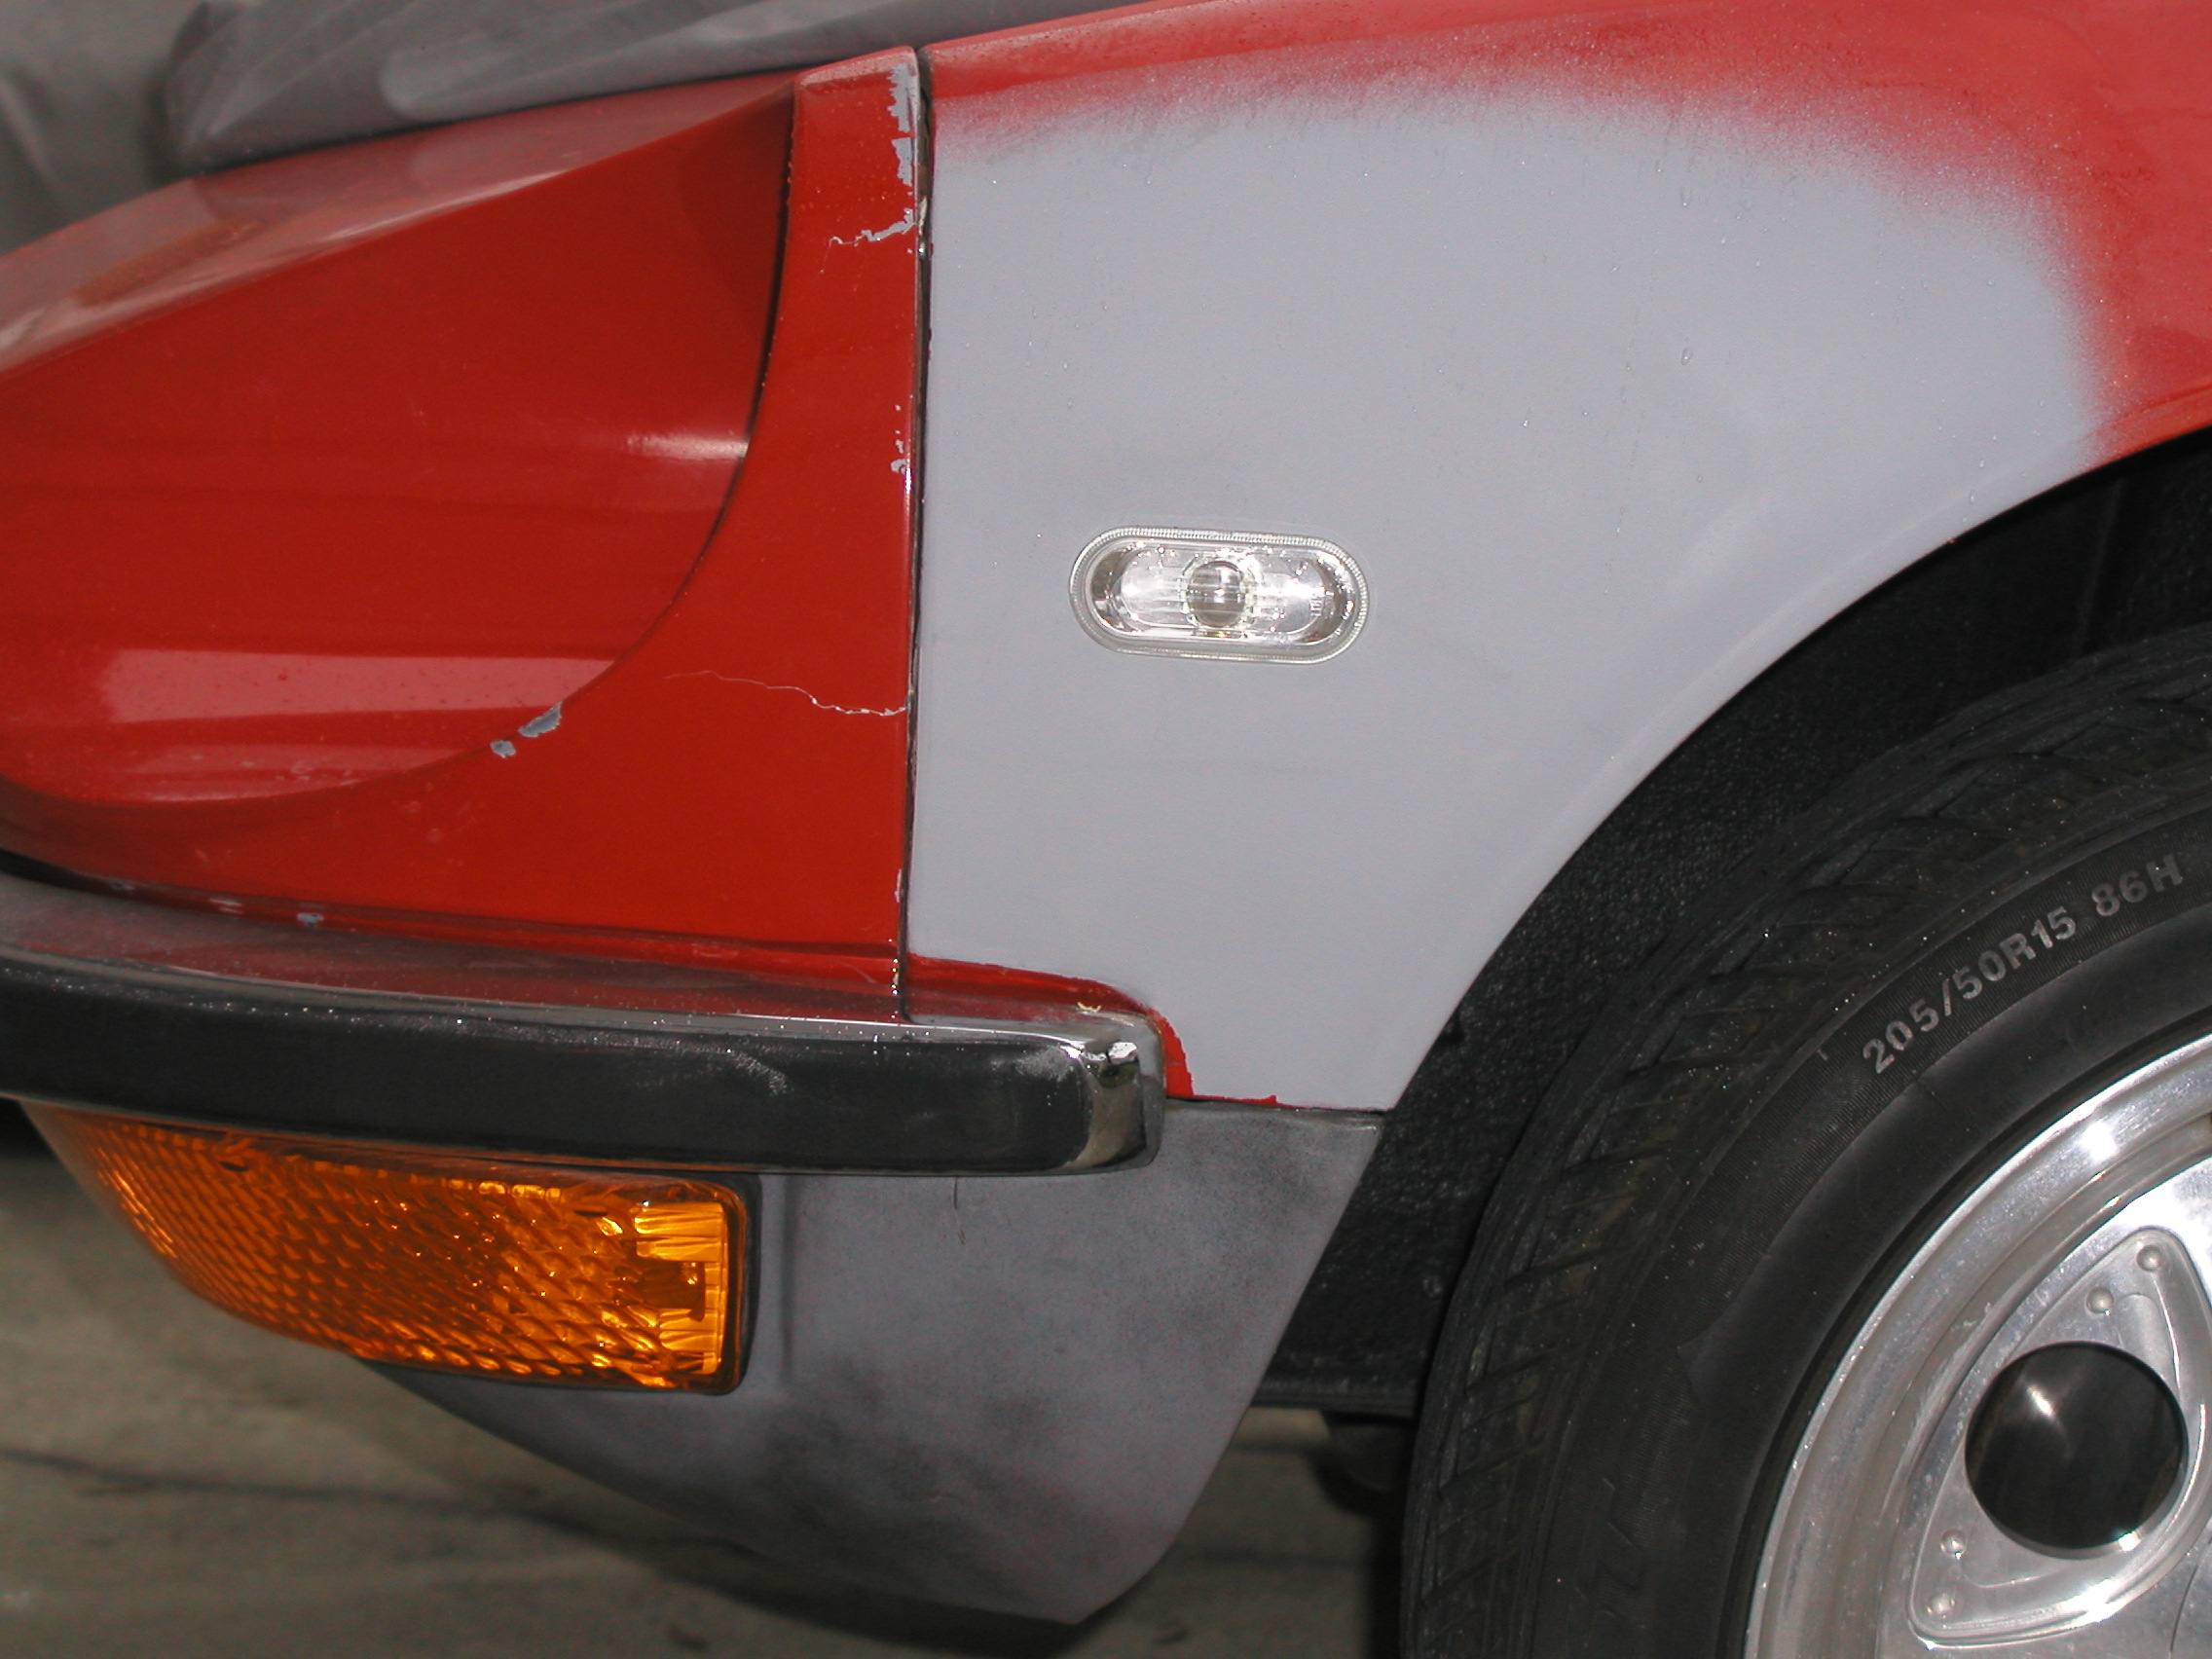
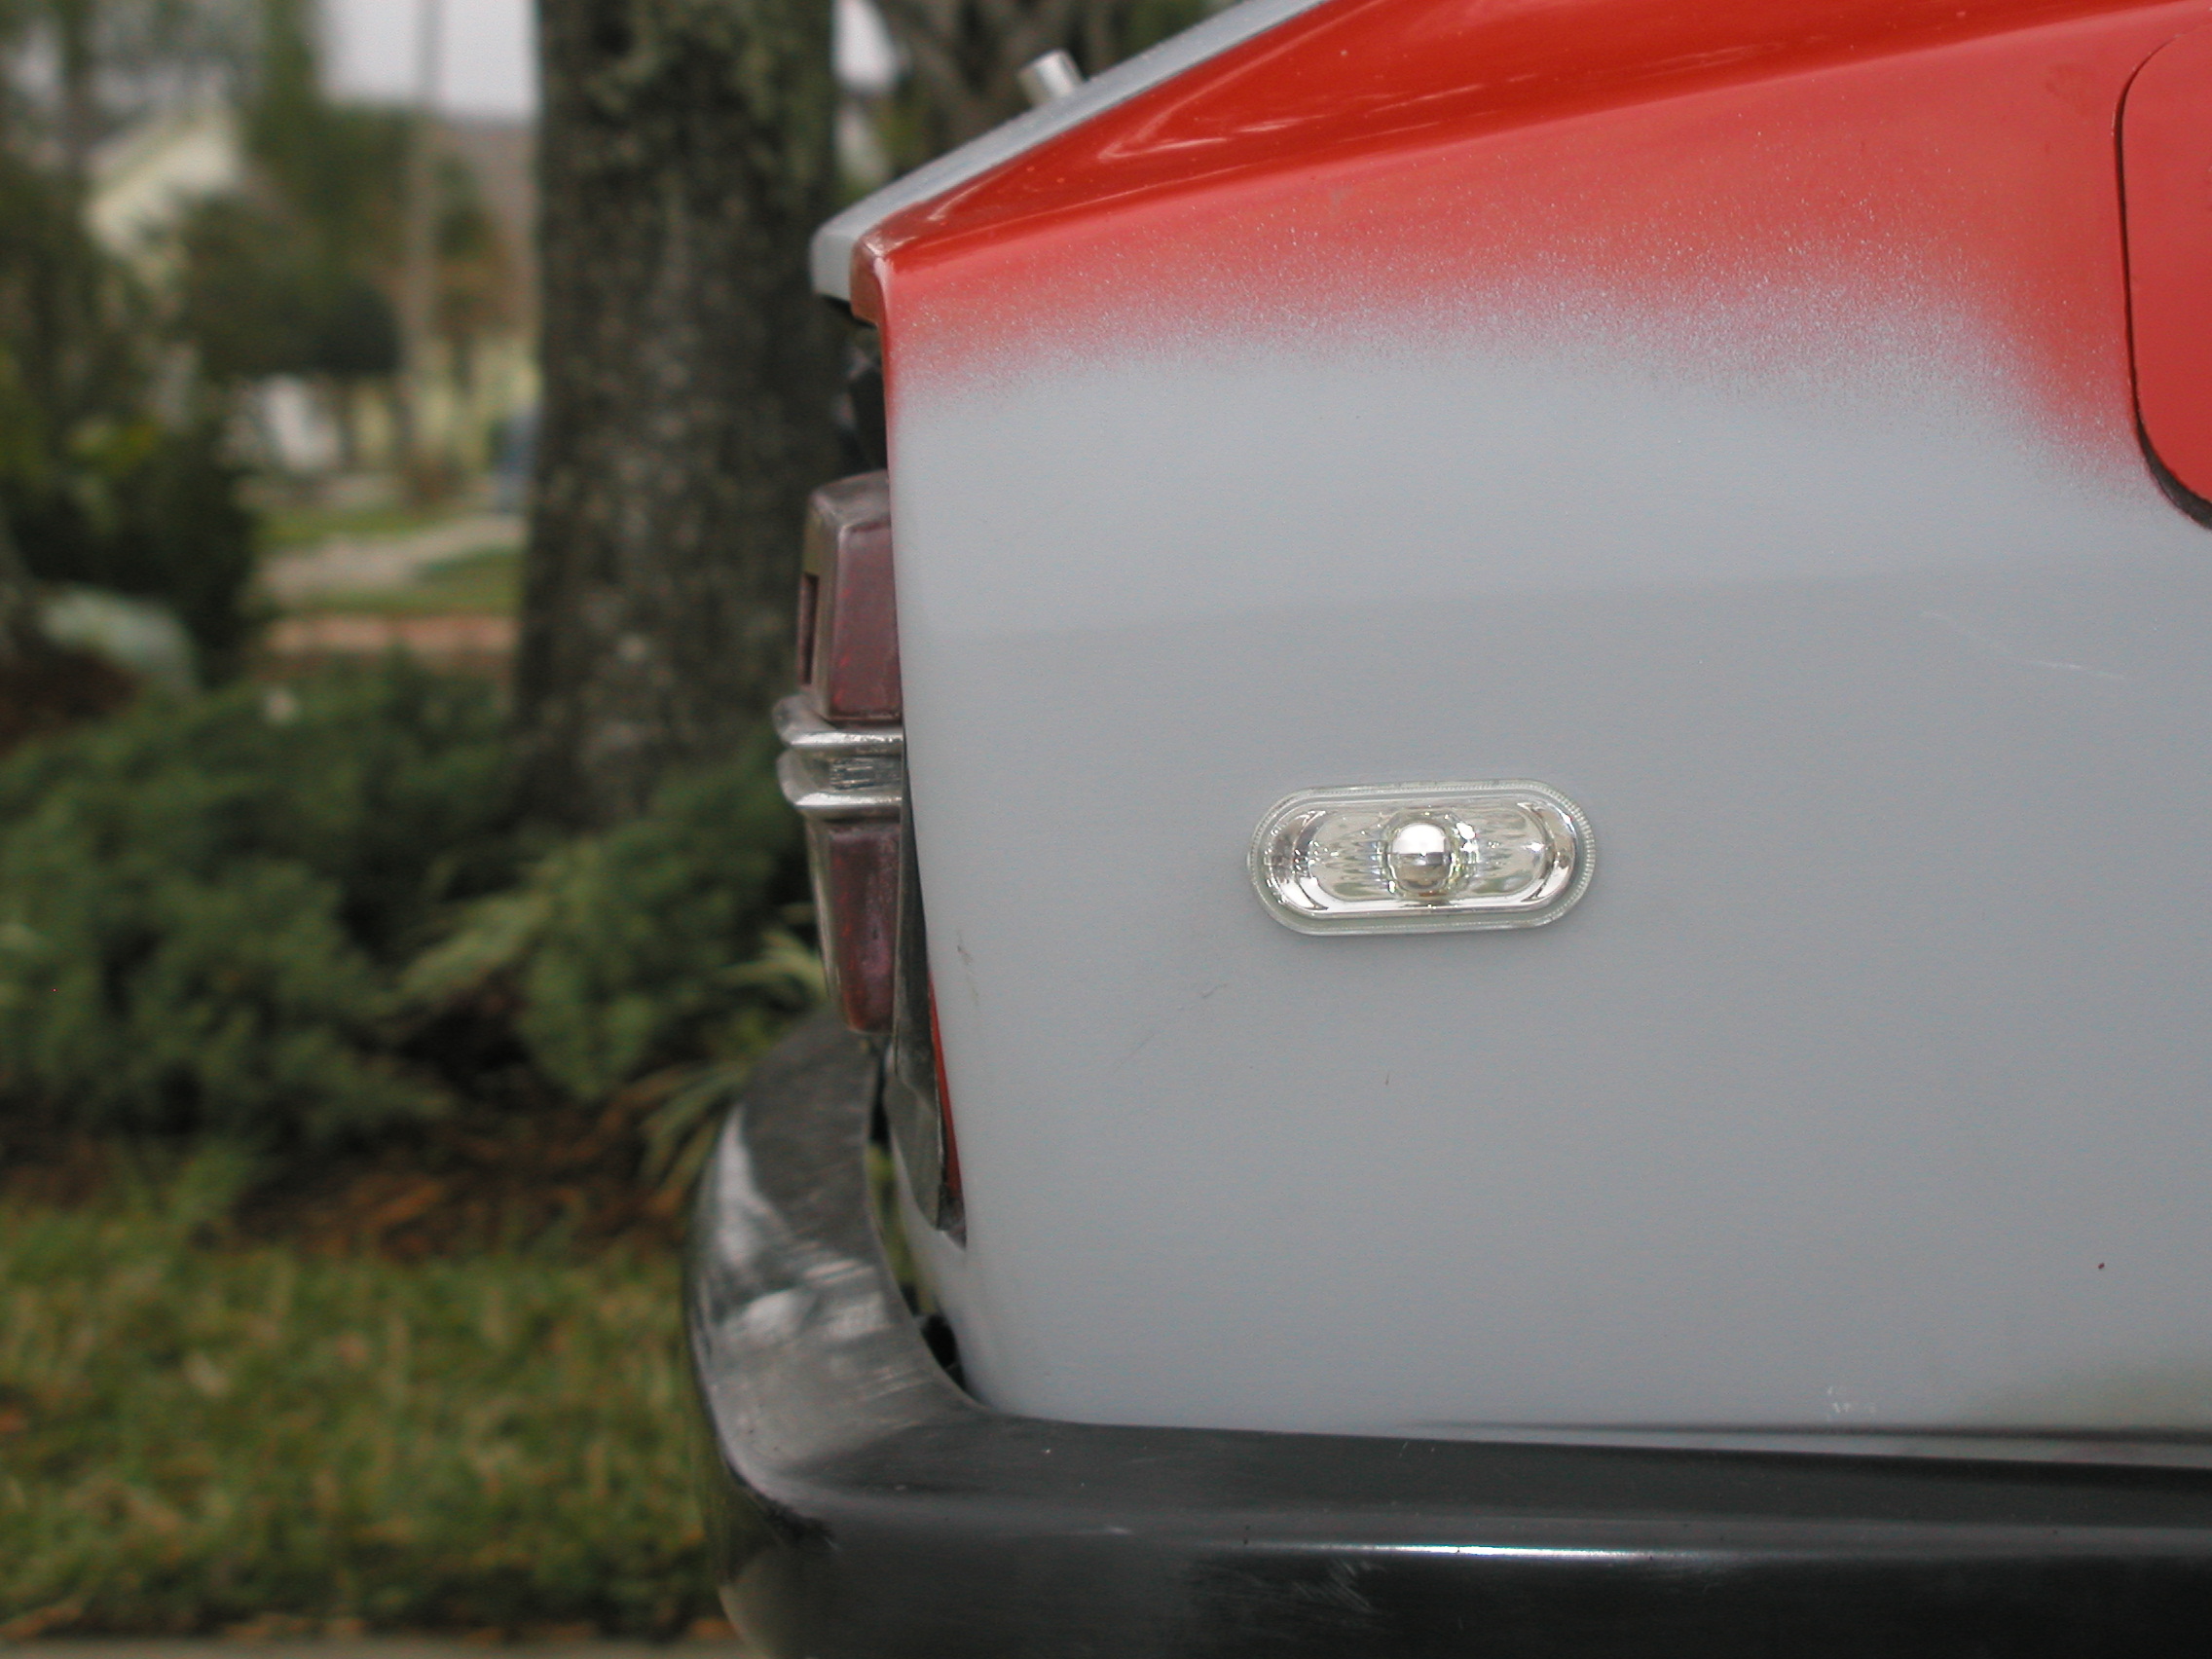
Marker Lights
As you probably know, cars are designed 3-5 years in advance of their first sale. When a new regulation suddenly appears, the manufacturer has to react quickly, outside their normal design cycle. That is how the S30 markers came to be.
This little light, more than most other elements of the otherwise classic Z design, dates the car. Removing it is certainly a possibility, but perhaps not wise. Here is my pass at updating it.
The new lights were harvested from Volkswagen, years 2000 to 2005 (approximately), multiple models. Some Audis also use them. These lights are mounted just ahead of the doors, and are used as side-facing turn signals. There are only two to a car, so you will need two wrecked cars for a set. I found a 2002 Jetta and a 2004 Passat in a local wrecking yard as donors. There are two other versions of this light I have seen, both the same size. One has a faceted lens instead of the clear lens I chose, and the other is also faceted, with 3-4 LEDs. They are on models beginning about 2006.
Aside from the appearance of the clear lens, I chose them particularly because I am going to change the incandescent lamps for LEDs. More on this, and the electrical characteristics of the various choices later.
The existing markers have a larger hole than the new lights (see photos), so the holes had to be patched with sheet metal, MIG welded in place. After grinding smooth and filling, new oval holes were cut. The VW lights snap into the hole, so it must be relatively accurate. A template was used. The repaired area was then primed. They have not been wired yet, although that will be very easy.
-
I can't say I've done it myself, but I intend to run late model BMW sidemarkers behind my ZG flares and shave the rectangular stock markers. I've only ever seen one other Z with the same thing. I think the picture was in the "White Z pictures" thread...
As far as mirrors go, I'm using carbon fiber APR racing mirrors. Not too many Zs have these, but there are a few on here. Those Honda mirrors really give a much more modern look, nice work.
Thanks for the compliment. Please do post some pictures if you have them. My next post will be my sidemarker solution, which I'm really delighted with.
-
Our ’71 240Z daily driver is almost completely restored/modified mechanically. The chassis is done. The interior is half done. Now it’s time to begin the bodywork. In no particular order, here are some of the bodywork items underway:
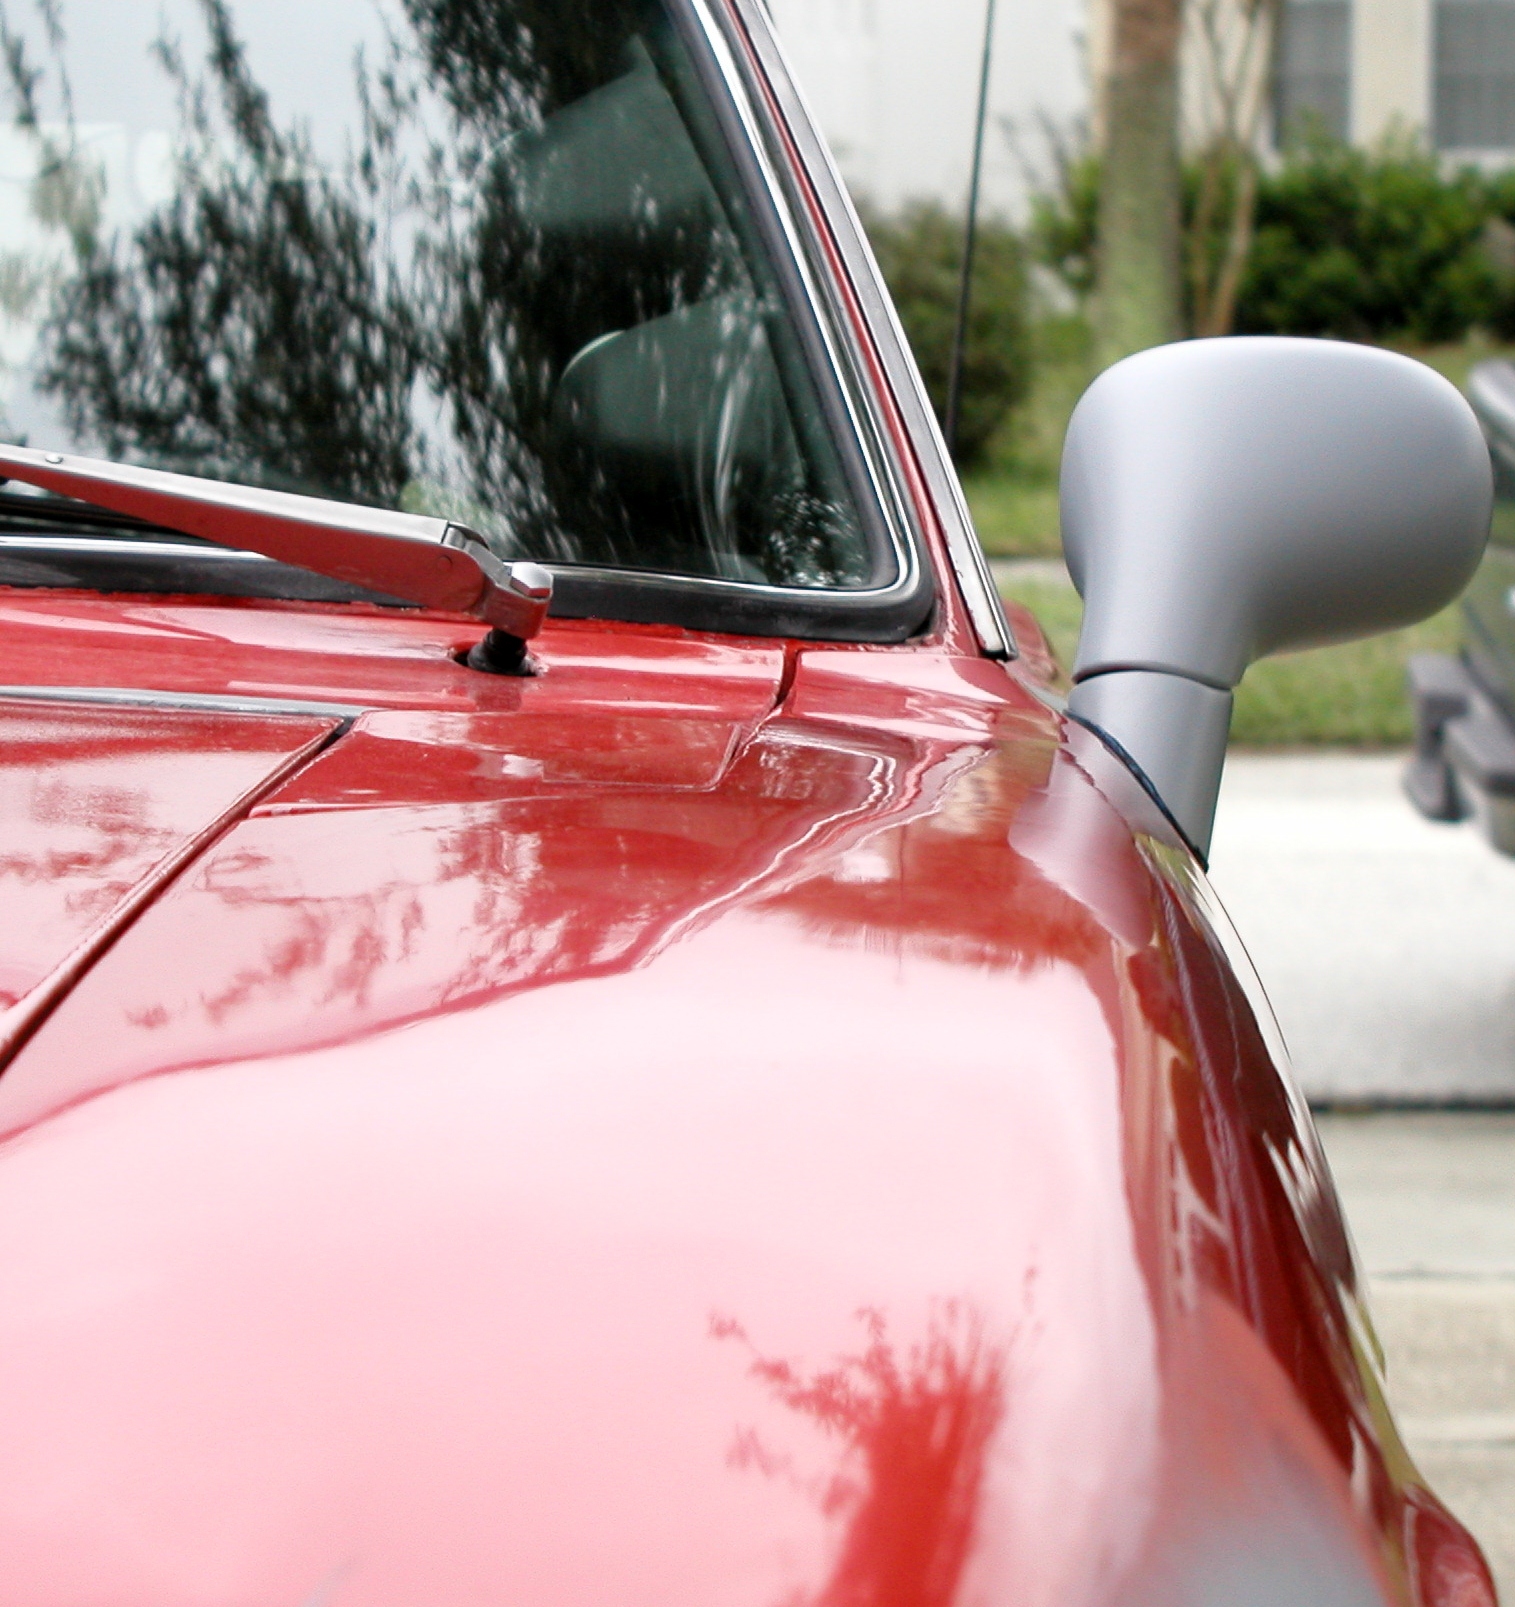
Mirrors
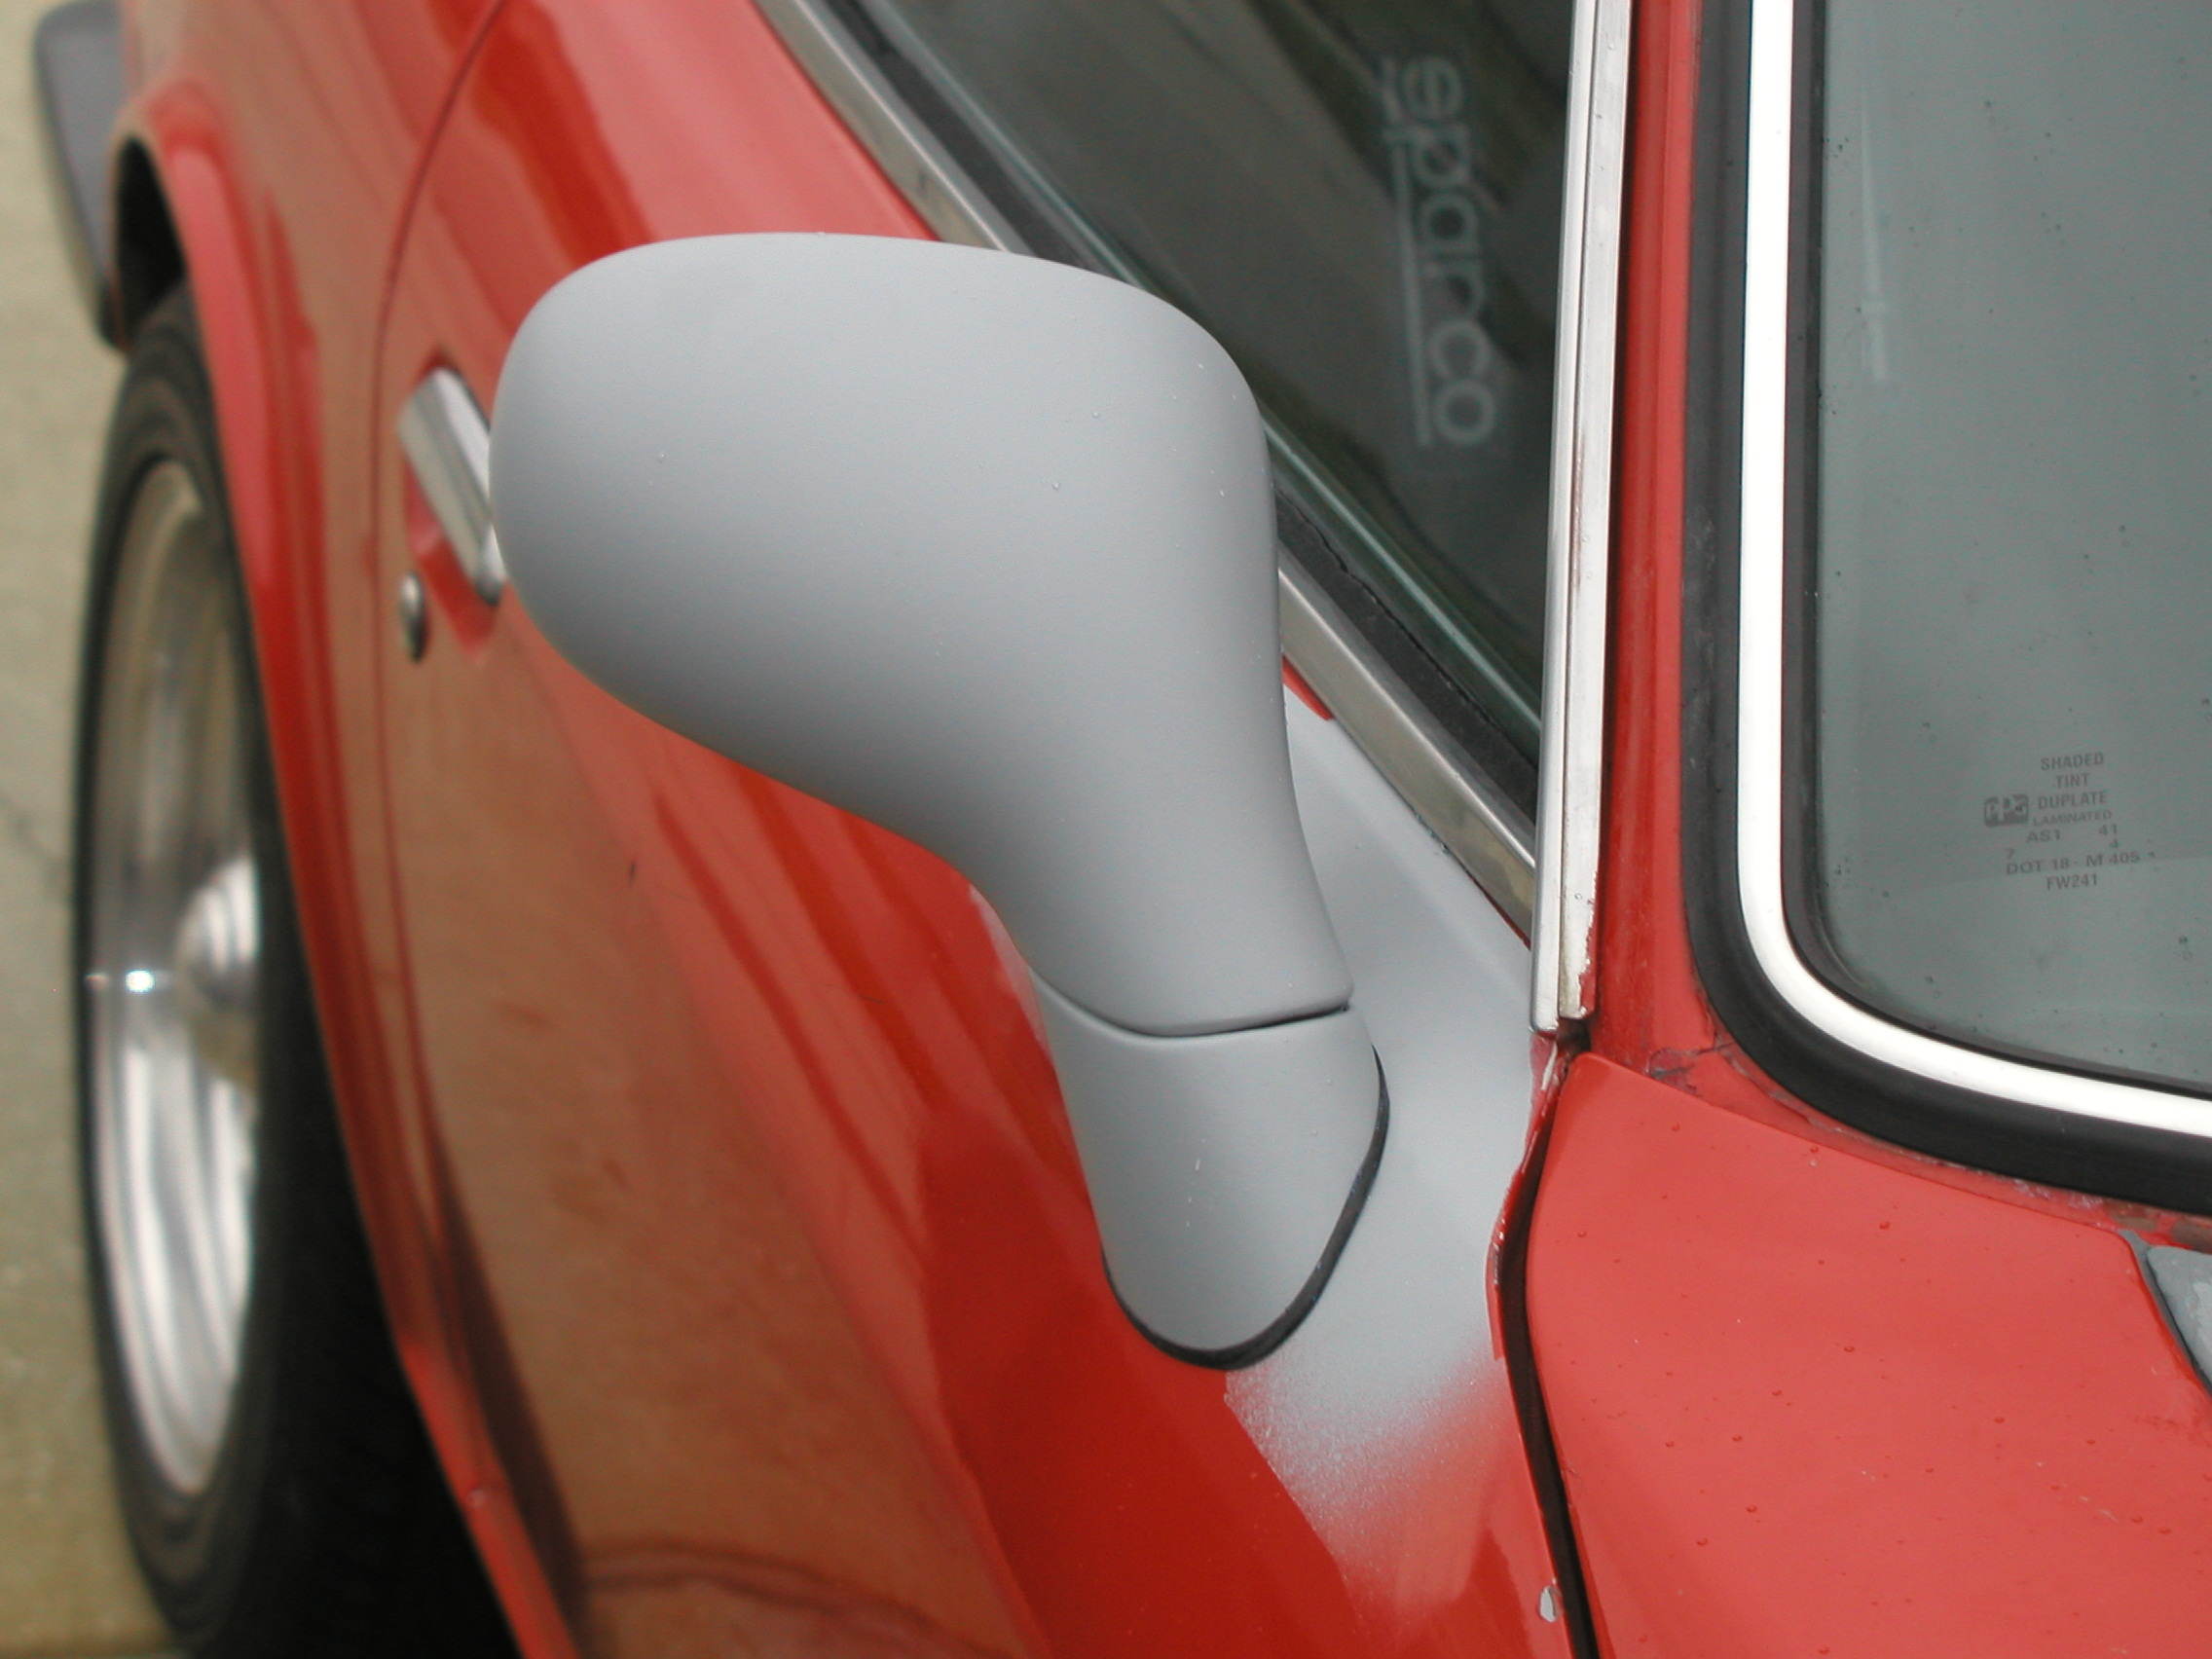
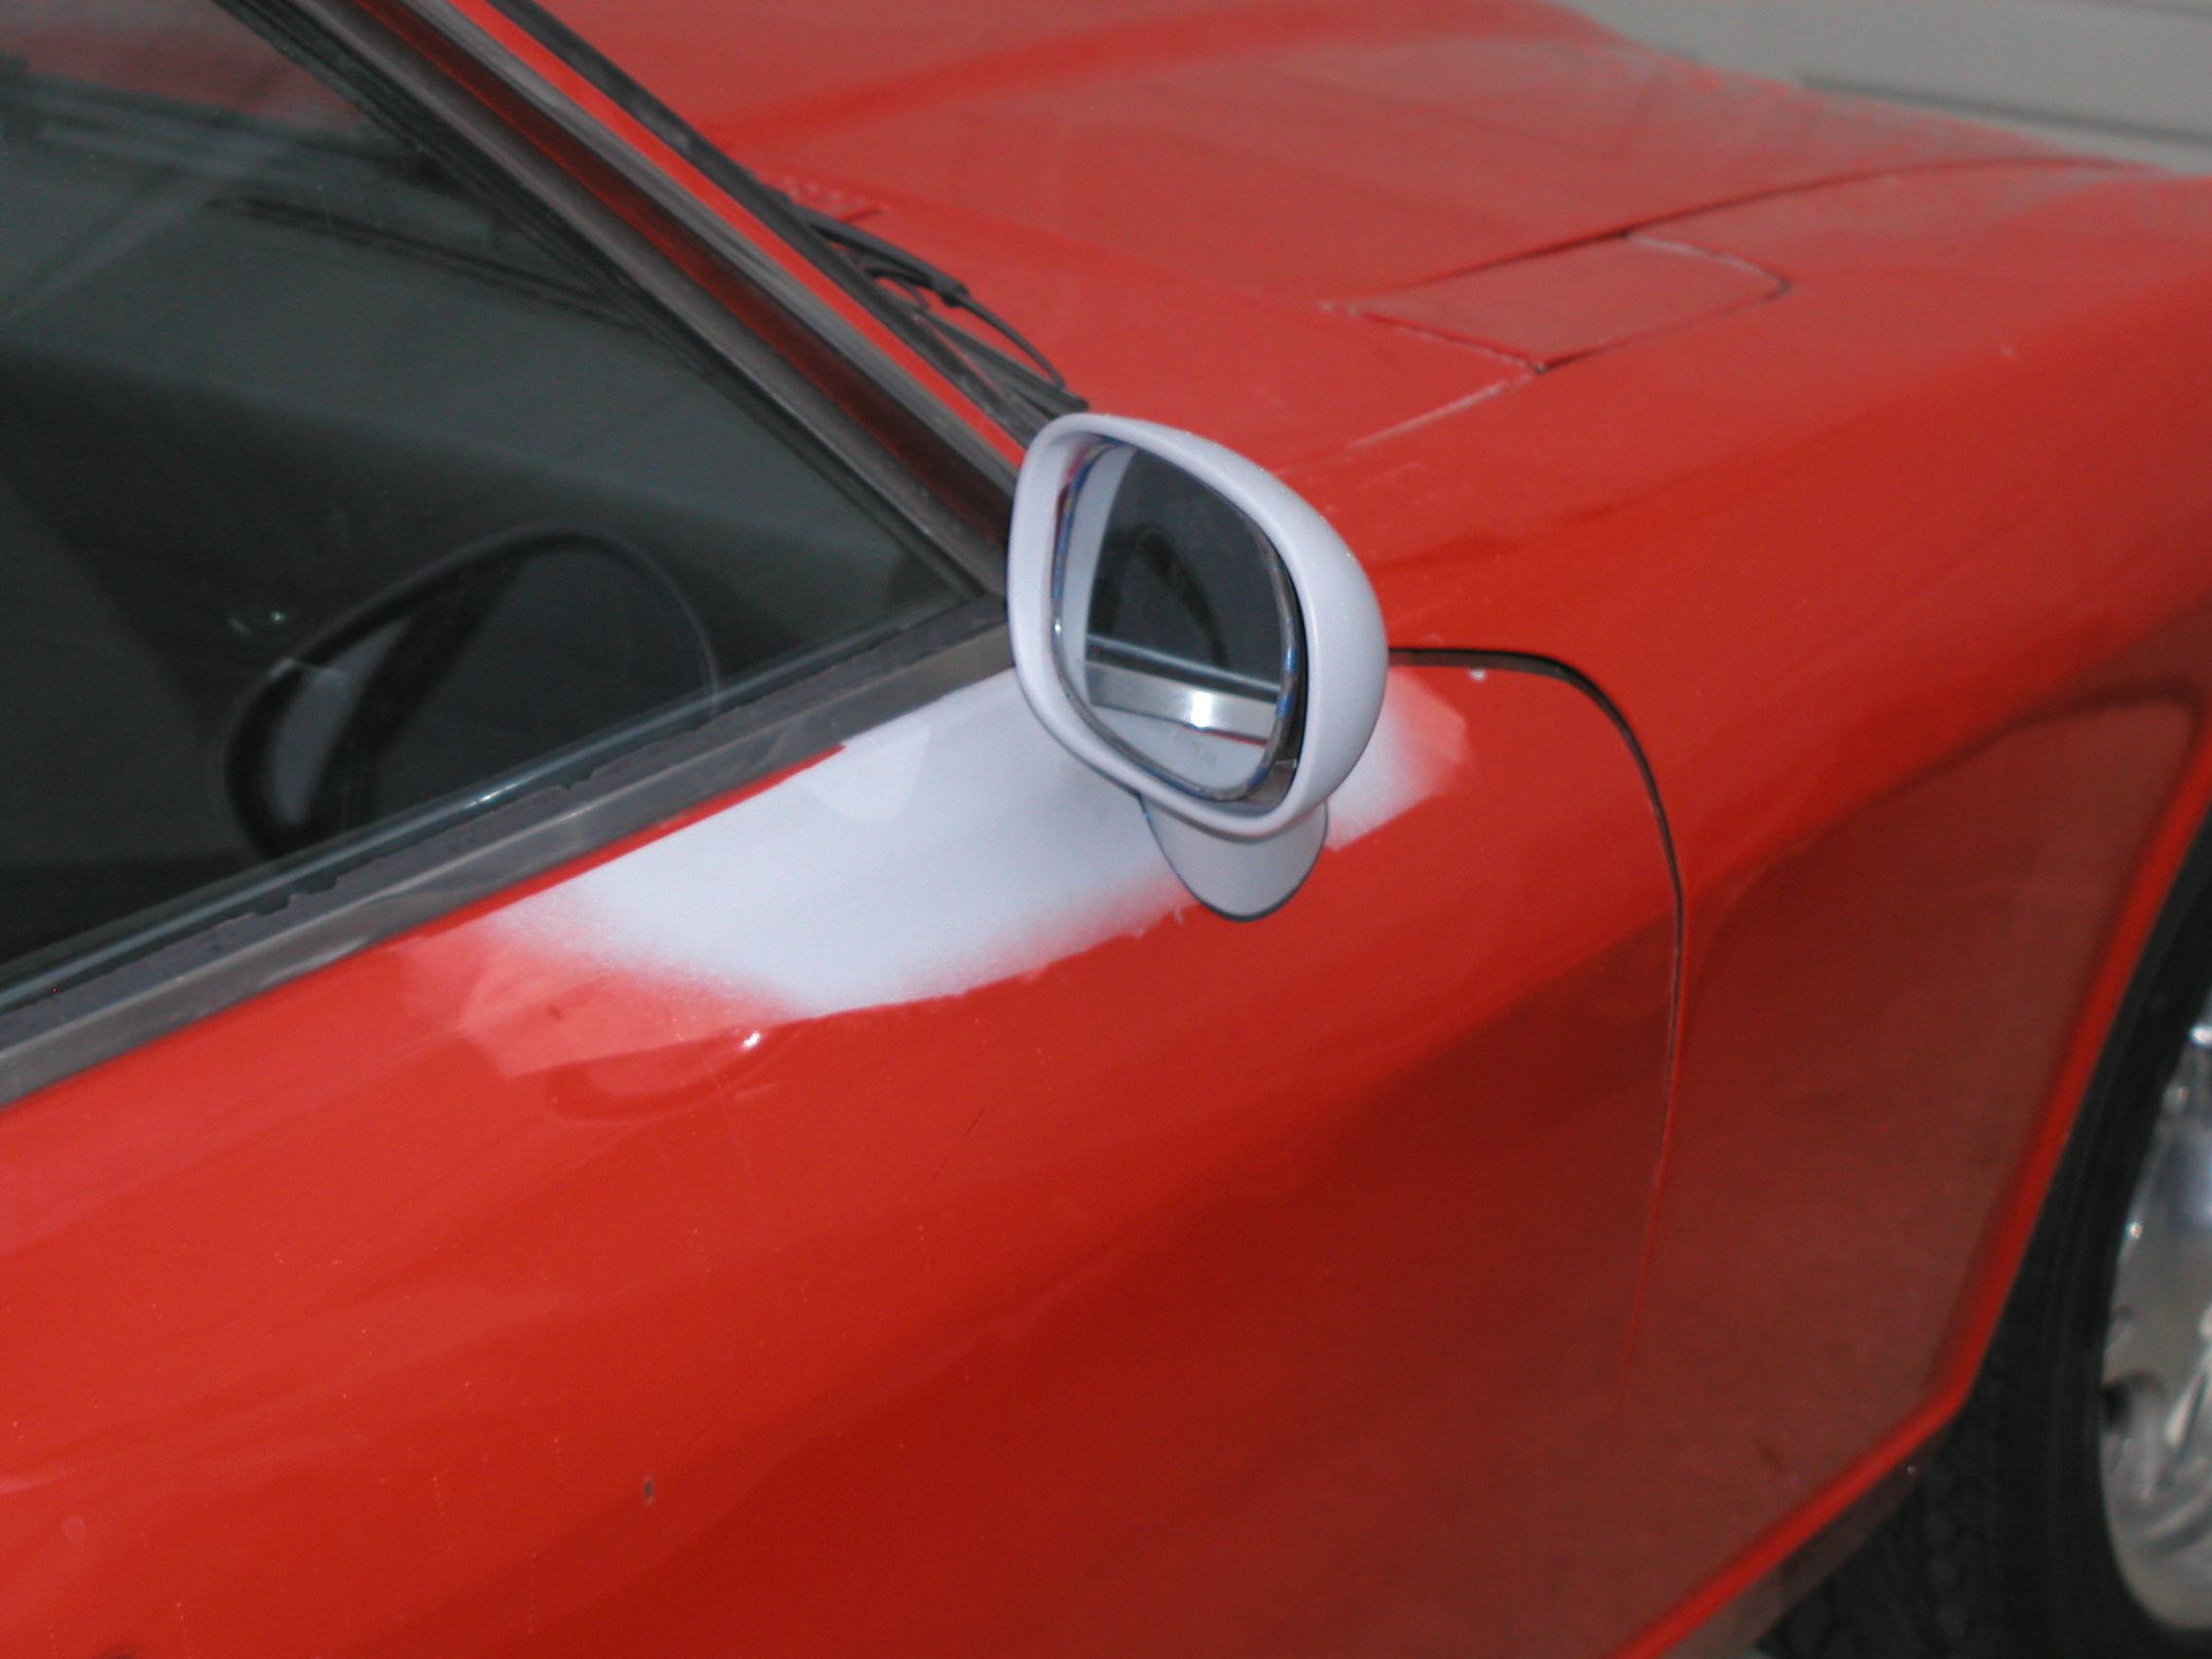
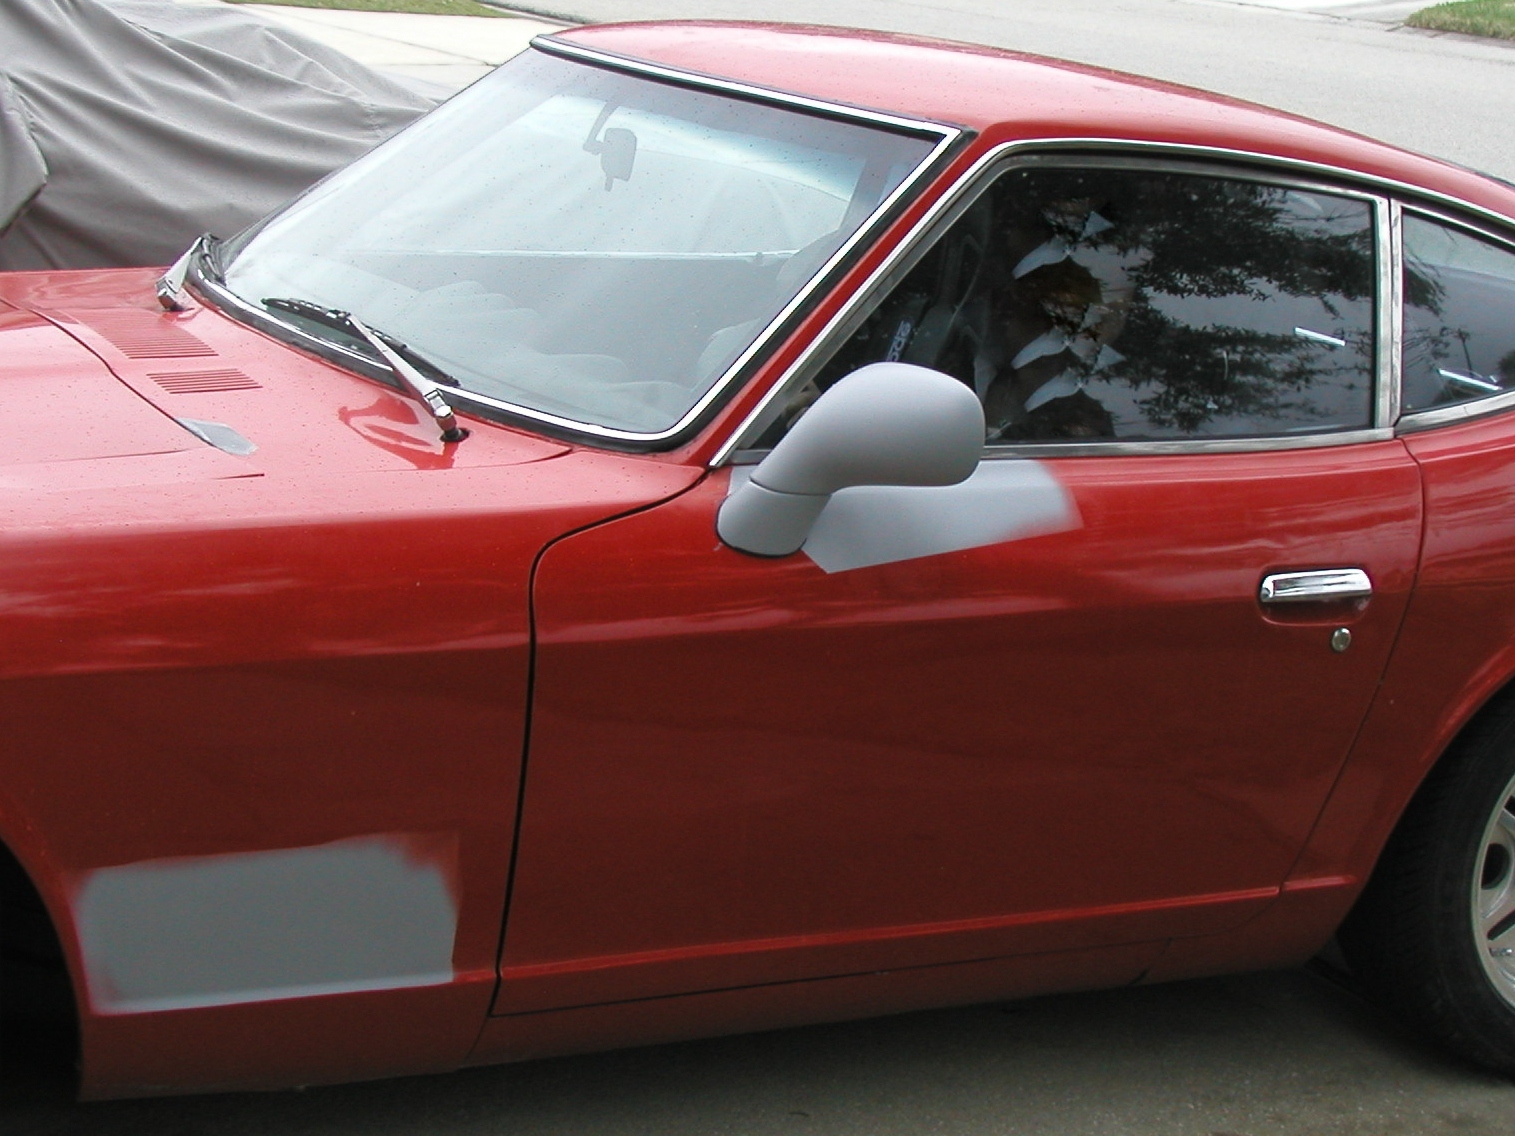
The outside rear view mirrors have been a challenge. The stockers were long gone when we got the car. The ones on the car were aftermarket “racingâ€-style mirrors, and were so bad, they were useless. Two subsequent attempts, with MSA aftermarket mirrors, were no better.
I finally concluded that a stock mirror off of a recent-model car might be the solution. I was unable to find any good internet sources of mirrors (other than the usual crap), and there really isn’t a database of mirror pictures anywhere. So, I resorted to writing down makes and models with likely-looking mirrors while driving around town. A Saturday trip to the local Pull-and-Pay yielded a pair of electric mirrors off a wrecked 1995 Honda CRX. These weren’t even on my list, but looked like they might work. Besides, for $14.99, it was worth the experiment.
The existing mirrors were removed and the holes MIG welded, along with the stock holes and several sets of other holes. A bit of grinding, a touch of filler and a coat of primer finished the repair. The Honda mirrors fit perfectly, even following the contour at the top of the Z door. A small rectangular hole had to be cut in the door to clear the center of the mirror bracket, which has a raised area. A shallow U-shaped bracket for the inside of the Z door was fabricated, which bridges the raised area and produces a tight fit.
The results far exceeded my hopes. You can actually see behind, and the mirrors are large enough to see well. There is no distortion due to vibration, and the mirrors actually stay adjusted. They look good, and most importantly, do not look like an afterthought. I have yet to hook up the electric, but will post a solution when I do.
-
This thread is intended to cover the dozens of minor bodywork details which might be done to restore, update or modify the Z prior to painting. The word “unusual†is meant in the sense “not usualâ€, not in the sense "bizarre".
There are plenty of discussions on Hybrid Z covering spoilers, flares, scoops and air dams, but the little details that go into an exceptional project are scattered all over. This discussion is to swap ideas and “how-tos†on all of the other, small topics. Please contribute your own challenges and solutions, or just ask for some help.
-
Did you get an answer to your question? I'm interested in this tank for a 280Z but I would like to retain all factory components. Why try to redesign the wheel just to have a different gauge.
Sorry, the thread quieted down, so I haven't checked it in a while.
The tank will fit a 280Z. It does retain all factory connections, although I improved them a bit. The only thing I completely changed was the sender, as it simply won't work with an Autometer gauge. Other than personal preference and "look", the best reason I can give you for a change is that they don't make either the gauges or the sender anymore, and eventually you may have trouble repairing or replacing them.
-
I assume that the autometer sender bolt pattern is different than the OE sender. Can you think of any reason I could not keep all the factory gauge components if the tank penetration was made to accomodate the OE sender ?
Yes, the mounting is quite different. The Autometer sender uses a "standard" bolt pattern used in most aftermarket tanks. In fact, the aluminum weldment for the sender is a pre-manufactured part which the fabricator welds in when he builds the tank. The stock Z sender has no bolt pattern, it is held into its mount with a compression ring. I imagine the tank builder could mount the stock sender, whether he would be able to find a pre-made weldment or fabricate something. He could not harvest the mount from a stock tank, as it's steel, not aluminum.
Another difference worth noting: the Autometer sender mounts from the top of the tank. The stock Z sender mounts from the side. There is space to do either.
Take a look at the first picture in this thread. The big hole in the side of the stock tank is the sender mount.
-
This is a continuation of Post # 30, above, which shows the B+ Main Buss. This post covers the intermediate portion of the B+ wiring, and taken with the post above, completely resolves a major weakness in the original 240Z wiring.
Beginning on the Main Buss drawing, the 100A feeder (#4 AWG red) connecting to the Flaming River switch is the branch of the circuit shown as the input on the B+ Intermediate Buss drawing below. This connection, through the switch, literally feeds everything on the car excepting the starter and alternator.
Notice that an intermediate amperage fuse/distribution block is added immediately behind the switch. Two of the fused outputs feed the "original" fuse block. These two white wires originally connected to the fusable links in the engine compartment. They have been stripped out of the wire loom, shortened, and are now fed from the intermediate block. Notice, also, that the headlights and horns have been removed from the original fuse block and fed directly from the intermediate block. This is to remove the highest amperage draws from the original fuse block. Since there are now relays to operate the actual lights, only a small control current passes through the old block and headlight switch. These have historically been major failure points. The lights are also brighter, as the relays greatly reduce voltage drop.
The "original" fuse block is in quotes above, because it is actually the MSA upgrade. (MSA 50-5011) online catalog page
The other parts sources are the same as those shown above in Post #30.
This circuit has actually been on the car and running for quite some time and works well. There have been no blown fuses or burned out wires in the last year.
Fuel Pump Noise and Wiring/Relays
in Fuel Delivery
Posted · Edited by Oddjob
With the changes above, you are now at a voltage drop of 0.3vdc at the pump. This is really pretty good, and I will bet it represents a considerable improvement over the stock wiring. I think you will see a further improvement when you run the star-ground lead you described from the firewall to the taillight ground buss. With any luck, all of this will fix your problem. If not, at least you have eliminated the prime candidate. Good luck.