
invalidusername
-
Posts
76 -
Joined
-
Last visited
Content Type
Profiles
Forums
Blogs
Events
Gallery
Downloads
Store
Posts posted by invalidusername
-
-
Thanks man, keep running out of daylight, so upholstery is all I have been able to do lately.
-
Hi everyone,
I wanted to make a little "how to" for how I reupholstered the T-top inserts (dont know the actual name) on my 280zx. I had already completed the part once, but thanks to a sick cat, I had the pleasure of doing it again. Since I was going to do it all over again, I figured I could at least document it, with a few little tips I figured out myself (that apply to other interior pieces as well). I know when I first started messing around with interiors, I had trouble finding information, so I am hoping someone may find this useful. I will be doing my sun visors soon, if anyone wants a write up, let me know.
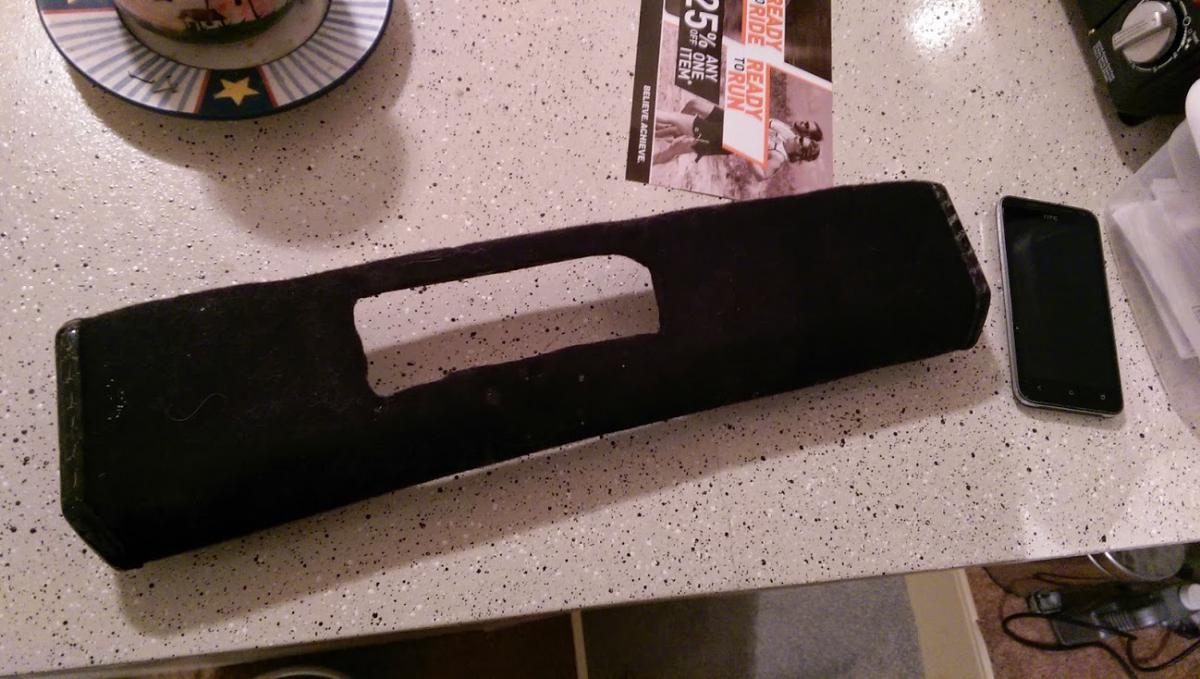
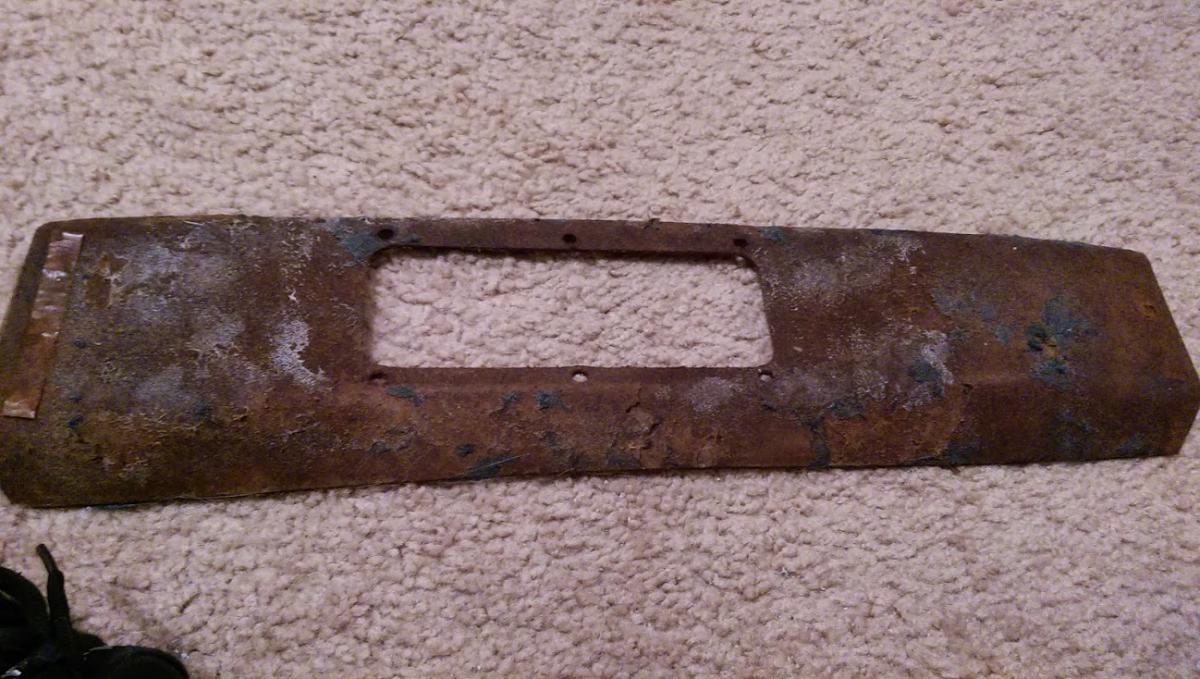
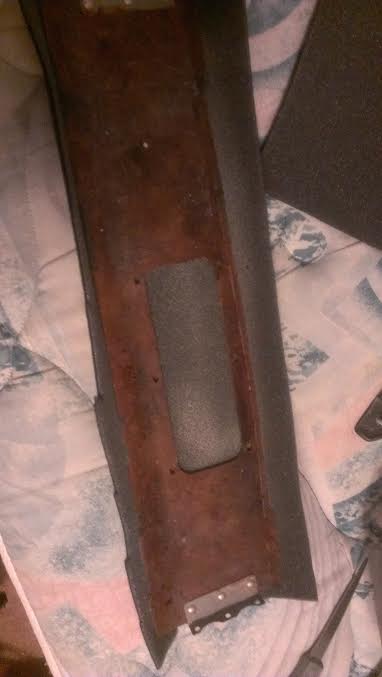
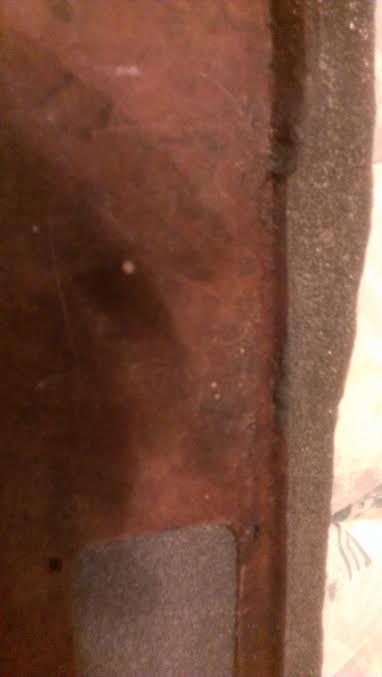
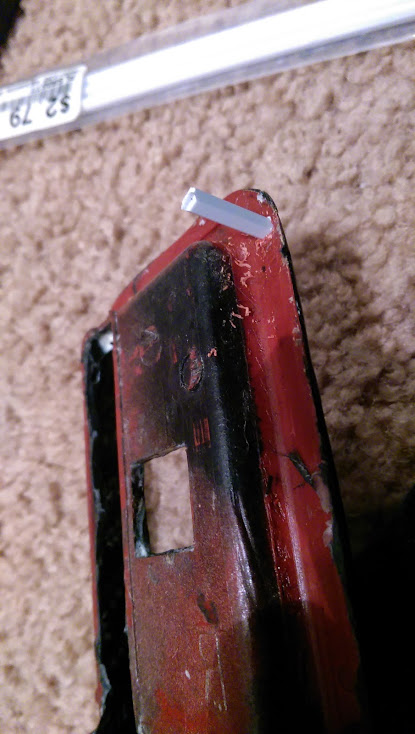
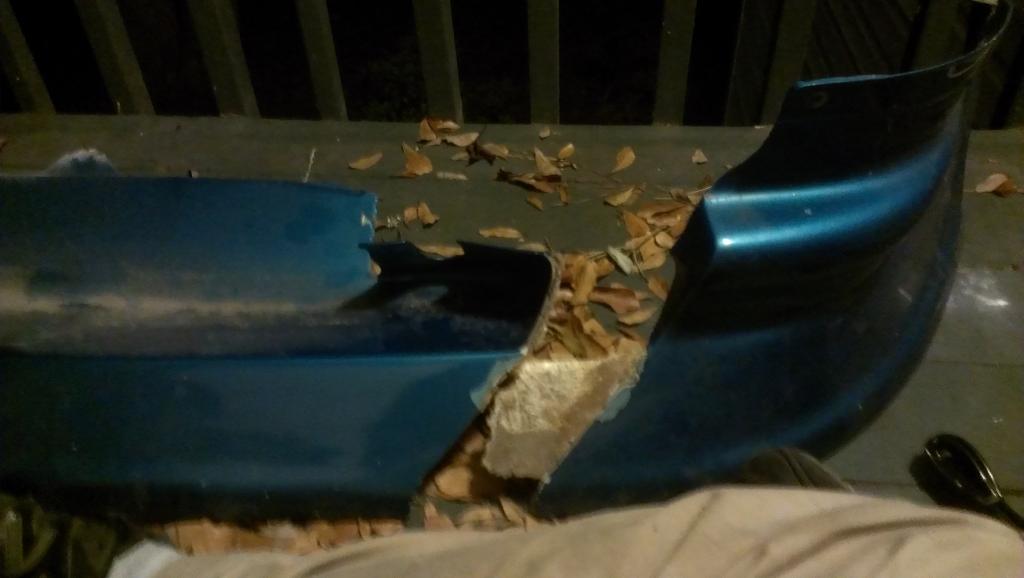
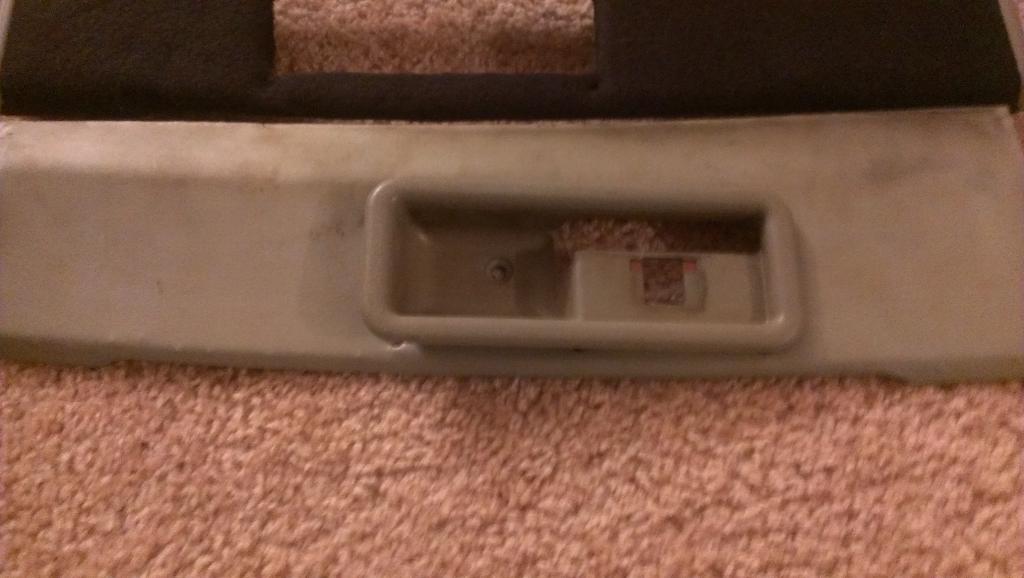
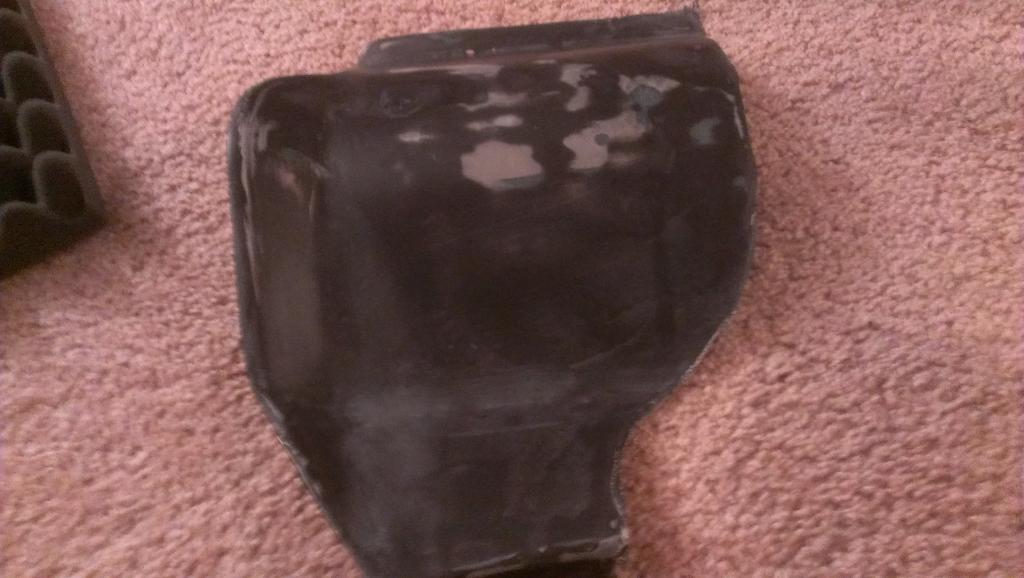
First off, the part has to be removed, FSM or just looking at it should explain how it comes off, mine was already off and not installed (and covered in cat hair and snot):

The first thing you want to do is remove the existing fabric, the plastic pieces are attached with pegs that fit through holes then are melted:
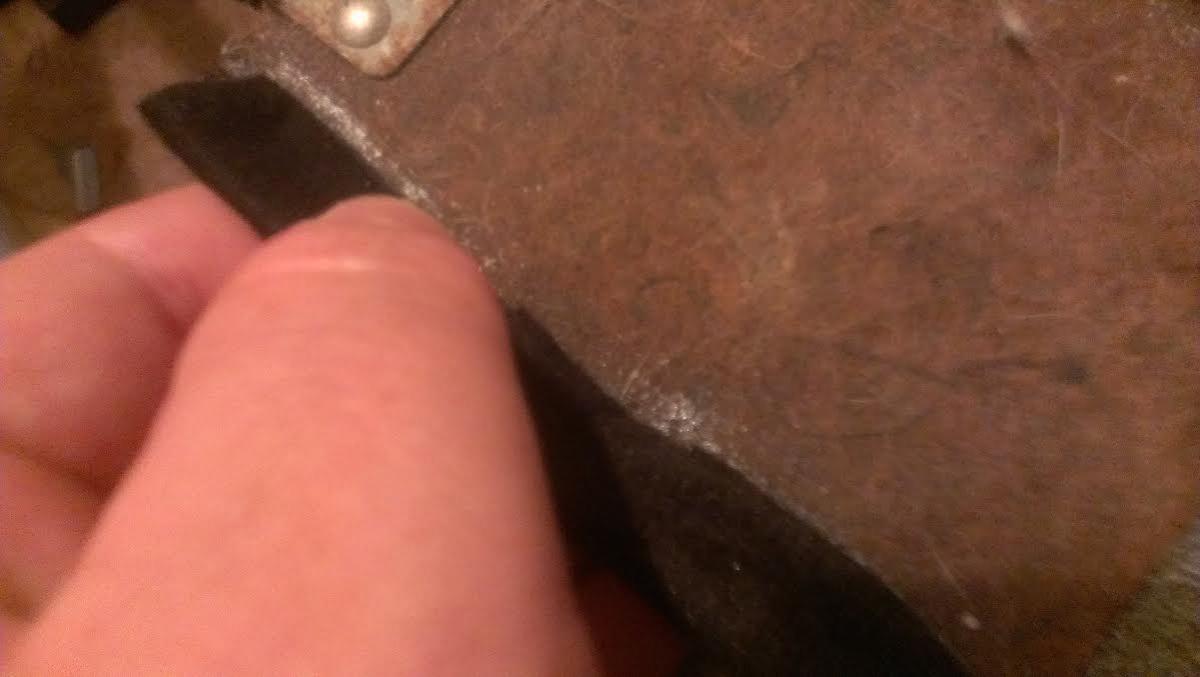
take a knife and you can snap them pretty easily to get the parts off (I'll discuss putting them back on later):
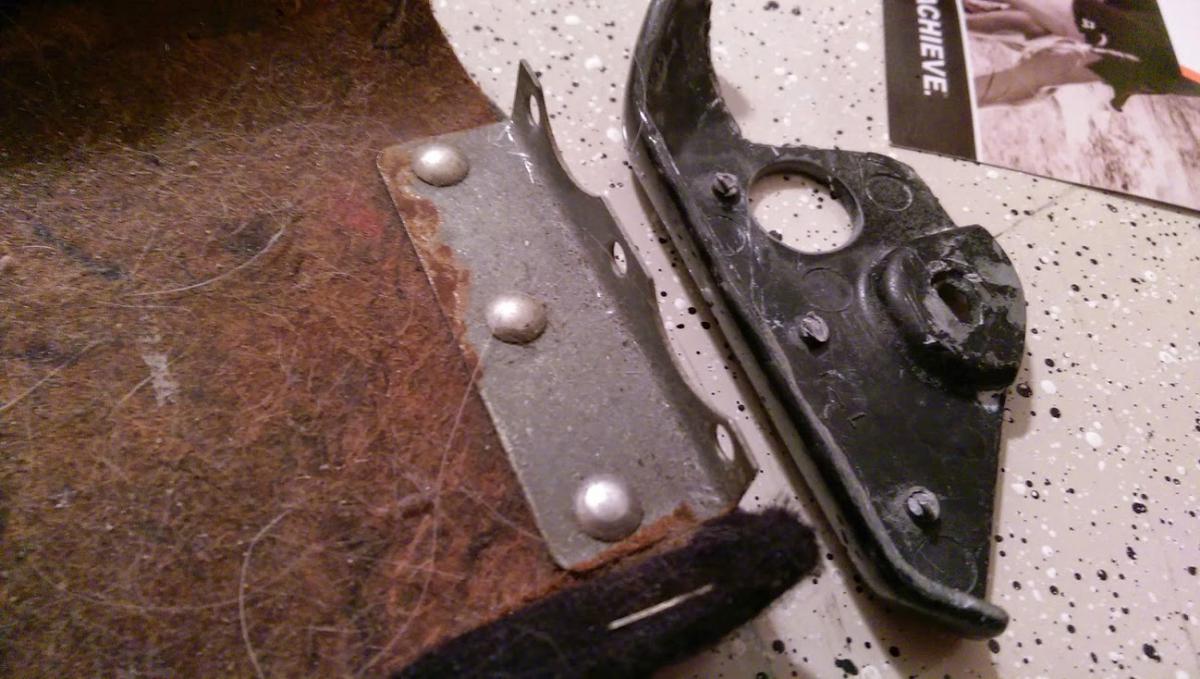
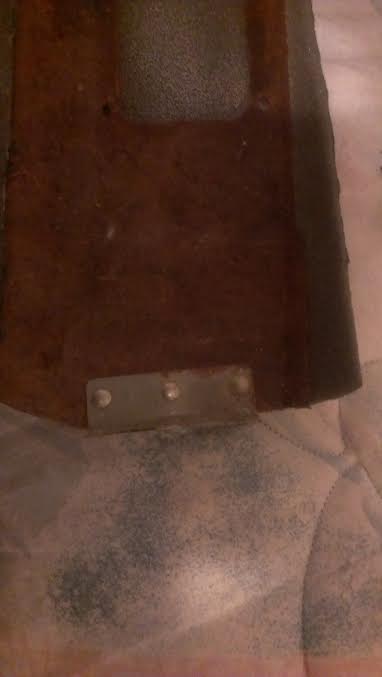
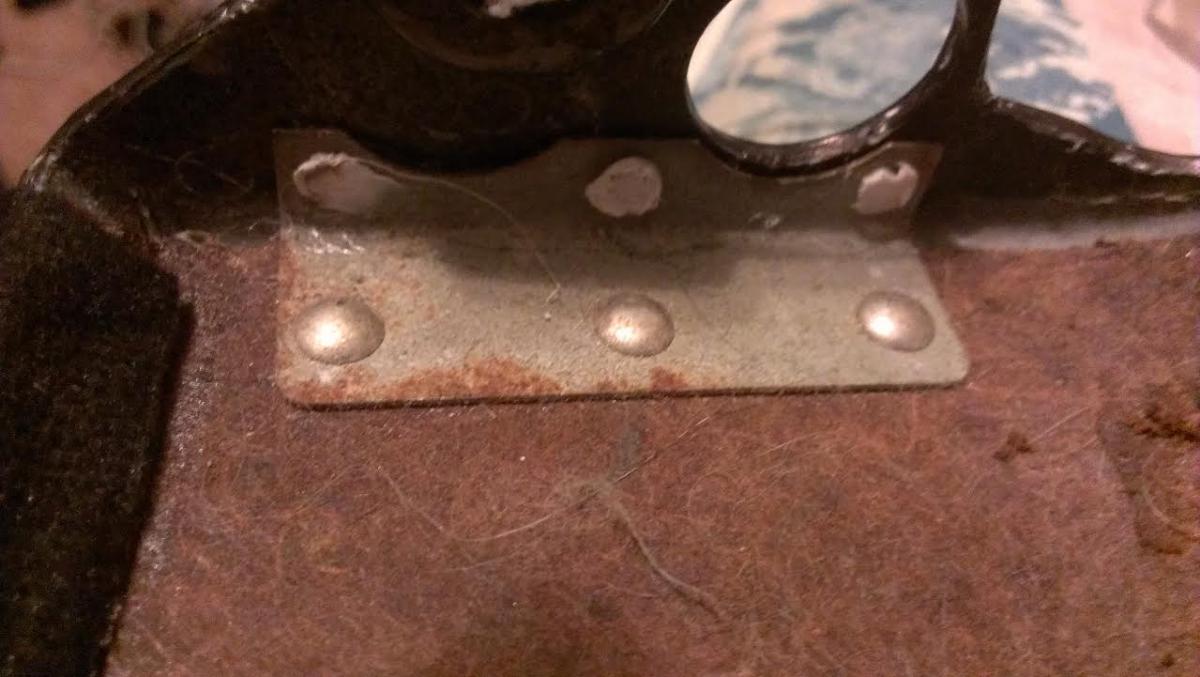
Most of these pieces on our cars is just chip board with a vinyl attached using adhesive, rivets, and staples, the staples in this case need to be removed:
Now remove the material:
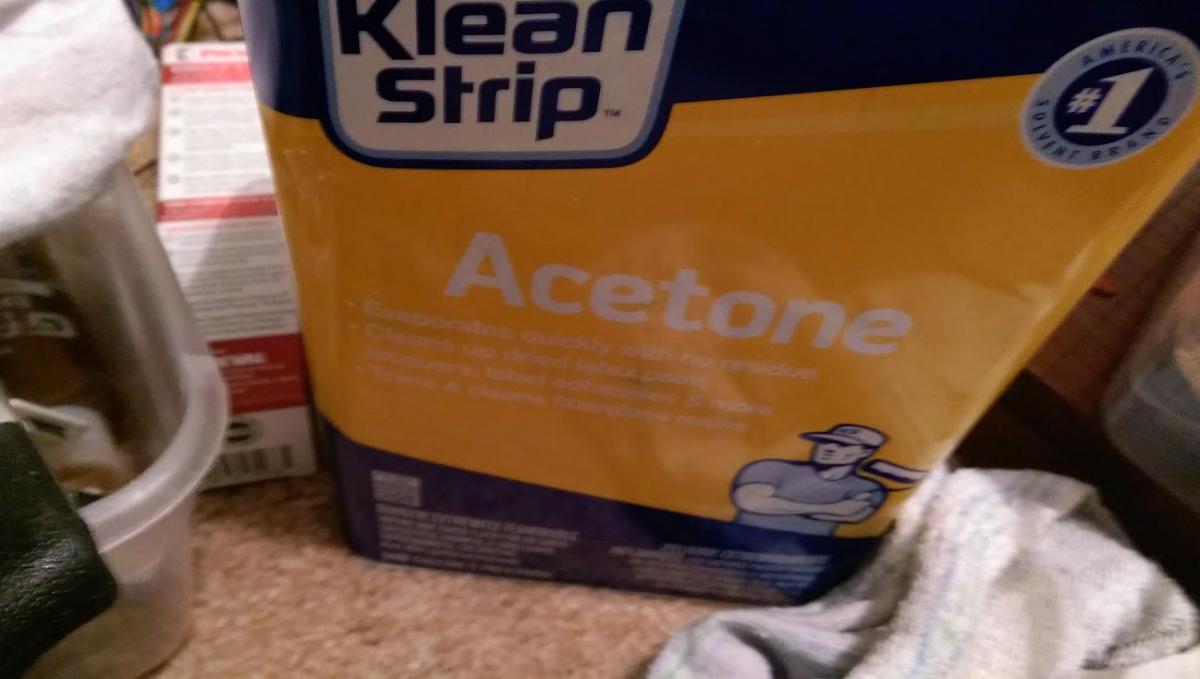
Vinyl usually comes off relatively easy, be careful not to destroy the chipboard piece, since I used headliner material on mine....it tore apart and was a little more difficult, to make it easier you can use acetone and a knife to scrap the stuff off (works really well for headliner pieces).
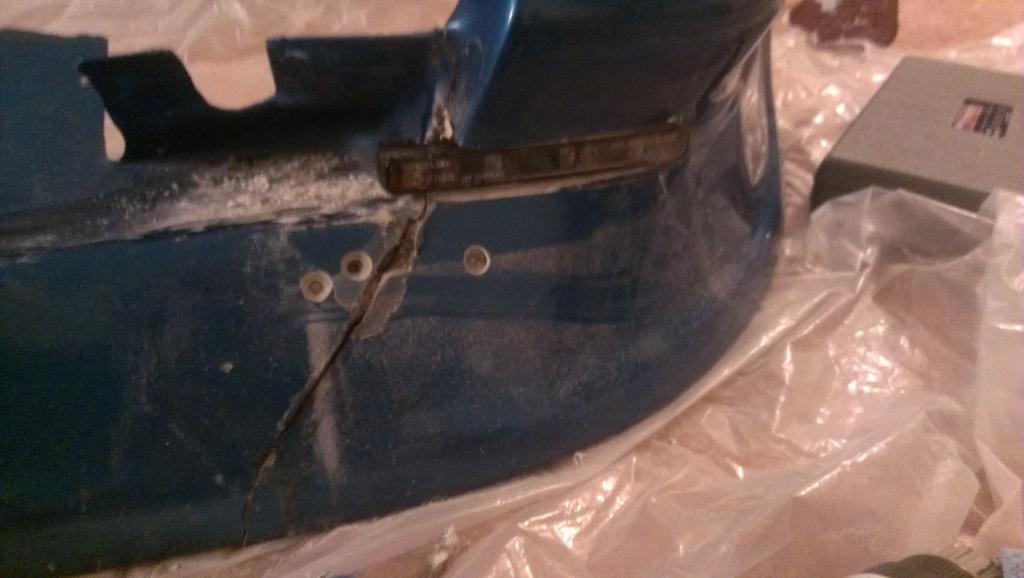
Once done you should have a "clean" part:
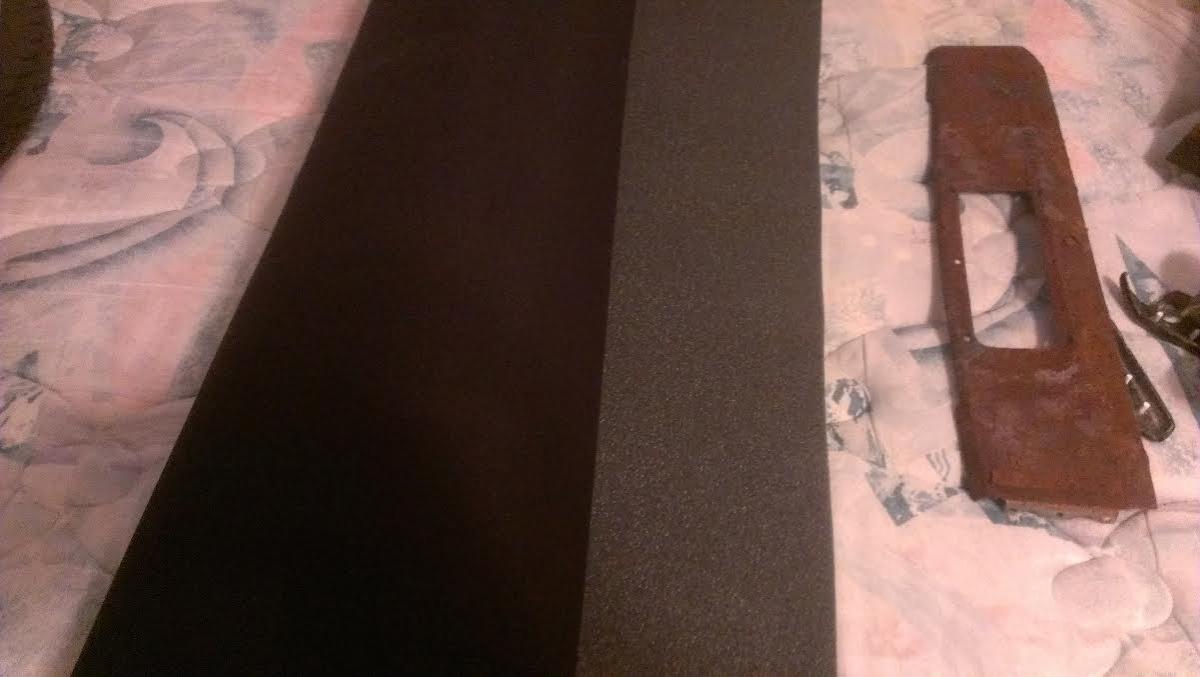
If you are recovering with vinyl, you may want to run coarse sand paper over the piece to make sure and get everything even and all original fabric off. Any little piece left can be seen or felt through vinyl.
I purchased some headliner fabric at Joannes, it's really easy to work with and relatively inexpensive.
Lay the part on the fabric and cut to size...well, close to size:
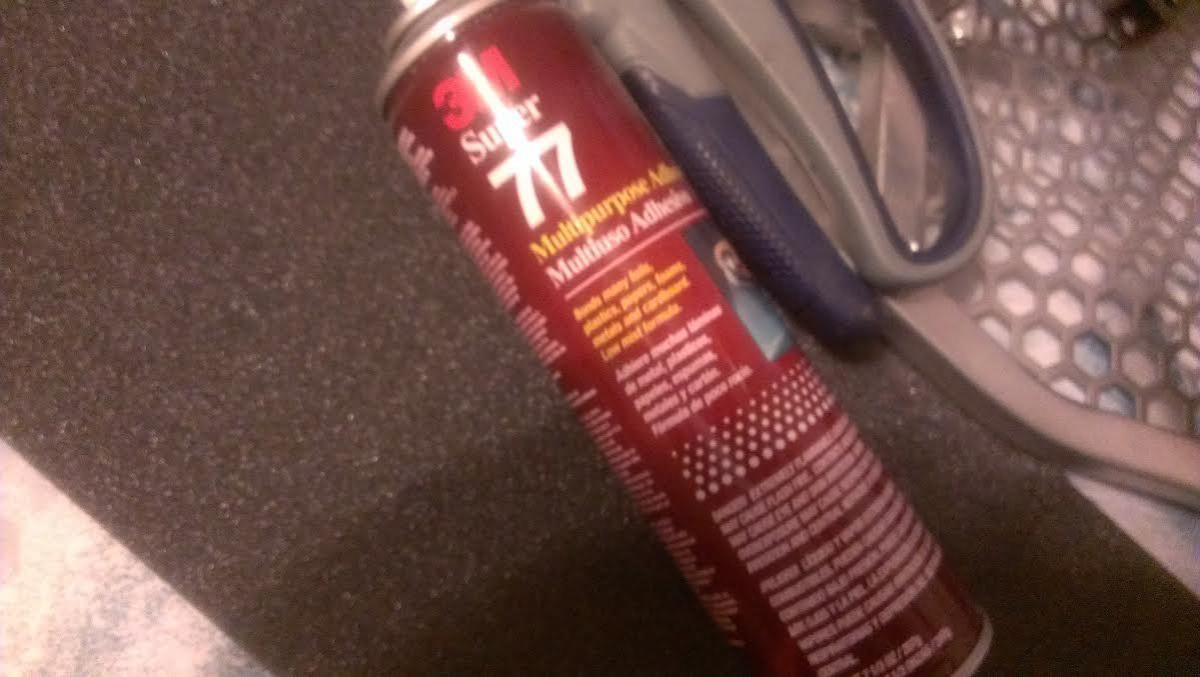
I prefer Super 77 for attaching light fabrics,
it is somewhat forgiving and, if used correctly, makes a pretty strong bond. I coat both the fabric and the part in glue and let set for about ten minutes until they are both tacky then stick them together:
Check to make sure that there are no large bumps in the surface and that it looks nice and even:
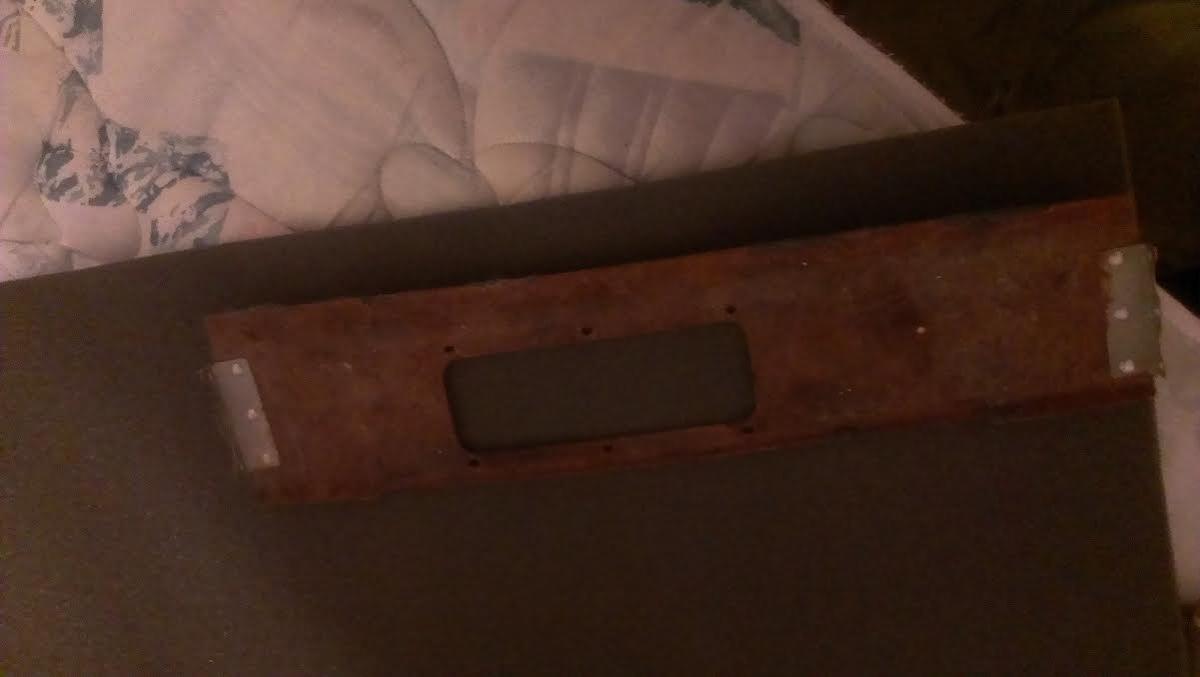
If it looks good, trim off the excess on the parts where the fabric sits flush and the other edges keep about half an inch to a quarter of fabric hanging over so that it can be securely fastened to the bottom.
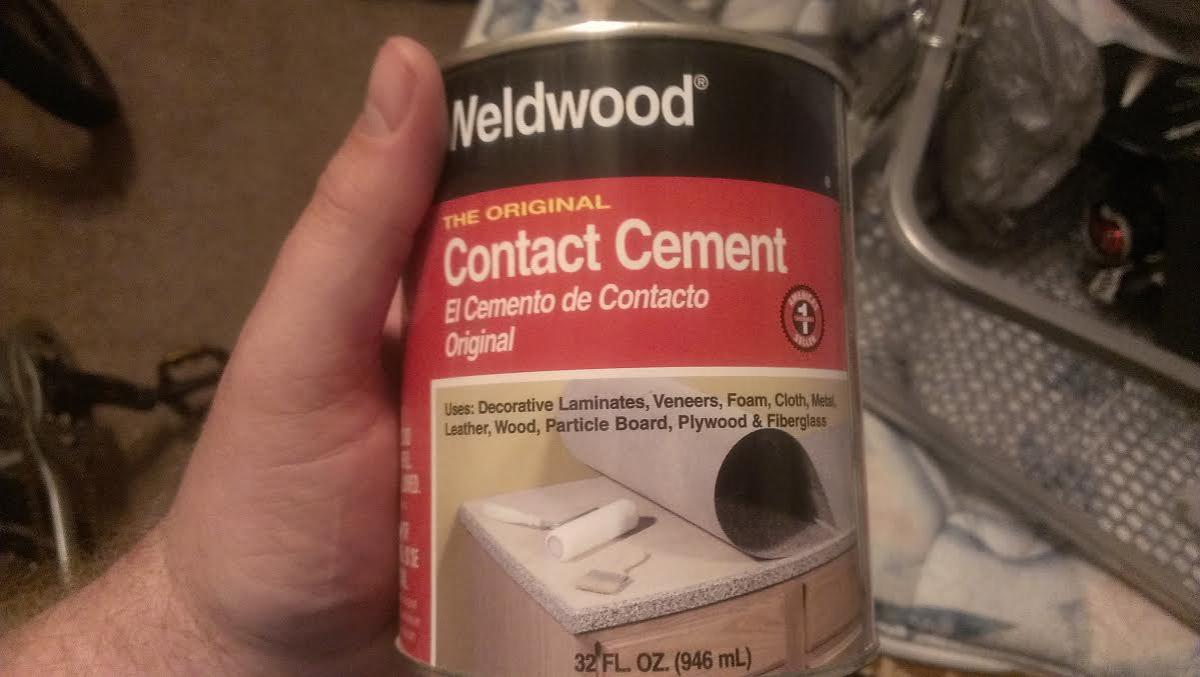
The Super 77 and other spray adhesives I have used are all really good at clinging to surfaces, as long as there are not too many bends or complex curves, but if there are they seem to want to release over time. My solution to this is Weldwood contact cement, my personal choice, there are others that work just as well I am sure.
You can attach the excess to the back of the part using staples if you wish, but I could not find any more really shallow staples, so I went ahead with my contact cement. I added the cement to the excess fabric on either side and to the back of the part itself.
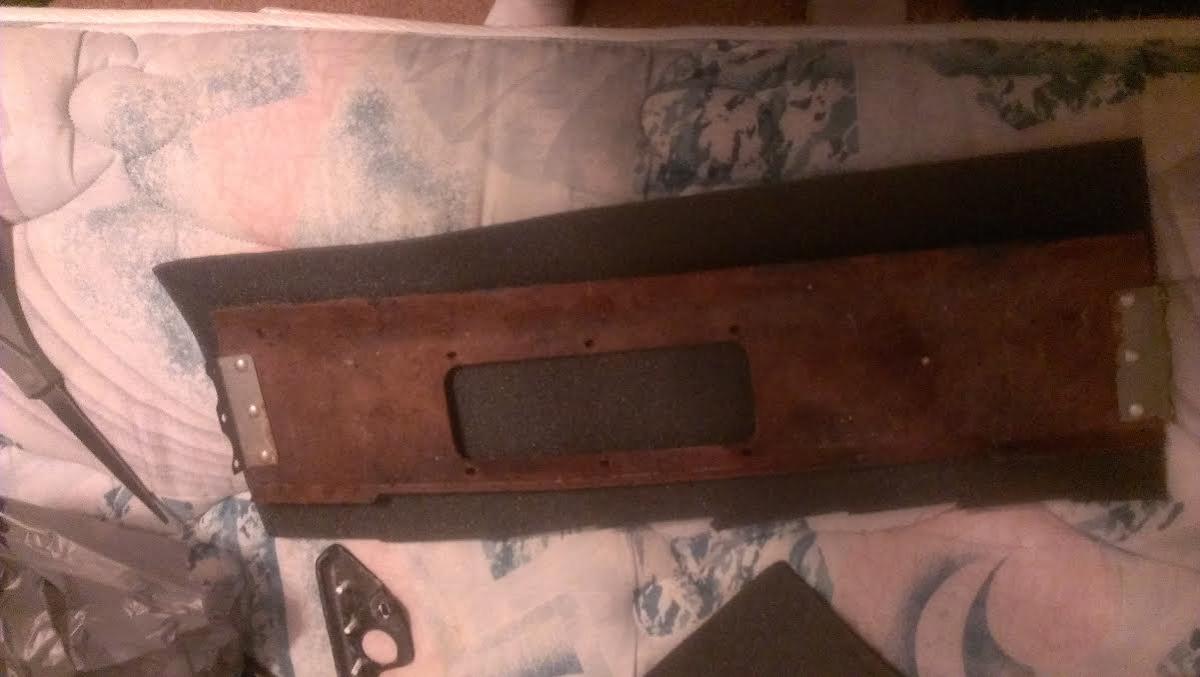
(not very noticeable)Then I waited about thirty minutes for it to become quite tacky and rolled the excess onto the part as tightly as I could.
Normally you would want to start from the middle and work your way out, since this was a smaller piece it really didn't make that big a difference. Let this set while you go and tend to your plastic pieces.
.
.
.
.
.
.
..
.
This feels like one long run on sentence, sorry for that,
.
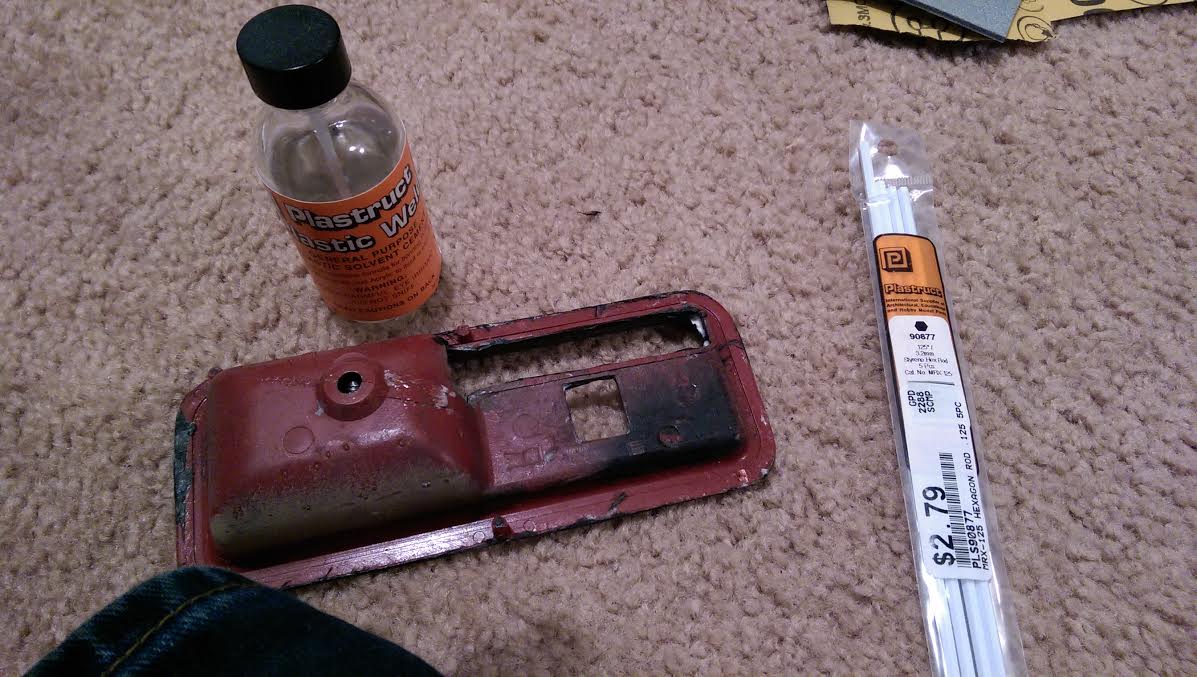
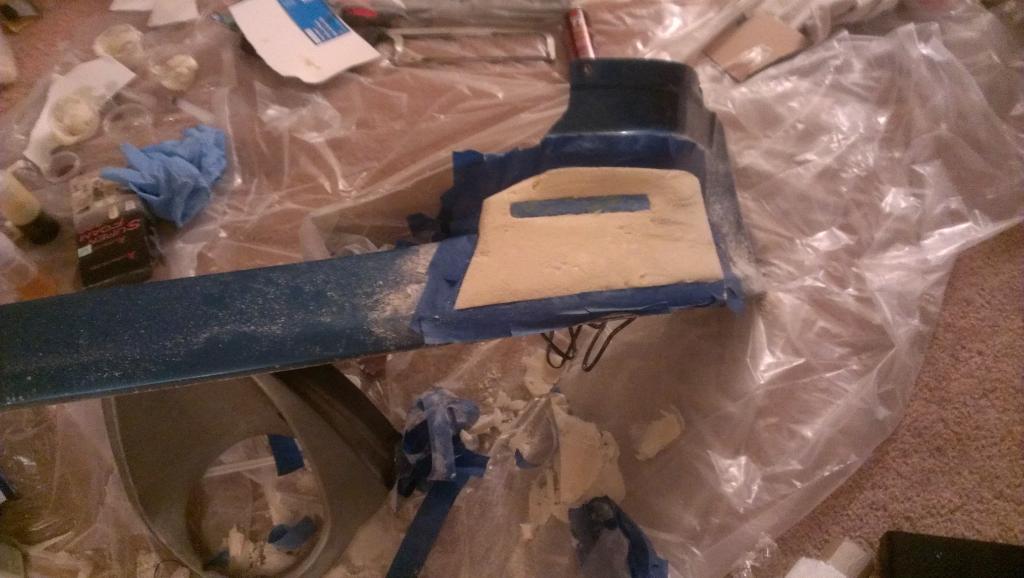
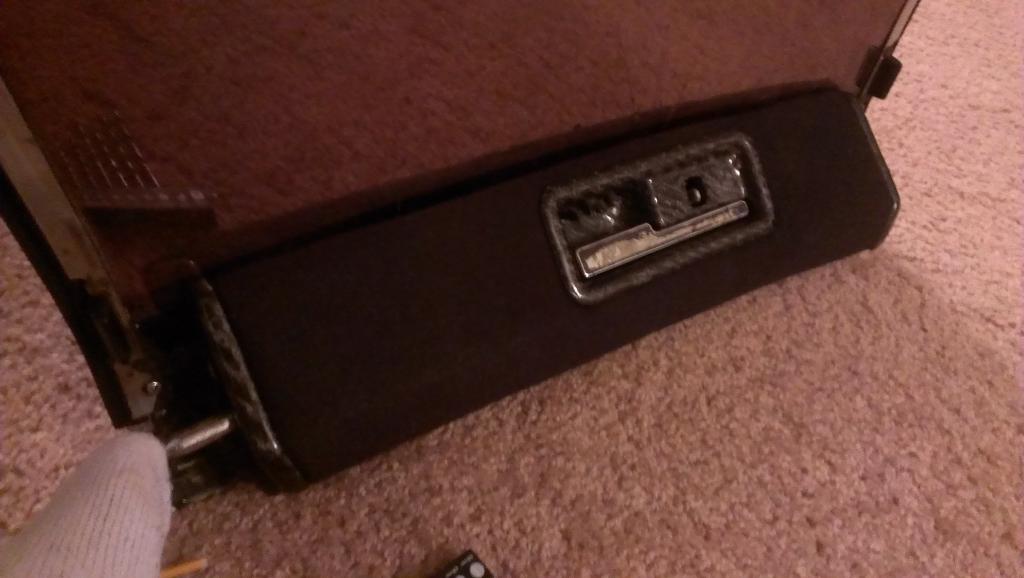
Now to the plastic pieces, I had cut the little pegs off of the parts, now I need to fix that so that I can reattach them. First you need materials:
I could not find ABS rods, but I was able to find 1/8th inch styrene rods, a plastic "glue" a power drill with ~1/8th inch bit..some flexibility here and the part.
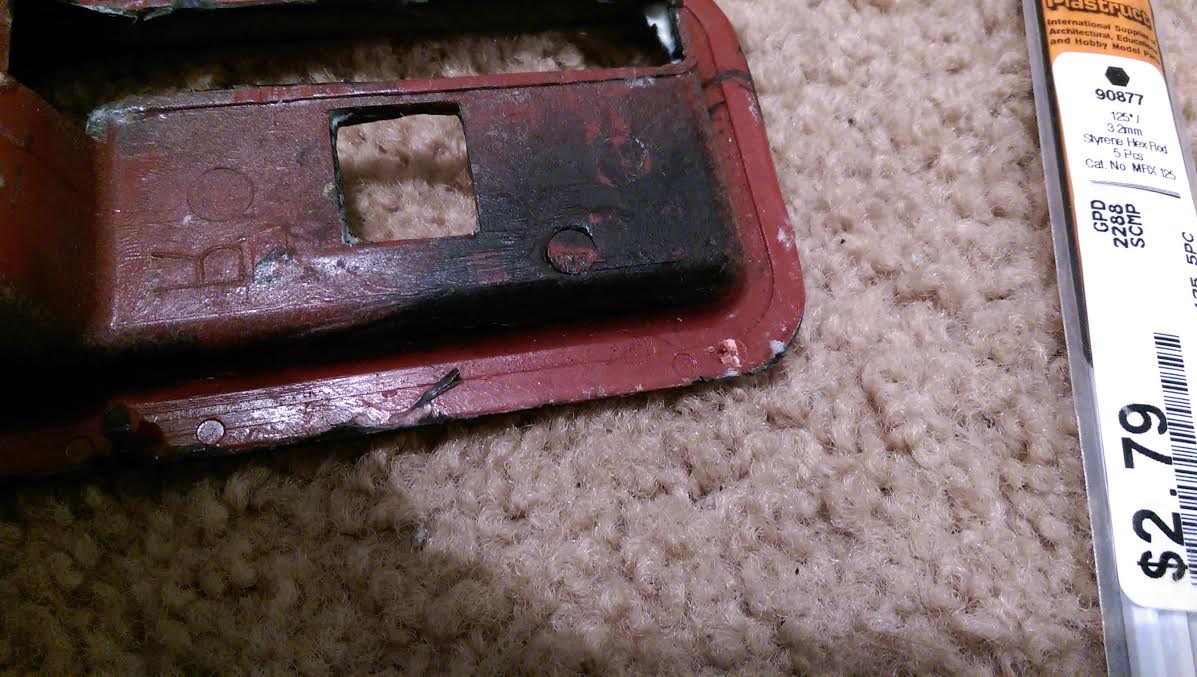
The glue is actually a solvent, Instead of sticking the pieces together it actually "welds" them. It dissolves the plastic into a paste, when it evaporates out you are left with a rigid plastic once again. If you have a crack in a plastic, or a chip, you can dissolve some shavings with the solvent and use it as a filler, just do not go on too thick or the solvent cannot dissipate and it will look horrible. I use to use acetone for attaching a lot of plastics, it works extremely well for acrylic, but doesn't seem to hold as well on abs and other automotive plastics (for me). This particular solvent is mostly MEK based, which you could buy at most home improvement stores, MEKP is used as a catalyst for lower end fiber glass resins and I have heard that it works to weld plastics, but I have never tried it myself.
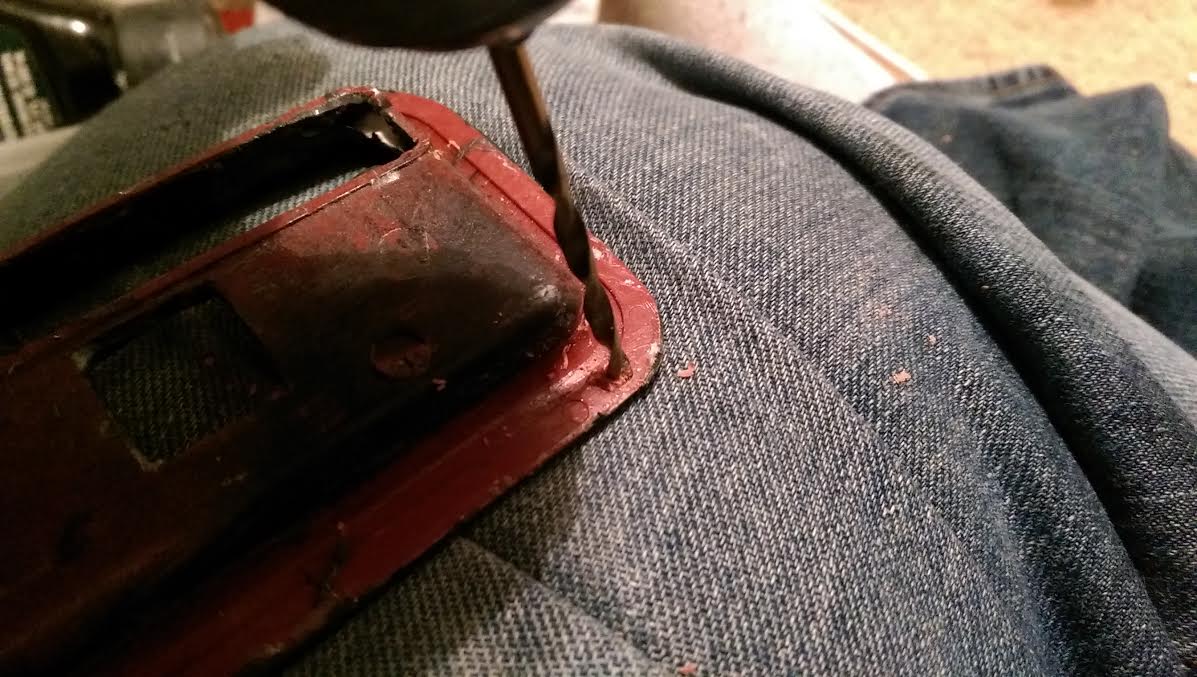
Take the piece and locate where the peg was, then drill this area out
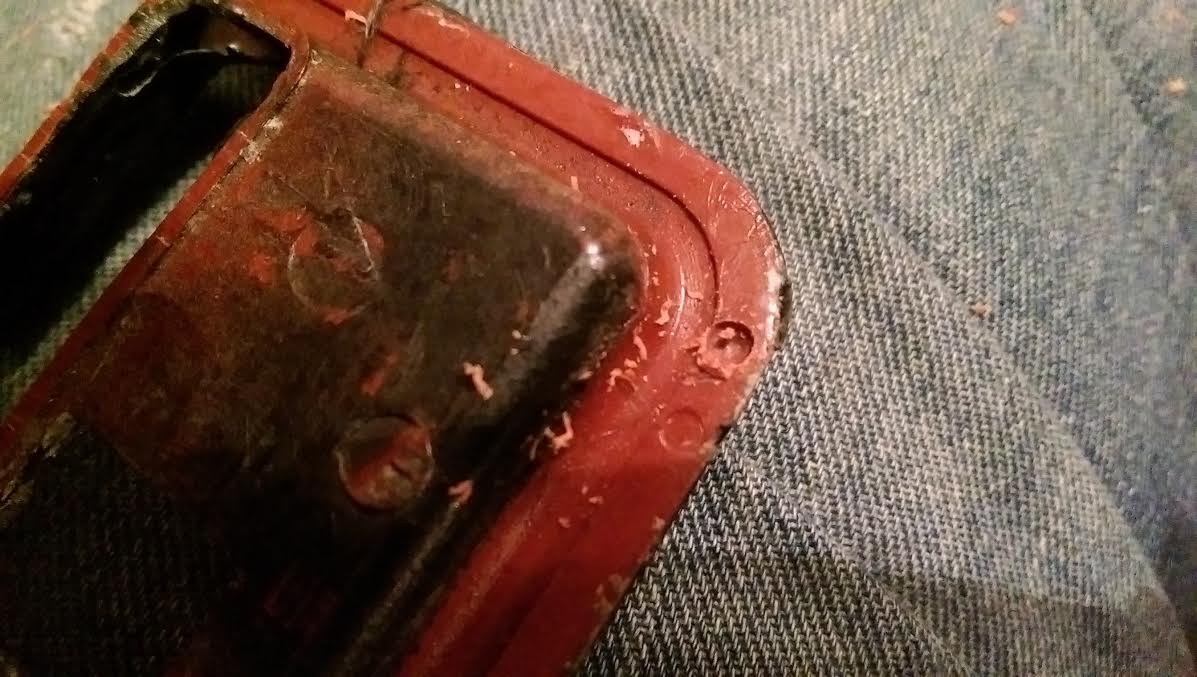
Spot foundBe very careful to not go completely through the piece, we are just trying to increase the surface area that is being contacted as well as aid in holding the peg in place long enough to stick.You should end up with a shallow divot
Now add a large drop of solvent into this hole and let set for a few seconds
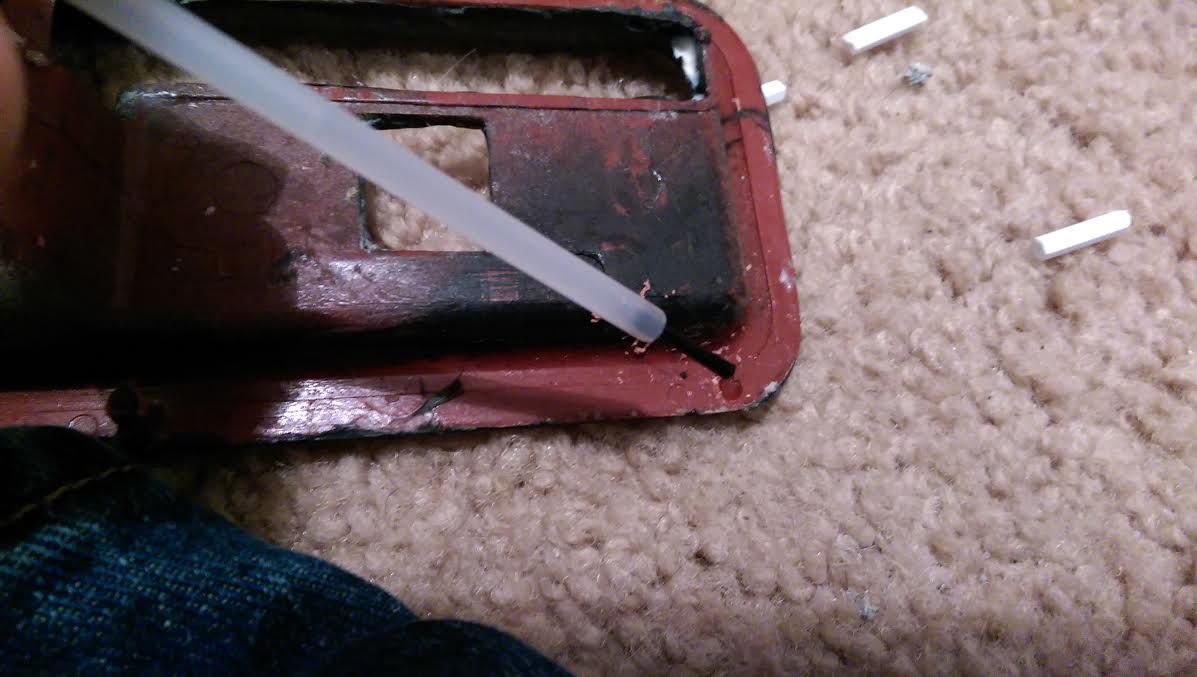
While the solvent is setting, go ahead and cut a piece of the rod off, longer is better than shorter, usually I start with a little under a 1/4"
Now shove the peg into the divot, twist it so that it will conform to the shape of the divot then hold it in place a good twenty or so seconds, until you can let go and it does not move:
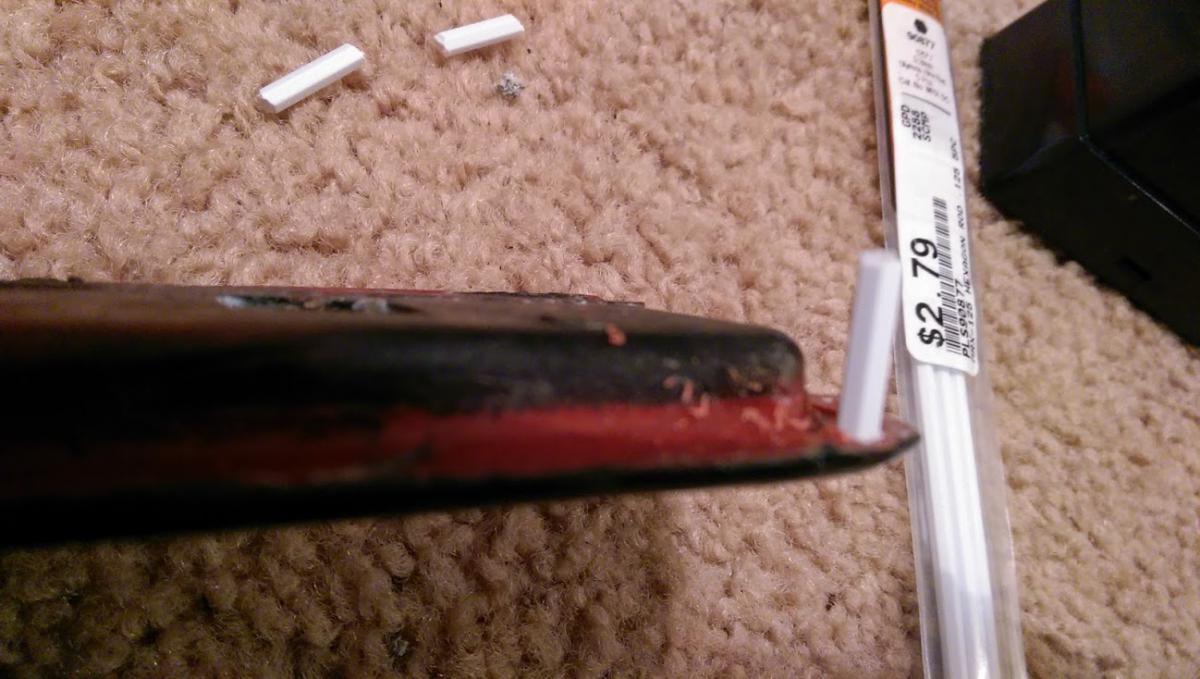
Now add some more solvent around the base of the peg, I like to push shavings around the base to build it up a little and hopefully make it a little stronger:
That's one down, now go ahead and do the rest. I sometimes take my chances with the original pegs if they were not broken completely off, but it is probably best to go ahead and replace them all. I let the solvent do it's magic for a little bit then I do a test fit to make sure that the pegs line up with the holes on the part, as long as you do not wait too long (time varies with conditions), you can still move them around a little. Then I let them set overnight..because that's what the bottle says to do.
.
.
.
.
.
Next day:
The best part, putting it all back together. Take the pieces you have added pegs to and put them in their appropriate places and trim the pegs down a little (if needed):
]
Now take a soldering iron, wood burning tool, hot piece of metal, whatever works and melt the pegs to the part. I use a small butane torch and spoon....which is probably not the most innocent looking way of doing this....I heat the spoon up then press it to the peg until it melts flat. Be careful when melting the pegs, they can catch fire, the fabric is flammable as well.
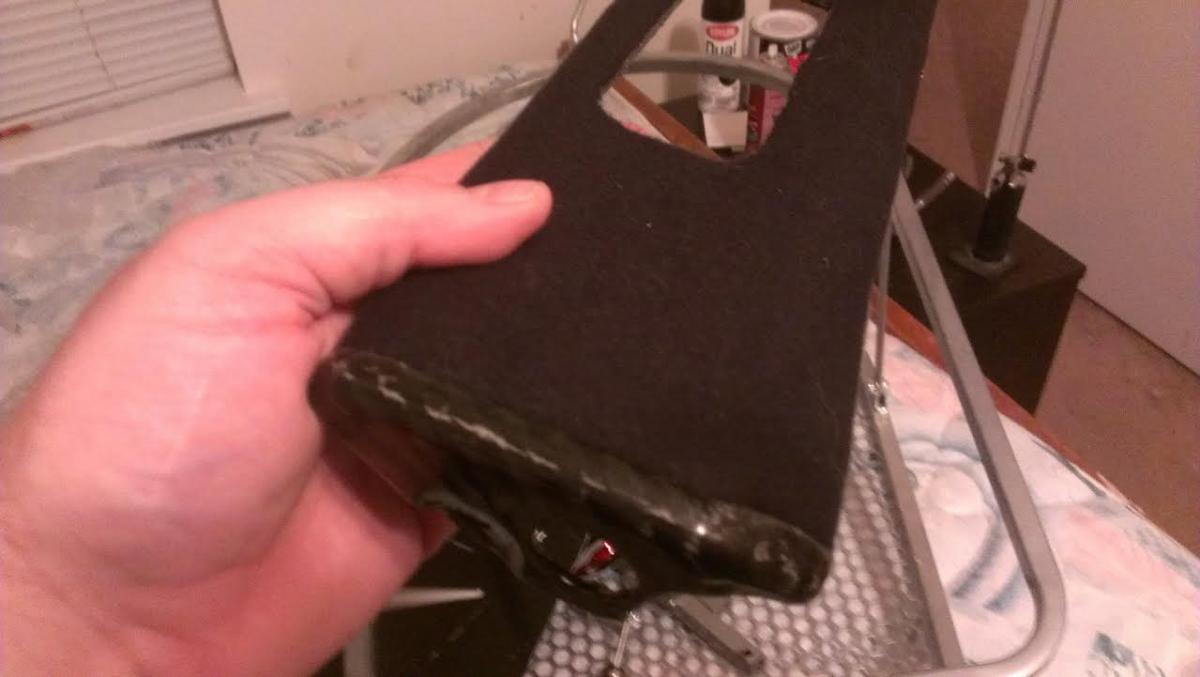
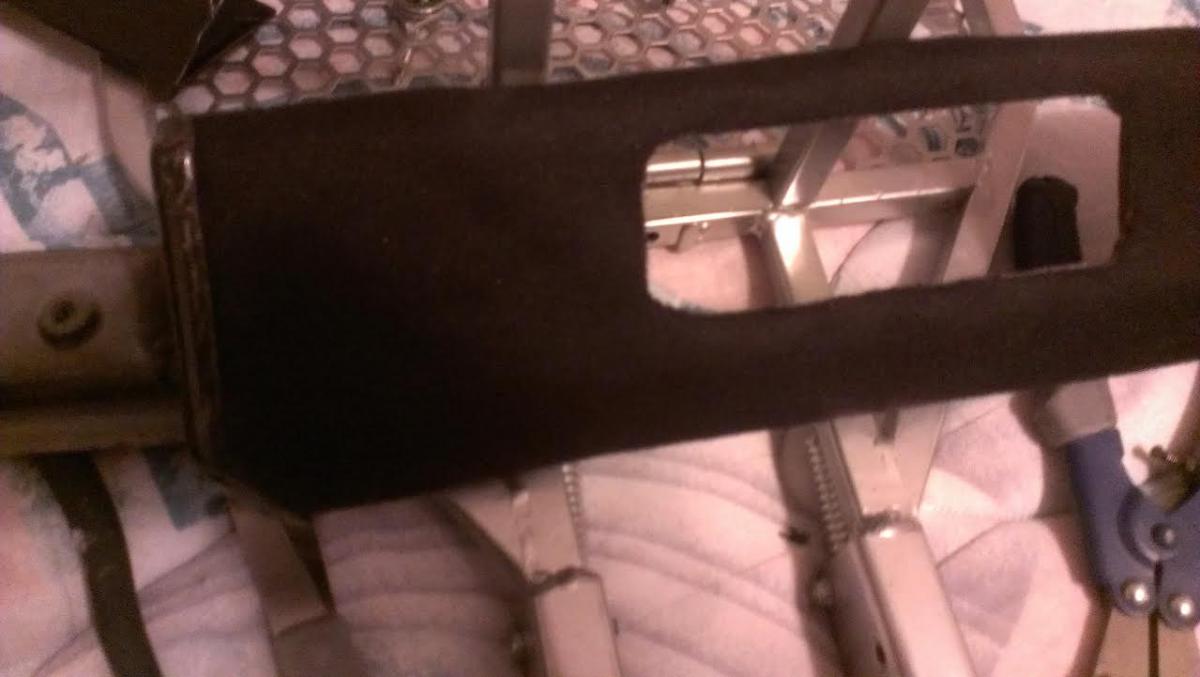
Once done it should look like this (or hopefully better):
Continue for all the pieces you removed, also give a little strength check to make sure everything is holding firm. As long as everything is holding well and it looks good, you are done, now all that's left is installing it back into your car.
I hope this helps some one. In the mean time I'm going to continue with my interior and slowly customizing everything.
-
Also wanted to add: If anyone is interested in the Speaker LED headlights, go to EADoffroad.com, best price anywhere. Contact them and ask for a discount code, don't get me wrong, they are very expensive...very, but I like them. They also added the fog lights at my request, so check those out too if you are interested.
-
OK, been a while since I have updated this thread. I have been using the Z as a daily driver for a while now, but lately it seems the timing is pretty bad off. Ive been too busy to get a light and check (work, travel, excuses excuses), but I got pretty scared once I found that cylinder 6 had not been firing at all (or very little). Looking at the rotor and cap, looks like the spark is happening just when the rotor is close enough to conduct, really black with build up on the very tip of the corner of the rotor. It does't matter now, Im going to be going with yukon coils in wasted spark configuration using the optical wheel from diyautotune. Since I have no idea whatsoever of what I am doing...I will be doing a lot of reading and research. It doesn't seem too bad.
Update on the other crap:
*Seats-have not been installed, removing rust took priority, almost done rustproofing (por15)
*Front air dam-made a positive with foam using the original air dam, and went ahead and made a carbon fiber air dam, test fit and found out that the foam had shrunk too much=waste of perfectly good carbon fiber.
*I will be rebuilding a subframe off the car then installing it (brakes, pads, cables, bushings, bearings etc)
The "custom" wiring job that was done for the megasquirt is absolutely terrible, I have had way too many issues with the vehicle due to faulty wiring alone, so I went crazy: I removed the entire dash, removed all of the stock AC stuff, ripped out any harness that did not keep the car from running, mounted in a vintage air air-handler and will be in the process of running wires correctly and relocating the battery. I bought a headlight harness from blackdragon, I will be removing the HID setup I have and replacing the headlights with LEDs (JW Speaker) and retrofitting the fiberglass airdam the car came with to accept LED fog lights. Ill post pictures of my progress and will keep this thread alive, especially now since I bought a brand new Nissan Frontier (Nissan baby) I can have the car down as long as I need.
-
Will do.
-
Sorry for reviving an old thread, but I'm having the exact same problem, just wanting to see what you did to fix it. 83 280zxt, Im starting to think it is my distributor, just havent checked it yet.
-
I am also adding daytime running lights to the car. I miss having fog lights and since I plan on doing leds for headlights and tail lights, I am installing phillips 8s in to the front air dam. I'm glad I started, I found that my air dam had cracked all the way through:
So I peeled off the old fiber glass someone had attempted (very very poorly) to fix the air dam with and added a layer of glass covered in West systems GFlex on the back side, then riveted a piece of aluminum in. Then proceeded to fit test the lights and cut out slots:
I decided to use foam to make "inserts' for the lights, that way they can kind of conform to some shape. The air dam doesnt look too great with flat lights.
That was after some serious shaping with 50 grit sand paper..what a pita. I added some colloidal silica to my epoxy until it was damn near peanut butter viscosity then filled in all the large divets, before it cured I put another coat on (I could not find my super light fiberglass cloth, otherwise I would have used that) then waited a day and pulled the form off:
I shaped it a little more, then started with the carbon (starting to see a theme yet?)
and began the process of doing wet layup. I was going to vacuum bag it, but the 3lb foam cant handle the pressure. Most of my other parts vacuumed quite well, it's just the slot for the light bends in too far. Ill post more once Im done. Im going to finish up refiberglassing the air dam and correctly fixing the crack while working on the light inserts.
-
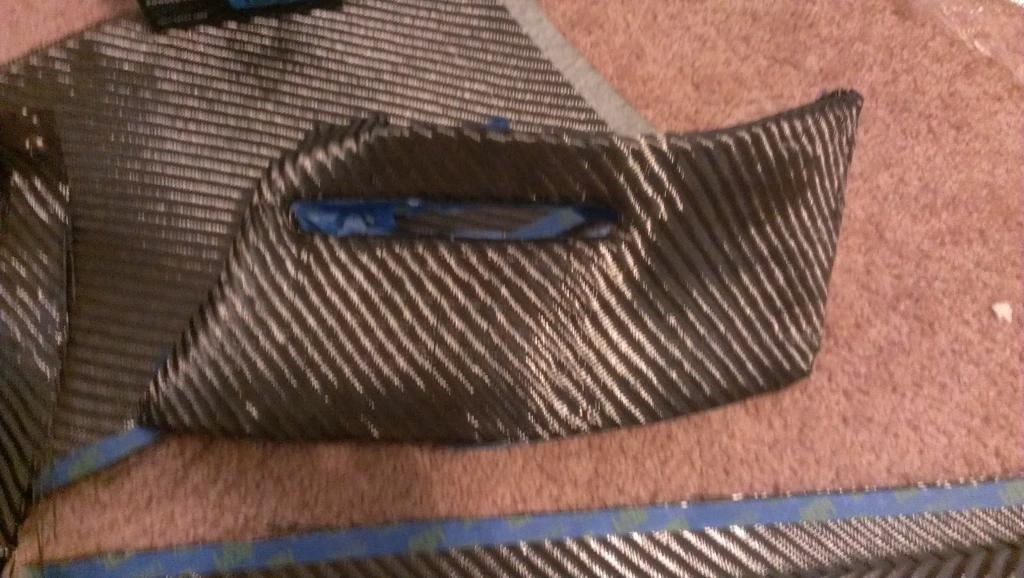
Mainly updating this for my benefit, so I can look back and remember how much effort I've put in to this. Did some work to my T-top pieces. They were worn and cracked and had ugly vinyl on them, so I reupholstered them and did a little CF magic.
Here is the before picture (with a piece I started above it):
After:
I like it, and that's all that matters, I guess.
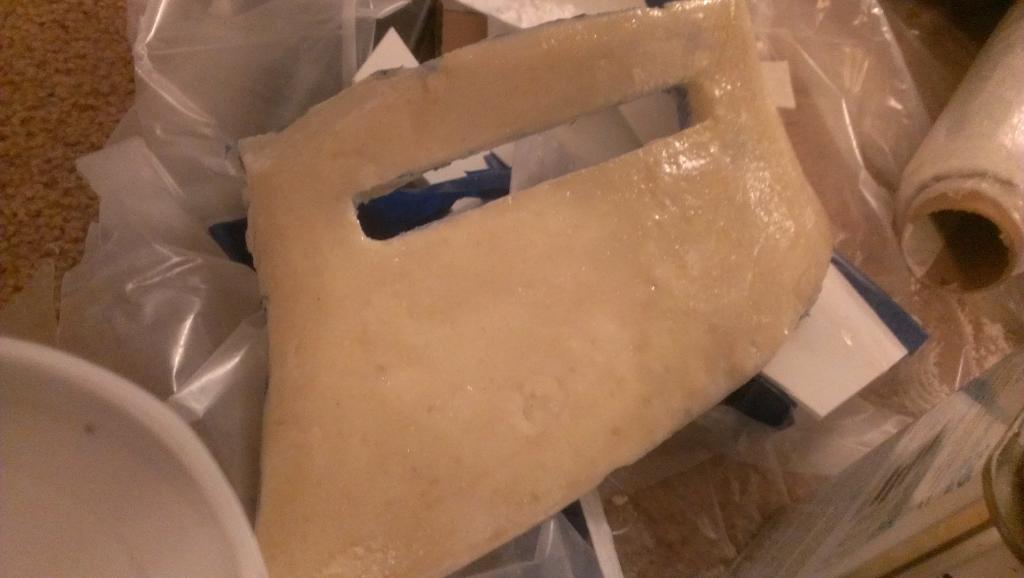
I had made inserts to go in the handle/latch part, but they did not fit right, so I am making them over.
-
Well, the differential is crazy loud, Im going to try a different weight oil, see if that helps, if not, Im going to try and find a 3.9 R200 for cheap, although I am getting better gas mileage with the 3.54 (I think, either that, or my gas gauge stopped working). Figured everyone likes pictures, so here are a few things I have been up to this rainy week.
Finishing up the gauge pillar so I can finally see my AFR and boost again:
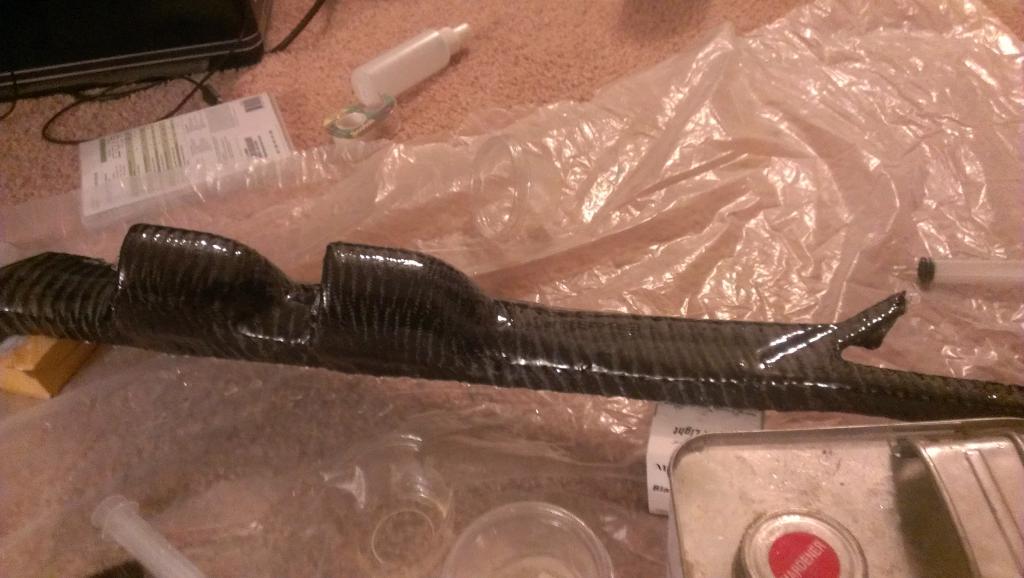
Ive also been making a plug so that I can make a carbon fiber heat shield...just something to do. I have some 12K carbon I bought a while back, I really can't think of anything else to make with it. I also have a very large sleeve that I will most likely make in to a custom coolant reservoir.
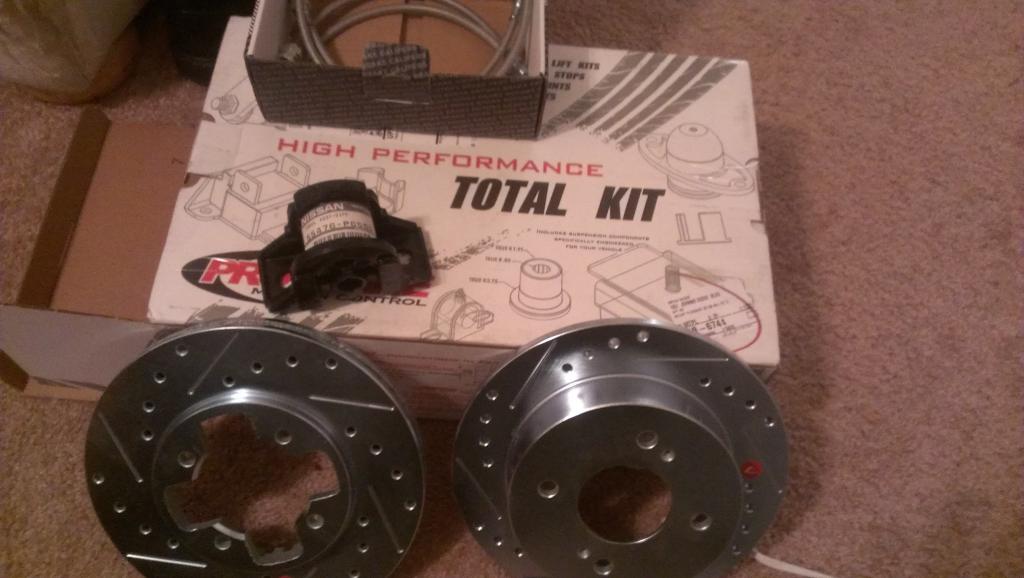
And here is all the crap I bought to "rebuild the rear end...and front eventually:
Im pretty excited about how it will look/ride when I am done. I cannot believe how expensive that dang differential insulator is. The brake lines werent too bad, nor was the prothane kit. I spoke to Techno Toy Tuning and they said that they should be making a trailing arm kit for the S130 in the next few months..which would be AWESOME! I am definitely going to be using their coil over conversion kit for the front (already have coil overs in the rear), tension rods as well. As far as brakes go, I don't do autocross, so Im sticking with the drill-slotted rotors and better pads for my stock brakes.
-
Well, with or without luck wishes, I got the "new" differential in and it seems to be fine. So far I have driven to and from work with no problems. At a few points though my release bearing began squealing loudly, this worries me, I just got it installed, Ill never use that shop again (all four bolts on my drive shaft were not even hand tight, no reverse light, didnt even hook the ground cable up to the starter) Im hoping they didnt screw something up. I'm picking up an entire subframe this weekend and Im going to restore it off the car (bearings, ujoints, bushings) and slap that beast in. Figured Ill do brake lines as well.
-
Also, Im going to do a search, I know I saw somewhere someone did a write up about it, but if anyone has any tips on installing a bushing kit (energy suspension, etc) I'm all ears. It should be arriving in the mail soon.
-
Got the car back! WOOHOO!.......but..... Well, as I was enjoying the way the T5 shifts with my brand new clutch and flywheel, I noticed a hum coming from the rear of the car...today, that hum has become a roar. Either the wheel bearing is out or it is my differential. I am sure the differential is bad, when I put it in reverse and back up there is this extremely loud knocking noise, more of a POP POP POP. I also believe all the jerkyness I feel while driving isnt the engine misfiring, it's the differential binding. I went ahead and got another differential, it's a 3.54 instead of 3.9 R200, so I am not sure how much different it will be, I was really enjoying the 3.9. Ill slap it on after work tomorrow, hopefully that fixes it, if it is the wheel bearing, Im going to have to let someone else handle that whenever they come in (already ordered them in anticipation). Wish me luck.
-
You have to email him, evidently he isnt having any luck with the site
-
Well, getting a shop to put the transmission on, got a new clutch to put on it as well. Hopefully she will be up and going in the next few days and I can start the work I want to do to her.
-
So, I am hoping I have found the cause. I have the car parked in a more well lit location, while I was checking under the hood and admiring the rats nest of wires and hoses that is my engine, I noticed that the daggum transmission is not bolted flush against the engine. It looks like it is a good 1/2 inch or so away. Would that be the cause of my issues? the trans is completely flush on the bottom. I know that the bolt on top is quite tight.....didnt realize it would be easier to get to from the top. Is there a peg that sticks out somewhere that may be misaligned? I am going to go at it again monday when I get off work, I am just hoping someone with more transmission experience can help me. I have friends with plenty of tranny experience...but that's only because they did a tour in Guam, so their input is quite useless, entertaining, but useless. Having been in the Navy myself, I should have known better.
-
So, I have tried searching and cannot seem to find someone with the same issue as I am having, so, please bare with me. Here we go:
My 280zx has a turbo engine in it that the previous owner built up. He never swapped out the NA 5 speed, when I got it he said the release bearing was going. A week or so ago the tranny started making terrible noises like a thumping and it started making a high pitch screech....well, figured it was time to put her down. I found a T5 in a junk yard, had them pull it and I put it on.
The shifter went in to every gear just fine when off the car, once installed I checked, still seemed to shift fine. I installed the drive shaft (lots of gap from yoke to back of tranny, but I will worry about that later) and cranked her up. Car idled like garbage...which is normal, so that was good, I put it in first and it shifted smooth and started driving....then I tried second, no go. I could not shift back in to first either, after several attempts I finally got it back in first. I parked the car, went home in a fit of rage and had terrible sleep.
So... here is one thing I thought of, I used the NA slave cylinder, I could not see a difference between the two, is there? could this be the issue? The clutch felt like it was going in, but, I dont know. If you are wondering why I dont just go out and measure the pistons and etc, its because the lift I am using is at my work place, which is thirty miles from my home, I am working 12hour night shift and am working on the car when I get off. If no one responds, Ill check the piston in the morning when I get off. I would rather it be a cylinder issue than a transmission issue.
-
Well, it has been rough, almost completely done with the transmission swap, thanks to a couple friends. It would have been a lot easier had I been able to remove the exhaust, but the only place to unbolt it is off the turbo and the bolts are completely rusted on. I have to swap the flange off the diff from the junk yard to fit the one already on my car, buy the rear oil seal for the tranny, install the drive shaft, fill her up with fluid, install the shifter, charge the dang battery and take her out for a spin. I will post pics when I am done, unfortunately I am not allowed to take photos where I am doing the work at. After the transmission, I will continue with the rust, got some POR15 in the mail, so Im good to go.
-
Wait....shirt?! All I got was a sticker!....guess Ill go elsewhere for my boost gauge. J/K
-
ihiryu:
I am in need of one Speedhut Quad gauge (Standard American) 3 3/8 inch in diameter for my 1971 Datsun 240Z with SBC engine. Do you wait until there are several folks that want to order gauges from you such that a sufficient quantity is order by yourself at one time? Or can you order one at a time? Please advise and quote your price on this item. As far as payment is concerned, do you want full payment up front to yourself prior to ordering the gauge? Please advise. Thanks.
If you PM him with what you need he can help you, he is real easy to deal with. I asked him for quotes on individual gauges and he was able to give me a helluva deal on a set. I got fuel pressure/oil pressue/ water temp/ fuel level/volts at the same time for a great deal. Worth it. I didnt have to wait for others to make an order.
-
Well, I am never using anything other than NGK spark plugs, car was running like garbage, went on rockauto and bought the last 8 brp 7es11s I saw (98cents a piece, woohoo!) and some NGK wires, put them on and drove a little bit, runs a lot better....transmission did not seem to enjoy it too much. I found that there is still fluid in the trans, it's just really loud, plus something is loose somewhere and the squeeling sounds like it's coming from the drive shaft or maybe the speedo cable. It doesnt matter, that tranny is gone come monday.
-
They are different, but from what I have read the non turbo clutch flywheel will fit the t5, but not vice versa. The na is a 225 vs a 240 flywheel. If I'm wrong I'll definitely be pissed. Can't afford a clutch and flywheel after getting the trans.
-
Im pretty sure the clutch/flywheel I have will work. I just have to use the right release bearing. The clutch is a racing clutch (pita) and a lightened flywheel, both have maybe 5000 on them. I have a new release bearing for it.
-
I got the entire drive train off the car thankfully. Thank you though.
-
Well, I just paid for a T5 with drive shaft and dif. Waiting on the parts place to call me so I can pick it up. I will be installing it all next week...or maybe the week after. It's gonna be a nightmare, Im sure. Good thing is I get to buy a few new toys, like a short shifter. Saw on Zdriver that Bleach was able to use a cheap one off ebay with really good results. Im all about cheap, as long as it works. I doubt anyone will pull up my shift boot to point and laugh at me.
On another note, I was able to completely rebuild my idler pulley for my power steering. I found it in the hatch badly rusted. I cleaned it up real well and bought new nut/washer/bolt and a bearing from "bearing distributors inc", who, by the way, are the cheapest and best place to get bearings if you find you need any, it cost me 5.50 for a new one. So, after I put the tranny in Im going to see about working the intercooler piping so that I can have power steering again and I may swap out the radiator so I can close the dang hood.


Transmission Issues
in S130 Series - 280ZX
Posted
Waay old, I know, just wanted to update the thread in case someone comes across it in the future and cares. Transmission is good, output shaft is good, pretty much everything was good, the only issue was the clutch. I had the clutch replaced and transmission slapped back on, no issues, been driven quite a bit since. The peg was longer than the hole was deep, not sure why, that was the first time I had heard of that as an issue. The peg was ground down some and it lined up just fine.