Dingo
-
Posts
64 -
Joined
-
Last visited
-
Days Won
1
Content Type
Profiles
Forums
Blogs
Events
Gallery
Downloads
Store
Everything posted by Dingo
-
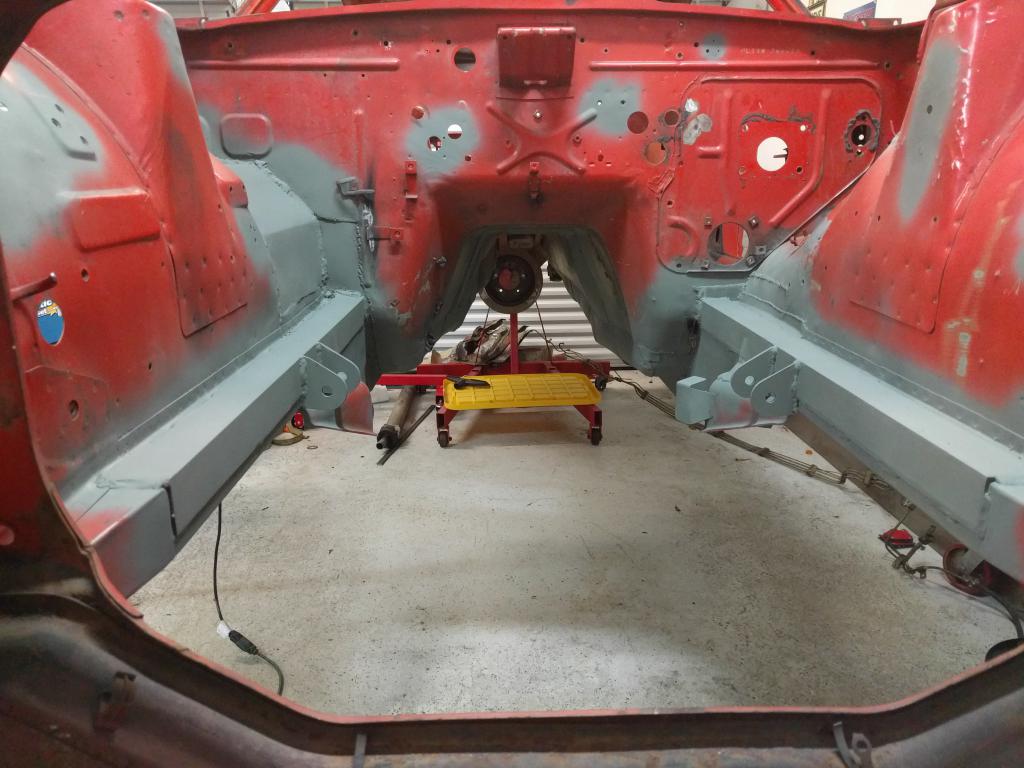
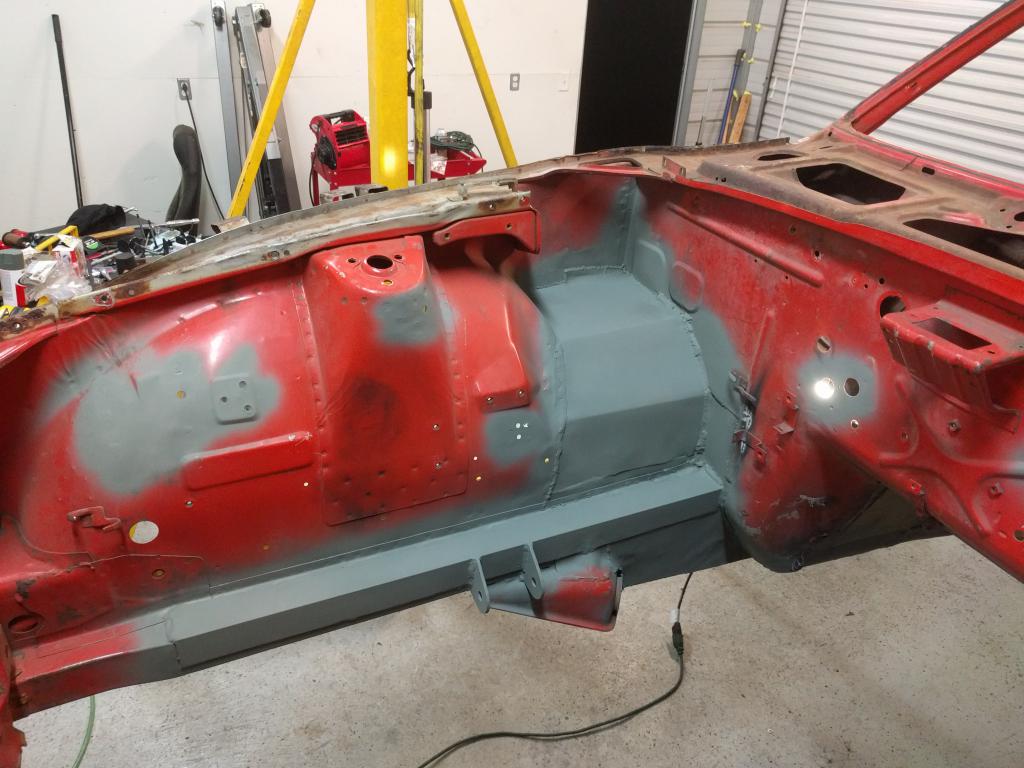
Update-o-rama time! I've done a few things since posting the last pics, so i'll break it down post by post. Started to get some surface rust I wasn't too happy about on the exposed metal, so I hit it with some rattle can self etching primer. I'll figure out something better when it comes time to really paint everything and get it cleaned up.

-
Do you have a gallery or build thread somewhere? If you have some pics i'd like to see what you're up to with your car!
-
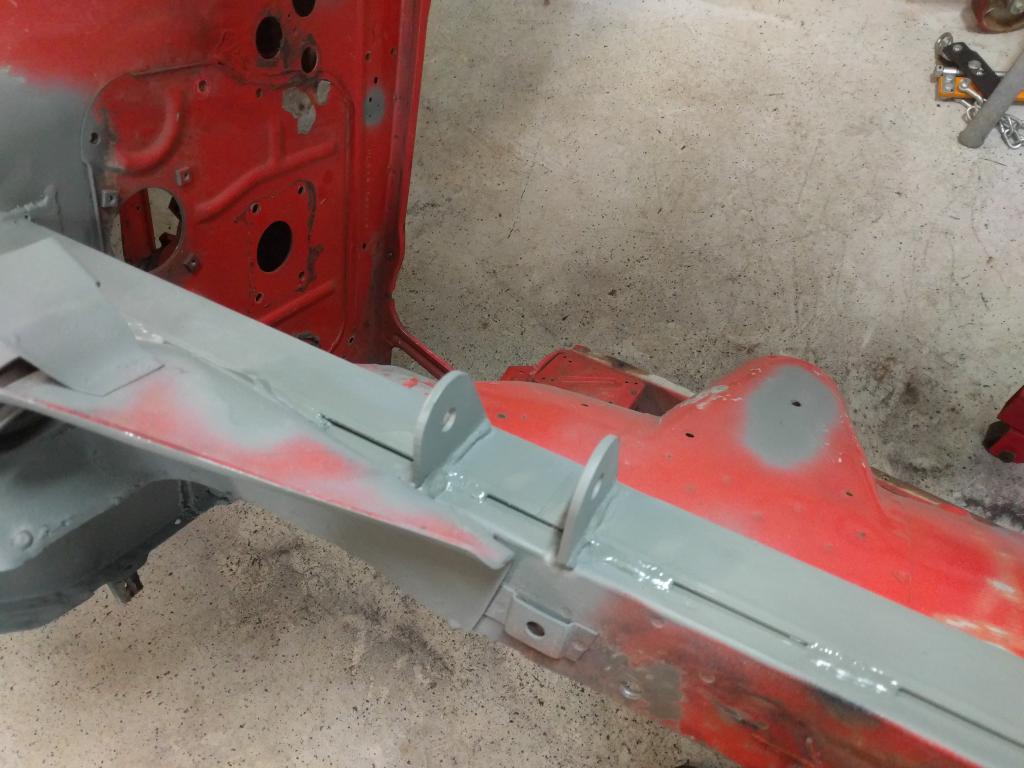
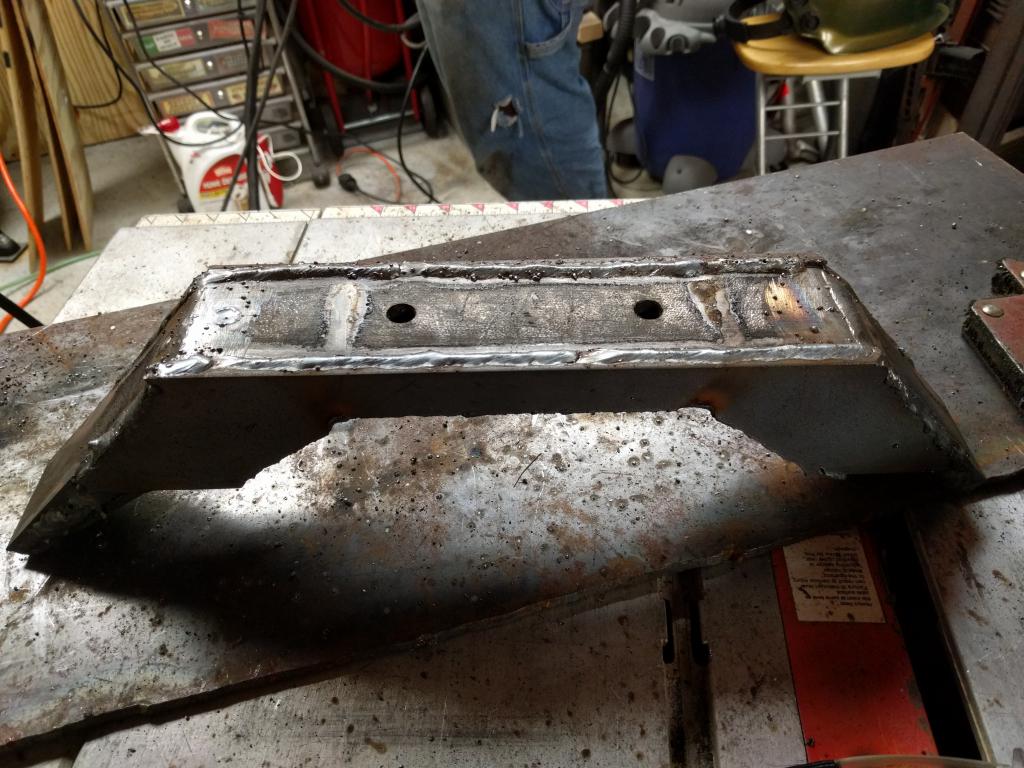
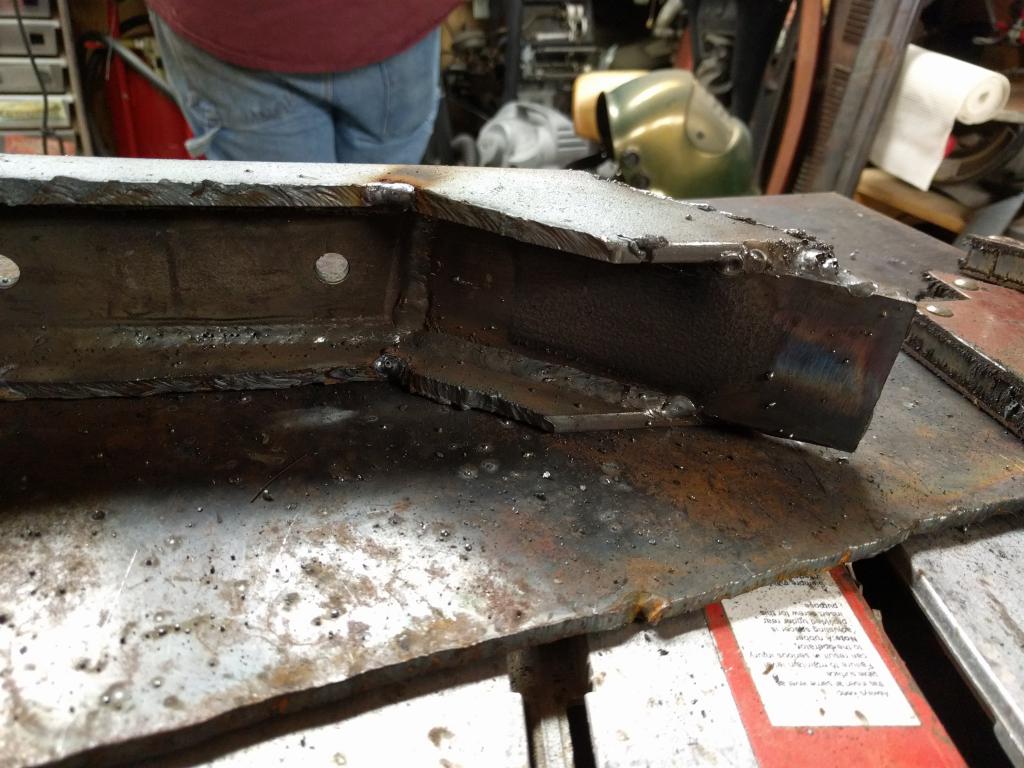
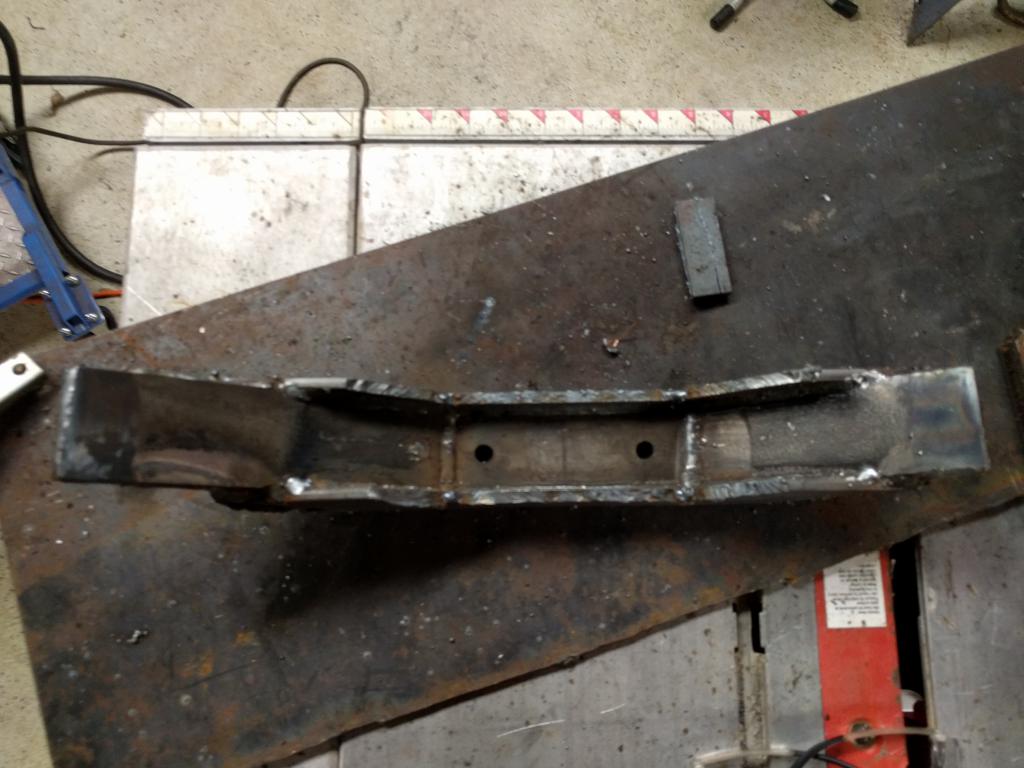
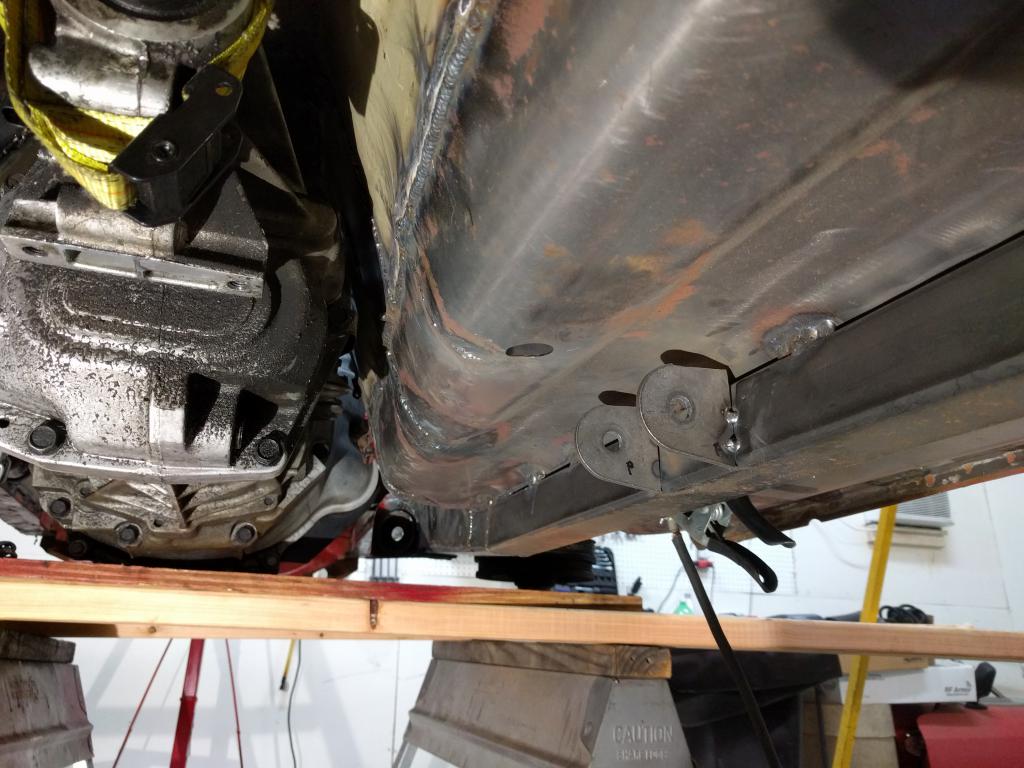
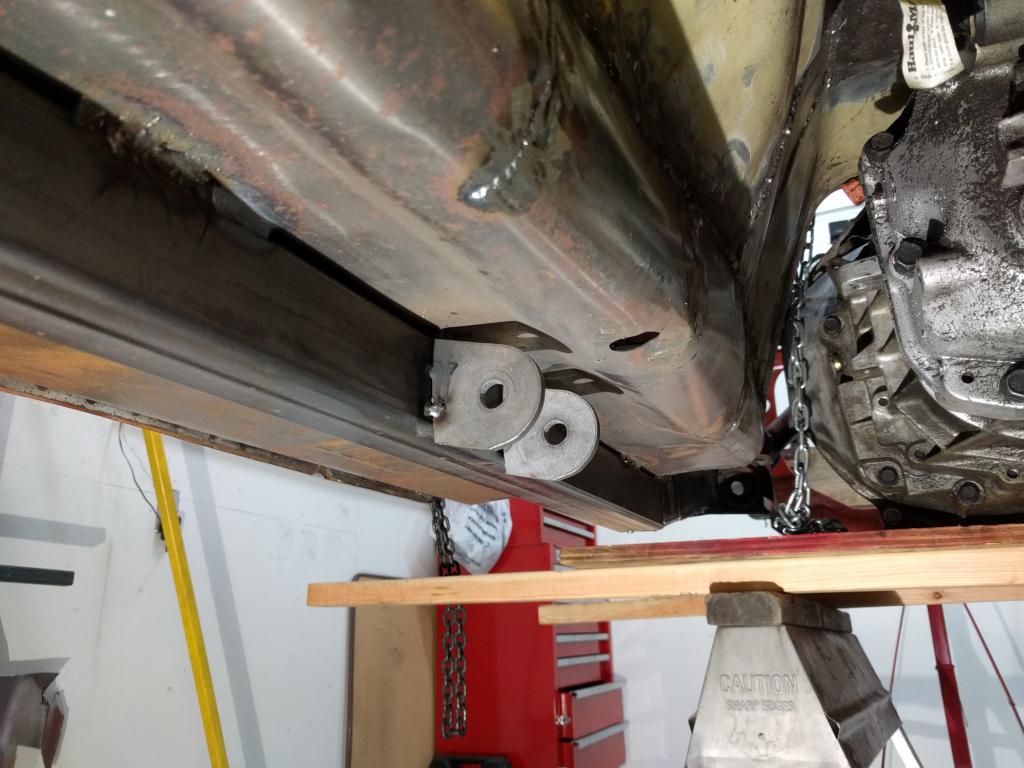
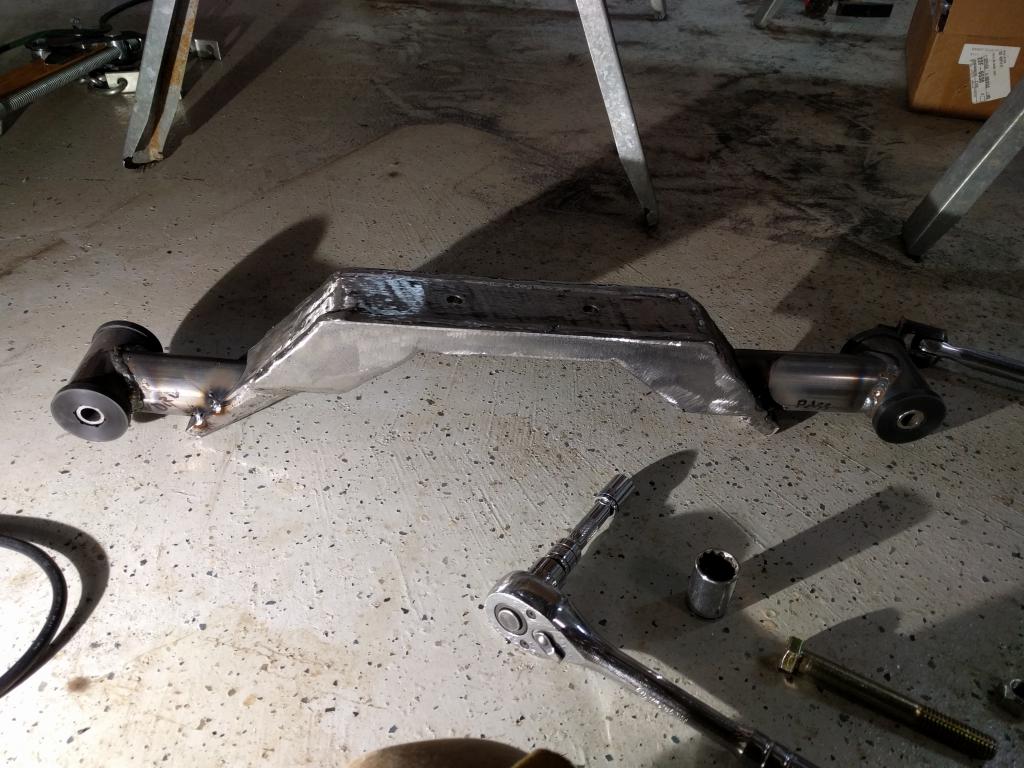
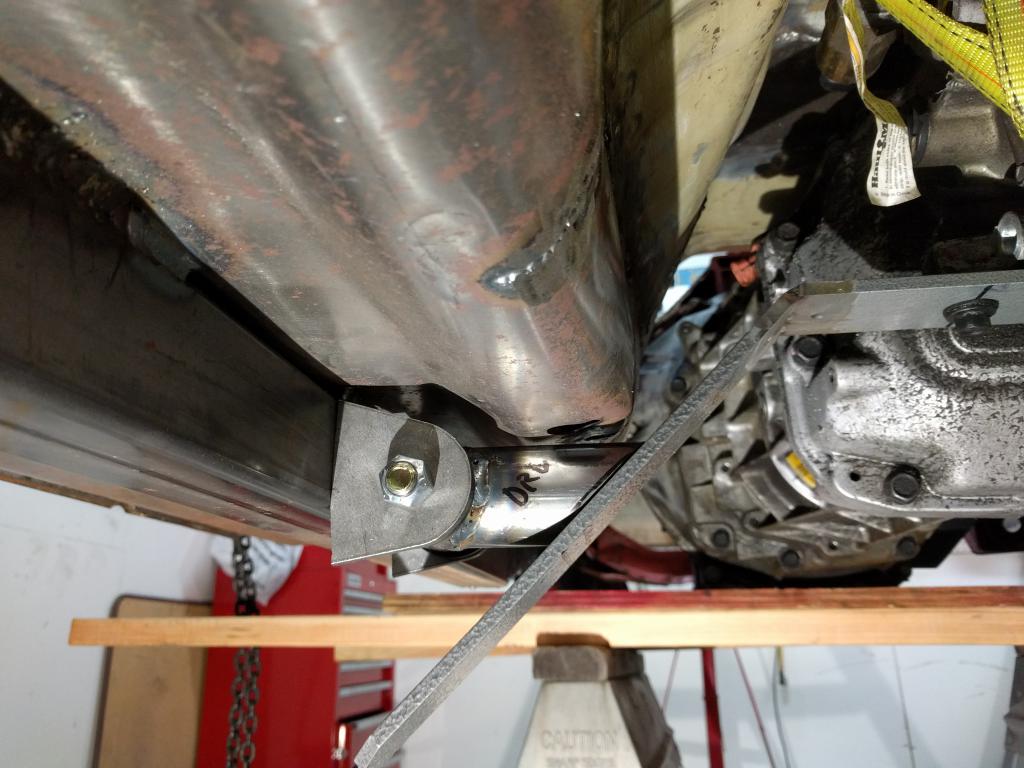
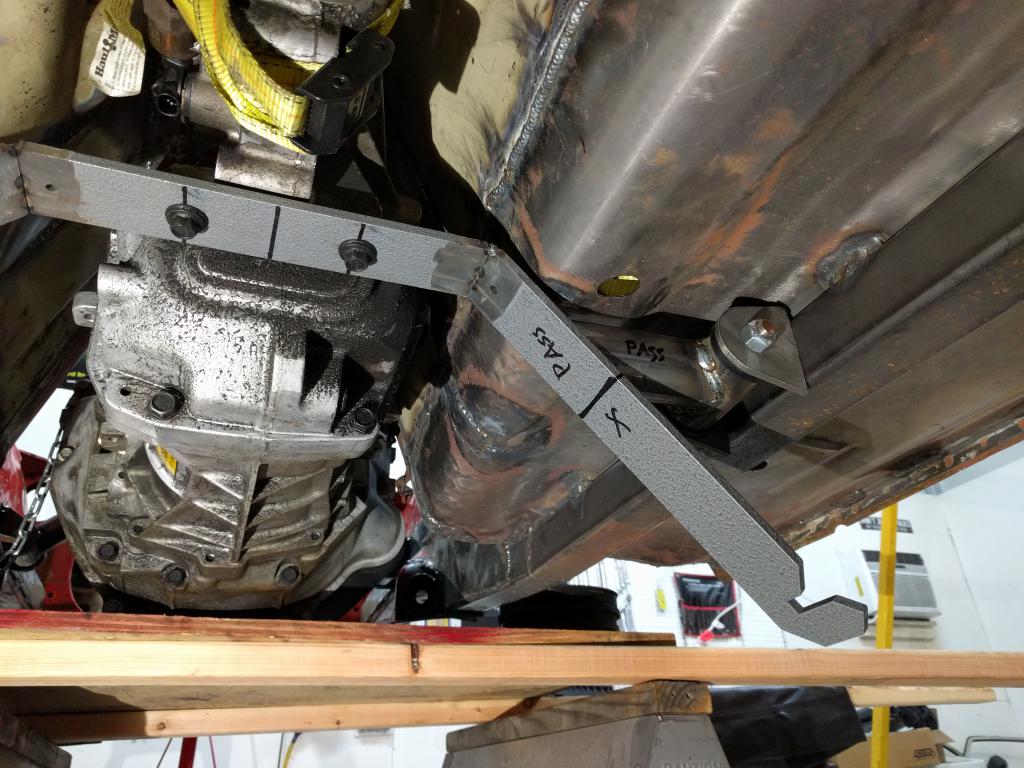
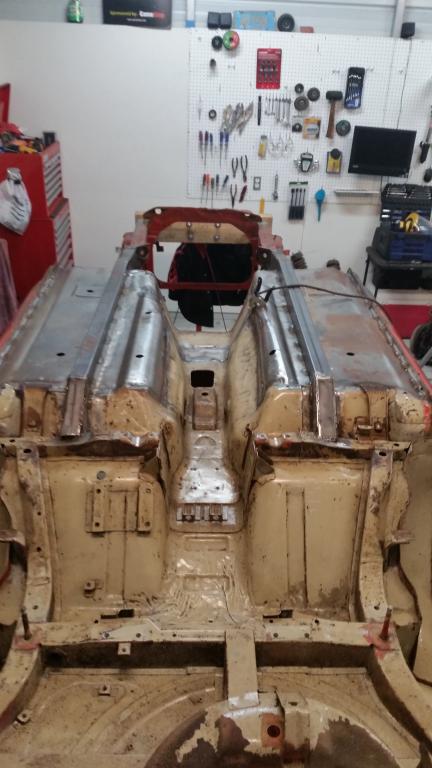
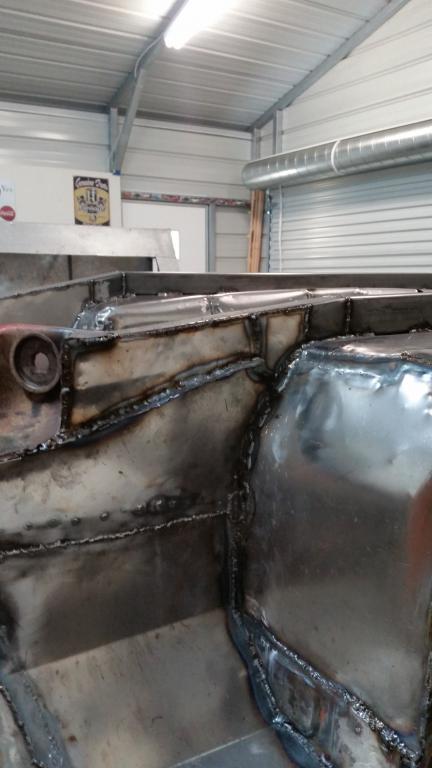
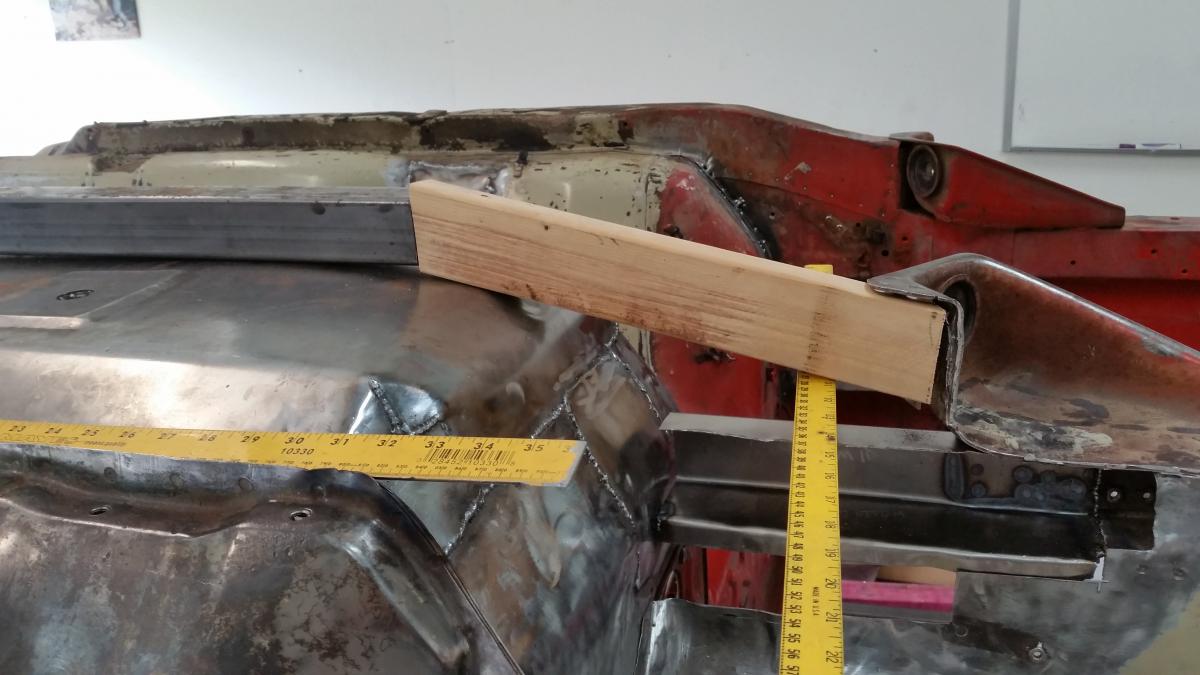
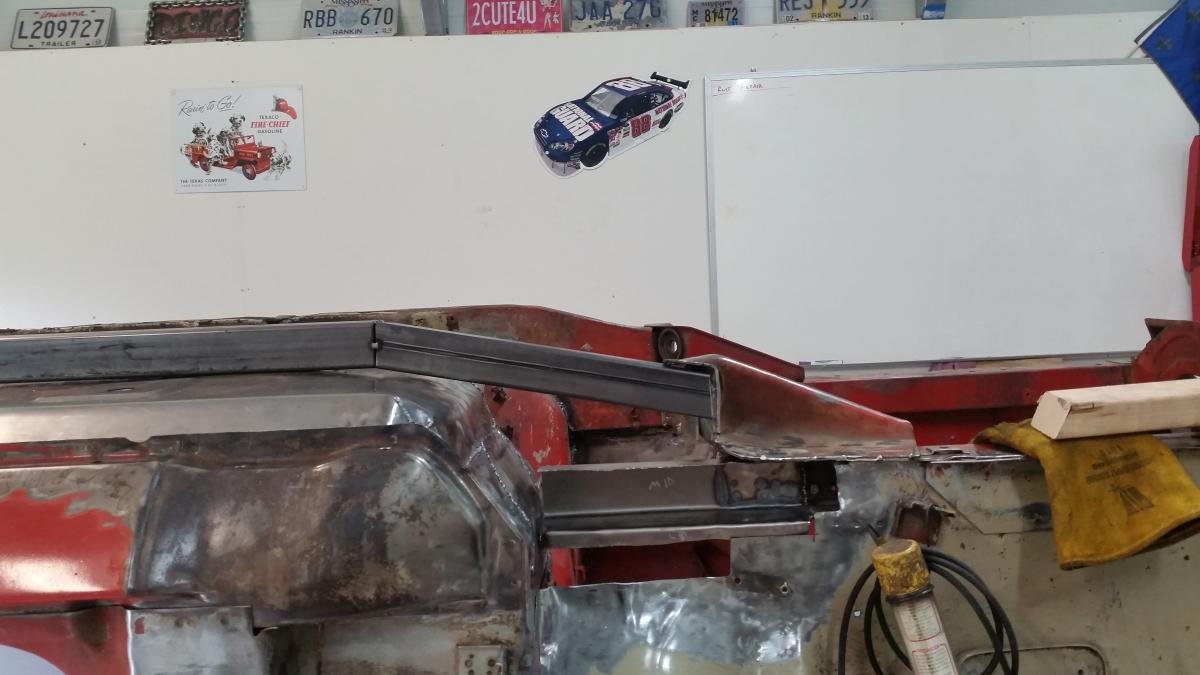
I'm still working on the transmission cross member, and I might have gone overboard with it... I mentioned earlier on that my frame rails weren't level to each other, and now trying to get the transmission in place it really shows. Each side is a different length to account for the difference in height, and how the floor pan replacement's went in (the humps). Last picture is the cross member tacked together. I am probably going to trim some more of the side "skirts" that we put on the sides to allow for my exhaust tubing room.
-
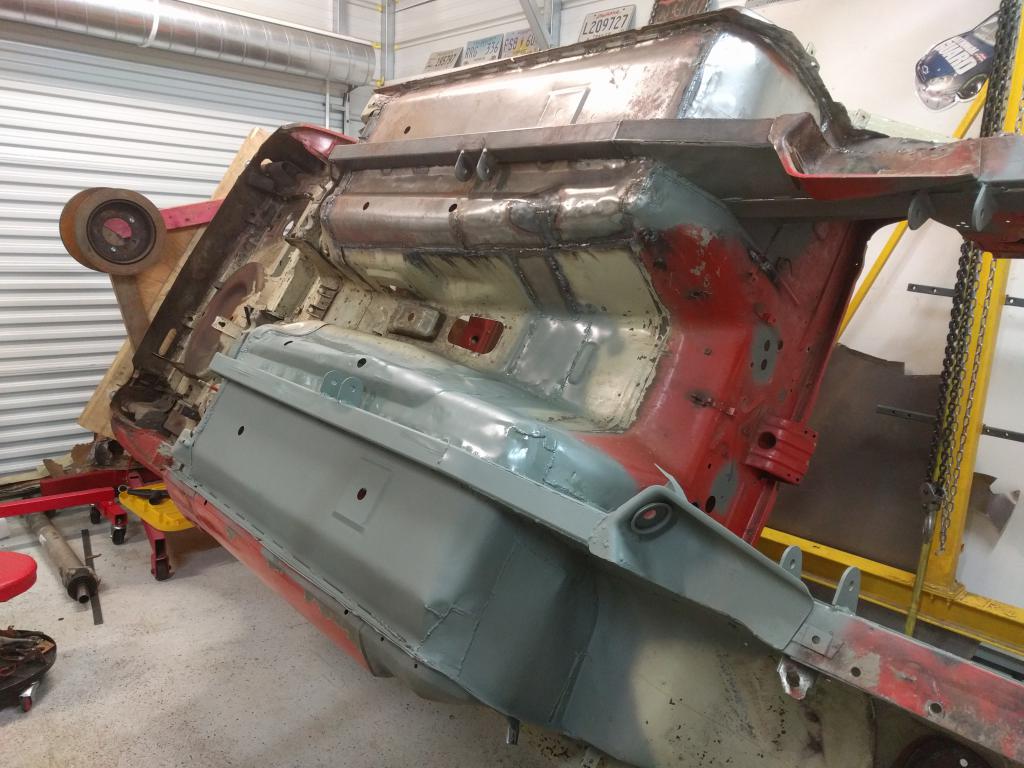
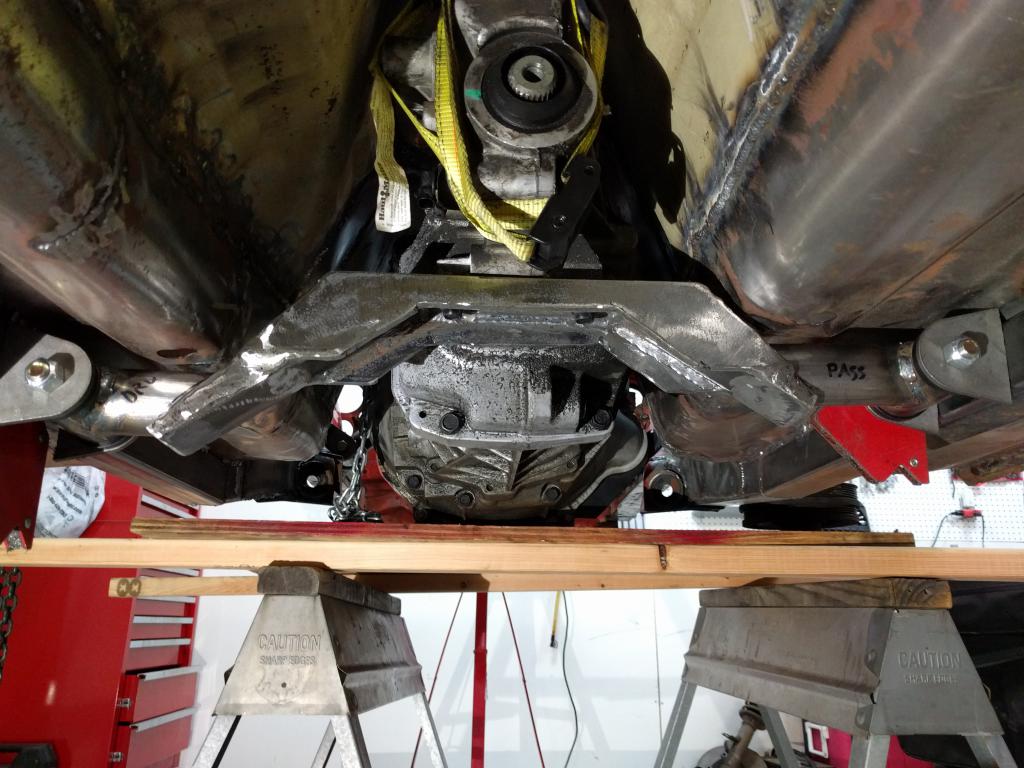
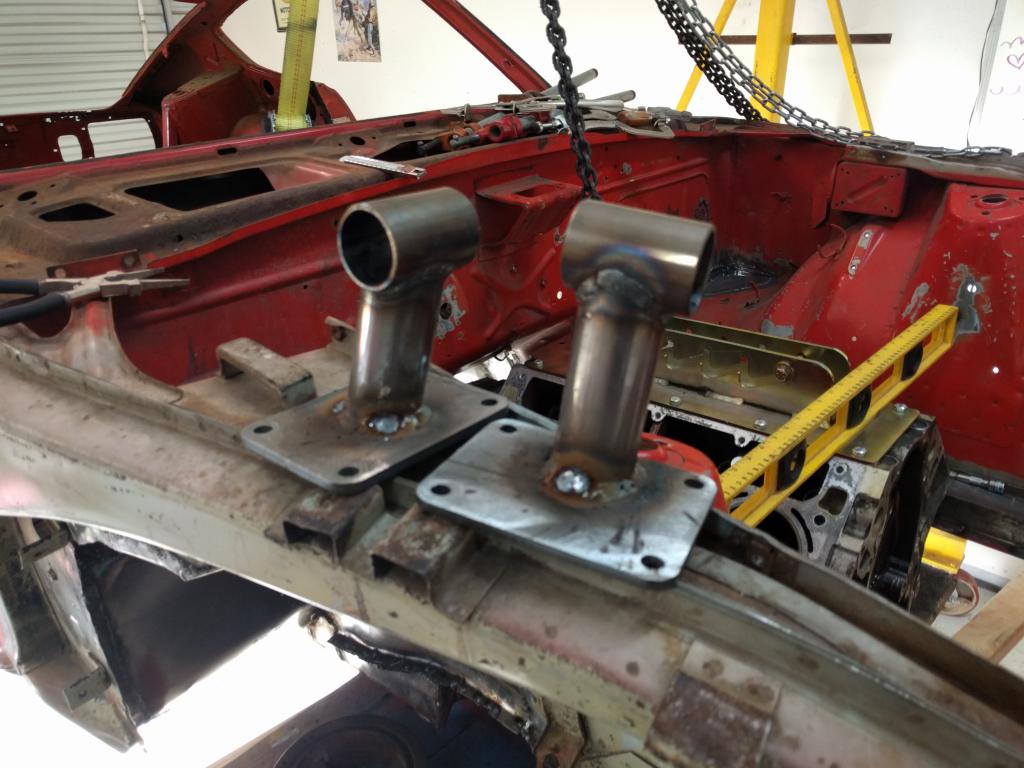
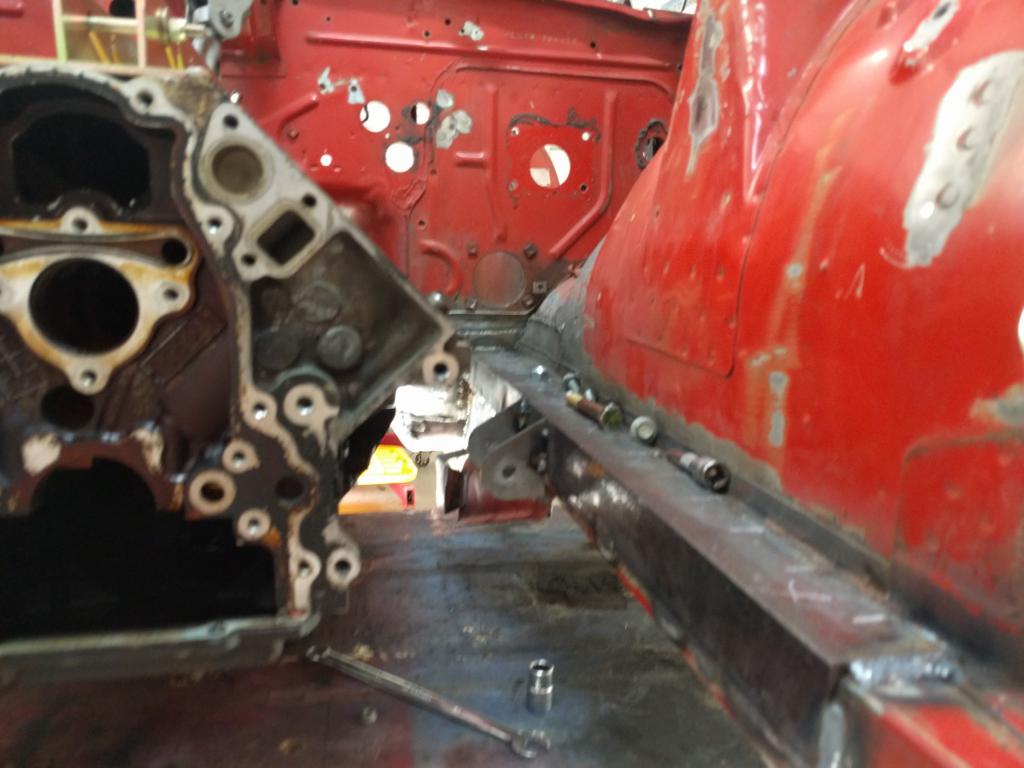
More progress getting the engine and transmission in and squared up. A large floor jack makes an excellent dolly for the motor and transmission to be moved around. We used the crane to hoist it up, then used sawhorses, various sized wood, and plywood, and got the motor leveled and in place for the mounts. I didn't take a picture, but once we got the motor leveled, we leveled the car in the rotisserie to the motor and tack welded an angle iron piece to the rotisserie so it wouldn't move. The last two pictures are fabbing up the transmission mount.
-
@BossaNova: Thanks for the kind words! This forum has been such a big help to me and my Z, I'm hoping to contribute back however I can.
-
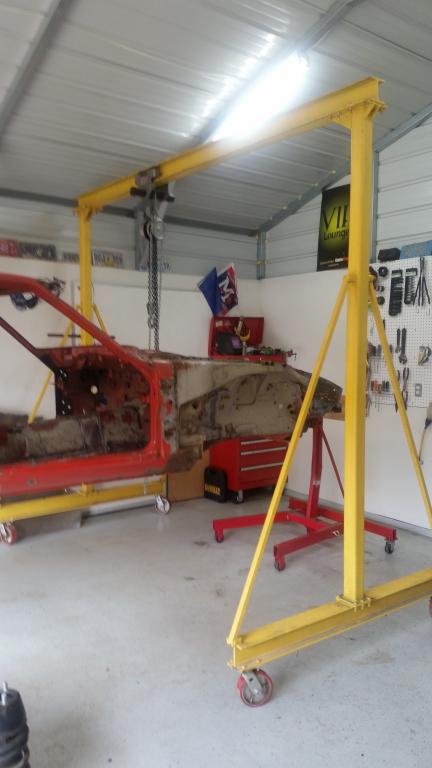
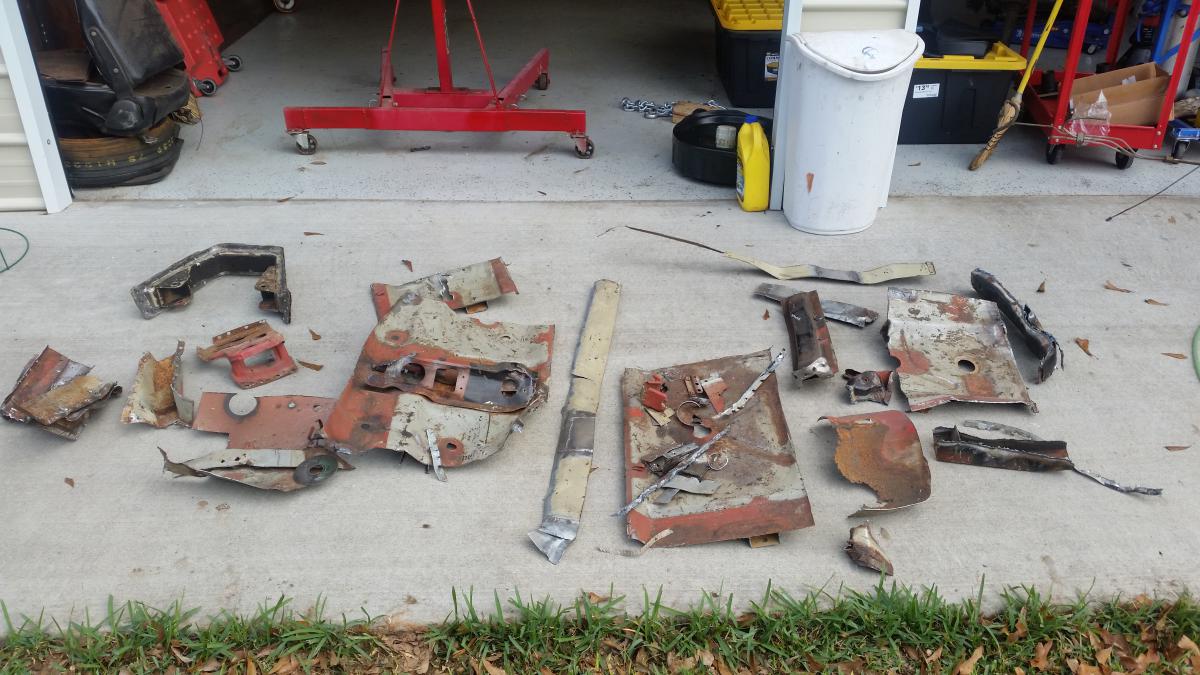
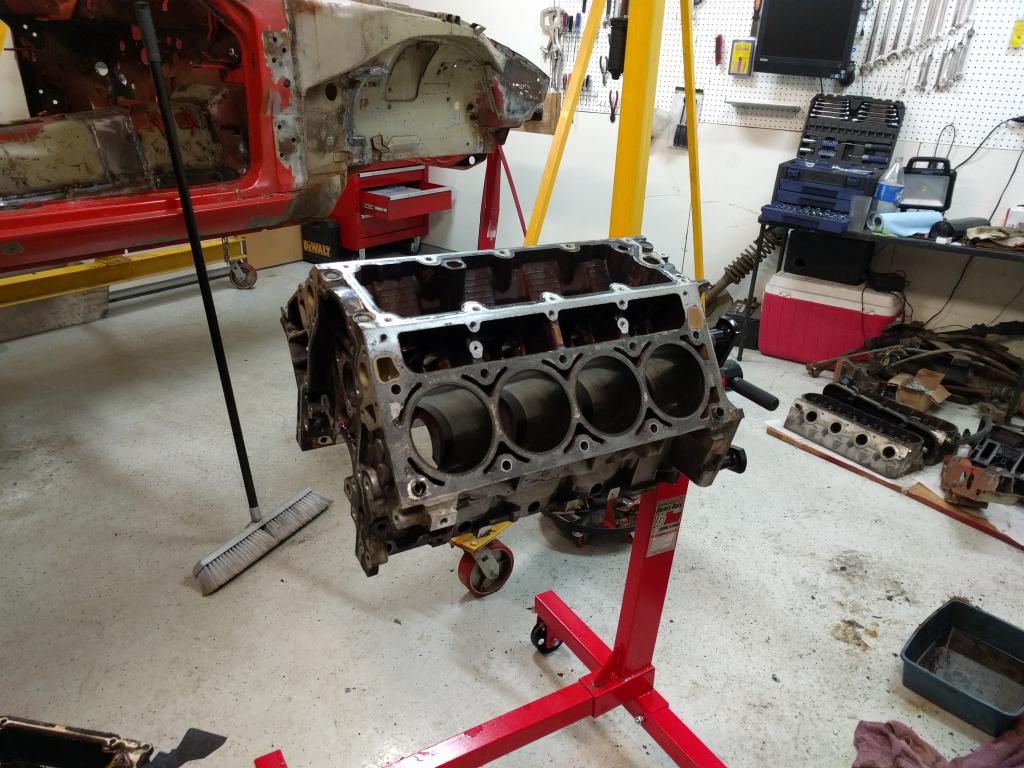
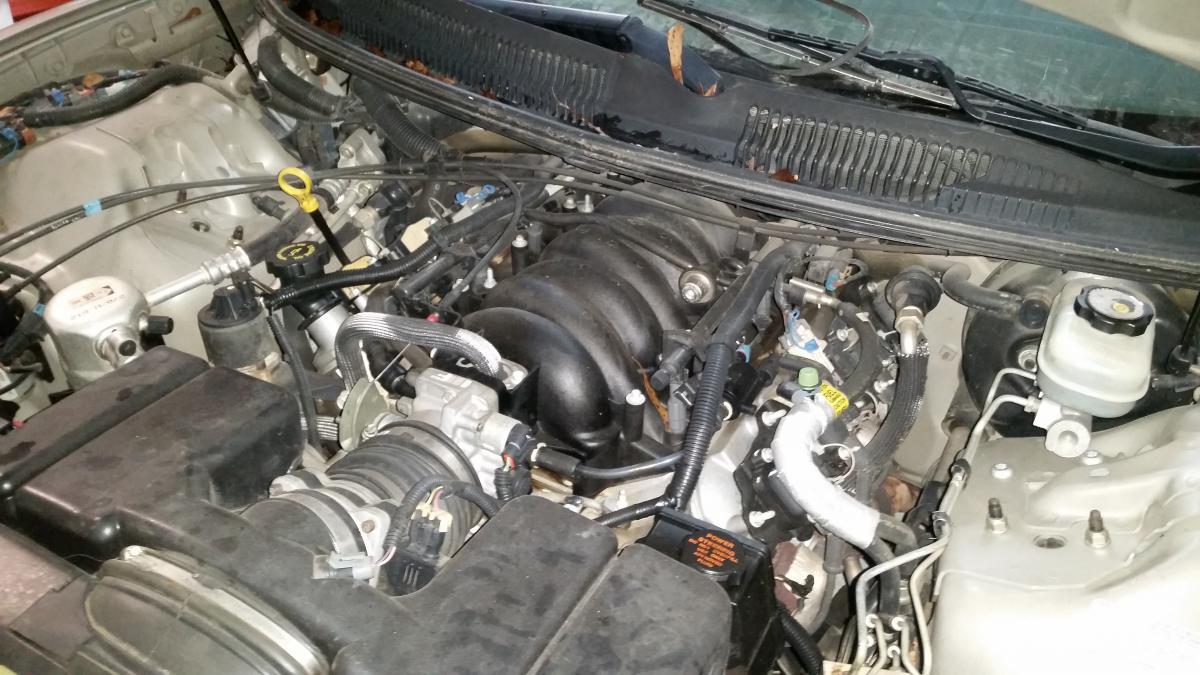
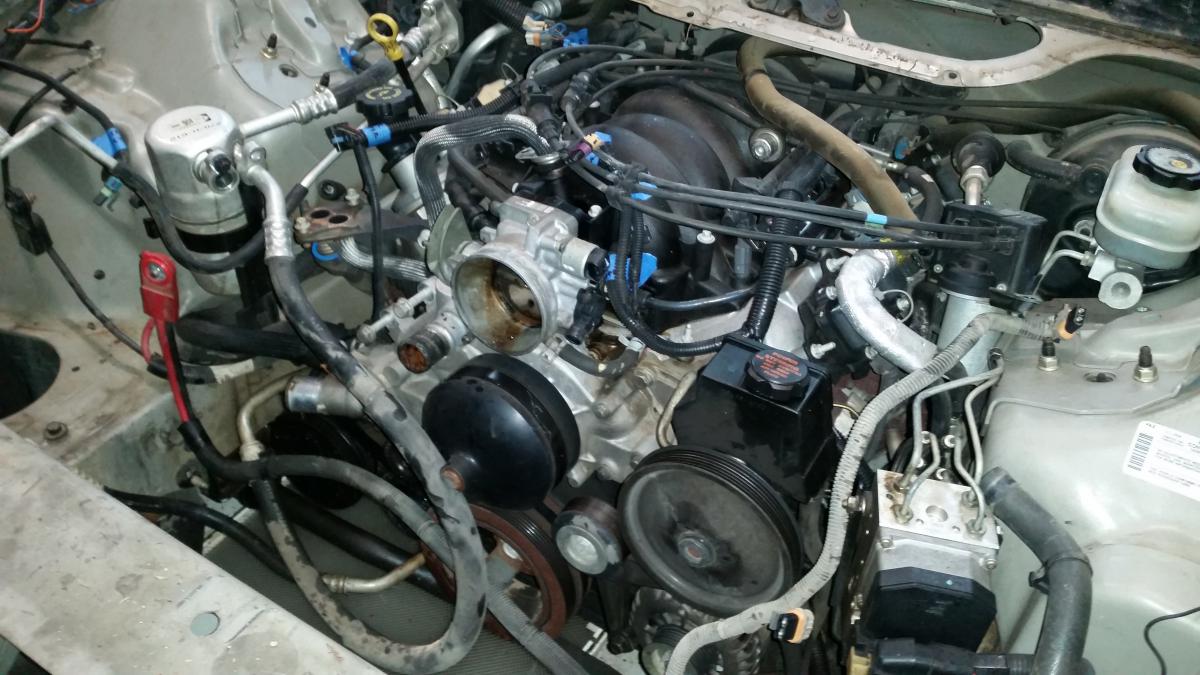
Motor is completely stripped down and i'm prepping to fab the motor/tranny mounts. Last year I helped my brother build a crane for one of his projects and now it temporarily lives with me. The second pic is a fun picture of all the metal I've cut out and replaced so far. The last three pics are the angle iron reinforcements for the front frame rails. They aren't fully burned in yet but they are square to the existing rail. I should have taken a picture of the kit, but I'll be using this for the motor and tranny: http://www.randyellisdesign.com/GM-LS-Series-DIY-Caged-Bushing-Tubular-Race-Motor-Mount-Kit_p_85.html
-
Also, I had finished up the frame rail rear end and bracing, but never posted pictures.
-
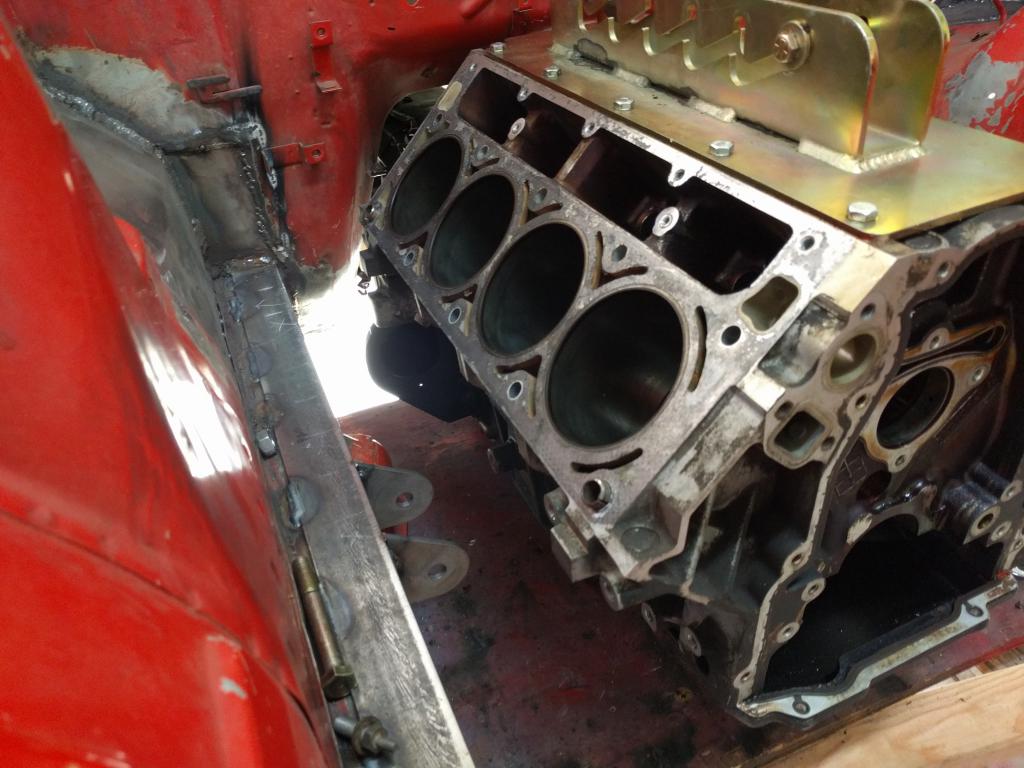
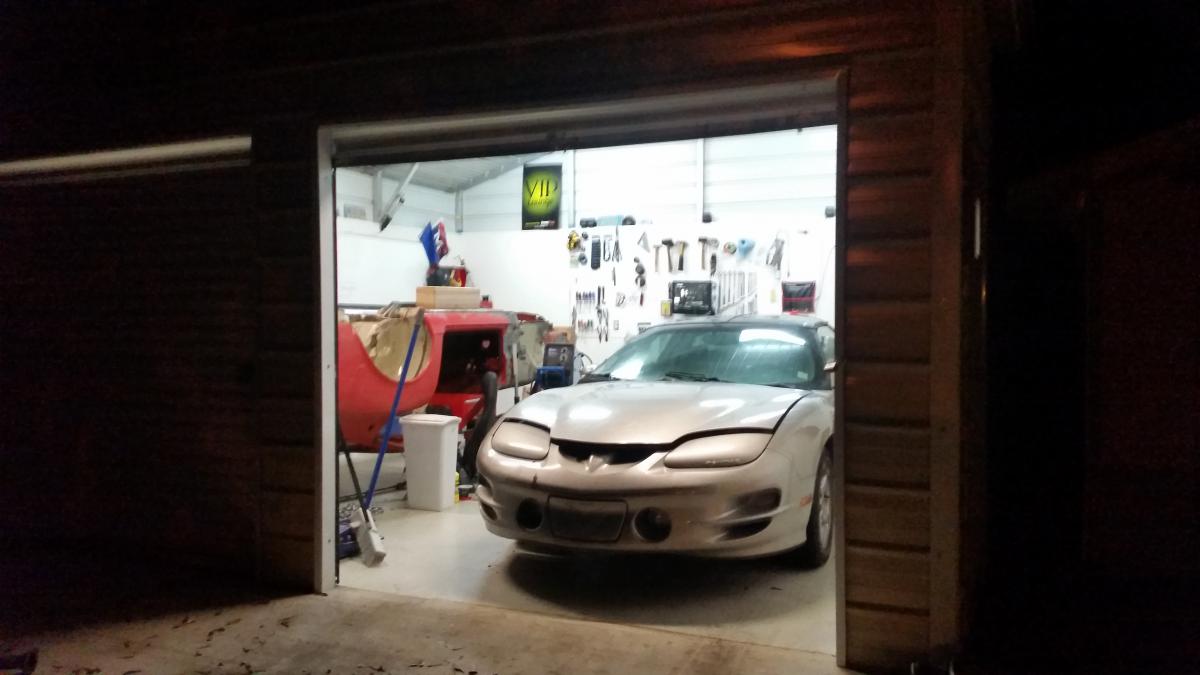
Long over due update! I had some medical problems over the summer which put me down for a little while, and after getting better I helped a buddy do a lot of upgrades to his Altima SE-R. I'm now getting back into the saddle with the 280Z project. In the time I haven't been posting updates, I bought a 2000 Trans Am for the donor motor and transmission. The price was too good to not pass up and it's just been sitting in my backyard for a couple months awaiting surgery. I got the Trans Am in the shop last night and started the work to pull the motor.
-
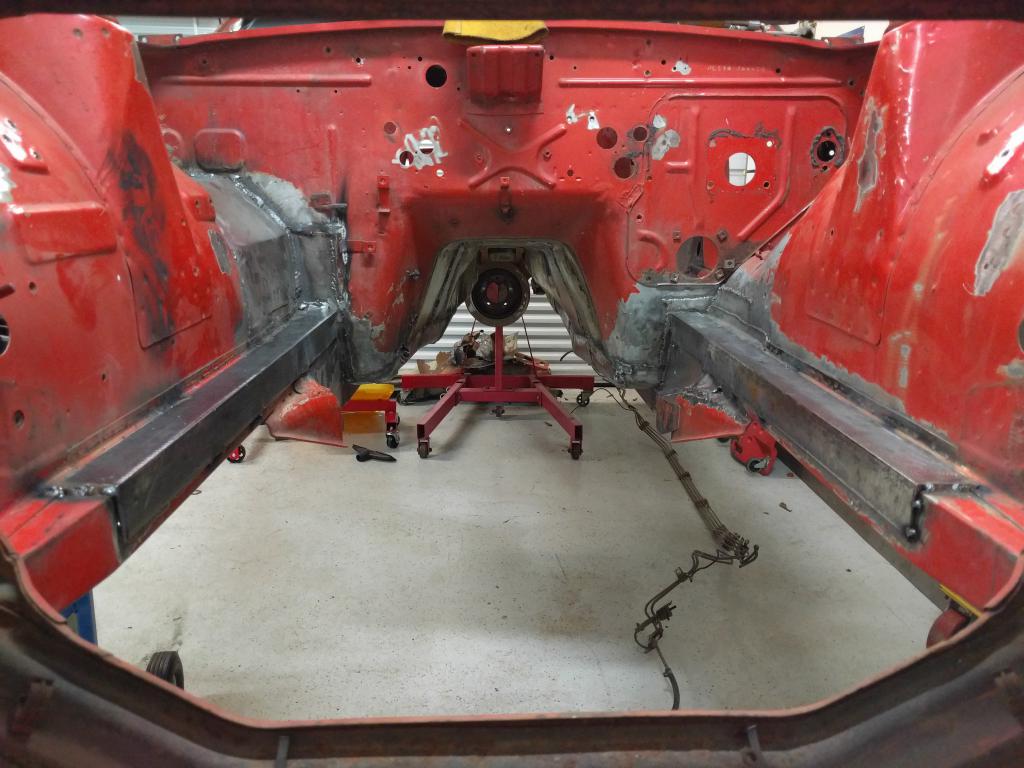
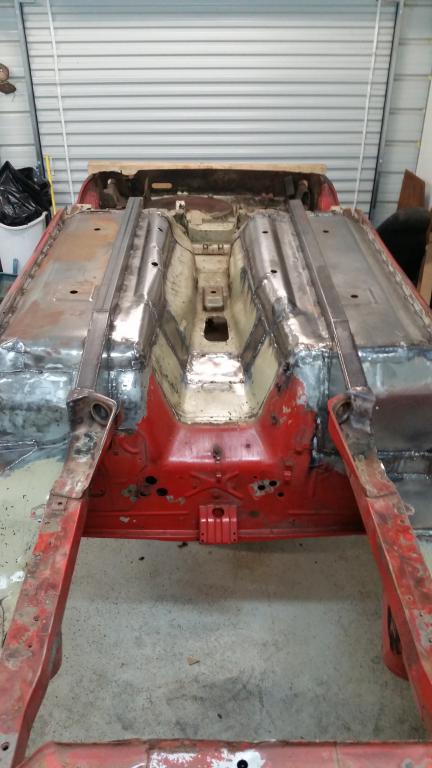
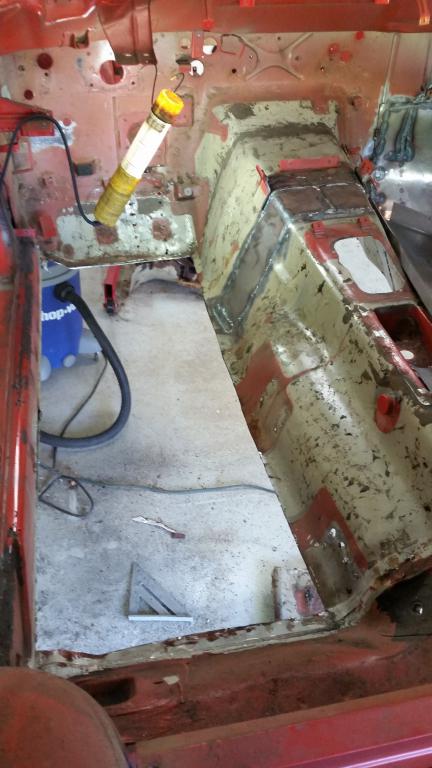
FLOOR PANS ARE IN. I REPEAT, FLOOR PANS ARE IN! Passenger side in, new fab'd frame rail in (except for rear extension pieces), and rebuilt sides on the front frame rail finished. After comparing the two side by side, I wish that the driver side went in as nice as the passenger side, but I had to cut out more rust areas on the driver side foot area and reshape it back. Also something else to note, the floor pans aren't completely level to each other in the foot-well area. They are level in the back though, so I should be able to get the new seat rails and seats level to each other. I might have to shim one of the new seat rails to correct any differences. I don't think the unevenness up front in the foot area is a big deal though. I'm also wondering if the floor pans were level to begin with? When we put in the passenger side we left a lip on the front and rear from the factory floors, and the new pan sat right down on the overhang. Also, both floors were put in with the pinch weld/door side running even the length of the car. I know cars aren't necessarily symmetrical underneath anyway, these are just things you think about while working I guess
-
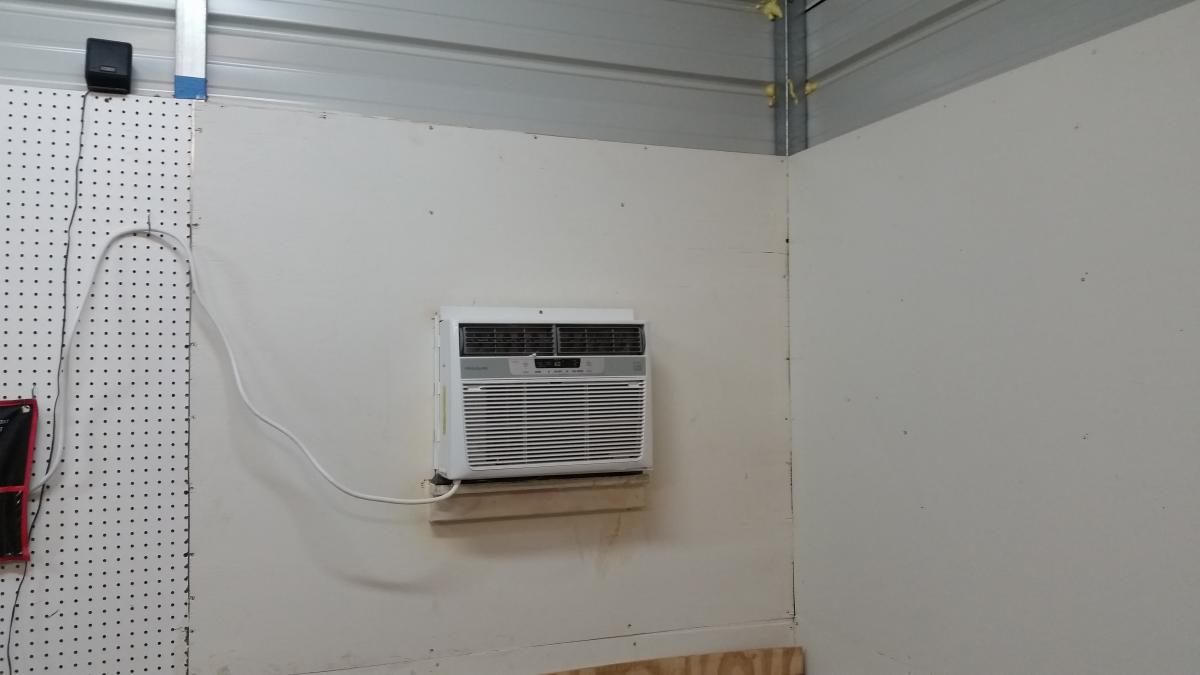
Jay_Gadsby: Free electricity after 9pm? I would run the air conditioner with the doors open just to combat nature! Thanks for the kind words everyone. It helps to keep going when this car has pretty much been my dream car since I was a kid!
-
Down here in the deep dirty south, temps are already in the mid 90's and climbing. The other day it was 96 or 97, and with humidity the weather forecast was showing "feels like 103".
-
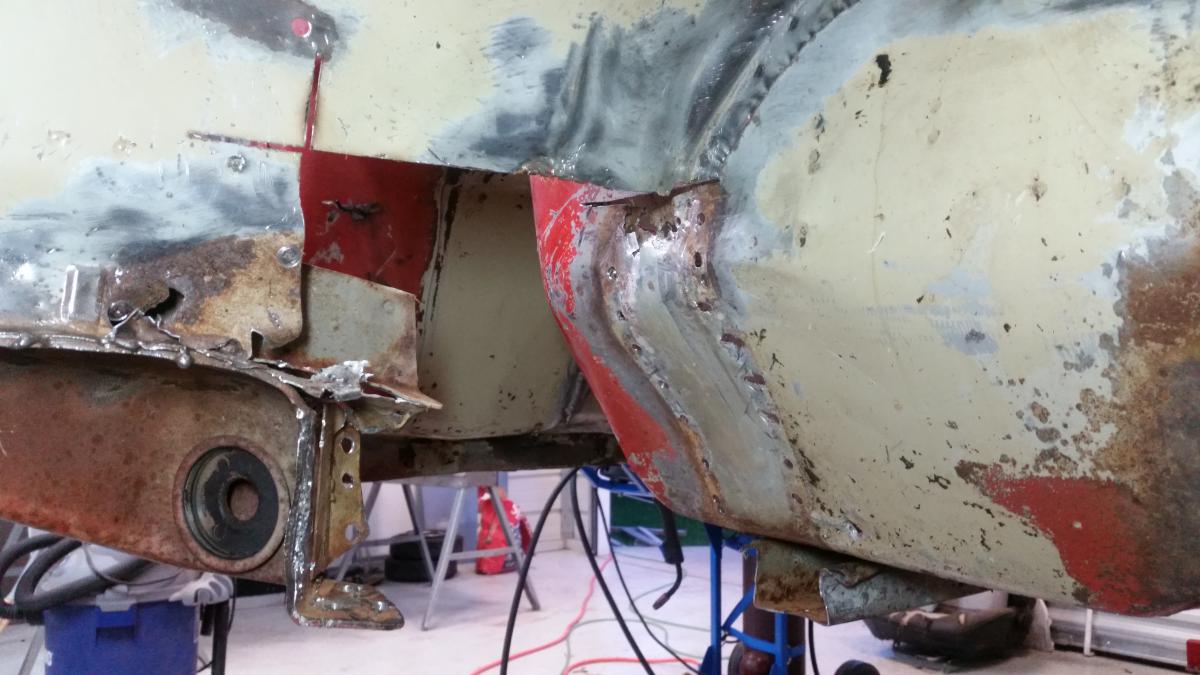
First two pics are the finale in the driver-side-front-frame-rail-rust-fiasco . Second, my bro came over to lend a helping hand and we got the passenger floor pan and front frame rail out in record time. For some reason I didn't snap any reinstall pics, but the passenger floor pan is back in and about 75% welded in place. Next up will be getting the passenger floor rail fabbed in place. It's getting to the point where i'm almost done with major structural rust repairs, and have to move on to exterior/body, and all the rust on the rear.
-
A non car update... so my last post ends on the July heat. I'll let the pic speak for itself Next post will have some car updates.
-
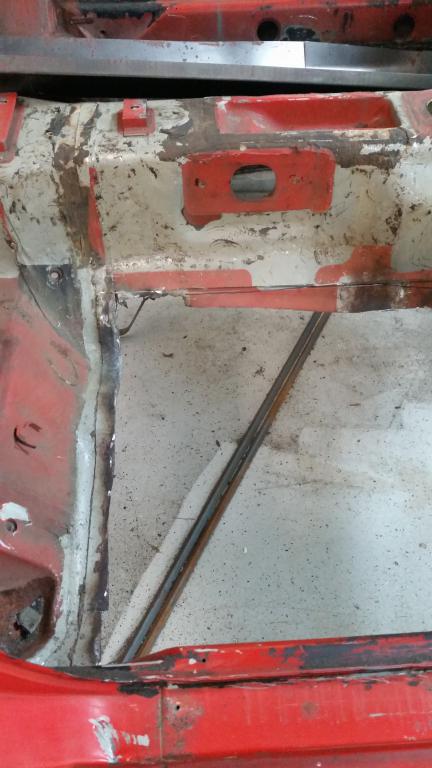
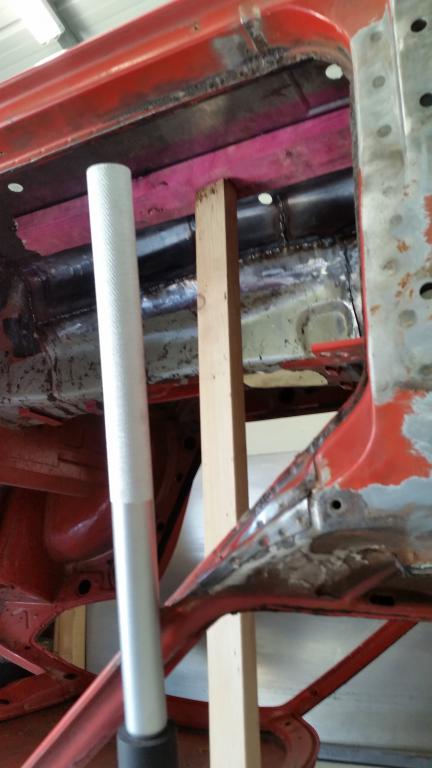
Jay_Gadsby: That's a good idea and I almost went with it. I ended up using a jack and a couple of boards to level it out (pics attached). I have the new floor rail in, and I started patching back the fender area. After it's all said and done it feels strong and tight, and you can hear the stability back in when you bang on the floor pan. I stopped for the day because this July heat is rough, and it's only the beginning of the hot season.
-
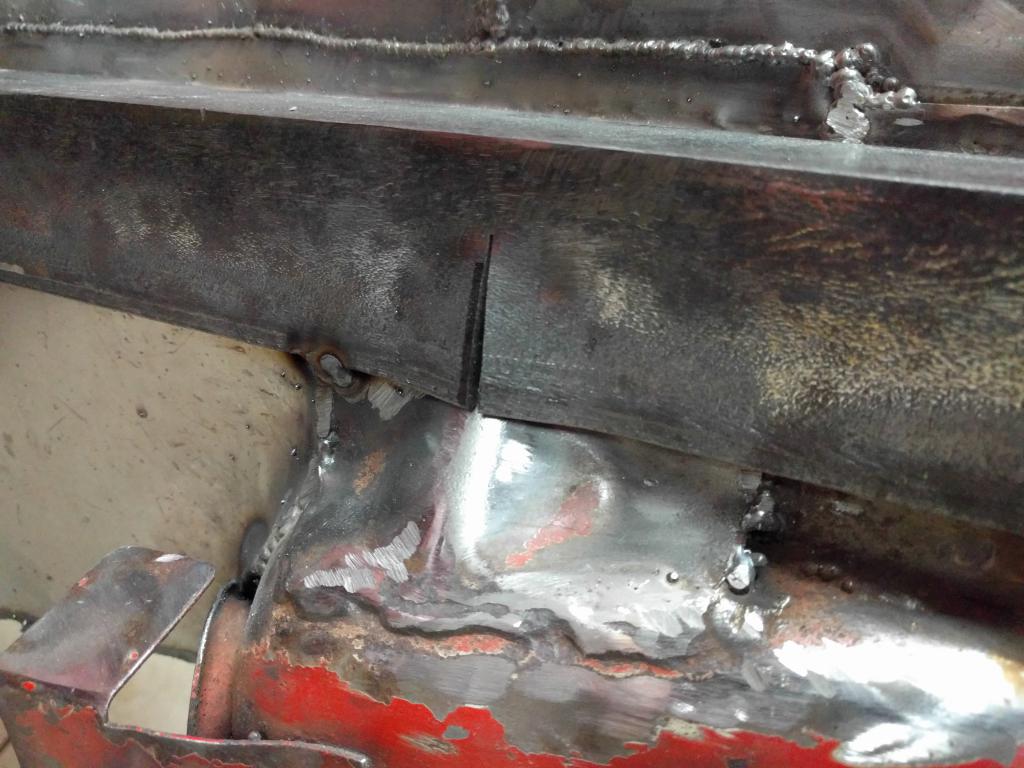
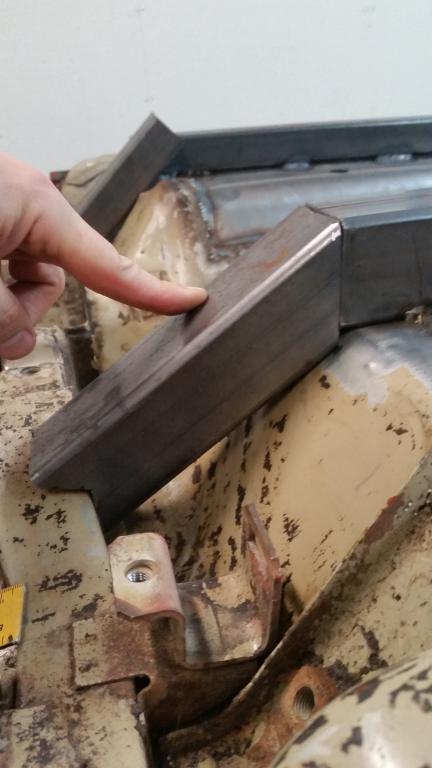
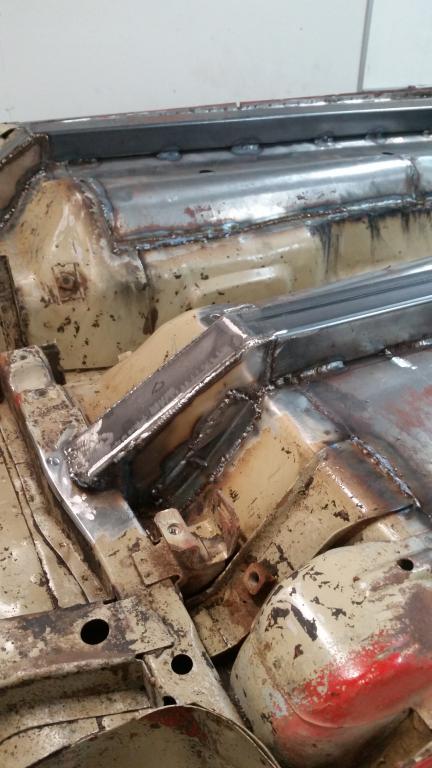
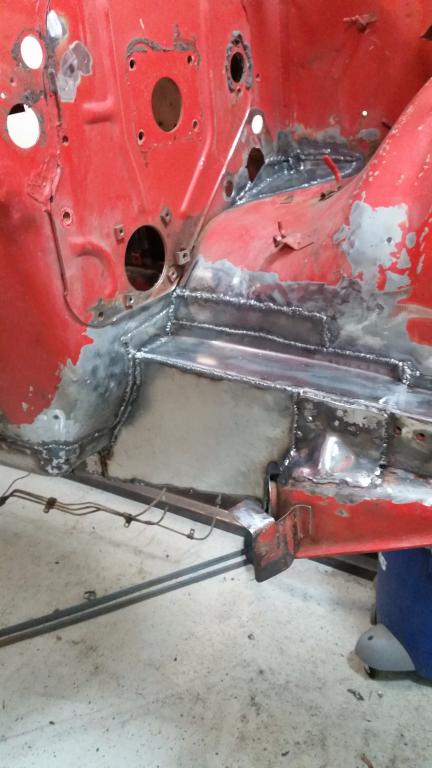
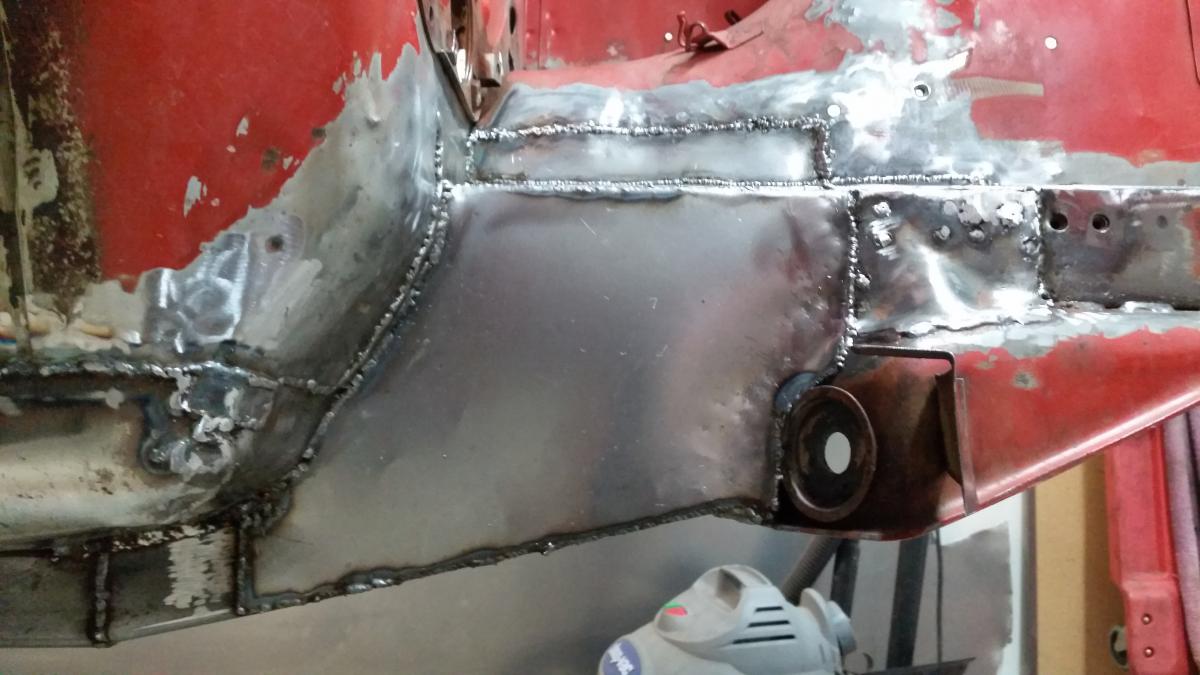
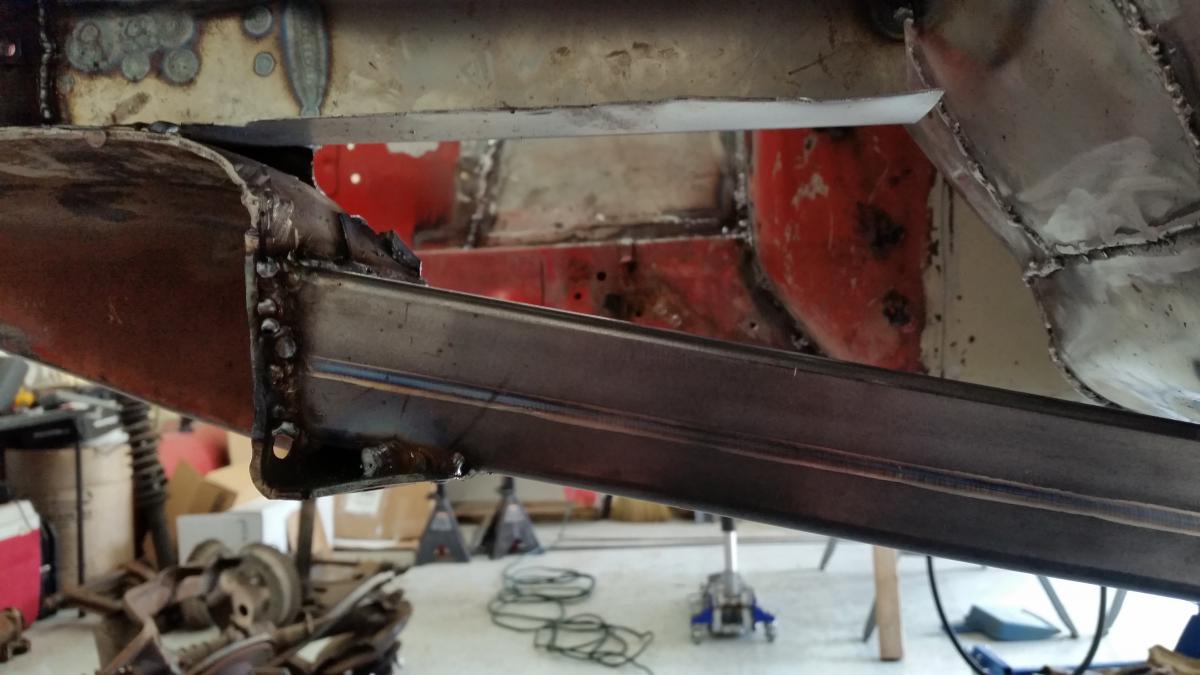
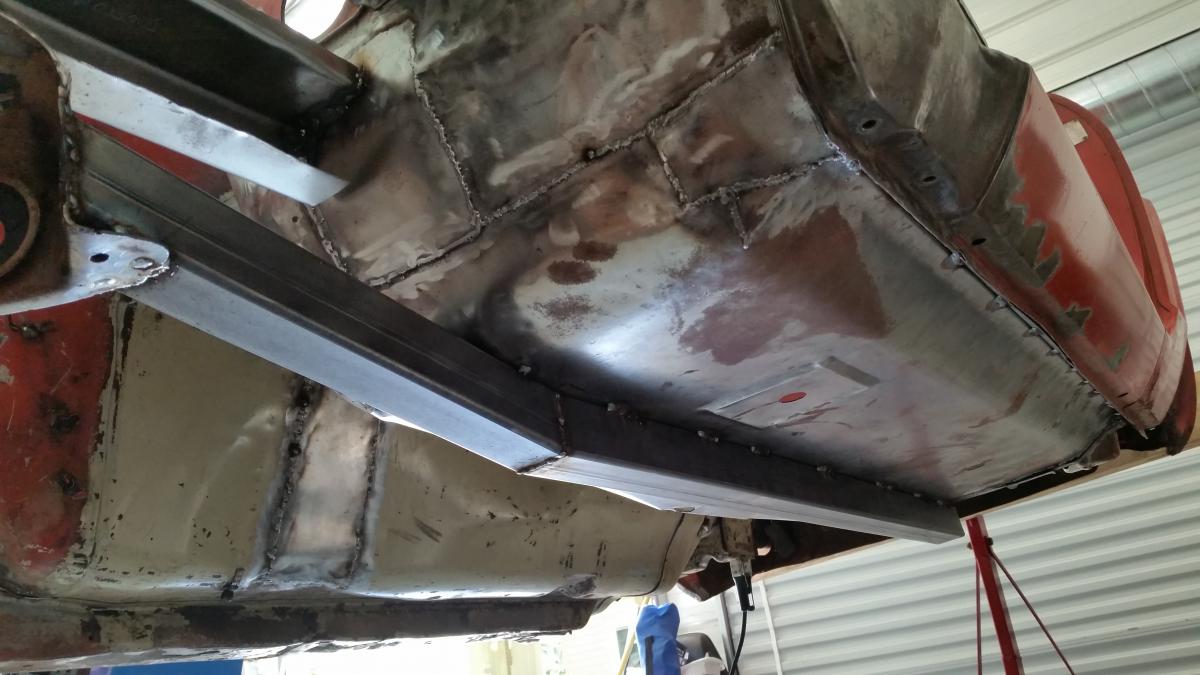
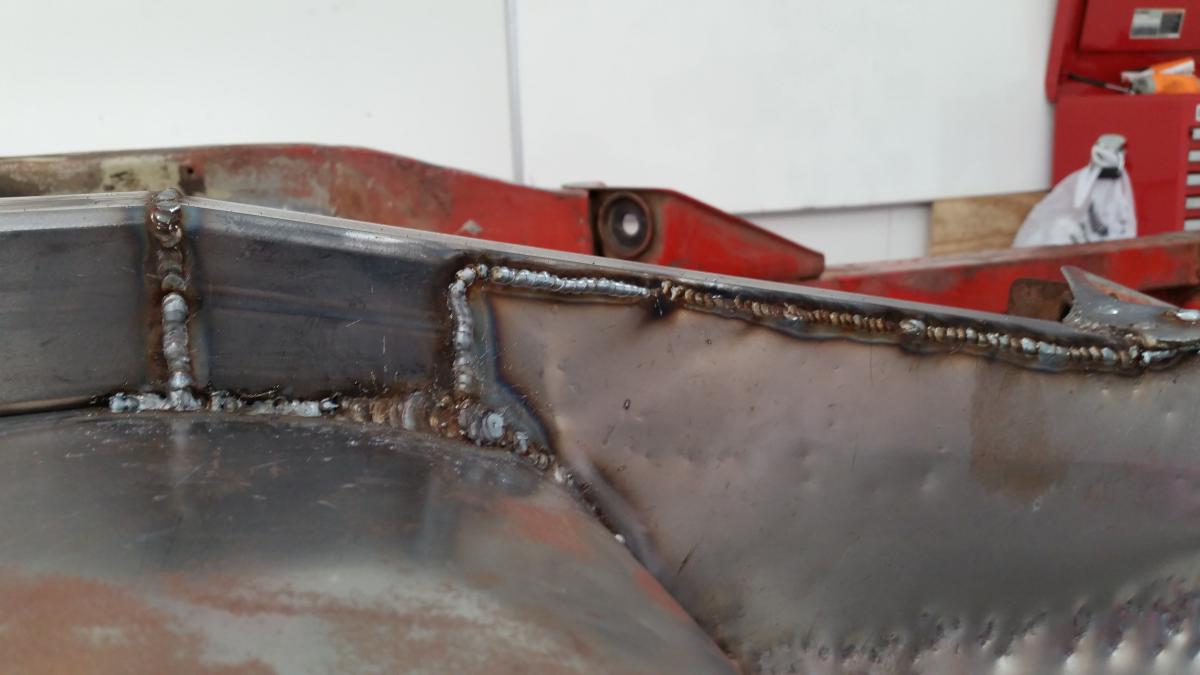
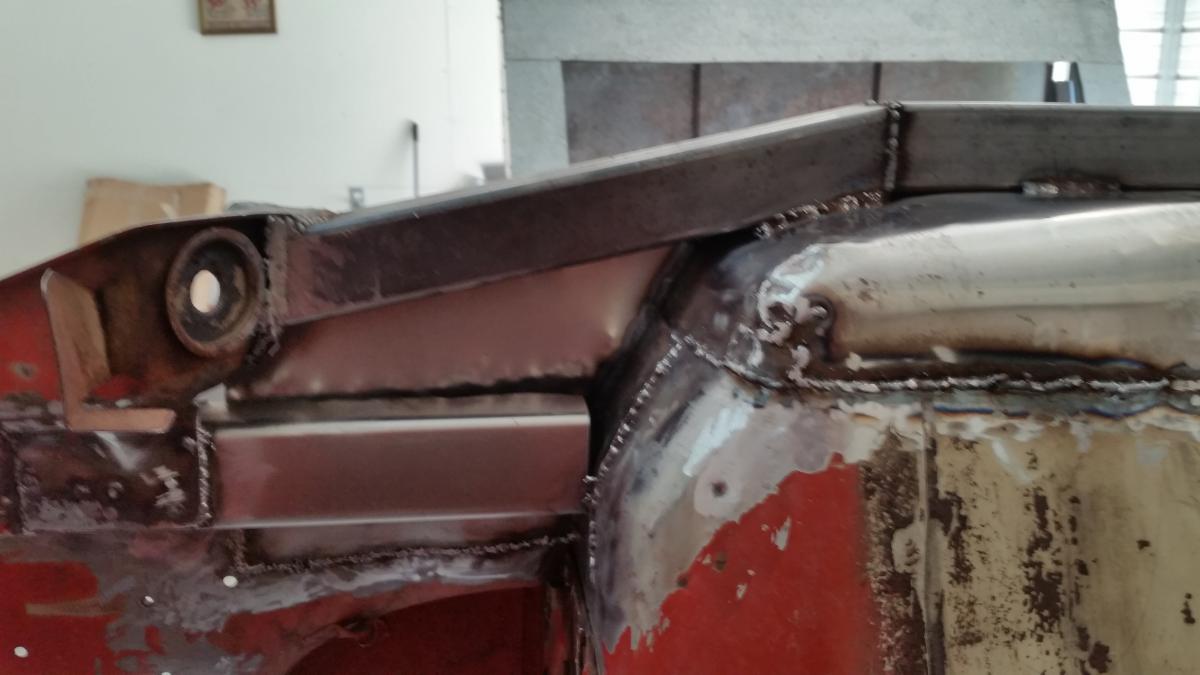
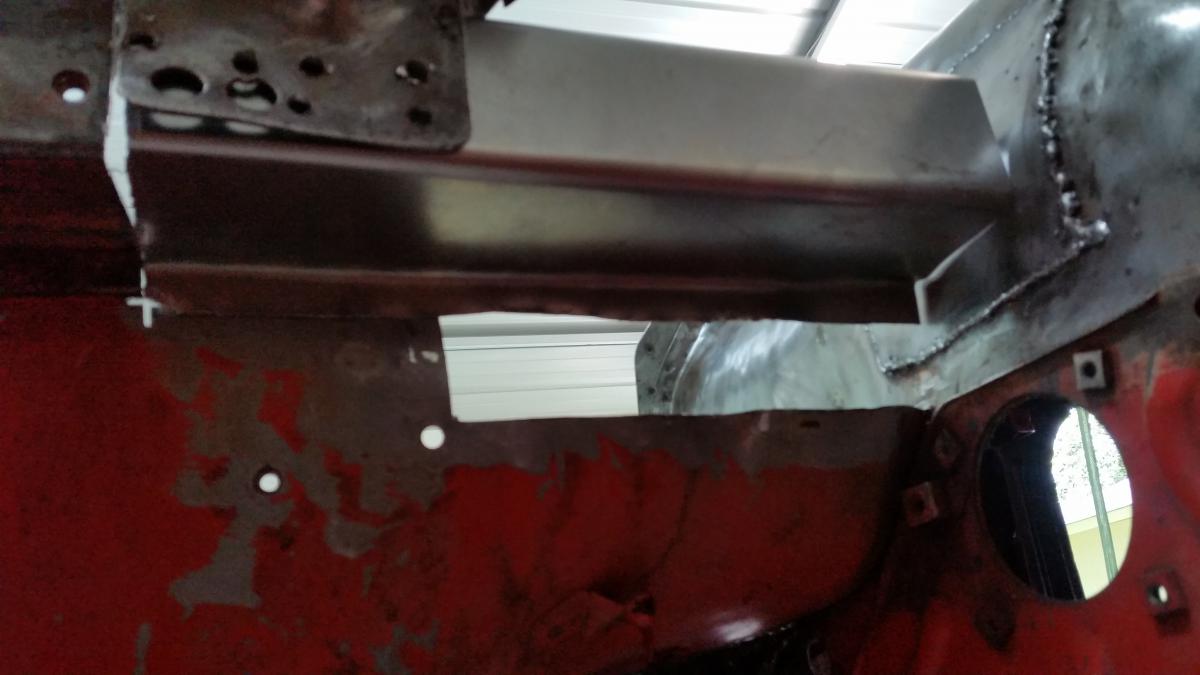
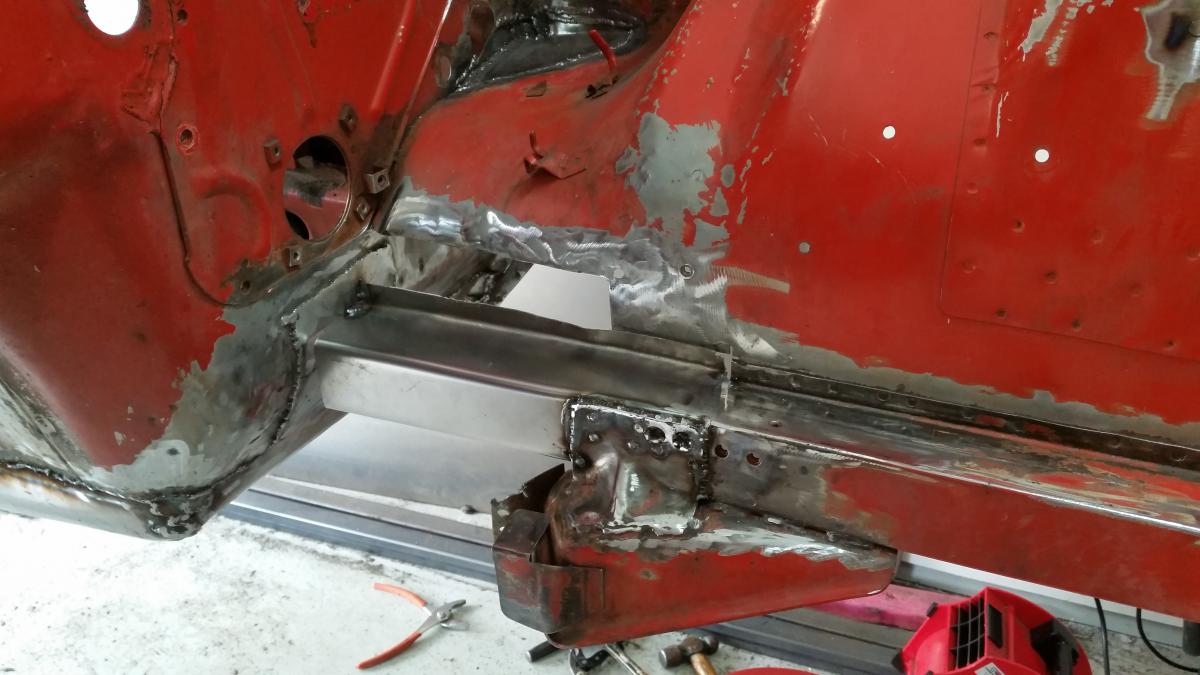
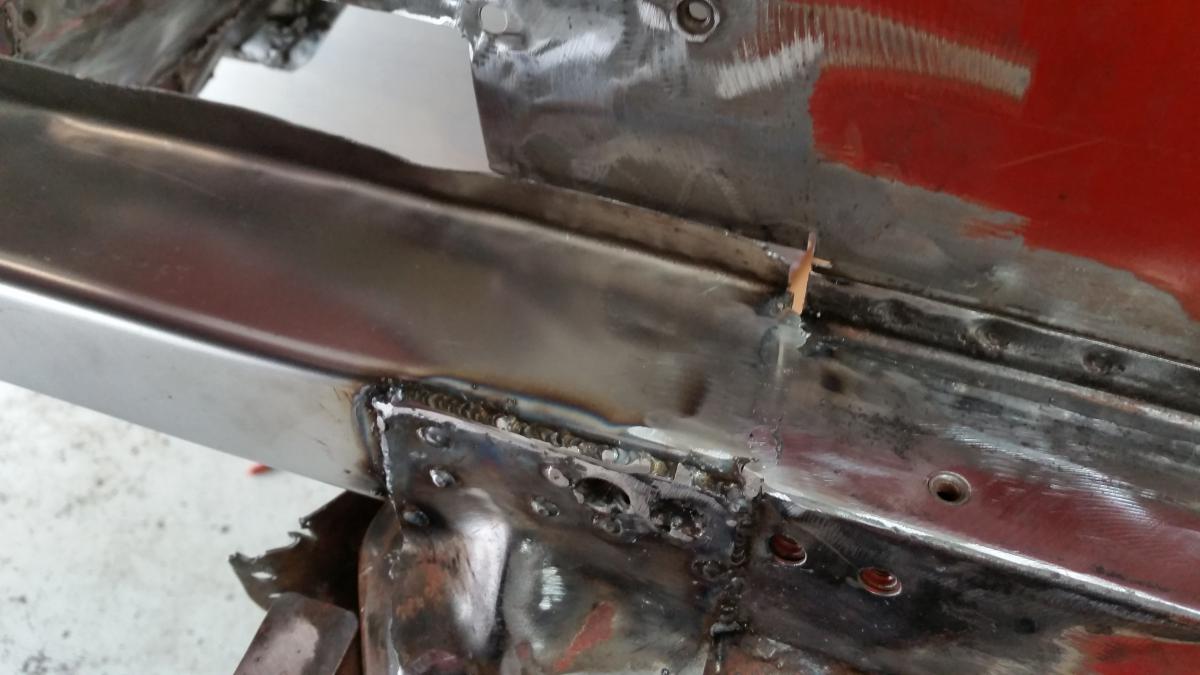
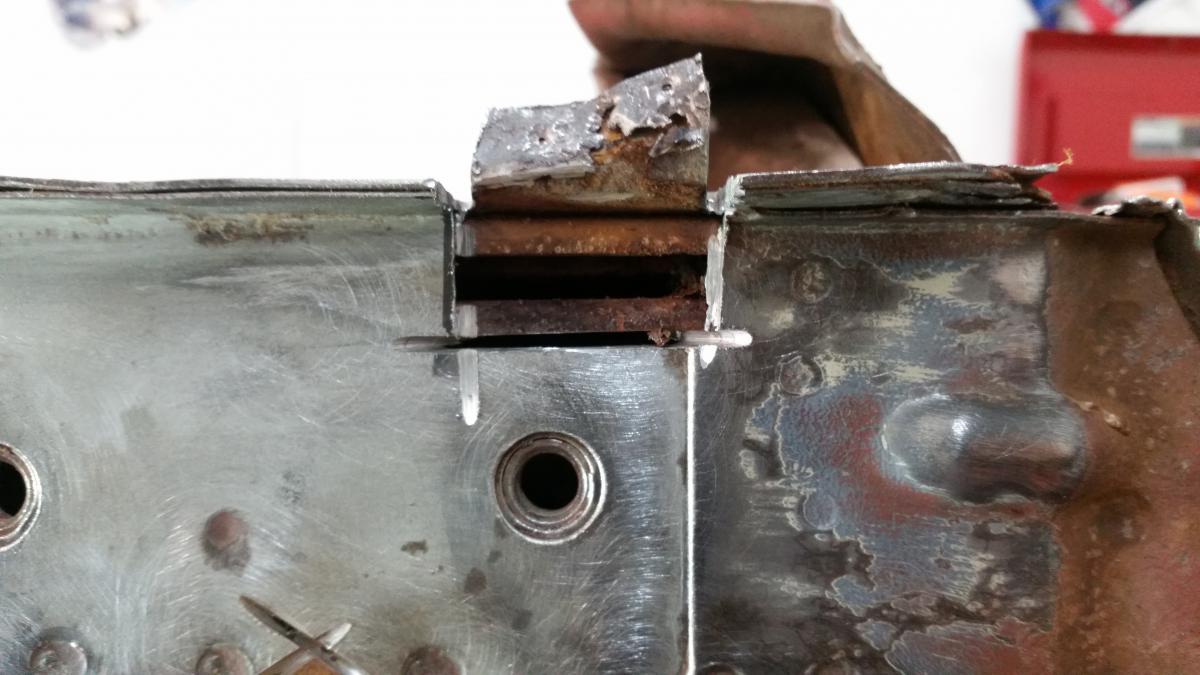
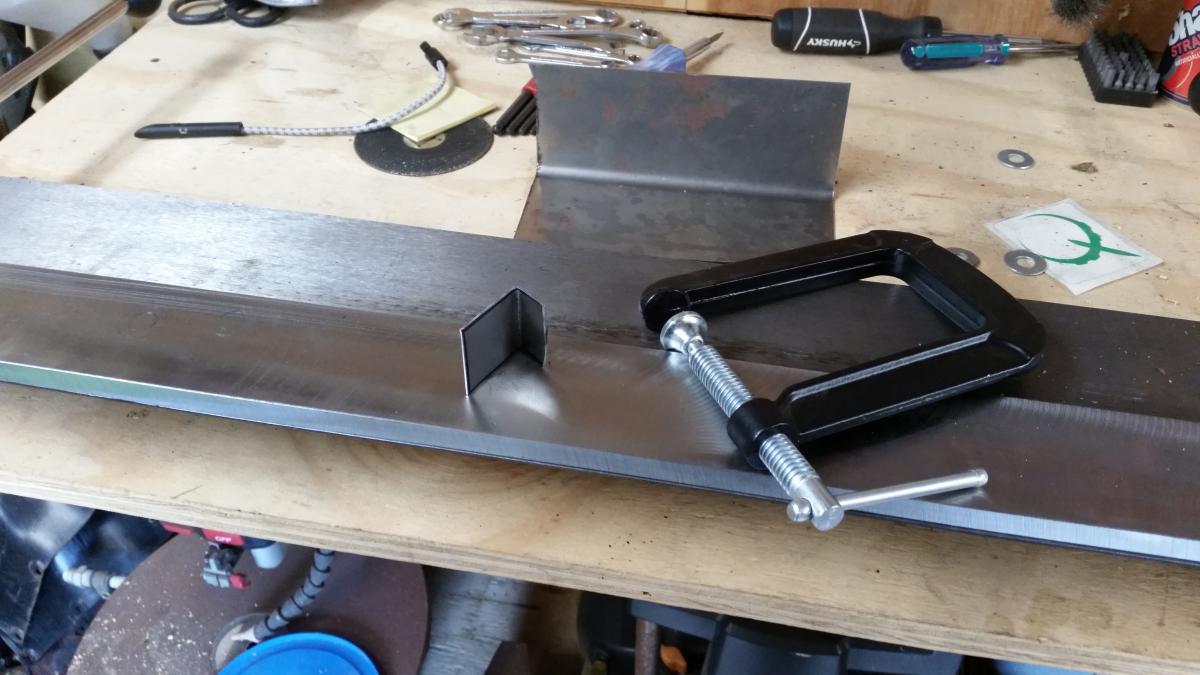
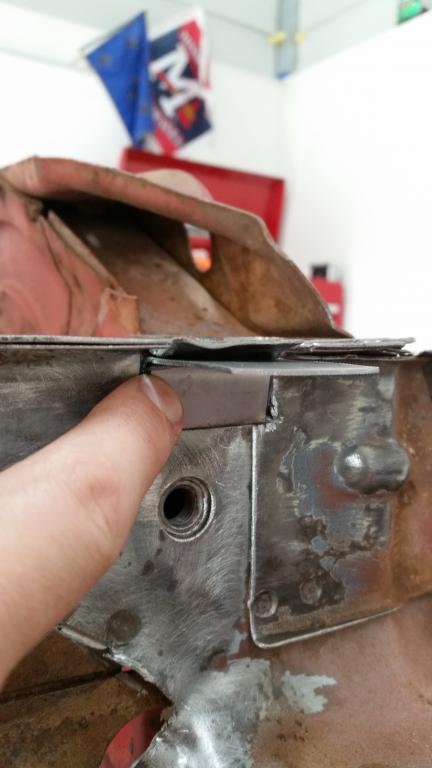
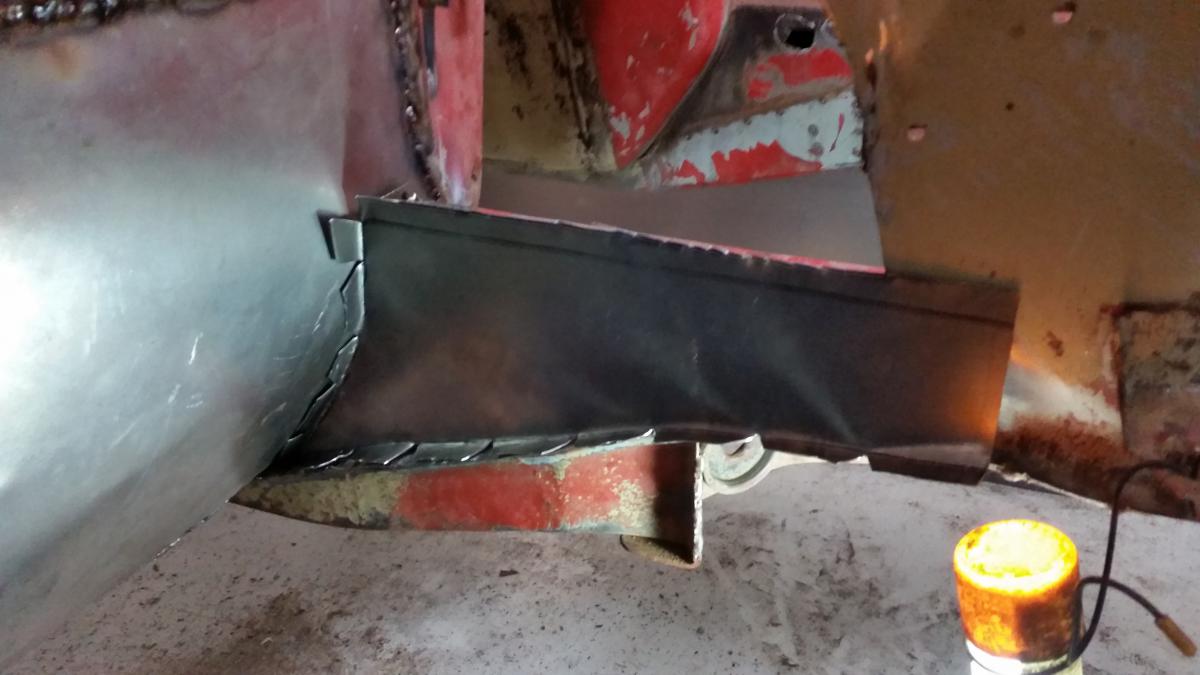
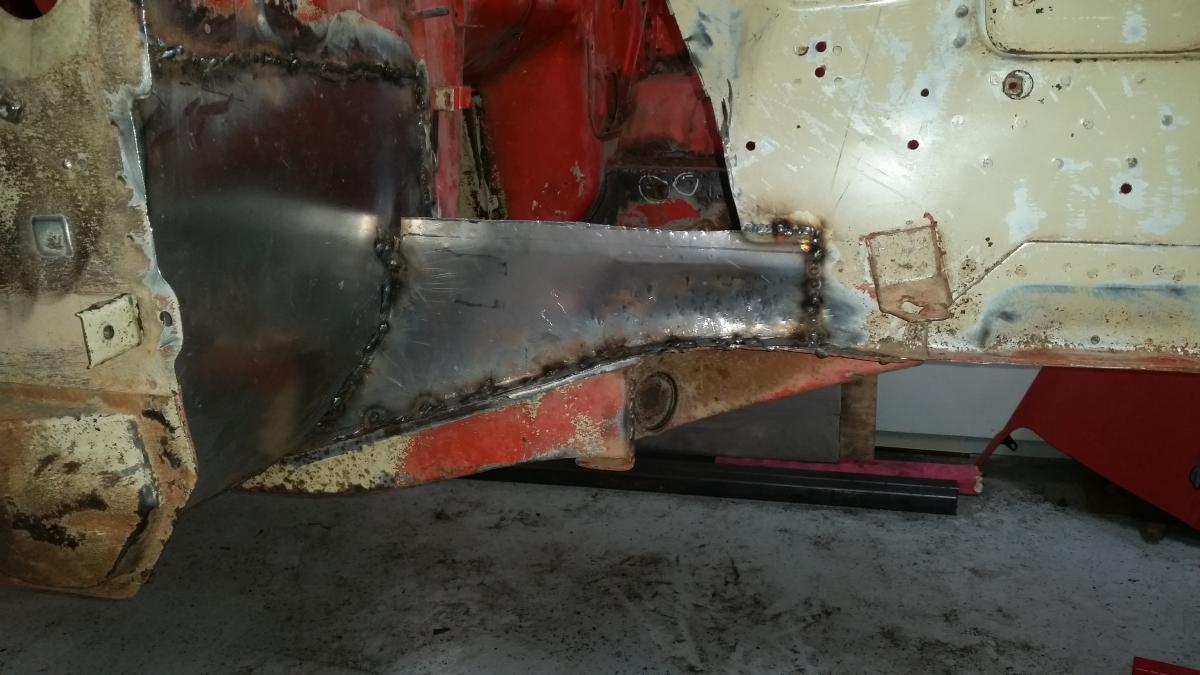
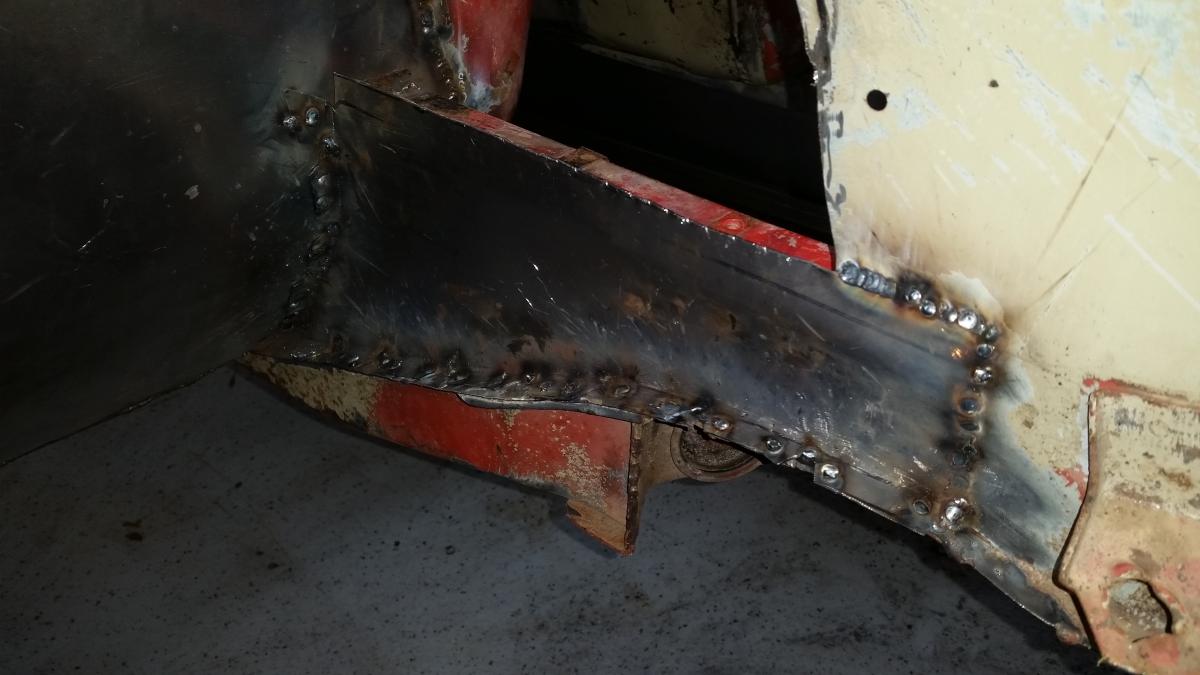
I've started rebuilding the bad frame rail as well. Instead of trying to mimic the factory contoured piece, I'm going to rebuild it in simpler sections. I was able to mock up the C-channel piece that is the frame rail pretty close to the original size and got it tacked in. Next up I started fab'ing the frame rail and TC bucket connector. I went with 2x2" tubing, and after replacing the entire floor with a mostly flat piece, it doesn't look like the new tubing will be much taller than the factory frame rail. I haven't started tacking in the frame rail yet, I've got a little more massaging on the floor pan to get it to lie completely flat. I am eventually going to fill in the front and back side of the frame rail extension where it meets the front frame rail and wheel well metal.
-
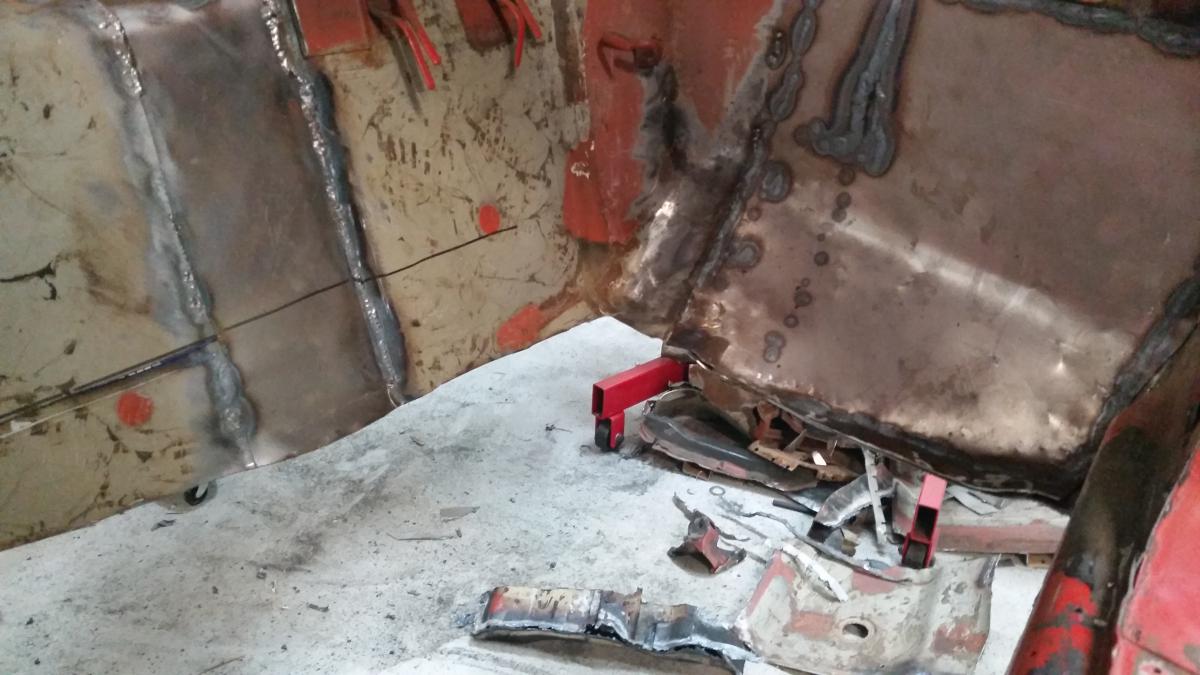
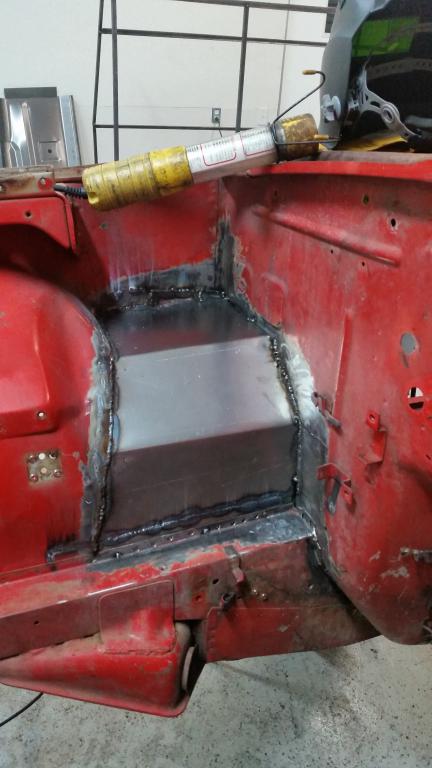
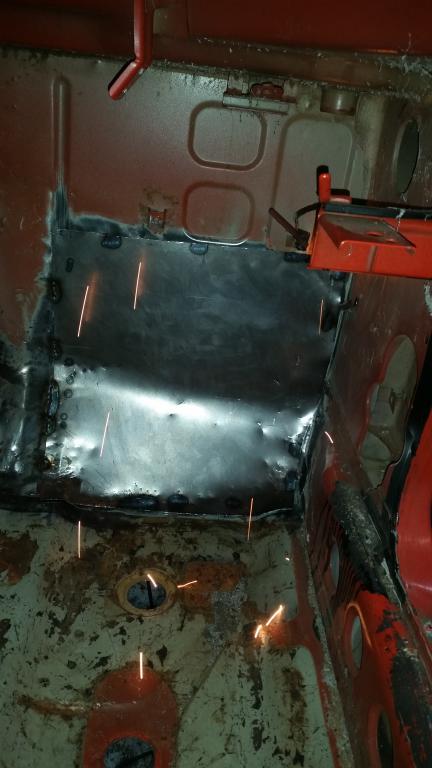
Lots to update this time around. I've spent pretty much all weekend working on the beast. I cut out the driver side floor pan (almost the whole thing front to back). I cleaned off to the pinch welds as well. Pics in this post are the floor board out, rocker panel cleaned up, new floor going back in, a shot of the car flipped with the new floor, and a close up of the floor that rises up to the firewall with a patch in it.
-
1972 240z Procharged LS6, soon to be turbo!
Dingo replied to mistafosta's topic in Gen III & IV Chevy V8Z Tech Board
Mistafosta, do you have any post-repair pics of your frame rails? The very first pic you posted of the front frame rail/firewall area looks like my driver side area that i'm about to start repairing. Good build by the way! The welds on that new upper intake piece are amazing. -
Thanks, it definitely made it nicer. The biggest problem I had putting the piece back in was blowing holes through the thin firewall metal I still have a couple of places to touch up and fill in around it. The metal i'm putting back in everywhere is 18 gauge, and you can really feel a difference when you bang on it.
-
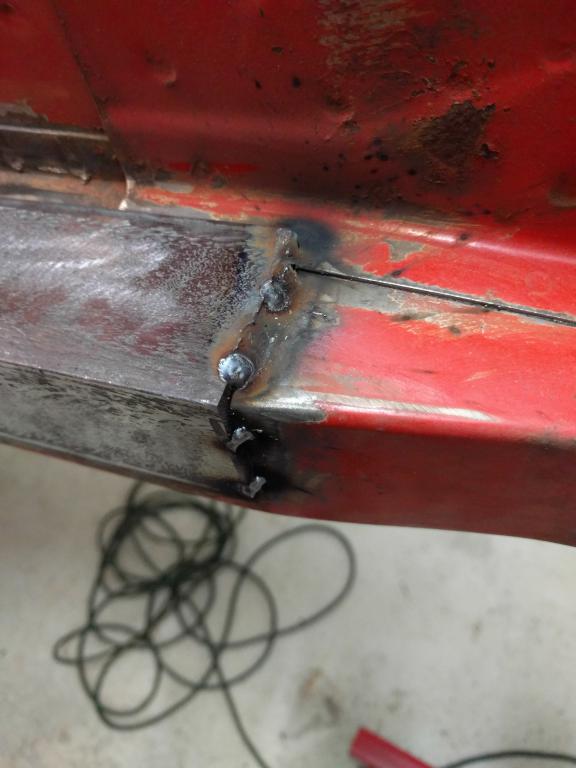
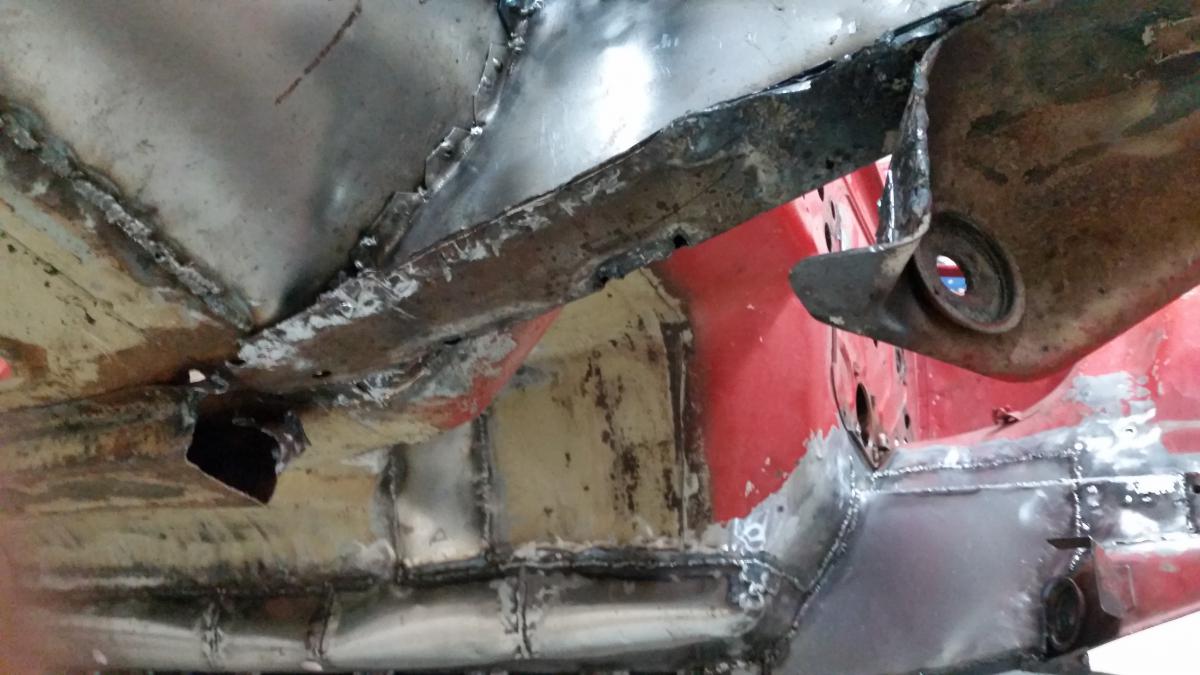
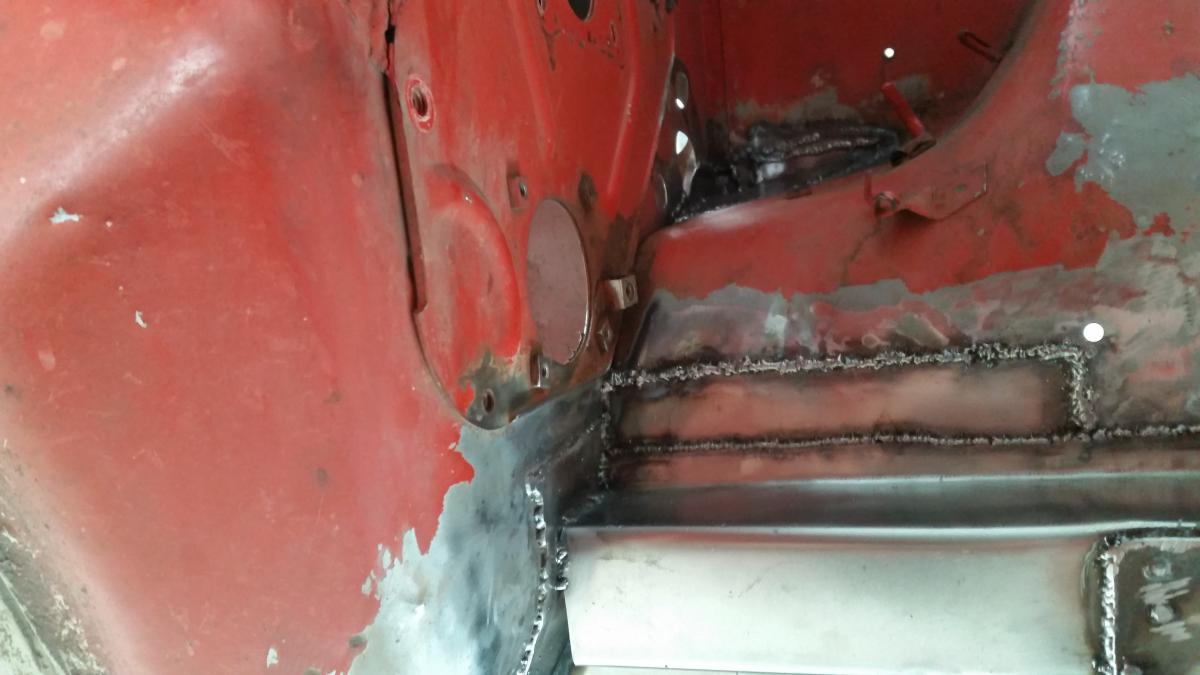
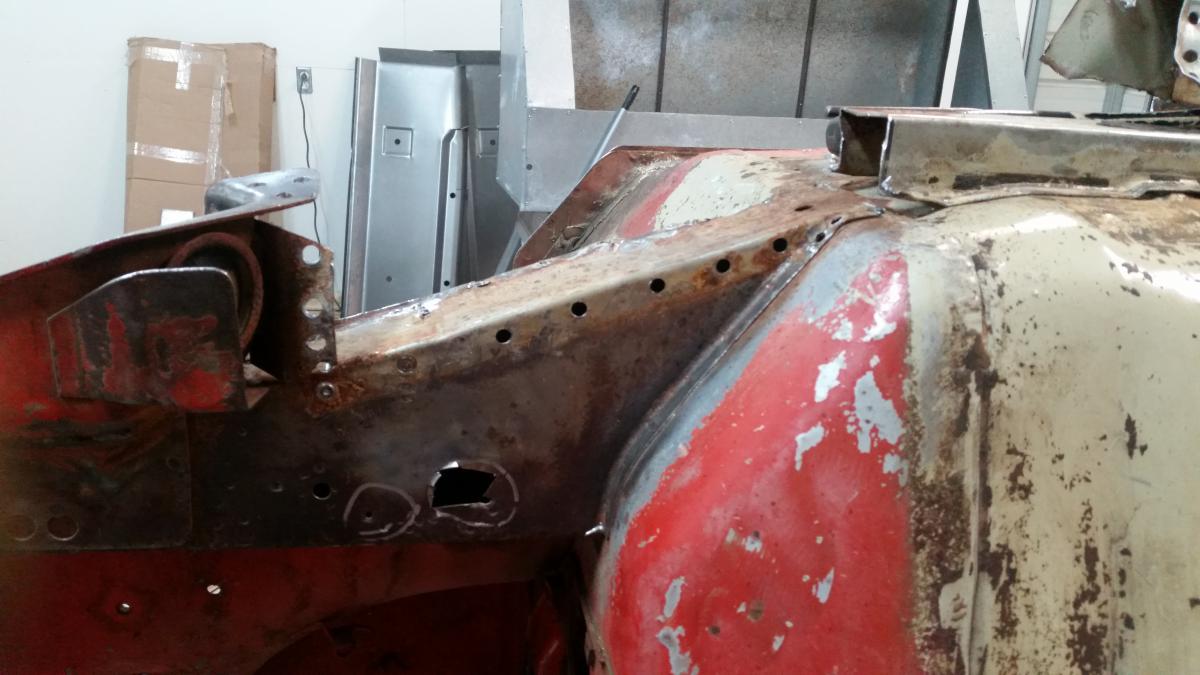
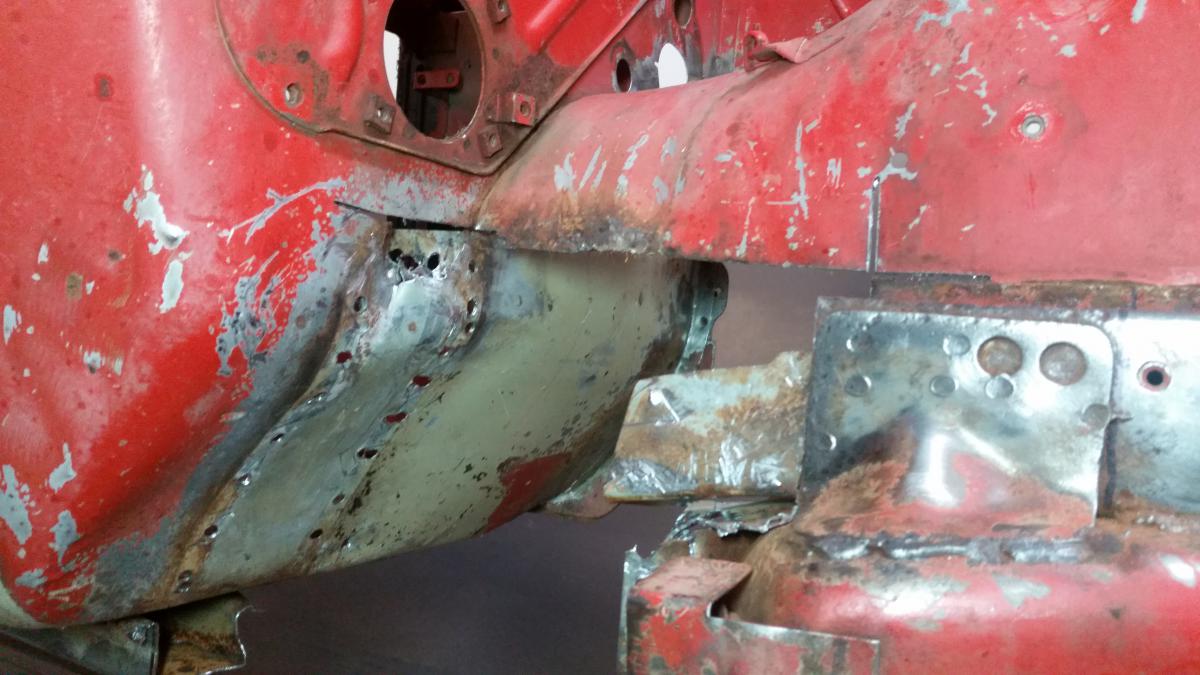
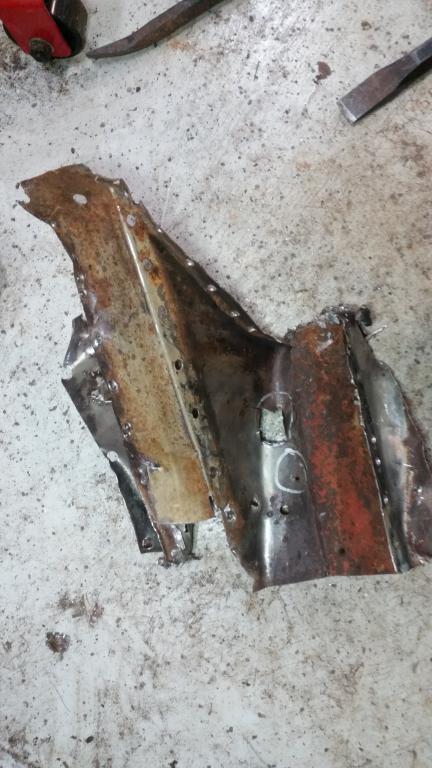
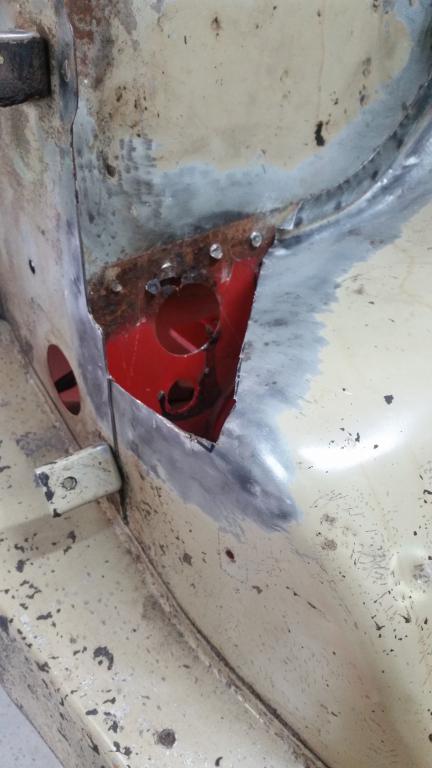
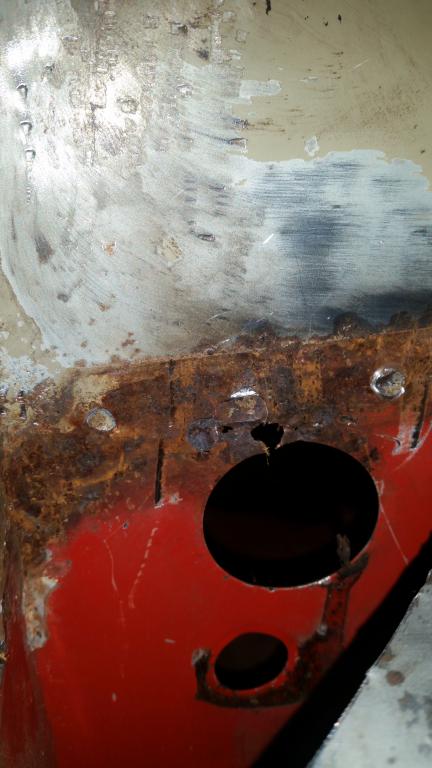
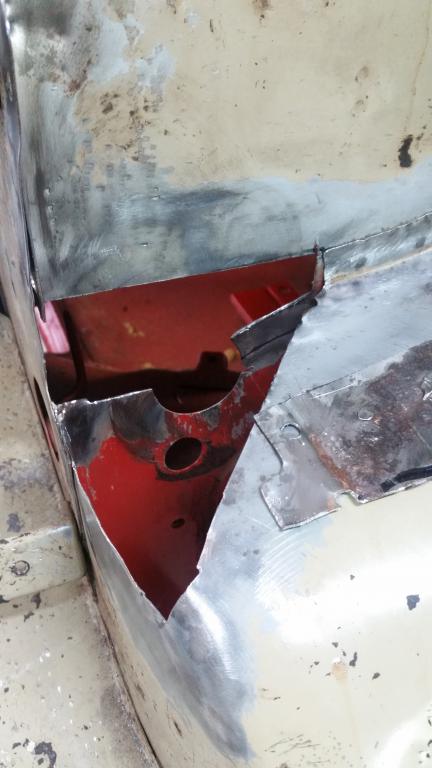
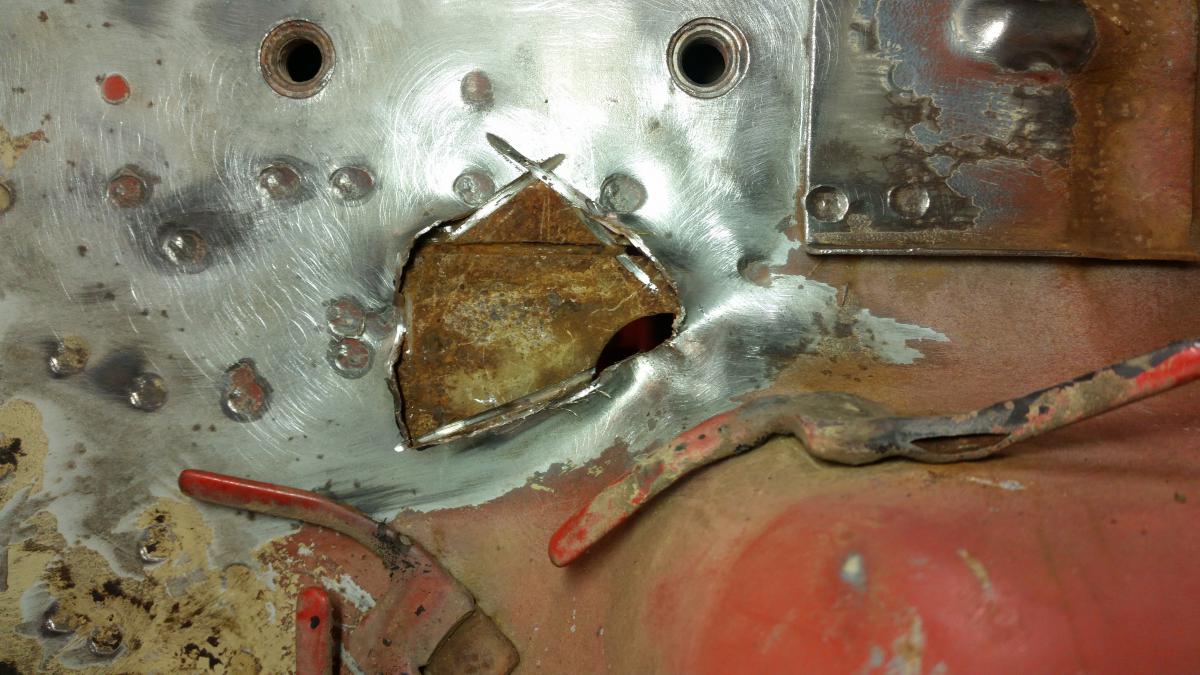
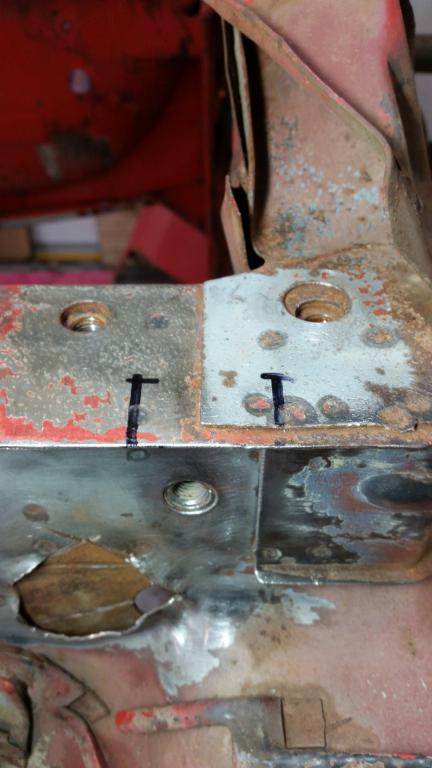
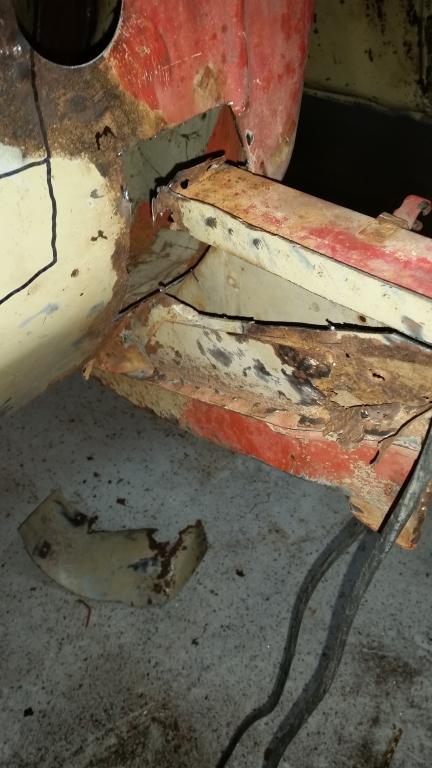
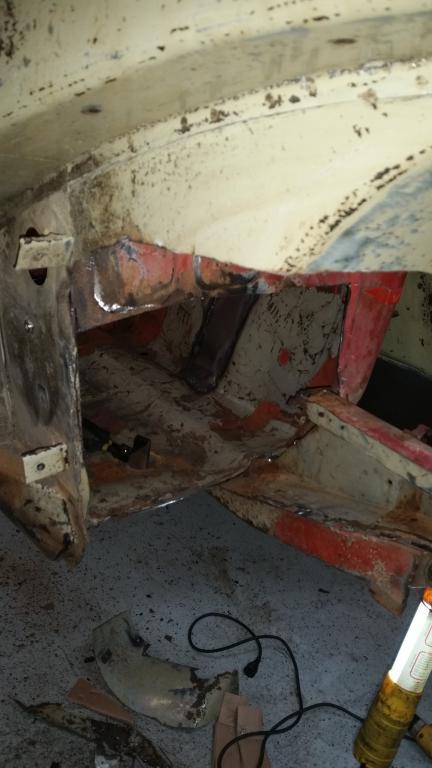
Next up... the driver side front frame rail (where it connects to the floor pan), is in terrible shape. After staring at it for 5-10 minutes trying to figure out what to do I just started hacking away. I removed the part that spans from the TC rod bucket to the floor frame rail first, then worked on removing the larger portion that is the frame rail. Hacking it out left things a bit ugly, but there's a lot of pitted rust on the top and side of that frame rail that needed to go. The rust also went up the fender well a bit, and a small portion of the firewall. Since this is out, I think the plan is to remove the driver side floor pan and rail, replace those, then start rebuilding the front frame rail back into the firewall.
-
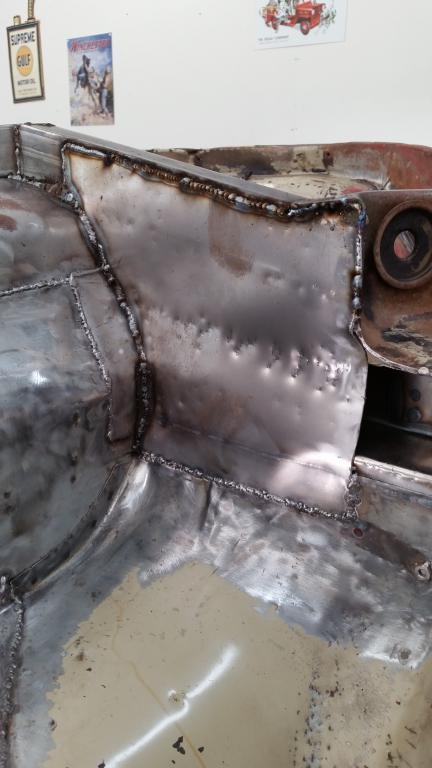
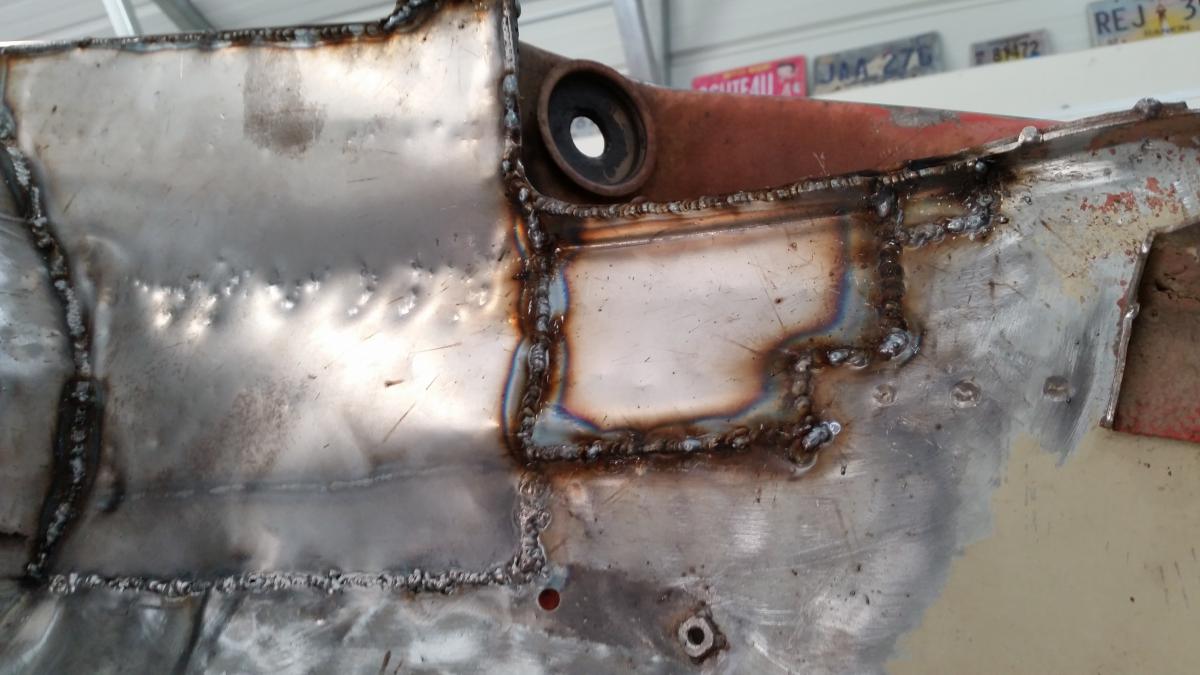
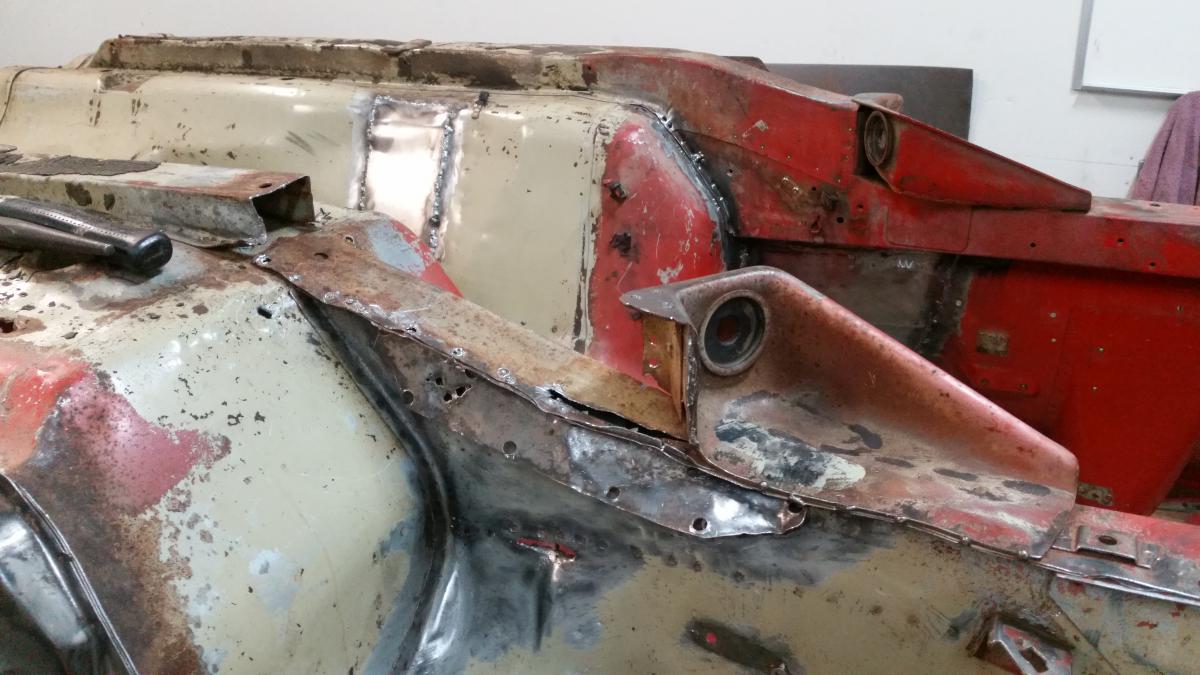
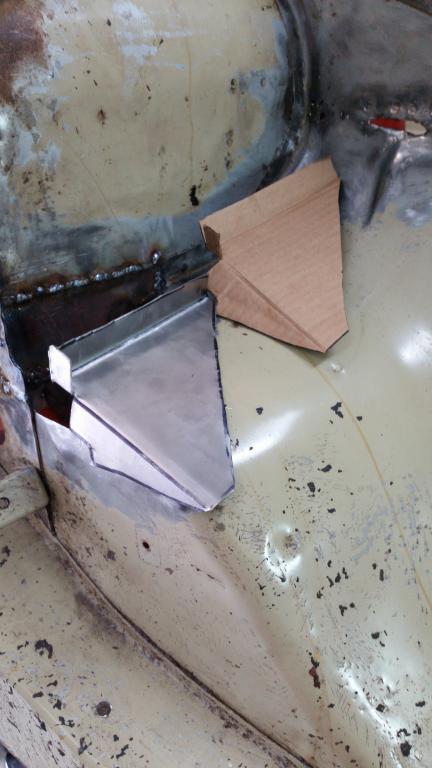
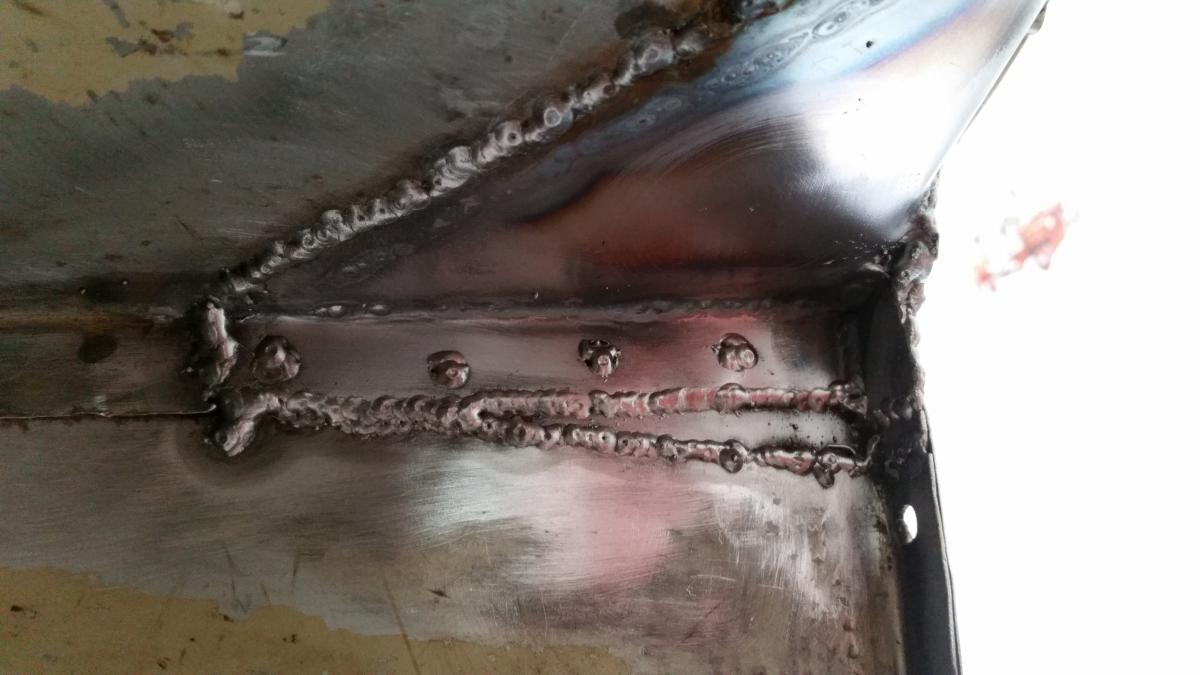
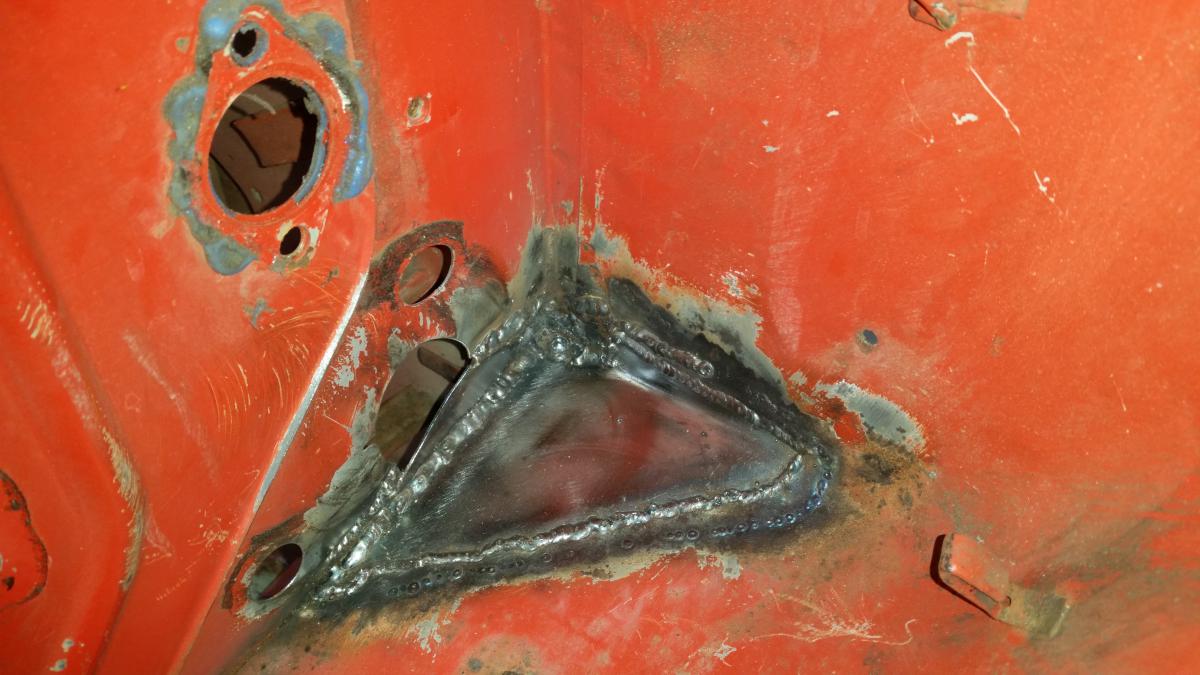
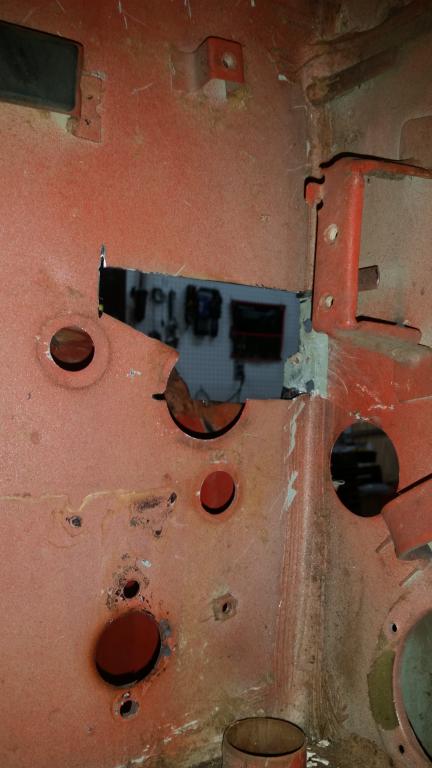
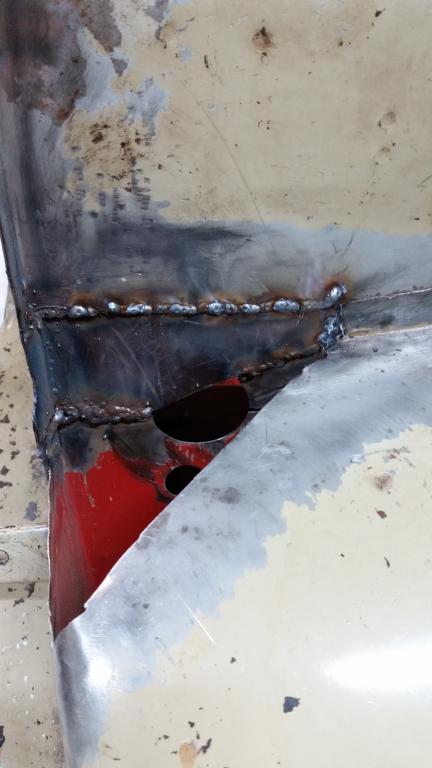
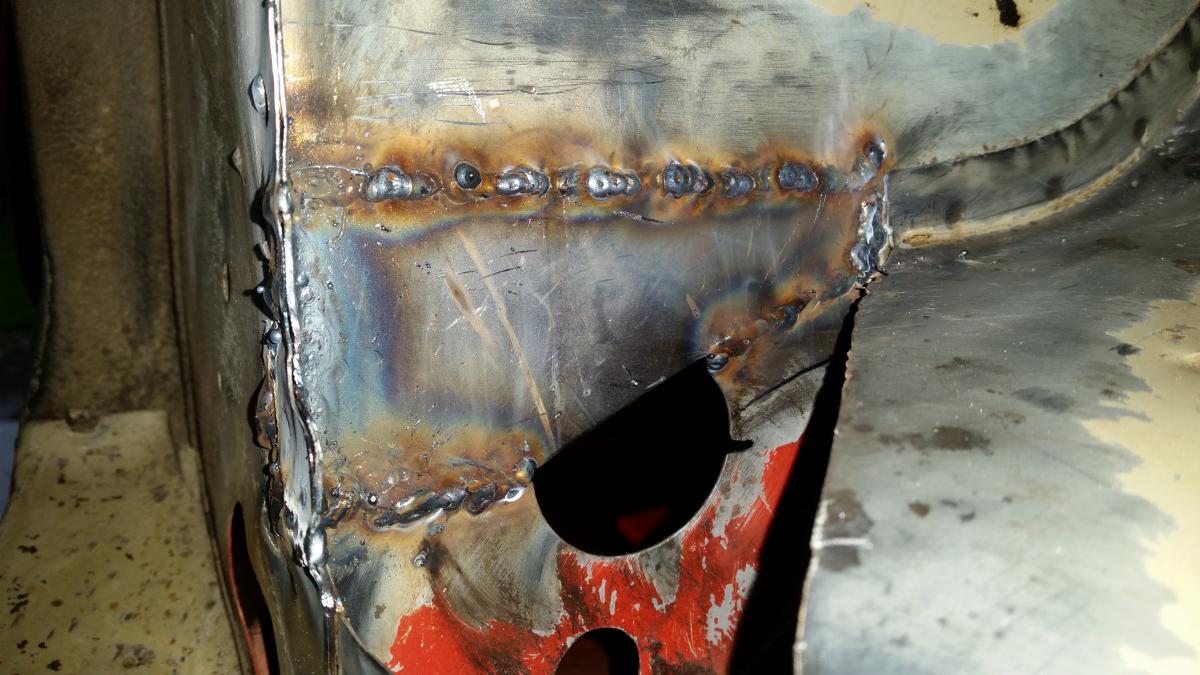
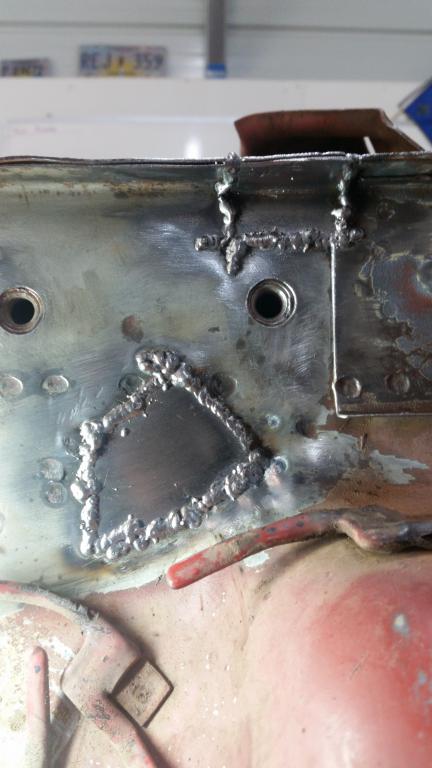
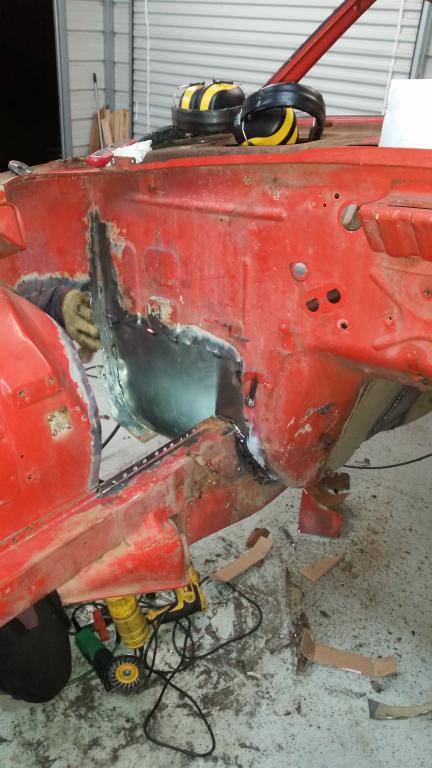
This weekend was car work extravaganza! Another round of updates and pics. I made the piece to fill in the triangle cut out on the firewall/fender area. I think this is my best work yet. I'm a newb when it comes to sheet metal fab and welding, but I think I'm starting to get the hang of it. One pic is of the cardboard template and it's metal counterpart, next pics are test fit, tack welds, the full burn in top and bottom.
-
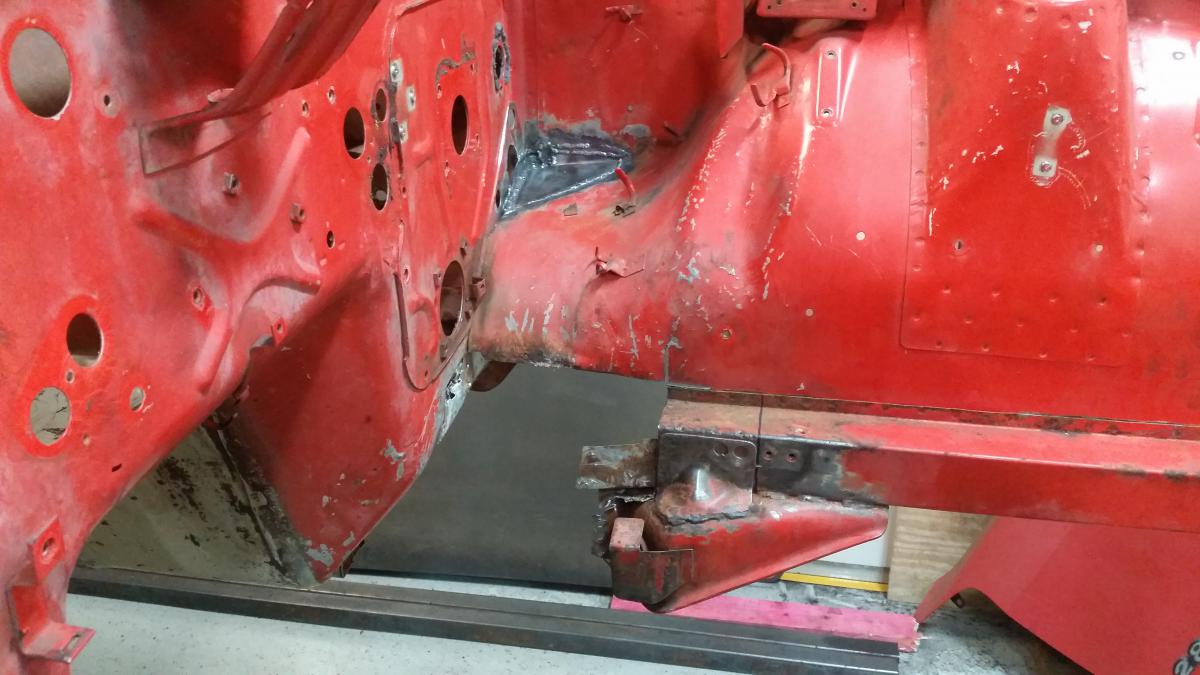
Pics from the firewall/fender area on the driver side.
-
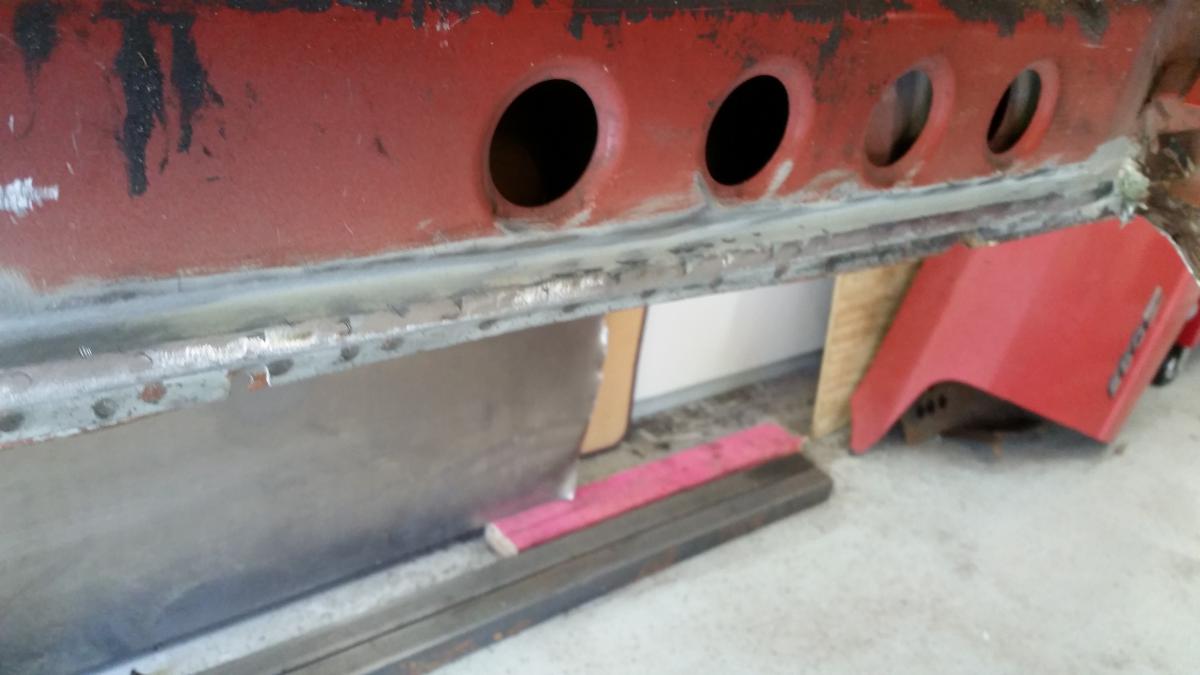
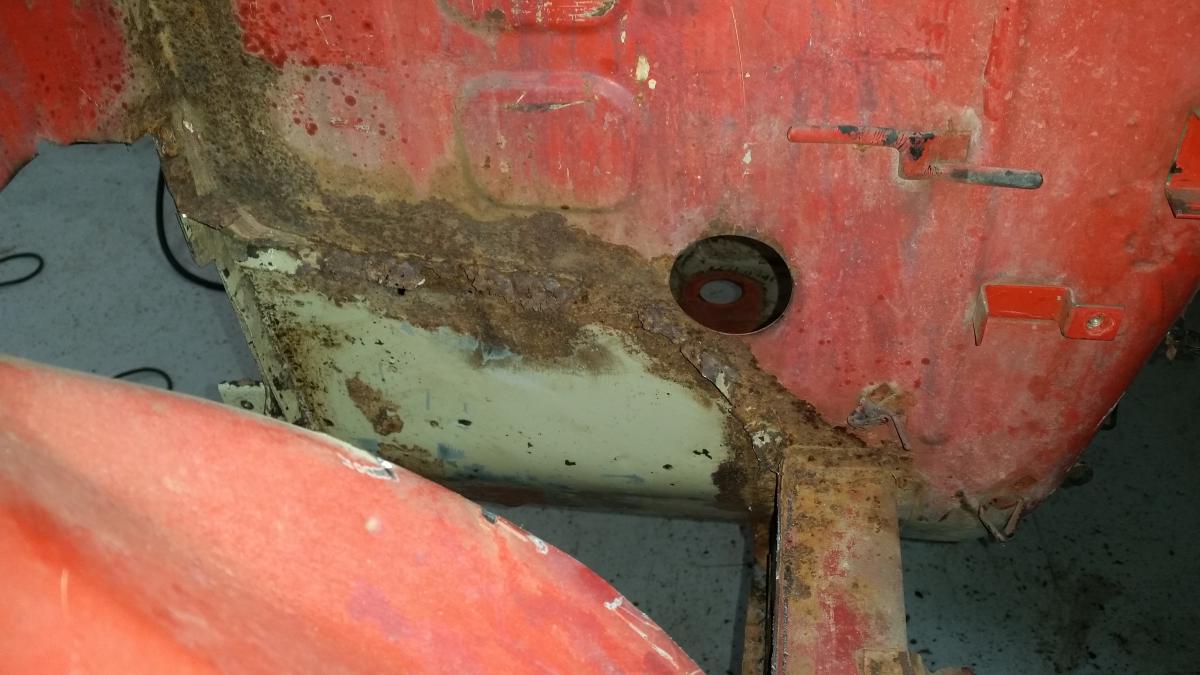
More rust... I think this entire thread will be about rust! There were two spots on the driver side wheel well, toward the front that needed to be fixed. These were pretty simple and went back together quick. Next I started on the fender/firewall under the brake and clutch master cylinders. This isn't as bad as the battery area, however the front frame rail on this side is in pretty rough shape. The front frame rail will be next after I get the fender corner back together. This post has all the pics related to the two rust places up front.
-
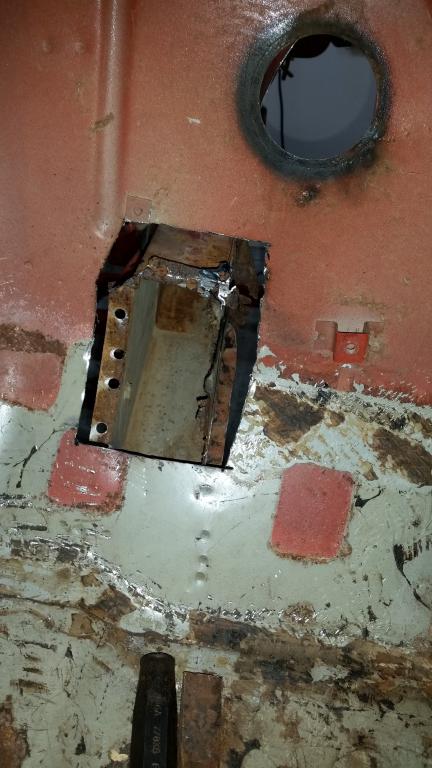
Overdue update! Pics attached are repairing the front frame rail under the battery box, and finally getting in the battery box area patched in. I need to finish the welds on the battery box area, but it's about 80% done. I will have to do similar work on the driver side front frame rail and fender under the clutch/brake masters. I also got the floor pans from Zedd Findings and they are really nice. I really like how long they are, and how much excess material is on the sides. I'm probably going to end up replacing as much of my floors as possible to get the benefit of the new pans.
-
So far it's been elbow grease. Once I get to the point i'm ready to recoat the bottom i'm going to scuff it up more for better adhesion. My thinking on removing the old tar was two fold, one was so I could get a better idea of the condition underneath it all, and second was so when I did bring out the wire wheels there was less gunk to eat through.
-
Pics from the battery area. We just kept cutting, and cutting, and cutting....