Jlhalsey3
-
Posts
27 -
Joined
-
Last visited
Content Type
Profiles
Forums
Blogs
Events
Gallery
Downloads
Store
Everything posted by Jlhalsey3
-
I have had some experience with R200 being noisy, especially when coasting. Had it rebuilt w same ring and pinion by a local shop, just as noisy. I located a low mileage R200 and had the ring and pinion transferred to my case by the same shop. It is now dead quiet. Very happy with it. The challenge is finding a ring and pinion in the right ratio that isn’t worn out. I couldn’t find any new OEM, i think there are some aftermarket available in Japan but very expensive. I got lucky and found a R200 seller who claimed the unit was out of a low mileage car he was parting out. I am using the OEM rubber trans mount that mounts under the front of the diff. Previously used a solid billet mount there but changed to rubber in quest of lower noise. Helped a little but the big change was switching out the worn ring and pinion gears. Not sure if there is a way to test or inspect the gears to determine wear, my old gears looked ok but when i found a unit from documented low mile vehicle ( i think 30k ish miles) i made the decision to purchase. Luckily it worked out great.
-
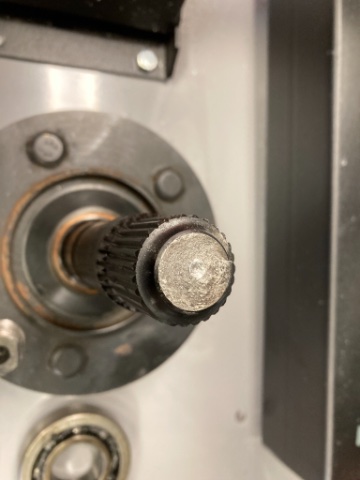
I ended up TIG welding the broken threaded portion back onto the stub axle. It fitted well back into the original fracture and the weld took well. Torqued the nut to 80 ft lbs, well below spec but didn’t want to risk breaking the weld. I now have about 1000 miles on the repair and it is holding up. Note I don’t drag race the car or drop the clutch for wheel spin starts. I do however use full throttle going up through the gears. This is a V10 Gen II Viper motor with 500 ft lbs of torque and a T56 Tranzilla from Rockland Standard Gear, R200 with Quaife. Based upon my experience and given the difficulty of finding replacement stub axles, maybe this is a route others could take with broken stub axles if the break is at the start of the threads.
-
on Monday I will try Joe at Chequjered Flad and also Futofab.
-
Well, struck out, T3 OEM axles were 25 spline and i need 27 spline. I tried to call Whitehead Performance to see if they actually have their chrome moly stub axles in stock but their voice mailbox is full and couldn’t leave a message. Anyone have another number, maybe a cell, for the manager or owner? Has anyone attempted a weld repair on a broken stub? Maybe a big chamfer at the base of the of the threads where the fracture occurred, may loose several threads, then TIG weld the stub, turn down in a lathe any weld material that sits proud of the shaft diameter? Last resort of course.
-
Thanks for the input. I’m in no mood to replace the rear suspension to gain a better stub axle solution. I have ordered T3 5 lug stock 280z 27 spline stub axles. May have to replace the wheel studs, not sure what length they come in but i need 2 1/2” studs to clear the thick rotor spacers that my Arizona Z setup uses. We’ll see how well the T3 OEM axles last, if they last as long as the first ones, I’ll be back here in 15 years asking the same question.
-
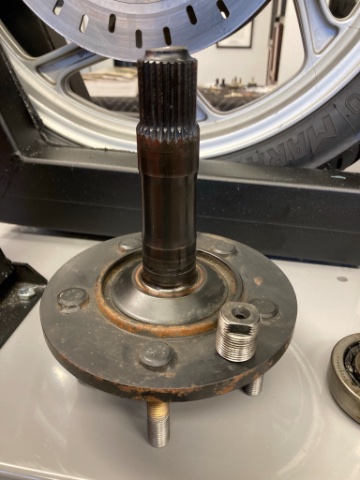
Old thread but current problem. Snapped the left side wheel stub axle on my Viper powered 1972 240Z after approximately 6,000 miles of use. It failed in the threaded portion, not the splines. I have the early Modern Motorsports setup with 280ZX Turbo CV axles and R200 w Quaife which is holding up just fine. What is the current thinking regarding the strongest solution available for the stub axles?

-
Further update. Took the car on a 100 mile trip with expressway speeds. Once speed reaches 65 mph, a strong high frequency vibration is felt, causing the rear view mirror to be blurry. So doing some further trouble shooting. It appears the culprit is the forward U joint operating angle which is 3.4 degrees and does not match the rear U joint angle. I re-drilled the transmission rear mounting bracket to lower the rear of the trans 3/8”. Little change in the angle and I can not go lower at the tail shaft. I think probably spacers under the motor mounts would need to be considered but not sure there is clearance under the hood to move the engine up. That the driveshaft is so short (16 1/4”) also contributes to the bad geometry. So after some research, I am having a custom driveshaft fabricated with a non-plunging CV joint at the front and conventional U joint at the rear. In theory, this will eliminate the vibration due to the excessive operating angle of the front U joint. Quite expensive but seems to be the best way forward. Also found another R200 differential with hopefully a noise free ring and pinion, will have my Quaife transferred over. It’s a 3.70:1 ratio, not a 3.91 but close as I could find. Car is now apart for driveshaft and diff swap, hopefully for the last time. Will post an update when it is back on the road.
-
I am looking for a 3.91 ratio ring and pinion gear set for a long nose R200 differential. Must be in excellent condition, will need close up photos of the gear teeth, especially ring gear drive and coast faces. Will also consider ratios in low 4`s. Thanks
-
Well, its been many months and I have continued to make progress with my V10 Z. Car is back on the road after months of rewiring under the dash and drives nicely. There is still some driveline vibration at higher speeds but much improved after i had the drive shaft and rear wheels rebalanced. The u joint working angles are still not under 2 degrees after much fiddling with the trans rear mount and the differential mounting. But the current focus is the differential, after rebuilding with new bearings it still whines on deceleration and has more backlash than I would like. I need to find a nice long nose ring and pinion in excellent condition, preferably 3.91 or thereabouts, to cure the whine. Something in the low 4's would also work as the T56 is double overdrive in 5th and 6th. If anyone has one they would like to sell or can lead me to someone, that would be awesome. I just missed one on ebay today that would have filled the bill.
-
Yes, car is on a 4 post lift. I have ordered a transmission jack from Harbor Freight but I may try moving the car forward on the lift and using my floor jack while I wait.
-
Progress, took the axles, circlips and differential back to the shop that rebuilt the differential. They were able to insert the circlips into the differential thru the axle openings and slide them down until they engaged the retaining groove. Didn’t take them long. I wasn’t able to watch this part but they said they used a screw driver to get them started and then a socket to push them down the splined part. This is exactly what I was trying to do but couldn’t. Then they inserted the drivers side (shorter) axle and with a mild tap with a mallet, it seated fully. Then using two screw drivers, one prying on each side of the axle, they were able to pop the axle back out again. All good. Then came the passenger side (longer) axle with the rectangular cross section circlip groove. They were worried the circular cross section circlip would either not engage this axle or if it did engage that it wouldn’t come out. This axle went in and out just like the other, to my great relief. At some point, I may attempt to disassemble the inner CV joint on my sole “long” axle, and transfer the stub axle to one of the “short” remanufactured CV axles I have so many of so both axles will be fresh. So I will now see if I can rent a transmission jack and install the diff, cut the Technoversions/RT poly mount to the correct size and hope the new OEM lower mount fits and see what the pinion / driveshaft angle delta looks like. Thanks again for all the help I have received here.
-
Well, if I was still in LA finding a specialist Datsun differential shop would be no biggie. Unfortunately, I am now in a lovely rural area which has tons of marina’s but very few automotive specialist shops.
-
I am planning to take the axles and diff back to the shop and let them install the circlips. They are telling me that the clips are installed on the axles. I want them to install them and then insert the axles into the diff. Then pull the axles out so I can be confident I can install and remove them in my garage. If they have trouble with this approach, I will ask them to disassemble the diff and install the clips that way. Another wrinkle I have noticed which may cause a problem is that the axles that came out of my car have a rectangular cross section circlip groove. The replacements I have purchased have a more of a V shaped groove. The circlips I bought have a round cross section which would appear to fit the V cross section axle grooves and not my original axles with the rectangular cross section grooves. Perhaps why my axles had no clips at all. Does anyone know if there is a different clip for rectangular groove axles and the part number for same? By the way, fyi, I have now bought two pairs of 1981-1983 280ZX Turbo remanufactured axles from different eBay vendors, both based in China I believe. Both sets contained equal length axles, the shorter ones for the drivers side. They seem to believe the axles are the same part and part #. On my R200, the passenger side depth from the outer seal to the circlip groove is 5/16” greater than the driver’s side. Appears using a short driver side axle in the passenger side will prevent the clip from reaching and engaging the groove. Thanks
-
I am very sure they are a short and long pair. I measured the depth from the outer oil seal to the bottom of the splines in the differential: driver's side 3 13/16", passenger side 4 1/8", so 5/16" difference. Same as the length difference of the axles. The problem with running the shorter driver's side axle in the passenger side is that the circlip will not reach the retaining groove in the differential and therefore won't lock in. I will check for binding when I get the diff and axles back in. Right now I'm having a helluva time getting the circlips started down the splines within the diff. I am prying on one end of the circlip with a screwdriver to get it started inside the splines but it keeps popping back out. If I can get it started square in the splines, I'm sure I will be able to push it down the rest of the way with a 32mm diameter socket. Just can't get it started and I don't want to pound on it with the socket without already having gotten some of the clip inside the splines. Suggestions welcome. Have written to Quaife technical support for tips well.
-
Update: I now have the R200 back, rebuilt by a local shop. Getting ready to install the circlips by inserting into the splines within the differential and pushing down with a 31 or 32mm socket until they pop into the grove towards the bottom. Hopefully no drama with this and also when I insert the axles hopefully with no more than a firm shove. Due to some shipping misadventures when purchasing a remanufactured pair of 280ZXT CV axles from the source identified here earlier, I ended up with two drivers side axles.These are the shorter axles, about 5/16" shorter than driver side. Was going to reuse my passenger side axle with the new drivers side axle but after reading so many threads about Z31 axles being too long, I am now wondering if the 280ZXT axles also may be too long for the 240z chassis with R200. Can anyone comment on whether this is the case and therefore I may be better off using two drivers side axles? Thanks!
-
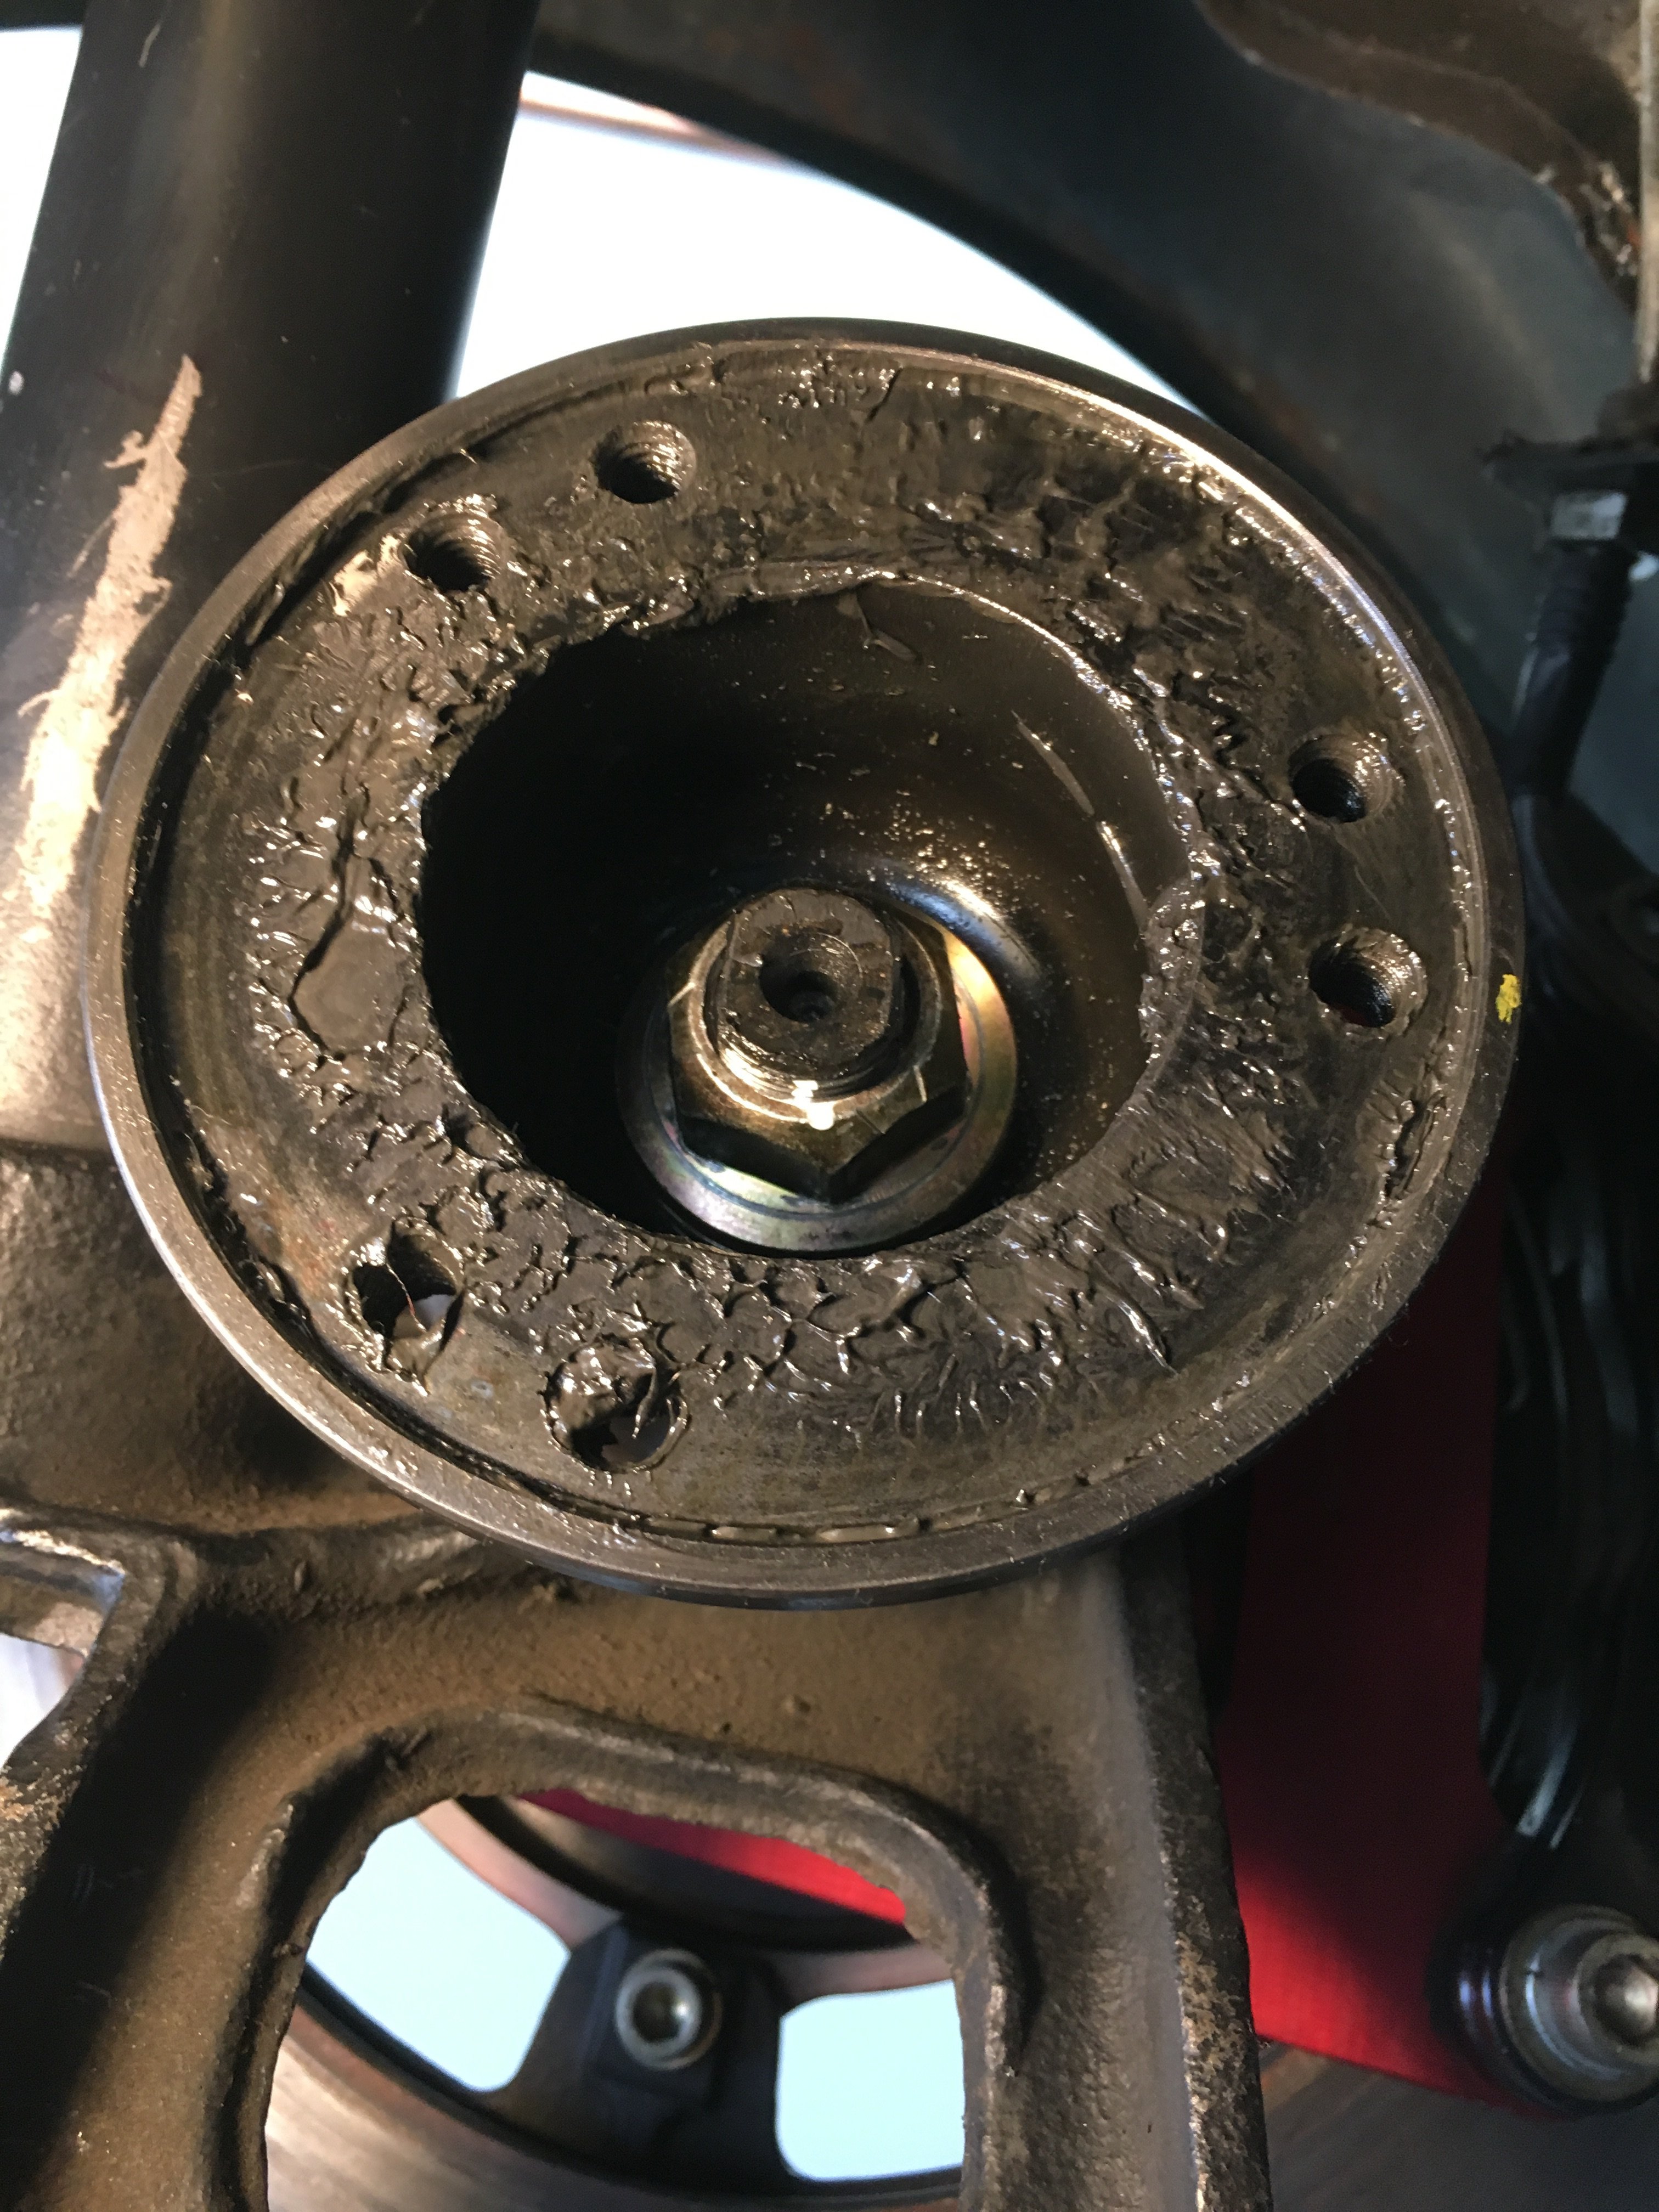
There is at least a 1/8” or maybe 3/16” lip on the circumference of the hub mounting surface. The seal plate fits tightly inside the recess. This is done, I believe, to ensure that the CV joint mounts hubcentricly rather than relying the six bolts to center it. The hub is a Modern Motorsports product. But if grease finds its way between the seal plate and the recessed hub surface, a hydraulic force develops between the two as there is very little clearance to let air in. Also, it is very difficult to insert any pry tool between them due to the recess within the hub. I was only able get a small screwdriver started where the tabs are, after bending them back and using a hammer to slowly work the blade deeper working in turn at all three tab cutouts. Then hammer blows did the rest and the joint body separates from the plate. After that, even the plate alone was not easily pried out of the recess. And, of course, grease everywhere.
-
ok, finally got the outter CV joints separated from the hubs, see picture. I ended up separating the joint body from the outer sealing plate with the three tabs as had been suggested earlier by NewZed. Bent the tabs back and pried inside then tabs and got them to move a little and then used a small sledge hammer on the body of the joints. If anyone else ends up in the same situation, make sure you wire up the shafts to something so they don't fall on the floor when the joint finally separates from the hub. It appears grease had somehow gotten between the sealing plates and the hubs causing the plates to adhere strongly to the hubs. Received the OEM lower mount which appears to be the identical thickness as the AZC billet mount (1") so the nose of the diff will rest exactly the same distance above the cross member as it did with the solid mount, hopefully keeping the pinion angle unchanged. Will post an update when I have the car back together and. road tested. Thanks for all the assistance.
-
Correct, billet aluminum from ASC. Hope to get the R200 back next week from the shop, they said it was in pretty good shape but they are going through it, replacing bearings and seals, setting it upon correctly w respect to pre-load, lash etc. They agreed that the missing circlips was a potential source of clunking rather than whine type noise. Hopefully with the rebuild, the circlips, and eliminating the solid lower mount, the car will be nice and quiet. Also putting in new lower control arm bushings. Bought a pair of new 280ZX Turbo CV axles from the source NewZed provided, they look very nice and are the same lengths as my current axles. Now I can be a little more forceful trying to remove the ones in the car from the hubs since I have new ones on hand. thanks for everyone’s help.
-
NewZed, regarding your pinion angle observation, I am sensitive to this issue. Before I moved from LA, I had my race shop do some work on the car, installed electric power steering, R200 ring/pinion swap, etc. They found the drive shaft vs pinion angle difference to be 3.7 degrees. They welded up the Moustache bar differential mounting holes and redrilled them ending up at 0.3 degrees difference. I will be careful not to change the installed height of the differential nose when I replace the solid AZC lower mount with the OEM Nissan. In any case, I will measure the angle difference after installation to confirm.
-
I ordered a stock Nissan mount for the lower crossmember. I have the ArizonaZcar Moustache bar and black mounts that came with it, not sure if they are rubber or urethane. Cant visualize what you are suggesting for isolating the Moustache bar mounts with spacers. Can you provide some further details? Thanks.
-
I would like to use some sort of rubber or urethane in the lower mount in addition to the RT mount on top. I have been using the Arizonzcar billet lower mount. Is there an OEM or aftermarket alternative to the solid lower mount that works with the OEM lower mount? I don’t drive the car hard but for noise and strength reasons i would prefer to have both upper and lower support for the differential. Thanks
-
I have the second one, from Technoversions that goes over the top. Didn’t know theat T3 offered a lower mount as well. I wonder if I could use them both for additional strength and to keep differential movement to a minimum while softmounted. Wouldn’t need the cables in that scenario.
-
Thanks NewZed. I am giving up trying to remove the axles for now, I have cleaned them, applied silicone sealant along the perimeter of that joint on both CV’s and will disassemble the boots so I can replace the grease that was lost. I am taking the R200 to a local shop tomorrow and see what they say about its condition and rebuild cost. The axle clips should arrive well before the R200 is repaired. Based on JHM’s and your earlier comments about solid mounts, I purchased the T3 upper mount/bracket. It arrived and is a nicely made piece. I spent a good part of yesterday installing it. This was made somewhat challenging because the area above the R200 nose is occupied by my emergency brake solution which is a “line lock” type device with a pressure switch and a solenoid in lieu of a mechanical emergency brake. To apply the brake, I turn on the power and plush firmly on the brake pedal. To release, I turn off the power and again press the pedal firmly. Works pretty well and I didn’t want to invent a new emergency brake solution. I was able to loosen the brake lines and rotate the pieces from vertical to horizontal and attach it to the floor pan with an existing fastener which was probably for the interior console. Had to trim a small piece from a bracket, when I finish I will post a picture. In any case, it appears it will all fit in the 2” above the bracket below the floor but its tight. Will have to trim the urethane bumper when the R200 is back. Thanks for everyone’s input. Hopefully with the R200 in good health, axles clipped in, and getting rid of the solid mount, the car will drive like a small limo.
-
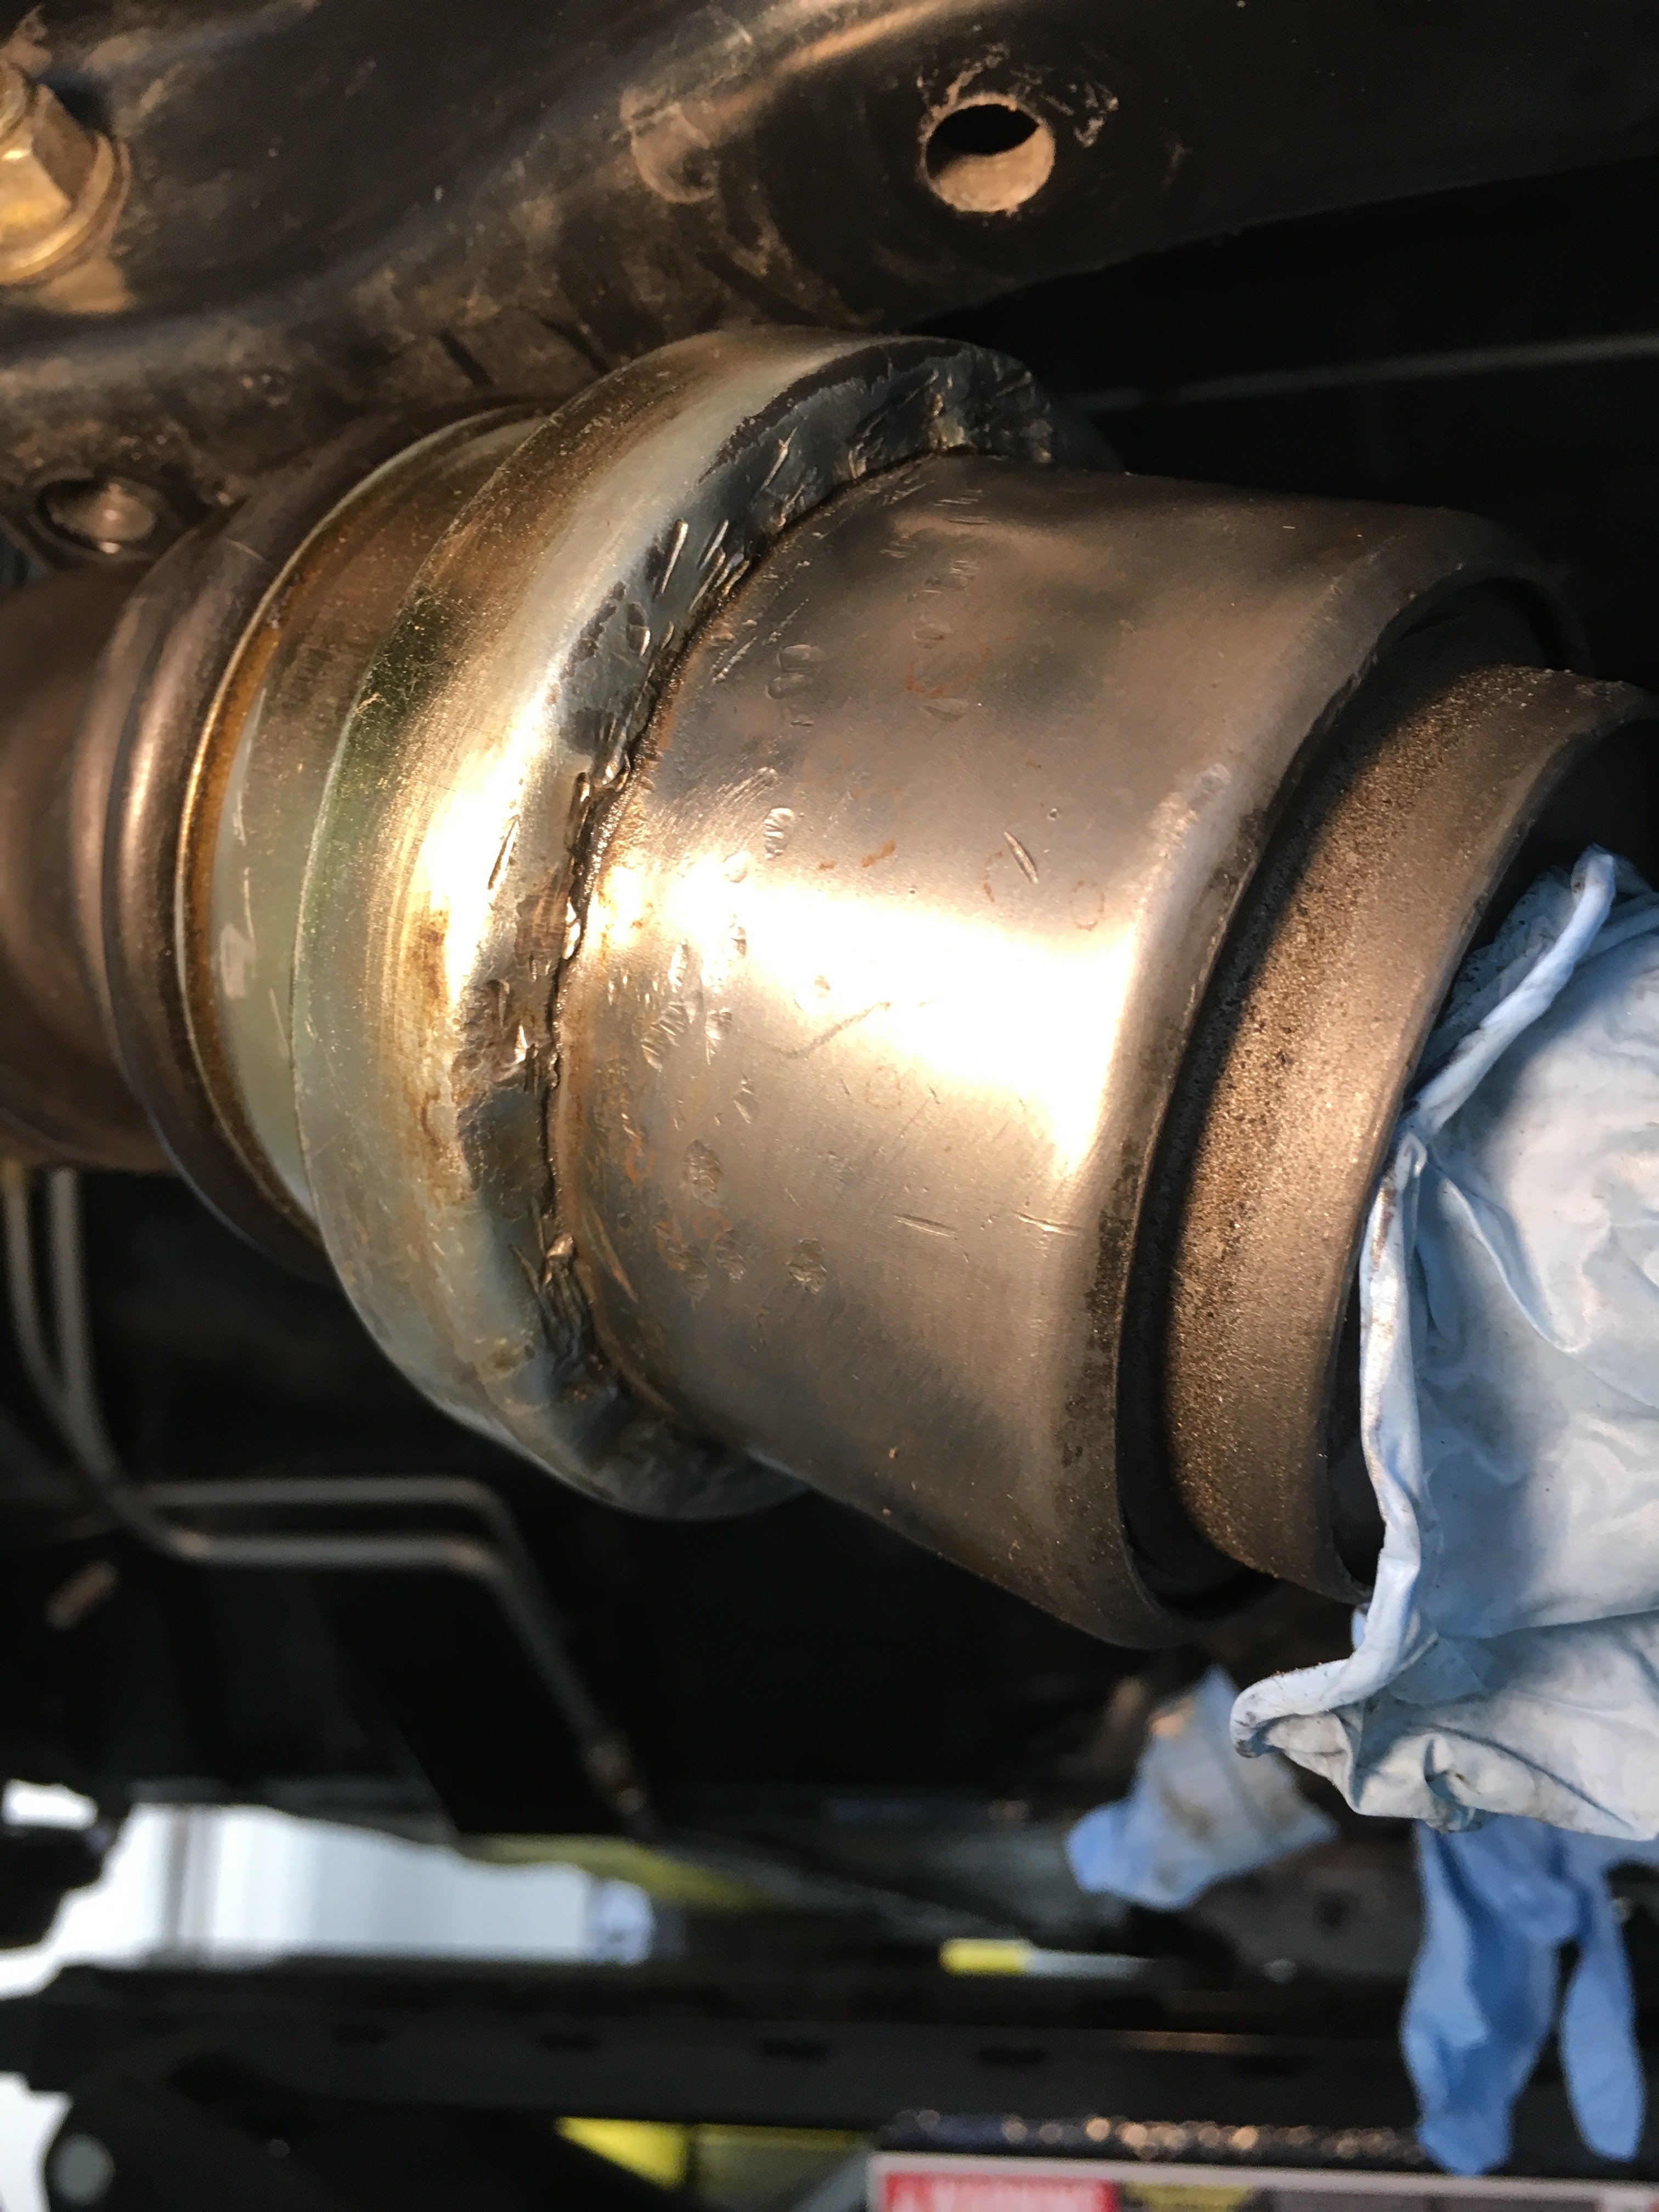
ok, still no luck freeing the outboard cv joints from the hubs. Tried the chisel approach but no go. I have ordered the Nissan clips identified in the thread that was sent. But one mystery has been resolved, on the driver's side of the car the inner cv joint has been throwing grease up on the floorpan. I had carefully inspected the boot many times and could find no damage and no evidence of grease escaping but when wiping down the joint I saw what I could not see with the differential in the car. See attached picture, looks like someone had the two halves of the joint apart at some point and beat the flange over to reseal it. Grease has been escaping from this area. Is this fixable with some silicone sealant or do I need to replace the joint, if thats even possible? Or purchase a new axle with joints installed? And does that have to be done as a pair so two new axles? Are these available? Where might I source them? Thanks for all the input.
-
Thanks jonbill. I will look for information on the Quaife axle/circlip installation procedure.