
long240project
-
Posts
52 -
Joined
-
Last visited
Content Type
Profiles
Forums
Blogs
Events
Gallery
Downloads
Store
Posts posted by long240project
-
-
A Koni or Bilstien shock can be revolved for about $100 per shock to get the traditional 90/10 drag racing shock. As set of new shocks of any kind will solve the rebound bounce in the video. You might want to up your front spring rate to about 250 to keep from slamming down hard.
Bilstein will no longer re-valve one of their strut inserts to create a drag racing double adjustable strut.
Koni will build one that is double adjustable and re-valve it for drag racing use. The measurements of the KONI inserts are not an exact match to the originals. The dimensions of the Koni inserts are a bit shorter than the stock and require a spacer to make up the length difference. The stroke however is the same and should be fairly easy to make work. The process of inquiring about this product was quite aggravating with both companies. I originally was quoted a price of around 800.00. I saved up the money over 3week period and called back to pull the trigger and the price changed. The final price for two struts is well into the $1000.00 Range far exceeding 100.00 per strut to re-valve. I am currently waiting for them to be built and will update with pics of installation which they arrive. I recommend asking for a quote upon inquiring about this process.
Finally, I did replace my worn out struts with a new stock type pair from O’reily’s. it was a cheap $100.00 experiment. I too was convinced that a new set would slightly calm down the up portion of my launch and drastically change the landing…..It completely killed the launch!!! as it doesn’t allow the car to come up and transfer weight over the differential like it did originally. I just wanted to share my findings in hopes that it may save someone the trouble…..
-
Hi,
I hope I am not missing a thread and this has been covered, if so please excuse. I can only find discussions about adjustable strut inserts on road racing applications. I have spoken to KONI's technical dept about revalving some for Drag Racing. They can Create one that has adjustment on both compression and extension for drag racing. I was wondering if anyone has overcame this through some other source or by having Koni custom build some similar? I know fabrication could allow for many different ways to resolve but I don't wanna cut up my stock strut assembly. Notice rebound bounce of car in video....
thanks in advance
Lane
-
Logan 1
What are you primarily looking to do with the car once complete? I think it is very important to ask yourself that question with a build in order to determine direction with regards to suspension, engine components, "frame or chassis upgrades" etc. For example: I wish my car was more of a driver now that it is complete but the direction I chose engine,suspension and even fuel type wise is drag racing specific. At the end of the day I wanted to go Drag racing. That is not everyones goal. That is not to say you can't take a piece of knowledge from a drag car, a piece of knowledge from a road course car and some what arrive at a finish product that accomplishes your goal. Most people will agree that for every gain in one aspect you generally compromise in another so determining a cars primary function is key. Hope this helps a bit.
-
Pretzel eh? (Roll bar only) everything else frame wise is just like it was in 1972.
-
-
Long240project:
Thanks a BUNCH for this info.
Rsicard,
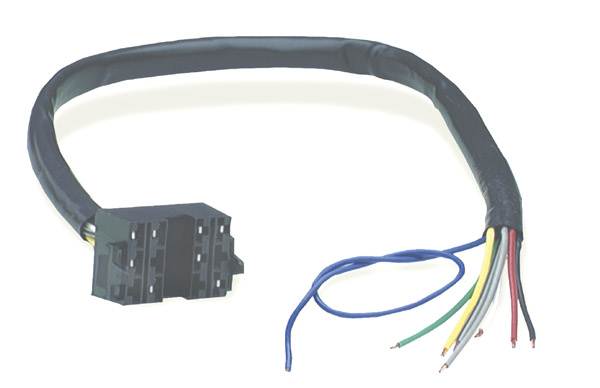
No problem at all. Fyi I had to order the Switch,Harness,Flasher through a Tractor/Trailer parts house that used the Grote brand.
Once I received it, I extended the length of each circuit by buying strands of 16gauge wire the indentical color of each existing wire in the Grote harness and soldered and shrink wrapped it all at once. This step help to speed up the wire rough in a lot. It also made following the instruction simple. Give me a buzz if you have problems
Thanks
Lane
-
Long240project:
Who makes or where is that turn signal stalk available. Please advise. Thanks.
rsicard,
Switch is made by Grote. Universal turn signal switch part #48272 also buy wire harness #69680 that plugs right into it and the flasher suggested. Your turn signals
are now wired with a color coded instruction sheet which is ultra straight forward and explains it word for word. Hope this helps
Lane
-
I would also be interested in seeing the signal stalk you used.
-
I would also be interested in seeing the signal stalk you used.
Sorry will take pics soon... trying to finish the car. Its driving me nutz
-
All,
I am searching for the center portion of the rear bumper!! I have my bumpers at a Chrome shop and he is saying that portion is twisted and unrepairable! I registered for a Big Car show in a few weeks so trying to find a good donor piece to have re-plated. Please just call me if anyone has one as I am in a time pinch!
Thanks,
Lane Comeaux
225-229-6094
-
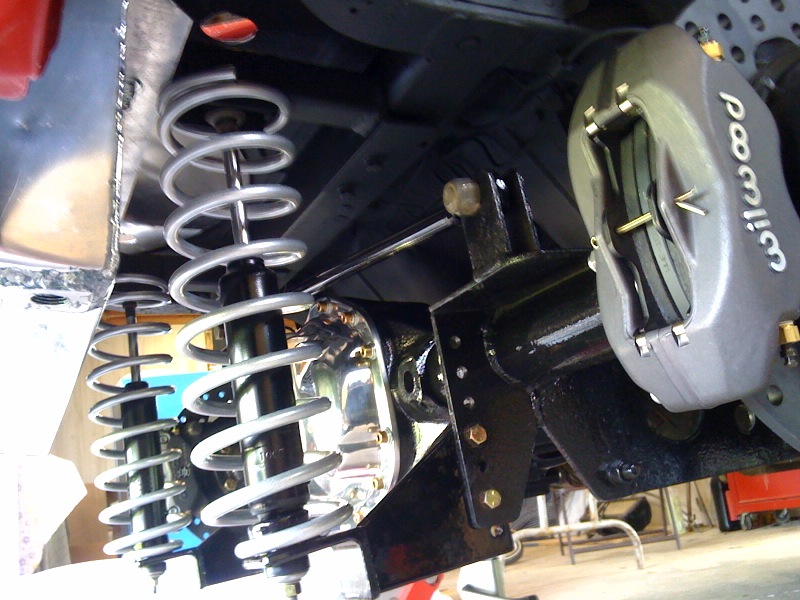
Great looking project! Just curious how the rearend and link system is tied in.
It's a ladder bar concept,
going forward from where the pic ends it attaches to floor of car by way of a flat plate with a rod end. Will take pic and post.
-
Long240project:
What is being done with the wiring? Did you find a fuse block and wiring kit that will go into the 240Z? What will be done with the turn signal and headlight switch stalks? I have to go through this process myself with a SBC and T56 trans in a 240Z. Hoping you will share some of your thoughts on this process.
Rsicard,
The wiring project was kicked off a long time ago and is a done deal now. When the car was taken down I strip every single wire out of it. The car is in reality a race car so my wiring is super simple compared to trying to make every bell and whistle that it came stock with work. Will your SBC be fuel injected or Carb? You can buy an upgraded mini fuse panel that plugs right into the existing harness if you havent taken your wiring out as I did. Tell me more about the current state of the wiring and where you wanna end up and I am sure I can help. Also I will take some pics of the turn signal stalk I used!! Its super trick and super compact and has turn indicators that also light up self contained. It's hard to cover everything on here so if you are interested once i post the pics we can discuss via phone. If you want use my method.
Lane
-
any updates on more detailed pix and info on your awsome rear end install?
-
Hi,
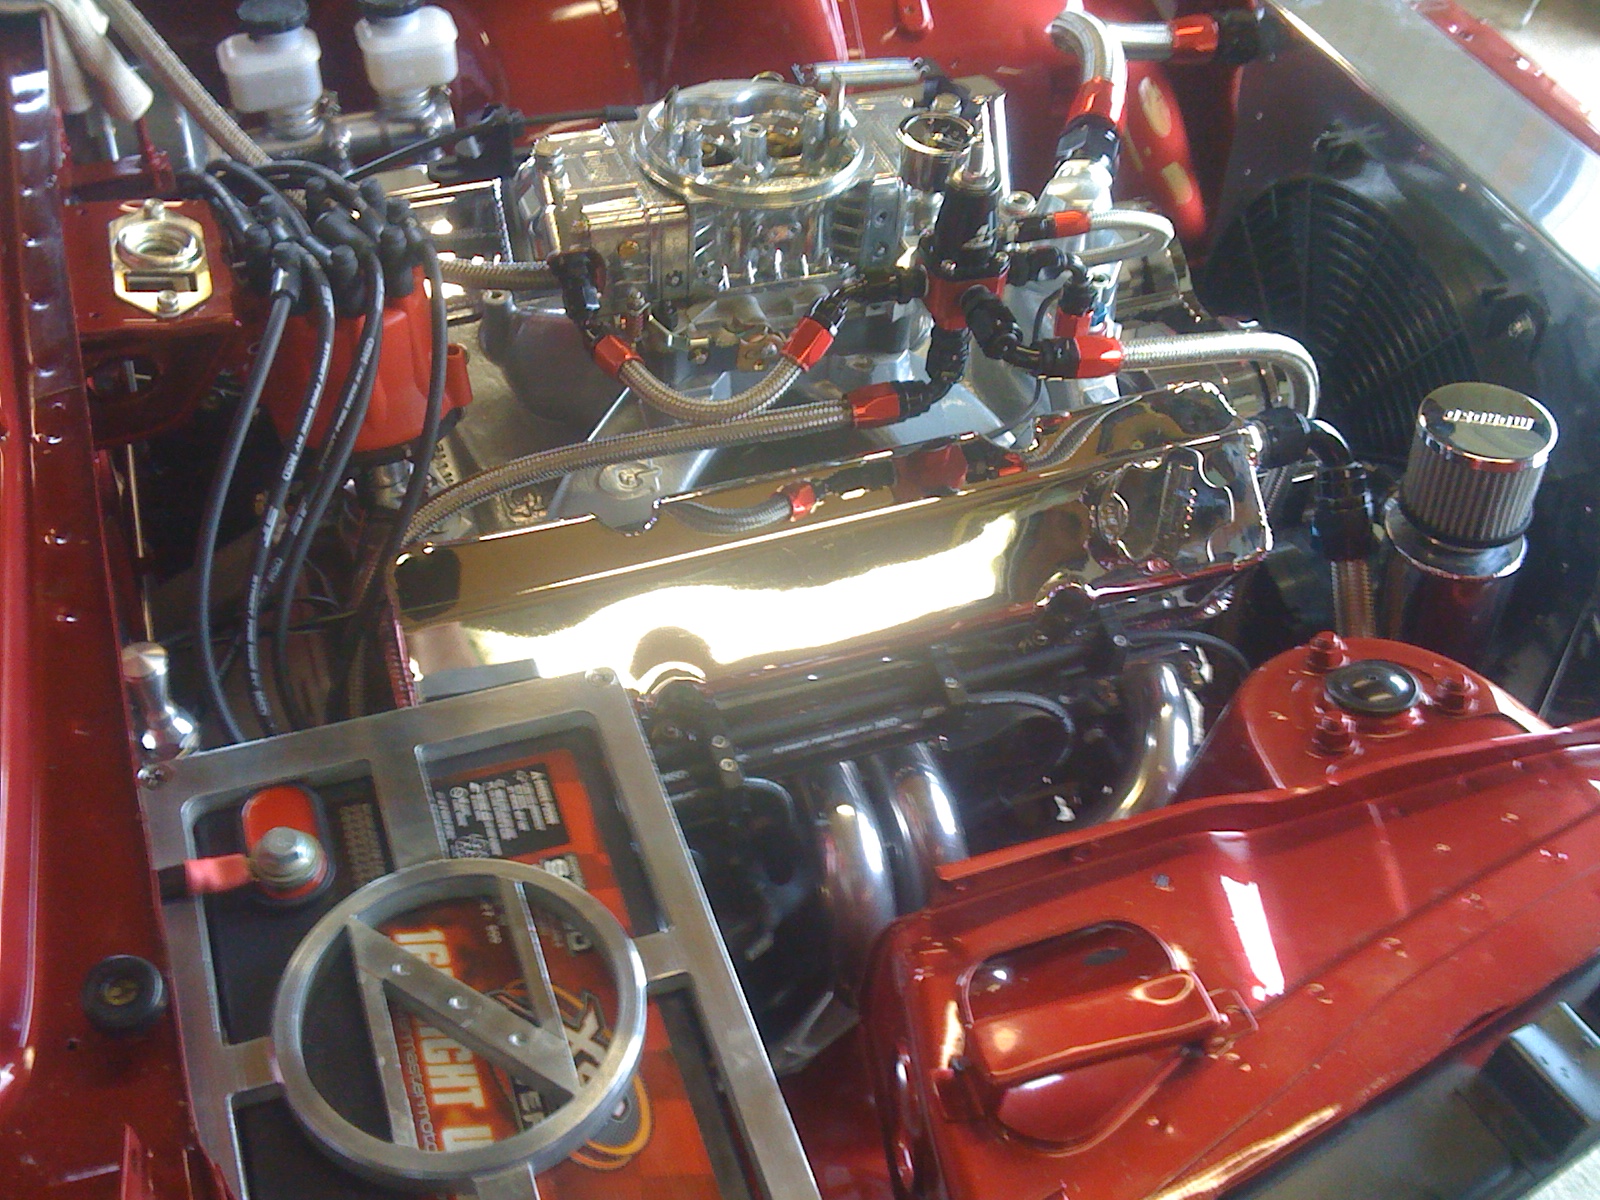
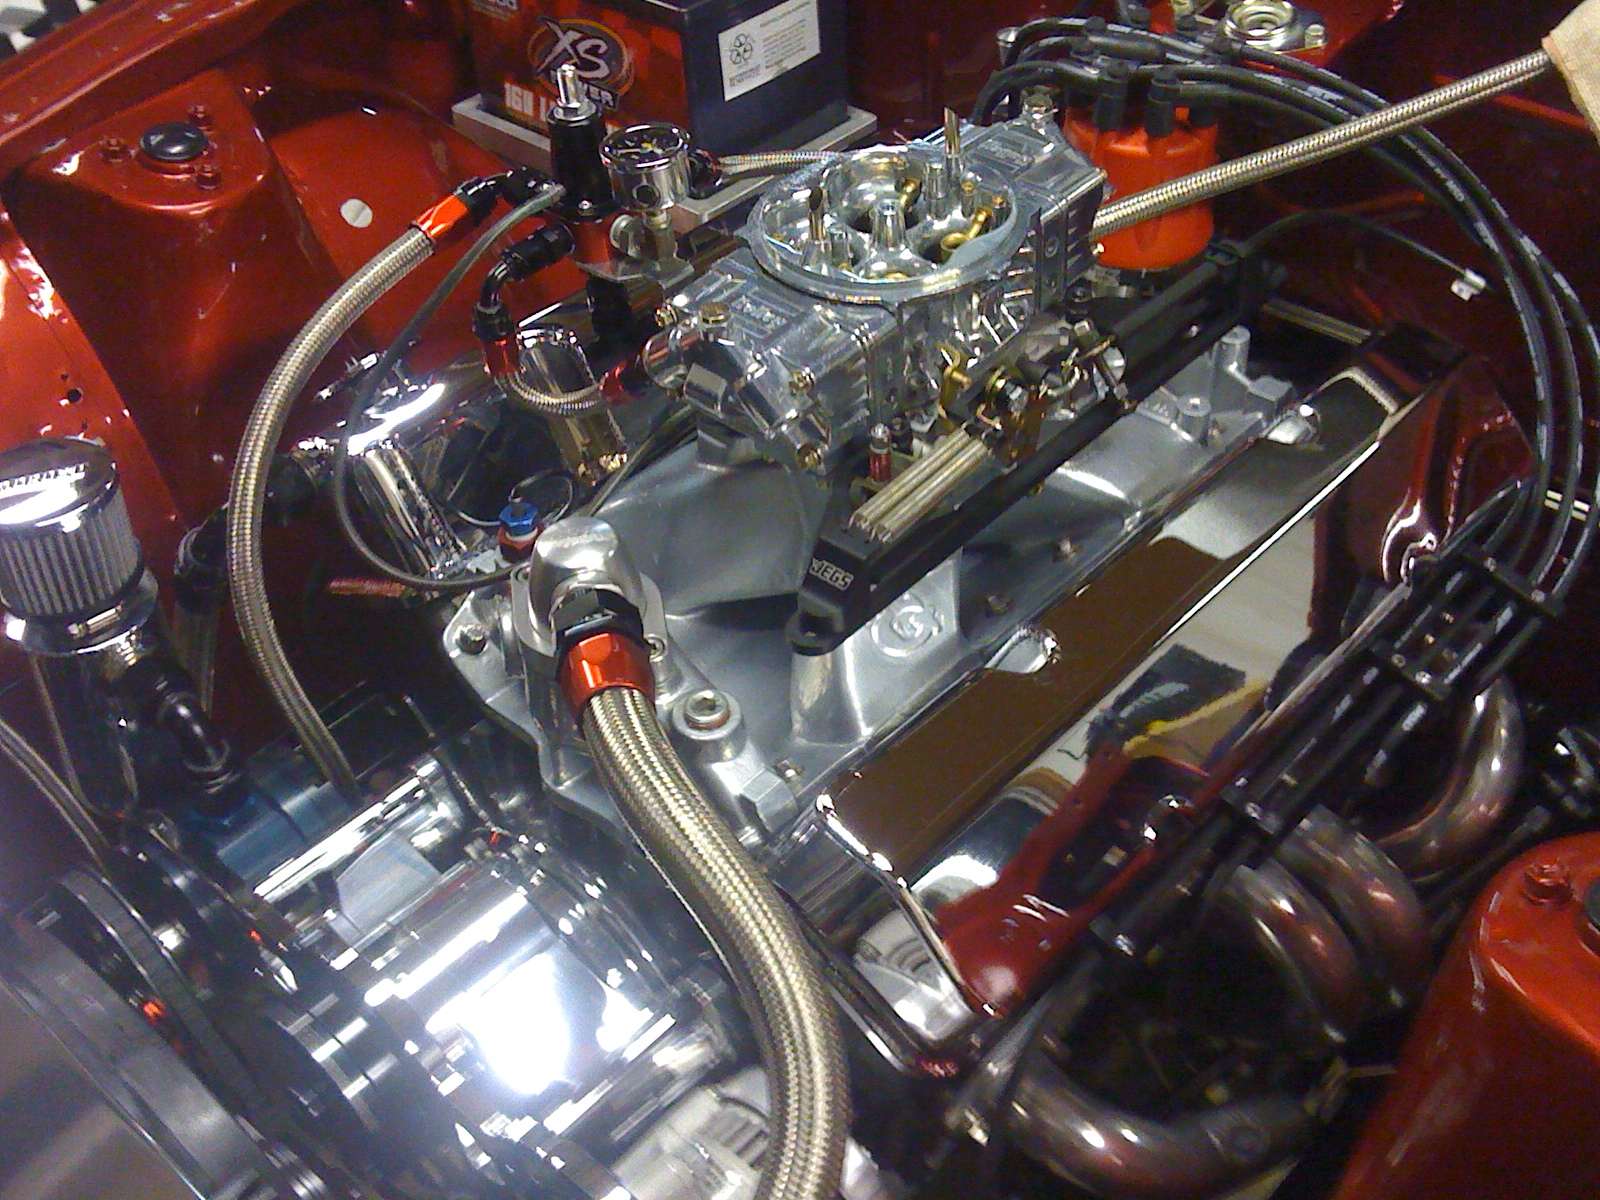
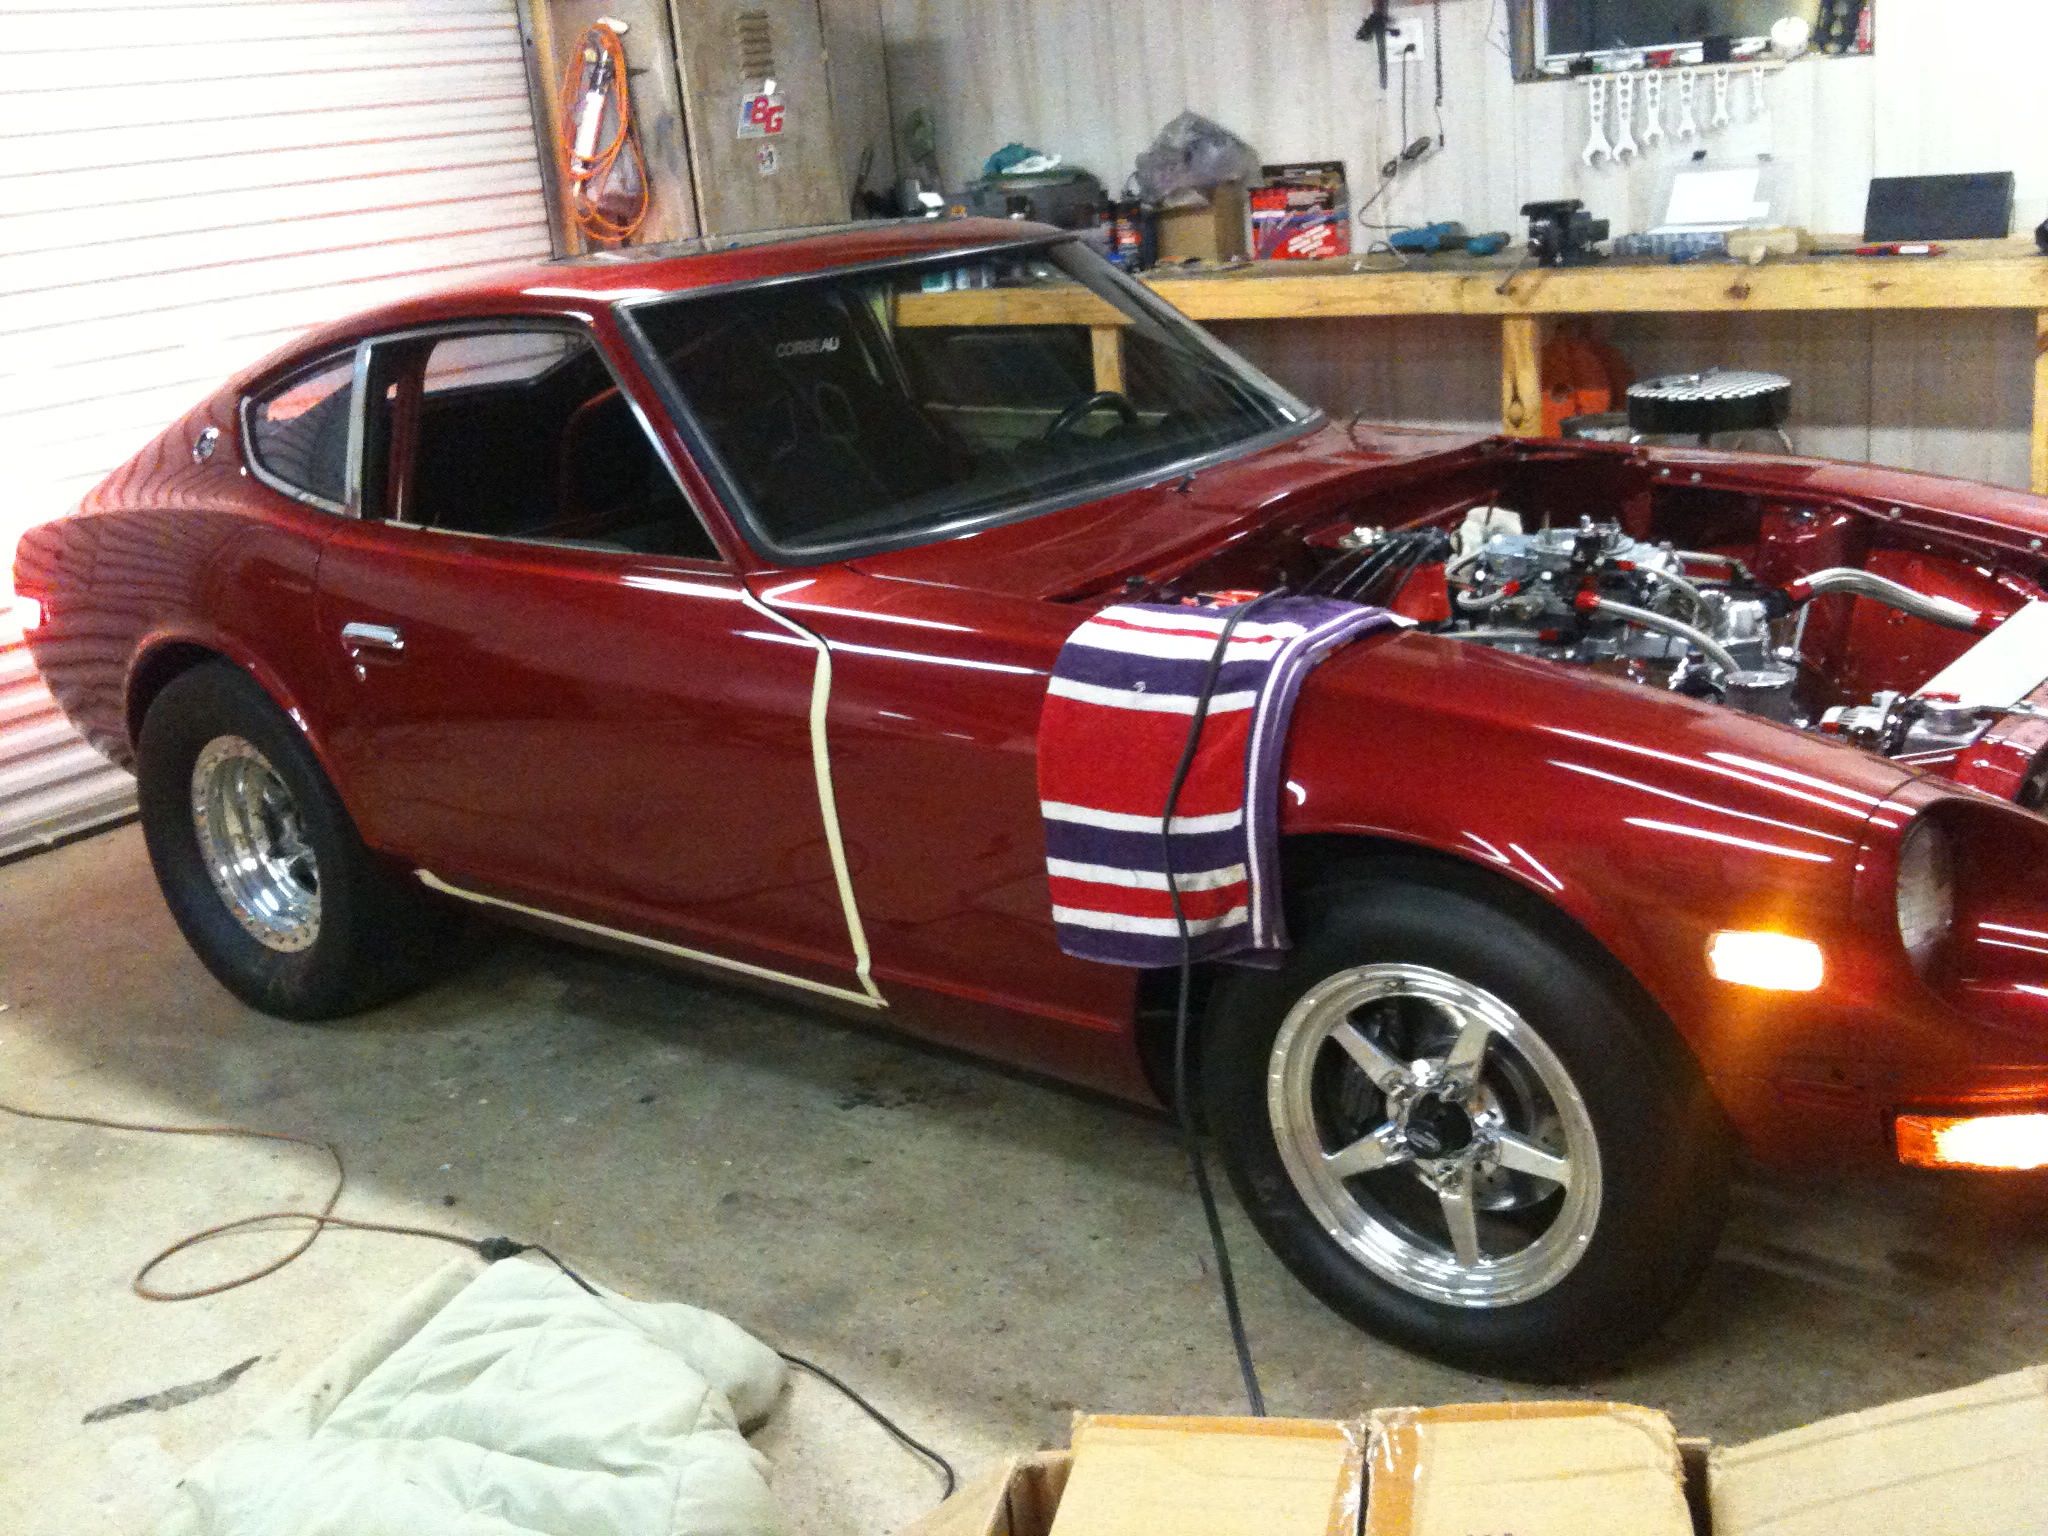
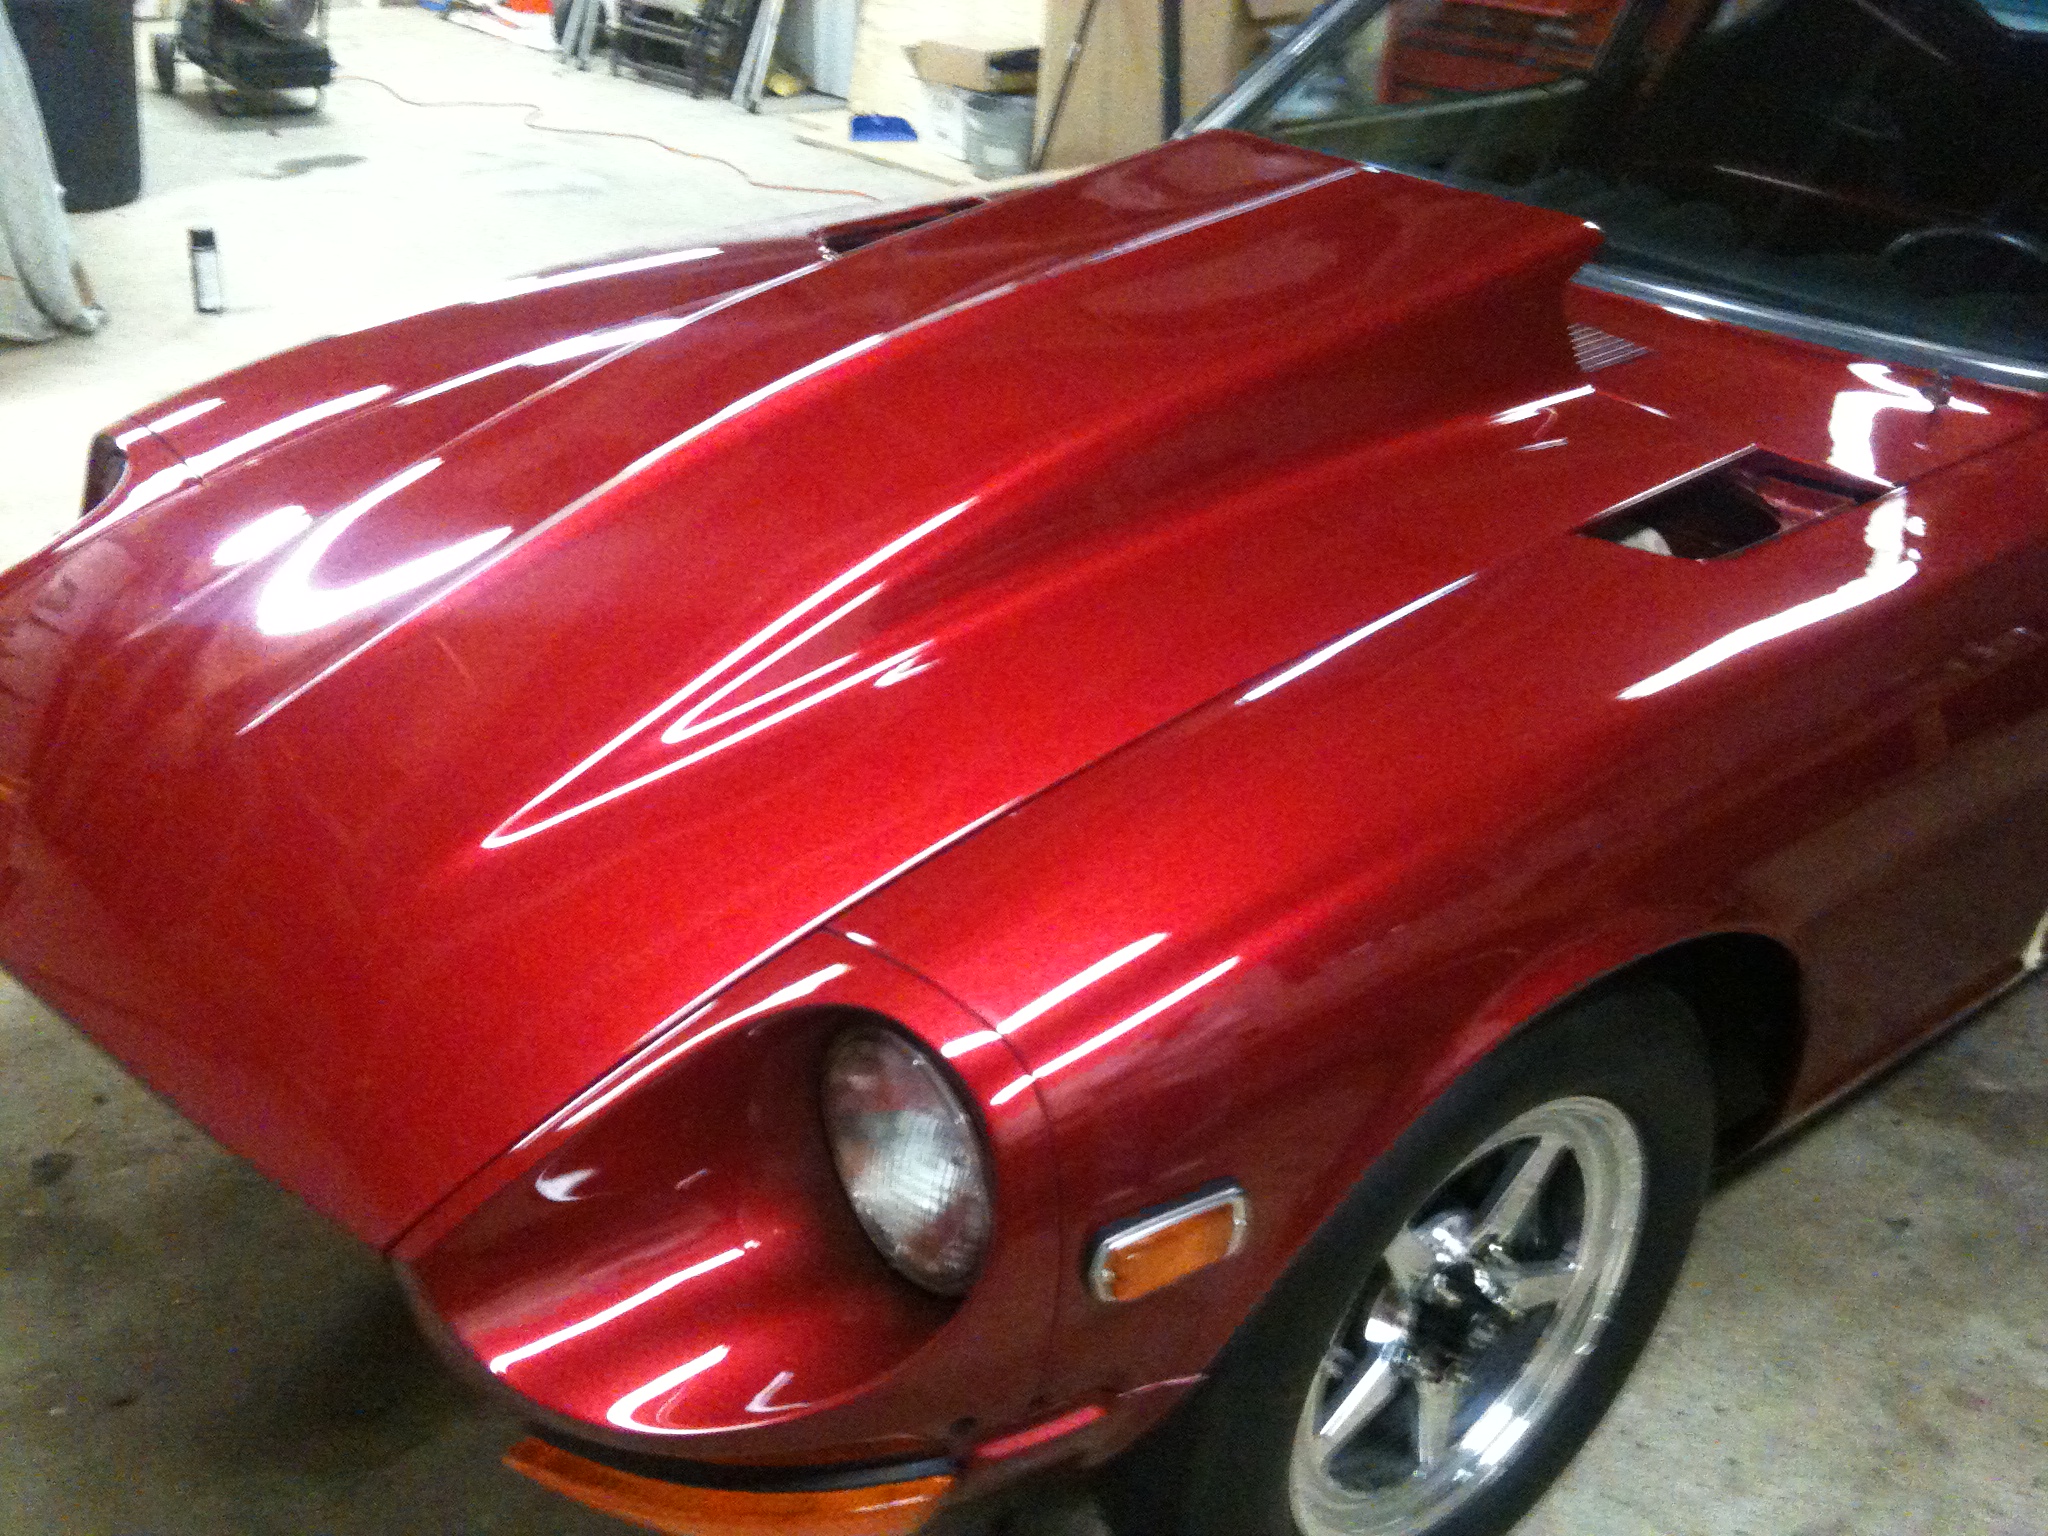
Finally got motor back in car. I am new to these forums... put a lot of work into my car and wanted to share...
Updated photos
-
Finally got wiring kicked off!
-
I have to ask what is that spiffy bracket you're using for the alternator? And it looks like you're installing A/C as well? Nice!
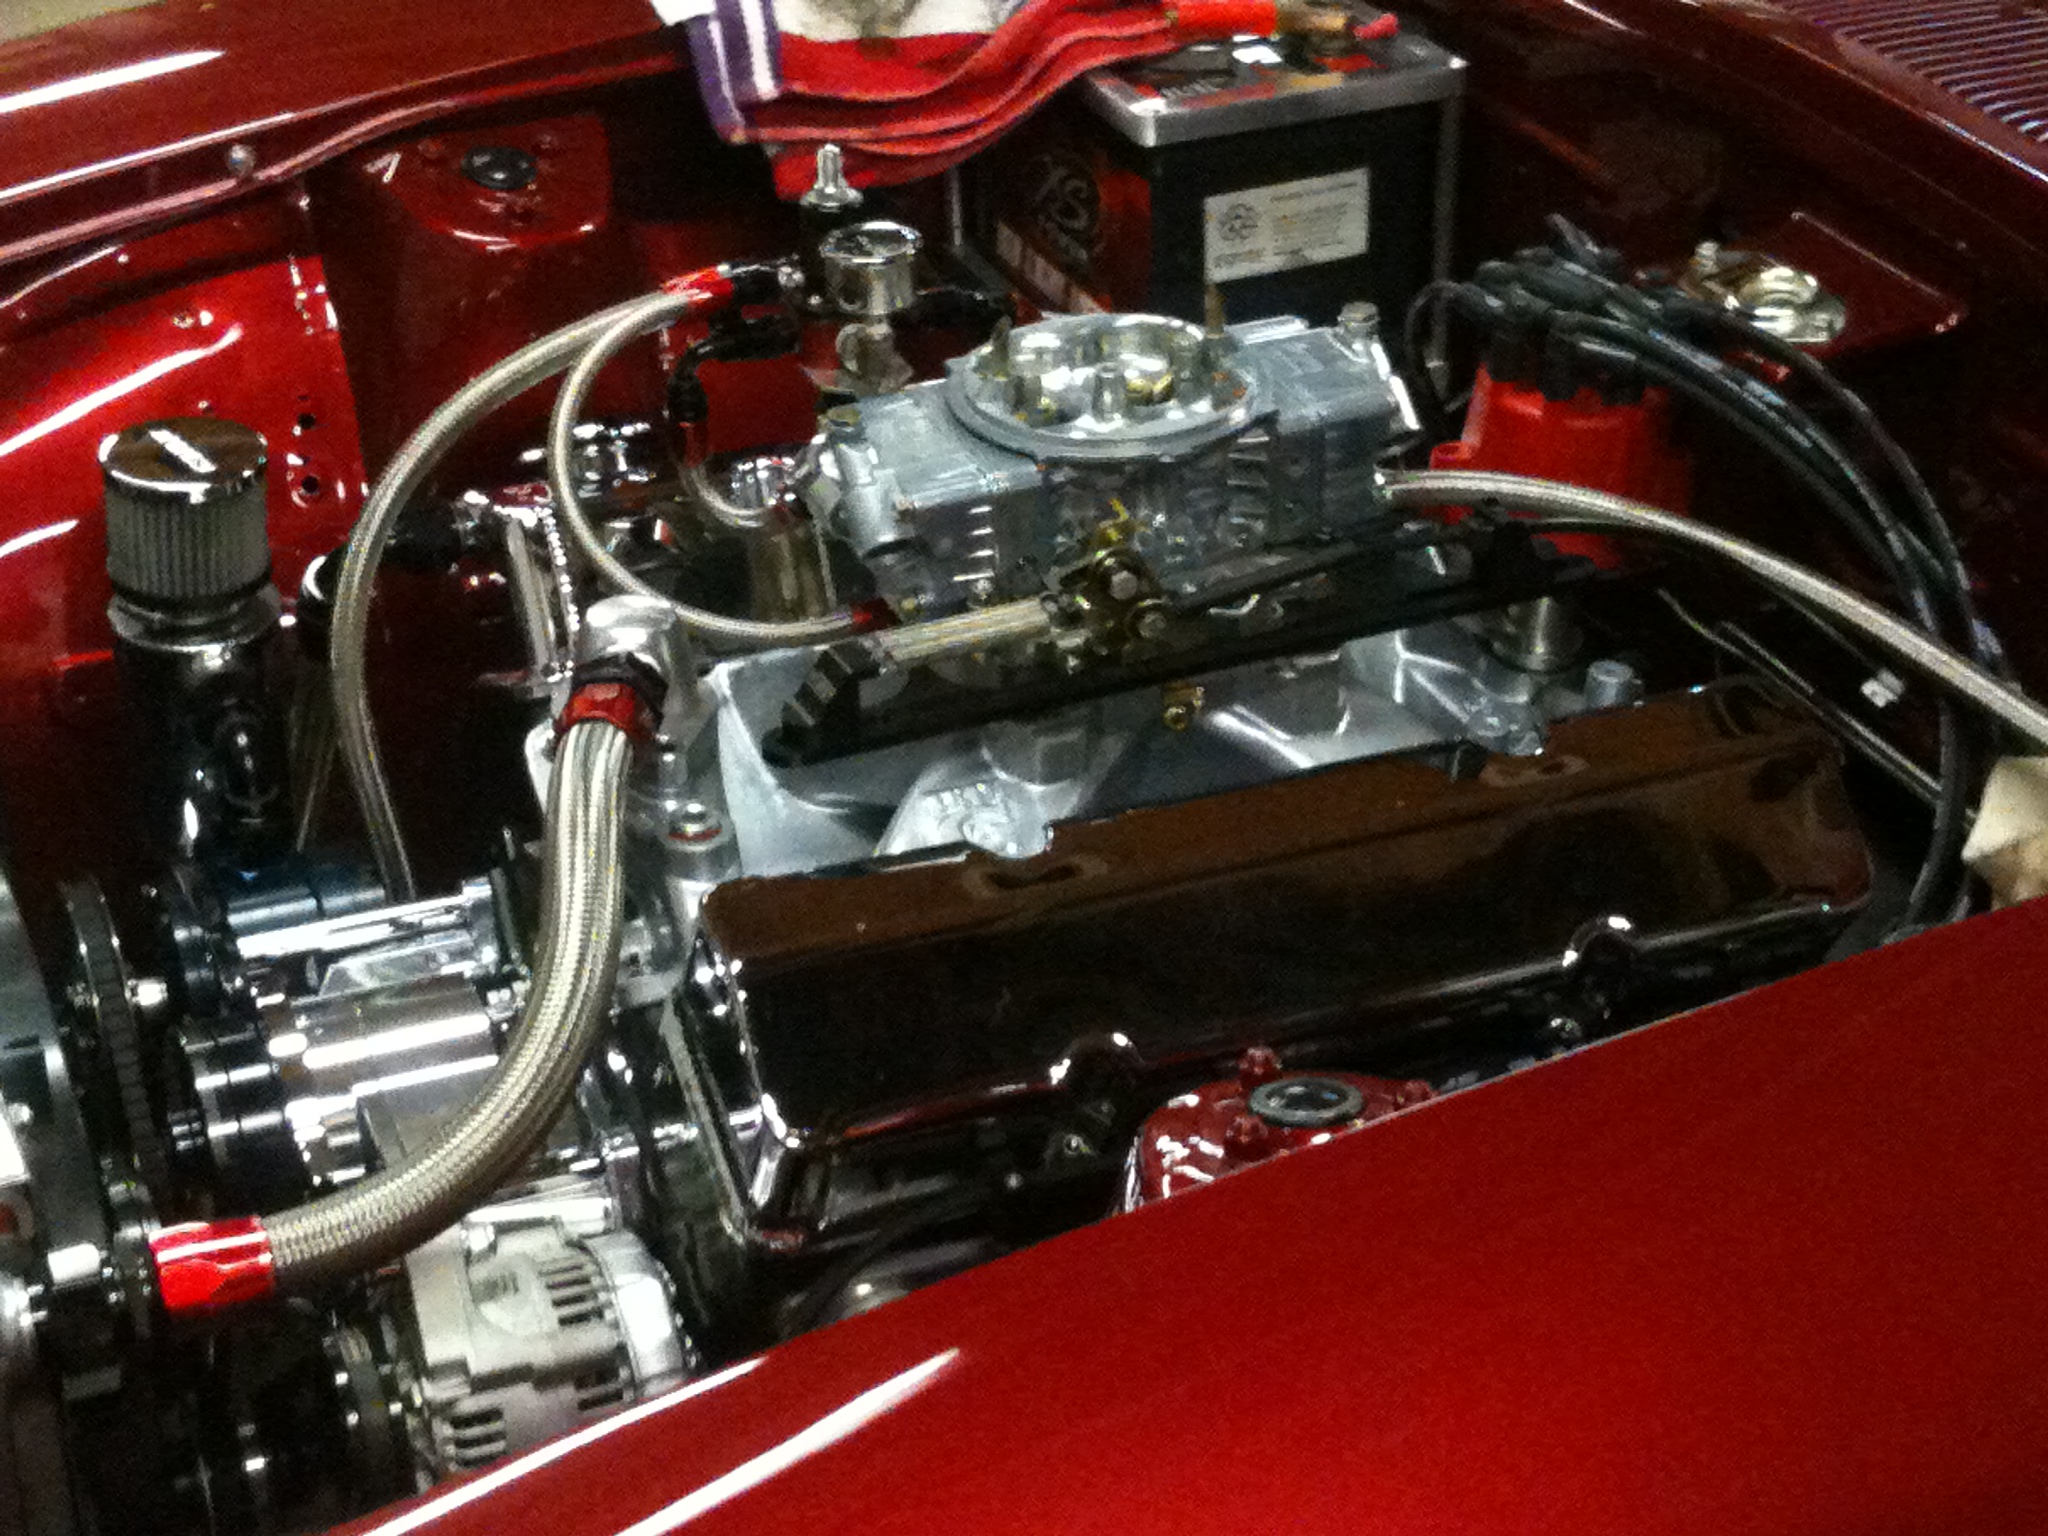
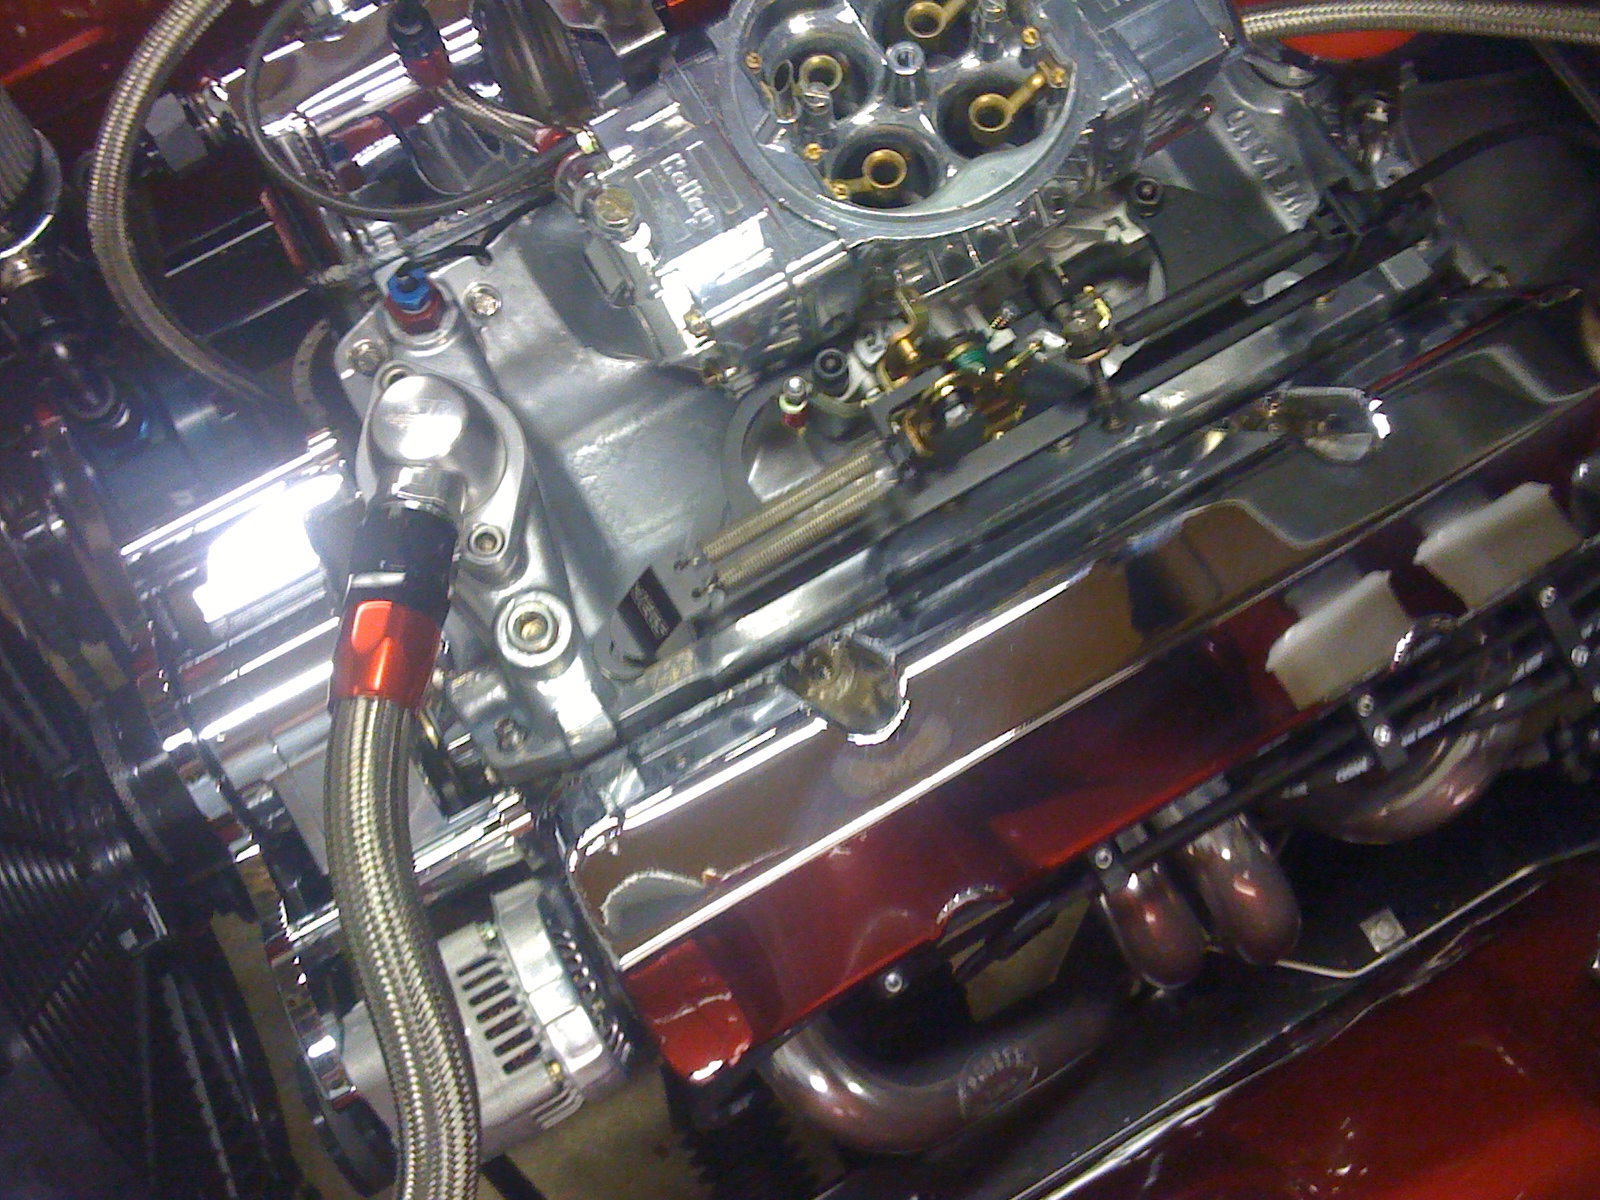
Man thanks for the compliments!! It makes the stress of the project worthwhile. The bracket is made by Moroso it comes with a Billet Aluminum finish but I had mine chromed. It must been ran with the CSR,Meziere or Moroso electric water pumps. I think it's the most trick bracket available especially if you are running old school heads like mine which do not have accessory bolt holes. Actually what you saw on my motor is a crank case vacuum pump. A/C? lol this unit is being built for wheelstands not comfort!
Good news is you won't need that bracket! Here's the link to the one you would most likely be interested in.http://www.moroso.com/catalog/categorydisplay.asp?catcode=30001
Finally got wiring kicked off!
-
I have to ask what is that spiffy bracket you're using for the alternator? And it looks like you're installing A/C as well? Nice!
Man thanks for the compliments!! It makes the stress of the project worthwhile. The bracket is made by Moroso it comes with a Billet Aluminum finish but I had mine chromed. It must been ran with the CSR,Meziere or Moroso electric water pumps. I think it's the most trick bracket available especially if you are running old school heads like mine which do not have accessory bolt holes. Actually what you saw on my motor is a crank case vacuum pump. A/C? lol this unit is being built for wheelstands not comfort!
Good news is you won't need that bracket! Here's the link to the one you would most likely be interested in.http://www.moroso.com/catalog/categorydisplay.asp?catcode=30001
-
ritrebor,
Got a couple in this thread on first page. I can shoot a couple for you in greater detail with a better quality camera. Will be home in a few days.
Lane
-
-
ritebor,
I Appreciate the props on the enginebay!! Anything you'd like to know regarding the rearend set up I 'd be glad to share. Just ask away
Thanks
Lane
-
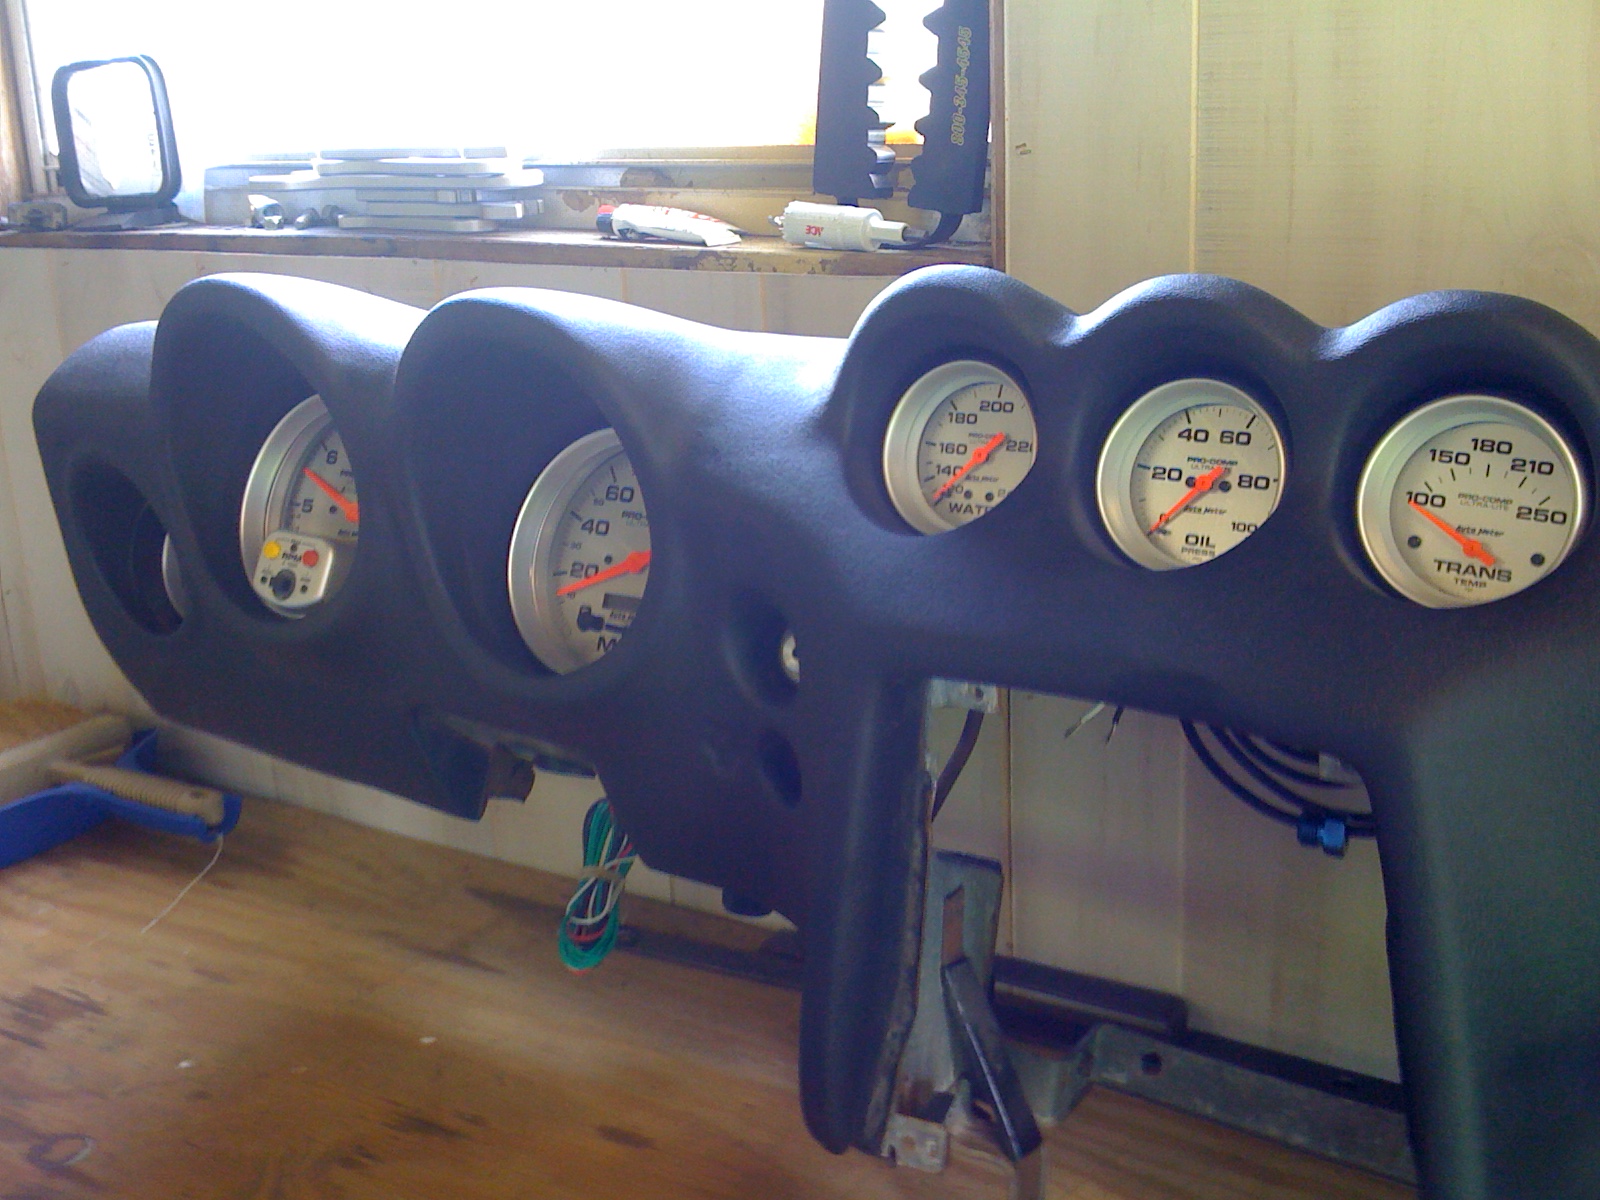
I have followed your building of the gauge cups!! I can't begin to say how impressed I was with your attention to detail on that project!!!!! I am at that stage with my car and I have my eyes on the Ultra lite gauges from Auto Meter. Any chance you've gone semi commercial with the gauge cups? Has the white material been used at this point? If no on both of those last two...Any suggestions as to how to make the installation a success? Going with Three electrical 2 & 5/8...and the 5'' in the speedo/tach spots.
thanks
Lane
-
Headed home to work on the Z and view dem Saints! WHO DAT!!!
-
Darn Grump,
You took the words right outta my mouth on that recommendation! Also a great Carb, to tame the launch on your car.
I'd also recommend not fooling around with a used one. Get you a brand new one to avoid a leaking base plate or one with slack in the shaft. I can't tell you how many guys I ve seen bad mouth a Holley and then you ride over to help them and they are tuning on the biggest piece junk ever bolted to the top of an intake Manifold.
Lane
-
Mark,
I was unaware that there was anything in Mandeville! Thats cool to know. That's a beautiful town so probably a cool event! Keep me posted on that!
Man I am so freaking ready for this job I am on to end! It's a catch 22. The longer I stay the more Z parts can be purchased with a clean concious! lol... but I am ready to install whats on the door step now! I made a rookie mistake with the brake upgrade by not buying the 15/16 master cylinder. Going from two pistons and two baby wheel cylinders to 16 pistons demands a lot more volume. I don't know what I was thinking!! I ordered a 15/16 bore base and my reservoirs are supposed to go on it. I'll be able to pass along exactly how much difference the two volumes make as soon I get home. Also the entire lot of things that go along with plumbing and wiring the car have arrived! It will rumble by mid March!!!
Lane


Struts options
in Gen I & II Chevy V8 Tech Board
Posted
Yes 13 year old strut come up perfectly...so did my original ones. If you were ever to replace them that would not be the case. Reason I replaced mine is because the car sat up for 4years while restoring. I didn't replace until after racing again and started experiencing rough landings. Now the old struts have no dampening on extension or compression therefore the landing is terrible. I have stood this car straight up in the pass with older struts that still had some dampening and you could not tell when the front wheels made contact with ground again. My problem exist due to laying the car up for so long.
Watch car get up of shape....old struts